

Olivetti d-COLOR MF222, d-COLOR MF282, d-COLOR MF362, d-COLOR MF452, d-COLOR MF552 Operation Manual
Page 1

Code: 575102
d-COLOR MF452/d-COLOR MF552
W
l
l
l
l
l
d-COLOR MF282/d-COLOR MF362
d-COLOR MF222
Operazioni Box
Box Operations
Arbeiten mit Boxen
Opérations Boîte
Operaciones con carpetas
Page 2

PUBLICATION ISSUED BY:
Olivetti S.p.A.
Gruppo Telecom Italia
Via Jervis, 77 - 10015 Ivrea (ITALY)
www.olivetti.com
Copyright © 2012, Olivetti
The manufacturer reserves the right to carry out modifications to the product described in this manual at any time
and without any notice.
ENERGY STAR is a U.S. registered m ark.
The ENERGY STAR program is an energy reduction plan introduced by theUnited States Environmental Pr otection
Agency in response to environmental issues and f or the purpose of advancing the development and utilization of
more energy efficient office equipment.
Your attention is drawn to the following actions which could compromise the conformity attested to above, as well as
the characteristics of the product:
• incorrect electrical power supply;
• incorrect installation, incorrect or improper use or use not in compliance with the warnings provided in the
User’s Manual supplied with the product;
• replacement of original components or accessories with others of a type not approved by the manufacturer, or
performed by unauthorised personnel.
All rights reserved. No part of this m aterial may be reproduced or transmitted in any form or by any means,
electronic or mechanical, including photocopying, recording or by any information storage and retrieval
system, without permission in writing from the Publisher.
The mark affixed to the product certifies that the
product satisfies the basic quality requir ements.
All rights reserved
Page 3

d-Color MF552/452/362/282/222 Contents-1
Table of contents
1 About the Boxes
1.1 Box screen....................................................................................................................................... 1-3
1.2 Available operations with User Box .............................................................................................. 1-4
1.3 Available operations with System Box.......................................................................................... 1-5
[Secure Print]...................................................................................................................................... 1-5
[Memory RX] ...................................................................................................................................... 1-5
[ID & Print] .......................................................................................................................................... 1-6
[Bulletin] ............................................................................................................................................. 1-6
[Polling TX] ......................................................................................................................................... 1-6
[Annotation]........................................................................................................................................ 1-7
[File Re-TX]......................................................................................................................................... 1-7
[Password Encrypted PDF]................................................................................................................ 1-7
[External Memory] .............................................................................................................................. 1-8
[Mobile/PDA] ...................................................................................................................................... 1-8
[Relay User Box] ................................................................................................................................ 1-8
2 Store documents as files in MFP and use them again when necessary
2.1 Boxes for document storage and readout (User Box)................................................................. 2-3
Available operations with User Box ................................................................................................... 2-3
Type of User Boxes ........................................................................................................................... 2-4
2.2 Rules to use User Boxes ................................................................................................................ 2-5
Public User Box ................................................................................................................................. 2-5
Personal User Box ............................................................................................................................. 2-5
Group User Box ................................................................................................................................. 2-6
When using a combination of Personal User Box and Group User Box ........................................... 2-7
2.3 Create User Box.............................................................................................................................. 2-8
2.4 Save file in a User Box.................................................................................................................... 2-9
Save (Basic operation flow) ............................................................................................................... 2-9
Save files in Copy mode .................................................................................................................. 2-10
Save file in Fax/Scan mode ............................................................................................................. 2-10
Save files from a PC......................................................................................................................... 2-10
Save file from a USB memory.......................................................................................................... 2-11
Save file from Bluetooth device ....................................................................................................... 2-11
2.5 Print file in a User Box .................................................................................................................. 2-12
Print (Basic operation flow) .............................................................................................................. 2-12
Print multiple files at the same time (Combine) ............................................................................... 2-14
2.6 Send files in a User Box................................................................................................................ 2-17
2.6.1 Sending (Basic operation flow) ........................................................................................................ 2-17
2.6.2 Set a destination .............................................................................................................................. 2-19
Select a destination from the Address Book ................................................................................... 2-19
Searching for destination................................................................................................................. 2-20
Direct input....................................................................................................................................... 2-21
Select file from the history ............................................................................................................... 2-21
Search for mail address or fax number from the LDAP server........................................................ 2-22
2.6.3 Send multiple files at the same time (Combine TX) ......................................................................... 2-23
2.6.4 Specify the destination (for Combine TX) ........................................................................................ 2-25
Select a destination from the Address Book ................................................................................... 2-25
Searching for destination................................................................................................................. 2-26
Direct input....................................................................................................................................... 2-27
Select file from the history ............................................................................................................... 2-27
Search for E-mail address from the LDAP server............................................................................ 2-28
2.7 Organize files in a User Box......................................................................................................... 2-29
Operation flow.................................................................................................................................. 2-29
Delete a file ...................................................................................................................................... 2-30
Rename a file ................................................................................................................................... 2-30
Page 4

Contents-2 d-Color MF552/452/362/282/222
Move file to another User Box ......................................................................................................... 2-31
Copy file to another User Box.......................................................................................................... 2-31
Edit a page....................................................................................................................................... 2-32
Save file in a USB memory .............................................................................................................. 2-33
Store file as an overlay image.......................................................................................................... 2-34
Check the file information ................................................................................................................ 2-35
2.8 Operate a User Box from the PC................................................................................................. 2-36
2.8.1 Operate a User Box via Web Connection........................................................................................ 2-36
Open User Box ................................................................................................................................ 2-36
Print files in a User Box.................................................................................................................... 2-37
Send files in a User Box................................................................................................................... 2-39
Download files in a User Box to the PC........................................................................................... 2-41
Move or copy files in a User Box to another User Box.................................................................... 2-43
Delete files from a User Box ............................................................................................................ 2-44
2.8.2 Operate a User Box using the Box Operator................................................................................... 2-45
3 Receive fax in memory and print it later ([Memory RX])
3.1 [Memory RX].................................................................................................................................... 3-3
3.2 Print fax from the Memory RX User Box....................................................................................... 3-4
3.3 Organize faxes in a User Box........................................................................................................ 3-6
Operation flow.................................................................................................................................... 3-6
Delete a file ........................................................................................................................................ 3-7
Rename a file ..................................................................................................................................... 3-8
Check the file information .................................................................................................................. 3-8
4 Retransmit fax if redialing has failed ([File Re-TX])
4.1 [File Re-TX] ...................................................................................................................................... 4-3
4.2 Send fax from Fax Transmit User Box .......................................................................................... 4-4
4.2.1 Sending (Basic operation flow) .......................................................................................................... 4-4
4.2.2 Set a destination ................................................................................................................................ 4-6
Select a destination from the Address Book ..................................................................................... 4-6
Searching for destination................................................................................................................... 4-7
Direct input......................................................................................................................................... 4-8
Select file from the history ................................................................................................................. 4-8
4.3 Print fax from the Memory RX User Box....................................................................................... 4-9
4.4 Organize faxes in a User Box....................................................................................................... 4-11
Operation flow.................................................................................................................................. 4-11
Delete a file ...................................................................................................................................... 4-12
Check the file information ................................................................................................................ 4-12
5 Print classified documents ([Secure Print])
5.1 [Secure Print]................................................................................................................................... 5-3
5.2 Print files in a User Box .................................................................................................................. 5-4
Print (Basic operation flow)................................................................................................................ 5-4
Print (If [Prohibited Functions When Authentication Error] is set to [Mode 2])................................... 5-6
5.3 Organize files in a User Box........................................................................................................... 5-9
Operation flow.................................................................................................................................... 5-9
Delete a file ...................................................................................................................................... 5-10
Rename a file ................................................................................................................................... 5-11
Check the file information ................................................................................................................ 5-11
6 Annotate files ([Annotation])
6.1 [Annotation]..................................................................................................................................... 6-3
6.2 Create an Annotation User Box..................................................................................................... 6-4
6.3 Save file in a User Box.................................................................................................................... 6-5
Save (Basic operation flow) ............................................................................................................... 6-5
Save files in Copy mode .................................................................................................................... 6-7
Page 5

d-Color MF552/452/362/282/222 Contents-3
Save files from a PC........................................................................................................................... 6-7
6.4 Print files in a User Box .................................................................................................................. 6-8
6.5 Send files in a User Box................................................................................................................ 6-10
6.5.1 Sending (Basic operation flow) ........................................................................................................ 6-10
6.5.2 Set a destination .............................................................................................................................. 6-13
Select a destination from the Address Book ................................................................................... 6-13
Searching for destination................................................................................................................. 6-14
Direct input....................................................................................................................................... 6-15
Select file from the history ............................................................................................................... 6-15
Search for E-mail address from the LDAP server............................................................................ 6-16
6.6 Organize files in a User Box......................................................................................................... 6-17
Operation flow.................................................................................................................................. 6-17
Delete a file ...................................................................................................................................... 6-18
Rename a file ................................................................................................................................... 6-19
Store file as an overlay image.......................................................................................................... 6-19
Check the file information ................................................................................................................ 6-21
7 Print an encrypted PDF ([Password Encrypted PDF])
7.1 [Password Encrypted PDF]............................................................................................................ 7-3
7.2 Store file in User Box, or print file from User Box........................................................................ 7-4
7.3 Organize files in a User Box........................................................................................................... 7-6
Operation flow.................................................................................................................................... 7-6
Delete a file ........................................................................................................................................ 7-7
Check the file information .................................................................................................................. 7-7
8 Registering a file for polling ([Polling TX])
8.1 [Polling TX] ...................................................................................................................................... 8-3
8.2 Print files in a User Box .................................................................................................................. 8-4
8.3 Organize files in a User Box........................................................................................................... 8-5
Operation flow.................................................................................................................................... 8-5
Delete a file ........................................................................................................................................ 8-6
Store file as an overlay image............................................................................................................ 8-7
Check the file information .................................................................................................................. 8-8
9 Store file for polling ([Bulletin])
9.1 [Bulletin]........................................................................................................................................... 9-3
9.2 Create Bulletin Board User Box..................................................................................................... 9-4
9.3 Print files in a User Box .................................................................................................................. 9-5
9.4 Organize files in a User Box........................................................................................................... 9-7
Operation flow.................................................................................................................................... 9-7
Delete a file ........................................................................................................................................ 9-8
Check the file information .................................................................................................................. 9-8
10 Use as Fax Transponder ([Relay User Box])
10.1 [Relay User Box]............................................................................................................................ 10-3
10.2 Operations required to use this function.................................................................................... 10-4
Register the fax recipients ............................................................................................................... 10-4
Create a Relay User Box.................................................................................................................. 10-5
11 Print on MFP under Authentication Control ([ID & Print])
11.1 [ID & Print] ..................................................................................................................................... 11-3
11.2 Print files in a User Box ................................................................................................................ 11-4
11.3 Organize files in a User Box......................................................................................................... 11-6
Operation flow.................................................................................................................................. 11-6
Delete a file ...................................................................................................................................... 11-7
Page 6

Contents-4 d-Color MF552/452/362/282/222
Check the file information ................................................................................................................ 11-8
12 Use a USB memory device ([External Memory])
12.1 [External Memory]......................................................................................................................... 12-3
12.2 Supported USB memory devices ................................................................................................ 12-4
12.3 Print a file from a USB memory device....................................................................................... 12-5
Operations required to use this function (for the administrator) ...................................................... 12-5
Operation flow.................................................................................................................................. 12-5
12.4 Save scanned data on a USB memory........................................................................................ 12-8
Preparation required to use this function (for the administrator) ..................................................... 12-8
Operation flow.................................................................................................................................. 12-8
12.5 Store USB memory files in External Memory User Box .......................................................... 12-10
Preparation required to use this function (for the administrator) ................................................... 12-10
Operation flow................................................................................................................................ 12-10
13 Use Bluetooth devices ([Mobile/PDA])
13.1 [Mobile/PDA] ................................................................................................................................. 13-3
13.2 Supported Bluetooth devices ...................................................................................................... 13-4
13.3 Print file by Bluetooth communication........................................................................................ 13-5
Operations required to use this function (for the administrator) ...................................................... 13-5
Operation flow.................................................................................................................................. 13-5
13.4 Save file by Bluetooth communication ....................................................................................... 13-7
Operations required to use this function (for the administrator) ...................................................... 13-7
Operation flow.................................................................................................................................. 13-7
14 Appendix
14.1 Optional settings before file storage........................................................................................... 14-3
Name a file ([File Name]) .................................................................................................................. 14-3
Scanning a 2-sided original ([Simplex/Duplex]) ............................................................................... 14-4
Specify the resolution to scan the original ([Resolution]) ................................................................. 14-4
Select the color mode to scan the original ([Color])......................................................................... 14-4
Select a file type to save the scanned original data ([File Type]) ..................................................... 14-5
Set the original size to scan ([Scan Size]) ........................................................................................ 14-5
Scan originals of different sizes at one time ([Mixed Original]) ........................................................ 14-5
Scan an original thinner than normal paper ([Thin Paper Original]) ................................................. 14-5
Scan a folded original ([Z-Folded Original]) ..................................................................................... 14-6
Scan a long original ([Long Original]) ............................................................................................... 14-6
Specify the original loading direction ([Original Direction]) .............................................................. 14-7
Specify the binding position of the original ([Binding Position])....................................................... 14-7
Scan while removing dust in the slit glass ([Despeckle]) ................................................................. 14-7
Skip blank pages ([Blank Page Removal]) ....................................................................................... 14-8
Split the left and right pages of a book or catalog ([Book Original])................................................ 14-8
Scan a number of originals in several batches ([Separate Scan]).................................................... 14-9
Select the appropriate image quality level for the contents of the original ([Original Type]).......... 14-10
Specify the density to scan the original ([Density]) ........................................................................ 14-10
Adjust the background density of the original ([Bkgd. Removal]).................................................. 14-10
Scanning after erasing text and shadows in the margins of an original ([Frame Erase]) ............... 14-11
Sharpen the boarder between text etc. ([Sharpness]) ................................................................... 14-11
14.2 Optional settings before printing............................................................................................... 14-12
Change the color mode and print ([Color])..................................................................................... 14-12
Enlarge or reduce an image ([Zoom])............................................................................................. 14-12
Print on both sides of paper ([Simplex/Duplex]) ............................................................................ 14-12
Printing multiple pages on the same side of a single sheet ([Combine]) ....................................... 14-13
Stapled sheets ([Staple]) ................................................................................................................ 14-13
Punch the printed sheets. ([Punch])............................................................................................... 14-14
Folding/Biding ([Fold/Bind]) ........................................................................................................... 14-14
Outputting by sets ([Group/Sort])................................................................................................... 14-15
Outputting each set in staggered position ([Offset]) ...................................................................... 14-16
Add a margin to pages ([Page Margin]) ......................................................................................... 14-16
Page 7

d-Color MF552/452/362/282/222 Contents-5
Fine-tuning the print position ([Image Shift]).................................................................................. 14-17
Insert front and back covers ([Cover Sheet]) ................................................................................. 14-17
Insert a different sheet into the specified page ([Insert Sheet]) ..................................................... 14-18
Arrange the first page of the chapter on the front side ([Chapters]) .............................................. 14-18
Add the date and time ([Date/Time]) .............................................................................................. 14-19
Add a page number ([Page Number]) ............................................................................................ 14-19
Add a stamp ([Stamp]) ................................................................................................................... 14-19
Add a stamp on the entire page ([Stamp Repeat])......................................................................... 14-20
Add information to the header/footer ([Header/Footer]) ................................................................ 14-20
Compose stored images ([Registered Overlay]) ............................................................................ 14-20
Print a concealed security watermark ([Copy Protect]) ................................................................. 14-21
Add copy restriction information ([Copy Guard]) ........................................................................... 14-21
Add a password ([Password Copy])............................................................................................... 14-22
14.3 Optional settings before file transfer ........................................................................................ 14-23
Change the file resolution ([Resolution]) ........................................................................................ 14-23
Change the file color ([Color]) ........................................................................................................ 14-23
Change a file type ([File Type])....................................................................................................... 14-23
Rename a file or a subject ([E-mail Settings]) ................................................................................ 14-23
Add the date and time ([Date/Time]) .............................................................................................. 14-23
Add a page number ([Page Number]) ............................................................................................ 14-24
Add a stamp ([Stamp]) ................................................................................................................... 14-24
Add information to the header/footer ([Header/Footer]) ................................................................ 14-24
Send and print at the same time ([Save & Print]) ........................................................................... 14-25
Report the destination of transfer file ([URL Dest. Settings]) ......................................................... 14-25
Encrpt an e-mail ([Mail Encryption])............................................................................................... 14-25
Add digital signature to e-mails ([Digital Signature])...................................................................... 14-25
Send by renaming the sender ([Fax Header Settings]) .................................................................. 14-26
Set a fax line type ([Line Setting])................................................................................................... 14-26
Send a fax at preset time ([Timer TX])............................................................................................ 14-26
Send a fax with a password ([Password TX])................................................................................. 14-27
Send a fax with F-code ([F-Code TX])............................................................................................ 14-27
15 Description of Setup Buttons
[Public] ............................................................................................................................................. 15-3
[Personal] ......................................................................................................................................... 15-3
[Group] ............................................................................................................................................. 15-4
[New] ................................................................................................................................................ 15-4
[Search] ............................................................................................................................................ 15-5
[Save] ([Public]/[Personal]/[Group]) .................................................................................................. 15-5
[File Name] ([Public]/[Personal]/[Group]) ([Save]) ............................................................................. 15-6
[Simplex/Duplex] ([Public]/[Personal]/[Group]) ([Save]) .................................................................... 15-6
[Resolution] ([Public]/[Personal]/[Group]) ([Save])............................................................................. 15-7
[Color] ([Public]/[Personal]/[Group]) ([Save])..................................................................................... 15-8
[File Type] ([Public]/[Personal]/[Group]) ([Save])............................................................................... 15-9
[PDF Detail Setting] ([Public]/[Personal]/[Group]) ([Save]) .............................................................. 15-10
[Encryption] ([Public]/[Personal]/[Group]) ([Save]) .......................................................................... 15-11
[Scan Size] ([Public]/[Personal]/[Group]) ([Save])............................................................................ 15-12
[Application] ([Public]/[Personal]/[Group]) ([Save]).......................................................................... 15-13
[Original Settings] ([Public]/[Personal]/[Group]) ([Save]) ................................................................. 15-14
[Mixed Original] ([Public]/[Personal]/[Group]) ([Save]) .................................................................... 15-15
[Thin Paper Original] ([Public]/[Personal]/[Group]) ([Save])............................................................. 15-15
[Z-Folded Original] ([Public]/[Personal]/[Group]) ([Save])................................................................ 15-16
[Long Original] ([Public]/[Personal]/[Group]) ([Save]) ...................................................................... 15-16
[Despeckle] ([Public]/[Personal]/[Group]) ([Save])........................................................................... 15-17
[Blank Page Removal] ([Public]/[Personal]/[Group]) ([Save]) .......................................................... 15-17
[Binding Position] ([Public]/[Personal]/[Group]) ([Save]) ................................................................. 15-18
[Original Direction] ([Public]/[Personal]/[Group]) ([Save])................................................................ 15-18
[Book Original] ([Public]/[Personal]/[Group]) ([Save])...................................................................... 15-19
[Separate Scan] ([Public]/[Personal]/[Group]) ([Save]).................................................................... 15-20
[Original Type] ([Public]/[Personal]/[Group]) ([Save]) ...................................................................... 15-20
[Density] ([Public]/[Personal]/[Group]) ([Save])................................................................................ 15-21
[Bkgd. Removal] ([Public]/[Personal]/[Group]) ([Save])................................................................... 15-22
[Frame Erase] ([Public]/[Personal]/[Group]) ([Save]) ....................................................................... 15-22
[Sharpness] ([Public]/[Personal]/[Group]) ([Save]) .......................................................................... 15-23
Page 8

Contents-6 d-Color MF552/452/362/282/222
[Details] ([Public]/[Personal]/[Group]) ............................................................................................. 15-23
[Print] ([Public]/[Personal]/[Group])................................................................................................. 15-24
[Color] ([Public]/[Personal]/[Group]) ([Print]) ................................................................................... 15-24
[Zoom] ([Public]/[Personal]/[Group]) ([Print])................................................................................... 15-25
[Duplex/Combine] ([Public]/[Personal]/[Group]) ([Print]) ................................................................. 15-25
[Simplex/Duplex] ([Public]/[Personal]/[Group]) ([Print])................................................................... 15-26
[Combine] ([Public]/[Personal]/[Group]) ([Print]).............................................................................. 15-26
[Finishing] ([Public]/[Personal]/[Group]) ([Print]).............................................................................. 15-27
[Group/Sort] ([Public]/[Personal]/[Group]) ([Print]) .......................................................................... 15-28
[Offset] ([Public]/[Personal]/[Group]) ([Print]) .................................................................................. 15-28
[Staple] ([Public]/[Personal]/[Group]) ([Print]).................................................................................. 15-29
[Punch] ([Public]/[Personal]/[Group]) ([Print]).................................................................................. 15-29
[Fold/Bind] ([Public]/[Personal]/[Group]) ([Print]) ............................................................................ 15-30
[Half-Fold] ([Public]/[Personal]/[Group]) ([Print]) ............................................................................. 15-31
[Center Staple & Fold] ([Public]/[Personal]/[Group]) ([Print])........................................................... 15-31
[Tri-Fold] ([Public]/[Personal]/[Group]) ([Print])................................................................................ 15-32
[Z-Fold] ([Public]/[Personal]/[Group]) ([Print]) ................................................................................. 15-32
[Application] ([Public]/[Personal]/[Group]) ([Print]) .......................................................................... 15-33
[Page Margin] ([Public]/[Personal]/[Group]) ([Print])........................................................................ 15-33
[Image Shift] ([Public]/[Personal]/[Group]) ([Print]).......................................................................... 15-34
[Cover Sheet] ([Public]/[Personal]/[Group]) ([Print]) ........................................................................ 15-35
[Insert Sheet] ([Public]/[Personal]/[Group]) ([Print])......................................................................... 15-36
[Chapters] ([Public]/[Personal]/[Group]) ([Print]) ............................................................................. 15-37
[Date/Time] ([Public]/[Personal]/[Group]) ([Print])............................................................................ 15-38
[Page Number] ([Public]/[Personal]/[Group]) ([Print])...................................................................... 15-39
[Stamp] ([Public]/[Personal]/[Group]) ([Print]).................................................................................. 15-40
[Stamp Repeat] ([Public]/[Personal]/[Group]) ([Print])..................................................................... 15-40
[Header/Footer] ([Public]/[Personal]/[Group]) ([Print])..................................................................... 15-41
[Registered Overlay] ([Public]/[Personal]/[Group]) ([Print]).............................................................. 15-42
[Copy Protect] ([Public]/[Personal]/[Group]) ([Print])....................................................................... 15-42
[Copy Guard]([Public]/[Personal]/[Group])([Print])........................................................................... 15-43
[Password Copy] ([Public]/[Personal]/[Group]) ([Print])................................................................... 15-44
[Send] ([Public]/[Personal]/[Group])................................................................................................ 15-45
[Address Book] ([Public]/[Personal]/[Group]) ([Send]) .................................................................... 15-45
[Direct Input] ([Public]/[Personal]/[Group]) ([Send]) ........................................................................ 15-46
[Fax
] ([Public]/[Personal]/[Group]) ([Send]) ..................................................................................... 15-47
[E-mail] ([Public]/[Personal]/[Group]) ([Send])................................................................................. 15-47
[Internet Fax] .................................................................................................................................. 15-48
[IP Address Fax]............................................................................................................................. 15-48
[PC (SMB)] ([Public]/[Personal]/[Group]) ([Send]) ........................................................................... 15-49
[FTP] ([Public]/[Personal]/[Group]) ([Send])..................................................................................... 15-50
[WebDAV] ([Public]/[Personal]/[Group]) ([Send])............................................................................. 15-51
[Job History] ([Public]/[Personal]/[Group]) ([Send])......................................................................... 15-52
[Addr. Search] ([Public]/[Personal]/[Group]) ([Send])...................................................................... 15-52
[Name Search] ([Public]/[Personal]/[Group]) ([Send]) ..................................................................... 15-53
[Address Search] ([Public]/[Personal]/[Group]) ([Send]).................................................................. 15-53
[Address Search (LDAP)] ([Public]/[Personal]/[Group]) ([Send]) ..................................................... 15-54
[Adv. Search (LDAP)] ([Public]/[Personal]/[Group]) ([Send])............................................................ 15-54
[Address Reg.] ([Public]/[Personal]/[Group]) ([Send]) ..................................................................... 15-55
[Resolution] ([Public]/[Personal]/[Group]) ([Send]).......................................................................... 15-55
[Color] ([Public]/[Personal]/[Group]) ([Send]) .................................................................................. 15-56
[File Type] ([Public]/[Personal]/[Group]) ([Send])............................................................................. 15-57
[PDF Detail Setting] ([Public]/[Personal]/[Group]) ([Send]).............................................................. 15-58
[Encryption] ([Public]/[Personal]/[Group]) ([Send]).......................................................................... 15-58
[E-mail Settings] ([Public]/[Personal]/[Group]) ([Send])................................................................... 15-59
[Application] ([Public]/[Personal]/[Group]) ([Send]) ......................................................................... 15-60
[Date/Time] ([Public]/[Personal]/[Group]) ([Send])........................................................................... 15-60
[Page Number] ([Public]/[Personal]/[Group]) ([Send]) ..................................................................... 15-61
[Stamp] ([Public]/[Personal]/[Group]) ([Send])................................................................................. 15-62
[Header/Footer] ([Public]/[Personal]/[Group]) ([Send]).................................................................... 15-62
[Save & Print] ([Public]/[Personal]/[Group]) ([Send]) ....................................................................... 15-63
[URL Dest. Settings] ([Public]/[Personal]/[Group]) ([Send])............................................................. 15-64
[Mail Encryption] ([Public]/[Personal]/[Group]) ([Send]) .................................................................. 15-64
[Digital Signature] ([P
ublic]/[Personal]/[Group]) ([Send])................................................................. 15-65
[Fax Header Settings] ([Public]/[Personal]/[Group]) ([Send]) .......................................................... 15-65
[Line Setting] ([Public]/[Personal]/[Group]) ([Send])........................................................................ 15-66
Page 9

d-Color MF552/452/362/282/222 Contents-7
[Timer TX] ([Public]/[Personal]/[Group]) ([Send])............................................................................. 15-67
[Password TX] ([Public]/[Personal]/[Group]) ([Send])...................................................................... 15-67
[F-Code TX] ([Public]/[Personal]/[Group]) ([Send]).......................................................................... 15-68
[Other] ([Public]/[Personal]/[Group]) ............................................................................................... 15-68
[Combine]....................................................................................................................................... 15-69
[Color] ([Public]/[Personal]/[Group]) ([Combine]) ............................................................................ 15-69
[2-Sided] ([Public]/[Personal]/[Group]) ([Combine]) ........................................................................ 15-70
[Finishing] ([Public]/[Personal]/[Group]) ([Combine])....................................................................... 15-70
[Offset] ([Public]/[Personal]/[Group]) ([Combine]) ........................................................................... 15-71
[Staple] ([Public]/[Personal]/[Group]) ([Combine])........................................................................... 15-72
[Punch] ([Public]/[Personal]/[Group]) ([Combine])........................................................................... 15-72
[Fold/Bind] ([Public]/[Personal]/[Group]) ([Combine]) ..................................................................... 15-73
[Half-Fold] ([Public]/[Personal]/[Group]) ([Combine]) ...................................................................... 15-74
[Center Staple & Fold] ([Public]/[Personal]/[Group]) ([Combine]).................................................... 15-74
[Z-Fold] ([Public]/[Personal]/[Group]) ([Combine]) .......................................................................... 15-75
[Application] ([Public]/[Personal]/[Group]) ([Combine])................................................................... 15-75
[Page Margin] ([Public]/[Personal]/[Group]) ([Combine])................................................................. 15-76
[Image Shift] ([Public]/[Personal]/[Group]) ([Combine])................................................................... 15-77
[Date/Time] ([Public]/[Personal]/[Group]) ([Combine]) .................................................................... 15-77
[Page Number] ([Public]/[Personal]/[Group]) ([Combine])............................................................... 15-78
[Stamp] ([Public]/[Personal]/[Group]) ([Combine]) .......................................................................... 15-79
[Stamp Repeat] ([Public]/[Personal]/[Group]) ([Combine]).............................................................. 15-80
[Header/Footer] ([Public]/[Personal]/[Group]) ([Combine]).............................................................. 15-80
[Registered Overlay] ([Public]/[Personal]/[Group]) ([Combine]) ...................................................... 15-81
[Copy Protect] ([Public]/[Personal]/[Group]) ([Combine])................................................................ 15-82
[Copy Guard] ([Public]/[Personal]/[Group]) ([Combine]) ................................................................. 15-83
[Password Copy] ([Public]/[Personal]/[Group]) ([Combine]) ........................................................... 15-84
[Combine TX] ................................................................................................................................. 15-85
[Address Book] ([Public]/[Personal]/[Group]) ([Combine TX])......................................................... 15-85
[Direct Input] ([Public]/[Personal]/[Group]) ([Combine TX])............................................................. 15-86
[E-mail] ([Public]/[Personal]/[Group]) ([Combine TX])...................................................................... 15-86
[PC (SMB)] ([Public]/[Personal]/[Group]) ([Combine TX]) ................................................................ 15-87
[FTP] ([Public]/[Personal]/[Group]) ([Combine TX]) ......................................................................... 15-88
[WebDAV] ([Public]/[Personal]/[Group]) ([Combine TX]) ................................................................. 15-89
[Job History] ([Public]/[Personal]/[Group]) ([Combine TX]) ............................................................. 15-90
[Addr. Search] ([Public]/[Personal]/[Group]) ([Combine TX])........................................................... 15-90
[Name Search] ([Public]/[Personal]/[Group]) ([Combine TX]).......................................................... 15-91
[Address Search] ([Public]/[Personal]/[Group]) ([Combine TX])...................................................... 15-91
[Address Search (LDAP)] ([Public]/[Personal]/[Group]) ([Combine TX]).......................................... 15-92
[Adv. Search (LDAP)] ([Public]/[Personal]/[Group]) ([Combine TX]) ................................................ 15-92
[Address Reg.] ([Public]/[Personal]/[Group]) ([Combine TX]).......................................................... 15-93
[File Type] ([Public]/[Personal]/[Group]) ([Combine TX]) ................................................................. 15-93
[PDF Detail Setting] ([Public]/[Personal]/[Group]) ([Combine TX]) .................................................. 15-94
[Encryption] ([Public]/[Personal]/[Group]) ([Combine TX]) .............................................................. 15-95
[E-mail Settings] ([Public]/[Personal]/[Group]) ([Combine TX]) ....................................................... 15-96
[Application] ([Public]/[Personal]/[Group]) ([Combine TX]).............................................................. 15-97
[Date/Time] ([Public]/[Personal]/[Group]) ([Combine TX])............................................................... 15-97
[Page Number] ([Public]/[Personal]/[Group]) ([Combine TX]).......................................................... 15-98
[Stamp] ([Public]/[Personal]/[Group]) ([Combine TX]) ..................................................................... 15-99
[Header/Footer] ([Public]/[Personal]/[Group]) ([Combine TX]) ........................................................ 15-99
[Save & Print] ([Public]/[Personal]/[Group]) ([Combine TX]) .......................................................... 15-100
[URL Dest. Settings] ([Public]/[Personal]/
[Group]) ([Combine TX]) ............................................... 15-101
[Mail Encryption] ([Public]/[Personal]/[Group]) ([Combine TX])..................................................... 15-101
[Digital Signature] ([Public]/[Personal]/[Group]) ([Combine TX]) ................................................... 15-102
[Edit Name] ([Public]/[Personal]/[Group]) ..................................................................................... 15-102
[Re-order] ..................................................................................................................................... 15-103
[Copy]........................................................................................................................................... 15-103
[Edit Document] ........................................................................................................................... 15-104
[Register Overlay] ([Public]/[Personal]/[Group])............................................................................ 15-105
[Save to External Memory]........................................................................................................... 15-105
[Resolution] ([Public]/[Personal]/[Group]) ([Save to External Memory])........................................ 15-106
[Color] ([Public]/[Personal]/[Group]) ([Save to External Memory]) ................................................ 15-107
[File Type] ([Public]/[Personal]/[Group]) ([Save to External Memory])........................................... 15-108
[PDF Detail Setting] ([Public]/[Personal]/[Group]) ([Save to External Memory])............................ 15-109
[Encryption] ([Public]/[Personal]/[Group]) ([Save to External Memory])........................................ 15-110
[Delete] ([Public]/[Personal]/[Group])............................................................................................ 15-111
Page 10

Contents-8 d-Color MF552/452/362/282/222
[System] ....................................................................................................................................... 15-111
[Secure Print]................................................................................................................................ 15-113
[Details] ([Secure Print])................................................................................................................ 15-113
[Print] ([Secure Print]) ................................................................................................................... 15-114
[Color] ([Secure Print]) ([Print])...................................................................................................... 15-114
[Zoom] ([Secure Print]) ([Print]) ..................................................................................................... 15-115
[Duplex/Combine] ([Secure Print]) ([Print]).................................................................................... 15-115
[Simplex/Duplex] ([Secure Print]) ([Print]) ..................................................................................... 15-116
[Combine] ([Secure Print]) ([Print]) ................................................................................................ 15-116
[Finishing] ([Secure Print]) ([Print]) ................................................................................................ 15-117
[Group/Sort] ([Secure Print]) ([Print])............................................................................................. 15-118
[Offset] ([Secure Print]) ([Print])..................................................................................................... 15-118
[Staple] ([Secure Print]) ([Print]) .................................................................................................... 15-119
[Punch] ([Secure Print]) ([Print]) .................................................................................................... 15-119
[Fold/Bind] ([Secure Print]) ([Print]) ............................................................................................... 15-120
[Half-Fold] ([Secure Print]) ([Print])................................................................................................ 15-121
[Center Staple & Fold] ([Secure Print]) ([Print]) ............................................................................. 15-121
[Tri-Fold] ([Secure Print]) ([Print]) .................................................................................................. 15-122
[Z-Fold] ([Secure Print]) ([Print]).................................................................................................... 15-122
[Application] ([Secure Print]) ([Print])............................................................................................. 15-123
[Page Margin] ([Secure Print]) ([Print]) .......................................................................................... 15-123
[Image Shift] ([Secure Print]) ([Print]) ............................................................................................ 15-124
[Cover Sheet] ([Secure Print]) ([Print])........................................................................................... 15-125
[Insert Sheet] ([Secure Print]) ([Print]) ........................................................................................... 15-126
[Chapters] ([Secure Print]) ([Print])................................................................................................ 15-127
[Date/Time] ([Secure Print]) ([Print]) .............................................................................................. 15-128
[Page Number] ([Secure Print]) ([Print]) ........................................................................................ 15-129
[Stamp] ([Secure Print]) ([Print]).................................................................................................... 15-130
[Stamp Repeat] ([Secure Print]) ([Print]) ....................................................................................... 15-131
[Header/Footer] ([Secure Print]) ([Print]) ....................................................................................... 15-132
[Registered Overlay] ([Secure Print]) ([Print])................................................................................ 15-133
[Copy Protect] ([Secure Print]) ([Print]) ......................................................................................... 15-134
[Copy Guard] ([Secure Print]) ([Print])........................................................................................... 15-135
[Password Copy] ([Secure Print]) ([Print]) ..................................................................................... 15-136
[Other] ([Secure Print]).................................................................................................................. 15-137
[Edit Name] ([Secure Print]).......................................................................................................... 15-137
[Enter
Password].......................................................................................................................... 15-137
[Delete] ([Secure Print])................................................................................................................. 15-138
[Memory RX] ................................................................................................................................ 15-138
[Details] ([Memory RX])................................................................................................................. 15-139
[Print] ([Memory RX]) .................................................................................................................... 15-139
[Other] ([Memory RX])................................................................................................................... 15-140
[Edit Name] ([Memory RX])........................................................................................................... 15-140
[Delete] ([Memory RX]) ................................................................................................................. 15-140
[ID & Print] .................................................................................................................................... 15-141
[Details] ([ID & Print]) .................................................................................................................... 15-141
[Print] ([ID & Print])........................................................................................................................ 15-142
[Delete] ([ID & Print]) ..................................................................................................................... 15-142
[Bulletin] ....................................................................................................................................... 15-143
[Polling TX] ................................................................................................................................... 15-144
[Register Overlay] ([Polling TX]).................................................................................................... 15-144
[Annotation].................................................................................................................................. 15-145
[Save] ([Annotation]) ..................................................................................................................... 15-145
[File Name] ([Annotation]) ([Save]) ................................................................................................ 15-146
[Simplex/Duplex] ([Annotation]) ([Save]) ....................................................................................... 15-146
[Resolution] ([Annotation]) ([Save]) ............................................................................................... 15-147
[Color] ([Annotation]) ([Save])........................................................................................................ 15-147
[File Type] ([Annotation]) ([Save]).................................................................................................. 15-148
[PDF Detail Setting] ([Annotation]) ([Save])................................................................................... 15-149
[Encryption] ([Annotation]) ([Save]) ............................................................................................... 15-150
[Scan Size] ([Annotation]) ([Save]) ................................................................................................ 15-150
[Application] ([Annotation]) ([Save]) .............................................................................................. 15-151
[Original Settings] ([Annotation]) ([Save])...................................................................................... 15-152
[Mixed Original] ([Annotation]) ([Save]) ......................................................................................... 15-153
[Thin Paper Original] ([Annotation]) ([Save]).................................................................................. 15-153
[Z-Folded Original] ([Annotation]) ([Save]) .................................................................................... 15-154
Page 11

d-Color MF552/452/362/282/222 Contents-9
[Long Original] ([Annotation]) ([Save]) ........................................................................................... 15-154
[Despeckle] ([Annotation]) ([Save])................................................................................................ 15-155
[Blank Page Removal] ([Annotation]) ([Save])............................................................................... 15-155
[Binding Position] ([Annotation]) ([Save]) ...................................................................................... 15-156
[Original Direction] ([Annotation]) ([Save])..................................................................................... 15-156
[Book Original] ([Annotation]) ([Save])........................................................................................... 15-157
[Separate Scan] ([Annotation]) ([Save])......................................................................................... 15-158
[Original Type] ([Annotation]) ([Save]) ........................................................................................... 15-158
[Density] ([Annotation]) ([Save]) .................................................................................................... 15-159
[Bkgd. Removal] ([Annotation]) ([Save])........................................................................................ 15-160
[Frame Erase] ([Annotation]) ([Save]) ............................................................................................ 15-160
[Sharpness] ([Annotation]) ([Save]) ............................................................................................... 15-161
[Details] ([Annotation]) .................................................................................................................. 15-161
[Print] ([Annotation])...................................................................................................................... 15-162
[Color] ([Annotation]) ([Print]) ........................................................................................................ 15-162
[Zoom] ([Annotation]) ([Print])........................................................................................................ 15-163
[Duplex/Combine] ([Annotation]) ([Print])...................................................................................... 15-163
[Simplex/Duplex] ([Annotation]) ([Print])........................................................................................ 15-164
[Combine] ([Annotation]) ([Print]) .................................................................................................. 15-164
[Finishing] ([Annotation]) ([Print])................................................................................................... 15-165
[Group/Sort] ([Annotation]) ([Print])............................................................................................... 15-166
[Offset] ([Annotation]) ([Print]) ....................................................................................................... 15-166
[Staple] ([Annotation]) ([Print])....................................................................................................... 15-167
[Punch] ([Annotation]) ([Print])....................................................................................................... 15-167
[Fold/Bind] ([Annotation]) ([Print]) ................................................................................................. 15-168
[Half-Fold] ([Annotation]) ([Print]) .................................................................................................. 15-169
[Center Staple & Fold] ([Annotation]) ([Print])................................................................................ 15-169
[Tri-Fold] ([Annotation]) ([Print]) .................................................................................................... 15-170
[Z-Fold] ([Annotation]) ([Print]) ...................................................................................................... 15-170
[Application] ([Annotation]) ([Print])............................................................................................... 15-171
[Page Margin] ([Annotation]) ([Print])............................................................................................. 15-171
[Image Shift] ([Annotation]) ([Print])............................................................................................... 15-172
[Cover Sheet] ([Annotation]) ([Print]) ............................................................................................. 15-173
[Insert Sheet] ([Annotation]) ([Print]).............................................................................................. 15-174
[Chapters] ([Annotation]) ([Print]) .................................................................................................. 15-175
[Date/Time] ([Annotation]) ([Print]) ................................................................................................ 15-176
[Page Number] ([Annotation]) ([Print])........................................................................................... 15-176
[Stamp] ([Annotation]) ([Print]) ...................................................................................................... 15-177
[Stamp Repeat] ([Annotation]) ([Print]).......................
................................................................... 15-178
[Header/Footer] ([Annotation]) ([Print]).......................................................................................... 15-179
[Registered Overlay] ([Annotation]) ([Print]) .................................................................................. 15-179
[Copy Protect] ([Annotation]) ([Print])............................................................................................ 15-180
[Copy Guard] ([Annotation]) ([Print]) ............................................................................................. 15-181
[Password Copy] ([Annotation]) ([Print]) ....................................................................................... 15-182
[Send] ([Annotation])..................................................................................................................... 15-183
[Address Book] ([Annotation]) ([Send]) ......................................................................................... 15-183
[Direct Input] ([Annotation]) ([Send]) ............................................................................................. 15-184
[E-mail] ([Annotation]) ([Send])...................................................................................................... 15-184
[PC (SMB)] ([Annotation]) ([Send]) ................................................................................................ 15-185
[FTP] ([Annotation]) ([Send]).......................................................................................................... 15-186
[WebDAV] ([Annotation]) ([Send]).................................................................................................. 15-187
[Job History] ([Annotation]) ([Send]).............................................................................................. 15-188
[Addr. Search] ([Annotation]) ([Send])........................................................................................... 15-188
[Name Search] ([Annotation]) ([Send]) .......................................................................................... 15-189
[Address Search] ([Annotation]) ([Send]) ...................................................................................... 15-189
[Address Search (LDAP)] ([Annotation]) ([Send]) .......................................................................... 15-190
[Adv. Search (LDAP)] ([Annotation]) ([Send]) ................................................................................ 15-190
[Address Reg.] ([Annotation]) ([Send]) .......................................................................................... 15-191
[Resolution] ([Annotation]) ([Send])............................................................................................... 15-191
[Color] ([Annotation]) ([Send]) ....................................................................................................... 15-192
[File Type] ([Annotation]) ([Send]) ................................................................................................. 15-193
[PDF Detail Setting] ([Annotation]) ([Send])................................................................................... 15-194
[Encryption] ([Annotation]) ([Send])............................................................................................... 15-195
[E-mail Settings] ([Annotation]) ([Send])........................................................................................ 15-196
[Application] ([Annotation]) ([Send]).............................................................................................. 15-197
[Date/Time] ([Annotation]) ([Send]) ............................................................................................... 15-197
Page 12

Contents-10 d-Color MF552/452/362/282/222
[Page Number] ([Annotation]) ([Send]).......................................................................................... 15-198
[Stamp] ([Annotation]) ([Send]) ..................................................................................................... 15-199
[Header/Footer] ([Annotation]) ([Send])......................................................................................... 15-199
[Save & Print] ([Annotation]) ([Send]) ............................................................................................ 15-200
[Stamp Settings]........................................................................................................................... 15-201
[URL Dest. Settings] ([Annotation]) ([Send]) ................................................................................. 15-201
[Mail Encryption] ([Annotation]) ([Send]) ....................................................................................... 15-202
[Digital Signature] ([Annotation]) ([Send])...................................................................................... 15-202
[Other] ([Annotation]) .................................................................................................................... 15-203
[Edit Name] ([Annotation]) ............................................................................................................ 15-203
[Register Overlay] ([Annotation])................................................................................................... 15-204
[Delete] ([Annotation])................................................................................................................... 15-204
[File Re-TX]................................................................................................................................... 15-205
[Details] ([File Re-TX])................................................................................................................... 15-205
[Proof Print] .................................................................................................................................. 15-206
[Details..] ...................................................................................................................................... 15-206
[Fax TX] ........................................................................................................................................ 15-207
[Address Book] ([File Re-TX]) ([Fax TX]) ....................................................................................... 15-207
[Direct Input] ([File Re-TX]) ([Fax TX]) ........................................................................................... 15-208
[Fax] ([File Re-TX]) ([Fax TX]) ........................................................................................................ 15-208
[Job History] ([File Re-TX]) ([Fax TX])............................................................................................ 15-209
[Addr. Search] ([File Re-TX]) ([Fax TX])......................................................................................... 15-209
[Name Search] ([File Re-TX]) ([Fax TX]) ........................................................................................ 15-210
[Address Search] ([File Re-TX]) ([Fax TX]) .................................................................................... 15-210
[Address Reg.] ([File Re-TX]) ([Fax TX]) ........................................................................................ 15-211
[Application] ([File Re-TX]) ([Fax TX])............................................................................................ 15-211
[Fax Header Settings] ([File Re-TX]) ([Fax TX]) ............................................................................. 15-212
[Line Setting] ([File Re-TX]) ([Fax TX])........................................................................................... 15-212
[Delete] ([File Re-TX]).................................................................................................................... 15-213
[Password Encrypted PDF].......................................................................................................... 15-213
[External Memory] ........................................................................................................................ 15-214
[De
tails] ([External Memory]) ........................................................................................................ 15-214
[Save] ([External Memory]) ........................................................................................................... 15-215
[File Name] ([External Memory]) ([Save]) ...................................................................................... 15-215
[Simplex/Duplex] ([External Memory]) ([Save]) ............................................................................. 15-216
[Resolution] ([External Memory]) ([Save])...................................................................................... 15-216
[Color] ([External Memory]) ([Save]).............................................................................................. 15-217
[File Type] ([External Memory]) ([Save])........................................................................................ 15-218
[PDF Detail Setting] ([External Memory]) ([Save]) ......................................................................... 15-219
[Encryption] ([External Memory]) ([Save]) ..................................................................................... 15-220
[Scan Size] ([External Memory]) ([Save])....................................................................................... 15-221
[Application] ([External Memory]) ([Save])..................................................................................... 15-222
[Original Settings] ([External Memory]) ([Save]) ............................................................................ 15-222
[Mixed Original] ([External Memory]) ([Save]) ............................................................................... 15-223
[Thin Paper Original] ([External Memory]) ([Save])........................................................................ 15-223
[Z-Folded Original] ([External Memory]) ([Save])........................................................................... 15-224
[Long Original] ([External Memory]) ([Save]) ................................................................................. 15-224
[Despeckle] ([External Memory]) ([Save])...................................................................................... 15-225
[Blank Page Removal] ([External Memory]) ([Save]) ..................................................................... 15-225
[Binding Position] ([External Memory]) ([Save]) ............................................................................ 15-226
[Original Direction] ([External Memory]) ([Save])........................................................................... 15-226
[Book Original] ([External Memory]) ([Save])................................................................................. 15-227
[Separate Scan] ([External Memory]) ([Save])............................................................................... 15-228
[Original Type] ([External Memory]) ([Save]) ................................................................................. 15-228
[Density] ([External Memory]) ([Save])........................................................................................... 15-229
[Bkgd. Removal] ([External Memory]) ([Save]).............................................................................. 15-230
[Frame Erase] ([External Memory]) ([Save]) .................................................................................. 15-230
[Sharpness] ([External Memory]) ([Save]) ..................................................................................... 15-231
[Print] ([External Memory])............................................................................................................ 15-231
[Color] ([External Memory]) ([Print]) .............................................................................................. 15-232
[Paper].......................................................................................................................................... 15-232
[2-Sided] ([External Memory]) ([Print]) .......................................................................................... 15-233
[Finishing] ([External Memory]) ([Print])......................................................................................... 15-233
[Group/Sort] ([External Memory]) ([Print])..................................................................................... 15-234
[Offset] ([External Memory]) ([Print]) ............................................................................................. 15-235
[Staple] ([External Memory]) ([Print])............................................................................................. 15-235
Page 13

d-Color MF552/452/362/282/222 Contents-11
[Punch] ([External Memory]) ([Print])............................................................................................. 15-236
[Fold/Bind] ([External Memory]) ([Print]) ....................................................................................... 15-236
[Half-Fold] ([External Memory]) ([Print]) ........................................................................................ 15-237
[Center Staple & Fold] ([External Memory]) ([Print])...................................................................... 15-238
[Tri-Fold] ([External Memory]) ([Print])........................................................................................... 15-238
[Z-Fold] ([External Memory]) ([Print]) ............................................................................................ 15-239
[Application] ([External Memory]) ([Print]) ..................................................................................... 15-239
[Sheet/Book Print] ([External Memory]) ([Print])............................................................................ 15-240
[Combination] ([External Memory]) ([Print])................................................................................... 15-240
[Date/Time] ([External Memory]) ([Print])....................................................................................... 15-241
[Page Number] ([External Memory]) ([Print])................................................................................. 15-241
[Stamp] ([External Memory]) ([Print])............................................................................................. 15-242
[Stamp Repeat] ([External Memory]) ([Print])................................................................................ 15-243
[Copy Protect] ([External Memory]) ([Print]).................................................................................. 15-244
[Copy Guard] ([External Memory]) ([Print]).................................................................................... 15-245
[Password Copy] ([External Memory]) ([Print]).............................................................................. 15-246
[Other] ([External Memory]) .......................................................................................................... 15-247
[Save in User Box] ([External Memory])........................................................................................ 15-247
[Mobile/PDA] ................................................................................................................................ 15-248
[Print] ([Mobile/PDA]).................................................................................................................... 15-248
[Save in User Box] ([Mobile/PDA])................................................................................................ 15-249
16 Description of Setup Buttons (User Settings)
[Utility] .............................................................................................................................................. 16-3
[One-Touch/User Box Registration]................................................................................................. 16-3
[Create One-Touch Destination] ...................................................................................................... 16-4
[Group] ............................................................................................................................................. 16-4
[Create User Box]............................................................................................................................. 16-5
[Public/Personal User Box] .............................................................................................................. 16-5
[Bulletin Board User Box]................................................................................................................. 16-6
[Relay User Box] .............................................................................................................................. 16-6
[User Settings].................................................................................................................................. 16-7
[Custom Display Settings]................................................................................................................ 16-7
[User Box Settings] ([Custom Display Settings]).............................................................................. 16-8
[Default Tab] ([User Box Settings])................................................................................................... 16-8
[Shortcut Key] .................................................................................................................................. 16-8
[Cellular Phone/PDA Setting] ........................................................................................................... 16-8
17 Description of Setup Buttons (Administrator Settings)
[Administrator Settings] ................................................................................................................... 17-3
[System Settings] ............................................................................................................................. 17-4
[User Box Settings] .......................................................................................................................... 17-5
[Delete Unused User Box]................................................................................................................ 17-5
[Delete Secure Print Documents]..................................................................................................... 17-6
[Auto Delete Secure Document]....................................................................................................... 17-6
[Encrypted PDF Delete Time]........................................................................................................... 17-6
[ID & Print Delete Time].................................................................................................................... 17-6
[Document Hold Setting].................................................................................................................. 17-7
[External Memory Function Settings]............................................................................................... 17-7
[Save Document].............................................................................................................................. 17-7
[Print Document] .............................................................................................................................. 17-7
[External Memory Document Scan] ................................................................................................. 17-7
[Allow/Restrict User Box] ................................................................................................................. 17-8
[ID & Print Delete after Print Setting]................................................................................................ 17-8
[Document Delete Time Setting] ...................................................................................................... 17-8
[Scan File Name Settings]................................................................................................................ 17-8
[Function Mode Initial]...................................................................................................................... 17-9
[Supplementary File Name].............................................................................................................. 17-9
[One-Touch/User Box Registration]................................................................................................. 17-9
[Create One-Touch Destination] ...................................................................................................... 17-9
[Group] ........................................................................................................................................... 17-10
[Create User Box]........................................................................................................................... 17-10
[Public/Personal User Box] ............................................................................................................ 17-11
Page 14

Contents-12 d-Color MF552/452/362/282/222
[Bulletin Board User Box]............................................................................................................... 17-12
[Relay User Box] ............................................................................................................................ 17-12
[Annotation User Box].................................................................................................................... 17-13
[Maximum Number of User Boxes]................................................................................................ 17-14
[User Authentication/Account Track] ............................................................................................. 17-14
[User Authentication Settings] ....................................................................................................... 17-15
[Administrative Settings] ................................................................................................................ 17-15
[User Name List]............................................................................................................................. 17-15
[Default Function Permission] ........................................................................................................ 17-16
[ID & Print Settings]........................................................................................................................ 17-16
[ID & Print Operation Settings]....................................................................................................... 17-16
[Default Operation Selection] ......................................................................................................... 17-16
[User Registration] ......................................................................................................................... 17-17
[Network Settings].......................................................................................................................... 17-18
[Bluetooth Setting] ......................................................................................................................... 17-19
[System Connection]...................................................................................................................... 17-19
[Cellular Phone/PDA Setting] ......................................................................................................... 17-20
[Security Settings] .......................................................................................................................... 17-20
[User Box Administrator Setting] ................................................................................................... 17-21
[Security Details] ............................................................................................................................ 17-21
[Prohibited Functions When Authentication Error]......................................................................... 17-22
[Confidential Document Access Method] ...................................................................................... 17-22
18 Index
18.1 Index by item ................................................................................................................................. 18-3
18.2 Index by button.............................................................................................................................. 18-5
Page 15

1
About the Boxes
Page 16

Page 17

d-Color MF552/452/362/282/222 1-3
1.1 Box screen
1
1About the Boxes
1.1 Box screen
The Box screen displays the User Box and the System Box.
The user can store documents in the User Box. Also, the user can print a file from the User Box or send a file
to another user.
The System Box is used by the system to temporarily store files when the user uses the facsimile or print
function together with the file storage function of the box.
The user can operate files in the System Box when necessary.
Page 18

Available operations with User Box
1
1-4 d-Color MF552/452/362/282/222
1.2
1.2 Available operations with User Box
The User Box is a box in which the user can store documents and use them again when necessary.
The original data read by this machine can be converted into a file and stored in the User Box. Also, data can
be stored in the User Box when printing is specified by any PC running on the network. A file stored in the
User Box can be printed out or sent out to another user.
If the frequently used original data is stored in the User Box, you do not need to search for the document or
data when they are being printed or sent. Because you do not need to operate the printer from a PC, you can
reduce operation time and improve the efficiency with which you carry out tasks.
The following types of User Boxes are available.
Type Description
[Public] This is the public box in which all users can store documents and use them.
A password can be set for each box in order to control access to it.
If documents are created in an electronic format and stored in the Public
User Box, all users can share the same information by accessing this box.
Also, users do not need to search for documents or data or operate the
printer during printing. This will save the user time and improve the efficiency with which they carry out tasks.
[Personal] This is a personal box and if user authentication is implemented, only users
who have logged in to the system can store documents in the Personal
User Box and use documents contained in it when necessary. Because
this box is not displayed to other users, there is no chance that important
files will be erroneously deleted from the box.
If frequently used documents are created in an electronic format and
stored in the Personal User Box, users do not need to search for documents or data or operate the printer from a PC during printing. This will
save the user time and improve the efficiency with which they carry out
tasks.
[Group] This is a user box. If the Account Track is implemented, only users belong-
ing to the same department (or group) can store and use documents in the
Group User Box. This box is not displayed when a user of another department or a public user have logged in.
If documents are stored in the Group User Box, all users of each group can
share the same information by accessing this box.
Page 19

d-Color MF552/452/362/282/222 1-5
1.3 Available operations with System Box
1
1.3 Available operations with System Box
[Secure Print]
When you print a document from the PC or when you select the Secure Print function using the printer driver,
this data file is stored in the Secure Print User Box. Once you have opened the User Box, you can select a
file stored in the User Box and preview, print, rename, or delete it.
The document ID and password are required to print out the files stored in the Secure Print User Box. After
the file has been printed out, it is deleted automatically. This box is used to handle classified documents.
[Memory RX]
When a facsimile is received by the Memory RX function, it is stored in the Memory RX User Box. Once you
have opened the User Box, you can select a fax stored in the User Box and preview, print, rename, or delete
it.
Because the received faxes are forcibly stored in this box, you can print out only the required faxes and subsequently reduce total printing costs. Also, this will prevent important faxes from being stolen or lost and
therefore enhance security.
document
document
Page 20

Available operations with System Box
1
1-6 d-Color MF552/452/362/282/222
1.3
[ID & Print]
When you print a document from the PC in the user authentication system environment, the files transferred
with the ID & Print function are stored in the ID & Print User Box. When a user who has sent the print data
logs in to this machine and opens the User Box, he/she can preview, print out, or delete the stored file.
Because user authentication is required in order to use a file, this box is useful for handling documents containing private information.
[Bulletin]
Multiple fax documents required for polling can be stored in the Bulletin Board User Box.
You can create and register up to 10 Bulletin Board User Boxes. Once you have opened the User Box, you
can select a fax document stored in the User Box and preview, print out, or delete it.
If announcements and other fax documents are stored in Bulletin Board User Boxes by aim, and if recipients
are notified of the related box numbers, users can select the required fax documents and be polled.
[Polling TX]
The fax documents required for polling are stored in the Polling Transmission User Box. Once you have
opened the User Box, you can select a fax document stored in the User Box and preview, print out, or delete
it.
If the fax documents are stored in the Polling TX User Box, recipients can be polled and receive fax documents from this box when necessary.
Login
Page 21

d-Color MF552/452/362/282/222 1-7
1.3 Available operations with System Box
1
[Annotation]
When a stored file is printed out or sent to another user, its date, time and any annotations are added to this
box automatically. Once you have opened the User Box, you can select a file stored in the User Box and preview, print out, send, rename, or delete it.
When a file is read from the Annotation User Box and used for printouts or transmitted to a recipient, the date,
time and any annotations (previously determined for management) are automatically added to the header or
footer of each image. You can prevent the unauthorized use of documents by creating a document that can
identify the creation date and time and serial page number of each document.
[File Re-TX]
When the recipient is busy and if communication cannot be established, undeliverable fax documents are
stored in the Fax Retransmit User Box. Once you have opened the User Box, you can select a fax document
stored in the User Box and preview, print out, send, or delete it.
Fax transmission is attempted for the number of times set by Auto Redialing function. If those attempts have
failed, the fax document is stored in the Fax Retransmit User Box.
[Password Encrypted PDF]
When a password protected PDF file is printed out or stored in the User Box by using the Direct Print function
or from a USB memory or a Bluetooth device, the file is stored in the Password Encrypted PDF User Box.
Once you have opened the User Box, you can select a PDF file stored in the User Box to preview and print
it out. Also, you can store the file in or delete it from the User Box.
When printing or saving a PDF file, you will need to enter a password that was set for the file.
ERROR
Page 22

Available operations with System Box
1
1-8 d-Color MF552/452/362/282/222
1.3
[External Memory]
This window appears when you insert a USB memory device into the USB port of this machine.
Once you have opened the User Box, you can print out a file stored on a USB memory. Also, you can read
the original data and directly save it as a file in the USB memory. You can also move a file from the USB memory to the External Memory User Box.
[Mobile/PDA]
This User Box is used to save files when this machine is connected to a Bluetooth-compatible mobile phone,
smartphone, tablet PC, or other devices.
Once you have opened the User Box, you can set the file printing and saving. Because files are transferred
from the Bluetooth device to this machine via wireless communication, you can save and print out files even
when no PC is available.
[Relay User Box]
When you use this machine as a relay machine to the facsimile, the Relay User Box is used for data relay.
If you use the Relay Distribution and you send a fax to the relay machine, it distributes the fax to all recipients
registered in the Relay User Box.
If you are broadcasting to distant destinations, you can reduce total communication costs by using the relay
machine.
Page 23

2
Store documents as files in
MFP and use them again
when necessary
Page 24

Page 25

d-Color MF552/452/362/282/222 2-3
2.1 Boxes for document storage and readout (User Box)
2
2 Store documents as files in MFP and use them
again when necessary
2.1 Boxes for document storage and readout (User Box)
Available operations with User Box
This machine allows a user to create a User Box where the user can store documents and use them again
when necessary. This box is called the User Box.
The original data scanned by this machine can be converted into a file and stored in the User Box. Also, data
can be stored in the User Box when printing is specified by any PC running on the network. A file stored in
the User Box can be printed out or sent out to another user.
If the frequently used original data is stored in the User Box, you do not need to search for the document or
data when they are being printed or sent. Because you do not need to operate the printer from a PC, you can
reduce operation time and improve the efficiency with which you carry out tasks.
Page 26

Boxes for document storage and readout (User Box)
2
2-4 d-Color MF552/452/362/282/222
2.1
Type of User Boxes
This section explains how to use the following User Boxes.
Type Description
[Public] This is the public box in which all users can store documents and use them.
A password can be set for each box in order to control access to it.
If documents are created in an electronic format and stored in the Public
User Box, all staff can share the same information by accessing this box.
Also, users do not need to search for documents or data or operate the
printer during printing. This will save the user time and improve the efficiency with which they carry out tasks.
[Personal] This is a personal box and if user authentication is implemented, only users
who have logged in to the system can store documents in the Personal
User Box and use documents contained in it when necessary. Because
this box is not displayed to other users, there is no chance that important
files will be erroneously deleted from the box.
If frequently used documents are created in an electronic format and
stored in the Personal User Box, users do not need to search for documents or data or operate the printer from a PC during printing. This will
save the user time and improve the efficiency with which they carry out
tasks.
[Group] This is a user box. If the Account Track is implemented, only users belong-
ing to the same department (or group) can store and use documents in the
Group User Box. This box is not displayed when a user of another department or a public user have logged in.
If documents are stored in the Group User Box, all users of each group can
share the same information by accessing this box.
Page 27

d-Color MF552/452/362/282/222 2-5
2.2 Rules to use User Boxes
2
2.2 Rules to use User Boxes
Public User Box
All users can reference to User Boxes.
Related setting (for the administrator)
- The administrator can set an authority so that each user is allowed to create, edit, or delete a User Box
(default: [Allow]). For details, refer to page 17-8.
Personal User Box
If User Authentication has been implemented, a user can only access the Personal User Box the user has
created. Other users cannot access this box.
Tips
- When releasing the User Authentication or when changing the authentication system and deleting the
authentication data, the administrator can change the Personal User Box to a Public User Box or can
delete the Personal User Box.
Related setting (for the administrator)
- If the administrator of this machine wants to entrust only box file management to another person, this
administrator can assign a box administrator (Default: [Restrict]). A User Box administrator can access
all Public User Boxes, all Personal User Boxes and all Group User Boxes. For details, refer to
page 17-21.
Public User Box
Personal User
Box of user 1
Personal User
Box of user 2
User 1
User 2
User Box
administrator
Page 28
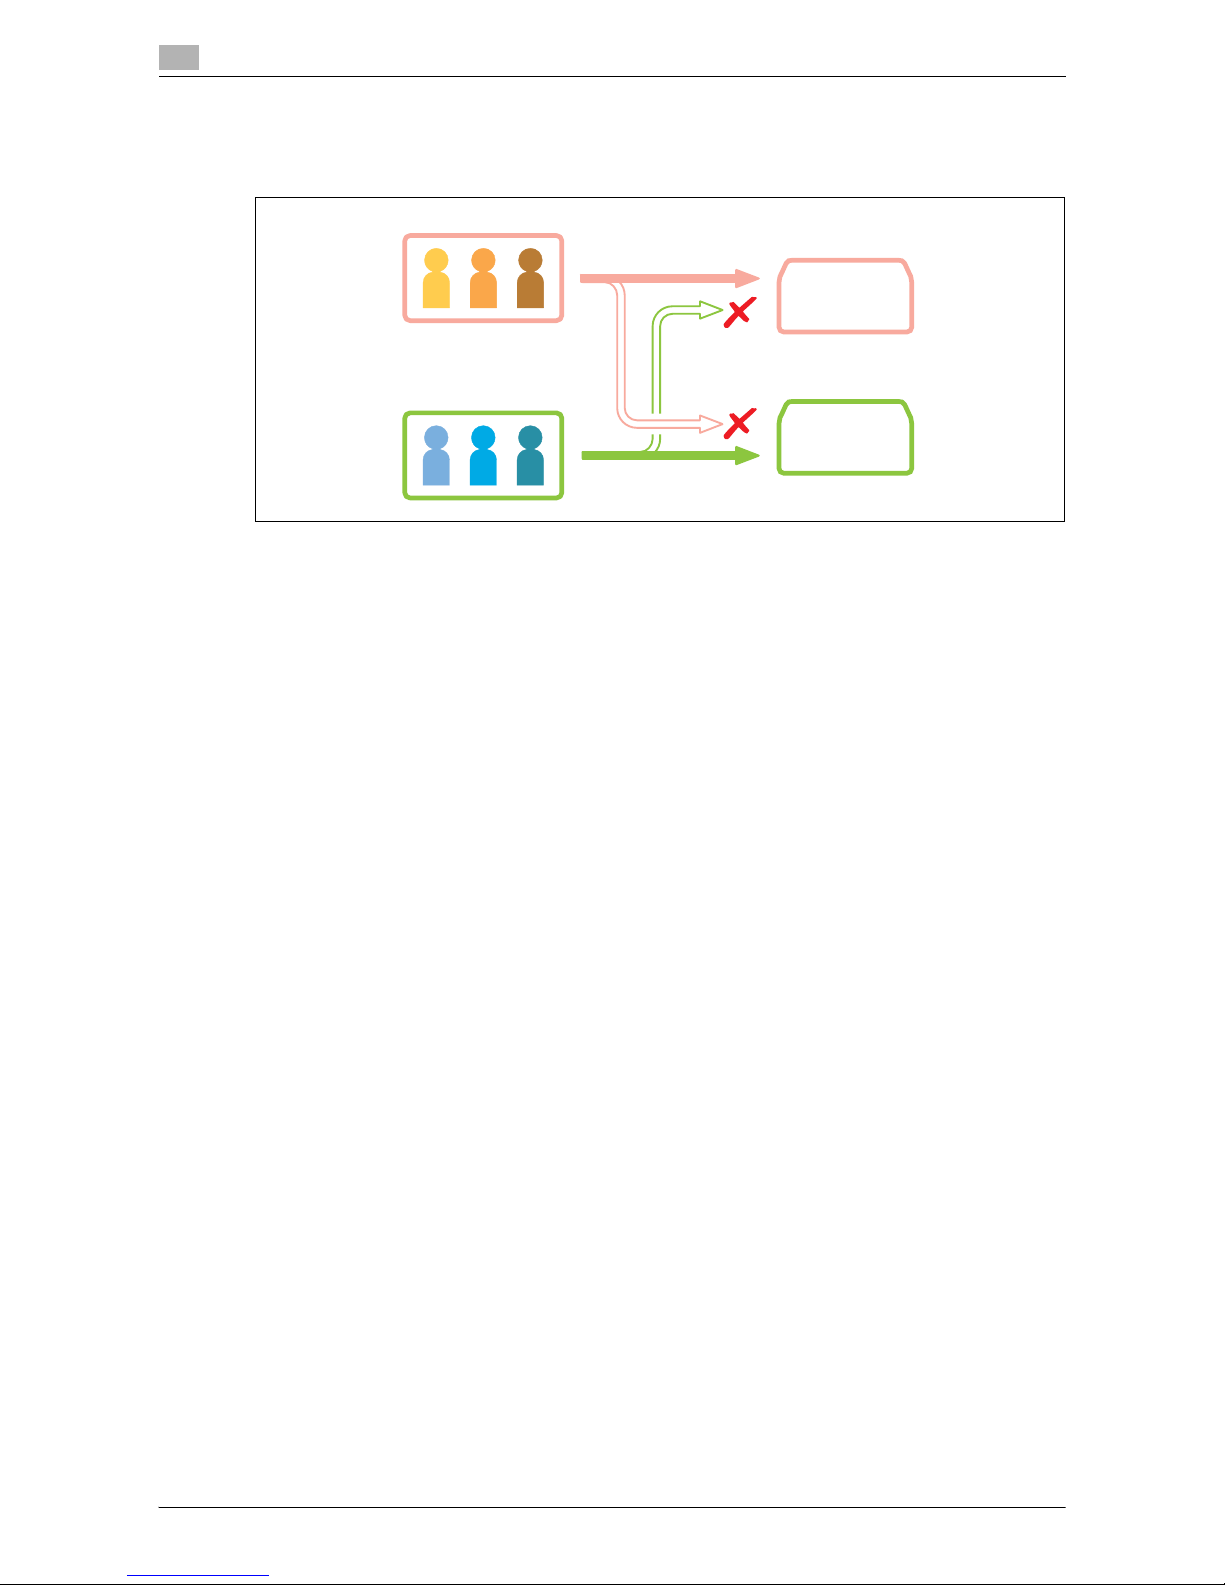
Rules to use User Boxes
2
2-6 d-Color MF552/452/362/282/222
2.2
Group User Box
If Account Track has been implemented, a user can only access the Group User Box of the department the
user belongs to. A user of another department cannot access this box.
Tips
- When releasing the User Authentication or when changing the authentication system and deleting the
authentication data, the administrator can change the Group User Box to a Public User Box or can delete the Group User Box.
Group User Box
of account A
Account A
Account B
Group User Box
of account B
Page 29

d-Color MF552/452/362/282/222 2-7
2.2 Rules to use User Boxes
2
When using a combination of Personal User Box and Group User Box
If both User Authentication and Account Track have been implemented, a user can access to the Public User
Box, a Personal User Box created by the user himself or herself, and the Group User Box of the department
the user belongs to.
Tips
- The Personal User Box is inaccessible by another user.
- If user authentication and department management are not linked to each other, the user can access a
Group User Box of his/her department when the user enters the correct department name and password in the authentication field of Group User Box during login.
- When releasing the User Authentication or when changing the authentication system and deleting the
authentication data, the administrator can change both Personal User Box and Group User Box to Public User Boxes or can delete the Personal and Group User Boxes.
Related setting (for the administrator)
- If the administrator of this machine wants to entrust only box file management to another person, this
administrator can assign a box administrator (Default: [Restrict]). A User Box administrator can access
all Public User Boxes, all Personal User Boxes and all Group User Boxes. For details, refer to
page 17-21.
User 1
User 2
Account track A
Account track B
Personal User
Box of user 1
Personal User
Box of user 2
Group User Box
of account A
Group User Box
of account B
User Box
administrator
Page 30

Create User Box
2
2-8 d-Color MF552/452/362/282/222
2.3
2.3 Create User Box
Up to 1000 User Boxes can be created.
1 Tap [Utility] - [One-Touch/User Box Registration] - [Create User Box] - [Public/Personal User Box] -
[New].
% The administrator can perform the same actions by selecting [Administrator Settings] - [One-
Touch/User Box Registration].
2 Enter the registered information, then tap [OK].
% For details on registration information, refer to page 16-5.
Related setting (for the administrator)
- The administrator can delete all unused and empty boxes simultaneously. For details, refer to
page 17-5.
- The administrator can select an authority so that each user is allowed to create, edit, or delete a User
Box (default: [Allow]). For details, refer to page 17-8.
- You can set a limit on the number of boxes that each user can create. For details, refer to page 17-14.
- The administrator can set a time to automatically delete files from all User Boxes (Default: [No]). For de-
tails, refer to page 17-8.
d Reference
You can also register boxes using Web Connection. For details, refer to [User's Guide: Web Management
Tool].
Page 31

d-Color MF552/452/362/282/222 2-9
2.4 Save file in a User Box
2
2.4 Save file in a User Box
Save (Basic operation flow)
1 Load the original.
2 Tap [Box].
3 Select a User Box in which to save a file, then tap [Save].
% This example uses the Public User Box for explanatory purposes. To use a Personal User Box or a
Group User Box, tap [Personal] or [Group] and select the desired box.
% Tap [New], to create a User Box. For details, refer to page 15-4.
% To search for a User Box in which to save a file, tap [Search]. For details, refer to page 15-5.
Page 32

Save file in a User Box
2
2-10 d-Color MF552/452/362/282/222
2.4
4 Set file save options if necessary.
% For detailed optional settings, refer to page 14-3.
5 Tap Start.
The file is saved.
Tips
- Up to 200 files can be stored in a User Box.
- A total of 10000 pages can be stored in all User Boxes.
- A total of 3000 files can be stored in all User Boxes.
- If files stored in a User Box are not used, they are deleted automatically when the [Auto Document De-
lete Time] has passed (Default: [1 day]).
Save files in Copy mode
You can read a document in Copy mode and save its data in the User Box.
For details, refer to [User's Guide: Copy Operations].
Save file in Fax/Scan mode
You can read the original data in Fax/Scan mode and save it in a User Box.
For details, refer to [User's Guide: Scan Operations].
Save files from a PC
When specifying to print using the printer driver, you can specify a User Box number and store the print data
in the box.
For details, refer to [User's Guide: Print Operations].
Page 33

d-Color MF552/452/362/282/222 2-11
2.4 Save file in a User Box
2
Save file from a USB memory
You can save a file stored on a USB memory in a User Box.
For details, refer to page 12-10.
Save file from Bluetooth device
You can save files from Bluetooth-enabled mobile phone, smartphone, and tablet PC in a User Box.
For details, refer to page 13-7.
Tips
- The Local Interface Kit EK-607 is required to use the Bluetooth devices.
- An interface setup by the service representative is required to use Bluetooth devices. For details, con-
tact your service representative.
Page 34

Print file in a User Box
2
2-12 d-Color MF552/452/362/282/222
2.5
2.5 Print file in a User Box
Print (Basic operation flow)
1 Tap [Box].
2 Select the desired User Box, then tap [Open].
% This example uses the Public User Box for explanatory purposes. To use a Personal User Box or a
Group User Box, tap [Personal] or [Group] and select the desired box.
% If the box is password protected, tap [Open] and enter the password.
% You can also open the desired User Box by tapping it twice.
3 Select a file to print, then tap [Print].
Page 35

d-Color MF552/452/362/282/222 2-13
2.5 Print file in a User Box
2
4 Set print options if necessary.
% For detailed optional settings, refer to page 14-12.
5 If necessary, enter the number of copies using the Keypad.
% To use the Keypad, slide the Control Panel to the left.
% If [10 Keypad] is assigned to the Register key, pressing the Register key enables you to display the
Keypad on the Touch Panel to enter data.
% To correct the number of copies, press C (Clear).
6 Press the Start key.
Printing starts.
Related setting (for the administrator)
- You can specify to hold or clear a file from the box after file printing or sending (Default: [Yes]). Also,
you can prompt the user to hold or not hold a file in the box after it has been printed or sent in the delete
confirmation screen. For details, refer to page 17-7.
Page 36

Print file in a User Box
2
2-14 d-Color MF552/452/362/282/222
2.5
Print multiple files at the same time (Combine)
When printing multiple files at the same time, you can combine those files and handle them as a single job.
This is called the Combine printing.
Using this function, you can reduce the print time and improve the efficiency as you can skip to repeat printing
files one by one.
1 Tap [Box].
2 Select the desired User Box, then tap [Open].
% This example uses the Public User Box for explanatory purposes. To use a Personal User Box or a
Group User Box, tap [Personal] or [Group] and select the desired box.
% If the box is password protected, tap [Open] and enter the password.
% You can also open the desired User Box by tapping it twice.
3 Select files for Combine printing, then tap [Other] - [Combine].
Page 37

d-Color MF552/452/362/282/222 2-15
2.5 Print file in a User Box
2
4 Change the order of printing files (Combine sequence) if necessary, then tap [OK].
% If you print a file containing a watermark first, the watermark will also be printed on the second and
subsequent files.
% Also, if you print a file that does not have a watermark first, the second and subsequent files will be
printed without watermarks even if they have watermarks.
5 Set print options if necessary.
% For detailed optional settings, refer to page 14-12.
6 If necessary, enter the number of copies using the Keypad.
% To use the Keypad, slide the Control Panel to the left.
% If [10 Keypad] is assigned to the Register key, pressing the Register key enables you to display the
Keypad on the Touch Panel to enter data.
% To correct the number of copies, press C (Clear).
Page 38

Print file in a User Box
2
2-16 d-Color MF552/452/362/282/222
2.5
7 Press the Start key.
Printing starts.
Related setting (for the administrator)
- You can specify to hold or clear a file from the box after file printing or sending (Default: [Yes]). Also,
you can prompt the user to hold or not hold a file in the box after it has been printed or sent in the delete
confirmation screen. For details, refer to page 17-7.
Page 39

d-Color MF552/452/362/282/222 2-17
2.6 Send files in a User Box
2
2.6 Send files in a User Box
2.6.1 Sending (Basic operation flow)
1 Tap [Box].
2 Select the desired User Box, then tap [Open].
% This example uses the Public User Box for explanatory purposes. To use a Personal User Box or a
Group User Box, tap [Personal] or [Group] and select the desired box.
% If the box is password protected, tap [Open] and enter the password.
% You can also open the desired User Box by tapping it twice.
3 Select a file to send, then tap [Send].
Page 40

Send files in a User Box
2
2-18 d-Color MF552/452/362/282/222
2.6
4 Specify the destination.
% For the destination setup, refer to page 2-19.
5 Set the file send options if necessary.
% For details, refer to page 14-23.
6 Press the Start key.
Transmission begins.
Related setting (for the administrator)
- You can specify to hold or clear a file from the box after file printing or sending (Default: [Yes]). Also,
you can prompt the user to hold or not hold a file in the box after it has been printed or sent in the delete
confirmation screen. For details, refer to page 17-7.
Page 41

d-Color MF552/452/362/282/222 2-19
2.6 Send files in a User Box
2
2.6.2 Set a destination
Select a destination from the Address Book
From the [Address Book], select a destination registered on this machine.
Broadcast transmission is possible by selecting multiple destinations. Broadcasting can also be used for other file transfer functions such as simultaneous E-mail and SMB file transfer.
No. Description
1 Narrow down destinations using the search text specified for the registered destination. Jobs
can be further filtered in combination with [Add. Type].
The following keys can be used to narrow down destinations:
• [All]: Displays all address book entries registered on this machine.
• [Favorite]: Displays the destinations registered as [Favorites] as search text.
• [etc]: Displays the destinations whose initial character is not an alphabet character and
whose character is not set for search.
2 Displays the registered destinations either as buttons or in a list.
If switched to the list display, you can sort the destinations by registration numbers, destination
types, or in alphabetical order of destination names.
3 Narrow down destinations using the type of registered destination. Jobs can be further filtered
in combination with Index.
1
2
3
Page 42

Send files in a User Box
2
2-20 d-Color MF552/452/362/282/222
2.6
Searching for destination
If a large number of destinations are registered, you can search for a destination by registration name or destination (E-mail address or PC name).
1 Tap [Addr. Search] - [Search] - [Name Search] or [Address Search].
% When searching for a destination by registration name, tap [Name Search].
% When searching for a destination by E-mail address or computer name, tap [Address Search].
2 Enter the text you want to search for, then tap [Search].
% To use [Name Search]
% To use [Address Search]
3 Select a destination from the search result.
Page 43

d-Color MF552/452/362/282/222 2-21
2.6 Send files in a User Box
2
Direct input
In [Direct Input], tap the destination type key and enter the destination name.
d Reference
You can directly enter a destination and store it in the Address Book. For details, refer to [User's Guide: Scan
Operations].
Select file from the history
Press [Job History], and you can select a destination from the scan or fax history.
The latest jobs (up to five) are displayed for history purposes. You can also select multiple destinations from
the history.
Tips
- If you have edited a destination, you have edited a User Box, or you have turned the power supply Off
and On again, the history data is deleted or lost.
Purpose Reference
Send fax. page 15-47
Send e-mail with an attached file. page 15-47
Send Internet fax. page 15-48
Send IP Address fax. page 15-48
Send file to shared folder of PC or server. page 15-49
Send file to FTP server. page 15-50
Send file to WebDAV server. page 15-51
Page 44

Send files in a User Box
2
2-22 d-Color MF552/452/362/282/222
2.6
Search for mail address or fax number from the LDAP server
If you are using the LDAP server or the Active Directory of Windows Server, you can search and select a mail
address from the server.
There are two ways to search: [Address Search (LDAP)] in which an E-mail address or fax number is searched
by a single keyword, and [Adv. Search (LDAP)] in which an E-mail address or fax number is searched by a
combination of keywords of different categories.
0 To use the LDAP server or Active Directory for specifying the destination, you must register the server
to this machine. The registration procedure is explained using Web Connection. For details, refer to
[User's Guide: Web Management Tool].
1 Tap [Addr. Search] - [Search] - [Address Search (LDAP)] or [Adv. Search (LDAP)].
2 Enter the keyword, then tap [Search].
% To use [Address Search (LDAP)]
% To use [Adv. Search (LDAP)]
3 Select a destination from the search result.
Page 45

d-Color MF552/452/362/282/222 2-23
2.6 Send files in a User Box
2
2.6.3 Send multiple files at the same time (Combine TX)
When sending multiple files at the same time, you can combine those files and handle them as a single job.
This is called the Combine TX.
Using this function, you can reduce the print time and improve the efficiency as you can skip to repeat sending files one by one.
1 Tap [Box].
2 Select the desired User Box, then tap [Open].
% This example uses the Public User Box for explanatory purposes. To use a Personal User Box or a
Group User Box, tap [Personal] or [Group] and select the desired box.
% If the box is password protected, tap [Open] and enter the password.
% You can also open the desired User Box by tapping it twice.
3 Select files for Combine TX, then tap [Other] - [Combine TX].
Page 46

Send files in a User Box
2
2-24 d-Color MF552/452/362/282/222
2.6
4 Change the file sequence (Combine TX sequence) if necessary, then tap [OK].
5 Specify the destination.
% For the destination setup, refer to page 2-25.
6 Set the file send options if necessary.
% For details, refer to page 14-23.
Page 47

d-Color MF552/452/362/282/222 2-25
2.6 Send files in a User Box
2
7 Press the Start key.
Transmission begins.
Related setting (for the administrator)
- You can specify to hold or clear a file from the box after file printing or sending (Default: [Yes]). Also,
you can prompt the user to hold or not hold a file in the box after it has been printed or sent in the delete
confirmation screen. For details, refer to page 17-7.
2.6.4 Specify the destination (for Combine TX)
Select a destination from the Address Book
From the [Address Book], select a destination registered on this machine.
Broadcast transmission is possible by selecting multiple destinations. Broadcasting can also be used for other file transfer functions such as simultaneous E-mail and SMB file transfer.
1
2
3
Page 48

Send files in a User Box
2
2-26 d-Color MF552/452/362/282/222
2.6
Searching for destination
If a large number of destinations are registered, you can search for a destination by registration name or destination (E-mail address or PC name).
1 Tap [Addr. Search] - [Search] - [Name Search] or [Address Search].
% When searching for a destination by registration name, tap [Name Search].
% When searching for a destination by E-mail address or computer name, tap [Address Search].
2 Enter the text you want to search for, then tap [Search].
% To use [Name Search]
% To use [Address Search]
3 Select a destination from the search result.
No. Description
1 Narrow down destinations using the search text specified for the registered destination. Jobs
can be further filtered in combination with [Add. Type].
The following keys can be used to narrow down destinations:
• [All]: Displays all address book entries registered on this machine.
• [Favorite]: Displays the destinations registered as [Favorites] as search text.
• [etc]: Displays the destinations whose initial character is not an alphabet character and
whose character is not set for search.
2 Displays the registered destinations either as buttons or in a list.
If switched to the list display, you can sort the destinations by registration numbers, destination
types, or in alphabetical order of destination names.
3 Narrow down destinations using the type of registered destination. Jobs can be further filtered
in combination with Index.
Page 49

d-Color MF552/452/362/282/222 2-27
2.6 Send files in a User Box
2
Direct input
In [Direct Input], tap the destination type key and enter the destination name.
d Reference
You can directly enter a destination and store it in the Address Book. For details, refer to [User's Guide: Scan
Operations].
Select file from the history
Press [Job History], and you can select a destination from the scan or saved job history.
The latest jobs (up to five) are displayed for history purposes. You can also select multiple destinations from
the history.
Tips
- If you have edited a destination, you have edited a User Box, or you have turned the power supply Off
and On again, the history data is deleted or lost.
Purpose Reference
Send e-mail with an attached file. page 15-86
Send file to shared folder of PC or server. page 15-87
Send file to FTP server. page 15-88
Send file to WebDAV server. page 15-89
Page 50

Send files in a User Box
2
2-28 d-Color MF552/452/362/282/222
2.6
Search for E-mail address from the LDAP server
If you are using the LDAP server or the Active Directory of Windows Server, you can search and select a mail
address from the server.
There are two ways to search: [Address Search (LDAP)] in which an E-mail address is searched by a single
keyword, and [Adv. Search (LDAP)] in which an E-mail address is searched by a combination of keywords of
different categories.
0 To use the LDAP server or Active Directory to specify the destination, you must register the server to
this machine. The registration procedure is explained using Web Connection. For details, refer to [User's Guide: Web Management Tool].
1 Tap [Addr. Search] - [Search] - [Address Search (LDAP)] or [Adv. Search (LDAP)].
2 Enter the keyword, then tap [Search].
% To use [Address Search (LDAP)]
% To use [Adv. Search (LDAP)]
3 Select a destination from the search result.
Page 51

d-Color MF552/452/362/282/222 2-29
2.7 Organize files in a User Box
2
2.7 Organize files in a User Box
Operation flow
1 Tap [Box].
2 Select the desired User Box, then tap [Open].
% This example uses the Public User Box for explanatory purposes. To use a Personal User Box or a
Group User Box, tap [Personal] or [Group] and select the desired box.
% If the box is password protected, tap [Open] and enter the password.
% You can also open the desired User Box by tapping it twice.
3 Select a file and set the desired operation.
Page 52

Organize files in a User Box
2
2-30 d-Color MF552/452/362/282/222
2.7
Delete a file
Select a file, then tap [Delete]. The file is deleted. You can select multiple files and delete them simultaneously. Check the file details, then tap [Yes].
Rename a file
Select a file, then tap [Other] - [Edit Name]. Now you can rename the file. Enter a new name from the Touch
Panel.
Tips
- Before renaming a file, check the destination server conditions and others.
- You can also rename a file while it is being transmitted.
Page 53

d-Color MF552/452/362/282/222 2-31
2.7 Organize files in a User Box
2
Move file to another User Box
Select a file, then tap [Other] - [Re-order]. Now you can move the file to another User Box. The destination
can be a Public User Box, a Personal User Box, or a Group User Box. Select a destination User Box, then
tap [Start] or press the Start key.
Tips
- You do not need to enter the password even if it is specified for the destination User Box.
Copy file to another User Box
Select a file, then tap [Other] - [Copy]. Now you can copy the file to another User Box. Select the destination
Public, Personal or Group User Box. Select a destination User Box, then tap [Start] or press the Start key.
Tips
- You do not need to enter the password even if it is specified for the destination User Box.
Page 54

Organize files in a User Box
2
2-32 d-Color MF552/452/362/282/222
2.7
Edit a page
Select a file, then tap [Other] - [Edit Document]. Now you can select page of the file to delete or rotate.
1 Select a page, and set the edit options.
2 Tap [Start].
3 To save your changes, tap [Yes].
Your settings are saved.
Function Description
[Odd Page] Selects odd-numbered pages only.
[Even Page] Selects even-numbered pages only.
[All Pages] Selects all pages.
[Delete Page] Deletes a selected page or pages. For example, you can delete blank pag-
es to reduce the amount of data.
[Rotate Page] Rotates a selected page 90 degrees or 180 degrees.
When a 2-sided original is scanned, the top and bottom may be reversed
page by page or the orientation may be different from the original. In this
case, you can rotate and correct the orientation of each page.
[Move Page] Reorders pages by moving some of them.
Only one page can be moved at a time. Repeat this operation to move two
or more pages.
• [Preview/Specify by Input]: If a large number of pages are stored, use
this option to set the destination to move pages by entering numeric
values. Enter a destination page number, and specify to insert the page
immediately before or after the destination.
[Preview/Set Range] Sets a range of pages and displays them as preview image. You can also
change the display size.
Page 55

d-Color MF552/452/362/282/222 2-33
2.7 Organize files in a User Box
2
Save file in a USB memory
Insert a USB memory device into the USB port of this machine, select a file, then tap [Other] - [Save to External Memory]. Now you can save the file on the USB memory.
0 A file storage on a USB memory must first be enabled with the administrator privileges. For details, refer
to page 17-7.
0 Files of some USB memory devices may not be recognized correctly. For support of USB memory de-
vices, refer to page 12-4.
1 Select a file to save on the USB memory device, then tap [Other] - [Save to External Memory].
2 Set file save options if necessary.
Options Reference
Resolution page 15-106
Color page 15-107
File Type page 15-108
Page 56

Organize files in a User Box
2
2-34 d-Color MF552/452/362/282/222
2.7
3 Press the Start key.
The file is saved on the USB memory device.
4 When the operation is complete, remove the USB memory device from the port of this machine.
Store file as an overlay image
Select a file, then tap [Other] - [Register Overlay]. Now you can store the file as an overlay image.
Once registered, you can compose an overlay image on the original during copy or printing from the PC. Also,
you can compose an overlay image onto a User Box file during file printing.
You can register up to 100 overlay images.
1 To register an overlay image, select an unregistered key and tap [New].
% To register an overlay image by overwriting an existing one, select the registered key and tap [Over-
write].
2 Enter a registration name, then tap [OK].
Page 57

d-Color MF552/452/362/282/222 2-35
2.7 Organize files in a User Box
2
3 Set a density and color of the image if necessary, then tap [Start].
Tips
- If a file consists of multiple pages, the first page is registered as an overlay image.
- Once registered, you can compose an overlay image on the original and copy it by selecting [Applica-
tion] in Copy mode and [Registered Overlay]. Also, when you print a file from a User Box, you can compose an overlay image to the file and print it by selecting [Application] - [Registered Overlay].
Check the file information
Select a file, then tap [Details] to check the detailed file information.
Tap [Details..], to preview the file image.
Page 58

Operate a User Box from the PC
2
2-36 d-Color MF552/452/362/282/222
2.8
2.8 Operate a User Box from the PC
2.8.1 Operate a User Box via Web Connection
Open User Box
Log in to the Web Connection user mode, and open a User Box.
1 Access to the Web Connection, using the Web browser.
% For details on how to access the Web Connection, refer to [User's Guide: Web Management Tool].
2 Log in to the user mode.
% For details on how to login to the user mode, refer to [User's Guide: Web Management Tool].
3 Click [Box] - [Open User Box].
The User Boxes existing in this machine (Public, Personal, and Group User Boxes) are listed.
4 Click and select a User Box to open from the list.
% You can also open a desired User Box by entering its number directly in the [User Box Number] col-
umn.
% If the box is password protected, you need to enter the password.
Page 59

d-Color MF552/452/362/282/222 2-37
2.8 Operate a User Box from the PC
2
Print files in a User Box
If a file can be printed, a check box is shown in the [Select] column. Also, symbol is shown in the [Selectable Operation] column.
1 Select the check box of file you wish to print, and click [Print].
% Or, click shown in the [Selectable Operation] column.
Page 60

Operate a User Box from the PC
2
2-38 d-Color MF552/452/362/282/222
2.8
2 Set the print options if necessary.
3 Click [OK].
Printing starts.
4 Click [OK].
The file list screen appears again.
Settings Description
[Change order] This option is displayed when multiple files are selected.
You can change the print sequence if necessary. Select files and change
their print sequence by clicking [Top]/[Up]/[Down]/[Bottom]/[Undo].
To display files as thumbnails, click [Thumbnail View].
[Combine] This option is displayed when multiple files are selected.
You can combine multiple files into a single file and print them at the same
time. If you select multiple files and set [OFF], you cannot use the [Basic
Setting] and [Application Setting] options.
[Basic Setting] You can set a number of copies, 2-sided Print, Color, and Finishing if nec-
essary.
[Application Setting] Configure more detailed setting such as Page Margin or Stamp. When us-
ing this function, click [Display].
[Save Print Settings] Specify to save the current print settings or not.
This option is not displayed when multiple files are selected.
Page 61

d-Color MF552/452/362/282/222 2-39
2.8 Operate a User Box from the PC
2
Send files in a User Box
If a file can be sent, a check box is shown in the [Select] column. Also, symbol is shown in the [Selectable
Operation] column.
1 Select the check box of file you wish to send, and click [TX].
% Or, click in the [Selectable Operation] column.
Page 62

Operate a User Box from the PC
2
2-40 d-Color MF552/452/362/282/222
2.8
2 Configure send settings.
Settings Description
[Specify destination] Click [Search from List], and select the destination from the Address Book.
When checking the destination list, click [Check Destination].
[Change order] This option is displayed when multiple files are selected.
You can change the file transfer sequence if necessary. Select files and
change their print sequence by clicking [Top]/[Up]/[Down]/[Bottom]/[Undo].
To display files as thumbnails, click [Thumbnail View].
[Combine] This option is displayed when multiple files are selected.
You can combine multiple files into a single file and send them at the same
time. If you select multiple files and set [OFF], you cannot use the [File
Type], [Communication Setting], and [Application Setting] options.
[File Type] Specify the file type and encryption contents for a file to be sent.
Page 63

d-Color MF552/452/362/282/222 2-41
2.8 Operate a User Box from the PC
2
3 Click [OK].
Sending starts.
4 Click [OK].
The file list screen appears again.
Download files in a User Box to the PC
If a file can be downloaded, a check box is shown in the [Select] column. Also, symbol is shown in the
[Selectable Operation] column.
1 Select the check box of file you wish to download, and click [Download].
% Or, click in the [Selectable Operation] column.
[Communication Setting] Configure E-mail settings or specify the URL notification destination. When
using this function, click [Display].
[Application Setting] Configure more detailed setting such as Stamp or Send & Print. When us-
ing this function, click [Display].
Settings Description
Page 64

Operate a User Box from the PC
2
2-42 d-Color MF552/452/362/282/222
2.8
2 Set the download options.
3 Click [OK].
4 When [Preparation for download has been completed.] has appeared, click [Download].
The File Download page appears.
5 Click [Save].
6 Specify the storage location and file name, and click [Save].
7 Click [Back].
The file list screen appears again.
Settings Description
[Change order] This option is displayed when multiple files are selected.
You can change the file storage sequence if necessary. Select files and
change their print sequence by clicking [Top]/[Up]/[Down]/[Bottom]/[Undo].
To display files as thumbnails, click [Thumbnail View].
[File Format] Select a type of file to save.
[Page Range] You can download all pages of file or the specified range of pages to the
PC.
Page 65

d-Color MF552/452/362/282/222 2-43
2.8 Operate a User Box from the PC
2
Move or copy files in a User Box to another User Box
If a file can be moved or copied to another User Box, a check box is shown in the [Select] column. Also, symbol is shown in the [Selectable Operation] column.
1 Select the check box of file you wish to move or copy, and click [Move/Copy].
% Or click in the [Selectable Operation] column.
% You cannot select multiple files.
2 Set the move or copy options.
3 Click [OK].
The file is moved or copied to the destination User Box.
4 Click [OK].
The file list screen appears again.
Settings Description
[User Box Number] Select the destination User Box from the box list.
[Copy] Select this check box to copy a file to the selected User Box.
Page 66

Operate a User Box from the PC
2
2-44 d-Color MF552/452/362/282/222
2.8
Delete files from a User Box
If a file can be deleted, a check box is shown in the [Select] column. Also, symbol is shown in the [Selectable Operation] column.
1 Select the check box of file you wish to delete, and click [Delete].
% You can select or deselect all files by checking the [Check/Uncheck (applied to all the documents)]
box.
% Or, click in the [Selectable Operation] column.
2 Check the name of file to delete, and click [OK].
% When you select multiple files and display them as thumbnails, click [Thumbnail View].
3 Click [OK].
The file is deleted, and the file list screen appears again.
Page 67

d-Color MF552/452/362/282/222 2-45
2.8 Operate a User Box from the PC
2
2.8.2 Operate a User Box using the Box Operator
Box Operator is an application software to allow to access files in a User Box from the PC running on the
Windows OS.
You can display files as thumbnails, print and delete files, and copy files to the PC.
For details on Box Operator installation and usage, refer to the Box Operator manual contained in the software package.
Page 68

Operate a User Box from the PC
2
2-46 d-Color MF552/452/362/282/222
2.8
Page 69

3
Receive fax in memory and
print it later ([Memory RX])
Page 70

Page 71

d-Color MF552/452/362/282/222 3-3
3.1 [Memory RX]
3
3 Receive fax in memory and print it later ([Memory
RX])
3.1 [Memory RX]
When a facsimile is received by the Memory RX function, it is stored in the Memory RX User Box. Once you
have opened the User Box, you can select a fax stored in the User Box and preview, print, rename, or delete
it.
Because the received faxes are forcibly stored in this box, you can print out only the required faxes and subsequently reduce total printing costs. Also, this will prevent important faxes from being stolen or lost and
therefore enhance security.
Tips
- The Fax Kit is required to use this function.
Related setting
- If you often use the Memory RX User Box, it will be useful to place its shortcut key on the top screen.
For details, refer to page 16-8.
Page 72

Print fax from the Memory RX User Box.
3
3-4 d-Color MF552/452/362/282/222
3.2
3.2 Print fax from the Memory RX User Box.
1
Tap [Box].
2 Tap [System] - [Memory RX].
3 Enter the password, then tap [OK].
Page 73

d-Color MF552/452/362/282/222 3-5
3.2 Print fax from the Memory RX User Box.
3
4 Select a file to print, then tap [Print].
Tips
- When you print a fax, it is deleted from the Memory RX User Box automatically.
Page 74

Organize faxes in a User Box
3
3-6 d-Color MF552/452/362/282/222
3.3
3.3 Organize faxes in a User Box
Operation flow
1 Tap [Box].
2 Tap [System] - [Memory RX].
3 Enter the password, then tap [OK].
Page 75

d-Color MF552/452/362/282/222 3-7
3.3 Organize faxes in a User Box
3
4 Select a fax and set an operation for it.
Delete a file
Select a file, then tap [Delete]. The file is deleted. You can select multiple files and delete them simultaneously. Check the file details, then tap [Yes].
Page 76

Organize faxes in a User Box
3
3-8 d-Color MF552/452/362/282/222
3.3
Rename a file
Select a file, then tap [Other] - [Edit Name]. Now you can rename the file. Enter a new name from the Touch
Panel.
Tips
- Before renaming a file, check the destination server conditions and others.
- You can also rename a file while it is being transmitted.
Check the file information
Select a file, then tap [Details] to check the detailed file information.
Tap [Details..], and you will be able to preview the file.
Page 77

4
Retransmit fax if redialing has
failed ([File Re-TX])
Page 78

Page 79

d-Color MF552/452/362/282/222 4-3
4.1 [File Re-TX]
4
4 Retransmit fax if redialing has failed ([File Re-TX])
4.1 [File Re-TX]
When the recipient is busy and if communication cannot be established, undeliverable fax documents are
stored in the Fax Retransmit User Box. Once you have opened the User Box, you can select a fax document
stored in the User Box and preview, print out, send, or delete it.
Fax transmission is attempted for the number of times set by Auto Redialing function. If those attempts have
failed, the fax document is stored in the Fax Retransmit User Box.
Tips
- The Fax Kit is required to use this function.
Related setting
- If you often use the Fax Retransmit User Box, it will be useful to place its shortcut key on the top screen.
For details, refer to page 16-8([Shortcut Key 1]/[Shortcut Key 2]).
d Reference
For details on the Auto Redialing function, refer to [User's Guide: Fax Operations].
ERROR
Page 80

Send fax from Fax Transmit User Box
4
4-4 d-Color MF552/452/362/282/222
4.2
4.2 Send fax from Fax Transmit User Box
4.2.1 Sending (Basic operation flow)
1 Tap [Box].
2 Tap [System] - [File Re-TX].
3 Select a fax to retransmit, then tap [Fax TX].
Page 81

d-Color MF552/452/362/282/222 4-5
4.2 Send fax from Fax Transmit User Box
4
4 Specify the destination.
% For the destination setup, refer topage 4-6.
5 Set the file send options if necessary.
6 Press the Start key.
Transmission begins.
Tips
- When you retransmit a fax, it is deleted from the Fax Retransmit User Box automatically.
Options Reference
[Fax Header Settings] page 15-212
[Line Setting] page 15-212
Page 82

Send fax from Fax Transmit User Box
4
4-6 d-Color MF552/452/362/282/222
4.2
4.2.2 Set a destination
Select a destination from the Address Book
From the [Address Book], select a destination registered on this machine.
Broadcast transmission is possible by selecting multiple destinations.
No. Description
1 Narrow down destinations using the search text specified for the registered destination. Using
[Add. Type] in combination further narrows down destinations.
The following keys can be used to narrow down destinations:
• [All]: Displays all address book entries registered on this machine.
• [Favorite]: Displays the destinations registered as [Favorites] as search text.
• [etc]: Displays the destinations whose initial character is not an alphabet character and
whose character is not set for search.
2 Displays the registered destinations either as buttons or in a list.
If switched to the list display, you can sort the destinations by registration numbers, destination
types, or in alphabetical order of destination names.
3 Narrow down destinations using the type of registered destination. Jobs can be further filtered
in combination with Index.
1
2
3
Page 83

d-Color MF552/452/362/282/222 4-7
4.2 Send fax from Fax Transmit User Box
4
Searching for destination
If a large number of destinations are registered, you can search for a destination by registration name or destination (E-mail address or PC name).
1 Tap [Addr. Search] - [Search] - [Name Search] or [Address Search].
% When searching for a destination by registration name, tap [Name Search].
% When searching for a destination by E-mail address or computer name, tap [Address Search].
2 Enter the text you want to search for, then tap [Search].
% To use [Name Search]
% To use [Address Search]
3 Select a destination from the search result.
Page 84

Send fax from Fax Transmit User Box
4
4-8 d-Color MF552/452/362/282/222
4.2
Direct input
Select [Direct Input], tap [Fax], then enter a fax number.
d Reference
You can directly enter a destination and store it in the Address Book. For details, refer to [User's Guide: Scan
Operations].
Select file from the history
Press [Job History], and you can select a destination from the scan or fax history.
The history shows the latest five fax destinations. When necessary, multiple destinations can be selected
from the history.
Tips
- If you have edited a destination, you have edited a User Box, or you have turned the power supply Off
and On again, the history data is deleted or lost.
Page 85

d-Color MF552/452/362/282/222 4-9
4.3 Print fax from the Memory RX User Box.
4
4.3 Print fax from the Memory RX User Box.
You can print only the first page of fax being stored in the Fax Retransmit User Box. The fax is not deleted
from the box even if it is printed out.
1 Tap [Box].
2 Tap [System] - [File Re-TX].
3 Select a fax to retransmit, then tap [Proof Print].
Page 86

Print fax from the Memory RX User Box.
4
4-10 d-Color MF552/452/362/282/222
4.3
4 Tap [Start].
% Tap [Details..], to preview the fax image. For preview image details, refer to page 15-206.
Printing starts.
Page 87

d-Color MF552/452/362/282/222 4-11
4.4 Organize faxes in a User Box
4
4.4 Organize faxes in a User Box
Operation flow
1 Tap [Box].
2 Tap [System] - [File Re-TX].
3 Select a file and set the desired operation.
Page 88

Organize faxes in a User Box
4
4-12 d-Color MF552/452/362/282/222
4.4
Delete a file
Select a file, then tap [Delete]. The file is deleted. You can select multiple files and delete them simultaneously. Check the file details, then tap [Yes].
Check the file information
Select a file, then tap [Details] to check the detailed file information.
Tap [Details..], and you will be able to preview the file.
Page 89

5
Print classified documents
([Secure Print])
Page 90

Page 91

d-Color MF552/452/362/282/222 5-3
5.1 [Secure Print]
5
5 Print classified documents ([Secure Print])
5.1 [Secure Print]
When you print a document from the PC or when you select the Secure Print function using the printer driver,
this data file is stored in the Secure Print User Box. Once you have opened the User Box, you can select a
file stored in the User Box and preview, print, rename, or delete it.
The document ID and password are required to print out the files stored in the Secure Print User Box. After
the file has been printed out, it is deleted automatically. This box is used to handle classified documents.
Related setting
- If you often use the Secure Print User Box, it will be useful to place its shortcut key on the top screen.
For details, refer to page 16-8([Shortcut Key 1]/[Shortcut Key 2]).
Related setting (for the administrator)
- You can delete all files from the Secure Print User Box. For details, refer to page 17-6.
- You can set a time to automatically delete files from the Secure Print User Box (Default: [1 day]). For
details, refer to page 17-6.
document
document
Page 92

Print files in a User Box
5
5-4 d-Color MF552/452/362/282/222
5.2
5.2 Print files in a User Box
Print (Basic operation flow)
1 Tap [Box].
2 Tap [System] - [Secure Print].
3 Enter the [Document ID] and [Password] for the secure document, then tap [OK].
Secure documents that have specified document IDs and password are listed.
Page 93

d-Color MF552/452/362/282/222 5-5
5.2 Print files in a User Box
5
4 Select a file to print, then tap [Print].
5 Set print options if necessary.
% For detailed optional settings, refer to page 14-12.
6 Press the Start key.
Printing starts.
Page 94

Print files in a User Box
5
5-6 d-Color MF552/452/362/282/222
5.2
Print (If [Prohibited Functions When Authentication Error] is set to [Mode 2])
If the [Prohibited Functions When Authentication Error] is set to [Mode 2], you need to enter the password to
select a file from the Secure Print User Box. You need to enter password for each file even if secure documents have the same document ID. Therefore, the security level is higher than that of default [Mode 1]. For
details on [Prohibited Functions When Authentication Error], refer to page 17-22.
1 Tap [Box].
2 Tap [System] - [Secure Print].
3 Enter the [Document ID] for the secure print document, then tap [OK].
Secure documents that have the specified document ID are listed.
Page 95

d-Color MF552/452/362/282/222 5-7
5.2 Print files in a User Box
5
4 Select a file to print, then tap [Other] - [Enter Password].
5 Enter the password for the secure print document, and then tap [OK].
The list of secure print documents matching the specified password appears.
% If the user cannot enter the correct password within the number of times being set by the password
administrator, the selected file is locked out. To release the operation prohibition status, contact
your administrator.
6 Tap [Print].
7 Set print options if necessary.
% For detailed optional settings, refer to page 14-12.
Page 96

Print files in a User Box
5
5-8 d-Color MF552/452/362/282/222
5.2
8 Press the Start key.
Printing starts.
Page 97

d-Color MF552/452/362/282/222 5-9
5.3 Organize files in a User Box
5
5.3 Organize files in a User Box
Operation flow
In the following example, [Prohibited Functions When Authentication Error] function has been set to [Mode 1].
1 Tap [Box].
2 Tap [System] - [Secure Print].
3 Enter the [Document ID] and [Password] for the secure document, then tap [OK].
Secure documents that have specified document IDs and password are listed.
Page 98

Organize files in a User Box
5
5-10 d-Color MF552/452/362/282/222
5.3
4 Select a file and set the desired operation.
Delete a file
Select a file, then tap [Delete]. The file is deleted. You can select multiple files and delete them simultaneously. Check the file details, then tap [Yes].
Page 99

d-Color MF552/452/362/282/222 5-11
5.3 Organize files in a User Box
5
Rename a file
Select a file, then tap [Other] - [Edit Name]. Now you can rename the file. Enter a new name from the Touch
Panel.
Tips
- Before renaming a file, check the destination server conditions and others.
- You can also rename a file while it is being transmitted.
Check the file information
Select a file, then tap [Details] to check the detailed file information.
Tap [Details..], and you will be able to preview the file.
Page 100

Organize files in a User Box
5
5-12 d-Color MF552/452/362/282/222
5.3
 Loading...