

Page 1
RS232-C Serial
Interface Card
Installation Instructions
RS232-C Serial Interface Card Part Number: 70042701
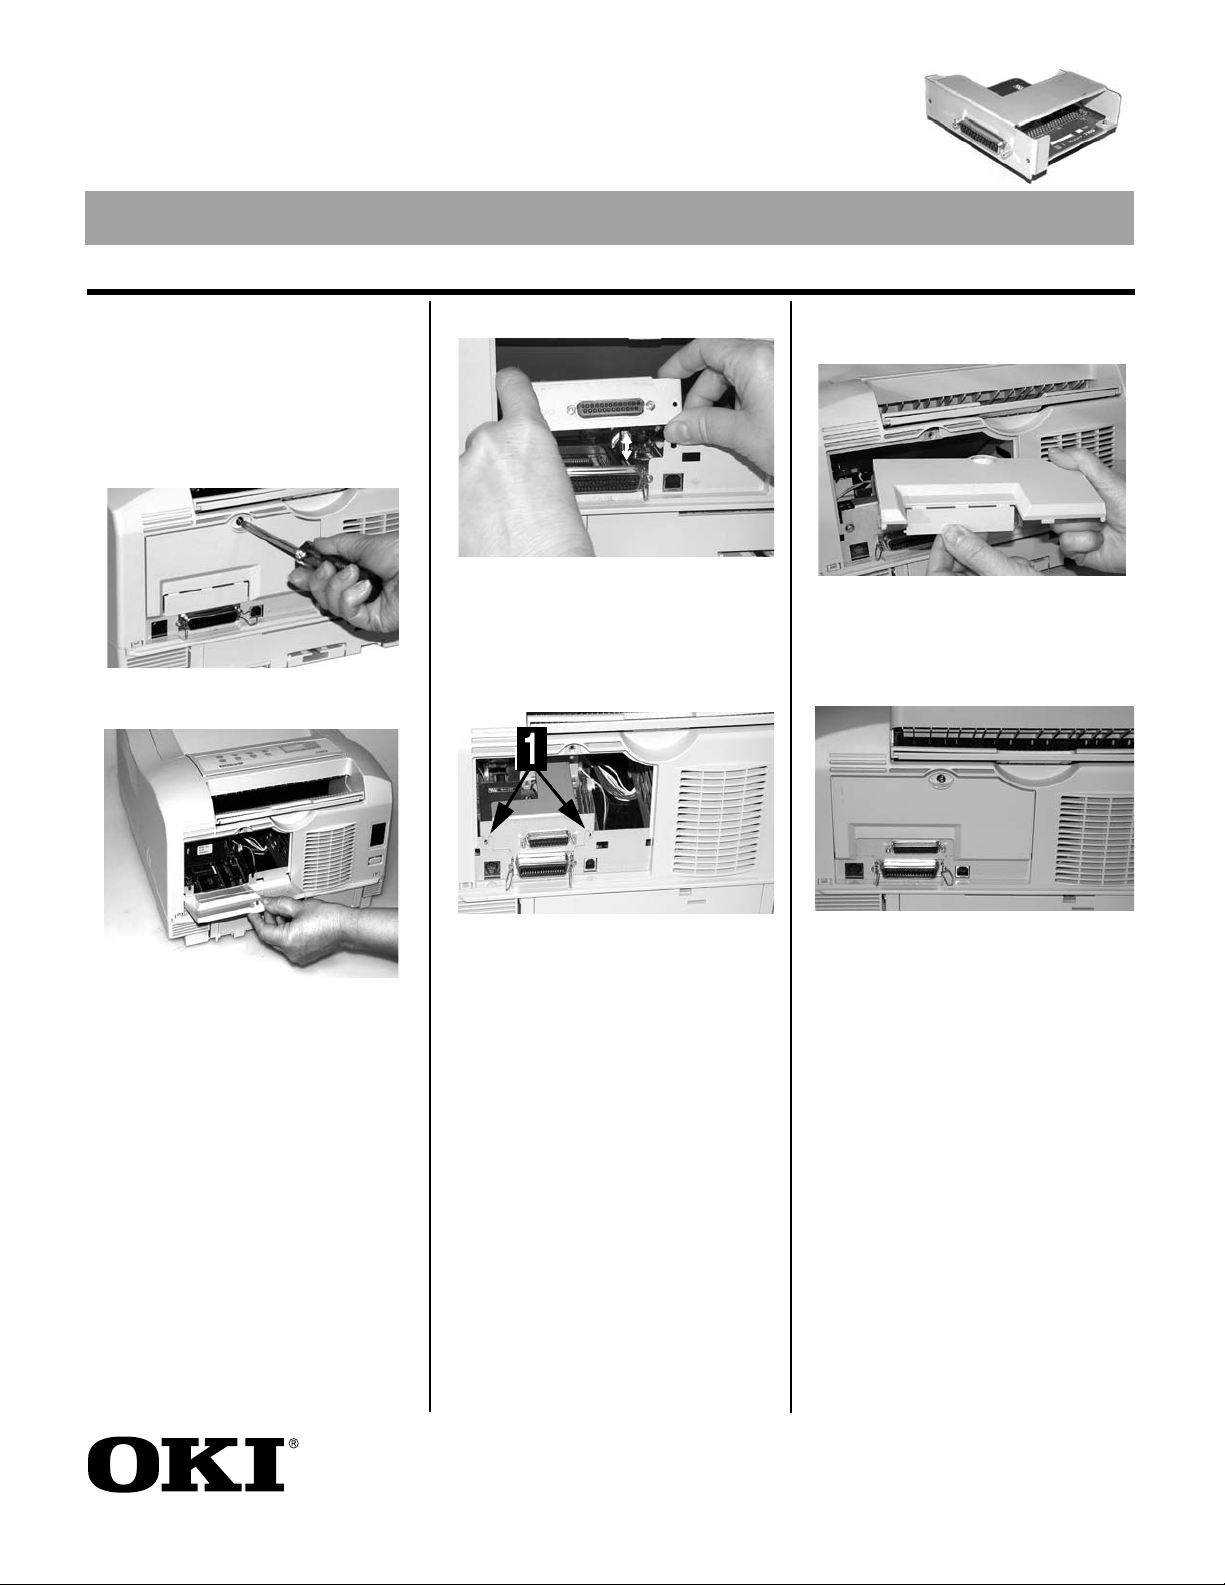
1. Unpack the serial card and
remove any shipping materials.
2. Turn off the printer and remove
the power cord and interface
cable.
3. Remove the access panel screw.
4. Lift off the access panel.
5.Install the Serial Interface Card:
a. Align the connector at the
bottom of the card with the
connector on the main board.
helps to align the screw holes (1)
to position the card correctly
7. Replace the access panel:
a. Snap off the breakout tab.
b. Align tabs at panel bottom with
It
.
holes in printer frame.
c. Swing panel up and into place.
d. Replace the screw.
b. Press the card down until the
connectors are fully engaged
and the card is securely
installed.
6. Insert and tighten the screws (1).
Oki Data Americas, Inc., Mt. Laurel, NJ 08054
http://www.okidata.com
8. Verify Installation:
Print a MenuMap-
a. Press the Menu button one or
more times until INFO.MENU
appears on the display.
b. Press SELECT twice. The
MenuMap prints.
c. RS232C MENU should appear
in the second column. If it isn’t
there, check to be sure that the
card is installed correctly.
To change RS232-C settings:
See the User’s Guide on the CD
included with your printer for
instructions to select interface
settings in the printer Menu.
58366401
 Loading...