

Page 1

PT340/PT341
POS Printer, Cash Drawer
Application Programmer's Guide
of
OPOS-OCX Driver
for
Serial/ USB/ LAN Interface
Page 2

Index
1. Outline ........................................................................................................................... 1
1.1. Subject Scope of this document........................................................................................1
1.2. OPOS Control Outline......................................................................................................2
1) OPOS Control Configuration Drawing...........................................................................2
2) Terminology....................................................................................................................4
1.3. Restrictions.......................................................................................................................5
1) POS Printer......................................................................................................................5
2) Drawer.............................................................................................................................6
3) Common Restrictions on POS Printer and Drawer.........................................................6
4) Restriction when Windows driver and OPOS driver are installed in the same system ...6
5) Setting of Apartment ="0" with connecting LAN interface cable...................................7
6) Setting of Apartment ="1" with connecting LAN interface cable...................................7
7) About the "Found New Hardware Wizard" in Windows.................................................8
1.4. Connection Way to POS Printer........................................................................................9
2. Installation ....................................................................................................................11
2.1. Installation Condition......................................................................................................11
2.2. Installation Media...........................................................................................................12
2.3. Installation Procedure.....................................................................................................13
Installation using installer.......................................................................................................... 13
Installation using batch file........................................................................................................17
2.4. Uninstallation Procedure.................................................................................................19
Uninstallation when installing it with installer (Setup32.exe or Setup64.exe) ..........................19
Uninstallation when OPOS is installed with batch file..............................................................21
2.5. Installation File List........................................................................................................22
2.6. Setting Program Usage ................................................................................................... 24
3. Using OPOS Control ................................................................................................... 38
3.1. Common..........................................................................................................................38
3.2. POS Printer.....................................................................................................................38
3.3. Drawer ............................................................................................................................38
3.4. How to Implement the OPOS Control............................................................................39
4. OPOS Interface Specifications (Printer)...................................................................... 46
4.1. List..................................................................................................................................46
4.2. Printing D
ata and Escape Sequence................................................................................ 56
Page 3

4.3. Common Properties ........................................................................................................64
BinaryConversion Property R/ W...............................................................................................64
CapCompareFirmwareVersion Property....................................................................................67
CapPowerReporting Prope rt y....................................................................................................67
CapStatisticsReporting Property................................................................................................67
CapUpdateFirmware Property...................................................................................................68
CapUpdateStatistics Property ....................................................................................................68
CheckHealthText Property.........................................................................................................68
Claimed Property.......................................................................................................................69
ControlObjectDescription Property...........................................................................................69
ControlObjectVersion Property..................................................................................................70
DeviceDescription Property.......................................................................................................70
DeviceEnabled Property R/W....................................................................................................71
DeviceName Property................................................................................................................73
FreezeEvents Property R/W.......................................................................................................73
OpenResult Property..................................................................................................................74
OutputID Property.....................................................................................................................74
PowerNotify Property R/W .......................................................................................................75
PowerState Property ..................................................................................................................76
ResultCode Property..................................................................................................................77
ResultCodeExtended Property...................................................................................................78
ServiceObjectDescription Property ...........................................................................................80
ServiceObjectVersion Property..................................................................................................80
State Property.............................................................................................................................80
4.4. Common Methods...........................................................................................................81
CheckHealth Method.................................................................................................................81
ClaimDevice Method.................................................................................................................83
ClearOutput Method..................................................................................................................84
Close Method.............................................................................................................................84
CompareFirmwareVersion Method............................................................................................85
DirectIO Method........................................................................................................................87
Open Method.............................................................................................................................94
ReleaseDevice Method..............................................................................................................95
ResetStatistics Method...............................................................................................................95
RetrieveStatistics Method..........................................................................................................95
UpdateFirmwareMethod............................................................................................................96
Page 4

UpdateStatistics Method............................................................................................................97
4.5. Specific Property.............................................................................................................98
AsyncMode Property R/W.........................................................................................................98
CapCharacterSet Property..........................................................................................................98
CapCoverSensor Property..........................................................................................................98
CapMapCharacterSet Property..................................................................................................99
CapRec2Color Property.............................................................................................................99
CapRecBarCode Property..........................................................................................................99
CapRecBitmap Property............................................................................................................99
CapRecBold Property..............................................................................................................100
CapRecCartridgeSensor Property............................................................................................100
CapRecColor Property.............................................................................................................100
CapRecDhigh Property............................................................................................................100
CapRecDwide Property...........................................................................................................101
CapRecDwideDhigh Property .................................................................................................101
CapRecEmptySensor Property ................................................................................................101
CapRecItalic Property..............................................................................................................101
CapRecLeft90 Property ...........................................................................................................102
CapRecMarkFeed Property......................................................................................................102
CapRecNearEndSensor Property.............................................................................................102
CapRecPageMode Property.....................................................................................................102
CapRecPapercut Property........................................................................................................103
CapRecPresent Property..........................................................................................................103
CapRecRight90 Property.........................................................................................................103
CapRecRotate180 Property......................................................................................................103
CapRecStamp Property............................................................................................................104
CapRecUnderline Property...................................................................................................... 104
CapTransaction Property .........................................................................................................104
CartridgeNotify Property R/W.................................................................................................105
CharacterSet Property R/W .....................................................................................................106
CharacterSetList Property........................................................................................................107
CoverOpen Property................................................................................................................107
ErrorLevel Property.................................................................................................................107
ErrorStation Propert y...............................................................................................................108
ErrorString Property................................................................................................................108
FlagWhenIdle Property R/W...................................................................................................109
Page 5

FontTypefaceList Property ......................................................................................................109
MapCharacterSet Property.......................................................................................................109
MapMode Property R/W .........................................................................................................110
PageModeArea Property..........................................................................................................110
PageModeDescriptor Property.................................................................................................110
PageModeHorizontalPosition Property ................................................................................... 111
PageModePrintArea Property..................................................................................................111
PageModeStation Property......................................................................................................111
PageModeVerticalPosition Property........................................................................................111
RecBarCodeRotationList Property ..........................................................................................112
RecBitmapRotationList Property.............................................................................................112
RecCartridgeState Property .....................................................................................................113
RecCurrentCartridge Property R/W.........................................................................................113
RecEmpty Property..................................................................................................................113
RecLetterQuality Property R/W ..............................................................................................114
RecLineChars Property R/W................................................................................................... 115
RecLineCharsList Property......................................................................................................116
RecLineHeight Property R/W..................................................................................................117
RecLineSpacing Property R/W................................................................................................118
RecLinesToPaperCut Property.................................................................................................118
RecLineWidth Property...........................................................................................................119
RecNearEnd Property..............................................................................................................119
RecSidewaysMaxChars Property.............................................................................................120
RecSidewaysMaxlLines Property............................................................................................121
RotateSpecial Property R/W....................................................................................................121
4.6. Exclusive-Use Methods................................................................................................123
BeginInsertion Method............................................................................................................123
BeginRemoval Method............................................................................................................123
ChangePrintSide Method.........................................................................................................124
ClearPrintArea Method............................................................................................................124
CutPaper Method.....................................................................................................................124
EndInsertion Method...............................................................................................................126
EndRemoval Method...............................................................................................................126
MarkFeed Method ...................................................................................................................126
PageModePrint Method...........................................................................................................127
PrintBarCode Method..............................................................................................................127
Page 6

PrintBitmap Method ................................................................................................................144
PrintImmediate Method...........................................................................................................147
PrintMemoryBitmap Method...................................................................................................149
PrintNormal Method................................................................................................................152
PrintTwoNormal Method.........................................................................................................153
RotatePrint Method..................................................................................................................154
SetBitmap Method...................................................................................................................157
SetLogo Method ......................................................................................................................159
TransactionPrint Method ......................................................................................................... 160
ValidateData Method ...............................................................................................................162
DrawRuled Line Method.........................................................................................................163
4.7. Event.............................................................................................................................164
DirectIOEvent Event ...............................................................................................................164
ErrorEvent Event .....................................................................................................................165
OutputCompleteEvent Event...................................................................................................166
StatusUpdateEvent Event ........................................................................................................166
5. OPOS Interface Specifications (Drawer)................................................................... 168
5.1. List................................................................................................................................168
5.2. Com
BinaryConversion Property R/ W.............................................................................................171
CapCompareFirmwareVersion Property..................................................................................172
CapPowerReporting Prope rt y..................................................................................................172
CapStatisticsReporting Property..............................................................................................172
CapUpdateFirmware Property.................................................................................................172
CapUpdateStatistics Property ..................................................................................................173
CheckHealthText Property.......................................................................................................173
Claimed Property.....................................................................................................................173
ControlObjectDescription Property.........................................................................................174
ControlObjectVersion Property................................................................................................174
DeviceDescription Property.....................................................................................................174
DeviceEnabled Property R/W..................................................................................................175
DeviceName Property..............................................................................................................176
FreezeEvents Property R/W.....................................................................................................176
OpenResult Property................................................................................................................177
mon Properties ......................................................................................................171
PowerNotify Property R/W .....................................................................................................178
PowerState Property ................................................................................................................178
Page 7

ResultCode Property................................................................................................................179
ResultCodeExtended Property.................................................................................................180
ServiceObjectDescription Property .........................................................................................180
ServiceObjectVersion Property................................................................................................180
State Property...........................................................................................................................181
5.3. Common Methods.........................................................................................................182
CheckHealth Method...............................................................................................................182
ClaimDevice Method...............................................................................................................183
Close Method...........................................................................................................................184
CompareFirmwareVersion Method..........................................................................................184
DirectIO Method......................................................................................................................184
Open Method...........................................................................................................................185
ReleaseDevice Method............................................................................................................186
ResetStatistics Method.............................................................................................................186
RetrieveStatistics Method........................................................................................................186
UpdateFirmwareMethod..........................................................................................................187
UpdateStatistics Method..........................................................................................................187
5.4. Specific Property...........................................................................................................188
CapStatus Property ..................................................................................................................188
CapStatusMultiDrawerDetect Property ...................................................................................188
DrawerOpend Property............................................................................................................189
5.5. Specific Method............................................................................................................190
OpenDrawer Method...............................................................................................................190
WaitForDrawerClose Method..................................................................................................190
5.6. Event.............................................................................................................................191
DirectIOEvent Event ...............................................................................................................191
StatusUpdateEvent Event ........................................................................................................191
6. Registry Used by OCX .............................................................................................. 192
6.1. POS Printer (Serial Interface).......................................................................................193
6.2. POS Printer (USB Interface).........................................................................................195
6.3. POS Printer (LAN Interface) ........................................................................................197
6.4. The explanation of the registry item (POS Printer) ......................................................198
6.5. Drawer ..........................................................................................................................202
6.6. The explanation of the registry item (Drawer)..............................................................205
7. Log Files.................................................................................................................... 206
8. Using Multiple Printers.............................................................................................. 208
Page 8

9. Replacement of printer............................................................................................... 209
Revision History ....................................................................................................................... 210
Page 9

1. Outline
POS Printer OPOS Control and Drawer OPOS Control that control POS Printer ("PT340-341") and
Drawer connected to the printer are OPOS Controls conforming to OPOS 1.13 POS Printer Devise
and Drawer Device. When using OPOS Control, refer to "OLE for Retail POS Application
Programmer's Guide Instructions The 1.13 Version" (OPOS-APG V1.13), too.
In this guide, "OPOS Control" means same as "OPOS OCX".
1.1. Subject Scope of this document
These instructions (Application Programmer's Guide) aim for the main reference of programmers
who develop the application for the use of OPOS Control, and describe the following contents
necessary for that.
- Installation way of OPOS Control
- Usage of OPOS Control
- Restrictions of OPOS Control
- Interface (Property/Method/Event) Remarks of OPOS Control
- Item Setting Remarks of OPOS Control
1
Page 10
r
1.2. OPOS Control Outline
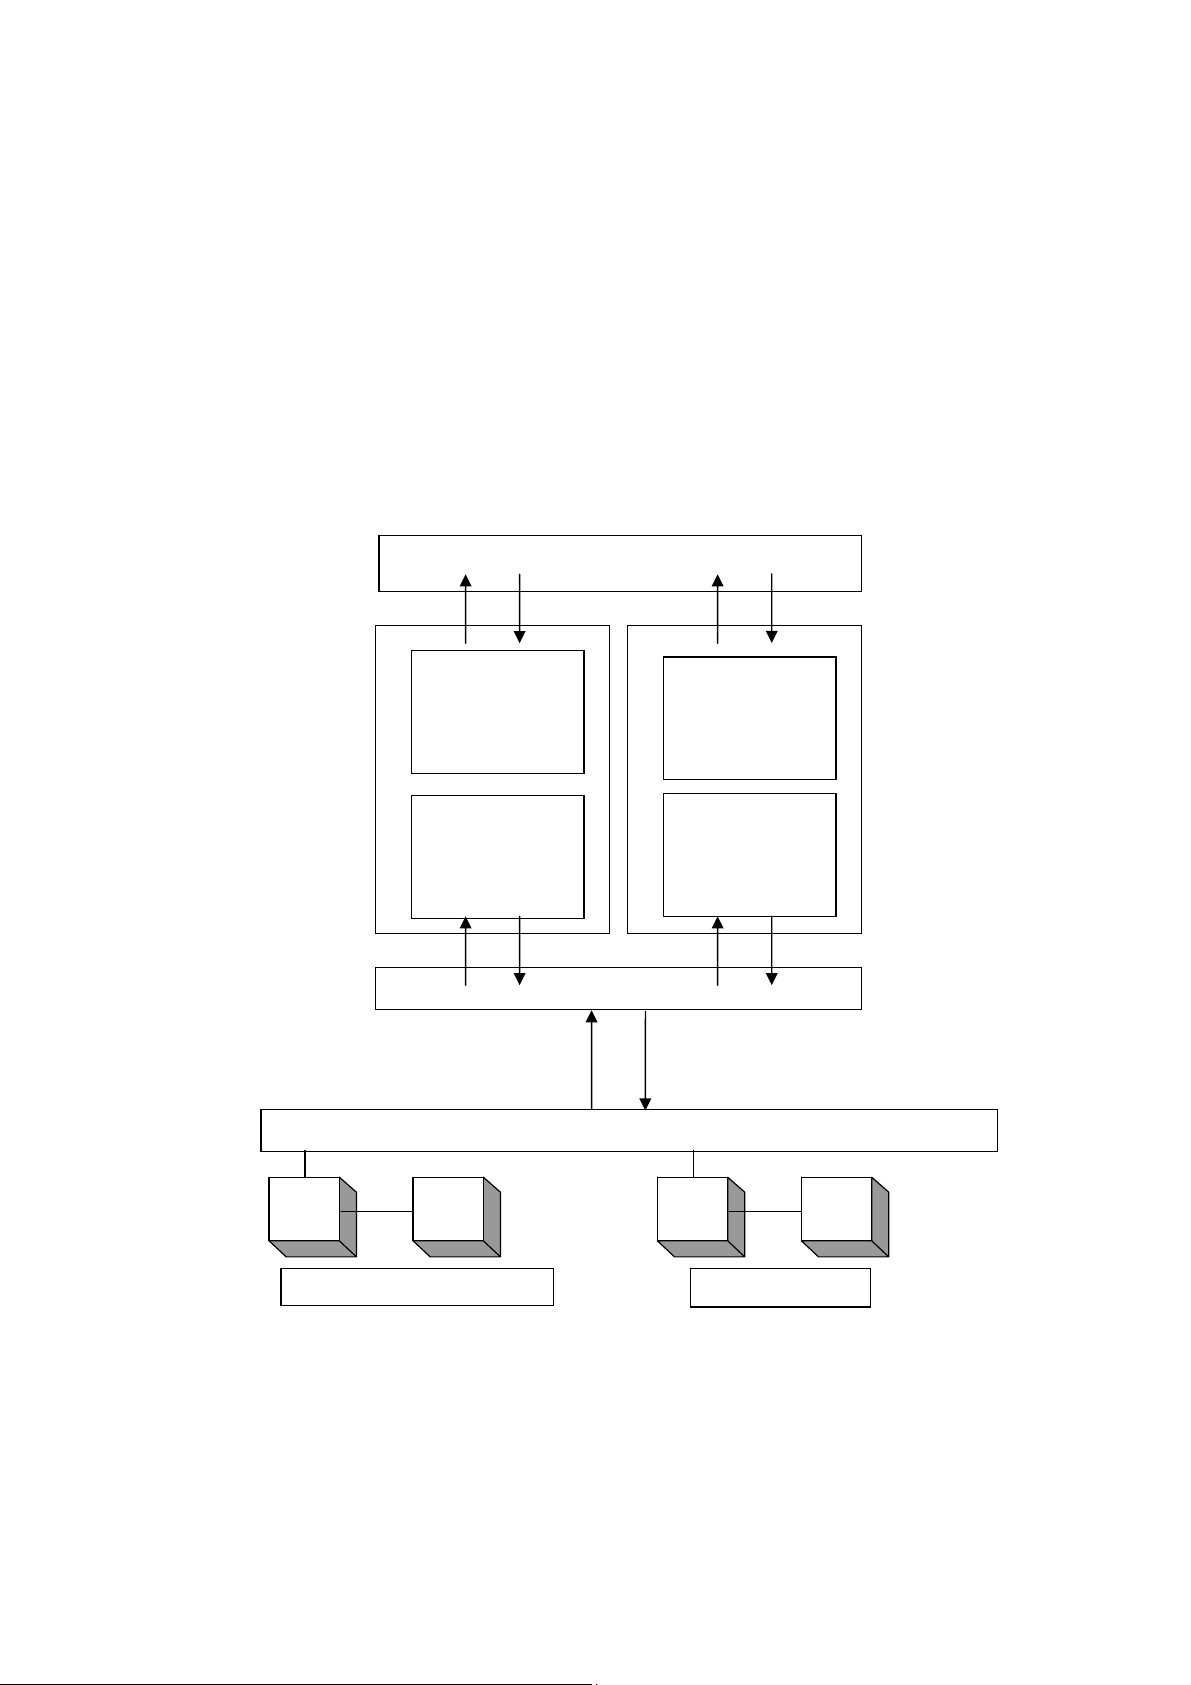
1) OPOS Control Configuration Drawing
OPOS Contro
l conforms to ActiveX specifications and provides Property, Method, and Event to
application. Control cannot be seen on UI in application execution. Only application, which uses it,
requests to process through Method and Property. Application receives processing result through
Method return value, parameter, Property, and Event. This OPOS Control is implemented as
in-process server.
<Serial, USB Interface>
Application
POSPrinter
Control
Object
CashDrawer
Control Object
POSPrinter
Service
Object
CashDrawer
Service Object
OPSharedPort.exe
OS / Device Drive
Printer Drawer
Printer Drawer
Serial Interface
USB Interface
2
Page 11
n
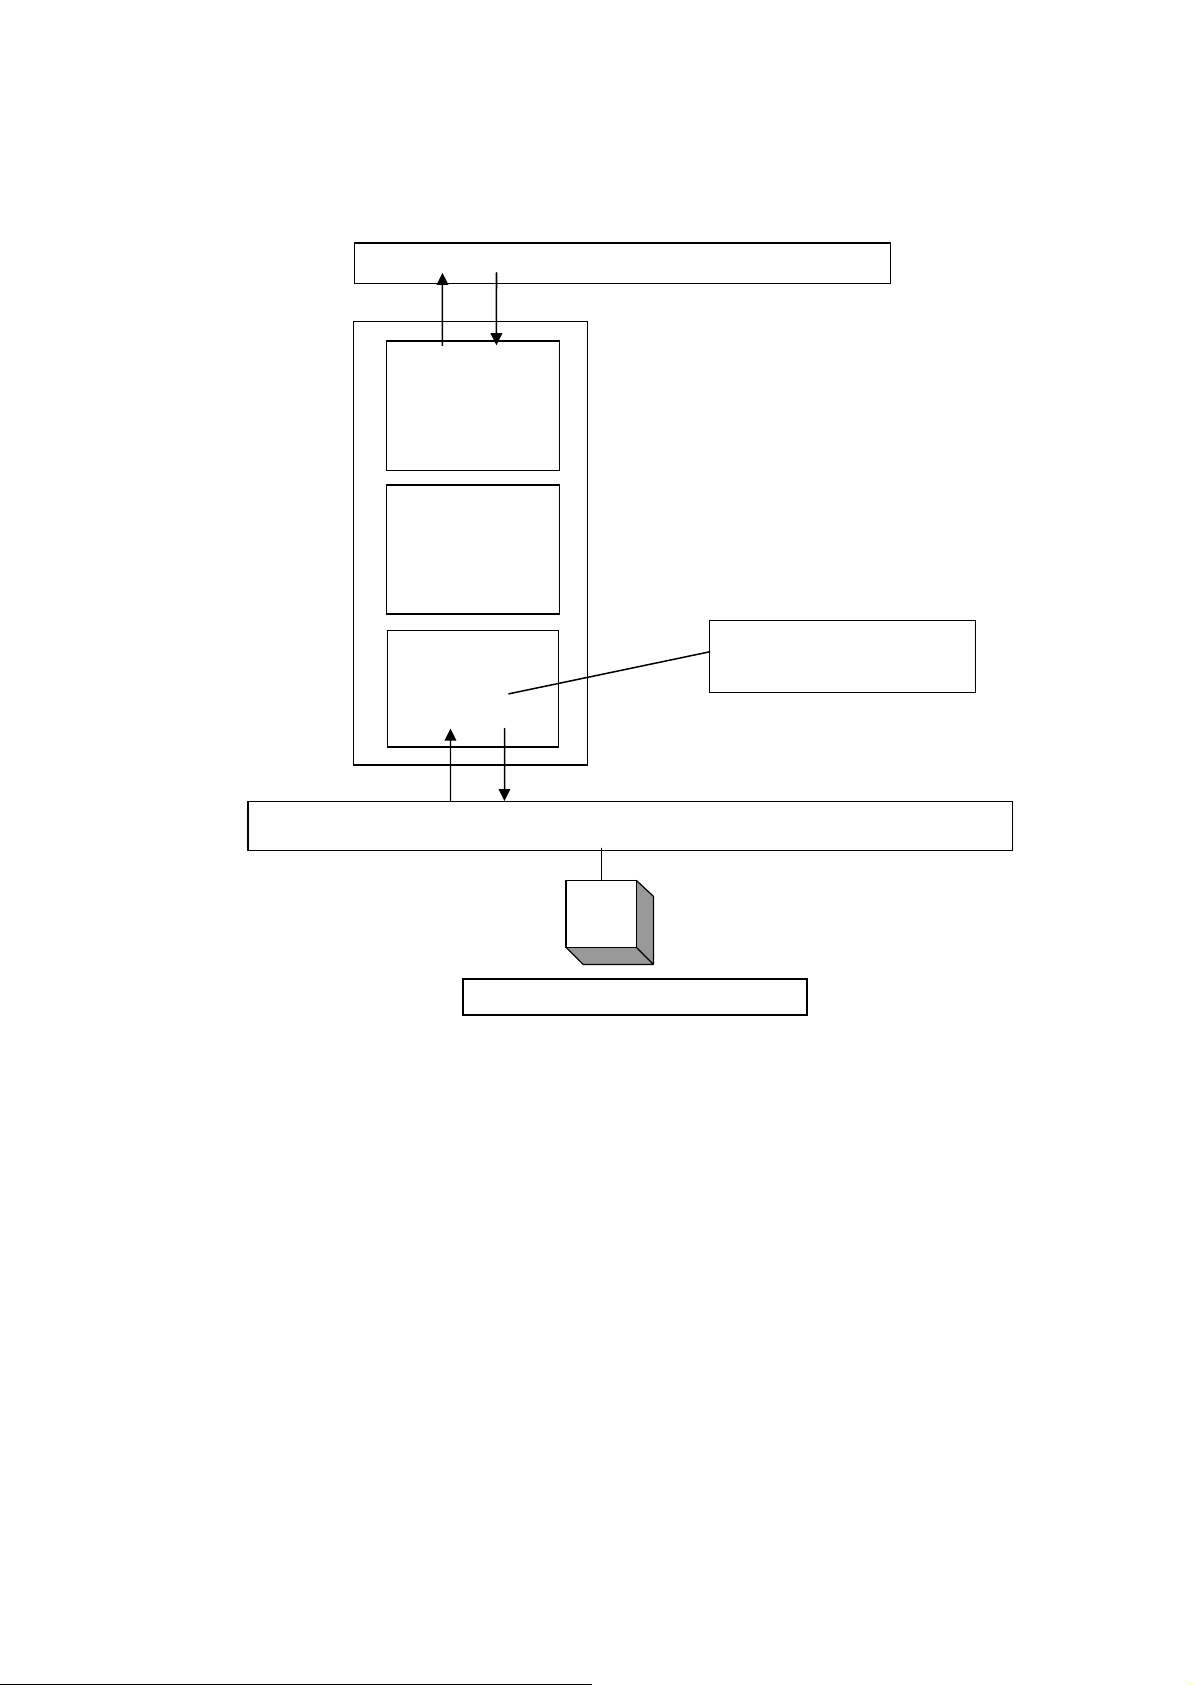
<LAN Interface>
POSPrinter
Control
Object
POSPrinter
Service
Object
ftfpcp.dll
Applicatio
OS / Device Driver
DLL used to communicate
with printer in LAN
*This
OPOS Driver supports the c
*Multiple numbers of interface and printers can be set to the driver. For details, refer to
Chapter 8 "Using Multiple Printers."
* In case of LAN Interface, OPOS Driver doesn’t support drawer connection.
*This OCX works with Thread Model of STA(Single, Thread or Apartment). To work with
several processes, the setting value of "Apartment" in Registry should be set as "1".
*Regarding LAN interface, Network Connection corresponds to 10Base-T, 100Base-T.
LAN Interface(10Base-T, 100Base-T)
Printer
ontrol of Serial/USB/LAN Interface Printer.
3
Page 12

2) Terminology a. Control Obj
According to each device class, it provides application with the set of Property, Method, and Event.
This Document explains these API.
b. Service Object (Service Object; SO)
It executes the function which is called from Control Object and which is prescribed by OPOS for
each device.
ect (Control Object; CO)
4
Page 13

1.3. Restrictions
Followings are restrictions.
1) POS Printer
[Restriction
restrictions.
s on OPOS specifications]
All the interfaces of OPOS POS Printer Device are provided, but there are the following
a. It does not support property setting concerning journal printing and journal.
b. It does not support property setting concerning slip printing and slip.
c. It does not support functions of Italic, custom color, shading printing, and cartridge.
d. It does not support change of receipt printing character font. (Printing font change)
e. The following methods always return OPOS_E_ILLEGAL(106) after enabling.
PrintTwoNormal Method
BeginInsertion Method
EndInsertion Method
BeginRemoval Method
EndRemoval Method
ChangePrintSide Method
MarkFeed Method
ResetStatistics Method
RetrieveStatistics Method
UpdateStatistics Method
(Limitation of Cable disconnection and connection)
There are conditions for disconnection and connection of LAN cable under printer
"enable" status:
1)When LAN cable is disconnected from PC, printer cannot support any actions. When the
cable is disconnected during "enable" status, OCX may fail to be "enable" even though
the application restarts.
2)When LAN cable is disconnected from Printer, and while OCX and printer is connecting,
printer cannot support any actions even if "disable" is sent. If "disable" is sent in
above situation, even though the application is restarted, OCX may fail to enable.
When the LAN cable is disconnected, connect the LAN cable again, and switch off and
on the power of Printer.
5
Page 14

2) Drawer
[Restrictions o
f OPOS specifications OPOS]
All the interfaces of OPOS Drawer Device are provided, but there are the following
restrictions.
a. PowerNotify Property (Power source notifying function setting)
Setting is only for OPOS_PN_DISABLED(0) (Impossible to notify)and
unchangeable.
b. PowerState Property (Power source state)
Only OPOS_PS_UNKNOWN(2000)(Unclear) is set.
c. DirectIO Method (Particular-to-Device function)
It is not supported. After enabling, it always returns OPOS_E_ILLEGAL(106).
d. WaitForDrawerClose Method (Waiting for the drawer to close)
It is not supported. After enabling, it always returns OPOS_E_ILLEGAL(106).
e. DirectIOEvent Event (Particular- to-Device event)
It is not supported.
f. DrawerOpened Property, StatusUpdateEvent Event
Status notification of the Drawer is available only when CapStatus is TRUE and
Printer OCX is enabled (DeviceEnabled=TRUE) for the printer connected to the
drawer. In case these conditions are not met, the status of the drawer is not
notified.
[Restriction of Drawer Hardware Specifications]
It does not support notifying function of drawer power source condition.
3) Common Restrictions on POS Printer and Drawer
The OPOS Control is not t
hread-safe. When the method or property is accessed from the
different thread, unexpected result may occur. In the multithread environment,
implementation of exclusive processing for the critical sections is required for accessing
the property and executing the method in order to avoid the method and prop erty ar e
executed at the same time.
4) Restriction when Windows driver and OPOS driver are installed in the same system
Problems such as failure to print correctly from the OPOS driver may occur if the
Windows driver and OPOS driver are both installed in the same system.
In this case, it is recommended that you uninstall the driver that is not being used.
6
Page 15

5) Setting of Apartment ="0" with connecting LAN interface cable
Apartment is set as "0" in Registry setting, one process can control several printers. But
the several processes do "Open" OCX (LAN Interface) at the same time, unexpected
results may happen.
6) Setting of Apartment ="1" with connecting LAN interface cable
Apartment is set as "
In this case, the number of printers (LAN interface) should be guaranteed that one process
should be less than one unit. If more than 2 printers per one process were used, unexpected
results might occur. The following chart shows the examples of the case that Apartment
="1" can work, and the case that Apartment ="1" cannot work. (OCX uses LAN interface.)
examples of the case that Apartment ="1" can work
ProcessA---PrinterOCX
ProcessB---PrinterOCX
examples of the case that Apartment ="1" cannot work---1
ProcessA---PrinterOCX, PrinterOCX
ProcessB---PrinterOCX
(Two PrinterOCX exist in ProcessA.)
0" in Registry setting, several processes can control printers.
7
Page 16

7) About the "Found New Hardware Wizard" in Windows
When the printer is connected to PC in USB or Parallel interface and "Found New
Hardware Wizard" was displayed, set it in the following procedures.
For Windows 8 / Server 2012
"Device Setup" in the task bar is displayed, but no operation is required.
For Windows 7 / Server 2008 R2
1. The message "Installing device driver software" is displayed in a balloon(lower right
corner of the screen).
2. After a while, the message "Device driver software was not successfully installed" is
displayed.
This is not a problem.
For Windows Vista / Server 2008
1. The "Found New Hardware" is displayed, select [Don't show this message again for
this device].
* When "User Account Control" screen is displayed, select [Continue].
For Windows XP / Server 2003 / WEPOS / WEPOS2009
1. The "Found New Hardware Wizard" screen is displayed. Select [No, not this time]
and then click [Next].
2. When "What do you want the wizard to do?" is displayed, select [Install from a list or
specific location] and then click [Next].
3. Select [Search for the best driver in these locations], clear all checkboxes and then
click [Next].
4. When "Cannot Install this Hardware" is displayed, click [Don't prompt me again to
install this software] and then click [Finish].
8
Page 17

1.4. Connection Way to POS Printer
Set the POS Printer to the following settings (in gray highlight). Rest of the values can be set in the
registry or the setting program attached with installer.
Memory Swith 1
No. Setting Item Setting Contents
1 Power On Status *Set form the registry
2 Receive Buffer 4 KB
3 Busy Condition Bufferfull
4 Receive Error ? Print
5 Auto LF Disable
6 DSR (#6) RESET Disable
7 USB Soft Reset Enable
Memory Swith 2
No. Setting Item Setting Contents
1 Cover Open Error Auto Recovery
2 Error Recovery by CMND
3 Batch (COM IF) Disable
4 Batch (Other IF) Disable
5 Serial Number Enable
6 ASB Enable
7 Font-B Mode1
Print
No. Setting Item Setting Contents
1 Paper Width *Set from the setting program
2 Max Speed *Set from the setting program
3 Print Density *Set from the setting program
9
Page 18

Hardware
No. Setting Item Setting Contents
1 Error Alert *Set from the setting program
2 Buzzer Interval *Set from the setting program
3 Buzzer Repetition *Set from the setting program
4 User NV Memory 192KB
5 Graphic Memory 384KB
6 Cut at CoverClose *Set from the setting program
7 PNE Detect *Set from the setting program
Interface
No. Setting Item Setting Contents
1 USB Printer
2 Protocol XON/XOFF
* Configure the printer settings as follows depending on the interface you are using.
■ For the LAN interface
• LAN: Enable
■ For the USB or Serial interface
• LAN: Disable
<Note>
The factory default value is "Enable".
Refer to the instruction manual for the printer for details on how to configure this setting.
10
Page 19

2. Installation
OPOS Control can be installed just like in the following procedures.
2.1. Installation Condition
Operation Environment
OS: Microsoft Windows XP, 2003Server, Vista, WEPOS, POSReady2009
Windows7, Server 2008, Server 2008 R2, Windows8, Server 2012
CPU: Pentium3 550MHz and more is recommended
RAM: 128MB and more is recommended
HDD: Space 2MB and more
*To install on WEPOS, "Local Management Support" must be installed in the minimum
configuration of WEPOS.
* To install on POS Ready 2009 using Batch Installer, "Command-line Application" component
must be installed on POS Ready 2009.
(Note)
When OPOS control (POS PRINTER OPOS OCX) is already installed,
please install this OPOS control aft er uninstallation of OPOS control.
Please refer how to uninstall to 2.4. uninstallation procedures.
11
Page 20

2.2. Installation Media
Installation media is provided as CD.
Configuration of CD is just the following.
\(root) \Drivers\OPOS
\ Driver........................The root folder of the Installer (x32)
- setup32.exe : Installer for 32bit OS
- setup64.exe : Installer for 64bit OS
\Driver_x32.................The folder of the driver (x32)
* Use this when you do not use the installer for 32bit.
\Driver_x64.................The folder of the driver (x64)
* Use this when you do not use the installer for 64bit
12
Page 21
2.3. Installation Procedure
Installation using installer
1. Set the installation Media CD to the Drive. After that, start "My Computer" or "Explorer"
and refer to the Drive.
In case of CD: Open \Driver folder, and if OS is 32bit, double click Setup32.exe. If OS
is 64bit, double click Setup64.exe
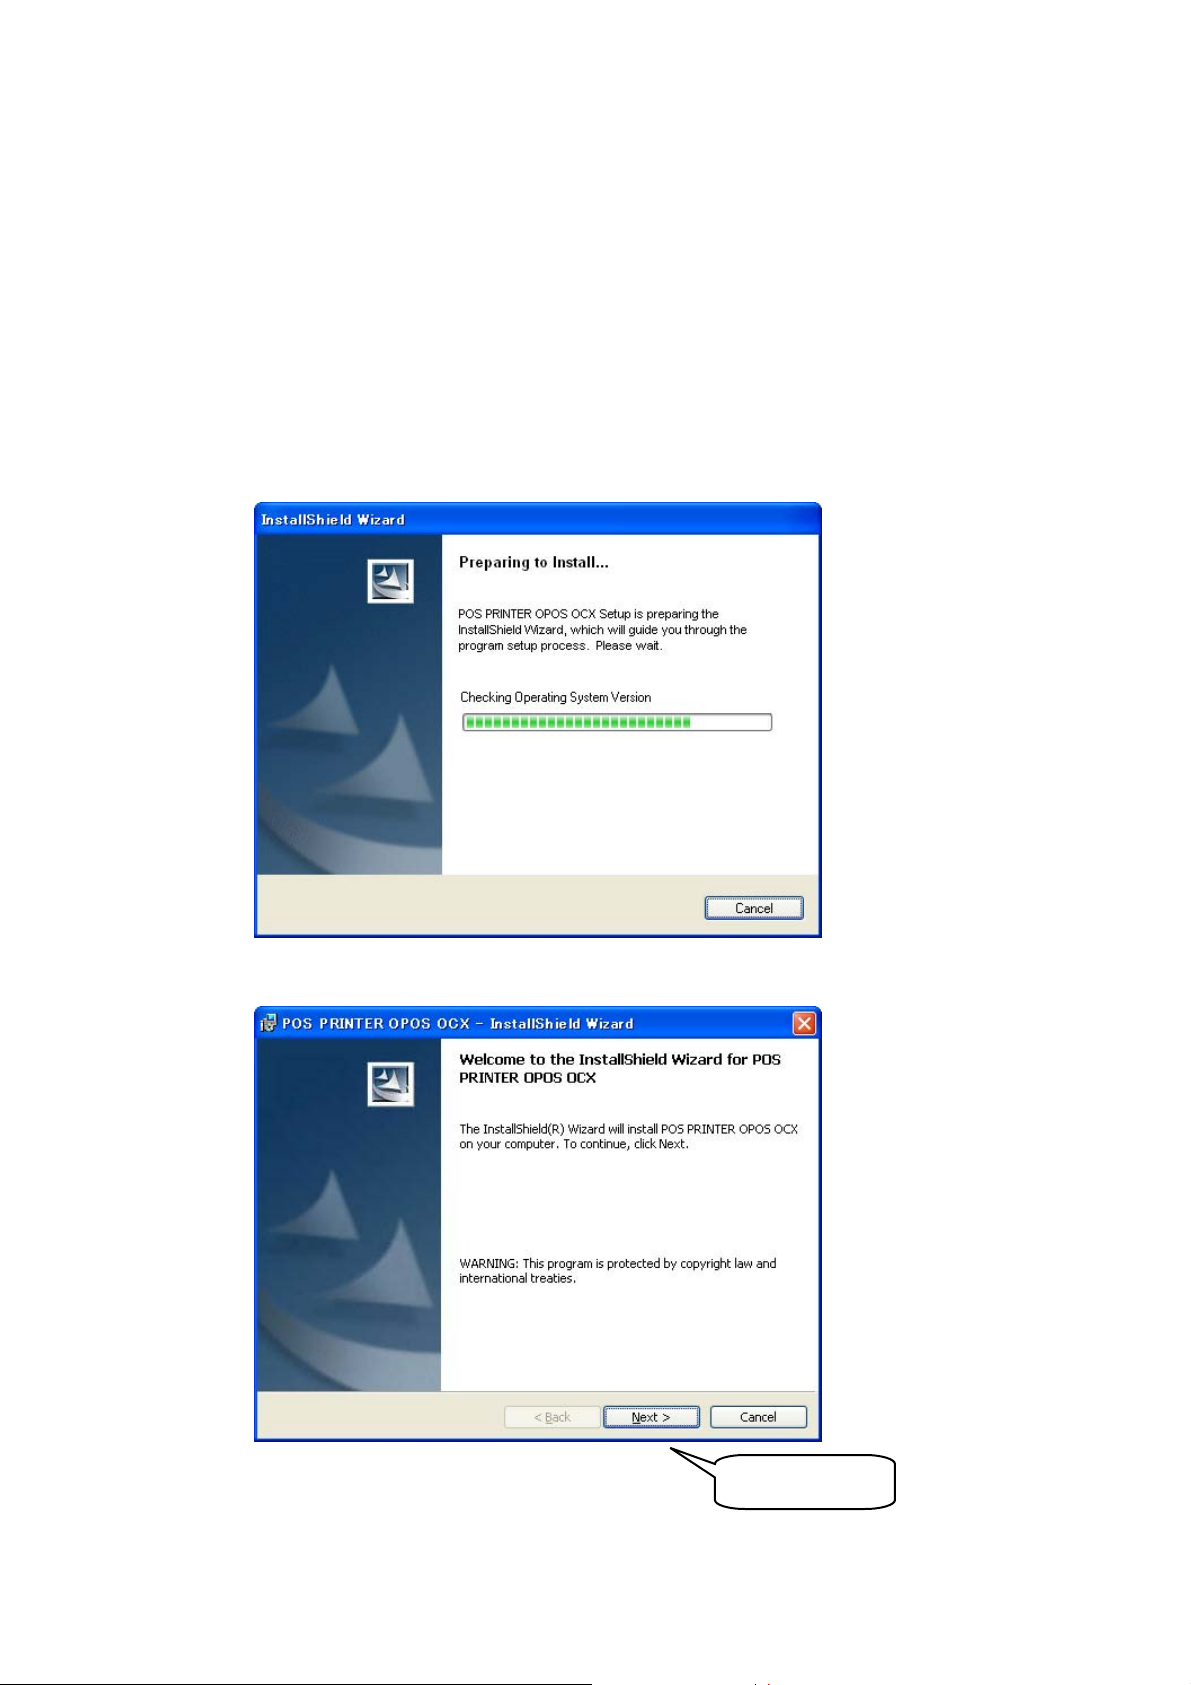
2. After the dialogue below is shown, Setup Program starts.
click "Next"
13
Page 22

3. Installation
[System Drive]:\OPOS\Okidata\PT\
starts. Installation folder is:
click "Next"
14
click "Install"
Page 23
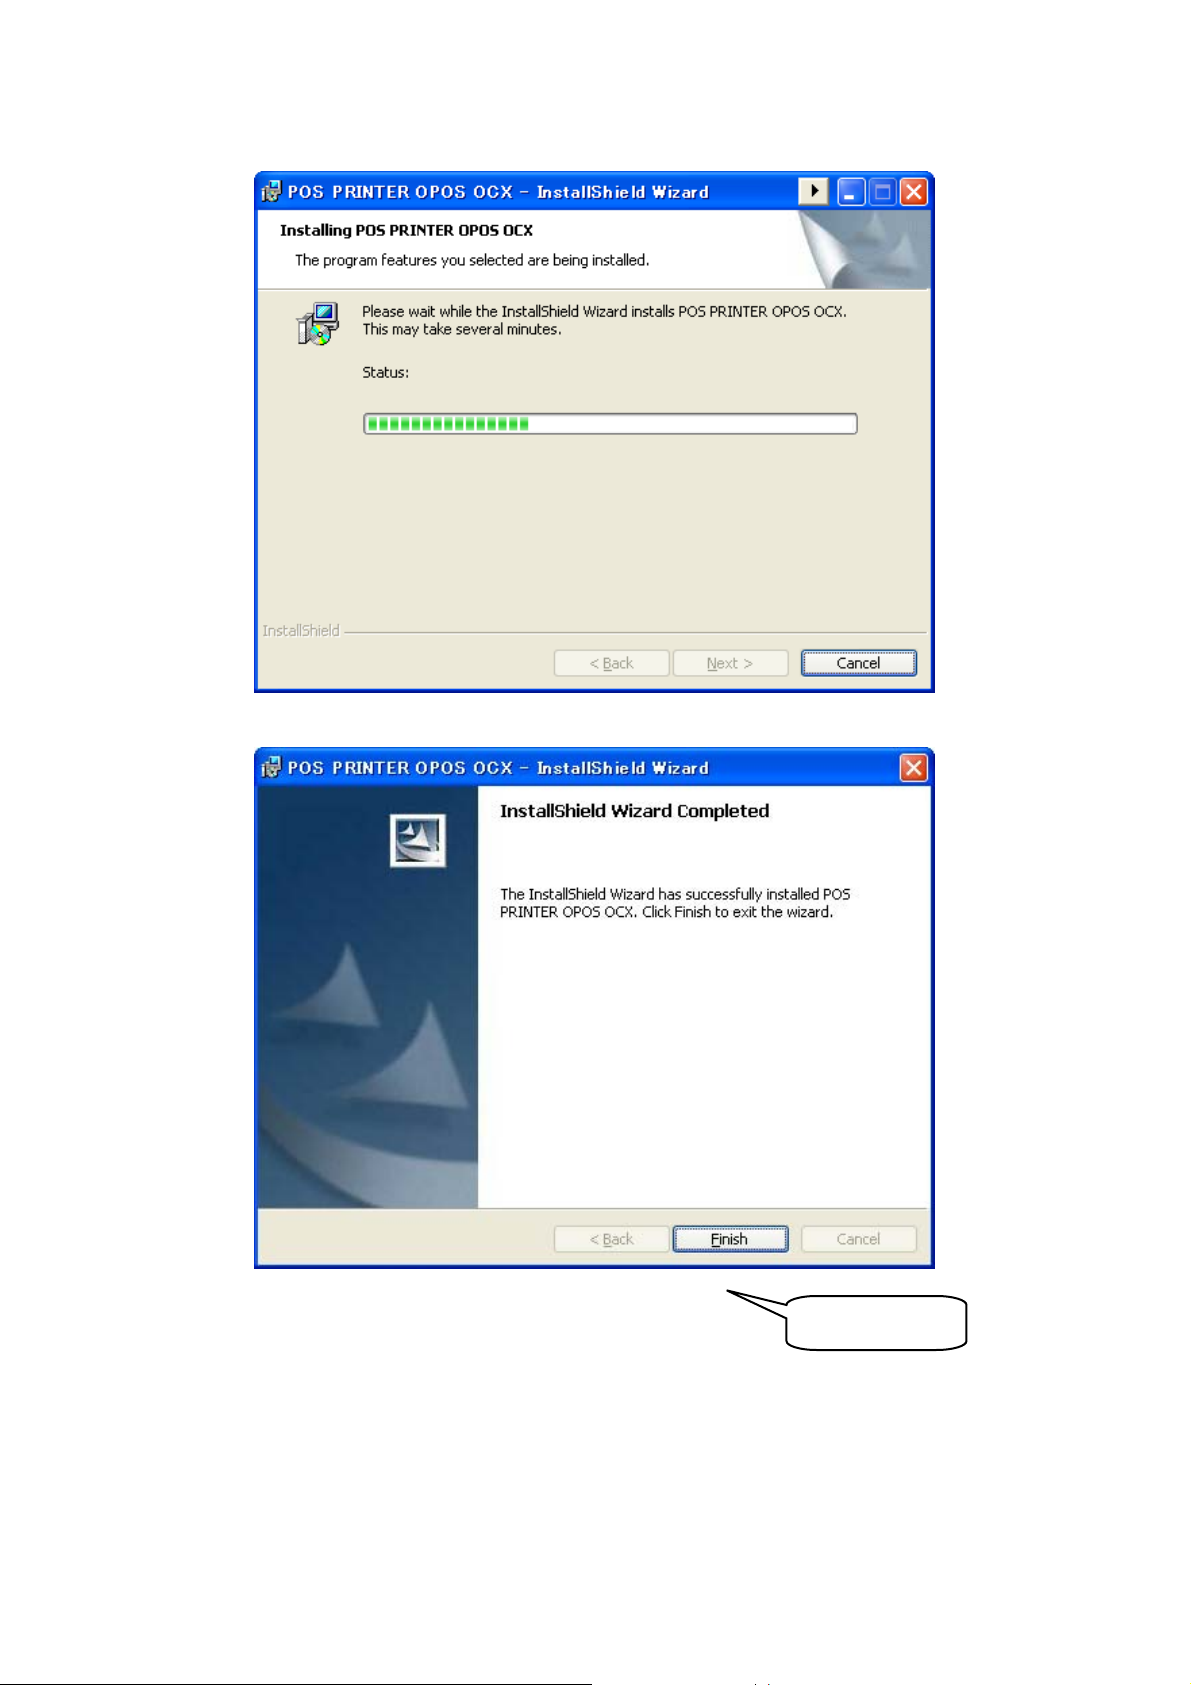
click "Finish"
15
Page 24

4. Start setting
If the [User Account Control] dialog box is displayed,
【For Windows 8 / Server 2012】
Click the [Printer OPOS Setup] tile in the Start screen.
【For Windows 7 / Windows Vista】
1) Click the button indicated with the Windows logo
2) Go to [All programs] →
【For Windows XP / Windows Server 2008 R2 / Windows Server 2008 /
Go to [Start]→[All programs] →
program.
[Windows 8 / Server 2012 / Windows 7 / Server 2008 R2]
click [Yes].
[Windows Vista / Server 2008]
click [Allow].
at the left bottom of the
desktop.
[Okidata]→[OPOS]→[Printer OPOS Setup].
Windows Server 2003 / WEPOS/POS Ready 2009】
[Okidata]→[OPOS]→[Printer OPOS Setup].
*As for how to use setting program, refer to 2.6. Setting Pr ogram Usage.
5. After setting, installation finishes.
16
Page 25

Installation using batch file
* If OS is 32bit, us
folder
Installation method for Windows 8 or Server 2012
1. Copy driver folder ("\Driver_x64" or "\Driver_x32") onto an arbitrary folder.
2. Press the Windows logo key + X key, shortcut menu is displayed bottom left of the screen.
3. And click [Command Prompt (Admin)], and execute the command prompt by the
administrator authority.
4. Change the current directory of the command prompt to the directory that copied by 1, and
execute the batch file "Install.bat".
5. The Registry Editor and additional confirmation message to the registry is displayed, and
click [yes]. The additional completion message to the registry is displayed when the
addition to the registry is completed, and click [OK].
6. The driver is installed in the folder "C:\OPOS\Okidata\PT\".
7. Please execute "C:\OPOS\Okidata\PT\OPPrinterSetup.exe", and execute the setup.
*As for how to use setting program, refer to 2.6. Setting Program Usage.
8. After setting, installation finishes.
e batch file of \Driver_x32 folder. If OS is 64bit, use batch file of \Driver_x64
Installation method for Windows Vista or Windows 7
1. Copy driver folder ("\Driver_x64" or "\Driver_x32") onto an arbitrary folder.
2. The button that attaches the Windows logo under the left of a desktop screen is clicked.
3. Select [All Programs]->[Accessories]->[Command Prompt], and right-click in the icon of
the [Command Prompt], click "Run as administrator (A)", and execute the command
prompt by the administrator authority.
4. Change the current directory of the command prompt to the directory that copied by 1, and
execute the batch file "Install.bat".
5. The Registry Editor and additional confirmation message to the registry is displayed, and
click [yes]. The additional completion message to the registry is displayed when the
addition to the registry is completed, and click [OK].
6. The driver is installed in the folder "C:\OPOS\Okidata\PT\".
7. Please execute "C:\OPOS\Okidata\PT\OPPrinterSetup.exe", and execute the setup.
*As for how to use setting program, refer to 2.6. Setting Program Usage.
8. After setting, installation finishes.
17
Page 26

Installation
1. Driver folder ("\Driver_x64" or "\Driver_x32") onto an arbitrary folder.
2. The button that attaches the Windows logo under the left of a desktop screen is clicked.
3. Select [All Programs]->[Accessories]->[Command Prompt], and execute the command
prompt.
4. Change the current directory of the command prompt to the directory that copied by 1, and
execute the batch file "Install.bat".
5. The Registry Editor and additional confirmation message to the registry is displayed, and
click [yes]. The additional completion message to the registry is displayed when the
addition to the registry is completed, and click [OK].
6. The driver is installed in the folder "C:\OPOS\Okidata\PT\".
7. Please execute "C:\OPOS\Okidata\PT\OPPrinterSetup.exe", and execute the setup.
*As for how to use setting program, refer to 2.6. Setting Program Usage.
8. After setting, installation finishes.
methods except Windows Vista, Windows 7, Windows 8 and Server 2012
18
Page 27

2.4. Uninstallation Procedure
Uninstallation when installing it with installer (Setup32.exe or Setup64.exe)
1. Follow the steps blow to display the uninstalling screen.
【For Windows 8 / Sever 2012】
・Press the Windows logo key + X key, shortcut menu is displayed bottom left of the
screen, and click [Programs and Features].
【For Windows 7 / Windows Vista】
・Click the button indicated with the Windows logo
desktop.
・Go to [Control Panel]→[Uninstall program] or [Uninstall a program].
【For Windows Server 2008 R2】
・Go to [Start]→[Control Panel]→[Uninstall a program]
【For Windows Server 2008】
・Go to [Start]→[Control Panel]→[Programs and Functions].
【For Windows XP / Server 2003 / WEPOS】
・Go to [Start]→[Control Panel]→[Add or Remove Progra ms].
at the left bottom of the
19
Page 28
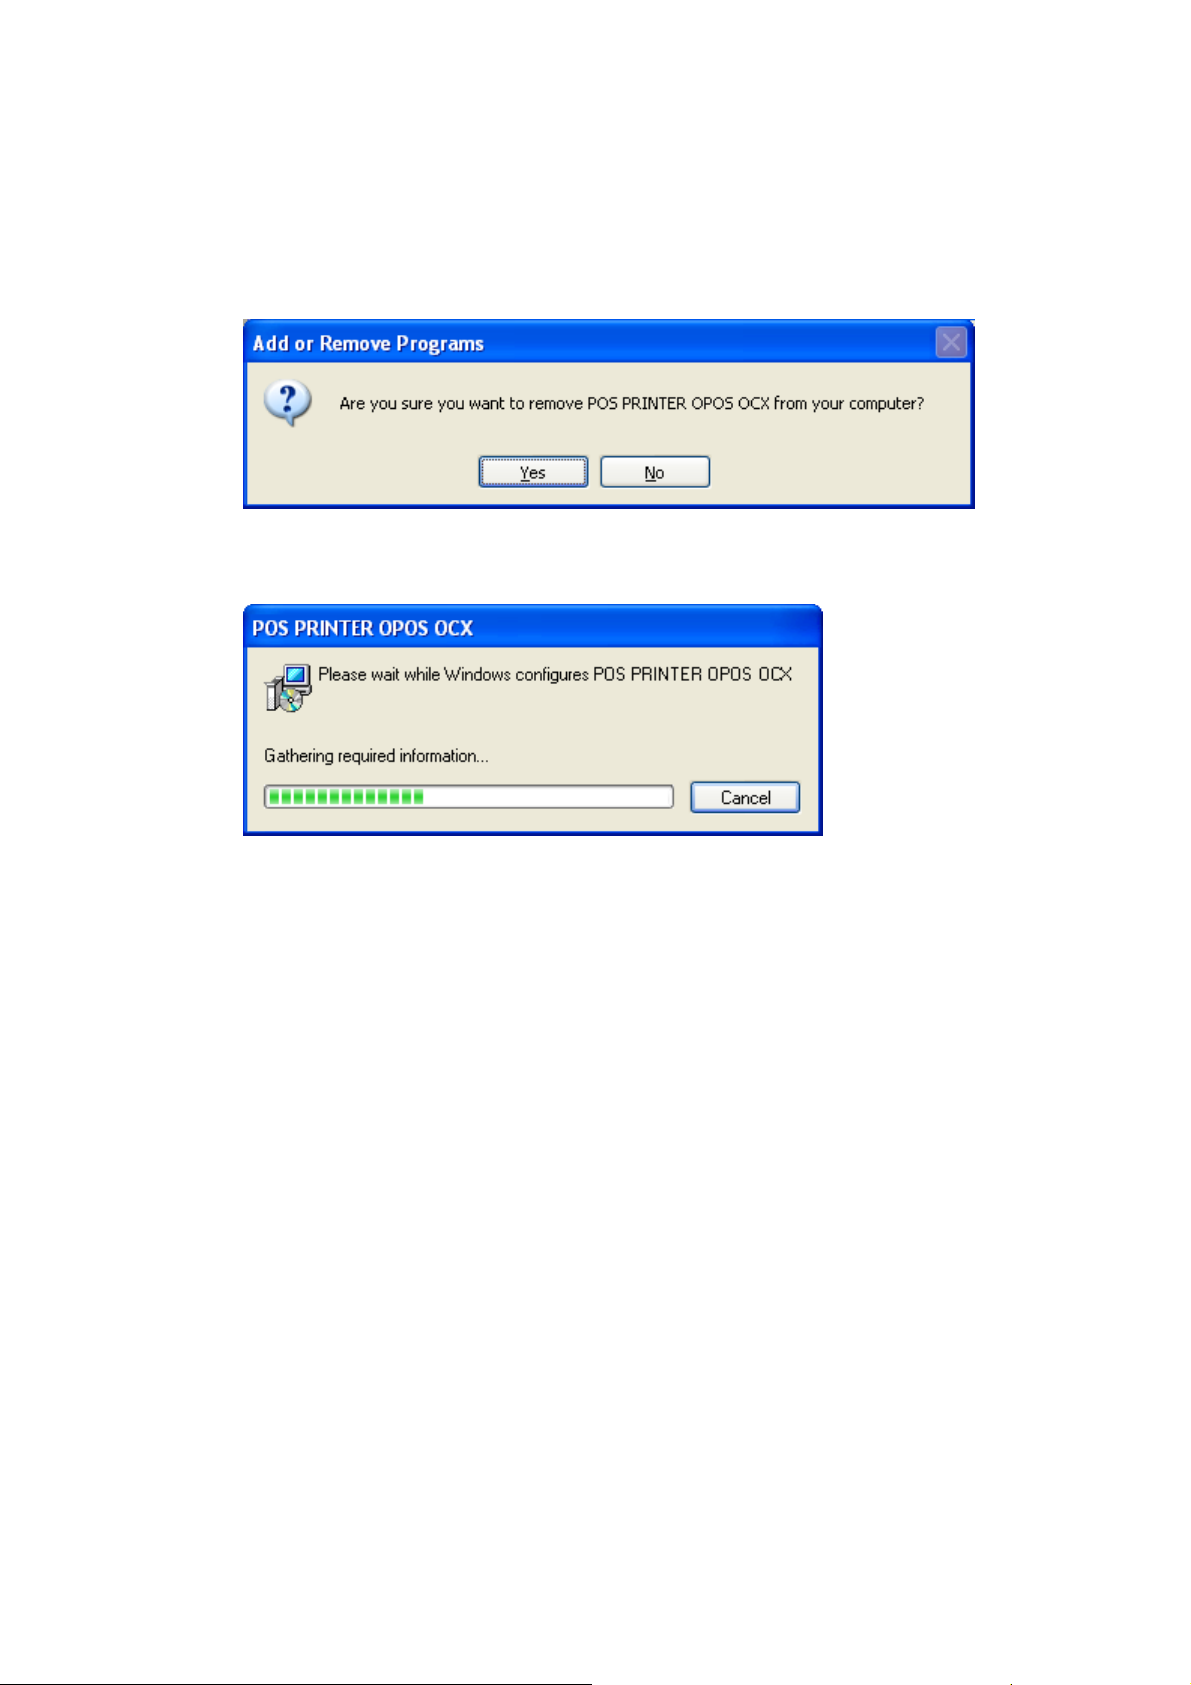
2. Select "POSPrint
3. The dialogue to confirm Uninstallation is displayed. Click [Yes].
4. Uninstallation is executed.
er OPOS OCX" and click "Uninstall" or "Remove".
5. Sometimes there are some files that could not be deleted by uninstaller in Installed folder
([System Drive]:\OPOS\Okidata\PT), so please delete manually.
That is all of uninstallation.
20
Page 29

Uninstallation when OPOS is installed with batch file
Uninstall
1. Press the Windows logo key + X key, shortcut menu is displayed bottom left of the screen.
2. And click [Command Prompt (Admin)], and execute the command prompt by the
administrator authority.
3. Execute batch file "uninstall.bat" with the folder of "C:\OPOS\Okidata\PT\".
4. Delete "C:\OPOS\Okidata\PT" folder manually.
5. It is an end.
Uninstallation method for Winodws Vista or Windows 7
1. The button that attaches the Windows logo under the left of a desktop screen is clicked.
2. Select [All Programs]->[Accessories]->[Command Prompt], and right-click in the icon of
the [Command Prompt], click "Run as administrator (A)", and execute the command
prompt by the administrator authority.
3. Execute batch file "uninstall.bat" with the folder of "C:\OPOS\Okidata\PT\".
4. Delete "C:\OPOS\Okidata\PT" folder manually.
5. It is an end.
ation method for Windows 8 or Server 2012
Uninstallation methods except Windows Vista, Windows 7, Windows 8 and Server 2012
1. The button that attaches the Windows logo under the left of a desktop screen is clicked.
2. Execute batch file "uninstall.bat" with the folder of "C:\OPOS\Okidata\PT\".
3. Delete "C:\OPOS\Okidata\PT" folder manually.
4. It is an end.
21
Page 30

2.5. Installation File List
File groups of POS Printer OPOS-OCX Control are arranged just like the following.
[System Drive]:\OPOS\Okidata\PT\
OPPOSPrinterCO.ocx POS Printer Control Object
OPPOSPrinterSO.dll POS Printer Service Object
OPCashDrawerCO.ocx Drawer Control Object
OPCashDrawerSO.dll Drawer Service Object
OPPrinterSetup.exe Setting Program
oposdef.ini OPOS display string definition file
[System Drive]:\OPOS\Okidata\PT\Log
Folder to output Log File
[System Drive]:\OPOS\Okidata\PT\include
Include-File-Group defined by OPOS-OCX
Control.
Opos.h OPOS Shared-Definition-Constant Header
File
OposPtr.h OPOS POS Printer Definition-Constant
Header File
OposCash.h OPOS Drawer Definition-Constant Header
File
FitPtr.h Particular Definition-Constant Header File
for OPOS Printer.
OPOSPRN.BAS OPOS Definition-Constant Standard Module
(Shared-Definetion-Constant,
Printer and Drawer Definition-Constant)
(for V isual Basic)
OposFIT.BAS OPOS Printer Particular Definition Constant
Module (for Visual Basic)
[System Drive]:\WINDOWS\system32\
(64bit OS: [System Drive]:\Windows\SysWOW64\)
OPSharedPort.exe Shared Port Program
ftfpcp.dll DLL used to communicate with printer in
LAN
22
Page 31

The module to be ins
File Version
Remarks
Copyright "Copyright (C) 20xx Oki Data Corporation"
Comment
Special Built Information (Not written specially)
Private Built Information (Not written specially)
Company " Oki Data Corporation"
Language "English (U.S.)"
Trademark (Not written specially)
Formal File Name (Object File Name of the subject)
Product Version Same as File Version
Product Name "OPOS POSPrinter" or "OPOS Cash Drawer"
Inside name (Formal File Name without extension)
talled has set property according to the following standard.
Item Remarks
OPOS Version (for each release, the third and the
forth characters are incremental numbers of version)
In case of files except CO/SO, successive increment
from 1.0.0.1
- In case of CO; "POSPrinter [or Cash Drawer]
OPOS Control Object Module".
- In case of SO; "POSPrinter [or Cash Drawer]
OPOS Service Object Module".
- The other cases; "[exe file name part without
extension] XXX (any wording)".
(Not written specially; If necessary, written
specially)
23
Page 32

2.6. Setting Program Usage
Operation Conditions
OPOS must be installed
Screen and function
Setting Program is executed as the following procedure.
1. Execution
If the [User Account Control] dialog box is displayed,
[Windows 8 / Server 2012 / Windows 7 / Server 2008 R2]
click [Yes].
[Windows Vista / Server 2008]
click [Allow].
【For Windows 8 / Server 2012】
Click the [Printer OPOS Setup] tile on the Start screen.
【For Windows 7 / Windows Vista】
1) Click the button indicated with the Windows logo
desktop.
2) Go to [All programs] →
[Okidata]→[OPOS]→[Printer OPOS Setup].
【For Windows XP / Windows Server 2008 R2 / Windows Server 2008 /
Windows Server 2003 / WEPOS/ POS Ready 2009】
Go to [Start]→[All programs] →
[Okidata]→[OPOS]→[Printer OPOS Setup].
at the left bottom of the
24
Page 33

2. Selecting Pri
Select “POS Printer” and “Interface”.
When LAN interface is selected, Searching printers screen is displayed.
When other interface is selected, POS printer detail setting screen is displayed.
3. Searching printers
nter and Interface
- Printer Detection
When "Printer Detection" is pressed, the list of IP address, MAC address and Device
25
Page 34

name of the found PO
disabled on OCX control. There are 2 solutions to enable Printer on OCX control. One is
to set all Unsetting POS printers to default setting by "Batch Setting Of Printers", and
another one is to entry Unsetting Printers one by one by "Printer Setting".
- Batch Setting Of Printers
When "Batch Setting Of Printers" button is pressed, OCX gives "Device name" to every
single "Unsetting" printer. In that case, registry setting value will be the same as "5.
Registry Used by OCX ". IP address and Device name is set depending on each printer's
setting.
- Printer Setting
When POS printer is selected in the list, "Setting printer" shows own IP address, then
press "Printer Setting" button for moving to POS printer detail setting screen page.
Double click on a printer in the list for jumping to POS printer detail setting screen page
directly.
S printer is displayed. When Device name is "Unsetting", Printer is
<Note>
When you use OPOS driver via LAN interface and IP address is not mapped by DHCP, IP
address should be set by "Printer LAN Settings Tool" prior to use.
See "3.2.2 Printer LAN Settings" of "Printer LAN Online Manual".
26
Page 35

4. POS printer
When an error occurred with OK button pushed, the following messages are displayed.
Confirm an error factor, and setup again.
detail setting
<An error factor>
A cable is not connected.
The printer is not switched on.
A cover opens.
There is not paper.
A port is already used in others.
A communication condition does not accord with a printer. (Serial connection)
Serial number input is wrong. (USB connection)
27
Page 36

1) Device Name
Specify the device to be set which may differ depending on the OCX installed. The items to
be displayed is as follows:
Device Name Interface
PT340-341SERPRT For Serial Interface
PT340-341USBPRT For USB Interface
PT340-341SER2PRT For Second Serial Interface
PT340-341USB2PRT For Second USB Interface
PT340-341LANPRT_xxx.xxx.xxx.xxx For LAN Interface
2) Port Name
For XXXSERPRT or XXXSER2PRT, the port can be selected from "COM1" to "COM9".
The port number other than above can be entered into the Dropdown list. "COM1" is set as
(xxx.xxx.xxx.xxx : IP Adress.)
the default setting after installation.
3) IP Adress
IP address of the set device is displayed.
4) Serial Number
For XXXUSBPRT or XXXUSB2PRT, select the serial number of the printer from "Serial
Number" by all means.
When the serial number of the printer is set by "123456", please select "123456" from
"Serial Number".
5) Baud Rate
Perform the baud rate setting. This setting is available only when XXXSERPRT or
XXXSER2PRT is selected in the “Port Name”. Set the baud rate set in the Printer.
28
Page 37

6) Format
rm the co
Perfo
XXXSER2PRT is selected in the “Port Name”. Set the communication format set in the
Printer.
The communication protocol is fixed to XON/XOFF.
* Special attention is required to perform the following settings:
1. Specifying 7bit Even (7bit Even 1) is not available from 8bit None (8 None 1) setting.
To perform this setting, specify Even (8 Even 1) first, and then specify 7bit Even.
2. Specifying 7bit Odd (7bit Odd 1) is not available from 8bit None (8 None 1) setting.
To perform this setting, specify Odd (8 Odd 1) first, and then specify 7bit Even.
3. To specify 8bit None (8 None 1) from 7bit Even (7 Even 1), specify 8bit Even (8 Even
1) first, and then specify 7bit Even.
4. To specify 8bit None (8 None 1) from 7bit Odd (7 Odd 1), specify 8bit Even (8 Odd 1)
first, and then specify 7bit Odd.
7) Print Columns
Set the width of receipt and the number of the characters to be set in a single line.
mmunication format. This setting is available only when XXXSERPRT or
8) Drawer Status
With some drawer, the drawer open/close event from the Drawer OCX may be reversed. To
acquire the event properly and avoid such behavior, change the setting to "Invert."
9) Smoothing
Select whether smoothing processing is performed when the RecLetterQuality property is
set to TRUE while printing double byte or more is specified for the font printing. When
Mode1 or Mode2 is selected, smoothing processing is performed. With smoothing
processing, the quality of double byte printing is improved, but printing performance may
be declined slightly.
10) PNE Detect
Set whether to notify the paper near end.
11) Print Level
Specifies the printing thickness.
The default's printing level of black is taken as 100 %. The percentage can be set from 70
to 130 by 10 %.
29
Page 38

12) Print Speed
Specifies the printing speed. It can be set to the numbers form 100mm/s to 220mm/s by
10mm/s, 250mm/s, 270mm/s and 300mm/s. The default is set to 220mm/s.
13) Extension Font
Set whether to use Extension font.
This is valid only for the Extension font model.
"Off" uses normal size font.
"On" uses Extension font, which is larger than normal size font.
14) Apartment
The method of initialization and the termination of DLL is specified.
15) Cut at CoverClose
When "Enable" is selected, cut operation is executed when cover is closed.
When "Disable" is selected, cutting operation is not executed when cover is closed.
16) Error Alert
It is a warning method with the buzzer when the error occurs.
When "None" is selected, the buzzer doesn't beep when the printer error occurs.
When "One Time" is selected, the buzzer beeps only once when the printer error occurs.
When "Continuous" is selected, the buzzer keeps beeping from the occurrence of the error
to release.
17) Buzzer Interval
Specifies the beeping interval of the buzzer .
18) Buzzer Repetition
Specifies the repetition frequency of the buzzer.
30
Page 39

19) Cancel, OK b
When th
to change the settings is sent to the Printer. To run this program, connect the printer and
turn on the power beforehand. (If the printer is not connected, the power is not turned on or
the printer is in the error status, the settings are not set in the Printer and only the registry is
set.)
20) Reload buttons
When the Reload button is pressed, the serial number of the printer connected with USB is
acquired again.
uttons
e OK button is pressed, the settings are written into the registry and the command
31
Page 40

Operation C
Registry Setting
The valu
Change the value as follows acc ording to the printer in use. Wh en the setting is applicable
to the particular OCX, it is stated as so.
onditions
e to write into the registry may differ depending on the printer to be set.
Device Name
Serial Interface USB Interface
POS Printer (first) PT340-341SERPRT PT340-341USBPRT
Drawer 1 (first) PT340-341SERDR1 PT340-341USBDR1
Drawer 2 (first) PT340-341SERDR2 PT340-341USBDR2
POS Printer (second) PT340-341SER2PRT PT340-341USB2PRT
Drawer 1 (second) PT340-341SER2DR1 PT340-341USB2DR1
Drawer 2 (second) PT340-341SER2DR2 PT340-341USB2DR2
Device Name
LAN Interface
POS Printer
(IP Adress : xxx.xxx.xxx.xxx)
PT340-341LANPRT_xxx.xxx.xxx.xxx
Port Name (Serial)
The value specified is directly written into the following registry:
· HKEY_LOCAL_MACHINE\SOFTWARE\OLEforRetail\ServiceOPOS\POSPrinter\[
Printer]\port
· HKEY_LOCAL_MACHINE\SOFTWARE\OLEforRetail\ServiceOPOS\CashDrawer\
[Drawer1]\port
· HKEY_LOCAL_MACHINE\SOFTWARE\OLEforRetail\ServiceOPOS\CashDrawer\
[Drawer2]\port
32
Page 41

SerialNumber
Default Port of
in it at the following registry. (Please set the serial number of the printer to connect)
(An example: When the serial number is set to "123456", "USB123456" is written in the
registry.)
· HKEY_LOCAL_MACHINE\SOFTWARE\OLEforRetail\ServiceOPOS\POSPrinter\[
Printer]\port
· HKEY_LOCAL_MACHINE\SOFTWARE\OLEforRetail\ServiceOPOS\CashDrawer\
[Drawer1]\port
· HKEY_LOCAL_MACHINE\SOFTWARE\OLEforRetail\ServiceOPOS\CashDrawer\
[Drawer2]\port
Baud Rate, Format (For Serial only)
Based on the setting values, the combination of Baud Rate and Format is written to the
registry. For example, when Baud Rate = "19200" and Format = "8 None 1",
"19200,N,8,1,x" is written into the value. When Format = "7 Odd 1", "19200.O,7,1,x", and
when Format = "8 Even 1", "19200,E,8,1,x" are written into the following values:
(USB)
the USB is set by "USB", and the set value adds it after "USB" and writes
· HKEY_LOCAL_MACHINE\SOFTWARE\OLEforRetail\ServiceOPOS\POSPrinter\[
Printer]\Protocol
· HKEY_LOCAL_MACHINE\SOFTWARE\OLEforRetail\ServiceOPOS\CashDrawer\
[Drawer1]\Protocol
· HKEY_LOCAL_MACHINE\SOFTWARE\OLEforRetail\ServiceOPOS\CashDrawer\
[Drawer2]\Protocol
IPAddress(LAN)
IP Address of the printer connected with the network is set.
· HKEY_LOCAL_MACHINE\SOFTWARE\OLEforRetail\ServiceOPOS\POSPrinter\[
Printer]\IPAddress
33
Page 42

Print Colum
Based on
ns
the setting values set, the number of the characters per line, available line
character width and paper width are set in the following values:
· HKEY_LOCAL_MACHINE\SOFTWARE\OLEforRetail\ServiceOPOS\POSPrinter\[
Printer]\RecLineChars
· HKEY_LOCAL_MACHINE\SOFTWARE\OLEforRetail\ServiceOPOS\POSPrinter\[
Drawer1]\RecLineCharsList
· HKEY_LOCAL_MACHINE\SOFTWARE\OLEforRetail\ServiceOPOS\POSPrinter\[
Drawer2]\RecLineWidth
The combinations are listed in the following table:
Print Columns
Setting Value
RecLineChars 48 42 35 32
RecLineCharsList 48,57,72 42,51,64 35,42,52 32,38,48
RecLineWidth 576 512 420 384
48 42 35 32
Drawer Status
When the value is set to Normal, "0" is written into the following registry, and when the
value is set to Invert, "1" is written.
· HKEY_LOCAL_MACHINE\SOFTWARE\OLEforRetail\ServiceOPOS\POSPrinter\[
Printer]\InvertDrawerStatus
Smoothing
When the value is set to Mode1, "1" is written into the following registry , and when the
value is set to Mode2, "2" is written into the following registry, and when the value is set to
OFF, "0" is written.
· HKEY_LOCAL_MACHINE\SOFTWARE\OLEforRetail\ServiceOPOS\POSPrinter\[
Printer]\Smoothing
34
Page 43

PNE Detect
the valu
When
value is set to Disable, "D" is written.
· HKEY_LOCAL_MACHINE\SOFTWARE\OLEforRetail\ServiceOPOS\POSPrinter\[
Printer]\PNESense
Print Level
The value specified is directly written into the following registry:
· HKEY_LOCAL_MACHINE\SOFTWARE\OLEforRetail\ServiceOPOS\POSPrinter\[
Printer]\PrintLevel
Print Speed
The value specified is directly written into the following registry:
· HKEY_LOCAL_MACHINE\SOFTWARE\OLEforRetail\ServiceOPOS\POSPrinter\[
Printer]\PrintSpeed
e is set to Enable, "E" is written into the following registry, and when the
Batch Print
When the value is set to Enable, "E" is written into the following registry, and when the
value is set to Disable, "D" is written.
· HKEY_LOCAL_MACHINE\SOFTWARE\OLEforRetail\ServiceOPOS\POSPrinter\[
Printer]\BatchPrint
35
Page 44

Extension Font
When the value is set to Off, "0" is written into the followi ng registry, and when the value
is set to On, "1" is written.
· HKEY_LOCAL_MACHINE\SOFTWARE\OLEforRetail\ServiceOPOS\POSPrinter\[
Printer]\ExtensionFont
AnkCharsSpacing and RecLineSpacing
If "Extension Font" value is set to On, "2" is written in "Ank.CharsSpacing" and "34" is
written in "RecLineSpacing".
If "Extension Font" value is set to Off, "0" is written in "Ank.CharsSpacing" and "30" is
written in "RecLineSpacing".
· HKEY_LOCAL_MACHINE\SOFTWARE\OLEforRetail\ServiceOPOS\POSPrinter\[
Printer]\AnkCharsSpacing
· HKEY_LOCAL_MACHINE\SOFTWARE\OLEforRetail\ServiceOPOS\POSPrinter\[
Printer]\RecLineSpacing
Apartment(LAN)
When the value is set to Mode0, "0" is written into the following registry, and when the
value is set to Mode1, "1" is written.
· HKEY_LOCAL_MACHINE\SOFTWARE\OLEforRetail\ServiceOPOS\POSPrinter\[
Printer]\Apartment
Cut at CoverClose
When the value is set to Enable, "E" is written into the following registry, and when the
value is set to Disable, "D" is written.
· HKEY_LOCAL_MACHINE\SOFTWARE\OLEforRetail\ServiceOPOS\POSPrinter\[
Printer]\CutAtCoverClose
36
Page 45

Error Alert
When the value is set to "None", "N" is written into the following registry, and when the
value is set to "OneTime", "O" is written, and when the value is set to "Continuous", "C" is
written.
· HKEY_LOCAL_MACHINE\SOFTWARE\OLEforRetail\ServiceOPOS\POSPrinter\[
Printer]\Error Alert
Buzzer Interval
The setting pattern number is written into the following registry.
· HKEY_LOCAL_MACHINE\SOFTWARE\OLEforRetail\ServiceOPOS\POSPrinter\[
Printer]\BuzzerInterval
Buzzer Repetition
The setting repetition frequency is written into the following registry.
· HKEY_LOCAL_MACHINE\SOFTWARE\OLEforRetail\ServiceOPOS\POSPrinter\[
Printer]\BuzzerRepetition
37
Page 46

3. Using OPOS Control
3.1. Common
The application uses the OPOS control in the steps as follows:
1. Open method: Called to link the control object to the service object.
2. ClaimDevice method: Called to enable exclusive access to the device. For the device of
exclusive use, this method is required, and foe the dev i ce of sharable use, it is opt io nal.
3. DeviceEnabled property: Set to TRUE to operate the device.
4. Use the device. (Each property, method, event)
5. DeviceEnabled property: Set to FALSE to disable the device.
6. ReleaseDevice method: Called to clear exclusive access to the device.
7. Close method: Called to release the service object from the control object.
For details of other usage, refer to "OPOS-APG V1.13" document.
3.2. POS Printer
The POS printer supports only "Receipt." For the methods and properties of other than that
(Journal or Slip), interface is supplied but behavior is not supported.
According to the general output model, synchronous and asynchronous output is available for the
POS printer.
The POS printer is the device to be used exclusively.
3.3. Drawer
The Drawer can be used in the same way as the POS printer, but all features are executable
without executing the ClaimDevice method. However, when exclusive permission is acquired for
particular application by the OpenDevice method, the OpenDevice method cannot be executed by
the application enabled with the same name. If there is no application with exclusive permission,
this is not the case.
38
Page 47

3.4. How to Implement the OPOS Control
The following steps describe how to implement the OPOS-OCX control in the application.
To Implement Using Visual Basic 6.0
1. Start Visual Basic 6.0 and select the type of the project to be created. In this example,
[Standard EXE] is selected. After selection, select [Project] from the menu, and select
[Component].
39
Page 48

2. When the Co
OLE Control (1.13) module], and press the [OK] button.
3. Paste the OCX displayed in the toolbar on the form. After this procedure, use it in the
mponent dialog box is displayed, select the [Control] tab -> [POSPrinter
same manner as normal OCX.
4. For the
Drawer
, repeat the steps to select [CashDrawer OLE Control (1.13) module].
40
Page 49

To Implement Using Visual C++ 6.0
1. Start Visual C++ 6.0, select [Create New] -> [MFC AppWizard(exe)], and press [OK].
2. In the MFC AppWizard Step 1, select [Dialog Base] and press the [Next] button.
41
Page 50

3. Select the ActiveX
to the type of the project to be created. Select [Next] and perform appropriate setting
as required for the rest of the instruction.
Control checkbox to be supported. Change other settings according
4. When
n the proje
ct is created, select [Resource View] to display the main dialog box.
42
Page 51

5. On the dialo
Control]. When the dialog box is displayed, select [POSPrinter OLE Control (1.13)
module] and select [OK].
6. When OCX is inserted on the dialog box, select the control and right-click it. From the
pop-up menu, select [Property]. Check the ID of the OCX. Clear the [Visible] and
g box, right-click to display the pop-up menu, and select [Insert ActiveX
[Tab Stop] check boxes.
43
Page 52

7. Close [Property
Variable] tab, select the control ID checked in the step 6, and press [Add Variable].
8. When th
e
], repeat the step 6 and select [ClassWizard]. Select the [Member
wing dialog box is displayed, press [OK].
follo
44
Page 53

9. Set the mem
Use this member variable for the properties and methods with the OCX.
Example: m_POSPrinter.Open(“PT340-341SERPRT”)
ber variable corresponding to the OPOS control, and exit Class Wizard.
10. For the
Drawer
, repeat the steps to select [CashDrawer OLE Control (1.13) module].
45
Page 54

4. OPOS Interface Specifications (Printer)
4.1. List
Properties
Common Type Access
BinaryConversion Long R/W Open OPOS_BC_NONE(0)
CapCompareFirmwareVersion Boolean R Open TRUE
CapPowerReporting Long R Open OPOS_PR_STANDARD(1
CapStatisticsReporting Boolean R Open FALSE
CapUpdateFirmware Boolean R Open TRUE
CapUpdateStatistics Boolean R Open FALSE
CheckHealthText String R Open ""
Claimed Boolean R Open FALSE
DeviceEnabled Boolean R/W Open &
FreezeEvents Boolean R/W
Open
OpenResult Long R None 0
OutputID Long R Open 1
PowerNotify Long R/W Open OPOS_PN_DISABLED(0)
PowerState Long R Open OPOS_PS_UNKNOWN(2
ResultCode Long R -- 0
ResultCodeExtended Long R Open 0
State Long R -- OPOS_S_CLOSED
ControlObjectDescription String R -- "POS Printer OPOS
ControlObjectVersion Long R -- 1013XXX
May Use
After
Claim
FALSE
Open
Initial Value, Conditions
Made writable after Open.
)
FALSE
Made writable after Open
and Claim.
FALSE
Made writable after Open.
Made writable after Open,
and unwritable after
Enabled.
000)
Control Object"
46
Page 55

Common Type Access
ServiceObjectDescription String R Open " POS Printer OPOS
ServiceObjectVersion Long R Open 1013XXX
DeviceDescription String R Open "OP 1 Station Thermal
DeviceName String R Open "OP 1 Station Thermal
May Use
After
Initial Value, Conditions
Service Object"
POSPrinter"
POSPrinter"
Specific Type Access
CapCharacterSet Long R Open PTR_CCS_KANJI (11)
CapConcurrentJrnRec Boolean R Open FALSE
CapConcurrentJrnSlp Boolean R Open FALSE
CapConcurrentPageMode Boolean R Open FALSE
CapConcurrentRecSlp Boolean R Open FALSE
CapCoverSensor Boolean R Open TRUE
CapMapCharacterSet Boolean R Open TRUE
CapTransaction Boolean R Open TRUE
CapJrnPresent Boolean R Open FALSE
CapJrn2Color Boolean R Open FALSE
CapJrnBold Boolean R Open FALSE
CapJrnDhigh Boolean R Open FALSE
CapJrnDwide Boolean R Open FALSE
CapJrnDwideDhigh Boolean R Open FALSE
CapJrnEmptySensor Boolean R Open FALSE
CapJrnItalic Boolean R Open FALSE
CapJrnNearEndSensor Boolean R Open FALSE
CapJrnUnderline Boolean R Open FALSE
CapJrnCartridgeSensor Long R Open 0
CapJrnColor Long R Open 0
May Use
After
Initial Value, Conditions
47
Page 56

Specific Type Access
CapRecPresent Boolean R Open TRUE
CapRec2Color Boolean R Open The initial value may vary
CapRecBarCode Boolean R Open TRUE
CapRecBitmap Boolean R Open TRUE
CapRecBold Boolean R Open TRUE
CapRecDhigh Boolean R Open TRUE
CapRecDwide Boolean R Open TRUE
CapRecDwideDhigh Boolean R Open TRUE
CapRecEmptySensor Boolean R Open TRUE
CapRecItalic Boolean R Open FALSE
CapRecLeft90 Boolean R Open TRUE
CapRecNearEndSensor Boolean R Open The initial value may vary
CapRecPapercut Boolean R Open TRUE
CapRecRight90 Boolean R Open TRUE
CapRecRotate180 Boolean R Open TRUE
CapRecStamp Boolean R Open FALSE
CapRecUnderline Boolean R Open TRUE
CapRecCartridgeSensor Long R Open 0
CapRecColor Long R Open 0
CapRecMarkFeed Long R Open 0
CapRecPageMode Boolean R Open FALSE
CapRecRuledLine Boolean R Open FALSE
May Use
After
Initial Value, Condition
according to the contents
of the registry.
according to the contents
of the registry.
48
Page 57

Specific Type Access
CapSlpPresent Boolean R Open FALSE
CapSlpFullslip Boolean R Open FALSE
CapSlp2Color Boolean R Open FALSE
CapSlpBarCode Boolean R Open FALSE
CapSlpBitmap Boolean R Open FALSE
CapSlpBold Boolean R Open FALSE
CapSlpDhigh Boolean R Open FALSE
CapSlpDwide Boolean R Open FALSE
CapSlpDwideDhigh Boolean R Open FALSE
CapSlpEmptySensor Boolean R Open FALSE
CapSlpItalic Boolean R Open FALSE
CapSlpLeft90 Boolean R Open FALSE
CapSlpNearEndSensor Boolean R Open FALSE
CapSlpRight90 Boolean R Open FALSE
CapSlpRotate180 Boolean R Open FALSE
CapSlpUnderline Boolean R Open FALSE
CapSlpBothSidesPrint Boolean R Open FALSE
CapSlpCartridgeSensor Long R Open 0
CapSlpColor Long R Open 0
CapSlpPageMode Boolean R Open FALSE
CapSlpRuledLine Boolean R Open FALSE
May Use
After
Initial Value, Condition
Specific Type Access
AsyncMode Boolean R/W Open FALSE
CartridgeNotify Long R/W Open PTR_CN_DISABLED(0)
CharacterSet Long R/W Open,
CharacterSetList String R Open "101,102,103,437,850,851,
CoverOpen Boolean R Open,
May Use
After
Claim &
Enable
Claim &
Enable
Initial Value, Condition
Made writable after Open.
Unwritable
998
Made writable after
Enabled
852,857,858,860,863,864,8
65,866,869,932,998,1252,2
8592,28597"
FALSE
49
Page 58

Specific Type Access
ErrorLevel Long R Open 0
ErrorStation Long R Open 0
ErrorString String R Open “”
FontTypefaceList String R Open “”
FlagWhenIdle Boolean R/W Open FALSE
MapCharacterSet Boolean R/W Open TRUE
MapMode Long R/W Open PTR_MM_DOTS (1)
PageModeArea String R Open “”
PageModeDescriptor Long R Open 0
PageModeHorizontalPosition Long R/W Open 0
PageModePrintArea String R/W Open “”
PageModePrintDirection Long R/W Open 0
PageModeStation Long R/W Open 0
PageModeVerticalPosition Long R/W Open 0
RotateSpecial Long R/W Open PTR_RP_NO R MAL (1)
May Use
After
Initial Value, Condition
Made writable after Open
Made writable after Open
Made writable after Open
Specific Type Access
JrnLineChars Long R/W Open,
JrnLineCharsList String R Open “”
JrnLineHeight Long R/W Open,
JrnLineSpacing Long R/W Open,
JrnLineWidth Long R Open,
JrnLetterQuality Boolean R/W Open,
JrnEmpty Boolean R Open,
JrnNearEnd Boolean R Open,
May Use
After
Claim &
Enable
Claim &
Enable
Claim &
Enable
Claim &
Enable
Claim &
Enable
Claim &
Enable
Claim &
Enable
Initial Value, Condition
0
Unwritable
0
Unwritable
0
Unwritable
0
FALSE
Unwritable
FALSE
FALSE
50
Page 59

Specific Type Access
JrnCartridgeState Long R Open,
JrnCurrentCartridge Long R/W Open,
May Use
After
Claim &
Enable
Claim &
Enable
Initial Value, Condition
0
Unwritable
0
Unwritable
Specific Type Access
RecLineChars Long R/W Open,
RecLineCharsList String R Open The initial value may vary
RecLineHeight Long R/W Open,
RecLineSpacing Long R/W Open,
RecLineWidth Long R Open,
RecLetterQuality Boolean R/W Open,
RecEmpty Boolean R Open,
RecNearEnd Boolean R Open,
RecSidewaysMaxLines Long R Open,
RecSidewaysMaxChars Long R Open,
RecLinesToPaperCut Long R Open,
RecBarCodeRotationList String R Open “0,R90,L90,180”
RecCartridgeState Long R Open,
May Use
After
Claim &
Enable
Claim &
Enable
Claim &
Enable
Claim &
Enable
Claim &
Enable
Claim &
Enable
Claim &
Enable
Claim &
Enable
Claim &
Enable
Claim &
Enable
Claim &
Initial Value, Condition
The initial value may vary
according to the contents
of the registry
Made writable after Open.
according to the contents
of the registry.
The initial value may differ
according to the contents
of the registry
Unwritable
The initial value may vary
according to the contents
of the registry
Made writable after Open.
The initial value may vary
according to the contents
of the registry
TRUE
Made writable after Open.
FALSE
FALSE
The initial value may vary
according to the contents
of the registry
The initial value may vary
according to the xml
contents.
The initial value may vary
according to the xml
contents.
PTR_CART_UNKNOWN
(268435456)
51
Page 60

Specific Type
RecCurrentCartridge Long R/W Open,
RecBitmapRotationList String
Access Initial Value, Condition
R Open
May Use
After
Enable
Claim &
Enable
Specific Type Access
SlpLineChars Long R/W Open,
SlpLineCharsList String R Open ""
SlpLineHeight Long R/W Open,
SlpLineSpacing Long R/W Open,
SlpLineWidth Long R Open,
SlpLetterQuality Boolean R/W Open,
SlpEmpty Boolean R Open,
SlpNearEnd Boolean R Open,
SlpSidewaysMaxLines Long R Open,
SlpSidewaysMaxChars Long R Open,
SlpMaxLines Long R Open,
SlpLinesNearEndToEnd Long R Open,
SlpBarCodeRotationList String R Open ""
SlpPrintSide Long R Open,
May Use
After
Claim &
Enable
Claim &
Enable
Claim &
Enable
Claim &
Enable
Claim &
Enable
Claim &
Enable
Claim &
Enable
Claim &
Enable
Claim &
Enable
Claim &
Enable
Claim &
Enable
Claim &
Enable
0
Unwritable
“0,R90,L90,180”
Initial Value, Condition
0
Unwritable
0
Unwritable
0
Unwritable
0
FALSE
Unwritable
FALSE
FALSE
0
0
0
0
0
52
Page 61

Specific Type Access
SlpCartridgeState Long R Open,
SlpCurrentCartridge Long R/W Open,
SlpBitmapRotationList String R Open ""
May Use
After
Claim &
Enable
Claim &
Enable
* In the Access column, R indicates Read-Only, R/W indicates Read/Write. The item in May
Use After is the method and property required for initialization, Open indicates the Open
method, Claim indicates the ClaimDevice method and Enable indicates setting the
DeviceEnabled property to TRUE. If required procedure is not executed, the error may be
set in the ResultCode property. When May Use After is Open & Claim or Open, Claim &
Enable, the property is available for acquisition after the Open method is executed, but the
value may not be initialized until all Open, Claim & Enable are executed. To acquire such
property, access it after the conditions are met.
Initial Value, Condition
0
0
Unwritable
53
Page 62

List of Methods
Common Initialization
Open --
Close Open
ClaimDevice Open
ReleaseDevice Open, Claim
ClearOutput Open, Claim & Enable *1
CheckHealth Open, Claim & Enable
CompareFirmwareVersion Open, Claim & Enable
DirectIO Open, Claim & Enable *1
ResetStatistics Open, Claim & Enable
RetrieveStatistics Open, Claim & Enable
UpdateFirmware Open, Claim & Enable
UpdateStatistics Open, Claim & Enable
Specific Initialization
PrintNormal Open, Claim & Enable
PrintTwoNormal Open, Claim & Enable
PrintImmediate Open, Claim & Enable
BeginInsertion Open, Claim & Enable
EndInsertion Open, Claim & Enable
BeginRemoval Open, Claim & Enable
EndRemoval Open, Claim & Enable
CutPaper Open, Claim & Enable
RotatePrint Open, Claim & Enable
PrintBarcode Open, Claim & Enable
PrintBitmap Open, Claim & Enable
TransactionPrint Open, Claim & Enable
ValidateData Open, Claim & Enable
SetBitmap Open, Claim & Enable
SetLogo Open, Claim & Enable
ChangePrintSide Open, Claim & Enable
MarkFeed Open, Claim & Enable
ClearPrintArea Open, Claim & Enable
PageModePrint Open, Claim & Enable
PrintMemoryBitmap Open, Claim & Enable
54
Page 63

List of E
vents
Event Initialization
DirectIOEvent Open, Claim & Enable
ErrorEvent Open, Claim & Enable *1
OutputCompleteEvent Open, Claim & Enable
StatusUpdateEvent Open, Claim & Enable
*1: Items required for initialization are different from "OLE for Retail POS Application
Programmer's Guide Instructions The 1.13 Version".
55
Page 64

4.2. Printing Data and Escape Sequence
This OCX supports the following Escape Sequence.
1) Escape Sequence which operates only when assigned time
Name Data Contents
Paper Cut ESC |#P It cuts the receipt paper. The character '#' is the
character string of ASCII decimal number which
shows the percentage of required cutting. It is
possible to omit '#'. When the value is between '1' to
'99', partial cutting is performed. When the value is
'100' or omitted, full cutting is performed. When the
value is other than any value between '1' to '100', it is
ignored
In addition to that, if there are data buffered to POS
Printer, (in the case that POS Printer does not print
even though printing request is done) it cannot do
cutting. To execute cutting, it must be at the head of
the line.
It is also unavailable in 90 degrees rotating to the left
or to the right by RotatePrint Method, and back in
operation after clearing 90 degrees rotating to the left
or to the right.
Feed and Paper Cut ESC |#fP It cuts the receipt paper after feeding the paper for
the lines of RecLinesToPaperCut. Character '#' is
defined by "Paper Cut" Escape Sequence. In addition
to that, if there are data buffered to POS Printer, (in
case that POS Printer does not print even though
printing request is done) it cannot do cutting. To
execute cutting, it must be at the head of the line.
It is also unavailable in 90 degrees rotating to the left
or to the right by RotatePrint Method, and back in
operation after clearing 90 degrees rotating to the left
or to the right.
Feed, Paper Cut,
and Stamp
ESC |#sP It is not supported.
56
Page 65

Name Data Contents
Print bitmap ESC |#B It prints the bitmap saved by SetBitmap Method. '#'
is the Bitmap number and supports 20 bitmap
printing '1' to '20'. It is possible to change printing
quality by changing RecLetterQuality property
value in printing. As for handling printing quality, it
is same as PrintBitmap Method. When '#' is
omitted, it is handled as character string.
Printing is available during 90 degrees rotating to the
left or to the right by the RotatePrint method, but
printing may not be performed properly because
printing area of the bitmap size is not calculated.
When '#' is omitted, it is regarded character string
data starting with the character "B".
When the number that is not stored in the SetBitmap
method, the print command is issued to the printer,
but printing is not performed.
It prints the top logo saved by SetLogo Method. Print top logo ESC |tL
It prints the bottom logo saved by SetLogo Method.Print bottom logo ESC |bL
Fire stamp ESC |sL It is not supported.
Feed line ESC |#lF Feeds the paper forward by lines. The character '#' is
replaced by an ASCII decimal string telling the
number of lines to be fed. If '#' is omitted, then one
line is fed. '#' supports the values from '1' to '255'. (If
the value is smaller than '1', the command is not
executed, and if the value is larger than '255', the
command is executed regarding that '255' is
assigned.)
If print data is not presence, line feed operation is
executed according to the amount of line feed, and if
print data is presence, the height of the print data is
fed.
If the value specified for "#" exceeds 35.4 in
(approx. 900 mm), the command is executed feeding
the paper by 35.4 in (approx. 900 mm)..
In 90 degrees rotating to the left or to the right by
RotatePrint Method, it prints next printing location
after Returns of feed-assigned lines.
57
Page 66

Name Data Contents
Feed unit ESC |#uF Feeds the paper forward by the units defined with
MapMode. The character '#' is replaced by an
ASCII decimal string telling the number of units to
be fed. If '#' is omitted, then one unit for each
MapMode is fed.
MapMode = PTR_MM_DOTS(1)
'#' supports the values from '1' to '127'. (If the value
is smaller than '1', the command is not executed, and
if the value is larger than '127', the command is
executed regarding that '127' is assigned.)
MapMode = PTR_MM_TWIPS(2)
'#' supports the values from '1' to '903'. (If the value
is smaller than '1', the command is not executed, and
if the value is larger than '903', the command is
executed regarding that '903' is assigned.)
MapMode = PTR_MM_ENGLISH(3)
'#' supports the values from '1' to '627'. (If the value
is smaller than '1', the command is not executed, and
if the value is larger than ''627', the command is
executed regarding that ''627' is assigned.)
MapMode = PTR_MM_METRIC(4)
'#' supports the values from '1' to '1594'. (If the value
is smaller than '1', the command is not executed, and
if the value is larger than '1594', the command is
executed regarding that '1594' is assigned.)
The line feed setting of the printer does not affect the
amount of line feed. It is executed on the halfway of
the line, and when the specified amount of line feed
is less than 1 line, then 1 line is fed
In 90 degrees rotating to the left or to the right by
RotatePrint Method, it will print after the interval of
the value of next printing location assigned by unit
feed.
Feed reverse ESC |#rF It is not supported.
58
Page 67

Name Data Contents
Send embedded data ESC |#rE The successive character string of "#E" is passed to
the device without any change. The character '#' is
replaced by an ASCII decimal string specifying the
number of bytes following the escape sequence to be
passed directly to the device. If '#' is omitted, it is not
regarded as the escape sequence, and handled as
print data. Character string cannot output a control
code and the cord of 80H - FFH as expected. In this
case, set it in either of OPOS_BC_NIBBLE(1),
OPOS_BC_DECIMAL(2) by a BinaryConversion
property, and set printing data.
When the print data specified by '#' is not set after
the escape sequence is specified, available print data
is sent. (Example: When ESC|2E"a" is specified,
only "a" is sent because the character string is set
only for one byte.)
In rotate printing 90 degrees to the left or to the right
by the RotatePrint method, the data column
specified by Send embedded data is not counted as
the character string, the width cannot be calculated.
Adjust the printing width by inserting empty space
and so on.
Barcode printing
(Refer to the next page)
ESC |#rR Prints the barcode. The character ‘#’ is replaced by
an ASCII decimal string and the number of
characters following the R to use in the definition of
the characteristics of the barcode to be printed. See
details below.
The barcode may be printed during rotate printing 90
degrees to the left or to the right by the RotatePrint
method, but printing may not be performed normally
because the print area is not calculated by the
specified barcode width. When the other character
string data specified exceeds the barcode width,
printing is executed.
In the RotatePrint method, please use it without
specifying PTR_RP_BARCODE.
Even if the RotateSpecial property is specified, the
rotation print is not done.
The available width that can be set by the parameter
is up to the value of the RecLineWidth property and
is not affected by the RotateSpecial property.
59
Page 68

Starting with
barcodes in-line with other print commands. The character ‘#’ is the number of characters
following the R to use in the definition of the characteristics of the barcode to be printed.
In the data following the R, other lower case letters and numbers are used to identify
different values. The same value definitions as defined for the printBarCode method
headers and definitions are used for the various barcode values. Converting to string the
values from the definitions are consistent.
The attribute symbols are defined as follows:
s symbology
h height
w width
a alignment
t human readable text position
d start of data
e end of sequence
The attributes must appear in the order specified in the above list. (It cannot be omitted)
Release 1.13, the application can use the ESC|#R escape sequence to print
Using a basic UPCA, center aligned, with bottom text, 200 dots height and 40 0 dots wide,
the command is as follows:
ESC|33Rs101h200w400a-2t-13d123456789012e
The followings are excerption of the definitions of the constants used in the example above
from the header file.
const LONG PTR_BCS_UPCA = 101; // Digits
const LONG PTR_BC_CENTER = -2;
const LONG PTR_BC_TEXT_BELOW = -13;
60
Page 69

In addition, the thres
hold of each parameter is as follows. When the threshold exceeded it,
the barcode is not printed.
Width(dot) Height(dot) Alignment Barcode
Except two
dimension code
The most narrow width
of the individual barcod
– RecLineWidth
QR
21 - RecLineWidth
QR
21 - RecLineWidth
During right and left
90 degrees turn by
RotatePrint method.
MicroQR
11 - RecLineWidth 1 – 16
1 - 255 All values defined by
PrintBarcode method are
available.
1 – 16
(as width of the
module)
1 – 16
(as width of the
module)
All values defined by
PrintBarcode method are
available.
As well as an appointed
value, all values become
the left hotchpotch
All values defined by
(as width of the
module)
PrintBarcode method are
available.
MicroQR
During right and left
90 degrees turn by
11 - RecLineWidth 1 – 16
(as width of the
module)
RotatePrint method.
PDF417
172 - RecLineWidth 12 - 831 All values defined by
PDF417
During right and left
172 - 831 12 –
RecLineWidth
90 degrees turn by
RotatePrint method.
2) Escape Sequence Operating in Printing
It has characteristics that are remembered until explicitly changed.
Name Data Contents
Font typeface selection ESC |#fT It is not supported.
As well as an appointed
value, all values become
the left hotchpotch
PrintBarcode method are
available.
As well as an appointed
value, all values become
the left hotchpotch
61
Page 70

3) Escape Sequence Operating at the Time of Printing
It has the characteristics that are reset at the end of each print method, by an explicit reset (where
applicable), or by a “Normal” sequence.
Name Data Contents
Bold ESC |bC Prints in bold. If ‘!’ is specified then bold is disabled.
Underline ESC |#uC Prints with underline. The character ‘#’ is replaced by an
ASCII decimal string telling the thickness of the underline
in printer dot units. Underlines of one dot or two dots are
only supported. If it is omitted, underline of one dot is
printed.
Italic ESC |iC It is not supported.
Alternate color ESC |#rC It is not supported.
Red ESC |rC It prints with the second color of the receipt.
Printing is possible only when "Printing Color" of Printer
Setting is "Two Colors".
When Color = mono is set in the setting program, printing
is not affected by specifying this escape sequence.
Reverse video ESC |rvC Prints in a reverse video format. If ‘!’ is specified then
reverse video is disabled.
Shadowing ESC |#sC It is not supported.
Single high and
wide
Double wide ESC |2C Prints double-wide characters.
Double high ESC |3C Prints double-high characters.
Double high and
wide
Scale horizontally ESC |#hC It prints characters, enlarging them horizontally. The
Scale vertically ESC |#vC It prints characters, enlarging them vertically. The character
RGB Color ESC |#fC It is not supported.
Center ESC |cA It aligns the text, from there after, in the center. It is not
Right justify ESC |rA It aligns the text, from there after, to the right. It is not
Normal ESC |N It regains POS Printer attribute to the normal state. It is
ESC |1C Prints normal size.
ESC |4C Prints double-high/double-wid e characters.
character '#'is the ASCII decimal character string which
shows horizontally enlarging rate. It supports form one to
eight times.
If "#" is omitted, it prints in life-size.
'#' is the ASCII decimal character string which shows
vertically enlarging rate. It supports form one to eight
times.
At the time of "#" abbreviation, it prints in life-size.
available unless you assign at the head of the line.
It is unavailable in 90 degrees rotating to the left or to the
right by RotatePrint Method.
available unless you assign at the head of the line.
It is unavailable in 90 degrees rotating to the left or to the right
by RotatePrint Method.
impossible to regain from Centering or Align Right, unless
you assign at the head of the row.
62
Page 71

Name Data Contents
SubScript ESC |tbC It is not supported.
SuperScript ESC |tpC It is not supported.
63
Page 72

4.3. Common Properties
The following sections describe the properties provided commonly to the POS printer.
We have two kinds of properties: Read-Only and Read/Write. If a property is for writing, R/W will
be shown at the side of each property.
Only if return value has a special meaning, it will be shown. As for error, in case that access is done
without satisfying initializing condition, refer to ResultCod e pr operty .
BinaryConversion Property R/W
Syntax
LONG BinaryConversion;
Remarks
OPOS passes multi-character input and output using BStrings. BStrings may be safely
used for text data. As the BStrings are passed between the application and the OPOS
Control, OLE may perform language-specific translations to or from Unicode. When
BStrings are used to pass binary data, then these translations may alter the original data
such that the data byte in a BString character at the application does not match the
corresponding byte at the Control. This mismatch is more likely when BString pointers are
used, since the Unicode characters are presented to the application and/or Control, and a
language difference between them may cause misinterpretation.
Characters between 0x00 and 0x7F may be sent without fear of language-specific
translation. Only characters between 0x80 and 0xFF sometimes cause incorrect
translations.
This document specifies those properties and method parameters that are affected by
BinaryConversion in the individual property and method descriptions. The following line
is added to their description:
"In the OPOS environment, the format of this data depends upon the value of the
BinaryConversion property. See BinaryConversion property."
64
Page 73

The val
V
OPOS_BC_NONE (0) Data is not converted and one character of Bstring is
OPOS_BC_NIBBLE(1) Each byte is converted to two characters. (By this
OPOS_BC_DECIMAL(2) Each byte is converted to three characters. VAL(string)
ues of BinaryConversion are as follows.
alue Meaning
contained for one byte. (Default)
option, conversion between Binary and ASCII is the
fastest.)
Each data byte is converted just like below.
The first character = 0x30 + 7-4 byte of data byte
The second character = 0x30 + 3-0 byte of data
byte
Example: 154=0x9A (byte value) is converted to 0x39
0x3A (character) (character string "9:"). So this
conversion way is deferent from usual hexadecimal
ASCII character conversion to convert byte value
(154=0x9A) to code (0x39 0x41)(character string
"9A").
is used with three characters for converting from ASCII
to Binary. RIGHT("^^"+STR(byte),3) is used to form
three ASCII characters from each byte. '^' means space
character.
Exampl1: 154=0x9A (Byte Value) becomes 0x31 0x35
0x34(Characters)(=Character string "154").
Example2: 8 (byte Value) becomes 0x30 0x30
0x38(Character)(=Character string "008").
When BinaryConversion is on (that is, not OPOS_BC_NONE) and the property or
method parameter description specifies that BinaryConversion applies, then the
application has the responsibilities to convert the character string to the format assigned to
BinaryConversion, before setting property and delivering method parameter.
This property is initialized to OPOS_BC_NONE(0) by Open Method.
65
Page 74

Return V
alue
When th
Property
Value Meaning
OPOS_SUCCESS(0) It succeeds s in Property setting.
OPOS_E_ILLEGAL(106) Illegal value is assigned.
is property is set, either of the following values will be contained in ResultCode
66
Page 75

CapCompareFirmwareVersion Property
Syntax
BOOL CapCompareFirmwareVersion;
Remarks
If TRUE, then the Service/device supports comparing the version of the firmware in the
physical device against that of a firmware file.
This property is initialized to TRUE by the Open method.
CapPowerReporting Property
Syntax
LONG CapPowerReporting;
Remarks
It identifies power reporting ability. The value to show power reporting ability is just the
following.
Value Meaning
OPOS_PR_STANDARD(1) SO can judge two kinds of power states and can report
it. (ONLINE and OFF_OFFLINE)
This property is initialized by Open Method.
CapStatisticsReporting Property
Syntax
BOOL CapStatisticsReporting;
Remarks
This property is initialized to FALSE by the Open method. Statistics reporting is not
supported.
67
Page 76

CapUpdateFirmware Property
Syntax
BOOL CapUpdateFirmware;
Remarks
This property is initialized to TRUE by the Open method. The device’s firmware can be
updated.
CapUpdateStatistics Property
Syntax
BOOL CapUpdateStatistics;
Remarks
This property is initialized to FALSE by the Open method. Statistics reporting is not
supported.
CheckHealthText Property
Syntax
BSTR CheckHealthText;
Remarks
It keeps the CheckHealth Method result called just before. The following are examples of
the check.
- In case of Internal "Internal HCheck: Successful", "Internal HCheck:
OFF/OFFLINE"
- In case of External "External HCheck: Not Supported"
- In case of Interactive "Interactive HCheck: Not Supported"
This value is initialized to null character before the first CheckHealth method call.
68
Page 77

Claimed Property
Syntax
BOOL Claimed;
Remarks
TRUE: The device is claimed for exclusive access.
FALSE: The device is released for sharing with other applications.
Claimed Property value is initialized to FALSE by Open Method.
ControlObjectDescription Property
Syntax
BSTR ControlObjectDescription;
Remarks
" POS Printer OPOS Control Object" is set.
Identifies the Control Object . It is a charact er string identifyi ng the Control Object and the
company that produced it and always readable.
This property is readable at any time.
69
Page 78

ControlObjectVersion Property
Syntax
LONG ControlObjectVersion;
Remarks
"1013XXX" is set. Holds the Control Object version number. Following three version
levels are specified:
Version Level Description
Major The "millions" place.
Holds the OPOS major version level.
Minor The "thousands" place.
Holds the OPOS minor version level. This is always set
to 10 since this OPOS control conforms to OPOS
version 1.13.
Build The "units" place. Updated when corrections are made
to the Control Object.
This property is always readable. (XXX varies depending on the time the Control Object is
distributed.)
DeviceDescription Property
Syntax
BSTR DeviceDescription;
Remarks
"OP 1 Station Thermal POSPrinter" is set.
This property is a character string identifying the device, and holds the device and any
pertinent information about it
This property is initialized by the Open method.
70
Page 79

DeviceEnabled Property R/W
Syntax
BOOL DeviceEnabled;
Remarks
TRUE:
The device is made to enable (Operation state). If converted to TRUE, it is made to
enable.
FALSE:
The device is made to disable. If converted to FALSE, it is made to disable.
Before this device is used, application must set this property TRUE.
Also, while DeviceEnable is TRUE, Device Connection State (PowerReporting) is
reported. This property is initialized to FALSE by Open Method.
71
Page 80

Return V
alue
When this pr
Value Meaning
OPOS_SUCCESS(0) It succeeds in Property setting.
OPOS_E_NOTCLAIMED(103) In order to make exclusive use device enable, it must
OPOS_E_NOHARDWARE(107) POS Printer is OFF or OFFLINE or the cable is not
OPOS_E_FAILURE(111) The connecti on to the device is failed. Carry out once
For USB interface, confirm two unsetting printers or
The mistake might be found in the setting of plural
OPOS_E_TIMEOUT(112) Connection to the POS Printer could not be established.
OPOS_E_BUSY(113) Setting the property is failed because processing . Set
The others Refer to ResultCode Property.
operty is set, the following value is placed in the ResultCode property:.
acquire exclusive access right, before that.
connected. Clear the problem, and then execute the
property again. (* In the case of USB interface, even if
a POS printer is connected, this error occurs when a
serial number set by registry is different from a serial
number set by a POS printer.)
*In case of LAN interface model, same error occurs that
if both of POS printer's IP addresses and the registry's
are different, even the POS printer is connected in
network.
again after having confirmed whether there is a
connection port and whether a connection port is not
used by other programs.
more are not connected at the same time, and confirm it
is not a printer used in the other port (for instance, when
XXXUSBPRT is used, XXXUSB2PRT).
connection. Set up one again.
There is the possibility of cover open or running out of
paper.
the property after processing.
72
Page 81

DeviceName Property
Syntax
BSTR DeviceName;
Remarks
"OP 1 Station Thermal POSPrinter" is set up.
This property shows the device and the any pertinent information about it. This is a short
version of DeviceDescription property and should be limited to 30 characters.
This property is initialized by the Open method.
FreezeEvents Property R/W
Syntax
BOOL FreezeEvents;
Remarks
Return Value
Property.
In case of TRUE, Event is not reported from Control.
Event is kept by Control till the freeze is terminated.
In case of FAL SE, if Event is reported from Control. If there is any Event kept during
freeze, that Event is reported when FreezeEvents are converted to FALSE.
If interrupt by Event is undesirable, Application can select Event freeze. In case that
ErrorEvent is frozen, State Property becomes OPOS_S_BUSY(3). In such case, Control
cannot be closed. In this case, cancel the event frozen by ClearOutput Method, or set
TRUE and execute Close Method after ErrorEventis originated.
This property is initialized to FALSE by Open Method.
At the time of this property setting, the following values will be contained to ResultCode
Value Meaning
OPOS_SUCCESS(0) It succeeds in property setting.
73
Page 82

OpenResult Property
Syntax
LONG OpenResult;
Remarks
It keeps the latest result by Open Method. The values of OpenResult are just the
following.
Value Meaning
OPOS_SUCCESS(0) Open is succeeded.
EOPEN_ALREADYOPEN(301) It is already opened.
EOPEN_REGBADNAME(302) There is no assigned Device Name Key in the registry,
or Device Name is not assigned.
EOPEN_REGPROGID(303) Default value o f De vice Name Key is not readable, or it
could not convert Programmatic ID kept there to
effective Class ID.
EOPEN_CREATE(304) It could not generate Service Object Instance, or could
not obtain IDispatch Interface.
EOPEN_BADIF(305) Service Object does not support one or more methods
required by assignment version. It is possible that
Device Name setting differs from POS Printer OPOS
Service Object.
This property is initialized by Open Method.
OutputID Property
Syntax
LONG OutputID;
Remarks
It has the identifier to uniquely identify asynchronous request. (Asynchronous Respond
Method Call when AsyncMode Property is set to TRUE.)
When a method successfully initiates a synchronous or asynchronous output, the Control
assigns an identifier to the request. For asynchronous output, when the output completes,
the Control will fire an OutputCompleteEvent passing this output ID as a parameter.
Output ID Number is numbered cyclically between 1 and 65535.
74
Page 83

PowerNotify Property R/W
Syntax
LONG PowerNotify;
Remarks
This is the Power Notify Function type set by Application.
The values to show Power Notify Function are just the following.
Value Meaning
OPOS_PN_DISABLED(0) Control does not give any power notification to
Application. StatusUpdateEvent concerning Power
Notification is not given and any setting is not done to
PowerState Property.
(Default Value)
OPOS_PN_ENABLED(1) When DeviceEnabled is set to TRUE, Control does
StatusUpdateEvent notification and PowerState
Property update.
PowerNotify Property can be set during Device is disable, which means when
DeviceEnabled Property is FALSE.
Return Value
When this property is set, one of the following values is contained in ResultCode
Property.
Value Meaning
OPOS_SUCCESS(0) It succeeds in property setting.
OPOS_E_ILLEGAL(106) One of the following happens:
Device is already enabled.
Property setting value is illegal.
The others Refer to ResultCode items.
75
Page 84

PowerState Property
Syntax
LONG PowerState;
Remarks
While PowerNotify is OPOS_PN_ENABLED(1), Present Device Power State is set up.
The values to show power state are just the following.
Value Meaning
OPOS_PS_UNKNOWN(2000) It cannot judge the device power state according to one
of the following reasons. (Default Value)
When PowerNotify = OPOS_PN_DISABLED(0),
Power Notify Function is disable.
When DeviceEnabled = FALSE, Power State Monitor
does not operate till Device becomes enable.
OPOS_PS_ONLINE(2001) Device power is ON and at the same time is ready.
OPOS_PS_OFF_OFFLINE(2004) Device power is OFF, or is not connected to the body.
As for recovery way, refer to ResultCode Property,
OPOS_E_NOHARDWARE(107).
This property is initialized to OPOS_PS_UNKNOWN by the Open method.
When PowerNotify is set to OPOS_PS_ENABLED(1) and DeviceEnabled is TRUE,
then this property is updated as the SO detects power condition changes.
76
Page 85

ResultCode Property
Syntax
LONG ResultCode;
Remarks
Each property sets this property. It is set when it obtains property, or when it set writable
property.
This property is always readable. It returns OPOS_E_CLOSED(101) till it calls up Open
Method.
The result code values are just the following.
Value Meaning
OPOS_SUCCESS(0) Normal Operation
OPOS_E_CLOSED(101) You try to access the closed device.
OPOS_E_NOTCLAIMED(103) You try to access Exclusive Use Device for which you
need to obtain exclusive access right before using
method/property setting process.
OPOS_E_NOSERVICE(104) Control cannot communicate to Service Object. Perhaps,
you must correct Set Up Error or Configuration Error.
OPOS_E_DISABLED(105) It cannot be executed when Device is disabled.
OPOS_E_ILLEGAL(106) You try to execute unavailable operation to Device or
operation not supported. Or you use unavailable
parameter value.
OPOS_E_NOHARDWARE(107) POS Printer is OFF or OFFLINE.
OPOS_E_FAILURE(111) Ev en though Device is connected to System, Power is
ON, and it is ONLINE, Device cannot execute the
requested process.
OPOS_E_TIMEOUT(112) The Service Object waiting for the response from
Device does time-out, or the Control waiting for the
response from Service Object does time-out.
OPOS_E_BUSY(113) Present SO state cannot accept this request. For
example, when asynchronous Output is executed, some
methods cannot accept it.
OPOS_E_EXTENDED(114) Particular Error State occurs. Error State Code can be
confirmed with ResultCodeExtended Property
77
Page 86

ResultCodeExtended Property
Syntax
LONG ResultCodeExtended;
Remarks
When ResultCode is OPOS_E_EXTENDED(114), particular-to-class error information
value described in device class explanation to this property is set.
When ResultCode is another value, Service Object can set particular-to-SO value to this
property. These values have meaning only when Application processes them adding
particular-to-SO values.
This OPOS Control has the following values.
Constant Name(Contents) Details ResultCodeExtended
201 OPOS_EPTR_COVER_OPEN
203 OPOS_EPTR_REC_EMPTY
206 OPOS_EPTR_TOOBIG
207 OPOS_EPTR_BADFORMAT
Printer Cover is open.
To recover from Error,
close the cover. In this case,
you don't have to make
OPOS disable,
ReleaseDevice, Close. If
Cover opens in printing,
after closing cover, the
not-yet-printed data will be
printed. However, there is
the possibility of
interrupted printing space
among the printing data.
Run-out-of-receipt-paper.
To recover from error, feed
receipt paper. At this time,
there is no need to make
OPOS disable, and
ReleaseDevice, Close. If
run-out-of-paper happens in
printing, the printing data
not yet printing will be
printed after feeding receipt
paper.
Bitmap is too big for the
Printer to process.
Check the bitmap file.
The format is not correct as
a bitmap file.
There is a possibility that
the file name is not correct
or the contents of the file
are corrupt.
78
Page 87

Constant Name(Contents) Details ResultCodeExtended
281 OPOS_FIRMWARE_BAD_FILE
10001 OPOS_FIT_EPTR_BLACKMARK
10003 OPOS_FIT_EPTR_FATAL
10006 OPOS_FIT_EPTR_OVERHEAT
10008 OPOS_FIT_EPTR_CUTTERJAM
The format is not correct as
a firmware file.
There is a possibility that
the file name is not correct
or the contents of the file
are corrupt.
Black Mark Sensor Error
happens. There is the
possibility that paper
cannot respond to Black
Mark. At such time, there is
no need to make OPOS
disable, and ReleaseDevice,
Close. Change the receipt
to the one responding to
Black Mark. *It does not
occur when Black Mark
Error Sensor is not on.
(Check Black Mark
Enable.)
Fatal error occurs in Printer.
There is no recover way.
Do OPOS Close.
Printer Header Overheat
Error happened. To recover
from the error, leave it for a
while until the head
temperature cools down
and the error does not occur
again. At such time, there is
no need to make OPOS
disable, and
ReleaseDevice, Close. If
Head Overheat occurs in
printing, the printing data
not yet printing will be
printed after the head
temperature recovery.
However, there is the
possibility of interrupted
space of printing of the
printing data.
Cutter Jam Error happened.
To recover from the error,
open the cover and remove
the cause (such as the
jammed paper), and close
the cover.
If the cover does not open,
follow procedure on Printer
UsersManual.
79
Page 88

ServiceObjectDescription Property
Syntax
BSTR ServiceObjectDescription;
Remarks
" POS Printer OPOS Service Object" is set.
This property is initialized by the Open method
ServiceObjectVersion Property
Syntax
LONG ServiceObjectVersion;
Remarks
"1013XXX" is set. Holds the Service Object version number. (XXX varies depending on
the time the Control Object is distributed.) This property is initialized by the Open
method.
State Property
Syntax
LONG State;
Remarks
It shows the present state of Control.
Value Meaning
OPOS_S_CLOSED(1) Control is closed. (Default)
OPOS_S_IDLE(2) Control is in normal state and not busy.
OPOS_S_BUSY(3) Control is in normal state and busy because it is
outputting.
OPOS_S_ERROR(4) Error is reported, and if you want to restart usual I/O,
Application must return Control into normal state.
This property is always readable.
80
Page 89

4.4. Common Methods
The following section describes the methods provided commonly to the POS printer.
CheckHealth Method
Syntax
LONG CheckHealth (LONG Level);
Level parameter shows the type of health check executed with device. The following
values can be assigned.
Value Meaning
OPOS_CH_INTERNAL(1) Performs on line check. The result is set to the
CheckHealthText property as follows:
When the POS Printer is connected to POS and the
power is turned on, "Internal HCheck: Successful" is
set in the CheckHealth property.
When the POS Printer is not connected to POS, or the
power is turned off, "Internal HCheck: OFF/OFFLINE"
is set in the CheckHealth property.
Returns OPOS_SUCCESS(0).
OPOS_CH_EXTERNAL(2) It is not supported with this OCX..
"Internal HCheck: NOT Supported" is set in the
CheckHealth property.
Returns OPOS_ILLEGAL(106).
OPOS_CH_INTERACTIVE(3) It is not supported with this OCX..
"Internal HCheck: NOT Supported" is set in the
CheckHealth property.
Returns OPOS_ILLEGAL(106).
Remarks
It is called at the time of device condition test. The result of this method is contained in
CheckHealthText Property. CheckHealth Method is always synchronous.
81
Page 90

Return V
alue
Any of the fol
Value Meaning
OPOS_SUCCESS(0) It shows that Health Check Procedure starts properly
OPOS_E_ILLEGAL(106) Level parameter not supported is assigned.
OPOS_E_NOHARDWARE(107) After assigning and executing
OPOS_E_BUSY(113) It cannot be executed while Output is ON.
The others Refer to the items of ResultCode.
lowing values will be returned and be contained in ResultCode.
and that, when confirmed that, the device is working
properly. However you cannot decide about its
properness until you see the result of the test.
OPOS_CH_INTERNAL(1), it is Offline.
82
Page 91

ClaimDevice Method
Syntax
LONG ClaimDevice (LONG Timeout);
Timeout Parameter shows maximum waiting time (in ms.) till it acquires exclusive access
right.
In case of zero, even if it cannot acquire the Device Exclusive Access Method, it returns
the result immediately.
If OPOS_FOREVER(-1) is set, Method waits as long as till it can acquire exclusive
access right.
Remarks
This method is called when exclusive access is required to device.
POS Printer Device cannot be used without acquiring exclusive access right.
In case of success, Claimed Property is set to TRUE.
Return Value
If ClaimDevice Method is executed, it establishes connection to POS Prin ter Device, and
confirms the process possibility. If the process is possible, it requires particular data and
ClaimDevice Method, and ends normally.
One of the following values will be returned and contained to ResultCode Property.
Value Meaning
OPOS_SUCCESS(0) Exclusive access right is confirmed. Claimed Property
is TRUE. If this application has already accessed the
device exclusively, it is returned, too.
OPOS_E_ILLEGAL(106) Unavailable Timeout Parameter is assigned.
OPOS_E_TIMEOUT(112) Other applicatio n tries to access the device exclusively
and waits for being released. But Timeout Time (in ms.)
has passed. Or, POS Printer Device does not become
POS-Printer-Device-Process-Possible State even after
Timeout Time (in ms.) passes.
OPOS_E_EXTENDED(114) Refer to the ResultCodeExtended property.
83
Page 92

ClearOutput Method
Syntax
LONG ClearOutput ();
Remarks
It is called when to clear all the output devices buffered by asynchronous issue of each
method of PrintNormal, CutPaper, RotatePrint, PrintBarCode, PrintBitmap,
TransactionPrint. Also, it does release when it is in rotation mode or in batch processing
mode by RotatePrint Method or TransactionPrint Method.
Pending Output Error Event (which is in case that FreezeEvents are wanting for being set
to FALSE) is also cleared.
Return Value
Following values will be returned and contained to ResultCode Property.
Value Meaning
OPOS_SUCCESS(0) Output is cleared.
OPOS_E_FAILURE(111) Device is accessed exclusively by other process.
The others Refer to items of ResultCode.
Close Method
Syntax
LONG Close ();
Remarks
It is called when to release Device and its resource.
If DeviceEnabled Property is TRUE, Device is forced to disable.
If Claimed Property is TRUE, at first, exclusive access will be released.
Don't execute at the time of Event Processing. (within Event Handler)
Return Value
One of the following values will be returned and contained to ResultCode Property.
Value Meaning
OPOS_SUCCESS(0) Device is disabled and closed.
OPOS_E_BUSY(113) Asynchronous processing is under way.
The others Refer to items of ResultCode.
84
Page 93

CompareFirmwareVersion Method
Syntax
LONG CompareFirmWareVersion (String FirmWareFileName, Long result);
Parameter Meaning
FirmWareFileName Holds the name of the firmware file whose version is to
be compared against the firmware version of the device.
result Returns the result of the comparison..
OPOS_CFV_FIRMWARE_OLDER (1)
Indicates that the version of one or more of the
firmware files is older than the firmware in the device.
OPOS_CFV_FIRMWARE_SAME(2)
Indicates that the versions of all of the firmware files
are the same as the firmware in the device.
OPOS_CFV_FIRMWARE_NEWER(3)
Indicates that the version of one or more of the
firmware files is newer than the firmware in the device.
OPOS_CFV_FIRMWARE_UNKNOWN(5)
Indicates that a relationship between the two firmware
versions could not be determined.
Remarks
This method determines whether the version of the firmware contained in the specified file
is newer than, older than, or the same as the version of the firmware in the POS printer.
The version of the firmware is represented by the value of first six successive numbers
found in the FirmWareFileName parameter. For example, when "01rm012345.hx5" is set
in the FirmWareFileName parameter, "012345" is recognized as the version of the
firmware file to be compared. The version of the POS printer can be acquired by sending
the command to the POS printer every time this method is executed.
In the first step of comparison, first four places in the version acquired from the POS
printer and first four places in the version of the firmware file are compared as the
character strings. When those are different, OPOS_CFV_FIRMWARE_UNKNOWN(5) is
set in the result parameter.
When the first four places are equal, then last two places are compared as the values.
When the version of the firmware file is smaller, OPOS_CFV_FIRMWARE_OLDER (1)
is set. When the version of the POS printer is smaller,
OPOS_CFV_FIRMWARE_NEWER(3) is set. When those are equal,
OPOS_CFV_FIRMWARE_SAME(2) is set.
85
Page 94

Return Value
One of the following values will be returned and contained to ResultCode Property.
Value Meaning
OPOS_SUCCESS(0) Compare firmware successful.
OPOS_E_BUSY(113) Specified argument is invalid as the firmware file name.
Other Values Refer to ResultCode.
86
Page 95

DirectIO Method
Syntax
LONG DirectIO (LONG Command, LONG* pData, BSTR* pString);
Remarks
In this OPOS, synchronous/asynchronous transmission of binary character string, and
conversional synchronous/asynchronous transmission of hexadecimal character string are
supported.
Synchronous transmission of binary character string
Command
OPOS_FIT_DIO_BIN_SYNC(0)
pData
pString
Function
OPOS_FIT_DIO_BIN_IMMIDIATE(1)
OPOS_FIT_DIO_BIN_REALTIME(2)
No
t in use
IN Binary character stri
It synchronou
not influenced by present BinaryConvertion (Equivalent to
OPOS_BC_NONE transmission). With this command, it becomes
possible to directly transmit command to POS Printer
Binary Character String is the following format.
&H00 - &Hff(&HFF)
The following are set when to transmit Partial Cut Command (1BH
6DH) to the printer side.
"&H1B&H6D" (Small letters in the alphabet except "&H" are
acceptable)
sly transmits binary character string to POS Printer,
ng
It ignores the characters not admittable as HEX.
Example:
When "ABCD&H00EFG" is transmitted, only "0x00" is
transmitted to Printer side.
87
Page 96

Conversional
Command
pData
pString
Function
synchronous transmission of hexadecimal character string
OPOS_FIT_DIO_HEX_SYNC(5)
Not y
IN hexadecim
It synchronou
Printer, not influenced by present BinaryConvertion (Equivalent
to OPOS_BC_NONE transmission). With this command, it
becomes possible to directly transmit command to POS Printer
One byte character is displayed in 2 byte character.
Charact ers ranging fro m '0' – '9', 'A' – 'F', and 'a' – 'f' are available.
If there is any character except the above, it returns
OPOS_E_ILLEGAL1(106) without transmitting the command.
used
et
al character string
sly transmits hexadecimal character string to POS
&H00 -> '00'
88
Page 97

Asynchron
Command
pData
pString
Function
ous transmission of binary character string
OPOS_FIT_DIO_BIN_ASYNC(6)
Not yet used
IN Binary character string
It asynchronou
not influenced by present BinaryConversion (Equivalent to
OPOS_BC_NONE transmission). With this command, it becomes
possible to directly transmit command to POS Printer. After
execution OutputCompleteEvent is up.
Binary character string is just like the following format.
&H00 - &Hff(&HFF)
The following are set when to transmit Partial Cut Command (1BH
6DH) to the printer side.
sly transmits binary character string to POS Printer,
"&H1B&H6D" (Small letters in the alphabet except "&H" are
acceptable)
It ignores characters not admittable as HEX.
Example:
When "ABCD&H00EFG" is transmitted, only "0x00" is
transmitted to Printer side.
89
Page 98

Conversional
Command
pData
pString
Function
asynchronous transmission of hexadecimal character string
OPOS_FIT_DIO_HEX_ASYNC(7)
Not yet used
IN
hexadecim
It asynchronously transmits hexadecimal character string to POS
Printer, not influenced by present BinaryConvertion (Equivalent
to OPOS_BC_NONE transmission). With this command, it
becomes possible to directly transmit command to POS Printer.
After execution OutputCompleteEvent is up.
One byte character is displayed in 2 byte character.
&H00 -> '00'
Characters ranging from '0' - '9', 'A' - 'F', and 'a' - 'f' are available.
If there is any character except the above, it returns
OPOS_E_ILLEGAL1(106) without transmitting the command.
al character string
90
Page 99

Setting of error correctio
Command
pData
pString
Function
n level of QR code
OPOS_FIT_DIO_SET_QRERRORLV(20)
IN error correction level of QR code
Not y
et used
Specifies error correction level of QR code.
The default value is “0”. The default value is set when
DeviceEnabled=True is executed.
Value Error correction level
0 Level L(7%)
1 Level M(15%)
2 Level Q(25%)
3 Level H(30%)
G
etting of erro
Command
pData
pString
Function
r correction level of QR code
OPOS_FIT_DIO_
OUT error correction level of QR code
Not yet used
The error correction level of the QR code is returned.
Error correction level (0-3) of the QR code is set to pData.
GET_QRERRORLV(21)
91
Page 100

Setting of error correctio
Command
pData
pString
Function
n level of Micro QR code
OPOS_FIT_DIO_SET_MICROQRERRORLV(22)
IN error correction level of Mi
Not y
et used
Specifies error correction level of Micro QR code.
The default value is “0”. The default value is set when
DeviceEnabled=True is executed.
Value Error correction level
0 Level L(7%)
1 Level M(15%)
2 Level Q(25%)
cro QR code
G
etting of erro
For
all the callin
returns OPOS_E_ILLEGAL(106) And DirectIO Method is buffered in TransactionPrint
and RotatePrint. In this case, as for synchronous/asynchronous transmission of DirectIO
Method, its synchronous/asynchronous execution depends on synchronous/asynchronous
execution of TransactionPrint Method and RotatePrint Method
r correction level of Micro QR code
Command
pData
pString
Function
OPOS_FIT_DIO_
OUT error correction level of Micro QR c
Not yet used
The error correction level of the Micro QR code is returned.
Error correction level (0-2) of the Micro QR code is set to pData.
g after Enable, if these values except command are set to Command, it
GET_MICROQRERRORLV(23)
ode
92
 Loading...