


LE840/LE850
Network Tool Manual
Technical Reference

Table of Contents
INTRODUCTION 1
SUPPORTED PRINTERS .......................................................................................................................................... 1
FEATURES............................................................................................................................................................. 1
NOTATION ............................................................................................................................................................. 1
USAGE LIMITATION OF THE PRODUCT...................................................................................................................... 2
SCREENS USED IN THIS DOCUMENT ....................................................................................................................... 3
TRADEMARK AND COPYRIGHT ................................................................................................................................3
OPERATIONAL CONDITIONS .................................................................................................................................... 4
Software (Operation System) .......................................................................................................................... 4
Hardware ......................................................................................................................................................... 4
DISCLAIMER .......................................................................................................................................................... 4
INSTALLATION 6
CAUTIONS FOR INSTALLATION................................................................................................................................. 6
When the User Uses the Product.................................................................................................................... 6
When Installing the Product on Windows XP/Server 2003 Computer ............................................................ 6
How to Install SNMP Service........................................................................................................................... 6
INSTALLATION PROCEDURE .................................................................................................................................... 8
Installation Procedure (for the Administrator) – Full Installation of the Product .............................................. 8
Installation Procedure (for the Administrator) – Downloader Only ................................................................10
Installation Procedure (for the User) ..............................................................................................................11
MODIFICATION/REPAIR OF INSTALLATION SETTING AND UNINSTALLATION ................................................................ 13
Modification of Installation Setting................................................................................................................. 13
Repair of Installation Setting.......................................................................................................................... 14
Uninstallation of the Product ......................................................................................................................... 15
SURVEILLANCE TOOL (NET ADMIN) 17
SURVEILLANCE TIMING ........................................................................................................................................ 17
TRAP NOTIFICATION............................................................................................................................................. 17
CAUTIONS FOR USING TRAP NOTIFICATION ........................................................................................................... 17
Clearing the Block on Trap Notification (Windows Firewall) ......................................................................... 18
HOW TO START ................................................................................................................................................... 21
Default Startup............................................................................................................................................... 21
STAR TI NG F RO M [LOGIN] SCREEN......................................................................................................................... 22
Login in Administrator Mode.......................................................................................................................... 22
Login in User Mode ....................................................................................................................................... 23
ADDITION OF PRINTERS TO PRINTER LIST ON LIST VIEW SCREEN........................................................................... 24
By Using Search Function............................................................................................................................. 24
By Specifying IP Address .............................................................................................................................. 25
EXIT FROM SURVEILLANCE TOOL .......................................................................................................................... 26
DETAILS OF SCREEN ............................................................................................................................................ 27
List View (Net View) ...................................................................................................................................... 27
Each Setting Screen of List View .................................................................................................................. 29
Printer Monitor ............................................................................................................................................... 37
Setting Screens of Printer Monitor ................................................................................................................ 43
PRINTER SETTING (NET CONFIG) 46
IMPORTANT NOTICE ON THIS FEATURE.................................................................................................................. 46
OPERATION FLOW ............................................................................................................................................... 46
Starting Printer Setting................................................................................................................................... 46
Starting Printer Setting from Printer Monitor Screen ..................................................................................... 48
DETAILS OF SCREEN DISPLAYED AND USED BY THIS FEATURE ............................................................................... 49
Printer Setting................................................................................................................................................ 49
PRINTER SETTING – DETAILS OF TAB.................................................................................................................... 51
[Maintenance] Tab ......................................................................................................................................... 51
[General] Tab ................................................................................................................................................. 51
[Device] Tab................................................................................................................................................... 52
[Option] Tab ................................................................................................................................................... 52
[Option] Tab – Setting for SNMP ................................................................................................................... 52
[Adjust] Tab.................................................................................................................................................... 53

Positional Adjustment Using [Adjust] Tab ...................................................................................................... 53
[Network] Tab................................................................................................................................................. 56
DOWNLOADER (NET LOADER) 58
IMPORTANT NOTICE ON THIS FEATURE.................................................................................................................. 58
Installing the Downloader Only...................................................................................................................... 58
When the User Installs the Product............................................................................................................... 58
When Connecting Supported Printers to Computer via USB........................................................................ 58
When Connecting Supported Printers to LAN............................................................................................... 58
When Supported Printer is in Use ................................................................................................................. 59
TYPES OF DOWNLOAD FILES ................................................................................................................................59
OPERATION FLOW ............................................................................................................................................... 60
Starting Downloader Using Surveillance Tool................................................................................................ 60
Starting Downloader Using [Start] Button...................................................................................................... 61
Downloading Operation................................................................................................................................. 62
SCREENS DISPLAYED AND USED BY THIS FEATURE ............................................................................................... 64
[Printer Selection] Screen.............................................................................................................................. 64
[Add Printer…] Screen .................................................................................................................................. 64
Downloader Main Screen .............................................................................................................................. 65
[Select file to download] Screen .................................................................................................................... 65
[Download] Screen ........................................................................................................................................ 65
[Customizing] Screen .................................................................................................................................... 66
[About Net Loader] Screen (Version Information) ......................................................................................... 66
DOWNLOAD RESULT FILE..................................................................................................................................... 67
Example of Download Result File ................................................................................................................. 67

Introduction
Thank you for purchasing the ‘Network Tool’, a network surveillance tool for the label printers.
This document gives you a general description of the ‘Network Tool’ (hereinafter referred to as “the Product”)
including the installation procedure and features.
Supported Printers
The Product supports the following printers:
LE840
LE850
Features
The Product is software which allows you to use the surveillance, setting, and download features of the
Supported Printers under Windows XP (32 bit/64 bit), Windows Server 2003 (32 bit/64 bit), Windows Vista (32
bit/64 bit), Windows Server 2008 (32 bit/64 bit), Windows 7 (32 bit/64 bit), Windows 8 (32 bit/64 bit
Server 2008 R2 environment.
Please note the Product is targeted for a user who is familiar with the internal setting of the Supported Printers.
) or Windows
Notation
Names of menus, screens, icons, buttons, tabs, and items are enclosed in square brackets ([ ]).
For example: Click the [OK] button.
Wordings shown on the computer monitor and the LCD message display of your printer are enclosed in
double quotation marks (“ “).
For example: “ON LINE”.
Titles of the chapters and sections to be referred to are enclosed in single quotation marks (‘ ‘).
For example: Please refer to ‘Introduction’.
In this document, users are divided into two types:
Administrator (hereinafter referred to as “the Administrator”)
who can use all features of the Product and start the Surveillance Tool by entering an Administrator
password on the [Login] screen.
User (hereinafter referred to as “the User”)
who can only monitor printer statuses using the Surveillance Tool of the Product. To start the
Surveillance Tool from the [Login] screen, the User must select [User Mode].
1
Usage Limitation of the Product
The Product is software that is intended to be used by the Administrator who is familiar with the internal setting of
the Supported Printers and general-purpose printers. The User, however, can use the Product by making
startup setting (startup in User Mode).
The table below shows the available features when the Surveillance Tool is started in Administrator mode and in
User mode.
OK: Available, NG: Not available
Started in
Feature Description
Surveillance Tool (Net Admin)
Login Allows to enter password at startup. OK OK
Search Adds printers by using the Search function. OK OK
Add Printer Manually adds printers. OK OK
List View Shows a printer status on a printer list. OK OK
View Options Selects items to be displayed. OK OK
Create/remove Group Creates/removes a group. OK OK
Web Browser Accesses web screen which shows printer
information.
Search Options Specifies search conditions. NG OK
Management Options Makes setting for Community properties and
allows to change password.
Surveillance Options Makes setting for surveillance method, timer,
and SMTP.
Log Options Makes setting for log output. NG OK
Head Check Performs a head check. OK OK
Surveillance Monitors the printer under the conditions set in
the Surveillance Options screen.
Printer Monitor Displays the [Printer Monitor] screen. OK OK
Printer Setting Displays the [Printer Setting] screen. NG OK
Download Starts the Downloader of printer firmware. NG OK
OK: Available, NG: Not available
Feature Description
Printer Monitor
[DEVICE] tab Displays detailed setting of each printer. OK OK
[JOB] tab Displays information of a job being issued for
each printer.
[NETWORK] tab Displays network information for each printer. OK OK
Surveillance Monitors the printer under the conditions set in
the Surveillance Options screen.
Remote Key Remotely operates the printer using key
operation of the computer.
Head Check Performs a head check. OK OK
Printer Setting Makes printer setting. NG OK
Management Info
Property
Makes setting for printer management
information.
User
mode
NG OK
NG OK
NG OK
OK OK
User
mode
OK OK
OK OK
OK OK
NG OK
Administrator
mode
Started in
Administrator
mode
2

Note: Instead of starting the download function using the Surveillance Tool, the download function can be
started from the [Start] button in the task bar. However, Our Company shall not be liable for any
outcome resulted from the use of the download function when the function is started from the [Start]
button.
When you are installing the Product on the computer which the User uses, please follow the instruction
in the section, ‘Installation Procedure (for the User)‘.
Screens Used in This Document
Screens shown in this document are examples used for explaining operations. Unless otherwise specified, an
operation system used in this document is Windows 7. Please note that the screens shown may differ
depending on your usage environment and conditions.
Trademark and Copyright
Microsoft and Windows are trademarks of Microsoft Corporation in the United States and other countries.
Other company and product names may be registered trademarks or trademarks of others.
Each company’s registered trademarks and trademarks are not marked with TM or ®.
This document uses the following abbreviations.
Microsoft® Windows® XP Home Edition and Microsoft® Windows® XP Professional: Windows XP
Microsoft® Windows® Server 2003, Standard Edition and Microsoft® Windows® Server 2003,
Enterprise Edition: Windows Server 2003
Microsoft® Windows® Vista Ultimate and Microsoft® Windows® Vista Enterprise and
Microsoft® Windows® Vista Business and Microsoft® Windows® Vista Home Premium and
Microsoft® Windows® Vista Home Basic: Windows Vista
Microsoft® Windows® Server 2008, Standard Edition and Microsoft® Windows® Server 2008,
Enterprise Edition and Microsoft® Windows® Server 2008, Datacenter Edition and
Microsoft® Windows® Web Server 2008 Edition: Windows Server 2008
Microsoft® Windows® 7 Ultimate and Microsoft® Windows® 7 Enterprise and
Microsoft® Windows® 7 Professional and Microsoft® Windows® 7 Home Premium: Windows 7
Microsoft® Windows® Server 2008 R2, Standard Edition and Microsoft® Windows® Server 2008 R2,
Enterprise Edition and Microsoft® Windows® Server 2008 R2, Datacenter Edition and
Microsoft® Windows® Web Server 2008 R2 Edition: Windows Server 2008
Microsoft® Windows® 8 Enterprise operating system and Microsoft® Windows® 8 Professional operating
system and Microsoft® Windows® 8 operating system: Windows 8.
The Product was developed using a technology of Hewlett-Packard.
Copyright of Hewlett-Packard in the United States and other countries is expressed as:
Copyright © 1999 Hewlett-Packard Company All Rights Reserved.
3

Operational Conditions
The Product can be used under the following system and environmental requirements.
Software (Operation System)
English operation systems of:
Windows XP (32 bit/64 bit), Windows Server 2003 (32 bit/64 bit), Windows Vista (32 bit/64 bit), Windows
Server 2008 (32 bit/64 bit) , Windows 7 (32 bit/64 bit), Windows 8 (32 bit/64 bit), or Windows Server 2008
R2.
Hardware
A DOS/V (IBM AT compatible) machine must be used under the above Windows operation system and
mandatory or recommended conditions explained in the table below.
Mandatory Conditions Recommended Conditions
CPU
Memory 64 MB or more 256 MB or more
HDD Free space of 10 MB or more
FDD 3.5-inch FDD
Note: Under the environment where more than one network connection is enabled, the Product may not operate
properly. Please enable only one network connection.
Intel® Pentium® II 400 MHz or higher Intel® Pentium® III 1 GHz or higher
Disclaimer
The Product allows the Administrator/User to monitor printer statuses, check/change printer setting, and
download a setting file on the computer monitor for the Supported Printers. When an invalid setting is
made for the Supported Printers using the Product, they may malfunction and may not be used
afterwards.
The Product is intended to be used by the Administrator who is familiar with the internal setting of the
Supported Printers and general-purpose printers. The Setting Tool and Downloader must be used by
the Administrator or under instructions of the Administrator.
Our Company shall not be liable for any outcome resulted from a failure to follow the above instructions
(both the Product and the Supported Printers).
4

1. Installation
Installation···············································································································································6
Cautions for Installation .....................................................................................................................6
When the User Uses the Product .................................................................................................6
When Installing the Product on Windows XP/Server 2003 Computer..........................................6
How to Install SNMP Service ........................................................................................................6
Installation Procedure.........................................................................................................................8
Installation Procedure (for the Administrator) – Full Installation of the Product ............................ 8
Installation Procedure (for the Administrator) – Downloader Only..............................................10
Installation Procedure (for the User) ...........................................................................................11
Modification/Repair of Installation Setting and Uninstallation ........................................................... 13
Modification of Installation Setting ..............................................................................................13
Repair of Installation Setting ....................................................................................................... 14
Uninstallation of the Product .......................................................................................................15
5
Installation
The Product consists of [Surveillance Tool], [Printer Setting], and [Downloader].
Cautions for Installation
When the User Uses the Product
The Product was designed based on the assumption that it is used by the Administrator. If you are installing the
Product on the computer which the User uses, install the Product following the instructions in the section
‘Installation Procedure (for the User)‘.
You can install and use the Downloader (Net Loader) only, but please note that the Downloader must be used by
the Administrator or under instructions of the Administrator.
When Installing the Product on Windows XP/Server 2003 Computer
About SNMP Service
When you are using the Product on the Windows XP/Server 2003 computer, the following Windows
components must be installed on the system.
Select the components from [Management and Monitoring Tools].
WMI SNMP provider
Simple Network Management Protocol (SNMP)
Install the SNMP Service following the instructions in the section ‘How to Install SNMP Service‘. Before
starting the installation, please prepare the Windows XP/Server 2003 installation CD-ROM which may be
required during the installation.
How to Install SNMP Service
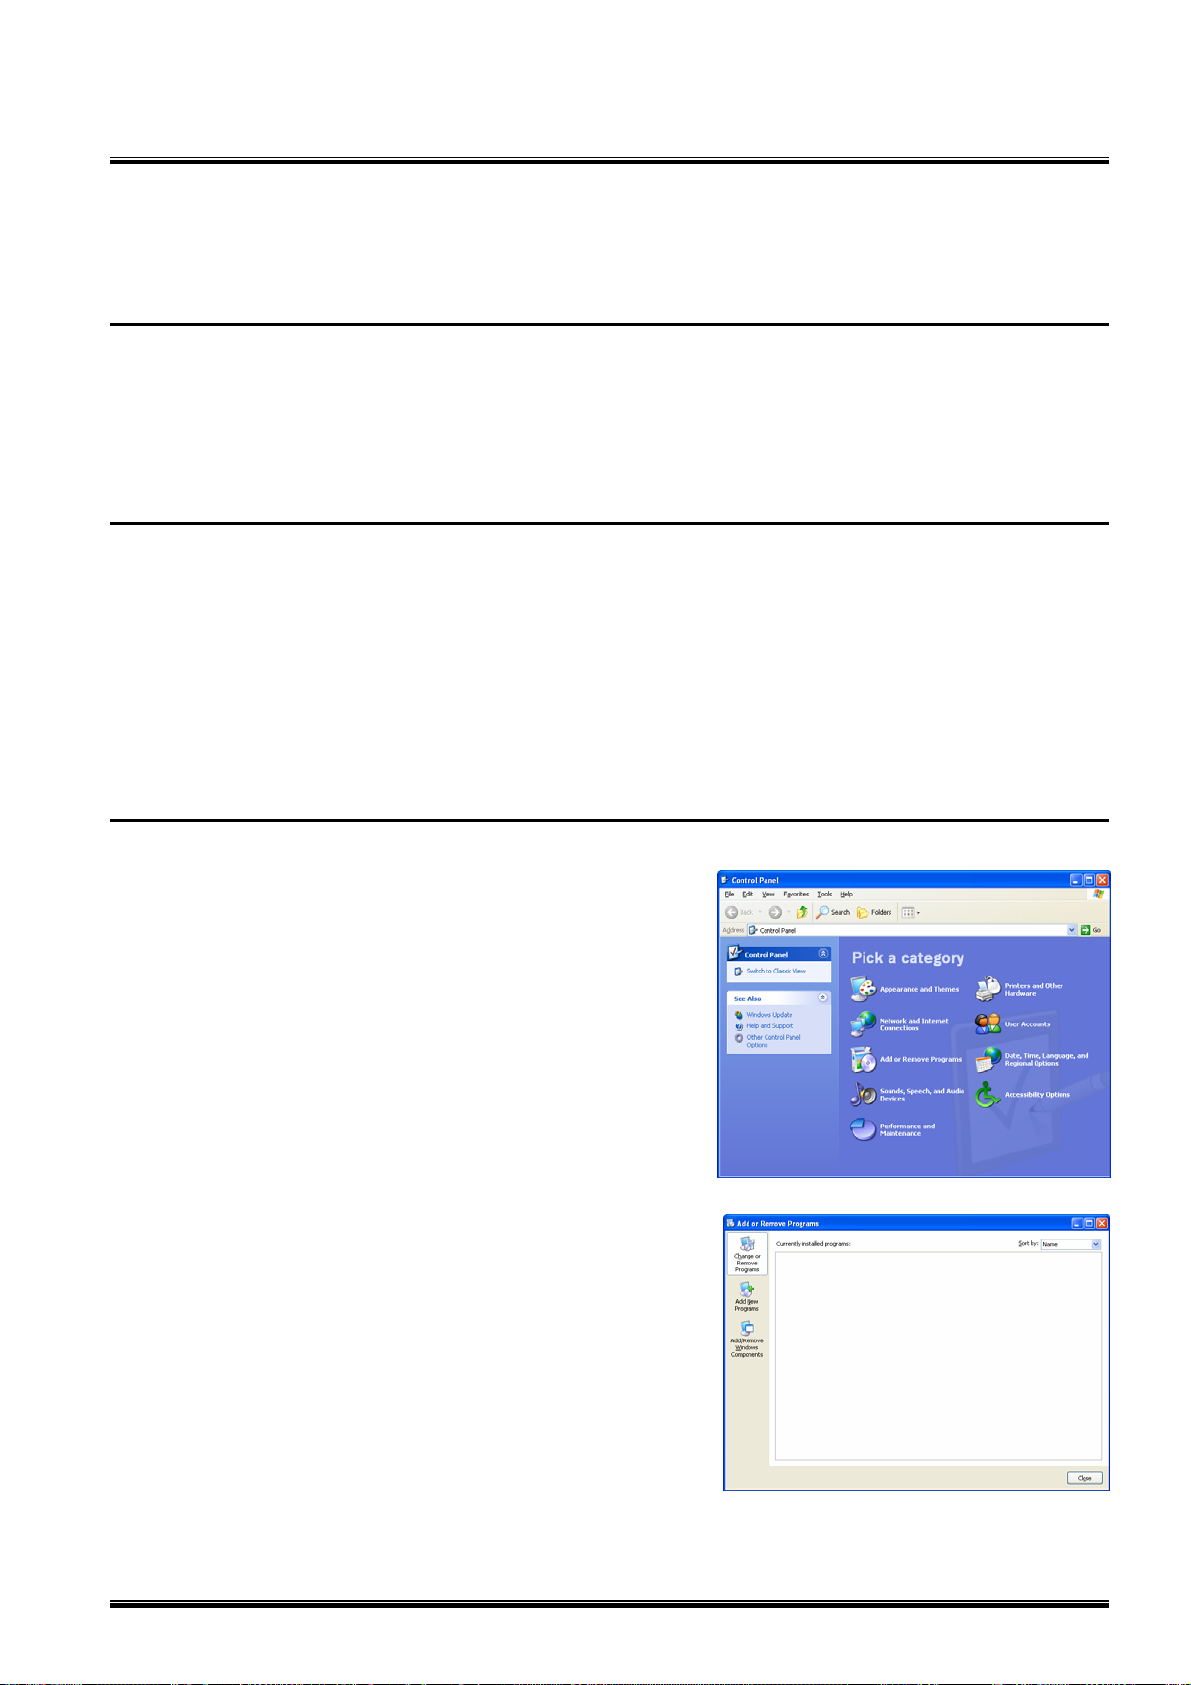
1. Click: [Start] – [Control Panel] –
[Add or Remove Programs].
2. The [Add or Remove Programs] screen appears.
Click [Add/Remove Windows Components].
6
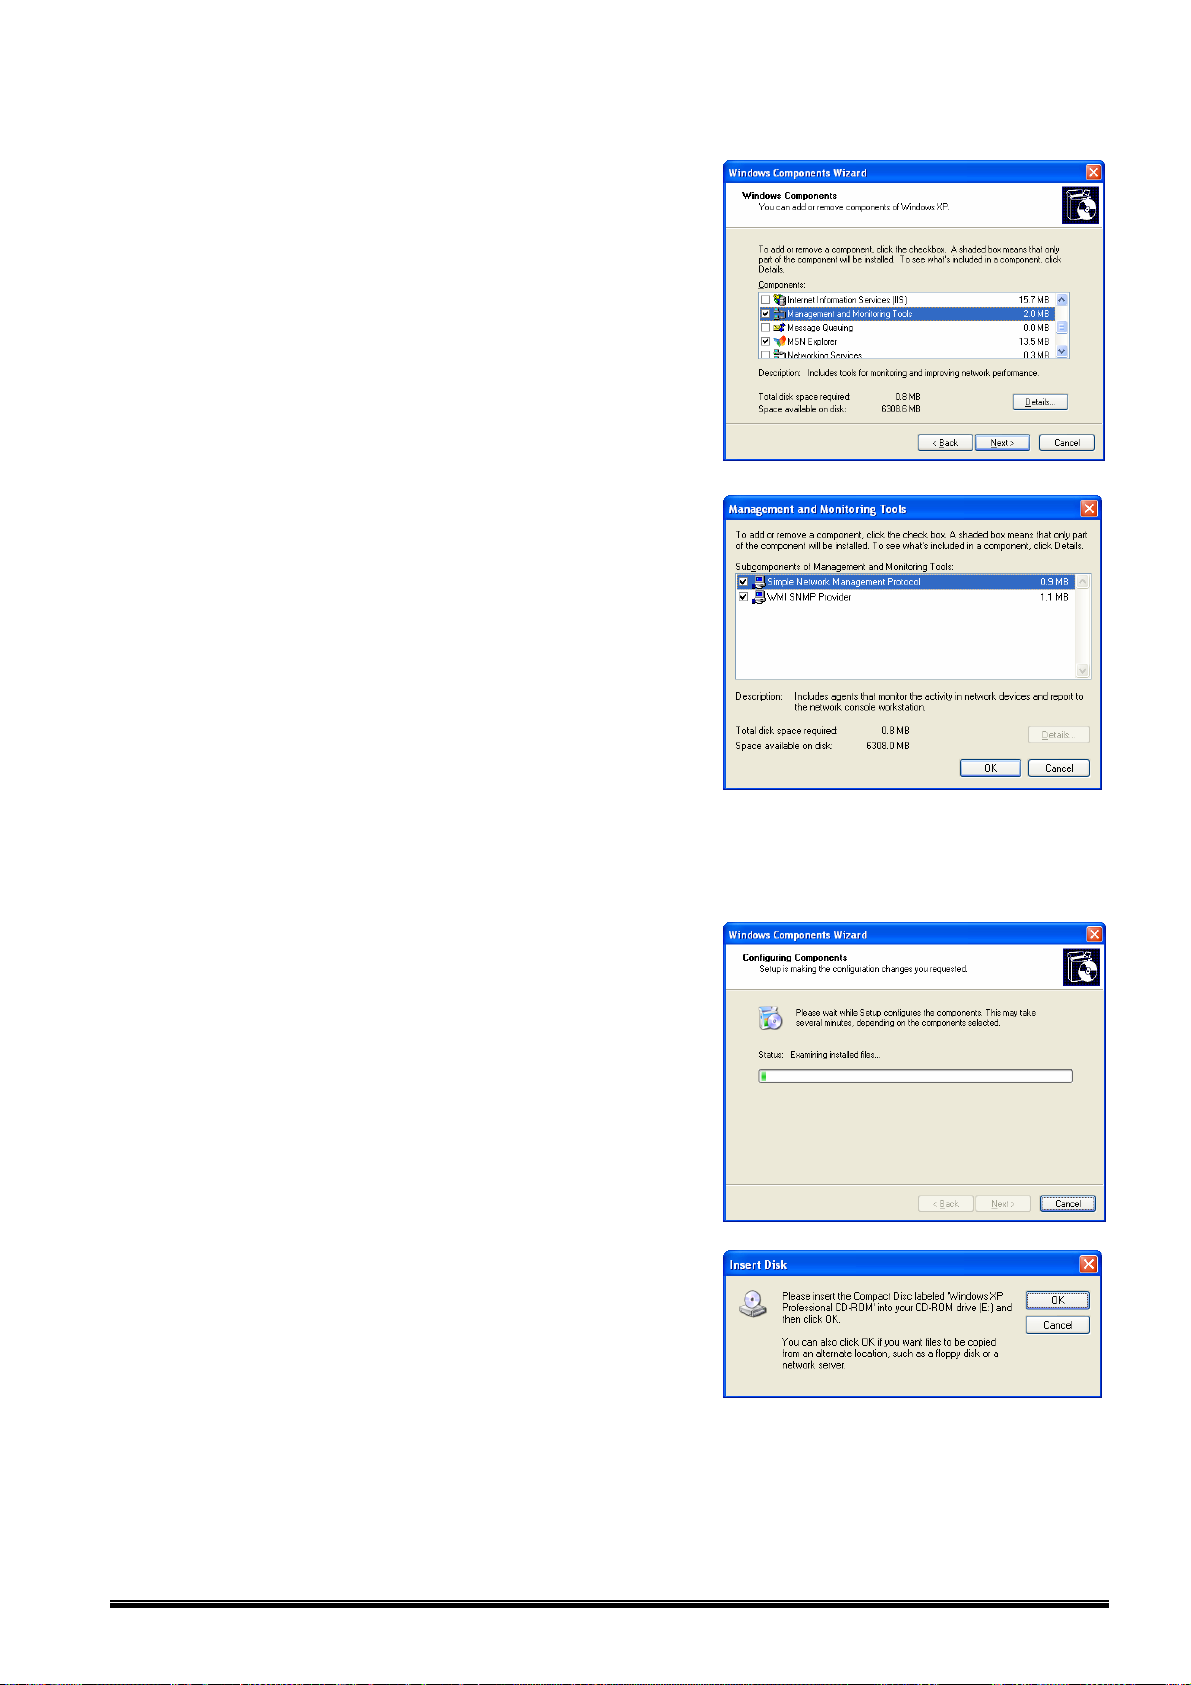
3. The [Windows Components Wizard] screen appears.
Check [Management and Monitoring Tools], then click
[Details…].
4. The [Management and Monitoring Tools] screen
appears. Check [WMI SNMP Provider] and
[Simple Network Management Protocol], then click
[OK].
5. The [Management and Monitoring Tools] screen closes. Click [Next] on the [Windows Components
Wizard] screen.
6. The [Configuring Components] screen appears and
the installation begins.
Follow the instructions on the screen to complete the
installation.
Before starting the installation, prepare the Windows
installation CD-ROM which may be required during the
installation.
7
Installation Procedure
Installation Procedure (for the Administrator) – Full Installation of the Product
This Installation Procedure guides you to install all features of the Product.
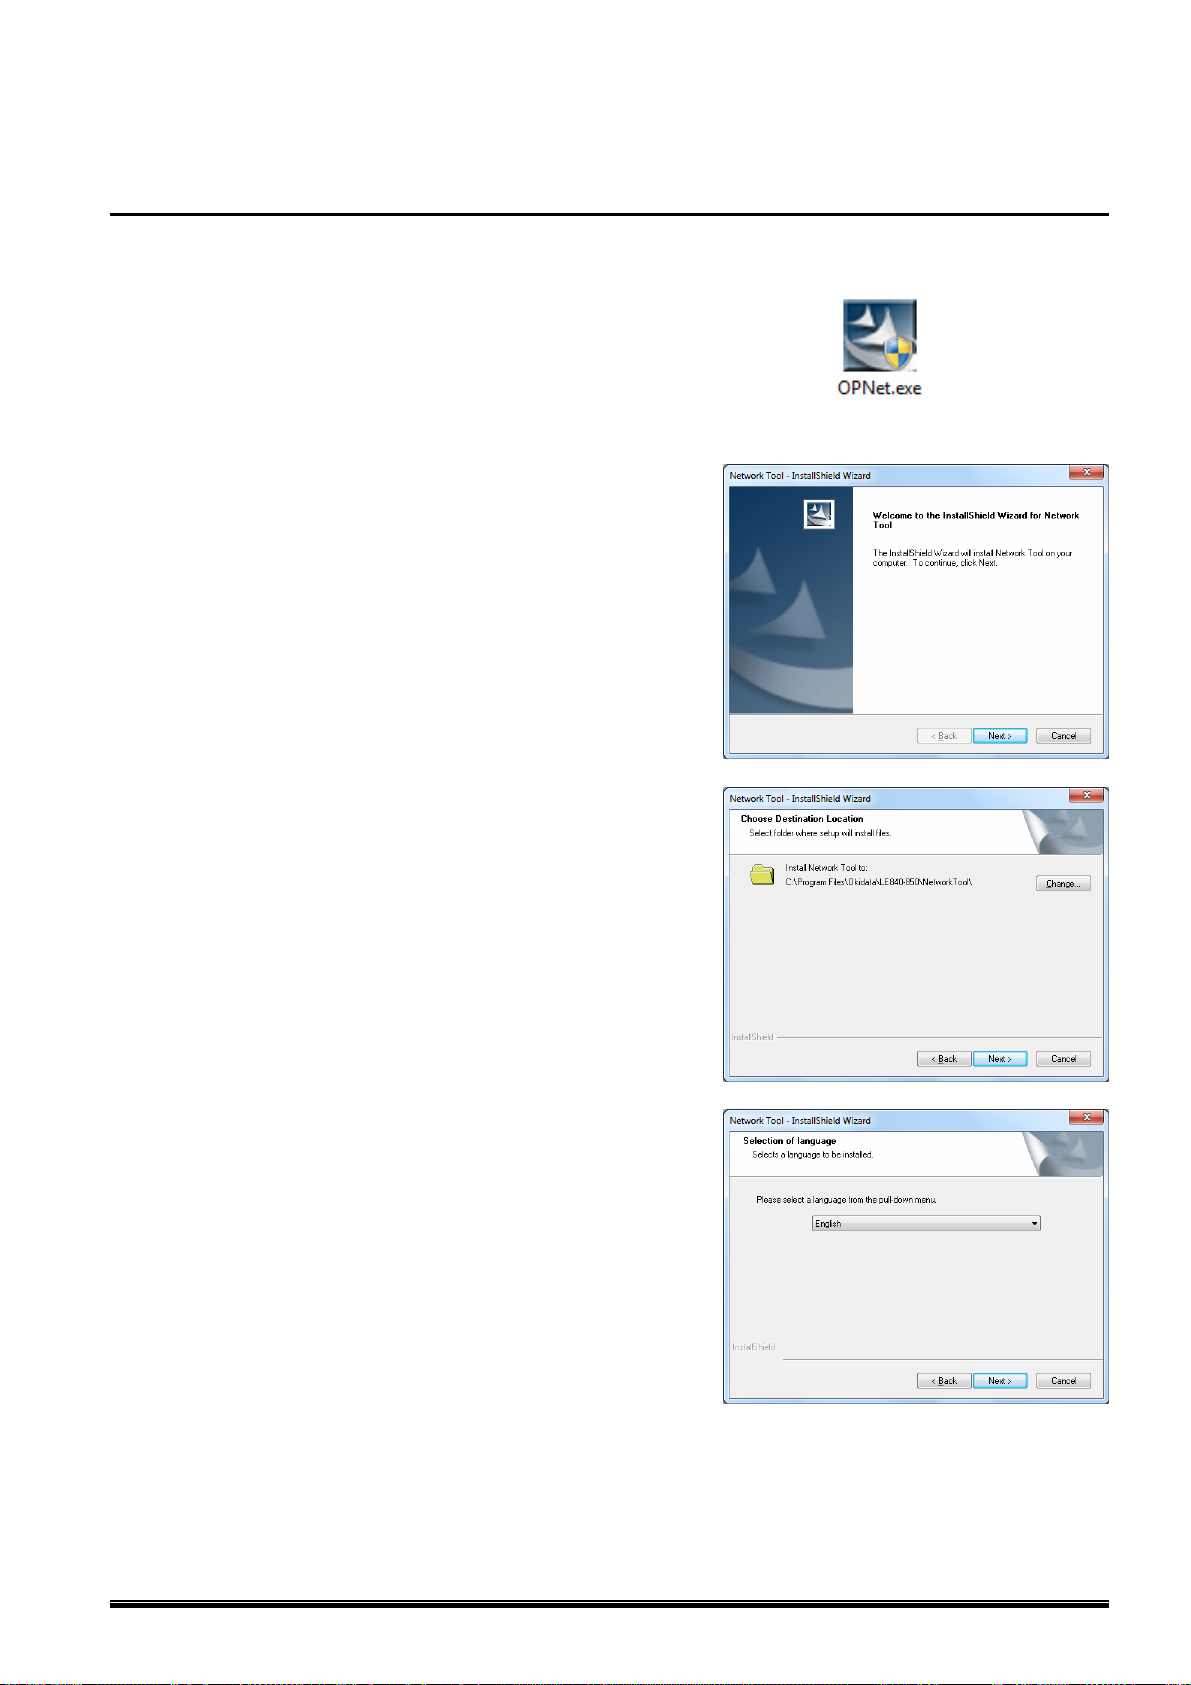
1. Double-click the setup program (OPNet.exe) of the
Product.
Note: With Windows Vista/Server 2008/7/8/Server 2008 R2,
the User Account Control dialog box may appear. In
that case, click [Allow] to continue.
2. The InstallShield Wizard starts. Click [Next].
3. The [Choose Destination Location] screen appears.
When you do not change the location shown on the
screen, where the Product is going to be installed,
click [Next].
When you want to change the location, click
[Change…], specify the location, then click [Next].
4. The [Selection of language] screen appears.
Select a language from a pull-down menu.
Here, select [English], then click [Next].
8
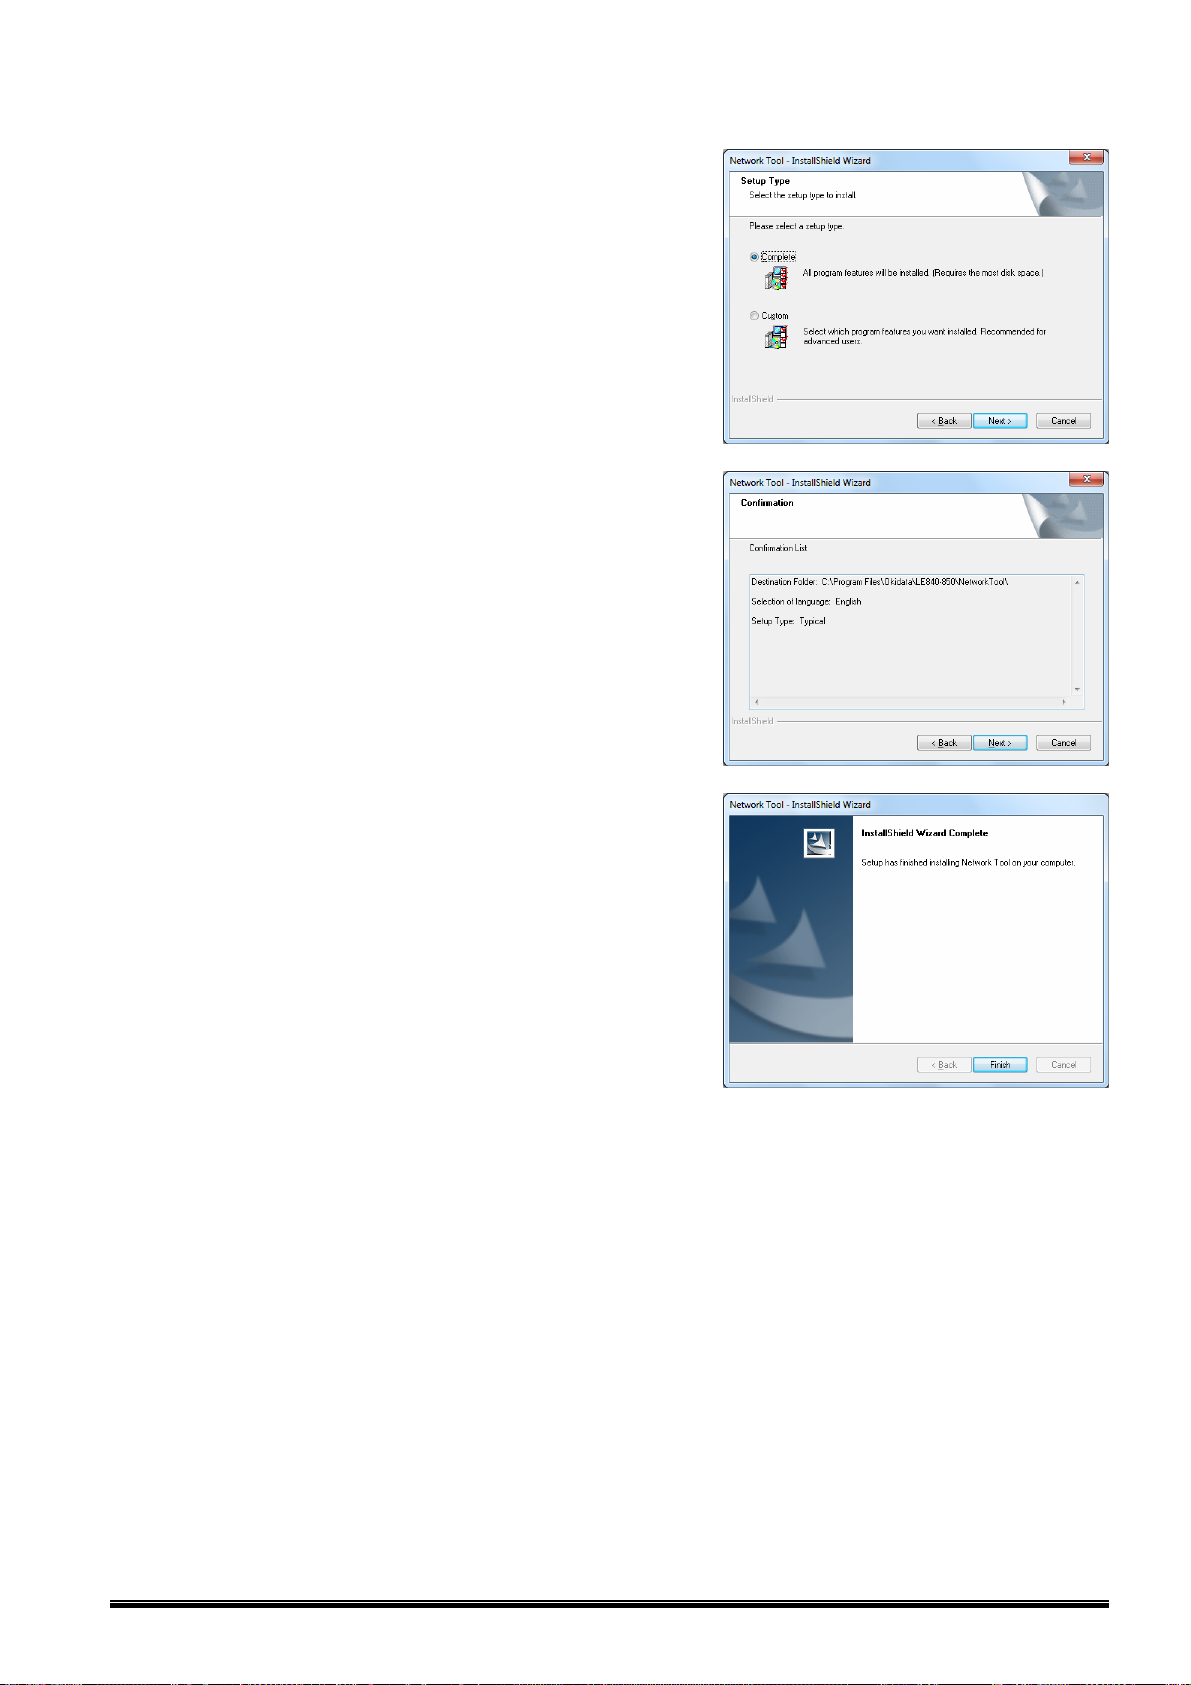
5. The [Setup Type] screen appears.
Select a setup type to install:
[Complete] for full installation and
[Custom] for the installation of limited features.
Then, click [Next].
6. The [Confirmation] screen appears.
Check the descriptions under the [Confirmation List]
and click [Next] when the descriptions are correct.
When you want to change the setting, click [Back] until
the applicable screen appears, then make the change.
7. The [InstallShield Wizard Complete] screen appears.
Click [Finish] to complete the installation.
9
Installation Procedure (for the Administrator) – Downloader Only
This Installation Procedure guides you to install the Downloader only. When you want to use the Downloader
only, install it following the instructions below.
Refer to the section ‘Installation Procedure (for the Administrator) – Full Installation of the Product‘ and
follow Steps 1 to 4, then start from Step 1 below.
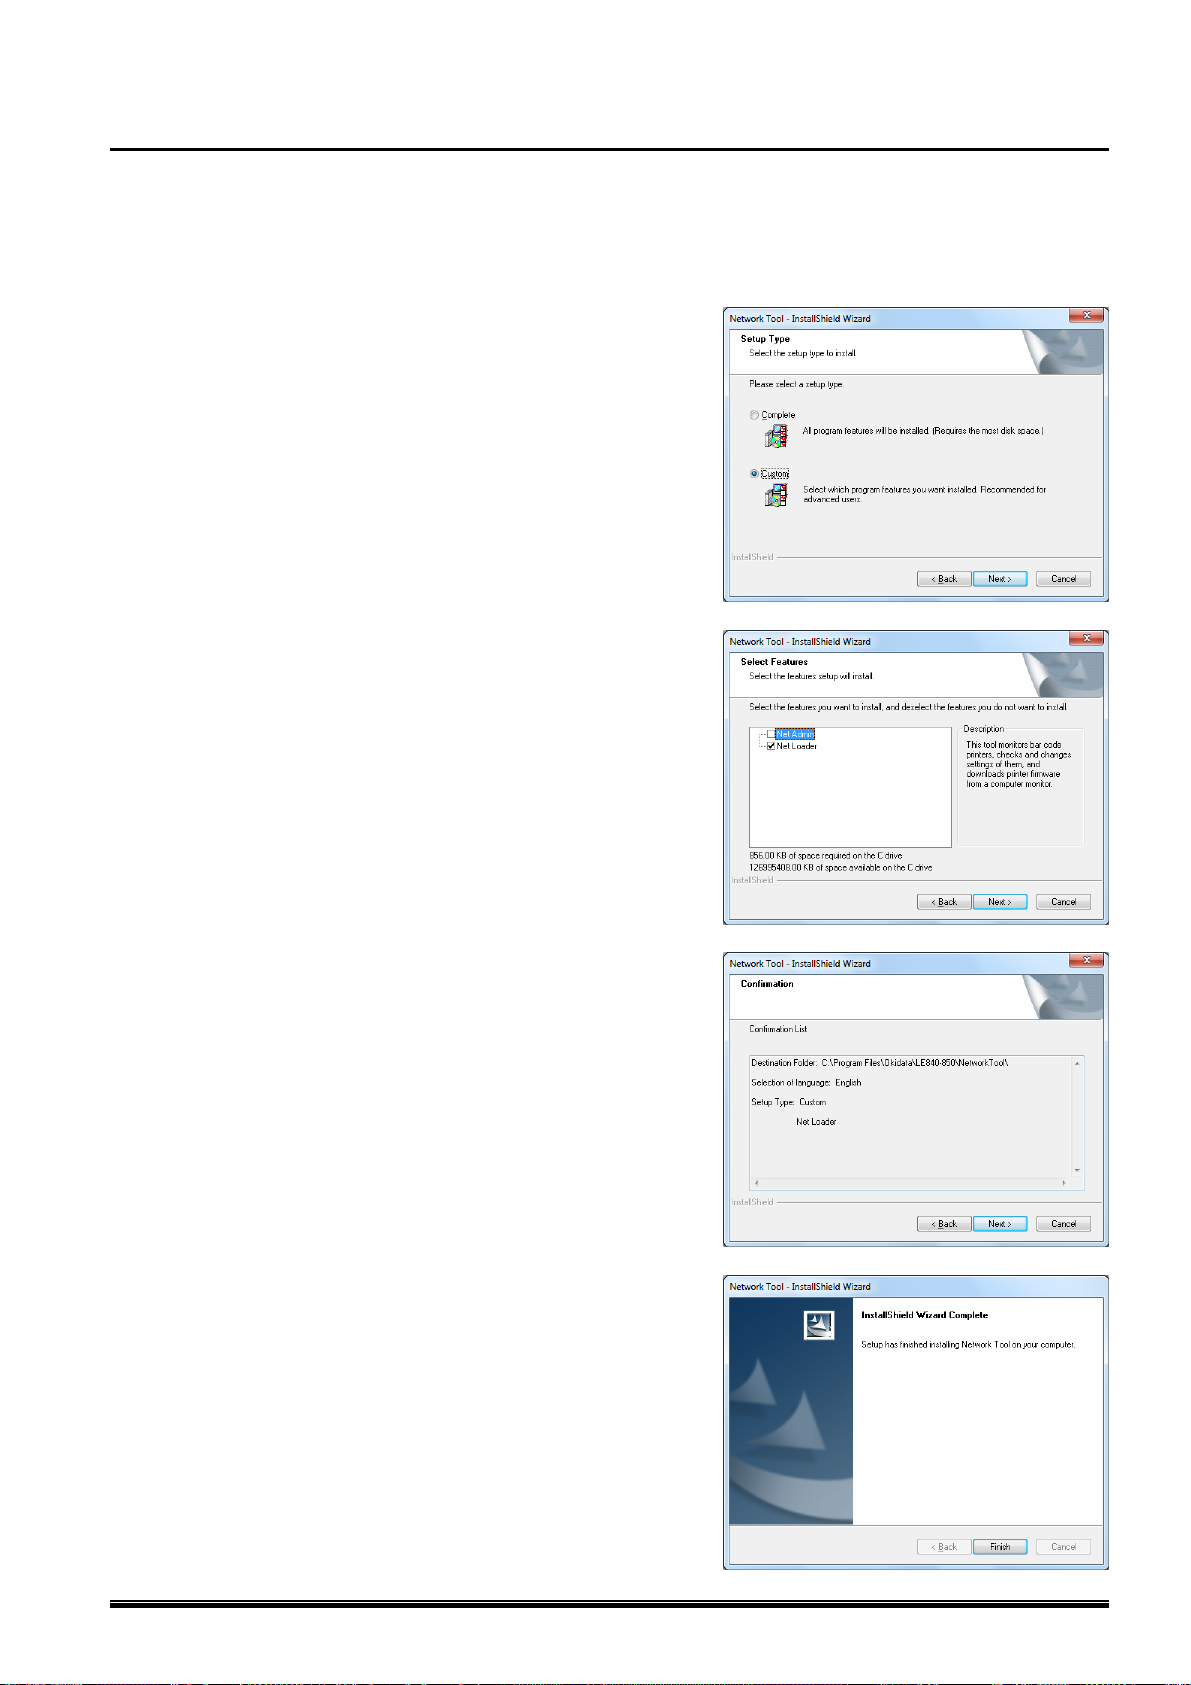
1. The [Setup Type] screen appears.
Check [Custom], then click [Next].
2. The [Select Features] screen appears.
Make sure that only [Net Loader] is checked, then click
[Next].
3. The [Confirmation] screen appears.
Check the descriptions under the [Confirmation List]
and click [Next] when the descriptions are correct.
When you want to change the setting, click [Back] until
the applicable screen appears, then make the change.
4. The [InstallShield Wizard Complete] screen appears.
Click [Finish] to complete the installation.
10
Installation Procedure (for the User)
This Installation Procedure is for the User who wants to use the Product to monitor the Supported Printers.
When the Product is installed following the procedure in this section, the Downloader will not appear in the [Start]
menu.
It is recommended that this installation procedure be used when the Surveillance Tool (Net Admin) is used in
User mode.
Refer to the section ‘Installation Procedure (for the Administrator) – Full Installation of the Product‘ and
follow Steps 1 to 4, then start from Step 1 below.
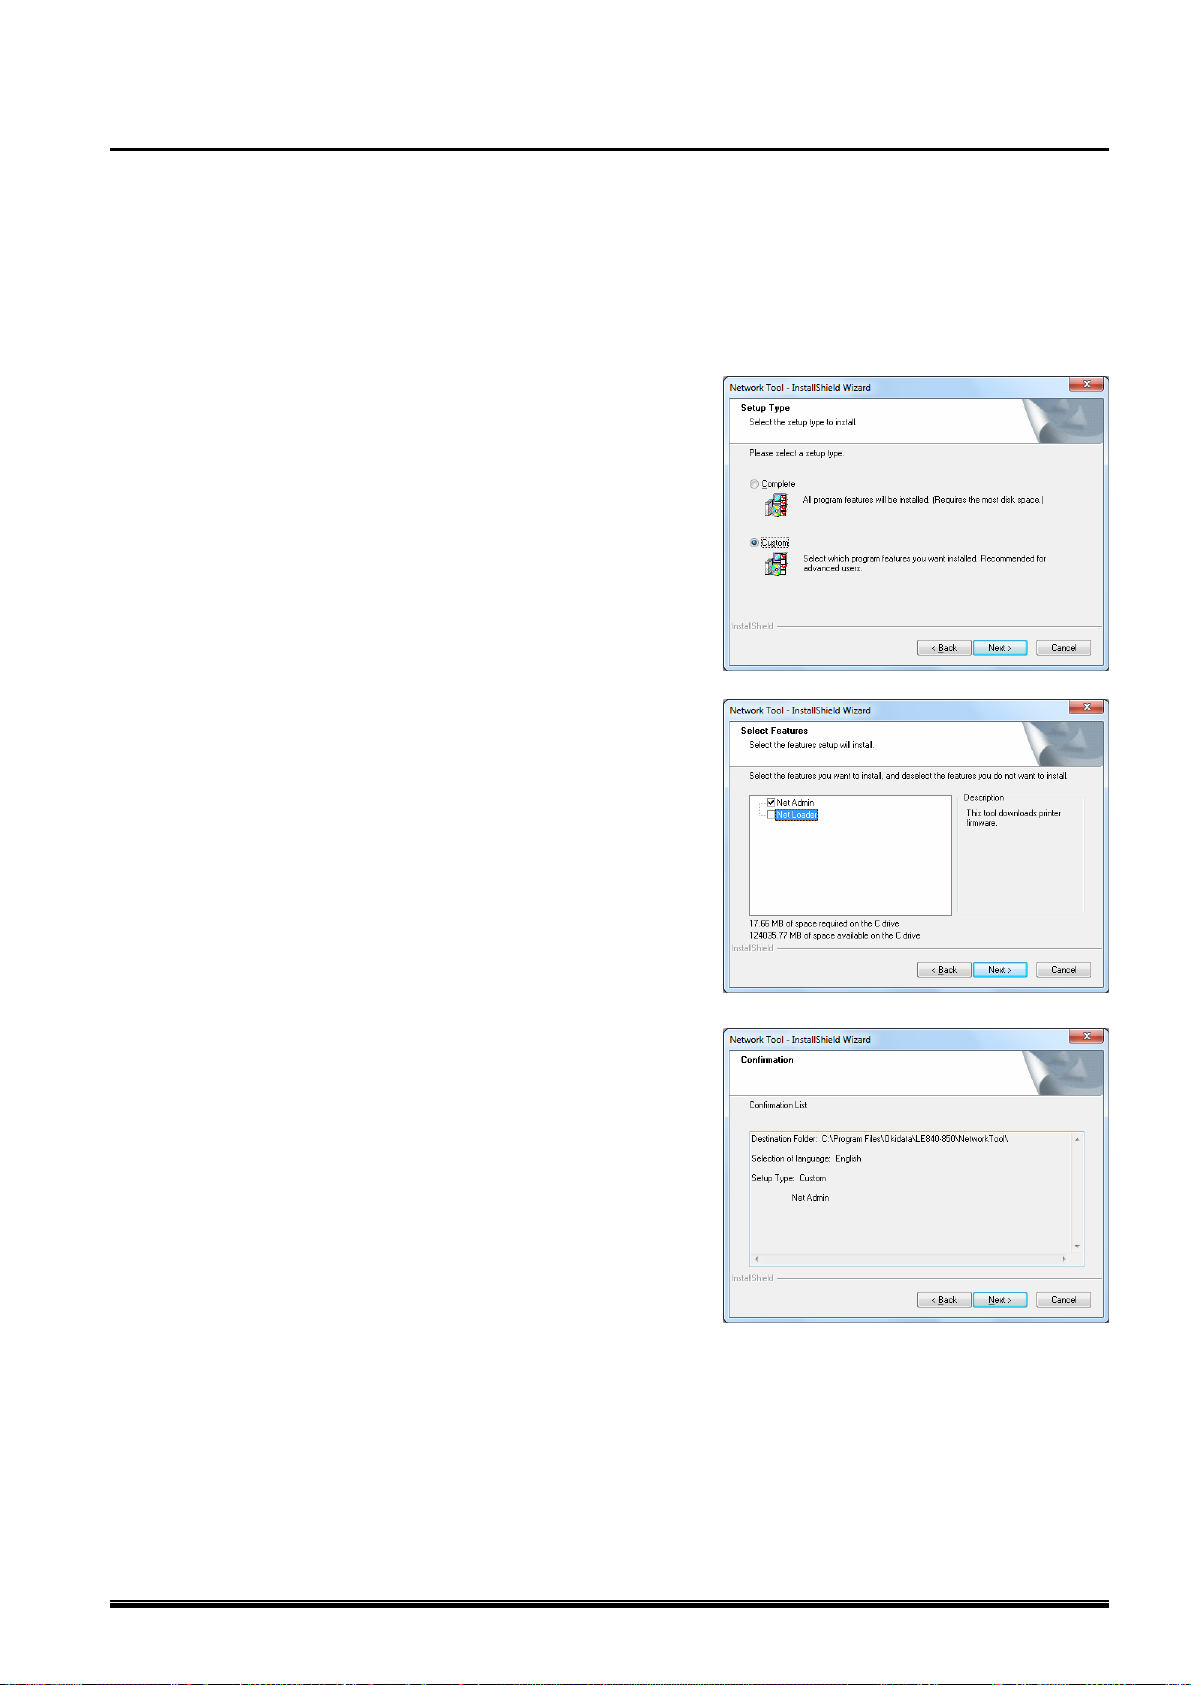
1. The [Setup Type] screen appears.
Check [Custom], then click [Next].
2. The [Select Features] screen appears.
Make sure that only [Net Admin] is checked, then click
[Next].
3. The [Confirmation] screen appears.
Check the descriptions under the [Confirmation List]
and click [Next] when the descriptions are correct.
When you want to change the setting, click [Back] until
the applicable screen appears, then make the change.
11

4. The [InstallShield Wizard Complete] screen appears.
Click [Finish] to complete the installation.
12
Modification/Repair of Installation Setting and Uninstallation
Modification of Installation Setting
Installation setting can be changed after completing the installation. This feature is useful in situations where:
only the Downloader is necessary but full installation was performed.
[Surveillance Tool] needs to be removed.
full installation was performed on the computer which the User uses.
[Downloader] needs to be removed.
only one feature has been installed and one more feature needs to be installed.
1. Click: [Start] – [All Programs] – [Okidata] – [LE840-850] – [UnInstall Network Tool].
Note: With Windows Vista/Server 2008/7/8/Server 2008 R2, the User Account Control dialog box may appear. In
that case, click [Allow] to continue.
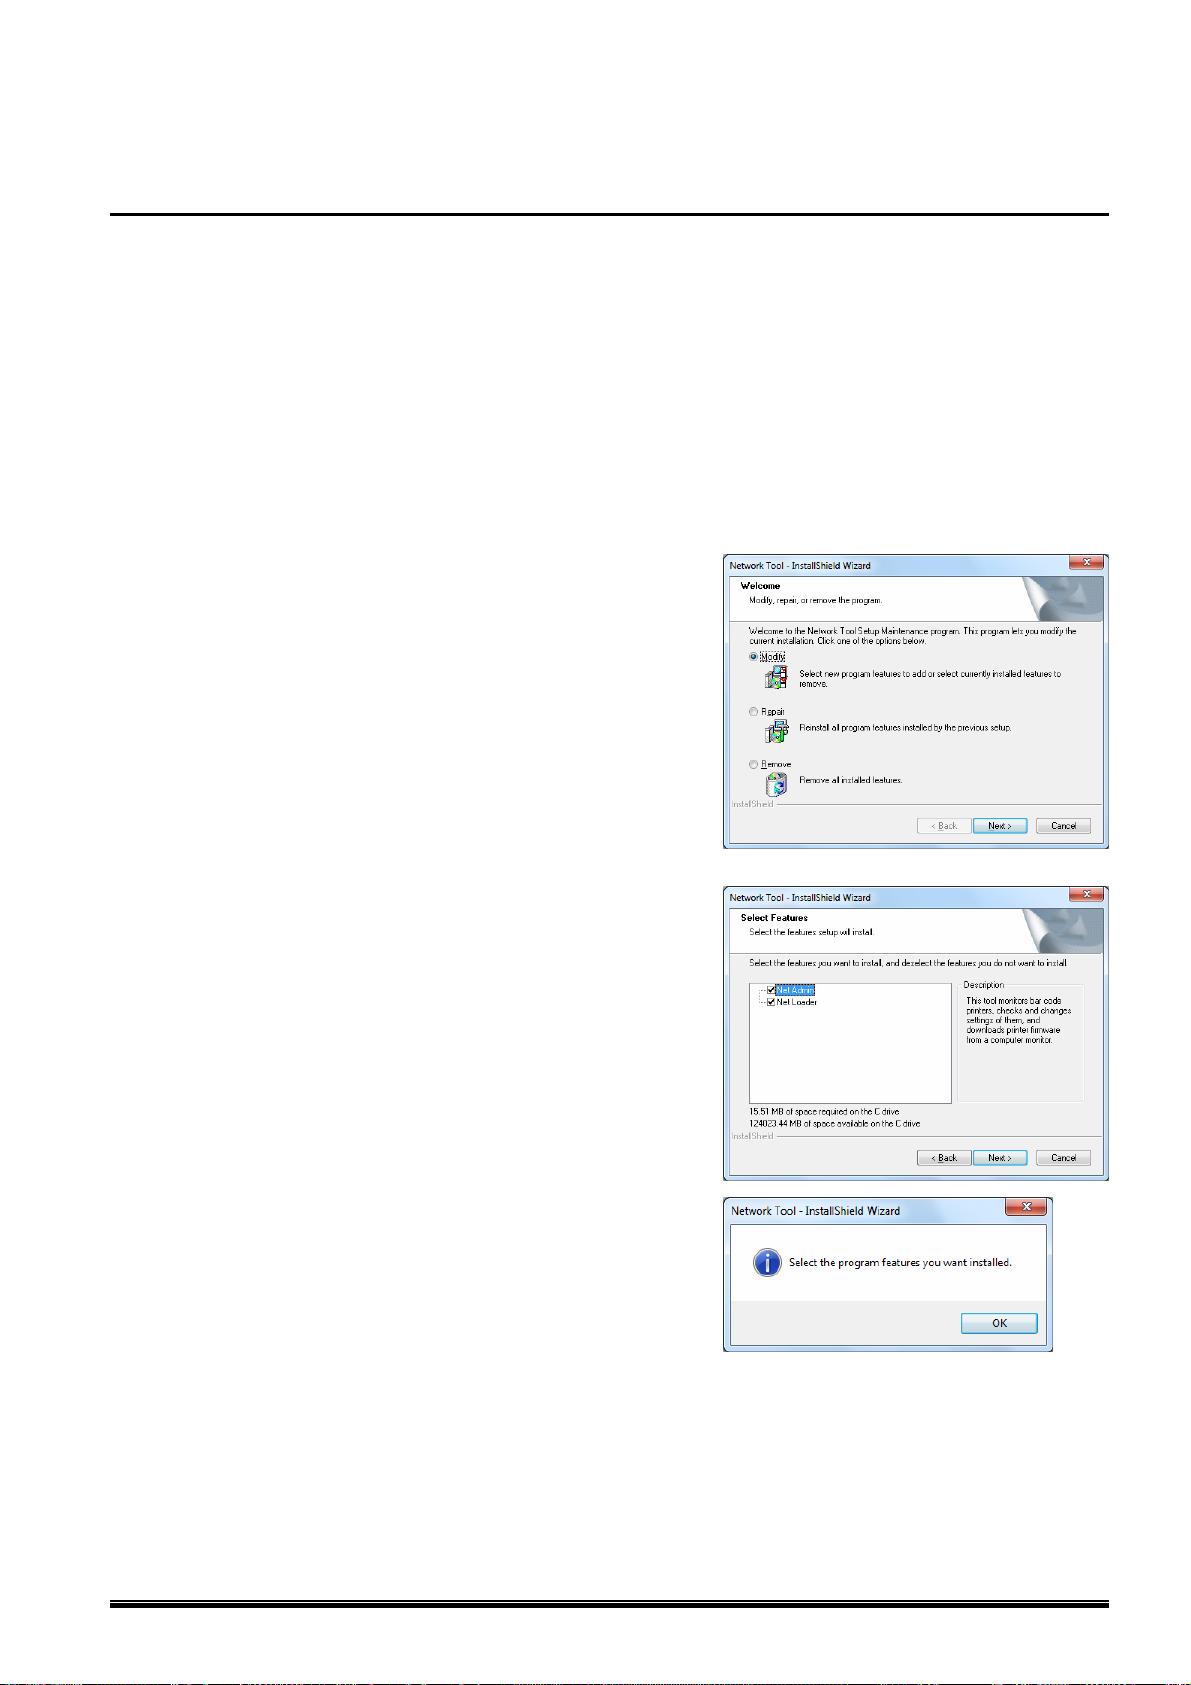
2. The [Welcome] screen appears.
Check [Modify], then click [Next].
When changing the installation setting, check [Modify].
When reinstalling all features by the previous setup, check
[Repair].
When uninstalling all installed features, check [Remove].
3. The [Select Features] screen appears. The currently
installed features are marked with a check mark.
Remove the check mark for the features you want to
uninstall.
Check the features you want to install.
Click [Next] to start the modification.
Removing all check marks and clicking [Next] display the
right screen.
Click [OK] to return to the [Select Features] screen.
To remove all features, uninstall the Product referring to the
section, ‘Uninstallation of the Product‘.
13
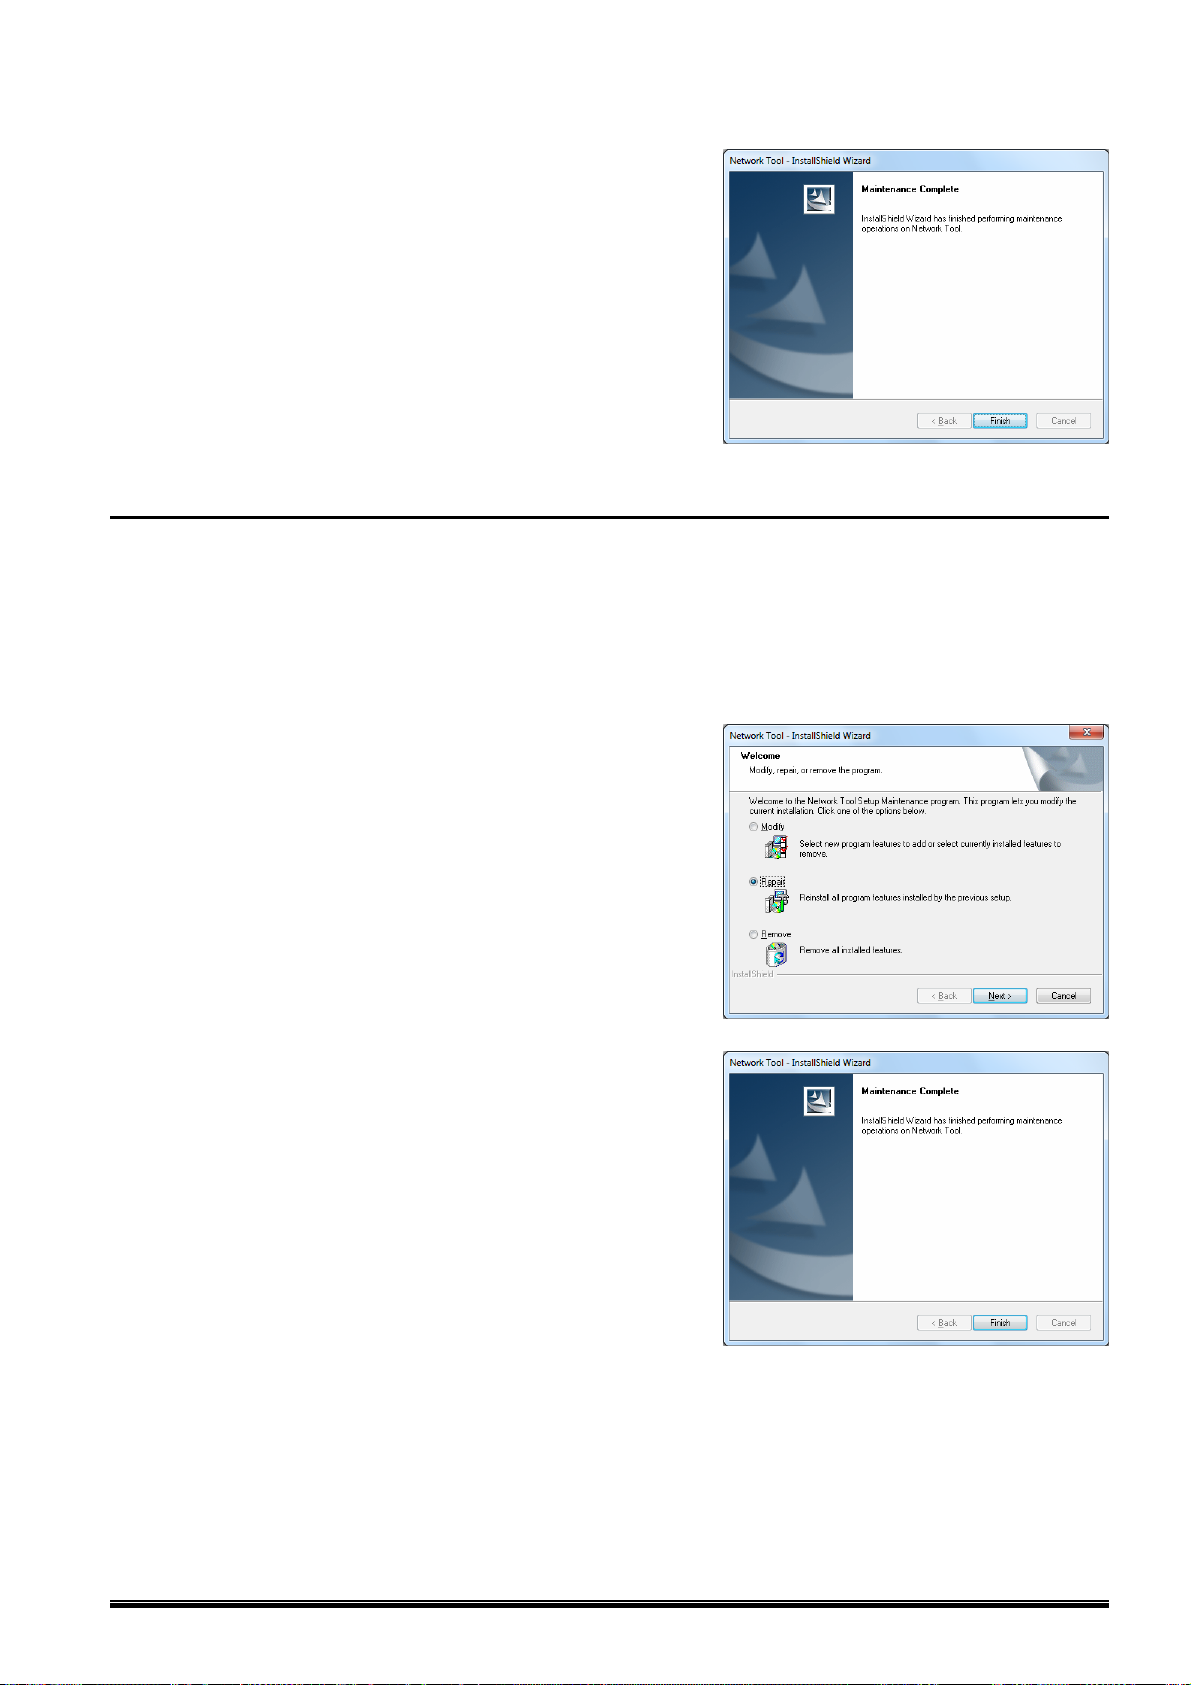
4. The [Maintenance Complete] screen appears.
Click [Finish] to complete the operation.
Repair of Installation Setting
This reinstalls all features by the previous setup.
1. Click: [Start] – [All Programs] – [Okidata] – [LE840-850] – [UnInstall Network Tool].
Note: With Windows Vista/Server 2008/7/8/Server 2008 R2, the User Account Control dialog box may appear. In
that case, click [Allow] to continue.
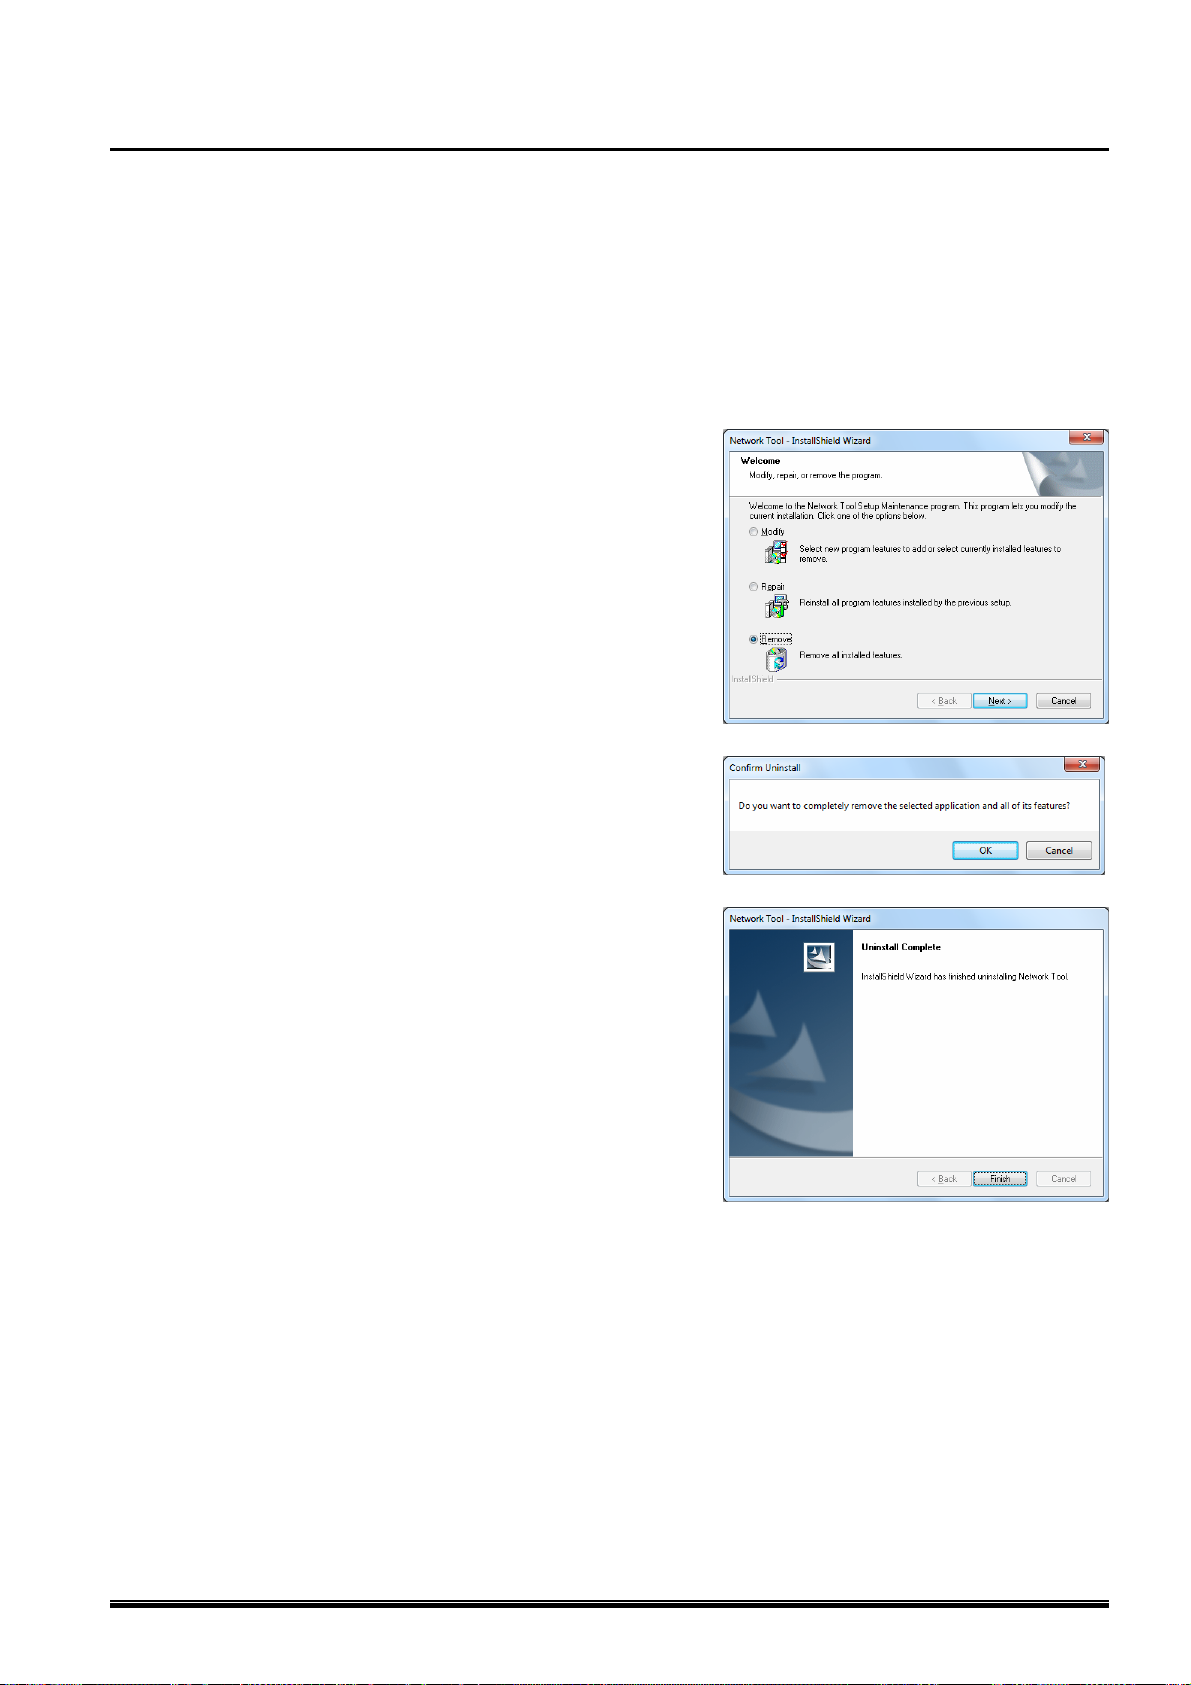
2. The [Welcome] screen appears.
Check [Repair], then click [Next].
When changing the installation setting, check [Modify].
When reinstalling all features by the previous setup, check
[Repair].
When uninstalling all installed features, check [Remove].
3. The [Maintenance Complete] screen appears.
Click [Finish] to complete the operation.
14
Uninstallation of the Product
This feature completely removes the Product from your computer.
Note: You may not be able to uninstall the Product by clicking:
[Control Panel] – [Add or Remove Programs].
In such case, follow the uninstallation procedure described below:
1. Click: [Start] – [All Programs] – [Okidata] – [LE840-850] – [UnInstall Network Tool].
Note: With Windows Vista/Server 2008/7/8/Server 2008 R2, the User Account Control dialog box may appear. In
that case, click [Allow] to continue.
2. The [Welcome] screen appears.
Check [Remove], then click [Next].
When changing the installation setting, check [Modify].
When reinstalling all features by the previous setup, check
[Repair].
When uninstalling all installed features, check [Remove].
3. The [Confirm Uninstall] screen appears.
Clicking [OK] starts uninstallation.
4. The [Uninstall Complete] screen appears.
Click [Finish] to complete the operation.
15

2. Surveillance Tool
Surveillance Tool (Net Admin)··············································································································· 17
Surveillance Timing .......................................................................................................................... 17
Trap Notification...............................................................................................................................17
Cautions for Using Trap Notification................................................................................................17
Clearing the Block on Trap Notification (Windows Firewall).......................................................18
How to Start...................................................................................................................................... 21
Default Startup ............................................................................................................................21
Starting from [Login] Screen.............................................................................................................22
Login in Administrator Mode .......................................................................................................22
Login in User Mode .....................................................................................................................23
Addition of Printers to Printer List on List View Screen.................................................................... 24
By Using Search Function........................................................................................................... 24
By Specifying IP Address............................................................................................................25
Exit from Surveillance Tool ...............................................................................................................26
Details of Screen .............................................................................................................................. 27
List View (Net View) .................................................................................................................... 27
Each Setting Screen of List View................................................................................................29
Printer Monitor............................................................................................................................. 37
Setting Screens of Printer Monitor .............................................................................................. 43
16

Surveillance Tool (Net Admin)
The Surveillance Tool monitors printer statuses. Unless otherwise specified, this chapter explains operations
and details in Administrator mode.
In Administrator mode, all features provided by the Surveillance Tool are available. While in User mode,
available features are limited.
By checking [Use password to log in] on the [Management Options] screen, users can be identified either
as the Administrator or as the User at the startup of the Surveillance Tool. When [Use password to log in]
is not checked, the Surveillance Tool always operates in Administrator mode. If there is a possibility that
the User may use a computer on which the Product is installed, check [Use password to log in] to identify
the User on the [Login] screen.
‘Starting from [Login] Screen’
‘Login in Administrator Mode’
‘Management Options (Effective only in Administrator mode)’
Surveillance Timing
Surveillance timing and notification method of the Surveillance Tool greatly differ depending on the operational
conditions.
When an icon is displayed in the task tray:
Only monitors trap notifications from the printer.
When the [Net View] (hereinafter referred to as ”List View”) (Page 27) screen is being displayed:
Performs [Trap Notification] and [Polling Surveillance] from the printer and updates information on the
printer list on the List View screen.
When Printer Monitor (Page 37) is in operation:
Performs [Trap Notification] and [Polling Surveillance] from the printer and updates information in the
printer monitor.
Supplemental explanation:
For the setting of [Polling Surveillance] and [Trap Notification], refer to ‘Surveillance Options (Effective only in
Administrator mode)’ (Page 33).
Trap Notification
The following printer errors can be monitored using [Trap Notification].
Paper end, ribbon end, ribbon error, head open error, command error, communication error, paper jam,
head broken elements error, cutter error, excessive head temperature error, cover open error, memory
error, RFID error, print error
Supplemental explanation:
When [E-mail] is selected for [Notification Method], a trap notification for memory error and RFID error can be sent by
assigning them to [Printer Error] and for ribbon end, to [ribbon error].
A print job end cannot be monitored using [Trap Notification].
Cautions for Using Trap Notification
By enabling [Trap Notification] on the [Surveillance Options] screen, a trap notification from the printer can be
monitored except for the following environment:
Firewall setting of the Windows XP/Server 2003/Vista/Server 2008/7/8/Server 2008 R2 is blocking trap
notifications.
Software with commercially available firewall function is installed.
When the SNMP Trap service has not been installed.
When the SNMP Trap service is disabled.
When the Windows XP/Server 2003/Vista/Server 2008/7/8/Server 2008 R2 firewall function or software with a
commercially available firewall function is installed, clearing the block on trap notification from the printer enables
[Trap Notification].
17
The following procedure explains how to change the Windows XP/Server 2003/Vista/Server 2008/7/8/Server
2008 R2 firewall setting. For the commercially available software with the firewall function, refer to its operation
manual.
In the case the SNMP Trap service is disabled, it is necessary to select the [Control Panel] – [Administrative Tool]
– [Service] and enable the [SNMP Trap Service]. To always use the trap notification, change the [SNMP Trap
Service] settings so that the service is started at the time of a start-up of the PC.
Clearing the Block on Trap Notification (Windows Firewall)
In the case of Windows XP/Windows Server 2003
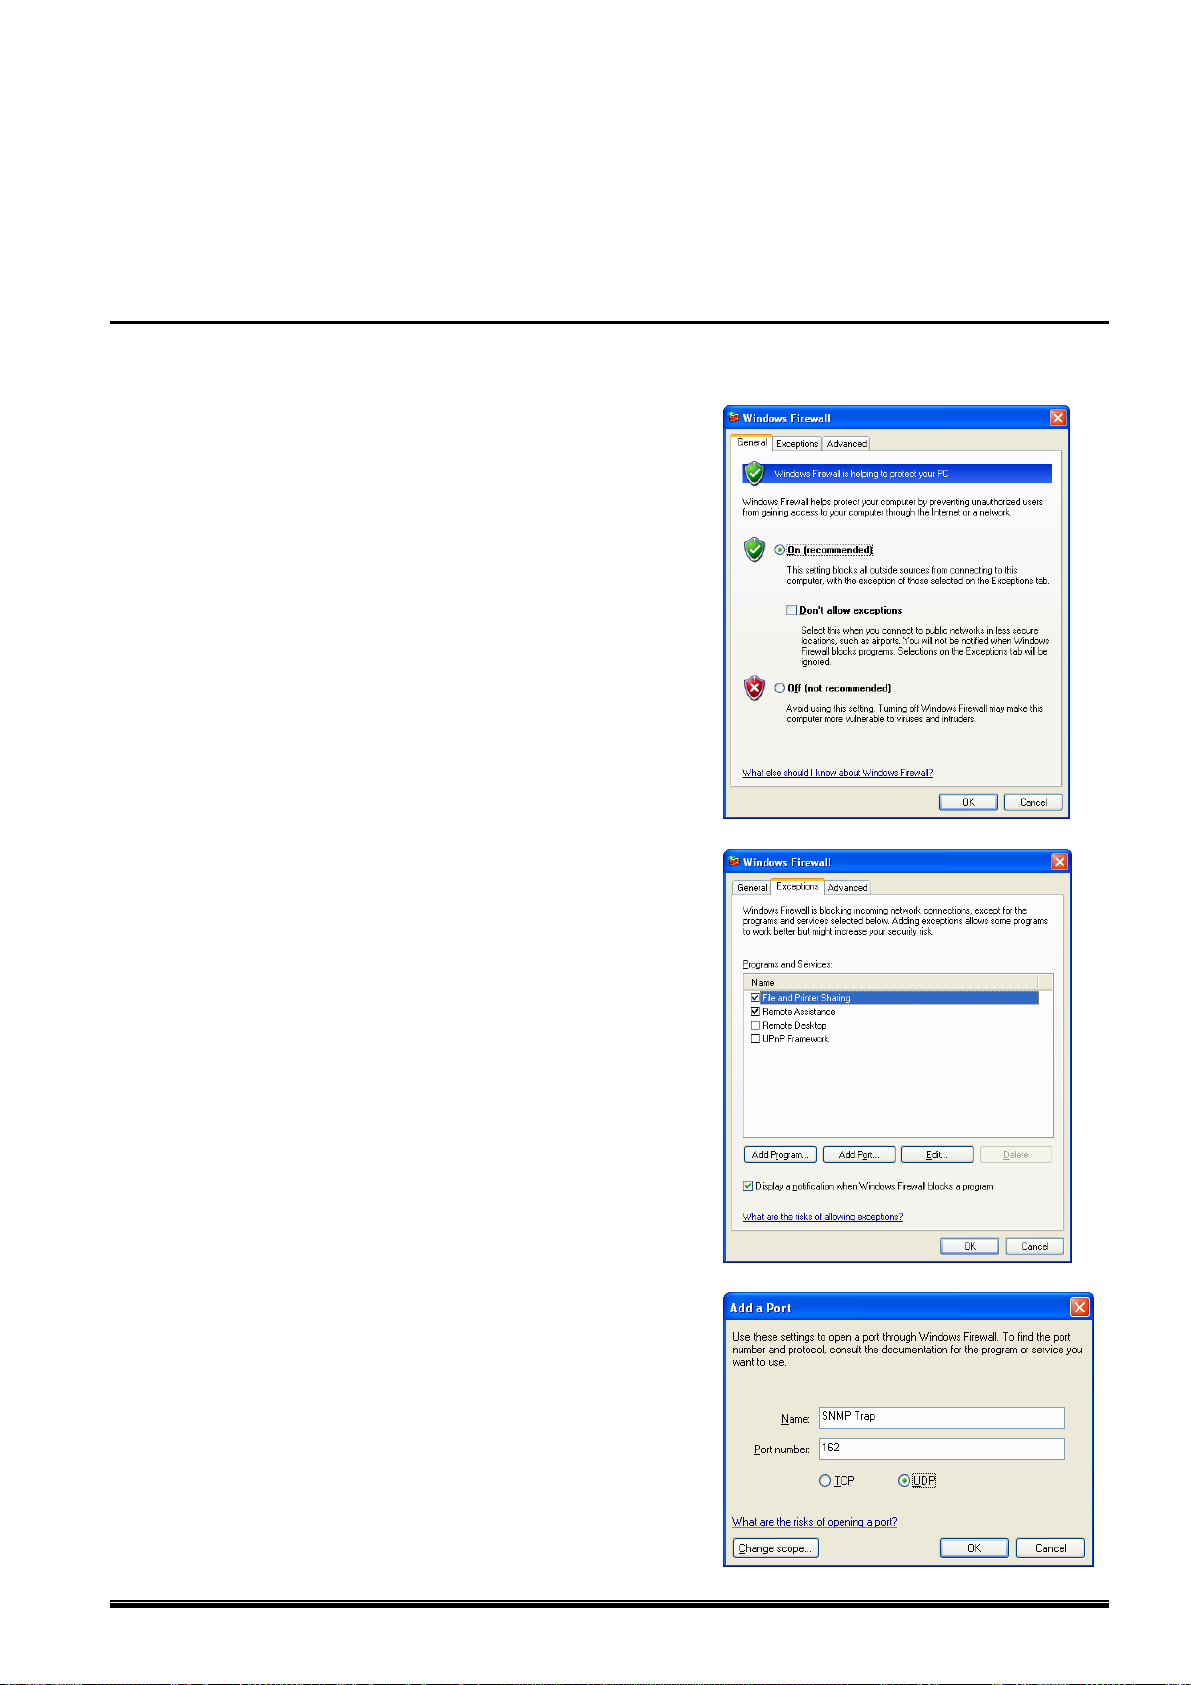
1. Click: [Start] – [Control Panel] – [Windows Firewall].
Remove the check mark for
[Don’t allow exceptions] under the [General] tab.
2. Click the [Exceptions] tab, then [Add Port…].
3. Enter the following in the [Name] and
[Port number] entry box respectively.
Check [UDP] and click [OK].
[Name] : Any
[Port number] : 162
[UDP] : Click on the radio button.
18
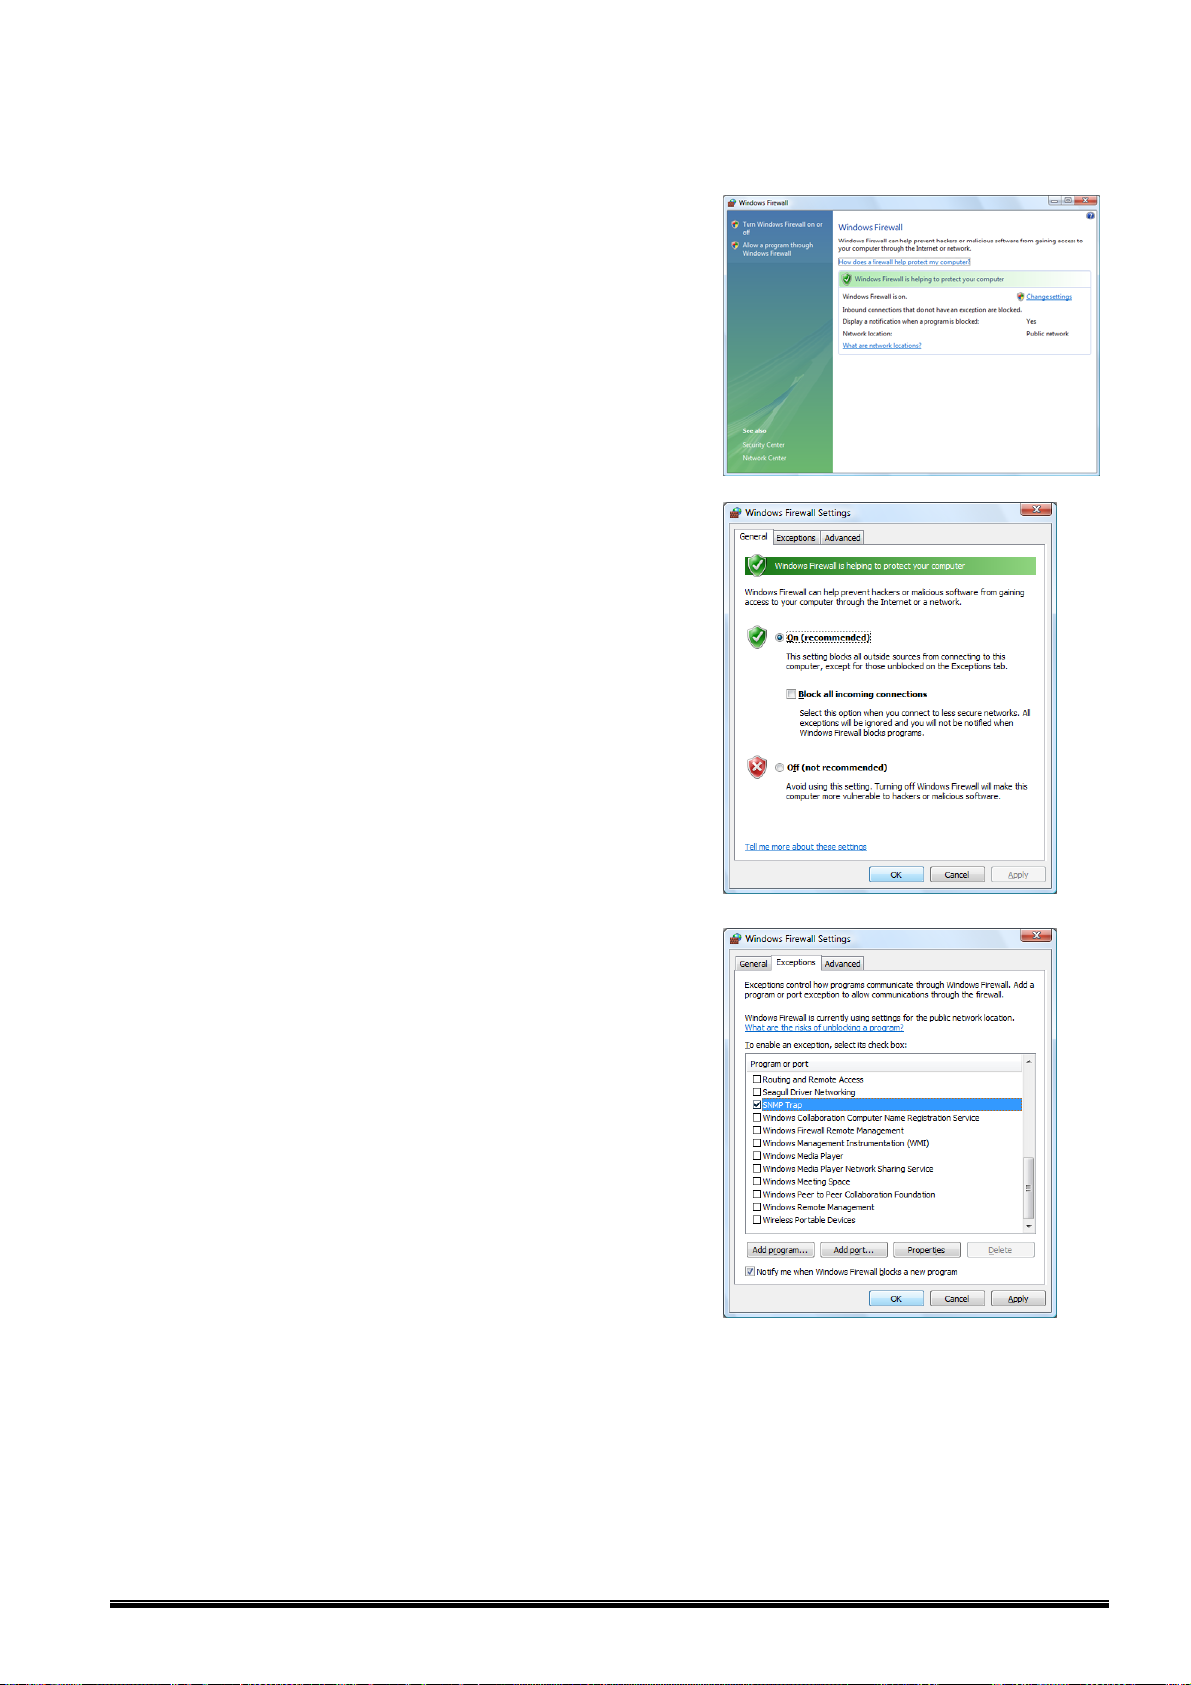
In the case of Windows Vista/Server 2008
1. Click: [Start] – [Control Panel] – [Security] – [Windows
Firewall].
Click the [Change settings].
Note: The User Account Control dialog box may appear.
In that case, click [Allow] to continue.
2. Remove the check mark for
[Block all incoming connections] under the [General]
tab.
3. Click the [Exceptions] tab, check [SNMP Trap] and
click [OK].
19

In the case of Windows 7/Server 2008 R2/8
1. Click: [Start] – [Control Panel] – [System and Security]
– [Windows Firewall].
Click the [Advanced settings].
Note: The User Account Control dialog box may appear.
In that case, click [Allow] to continue.
2. Click: [Inbound Rules] – [SNMP Trap Service (UDP
In)] – [Enable Rule].
When the service is enabled, the color of the icon
changes from gray to green.
20

How to Start
Default Startup
1. Click: [Start] – [All Programs] – [Okidata] – [LE840-850] – [Network Tool] – [Net Admin] to start the
Surveillance Tool.
When the shortcut icon is on the desktop, double-clicking it does the same operation.
2. The icon appears in the task tray. Right-click it.
3. Select [Net View], and List View (Page 27) starts.
The Administrator can specify operations at startup. To specify the operations, select [Property] –
[Management Options…] in Step 3 above or select [Property] – [Management Options…] on the List View
screen, then make setting using the [Management Options] screen. For details, refer to ‘Management
Options (Effective only in Administrator mode)’.
21

Starting from [Login] Screen
When [Use password to log in] is checked on the [Management Options] screen, the User can be identified from
the Administrator in Login mode. When this feature is used, only the Administrator can make changes to the
printer setting.
‘Management Options (Effective only in Administrator mode)’
Login in Administrator Mode
1. Click: [Start] – [All Programs] – [Okidata] – [LE840-850] – [Network Tool] – [Net Admin] to start the
Surveillance Tool.
2. The [Login] screen appears. Enter a password, then
click [OK].
The password is shown with the asterisk characters
“ ***** “.
3. The icon appears in the task tray. Right-click it.
4. Select [Net View], and List View (Page 27) starts.
When [Display the list at the startup of Net Admin.] on the
[Management Options] screen is checked, the Printer List is
displayed.
22

Login in User Mode
1. Click: [Start] – [All Programs] – [Okidata] – [LE840-850] – [Network Tool] – [Net Admin] to start the
Surveillance Tool.
2. The [Login] screen appears.
Click [User Mode].
3. The icon appears in the task tray. Right-click it.
4. Select [Net View], and List View (Page 27) starts.
When [Display the list at the startup of Net Admin.] on the
[Management Options] screen is checked, the Printer List is
displayed.
23

Addition of Printers to Printer List on List View Screen
When printers to be monitored are not on the Printer List, add the printers manually either by searching them
using the Surveillance Tool or by specifying an IP address.
Observe the following precautions when adding the printers on the Printer List.
Please turn the printer power on before starting the search.
When the printer power is off, the printer cannot be searched.
Please specify the printer IP address before starting the search.
Please specify your printer IP address, gateway IP address, and subnet mask. For details, please refer
to the product manual.
By Using Search Function
This section describes the method to add printers by using the search function of the Surveillance Tool.
The printers will be searched under the conditions specified in the [Search Options] screen.
‘Search Options (Effective only in Administrator mode)‘
1. Select [Net View], and List View (Net View)(Page 27)
starts.
The search function is also available when the Surveillance
Tool is logged in User mode.
When searching printers under specified conditions, log in in
Administrator mode and make setting using the
[Search Options] screen.
2. Click: [Device] – [Search].
3. The [Search] screen appears.
Search can be performed under specified conditions by using
the [Search Options] screen.
‘Search Options (Effective only in Administrator mode)‘
4. The printers searched are added.
24

By Specifying IP Address
When the [Search] function described in the previous section is used, printers, which do not have to be monitored,
may also be searched. To avoid this situation, using an IP address can add only the desired network printers to
the Printer List. (An IP address of a non-printer device can be specified, but [
under [Status] in the List View screen.)
Unknown] will be displayed
1. Select [Net View], and List View (Net View)(Page 27)
starts.
The [Add] function is available even when the Surveillance
Tool is logged in User mode.
2. Click: [Device] – [Add].
Clicking the
operation.
button in the tool bar does the same
3. The [Add Printer] screen appears.
Enter an IP address, then click [OK].
The IP address entered is added to the Printer List.
4. A printer specified by the IP address is added.
One IP address can be added at a time.
When specifying several IP addresses, follow the procedure
for all IP addresses.
IP address must be different for each printer.
Up to 50 printers can be added on the Printer List.
25

Exit from Surveillance Tool
The Surveillance Tool does not end by clicking [File] – [Exit] while the List View screen is being displayed.
Follow the procedure below to end the Surveillance Tool.
1. Right-click the icon in the task tray.
2. Select [Exit].
3. When the right dialog box appears, click an applicable
button.
Yes: to save the current Printer List and reflect the latest
information on the Printer List when the Surveillance Tool is
started next time.
The list file currently opened will not be updated.
Cancel: to save the latest information to the list file.
After clicking [Cancel], save the information by clicking:
[File] – [Save As...…] or by clicking: [File] – [Save] on the
[List View] screen.
No: to exit from the Surveillance Tool without saving the
Printer List.
You do not have to save the Printer List if it does not have to
be changed.
26

Details of Screen
List View (Net View)
(1) Menu
[File]
[Device]
[View]
(1)
(2)
(3)
(4)
[Open…] : Opens a list file previously saved.
[Save As...] : Saves the currently displayed Printer List to a list file.
[Save] : Overwrite the currently displayed Printer List in the list file.
[Create Group…] : Opens Group Properties to create a new group.
‘Group Properties’
[Exit] : Closes the [List View] screen.
[Printer Monitor…] : Displays the Printer Monitor screen. ‘Printer Monitor‘
[Search] : Searches a printer. ‘Search’
[Add…] : Adds a printer. ‘Add Printer’
[Remove] : Removes a printer from the Printer List.
[Web Browser…] : Displays a status of a specified printer on web page. This does not
[Head Check] : Performs a head check for a specified printer.
[Printer Setting…] : Starts the Setting Tool.
[Downloader…] : Starts the Downloader.
[Tool Bar] : Selects show/hide of the tool bar.
[Status Bar] : Selects show/hide of the status bar.
[Always on Top] : Always show a selected window on top. However, it may not work
[Sort List] : Sorts the printers in ascending sequence using printer names.
[Refresh] : Updates the Printer List.
[Option…] : Items to be displayed can be set in the [View Options] screen.
‘View Options’
(5)
(6)
function when several printers are specified or may not function for a
printer other than the Supported Printers.
(Effective only in Administrator mode)
(Effective only for the Supported Printers)
‘Head Check (Effective only for the Supported Printers)
(Effective only in Administrator mode and for the Supported Printers)
‘Printer Setting (Net Config)‘
(Effective only in Administrator mode and for the Supported Printers)
‘Downloader (Net Loader)‘
depending on the applications.
27

[Property]
[Management Options…] : Displays the [Management Options] screen, where the startup setting can
[Search Options…] : Displays the [Search Options] screen, where the setting for searching
[Surveillance Options…] : Displays the [Surveillance Options] screen, where conditions to monitor
[Log Options…] : Displays the [Log Options] screen, where the setting for log output of
[Help]
[Topic Search…] : Displays the [Help] screen.
[About…] : Displays the [About Net View] (version information) screen.
(2) Tool Bar
be made.
‘Management Options (Effective only in Administrator mode)’
printers can be made.
‘Search Options (Effective only in Administrator mode)’
printers can be set.
‘Surveillance Options (Effective only in Administrator mode)’
surveillance result can be made.
‘Log Options (Effective only in Administrator mode)’.
‘About… (Version Information)’
Printer Monitor : Displays the [Printer Monitor] screen. ‘Printer Monitor’
Refresh : Updates the Printer List.
Add Printer : Add printers to the Printer List. ‘Add Printer’
View Options : Displays the [View Options] screen. ‘View Options’
Help : Display the [Help] screen.
(3) Group
Displays printer groups.
Clicking [File] – [Create Group…] can create a new group. ‘Group Properties’
(4) Printer List
Displays printers searched. All listed printers are monitored. Non SNMP-compliant printers are neither
displayed nor monitored.
Double clicking a printer on the Printer List opens the [Printer Monitor] screen.
(5) Displayed Items
Displays printer information items selected in the [View Options] screen. ‘View Options’
(6) Status Bar
From the left of the status bar, description of menu and printer status, the number of printers searched, and
polling interval are shown. The status bar is shown or hidden by clicking: [View] – [Status Bar].
28

Each Setting Screen of List View
Group Properties
Makes setting for groups to be displayed in the Printer List.
Up to 10 groups can be displayed.
[Group Name]
A group name is entered. (Up to 32 characters)
[Model]
Filter conditions on a printer model are entered using a
comma to separate each condition.
(Up to 256 characters)
Setting can also be made using the [Filter Property]
screen.
[Port]
Filter conditions on an address are entered.
When the fourth segment of an IP address is 255 (broadcast) as an effective host address, filters
addresses within a specified subnet.
For example: XXX.XXX.XXX.255
IP addresses from XXX.XXX.XXX.1 to XXX.XXX.XXX.254 are displayed on the Printer List.
[Location]
Filter conditions on a location are entered using a comma to separate each condition.
(Up to 256 characters) Setting can also be made using the [Filter Property] screen.
[ID Number]
Filter conditions on an ID number are entered: develop number in the left box and complete number in the
right box. (Up to 16 characters)
[Administrator]
Filter conditions on the Administrator are entered using a comma to separate each condition.
(Up to 256 characters) Setting can also be made using the [Filter Property] screen.
[Comment]
Filter conditions on a comment are entered using a comma to separate each condition.
(Up to 256 characters) Setting can also be made using the [Filter Property] screen.
[OK]
Adds a new group with filter conditions and exits from the [Group Properties] screen.
[Cancel]
Exits without saving the current setting.
Search
Clicking [Device] – [Search] starts searching printers which
can be displayed on the Printer List.
Clicking [Cancel] stops searching. Search time can be
changed in the [Search Options] screen.
‘By Using Search Function’
‘Search Options (Effective only in Administrator mode)’
29

Add Printer
Adds printers. An IP address of a printer to be added is
entered in the [IP Address] entry box.
‘By Specifying IP Address’
[IP Address]
An IP address of a printer to be added is entered.
First to fourth segment of IP address: 0 to 255
0 and 255 should not be used for an effective host
address. The IP address must be specified in a way so
that the combination of the IP address and the subnet
mask, set in printer System mode, must be valid. Even
when a wrong IP address is specified, a printer can be
added, but you cannot access the printer.
[OK]
Adds an IP address to the current Printer List and exits from the [Add Printer] screen.
[Cancel]
Exits without saving the current setting.
Head Check (Effective only for the Supported Printers)
Performs a head check.
A printer must be in idle state.
View Options
Displays items to be displayed on the Printer List on the List
View screen.
[Non-displayed Item] and [Displayed Item] can be changed
using the [Add>>] and [<<Remove] buttons. Only [Printer
Name] cannot be removed.
Clicking [Default] displays the default setting.
[Non-displayed Item]
Displays items which are not to be displayed on the List
View screen.
[Displayed Item]
Displays items to be displyed on the List View screen in
order:
The top item in [Displayed Item] is displayed at the left most on the List View screen, the second top at the
second left most, and so on.
[Add>>]
Moves an item selected in the [Non-displayed item] area to the [Displayed Item] area. The selected
item will be highlighted.
[Default]
Resets to the default setting.
[<<Remove]
Moves an item selected in the [Displayed Item] area to the [Non-displayed item] area. The selected
item will be highlighted.
[Printer Name] cannot be removed from the [Displayed Item] area.
[OK]
Saves the current setting and exits. New setting becomes effective from a next operation.
[Cancel]
Exits without saving the current setting.
30

Management Options (Effective only in Administrator mode)
On the List View screen, click: [Property] – [Management
Options], or right-click the icon in the task tray, then select
[Property] – [Management Options]. The [Management
Options] screen shown in the right side appears.
[Start Net Admin at the startup of the operating system]
Starts the Surveillance Tool at the startup of the
computer.
[Display the list at the startup of Net Admin.]
Starts the Surveillance Tool and displays a task icon,
then the List View screen.
[Use password to log in]
Displays the [Log in] screen at the startup of the Surveillance Tool to identify the Administrator from the
User. When it is checked, the [Password…] button will become effective.
‘Starting from [Login] Screen’
[Password...]
Displays the [Password Change] screen. ‘Password Change’
[Community...]
Displays the [Community Property] screen. ‘Community Property’
[OK]
Saves the current setting and exits. New setting becomes effective from a next operation.
[Cancel]
Exits without saving the current setting.
Password Change
A password for the Administrator to log in is specified.
When the password is set for the first time, no password is
required in the [Old Password] entry box. To specify the
password, up to 16 one-byte alphanumeric characters can
be used (Password is not case-sensitive.)
[Old Password]
Shows each input character with the asterisk character.
When the password is specified at the first time, you do
not have to enter it. (Password is not set when the
Product was just installed.)
[New Password]
Shows each input character with the asterisk characters.
[Confirm New Password]
Shows each input character with the asterisk character.
[OK]
Changes a password and exits.
[Cancel]
Exits without changing the password.
Community Property
Sets community used for sending/receiving packets for
SNMP at the computer side.
[Read Community]
Fixed to public. Do not change.
[Write Community]
Fixed to public. Do not change.
[OK]
Sets a community name shown and exits.
[Cancel]
Exits without changing community.
31

Search Options (Effective only in Administrator mode)
Selects a method for searching printers.
[Start the auto-search when Net Admin opens.]
Displays the [Search] screen at the startup of the Product
and automatically searches printers.
[Broadcast Search]
Searches printers by Broadcast Search and adds
SNMP-compliant printers to the Printer List.
Note: Printers may not be searched depending on network
environment. When broadcast is blocked by a router, a
search is performed within the same segment.
Perform a search by [Specification Search] or by specifying
an IP address.
‘By Specifying IP Address’
[Specification Search]
Searches SNMP-compliant printers under specified
conditions and adds them to the Printer List.
[Start IP]
Enabled when [Specification Search] is selected. Specifies a start IP address of a search range.
First to fourth segment of IP address: 0 to 255
Do not specify 0 as an effective host address. 255 in the fourth segment defines multicast. The IP
address must be specified in a way so that the combination of the IP address and the subnet mask,
set in printer System mode, must be valid. Even when a wrong IP address is specified, a printer can
be added, but you cannot access the printer.
[End IP]
Enabled when a start IP is entered, but disabled if the fourth segment of the start IP address is 255.
Only the fourth segment of an end IP address of the search range is entered. (0 to 255)
[Add]
Enabled when a search range is entered. Otherwise, disabled.
Adds the search range in the search condition list. (Up to 10)
[Remove]
Enabled when a search condition list is selected. Otherwise, disabled.
Removes the conditions selected on the search condition list.
Disabled when the search condition list is not selected.
[Search for all SNMP-compliant printers]
Displays printers other than the Supported Printers.
[Search Time]
Sets a time for searching printers 1 second to 600 seconds.
[Import]
Retrieves setting information from a file.
[Export]
Saves setting information to a file.
[OK]
Exits with enabling all settings.
[Cancel]
Exits without saving the current setting.
32

Surveillance Options (Effective only in Administrator mode)
Displays the [Surveillance Options] screen shown in the
right side when [Property] – [Surveillance Options] on the
[List View] screen are selected or when the icon in the task
tray is right-clicked, and [Property] – [Surveillance Options]
are selected.
Selects a method to monitor printers.
[List View]
Starts [List View] when the trap function receives error
information if the [List View] screen is not being
displayed.
[Printer Monitor]
Displays the [Printer Monitor] screen when the trap function receives error information.
[Sound]
Generates a sound according to the type of error when the trap function receives error information.
[E-Mail]
Sends email under a specified email condition when the trap function receives error information.
[Details]
Enabled when [E-Mail] is checked. Clicking [Details] displays the [Mail Property] screen.
‘Mail Property’
[Polling Surveillance]
Gets printer status using the Polling Surveillance function.
[List Information]
Enabled when [Polling Surveillance] is enabled.
Sets a polling interval for surveillance task (List View). (0 to 720 seconds, in units of 10 seconds)
When 0 is entered, [Polling Surveillance] is not performed.
Note: For each printer, 3 seconds is preferable for a polling interval to be entered in [List Information].
If there are printers, of which status is unknown, shown as [
surveillance. In this case, improve the printer status or remove the unknown printers from the Printer List.
: Unknown], an operation takes time to complete
[Printer Information]
Enabled when [Polling Surveillance] is enabled.
Sets a polling interval for updating Printer Monitor. (0 to 720 seconds, in units of 10 seconds)
When 0 is entered, [Polling Surveillance] is not performed.
[Trap Notification]
Monitors a trap notification from the printer.
Note: [List View], [Printer Monitor], [Sound], and [E-Mail] under [Notification method] become effective when [Trap
Notification] is checked.
Note: When the setting of the Windows XP/Server 2003/Vista/Server 2008/7/8/Server 2008 R2 firewall function has not
been changed or commercially available software with firewall function is installed, the trap notification function is
not available. To enable [Trap Notification], clear the block on trap notification.
‘Clearing the Block on Trap Notification (Windows Firewall)’
Supplemental explanation:
To enable [Trap Notification], make setting for the printer. By using the printer setting function of this Tool, make
setting for [Trap Notification].
Please refer to the section, ‘[Option] Tab – Setting for SNMP’ (Page 52) under [Option] tab of [Printer Setting].
‘[Option] Tab – Setting for SNMP’
[OK]
Exits enabling all settings.
[Cancel]
Exits without saving the current setting.
33

Mail Property
Sets sender information, destination addresses.
Sender information
[Mail Server]
A name of an email server, used for sending email, is
entered.
(Up to 256 characters)
This information is required for a protocol to send
email.
[User Name]
A name of a user, who has been registered in the
email server, is entered.
(Up to 64 characters)
User Name information is required only when the
email server needs user information.
[Password]
Characters entered are shown with the asterisk
characters.
(Up to 32 characters)
Password information is required only when the
email server needs user information.
[Address]
An email address of a sender is entered. (Up to 256 characters)
This information is included in the mail header.
[First User]/[Second User]
Sends email under specified conditions.
[Address]
Destination email addresses are entered. (Addresses are divided by semicolon “;”.)
[Property]
Clicking the “Property” button displays the “User Property” screen.
[Mail Test]
A test email is sent with the current settings being displayed.
Please check the test result at a destination device.
[OK]
Changes Mail Property setting and exits.
[Cancel]
Exits without changing the current Mail Property setting.
User Property
Events to trigger an email notification and email format is
selected.
[Event]
Conditions for sending email are set. (More than one
item can be selected.)
[Format]
Format of email to be sent is selected. (More than one
item can be selected.)
When no items are selected, only email title is set as
email format.
[Message]
Message file is set.
Reads text of a selected file and attaches it to email.
[OK]
Changes User Property setting and exits.
[Cancel]
Exits without changing the current User Property setting.
34

Log Options (Effective only in Administrator mode)
Displays the [Log Options] shown in the right side when
[Property] – [Log Options] on the [List View] screen are
selected or when the icon in the task tray is right-clicked,
and [Property] – [Log Options] are selected.
Makes setting for log output of surveillance result.
Note: To use the log output feature, the printer must be
monitored using the Trap Notification feature. For details,
refer to [Trap Notification] of Surveillance Options.
[Trap Notification Record]
Outputs a trap notification to a log in the order received.
[File Name]
Enabled when [Trap Notification Record] is enabled.
A name of a log file, where trap notifications received
are output, is entered.
[Max Size]
Enabled when [Trap Notification Record] is enabled.
The maximum size of a log file is set. When the size of the log file exceeds the maximum size set,
data is deleted from the oldest.
[Event]
Enabled when [Trap Notification Record] is enabled.
A type of received trap notification to be output to a log is selected.
Trap Notification Trap Notification Record (Log) Error Info Job Info
Reset Cold Start Output Output
Refresh Warm Start Output Output
Print end printer job end Not output Output
Paper end PAPER END Output Not output
Ribbon end RIBBON END Output Not output
Ribbon error RIBBON ERROR Output Not output
Head open HEAD OPEN Output Not output
Command error COMMAND ERROR Output Not output
Communication error COMMUNICATION ERROR Output Not output
Paper jam PAPER JAM Output Not output
Head broken elements error HEAD BROKEN ELEMENTS ERROR Output Not output
Cutter error CUTTER ERROR Output Not output
Excessive temperature error HEAD TEMP ERROR Output Not output
Cover open COVER OPEN Output Not output
Printer error PRINTER ERROR Output Not output
Memory error MEMORY ERROR Output Not output
RFID error RFID ERROR Output Not output
Rewinder full REWIND FULL Output Not output
Low battery LOW BATTERY Output Not output
[Environmental Check Record]
Periodically collects information of the system and printers to be monitored and outputs a result to a log.
[File Name]
Enabled when [Environmental Check Record] is enabled.
A name of a log file, where a received environmental check record is to be output, is entered.
[Max Size]
Enabled when [Environmental Check Record] is enabled.
The maximum size of a log file is set. When the size of the log file exceeds the maximum size set,
data is deleted from the oldest.
[Item]
Enabled when [Environmental Check Record] is enabled.
35

Items to be performed are selected.
There are six items as follows:
Head Check
Head check result is recorded on a log file either with [OK] or [NG].
System Information
System information is recorded on a log file, such as a name of computer collecting a log and
user name.
Diagnosis Information
Diagnosis information is recorded on a log file, such as printer firmware version, printing
conditions, and each fine adjustment value.
Counter Information
Printer counter information is recorded on a log file, such as total label distance covered, cut
count, and momentary power interruption count.
Printer Information
System information is recorded on a log file, such as printer name, location, ID number, and
Administrator.
Network Information
Network information is recorded on a log file, such as printer IP address, MAC address, and
communication status (the number of packets sent/received).
[Cycle/Time]
Enabled when [Environmental Check Record] is enabled.
Cycle and time when an environmental check is to be performed is entered.
[OK]
Enables the setting and exits.
[Cancel]
Exits without saving the current setting.
About… (Version Information)
[About Net View] (version information) is displayed.
Click [OK] to return.
36

Printer Monitor
Any printer on the Printer List can be monitored. One [Printer Monitor] screen can monitor only one printer.
Note: Opening several [Printer Monitor] screens can monitor several printers (1 printer/screen). It is preferable that a
maximum of 10 screens be opened at the same time. Depending on the operational environment, operation of your
computer slows down due to lack of resources or other reasons.
Though the function to show the [Printer Monitor] screen on top is not provided,
displayed on top.
Common Item – Menu
Device
[Remote Key] : Displays the [Remote Key] screen.
‘Remote Key (Effective only for Supported Printers)’
[Head Check] : Performs a head check.
(This function is the same as Head Check under [Device] – [Head Check] on
the List View screen.
‘Head Check (Effective only for the Supported Printers)’
[Printer Setting] : Starts the Setting Tool. (Effective only in Administrator mode and for
the Supported Printers)
[Exit] : Closes the [Printer Monitor] screen.
View
[Status Bar] : Selects show/hide of the status bar.
[Refresh] : Updates the list.
Property
[Management Info…] : Displays the [Management Info Property] screen.
‘Management Options (Effective only in Administrator mode)’
Help
[Topic Search] : Displays the [Help] screen.
[About…] : Displays the [About Net View] (version information) screen.
‘About… (Version Information)‘
[DEVICE] Tab
(1) Printer Image
Shows a printer status in the upper left area of the screen.
(2) LCD Message Display
Allows to check the LCD message display of the printer on the printer monitor.
(1)
(2)
(3)
the [List View] screen can be
(4)
(5)
(6)
(7)
(8)
37

(3) Basic Information
Displays basic information of a printer.
(4) Printer Information List
Depending on the item selected on the Printer Information List, descriptions in the Detailed Information
differ.
Also the items displayed differ between the Supported Printers and other printers.
Supported Printers
Counter
Displays counter information.
Print
Displays printing conditions.
Firmware
Displays firmware information.
Memory
Displays capacity and free space.
Hardware
Displays hardware information and status.
Other printers
Input
Displays input information.
Output
Displays output information.
Media
Displays toner/ink information.
Counter
Displays counter information.
Emulator
Displays interpreter information.
Memory
Displays capacity and free space.
(5) Detailed Information
Obtains and displays information about the item selected on the Printer Information List.
(6) [Printer Setting] (Effective only in Administrator mode and for the Supported Printers)
Clicking the [Printer Setting] button starts the Setting Tool. ‘Printer Setting (Net Config)’
(7) [Guide]
Clicking the [Guide] button in an error state displays the [Help] screen which explains the error.
(8) Status Bar
Displays messages and icon. From the left side: Description of menu and printer status, polling interval,
connection mark (connected:
, disconnected: ). The status bar is shown/hidden by selecting
[View] – [Status Bar].
38

Icons Used for Printer Image and LCD Message Display
Icon Status Name LCD Message Display Description
SUPPORTED PRINTERS
Off-line
Printer is not connected or recognized.
On-line /
Printing /
Peeling
On-line [R] /
Printing [R]
ON LINE
On-line [P] /
Printing [P]
The printer is in idle state or operating normally.
A ribbon near end is detected while printer is in
idle state or operating normally.
Remaining amount of ribbon is low.
A paper near end is detected while printer is in
idle state or operating normally.
Remaining amount of paper is low.
Writable characters or PC command is being
Saving SAVING
Pause
saved.
Returns to online mode after saving is
completed.
In pause state
An issue is being stopped by the [PAUSE] key.
Pressing the [RESTART] key continues to print.
Pause [R]
Pause [P]
PAUSE
A ribbon near end is detected in pause state.
Remaining amount of ribbon is low.
A paper near end is detected in pause state.
Remaining amount of paper is low.
Command error is occurring.
Please send a correct command.
Command error COMMAND ERROR
When an error exists in a command sent from a
computer, 16 bytes of the command code of the
applicable command is displayed on the upper
line of the LCD.
Communication error is occurring.
Communication
error
COMMS ERROR
Turn the power switch off/on, or press the
[RESTART] key.
If the same error repeats, contact your local
service station.
Memory error is occurring.
FLASH WRITE ERR.
Several causes can be thought of. Handle the
matter with reference to ‘Error Message’ in
Memory error
FORMAT ERROR
Owner’s Manual.
• Write error to flash memory occurred.
• Format error occurred in flash memory.
• Saving failed due to insufficient free space of
FLASH CARD FULL
flash memory.
RFID communication error is occurring.
Several causes can be thought of. Handle the
matter with reference to ‘Error Message’ in
RFID error RFID ERROR
Owner’s Manual.
• Communication with RFID module is not
available.
• Writing to chip failed.
The rewinder is full of paper.
Rewinder full REWIND FULL
Remove the paper from the rewinder and press
the [RESTART] key to resume printing.
The battery level is low.
Low battery
LOW BATTERY
The battery voltage of the RTC decreased.
Replace the battery.
39

Icon Status Name LCD Message Display Description
SUPPORTED PRINTERS
Printer error is occurring.
Printer error
[Status Value]
[Status Value] [H]
********
********
********
Other hardware/software problem is occurring.
If the same problem repeats, turn the power off
and consult with your service engineer.
Head broken elements error is occurring.
The result of the head check by the Net Admin
shows broken dots.
Paper jam error (paper feed error)
Several causes can be thought of. Handle the
matter with reference to ‘Error Message’ in
Owner’s Manual.
Paper jam
PAPER JAM
• Paper is not properly loaded.
• Paper jam occurred during an issue.
• Paper is not fed properly.
• Size of paper being loaded is different from the
one specified by the program.
Cutter error is occurring.
Cutter error
CUTTER ERROR
Paper jam is occurring in the cutter area.
Remove the paper and load a paper again.
Pressing the [RESTART] key continues to print.
No paper error is occurring.
No paper
NO PAPER
Paper has run out. Please load paper.
Pressing the [RESTART] key continues to print.
No ribbon error is occurring.
No ribbon
NO RIBBON
The ribbon has run out. Please install a new
ribbon.
Pressing the [RESTART] key continues to print.
Head is open.
Properly lock the top cover (print head
Head open HEAD OPEN
mechanical unit).
Head open error is occurring.
Properly lock the top cover (print head
mechanical unit).
Cover open error is occurring.
Cover open
COVER OPEN
Paper was issued or fed without closing the front
cover.
Pressing the [RESTART] key continues to print.
Head broken
elements error
HEAD ERROR
Head broken elements error is occurring.
Heating element of the head may be partly
broken. Replace the head.
Excessive had temperature error is occurring.
The head temperature has reached the upper
Excessive head
temperature error
EXCESS HEAD TEMP
limit of the usage range. Stop issuing paper
and turn the power off. After the head cools
down, restart issuing paper. If the same
problem repeats, turn the power off and contact
your local service station.
40

Icon Status Name LCD Message Display Description
SUPPORTED PRINTERS
Ribbon error is occurring.
Several causes can be thought of. Handle the
matter with reference to ‘Error Message’ in
Owner’s Manual.
• Ribbon has run out.
Set a new ribbon. Pressing the [RESTART]
key continues to print.
Ribbon error
RIBBON ERROR
• Ribbon is cut.
Glue both ends where the ribbon was cut and
set it again. Pressing the [RESTART] key
continues to print.
• Ribbon motor sensor is broken.
If a ribbon error repeats, the ribbon motor
sensor may be broken. Turn the power off
and contact your local service station.
Printers other than SUPPORTED PRINTERS
Unknown/Off-line
*******
Printer is not connected or recognized.
Online/
Printing/
Warm-up
Printer error
No paper
Toner empty
*******
*******
*******
*******
*******
Printer is being monitored properly.
Error is occurring in printer. Check the printer.
Paper has run out. Please load paper.
Amount of paper is very low. Add paper.
(This icon is displayed with other icon.)
Toner has run out. Supply toner.
The remaining amount of toner is very low.
Cover open
Paper jam
*******
*******
*******
*******
Prepare for a new toner.
(This icon is displayed with other icon.)
Cover is open. Close the cover.
Paper jam is occurring. Remove the paper.
Error requiring a service call is occurring.
41

[JOB] Tab
Under the [JOB] tab, job information acquired from the
printer is shown.
Note: Only the jobs printed from the printer driver are displayed.
[NETWORK] Tab
Network device information is displayed in the upper area
and detailed information of network protocol is displayed in
the lower section.
42

Setting Screens of Printer Monitor
Remote Key (Effective only for Supported Printers)
Remotely performs feed, restart, pause, and reset for the
printer. Checks a printer status using the LCD message
display.
Note: LCD message display is shown only in English.
For the LCD Message Display, refer to
’Icons Used for Printer Image and LCD Message Display’.
[FEED]
Same operation as when the printer’s FEED key is pressed.
[RESTART]
Same operation as when the printer’s RESTART key is
pressed.
[PAUSE]
Same operation as when the printer’s PAUSE key is pressed.
[Reset]
Resets the printer. (Same operation as when the power is turned off and on)
[Close]
Closes the Remote Key screen and updates the printer monitor.
Management Info Property (Effective only in Administrator mode)
Specifies management information for the printer.
Note that items displayed for the Supported Printers differ from those for other printers.
Note: On the [Management Info Property] screen, only one-byte alphanumeric characters and symbols can be
used. Two-byte characters (Hiragana, Katakana, alphanumeric characters, symbols) and one-byte
Katakana cannot be used.
Management Info Property
[ID Number], [Administrator], and [Comment] cannot be
set for printers other than the Supported Printers.
Printer Name
A printer name is entered, with which printer setting
information is obtained/changed when the [Printer
Monitor] screen is displayed.
(Up to 255 characters)
Location
A location is entered, with which printer setting
information is obtained/changed when the [Printer
Monitor] screen is displayed.
(Up to 255 characters)
ID Number
A serial number is entered, with which printer setting
information is obtained/changed when the [Printer
Monitor] screen is displayed.
(Up to 16 characters)
Administrator
A name of the Administrator is entered, with which
printer setting information is obtained/changed when
the [Printer Monitor] screen is displayed.
(Up to 64 characters)
Contact
A contact is entered, with which printer setting
information is obtained/changed when the [Printer
Monitor] screen is displayed.
(Up to 255 characters)
Comment
Other information is entered, with which printer
setting information is obtained/changed when the
(Supported Printers)
(Other printers)
43

[Printer Monitor] screen is displayed.
(Up to 255 characters)
[Update]
Updates printer information (Printer Monitor).
[Close]
Closes the screen without saving the current setting.
About… (Version Information)
[About Net View] (version information) is displayed.
Click [OK] to return.
44

3. Printer Setting
Printer Setting (Net Config)···················································································································46
Important Notice on This Feature...................................................................................................... 46
Operation Flow..................................................................................................................................46
Starting Printer Setting................................................................................................................... 46
Starting Printer Setting from Printer Monitor Screen .....................................................................48
Details of Screen Displayed and Used by This Feature ...................................................................49
Printer Setting................................................................................................................................49
Printer Setting – Details of Tab ........................................................................................................51
[Maintenance] Tab .........................................................................................................................51
[General] Tab .................................................................................................................................51
[Device] Tab .......................................................................................................................... 52
[Option] Tab .......................................................................................................................... 52
[Option] Tab – Setting for SNMP ...................................................................................................52
[Adjust] Tab ....................................................................................................................................53
Positional Adjustment Using [Adjust] Tab......................................................................................53
[Network] Tab ............................................................................................................................. 56
45

Printer Setting (Net Config)
This feature is for changing the printer setting using the [Printer Setting] function. When configuring the system
of several printers at the same time, use [Batch Printer Set].
Important Notice on This Feature
This feature was designed based on the assumption that it is used by the Administrator. If there is a possibility
that the User may operate a computer on which the Product is installed, let the User enter the password on the
[Login] screen at the startup of the Surveillance Tool. To do this, check [Use password to log in] on the
[Management Options] screen of the Surveillance Tool. The Administrator must control this login password.
For details of the setting, please refer to the key operation sections of the System Mode Manual for each of the
Supported Printers.
Our Company shall not be liable for any outcome resulted from the use of this feature by the User.
Operation Flow
Starting Printer Setting
1. Start the Surveillance Tool and right-click the
applicable printer. Select [Printer Setting...].
When you logged in in User mode, you cannot select [Printer
Setting…].
You can also start [Printer Setting…] by Selecting [Device] –
[Printer Setting...].
Supplemental explanation:
[Batch Printer Set] is useful when configuring several
printers at the same time.
To select [Batch Printer Set], left-click and move the mouse
with holding down the left button over the applicable
printers. The selected printers will be highlighted.
Then, right-click and select [Printer Setting...].
Or, select [Device] – [Printer Setting...].
Note: [Batch Printer Set] is not available under the following
situation.
Selected printers are not the same model.
46

2. [Printer Setting] starts.
For details of the screen, refer to the section,
‘Screens Displayed and Used by This Feature.
3. Change the setting.
For details of setting, refer to ‘Printer Setting – Details of
Tab’.
Click [Exit] to complete the printer setting.
47

Starting Printer Setting from Printer Monitor Screen
You can start [Printer Setting] from the [Printer Monitor] screen, but [Batch Printer Set] is disabled.
1. Select: [Device] – [Printer Monitor].
Double-clicking a desired printer does the same operation.
2. The [Printer Monitor] screen appears.
Start [Printer Setting] by selecting [Device] –
[Printer Setting...]
Clicking the [Printer Setting...] button in the bottom-middle
area does the same operation.
When you logged in in User mode, you cannot select
[Printer Setting…].
3. [Printer Setting] starts.
For details of the screen, please refer to the section,
’Details of Screen Displayed and Used by This Feature’.
4. Change the setting.
For details of setting, refer to ‘Printer Setting – Details of
Tab’.
Click [Exit] to complete the printer setting.
48

Details of Screen Displayed and Used by This Feature
Printer Setting
(1) Title Bar
(2) Tab
Printer Setting
Batch Printer Set
(3) Information Area
(4) Help Area
(1)
(2)
(3)
(4)
(5)
(7)
(6)
(8) (9)
Right-clicking the title bar displays a menu.
Selecting [About...] displays [About Net Config] (version information) screen.
Setting information is categorized under each tab.
Tabs displayed differ depending on a function initiated.
Six categories: Maintenance, General, Device, Option, Adjust, Network
Four categories: General, Device, Option, Adjust
Displays setting information for a selected tab in a tree format. Each icon at the left side of the items
indicates as follows:
,
status
Displays setting values at the right side of the colons.
Displays help information for an item selected in the information area.
(Yellow);
; Item,
Information to be updated,
(Gray); information that cannot be changed, (Green); current printer
(Red); Read error information
.
49

(5) Setting Value Area
Displays a setting value for an item selected in the information area. Depending on the setting method,
either of the following boxes is displayed: combobox, edit box, or spin control.
ComboBox
You can specify a value by either entering text or choosing an item.
Edit Box
You can specify a value by entering text. Please note that text cannot be entered in the edit box where
the background color is gray.
Spin Control
You can specify a value by clicking the ▲ or ▼ mark at the right side which increases/
decreases the value or by directly entering a value.
(6) [Function >>]
Displays the supplemental functions of [Printer Setting] in menu format.
Import...
Opens a data file and loads the setting.
Export...
Saves the current setting in text or data format.
When the current setting is saved in text format, [Import...] is disabled.
Refresh...
Obtains the latest information for all items from the printer. The information is updated only
when the printer is in idle state.
List... (Effective only for Batch Printer Set)
Shows a list of port information of printers
to be set together.
To remove a printer, click [Remove].
Clicking [Exit] shows the [Batch Printer Set] screen.
Clear All (Effective only for Batch Printer Set)
Clears all information to be updated.
(7) [Set] ([Clear] under the [Maintenance] tab)
Reflects the value selected in the setting value area to the
information area.
Under the [Maintenance] tab, the name of this button is
[Clear] which clears the counter.
(8) [Update]
Reflects the setting for the printer.
(9) [Exit]
Exits the [Printer Setting] function.
50

Printer Setting – Details of Tab
Tabs displayed differ depending on a function initiated.
Printer Setting
Six categories: Maintenance, General, Device, Option, Adjust, Network
Batch Printer Set
Four categories: General, Device, Option, Adjust
For explanation of items to be set under each tab, please refer to the key operation sections of the System Mode
Manual for each of the Supported Printers.
Note: Setting values are not displayed on the [Batch Printer Set] screen because several printers are configured at the
same time. In addition, added functions, which were added by the firmware’s function, are ignored nor set if
such added functions are not supported by the Supported Printers.
Note: Some of the items listed under each Tab are not displayed on the screen if such items are not supported by the
Supported Printer.
[Maintenance] Tab
Displays items for maintenance counter information and clears
the counter.
TOTAL FEED (total label distance covered) cannot be cleared.
[General] Tab
Displays and sets the items about general information.
There are four major setting items: [Character], [Command],
[Action], and [Peel-off].
Character
Sets characters used for printer font and LCD message
display.
Command
Sets Euro font code, selects the method by which
MaxiCode barcodes are created, and selects the type of
control code used for command analysis.
Action
Makes setting for each of printer actions.
Peel-off (hereinafter referred to as “strip”)
Makes printer setting in strip issue mode.
51

[Device] Tab
Displays and sets the items about device information.
There are four major setting items: [Ribbon], [Parallel Port],
[Serial Port], [RTC], and [Expansion].
Ribbon
Selects the condition for ribbon near end detection.
Parallel Port
Makes setting for parallel port.
Serial Ports
Makes setting for serial port.
RTC
Makes setting for RTC.
Expansion
Selects the expansion I/O operation mode and selects
whether or not the Web server function is active.
[Option] Tab
Displays and sets the items about option information.
There are three major setting items: [RFID], [BASIC],
[Stabilizer], and [SNMP].
RFID
Makes setting for RFID.
BASIC
Makes setting for BASIC interpreter and BASIC
interpreter trace.
Stabilizer
Makes setting for stabilizer.
SMNP
Makes setting for SMNP.
For Trap 1 to 10, sets conditions under which trap
notifications are sent and destination IP address.
[Option] Tab – Setting for SNMP
TRAP1 to 10
Sets the trap condition under which the printer sends trap notifications.
OFF : Does not send trap notifications.
Error : Sends a trap notification when an error occurs.
Job end : Sends a trap notification when a print job completes (for each print job).
Error & Job end : Sends a trap notification when a print job completes (for each print job) and when
an error occurs.
Note: Job end is effective when printing is performed using the printer driver.
IP ADDRESS
Specifies an IP address of a computer to which the printer sends a trap notification. The IP address of a
computer, on which the Surveillance Tool (Net Admin) is installed, is specified.
52

One labe
[Adjust] Tab
Displays and sets the items about adjustment information.
There are four major setting items: [Position], [Density],
[Ribbon], and [Sensor].
Position
Makes setting for positional relationship between paper
and the printer.
‘Positional Adjustment Using [Adjust] Tab’
Density
Selects a fine adjustment value for the print density.
Ribbon
Selects a fine adjustment value for the ribbon motor drive
voltage.
Sensor
Selects a manual threshold fine adjustment value for the
reflective sensor or transmissive sensor.
Positional Adjustment Using [Adjust] Tab
This section explains an adjustment of position using the [Adjust] tab. For details, refer to the key operation
sections of the System Mode Manual for each of the Supported Printers.
FEED ADJ. (Feed fine adjustment)
The feed fine adjustment changes a print position on paper.
As in the right figure, increasing a value in the plus (+)
direction (more feed length) prints data in an area closer to
the leading edge of paper and decreasing the value (less
feed length) in the minus (–) direction prints data in an area
further from the leading edge of paper.
CUT ADJ. (Cut (strip) position fine adjustment)
The cut (strip) position adjustment changes a cut (strip)
position of paper. As in the right figure, increasing a value
in the plus (+) direction (less cut area) cuts the paper in an
area closer to the leading edge and decreasing the value
(more cut area) in the minus (–) direction cuts the paper in
an area further from the leading edge.
+0.0 mm
+3.0 mm
-3.0 mm
+0.0 mm
+3.0 mm
-3.0 mm
Paper feed
direction
Paper feed
direction
Print
start
One label
Print start
position
One label
Print start position
Cut position
Cut position
Cut position
l
53

(2)
(A)
<Handling of label papers having the label pitch of less than 22 mm in cut issue mode>
The minimum label pitch in normal cut issue mode is 22.0 mm. When a label paper having the label pitch
of less than 22.0 mm is used (although it is out of specification), an edge of a label is caught by an edge of
the thermal head during a back feed to the home position after the paper is cut in a gap area between labels.
This may prevents the label from being fed back to the proper home position. In such case, perform the
method below to solve the problem.
Workaround by adjusting the cut position fine adjustment value
When this method is used, one or more printed labels are left between the head and the cutter, which
should be removed by an issue or a label feed.
Calculation of cut position fine adjustment value
The cut position fine adjustment value is calculated using the following formula. If the paper still is
not fed back to the proper home position using the value obtained, the cut position should be adjusted
using any other value.
Cut position fine adjustment value = (Number of labels left between head and cutter) X (Label pitch)
=
22.0 mm
x (Label pitch)
Label pitch
* Any decimal remainders are dropped.
(For example) Label pitch: 20.0 mm
Cut position fine adjustment value = x (20.0 mm)
22.0 mm
20.0 mm
= 1 x 20.0 mm
= +22.0 mm
Operation example
Issue count: 2, Cut interval = 1
Cut
position
Head
position
A
(1) Idling
B
A
B C
A
C
B
A
B C
B
A
C
B
A
C
A
B
C
A
B C
B
A
C
B
C
Completes printing Label (A).
(3) Feeds Label (A) to the cut position,
then cuts the paper between the
previous label and Label (A).
(4) Backfeeds the paper to the home
position of Label (B).
(5) Completes printing the Label (B).
(6) Feeds Label (B) to the cut position,
then cuts the paper between Label
and Label (B).
(7) Backfeeds the paper to the home
position of Label (C).
(8) To eject Label B, feeds Label (C).
(9) Feeds Label (C) to the cut position,
then cuts the paper between Label
(B) and Label (C)
(10) Backfeeds the paper to the home position.
A
54

(
)
(
)
(
)
Strip position fine adjustment
0.0 mm
+3.0 mm
+3.0 mm
Assuming the label gap is 2 mm, the print stop position in
strip issue mode is designed in a manner so that printing
stops when the distance from the middle of the gap
between labels to the end of the strip shaft is 4 mm.
When this print stop position is not proper because the gap
is more than 2 mm, the print stop position should be
adjusted using the strip position fine adjust function.
BACK ADJ. (Back feed fine adjustment)
There may be cases where a label is not returned to the
home position depending on the print conditions, even if a
backfeed length is the same as a forward feed length.
When an operation including back feed (cut issue, strip
issue, forward feed standby after an issue) is performed
using a sensor, a label/tag may not be returned to the home
position resulting an error, if the label pitch length is almost
the same as the distance between the thermal print head
and the paper sensor (69.8 mm). To prevent this problem,
the backfeed length should be increased by performing the
back feed fine adjustment in the + direction.
Label
+0.0 mm
+3.0 mm
-3.0 mm
4 mm
3 mm
Strip shaft
Print start position
Home position after back feed
Print start position
Home position after back feed
Print start position
Home position after back feed
Paper feed direction
Print head
Platen
Gap
Label
2 mm
55

[Network] Tab
Displays and sets the items about network information.
There are two major setting items: [TCP/IP] and [DHCP].
TCP / IP
Makes setting for TCP/IP.
DHCP
Makes setting for DHCP.
Note: Clicking [Update] does not reflect the network
information on actual printer control. To reflect
the information, turn the printer power off and on
or reset the printer using the Remote Key (Page
43) of the printer.
56

4. Downloader
Downloader (Net Loader) ·····················································································································58
Important Notice on This Feature...................................................................................................... 58
Installing the Downloader ............................................................................................................58
When the User Installs the Product...............................................................................................58
When Connecting Supported Printers to Computer via USB........................................................58
When Connecting Supported Printers to LAN...............................................................................58
Types of Download Files...................................................................................................................59
Operation Flow..................................................................................................................................60
Starting Downloader Using Surveillance Tool................................................................................ 60
Starting Downloader Using [Start] Button ...................................................................................... 61
Downloading Operation ................................................................................................................. 62
Screens Displayed and Used by This Feature..................................................................................64
[Printer Selection] Screen..............................................................................................................64
[Add Printer…] Screen................................................................................................................... 64
Downloader Main Screen ..............................................................................................................65
[Select file to download] Screen .................................................................................................... 65
[Download] Screen ........................................................................................................................65
[Customizing] Screen ....................................................................................................................66
[About Net Loader] Screen (Version Information) .........................................................................66
Download Result File ........................................................................................................................67
Example of Download Result File .................................................................................................67
57

Downloader (Net Loader)
This feature is for downloading files required for printer setting.
Important Notice on This Feature
This feature was designed based on the assumption that it is used by the Administrator.
Our Company shall not be liable for any outcome resulted from the use of this feature by the User.
Installing the Downloader Only
This feature can be installed independent of the Surveillance
Tool. To only install the Downloader, only check [Net Loader]
on the [Select Features] screen.
‘Installation Procedure (for the Administrator) – Downloader
Only’
In this case, the Downloader will not be started from the
Surveillance Tool. To directly start the Downloader, use the
[Start] button in the task bar (i.e. select: [Start] in the task bar –
[Okidata] – [LE840-850] – [Network Tool] – [Net Loader]).
‘Starting Downloader Using [Start] Button’
When full installation of the Product has been performed, the
Downloader can be started either from the Surveillance Tool or
from the [Start] button.
When the User Installs the Product
When the Product is fully installed, the Downloader can be
directly started from the [Start] button as in the same case as
when only the Downloader is installed. In this case, the
Downloader can be used even when [Use password to log in] is
checked in the [Management Options] of the Surveillance Tool.
However, please note that this feature was designed based on
the assumption that it is used by the Administrator and Our
Company shall not be liable for any outcome resulted from the
use of this feature by the User if the Downloader is started from
the [Start] button.
The Administrator and the User who want to use the
Surveillance Tool only, install the Product without checking [Net
Loader].
‘Installation Procedure (for the User)’
When Connecting Supported Printers to Computer via USB
When the Supported Printers are connected to a computer via USB, you can perform printing without using the
printer driver, but the printer driver installation screen appears when you use this feature.
For your convenience, please install the printer driver following the instructions on the screen.
When Connecting Supported Printers to LAN
Setting for IP address in printer System mode
When downloading via LAN, you are required to set the IP address of your printer.
Please specify your printer IP address, gateway IP address, and subnet mask in System mode of the printer.
For details, refer to the product manual.
Also, please make setting for socket communication in printer System mode as in the same manner as for IP
address because the Downloader communicates with the printer by socket communication.
58

Open of Socket Communication
When downloading via LAN, please stop the socket communication if it is performed by other software. After
finishing the applicable software, start downloading.
When Supported Printer is in Use
Stop of Status Monitor of Printer Driver
Please stop the status monitor of the printer driver if it is in operation, then start downloading.
View when the status monitor is in operation
With status monitor With icon
How to Stop Status Monitor
Please open the Properties of the printer driver in the printer folder, select the [Port] tab, and remove the check
from the “Enable bi-directional support” checkbox.
Then, make sure that the icon indicating the status monitor is in operation has disappeared.
Types of Download Files
This feature can download the following files:
Type of File
Main program The file name is “MAIN”.
Boot program The file name is “BOOT”.
Character generator The file name is “CG”.
KANJI1/KANJI2 The file name is “KANJI1 and KANJI2”.
Writable characters The file name is “GAIJI”.
HTML The file name is “HTML”.
Note: Download files must be prepared in advance.
Please ask your local sales engineer about how you can obtain the download files.
59

Operation Flow
Before downloading, the Downloader needs printer information, which can be obtained using the Surveillance
Tool or the Downloader.
Starting Downloader Using Surveillance Tool
1. Click: [Start] – [All Programs] – [Okidata] – [LE840-850] – [Network Tool] – [Net Admin] to start the
Surveillance Tool.
Please start the Surveillance Tool in Administrator mode.
2. While the printer is highlighted, select: [Device] –
[Downloader] in the List View screen.
When you logged in in User mode, you cannot select the
Downloader.
When the printer is not on the Printer List, please search the
printer by selecting: [Device] – [Search].
3. The “Obtaining printer information” message appears.
4. The printer is shown in the [Printer:] area of the main
screen of the [Net Loader] screen (hereinafter referred
to as “the Main screen”.
Clicking displays the [Select file to download] screen.
Clicking [DOWNLOAD START] displays the [Download]
screen, and starts downloading a file.
For details of the screen, refer to
‘Screens Displayed and Used by This Feature’.
5. Now you can start downloading. Please go to Step 1 in ‘Downloading Operation’.
60

Starting Downloader Using [Start] Button
This section describes the procedure to start the Downloader without using the Surveillance Tool.
Both of the Administrator and the User can start the Downloader by using this procedure.
1. Click: [Start] – [All Programs] – [Okidata] – [LE840-850] – [Network Tool] – [Net Loader] to start the
Downloader.
2. The [Printer selection] screen appears.
To automatically search the printer, please click
[Printer Search].
To manually search the printer, please click [Add Printer..]
For details of the screen, please refer to
‘Screens Displayed and Used by This Feature’.
3. Make sure the check box at the left side of the model
name is checked (
Clicking [OK] with the several different printer models
selected displays the following error message:
“You are selecting the several different printer models.
Please select only one printer model. “
Check the check box (
click [OK].
)
, then click
[OK].
) for the same printer models and
4. The printer is shown in the [Printer:] area of the Main
screen.
Clicking displays the [Select file to download] screen.
Clicking [DOWNLOAD START] displays the [Download]
screen, and starts downloading a file.
For details of the screen, please refer to
‘Screens Displayed and Used by This Feature’.
5. Now you can start downloading.
Please go to Step 1 in ‘Downloading Operation’.
61

Downloading Operation
1. Click
screen.
2.
The [Select file to download] screen appears.
Select a download file and click [Open].
in the [Download file:] area of the Main
3. The file name and details are shown in the
[Download file:] area.
Click the [DOWNLOAD START] button in the bottom
right area to start downloading.
62

4. Downloading the file selected in the
[Select file to download] screen starts.
The progress bar indicates the status.
5. When the download completes, the
[Save the result] and [OK] buttons are enabled.
To save the download result, click [Save the result],
and to show the Main screen without saving the result,
click [OK].
For details of files to be saved by [Save the result], please
refer to ‘Download Result File’.
63

Screens Displayed and Used by This Feature
This section explains each screen.
[Printer Selection] Screen
This screen appears when the downloader is started alone or
when no printer information has been recorded.
You will list a printer by clicking [Printer Search] or [Add
Printer…].
When the printer is searched and added, the right figure
appears. If a printer you want to use is not on the list, please
list the printer by clicking [Printer Search] or [Add Printer].
When several printers are on the list, you can select a printer
using the search function at the bottom of the screen.
[Add Printer…] Screen
This screen appears when you click [Add Printer] on the
[Printer Selection] screen.
Available connection: LAN, COM (serial port), LPT, or USB
Items to be set for each connection
LAN : IP address
COM : Transmission speed, data length, parity,
stop bit
LPT, USB : None
(The right figure is for the case when LAN is selected.)
Note: If you are using the Supported Printers without using the
printer driver, the printer driver installation screen appears
when the Supported Printers are connected to a
computer via USB.
In such case, please install the printer driver following the
instructions on the screen.
64

Downloader Main Screen
This is the Main screen of the Downloader which includes the
printer list and download file information.
To add or remove printers, click [Add or remove printer], and the
[Printer selection] screen appears.
Clicking
Clicking [Customiz…] displays the [Customizing] screen.
displays the [Select file to download] screen.
[Select file to download] Screen
Clicking
the [Select file to download] screen.
After you select a download file, file information is shown at the
bottom area of the screen.
Please ask your local sales engineer about how you can
obtain the download files.
The right screen appears when you selected a file which is not a
download file and clicked [Open].
Please click [OK] to show the [Select file to download] screen.
on the Main screen of the Downloader displays
[Download] Screen
This screen appears when a file is being downloaded.
The progress bar in the [Progress…] area indicates the progress
of the download.
When the download completes, the [Save the result] and [OK]
buttons are enabled.
To save the download result, click [Save the result], and to show
the Main screen without saving the result, click [OK].
65

[Customizing] Screen
This screen appears when [Customiz…] is clicked on the
Downloader Main screen.
This screen allows you to select printer information to be
displayed in the [Printer info item:] area and select a background
color in the [Background color:] area.
[About Net Loader] Screen (Version Information)
1. Right clicking on the title bar displays a pull-down menu. Select [About Net Loader…].
2. The [About Net Loader…] screen (version information) appears. Click [OK] to close it.
66

Download Result File
Time and date when the download was started/finished, download file information, printer information
(before/after downloading), and results are saved in text file. After the download completes, clicking [Save the
result] displays a screen where you can enter a file name. Please enter the file name and click [Save] to save
the file.
Example of Download Result File
******** Download of the main program ********
Date and time when started : YYYY/MM/DD 99:99:99.999
Date and time when finished : YYYY/MM/DD 99:99:99.999
---------------------------------------------------------------------------------------------Download file information:
File name : C:¥XXXXXXX¥XXXXXXXXXX.ROM
Model name : XXXXX Part number : XXXXXXXXX Version : V1.0
Data size : 99999KB Date : DDMMMYYY Destination address : 99999999H
----------------------------------------------------------------------------------------------
Printer 1 SNMP 999.999.999.999:9999
Model : XXXXXXXXX
Name : XXXXX
Printer information before download
Type : XXXXX
Main program version : V1.0 Main program date : DDMMMYYY
Boot program version : V1.0 Boot program date : DDMMMYYY
Character generator version : V1.0
Kanji font 1 version : V1.0 Kanji font 1 ROM : GOTHIC
Kanji font 2 version : V1.0 Kanji font 2 ROM : MINCHO
HTML program version : V1.0 HTML program date : DDMMMYYY
Printer information after download
Type : XXXXX
Main program version : V1.0 Main program date : DDMMMYYY
Boot program version : V1.0 Boot program date : DDMMMYYY
Character generator version : V1.0
Kanji font 1 version : V1.0 Kanji font 1 ROM : GOTHIC
Kanji font 2 version : V1.0 Kanji font 2 ROM : MINCHO
HTML program version : V1.0 HTML program date : DDMMMYYY
Result:
Normal end
**********************************************************************************************
Printer 2 SNMP 999.999.999.999:9999
Model : XXXXXXXXX
Name : XXXXX
Printer information before download
Type : XXXXX
Main program version : V1.0 Main program date : DDMMMYYY
Boot program version : V1.0 Boot program date : DDMMMYYY
Character generator version : V1.0
Kanji font 1 version : V1.0 Kanji font 1 ROM : GOTHIC
Kanji font 2 version : V1.0 Kanji font 2 ROM : MINCHO
HTML program version : V1.0 HTML program date : DDMMMYYY
Printer information after download
Type : XXXXX
Main program version : V1.0 Main program date : DDMMMYYY
Boot program version : V1.0 Boot program date : DDMMMYYY
Character generator version : V1.0
Kanji font 1 version : V1.0 Kanji font 1 ROM : GOTHIC
Kanji font 2 version : V1.0 Kanji font 2 ROM : MINCHO
HTML program version : V1.0 HTML program date : DDMMMYYY
Result:
Normal end
**********************************************************************************************
All completed successfully.
67

Oki contact details
Oki Systems (UK) Ltd
Blays House
Wick Road
Egham
Surrey
TW20 0HJ
Tel: +44 (0) 1784 274300
Fax: +44 (0) 1784 274301
http://www.oki.co.uk
Oki Systems Ireland Limited
The Square Industrial Complex
Tallaght
Dublin 24
Tel:+353 (0) 1 4049590
Fax:+353 (0)1 4049591
http://www.oki.ie
Oki Systems Ireland Limited Northern Ireland
19 Ferndale Avenue
Glengormley
BT36 5AL
Northern Ireland
Tel:+44 (0) 7767 271447
Fax:+44 (0) 1 404 9520
http://www.oki.ie
Technical Support for all Ireland:
Tel:+353 1 4049570
Fax:+353 1 4049555
E-mail: tech.support@oki.ie
OKI Systems (Czech and Slovak), s.r.o.
IBC – Pobřežní 3
186 00 Praha 8
Czech Republic
Tel: +420 224 890158
Fax:+420 22 232 6621
Website: www.oki.cz, www.oki.sk
Oki Systems (Deutschland)
GmbH
Hansaallee 187
40549 Düsseldorf
Tel: 01805/654 4357**
01805/OKIHELP**
Fax: +49 (0) 211 59 33 45
Website:
www.okiprintingsolutions.de
info@oki.de
**0,14€/Minute aus dem dt.
Festnetz der T-Com (Stand
11.2008)
Διανομέας των συστημάτων OKI
CPI S.A1 Rafailidou str.
177 78 Tavros
Athens
Greece
Tel: +30 210 48 05 800
Fax:+30 210 48 05 801
EMail:sales@cpi.gr
Oki Systèmes (France) S.A.
44-50 Av. du Général de Gaulle
94246 L'Hay les Roses
Paris
Tel:+33 01 46 15 80 00
Télécopie:+33 01 46 15 80 60
Website: www.oki.fr
OKI Systems (Magyarország)
Kft.
Capital Square
Tower 2
7th Floor
H-1133 Budapest,
Váci út 76
Hungary
Telefon: +36 1 814 8000
Telefax: +36 1 814 8009
Website: www.okihu.hu
OKI Systems (Italia) S.p.A.
via Milano, 11,
20084 Lacchiarella (MI)
Tel:+39 (0) 2 900261
Fax:+39 (0) 2 90026344
Website: www.oki.it
OKI Printing Solutions
Platinium Business Park II, 3rd
Floor
ul. Domaniewska 42
02-672 Warsaw
Poland
Tel:+48 22 448 65 00
Fax:+48 22 448 65 01
Website: www.oki.com.pl
E-mail: oki@oki.com.pl
Hotline: 0800 120066
E-mail: tech@oki.com.pl
Oki Systems (Ibérica) S.A.
Sucursal Portugal
Edifício Prime -
Av. Quinta Grande 53
7º C Alfragide
2614-521 Amadora
Portugal
Tel:+351 21 470 4200
Fax:+351 21 470 4201
Website:www.oki.pt
E-mail : oki@oki.pt
Oki Service
Serviço de apoio técnico ao
Cliente
Tel: 808 200 197
E-mail : okiserv@oki.pt
OKI Europe Ltd. (Russia)
Ofce 702, Bldg 1
Zagorodnoye shosse
117152, Moscow
Tel: +74 095 258 6065
Fax: +74 095 258 6070
e-mail: info@oki.ru
Website: www.oki.ru
Technical support:
Tel: +7 495 564 8421
e-mail: tech@oki.ru
Oki Systems (Österreich)
Campus 21
Businesszentrum Wien Sued
Liebermannstrasse A02 603
22345 Brun am Gebirge
Tel: +43 223 6677 110
Drucker Support:
+43 (0) 2236 677110-501
Fax Support:
+43 (0) 2236 677110-502
Website: www.oki.at
OKI Europe Ltd. (Ukraine)
Raisy Opkinoy Street,8
Building B, 2
Kiev 02002
Ukraine
Tel: +380 44 537 5288
e-mail: info@oki.ua
Website: www.oki.ua
OKI Sistem ve Yazıcı Çözümleri
Tic. Ltd. Şti.
Harman sok Duran Is Merkezi,
No:4, Kat:6,
34394, Levent
İstanbul
Tel: +90 212 279 2393
Faks: +90 212 279 2366
Web: www.oki.com.tr
www.okiprintingsolutions.com.tr
Oki Systems (Belgium)
Medialaan 24
1800 Vilvoorde
Helpdesk: 02-2574620
Fax: 02 2531848
Website: www.oki.be
AlphaLink Bulgaria Ltd.
2 Kukush Str.
Building "Antim Tower", . 6
1463 Soa, Bulgaria
tel: +359 2 821 1160
fax: +359 2 821 1193
Website: http://bulgaria.oki.com
nd
Floor,

OKI Printing Solutions
Herstedøstervej 27
2620 Albertslund
Danmark
Adm.: +45 43 66 65 00
Hotline: +45 43 66 65 40
Salg: +45 43 66 65 30
Fax: +45 43 66 65 90
Website: www.oki.dk
Oki Systems (Finland) Oy
Polaris Capella
Vänrikinkuja 3
02600 Espoo
Tel: +358 (0) 207 900 800
Fax: +358 (0) 207 900 809
Website: www.oki.
Oki Systems (Holland) b.v.
Neptunustraat 27-29
2132 JA Hoofddorp
Helpdesk: 0800 5667654
Tel:+31 (0) 23 55 63 740
Fax:+31 (0) 23 55 63 750
Website: www.oki.nl
Oki Systems (Norway) AS
Tevlingveien 23
N-1081 Oslo
Tel:+47 (0) 63 89 36 00
Telefax:+47 (0) 63 89 36 01
Ordrefax:+47 (0) 63 89 36 02
Website: www.oki.no
General Systems S.R.L. (Romania)
Sos. Bucuresti-Ploiesti Nr. 135.
Bucharest 1
Romania
Tel: +40 21 303 3138
Fax: +40 21303 3150
Website: http://romania.oki.com
Var vänlig kontakta din
Återförsäljare i första hand, för
konsultation. I andra hand kontakta
Oki Systems (Sweden) AB
Borgafjordsgatan 7
Box 1191
164 26 Kista
Tel. +46 (0) 8 634 37 00
e-mail:
info@oki.se för allmänna frågor om
Oki produkter
support@oki.se för teknisk support
gällandes Oki produkter
Vardagar: 08.30 - 12.00,
13.00 - 16.00
Website: www.oki.se
Oki Systems (Schweiz)
Baslerstrasse 15
CH-4310 Rheinfelden
Support deutsch +41 61 827 94 81
Support français +41 61 827 94 82
Support italiano +41 061 827 9473
Tel: +41 61 827 9494
Website: www.oki.ch
Oki Data Americas Inc.(United
States • États-Unis)
2000 Bishops Gate Blvd.
Mt. Laurel, NJ 08054
USA
Tel: 1-800-654-3282
Fax: 1-856-222-5247
http://
COM
http://my.okidata.com
Oki Data Americas Inc.(Canada
• Canadá)
4140B Sladeview Crescent Unit 7 & 8
Mississauga, Ontario
Canada L5L 6A1
Tél: 1-905-608-5000
Téléc: 1-905-608-5040
http://
COM
Oki Data Americas Inc.(América
Lat ina (OTRO))
2000 Bishops Gate Blvd.
Mt. Laurel, NJ 08054
USA
Tel (Español): 1-856-222-7496
1-856-222-5276
Fax: 1-856-222-5260
Email: LASatisfaction@okidata.com
Oki Data de Mexico, S.A. de C.V.
Mariano Escobedo #748, Piso 8
Col. Nueva Anzures
C.P. 11590, México, D.F.
Tel: 52-555-263-8780
Fax: 52-555-250-3501
http://
COM
Oki Data do Brasil, Ltda.
Rua Alexandre Dumas, 2220-80
andar Chácara Santo Antonio
04717-004, São Paulo, SP Brasil
Tel: 55-11-3444-6747 (Grande São
0800-11-5577 (Demais
Fax: 5511-3444-3501
e-mail: okidata@okidata.com.br
http://
COM
WWW.OKIPRINTINGSOLUTIONS.
WWW.OKIPRINTINGSOLUTIONS.
WWW.OKIPRINTINGSOLUTIONS.
Paulo)
localidades)
WWW.OKIPRINTINGSOLUTIONS.
Oki Data (Singapore) Pte. Ltd.
438A Alexandra Road #02-11/12,
Lobby 3, Alexandra Technopark
Singapore(119967)
Tel:(65) 6221 3722
Fax:(65) 6594 0609
http://www.okidata.com.sg
Oki Systems (Thailand) Ltd.
1168/81-82 Lumpini Tower,
27th Floor Rama IV Road
Tungmahamek, Sathorn
Bangkok 10120
Tel:(662) 679 9235
Fax:(662) 679 9243/245
http://www.okisysthai.com
Oki Data(Australia) Pty Ltd.
Level1 67 Epping Road, Macquarie
Park
NSW 2113, Australia
Tel: +61 2 8071 0000
(Support Tel: 1800 807 472)
Fax: +61 2 8071 0010
http://www.oki.com.au
Comworth Systems Ltd.
8 Antares Place Rosedale,
Auckland 0632, New Zealand
Tel:(64) 9 477 0500
Fax:(64) 9 477 0549
http://www.comworth.co.nz
Oki Data(S) P Ltd. Malaysia Rep
Ofce
Suite 21.03, 21st Floor Menara IGB,
Mid Valley City,
Lingkaran Syed Pura 59200,
Kuala Lumpur, Malaysia
Tel: (60) 3 2287 1177
Fax: (60) 3 2287 1166

Oki Data Corporation
4-11-22 Shibaura, Minato-ku,Tokyo
108-8551, Japan
www.okiprintingsolutions.com
Rev2
 Loading...