


Installation
Checklist:
h
h
h
C7100/C7300/C7500/C9300/C9500
Software Installation Guide
Print a Demo Page................................................................................2
Which Printer Driver? ..........................................................................2
Installation
Network Installation
Connect to the Network Port .............................................3
Install the Ferrite Core ..........................................................4
Windows
Install Printer Software for TCP/IP .................................... 5
Novell
Install Software for Configuring the Printer.................... 7
Local Installation
USB
Connect to the Computer....................................................8
Install Software
Windows 98 ....................................................................9
Windows XP ................................................................. 10
Windows 2000 ............................................................ 11
Windows Me ................................................................ 12
Parallel
Connect to the Computer................................................. 13
Install Printer Software ...................................................... 14
Macintosh Installation
Connect to the Computer
Network ......................................................................... 15
USB ................................................................................. 15
Install Printer Software
OS 8.6 - 9.1 .................................................................. 16
OS X.1 ............................................................................ 18
h
Affix the Handy Reference ............................................................. 19
Service and Support Resources....................................................... 20
1
Print a Demo Page
Printer Drivers
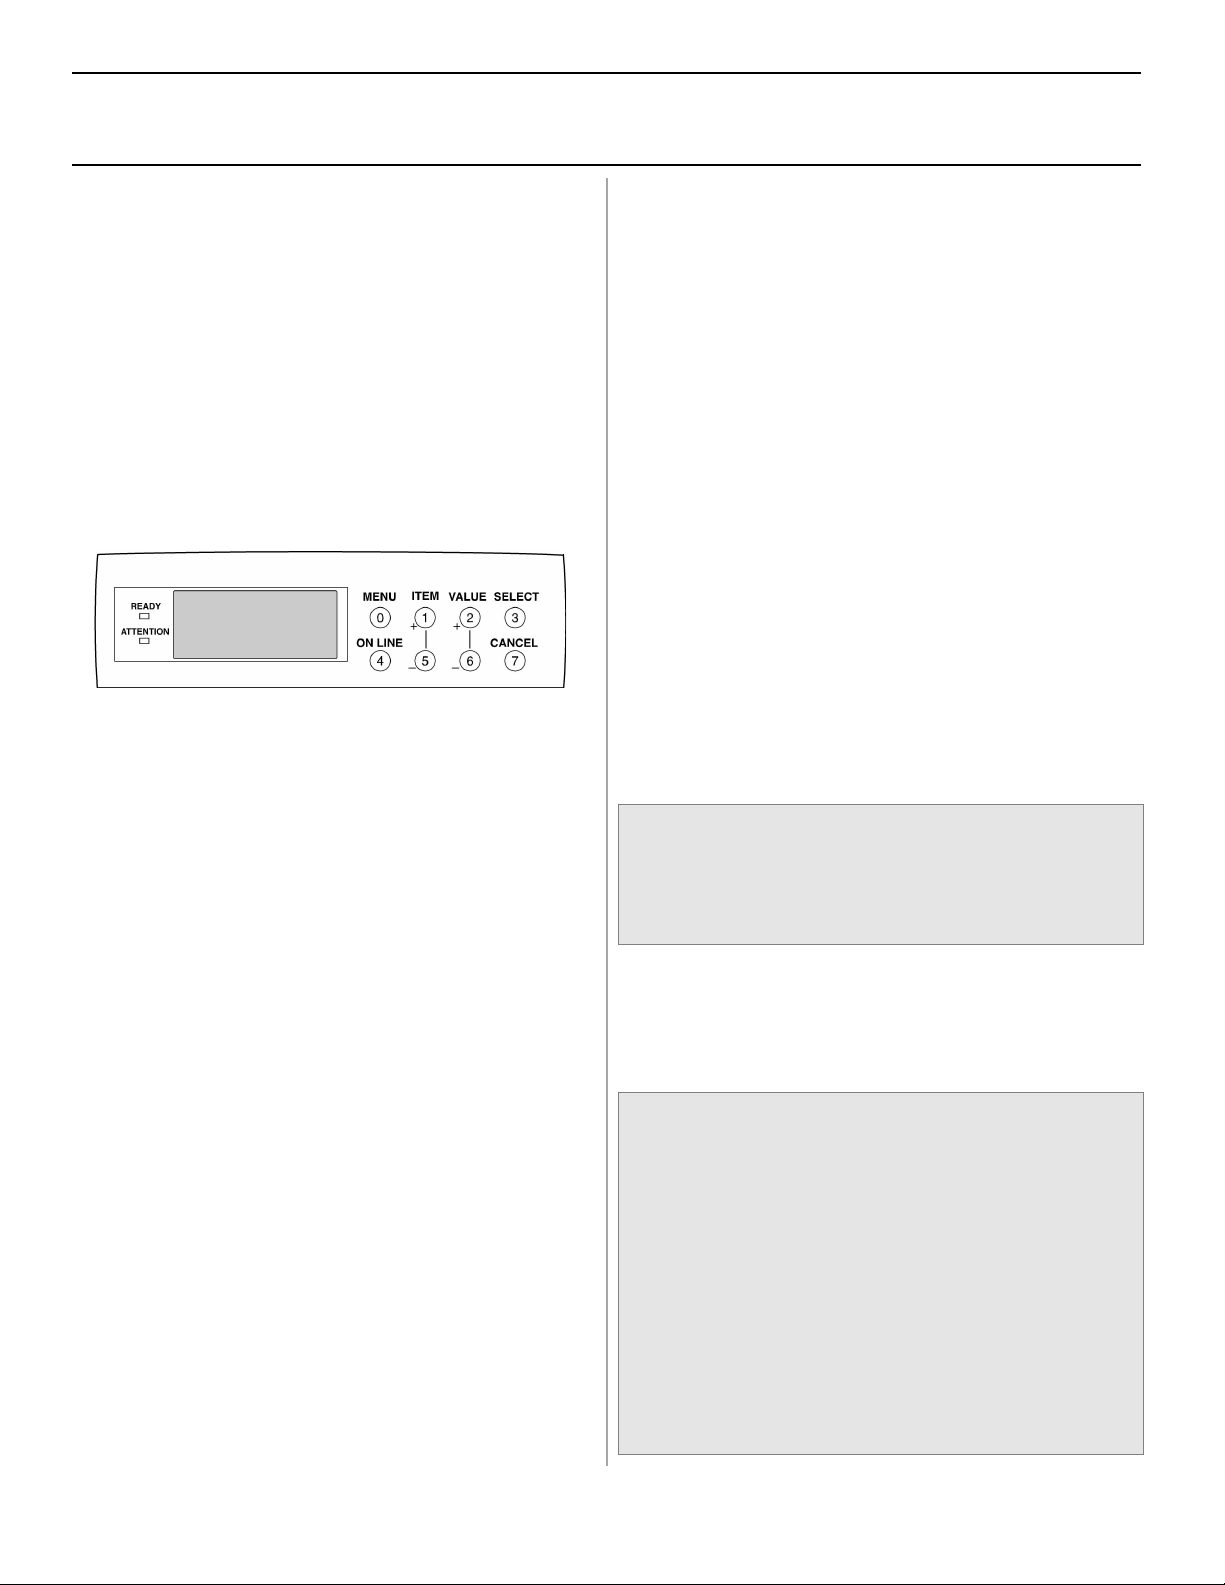
To test the printer, print a Demo page:
□ Press MENU repeatedly until INFORMATION
MENU appears.
□ Press ITEM - repeatedly until DEMO1
displays.
□ Press SELECT. The Demo page prints and the
printer goes back on line.
Which Printer Driver?
Your printer comes with Windows drivers for PCL and
PostScript(PS). You can install either driver or both,
depending on your application.
If you use TrueType fonts and you do not print PostScript
(including “.eps” files) graphics, choose the PCL driver.
This will be more efficient and give good results.
If you use PostScript fonts or you will be printing
PostScript graphics, choose the PostScript driver.
Performance will be faster and graphics will be printed at
their best quality.
If your applications vary, you could choose to install both.
Then select the one you plan to use most to be your
Windows default driver. Choose the alternate driver from
within the print dialog when you need to.
If you install both drivers, simply select the same printer
port (LPT1 or Network Port) during the installation.
Readme File
Please refer to the readme file on CD1 for the
latest information on printer drivers.
OKI Knowledge Base
See the OKI Knowledge Base at my.okidata.com for a
complete listing of all the knowledge Oki Data knows
about your product. These documents are in the format
of FAQ's (frequently asked questions), Application
Notes and Troubleshooting documents.
This section is usually a good first source of
information about your OKI product. The topics
include applied solutions, general, installation and
setup, product usage and troubleshooting.
2
Network Installation
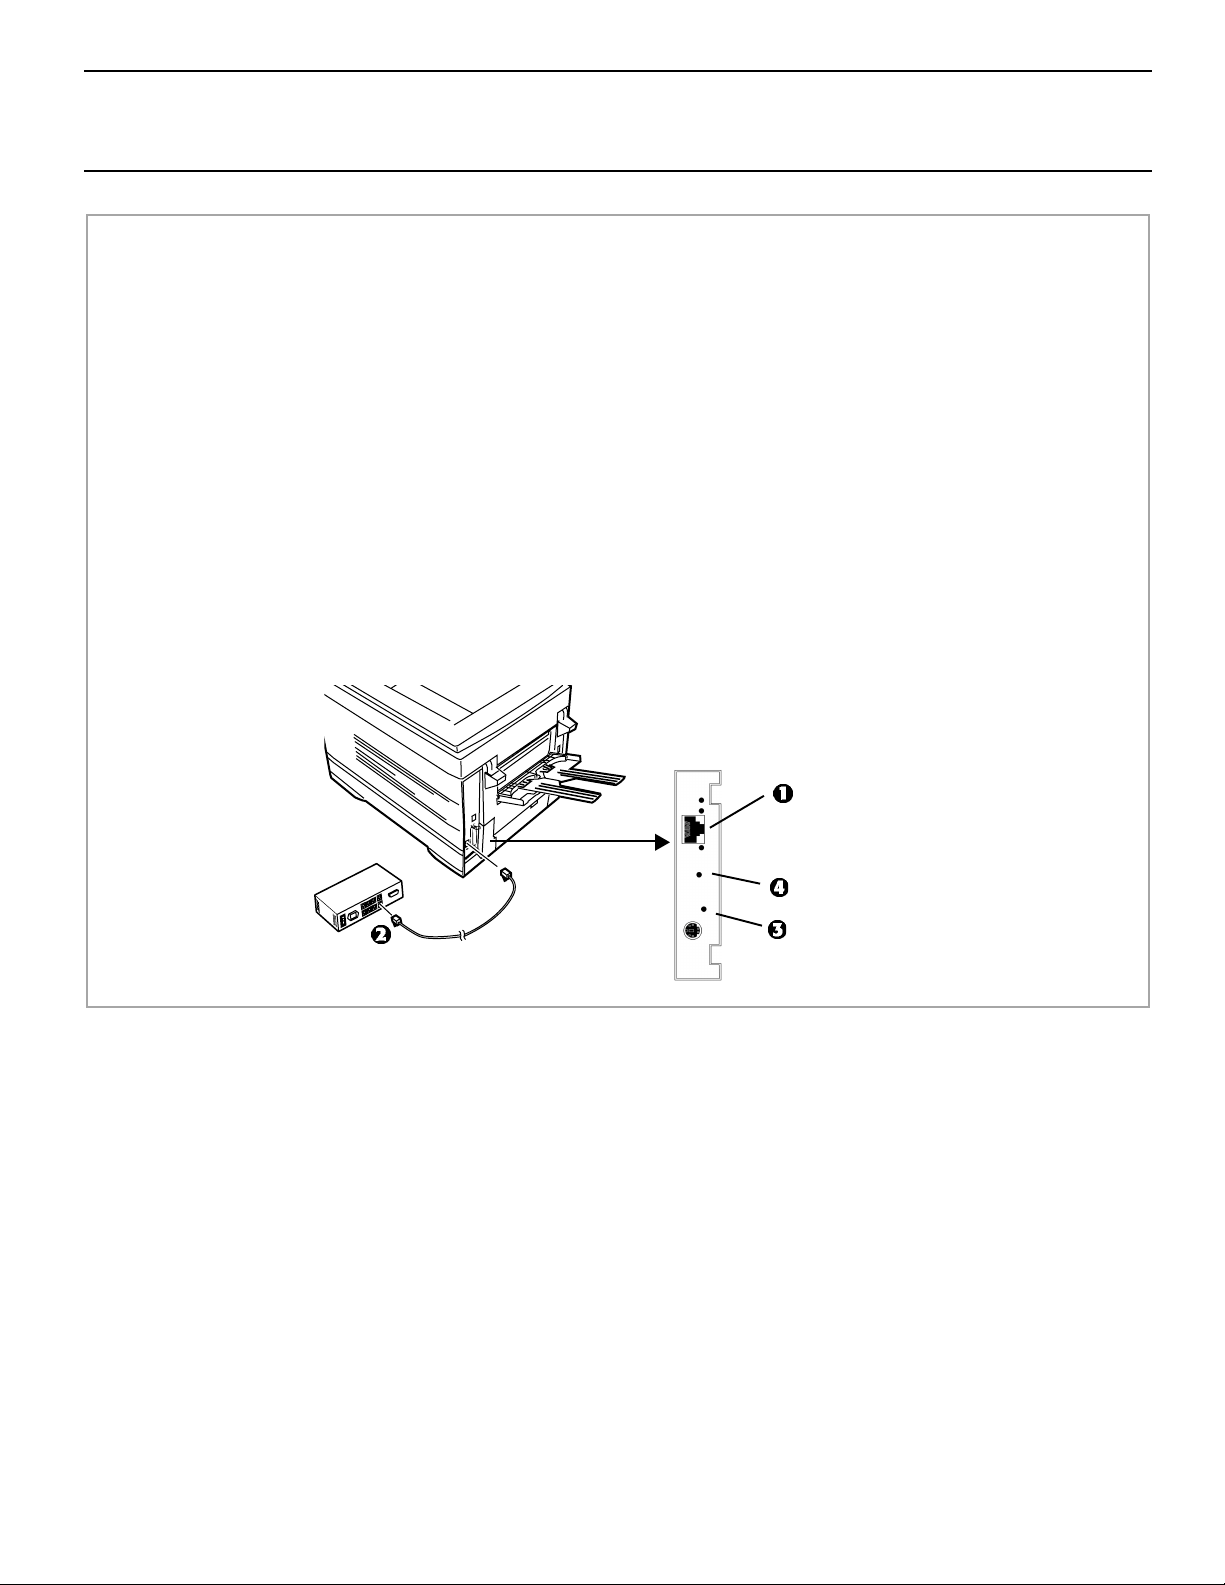
Connect to the Network Port
No Ethernet® cable is supplied with the printer. Use an Ethernet cable with two twisted wire pairs
and an RJ45 plug.
!
□ Turn the printer off.
□ Connect your Ethernet cable to the network port on the print server (1).
□ Connect the other end of the cable to the network port (2).
□ Turn the printer on and wait for the print server status light (3) to stop blinking.
□ Press the Test button (4) on the print server. An OkiLAN Configuration Sheet prints. This sheet
contains information you need to set up the printer on your network.
3

Network Installation
Install the Ferrite Core
Important!
In order to reduce electromagnetic interference—”noise” that interferes with TVs or other appliances—you
must put the enclosed ferrite core on the network cable connected to your printer.
This is required by the FCC.
Here’s how to do it:
□ Disconnect the network cable from the printer, if necessary.
□ Loop the cable if necessary to keep the ferrite core
in place.
□ Place the open core about 1 inch from the cable connector on the printer end.
□ Press the two halves of the core together until they
click shut.
4
Windows® Network Installation
Install Printer Software for TCP/IP
Installing a printer on a network is best handled by
someone familiar with networks (such as a network
!
Administrator).
TCP/IP Configuration Options
For information on how to modify configuration
settings specific to the TCP/IP protocol such as IP
address, subnet mask and default gateway, see the TCP/
IP section in the OkiLAN 6200e+ User’s Guide located
on both CDs.
Install the Drivers
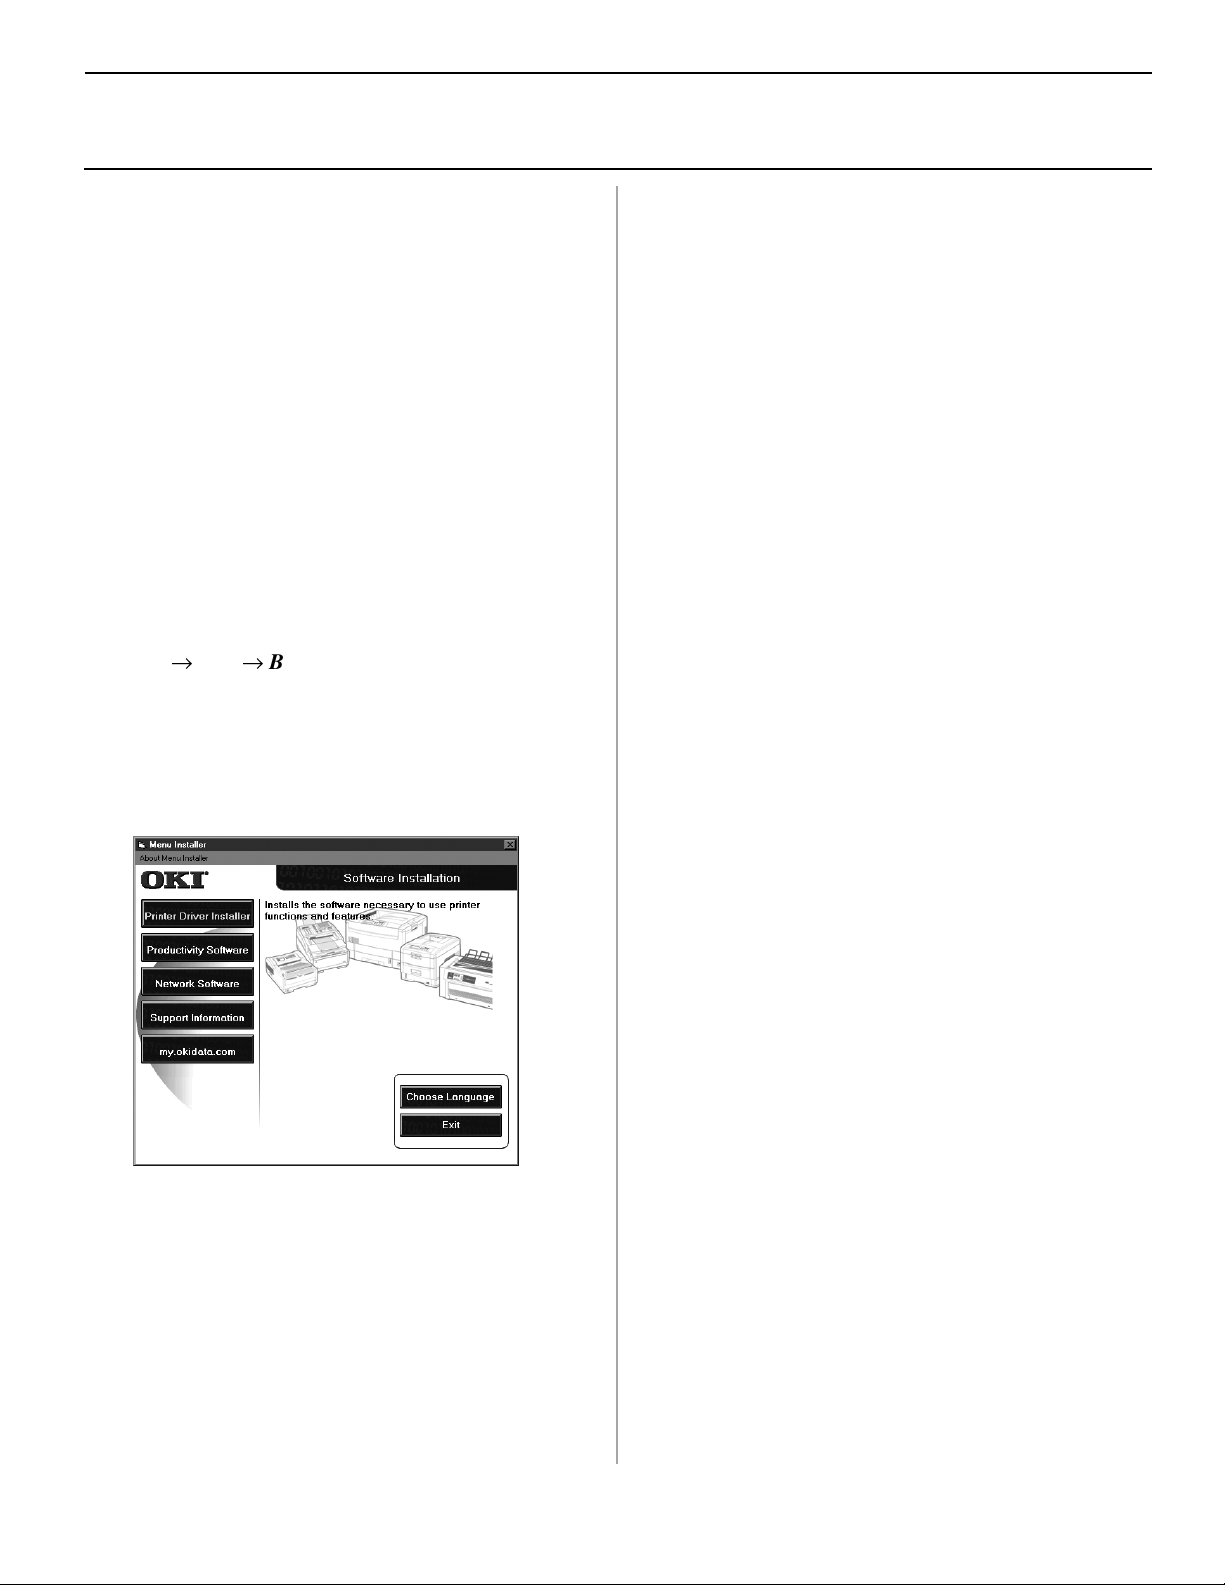
□ Insert CD1 into the CD-ROM drive. The CD will
autorun. (If the system autorun is disabled, click
Start ® Run ® Browse. Browse to your CD-ROM
drive and double-click Install.exe then click OK.)
□ The License Agreement appears, click I Accept.
□ The Menu Installer appears.
Directly to the Network using TCP/IP
□ Click Next.
□ Enter the IP address or select Search to
look for the printer. Click Next.
□ When the IP address is found, select the printer
by clicking on it, then select the printer
emulation you want. Click Next.
□ Type in a new printer name. Click Next.
XP and 2000 users: here you may need to
select Do Not Share or Share printer. Follow
!
the on-screen instructions.
If Digital Signature Not Found displays, Click
Continue Anyway or Yes.
!
□ Click OK.
□ Click Finish when the installation is complete.
Indirectly to Network via another PC
Your printer must be shared off another PC
before you perform the network installation.
!
□ Click the Printer Driver Installer button.
□ Select Network Printer. Click Next.
□ Connection Type screen appears. Select “how your
printer is connected to the network.” Follow the
appropriate instructions below:
□ Click Next.
□ Select shared printer. Click Next.
□ Select printer model and emulation. Click Next.
□ Type a new name. Click Next.
□ Click Finish when the installation is complete.
Network Client Distribution
If you are installing the software on a network for
network clients, the software must be installed on all
clients’ workstations. Net PnP Install sets printer sharing
in Windows, and notifies client users by e-mail. See the
Help file for more information.
To install the Net PnP Install Utility on the server, do the
following:
□ In the Menu Installer, click the Network Software
button.
□ Click the Administration Tools button.
□ Click the Net PnP Install Utility button and follow
the on-screen instructions.
5

Windows® Network Installation
Install Printer Software for TCP/IP (cont.)
Activating the Duplex Unit, Internal
Hard Drive and 0ptional Paper Trays
If your printer has a duplex unit or internal hard drive
(standard on Models C7100dxn, C7300dxn, C7500dxn,
C9300dxn and C9500dxn) or optional paper trays, you
must enter the driver and activate them.
To activate in the PostScript driver:
□ Click Start ® Settings ® Printer.
□ Right click the OKI PostScript printer icon, then click
Properties.
Windows 2000, XP and NT 4.0:
□ Click the Device Settings tab.
□ Scroll down to Installable Options.
□ Click Duplex, then click Installed in the box
below; do the same thing for Hard Disk.
Windows Me, 98 and 95:
□ Click the Device Options tab.
□ Select Duplex Option Unit, Printer Hard Disk, and
select optional paper trays if installed.
□ Click OK, then close the Printers dialog box.
To activate in the PCL driver:
□ Click Start ® Settings ® Printer.
□ Right click the OKI PCL printer icon, then click
Properties (Windows 2000/XP/Me/9x), or Document
Defaults (Windows NT 4.0).
□ Click the Device Options tab.
□ Select Duplex Option Unit, Printer Hard Disk, and
select optional paper trays if installed.
□ Click OK, then close the Printers dialog box.
6
 Loading...