


Graphic Elements Creation
Manual
for DICOM Embedded Printer
Common to OKI DICOM Embedded Printer Version 4 Series
C610 DICOM
C711 DICOM
C831 DICOM
C910 DICOM
C911 DICOM
C931 DICOM
ES6410 DICOM
ES7411 DICOM
ES8431 DICOM
ES9410 DICOM
ES9411 DICOM
ES9431 DICOM
Pro9431 DICOM
Copyright © 2016 Oki Data Corporation. All rights reserved.
1

Table of Contents
Chapter
Title
Page
1
How it works
3
2
Recommendations
3
3
Limitations
3
4
Header Page Layout
4
5
Booklet Page Layout
5
6
Using MS WordPad or MS Word for Headers
6
7
Using MS PowerPoint to create Headers
10
8
Using MS PowerPoint to create Booklet forms
14
9
Package the Forms and send them to DICOM Embedded
Printer, using Configuration Tool
17
10
Package the Forms and send them to DICOM Embedded
Printer, using Sto rage Devi ce Manag er
20
11
Using the Form when printing in DICOM
21
Copyright © 2016 Oki Data Corporation. All rights reserved.
2

1 How it works
To give the needed flexibility to Users, Resellers, and OPCO’s in creating a
Logo or a front and back page, the best solution is to allow usage of
whatever Computer editing software they own for text/graphics edition.
Mixing this graphic work with the DICOM printout is based on PostScript
forms.
Creation/design can be made with whatever software you want using the
standard PS printer driver and asking for form creation in the advanced
setting. Refer to the standard printer manual.
The created files can be packaged and downloaded to the printer with OKI
free software: “Storage Device Manager” or “Configuration Tool”.
2 Recommendations
Resolution of the Artwor k:
Each time a printout is made using the “Header Logo” function, the header
Logo file is computed in addition to the DICOM printing.
Therefore, be careful not to put a too high resolution Logo in the Header.
It is very easy to resize a high resolution logo to the adequate size in any
page publishing program, but resizing doesn’t resample the image to
remove the useless details. Sometimes, just resizing will p roduce a very
high resolu tion lo go file whic h wi ll be pro cess or cons umi ng a t prin to ut ti me .
If you notice a sensible loss in performance when you print with Logo
Heade r op ti on, you certainly produced a too high resolution file for the
purpose.
We recommend using Graphics at a resolution between 200 and 300dpi at
1:1 scale.
3 Limitations
You need to use a MS Windows computer as the Storage Device Manager
and Configuration Tool are only available for this platform.
You need to install the PostScript diver for you r p rint er.
Only one form for the header or for the booklet is available for one paper
format in one printer.
Copyright © 2016 Oki Data Corporation. All rights reserved.
3
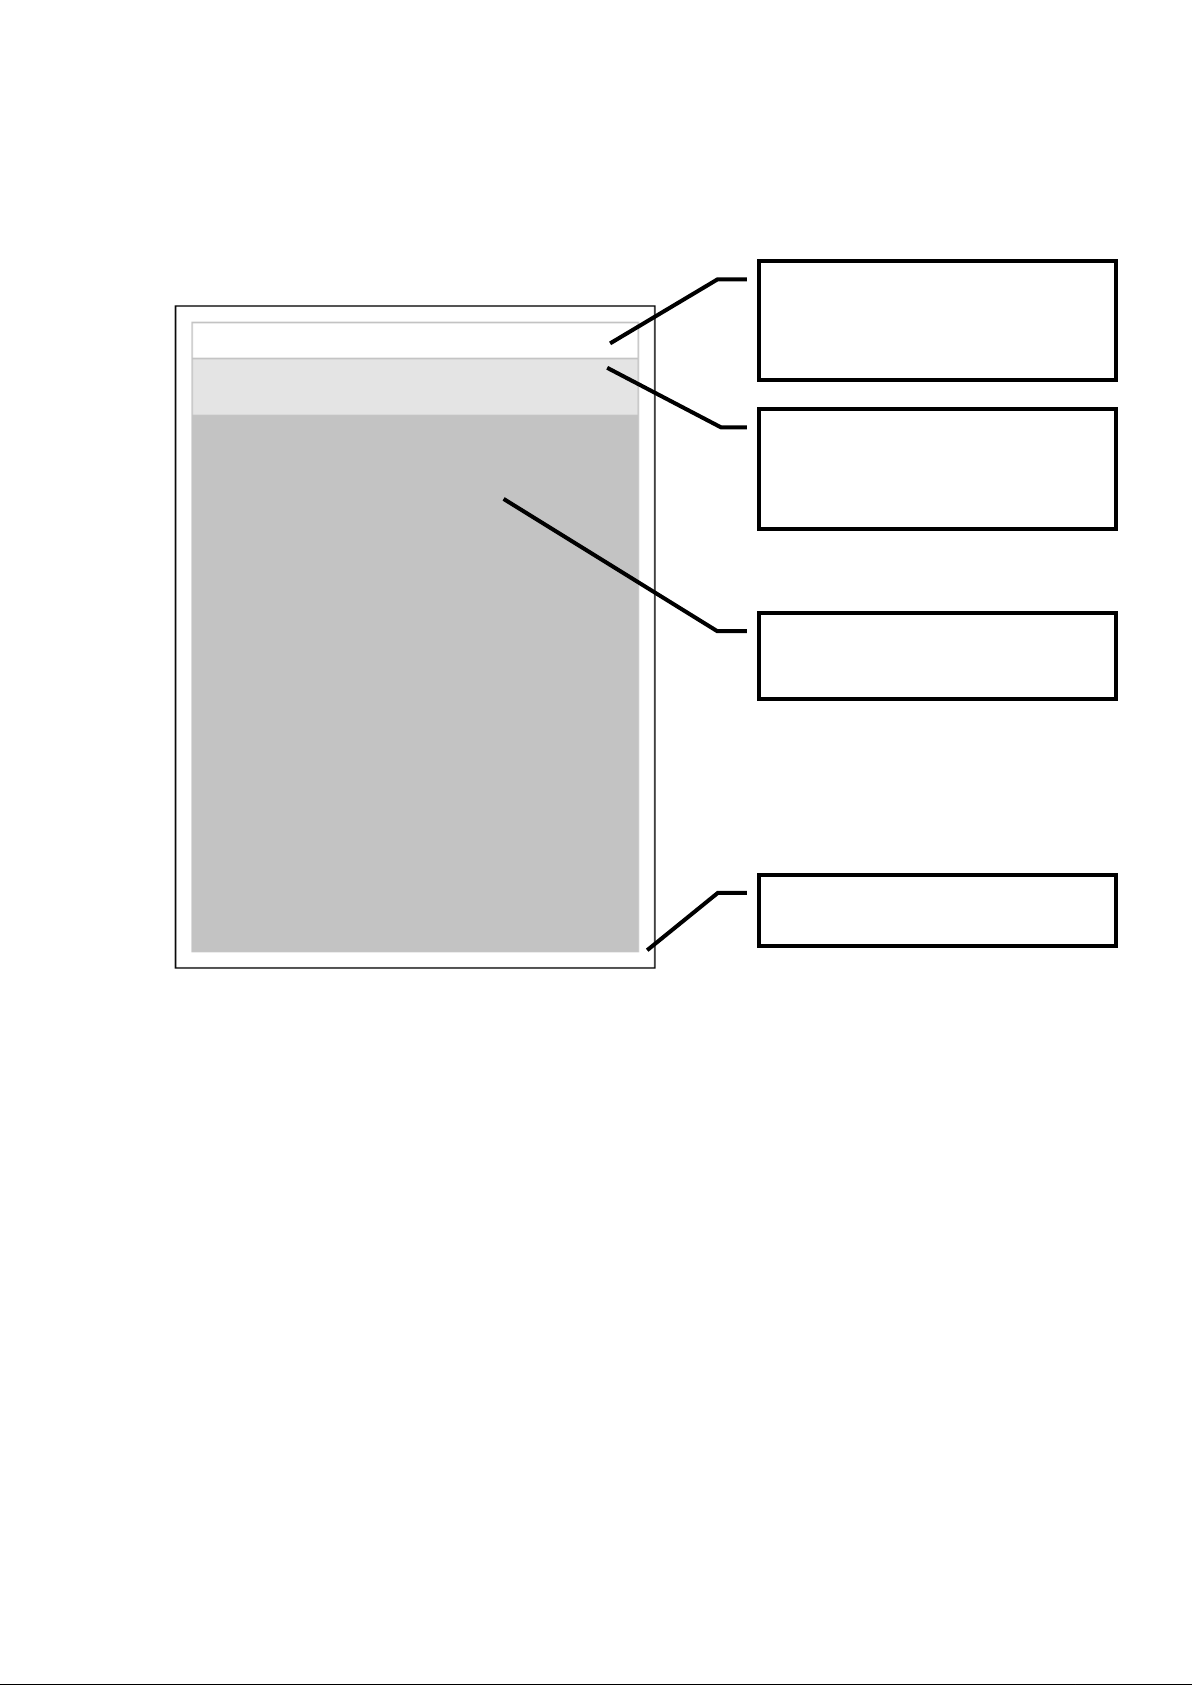
4 Header Page Layout
Space for text header
Additional space that is
Unprintable area
Printable area when Logo
A space for text header is reserved at the top of the page. This space is
increased in case of use of graphical “Logo Header”.
taken for graphica l
header you will create.
Header is selected.
The reserved space on the DICOM page for the logo is always at the top of
the A4/Letter or A3/Tabloid format.
The DICOM print area begins one inch (25.4mm) below the paper edge.
The unprintable area is 5mm around the page thus the remaining space is
20.4mm for the Logo and/or text. If you want to have an equilibrated
spacing with the DICOM maximum area printout, we recommend creating
a 15 to 16mm height artwork starting at 5mm from top of page.
4
Copyright © 2016 Oki Data Corporation. All rights reserved.
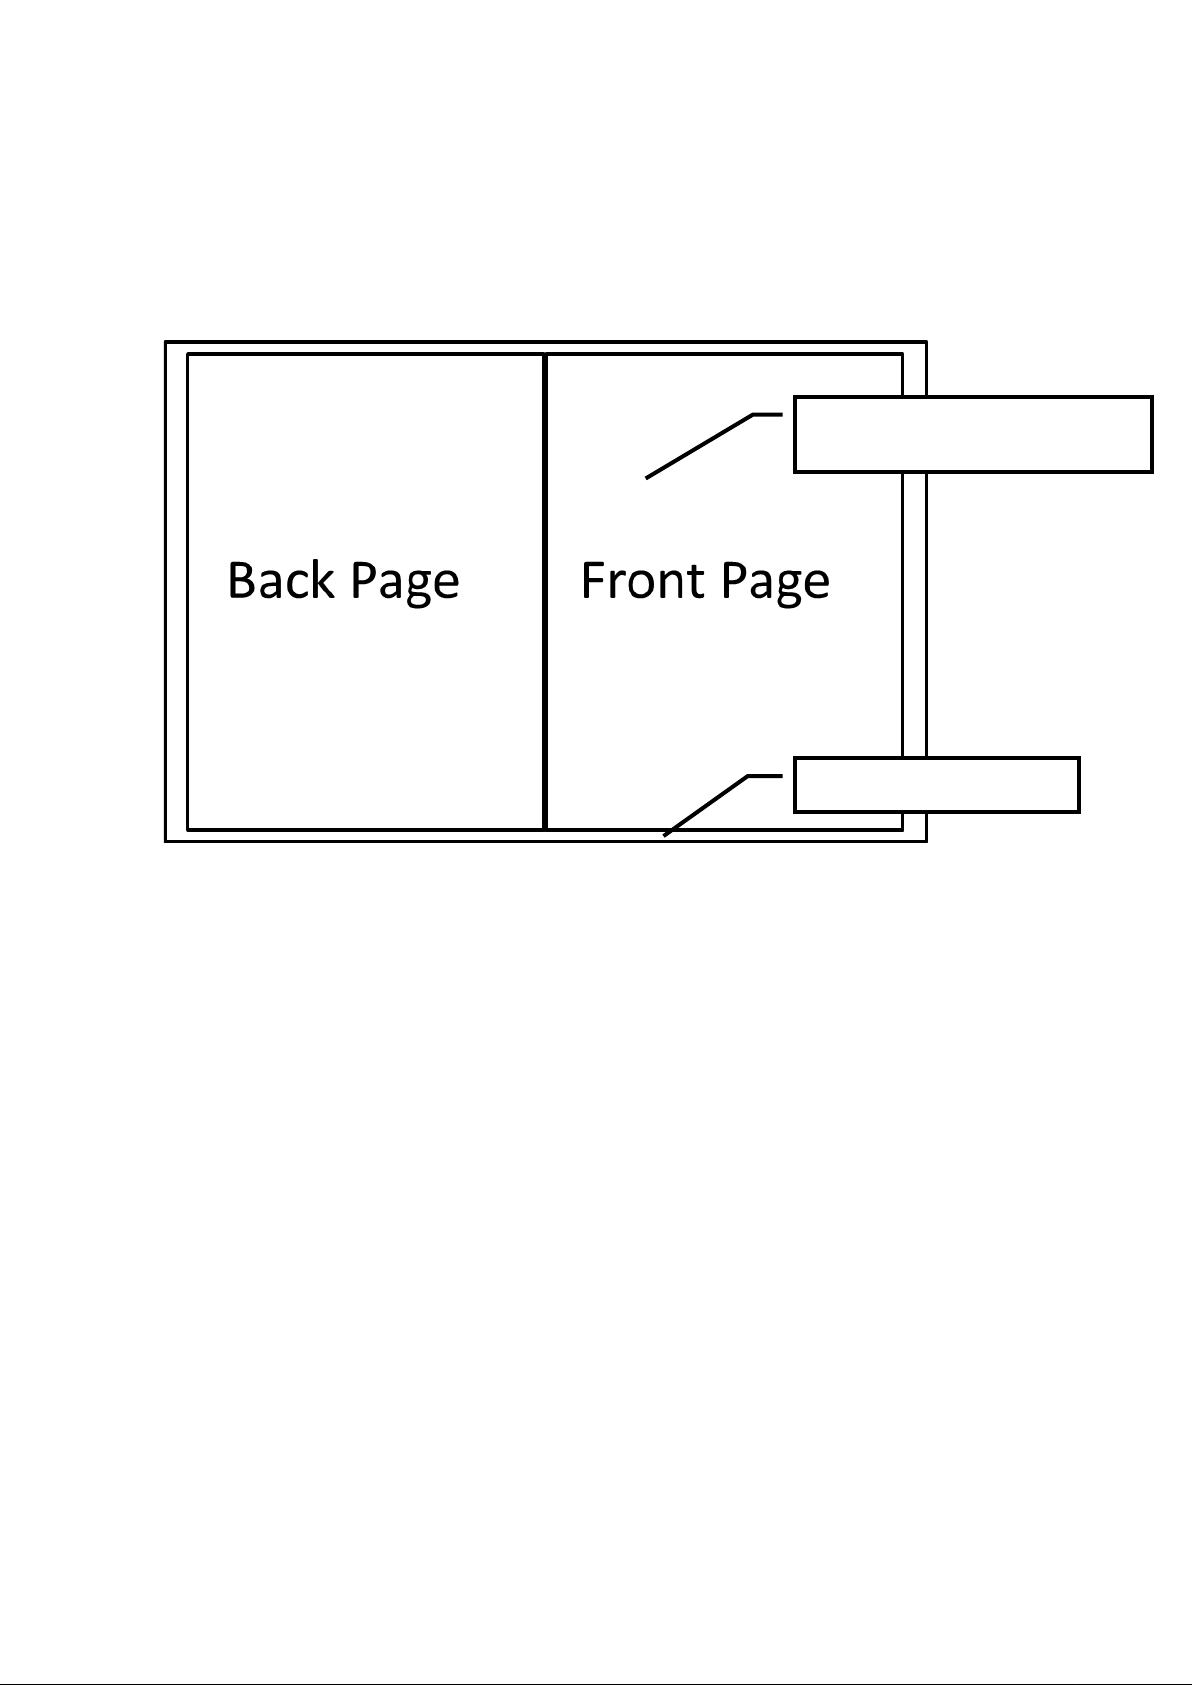
5 Booklet Page Layout
Front Page is at the right
side.
Unprintable area
The Space for booklet cover and back page is a whole A4 or A3 page.
The medical image is printed on the other side. Once folded, you get A5 or
A4 booklet.
The unprintable area is 5mm around the page and all the remaining space
is free for customization.
5
Copyright © 2016 Oki Data Corporation. All rights reserved.
6 Using MS Wo rdP ad or MS Wo rd for Headers
Open a new document in MS WordPad or MS Word.
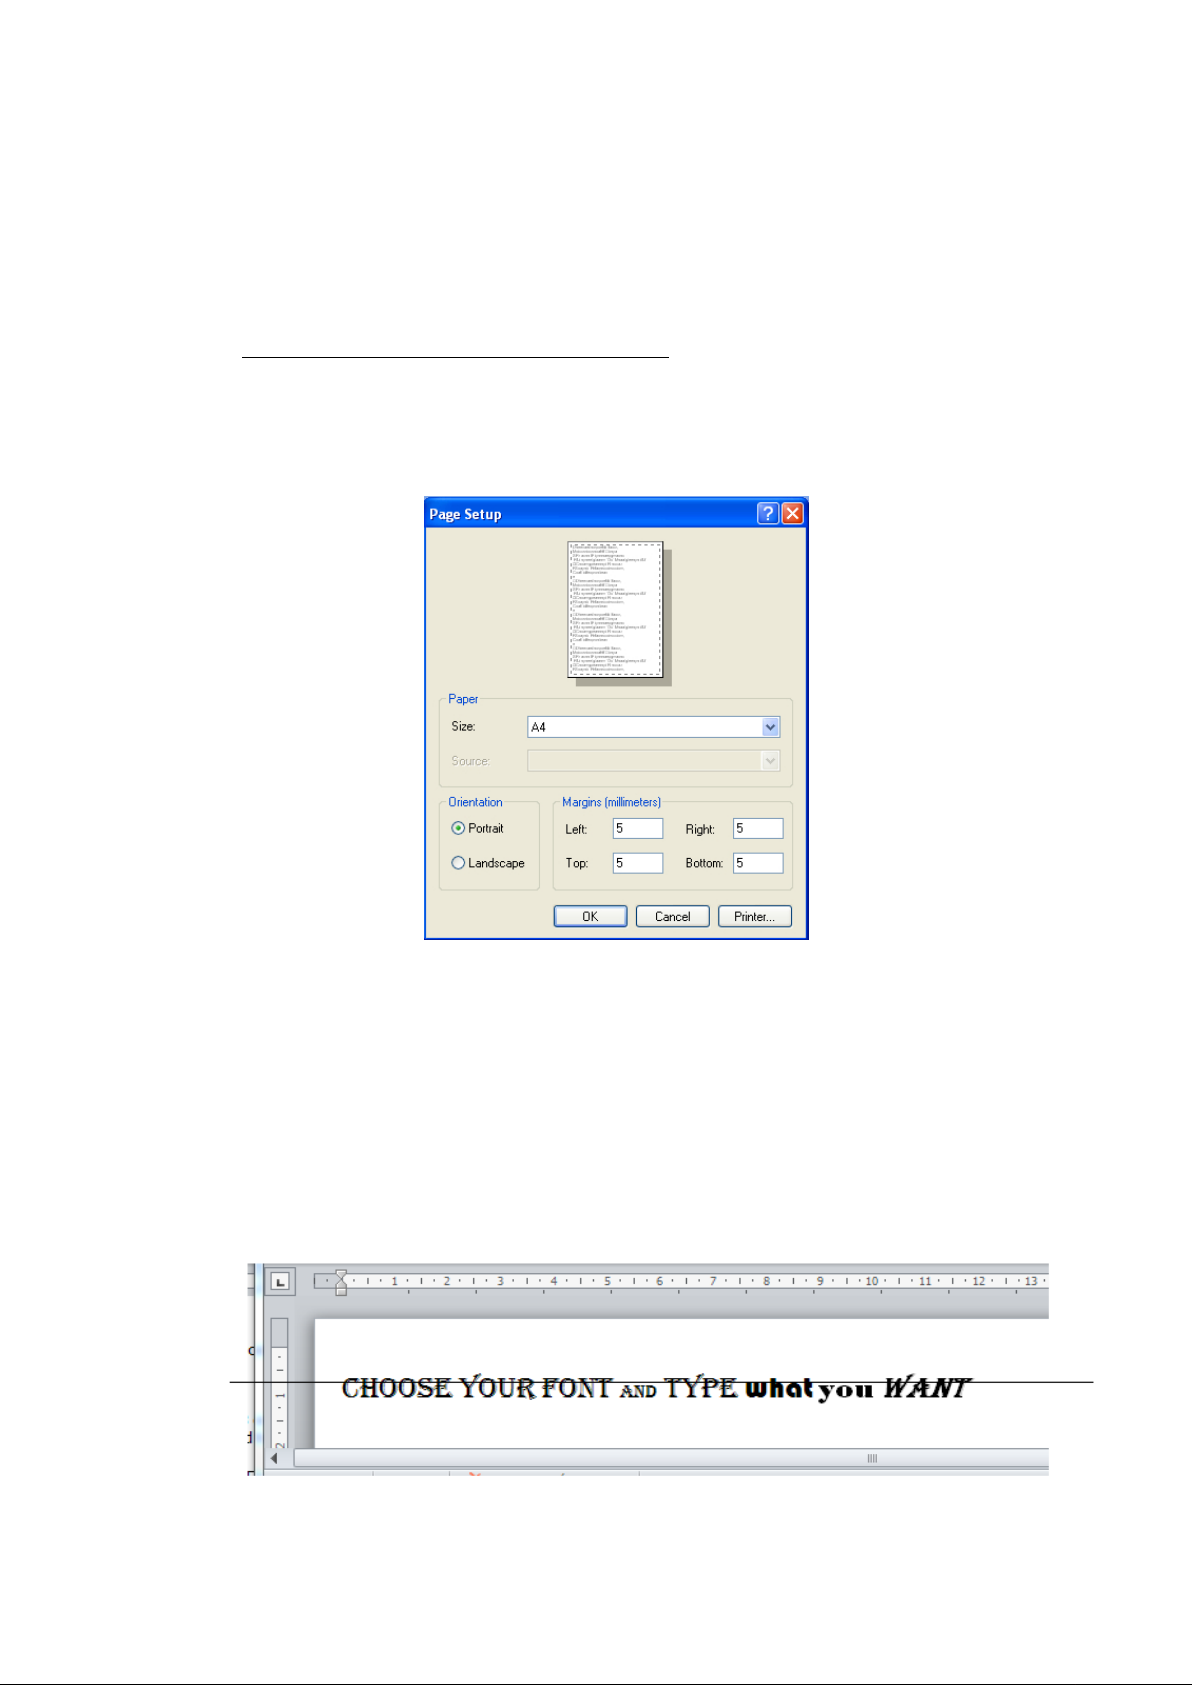
First step is to select the paper format you want to produce accordingly
with the format you want to DICOM print with the header.
1) Set the paper format to desired size A4, Letter, A3 or Tabloid.
2) Keep the page orientation in Portrait even if you intend to produce
Landscape DICOM pri ntouts.
3) Adjust the margins for the printer printable area to 5 mm each side.
Page format margins
4) Type text and/or paste your logo in the upper part of the page.
Tips:
Reduce the MS Word window to show only the available area (align
with the 2cm rule graduation).
Use the 0.75cm sub graduation to visualize the horizontal axis of the
free area.
6
Copyright © 2016 Oki Data Corporation. All rights reserved.
5) You have completed your Header creation.
You can check it by printing on paper. Once OK, you will need to
produce the form file for the printer.
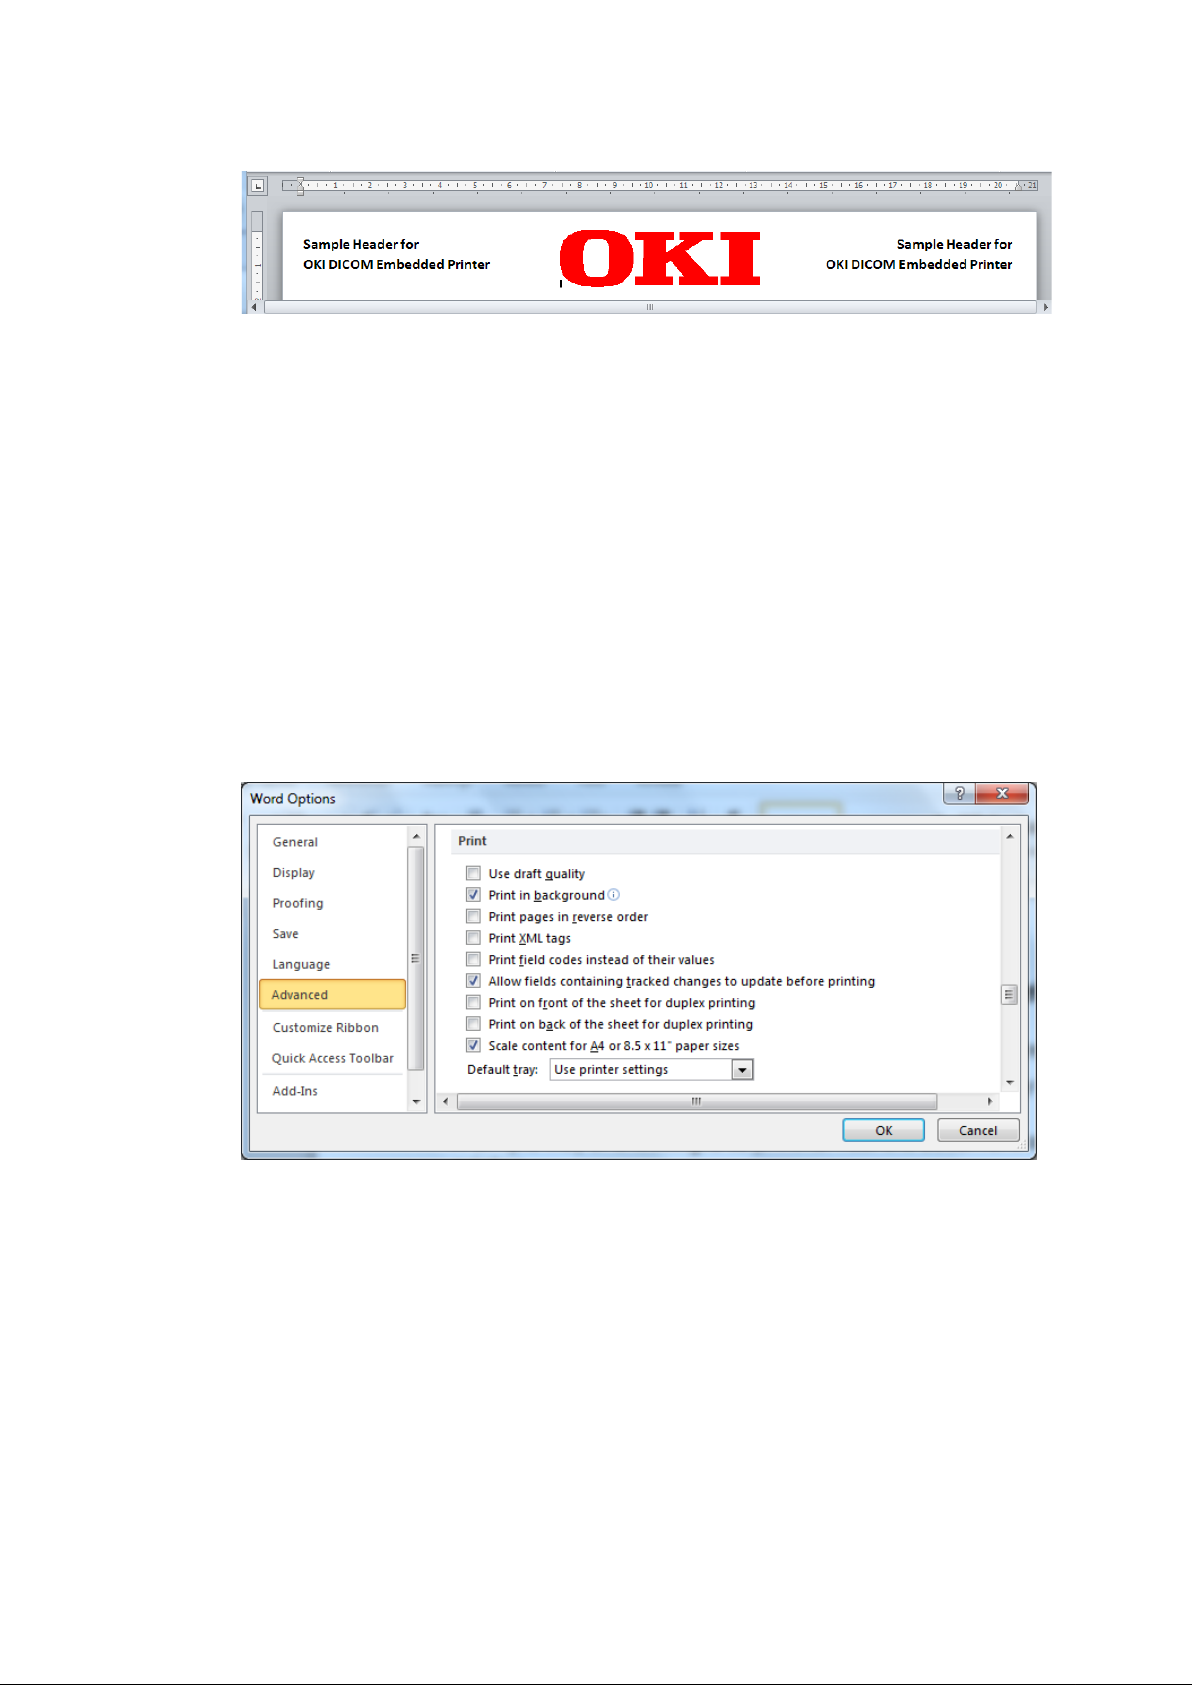
You may get diffi culti es in creating A4/Letter document with the
latest MS Word. The reason is that Office changes the print format
automatically up to your computer regional settings.
A simple way of checking is to print for real the document on the
destination printer.
If the print is OK, then you o nly need t o adjust yo ur docum ent. If
the printer asks for Letter when you print an A4 document (or vice
versa), you need to proceed through the following steps.
Open: File/options
Deselect “Scale content for A4 or 8.5x11” paper sizes”.
Copyright © 2016 Oki Data Corporation. All rights reserved.
7

6) Print to file option.
Up to the v ersi on o f Win d ows a nd Off ic e y ou use yo u may have to
setup the driver for printing into File.
Open the Configuration Panel and edit the PS printer properties.
Then in the “Ports” Tab, select File and apply.
7) Set up the PostScript pri nt e r dri v er f or f orm s c re ati o n.
In the print dialog from Word, open Printer Settings.
Then Job Option Tab and cli ck on “Overlay” button.
Select “Create Form”.
8
Copyright © 2016 Oki Data Corporation. All rights reserved.

You should get a warning popup.
Apply and close Printer settin g dial og.
8) Print to generate the file.
Print your job.
A popup window will appear asking you for the file name you want
to use.
Use full path naming f or saving i.e. “C:\Dicomheaders\HeaderA4.hst”.
Names should be:
Header-A4.hst, for A4 paper
Header-A3.hst, for A3 paper
Header-Letter.hst for Letter paper
Header-Tabloid.hst for the Tabloid paper
Header-A3Nobi.hst for the A3 N OBI paper ( 328x453 mm)
The following formats are not possible in MS word, see next page of
this document how to work them with MS PowerPoint:
Header-215X900.hst for the 215 x 900 mm paper
Header-215X1200.hst for the 215 x 1200 mm paper
Header-297X900.hst for the 297 x 900 mm paper
Header-297X1200.hst for the 297 x 1200 mm paper
Header-328X900.hst for the 328 x 900 mm paper
Header-328X1200.hst for the 328 x 1200 mm paper
9
Copyright © 2016 Oki Data Corporation. All rights reserved.

7 Using MS PowerPoint to create Headers
As you may have noticed MS Word is limited in format and can’t handle
“banner” sizes having dimension over 55.87 cm.
Open a new document in MS PowerPoint.
First step is to select the paper format you want to produce accordingly
with the format you want to DICOM print with the header.
1) In Design, Page Setup Set the paper format to desired size.
2) Keep the page orientation in Portrait even if you intend to produce
Landscape DICOM pri ntouts.
3) Type text and/or paste your logo in the upper part of the page.
Tips:
Reduce the MS PowerPoint window to show only the available area
(align at 2.5 cm from top graduation).
Copyright © 2016 Oki Data Corporation. All rights reserved.
10

4) Open the picture tool window in PowerPoint.
Select the compress picture tool.
Use the above settings or 150 ppi to reduce the size of your graphic
elements for better printing speed, and click OK.
5) Before printing, specify the custom paper format in the printer
advanced settings.
11
Copyright © 2016 Oki Data Corporation. All rights reserved.

6) Follow naming scheme of your files as per following:
Header-A4.hst, for A4 paper (210x297 mm)
Header-A3.hst, for A3 paper(297x420 mm)
Header-Letter.hst for Letter paper (215x279 mm)
Header-Tabloid.hst for the Tabloi d paper (279x432 mm)
Header-A3Nobi.hst for the A3 NOBI paper (328x453 mm)
Header-215X900.hst for the 215 x 900 mm paper
Header-215X1200.hst for the 215 x 1200 mm paper
Header-297X900.hst for the 297 x 900 mm paper
Header-297X1200.hst for the 297 x 1200 mm paper
Header-328X900.hst for the 328 x 900 mm paper
Header-328X1200.hst for the 328 x 1200 mm paper
Be careful when creating the document to always use custom format
in PowerPoint even for already defined paper size.
i.e. for Letter create page as custom:
Also make sure that the scale to fit paper option is disabled in both
dialogs:
Copyright © 2016 Oki Data Corporation. All rights reserved.
12

13
Copyright © 2016 Oki Data Corporation. All rights reserved.

8 Using MS PowerPoint to create Booklet forms
Open a new document in MS PowerPoint.
First step is to select the paper format you want to produce accordingly
with the paper format you want to use for the Booklet, A3, A4, Tabloid or
Letter.
1) In Design, Page Setup Set the paper format to desired size. Always use
custom to be sure to have access to the whole area for design.
Orientation is Landscape.
2) Make your design.
14
Copyright © 2016 Oki Data Corporation. All rights reserved.

3) Open the picture tool window in PowerPoint.
Select the compress picture tool.
Use the above settings or 150 ppi to reduce the size of your graphic
elements for better printing speed, and click OK.
4) Before printing, specify the custom paper format in the printer
advanced settings.
Copyright © 2016 Oki Data Corporation. All rights reserved.
15

5) Save your artwork under one of the following names.
Booklet-A4.hst, for A4 paper (210x297 mm)
Booklet -A3.hst, for A3 paper (297x420 mm)
Booklet -Letter.hst for Letter paper (215x279 mm)
Booklet -Tabloid.hst for the Tabloid paper (279x432 mm)
Be careful when creating the document to always use custom format
in PowerPoint even for already defined paper size.
i.e. for Letter create page as custom:
Also make sure that the scale to fit paper option is disabled:
Copyright © 2016 Oki Data Corporation. All rights reserved.
16

9 Package the Forms and send them to DICOM
Embedded Printer, using Configuration Tool
Install OKI Configuration Tool 1.6.5 or later on your computer if not yet
done.
Application software is available on the Software DVD delivered with the
printer and also on OKI web sites. User Documentation is included in the
Software Help menu.
Start Configuration Tool.
Step 1: Register your printer.
Click on T ools -> Register Device, then select and register your
printer.
NOTE: if you have already registered your printer, go to Step 2.
Copyright © 2016 Oki Data Corporation. All rights reserved.
17

Step 2: Start Storage Manager.
Click on Plug-ins -> Storage Manager.
Search for and select your printer at the bottom of the window.
18
Copyright © 2016 Oki Data Corporation. All rights reserved.

Step3: Select “Create New Project”.
Import the File(s) that you just printed.
Header-A4.hst will be automatically transformed into Header-A4
form.
MAKE SURE NAMING MATCHES EXACLTY THE SCHEME.
Naming is case sensitive. If there is a mi stak e, the Form will
not work.
Repeat this step, if you ne ed to add Form in another paper format.
Once all the wanted forms are listed in Projects, select “Send
Project Files to Printer”.
You will receive confirmati on with this Pop up:
19
Copyright © 2016 Oki Data Corporation. All rights reserved.

10 Package the Forms and send them to DICOM
Embedded Printer, using Storage Device
Manager
Install OKI Storage Device Manager on your computer if not yet done.
Application software is available on the Software DVD delivered with the
printer and also on OKI web sites. User Documentation is included in the
Software Help menu.
Start Storage Device Manager.
Search for Network for your DICOM Embedded Printer and select it.
Create New Project. Import the File(s) you just printed.
Header-A4.hst will be automatically trans formed into Header-A4 form
MAKE SURE NAMING MATCHES EXACTLY THE SCHEME.
Naming is case sensitive. If there is a mistake, the Form will not work.
Repeat this step if you need to add Form in another format.
Once all the wanted forms are listed in Projects, select “Send Project Files
to Printer”.
You will receive confirmati on with this Pop up:
20
Copyright © 2016 Oki Data Corporation. All rights reserved.

11 Using the Form when printing in DICOM
Open DICOM Printer Configuration.
If you want to use the form, you just check the “Replace Header by Logo”
option in the AET.
Then click “Save” but ton.
Then DICOM Embedded Printer calls the needed form up to the paper
format that is asked to use.
46572701EE Rev.2
21
Copyright © 2016 Oki Data Corporation. All rights reserved.
 Loading...