

Page 1
Page 2

Page 3
Installing MFP Drivers and Utilities
Note:
You must be logged on as an administrator or a member of the Administrators group in
order to complete this procedure. If your computer is connected to a network, network
policy settings may also prevent you from completing this procedure.
Note: Install the printer driver before connecting the USB cable to the printer.
1. Turn the printer OFF.
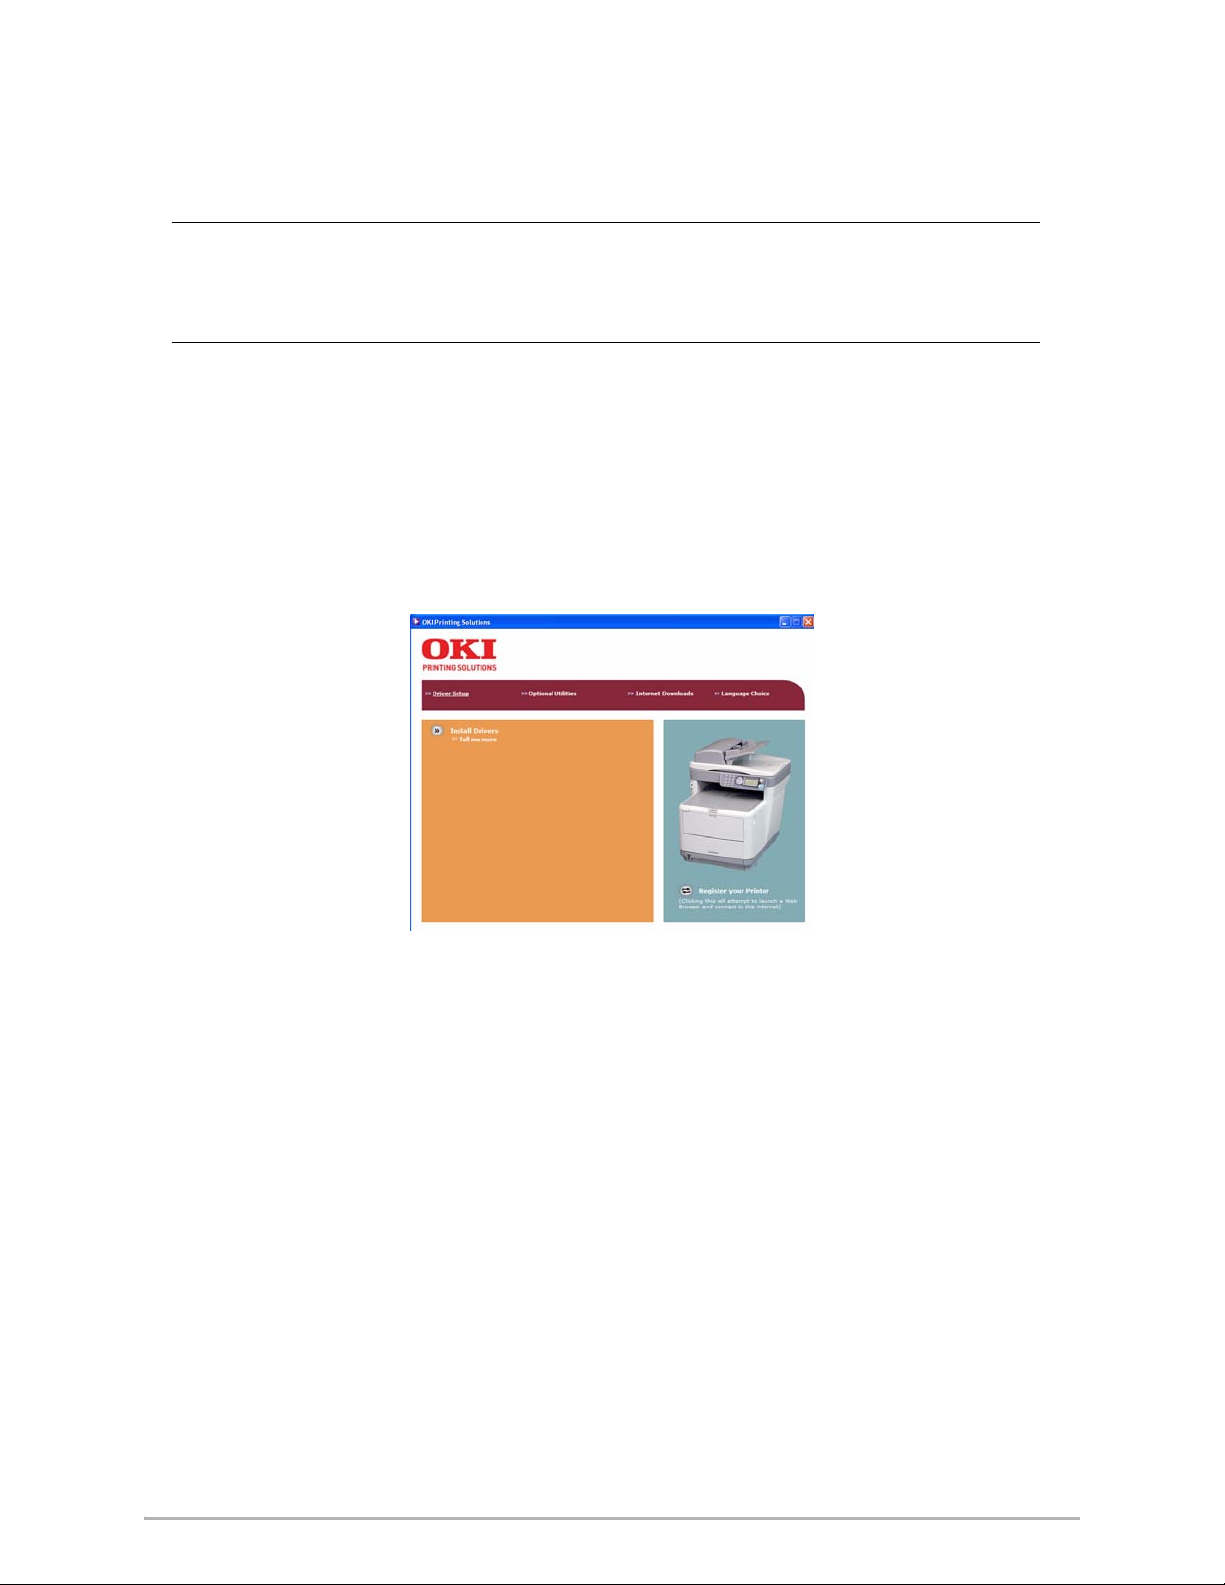
2. Insert CD1 in the CD-ROM drive. The CD will autorun.
3. Select your language.
4. Accept the license agreement.
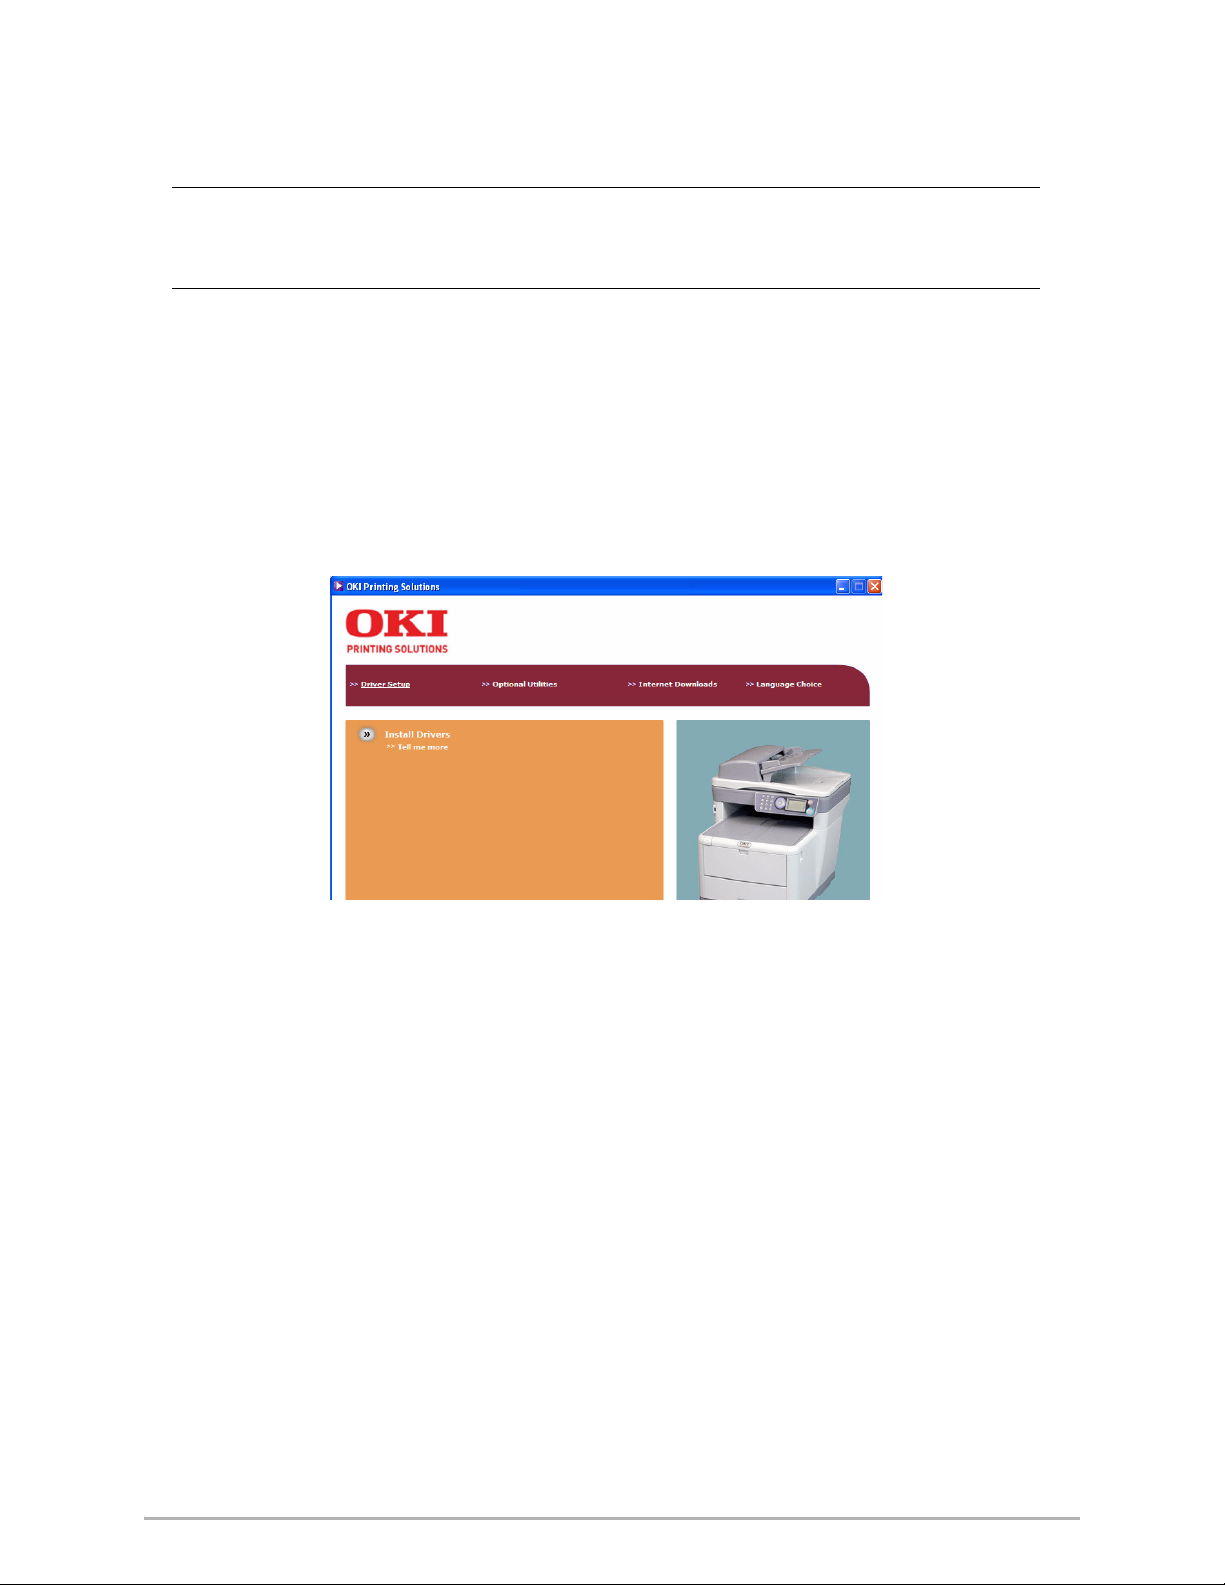
5. Click Install Drivers.
6. Select local or network printer.
7. When prompted, select one or both printer emulations: GDI: This emulation installs the printer driver, and the Twain driver (used for
initiating a scan from your PC via software).
FAX: The fax printer driver allows you to send faxes directly from your computer
without printing the document first. With Oki’s fax driver you are sending the
fax data from your computer to the MFP, and then the MFP automatically
sends the document.
Windows XP has built-in fax support - you can use your computer’s modem
to send faxes directly from your computer.
8. Follow the on-screen instructions.
9. When prompted, connect the USB cable and turn the printer on.
1
Page 4
HotKey Utility
The HotKey utility enables the MFP to receive one key touch commands from a locally
connected computer (Pull Scan).
Installation of the HotKey utility is optional and can be found on the MFP Utilities CD
under the Utilities folder.
Information on using the HotKey utility can be found in the User’s Guide on the CD.
S
ETTING UP THE HOTKEY UTILITY
1. Install the HotKey utility from the CD: Setup will place a “HotKey” icon on your
desktop.
2. Double-click this icon to open the HotKey console.
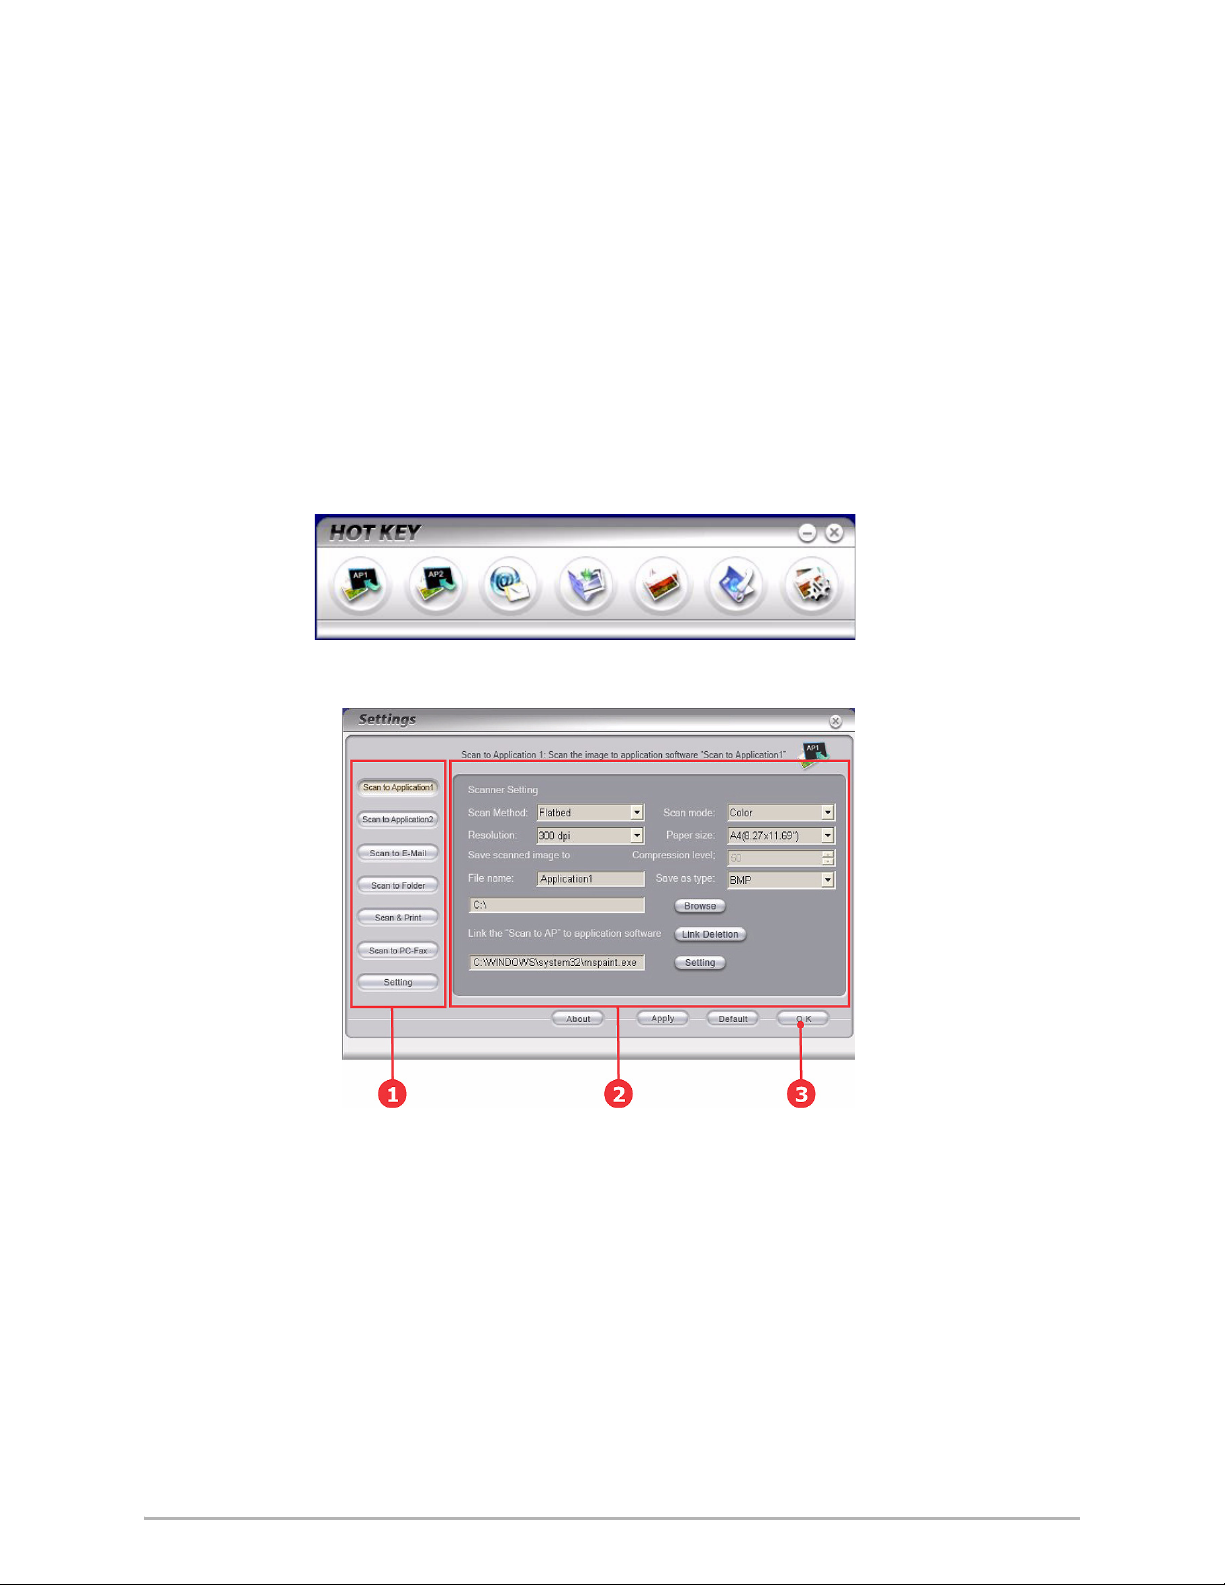
3. The following screen appears.
4. Select the function you want to set in section (1).
5. Set the parameters for this function in section (2).
6. When you have completed settings, press OK (3). The Utility will return to the
HotKey console.
2
Page 5
MFP Setup Utility
Installation of the MFP setup utility is optional and can be found on the Driver/Utilities
CD under the Utilities folder.
The MFP setup tool can discover C3530MFP devices over USB or network connections.
The setup program does not automatically place an icon on your desktop. If you wish,
you can drag and drop the icon on to your desktop for ease of future use.
There are 6 main functions included in this software;
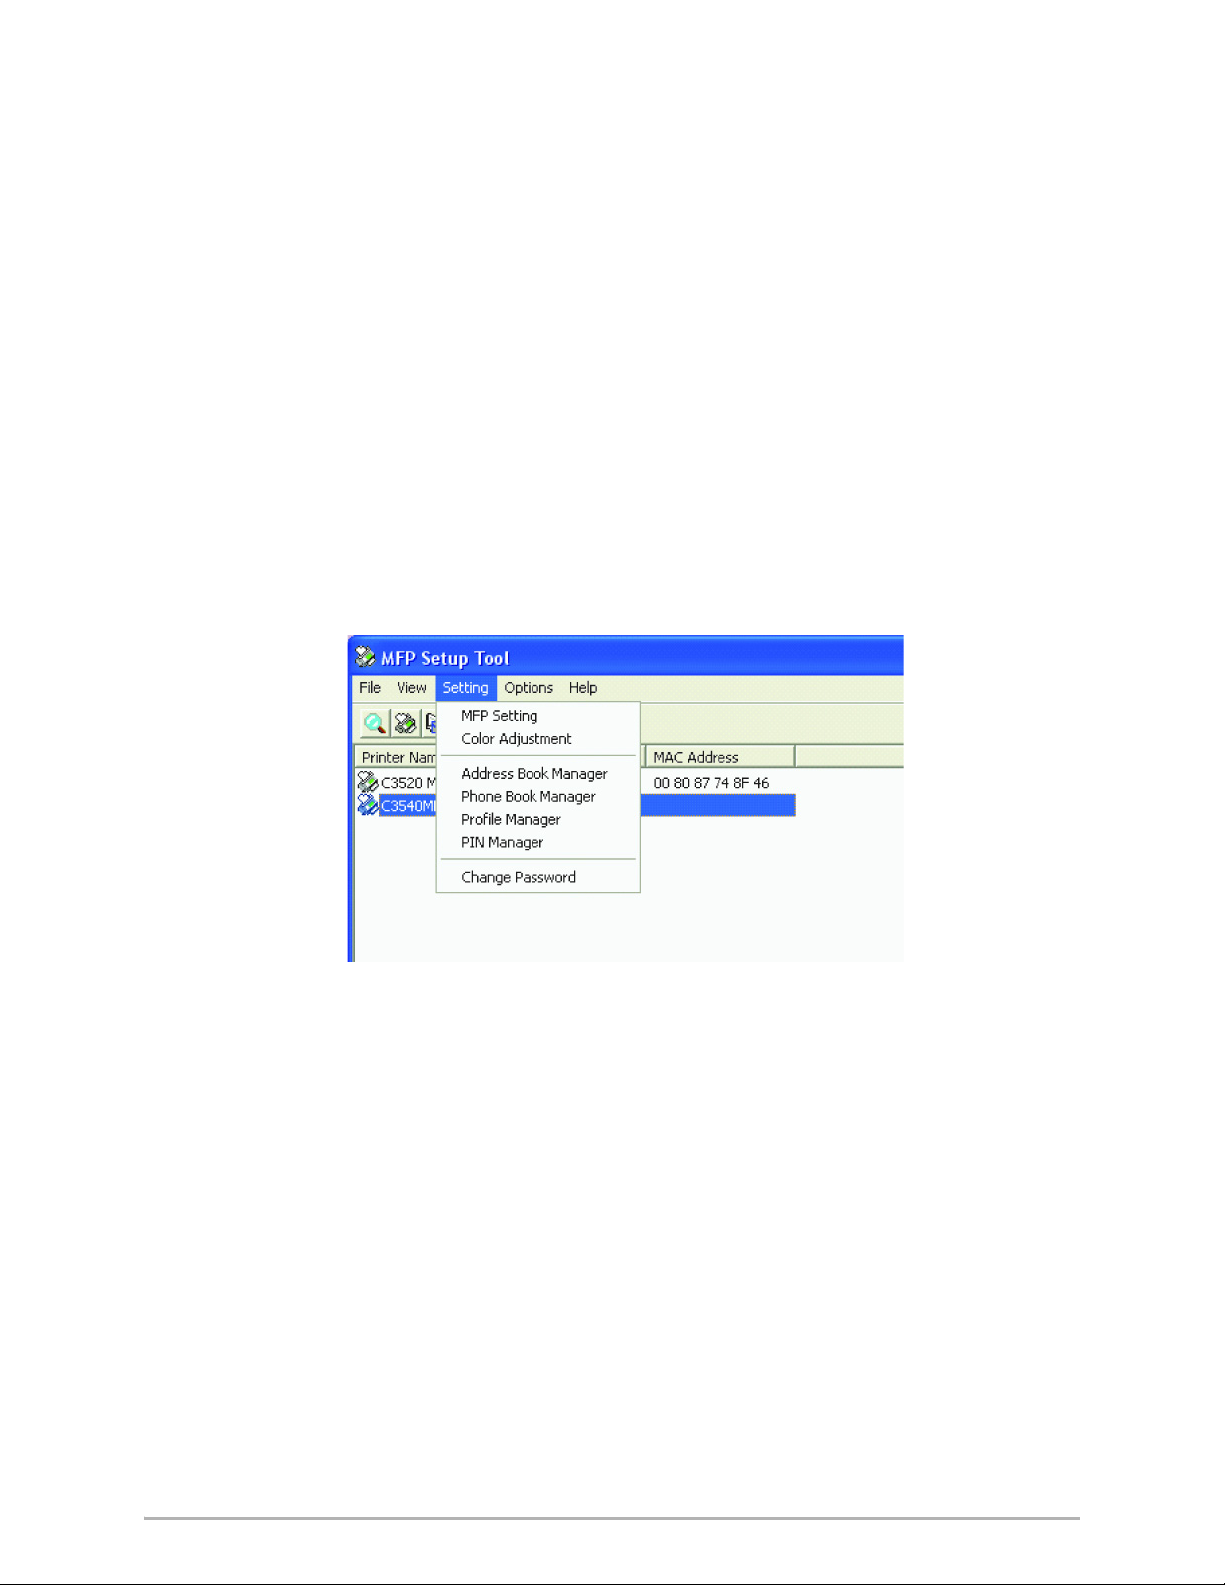
>MFP Settings
> Color Adjustment
> Address Book Manager
> Phone Book Manager
> Profile Manager
> PIN Manager.
1. MFP Settings: Allows you to change most of the same settings as you'd see on
the MFP's operator panel, on a locally connected PC.
The settings include an Admin. menu. This is password protected and hidden by
default. To enable the Admin menu, select: Setting>MFP Setting>Display >
Administrator menu and enter the MFP's password.
2. Color Adjustment: Changes the Hue and Saturation of the MFP's copy
function. It doesn't affect the print or scan color.
3. Address Book Manager: Adds names, e-mail addresses, assign them to IDs
(for scan to e-mail feature of MFP).
> Arrange people into groups.
> Import and export settings to CSV files.
> Import settings from other Oki MFP devices.
3
Page 6

4. Phone Book Manager: For managing people and fax numbers (for "scan to fax" feature of MFP). Add names, fax numbers, assign them to speed dial numbers.
> Arrange people into groups.
> Import and export settings to CSV files.
> Import settings from other Oki MFP devices.
5. Profile Manager: A profile is a set of saved settings for scanning to a networked PC. A profile consists of the following:
> Details for connecting to the networked PC (protocol, port, user name,
password etc)
>Paper size
> File format to scan to (PDF, TIFF, JPEG) and format settings such as
resolution, compression
> Import and export settings to CSV files
> Import settings from other Oki MFP devices.
6. PIN Manager: The MFP can have access control switched on the front panel. If
this is the case, a PIN (Personal Identification Number) is required to use the
MFP. The PIN Manager creates PIN numbers and assigns them rights such as
whether they can copy, print, scan to email, scan to network PC or fax.
> Import and export settings to CSV files.
> Import settings from other Oki MFP devices.
4
Page 7

Scanner/copier Section
a
b
The MFP can scan/copy/send document(s) either using the ADF (Automatic Document
Feeder) or manually on the glass.
If you want to scan/copy/send multiple pages, use the ADF. The ADF can hold up to
50 pages at one time.
If you want to scan/copy/send pages from books, newspaper clippings, or paper with
wrinkles or curls, use the glass.
An instant single copy, in monochrome (a) or color (b), can be made by pressing the
appropriate button on the operator panel.
Printer Section
Your MFP will handle a variety of print media including a range of paper weights and
sizes.
See the User’s Guide on the CD1 for general advice on choice of media, and an
explanation of how to use each type.
See the Handy Reference Guide for quick instructions for using the multi-purpose
Tray, optional trays, exit trays, and double-sided (duplex) printing.
5
Page 8

Configuring your machine....
Note:
In the United States, as required by FCC regulations, a heading must be included on all
FAX messages. The heading must include the date and time it is sent and an
identification of the business or other entity, or other individual sending the message,
and the telephone number of the sending machine or such business, other entity, or
individual.
PIN Numbers
Before using this MFP, a few basic settings have to be carried out.
Ensure that you have the relevant permission/PIN numbers before commencing.
The Factory set default passwords/PIN are:
Administrator aaaaaa
PIN 000000
Network (web page)last 6 figures of MAC address
Fax Receiving
This MFP’s fax will automatically answer the telephone after the Ring Response delay.
For information on setting this, see “Setting the Ring Response” on page 8.
Setting the Date & Time (Clock Adjustment)
The Date & Time can be set up by accessing the set up screen as follows:
1. Using the Up or Down arrow keys, select the Menu function.
2. Using the Right arrow key, select the Admin Menu.
3. Enter a password when prompted (Default is “aaaaaa”).
4. Select Fax Setup, then Clock Adjustment.
5. Using the Right arrow key, and the numeric key pad enter the correct Date & Time.
6. Once the Date & Time are set, press the Enter button to exit Clock Adjustment.
E
NTERING NUMBERS
Numbers are entered using the Ten Digit Numeric Key Pad.
When a number is entered, the numbers currently displayed for the highlighted field ("month," "day,"
"hour," or "minute") are cleared and the number just entered is displayed as the first digit. When another
number is entered, the number first number entered moves to the left, and so on.
C
ONFIRMING THE TIME
To confirm the time entered, press the Enter key.
6
Page 9

C
ANCELLING THE SET TIME
To cancel the time setting press the left key when the cursor is over "month," "date,"
or "year," whichever is located at far left of the second line.
Setting the Country Code
Set your Country code as follows:
1. From the Function screen select Menu.
2. Using the Down arrow key scroll to Admin Setup.
3. Press Enter. (At this point you will need the Administrators’ password)
4. Enter the admin. password using the Ten Key Pad. Press Done to complete.
5. Using the Down arrow key scroll to Fax Setup. Press Enter.
6. Using the Down arrow key scroll to Basic Setup. Press Enter.
7. Using the Down arrow key scroll to Country Code. Press Enter.
8. Select the Country in which the MFP is situated. Press Enter.
9. Use Left arrow key to return to Function screen.
Setting the Fax Sender ID
Set your Fax ID as follows:
1. From the Function screen select Menu.
2. Using the Down arrow key scroll to Admin Setup.
3. Press Enter. At this point you need the Administrators’ password)
4. Enter the admin. password using the Ten Key Pad. Press Done to complete.
5. Using the Down arrow key scroll to Fax Setup. Press Enter.
6. Using the Down arrow key scroll to Basic Setup. Press Enter.
7. Using the Down arrow key scroll to Sender ID. Press Enter.
8. Enter your Sender ID (as required) using the Ten Key Pad. Press Done to complete.
9. Use Left arrow key to return to Function screen.
7
Page 10

Setting the Ring Response
The fax facility of this MFP will automatically answer the incoming ringtone after the
delay period set by the ring response
The factory default for ring response is 1 ring. This can be set up to 20 seconds in the
Admin Menu as follows (you need to have administrator rights to alter this setting):
1. In the top level screen, scroll down to Menu and select using the Enter key.
2. In the drop down menu, scroll down to the Admin Menu and select using the Enter key. Enter the password.
3. In the drop down menu, scroll down to Fax Setup and select using the Enter key.
4. In the drop down menu, scroll down to Basic Setup and select using the Enter key.
5. In the drop down menu, scroll down to the Ring Response and select using the Enter key.
6. In the drop down menu, scroll down to the response time required and select using the Enter key.
7. Using the Left arrow key, return to the top level menu.
Setting Access Control
The operation and functionality of this machine can be limited only to authorized
personnel by the simple introduction of a 4-9 digit PIN (Personal Identification
Number). This is known as Access Control. The greater the number of digits in the
PIN, the more secure it is.
E
NABLE/DISABLE ACCESS CONTROL
> Access Control Enable/Disable is switched in Menu >Admin Setup>System
Setup>Access Control.
E
NABLING ACCESS CONTROL
> With Access Control set to Enable, the display reverts to the System Setup
screen immediately following the setting change. If one of the functions such as
Print, Fax Send or PC Scan is running however, the display will only revert to
the System Setup screen when the task has been completed.
E
NTERING
> With Access Control Enabled, entering a PIN ID is required to enable setting up
> Enter the PIN ID via the Ten Key pad.
PIN ID
various utilities.
> A valid PIN ID consists of 4 to 9 digits.
8
Page 11

> The numbers entered are not displayed on the Enter PIN ID screen, being
replaced by '*'.
> The PIN ID entered can be confirmed by either the Start button or the Enter
key.
> The MFP supports the following 2 kinds of PIN ID.
A
DMINISTRATOR
PIN ID
This is the PIN ID for the system administrator(s).
If a PIN ID is registered as an administrator, the Admin password entry screen
is displayed, and, when an Admin password is entered, it will be authenticated
as an administrator.
U
SER
PIN ID
This is PIN ID for general users.
If a PIN ID is registered as a general user, the function selection screen is
displayed, also after PIN ID entry the function selection screen is displayed.
I
NVALID
PIN ID
If the PIN number entered is invalid, Incorrect Password is displayed for 3 seconds
and the display reverts to the Enter PIN ID screen.
L
OGOUT OPERATION
If Logout is selected or an Operation Time-out occurs, the display reverts to the Enter
PIN ID screen.
L
OGOUT BY USER
With Access Control enabled, Logout options are displayed in the Menu on the Mode
Selection screen.
When the cursor is moved to Logout and the Enter key is pressed, the display reverts
to the Confirm Logout screen.
If Yes is selected with the Enter key on the Confirm Logout screen, the display reverts
to the Enter PIN ID screen.
O
PERATION TIME-OUT
> When the MFP operation panel is left inactive for a prescribed length of time
(Operation Time-out), the display automatically reverts to the Idle screen if
Access Control is disabled.
> If an error state occurs, Operation Time-out is disabled.
> After Operation Time-out, the display automatically reverts to the Enter PIN ID
screen if Access Control is enabled.
9
Page 12

> The length of the Operation Time-out depends on the setting in Menu
Mode>Admin Setup >System Setup > Return to Stand-by Time.
The Scanner/Copier section
M
INIMUM CONFIGURATION REQUIREMENTS
To make the best of this MFP, the following configuration is required:
TO
SEND FAXES
> A PSTN telephone line connection.
TO
SEND E-MAILS
>TCP/IP network.
> A SMTP and an optional POP3 server.
> Default “From” Address (this MFP’s Address).
TO
FILE DOCUMENT(S) VIA INTRANET
> FTP, HTTP, or CIFS Protocol environment.
:
:
> Windows 2000, Windows XP, HTTP or FTP server.
I
NTERNET COMMUNICATION FEATURES
PRE-I
NSTALLATION INFORMATION
The MFP has to be set up properly on your network to perform scan to e-mail and
other functions. In order for other network devices to find the MFP on the network,
the following network parameters have to be set:
1. DHCP enable:
2. IP Address: . . .
3. Subnet mask:. . .
4. Gateway IP:. . .
5. DNS server:. . .
6. SMTP server:. . .
7. SMTP port:25
8. POP3 server: . . .
9. POP3 Port:110
For an Explanation of these setting, see the online user’s guide on the CD.
S
CAN TO
E-
MAIL
The MFP allows you to deliver your scanned document to e-mail addresses on
the network. The document is first scanned and converted to a standard PDF,
10
Page 13

JPEG, TIFF, or MTIF (Multi-page TIFF) file format and then transmitted to remote
recipients simultaneously as an e-mail attachment.
When you send an e-mail to someone using this MFP it uses Simple Mail Transfer
Protocol (SMTP) to transfer your outgoing e-mails to your SMTP mail server, and
then send these e-mails to your recipients via the internet.
S
ETTING UP A SERVER
This section explains setting up a server.
1. Using the Up or Down arrow keys, scroll to the Menu function and select it using the Right arrow key.
2. Using the Down arrow key, scroll to Admin Setup and select by pressing the Enter or Right arrow key.
3. Using the Down arrow key, scroll to Network Setup and select by pressing the Enter or Right arrow key.
4. Then, again using the Down arrow key, scroll to Network and select by pressing the Enter or Right arrow key.
5. From the drop down menu, select IP Address by pressing the Enter or Right arrow key.
IP A
DDRESS ENTRY SCREEN
On the IP Address Entry screen, the first field is highlighted (the 3-digit value on
the far left of four fields - each separated with ".") and the cursor is located over
the first digit.
M
OVING BETWEEN THE FIELDS
To move between the fields, use the Left and Right arrow keys.
6. Enter your IP address.
E
NTERING NUMBERS
Numbers are entered using the Ten Key pad
When a number is entered from the Ten Key pad, the number currently
displayed is cleared and the number just entered is displayed as the first digit.
When another number is entered, the number in the first digit moves to the
next, and so on.
7. To confirm, press the Enter key.
C
ANCELLING THE
IP
ADDRESS
To cancel the IP address, move the cursor to the first field and then press the Left
arrow key.
11
Page 14

Page 15
Installation des pilotes et utilitaires du MPF
Remarque:
Vous devez être connecté en tant qu’administrateur ou appartenir au groupe
des administrateurs pour exécuter cette procédure. Si votre ordinateur est
connecté à un réseau, les paramètres de règle du réseau peuvent également
vous empêcher d’effectuer cette procédure.
Remarque: Installez le logiciel avant de connecter le câble USB à l’imprimante.
1. Éteignez l’imprimante.
2. Insérez le CD1 dans l’unité de CD. Le CD est lancé automatiquement.
3. Sélectionnez la langue d’installation.
4. Acceptez le contrat de license.
5. Cliquez sur Installer le pilote d’impression.
6. Cliquez sur imprimante locale ou network.
7. À l'invite, sélectionnez un ou les deux modes d'émulation d'imprimante : GDI: Cette émulation installe le pilote d'imprimante et le pilote Twain (utilisé
pour initier le scannage depuis votre ordinateur par le biais du logiciel).
FAX: Le pilote d'imprimante télécopieur permet d’envoyer des fax directement
à partir de l’ordinateur sans imprimer les documents au préalable. Avec le
pilote de télécopieur d’OKI, vous envoyez des données de fax directement
à partir de l’ordinateur vers le MPF et ce dernier envoie automatiquement
le document.
La prise en charge des fax est intégrée à Windows XP : vous pouvez
utiliser le modem de votre ordinateur pour envoyer des fax directement à
partir de celui-ci.
8. Observez les directives à l’écran.
9. Lorsque vous y êtes invité, connecter le câble USB à l’imprimante et allumez l’imprimante.
1
Français
Page 16

Utilitaire de raccourcis
L’utilitaire de raccourcis permet au MPF de recevoir des commandes activées par une
seule touche à partir d’un ordinateur connecté en local (« Pull Scan »).
L’installation de l’utilitaire de raccourcis est facultative et peut être effectuée à partir
du CD des MFP utilitaires (MFP Utilities) sous le dossier des utilitaires (Utilities).
Vous trouverez l'information sur l'utilisation de l'utilitaire dans le Guide de l'utilisateur
sur le CD1Configuration de l'utilitaire de raccourcis.
1. Installez l'utilitaire de raccourcis à partir du CD : Le programme d'installation place une icône de raccourci (HotKey) sur votre
bureau.
2. Double-cliquez sur cette icône pour ouvrir la console de raccourcis.
3. Sélectionnez Paramètres. L'écran suivant s’affiche.
4. Sélectionnez la fonction que vous souhaitez définir dans la section (1).
5. Définissez les paramètres pour cette fonction dans la section (2).
6. Une fois que vous avez terminé la configuration des paramètres, cliquez sur OK
(3). L’utilitaire vous ramène dans la console des raccourcis (paragraphe 2 ciavant).
2
Français
Page 17

Outil de configuration du MPF
L’installation de l’utilitaire de configuration du MPF est facultative et peut être effectuée à partir
du CD de utilitaires (MFP Utilities) sous le dossier des utilitaires (Utilities).
Comme le programme de configuration ne place pas automatiquement d’icône sur le
bureau, y accéder via si vous le souhaitez, vous pouvez faire glisser cette icône sur
le bureau pour faciliter toute utilisation ultérieure.
L’outil de configuration du MPF peut repérer des périphériques C3530MFP via des
connexions USB ou réseau.
Ce logiciel comprend six fonctions principales :
> MFP Settings (Paramètres MFP)
> Colour Adjustment (Réglage des couleurs)
> Address Book Manager (Gestionnaire de carnet d'adresses)
> Phone Book Manager (Gestionnaire de répertoire téléphonique)
> Profile Manager (Gestionnaire de profils)
Chacune des ces fonctions est décrite ci-après.
1. MFP Settings (Paramétrage MFP) : Permet de modifier la plupart des paramètres que vous pourriez voir sur le panneau de commande du MFP sur un PC connecté en local.
Les paramètres comprennent un menu d’administration. Celui-ci est protégé par
un mot de passe et masqué par défaut. Pour activer le menu d’administration,
sélectionnez : Setting (Paramétrage) > MFP Setting (Paramétrage MFP) >
Display (Affichage) > Administrator Menu (Menu administrateur) et entrez le
mot de passe du MFP.
2. Color Adjustment (Réglage des couleurs) : Modifie la nuance et la saturation pour la fonction de copie du MFP. Cet outil n’a pas d’incidence sur la couleur d’impression ou de numérisation.
3. Address Book Manager (Gestionnaire de carnet d'adresses) : Ajoute des noms et des adresses électroniques et les affecte à des identificateurs (pour la fonction de numérisation vers la messagerie électronique du MFP).
> Répartit les personnes en groupes.
> Importe et exporte des paramètres vers des fichiers CSV.
> Importe des paramètres à partir d'autres périphériques MPF Oki.
4. Phone Book Manager (Gestionnaire de répertoire téeléphonique. > Permet de géerer des personnes et des numéros de fax (pour la fonction de
numérisation vers un télécopieur de MFP). Ajoute des noms et des numéros
de fax et les affecte à des numéros de composition abrégée.
> Répartit les personnes en groupes.
> Importe et exporte des paramètre vers des fichiers CSV.
3
Français
Page 18

> Importe des paramètre à partir d’autres périphériques MPF Oki.
5. Profile Manager (Gestionnaire de profils) : Un profil est un ensemble de paramètres enregistrés pour la numérisation vers un PC en réseau. Il est constitué par les éléments suivantes ::
> Informations permettant la connexion au PC en réseau (protocole, port, nom
d’utilisateur, mot de passe, etc.)
> Format de papier
> Format de fichier vers lequel effectuer la numérisation (PDF, TIFF, JPEG) et
paramètres de format, tels que la résolution et la compression
> Importation et exportation de paramètres vers des fichiers CSV
> Importation de paramètres à partir d'autres périphériques MPF Oki
6. PIN Manager (Gestionnaire d’identificateurs PIN) : Le contrôle d’accès au MFP
peut être activé sur le panneau avant. Dans ce cas, un numéro d’identification
personnel (PIN - Personal Identification Number) est requis pour utiliser le MFP.
PIN Manager crée des codes PIN et leur affecte des droits indiquant si les
personnes correspondantes peuvent copier, imprimer ou numériser vers une
messagerie électronique, vers un PC du réseau ou vers un télécopieur.
> Importe et exporte des paramètres vers des fichiers CSV.
> Importe des paramètres à partir d'autres périphériques MPF Oki.
Section Scanner/Photocopieur
Le MFP peut numériser/copier/envoyer des documents se trouvant soit dans le
chargeur automatique de documents (ADF - Automatic Document Feeder), soit sur la
vitre de numérisation.
Si vous souhaitez numériser/copier/envoyer plusieurs pages, utilisez le chargeur
automatique de documents. Ce dernier peut contenir jusqu’à 50 pages.
Si vous souhaiter numériser/copier/envoyer des pages d'un livre, des coupures de
journaux ou du papier corné ou ondulé, servez-vous de la vitre de
numérisation.
Vous pouvez produire un seul exemplaire instantané en
monochrome (8a) ou en couleur (8b) en appuyant sur le bouton
approprié du panneau de commande.
b
Section Imprimante
a
Votre MFP peut employer divers supports d'impression incluant une gamme
d'épaisseurs et de dimensions de papier. Consultez le Guide de l'utilisateur sur le CD1
pour obtenir des conseils généraux sur le choix de supports et une explication de leur
usage respectif.
Consultez le Guide de référence pratique pour de brèves instructions sur l’utilisation
du bac multi-usage, les bacs en options, les bacs de sortie et l’impression recto-verso
(duplex manuel).
4
Français
Page 19

C
ONFIGURATION DE VOTRE APPAREIL
Remarque: Aux États-Unis, conformément aux règlements de la FCC, une en-tête doit étre incluse
avec tous les messages par fax. Ces messages fassent clairement mention, de la date et
de l’heure d’envoi ainsi que de l’identification de l’entreprise ou autre entité, voire d’un
autre individu expédiant le(s) message(s), ainsi que du numéro de téléphone dudit
appareil utilisé ou d’une telle entreprise, d’une autre entité ou individu.
...
Codes Pin
Avant d’utiliser ce MFP, vous devez définir quelques paramètres de base.
Assurez-vous que vous disposez des droits/codes PIN appropriés avant de
commencer.
Les mots de passe/code PIN par défaut définis en usine sont les suivants :
Administrateur aaaaaa
Code PIN 000000
Réseau (page Web) les six derniers chiffres de
l'adresse MAC
Réception de fax
Le télécopieur du MFP répond automatiquement au téléphone à l’issue du délai de
prise de ligne. Pour plus d'informations sur ce paramètre, reportez-vous à la section .
Définition de la date et de l’heure
Le format de date peut être défini en accédant à l’écran de configuration comme suit :
1. À l’aide des flèches vers le haut et vers le bas, sélectionnez la fonction Menu.
2. À l’aide de la flèche vers la droite, sélectionnez Admin Menu (Menu Admin).
3. Entrez un mot de passe si vous y êtes invité.
4. Sélectionnez Réglages système, puis Format date.
5. Sélectionnez le format requis. Les formats disponibles sont : mm/jj/aaaa jj/mm/aaaa aaaa/mm/jj
(où « mm » = mois, « jj » = jour, « aaaa » = année)
Lorsque vous placez le curseur sur l’élément à définir et que vous appuyez sur la
touche droite ou Entrée, l’écran Time Setting (Réglage date/heure) s’affiche. Le
curseur est positionné tout à gauche sur le premier chiffre du mois, du jour ou de
l’année (le format dépend de la valeur de Format date).
Saisie de nombres
Les nombres sont entrés à l’aide du clavier à dix touches.
Lorsqu’un chiffre est entré, les chiffres actuellement affichés pour le mois, le jour,
l’heure et les minutes sont effacés et le chiffre saisi s’affiche comme premier chiffre.
5
Français
Page 20

Lorsqu’un autre chiffre est entré, le premier chiffre du nombre se décale vers la
gauche, et ainsi de suite.
Confirmation de la date et de l’heure
Pour confirmer la date et l’heure saisies, appuyez sur la touche Entrée.
Annulation de la date et de l’heure définies
Pour annuler la valeur de date et d’heure, appuyez sur la touche gauche lorsque le
curseur est positionné sur le mois, le jour ou l’année, selon ce qui est situé à l’extrême
gauche de la deuxième ligne.
Définition du code pays
Définissez votre code pays en procédant comme suit :
1. À partie de l’écran Fonction, sélectionnez Menu.
2. À l’aide de la flèche vers le bas, faites défiler l’affichage jusqu’à Configuration admin..
3. Appuyez sur Entrée. (À ce stade, vous avez besoin du mot de passe de l’administrateur.)
4. Entrez le mot de passe de l’administrateur à l’aide du clavier à dix touches. Cliquez sur Terminé pour terminer.
5. À l’aide de la flèche vers le bas, faites défiler l’affichage jusqu’à Paramétrage fax. Appuyez sur Entrée.
6. À l’aide de la flèche vers le bas, faites défiler l’affichage jusqu’à Réglages de base. Appuyez sur Entrée.
7. À l’aide de la flèche vers le bas, faites défiler l’affichage jusqu’à Code pays. Appuyez sur Entrée.
8. Sélectionnez le pays dans lequel se trouve le MFP. Appuyez sur Entrée.
9. Utilisez la flèche vers la gauche pour revenir à l’écran Fonction.
Identificateur d’émetteur de fax
Définissez votre identificateur d’émetteur de fax en procédant comme suit :
1. À partie de l’écran Fonction, sélectionnez Menu.
2. À l’aide de la flèche vers le bas, faites défiler l’affichage jusqu’à Configuration
admin.
3. Appuyez sur Entrée. (À ce stade, vous avez besoin du mot de passe de l’administrateur.)
4. Entrez le mot de passe de l’administrateur à l’aide du clavier à dix touches. Cliquez sur Terminé pour terminer.
6
Français
Page 21

5. À l’aide de la flèche vers le bas, faites défiler l’affichage jusqu’à Paramétrage fax. Appuyez sur Entrée.
6. À l’aide de la flèche vers le bas, faites défiler l’affichage jusqu’à Réglages de base. Appuyez sur Entrée.
7. À l’aide de la flèche vers le bas, faites défiler l’affichage jusqu’à ID émetteur. Appuyez sur Entrée.
8. Entrez votre identificateur d’émetteur (le cas échéant) à l’aide du clavier à dix touches. Cliquez sur Terminé pour terminer.
9. Utilisez la flèche vers la gauche pour revenir à l’écran Fonction.
Délai de prise de ligne
La fonction télécopieur de ce MFP répond automatiquement à la sonnerie à l’issue de
la période définie pour le délai de prise de ligne.
La valeur par défaut définie par le fabricant pour le délai de prise de ligne est d’une
sonnerie. Ce délai peut être porté à 20 secondes dans le menu d’administration en
procédant comme suit (vous devez disposer des droits d’administrateur pour modifier
ce paramètre) :
1. Dans l’écran de niveau supérieur, faites défiler l’affichage jusqu’à Menu et sélectionnez à l’aide de la touche Entrée.
2. Dans le menu déroulant, faites défiler l’affichage jusqu’à Admin Menu (Menu Admin.) et sélectionnez à l’aide de la touche Entrée. Entrez le mot de passe.
3. Dans le menu déroulant, faites défiler l’affichage jusqu’à Paramétrage fax et sélectionnez à l’aide de la touche Entrée.
4. Dans le menu déroulant, faites défiler l’affichage jusqu’à Réglages de base et sélectionnez à l’aide de la touche Entrée.
5. Dans le menu déroulant, faites défiler l’affichage jusqu’à Délais prise de ligne et sélectionnez à l’aide de la touche Entrée.
6. Dans le menu déroulant, faites défiler l’affichage jusqu’au temps de réponse requis et sélectionnez à l’aide de la touche Entrée.
7. Utilisez la flèche vers la gauche pour revenir au menu de niveau supérieur.
Contrôle d'accès
L’exploitation et les fonctionnalités de cet appareil peuvent être limitées au personnel
autorisé. Il suffit pour cela de saisir un code PIN de 4 à 9 chiffres (Personal
Identification Number – numéro d’identification personnel). Cette fonction est
appelée Contrôle d’accès. Plus les chiffres du code PIN sont nombreux, mieux
l’appareil est protégé.
Activation/Désactivation du contrôle d'accès > Le contrôle d'accès est activé ou désactivé dans Menu >Configuration admin
> Réglages système > Contrôle d’accès.
7
Français
Page 22

Activation du contrôle d'accès
> Lorsque le contrôle d'accès a pour valeur Activer, l’écran Réglages système
réapparaît immédiatement après la modification du paramètre. Toutefois, si
l’une des fonctions telles que l’impression, l’envoi d’un fax ou la numérisation
PC s’exécute, l’écran Réglages système réapparaît qu’une fois la tâche
terminée.
Saisie de l’identificateur PIN
> Lorsque le contrôle d'accès a pour valeur Activer, la saisie d’un identificateur
PIN est requise pour permettre la configuration de différents utilitaires.
> Entrez l’identificateur PIN à l’aide du clavier à dix touches.
> Un identificateur PIN correct comprend 4 à 9 chiffres.
> Les chiffres entrés ne s’affichent pas sur l’écran Entrer code PIN ; ils sont
remplacés par des astérisques (*).
> L’identificateur peut être confirmé par le bouton Démarrage ou la touche
Entrée.
> Le MFP prend en charge deux types d’identificateur PIN.
Identificateur PIN administrateur
Il s’agit de l’identificateur PIN de l’administrateur ou des administrateurs
système.
Si un identificateur PIN est enregistré comme étant celui d’un administrateur,
l’écran de saisie du mot de passe administrateur s’affiche. Lorsqu’un mot de
passe administrateur est entré, l’utilisateur est authentifié comme étant un
administrateur.
Identificateur PIN utilisateur
Il s’agit de l’identificateur PIN des utilisateurs quelconques.
Si un identificateur PIN est enregistré comme étant celui d’un utilisateur
quelconque, l’écran de sélection de fonction
s’affiche. Après la saisie de l’identificateur PIN, c’est également cet écran qui
apparaît.
Identificateur PIN incorrect
Si le code PIN entré est incorrect, le message Mot de passe incorrect s’affiche
pendant trois secondes et l’écran Entrer code PIN réapparaît.
Déconnexion
Si Sortir est sélectionné ou si une expiration de délai a lieu pour une opération, l’écran
Entrer code PIN réapparaît.
8
Français
Page 23

Déconnexion par l’utilisateur
Lorsque le contrôle d’accès est activé, des options de sortie s’affichent dans le menu
de l’écran de sélection de mode.
Si vous placez curseur sur Sortir et que vous appuyez sur la touche Entrée, l’écran de
confirmation de sortie s’affiche.
Si Oui est sélectionné avec la touche Entrée sur l’écran de confirmation de sortie,
l’écran Entrer code PIN réapparaît.
Expiration de délai pour une opération
> Lorsque le panneau de commande du MFP reste inactif pendant une durée
définie (délai d’expiration pour une opération), l’écran de veille réapparaît
automatiquement si le contrôle d’accès est désactivé.
> Si un état d’erreur survient, le délai d’expiration est désactivé.
> Si une expiration de délai a lieu pour une opération, l’écran Entrer code PIN
réapparaît automatiquement si le contrôle d’accès est activé.
> La durée de l’expiration de délai est fonction de la valeur de Mode menu >
Configuration admin. > Réglages système > Délai ret. par déf..
Section scanner/photocopieur
Configuration minimale requise
La configuration suivante permet d’optimiser l’utilisation de ce MFP :
Pour envoyer des fax :
> Une connexion de ligne téléphonique PSTN.
Pour envoyer des courriers électroniques :
> Réseau TCP/IP
> Un serveur SMTP et un serveur POP3 facultatif
> Adresse d’expéditeur par défaut (adresse de ce MFP).
Pour archiver des documents via un intranet :
> Environnement de protocole FTP, HTTP ou CIFS
> Windows 2000, Windows XP, serveur HT TP ou FTP.
Fonctionnalités de communication Internet
Informations de préinstallation
Le MFP doit être correctement configuré sur votre réseau pour exécuter les fonctions
de numérisation vers messagerie et d’autres fonctions. Pour que les autr es
périphériques réseau trouvent le MFP sur le réseau, les paramètres ci-après doivent
être définis :
9
Français
Page 24

1. Activation de DHCP :
2. Adresse IP : . . .
3. Masque sous-réseau :. . .
4. Passerelle IP :. . .
5. Serveur DNS :. . .
6. Serveur SMTP :. . .
7. Port SMTP :25
8. Serveur POP3 : . . .
9. Port POP3 :110
Pour plus d’information sur le fonctionnement de l’apparell, consultez le Guide de
l’utilisateur en ligne sur le CD1.
Numérisation vers la messagerie électronique
Le MFP vous permet d’envoyer vos documents numérisés à des adresses de
courrier électronique via le réseau. Le document est d’abord numérisé et
converti dans un format de fichier PDF, JPEG, TIFF ou MTIF (Multipage TIFF)
standard, puis est transmis simultanément à des destinataires distants sous
forme de pièce jointe.
Lorsque vous envoyez un courrier électronique à l’aide du MFP, ce dernier utilise
le protocole SMTP (Simple Mail Transfer Protocol) pour transférer vos courriers
sortants vers votre serveur de messagerie SMTP, puis envoie ces courriers à vos
destinataires via Internet.
Configuration d’un serveur
Cette section explique comment configurer un serveur.
1. À l'aide des flèches vers le haut et vers le bas, faites défiler l’affichage jusqu’à la fonction Menu et sélectionnez-la à l’aide de la flèche droite.
2. À l'aide des flèches vers le haut et vers le bas, faites défiler l’affichage jusqu’à Configuration admin. et sélectionnez en appuyant sur Entrée ou sur la flèche droite.
3. À l'aide des flèches vers le haut et vers le bas, faites défiler l’affichage jusqu’à Config réseau et sélectionnez en appuyant sur Entrée ou sur la flèche droite.
4. Utilisez à nouveau les flèches vers le haut et vers le bas pour faire défiler l’affichage jusqu’à Réseau et sélectionnez en appuyant sur Entrée ou sur la flèche droite.
5. À partir du menu déroulant, sélectionnez Adresse IP en appuyant sur Entrée ou sur la flèche droite.
10
Français
Page 25

Écran de saisie d’adresse IP
Sur l’écran de saisie d’adresse IP, le premier champ est mis en évidence (valeur
à 3 chiffres à l’extrême gauche des quatre champs, qui sont séparés par un
« . ») et le curseur est placé sur le premier chiffre.
Déplacement entre les champs
Pour vous déplacer entre les champs, utilisez les flèches droite et gauche.
6. Entrez votre adresse IP.
Saisie de nombres
Les nombres sont entrés à l’aide du clavier à dix touches.
Lorsqu’un chiffre est entré à partir du clavier à dix touches, le nombre
actuellement affiché s’efface et le chiffre entré s’affiche en tant que premier
chiffre. Lorsqu’un autre chiffre est entré, le premier chiffre se décale, et ainsi de
suite.
7. Pour confirmer, appuyez sur la touche Entrée.
Annulation de l’adresse IP
Pour annuler l’adresse IP, placez le curseur sur le premier champ et appuyez sur la
flèche gauche.
11
Français
Page 26

Page 27

I
NTRODUCCIÓN
I
NSTALACIÓN DE CONTROLADORES Y UTILIDADES DE LA
MFP
Nota:
Nota: Instale el software antes de conectar el cable USB a la impresora.
1. Apague la impresora.
2. Inserte el CD1 viene con su impresora en la unidata CD El CD se ejecuta
3. Seleccione su idioma.
4. Aceptar el contrato de licencia.
5. Clique Instalar el controlador de impresora.
Para realizar este procedimiento debe haber iniciado sesión como un administrador o
un miembro del grupo de administradores. Si el ordenador está conectado a una red,
los ajustes de directivas de red también pueden suponer un impedimento para completar este procedimiento.
automáticamente.
6. Seleccione de impresoras local o network.
7. Cuando se le indique, seleccione una o ambas emulaciones de impresoras:. GDI: Esta emulación instala el controlador de la impresora y el controlador
Twain (necesario para iniciar el escaneo con el software desde su
computadora).
FAX: El controlador de impresora de fax permite enviar faxes directamente
desde el ordenador sin tener que imprimir antes el documento. Con el
controlador de fax de Oki los datos de fax se envían desde el ordenador a
la MFP y, a continuación, la MFP envía el documento automáticamente.
Windows XP dispone de soporte de fax integrado, es decir, puede usar el
módem del ordenador para enviar faxes directamente desde el ordenador.
8. Siga las instrucciones en pantalla.
9. Cuando se le solicite, conecte un cable USB y encienda la impresora.
1
Español
Page 28

U
TILIDAD HOTKEY
La utilidad HotKey permite a la MFP recibir comandos con la pulsación de una sola
tecla desde un ordenador conectado localmente (“Pull Scan”).
La instalación de la utilidad Hotkey es opcional y está disponible en el CD de
utilidades, en la carpeta de utilidades.
La información sobre el uso de la utilidad HotKey se encuentra en la Guía del Usuario
en el CD1.
Configuración de la utilidad HotKey
1. Instale la utilidad HotKey desde el CD: El programa de instalación colocará un icono “HotKey” en el escritorio.
2. Haga doble clic en este icono para abrir la consola de HotKey.
3. Seleccione los ajustes. Aparecerá la siguiente pantalla.
4. Seleccione la función que desee ajustar en la sección (1).
5. Ajuste el parámetro de esta función en la sección (2).
6. Una vez finalizados los ajustes, pulse el botón Aceptar (3). La utilidad regresará a la consola de HotKey (paso 2 arriba).
2
Español
Page 29

H
ERRAMIENTA DE CONFIGURACIÓN DE LA
La instalación de la utilidad de configuración de la MFP es opcional y está disponible
en el CD de utilidades, en la carpeta de utilidades.
El programa de instalación no coloca automáticamente un icono en el escritorio.
Si lo desea, puede arrastrar y soltar este icono en el escritorio para facilitar su uso en
futuras ocasiones
La herramienta de configuración de la MFP puede detectar dispositivos C3520/
C3530MFP a través de conexiones USB o de red.
Este software incluye 6 funciones principales;
> Ajustes de la MFP
>Ajuste de color
> Gestor de la libreta de direcciones
> Gestor de la guía de teléfonos
> Gestor de perfiles
>Gestor de PIN.
Todas estas funciones se describen a continuación.
MFP
1. Ajustes de la MFP: Permite cambiar la mayoría de los mismos ajustes que están disponibles en un panel de operador de la MFP en un PC conectado localmente.
Los ajustes incluyen un menú de administrador. Este menú está protegido
mediante contraseña y está oculto de forma predeterminada. Para habilitar el
menú de administración, seleccione: Ajustes>Ajustes de la MFP>Pantalla>
Administrador e introduzca la contraseña de la MFP.
2. Ajuste del color: Cambia el tono y la saturación de la función de copia de la MFP . No afecta al color de las impresiones o digitalizaciones.
3. Gestor de libretas de direcciones: Añade nombres y direcciones de correo electrónico y les asigna identificadores (para la función de envío de digitalización a correo electrónico de la MFP)
> Distribuye las personas en grupos.
> Importa y exporta los ajustes a archivos CSV.
> Importa los ajustes de otros dispositivos MFP de Oki.
4. Gestor de la guía de teléfonos: Para gestionar personas y números de fax (para la función "enviar digitalización
a fax" de la MFP). Añade nombres y números de fax y les asigna números de
marcación rápida.
> Distribuye las personas en grupos.
> Importa y exporta los ajustes a archivos CSV.
3
Español
Page 30

> Importa los ajustes de otros dispositivos MFP de Oki.
5. Gestor de perfiles: Un perfil es un conjunto de ajustes guardados para realizar la digitalización a un PC conectado en red. Un perfil está compuesto por:
> Detalles para la conexión a un PC conectado en red (protocolo, puerto, nombre
de usuario, contraseña, etc.)
> Tamaño de papel
> Formato del archivo digitalizado (PDF, TIFF, JPEG) y ajustes de formato, como la
resolución y la compresión
> Importa y exporta los ajustes a archivos CSV
> Importa los ajustes de otros dispositivos MFP de Oki
6. Gestor de PIN: El control de acceso a la MFP se puede cambiar en el panel
frontal. A tal efecto se necesita un PIN (número de identificación personal) para
poder usar la MFP. El Gestor de PIN crea los números PIN y les asigna derechos
de copia, impresión, envío de digitalización a correo electrónico, envío de
digitalización a red o fax.
> Importa y exporta los ajustes a archivos CSV.
> Importa los ajustes de otros dispositivos MFP de Oki.
S
ECCIÓN DEL ESCÁNER/COPIADORA
La MFP puede digitalizar/copiar/enviar los documentos mediante el ADF (Automatic
Document Feeder, alimentador automático de documentos) o manualmente sobre el
cristal.
Si tiene que digitalizar/copiar/enviar varias páginas, utilice el
ADF. El ADF puede admitir hasta 50 páginas de una vez.
Si necesita digitalizar/copiar/enviar páginas de libros, recortes
de periódicos o papel con arrugas u ondulaciones, utilice el
cristal.
Es posible realizar una sola copia instantánea, en monocromo
(8a) o en color (8b), pulsando el botón adecuado en el panel del
operador.
S
ECCIÓN SOBRE LA IMPRESORA
La MFP manejar una gran variedad de medios de impresión, incluyendo una gran
variedad de gramajes y tamaños de papel. Vea la Guía del Usuario en el CD1 para
obtener información sobre los diferentes medios y cómo utilizar cada uno de ellos.
Vea la Guía de referencia útil para obtener información rápida sobre cómo utilizar la
bandejas multiuso, opcionales y de salida, e información sobre la impresión por
ambos lados (manual/dúplex).
a
b
4
Español
Page 31

C
ONFIGURACIÓN DE LA MÁQUINA
Nota: En los Estados Unidos, todos los mensajes de fax deben contener un encabezado de acuerdo a
las regulaciones de la FCC. Que el mensaje contenga claramente la fecha y hora en que se
envió el mensaje y la idenficación el negocio u otra entidad, o el individuo que envia el mensaje, y el número telefó de la máquina remitente, del negocio, entidad o individuo.
...
PIN N
Antes de usar la MFP, es preciso realizar algunos ajustes básicos.
Asegúrese de que dispone de los números de permiso/PIN necesarios antes de
comenzar.
Las contraseñas/PIN ajustados de fábrica de forma predeterminada son:
R
A
El formato de la fecha se puede ajustar accediendo a la pantalla de configuración de
la siguiente manera:
1. Con las teclas de flecha arriba y abajo, seleccione la función Menú.
ECESARIOS
Administradoraaaaaa
PIN000000
Red (página web)últimas 6 cifras de la dirección MAC
ECEPCIÓN DE FAX
El fax de esta MFP responderá automáticamente al teléfono una vez transcurrido
el retraso de respuesta de timbre. Para obtener información acerca de este
ajuste, consulte el apartado
JUSTE DE FECHA Y HORA
2. Con la tecla de flecha a la derecha, seleccione la función Admin Menu (Menú de administración).
3. Si se le solicita, introduzca una contraseña.
4. Seleccione Config. del sistema y, a continuación, Formato Fecha.
5. Seleccione el formato que necesite. Los formatos disponibles son: mm/dd/aaaa dd/mm/aaaa aaaa/mm/dd
(donde "mm" = mes, "dd" = día, "aaaa" = año)
Cuando el cursor se desplaza por encima del elemento que desee ajustar y se pulsa
la tecla a la derecha o la tecla ENTER, aparecerá la pantalla Ajuste de hora. El cursor
se coloca en el extremo izquierdo, en el primer dígito del "mes," "día" o "año" (el
formato depende del ajuste en Formato Fecha).
5
Español
Page 32

I
NTRODUCCIÓN DE NÚMEROS
Los números se introducen mediante el teclado numérico.
Cuando se introduce un número, los números mostrados para "mes", "día", "hora" y
"minuto" se borran y el número que se acaba de introducir aparece como el primer
dígito. Cuando se introduce otro número, el número introducido en primer lugar se
desplaza a la izquierda, y así sucesivamente.
C
ONFIRMACIÓN DE LA HORA
Para confirmar la hora introducida, pulse la tecla ENTER.
C
ANCELACIÓN DE LA HORA AJUSTADA
Para cancelar el ajuste de la hora, pulse la tecla izquierda cuando el cursor se
encuentre encima del campo "mes", "fecha" o "año" que s encuentre en el extremo
izquierdo de la segunda línea.
A
JUSTE DEL CÓDIGO DE PAÍS
El código de país se ajusta de la siguiente manera:
1. En la pantalla Función, seleccione Menú.
2. Con la tecla de flecha abajo, desplácese hasta Config. admin..
3. Pulse ENTER. (En este punto necesitará la contraseña de administrador)
4. Introduzca la contraseña de administrador con el teclado numérico. Pulse Hecho cuando haya terminado.
5. Con la tecla de flecha abajo, desplácese hasta Config. Fax. Pulse ENTER.
6. Con la tecla de flecha abajo, desplácese hasta Config. Básica. Pulse ENTER.
7. Con la tecla de flecha abajo, desplácese hasta Código País. Pulse ENTER.
8. Seleccione el país en el que se encuentra la MFP. Pulse ENTER.
9. Utilice la tecla de flecha izquierda para regresar a la pantalla Función.
ID DE
Ajuste el ID de fax de la siguiente manera:
1. En la pantalla Función, seleccione Menú.
2. Con la tecla de flecha abajo, desplácese hasta Config. admin..
3. Pulse ENTER.
TRANSMISOR DE FAX
En este punto necesitará la contraseña de administrador.
4. Introduzca la contraseña de administrador con el teclado numérico. Pulse
Hecho cuando haya terminado.
6
Español
Page 33

5. Con la tecla de flecha abajo, desplácese hasta Config. Fax. Pulse ENTER.
6. Con la tecla de flecha abajo, desplácese hasta Config. Básica. Pulse ENTER.
7. Con la tecla de flecha abajo, desplácese hasta ID Transmisor. Pulse ENTER.
8. Introduzca el ID Transmisor (si es preciso) mediante el teclado numérico. Pulse Hecho cuando haya terminado.
9. Utilice la tecla de flecha izquierda para regresar a la pantalla Función.
R
ESPUESTA TIMBRE
La función de fax de esta MFP responderá automáticamente al tono de timbre
entrante una vez transcurrido el periodo de retraso establecido por la respuesta de
timbre.
El valor por defecto de fábrica de la respuesta de timbre es de 1 tono. Este valor se
puede ajustar en 20 segundos en el menú de administración de la siguiente manera
(para modificar este ajuste se necesitan derechos de administrador):
1. En la pantalla de nivel superior, desplácese hasta Menú y seleccione con la tecla ENTER.
2. En el menú desplegable, desplácese hasta Admin Menu (Menú de administración) y seleccione con la tecla ENTER. Introduzca la contraseña.
3. En el menú desplegable, desplácese hasta Config.Fax y seleccione con la tecla ENTER.
4. En el menú desplegable, desplácese hasta Config.Básica y seleccione con la tecla ENTER.
5. En el menú desplegable, desplácese hasta Respuesta Timbre y realice su selección con la tecla ENTER.
6. En el menú desplegable, desplácese hasta el tiempo de respuesta necesario y realice su selección con la tecla ENTER.
7. Utilice la tecla de flecha izquierda para regresar al menú de nivel superior.
C
ONTROL DE ACCESO
Para que únicamente los usuarios autorizados puedan utilizar esta máquina, puede
introducir un PIN (número de identificación personal) de 4 a 9 dígitos. Esta medida
se conoce como control de acceso. Este PIN será más seguro cuantos más dígitos
incluya en él.
A
CTIVACIÓN O DESACTIVACIÓN DEL CONTROL DE ACCESO
> La activación o desactivación del Control de acceso se ajusta en Menú
>Config. admin.>Config. del sistema>Control Acceso.
7
Español
Page 34

A
CTIVACIÓN DEL CONTROL DE ACCESO
> Cuando el Control de acceso está ajustado en Activado, la pantalla vuelve a
Config. del sistema inmediatamente después de efectuar el cambio. Sin
embargo, si las funciones Imprimir, Envío Fax o Escanear a PC se están
ejecutando, la pantalla Config. del sistema sólo se volverá a mostrar cuando
estas tareas hayan finalizado.
I
NTRODUCCIÓN DEL
ID DE PIN
> Cuando Control de acceso está Activado, es preciso introducir un ID de PIN
para permitir el ajuste de las utilidades.
> Introduzca el ID de PIN con el teclado numérico.
> Un ID de PIN válido debe estar formado por un número de 4 a 9 dígitos.
> Los números que escribe no se muestran en la pantalla de introducción del ID
de PIN. En su lugar se muestran asteriscos (*).
> El ID de PIN introducido se puede confirmar con la tecla Start o la tecla
ENTER.
> La MFP admite los dos siguientes tipos de ID de PIN.
ID de PIN de administrador
ID de PIN del administrador o administradores del sistema.
Si un ID de PIN está registrado como administrador, se mostrará la pantalla de
entrada de contraseña del administrador y, una vez introducida la contraseña,
se autenticará como un administrador.
ID de PIN de usuario
ID de PIN utilizado para usuarios en general.
Si un ID de PIN ID está registrado como un usuario normal, se mostrará la
pantalla de selección de función. Después de introducir el ID de PIN se volverá
a mostrar la pantalla de selección de función.
D DE PIN NO
VÁLIDO
Si el número PIN introducido no es válido, la pantalla Contraseña incorr. se
mostrará durante 3 segundos tras los cuales la pantalla regresa a la pantalla de
introducción del ID de PIN.
Operación de salida
Si se selecciona Salir o se produce un tiempo de espera de la operación, se muestra
la pantalla de introducción de ID de PIN.
Salida por usuario
8
Español
Page 35

Con el Control de acceso activado, las opciones de Salir se muestran en el menú de
la pantalla de selección de modo.
Cuando el cursor se desplaza sobre Salir y se pulsa la tecla ENTER, se muestra la
pantalla de confirmación de salida.
Al seleccionar Sí con la tecla ENTER en la pantalla de confirmación de salida, se
muestra la pantalla de introducción de ID de PIN.
T
IEMPO DE ESPERA DE LA OPERACIÓN
> Cuando el panel de operación de la MFP está inactivo durante un periodo de
tiempo predefinido (tiempo de espera de la operación), se muestra
automáticamente la pantalla de inactividad si Control de acceso está
desactivado.
> Si se produce un error, el tiempo de espera de operación se desactiva.
> Después del tiempo de espera de la operación, se muestra automáticamente la
pantalla de introducción de ID de PIN si Control de acceso está desactivado.
> La duración del tiempo de espera de la operación depende del ajuste realizado
en Modo menú>Config. admin >Config. del sistema > Volver a tiempo
en espera.
S
ECCIÓN DE ESCÁNER/COPIADORA
R
EQUISITOS MÍNIMOS DE CONFIGURACIÓN
Para obtener el máximo rendimiento de la MFP, se debe realizar la siguiente
configuración:
Para enviar faxes:
> Conexión a una línea telefónica conmutada pública (PSTN).
Para enviar mensajes de correo electrónico:
> Red TCP/IP
> Un servidor SMTP y un servidor POP3 opcional.
> Dirección “De” predeterminada (la dirección de esta MFP).
Para archivar los documentos p o r intranet
> Entorno de protocolo FTP, HTTP o CIFS.
> Windows 2000, Windows XP, HTTP o servidor FTP.
9
Español
Page 36

C
ARACTERÍSTICAS DE LAS COMUNICACIONES POR INTERNET
I
NFORMACIÓN SOBRE LA PREINSTALACIÓN
La MFP debe configurarse correctamente en la red para que pueda realizar las
funciones de envío de la digitalización por correo electrónico y otras funciones. Para
que los demás dispositivos de la red encuentren la MFP en la red, se deben configurar
los siguientes parámetros de red:
1. Activar DHCP:
2. Dirección IP: . . .
3. Máscara de subred:. . .
4. IP de puerta de enlace:. . .
5. Servidor DNS:. . .
6. Servidor SMTP:. . .
7. Puerto SMTP:25
8. Servidor POP3: . . .
9. Puerto POP3:110
Para obtener más información vea l Gúia del Usuario en línea que viene en el CD1.
Enviar digitalización a correo electrónico
La MFP permite enviar los documentos digitalizados a las direcciones de correo
electrónico de la red. El documento se digitaliza en primer lugar y se convierte
a un archivo con formato PDF, JPEG, TIFF, o MTIF (Multi-page TIFF, TIFF con
múltiples páginas) para trasmitirlo simultáneamente a los destinatarios en
forma de archivo adjunto de un mensaje de correo electrónico.
Cuando envía un mensaje de correo electrónico utilizando esta MFP, utiliza SMTP
para transferir los mensajes salientes al servidor de correo SMTP y, a
continuación, envía estos mensajes a los destinatarios a través de Internet.
Configuración de un servidor
En esta sección se describe cómo se configura un servidor.
1. Con las teclas de flecha arriba y abajo, desplácese hasta la función Menú y seleccione con la tecla de flecha derecha.
2. Con la tecla de flecha abajo, desplácese hasta Config. admin y seleccione con la tecla ENTER o la tecla de flecha derecha.
3. Con la tecla de flecha abajo, desplácese hasta Config. de red y seleccione con la tecla ENTER o la tecla de flecha derecha.
4. A continuación, de nuevo con la tecla de flecha abajo, desplácese hasta Red y seleccione con la tecla ENTER o la tecla de flecha derecha.
5. En el menú desplegable, elija Dirección IP y seleccione con la tecla ENTER o la tecla de flecha derecha.
10
Español
Page 37

Pantalla de entrada de la dire cción IP
En la pantalla de entrada de la dirección IP, el primer campo está resaltado (el
valor de 3 dígitos situado en el extremo izquierdo de los cuatro campos, cada
uno separado por un ".") y el cursor está situado sobre el primer dígito.
Desplazamiento entre los campos
Para desplazarse de un campo a otro, utilice las flechas de tecla izquierda y
derecha.
6. Introduzca su dirección IP.
Introducción de números
Los números se introducen mediante el teclado numérico
Cuando se introduce un número con el teclado numérico, el número actualmente
mostrado se borra y el número que se acaba de introducir aparece como el
primer dígito. Cuando se introduce otro número, el número del primer dígito se
desplaza al siguiente, y así sucesivamente.
7. Para confirmar, pulse la tecla ENTER.
Cancelación de la dirección IP
Para cancelar la dirección IP, mueva el cursor hasta el primer campo y, a
continuación, pulse la tecla de flecha izquierda.
11
Español
Page 38

Page 39

Instalação dos drivers e utilitários do MFP
Obs.:
É preciso estar conectado como administrador ou membro do grupo de
administradores para realizar este procedimento. Se o computador utilizado estiver
conectado a uma rede, políticas referentes às configurações da rede também podem
impedir que este procedimento seja realizado.
Obs. :Instale o driver primeiro antes de ligar o cabo USB ao impressora.
1. Desligue a impressora.
2. Insira o CD na unidade de CD-ROM. O CD será executado automaticamente.
3. Selecione o idioma.
4. Aceite o Contrato de Licença.
5. Clique em Install Drivers (Instalar drivers)..
6. Selecione impressora local ou de rede.
7. Quando solicitado, selecione uma ou ambas as emulações de impressora.
GDI: Esta emulação instala o driver da impressora, o driver Twain (usado para
iniciar um escaneamento a partir do PC através do software) e o utilitário de
amostra de cores.
FAX: FAX: O driver do fax permite o envio de faxes diretamente do computador do
usuário, sem imprimir antes os documentos. O Windows XP oferece
compatibilidade nativa com a função de fax - é possível usar o modem do
computador para enviar faxes diretamente a partir do computador. Com o
driver do fax da Oki os dados são enviados do computador do usuário para o
MFP e, em seguida, o MFP envia automaticamente o documento.
8. Quando solicitado, conecte o cabo USB e ligue a impressora.
9. Siga as instruções exibidas na tela para concluir a instalação.
1
Português
Page 40

Utilitário HotKey
O utilitário HotKey permite que o MFP receba comandos com um toque de tecla
oriundos de um computador conectado localmente ("Pull Scan").
A instalação do utilitário Hotkey é opcional. O utilitário está disponível na pasta
Utilities (Utilitários) no CD de utilitários do MFP.
Informações sobre como usar o utilitário HotKey estão disponíveis no Manual do
Usuário no CD.
INSTALAÇÃO DO UTILITÁRIO HOTKEY
1. Instalação do utilitário HotKey a partir do CD: A instalação colocará um ícone do "HotKey" na área de trabalho do computador.
2. Clique duas vezes no ícone para abrir o painel do HotKey..
3. A tela a seguir será exibida..
4. Selecione a função que deseja configurar na seção (1).
5. Configure os parâmetros da função na seção (2).
6. Quando concluir as configurações, clique em OK (3). O utilitário exibirá novamente o painel do HotKey.
2
Português
Page 41

Utilitário de configuração do MFP
A instalação do utilitário de configuração do MFP é opcional. O utilitário está disponível
na pasta Utilities (Utilitários) no CD de drivers/utilitários.
A ferramenta de configuração do MFP consegue detectar dispositivos C3530MFP
através de conexões USB ou de rede.
O programa de instalação não coloca automaticamente um ícone na área de trabalho
do computador. Se desejar, é possível arrastar e soltar o ícone na área de trabalho
do computador para facilitar seu acesso no futuro.
O software inclui seis funções principais:
> ;MFP Settings ((Configurações do MFP)
> Color Adjustment (Ajuste de Cor)
> Address Book Manager (Gerenciador de Catálogo de Endereços)
> Phone Book Manager (Gerenciador de Lista Telefônica)
> Profile Manager (Gerenciador de Perfis)
> PIN Manager (Gerenciador de NIP).
1. MFP Settings (Configurações do MFP): Permite a alteração da maioria das configurações exibidas no painel de operação do MFP, em um PC conectado localmente.
As configurações incluem um menu de administrador, que é protegido por senha
e permanece oculto. Para ativá-lo, selecione: Setting (Configuração)>MFP
Setting (Configuração do MFP)>Display (Exibir)>Administrator menu (Menu do
administrador) e digite a senha do MFP.
2. Color Adjustment (Ajuste de Cor): Altera a matiz e a saturação da função de cópia do MFP. Não afeta a cor das impressões nem dos escaneamentos.
3. Address Book Manager (Gerenciador de Catálogo de Endereços): Adiciona nomes, endereços de e-mail e atribui identificações a eles (para a função "escanear para e-mail" do MFP).
> Organiza os contatos em grupos.
> Importa e exporta as configurações para arquivos CSV.
3
Português
Page 42

> Importa as configurações de outros dispositivos Oki MFP.
4. Phone Book Manager (Gerenciador de Lista Telefônica) : Para gerenciar contatos e números de fax (para a função "escanear para fax" do MFP).
Adiciona nomes e números de fax e os atribui a números de discagem rápida.
> Organiza os contatos em grupos.
> Importa e exporta as configurações para arquivos CSV.
> Importa as configurações de outros dispositivos Oki MFP.
5. Profile Manager (Gerenciador de Perfis): Um perfil é um conjunto de
configurações salvas utilizadas para escanear para um PC conectado em rede.
Componentes de um perfil:Detalhes para estabelecer a conexão ao PC
conectado em rede (protocolo, porta, nome do usuário, senha, etc.)
> Tamanho do papel
> Formato a ser usado para o arquivo escaneado (PDF, TIFF, JPEG) e
configurações do formato, como resolução e compressão
> Importa e exporta as configurações para arquivos CSV
> Importa as configurações de outros dispositivos Oki MFP
6. PIN Manager (Gerenciador de NIP): É possível ativar o controle do acesso ao
MFP usando o painel frontal. Neste caso, um NIP (número de identificação
pessoal) é necessário para usar o MFP. O Gerenciador de NIP cria números de
identificação pessoal e atribui a eles direitos específicos, como o direito de
copiar, imprimir, escanear para e-mail, escanear para PC em rede ou fax.
> Importa e exporta as configurações para arquivos CSV.
> Importa as configurações de outros dispositivos Oki MFP.
Seção do escâner/copiadora
O MFP consegue escanear/copiar/enviar documentos usando o AAD (alimentador
automático de documentos) ou manualmente por meio do vidro do escâner.
Para escanear/copiar/enviar várias páginas, use o AAD. O AAD tem capacidade para
50 páginas de cada vez.
Se desejar escanear/copiar/enviar páginas de livros, recortes de
jornais ou papéis amassados ou curvados, use o vidro.
Para fazer uma única cópia monocromática (8a) ou colorida (8b),
basta pressionar o botão apropriado no painel de operação.
Seção da impressora
O MFP pode imprimir em várias mídias, inclusive papéis de diversos tamanhos e
gramaturas. Consulte as recomendações gerais sobre as opções de mídias e
explicações sobre como usar cada uma delas no Manual do Usuário.
a
b
4
Português
Page 43

Configuração do equipamento....
Obs. : Nos Estados Unidos, conforme exigido pelas regulamentações da FCC, todas
as mensagens de fax devem conter um cabeçalho.
Números de identificação pessoal
Antes de usar o MFP, é necessário fazer algumas configurações básicas.
Certifique-se de ter a permissão/números de identificação pessoal (NIP) relevantes
antes de começar.
Estas são as senhas/NIP padrão de fábrica:
Administrator aaaaaa
NIP 000000
Rede (página de Internet)últimos 6 números do endereço MAC
Recepção de fax
O fax do MFP atenderá automaticamente o telefone depois do número de toques
configurado. Para obter informações sobre esta configuração, consulte "Resposta a
toque de chamada (C3530MFP)" na página 5Setting the Date/Time.
O formato da data pode ser configurado após acesso à tela de configuração da
maneira descrita a seguir:
1. Usando o botão da seta para cima ou para baixo, selecione a função Menu.
2. Usando o botão da seta para a direita, selecione Admin Menu (Menu do administrador).
3. Se solicitado, digite a senha.
4. Selecione System Setup (Configuração do sistema) e, em seguida, Date Format (Formato da data).
5. Selecione o formato desejado. Formatos disponíveis: mm/dd/aaaa dd/mm/aaaa aaaa/mm/dd Onde "mm" = mês, "dd" = dia, "aaaa" = ano Quando o cursor é movido sobre o item a ser configurado e o botão da seta para
a direita ou Enter é pressionado, a tela Time Setting (Ajuste da hora) aparece.
O cursor ficará posicionado à extrema esquerda, no primeiro dígito do "mês",
"dia" ou "ano" [o formato depende da configuração do parâmetro Date Format
(Formato da data)].
5
Português
Page 44

D
IGITAÇÃO DE NÚMEROS
Os números são digitados por meio do teclado numérico.
Quando um número é inserido, os números atualmente exibidos para "mês", "dia",
"hora" e "minuto" desaparecem e o número inserido é exibido como o primeiro dígito.
Quando outro número é inserido, o primeiro número é movido para a esquerda, e
assim por diante.
C
ONFIRMAÇÃO DA HORA
Para confirmar a hora especificada, pressione o botão Enter.
C
ANCELAMENTO DO AJUSTE DA HORA
Para cancelar o ajuste da hora, pressione a tecla da seta para a esquerda quando o
cursor estiver sobre o "mês", a "data" ou o "ano", o que estiver à extrema esquerda
da segunda linha.
C
ONFIGURAÇÃO DO CÓDIGO DO PAÍS
Configure o código do país da seguinte maneira:
1. Na tela Function (Função), selecione Menu.Using the Down arrow key scroll to Admin Setup.
2. Pressione Enter.
3. (Neste momento, será preciso digitar a senha do Administrador)
4. Digite a senha do administrador usando o teclado numérico.
5. Selecione Done (Concluído) para concluir.
6. Usando o botão da seta para baixo, selecione Fax Setup (Configuração do fax). Pressione Enter.
7. Usando o botão da seta para baixo, selecione Basic Setup (Configuração básica). Pressione Enter.
8. Usando o botão da seta para baixo, selecione Country Code (Código de país). Pressione Enter.
9. Selecione o país no qual o MFP está instalado. Pressione Enter.
10. Use o botão da seta para a esquerda para voltar para a tela Function (Função).
ID DE
EMISSOR DE FAX
Configure a ID de emissor de fax da seguinte maneira:
1. Na tela Function (Função), selecione Menu.
2. Usando o botão da seta para baixo, selecione Admin Setup (Configuração do administrador).
6
Português
Page 45

3. Pressione Enter. (Neste momento, será preciso digitar a senha do Administrador).
4. Digite a senha do administrador usando o teclado numérico. Selecione Done (Concluído) para concluir.
5. Usando o botão da seta para baixo, selecione Fax Setup (Configuração do fax). Pressione Enter.
6. Usando o botão da seta para baixo, selecione Basic Setup (Configuração básica). Pressione Enter.
7. Usando o botão da seta para baixo, selecione Sender ID (ID do emissor). Pressione Enter.
8. Digite a ID de emissor necessária usando o teclado numérico. Selecione Done (Concluído) para concluir.
9. Use o botão da seta para a esquerda para voltar para a tela Function (Função).
R
ESPOSTA A TOQUE DE CHAMADA
O fax deste MFP atenderá automaticamente o telefone depois de transcorrido o
período de tempo configurado para o parâmetro de resposta a toque de chamada.
O parâmetro padrão de fábrica é 1 toque e pode ser configurado para até 20 segundos
no Admin Menu (Menu do administrador) da seguinte maneira (é preciso ter direitos
de administrador para alterar esta configuração):
1. Na tela inicial, acesse Menu e selecione esta opção usando o botão Enter.
2. No menu suspenso, acesse Admin Menu (Menu do administrador) e selecione esta opção usando o botão Enter. Digite a senha.
3. No menu suspenso, acesse Fax Setup (Configuração do fax) e selecione esta opção usando o botão Enter.
4. No menu suspenso, acesse Basic Setup (Configuração básica) e selecione esta opção usando o botão Enter.
5. No menu suspenso, acesse Ring Response (Resposta a toque de chamada) e selecione esta opção usando o botão Enter.
6. No menu suspenso, acesse o tempo de resposta necessário e selecione-o usando o botão Enter.
7. Usando o botão da seta para a esquerda, volte ao menu principal.
Controle de acesso
A operação e as funções deste equipamento podem ser limitadas apenas a pessoal
autorizado. Para isso, basta introduzir um número de identificação pessoal (NIP) de
4 a 9 dígitos. Este recurso é conhecido como controle de acesso. Quanto maior o
número de dígitos no NIP, mais seguro ele é.
7
Português
Page 46

A
TIVAÇÃO/DESATIVAÇÃO DO CONTROLE DE ACESSO
> Para ativar/desativar o controle de acesso, selecione Menu >Admin Setup
(Configuração do administrador)>System Setup (Configuração do
sistema)>Access Control (Controle de acesso).
A
TIVAÇÃO DO CONTROLE DE ACESSO
> Com o controle de acesso ativado, o display passa a exibir imediatamente a
tela de configuração do sistema depois de o parâmetro ser alterado. No
entanto, se uma das funções, como imprimir, enviar fax ou escanear para PC,
estiver em execução, o display só passará a exibir a tela de configuração do
sistema quando a tarefa estiver concluída.
I
NSERÇÃO DO
NIP
> Quando o controle de acesso está ativado, é necessário digitar um NIP para
poder configurar várias funções.
> Digite o NIP usando o teclado numérico.
> Um NIP válido é composto de 4 a 9 dígitos.
> Os números digitados não são exibidos no display e são substituídos por
asteriscos '*'.
> O NIP digitado pode ser confirmado com o botão Iniciar ou com o botão Enter.
> O MFP aceita dois tipos de NIPs:
NIP DE
ADMINISTRADOR
Este é o NIP do(s) administrador(es) do sistema.
Se um NIP for registrado como sendo de administrador, a tela de inserção da
senha do administrador será exibida e, quando for digitada, será autenticada
como sendo de um administrador.
NIP DE
USUÁRIO
Este é o NIP para usuários em geral.
Se um NIP for registrado como sendo de usuário, a tela de seleção de funções
será exibida. Esta tela também é exibida depois de o usuário digitar o NIP.
NIP
INVÁLIDO
Se o NIP digitado for inválido, a mensagem Incorrect Password (Senha incorreta) será
exibida durante 3 segundos e o display passará a exibir a tela de inserção do NIP.
O
PERAÇÃO DE LOGOUT
Se Logout for selecionado ou o tempo limite de uma operação for ultrapassado, o
display passará a exibir a tela de inserção do NIP.
8
Português
Page 47

L
OGOUT FEITO PELO USUÁRIO
Com o controle de acesso ativado, as opções de logout são exibidas no Menu na tela
Mode Selection (Seleção de modos).
Quando o cursor é movido para Logout e o botão Enter é pressionado, o display passa
a exibir a tela de confirmação de logout.
Se a opção Yes (Sim) for selecionada com o botão Enter na tela de confirmação de
logout, o display passará a exibir a tela de inserção do NIP.
T
EMPO LIMITE DE OPERAÇÃO
> Quando o painel de operação do MFP não é utilizado durante um intervalo de
tempo predefinido (tempo limite de operação), o display passa
automaticamente a exibir a tela de repouso se o controle de acesso estiver
desativado.
> Se ocorrer um estado de erro, o tempo limite de operação será desativado.
> Depois de transcorrido o tempo limite de operação, o display passará a exibir
automaticamente a tela de inserção de NIP se o controle de acesso estiver
ativado.
> A duração do tempo limite de operação depende da configuração definida em
Menu Mode (Modo Menu)>Admin Setup (Configuração do
administrador)>System Setup (Configuração do sistema)>Return to Stand-by
Time (Voltar ao tempo de espera).
Seção do escâner/copiadora
R
EQUISITOS MÍNIMOS DE CONFIGURAÇÃO
Para aproveitar ao máximo os recursos do MFP, é preciso dispor da seguinte
configuração:
P
ARA ENVIAR FAXES
> Uma conexão de linha telefônica.
P
ARA ENVIAR E-MAILS
> Rede TCP/IP.
> Um servidor SMTP e um servidor POP3 opcional.
> Endereço de origem padrão (o endereço do MFP).
P
ARA ARQUIVAR DOCUMENTOS ATRAVÉS DE INTRANET
> Ambiente de protocolo FTP, HTTP ou CIFS.
> Servidor Windows 2000, Windows XP, HTTP ou FTP.
:
:
9
Português
Page 48

R
ECURSOS DE COMUNICAÇÃO PELA INTERNET
I
NFORMAÇÕES DE PRÉ-INSTALAÇÃO
O MFP precisa ser configurado corretamente na rede para executar as funções de
escaneamento para e-mail e outras funções. Para que outros dispositivos de rede
detectem o MFP na rede, é necessário configurar os seguintes parâmetros:
1. DHCP enable (Ativar DHCP):
2. IP Address (Endereço IP): . . .
3. Subnet mask (Máscara de subrede):. . .
4. Gateway IP (IP do Gateway):. . .
5. DNS server (Servidor DNS):. . .
6. SMTP server (Servidor SMTP):. . .
7. SMTP Port (Porta SMTP):25
8. POP3 server (Servidor POP3): . . .
9. POP3 Port (Porta POP3):110 ‘
C
ONSULTE A EXPLICAÇÃO DESTAS CONFIGURAÇÕES NO MANUAL DO USUÁRIO ELETRÔNICO NO
CD.
E
SCANEAR PARA E-MAIL
O MFP permite o envio dos documentos escaneados a endereços de e-mail na
rede. Os documentos são primeiro escaneados e convertidos em um formato de
arquivo padrão, como PDF, JPEG, TIFF ou MTIF (Multi-page TIFF) e depois
transmitidos a destinatários remotos simultaneamente como anexos de e-mail. .
Quando um e-mail é enviado a alguém através do MFP, a unidade usa o
protocolo SMTP (Simple Mail Transfer Protocol) para transferir os e-mails
enviados para o servidor de e-mail SMTP e depois enviá-los aos destinatários
através da Internet.
C
ONFIGURAÇÃO DE UM SERVIDOR
Esta seção explica como configurar um servidor.
1. Usando o botão da seta para cima ou para baixo, acesse a função Menu e selecione-a com o botão da seta para a direita.
2. Usando o botão da seta para baixo, acesse a opção Admin Setup (Configuração do administrador) e selecione-a com o botão Enter ou o da seta para a direita.
3. Usando o botão da seta para baixo, acesse a opção Network Setup (Configuração da rede) e selecione-a com o botão Enter ou o da seta para a direita.
4. Use novamente o botão da seta para baixo para acessar a opção Network (Rede) e selecione-a com o botão Enter ou o da seta para a direita.
10
Português
Page 49

5. No menu suspenso, selecione IP Address (Endereço IP) pressionando o botão Enter ou o da seta para a direita.
Tela de inserção do endereço IP
Na tela de inserção do endereço IP, o primeiro campo estará realçado (o valor
de 3 dígitos na extrema esquerda dos quatro campos - cada um separado com
um ponto ".") e o cursor estará posicionado sobre o primeiro dígito.
Movimentação entre os campos
Para movimentar o cursor entre os campos, use os botões da seta para a
esquerda e da seta para a direita.
6. Digite o endereço IP.
Digitação de números
Os números são digitados por meio do teclado numérico.
Quando um número é digitado no teclado numérico, o número exibido
atualmente é apagado e o número que acabou de ser digitado é exibido como o
primeiro dígito. Quando outro número é digitado, o número no primeiro espaço
muda para o próximo, e assim por diante.
7. Para confirmar a informação, pressione o botão Enter.
C
ANCELAMENTO DO ENDEREÇO
Para cancelar o endereço IP, mova o cursor para o primeiro campo e depois pressione
o botão da seta para a esquerda.
•
IP
11
Português
Page 50

Page 51

Service and Support
Available 24 hours a day, 7 days a week
• Visit our multilingual web site:
• Visit MY.OKIDATA.COM
• Call 1-800-654-3282
Service et soutien
Offert 24 heures sur 24, 7 jours sur 7
• Visitez notre site Web multilingue :
• Visitez MY.OKIDATA.COM (Anglais uniquement).
• Composez le 1-800-654-3282
Assistencia Técnica y Soporte
• Visite nuestro sitio Web multilingue:
• Visite MY.OKIDATA.COM (Inglés solamente).
• Estados Unitos: llame al 1-856-222-7496
• Mêxico: llame al (525) 263-8780
Assistência Técnica e Suporte
• Visite nosso site multilingüe na Web:
• Visite MY.OKIDATA.COM (somente em inglê).
• Ligue para 55-11-3444-6746 (Grande São Paulo) ou 0800-11-5577 (demais
localidades).
WWW.OKIPRINTINGSOLUTIONS.COM
WWW.OKIPRINTINGSOLUTIONS.COM
WWW.OKIPRINTINGSOLUTIONS.COM
WWW.OKIPRINTINGSOLUTIONS.COM
Page 52

OKI, OkiLAN ® Oki Electric Industry Company, Ltd. Microsoft, Windows, Internet Explorer ®/™ Microsoft Corporation in the United States
and other countries. Novell, NetWare ® Novell Corporation in the U.S. and other countries. Adobe, Acrobat, Acrobat Reader, PostScript
™ Adobe Systems, Inc. which may be registered in certain jurisdictions. Ethernet ® Digital Equipment Corporation. EtherTalk, LaserWriter,
Mac, Macintosh ® Apple Computer, Inc.
Oki Data Americas, Inc., 2000 Bishops Gate Blvd., Mt. Laurel, NJ 08054-4620
Tel: 1-800-Oki-Data (1-800-654-3282) Fax: (856) 222-5320 www.okiprintingsolutions.com
 Loading...