

Page 1

HO 819
Mounting Instructions
Note!
Please note that this image is a general representation
of the product and may differ slightly from your product.
Note!
Please note that during storage and transportation,
especially at high ambient temperature, some of the oil
and grease used for assembling may leak and stain the
packaging. This is in no way detrimental to the product,
wipe off the excessive oil/grease with a cloth.
Warning!
Before installing this product, read the Öhlins Owner’s
Manual. The shock absorber is an important part of your
vehicle and will affect the stability.
Note!
Before installing this product, check the contents of
the kit. If anything is missing, please check an Öhlins
dealer.
Kit Contents
Description Part No Pcs
Shock absorber HO 819 2
Tool preload adjuster 03199-03 1
Sticker set "ÖHLINS" 10207-01 1
Owners manual road & track 07241-02 1
Alternative spring
Spring 46/200/
prog 12-19 N/mm
60360-02 2
Shock Absorber for Honda Monkey-2018
Page 2

2
MOUNTING INSTRUCTIONS
1.
Put the motorcycle on a work stand so that the
rear wheel barely touches the ground. Make
sure the motorcycle is in a stable position.
Warning!
It is advisable to have an Öhlins dealer install the shock
absorber.
Warning!
If working on a raised vehicle, ensure it is securely
supported so that it will not tip over.
Note!
Before mounting this product clean the vehicle
thoroughly.
Note!
When working on this product, always see the Vehicle
Service Manual for vehicle specic procedures and
important data.
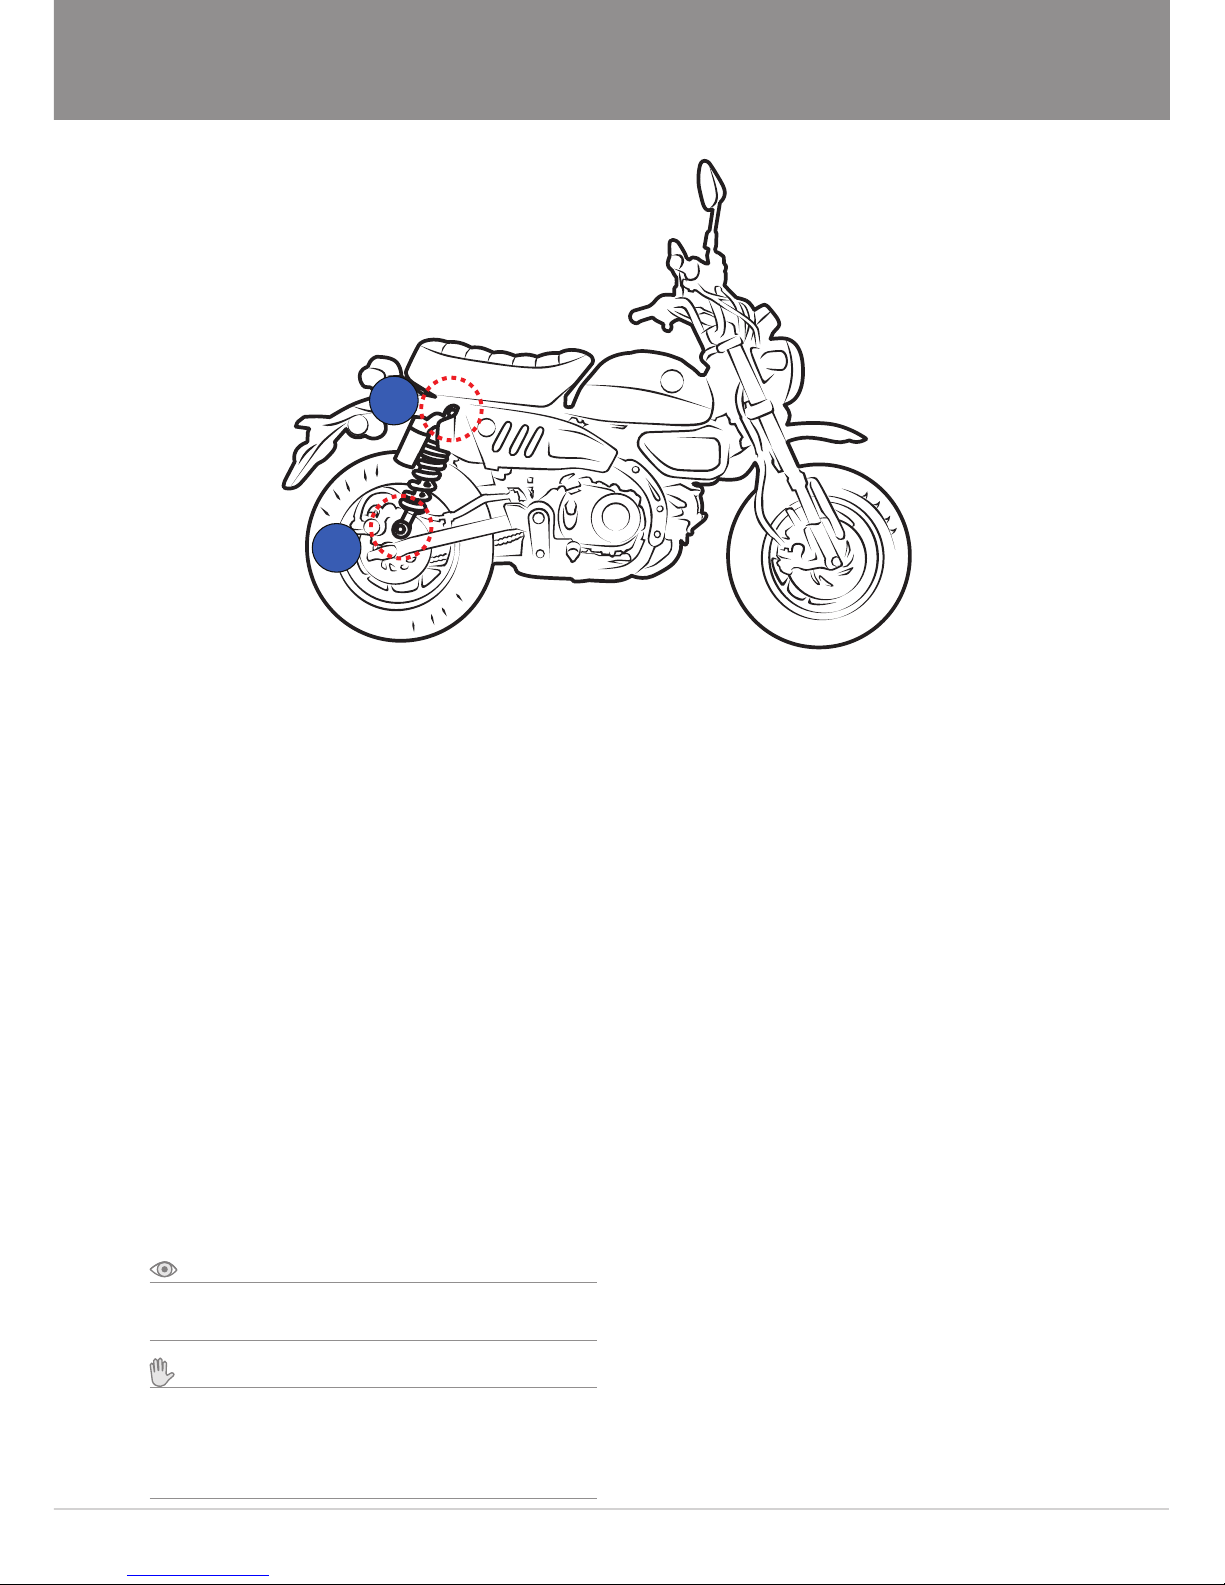
2.
Uninstall the standard shock absorber by
loosening the upper and lower mounting bolts.
①②
1
2
Page 3
3
MOUNTING INSTRUCTIONS
Note!
Lower the vehicle so that the suspension is slightly
compressed before tightening the screws.
Caution!
Ensure that all screws are tightened to the correct
torque and that nothing fouls or restricts movement
of the shock absorber when the suspension is fully
compressed or extended.
Tighten at a torque value as specied in the
vehicle service manual.
Reverse all procedures as necessary.
3.
Install the Öhlins shock absorber by tightening
the upper and lower mounting bolts
①②
1
2
Page 4
Öhlins Asia Co. Ltd
700/937 Moo5, Tambol Nongkhaga,
Amphur Phantong, Chonburi Province
20160 Thailand
© Öhlins Asia Co. Ltd. All rights
reserved. Any reprinting or
unauthorized use without the written
permission of Öhlins Racing AB
is prohibited.
Öhlins products are subject to
continuous improvement and
development, therefore, although
these instructions include the most
up-to-date information available at
the time of printing, minor updates
may occur.
To nd the latest information
contact an Öhlins distributor.
Please contact Öhlins if you have
any questions regarding the
contents in this document.
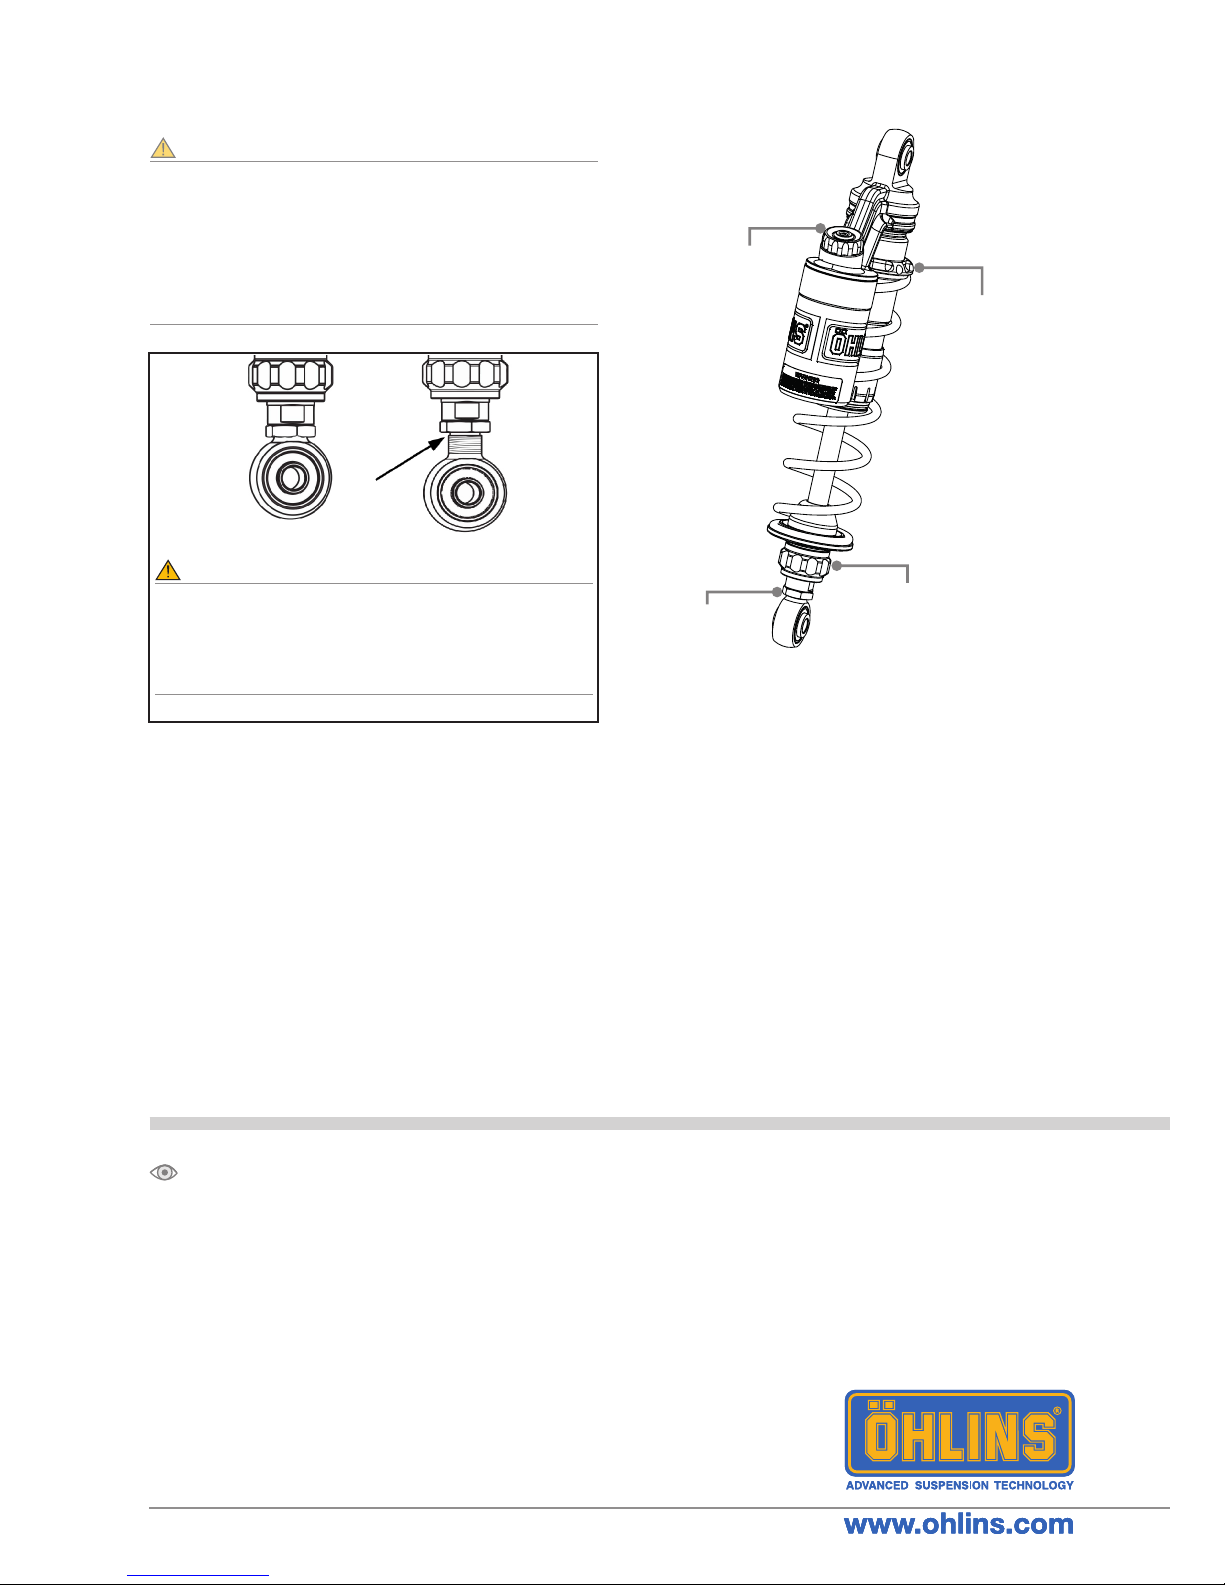
Compression
Adjuster
SET-UP DATA
Warning!
Before riding, always make sure that the basic settings
made by Öhlins are according to recommended
Set-up Data. Read about adjustments and setting up
in the Öhlins Owner’s Manual before you make any
adjustments. Contact an Öhlins dealer if you have any
questions about setting up.
ADJUSTMENTS
Part no. MI_HO 819_EN_0
Issued 2018-06-21
Spring Preload
Adjuster
Rebound
Adjuster
Spring Installed spring Alternative spring
Part No ................... 60360-01 60360-02
Free spring length... 200 mm. 200 mm.
Spring rate.............. Prog 11-15 N/mm Prog 12-19 N/mm
Preload adj.range.... [0-37] mm [0-31] mm
For rider’s weight.... Below 80 kg Above 80 kg
Shock absorber data
Length ....................
334 +9/-1 mm.
Stroke .................... 93 mm.
Recommended set-up
Spring Preload............................ 7 mm.
Compression adjuster ................ 12 Clicks
Rebound adjuster ...................... 16 Clicks
Max. Position
Min. Position
Warning!
The adjustable end eye/bracket must not be threaded
out more than that the groove is fully visible beneath
the lock nut. This is maximum length. After adjusting,
make sure that the lock nut is tightened (30Nm).
Length
Adjuster
 Loading...