

Page 1

Objectif Lune Software
PrintShop Mail
WEB
Administration Guide
Page 2

©2010 Objectif Lune Inc - 2 -
Page 3
Table of Content
Table of Content
Table of Content 3
Overview 11
Icons used in this guide 11
Other Documentation 11
Understanding PrintShop Mail Web 13
What is PrintShop Mail Web? 13
About Companies 13
Public Companies 14
About Users 14
Public Users 14
User Roles 14
About Publication Types 14
About Documents 15
Getting Started 17
Installing the software 19
System requirements 19
Running the installer 20
Configuring the database and web site 24
Upgrading PrintShop Mail Web 2.Xto Version 7 27
Orders and Documents 28
Skin changes 28
Create backups 28
Backup your database 28
Backup production files 29
Backup skin files 30
Backup configuration files 31
PrintShop Server service 33
Creating a User Account for the PSS service 34
Setting the PrintShop Server Service account 37
Set the security privileges (local account) 41
Managing printers for PrintShop Server 44
PrintShop Mail Web and HTTPS 47
What is HTTPS? 47
SSL certificates 47
Server installation 48
Client installation 48
Test Certificate by Web Browser 50
Test Certificate in PrintShop Mail 50
USBHardware Key 51
B2C (Business to Customer) 52
Skins 53
Quick start guide 53
©2010 Objectif Lune Inc - 3 -
Page 4

Table of Content
The PrintShop Mail Web Interface 55
Accessing PrintShop Mail Web 55
The PrintShop Mail Web Menu Tabs 56
Common Tasks 56
Remember me 56
Lost password 57
Modify user info 57
Set New Password 58
Change the language of the web site 58
Publishing Workflow 59
Publishing a PrintShop Mail Design Document 59
Publishing a Word Mail Merge Document 59
Publishing a Static PDFDocument 59
Ordering Workflow 61
Customer Workflow 61
Processing Workflow 62
Order Statuses 62
New Document 65
Document Selection Screen 65
Ordering A Database-Upload Document 66
Database Upload Screen 66
Field Mapping 66
Preview Range 67
Ordering a User Input Document 67
User Input Fields 67
Ordering a Static PDF Document 68
Softproof 68
Order Manager 69
Viewing Order Details 70
Order Properties 70
Order Details 70
Job Properties 71
Checkout 73
The Checkout Process 73
Shopping Cart 73
Automatic price calculation 74
No price calculation 74
Price Quotes 74
Shipping Options 75
Shipping Date and Rush Rate handling 75
Shipping Methods 76
Order summary 76
Companies 77
Add companies 77
©2010 Objectif Lune Inc - 4 -
Page 5

Table of Content
Modify properties 77
Add or modify address 78
Add departments 78
Assign a publication type to a department 79
Change web design settings 79
Modify Pricing and Ordering parameters 80
Delete company 81
Users 83
Add users 83
Modify user info 83
Assign users to a department 84
Publication Types 85
Create a publication type 85
Create a publication type in the Companies section 86
Modify the publication type properties 86
Delete a publication type 86
Adding documents to a Publication Type 87
Word Mail Merge Document 87
Delete documents from a publication type 88
Edit document properties 89
Manage production settings 89
Output options 90
Output options for a PrintShop Mail document 90
Output options for a static document (PDF) 91
Manage linked files 91
Setting up web forms 92
User Input vs Database Upload 94
Define file upload settings 102
Setting up pricing 103
Collections 107
Create an image collection 107
Add images to a collection 108
Delete image from a collaction 108
Settings 111
About 113
License 113
Roles 113
Modify a role 114
Languages 120
Add a new language 121
Delete a language 121
Edit a language 121
Web Design 122
Maintenance 123
Word Maintenance 123
©2010 Objectif Lune Inc - 5 -
Page 6

Table of Content
Settings 125
Currencies 126
Add a new currency 126
Delete a currency 127
Tax Rates 127
Add a new tax rate 128
Delete a tax rate 128
Edit a tax rate 129
Shipping Rates 130
Shipping Rate Profiles 130
Add a Rate to a Shipping Rate Profile 130
Add a new Shipping Rate Profile 131
Delete a Rate 132
Delete a Shipping Rate Profile 132
Edit a Rate 132
Edit a Shipping Rate Profile 132
Import and Export a Rates table 133
Calendar 133
Add a Restricted Order Date 134
Change the Working Days 135
Delete Restricted Order Dates 136
Import and Export Restricted Order Dates 136
Price Groups 137
Discount Vouchers 138
Production Settings 141
User Input Field Defaults 142
Add a new User Input Field Default item 142
Arrange User Input Field Defaults items 143
Delete an User Input Field Default item 144
Import and Export an User Input Field Default list 144
Output Folders 144
Enable the download link 145
Job options 146
Add a new job options file 146
Delete job options files 147
Printers 147
Change the status of a printer 147
E-mail Settings 149
Configure the E-mail settings 149
Test the E-mail settings 150
E-mail Addressees 150
Configure the addressees 150
Managing E-mail Templates 151
Edit a default e-mail template 152
Template names 152
©2010 Objectif Lune Inc - 6 -
Page 7

Table of Content
Using functions in e-mail templates 153
Modules Settings 157
MIS Connectors 159
Enabling a MIS connector 159
Installed modules 160
Properties 161
Enabling a Print Production connector 163
Installed modules 163
Properties 163
Payment Modules 163
PayPal Payment Module 164
Requirements 164
Instant Payment Notifications 165
Configuring the module 165
The PayPal Sandbox 166
Creating a PayPal Sandbox Access account 166
Creating a PayPal Sandbox Seller test account 166
Creating a PayPal Sandbox Buyer test account 167
Processing orders 167
PayPal Sandbox 167
Payment process 167
Authorize.Net Payment Module 168
Requirements 168
Configuring the Authorize.net module 169
Test mode 169
AVS and CCV checks 170
Payment page 170
iDeal Payment Module 170
Requirements 171
Requesting a test account 171
Configuring the iDEAL test dashboard 172
Configuring the iDeal module 172
Moneris Payment Module 173
Requirements 174
Configuring the Moneris module 174
Test mode 175
Requesting a live account 176
AVS and CVD checks 176
Payment page 176
Add a new Module 176
Configure a module 177
Delete a Module 177
XML to File connector 179
©2010 Objectif Lune Inc - 7 -
Page 8

Table of Content
XML (eXtensible Markup Language) 179
Options 180
General information 180
Push method 181
XML options 182
Post options 183
File options 183
Sample POST receive script 185
Manage the Terms and Conditions 186
Interaction With PrintShop Mail Design 187
Receiving Jobs from Print to Web 187
Print Driver Matching 187
Creating Companies And Publication Types 188
Images VS Image Collections 189
Introduction to Regular Expressions 191
Syntax 191
Character selection 191
Alternation 192
Grouping 192
Quantification 192
Examples 193
Only numbers 193
Dutch zip code 193
Canadian zip codes 193
Introduction 195
Integration methods 197
External login 198
Examples 199
External person access 200
Examples 201
Implementing a custom store front 205
Account authentication 205
Custom store front pages 205
Adding a redirect to PrintShop Mail Web 207
Skinning Guide 209
Getting started 211
Skinning 211
Templates and styles 212
File organization 212
Creating your own skin 214
Resources 214
Tools 214
PrintShop Mail Web demo version 214
Design 215
©2010 Objectif Lune Inc - 8 -
Page 9

Table of Content
Text editor 215
Browser extensions 215
The template file 217
HMTL Outline 217
Page title 219
CSS includes 219
Header 220
User information 220
Menu 220
Crumbs 220
Messages 220
Content 221
Sub menus 221
Search 222
Summary 222
Preview 222
Footer 222
Styling 223
Key Concepts 223
Tags, IDs and classes 223
CSS Syntax 223
Style organization 224
Global styles 225
Page specific styles 226
Browser exceptions 226
Header 227
Replacing content 227
User information 228
CSS Lists 228
Adding additional information 229
Highlighting "hovered" items 229
Menu bar 229
Styling the menu items 230
Creating a Tabbed menu 231
Styling the selected menu item 232
Background 232
Adding a background image 232
Overview tables 232
Head 234
Subhead 234
Content 234
Footer 234
Buttons 235
Edit forms 235
Form head 236
©2010 Objectif Lune Inc - 9 -
Page 10

Table of Content
Form lines 236
Warnings and Errors 237
Sub menus 238
Multiple sub menus 239
Special variables 241
Variables for template files 241
setRowsPerPage 241
generateString 241
Variables for style files 241
generateSkinContrastColor 242
generateSkinContrastColorHighLight 243
generateSkinFont 243
generateSkinHeaderColor 243
generateSkinHeaderColorHighLight 243
generateSkinLocation 244
generateSkinLogo 244
generateSkinMainColor 244
generateSkinMainColorHighLight 244
Creating page exceptions 247
Creating a page specific template file 247
Modifying a page specific template file 248
DOM manipulation using jQuery 251
Launching code on Document Ready 251
Populating fields with computed values 252
Removing elements from the DOM 252
Adding information to the DOM 253
Customizing the store front 255
Storefront class 255
getTree(); 256
Creating a hierarchical tree 257
The Javascript file 257
The template file 257
Virtual Subfolders 258
Adding a live search option 260
The Javascript file 260
The template file 261
Livesearch.php 262
Copyright Information 263
Index 265
©2010 Objectif Lune Inc - 10 -
Page 11
Overview
Overview
This PDF documentation covers version 7.1. To view the documentation of previous versions please refer to the PDF files
available in the Downloads section of our website:
http://www.objectiflune.com/OL/Download/DownloadCenter.
Icons used in this guide
Some icons are used throughout this guide in order to catch your attention to certain particular information.
Notes: This icon shows you something that complements the information around it. Understanding notes is not critical but may be helpful when using PrintShop Mail Web.
Warnings: This icon shows information that may be critical when using PrintShop Mail Web. It is important to pay
attention to these warnings.
Technical: This icon shows technical information that may require some technical knowledge to understand.
Other Documentation
For other related documentation , please see the drop-down menu at the top-right corner of this page.
©2010 Objectif Lune Inc - 11 -
Page 12

©2010 Objectif Lune Inc - 12 -
Page 13

Understanding PrintShop Mail Web
Understanding PrintShop Mail Web
What is PrintShop Mail Web? 13
About Companies 13
Public Companies 14
About Users 14
Public Users 14
User Roles 14
About Publication Types 14
About Documents 15
This chapter will introduce PrintShop Mail Web as well as establish its terminology in a glossary.
What is PrintShop Mail Web?
PrintShop Mail Web is a companion extension to the PrintShop Mail Design module. It supports multi-user printing from PrintShop Mail Design with the added benefit of a web interface for automating and managing document templates. PrintShop Mail
Web is the perfect module for organizations where multiple users can create and/or manage document templates and facilitates their publication enterprise-wide to a web interface. Its web capability allows real-time, 24/7 online modification, ordering and production of repetitive, promotional and personalized documents created with PrintShop Mail Design as well as static
PDF files. It's the ideal solution for any business that has remote workers or offices – typically retail outlets, franchises and
dealerships.
Users can upload an image for local personalization and modify the text based on pre-defined variable fields. Once the document is ready, users validate and pre-flight their print run and initiate the ordering process. With permissions and access
rights that can be set per user, PrintShop Mail Web allows companies to adapt the verification process of submitted documents
based on their business rules.
PrintShop Mail Web is also a fully functional web front for print shops that want to give their clients the ability to order documents, whether these clients are part of a known company or are one-time users from the web. With the B2Cfunctionality,
anyone can create and pay for their orders directly from the web interface (requires separate B2Clicense).
About Companies
In PrintShop Mail Web, a Company is an entity that contains departments users, publication types and documents. Acompany
can have more one or more departments, in which each user can have specific roles such as Operator, Manager, Designer, etc
(see "About Users" (page 14)).
Each company also has their own individual publication types (see "About Publication Types" (page 14)) in which users with
the appropriate role can upload documents (see "About Documents" (page 15)).
Companies are access via sub-folders from the main website. For example, a company may be called "Oasis Health &Beauty
Spa"and its URLwill be http://www.mywebsite.com/
©2010 Objectif Lune Inc - 13 -
Page 14
Understanding PrintShop Mail Web
For more information, see the chapter on "Companies" (page 77).
Public Companies
Apublic company is a special type of company in which users can create accounts themselves (normally an administrator or
manager has to create each user account). Public companies are used by print shops that want to have a storefront where
anyone can order specific document types. For example, a print shop wants to offer its clients the ability to create their own
business cards or postcards from pre-existing templates can do this with PrintShop Mail Web.
Public Companies require a B2Clicense to be installed on the server. See "B2C (Business to Customer)" (page 52).
About Users
A user is an entity within PrintShop Mail Web that has a specific roleand is generally part of a company (see "About Com-
panies" (page 13)). However, a user can be assigned to multiple companies if it is necessary. This is useful if one of the com-
panies is the print shop itself and one of its operators is assigned to a certain number of companies and is responsible for
generating output for them. What a user can do on PrintShop Mail Web depends on their role.
To create users, please see the chapter on "Users" (page 83).
Public Users
Public users are users that are part of a public company. These users are so-called "basic" users and cannot do anything other
than create new orders, view the status of their order and edit their user preferences. Public users can create themselves as
long as their do so within a public company.
User Roles
A user role is a set of permission that is applied to one or more users in PrintShop Mail Web. Users in specific roles will be able
to execute certain specific actions such as uploading documents, approving and modifying orders, providing quotes or generating outputs. Alist of pre-built user roles, as well as the ability to create new custom user roles, is described in the "Roles"
(page 113) section of the PrintShop Mail Web "Settings" (page 111) tab.
Roles are site-wide, meaning they are applied to all users across all companies, whether this company is private or
public. Only administrator can edit roles, but managers can assign roles to users.
About Publication Types
A publication type is a folder in which template documentsof your customers are grouped (see "About Documents" (page 15)).
These publication type folders can contain multiple documents. For example: a publication type folder to store different language variants of a brochure (e.g. Dutch and English-versions), a publication type folder for house style related document
(e.g. Business cards, letterheads, envelopes). Each company has his own publication types.Publication types are set within the
"Publication Types" (page 85) tab in PrintShop Mail Web.
©2010 Objectif Lune Inc - 14 -
Page 15

Understanding PrintShop Mail Web
About Documents
A document is a file present within PrintShop Mail that is used to generate outputs. There are multiple types of documents
including Static PDFs, PrintShop Mail Design documents and Mail Merge documents.
Documents are always part of a publication type (see "About Publication Types" (page 14))so they are always specific to a
company (see "About Companies" (page 13)). Documents are what clients and users are selecting to build an order and its out-
put.
©2010 Objectif Lune Inc - 15 -
Page 16

©2010 Objectif Lune Inc - 16 -
Page 17
Getting Started
Getting Started
PrintShop Mail Web is a modern and versatile software package which integrates workflow processes and introduces a whole
new way of thinking about your customers and their print jobs!
©2010 Objectif Lune Inc - 17 -
Page 18

©2010 Objectif Lune Inc - 18 -
Page 19

Installing the software
This section will show you how to install PrintShop Mail Web and its components, as well as configure it through the First Run
Wizard.
The steps to install PrintShop Mail Web are:
l Make sure your system conforms to the "System requirements" (page 19).
l Run the PrintShop Mail Web installer(see "Running the installer" (page 20))
l Access the website and use the First Run Wizard (see "Configuring the database and web site" (page 24))
l Check your "Settings" (page 111)
l Check your activation (see "USBHardware Key" (page 51))
l Follow the "Quick start guide" (page 53) to get started.
System requirements
PrintShop Mail Web is a server software and is delivered as an executable installer with predefined configuration settings. We
strongly recommend to install the software on a clean installed Windows computer.
Pre-requisites
Please ensure that the following requirements have been met before you run the PrintShop Mail Suite installer:
l Login user must have administrator privileges
l An Internet connection is required.
l The PrintShop Mail Suite installer will install the following system components:
l Microsoft .Net Framework
l Version 2.0 SP2 (on Windows 2000, XP and 2003 Server)
l Version 3.5 SP1 (on Windows Vista, Windows 7 and 2008 Server)
l MSXML 4.0 SP3 Parser
l Visual C++ 2008 runtime libraries (vanilla, not SP1)
l Access Database Engine
Missing third party software packages will be downloaded from the Internet and installed during the course of the installation.
The mentioned components can also be downloaded and installed manually. Installers for these packages can be downloaded
from the Microsoft web site.
The software components are installed in the Program Files folder of the system drive. Normally this is drive C.
Minimum Hardware Requirements
l Pentium 4, 3 GHz 32-bit (x86)
l 2 GB of system memory
l 80 GB hard disk with at least 1 GB of available space
Supported Operating Systems
l Microsoft Windows 2000 (32-bit)
l Microsoft Windows XP Professional (32-bit and 64 bit)
l Microsoft Windows Vista (32-bit and 64 bit)
l Microsoft Windows 2003 Server (32-bit and 64 bit)
l Microsoft Windows 2008 Server (32-bit and 64 bit)
©2010 Objectif Lune Inc - 19 -
Page 20

Suggested Requirements
For production servers, it's recommended to invest in specific server hardware, such as large RAID hard disks, UPS (uninterrupted power supply) and enough RAM memory.
l Intel or AMD dual-core processor
l 4 GB of system memory
l 300 GB hard drive with as much available space as possible
Notes
l Make sure that port 80 and/or port 443 are available for the Apache web server that comes with PrintShop Mail Web.
l USB slot (not required for testing). Your server musts have a USB port to which the hardware key ('dongle') can be
attached. See "USBHardware Key" (page 51).
l Your network should be an Ethernet (TCP/IP) network, which is by far the most commonly used network today.
l You should have a high speed Internet connection, and a fixed outgoing IP address, which implies that you can run a
web server.
l The PrintShop Mail Web server should be directly connected to the RIP or Printer. This means that the PrintShop Mail
Web server should be located on your local network (same subnet), on your premises, and preferably not at your ISP's
(Internet Service Provider, the company that provides your Internet connection).
l Your router should be configured to allow incoming HTTP connections over port 80. Your network administrator or your
ISP should know how to enable this.
l The PrintShop Mail Web server has a built-in email server. This email server will send email notifications to you and
your customers when the order status changes. You'll need to know your ISP's SMTP server address (usually something like smtp.yourprovider.com)
Running the installer
1. Navigate to the PrintShop Mail Suite.exe file you downloaded from the Internet or locate the file on the PrintShop Mail
Suite product CD. Once located double click its icon to launch the installation program. The Select Setup Language
dialog appears.
2. Select your preferred language and click OK.
In case the prerequisites are not met, the following dialog is shown stating the missing items.
©2010 Objectif Lune Inc - 20 -
Page 21
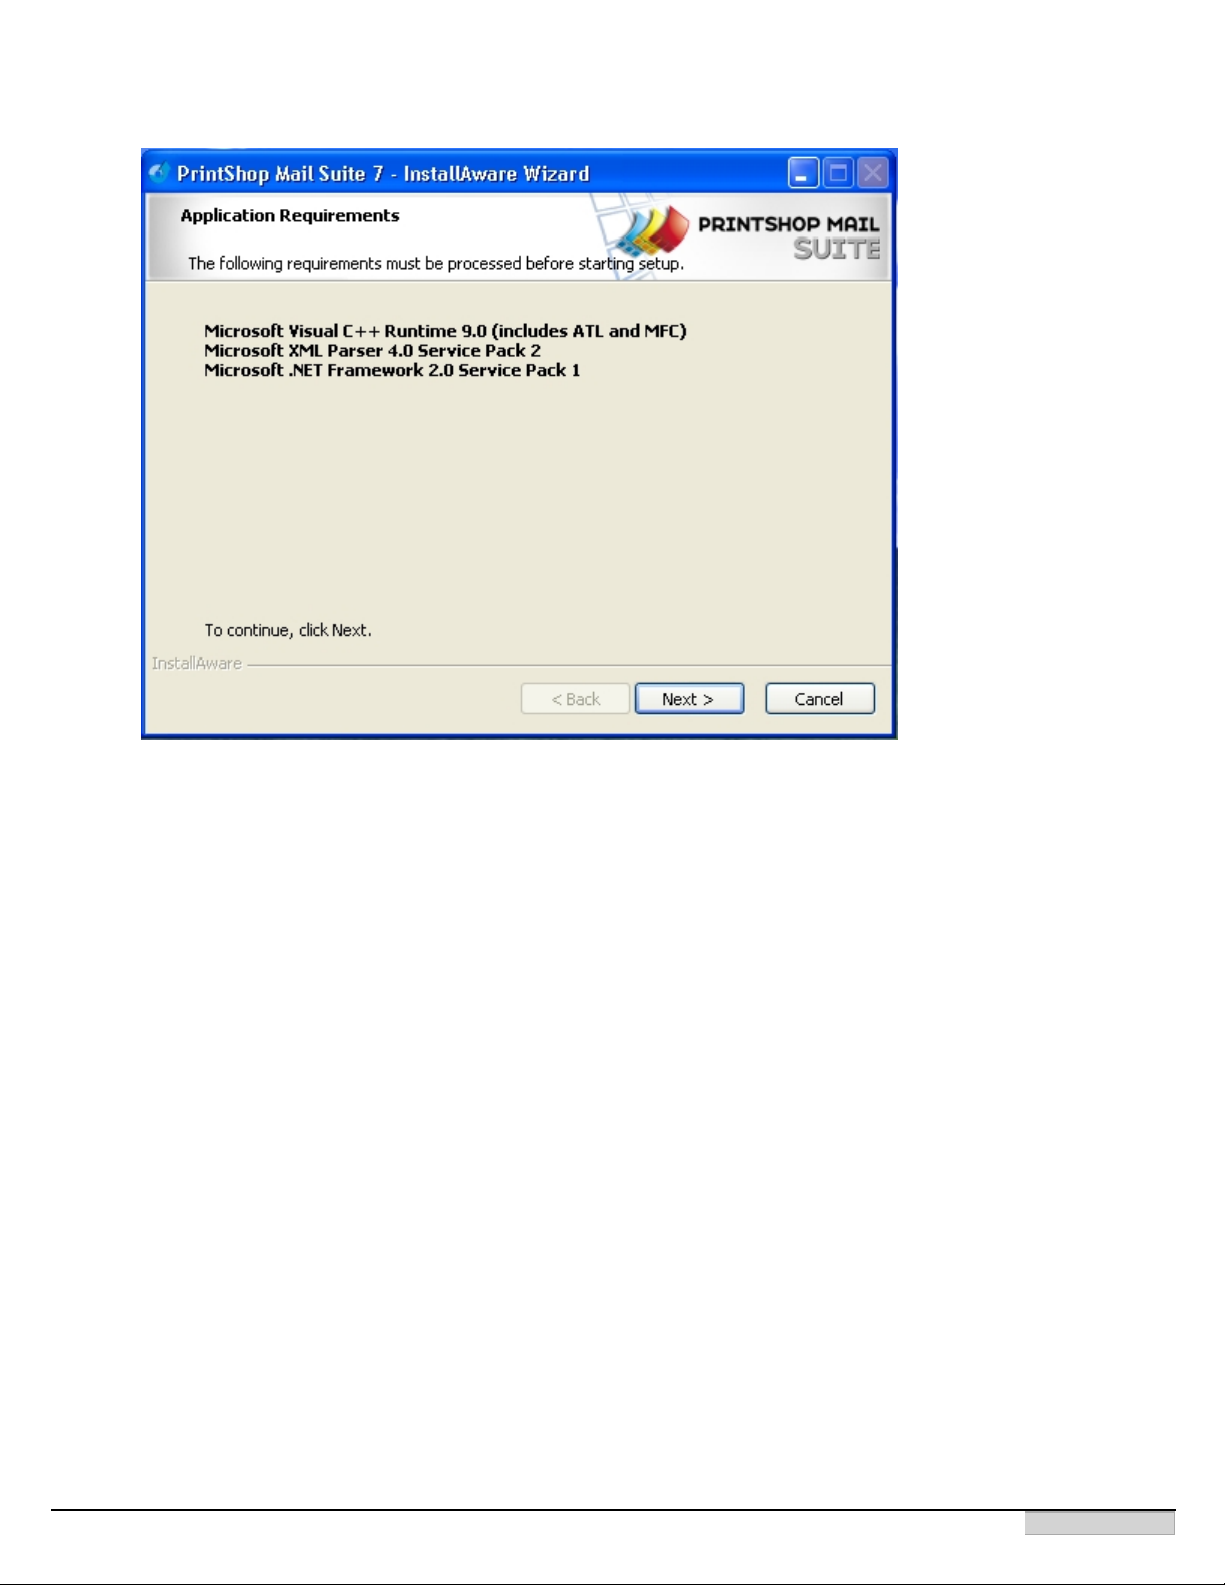
The stated components/libraries are missing
3. Click Next to download and install the required components. Once the installation of the components is completed the
installer Welcome screen displays.
4. Click Next. The License Agreement page is shown.
5. Read the license agremeent. If the terms of the agreement are acceptable, click on I accept the terms of the license
agreement.
Note: You must accept the terms of the license agreement to continue.
6. Click Next to continue the installation process. The Features page displays.
7. Select the PrintShop Mail Web option to install the web server, database server and PrintShop Mail Server components
required for PrintShop Mail Web. The PrintShop Mail application is a required by PrintShop Mail Web and cannot be deselected. Unless you have specific setup requirements, we recommend using the default options for the PrintShop Mail
application.
©2010 Objectif Lune Inc - 21 -
Page 22
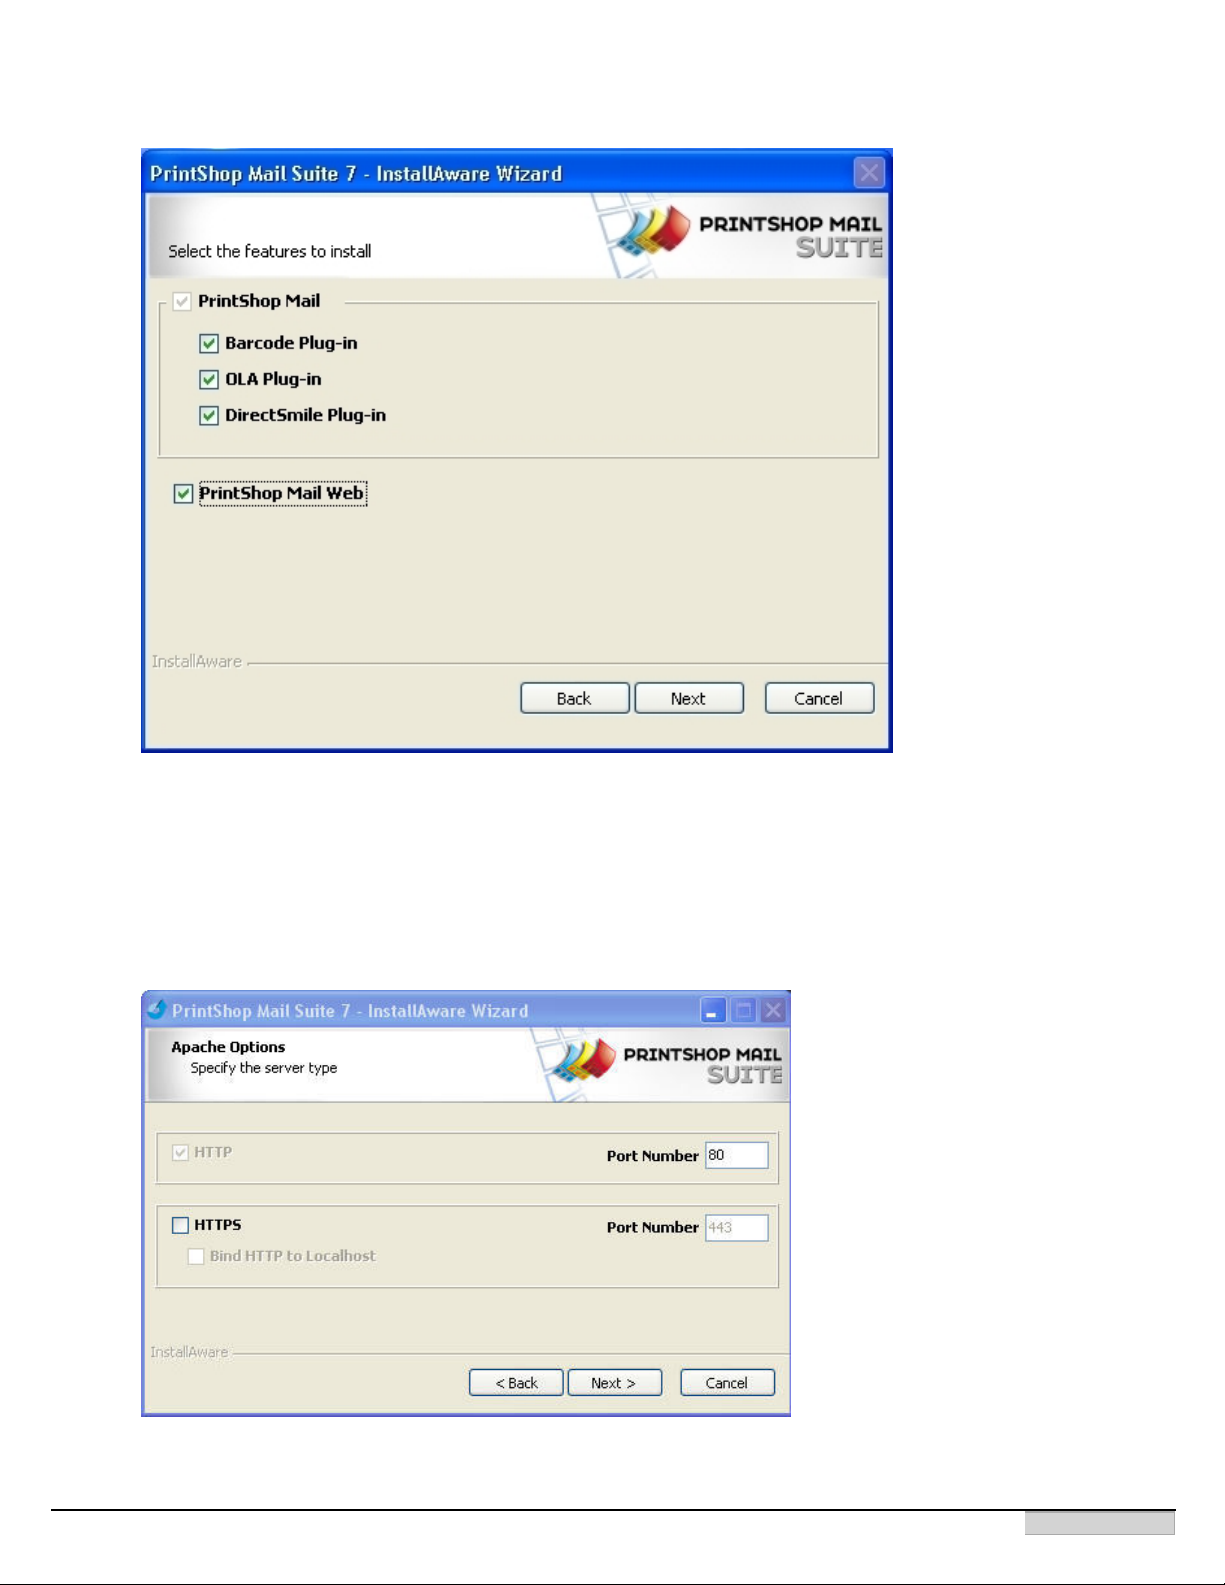
The features dialog
8. Click Next. The Apache Options screen appears.
PrintShop Mail Web uses the Apache web server, the software can be configures to support regular (HTTP) and
secured (HTTPS) types of connections. HTTP is required for the communication between PrintShop Mail Server and
PrintShop Mail Web. HTTPS enabls the secured transmission of web pages. Please refer to the HTTP over SSL (HTTPS)
chapter for more information on this subject. When selecting Bind HTTP to localhost, PrintShop Mail Web only accpets
HTTP connections from the local machine, from all other systems PrintShop Mail Web accepts only HTTPS connections.
The Apache Options dialog
©2010 Objectif Lune Inc - 22 -
Page 23
9. Select the protocol(s) you wish to use.
Note: If the ports for these protocols are in use a warning appears. This may occur when an existing web server like
Apache, Internet Information Server (IIS) or applications like Skype is already running on the same machine. The application or service that uses port 80 or 443 (https) must be closed in order to use PrintShop Mail Web. If you proceed without closing the conflicting application, the installer application will not be able to start the Apache web server. Apache
can be started manually using the PrintShop Server Managerapplication.
10. Click Next. The PriintShop Server Services screen appears.
PrintShop Mail Server is a Windows Service that runs in the background. Windows services by default run as a virtual
user: Localsystem. As the Local System-account has some limitations the PrintShop Mail Suite installer assigns the cur-
rently logged on account to the PrintShop Mail Server service. For more information on this subject please refer to the
PrintShop Mail Server service chapter.
Note: In order to start a Windows Service your account must have a password (not empty).
11. Type the password of the displayed user.
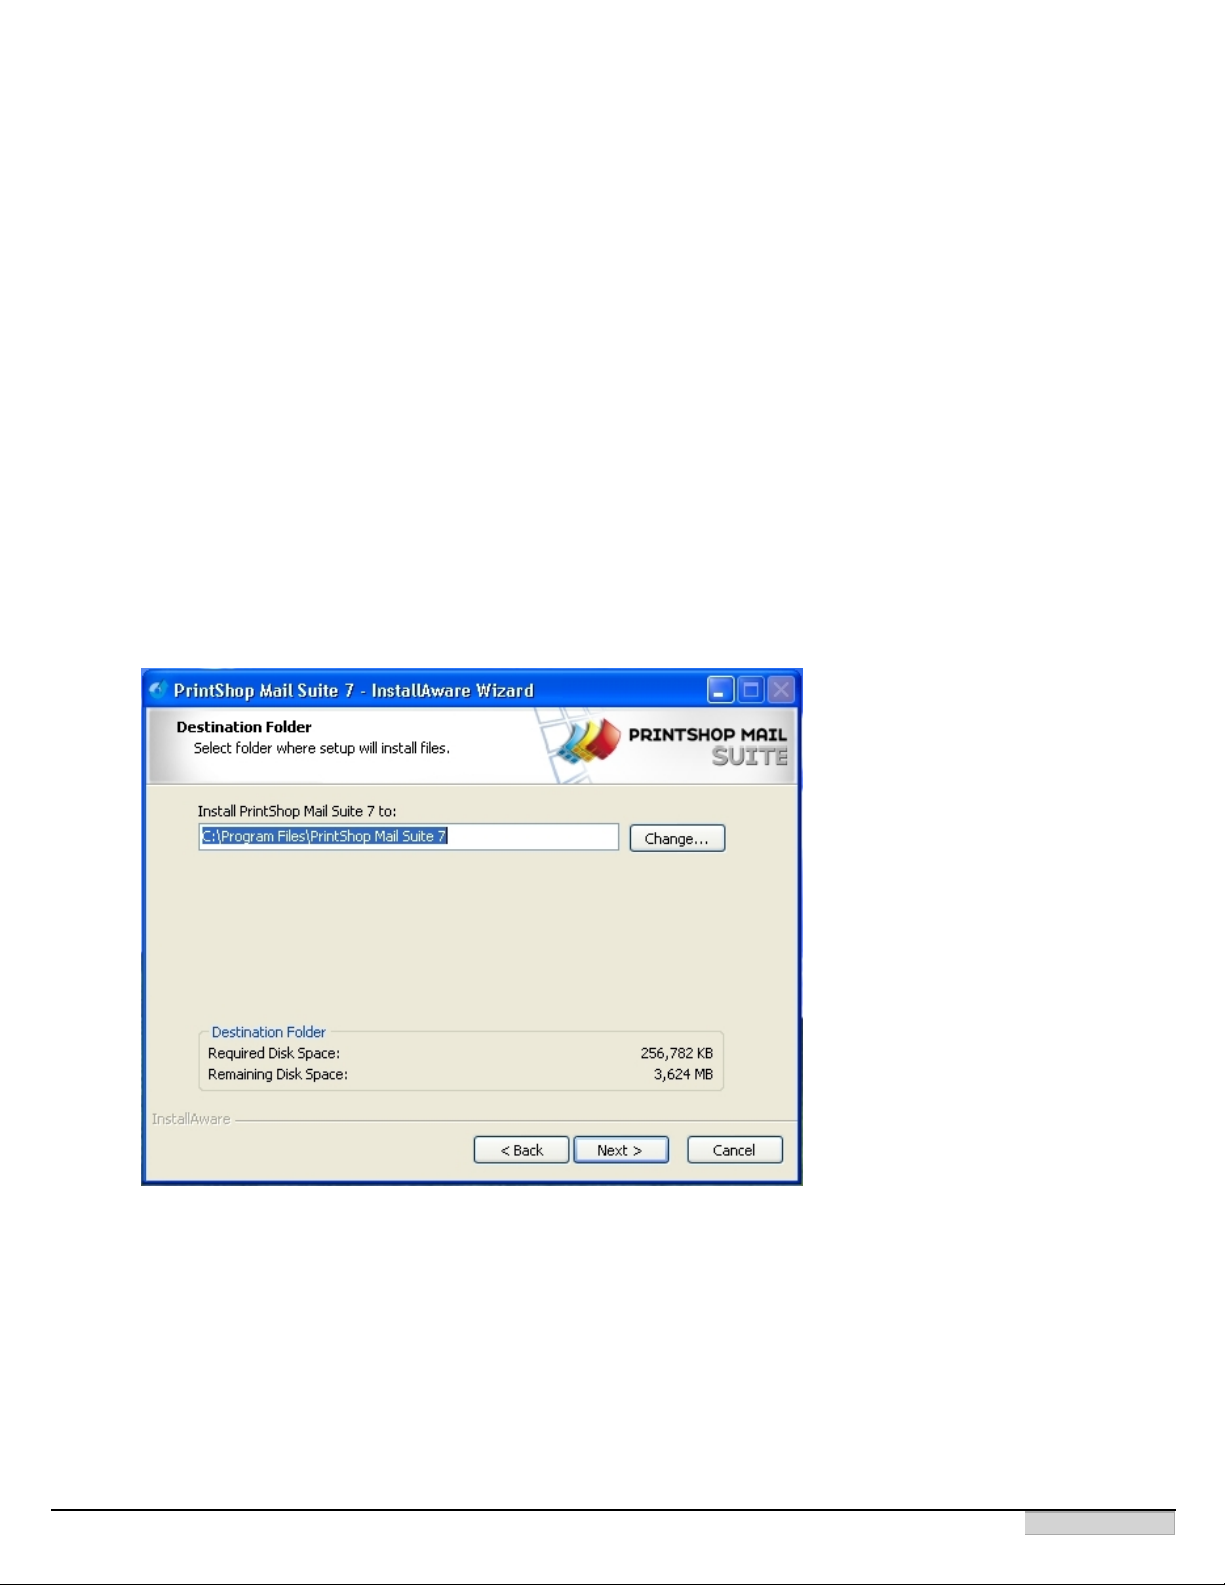
12. Click Next. The Destination Folder screen displays the drive and folder where PrintShop Mail Web will be installed. To
install the software elsewhere, click Change... and navigate to the desired folder.
Select the destination folder
13. Click Next. The Program Folder page is shown.
14. Enter a name for the shortcuts folder in the Start menu.
15. Click Next. The Ready to install screen appears.
16. Click Next to install the program files.
When the installation has been successful, the following dialog appears:
©2010 Objectif Lune Inc - 23 -
Page 24
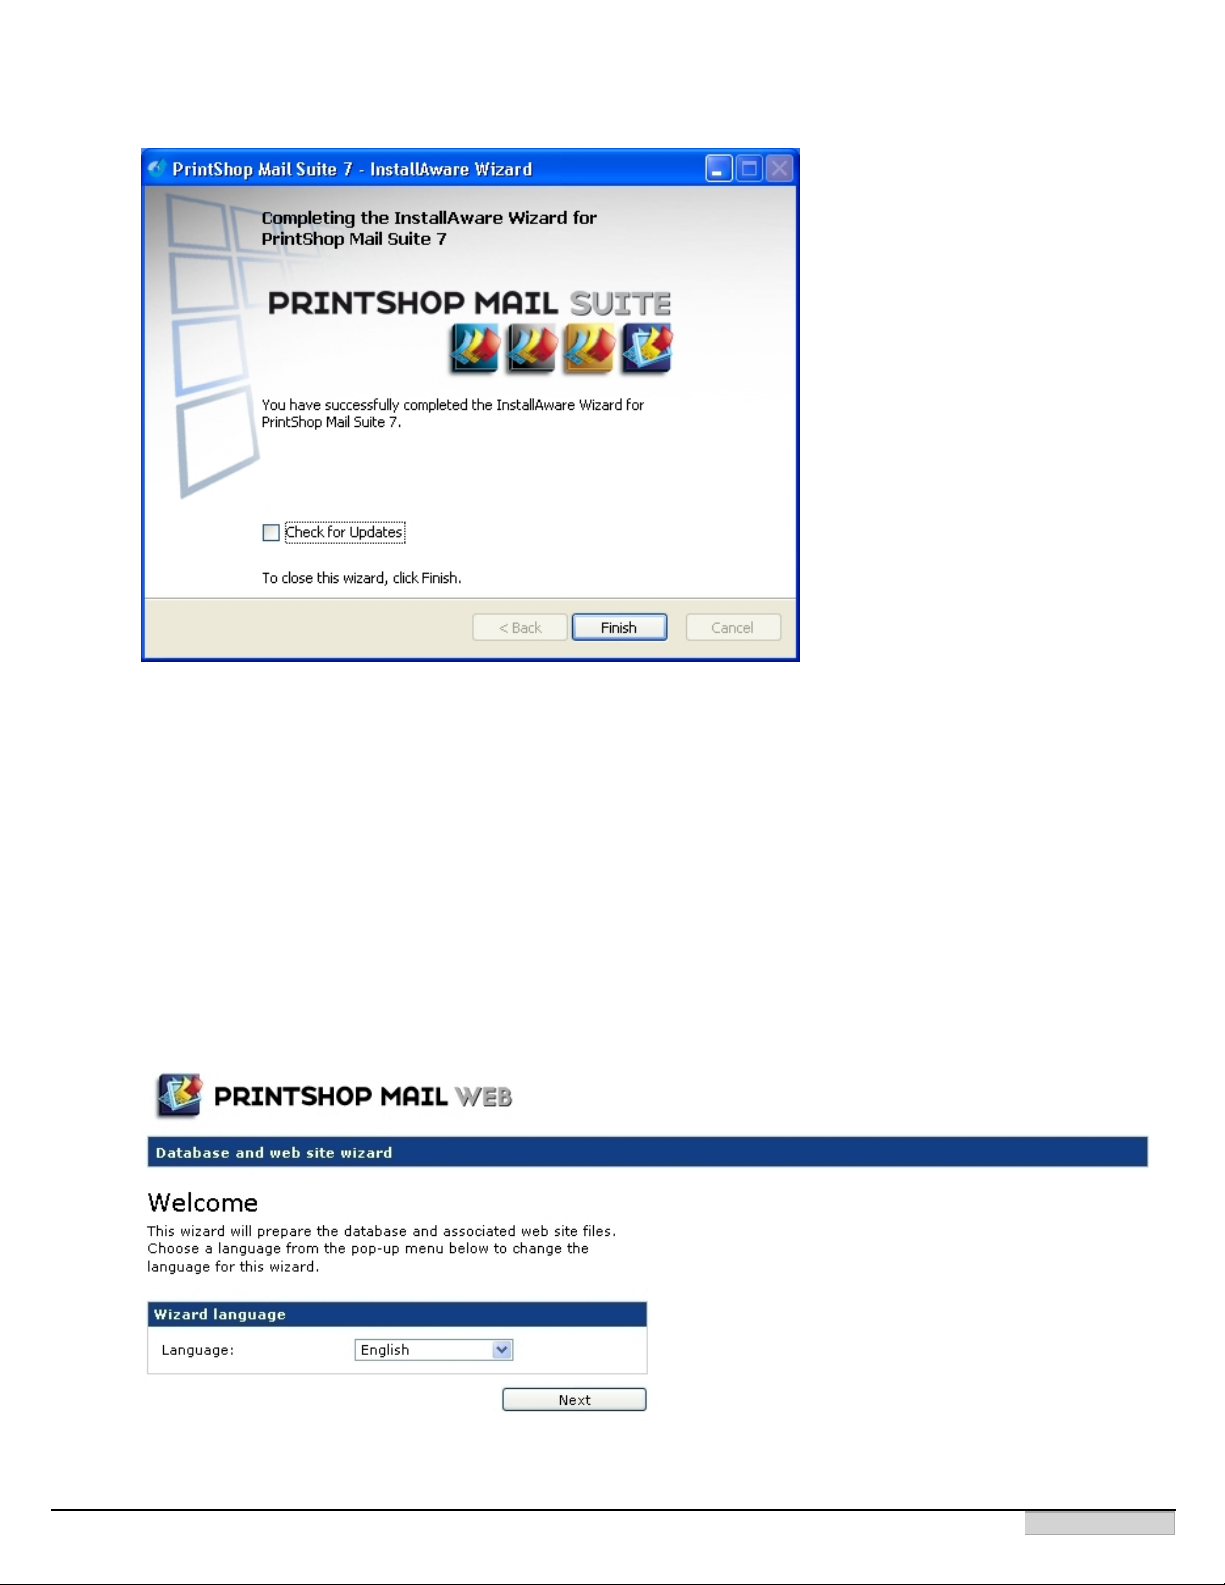
Setup completed dialog
17. Click Finish to complete the installation of PrintShop Mail Web. Further configuration is still needed and is explained in
the following sections.
l Select the Check for Updates option to launch the Objectif Lune Update Manager service. It contains a list of
updates (if available) for the PSM Suite components that are installed on your system. Click the Install icon to
downloaded and install the new versions.
Configuring the database and web site
After the installation you will need to launch your web browser and navigate to the PrintShop Mail Web web site. You can reach
the web site using localhost in your web browser's address bar. The first time you visit the web site the First Run page will be
shown. This web page will initialize the PrintShop Mail Web web site and database and guides you through this process step by
step.
1. Open your web browser and enter localhost in the address bar. The First Run wizard appears.
Choose your language:The wizard will first allow you to select a language to use.
2. Select a language and click Next to proceed to the Database server connection page.
©2010 Objectif Lune Inc - 24 -
Page 25
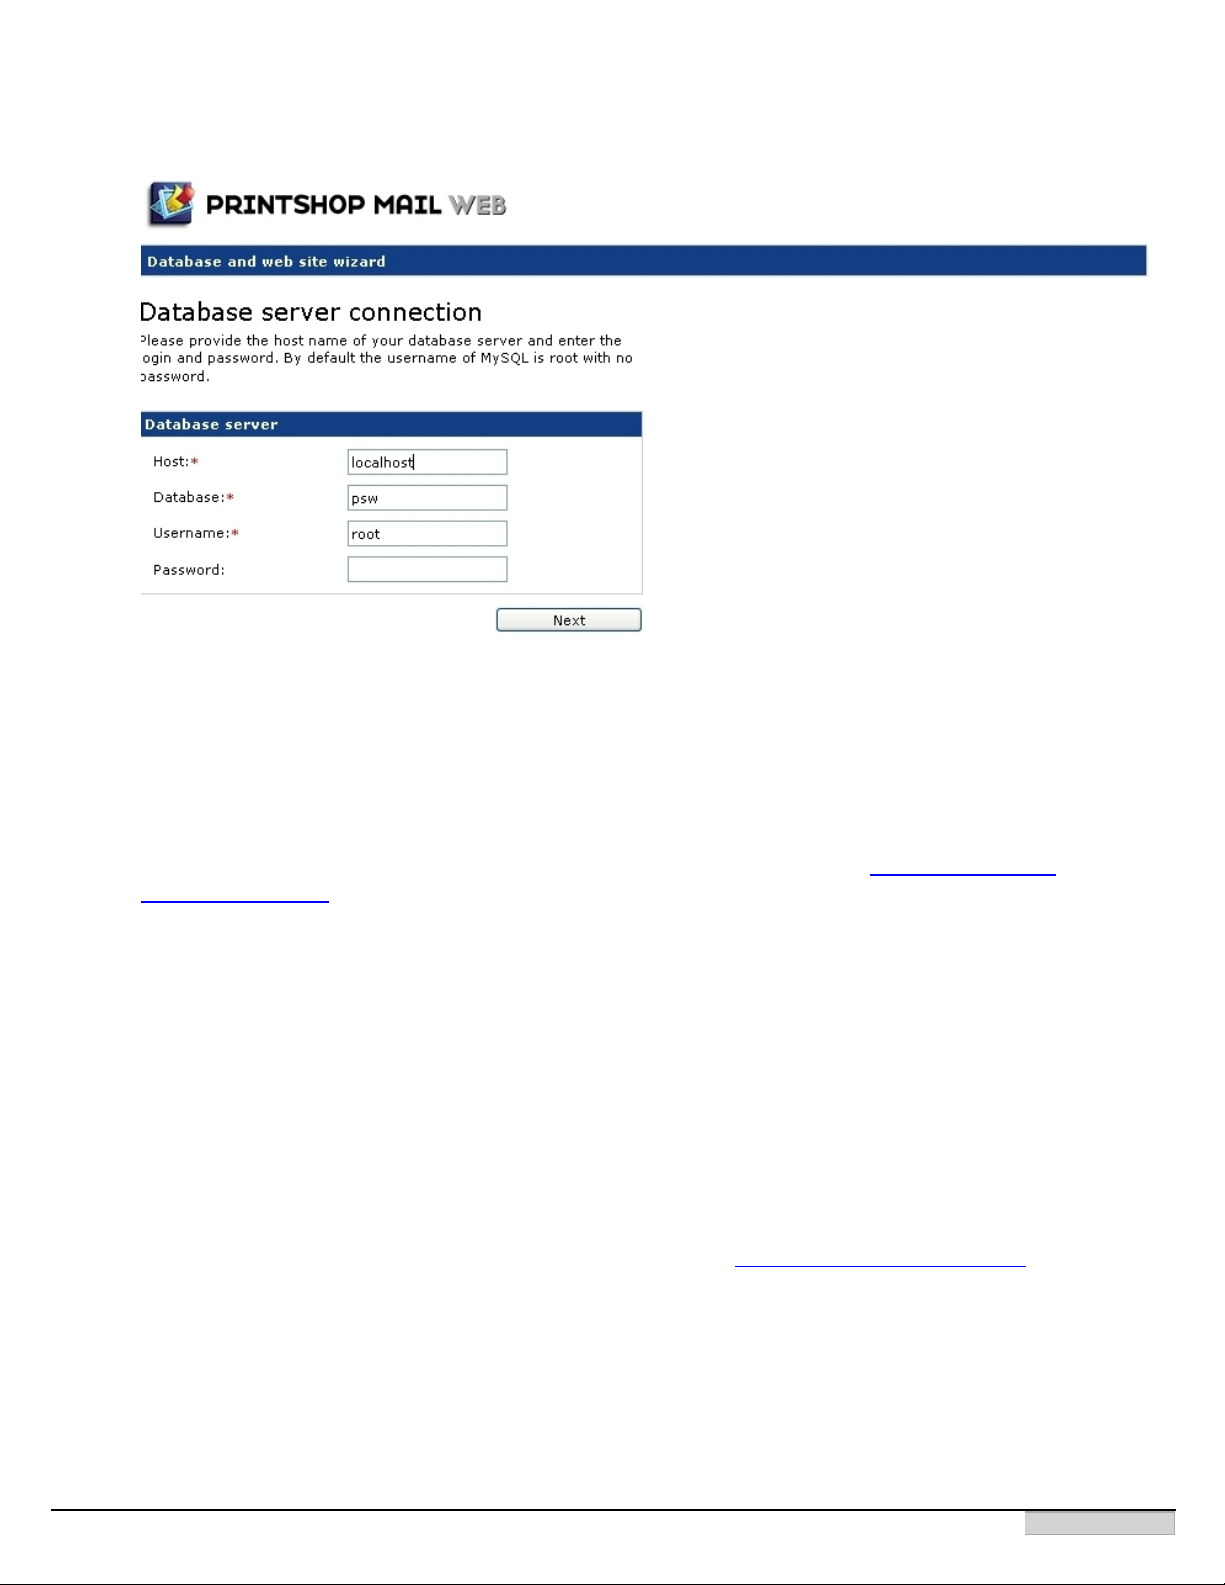
Specify your MySQL host, user name and password
Provide the host name of your database server and enter the login and password. If both the web server and database
server (typical installation) are running on the same machine, you can use localhost as the host and use root as the
user name.
During the installation of the MySQL database software a user is created with the name root, with no password. To mod-
ify the password you can use an application like MySQL Administrator afterwards. The MySQL Administrator is part of
the MySQL GUI Tools suite which you can download for free from the MySQL website: http://dev.mysql.com-
/downloads/gui-tools/
Note: The incDBLink.php file (located in the Functions folder of the PSW Website folder) should be changed accord-
ingly.
3. Leave all the server connections options set to the default value unless you need to make a specific change. Click Next
to proceed.
When PrintShop Web find a database wich the name psw, the Database Exists page may appear:
This page allows you to use the existing database or to overwrite it. If an older version of the system is found you will
be able to update the database keeping the existing orders, templates, etc. Once the installation procedure is finished
you should check that the companies, templates and other information in the system has default values set for items
like the pricing settings.
Note: When upgrading PrintShop Web we strongly advise to read the "Important update notes" (page n) chapter and
create backups of your current PrintShop Web installation. You can use the MySQL Administrator tool described before
to create a backup of your psw database.
4. Once the database is created several system defaults need to be set. These settings can be modified and expanded in
PrintShop Web once the first run wizard is completed.
©2010 Objectif Lune Inc - 25 -
Page 26
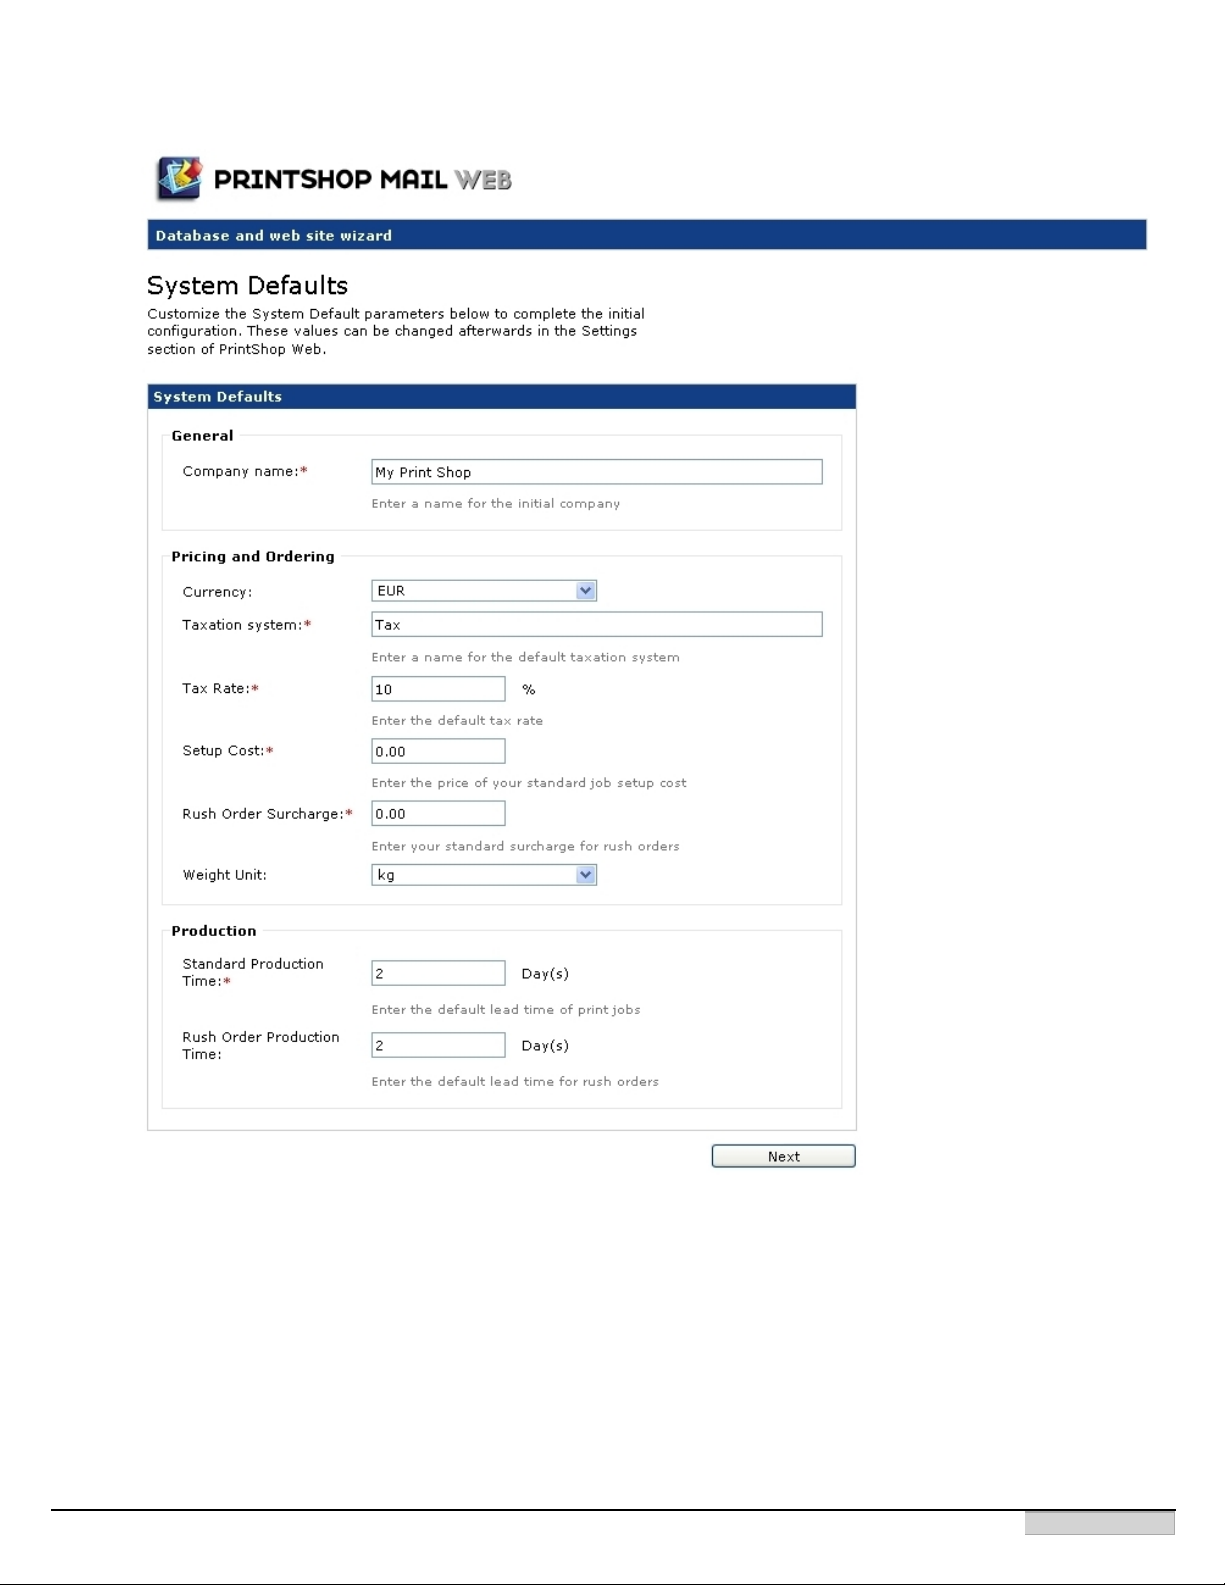
Specify the name for the initial company and set system defaults
The system default settings page requires input for the following system defaults:
l Company Name: The name of the initial company. This field is not visible when upgrading a previous version
of PSW.
l Currency: The selected currency will be presented in Checkout and Order Manager sections of the system.
l Taxation System: The standard Taxation system.
l Tax Rate: The percentage of the standard taxation system.
l Setup Cost: The surcharge for setting up your production environment and workstations.
l Rush Order Surcharge: The surcharge for urgency printing (if applicable).
l Weight Unit: The weight unit used to define the total weight of the documents/jobs in the checkout. PSW
©2010 Objectif Lune Inc - 26 -
Page 27
supports kg and lb.
l Standard Production Time: The number of days to produce documents.
l Rush Order Production Time: The number of production days for rush orders.
Enter a name for the initial company and verify the remaining parameters. Refer to the Administrative Guide for more
information about these parameters. Click Next to proceed to the Registration page.
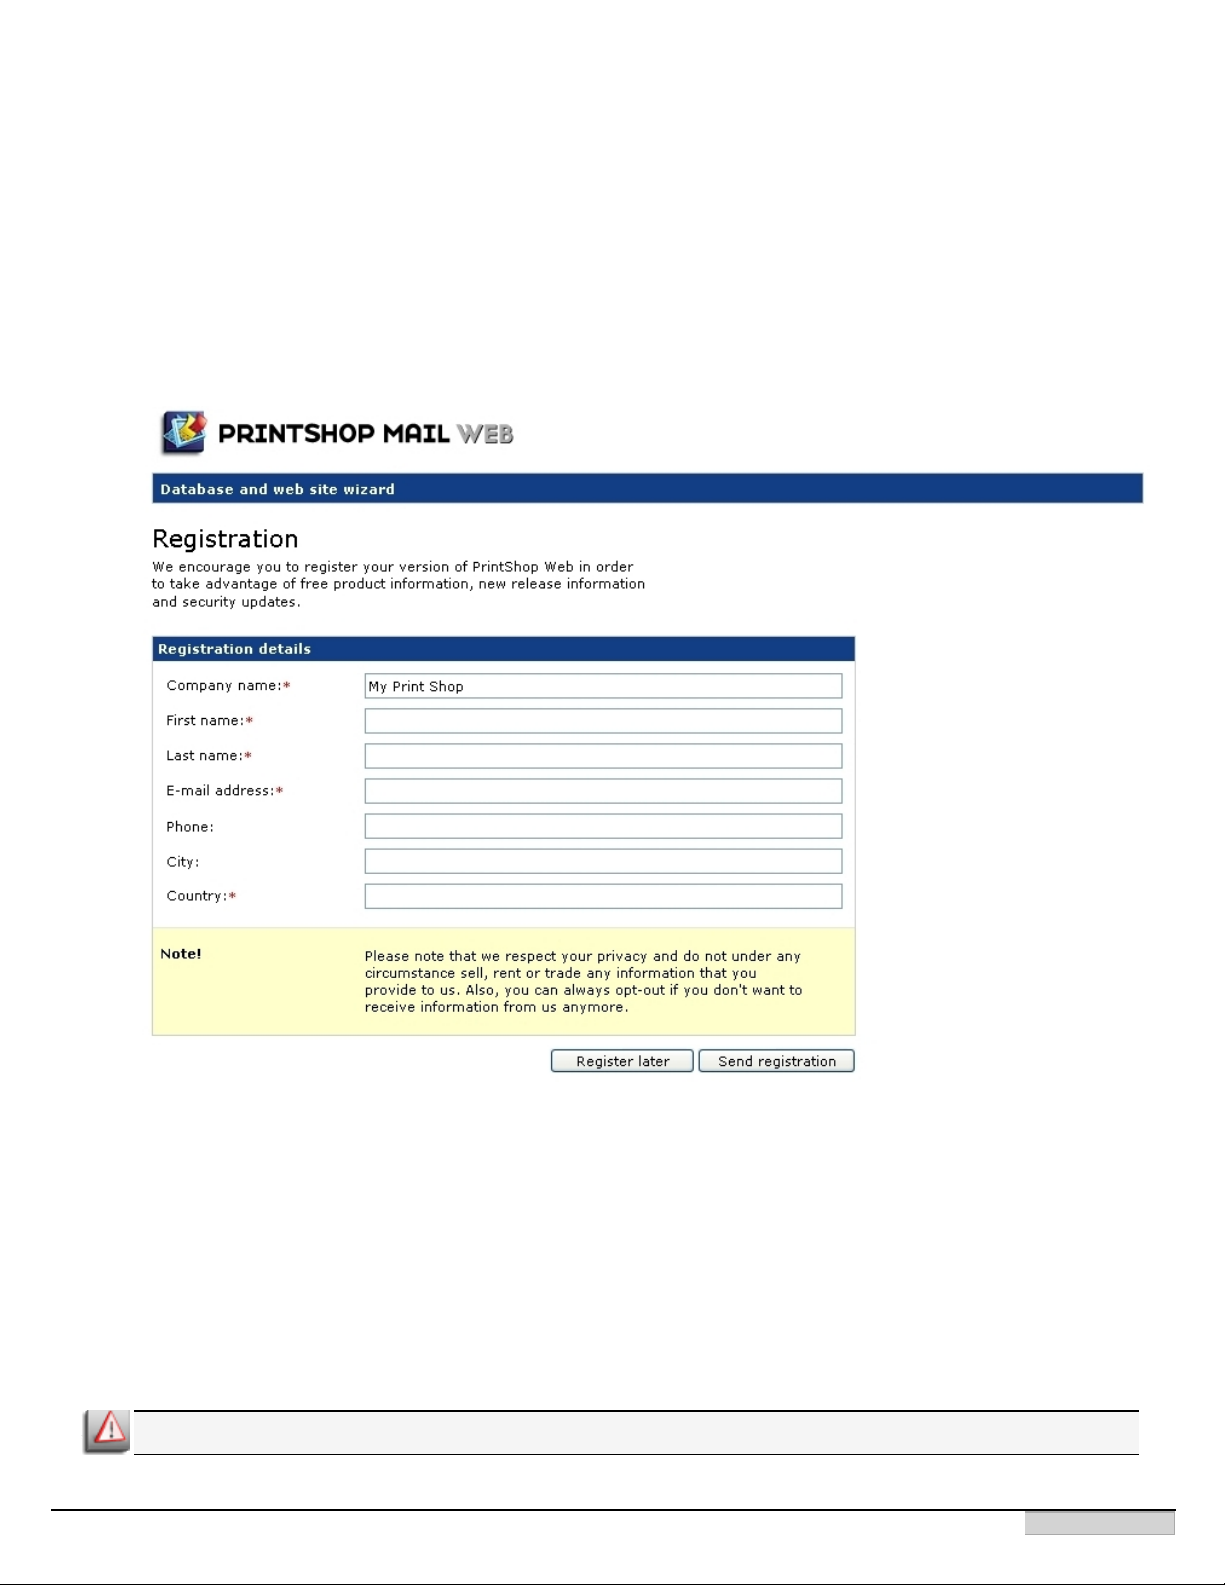
5. We encourage you to register your PrintShop Web product in order to have the benefit of free product information, new
release information, and security updates.
Register your version of Printshop Web in order to take advantage of free product information
Enter your details and click Send registration or Register later to continue.
6. The website and database initialization process is now completed and you are ready to use the system. Click Go to
enter the login page of PrintShop Mail Web
For both the login name and password use administrator to enter the system and you are ready to setup the system for
your clients.
Upgrading PrintShop Mail Web 2.Xto Version 7
When upgrading PrintShop Mail Web we strongly advise to create backups of your current installation.
Upgrading to PrintShop Mail Web 7 is a one way street and be undone since the PrintShop Mail Web 7 database is not
©2010 Objectif Lune Inc - 27 -
Page 28
backwards compatible with older versions.
Orders and Documents
l In PrintShop Mail Web the relationship between orders and documents (print jobs) is changed. Orders now can contain
multiple documents which is visualized using a tree view. To avoid misunderstanding by customers it is advised to
change the status of orders in the Ordered and Approved status folders to In-plant. Price related items remain intact
although the presentation is different due to changes in the PrintShop Web user interface.
l PrintShop Mail documents (templates and print jobs) in the system are automatically converted to the PrintShop Mail 7
format the first time they are used for previews or print actions. This action is performed only once.
Skin changes
l As PrintShop Mail Web 7 includes various user interface enhancements and new interface elements (e.g. modular
dialogs) custom skins should be checked and updated to support these new items. To test your existing skin(s) with
PrintShop Mail Web 7:
l Install PrintShop Mail Web 7 on a stand-alone machine.
l Copy your skin(s) to the templates folder of the PrintShop Mail Web 7 installation.
l Test and modify your skin
l Once completed create a backup of the modified skin and copy it to your production server.
l The 'Default' skin of PrintShop Mail Web 7 uses a gradient image as background image in the menu bar and table head-
ers. Although this looks very nice it prevents the web browser from showing the contrast color set in the Edit Web
Design page. If the contrast color is preferred the style-element-menu.php of the default skin should be changed. The
original code is still there but commented out. Simply remove these comments and comment the lines that render the
gradient image.
Create backups
Backup all files and databases prior to the migration. In case of problems during the update installation this will enable the contents of PrintShop Mail Web to be restored.
l "Backup configuration files" (page 31)
l "Backup production files" (page 29)
l "Backup skin files" (page 30)
l "Backup your database" (page 28)
Backup your database
To create a backup of the database:
1. Download and install the MySQL GUI tools. These tools can be downloaded for free at: http://dev.mysql.com-
/downloads/gui-tools/
©2010 Objectif Lune Inc - 28 -
Page 29

2. Launch the MySQL Administrator application. Existing backup projects are listed in the lower left area of the sidebar.
The MySQL Administrator window.
3. If you are not working from a previously saved backup project, click the New Project button to create a new backup
project. You cannot begin configuring a backup operation without either loading an existing project or creating a new
project.
4. Once you have configured your backup project, you can click the Save Project button to save your project for future
use. To start your backup, click the Execute Backup Now button. You will be prompted for a path and filename for the
backup file, after which the backup operation will begin.
MySQL Administrator can be used to restore the database backup files created using MySQL Administrator. The backup files
created by MySQL Administrator are similar but not identical to those created by mysqldump. A consequence of the differences is that MySQL Administrator cannot read dump files created by mysqldump.
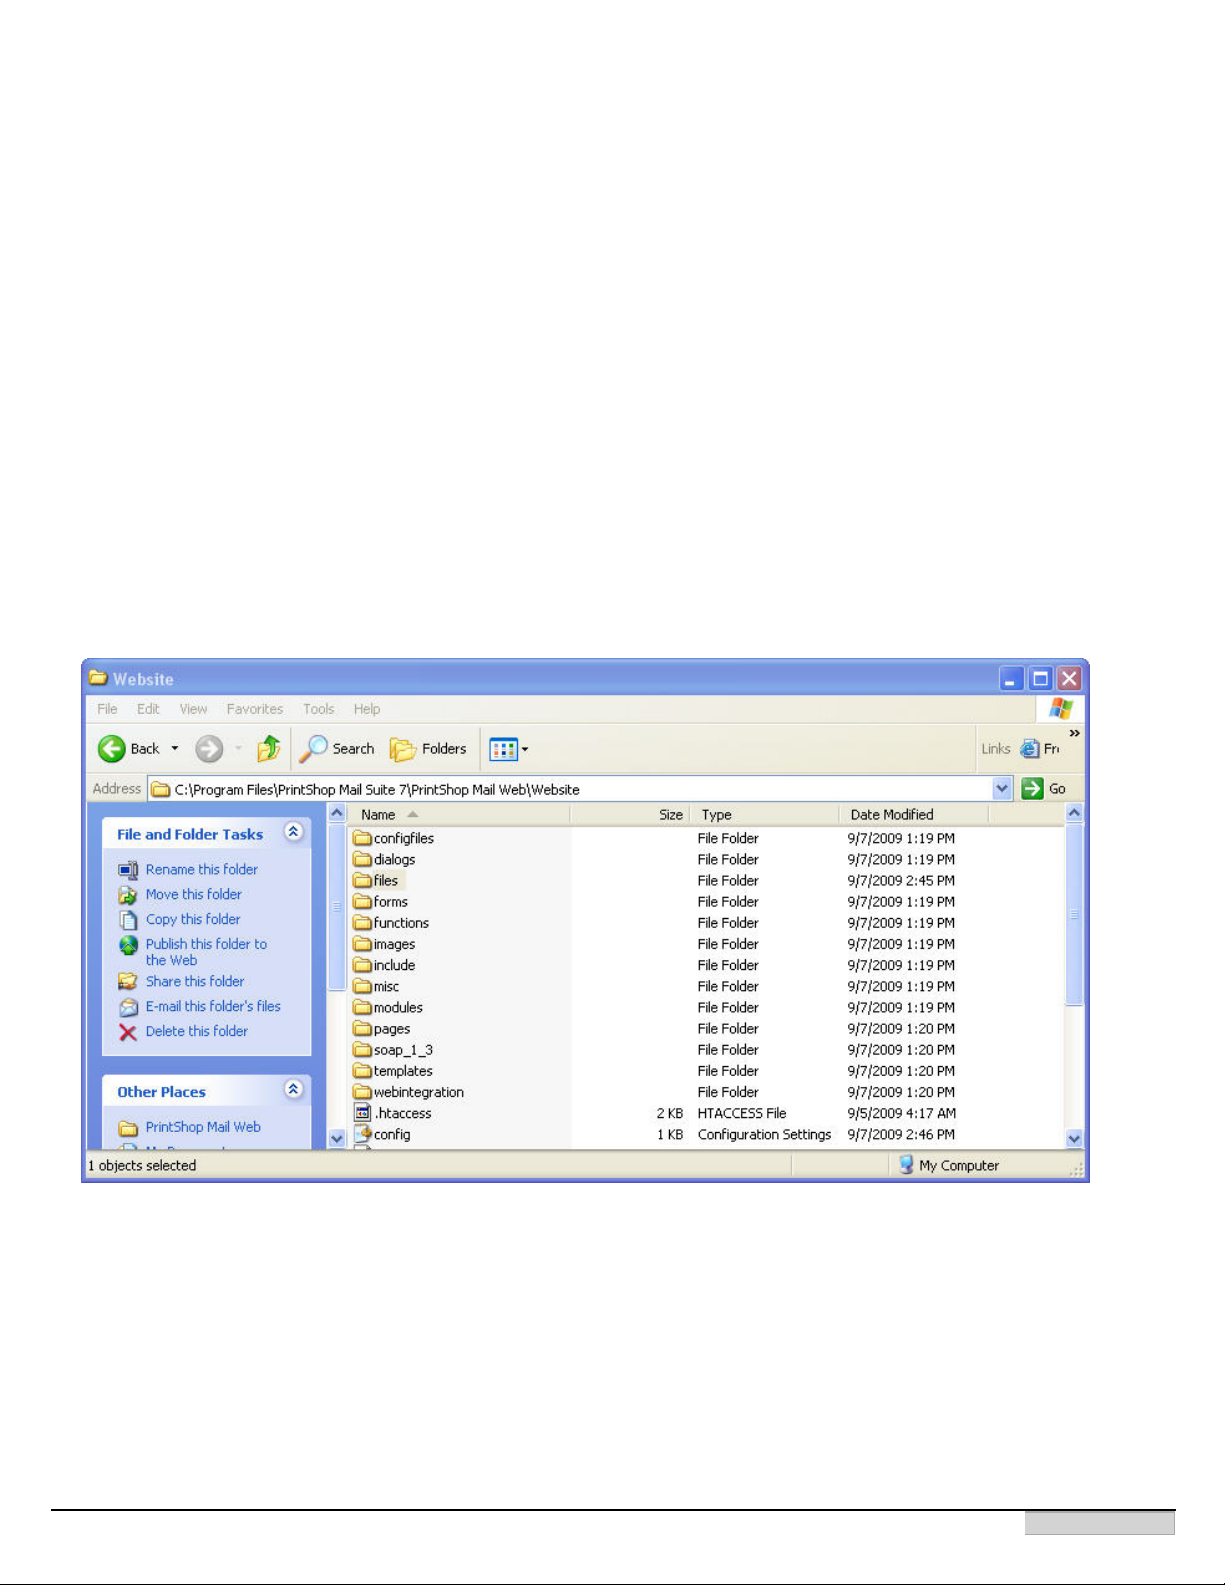
Backup production files
PrintShop Mail Web stores the production files in a central location located in the web site folder of the PrintShop Mail Web system. This folder includes: template documents, job created by the visitors, image collections, job option files etc. Most of these
items are referred to by the PrintShop Mail Web database. It is very important to create a backup of the database that goes
with the current state of your files folder.
To create a backup of the files folder:
©2010 Objectif Lune Inc - 29 -
Page 30
1. Stop the PrintShop Mail Server service. This can be done via the Windows Services dialog (Administrative tools) or by
launching the PrintShop Server - Service Manager application. The latter can be found in the following locations:
l For PSW 2.x this is:
C:\Program Files\PrintShop Web\PrintShop Server
l For PrintShop Mail Web 7 this is:
C:\Program Files\PrintShop Mail Suite 7\PrintShop Mail Web\PrintShop Server
Note: If you do not stop the PSM Server service files might be in use (busy) due to the template cache of PrintShop
Server.
2. Locate the web site folder of your PrintShop Mail Web installation.
l For PSWeb 2.x this is:
C:\Program Files\PrintShop Wev\Website
l For PrintShop Mail Web 7 this is:
C:\Program Files\PrintShop Mail Suite 7\PrintShop Mail Web\Website
3. Copy the files folder to an external hard drive or share on your network.
The files folder of a PrintShop Mail Web 7 installation.
Backup skin files
Skin files should be backupped when you created customs skins or altered the default skins supplied with PrintShop Mail Web.
To create a backup of your skins:
©2010 Objectif Lune Inc - 30 -
Page 31

1. Locate the web site folder of your PrintShop Mail Web installation.
l For PSWeb 2.x this is:
C:\Program Files\PrintShop Wev\Website
l For PrintShop Mail Web 7 this is:
C:\Program Files\PrintShop Mail Suite 7\PrintShop Mail Web\Website
2. Copy the templates folder to an external hard drive or share on your network.
The templates folder of a PrintShop Mail Web 7 installation.
Note: Custom skins or skins from older/newer versions of PrintShop Mail Web might not work properly in newer or older versions of PrintShop Mail Web.
Backup configuration files
If you modified the httpd.conf and ssl.conf files (f.e. changed the VirtualHost(s) ) these should be backupped too.
To create backups of your configuration files:
1. Locate the conf folder of the Apache folder which resides in the PrintShop Mail Web folder.
l For PSW 2.x this is:
C:\Program Files\PrintShop Web\PrintShop Server\Apache\conf
l For PrintShop Mail Web 7 this is:
C:\Program Files\PrintShop Mail Suite 7\PrintShop Mail Web\Apache\conf
2. Copy the httpd.conf and ssl.conf files to an external hard drive or share on your network.
©2010 Objectif Lune Inc - 31 -
Page 32

©2010 Objectif Lune Inc - 32 -
Page 33

PrintShop Server service
This section describes the configuration of a distinct local user-account for the PrintShop Server service.
This description focuses on procedures on Windows XP; on other platforms this procedure may be slightly different.
PrintShop Server (PSS) is a Windows Service that runs in the background. Windows Services mostly run under a different Windows User Account than the one any end-user has used to log on to their system called Local System. Because the Local System-account has some limitations the PrintShop Server service will run by default under the administrator end-user account
that was logged on to the system during the installation of PrintShop Web.
In order to properly serve PrintShop Web, it is vital that the account that PrintShop Server runs under has enough security privileges on the local machine, and perhaps on the network, to access (network-)printers or other resources it needs.
First and foremost, as the name Local System implies, the account is only valid for the local machine. Network printers will
therefore not available for use in PrintShop Server. The second limitation is printer management. PrintShop server will only
have access to printers installed for the user account under which PrintShop Surver runs. This means that if Administrator has
logged on and manages his printers, this might not propagate to the Local System account’s printers, which PrintShop Server
would use!
To avoid these issues with Printer Management, we strongly advise to make sure that the PrintShop Server service runs under
a user-account with administrative privileges. It is necessary to install and configure your printer(s) explicitly for this useraccount, - for the PrintShop Server service.
What follows is a description of how to create a new (local) user-account with sufficient administrative privileges on the system where the PrintShop Server service is running.
In case your network-configuration requires this user-account to be a Domain User to be able to access network
resources, like network-printers, please contact your Domain Administrator to set up a proper configuration.
©2010 Objectif Lune Inc - 33 -
Page 34

Creating a User Account for the PSS service
1. Click Control Panel in the Start menu in windows. If the Control Panel looks like this, click on Switch to Classic View:
The Control Panel window
It should look like this now:
©2010 Objectif Lune Inc - 34 -
Page 35

The Control Panel window
2. Open Administrative Tools:
©2010 Objectif Lune Inc - 35 -
Page 36

The Administrative Tools window
3. Open the Computer Management window and expand Local Users and Groups:
©2010 Objectif Lune Inc - 36 -
Page 37

The Computer Management window
4. Right-click Users and select New User… the New User window appears
5. Enter a User name, a Password and select the check boxes as shown below:
The New User window
6. Click Create and after that click Close. The account is created; now the security privilege need to be set.
Setting the PrintShop Server Service account
Now that we have set-up an account for PrintShop Server, PrintShop Server must be configured to use it.
1. Start PrintShop Server Manager from the Start menu.
The PrintShop Server Manager main window
2. Click Services, which will lead to the Service window and locate PrintShop Server in the list:
©2010 Objectif Lune Inc - 37 -
Page 38

Locate PrintShop Server
3. Right-click PrintShop Server and select Properties in the menu that appears, which will lead to the following window:
PrintShop Server service properties
4. Select the Log On tab, and select the This account:-option
©2010 Objectif Lune Inc - 38 -
Page 39

PrintShop Server service properties log on
5. Click Browse…. The following window will appear:
Select a user
6. Type the name of the newly created account:
The Select Users window
7. Click Check Names to be sure we entered it correctly, clicking OK after will lead to the following window:
©2010 Objectif Lune Inc - 39 -
Page 40

PrintShop Server service properties log on as PrintshopServer_User
8. The Password is an old and invalid value, so the Password field must be set to the password for the new account:
The Locate PrintShop Server window
9. Click OK to proceed
Log on as service rights granted
10. Clicking OK will return you to the following window:
©2010 Objectif Lune Inc - 40 -
Page 41

Log on as PrintShopServer_User
11. Right-click PrintShop Server and select Restart in the menu that appears.
Restart service
Note: Wait for the restart to finish: (do not click Close, this dialog will disappear automatically).
Set the security privileges (local account)
1. Select the Groups in the Computer Management pane on the left side of the window.
2. Right-click Administrators in the right pane and select Properties in the menu that appears. The following window will
be shown:
©2010 Objectif Lune Inc - 41 -
Page 42

The Administrators Properties window
3. Click Add… The Select Users, Computers, or Groups window appears. In this window the From this location option is
set to a domain, in this example atlas.local.
The Select Users, Computers, or Groups window
In case you would want to select another domain, or use a local account, click Locations…, which will lead to the fol-
lowing window:
©2010 Objectif Lune Inc - 42 -
Page 43

Select the location you want to serch for users.
In this example the local computer (PRINTSHOPWEB) must be selected, because we want to set the security settings
for the just created local account.
4. Click OK to proceed.
The Select Users window
5. Type the name of the local account to set the security settings.
6. Click Check Names to ensure that the account-name was entered correctly:
The Select Users window
7. Click OK twice. The Administrators Properties window appears showing the new user.
©2010 Objectif Lune Inc - 43 -
Page 44

The Administrator Properties window
Managing printers for PrintShop Server
Installed printers differ per user in Windows, so we need to Log Off from Windows via the Start menu and Log On with the
account that will be used for PrintShop Server.
Note: PrintShop Server needs at least one PostScript printer to operate.
1. Open the Printers and Faxes settings from the Windows Control Panel (use the Windows Start menu)
2. Click the Add Printer icon, Add Printer wizard appears
The Printers and Faxes window
3. Add any PostScript printer you like through the Add Printer wizard.
4. Once created the printer is added to the Printers and Faxes overview.
©2010 Objectif Lune Inc - 44 -
Page 45

The new printer is added to the Printers and Faxes window
Note: The PrintShop Server service must be restarted after changing printer settings (or when printers have been added) to
be able to use these new settings (or printers).
©2010 Objectif Lune Inc - 45 -
Page 46

©2010 Objectif Lune Inc - 46 -
Page 47

PrintShop Mail Web and HTTPS
The PrintShop Mail Web installer gives you the option to support both HTTP and HTTPS connections. If you do not install
HTTPS during the installation you can enable it afterwards.
What is HTTPS?
HTTPS (Hypertext Transfer Protocol over Secure Socket Layer, or HTTP over SSL) is a Web protocol used to encrypt and
decrypt user page requests as well as the pages that are returned by the Web server.
SSL is an open, non proprietary protocol that Netscape has proposed as a standard to the World Wide Consortium (W3C).
HTTPS is not to be confused with S-HTTP, a security-enhanced version of HTTP developed and proposed as a standard by
EIT.
When you visit a web site with a Uniform Resource Locator (URL) that starts with https:// your browser's HTTPS layer will
encrypt information send from the client to the server. The acknowledgment you receive from the server will also travel in
encrypted form, arrive with an https:// URL, and be decrypted for you by your browser's HTTPS sublayer.
HTTPS and SSL support the use of X.509 digital certificates from the server so that a user can authenticate the sender.
SSL certificates
When you enable HTTPS you have to obtain a ssl certificate from a certificate authority like Verisign (http://ww-
w.verisign.com), this certificate and the private key must be placed in /apache/certificate. PSW comes with a sample cer-
tificate, which will work on PrintShop Mail Web servers that can be reached through the URL https://localhost. For any other
URL the supplied certificate will generate security warnings when an user connects to the PrintShop Mail Web server.
Most certificate authorities have detailled information on their web site on how to obtain, create and install certificates. The following steps will help you generating a Certificate Signing Request (CSR) and need to be performed on the PrintShop Mail Web
server.
1. Download and install Openssl. Openssl can be found at the following location: http://www.slproweb.com/
2. Navigate to the OpenSSL folder and launch the OpenSSL.exe located in the bin folder
3. Enter the following command to generate a private key:
openssl genrsa -out yourdomainname.key 1024
The example above generates a genrsa encrypted key. These settings may differ between certificate providers.
4. Enter the following to create the CSR:
openssl req -new -key yourdomainname.key -out yourdomainname.xsr
5. Read the instructions and completed the information on screen (use YOUR details).
You are about to be asked to enter information that will be
incorporated into your certificate request.
What you are about to enter is what is called a Distinguished Name
or a DN. There are quite a few fields but you can leave some blank
For some fields there will be a default value,
If you enter '.', the field will be left blank.
----Country Name (2 letter code) [AU]:NL
State or Province Name (full name) [Some-State]:Zuid Holland
©2010 Objectif Lune Inc - 47 -
Page 48

Locality Name (eg, city) []:Zoetermeer
Organization Name (eg, company) [Internet Widgits Pty Ltd]:Objectif Lune BV
Organizational Unit Name (eg, section) []:R and D
Common Name (eg, YOUR name) []:www.yourdomainname.com
Email Address []:info@yourdomainname.com
Please enter the following 'extra' attributes
to be sent with your certificate request
A challenge password []:
An optional company name []:
Enter your host address at "Common Name", if you enter "yourdomainname.com",the certificate is limited to the
https://yourdomainname.com and cannot be used for https://www.yourdomainname.com.
You can leave the "challenge password" and "optional company name" empty. This completes to steps to create a private key and the csr, both files are created inside the folder of OpenSSL.exe. You will need the csr when obtaining a
SSL certificate.
Place the key file generated in step 3 in Apache/certificate/psw.key in your PrintShop Mail Web installation folder. The
.crt file provided by your certificate authority must be installed in Apache/certificate/psw.crt in your PrintShop Mail Web
installation folder.
Server installation
During the installation of PrintShop Mail Web all components to run HTTPS are installed but will be disabled if you did not
choose to select the HTTPS protocol. To enable and configure HTTPS:
1. Open the httpd.conf file located in the conf folder of the Apache folder (inside the PrintShop Web folder).
2. Add the following module rule:
LoadModule ssl_module modules/mod_ssl.so
3. Open the ssl file located in the conf folder of the Apache folder (inside the PrintShop Web folder).
4. Make sure that the following entries refer to the location of your certificate files:
l SSLCertificateFile (.crt)
l SSLCertificateKeyFile (.key)
5. Restart the Apache service using the PrintShop Server Manager.
Client installation
Important: The supplied certificate only works on PrintShop Mail Web servers that can be reached through the URL http:/-
/localhost. For any other URL the supplied certificate will generate security warnings when an user connects to the PrintShop
Mail Web server.
1. Close all opened web browser windows.
2. Open the an Internet Explorer web browser and go to https://localhost (notice that this is https, not http!).
3. If you don't see the following dialog and PrintShop Mail Web loads normally, all settings are correct and you may stop
reading this section:
©2010 Objectif Lune Inc - 48 -
Page 49

This certificate is not accepted yet
4. Click View Certificate to view the certificate. The following dialog appears:
View the certificate
5. Click on Install Certificate, progress through the wizard and click Yes.
©2010 Objectif Lune Inc - 49 -
Page 50

Test Certificate by Web Browser
1. Open an internet browser and add the following URL to test the non-secure version: http://localhost
2. Open an internet browser and add the following URL to test the secure version: https://localhost
Important: If you see the following window while visiting the secure version, the certificate isn't properly installed on
your system (See Install Certificate). Please do not close the windows and repeat Install Certificate.
This certificate is not accepted yet
Important: If you see the following window while visiting the secure version, the URL you are using is not https://localhost but some other one!
The URL you used doesn't mach the URL in the certificate
Test Certificate in PrintShop Mail
1. Open PrintShop Mail. In the PrintShop Mail Web publishing preferences, please set the URL property to: https://localhost
©2010 Objectif Lune Inc - 50 -
Page 51

2. Click on Test Connection...button. If you the following message, please re-check the URL and re-test by webbrowser if
the URL was set correctly.
There is no certificate installed yet for this server
USBHardware Key
Without a hardware key, also known as a "dongle", PrintShop Mail Web will run in limited mode. In this mode, PrintShop Mail
Web will run with the following limitations:
l It will not accept requests from the web and only be accessible from computers on the same local network.
l All softproof and output will be produced with a watermark
l Only 2 records per print job will be printed.
In order to enjoy PrintShop Mail Web's full set of functionality, a hardware key needs to be attached to the system. This hardware key also needs to be activated with an activation code provided by Objectif Lune.
Because the hardware key is USB and needs to be connected directly to the server, PrintShop Mail Web cannot be
used in a virtual machine or virtual environment such as VMWare or ESXservers. It must be on a physical machine
with direct access to a USBport.
The Hardware Key generally looks like, though it may differ slightly in appearance:
To activate the hardware key:
1. Attach the hardware key to the computer.
2. Open PrintShop Mail Web.
3. Click the Settings button.
4. Click on License in the General section.
5. Click on License Information to refresh the dongle status.
6. If the license is not activated, click Activate Upgrade and paste your activation code before clicking OK.
7. If you have a voucher number instead of an activation code, click Voucher and follow the instructions on the screen to
redeem the voucher for an activation code.
8. If you do not have either a voucher or activation code, please contact the Objectif Lune customer service department.
If your hardware key worked in PrintShop Mail Design but does not work when plugging it into PrintShop Mail Web, it
©2010 Objectif Lune Inc - 51 -
Page 52

may be because it is not licensed to work with PrintShop Mail Web. Contact customer service for more information.
B2C (Business to Customer)
While by default PrintShop Mail Web is a B2B(Business to Business)software that simplifies transactions between print shops
and their clients, it can also be easily used as a B2C(Business to Consumer)interface for direct client sales. To do this, you
must purchase the optional B2Clicense on your hardware key, and you must create a public company in which the clients will
be able to register.
URL of a Public Company
To allow any visitor from the web to view and order selected documents, without having to create an account first, the documents and publication types must bedefined in a public company, thatis a company whose type is Public. Like any
company,a public companycan be accessed by typing the PrintShop Mail WebURL with the company name as the path. For
example, if the URL of PrintShop Mail Web is www.psmw.com and a public company is named 'shop', then the URL of the public company is http://www.acmeprinting.com/shop.
Instead of the login page, the home page of a public company displays basic actions that any customer can do: add item(s) to
a shopping cart and checkout.
How to Create a Public Company
To create a public company, a PrintShop Mail adminstrator (or user with appropriate rights) simply needs to add a new company and specify its type to be Public.
A company defined in PrintShop Mail Webas Public can be accessedby any visitor from the web without having to log in. It is
therefore like a publiconline shop where any visitor can view document(s) and create order(s). Only when proceeding to
checkout isthe vistor invited to create an account.
The sametypes of documents can be published either in a public or private company (PDF, user upload, user input, database).
How to Place an Order
Placing orders in a public company is achieved the same way aswith a private company,except that in order to proceed to
checkout, the user is invited to create an account. As illustrated below, the Proceed button is grayed out until the user creates
an account by clicking ont the create account link.
Account Creation
New users can create an account by filling a web form asking for standard information (user name, password, billing/shipping
address). A CAPTCHA is used to validate the account was created by a human. Once the account is created, the new user is
brought back to the checkout page, where the Proceed button is now enabled.
Public Customer Capabilities
Auser account created with creation form available when checking out of a public company is defined in PrintShop Mail Web as
a user of type Public Customer. Such users have limited capabilities in the sense that they can only place, approve, or view
the status oftheir own order(s).
By default, the account manager of a public customer will only let him see his current order(s).It will not show the different statuses of an order (Approved, Shipping, etc.). Of course, like with other roles, this can be changed by the administrator.
©2010 Objectif Lune Inc - 52 -
Page 53

Skins
The PrintShop Mail Web web site is fully skinnable. A skin is a series of files that control the presentation of the web site. Every-
thing except the actual textual content of the page can - and will - vary from skin to skin. To allow PrintShop Mail Web to be
skinnable, style is completely separated from contents. The web page use standard HTML elements, user defined classes and
unique IDs. The style information is stored in Cascading Style Sheets (CSS) documents, allowing the styles to be changed
and manage the styles without the need to change the source code.
Skins can be applied to the default website as well as to each individual companies in PrintShop Mail Web but they cannot be
chosen directly by the user.
To install a skin:
1. Extract the skin's ZIPfile into a temporary folder
2. Copy the skin's folder
3. Paste the skin's folder into the following location:C:\Program Files\Printshop Mail Suite 7\PrintShop Mail Web\Website\templates
The location of the PrintShop Mail Suite installation being customizable, it may be different on your system.
To learn how to create your own skin, please refer to "Skinning Guide" (page 209).
Quick start guide
Perform the following steps to set up PrintShop Mail Web:
1. After login as administrator click Settings in the Menu bar and register your version of PrintShop Mail Web. For more
information see "Settings" (page 111).
2. Add a company to the system. For more information see"Add companies" (page 77).
3. Add departments to a company if necessary. For more information see"Add departments" (page 78).
4. Add users to a company and assign them to a department. For more information see "Add users" (page 83) and "Assign
users to a department" (page 84).
5. Add publication types and assign them to a company and/or department. For more information see Add publication
types and "Adding documents to a Publication Type" (page 87).
6. Define user roles within your own company (Designer, Production Manager and Operator) and assign these roles to the
companies you have defined. For more information see "Add users" (page 83).
7. The Designer can now publish documents to PrintShop Mail Web and assign them to the companies and the publication
types folder that are in the system already. For more information see the PrintShop Mail Design User Guide.
8. Edit the documents-web form: define pricing details, add a volume discount table and enable the document for the
users. For more information see "Setting up web forms" (page 92).
9. Setup e-mail messaging to communicate with your customers. For more information see "Settings" (page 111).
10. Enable the company, publication type(s) and documents.
Your system is now ready for your customers to use. There are many other settings that can be modified. Please see the other
chapters in this manual for the possibilities.
©2010 Objectif Lune Inc - 53 -
Page 54

©2010 Objectif Lune Inc - 54 -
Page 55

The PrintShop Mail Web Interface
The PrintShop Mail Web Interface
Accessing PrintShop Mail Web 55
The PrintShop Mail Web Menu Tabs 56
Common Tasks 56
Remember me 56
Lost password 57
Modify user info 57
Set New Password 58
Change the language of the web site 58
The PrintShop Mail Web Interface is composed of a top menu, a tab-menu for each of the sections, as well as breadcrumbs.
Some sections of the website also include a sidebar on the right (with the default skin) that offer sub-sections to each tab.
PrintShop Mail Web navigates just like any other website and offers the same type of interface tools such as links, buttons,
radio buttons and checkboxes.
Accessing PrintShop Mail Web
To access the PrintShop Mail Web Interface, you must do so from a browser that has access to the location where it is
installed.
To access the website from the server where it is installed use any of the following methods:
l Double-click on PrintShop Mail Web on your desktop
l Go to Start, (All)Programs, PrintShop Mail Suite 7 and click on PrintShop Mail Web
l Open your browser and go to http://localhost/
l Open your browser and go to http://127.0.0.1/
To access the website from a computer on the same local network as the server:
l Open your web browser on the client computer
l Type in the IPof the server within a URL. For example if the server's IPis 192.168.100.123 , type in
http://192.168.100.123/
To access the website from a computer on the internet (for anyone to access the website):
l Make sure your server is accessible from the internet. To do this, make sure the port used by PrintShop Mail Web is
redirected from by the router to the PrintShop Mail Web server IP address. Your network administrator can do this for
you.
l If you want your website to be accessible using a domain name such as http://www.myprintshopname.com/ , you will
need to create a redirection or DNSsetup on the domain name. Your network administrator can do this for you.
l Once this is done, you can access your website from anywhere in the world by typing the IPor domain name of your
server, such as http://12.34.56.78/ or http://www.myprintshopname.com/
If, during installation, you specified an HTTPport that is different than port 80 (The default HTTPport), you will need
©2010 Objectif Lune Inc - 55 -
Page 56

The PrintShop Mail Web Interface
to always type in the port when accessing your website, even when using a domain name. For example if you put
port 8080, any URLwill need to contain :8080 at the end, like this: http://www.myprintshopname.com:8080/ . If
PrintShop Mail Web is to be accessed publicly through the web, it is not recommended to use a port other than 80, as
regular Internet users will not expect to have to type in a port, thus may not be able to understand how to access your
website.
The PrintShop Mail Web Menu Tabs
To navigate PrintShop Mail Web, you must use the menu tab at the top (with the default skin, this is a blue bar with white links
within it). This menu can let you access all the parts of PrintShop Mail Web, except for the User Account menu which is
accessed at the top-right of the menu next to the language selection.
l Home:Displays a welcome message once a user is logged on. This message can be modified by the administrator in
the Web Design section of the "Settings" (page 111) tab.
l "New Document" (page 65):This tab is used to create new orders. It will display existing and active publication types
as well as their containing documents.
l Order Manager:This tab is used to manage existing orders that are in the system.
l Checkout: This tab is used to complete your order once you have added all the documents you want to order to your
shopping cart.
l "Companies" (page 77):This tab is used to manage, add or delete companies on the system.
l "Users" (page 83):This tab is used to manage, add or delete users on the system. This can be used to create a user in
any company in the system, but you can also add users through the company itself in the Companies tab.
l "Publication Types" (page 85):This tab is used to manage, add or delete publication types and their documents. This
can be used to create publication types for any company in the system, but you can also add publication types through
the company itself in the Companies tab.
l "Collections" (page 107):This tab is used to manage, add or delete image collections for your system. Collection can be
global to all the companies or be assigned to a specific company.
l "Settings" (page 111):This tab is used by administrators to change system settings, pricing, production, etc. Only
administrators can access this tab.
Common Tasks
This section describes how to perform some common tasks in PrintShop Mail Web.
Remember me
The Login page lets the user log on to the system. The Remember me option is found on the Login page. By default the
remember me checkbox is unchecked.
When the Remember me checkbox is checked a cookie is created. This cookie stores the user name and password of the
user. The next time the PrintShop Mail Web web site is visited by the user the system will check for the cookie and automatically log in the user in order to show the appropriate content.
Cookies are in fact only data, not program code. Cookies cannot erase or read information from the user's computer. A cookie
is a piece of text that a Web server can store on a user's hard disk. Cookies allow a Web site to store information on a user's
©2010 Objectif Lune Inc - 56 -
Page 57

The PrintShop Mail Web Interface
machine and later retrieve it. Internet Explorer and other browsers store cookies on your computer. If you use Microsoft's
Internet Explorer to browse the Web, you can see all of the cookies that are stored on your machine. The most common place
for them to reside is in a directory called c:\windows\cookies. You can see which Web site placed the file on your machine by
looking at the file name (the information is also stored inside the file). You can open each file by clicking on it.
Lost password
The I lost my password option allows users to retrieve a new password for their account and is based on the users e-mail
address. An e-mail with the new password is send to the e-mail address of the given user. To get a new password:
1. Click the I lost my password link on the login screen. The following screen appears:
2. Enter the e-mail address associated with your account.
3. Confirm the entered e-mail address.
4. Click Proceed to generate a new password.
The user receives on the entered e-mail address a new password. The user can use this password to logon. Once logged on
the user can decide to change the password or keep using this new password.
Note: It is not possible to reset the PrintShop Mail Web password if the PrintShop Mail Web installation authenticates against a
LDAP directory. Reset the password in the corporate LDAP system. When the password is changed in the corporate LDAP system, it is automatically changed in PrintShop Mail Web.
Modify user info
Each user can modify his personal account information. To change these parameters:
1. Click My Account in the Menu bar.
2. The following items can be changed:
l User name: This field defines the user name required to logon to the system.
l Language: The selected language is used for the e-mail message the user receives when creating an order or
when the status of an order is changed. The language selected in the login window defines the application language.
l Person Code: This value is a unique code which can be used to link to an administration or ordering system.
Users with the appropriate privilege (role) can edit this field.
l Remember me: When the Remember me checkbox is checked a user is recognized by the system and auto-
matically logged in and re-direct to the Welcome page.
l Additional Information: The fields in this section are used in the ordering processs and can be used as
default values for user input fiields in the New Document section.
3. Click Save to store the changes.
©2010 Objectif Lune Inc - 57 -
Page 58

The PrintShop Mail Web Interface
Set New Password
Each user can set a new password. To set a new password :
1. Click My Account in the Menu bar.
2. Enter a new password.
3. Confirm the new added password.
4. Click Save to store the changes.
Change the language of the web site
When using PrintShop Mail Web the user can specify which language is displayed in the menus, dialogs and pages. This allows
the customer to work in the language they are most familiar with. The customer can choose the language from any of the available languages.
To specify the interface language:
1. Launch a web browser and enter the URL of the system. The Login page appears.
2. Choose a language from the Language pop-up-menu, the interface will be change accordingly. The selected language
will be stored with your web browser (cookie). The next time the customer visits the system the language of the interface is automatically set based on the stored value.
The Login page.
It is also possible to change the language of the web site in the User info bar.
©2010 Objectif Lune Inc - 58 -
Page 59

Publishing Workflow
Publishing Workflow
The Publishing Workflow describes each step necessary in the publication of documents through PrintShop Mail Web. Depending on the document to be used in PrintShop Mail Web, the methods may differ.
Publishing a PrintShop Mail Design Document
Publishing of a PrintShop Mail Design document is fairly simple and follows these simple steps:
1. Making sure the Company and Publication Type have already been created (optional; this can be done from PrintShop
Mail Design). See "Companies" (page 77) and "Publication Types" (page 85).
2. Creating the PrintShop Mail Design document meant for publishing. See "Interaction With PrintShop Mail Design" (page
187).
3. Sending the document from PrintShop Mail Design to PrintShop Mail Web. See the PrintShop Mail Design User Guide.
4. Setup the document's fields in PrintShop Mail Design. See "Interaction With PrintShop Mail Design" (page 187).
5. Enable the document for use with PrintShop Mail Web. See "Modify the publication type properties" (page 86).
Publishing a Word Mail Merge Document
Publishing a Word document with Mail Merge in PrintShop Mail Web is very simple and follows these simple steps:
1. Create a Word document that contains one or more MergeFields corresponding to a database entry.
2. Create a new Document in a new or an existing Publication Type of the Mail Merge type. See "Word Mail Merge Doc-
ument" (page 87).
3. Enable the document for use with PrintShop Mail Web. See "Modify the publication type properties" (page 86).
Publishing a Static PDFDocument
Publishing Static PDFfiles in PrintShop Mail Web is pretty trivial as it consists only of 2 steps:
1. Create a new Document in a new or an existing Publication Type of the Static PDFtype. See "Adding documents to a
Publication Type" (page 87).
2. Enable the document for use with PrintShop Mail Web. See "Modify the publication type properties" (page 86).
©2010 Objectif Lune Inc - 59 -
Page 60

©2010 Objectif Lune Inc - 60 -
Page 61

Ordering Workflow
Ordering Workflow
This chapter explains each individual step that is involved in the ordering, processing and output generating of an order in PrintShop Mail Web. This includes the definition of each user that is involved in this workflow and the steps they each need to take
to get the job done.
This workflow assumes that PrintShop Mail Web has already been setup with the appropriate companies, departments, publication types, documents and users. It consists of two different parts - the first part is the Customer Workflow where a customer selects a document to order, adds it to a shopping cart and completes an order and the Processing Workflow where
managers and operators can approve orders, generate output and mark it as complete.
Customer Workflow
This diagram details the possible paths a customer may take in the workflow. Note that the first branches are all about the different types of document and are automatically chosen by the software, they are not a user choice:
The Customer Workflow consists of these basic steps:
1. Document Creation: Customers use the "New Document" (page 65) section to create a new document and add it to
the order. This process involves a variable number of steps depending on the document type. For more information on
the optional steps involved, see "New Document" (page 65).
©2010 Objectif Lune Inc - 61 -
Page 62

Ordering Workflow
2. Shopping Cart: Once the customer is satisfied with the order, he may use the "Checkout" (page 73) section to review
his shopping cart, adjust item quantities and review pricing. See "Shopping Cart" (page 73).
3. Shipping Options: This step allows the customer to select one of the available shipping methods (if applicable),
select a preferred shipping date, verify the shipping address information and add comments. See "Shipping Options"
(page 75).
4. Payment Options: The Payment Options page requires the customer to select a payment method (if applicable),
add a order reference number and verify the billing address.
5. Order Summary: This page summarizes the order. The documents in the cart, the address the order will be shipped
to, and the payment information are shown. See "Order summary" (page 76).
6. Order Confirmation: If the order has been processed successfully, the order confirmation page is shown. This page
includes the PrintShop Mail Web order number and transaction information if applicable.
Processing Workflow
The Processing Workflow consists of multiple order statuses through which the order passes in the "Order Manager" (page
69). Which statuses it uses depends on whether or not the order contains a document that requires a quote, whether there is a
payment module other than Purchase Order activated in the system and what user role the customer has in PrintShop Mail
Web.
The following diagram details the different statuses that are in PrintShop Mail Web along with the link between them (how the
order can evolve). The arrows indicate the only path an order can take from one status to another:
Order Statuses
l New (Shopping Cart):This represents a customer that is processing an order. It's not a status that is visible
through the PrintShop Mail Web interface, it is simply the starting point. Depending on user rights and setup, a new
order may go to the following statuses:
l Ordered:If an order is placed by a user, paid for and the payment goes through, the order will go to Ordered
status. This assumes that there is no price quote necessary for any of the documents in the order.
l Approved:If the order is placed by a manager of any type, the order can go into Approved status if the man-
ager clicks Approve instead of Order in the confirmation page.
l On Hold:If any of the documents in the order require a price quote to be made, it is put on hold until a Pro-
duction Manager gives a price for each required quote and a Department or Company Manager accepts the
price quote and will then go into Ordered or Approved mode.
©2010 Objectif Lune Inc - 62 -
Page 63

Ordering Workflow
l Awaiting Payment:If a payment is required on the order but the payment does not go through, for example
if the customer cancels or closes the payment window. If the customer returns to complete the payment or a Production Manager manually approves the order, it will go into Ordered or Approved status.
l Awaiting Payment:Orders that are awaiting payment can be re-opened by the customer that made the order, a
manager or an administrator. An order that is awaiting payment can either go to the Ordered or Approved status
depending if the user or a Manager changed its status, respectively.
l On Hold:An order can either be put On Hold automatically if a new order requires a price quote, or manually by a Man-
ager as required. An On Hold order can be put into Ordered status manually or Approved status when a price quote has
been completed.
l Approved:An order goes into approved status once it's been quoted, paid for and approved by the appropriate man-
agers. Once an order is Approved, it cannot revert to any previous status and must move forward unless it is deleted.
An Approved order can be put into the In Plant state by a Production Manager.
l In Plant:An order goes into In Plant status by the Production Manager when it is ready to generate output. An Oper-
ator uses the In Planet status to see what jobs are ready and as a queue to know which job to output next. Once the job
has been output, the Operator can place the order in Shipping status.
l Shipping:This status is used to indicate that an order has been generated and is ready to be shipped (or has already
been shipped)to a customer.
l Completed:Once a customer confirms that his order has been received, an Operator or Production Manager will be
able to place the job into Completed status, where no further processing is necessary.
©2010 Objectif Lune Inc - 63 -
Page 64

©2010 Objectif Lune Inc - 64 -
Page 65

New Document
New Document
Document Selection Screen 65
Ordering A Database-Upload Document 66
Database Upload Screen 66
Field Mapping 66
Preview Range 67
Ordering a User Input Document 67
User Input Fields 67
Ordering a Static PDF Document 68
Softproof 68
The New Document tab is used as part of the Ordering process, and is the first step in creating and completing an order.It is
used to select a document to order from a list of documents in publication types, and will only display documents that are
active and related to the company you are logged on under.
To get to the New Document tab:
1. Access the PrintShop Mail Web site interface (See "Accessing PrintShop Mail Web" (page 55))
2. Click on New Document in the PrintShop Mail Web Menu (see "The PrintShop Mail Web Menu Tabs" (page 56))
Once you are within the New Document tab, you will see a list of publication types that are available for you to order.
When you click on a publication type in the New Document tab, two things can happen. If the publication type contains more
than one document, you will be sent to the "Document Selection Screen" (page 65). If there is only one document in the pub-
lication type, you will be sent to one of the following windows:
l If the document requires a database upload, the "Ordering A Database-Upload Document" (page 66) window will be dis-
played.
l If the document uses input fields, the "Ordering a User Input Document" (page 67) window will be displayed.
l If the document is a Static PDFdocument, the Softproof window will be displayed directly.
l If the document is a File Upload document, the Upload File window will be displayed.
Document Selection Screen
When a publication type contains more than one file, clicking on that publication type will bring up a list of documents within it.
Each document will display a preview (if possible)as well as a description as entered in the document's properties.
If there is only one document, or after click on a document in this screen, you will be taken directly to the correct screen
depending on the type of document. See "Ordering Workflow" (page 61) for more details.
©2010 Objectif Lune Inc - 65 -
Page 66

New Document
Ordering A Database-Upload Document
When you click on a document that requires a document upload in the New Document tab, you will need to go through the following steps for the document to be added to your cart:
l Upload your database through the "Database Upload Screen" (page 66).
l Verify the field mappings through the "Field Mapping" (page 66).
l Select your preview range in the "Preview Range" (page 67) window.
l Verify the result in the "Softproof" (page 68) window.
l Add the document to your cart and proceed to checkout.
Database Upload Screen
When a document requires a database in order to be processed, the Database Upload screen will be displayed.
The Fields table shows all of the fields that are expected to be in the uploaded database, and their order. If your database does
not correspond exactly to this list, you will be able to re-order them in the next step.
While it is recommended that the uploaded database be of the same type as the one used to create the document, this
is by no ways mandatory. As long as the database you upload is compatible with PrintShop Mail Suite your document
should output correctly. To verify this, make sure you double-check the softproof.
The Database file box lets you upload your database to PrintShop Mail Web to be merged with the document.
To upload the database:
1. Click the Browse button next to the Source File box.
2. Browse to your database file using your browser's File Upload dialog.
3. Click on the database in the File Upload Dialog
4. Click on OK.
5. When the filename and path appears in the Source File box, click Upload.
When you click Upload, you will be taken to the "Field Mapping" (page 66) window.
Field Mapping
The Field Mapping window is used to make sure the uploaded database file's fields correspond to the one that was used to
create the document. The window displays the Fields table with the following rows:
l Field Name:The list of all fields that the document expects to receive from the database. If there are more fields than
expected in the uploaded database, dashes (-) will be displayed as placeholders and the corresponding upload field will
not be used.
l Header:The list of fields in your database. If your database contains less fields than what is expected, a dash(-) will
be displayed as a placeholder, and nothing will be displayed in the output for this field.
l Value:Displays the first record in the uploaded database next to its field name.
PrintShop Mail Web will attempt to automatically match fields in your uploaded database that match the field names it knows to
use. If it cannot do this for one or more of the fields, you will have to reorder them manually.
©2010 Objectif Lune Inc - 66 -
Page 67

New Document
PrintShop Mail always expects to find headers in the uploaded database. If your uploaded database does not contain
field headers, the first record will display as the headers and the output will not contain that record.
To map the fields correctly:
l Drag and drop the upload field that corresponds to the expected database field to the first position in the field mapping
table.
l Drag and drop the upload field that corresponds to the expected database field to the second position in the field map-
ping table.
l Repeat for all the fields.
l If some fields to not match, you can match them to a dash(-) field for it to be ignored.
Once you have completed the field mapping, click Next to get to the "Preview Range" (page 67) window.
Preview Range
The Preview Range window will let you select what range of records will be used in the softproof. Previewing a smaller range
will make the preview faster but will display less pages. On the other hand, previewing a larger number of records will take
more time but will let you check the validity of more records.
Changing the preview range will not affect the number of records that will actually be generated in the output, it will
only change the number of records displayed in the softproof.
To change the range of records to preview:
l In the Preview Range box, change the From box to the first record you want to preview.
l Change the To box to the last record you want to preview
l Click Next to generate and view the "Softproof" (page 68).
Ordering a User Input Document
When you click on a document that requires user input to determine the contents of its fields in the New Document tab, you will
need to go through the following steps for the document to be added to your cart:
l Enter the field contents in the "User Input Fields" (page 67) window
l Verify the result in the "Softproof" (page 68) window.
l Add the document to your cart and proceed to checkout.
User Input Fields
The User Input Fields window will let you enter the information necessary to generate your output, when the document was
set to have user input instead of a database upload.
l The Fields table will display all of the fields in the database, as well as an input box where you can enter the expected
data.
l The Update Preview button will refresh the thumbnail on the right with the new user input information.
l The Back button will bring you back to the "New Document" (page 65) window.
l The Next button will generate and display the "Softproof" (page 68).
l The Thumbnail box displays the expected output with the user input that was entered. If more than one layout is
present in the uploaded document, a Layout drop-down is displayed under the thumbnail. Click on it and select a new
layout to display this layout preview in the Thumbnail box.
©2010 Objectif Lune Inc - 67 -
Page 68

New Document
Ordering a Static PDF Document
When ordering a static PDF, there is no customization, so the only window you will get is the "Softproof" (page 68) window,
which will display the complete PDFfile in its preview. You can then add it to your cart and continue shopping.
Softproof
The Softproof window displays a PDFthat corresponds to what the generated output will look like in your order. If you have
previously selected a preview range, the PDFwill only contain this range.
The Softproof window requires a PDFviewer such as Adobe PDFin order to display the PDF preview.
Once you are satisfied with the preview, click the Next button and the document will be added to your cart. The "Checkout"
(page 73) tab will be opened with your current cart contents.
©2010 Objectif Lune Inc - 68 -
Page 69

Order Manager
Order Manager
Viewing Order Details 70
Order Properties 70
Order Details 70
Job Properties 71
The Order Manager displays any and all orders that can be viewed, processed or modified by the currently logged on user.
The Order Manager is divided into 4 sections:
l The Order(s)table displays the orders for the currently selected section. When first opening the Order Manager, it will
most likely be empty. It displays the following information:
l ID:The software-generated identification for the order.
l Company:The company in which the order belongs.
l Department:The specific department the document belongs to, if applicable.
l Created:The date at which the order was created.
l Shipping Date:The expected shipping date of the order.
l Price:The order price including all taxes and shipping charges.
l The Order Manager section in the sidebar displays the different order statuses:
l General:Orders will go through some of these statuses, following the "Ordering Workflow" (page 61). The vis-
ible statuses and actions which a user can do depends on user rights and the ordering workflow.
l Other:
l Render Queue:Click to displays a list of orders that are being rendered or have been rendered in the
recent past. This includes softproofs for orders being created by users.
l Print Jobs:Click to display a list of Print Jobs that have been generated. Jobs printed using PrintShop
Mail Design's PrintTo Web functions appear here. See "Interaction With PrintShop Mail Design" (page
187).
l Personal Order folders:
l My Orders:Click to display all orders that the currently logged on user has access to.
l My Approved Orders:Click to display all approved orders that the currently logged on user has
access to.
l All Companies:Click to display all the orders for all companies.
l The Search section in the sidebar lets you search through all orders:
l Search: Enter a word (or words)to search for.
l In:Select which field you want to search in (Document name, Shipping date, Contact name, Order ID) from the
drop-down list, then click Search.
l The Summary section in the sidebar displays a summary of information about the current status of orders that the cur-
rently logged on user has access to:
l Number of orders: Total number of orders.
l Total price:Total combined price of all the orders.
l Rush orders:The number of orders that were requested as rush orders.
l Required by today:The number of orders that are due today.
l Exceeded date orders:The number of orders that have gone over the shipping date, in other words late
orders.
©2010 Objectif Lune Inc - 69 -
Page 70

Order Manager
Viewing Order Details
There are different types of details available for orders in PrintShop Mail Web. Those details are divided into three distinct locations that are easily accessible from the Order Manager.
The first location is the Order Manager status pages themselves, as described above. This displays the ID, Company, Department, Created, Shipping Date and Price. You can also expand each order by clicking on the [+] sign next to the ID, which will
display the list of documents in the order. The list of documents appear with the ID, Name, Quantity and Print Status of the document. Clicking on any document name will display its "Job Properties" (page 71).
The second location is the Order Properties page. This page displays detailed information about the order and is also the location where the status of the order can be changed. For more details see "Order Properties" (page 70).
The third location is the Order Details page, which lets a user modify options and shipping information for an order. For more
details see "Order Details" (page 70).
Order Properties
The Order Properties page displays information on orders in the system as well as displays a list of available actions for the
order.
The Order Properties is divided into 2 main sections with various details and links:
l OrderInformation section
l Toolbar:The top area of the Order Information section contains the actions available for the current order.
l Action :This lets you put the order in the appropriate status like Approved, In Plant, On Hold, etc.
l Details:This brings up the "Order Details" (page 70) page.
l Set Paid:Order is Awaiting Payment status display the Set Paid action. This displays a dialog that lets
you place aTransaction number (which is optional but would correspond to your payment system's transaction confirmation number). Once you click Set paid in the dialog, the order goes in to Approved status.
l Delete:This action will delete the order and all attached details, after a proper confirmation dialog
appears of course.
l General group:Displays information about the customer who created the order.
l Additional Information:Displays information about the order itself, as well as the shipping address.
l History:Displays the history of the order, when it was created and which statuses it went through. Each date
and status also displays which user made the change.
l Jobs Overview section:This displays each document that is part of the order, including the ID, Description, Quantity
and Price. It also displays the Subtotal, taxes and total price of the order. Clicking on any of the document details will display the "Job Properties" (page 71). page for the document.
Order Details
The Order Details page is used to modify the shipping details for an order. It is divided into 3 different groups:
©2010 Objectif Lune Inc - 70 -
Page 71

Order Manager
l The General group displays the OrderIDand current status. It is not editable.
l The Options group lets you change the shipping options such as a shipping Tracking and Reference number as well as
shipping comments.
l The Shipping Information lets you change the shipping address and contact information.
Job Properties
The Job Properties page displays all the details for the selected document in an order. It also lets an Operator generate output
for this document if the document is In-Plant status.
To generate the job's output, click Generate Output in the Action bar. The Output dialog is shown.
The Output dialog has the following options:
l General Group:
l Method:Choose between these 5 output methods. The rest of the options will depend on the output method
you choose.
l Print:Sends the job to a physical printer installed on the PrintShop Mail Web server.
l Print to File:Creates a postscript version of the job and saves it in the selected output folder.
l Create PDF:Generates a PDFfile of the job and saves it in the selected output folder.
l Preflight:Does a verification of the document by simulating the output. However, it does not actually
create any output. Will display a report with any error found.
l Printer: Select the printer of which the drivers will be used to generate the job. Even when generating a PDF,
the printer is necessary as it is the one who determines the page sizes and margins, etc. This printer selection
should correspond to the printer selected when creating the document if it is a PrintShop Mail Design document
that was used to create this job.
l Job Option File (Create PDFoutput): When creating a PDFoutput, you can use one of the built-in job options
files to adjust the quality of the PDFfile.
l Output Folder (Print to File and Create PDF outputs):This is where the output will be generated unless it is
printed out. Output folder are created in the "Output Folders" (page 144) section of the Settings window.
l Copies and Range Group:
l Copies:The number of copies for the file. Note that they will automatically be collated.
l Range:Select whether you want the whole job to be generated or just a subset of records (not pages).
l From:The first record you wish to use in the set.
l To:The last record to use in the set.
©2010 Objectif Lune Inc - 71 -
Page 72

©2010 Objectif Lune Inc - 72 -
Page 73

Checkout
Checkout
The Checkout Process 73
Shopping Cart 73
Automatic price calculation 74
No price calculation 74
Price Quotes 74
Shipping Options 75
Shipping Date and Rush Rate handling 75
Shipping Methods 76
Order summary 76
The Checkout tab will automatically appear when you start your checkout process from the New Document tab. It contains
your shopping cart as well as the pages that will let you confirm your order and, if required, pay for it.
The Checkout Process
Checking out is a simple 3-step process that is seamlessly integrated within the ordering process that it may be easily missed
when ordering a document.
l The Checkout Overview page displays your shopping cart including each document that you ordered. It will also let you
change your ordering quantities. See "Shopping Cart" (page 73).
l The Shipping Options page is where you enter you shipping address and choose your preferred shipping dates. See
"Shipping Options" (page 75).
l The Order Summary page displays your order information and reconfirms your ordered items, shipping address and
payment options. It is also where you can enter a discount voucher if you have one. See "Order summary" (page 76).
Shopping Cart
The shopping cart allows customers to collect multiple documents in the cart before placing an order. Documents created by a
customer stay in the shopping cart even if the customer leaves the web site. There is no need for the customer to complete the
ordering process. The next time the customer logs on the shopping cart will list the documents created in a previous session.
The contents of the documents can be changed (Edit job content), the documents can be removed from the cart and new documents can added.
In PrintShop Mail Web it is possible to edit the content of PrintShop Mail documents in the Checkout or Shopping cart. These
PrintShop Mail documents must contain data fields and/or variables. In the shopping cart, next to the documents name a pencil
icon is shown. Customers can click the pencil icon to edit the content of the job. It is possible now to change the data entered
for user input fields, change the field mapping of an uploaded database file or replace the database file.
Each item in the cart can have a different pricing setup and quantity entry method. The appearance of the quantity field
depends on the entry method set for the document or is defined by the document type. Documents that require a database file
©2010 Objectif Lune Inc - 73 -
Page 74

Checkout
upload have quantity, which is determined by the number of records in the database file. Documents that require a file upload
are placed in the shopping cart as a quote order.
The quantity entry method could be one of the following:
l Free entry field: The customer can enter a custom quantity within the minimum and maximum quantity range (Pric-
ing Options page).
l Predefined list: The customer can select a quantity from a predefined list. This list is derived from the volume dis-
count table.
Automatic price calculation
In order to automatically calculate the price of a job a volume discount table should be available and the pricing calculation
option must be enabled (Edit Pricing page).
The prices shown in the shopping cart include setup costs (optional), these costs are defined separately.
When the quantity entry is set to Free Entry, a custom quantity can be entered. The entered value should be between the minimum and maximum quantity range. Whenever the user changes the quantity in the shopping basket the price of that document and the subtotal will be updated automatically. If the entered quantity does not meet the minimum and maximum
requirements a warning will be shown.
Prerequisites
Prerequisites for automatic price calculation:
l Enable pricing for the document
l Create a volume discount table for the document
No price calculation
Automatic price calculation is defined per document and is disabled by default. The initial entry method for these document is
Free Entry and no quantity restrictions are set. In this case the pricing column shows the Not Applicable (N/A) message. The
Quantities options on the Edit Pricing page control the entry method and quantity restrictions of the document.
When the quantity entry method is set to Predefined List the customer will choose the quantity from a pop-up-menu. The avail-
able quantities are retrieved from the volume discount table of that document. If there is only one entry in the discount table
this value is used as the quantity for the document, the customer will not be able to change this value. If automatic price calculation is disabled the prices in the volume discount table are ignored but still define the quantities the user will be able to
choose from.
Prerequisites
To disable automatic price calculation:
l Disable pricing for the template
Price Quotes
A document will require a price quote when pricing is enabled for the document but no entries are found in the volume discount
table. In this case no subtotals and totals will be shown in the shopping basket. After placing the order the production manager
needs to enter a price quote. The customer will not be able to approve the order until a price quote is given.
Prerequisites
Prerequisites to enable price quotes:
©2010 Objectif Lune Inc - 74 -
Page 75

Checkout
l Enable pricing for the document
l Do not create a volume discount table
Shipping Options
The Shipping page lets the customer edit the shipping address and specify shipping related items like the shipping method (if
applicable) and the preferred shipping date. Shipping methods are managed in the Settings section of the system. The calculation of shipping charges can be enabled and disabled per company. Profiles need to be assigned to companies and departments to enable the customer to select a shipping method in the ordering workflow.
The Shipping page contains the following sections:
l Address: The Address the order will be shipped to. This information is automatically retrieved from the company or
department the customer belongs to. In case the customer belongs to multiple departments or companies the information is based on the company/department of the first document in the cart. The selected country in the pull-downmenu defines the checks of the zip code and defines the presentation and values of the state field.
l Options:
l Shipping Methode: The preferred shipping method.
l Shipping Date: The preferred or estimated shipping date.
l Comment Field: In this field the customer can enter a descriptive text or note.
l Reference Field: The Reference field can be used by end users to enter a company reference. This reference
can be used than in correspondence with the print supplier.
l Terms and Conditions: The ordering workflow requires the customer to view and accept the Terms and Conditions
of the print shop. The text for the terms and conditions can changed by the print shop. The terms and conditions are
required. First after checking the terms and conditions checkbox the Proceed button is enabled.
Click the Terms and Conditions link to open the Terms and Conditions dialog. For more information see Managing the
Terms and Conditions.
When done entering the information, the following buttons are available:
l Back:Return to the previous page.
l Restore Address:The address information is restored from the address information section from the com-
pany/department.
l Proceed:Displays the Order summary page.
Shipping Date and Rush Rate handling
PrintShop Mail Web automatically calculates an estimated shipping date based on the longest Standard Production Time set
for the documents in the cart. The customer can select a different date by clicking the calendar icon. The calendar marks the
current date, production dates and non working days. None of the dates marked as production day or non working day can be
selected.
The system will check if Rush Order Production Time is applicable. Shipping dates that require a rush order are marked
behind the calendar icon. The rush rate charges for those documents that require a rush order are added to the final price calculation.
The Standard Production Time, Rush Order Production Time and Rush Rate are set in the Settings page from the Production
section of a document.
Prerequisites
Prerequisites for automatic rush rate calculation:
©2010 Objectif Lune Inc - 75 -
Page 76

Checkout
l Setup working days and restricted order dates in the Settings section.
l Set the Standard Production Time and Rush Production Time of the templates. To accept rush orders the Rush Pro-
duction Time should be set to a lower value than the Standard Production Time.
l Enter a Rush Rate on the Settings page from the Pricing and Ordering section of the document.
Shipping Methods
To allow a customer to select a shipping method the administrator should enable the calculation of shipping charges for the
company (or department). When the customer has access to multiple companies or departments the entries of the shipping
method list is defined by the selected company or department on the Shipping page.
When a shipping rates table is available, the shipping rate is calculated based on the total weight of the items in the cart. If no
rates table is specified the base fee of the shipping rate profile is used as a flat fee for all items in the cart. In case both a base
rate and a rates table are available, the base rate will be added to the price that is calculated based on the total weight.
The actual shipping rate is shown on the Order Summary page.
Prerequisites
Prerequisites for charging shipping rates:
l Create one or multiple shipping rate profiles.
l Set a base rate and/or create a rates table for the profile.
l Enable the Calculate Shipping Charges option in the Pricing and Ordering page of companies or departments.
l Enable the Calculate Shipping Charges option in the Pricing and Ordering page of templates.
l To use a rates table a value needs to be entered in the Weight Per Unit field of the template.
Order summary
Once all order information is collected the summary page is shown. This page summarizes the order information and shows
the final pricing including shipping charges, rush rates and tax. Based on the customers role the Place Order and Approve but-
tons are shown.
On this page, you can also enter a Discount Voucher Code. Discount vouchers are generated by PrintShop Mail Web administrators or production managers and can apply a discount on shipping or the price of your purchase. Only one discount
voucher can be applied to an order. Simply type in or paste the discount code and click Apply to apply the discount to the order.
PrintShop Mail Web invokes a workflow specific to the selected payment connector. The default payment connector (Purchase
Order), pops up a processing dialog and no user interaction is required to place the order. Once the order is placed a confirmation page is shown and a e-mail notification message is sent.
©2010 Objectif Lune Inc - 76 -
Page 77

Companies
Companies
Add companies 77
Modify properties 77
Add or modify address 78
Add departments 78
Assign a publication type to a department 79
Change web design settings 79
Modify Pricing and Ordering parameters 80
Delete company 81
Company related tasks are typically performed by Production Managers and Company Managers. This chapter describes common tasks in the Company section of PrintShop Mail Web.
Add companies
To add a new company in PrintShop Mail Web:
1. Click Companies in the Menu bar. The Companies overview page is shown.
2. Click Add. The add dialog appears.
3. Enter the Company name.
4. Click Save to create the new company. You have now added a company, which is added directly to the Companies
overview.
Notes:
l Newly created companies are initially disabled and must be enabled once user accounts and publication types are
added. Users belonging to a disabled company will not be able to access the items in the Menu bar. A company can be
enabled via the summary abd/or properties page of that company. Typically Administrators, Production Managers and
Designers can test the templates of these disabled companies via the New Document section.
l About Company Type:
l The Company Typecanbeset to Public to enable B2C (Business to Customer), so that visitors (i.e. non logged-
in users) are able toviewthe company's enabled publication typesand documents withoutlogging in to PrintShop Mail Web, and add items to their shopping cart. Visitors of a public company willnevertheless have to
create an account in order to proceedto checkout.
l Companies of type Private can only be accessed by userswho have been either created within the company or
assigned to it.This is for regularB2B (Business to Business)transactions.
Modify properties
After creating a new company or department it is possible to modify all company or department properties. To modify the company properties:
1. Click Companies in the Menu bar. The Companiesoverview page is shown.
2. Select a company from the overview by clicking on the company name. The Companies Summary page is shown and
on the right hand side a menu is displayed. This side menu allows management of the following items of the currently
©2010 Objectif Lune Inc - 77 -
Page 78

Companies
selected company:
l Properties
l Addresses
l Users
l Publication Types
l Web Design
l Departments
l Pricing and Ordering.
3. On the Company Summary page the basic company information is displayed in the Properties section. To modify the
information in the Properties section click the Edit link or click Properties in the side menu.
4. Click Edit. The companies properties screen appears.
5. Enter additional information for the company:
l Company Code: This value is a unique code which can be used to link to an administration or ordering sys-
tem.
l URL: The customers company URL can be entered here.
l Contact Person: When users have been added to the company, a company contact person should be
selected in the Contact person pull-down-menu.
6. Click Save to store the changes. The company properties page is shown.
The Company Type, indicating whether the company has been defined as Private (for B2B) or Public (for B2C), is a
static value .
Add or modify address
To add the company address in PrintShop Mail Web:
1. Click Companies in the Menu bar. The Companiesoverview page is shown.
2. Select a company from the overview by clicking the company name. The Company Summary page is shown. On the
company summary page the basic company information is displayed. The Company Address is placed in a collapsible
information window.
3. To make the Address information visible, click the text. The address information can add or modified by clicking the
Edit link or click Addresses in the side menu.
4. Click Edit. The Company Addresses screen appears.
5. The Shipping and Billing address information is used during the ordering process and can be used as default value for
input fields in the New Document section. Enter the required information:
l Country: Select a country in the pull-down-menu. By default the value None is selected.
l Address Fields: Enter the address information in this fields. Maximal 255 characters can be typed or pasted in
this fields.
l Zip code: The Zip code is related to the selected country. In some cases a regular expression is added to
check the entered zip code.
l State: The State is also related to the selected country. When selecting US or Canada a pull-down-menu is
shown, presenting the states of the US or Canada. State is a required field than. In all other cases an entry field
is visible.
6. Click Save to store the changes.
Add departments
To add a department to a company:
1. Click Companies in the Menu bar. The Companiesoverview page is shown.
2. Select a company from the overview by clicking on the company name.
©2010 Objectif Lune Inc - 78 -
Page 79

Companies
3. Click Departments in the side menu. The Departments overview page is shown.
4. Click Add. The Add Department dialog appears.
5. Enter the Department name.
6. Click Save to store the changes. You have now added a department, which is added directly to the companies' Depart-
ments overview.
Note: After creating a new department it is possible to modify the Department Properties and add the Department Address
information. On the department's address page the checkboxes for Use company address are enabled by default; the system
automatically takes shipping and billing addresses from the company. If this option is not required, please click in the checkbox to allow different shipping and billing addresses to be entered.
Assign a publication type to a department
Documents published by a Designer, are automatically assigned to a company as a whole. In order to assign these documents
to a department:
1. Click Companies in the Menu bar. The Companiesoverview page is shown.
2. Select a company from the overview by clicking the company name.
3. Click Departments in the side menu and select a department.
4. Click Publication types in the side menu.
5. Click Assign. The Publication Types assignment dialog appears.
6. Select a publication type in the Unassigned window and click the Assign button to move the selected publication type to
the Assigned window. Double clicking the selected name will also assign or unassign the selected publication type.
7. Click Save to store the changes and return to the Publication Types overview.
To assign a publication type to a department via the Publication Type section:
1. Click Publication Types in the Menu bar. The Publication Typesoverview page is shown.
2. Select a publication type from the overview by clicking the publication type name. The Publication Types Summary
page appears:
3. Click Assign and select a department in the Unassigned window and click the Assign button to move the selected
department to the Assigned window. Double clicking the selected name will also assign or unassign the selected depart-
ment.
4. Click Save to store the changes and to return to the Summary page of the selected publication type.
Change web design settings
PrintShop Mail Web can use different skins for each company, allowing your customers to use the system in their own house
style or a style that closely matches their house style. Users of that company can access the PrintShop Mail Web web site via a
personalized URL which will invoke their skin. The web design settings of a company control the skin, global style settings and
the personalized URL variable of the company. For example: http:/www.yourprintshopweb.com/yourclientscompanyname.
To change the web design settings of a company:
1. Click Companies in the Menu bar. The Companiesoverview page is shown.
2. Select a company from the overview.
3. Click Web Design in the side menu.
4. Click Edit. The Web Design screen appears.
5. The Web Design page contains the following fields:
l Skin: This pop-up menu lets you select one of the available skins. For more information about creating skins
refer to the Skinning Guide.
l Design Name: The Design Name defines the URL suffix to invoke the selected skin and web design settings.
l Font Family: The font-family property is a prioritized list of font family names and/or generic font family
©2010 Objectif Lune Inc - 79 -
Page 80

Companies
names. The browser will use the first value it recognizes. Separate each value with a comma, and always offer
a generic-family name as the last alternative.
l Colors: These color pickers are used to select colors for various parts of the web site.
l Header Image: Use the Browse button to select an image file on your local machine (jpg or gif). In the
Default skin this image is used in the area above the Menu bar.
6. Click Save to store the changes and to upload the company logo (if applicable).
To Restore the default PrintShop Mail Web skin click the Defaults button. A warning dialog is shown. After clicking OK the
default PrintShop Mail Web skin is restored. Click Save to store the changes.
Note: If the selected skin does not make use of the custom font family, colors and header image, changes to these fields will
have no effect. The Skinning Guide explains how a skin can be made dependent on these parameters.
Note: You might need to refresh the cache of your browser in order to see the changes.
Modify Pricing and Ordering parameters
In the Pricing and Ordering section of a company or department a tax rate profile can be selected. The calculation of shipping
rates can be enabled and a payment module can be selected. In addition to this it defines the shipping rate profiles visible in
the order working. If multiple profiles are available the end user can select the preferred method. The calculation of shipping
rates has the following prerequisites:
l The administrator should create one or multiple shipping rate profiles in the Shipping Rates page of the Settings sec-
tion. For more information see the Settings section.
l The Calculate Shipping Charges option of the company should be enabled (described below).
l Pricing should be enabled for the company's publication types and documents.
To set the pricing and ordering settings for a company:
1. Click Companies in the Menu bar. The Companiesoverview page is shown.
2. Click Pricing and Ordering in the side menu, the Pricing and Ordering Settings page appears.
3. Click Edit. The Pricing and Ordering Settings screen appears:
4. This page contains the following sections and lets you set the following items:
l Tax: Defines the Tax Rate Profile that applies to this company (or department).
l Shipping Rates: This section defines the following shipping charge options:
l Calculate Shipping Charges: Check the Calculate Shipping Charges checkbox to enable the cal-
culation of shipping rates for this company (or department). This enables the options below.
l Use System Defaults: If selected the system default rates are used in the ordering workflow. If this
option is selected the Shipping Rate Profile area is enabled.
l Shipping Rate Profiles: The shipping rate profiles become available when the Use System Default
checkbox is unchecked. To select one or multiple contiguous profiles use shift click. Non contiguous items
can be selected with alt click.
When multiple shipping rate profiles are assigned, the customer is able to select the preferred shipping
method in the ordering workflow.
Shipping charges can be defined for the company and/or departments. These are managed independently; the profile list of a department can be completely different from the list for the company (e.g.
when located in a different country or region).
l Payment Modules: This section controls the settings used for the payment modules.
l Use System Defaults: If selected the system default module is used. If this option is deselected the
Module area becomes available.
l Modules: The modules become available when the Use System Default checkbox is unchecked. To
select one or multiple contiguous modules use shift click. Non contiguous items can be selected with alt
click.
©2010 Objectif Lune Inc - 80 -
Page 81

Companies
When multiple modules are assigned, the customer is able to select the preferred payment method in the
ordering workflow.
Modules can be defined for the company and/or departments. These are managed independently; the
module list of a department can be different from the list for the company (e.g. when located in a different country or region).
5. Click Save to store the changes.
Delete company
On the Companies overview page it is possible to delete a company. When a company is deleted the company and the linked
departments, orders, publication types and collections are removed from the system. In the database these items will be
marked as deleted. When performing the delete companies process on the Maintenance page in the Settings section the com-
pany and all linked items will be deleted from the database and the file system.
To delete a company from the Companies overview page:
1. Click Companies in the Menu bar. The Companies overview page is shown.
2. Select the checkbox next to the company name.
3. Click Delete. First after click OK in the warning dialog the company is removed from the overview.
©2010 Objectif Lune Inc - 81 -
Page 82

©2010 Objectif Lune Inc - 82 -
Page 83

Users
Add users 83
Modify user info 83
Assign users to a department 84
This chapter explains Users, how to create them, edit them and assign them to companies and departments.
Add users
To create a new user account for a company:
1. Click Companies in the Menu bar. The Companiesoverview page is shown.
2. Select a company from the overview by clicking on the company name.
3. Select Users in the side menu.
4. Click Add. The Add User dialog appears.
5. Enter the required information:
l User Name and Password: These fields define the information required to logon to the system and need to
be entered in the Login page.
l Role: The selected role defines the privileges and access level of the user.
l Department: Select a department to which the user belongs (if available). It is possible to assign users to
more than one department, by holding the shift key and clicking all the departments to which the users belongs.
l Login: Set this option to Enabled to allow the user logon to the system.
l First, Last, Gender,Job Titleand E-mail address: The values of these fields are used in the ordering
process and can be used as default values for user input fields in the New Document section.
6. Click Save. You have now added a user, which is added directly to the companies’ User overview. When more users
need to be added click Add again.
Users
Important: When users have been assigned to departments, a department contact person should be selected: click on
Departments in the side menu, select a department from the overview, click Properties in the side menu and click Edit. This
will open the Department Properties page, where the correct contact person can be selected from a pull-down-menu. Click
Save to store the changes.
Modify user info
To modify the user information:
1. Click Companies in the Menu bar. The Companiesoverview page is shown.
2. Select a company from the overview by clicking on the company name.
3. Click Users in the side menu.
4. Select a user from the overview by clicking the user name.
5. Click Edit. The Edit Account page appears.
6. Enter the required user information:
l Person Code: This value is a unique code which can be used to link to an administration or ordering system.
l Language: The selected language defines the language used for the e-mail messages send by PrintShop Mail
Web. The language of the web site is defined by the language selected in the Login page.
l Login: Set this option to Enabled to allow the user logon to the system.
l Additional Information: The values of these fields are used in the ordering process and can be used as
default values for user input fields in the New Document section.
7. Click Save to store the changes.
©2010 Objectif Lune Inc - 83 -
Page 84

Assign users to a department
To assign a user account to a department:
1. Click Companies in the Menu bar. The Companiesoverview page is shown.
2. Select a company from the overview by clicking its name.
3. Click Departments in the side menu and select a department from the overview.
4. Click Users in the side menu. An overview shows the user accounts in that department.
5. Click Assign. The Assign Users dialog appears.
6. Select a user from the Unassigned list and click Assign or double click a name to assign.
The Unassigned Users are those users that are not part of the department. The users shown in the list depend on the
role of the currently logged on user. A role defines which roles the user can assign when creating new accounts. The list
shows those users of which the role can be assigned by the current user.
7. Click Save to store the changes. The assigned user(s) will be visible from the Users overview of the department.
User accounts can be added directly to a department.
To create a new account at department level:
1. Click Companies in the Menu bar. The Companies overview page is shown.
2. Select a company from the overview by clicking its name.
3. Click Departments in the side menu and select a department from the overview.
4. Click Users in the side menu. An overview is shown with the user accounts of the department.
5. Click Add and fill in the required user info (see "Add users" (page 83) and "Modify user info" (page 83)). Users who are
added directly to a department can be (re)assigned to other departments later.
Users
©2010 Objectif Lune Inc - 84 -
Page 85

Publication Types
Publication Types
Create a publication type 85
Create a publication type in the Companies section 86
Modify the publication type properties 86
Delete a publication type 86
Adding documents to a Publication Type 87
Word Mail Merge Document 87
Delete documents from a publication type 88
Edit document properties 89
Manage production settings 89
Output options 90
Output options for a PrintShop Mail document 90
Output options for a static document (PDF) 91
Manage linked files 91
Setting up web forms 92
User Input vs Database Upload 94
Define file upload settings 102
Setting up pricing 103
This chapter describes tasks related to publication types and docments. Typically these tasks are performed by the designer,
operator or the production manager. Read the Designer Guide and PrintShop Mail User Guide for detailed information on PrintShop Mail related tasks and how to publish a PrintShop Mail document to PrintShop Mail Web.
There are two ways to create publication types:
l Using PrintShop Mail Web.
l Using PrintShop Mail Design when using Publish To Web.
For more information on how to create publication types via PrintShop Mail please refer to the PrintShop Mail Design User
Guide.
Create a publication type
To create a new publication type in PrintShop Mail Web:
1. Click Publication Types in the Menu bar. The Publication Types overview page is shown.
2. Click Add. The AddPublication Type dialog appears.
3. Complete the following fields:
©2010 Objectif Lune Inc - 85 -
Page 86

l Publication Type: Enter the name for the new publication type.
l Status: The selected status defines if end users can view this folder in the New Document section and start cre-
ating new documents based on the contained templates. Typically administrators and designers can view these
publications types in the New Document section allowing them to test the preview and job generation. Disabled
folders are marked with a red background in the New Document section and have a stop-symbol next to their
name.
l Company Name: Select a company in this pull-down-menu to assign the publication type folder to that com-
pany. A publication type folder is always assigned to a company.
4. Click Save to add the folder.
Create a publication type in the Companies section
To create a publication type folder from the Companies section:
1. Click Companies in the Menu bar. The Companies overview page is shown.
2. Select a company by clicking its name.
3. Click Publication Types in the side menu.
4. Click Add to display the Add dialog.
Publication Types
Modify the publication type properties
After a publication type folder is created the folders properties can be changed and additional information can be added. To
modify the publication type properties:
1. Click Publication Types in the Menu bar. The Publication Typesoverview page is shown.
2. Select a publication type from the overview by clicking on the publication type name. The Publication Type Summary
page is shown and on the right hand side a menu is displayed. This side menu allows management of the following
items of the selected publication type folder:
l Summary
l Properties
l Documents
l Settings
l Volume Discount Table.
3. On the Publication Type Summary page the most relevant publication type information is displayed. To modify the Pub-
lication Type Properties click the Edit link or click Properties in the side menu
4. Click Edit. The Publication Type Properties screen appears.
5. It is possible to complete the following fields:
l Product Code: This value is a unique code which can be used to link to an administration or ordering system.
l Description: A text describing the publication type folder and/or additional information.
l Company Name: Select the company to be associated with the publication type.
l Use Custom Thumbnail: Check the Use custom thumbnail checkbox to display a custom logo, icon or
image for the publication type.
l Browse: Click Browse to locate the image file to be used as the thumbnail on your local hard drive.
6. Click Save to store the changes. The Publication Type Properties page is shown.
Delete a publication type
It is possible to delete one or multiple publication type folders on the Publication Types overview page. To delete a publication
type folder:
1. Click Publication Types in the Menu bar. The Publication Types overview page is shown.
2. Select the checkbox next to the publication type name
©2010 Objectif Lune Inc - 86 -
Page 87

Publication Types
3. Click Delete. First after click OK in the warning dialog the publication type(s) is removed from the overview.
Note: A publication type can only be deleted when there are no orders using one of the containing documents.
Adding documents to a Publication Type
In order for customers to be able to places orders, your publication type must contain one or more documents. There are multiple types of documents that are available, but only 3 are uploaded from the PrintShop Mail Web interface:
l Word Mail Merge documents.
l Static PDF files.
l File Upload documents (manual job submission).
PrintShop Mail documents, wether they are variable or static, should always be uploaded using PrintShop Mail Design.
Please refer to the PrintShop Mail Design User Guide for more information.
To add a document, click the Add button. The Add dialog appears.
l Document Type: use the drop-down to select one of 3 types:
l Static PDF:Select to upload a PDFthat can be printed by the user directly. PDFfiles will display a softproof to
the client whenever they are ordering.
l File Upload:Select to let the user upload his own file for a printer order. Softproofs will not be available unless
the document is a Word or PDFfile.
l Word Mail Merge:Select to have the user enter custom fields or upload a database. The Word document
must be prepared in advance to be compatible.
l Document Name: Enter a Name for the document. The name for the document should be unique. To create a mul-
tilingual document name (a document name that switches with the language of the PrintShop Mail Web user interface),
add a document name according to the internal PrintShop Mail Web language string format. Language strings start with
the percentage character %, followed by the document name in which the words are joined without spaces and are capitalized within the compound. The string should end with the percentage character % (e.g. %ServiceManual%). Subsequently you should add this string to the various languages via the Languages section of the Settings section.
l Status:The selected status defines if end users can see the document in the New Document section and start cre-
ating new documents based on it. Typically administrators and designers can view these documents allowing them to
test the preview and job generation. Disabled documents are marked with a red background in the New Document sec-
tion and have a stop-symbol next to their name.
l Product code:This value is a unique code which can be used to link to an administration or ordering system.
l Description:Enter a descriptive text for the document in the Description field, this is optional. The description field
can be used now to add additional information for end users according to the file upload document template. Use the <!-
-break--> breakpoint to split the information. Text before the breakpoint is shown in the New Document overview and
document pages. The text after the breakpoint is shown on the File Upload page in the ordering process.
l PDFFile (Static PDFdocument type only):Click Browse to navigate to a PDF document on your local hard drive. This
will be the High Resolution version for this document. Afterwards an optional Low Resolution can be uploaded via the
properties page of the document.
Word Mail Merge Document
With the Word mail merge engine feature, users are able to prepare a document for mail merge in Word and do the actual
merge in PrintShop Mail Web using user input fields or a database. This feature also enables upload of static Word documents.
This provides with both a new static publication type and a dynamic one for companies who do not use or own PrintShop Mail
Design or do not need any of its more advanced features.
The following is required for Mail Merge to be available in PrintShop Mail Web:
©2010 Objectif Lune Inc - 87 -
Page 88

Publication Types
l Microsoft Word 2007 or higher.
l Microsoft Word to PDFAdd-In for Microsoft Office (Word 2007 only).
Both the .doc and .docx extensions are supported for Microsoft Word documents you upload.
Mail Merge documents can contain user input or database fields. When you create your document in Microsoft Word, each field
you create in Word becomes a new field in PrintShop Mail Web.
Only MergeField types are supported in PrintShop Mail Web's Mail Merge engine. Any other field type (Address,
etc)will not function when creating a new order.
To upload a Mail Merge document, see "Adding documents to a Publication Type" (page 87). Once the document is
uploaded in PrintShop Mail Web, you can change the type of each field by editing the document properties (see "User Input
Fields" (page 92)).
To create an order using a Mail Merge document, see the PrintShop Mail Web User Guide.
You can also kill any process from the Mail Merge engine which may be "stuck"by using the Word Maintenance page
in the Settings. See "Word Maintenance" (page 123) for details.
Correcting DCOMerrors
When PrintShop Mail Web is installed after Microsoft Office it will automatically make the necessary changes to the DCOM configuration in your operating system. However, if Microsoft Office is installed after PrintShop Mail Web, the DCOM configuration
must be changed manually. To do this, follow these steps:
1. Go to Start ->Run
2. Type dcomcnfg in 32-bit operating systems or mmc comexp.msc /32 in 64-bit operating systems.
3. Go in Components Services
4. Go in Computers
5. Go in My Computer
6. Go in DCOMConfig
7. Locate then Right-click on Microsoft Office Word 97 - 2003 (or Microsoft Word 97 - 2003) then click Prop-
erties.
8. Go to the Identity Tab
9. Select This User.
10. Enter the username and password of the local administrator account used for PrintShop Mail Web.
11. Click OK.
Delete documents from a publication type
To delete documents from a publication type folder:
1. Click Publication Types in the Menu bar. The Publication Types overview page is shown.
2. Select a publication type by clicking its name.
3. Click Documents in the side menu.
4. Select the checkbox in front of the document's name.
5. Click Delete to remove the document from the overview.
Note: A document can not be deleted while there are orders in the Order Manager that are based on this document. The
number of print jobs referring to this document is displayed in the column with the symbol.
©2010 Objectif Lune Inc - 88 -
Page 89

Edit document properties
To modify the properties of a document:
1. Click Publication Types in the Menu bar. The Publication Types overview page is shown.
2. Select a publication type by clicking its name
3. Click Documents in the side menu.
4. Select a document from the overview, the Documents Summary page is shown.
5. Click Properties in the side menu.
6. Click Edit. The Document Properties screen appears.
7. The document properties page contains the following sections:
l General: In this section you can change the name of the document, the status, and the product code.
Check the Attach Softproof to e-mail checkbox to make it possible to send a softproof with the e-mail sent on
status change (Ordered and Approved). Attach softproof is only available for static PDF and PrintShop Mail doc-
uments.
On the Softproof page (New document) customers can choose to check the Attach softproof to e-mail checkbox
and receive the softproof as an e-mail attachment than. This check box will only be shown for templates where
the softproof attachment option is enabled. If the attach softproof option is enabled and the softproof is too large
to send the e-mail is not send.
l Other: In this section it is possible to select Use custom thumbnail to display a custom logo, icon or image for
the document. Click Browse to locate the image file to be used as the thumbnail on your local hard drive.
8. Click Save to store the changes and upload the image file (if applicable).
Publication Types
Note: For the user to receive the e-mail with attachment the attachment size must not exceed the SMTP server or the user's
e-mail box capacity.
Manage production settings
The ProductionSettings lets you change default values for production specific parameters on document level. The document
production settings are related to the Shipping date calendar in the ordering process. To modify the Settings in the Production
section:
1. Click Publication Types in the Menu bar. The Publication Types overview page is shown.
2. Select a publication type by clicking its name
3. Click Documents in the side menu.
4. Select a PDF document from the overview, the Documents Summary page is shown.
5. Click Settings in the Production section from the side menu.
6. Click Edit. The Document Production Settings screen appears:
7. The document production settings page contains the following sections:
l Use System Defaults: The Use system default checkbox is on by default, which causes the remaining
options of this section to be disabled. If selected the system default values are used.
l Standard Production Time: In the Standard production time pull-down-menu the number of days to
produce documents can be defined. The values ranges from 0 to 15. The standard production time is used to calculate the first possible shipping date during the ordering process. The end user has the option to select a different date (via a calendar) but cannot select any of the data marked as standard production time. The values
specified in this section are automatically applied to new templates.
l Rush Order Production Time: The Rush order production time pull-down-menu represents the time frame
to produce the document measured in days for rush orders. The end user will be able to select a date between
the Standard Production Time and Rush Order Production Time. If such a date is selected as the shipping date
the rush rate of the document is added to the price calculation (surcharge) and the order is marked as a rush
order.
©2010 Objectif Lune Inc - 89 -
Page 90

Publication Types
If the value is set to same value as the Standard Production Time, customers cannot request a rush order.
l Include Today In Production Time: When checked, this option determines if the current date is counted
as a production day for orders placed before the time specified in the orders placed before pull-down-menu.
l Orders Placed Before: The Orders placed before option defines the time slot for the Include today for pro-
duction option. If an order is placed before the stated time and the Include Today In Production Time option is
selected, the current day is counted as production day. The default value of the Orders placed before pull-down-
menu is 13:00 hours.
When no Standard production time is specified and the Include today in production time checkbox is cheked it is pos-
sible for customers to order print jobs for the same day (when ordered before the specified Orders placed before time).
8. Click Save to store the changes.
Output options
The Output Options of a document depend on the document type. The output options of a static PDF document differ from the
output options of an PrintShop Mail document. The following sections explain the output options of both document types.
Output options for a PrintShop Mail document
To modify the document Output Options:
1. Click Publication Types in the Menu bar. The Publication Types overview page is shown.
2. Select a publication type from the overview by clicking its name.
3. Click Documents in the side menu.
4. Select a PrintShop Mail document from the overview, the Document Summary page is shown.
5. Click Output Options in the side menu.
6. Click Edit. The Document Output Options screen appears.
7. The document output options page contains the following sections:
l General:
l Operator Instructions: Enter a note or reminder for the operator regarding, duplex settings, paper
type, paper weight etc. This information is visible when the operator views a job in the Order Manager
section.
l Document's Printer: This static field states the printer that was saved with the document upon pub-
lishing.
l Output Printer: The selected driver defines the default item for the Printer list in the Print page (Order
Manager section). Defines the printer driver that is used to create PDF softproofs.
l Operator Defaults:
l Job Option File: Defines the default item for the Job Options list in the Create PDF page (Order Man-
ager section). Via this page the operator can output the page to PDF. By default the Job Option File field
is set to None, in this case the job options file installed with PrintShop Server is applied.
A Job Options file defines the characteristics of the resulting PDF document. The administrator can add
and remove Job Options in the Settings section.
l Folder Name: This option defines the default Output folder when the operator creates PDF documents
in the Order Manager section (In-Plant status). The operator can override the value in the Create PDF
page. For more information see "Output Folders" (page 144).
l Softproof Options:
l Job Options File: Select a Job Options file from the list a Job Options files define the characteristics of
the resulting PDF document. The administrator can add and remove Job Options in the Settings section.
By default this is set to None, in this case the Job Options file installed with PrintShop Server is applied.
©2010 Objectif Lune Inc - 90 -
Page 91

Publication Types
l Print Permissions: The Print permissions option controls the print permission for the PDF softproof.
There are three options: None, Low resolution and High resolution. Selecting None will prevent printing
the softproof; the print icon in the softproof window is disabled. Selecting the Low resolution option
allows customers to print the softproof with a resolution of 150 dpi.
8. Click Save to store the changes and upload the image file (if applicable).
Important: If a non-PostScript printer is selected in the Printer section, users may experience rendering engine errors when
a softproof is created!
Output options for a static document (PDF)
To modify the document Output Options:
1. Click Publication Types in the Menu bar. The Publication Types overview page is shown.
2. Select a publication type from the overview by clicking its name.
3. Click Documents in the side menu.
4. Select a static document (PDF) from the overview, the Document Summary page is shown.
5. Click Output Options in the side menu.
6. Click Edit. The Document Output Options screen appears.
7. The document output options page contains the following sections:
l General:
l Operator Instructions: Enter a note or reminder for the operator regarding, duplex settings, paper
type, paper weight etc. This information is visible when the operator views a job in the Order Manager
section.
l Printer: The selected Printer defines the selected printer item for the Printer list in the Print page (Order
Manager section.
l Operator Defaults:
l Folder Name: This option defines the default Output folder when the operator creates PDF documents
in the Order Manager section (In-Plant status).
l Documents: The Document section lets you replace the High Resolution version of the PDF and optionally
add a Low Resolution version. If the View Low Resolution PDF preview is enabled the end user will see this
document in the ordering process.
Especially for large PDF documents this options should be enabled and a Low Resolution PDF should be
uploaded. Using a Low Resolution PDF will reduce network bandwith and will reduce the respons time of the sys-
tem.
8. Click Save to store the changes.
Manage linked files
When a document is published the designer has the option to include the variable images required to print the document. Examples of variable images are: logo’s, stock photos, signatures etc. The PrintShop Mail Web interface allows the designer to manage these files online once the document is published. New files can be added by the designer, he can add this via PrintShop
Mail Web instead of re-publishing the document using PrintShop Mail.
To add a new file:
1. Click Publication Types in the Menu bar. The Publication Types overview page is shown.
2. Select a publication type from the overview by clicking its name.
3. Click Documents in the side menu.
4. Select a document from the overview.
©2010 Objectif Lune Inc - 91 -
Page 92

5. Click Linked Files in the side menu. The following screen appears:
The Linked Files overview showing all files related to the document
6. Click Add the Add dialog appears:
Publication Types
The Add dialog to upload new files
7. Click Browse and select a file on your local hard drive.
8. Click Save to upload the new file. The new file is added to the Linked Files Overview.
Important: When a new linked file is added with the same name a warning is shown. It is possible than to replace the existing file by clicking the Replace button.
Setting up web forms
Documents that require user input use a web form to collect information entered by the customer. Such a form contains of one
or multiple modifiable elements called input fields (e.g. text fields, checkboxes, radio buttons, etc.). This section describes
how to set the entry method and appearance of these fields.
User Input Fields
To make modifications to a user input field:
1. Click Publication Types in the Menu bar. The Publication Types overview page is shown.
2. Click the + symbol next to the publication type to view a list of its documents. Documents containing user input fields
have a value in the User Input Fields column ( ).
3. Select a document that requires user input from the overview. The Document's Properties page is shown.
4. Select User Input Fields in the side menu. The User Input Fields page is shown, this overview displays information
about the input fields (e.g. name, default value, input type):
©2010 Objectif Lune Inc - 92 -
Page 93

In the User Input fields overview information about input fields is shown
5. Select an input field from the overview. The following screen appears:
Publication Types
The options in the Item page define the appearance of the input field
6. The Item Properties page consists of following sections:
l General: The Name of the entry field can be modified and it is possible to add an informative text which
appears below the data entry field.
l Web Form Parameters: The options found in the Web form parameter section are used to define the
©2010 Objectif Lune Inc - 93 -
Page 94

Publication Types
appearance of the field. They depend on the selected field type. PrintShop Mail Web supports the following field
types (described separately):
l Plain text
l Pull-down
l Phone
l Image upload
l Collection
l Checkbox
l Rich text editor
l Regular expression.
l Default Value: The options in this section define the initial value of the field. The value can be overwritten by
the end user.
7. Click Save to store your changes.
When User Input Field Default items are specified in the Settings section it is not necessary to define the settings of a specific
item. With the Apply Default button it is possible to select a user input field default item which setting should be applied to the
current user input field. Clicking Save will replace the current user input field settings.
User Input vs Database Upload
The difference between a User Input and a Database Input document in PrintShop Mail Web is the following:
l User Input documents will always have the same data on each page. The price and number of records printed will
depend on how the pricing is setup for the document.
l Database Upload documents require a database matching what the document was designed with to be uploaded.
The number of records produced will equal the number of records in the database itself.
While the setting that determines whether user input or a database will be needed can be made from PrintShop Mail Web in the
Document's properties in the Publication type, your designer can also set it up beforehand in the PrintShop Mail Design document. In the datafield's properties, you can change the Source option from Database to User Input and vice-versa as
required.
Note that you can both User Input and Database fields in the same document. When this happens, you will be presented with
the user inputs first, then with the database upload.
Plain Text field
Plain text fields are the most commonly used input type and are used when you want the user to type letters, numbers, etc. in
a form. The height is measured in lines, by default the field allows a single line of input.
A required plain text field showing a description
Web Form Parameters
A plain text field has the following properties:
l Required: Defines the plain text option as a required field.
l Read Only: Customers can not edit the information, the value is static.
l Separator Line: Controls whether a separator line will be shown before this field. With this option web forms that
have more complex variable data can be arranged more logically.
©2010 Objectif Lune Inc - 94 -
Page 95

Publication Types
l Field Width: The width of the data entry field can be modified. The minimum width of the data entry field is 1 pixel,
the maximum width is 2048 pixels. By default the value is set to 300 pixels.
l Field Height: The height of the data entry field can be modified. The minimum height of the input field is 1 line and the
maximum height is 255 lines. By default the value is set to 1 line.
l Max. Input Characters: Defines the maximum number of characters that the user may enter. The number of char-
acters is unlimited. By default the value is set to 256 characters.
Default Value
This field type has the following Default Value options:
l Default Value: This pop-up menu contains a list of items referring to company information and account details. The
selected value defines the initial value for the field and it's retrieved automatically when creating new jobs. This is very
useful for business cards, letterheads and other versioned documents as it will automatically populate the field with
user specific information.
l Custom Value: Enter an initial value for the field. If a value is entered this will overwrite the selected Default Value.
Checkbox field
Checkboxes are used to allow the user to select one or more options of a limited number of choices. Based on the status of the
checkbox a 0 (zero) or 1 (checked) is set as the value of the user input field. This value can be used in an expression in the
PSM document to implement a specific condition (e.g. print or skip layouts). A data field can have only one checkbox, if a range
of checkboxes is required one data field should be created per option.
A range of checkboxes.
Web Form Parameters
l Separator Line: Controls whether a separator line will be shown before this field. With this option web forms that
have more complex variable data can be arranged more logically.
Default Value
l Custom Value: Defines the initial status of the checkbox (checked or unchecked).
©2010 Objectif Lune Inc - 95 -
Page 96

Publication Types
A layout condition to skip or print a layout, in PrintShop Mail Design
Collection field
Image Collections allows the end user to select an image by browsing a collection of predefined images. The PrintShop Mail
document should contain a variable image box, with an expression that refers to a (user input) data field. The Scale property
of this box defines how the image is resized relative to the box. Make sure that the Source of the data field is set to User Input.
Collections can be assigned to data fields across multiple documents and are managed in the Collection section. Collections
examples are: a set of stock images used for backgrounds or a group of company logo variants.
©2010 Objectif Lune Inc - 96 -
Page 97

An image collection
Publication Types
Web Form Parameters
When the Field Type is set to Collection the following options are shown:
l Required: Defines the collection field as a required field, requiring customers to select an image then.
l Separator line: A separator line between two data entry fields. With this option it is possible to arrange web forms
that have more complex variable data more logically.
l Collection: Select one of the available collections.
Image Upload field
The Image Upload field type enables the end user to upload an image file for the job. The PrintShop Mail document should contain a variable image box, with an expression that refers to a (user input) data field. The Scale property of this box defines
how the image is resized relative to the box. Make sure that the Source of the data field is set to User Input. For more infor-
mation about variable images refer to the Designer Guide.
The supported image formats are: JPEG, GIF, PDF.
An image upload field
Web Form Parameters
The Image Upload field has the following parameters:
l Required: Defines the image upload option as a required field requireing upload an image.
l Separator Line: Controls whether a separator line will be shown before this field. With this option web forms that
have more complex variable data can be arranged more logically.
©2010 Objectif Lune Inc - 97 -
Page 98

Publication Types
The image box in PrintShop Mail Design, the expression of this box is referring to a data field
Phone field
This field type is used to restrict the user supplied data to a pattern for a phone number.
Web Form Parameters
This field type has the following parameters:
l Required: Defines the phone option as a required field.
l Separator Line: Controls whether a separator line will be shown before this field. With this option web forms that
have more complex variable data can be arranged more logically.
l Phone Template: This field defines the pattern for the phone number. Use a #-symbol for each digit. The number of
# -symbol defines the maximum numbers of digits a telephone number can consist of.
Regular Expression field
Regular expressions allow text strings such as names, addresses, phone numbers, and other user information to be validated.
Regular Expressions can be used to constrain input and check lengths. PrintShop Mail Web allows the designer to enter a custom expression or to pick one from the expression library. For more information about this subject refer to the Regular Expres-
sions chapter.
Web Form Parameters
This field type has the following parameters:
©2010 Objectif Lune Inc - 98 -
Page 99

Publication Types
l Required: Marks the field as a required, the user needs to enter data in order to proceed.
l Separator Line: Controls whether a separator line will be shown before this field. With this option web forms that
have more complex variable data can be arranged more logically.
l Field Width: The width of the field in the web form. The minimum width of the data entry field is 1 pixel, the max-
imum width is 2048 pixels. By default the value is set to 300 pixels.
l Field Height: The height of the field in the web form. The minimum height of the input field is 1 line and the maximum
height is 255 lines. By default the value is set to 1 line.
l Max. Input Characters: Defines the maximum number of characters that the user may enter. The number of char-
acters is unlimited. By default the value is set to 256 characters.
l
Regular Expression: Type or paste the expression in this field. Click the -icon to display the Regular Expression
Library. This dialog shows a list of predefined expressions. Double click an expression to copy it to the Item Properties
page. This action will also copy the description to the Description field.
l
Test Data: Enter a sample string in this field and hit the -icon to test the expression.
Default Value
This field type has the following Default Value options:
l Default Value: This pop-up-menu contains a list of items referring to company information and account details. The
selected value defines the initial value for the field and it's retrieved automatically when creating new jobs. This is very
useful for business cards, letterheads and other versioned documents as it will automatically populate the field with
user specific information.
l Custom Value: Enter an initial value for the field. If a value is entered this will overwrite the selected Default Value is
ignored.
Enter three digits (0 through 9)
[0-9]{3}
Dutch postal code (e.g. 2718RP or 2718 RP)
Four digits where the first cannot be a 0.
An optional space
And two uppercase characters
[1-9]{1}[0-9]{3}\s?[A-Z]{2}
Rich Text Editor field
The Rich Text Editor input field allows the end user to apply basic formatting to the entered text. Such as: bold, italic, underline, alignment options and lists.
The entered data is converted into a RTF file. The user input field will contain the path to the RTF file. The PrintShop Mail document should have a variable with the TEXT_FILE() expression. The value parameter of this expression should state the
name of the user input data field, e.g. TEXT_FILE([Specification]). For more information about the TEXT_FILE() expression
refer to the PrintShop Mail User Guide.
©2010 Objectif Lune Inc - 99 -
Page 100

Publication Types
A rich text field
Web Form Parameters
l Required: Defines the Rich Text Editor field as a required field.
l Separator Line: Controls whether a separator line will be shown before this field. With this option web forms that
have more complex variable data can be arranged more logically.
l Max. Input Characters: Defines the maximum number of characters that the user may enter. The number of char-
acters is unlimited. By default the value is set to 256 characters.
l Field Width: The width of the field in the web form. The minimum width of the data entry field is 1 pixel, the max-
imum width is 2048 pixels. By default the value is set to 300 pixels.
l Field Height: The height of the field in the web form. The minimum height of the input field is 1 line and the maximum
height is 255 lines. By default the value is set to 1 line.
Rich Text Defaults
When the field type is set to Rich Text an additional group of options becomes available. These options are used to set basic
formatting of the content or to specify additional parameters of the online editor. The Rich Text Defaults section contains the
following properties:
l Font: Enter the name of the font for text. All text will have the same font applied. Note that this font should be installed
and activated on the PrintShop Mail Web server.
l Font Size: The fonts size applied to the text in the RTF file.
l Line Spacing: Space between lines of text measured fom baseline to baseline. The value is measured in points.
l Default Color: Enter the base color for the text (hexadecimal value, e.g. 0099FF).
l Color Palette: This field defines the contrast colors that can be used to mark ranges of text in the online editor. Col-
ors should be entered using hexadecimal values. The values are comma separated, the #-symbol is not required (e.g.
0099FF, FF0000, 00CC00).
l Background Color: Enter the background color for the text editor (hexadecimal value, e.g. 0099FF). Change this
value when the Default Color is set to white (#FFFFFF) or a light color, to enable the end user to see the entered text
clearly.
Default Value
This field type has the following Default Value option:
©2010 Objectif Lune Inc - 100 -
 Loading...