

Page 1

PrintShop Mail Web
Installation Guide
Page 2

Copyright Information
Copyright © 1994-2010 Objectif Lune Inc. All Rights Reserved.
No part of this publication may be reproduced, transmitted, transcribed, stored in a retrieval system, or
translated into any other language or computer language in whole or in part, in any form or by any means,
whether it be electronic, mechanical, magnetic, optical, manual or otherwise, without prior written consent of
Objectif Lune Inc.
Objectif Lune Inc. disclaims all warranties as to this software, whether expressed or implied, including without
limitation any implied warranties of merchantability, fitness for a particular purpose, functionality, data
integrity or protection.
PlanetPress and PrintShop Mail are registered trademarks of Objectif Lune Inc.
PostScript and Acrobat are registered trademarks of Adobe Systems Inc.
Pentium is a registered trademark of Intel Corporation.
Windows is a registered trademark of Microsoft Corporation.
Adobe, Adobe PDF Library, Adobe Acrobat, Adobe Distiller, Adobe Reader, Adobe Illustrator, Adobe Photoshop,
Optimized Postcript Stream, the Adobe logo, the Adobe PDF logo are either registered trademarks or
trademarks of Adobe Systems Incorporated in the United States and/or other countries.
Trademarks of other companies mentioned in this documentation appear for identification purposes only and
are the property of their respective companies.
Title PrintShop Mail Web - Installation Guide
Revision 2010/01/04
Page 3

Table of contents
1 Introduction ..................................................................................................................................................................................................... 1
1.1 Steps to install ................................................................................................................................................................................................... 2
1.1.1 Upgrading PrintShop Mail Web .................................................................................................................................................................. 2
2 Installing the software..................................................................................................................................................................................... 3
2.1 System requirements ......................................................................................................................................................................................... 4
2.1.1 Prerequisites ........................................................................................................................................................................................... 4
2.1.2 Minimum Hardware Requirements ............................................................................................................................................................. 4
2.1.3 Supported Operating Systems ................................................................................................................................................................... 4
2.1.4 Suggested requirements ........................................................................................................................................................................... 4
2.1.5 Notes....................................................................................................................................................................................................... 5
2.2 Running the installer .......................................................................................................................................................................................... 6
2.3 Configuring the database and web site .............................................................................................................................................................. 10
3 PrintShop Server service ................................................................................................................................................................................ 14
3.1 Creating a User Account for the PSS service....................................................................................................................................................... 15
3.2 Set the security privileges (local account) .......................................................................................................................................................... 18
3.3 Managing printers for PrintShop Server.............................................................................................................................................................. 21
3.4 Setting the PrintShop Server Service account ..................................................................................................................................................... 22
4 Important update notes ................................................................................................................................................................................. 27
4.1 Create backups................................................................................................................................................................................................ 28
4.1.1 Backup your database............................................................................................................................................................................. 28
4.1.2 Backup production files ........................................................................................................................................................................... 29
4.1.3 Backup skin files..................................................................................................................................................................................... 30
4.1.4 Backup configuration files ....................................................................................................................................................................... 30
4.2 Orders and Documents..................................................................................................................................................................................... 31
4.3 Skin changes ................................................................................................................................................................................................... 32
5 HTTP over SSL (HTTPS).................................................................................................................................................................................. 33
5.1 PrintShop Mail Web and HTTPS......................................................................................................................................................................... 34
5.1.1 SSL certificates....................................................................................................................................................................................... 34
5.1.2 Server installation................................................................................................................................................................................... 35
5.1.3 Client installation .................................................................................................................................................................................... 35
I
Page 4

1 Introduction
The instructions in this document describe how to install, set up, and initialize PrintShop Mail Web. After you
have finished installing the software components and configured them properly, you are ready to use your
PrintShop Mail Web system. Refer to the PrintShop Mail Web documentation for information about using the
various software components.
Before you begin installing PrintShop Mail Web and its associated files, make sure that the computers on
which you plan to install the software meet the minimum hardware and software requirements, and that you
have sufficient hard disk space to install the PrintShop Web software.
Objectif Lune Inc. © 2010 1
Page 5

1.1 Steps to install
As a general rule, we recommend to install the PrintShop Mail Web and its accompanying modules on a clean
machine using the supplied installer. A clean machine is any computer without preinstalled versions of PHP,
MySQL, Apache webserver or Microsoft IIS (or at least turned off).
The following steps are required to install the software:
1. Install the software components using the PrintShop Mail Suite installer (setup.exe)
2. Initialize the PrintShop Mail Web website and database
3. Optionally configure the PrintShop Mail Server service and set up printers
1.1.1 Upgrading PrintShop Mail Web
When upgrading PrintShop Mail Web we strongly advise to read the Important update notes (Page 27) section
and create backups of your current installation.
Note! Upgrading to PSM Web 7 cannot be undone, the PSM Web 7 database is not backwards
compatible with PSW 2.x.
Objectif Lune Inc. © 2010 2
Page 6

2 Installing the software
Following the instructions in this chapter will enable you to successfully install PrintShop Mail Web and its
components. After the installation the you will to setup the PSM Web database and web site. This section
covers the following subjects:
• System requirements (Page 4)
• Running the installer (Page 6)
• Configuring the database and web site
Objectif Lune Inc. © 2010 3
Page 7

2.1 System requirements
PrintShop Mail Web is a server software and is delivered as an executable installer with predefined
configuration settings. We strongly recommend to install the software on a clean installed Windows computer.
2.1.1 Prerequisites
Please ensure that the following requirements have been met before you run the PrintShop Mail Suite
installer:
• Login user must have administrator privileges
• Be sure to have an internet connection during the installation!
• PrintShop Mail Web requires the following system components to be installed on your computer prior to
installing the product:
▪ Microsoft .Net Framework
▪ Version 2.0 SP1 (on Windows 2000, XP and 2003 Server)
▪ Version 3.5 SP1 (on Windows Vista and 2008 Server)
▪ MSXML 4.0 SP2 Parser and SDK
▪ VCRedist (Visual C++ 2008 vanilla)
▪ Access Database Engine
The PrintShop Mail Suite setup will automatically check these requirements, missing third party software
packages will be downloaded from the internet and installed (but of course, not without your permission). The
mentioned components can also be downloaded and installed manually. Installers for these packages can be
downloaded from the Microsoft web site.
The software components are installed in the Program Files folder of the system drive. Normally this is drive
C.
2.1.2 Minimum Hardware Requirements
• Pentium 4, 3 GHz 32-bit (x86)
• 2024 MB of system memory
• 80 GB hard drive
2.1.3 Supported Operating Systems
• Microsoft Windows 2000 (32-bit)
• Microsoft Windows XP Professional (32-bit and 64 bit)
• Microsoft Windows Vista (32-bit and 64 bit)
• Microsoft Windows 2003 Server (32-bit and 64 bit)
• Microsoft Windows 2008 Server (32-bit and 64 bit)
2.1.4 Suggested requirements
For production servers, it's recommended to invest in specific server hardware, such as large RAID hard disks,
UPS (uninterrupted power supply) and enough RAM memory.
• Intel or AMD dual-core processor
• 4048 MB of system memory
• 300 GB hard drive
Objectif Lune Inc. © 2010 4
Page 8

Installing the software - System requirements
2.1.5 Notes
• Make sure that port 80 and/or port 443 are available for the Apache web server that comes with
PrintShop Mail Web.
• USB slot (not required for testing). Your server musts have a USB port to which the hardware key
('dongle') can be attached.
• Your network should be an Ethernet (TCP/IP) network, which is by far the most commonly used network
today.
• You should have a high speed Internet connection, and a fixed outgoing IP address, which implies that
you can run a web server.
• The PrintShop Mail Web server should be directly connected to the RIP or Printer. This means that the
PrintShop Mail Web server should be located on your local network (same subnet), on your premises,
and preferably not at your ISP's (Internet Service Provider, the company that provides your Internet
connection).
• Your router should be configured to allow incoming HTTP connections over port 80. Your network
administrator or your ISP should know how to enable this.
• The PrintShop Mail Web server has a built-in email server. This email server will send email notifications
to you and your customers when the order status changes. You'll need to know your ISP's SMTP server
address (usually something like smtp.yourprovider.com)
Objectif Lune Inc. © 2010 5
Page 9
2.2 Running the installer
1. Navigate to the PrintShop Mail Suite.exe file you downloaded from the Internet or locate the file on the
PrintShop Mail Suite product CD. Once located double click its icon to launch the installation program.
The Select Setup Language dialog appears.
2. Select your preferred language and click OK.
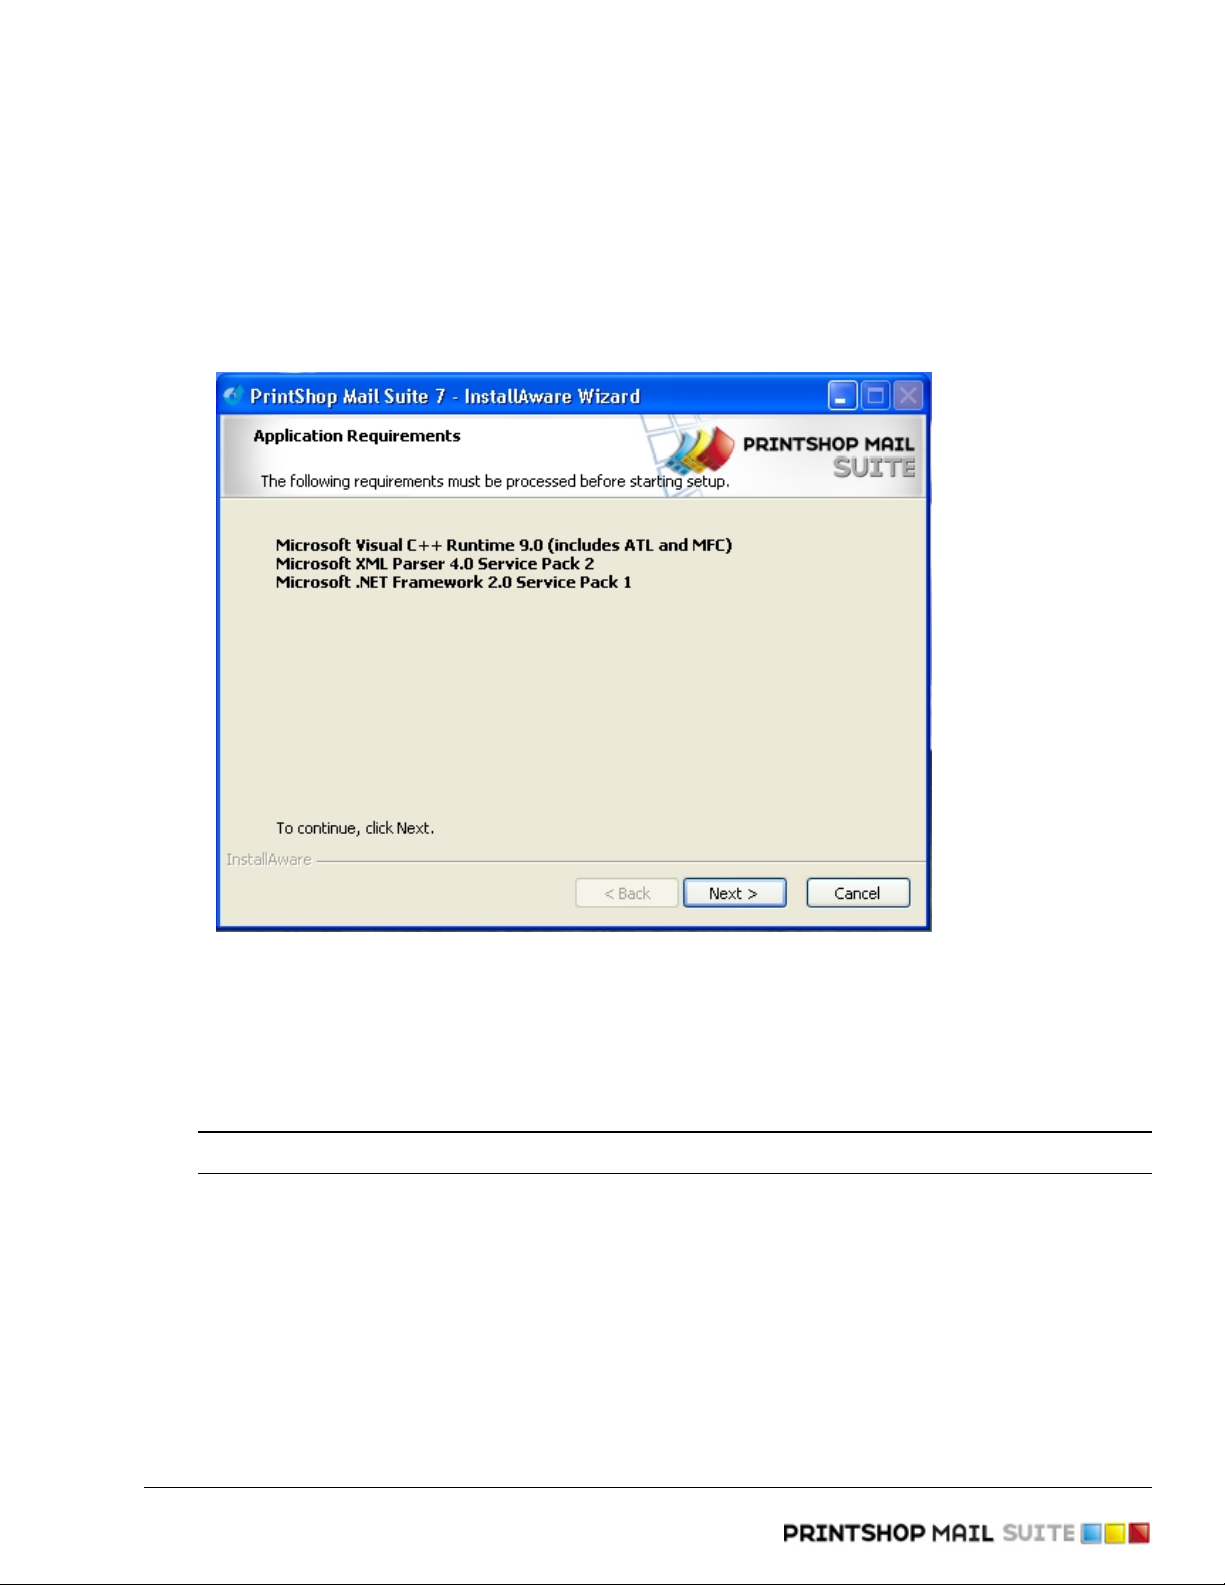
In case the prerequistes are not met, the following dialog is shown stating the missing items.
The stated components/libraries are missing
3. Click Next to download and install the required components. Once the installation of the components is
completed the the installer Welcome screen displays.
4. Click Next. The License Agreement page is shown.
5. Read the license agremeent. If the terms of the agreement are acceptable, click on I accept the terms of
the license agreement.
Note: You must accept the terms of the license agreement to continue.
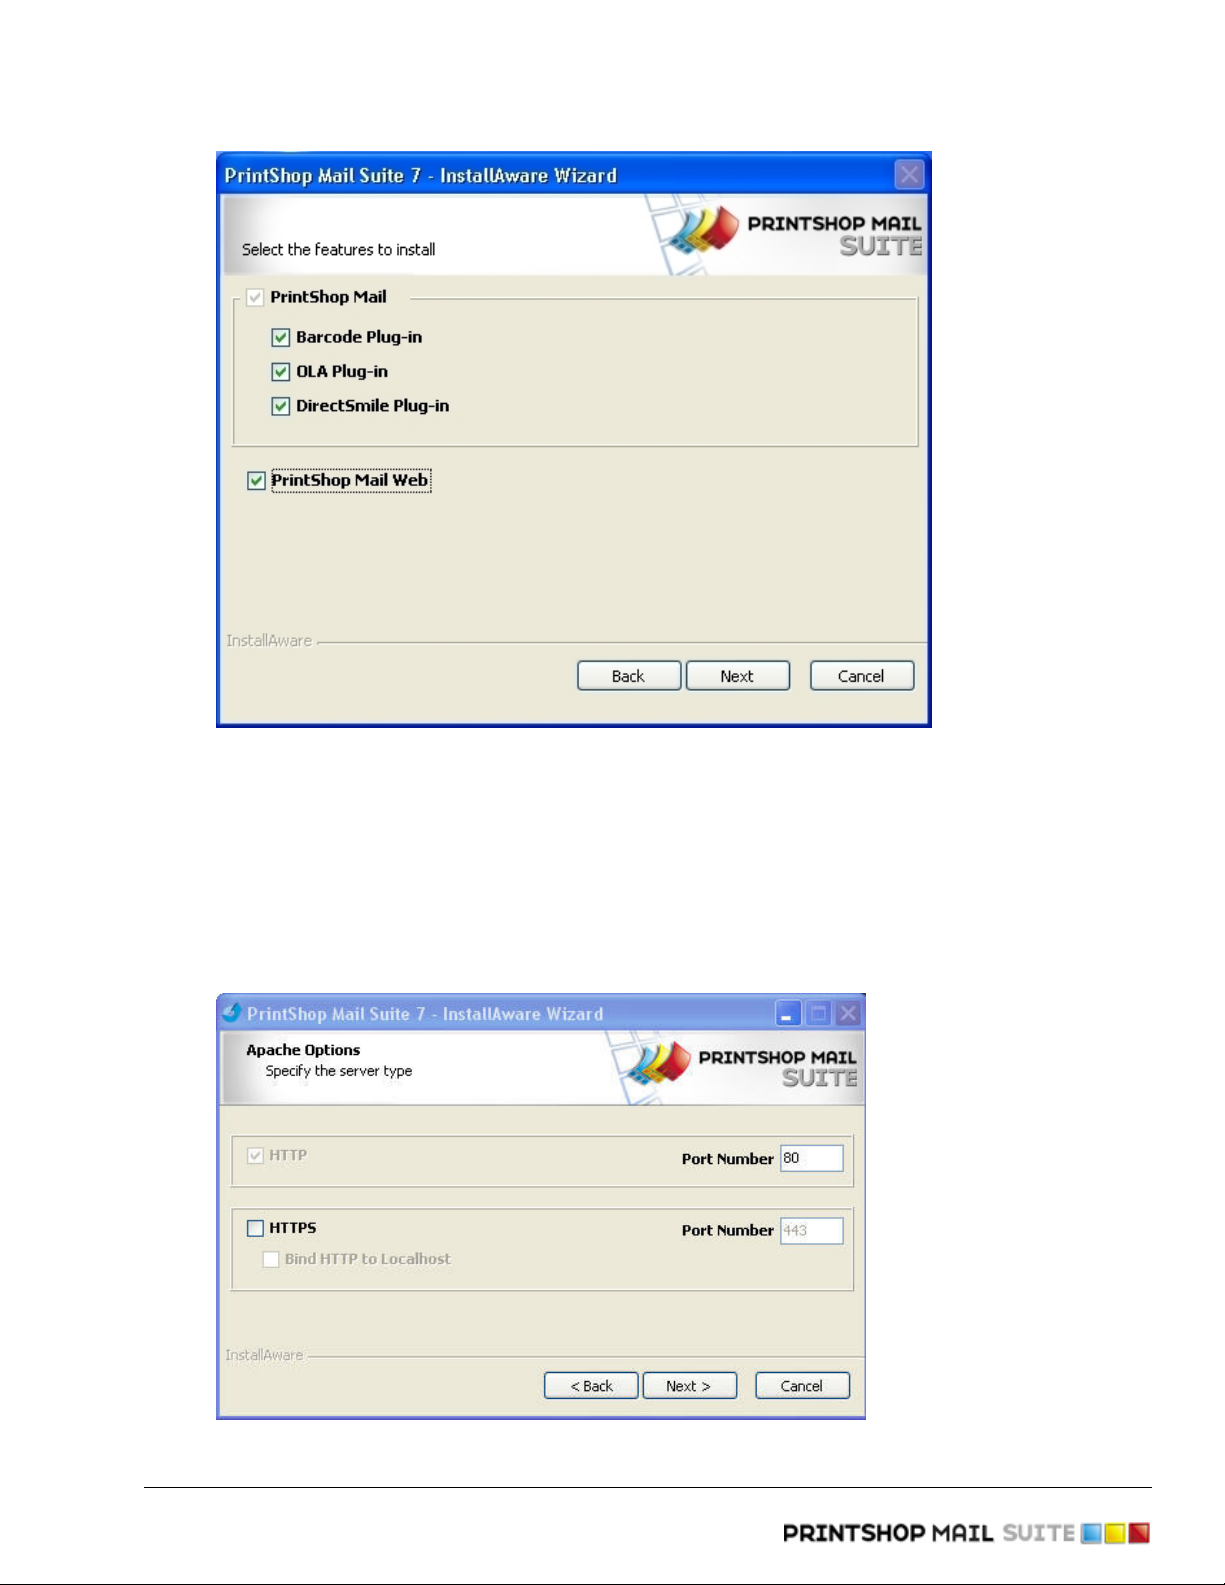
6. Click Next to continue the installation process. The Features page displays.
7. Select the PrintShop Mail Web option to install the web server, database server and PrintShop Mail
Server components required for PrintShop Mail Web. The PrintShop Mail application is a required by
PrintShop Mail Web and cannot be deselected. Unless you have specific setup requirements, we
recommend using the default options for the PrintShop Mail application.
Objectif Lune Inc. © 2010 6
Page 10
Installing the software - Running the installer
The features dialog
8. Click Next. The Apache Options screen appears.
PrintShop Mail Web uses the Apache web server, the software can be configures to support regular
(HTTP) and secured (HTTPS) types of connections. HTTP is required for the communication between
PrintShop Mail Server and PrintShop Mail Web. HTTPS enabls the secured transmission of web pages.
Please refer to the HTTP over SSL (HTTPS) chapter for more information on this subject. When selecting
Bind HTTP to localhost, PrintShop Mail Web only accpets HTTP connections from the local machine, from
all other systems PrintShop Mail Web accepts only HTTPS connections.
The Apache Options dialog
Objectif Lune Inc. © 2010 7
Page 11
Installing the software - Running the installer
9. Select the protocol(s) you wish to use.
Note: If the ports for these protocals are in use a warning appears. This may occur when an
existing web server like Apache, Internet Information Server (IIS) or applications like
Skype is already running on the same machine. The application or service that uses port
80 or 443 (https) must be closed in order to use PrintShop Mail Web. If you proceed
without closing the conflicting application, the installer application will not be able to start
the Apache web server. Apache can be started manually using the PrintShop Server
Managerapplication.
10. Click Next. The PriintShop Server Services screen appears.
PrintShop Mail Server is a Windows Service that runs in the background. Windows services by default
run as a virtual user: Localsystem. As the Local System-account has some limitations the PrintShop Mail
Suite installer assigns the currently logged on account to the PrintShop Mail Server service. For more
information on this subject please refer to the PrintShop Mail Server service chapter.
Note: In order to start a Windows Service your account must have a password (not empty).
11. Type the password of the displayed user.
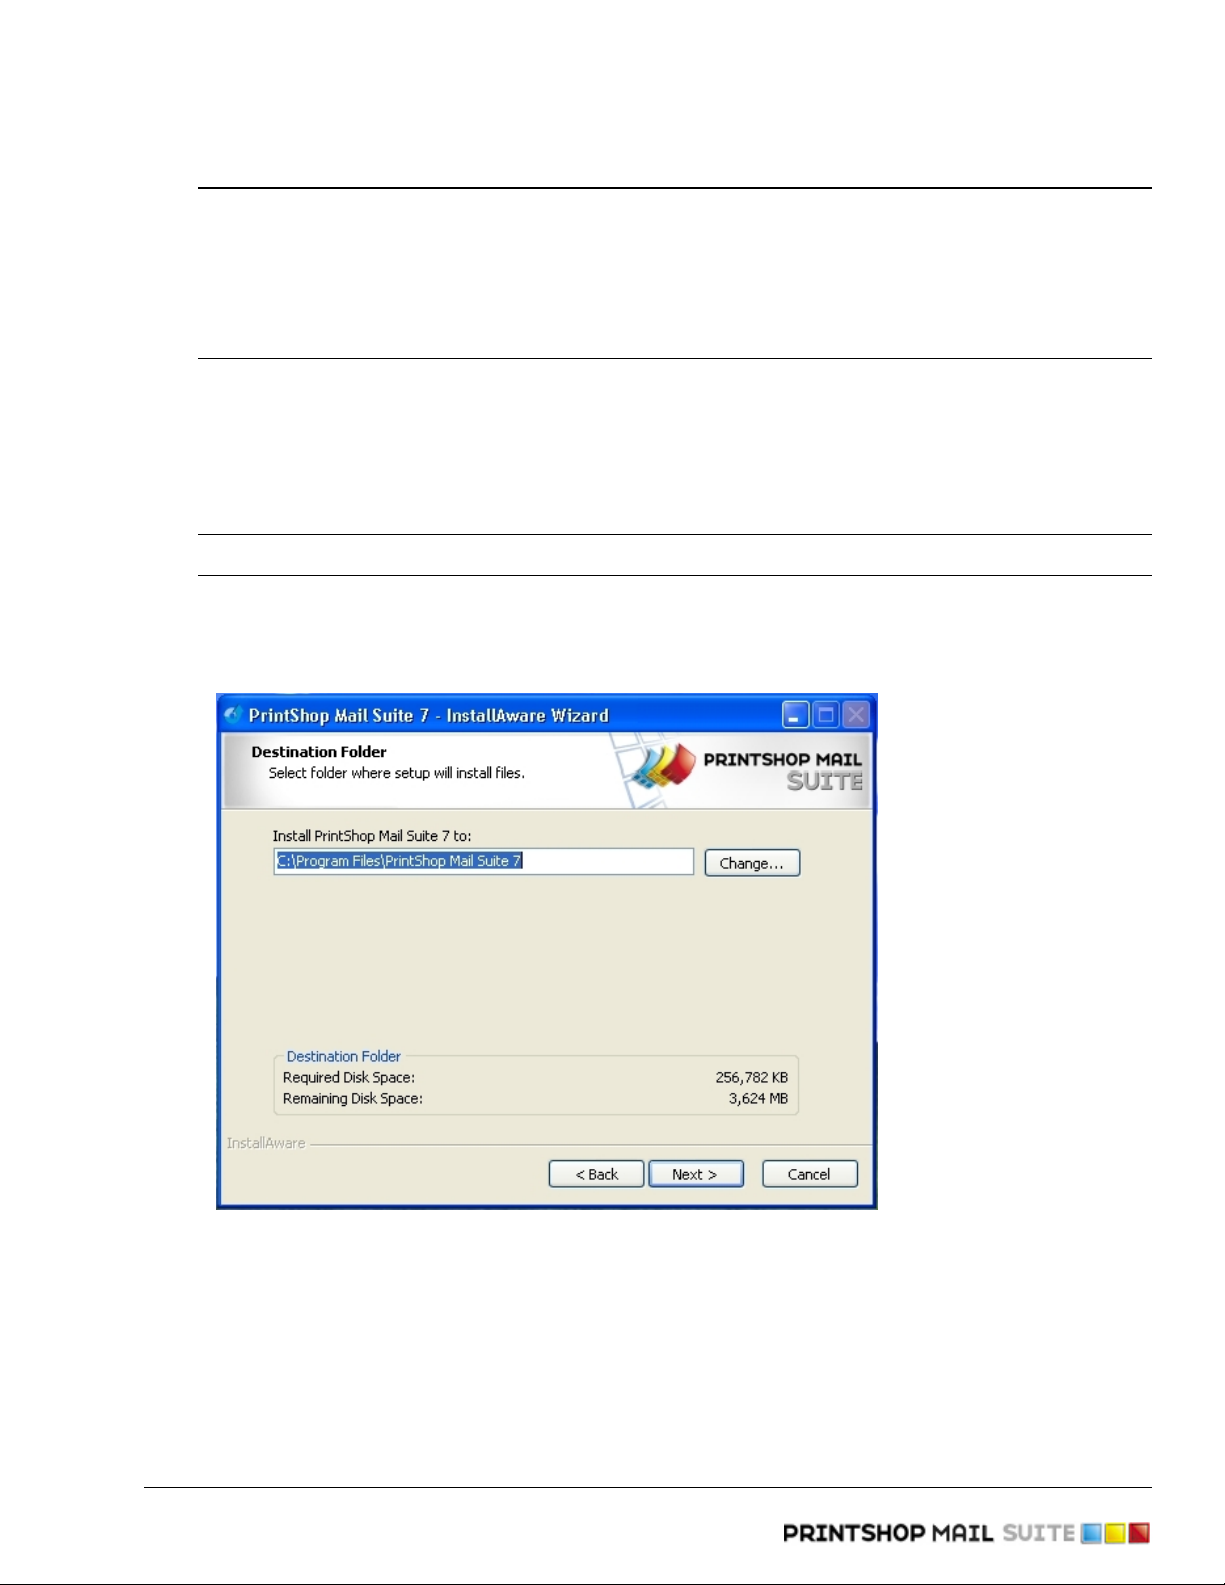
12. Click Next. The Destination Folder screen displays the drive and folder where PrintShop Mail Web will be
installed. To install the software elsewhere, click Change... and navigate to the desired folder.
Select the destination folder
13. Click Next. The Program Folder page is shown.
14. Enter a name for the shortcuts folder in the Start menu.
15. Click Next. The Ready to install screen appears.
16. Click Next to install the program files.
When the installation has been successful, the following dialog appears:
Objectif Lune Inc. © 2010 8
Page 12

Installing the software - Running the installer
Setup completed dialog
17. Click Finish to complete the installation of PrintShop Mail Web. Further configuration is still needed and
is explained in the following sections.
▪ Select the Check for Updates option to launch the Objectif Lune Update Manager service. It
contains a list of updates (if available) for the PSM Suite components that are installed on your
system. Click the Install icon to downloaded and install the new versions.
Objectif Lune Inc. © 2010 9
Page 13
2.3 Configuring the database and web site
After the installation you will need to launch your web browser and navigate to the PrintShop Mail Web web
site. You can reach the web site using localhost in your web browser's address bar. The first time you visit the
web site the First Run page will be shown. This web page will initialize the PrintShop Mail Web web site and
database and guides you through this process step by step.
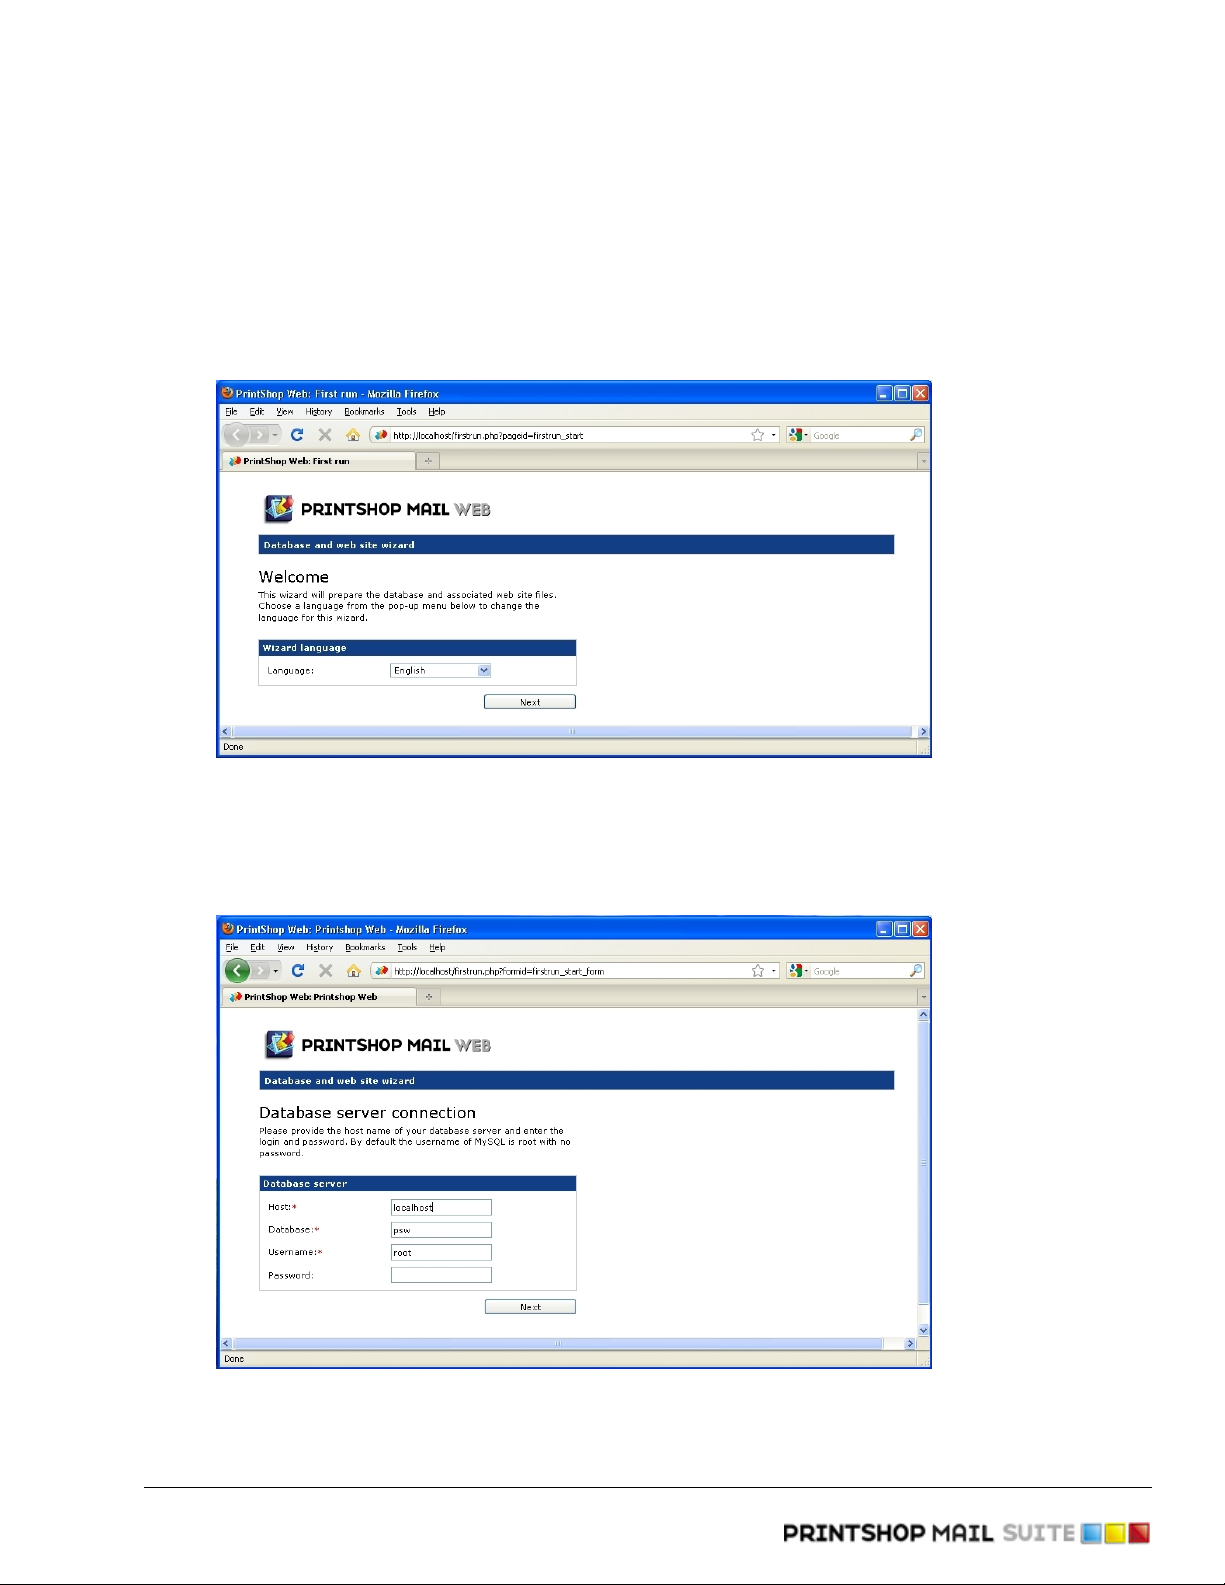
1. Open your web browser and enter localhost in the address bar. The First Run wizard appears.
Choose your language
The wizard will first allow you to select a language to use.
2. Select a language and click Next to proceed to the Database server connection page.
Specify your MySQL host, user name and password
Objectif Lune Inc. © 2010 10
Page 14

Installing the software - Configuring the database and web site
Provide the host name of your database server and enter the login and password. If both the web server
and database server (typical installation) are running on the same machine, you can use localhost as
the host and use root as the user name.
During the installation of the MySQL database software a user is created with the name root, with no
password. To modify the password you can use an application like MySQL Administrator afterwards. The
MySQL Administrator is part of the MySQL GUI Tools suite which you can download for free from the
MySQL website: http://dev.mysql.com/downloads/gui-tools/
Note: The incDBLink.php file (located in the Functions folder of the PSW Website folder) should
be changed accordingly.
3. Leave all the server connections options set to the default value unless you need to make a specific
change. Click Next to proceed.
When PrintShop Web find a database wich the name psw, the Database Exists page may appear:
This page allows you to use the existing database or to overwrite it. If an older version of the system is
found you will be able to update the database keeping the existing orders, templates, etc. Once the
installation procedure is finished you should check that the companies, templates and other information
in the system has default values set for items like the pricing settings.
Note: When upgrading PrintShop Web we strongly advise to read the Important update notes
(Page 27) chapter and create backups of your current PrintShop Web installation. You can
use the MySQL Administrator tool described before to create a backup of your psw
database.
4. Once the database is created several system defaults need to be set. These settings can be modified
and expanded in PrintShop Web once the first run wizard is completed.
Objectif Lune Inc. © 2010 11
Page 15

Installing the software - Configuring the database and web site
Specify the name for the initial company and set system defaults
The system default settings page requires input for the following system defaults:
▪ Company Name: The name of the initial company. This field is not visible when upgrading a
previous version of PSW.
▪ Currency: The selected currency will be presented in Checkout and Order Manager sections of the
system.
▪ Taxation System: The standard Taxation system.
▪ Tax Rate: The percentage of the standard taxation system.
▪ Setup Cost: The surcharge for setting up your production environment and workstations.
▪ Rush Order Surcharge: The surcharge for urgency printing (if applicable).
▪ Weight Unit: The weight unit used to define the total weight of the documents/jobs in the
checkout. PSW supports kg and lb.
▪ Standard Production Time: The number of days to produce documents.
▪ Rush Order Production Time: The number of production days for rush orders.
Enter a name for the initial company and verify the remaining parameters. Refer to the Administrative
Guide for more information about these parameters. Click Next to proceed to the Registration page.
Objectif Lune Inc. © 2010 12
Page 16

Installing the software - Configuring the database and web site
5. We encourage you to register your PrintShop Web product in order to have the benefit of free product
information, new release information, and security updates.
Register your version of Printshop Web in order to take advantage of free product information
Enter your details and click Send registration or Register later to continue.
6. The website and database initialization process is now completed and you are ready to use the system.
Click Go to enter the login page of PrintShop Mail Web
For both the login name and password use administrator to enter the system and you are ready to setup
the system for your clients.
Objectif Lune Inc. © 2010 13
Page 17

3 PrintShop Server service
This section describes the configuration of a distinct local user-account for the PrintShop Server service.
Note: This description focuses on procedures on Windows XP; on other platforms this procedure may
be slightly different.
PrintShop Server (PSS) is a Windows Service that runs in the background. Windows Services mostly run under
a different Windows User Account than the one any end-user has used to log on to their system called Local
System. Because the Local System-account has some limitations the PrintShop Server service will run by
default under the administrator end-user account that was logged on to the system during the installation of
PrintShop Web.
In order to properly serve PrintShop Web, it is vital that the account that PrintShop Server runs under has
enough security privileges on the local machine, and perhaps on the network, to access (network-)printers or
other resources it needs.
First and foremost, as the name Local System implies, the account is only valid for the local machine. Network
printers will therefore not available for use in PrintShop Server. The second limitation is printer management.
PrintShop server will only have access to printers installed for the user account under which PrintShop Surver
runs. This means that if Administrator has logged on and manages his printers, this might not propagate to
the Local System account’s printers, which PrintShop Server would use!
To avoid these issues with Printer Management, we strongly advise to make sure that the PrintShop Server
service runs under a user-account with administrative priveleges. It is necessary to install and configure your
printer(s) explicitly for this user-account, - for the PrintShop Server service.
What follows is a description of how to create a new (local) user-account with sufficient administrative
privileges on the system where the PrintShop Server service is running.
Note: In case your network-configuration requires this user-account to be a Domain User to be able
to access network resources, like network-printers, please contact your Domain Administrator to
set up a proper configuration. If you need further assistance, please feel free to contact
technical support (support@printshopweb.com) or your local distributor.
This section covers the following subjects:
• Creating a User Account for the PSS service
• Set the security privileges (local account)
• Managing printers for PrintShop Server
• Setting the PrintShop Server Service account
Objectif Lune Inc. © 2010 14
Page 18

3.1 Creating a User Account for the PSS service
1. Click Control Panel in the Start menu in windows. If the Control Panel looks like this, click on Switch to
Classic View:
The Control Panel window
It should look like this now:
The Control Panel window
Objectif Lune Inc. © 2010 15
Page 19

PrintShop Server service - Creating a User Account for the PSS service
2. Open Administrative Tools:
The Administrative Tools window
3. Open the Computer Management window and expand Local Users and Groups:
The Computer Management window
4. Right-click Users and select New User… the New User window appears
5. Enter a User name, a Password and select the check boxes as shown below:
Objectif Lune Inc. © 2010 16
Page 20

PrintShop Server service - Creating a User Account for the PSS service
The New User window
6. Click Create and after that click Close. The account is created; now the security privilege need to be set.
Objectif Lune Inc. © 2010 17
Page 21

3.2 Set the security privileges (local account)
1. Select the Groups in the Computer Management pane on the left side of the window.
2. Right-click Administrators in the right pane and select Properties in the menu that appears. The
following window will be shown:
The Administrators Properties window
3. Click Add… The Select Users, Computers, or Groups window appears. In this window the From this
location option is set to a domain, in this example atlas.local.
The Select Users, Computers, or Groups window
In case you would want to select another domain, or use a local account, click Locations…, which will
lead to the following window:
Objectif Lune Inc. © 2010 18
Page 22

PrintShop Server service - Set the security privileges (local account)
Select the location you want to serch for users.
In this example the local computer (PRINTSHOPWEB) must be selected, because we want to set the
security settings for the just created local account.
4. Click OK to proceed.
The Select Users window
5. Type the name of the local account to set the security settings.
6. Click Check Names to ensure that the account-name was entered correctly:
The Select Users window
7. Click OK twice. The Administrators Properties window appears showing the new user.
Objectif Lune Inc. © 2010 19
Page 23

PrintShop Server service - Set the security privileges (local account)
The Administrator Properties window
Objectif Lune Inc. © 2010 20
Page 24

3.3 Managing printers for PrintShop Server
Installed printers differ per user in Windows, so we need to Log Off from Windows via the Start menu and Log
On with the account that will be used for PrintShop Server.
Note: PrintShop Server needs at least one PostScript printer to operate.
1. Open the Printers and Faxes settings from the Windows Control Panel (use the Windows Start menu)
2. Click the Add Printer icon, Add Printer wizard appears
The Printers and Faxes window
3. Add any PostScript printer you like through the Add Printer wizard.
4. Once created the printer is added to the Printers and Faxes overview.
The new printer is added to the Printers and Faxes window
Note: The PrintShop Server service must be restarted after changing printer settings (or when
printers have been added) to be able to use these new settings (or printers).
Objectif Lune Inc. © 2010 21
Page 25

3.4 Setting the PrintShop Server Service account
Now that we have set-up an account for PrintShop Server, PrintShop Server must be configured to use it.
1. Start PrintShop Server Manager from the Start menu.
The PrintShop Server Manager main window
2. Click Services, which will lead to the Service window and locate PrintShop Server in the list:
Locate PrintShop Server
3. Right-click PrintShop Server and select Properties in the menu that appears, which will lead to the
following window:
Objectif Lune Inc. © 2010 22
Page 26

PrintShop Server service - Setting the PrintShop Server Service account
PrintShop Server service properties
4. Select the Log On tab, and select the This account:-option
PrintShop Server service properties log on
Objectif Lune Inc. © 2010 23
Page 27

PrintShop Server service - Setting the PrintShop Server Service account
5. Click Browse…. The following window will appear:
Select a user
6. Type the name of the newly created account:
The Select Users window
7. Click Check Names to be sure we entered it correctly, clicking OK after will lead to the following window:
Objectif Lune Inc. © 2010 24
Page 28

PrintShop Server service - Setting the PrintShop Server Service account
PrintShop Server service properties log on as PrintshopServer_User
8. The Password is an old and invalid value, so the Password field must be set to the password for the new
account:
The Locate PrintShop Server window
9. Click OK to proceed
Log on as service rights granted
10. Clicking OK will return you to the following window:
Objectif Lune Inc. © 2010 25
Page 29

PrintShop Server service - Setting the PrintShop Server Service account
Log on as PrintShopServer_User
11. Right-click PrintShop Server and select Restart in the menu that appears.
Restart service
Note: Wait for the restart to finish: (do not click Close, this dialog will disappear automatically).
Objectif Lune Inc. © 2010 26
Page 30

4 Important update notes
Before updating an existing PSW 2.x installation please read the following:
• Creating a backup (Page 28)
• Orders and Documents (Page 31)
• Skin changes (Page 32)
Note! Upgrading to PSM Web 7 cannot be undone, the PSM Web 7 database is not backwards compatible with
PSW 2.x.
Objectif Lune Inc. © 2010 27
Page 31

4.1 Create backups
Backup all files and databases prior to the migration. In case of problems during the update installation this
will enable the contents of PrintShop Mail Web to be restored.
• Backup configuration files (Page 30)
• Backup production files (Page 29)
• Backup skin files (Page 30)
• Backup your database (Page 28)
4.1.1 Backup your database
To create a backup of the database:
1. Download and install the MySQL GUI tools. These tools can be downloaded for free at:
http://dev.mysql.com/downloads/gui-tools/
2. Launch the MySQL Administrator application. Existing backup projects are listed in the lower left area of
the sidebar.
The MySQL Administrator window.
3. If you are not working from a previously saved backup project, click the New Project button to create a
new backup project. You cannot begin configuring a backup operation without either loading an existing
project or creating a new project.
4. Once you have configured your backup project, you can click the Save Project button to save your
project for future use. To start your backup, click the Execute Backup Now button. You will be prompted
for a path and filename for the backup file, after which the backup operation will begin.
MySQL Administrator can be used to restore the database backup files created using MySQL Administrator.
The backup files created by MySQL Administrator are similar but not identical to those created by
mysqldump. A consequence of the differences is that MySQL Administrator cannot read dump files created by
mysqldump.
Objectif Lune Inc. © 2010 28
Page 32

Important update notes - Create backups
4.1.2 Backup production files
PrintShop Mail Web stores the production files in a central location located in the web site folder of the PSM
Web system. This folder includes: template documents, job created by the visitors, image collections, job
option files etc. Most of these items are referred to by the PSM Web database. It is very important to create a
backup of the database that goes with the current state of your files folder.
To create a backup of the files folder:
1. Stop the PrintShop Mail Server service. This can be done via the Windows Services dialog
(Administrative tools) or by launching the PrintShop Server - Service Manager application. The latter can
be found in the following locations:
▪ For PSW 2.x this is:
C:\Program Files\PrintShop Web\PrintShop Server
▪ For PSM Web 7 this is:
C:\Program Files\PrintShop Mail Suite 7\PrintShop Mail Web\PrintShop Server
Note: If you do not stop the PSM Server service files might be in use (busy) due to the template
cache of PrintShop Server.
2. Locate the web site folder of your PrintShop Mail Web installation.
▪ For PSWeb 2.x this is:
C:\Program Files\PrintShop Wev\Website
▪ For PSM Web 7 this is:
C:\Program Files\PrintShop Mail Suite 7\PrintShop Mail Web\Website
3. Copy the files folder to an external hard drive or share on your network.
The files folder of a PrintShop Mail Web 7 installation.
Objectif Lune Inc. © 2010 29
Page 33

Important update notes - Create backups
4.1.3 Backup skin files
Skin files should be backupped when you created customs skins or altered the default skins supplied with
PrintShop Mail Web.
To create a backup of your skins:
1. Locate the web site folder of your PrintShop Mail Web installation.
▪ For PSWeb 2.x this is:
C:\Program Files\PrintShop Wev\Website
▪ For PSM Web 7 this is:
C:\Program Files\PrintShop Mail Suite 7\PrintShop Mail Web\Website
2. Copy the templates folder to an external hard drive or share on your network.
The templates folder of a PrintShop Mail Web 7 installation.
Note: Custom skins or skins from older/newer versions of PrintShop Mail Web might not work
properly in newer or older versions of PrintShop Mail Web.
4.1.4 Backup configuration files
If you modified the httpd.conf and ssl.conf files (f.e. changed the VirtualHost(s) ) these should be backupped
too.
To create backups of your configuration files:
1. Locate the conf folder of the Apache folder which resides in the PrintShop Mail Web folder.
▪ For PSW 2.x this is:
C:\Program Files\PrintShop Web\PrintShop Server\Apache\conf
▪ For PSM Web 7 this is:
C:\Program Files\PrintShop Mail Suite 7\PrintShop Mail Web\Apache\conf
2. Copy the httpd.conf and ssl.conf files to an external hard drive or share on your network.
Objectif Lune Inc. © 2010 30
Page 34

4.2 Orders and Documents
• In PSM Web 3 the relationship between orders and documents (print jobs) is changed. Orders now can
contain multiple documents which is visualized using a tree view. To avoid misunderstanding by
customers it is advised to change the status of orders in the Ordered and Approved status folders to In-
plant. Price related items remain intact although the presentation is different due to changes in the
PrintShop Web user interface.
• PrintShop Mail focuments (templates and print jobs) in the system are automatically converted to the
PrintShop Mail 7 format the first time they are used for previews or print actions. This action is
performed only once.
Objectif Lune Inc. © 2010 31
Page 35

4.3 Skin changes
• As PSM Web 7 includes various user interface enhancements and new interface elements (e.g. modular
dialogs) custom sskins should be checked and updated to support these new items. To test your existing
skin(s) with PSM Web 7:
▪ Install PSM Web 7 on a stand-alone machine.
▪ Copy your skin(s) to the templates folder of the PSM Web 7 installation.
▪ Test and modify your skin
▪ Once completed create a backup of the modified skin and copy it to your production server.
• The 'Default' skin of PSM Web 7 uses a gradient image as background image in the menu bar and table
headers. Although this looks very nice it prevents the web browser from showing the contrast color set
in the Edit Web Design page. If the contrast color is preferred the style-element-menu.php of the default
skin should be changed. The original code is still there but commented out. Simply remove these
comments and comment the lines that render the gradient image.
Objectif Lune Inc. © 2010 32
Page 36

5 HTTP over SSL (HTTPS)
HTTPS (Hypertext Transfer Protocol over Secure Socket Layer, or HTTP over SSL) is a Web protocol used to
encrypt and decrypt user page requests as well as the pages that are returned by the Web server.
SSL is an open, non proprietary protocol that Netscape has proposed as a standard to the World Wide
Consortium (W3C). HTTPS is not to be confused with S-HTTP, a security-enhanced version of HTTP developed
and proposed as a standard by EIT.
When you visit a web site with a Uniform Resource Locator (URL) that starts with https:// your browser's
HTTPS layer will encrypt information send from the client to the server. The acknowledgment you receive from
the server will also travel in encrypted form, arrive with an https:// URL, and be decrypted for you by your
browser's HTTPS sublayer.
HTTPS and SSL support the use of X.509 digital certificates from the server so that a user can authenticate
the sender.
Objectif Lune Inc. © 2010 33
Page 37

5.1 PrintShop Mail Web and HTTPS
The PrintShop Mail Web installer gives you the option to support both HTTP and HTTPS connections. If you do
not install HTTPS during the installation you can enable it afterwards.
5.1.1 SSL certificates
When you enable HTTPS you have to obtain a ssl certificate from a certificate authority like Verisign
(http://www.verisign.com), this certificate and the private key must be placed in /apache/certificate. PSW
comes with a sample certificate, which will work on PrintShop Mail Web servers that can be reached through
the URL https://localhost. For any other URL the supplied certificate will generate security warnings when an
user connects to the PrintShop Mail Web server.
Most certificate authorities have detailled information on their web site on how to obtain, create and install
certificates. The following steps will help you generating a Certificate Signing Request (CSR) and need to be
performed on the PSM Web server.
1. Download and install Openssl. Openssl can be found at the following location:
http://www.slproweb.com/
2. Navigate to the OpenSSL folder and launch the OpenSSL.exe located in the bin folder
3. Enter the following command to generate a private key:
openssl genrsa -out yourdomainname.key 1024
The example above generates a genrsa encrypted key. These settings may differ between certificate
providers.
4. Enter the following to create the CSR:
openssl req -new -key yourdomainname.key -out yourdomainname.xsr
5. Read the instructions and completed the information on screen (use YOUR details).
You are about to be asked to enter information that will be
incorporated into your certificate request.
What you are about to enter is what is called a Distinguished Name
or a DN. There are quite a few fields but you can leave some blank
For some fields there will be a default value,
If you enter '.', the field will be left blank.
----Country Name (2 letter code) [AU]:NL
State or Province Name (full name) [Some-State]:Zuid Holland
Locality Name (eg, city) []:Zoetermeer
Organization Name (eg, company) [Internet Widgits Pty Ltd]:Objectif Lune BV
Organizational Unit Name (eg, section) []:R and D
Common Name (eg, YOUR name) []:www.yourdomainname.com
Email Address []:info@yourdomainname.com
Please enter the following 'extra' attributes
to be sent with your certificate request
A challenge password []:
An optional company name []:
Enter your host address at "Common Name", if you enter "yourdomainname.com",the certificate is
limited to the https://yourdomainname.com and cannot be used for https://www.yourdomainname.com.
Objectif Lune Inc. © 2010 34
Page 38

HTTP over SSL (HTTPS) - PrintShop Mail Web and HTTPS
You can leave the "challenge password" and "optional company name" empty. This completes to steps
to create a private key and the csr, both files are created inside the folder of OpenSSL.exe. You will
need the csr when obtaining a SSL certificate.
Place the key file generated in step 3 in Apache/certificate/psw.key in your PrintShop Mail Web
installation folder. The .crt file provided by your certificate authority must be installed in Apache/
certificate/psw.crt in your PrintShop Mail Web installation folder.
5.1.2 Server installation
During the installation of PSM Web all components to run HTTPS are installed but will be disabled if you did
not choose to select the HTTPS protocol. To enable and configure HTTPS:
1. Open the httpd.conf file located in the conf folder of the Apache folder (inside the PrintShop Web folder).
2. Add the following module rule:
LoadModule ssl_module modules/mod_ssl.so
3. Open the ssl file located in the conf folder of the Apache folder (inside the PrintShop Web folder).
4. Make sure that the following entries refer to the location of your certificate files:
▪ SSLCertificateFile (.crt)
▪ SSLCertificateKeyFile (.key)
5. Restart the Apache service using the PrintShop Server Manager.
5.1.3 Client installation
Important: The supplied certificate only works on PrintShop Mail Web servers that can be reached
through the URL http://localhost. For any other URL the supplied certificate will generate
security warnings when an user connects to the PrintShop Mail Web server.
1. Close all opened web browser windows.
2. Open the an Internet Explorer web browser and go to https://localhost (notice that this is https, not
http!).
3. If you don't see the following dialog and PrintShop Mail Web loads normally, all settings are correct and
you may stop reading this section:
Objectif Lune Inc. © 2010 35
Page 39

HTTP over SSL (HTTPS) - PrintShop Mail Web and HTTPS
This certificate is not accepted yet
4. Click View Certificate to view the certificate. The following dialog appears:
View the certificate
5. Click on Install Certificate, progress through the wizard and click Yes.
Test Certificate by Web Browser
1. Open an internet browser and add the following URL to test the non-secure version: http://localhost
2. Open an internet browser and add the following URL to test the secure version: https://localhost
Important: If you see the following window while visiting the secure version, the certificate isn't
properly installed on your system (See Install Certificate). Please do not close the windows and repeat
Install Certificate.
Objectif Lune Inc. © 2010 36
Page 40

This certificate is not accepted yet
HTTP over SSL (HTTPS) - PrintShop Mail Web and HTTPS
Important: If you see the following window while visiting the secure version, the URL you are
using is not https://localhost but some other one!
The URL you used doesn't mach the URL in the certificate
Test Certificate in PrintShop Mail
1. Open PrintShop Mail. In the PrintShop Mail Web publishing preferences, please set the URL property to:
https://localhost
2. Click on Test Connection...button. If you the following message, please re-check the URL and re-test by
webbrowser if the URL was set correctly.
Objectif Lune Inc. © 2010 37
Page 41

HTTP over SSL (HTTPS) - PrintShop Mail Web and HTTPS
There is no certificate installed yet for this server
Objectif Lune Inc. © 2010 38
 Loading...