

Page 1

Page 2

Legal Notices
Copyright © 2003 by ScanSoft®, Inc. All rights reserved. No part of th is publ ication may be
transmitted, transcribed, reproduced, stored in any retrieval system or translated into any
language or computer language in any form or by any means, mechanical, electronic,
magnetic, optical, chemical, manual, or otherwise, without prior written consent from the
Legal Department at ScanSoft, Inc., 9 Centennial Drive, Peabody, Massachusetts 01960.
Printed in the United States of America and in the Netherlands.
The software described in this book is furnished under licens e and may be used or copied
only in accordance with the terms of such license.
Important Notice
ScanSoft, Inc. provides this publication “as is” without warranty of any kind, either express or
implied, including but not limited to the implied warranties of merchantability or fitness for a
particular purpose. Some states or jurisdictions do not allow disclaimer of express or implied
warranties in certain transactions; therefore, this statement may not apply to you. ScanSoft
reserves the right to revise this publication and to make changes from time to time in the
content hereof without obligation of ScanSoft to notify any person of such revision or
changes.
Trademarks and Credits
OmniForm, eOmniForm.com, OmniForm Filler, Dragon NaturallySpeaking, and ScanSoft are
registered trademarks or trademarks of ScanSoft, Inc., in the United States and/or other
countries.
Microsoft Windows XP Tablet PC Edition is a registered trademark of Microsoft Corporation.
All other trademarks and tradenames mentioned herein are hereby recognized and may be
registered to their respective holders.
ScanSoft, Inc.
9 Centennial Drive
Peabody, Massachusetts
01960
TM
OmniForm
Part Number 50-365003-00C
Filler
International Headquarters
Guldensporenpark 32
Building D
BE-9820 Merelbeke
Belgium
Page 3

Contents
Welcome 7
What is OmniForm Filler? 7
OmniForm Filler Features 8
Using This Guide 9
Conventions 10
Additional Information 10
Chapter 1 Installation and Setup 11
System Requirements 12
Upgrading from a Previous Version of OmniForm Filler 12
Installing OmniForm Filler 13
Starting OmniForm Filler 15
Chapter 2 Working with Forms 17
Opening a Form for Filling 18
Moving Through Fields on a Form 19
Working with Different Field Types 20
Fillable Text Fields 21
Comb Fields 21
Check Box Fields 22
iii
Page 4

Circle Text Fields 22
Table Fields 23
Fillable Graphic Fields 23
Drop-Down List Fields 25
Digital Signature Fields 26
Verifying Digital Signature Fields 27
Fields with Validation Settings 28
Fields Defined by Calculations 28
Using the Type Ahead Feature 28
Shrinking Text to Fit Fields 29
Adding File Attachments to Form Records 30
Entering Data Automatically with User Profiles 32
Adding Data to User Profiles 35
Entering Data Automatically with Client Profiles 38
Spell Checking Forms 46
Saving Forms 47
Printing Forms 48
Emailing Forms 49
Specifying What You Want to Email 50
Adding a Routing Slip 51
Chapter 3 Working with OmniForm Databases 53
iv Contents
About OmniForm Databases 54
Moving Through Records in a Database 55
Creating New Records 55
Duplicating Existing Records 57
Searching Records 57
Sorting Records 60
Recalculating Records 61
Deleting Records 62
Setting Up an OmniForm Database to Be Shared 63
Refreshing Records in a Shared Form 64
Page 5

Exporting Data 64
Importing Data 68
Protecting Data 71
Chapter 4 Controlling OmniForm Filler by Voice 73
Speech Recognition Engines Supported by OmniForm Filler 74
Automatic Speech Recognition 74
ScanSoft Dragon NaturallySpeaking 74
Speech Recognition in Windows XP Tablet PC Edition 74
Automatic Speech Recognition 75
Enabling 75
Navigation 75
Filling 77
Supporting Dragon NaturallySpeaking 79
Enabling 79
Navigation 80
Filling 80
Select and Say 80
Speech Recognition in Windows XP Tablet PC Edition 80
Enabling 81
Navigation 81
Filling 81
Chapter 5 Utilizing Special Tablet PC Services 83
Handwritten Filling 84
Handwritten Filling of Text Fields 84
View Handwritten image 86
Choosing a Handwrite Recogniser Engine 86
Using Annotations and Drawings on Forms 87
v
Page 6

Selecting annotations and drawings 88
Resizing or moving annotations and drawings 89
Deleting annotations and drawings 90
Chapter 6 Technical Information 93
Troubleshooting 94
Solutions to Try First 94
Low Memory Problems 94
Low Disk Space Problems 95
OmniForm Filler Compatibility and Limits 95
Supported Databases 95
Supported Graphic Formats 96
OmniForm Filler Limits 96
Uninstalling OmniForm Filler 96
vi Contents
Index 97
Page 7
Welcome
Welcome to OmniForm FillerTM from ScanSoft, Inc.
This user’s guide is intended for the person who will be filling out electronic forms
and managing form data records in an OmniForm
installation and setup instructions, task-oriented instructions for filling and
managing forms, and technical information.
®
database. It provides you with
What is OmniForm Filler?
OmniForm Filler makes it easy to fill and manage electronic forms. You can enter
data on forms, manage form records in a database, import and export form
information, print forms, and mail forms to other users.
7
Page 8

OmniForm Filler Features
The following is a list of features that are available with OmniForm Filler.
Form Filling
You can easily fill out information on a form and then print or mail it. For more
information, see Chapter 2.
Automatic Data Entry with User and Client Profiles
The User Profile and Client Profile features save you time by automatically
filling out repetitive information on forms for you. A User Profile remembers
information about you and your business. A Client Profile remembers
information about other people, such as your customers, employees, or family
members. For more information, see Chapter 2.
OmniForm Database
The information that you enter on a form is automatically saved and stored as a
record in an OmniForm database. You can crea te, duplicate, search, and sort
records, and import and export data to and from other databases. For more
information, see Chapter 3.
File Attachments
8 Welcome
You can attach files to your form records. For example, you might want to
attach scanned receipts when you fill out expense forms. F or more info rmation,
see page 30.
Information Import and Export
You can import information from another OmniForm database or from other
external database sources into your current database. You can also export
information from your current database for import into other supported
databases. For more information, see Chapter 3.
Speech Recognition
OmniForm Filler’s built-in speech recognition accepts voice commands, such
as field and page navigation, text spelling, date input, zooming, record insert
and save etc.
If the speech recognition product ScanSoft Dragon NaturallySpeaking is
installed on the system, its advanced features, e.g. text dictating, or "Select and
Say" are also available for you.
Page 9

When OmniForm Filler is installed on a tablet PC running Windows XP Tablet
PC Edition, it can also use the device’s built-in speech recognition technology.
Utilizing Tablet PC Functionality
On a tablet PC you can use the tablet pen to handwrite directly into OmniF orm
fields. It will recognize the data and convert it to text.
You can toggle between the handwritten image and the converted text.
Additionally, you can add annotation notes or drawings to forms. They are
saved for each form record, and can be selected, resized, dragged or deleted
one by one.
Using This Guide
This guide assumes that you are familiar with basic Windows operations and can
install and set up devices such as scanners and printers. It is organized into the
following chapters:
◆ Chapter 1 — Installation and Setup. Provides instructions for installing
OmniForm Filler on your computer. You do not need to read this chapter if
you have the full version of OmniForm. Instead, read Chapter 1 of the
OmniForm User’s Guide.
◆ Chapter 2 — Working with Forms. Describes how to open, fill out, and
work with forms in OmniForm Filler.
◆ Chapter 3 — Managing an OmniForm Database. Describes how to work
with OmniForm databases and data records.
◆ Chapter 4 — Speech Recognition. Describes how to work with OmniForm
by talking to your computer.
◆ Chapter 5 — OmniForm Tablet PC Features. Describes the special
functionality of OmniForm for tablet PC users.
◆ Chapter 6— Technical Information. Provides troubleshooting tips.
Using This Guide 9
Page 10

Conventions
This user’s guide uses the following conventions:
Bold text Emphasizes new terms, commands, screen names,
and headings.
Italic text Emphasizes new terms, commands, screen names,
and headings in callout text that accompanies
graphics, as well as document names.
Note
Tip
Presents an item of additional information.
Presents ideas for using features to accomplish
specific tasks.
Additional Information
In addition to this user’ s guide, you can use the following resources to learn about
OmniForm:
◆ Online Help — Provides the most comprehensi ve information on OmniForm
features, settings, and procedures. Choose OmniForm Filler Help (or
OmniForm Help) in the Help menu. Or, press the F1 key.
◆ OmniForm User’s Guide — Introduces you to the basics of using
OmniForm’s form design and distribution tools (provided with the full
OmniForm version only).
◆ Release Notes — Provide important information about this version of
OmniForm Filler. The notes are available electronically on the installation CD.
◆ Product Support — Additional technical support in the form of technical
notes, frequently asked questions, software updates, and more. Choose
Product Support in the Help menu.
10 Welcome
◆ ScanSoft We b Si te — www.scansoft.com provides updated information and
links to OmniForm support pages.
Page 11

Chapter 1
Installation and Setup
This chapter describes how to install and get started using OmniForm Filler
software.
It includes the following topics:
◆ System Requirements
◆ Upgrading from a Previous Version of OmniForm Filler
◆ Installing OmniForm Filler
◆ Starting OmniForm Filler
11
Page 12

System Requirements
These are the minimum system requirements to install and run OmniFor m Fille r:
Note
◆ Computer with a Pentium or higher processor; Tablet PC to access its special
◆ Windows 95C, Windows 98SE, Windows 2000, Windows ME, or Windows NT
◆ 50MB of free hard disk space
◆ System memory of at least 32MB RAM
◆ SVGA monitor with at least 256 colors and 800 x 600 pixel resolution
◆ Windows-compatible pointing device
◆ CD-ROM drive for installation
◆ Installed and operating microphone to access the voice control built into
◆ Dragon NaturallySpeaking Version 7 or higher to access the Select and Say
Performance and speed will be enhanced if your computer’s processor,
memory, and available disk space exceed the minimum requirements.
services within OmniForm Filler
4.0
OmniForm Filler
functionality
Upgrading from a Previous Version of OmniForm
12 Installation and Setup
Filler
If you have a previous version of OmniF orm Filler installed, it is recommended that
you uninstall that version before installing your new version. You should also back
up your OmniForm forms before opening them in the new version. Y ou can do this
by saving copies of the forms in another folder location.
If you open a form from a previous version and then try to save that form, you will
be prompted to update the form to the new version. This will only take a moment
and will not visibly alter anything on the form itself.
Page 13

Chapter 1
Note
You must update a form to the new version of OmniForm in order to
take advantage of new features such as Client and User Profile fields and
file attachments. Howev er , if you do not need to use the new features , y ou
are not required to update the form. For example, you might want to keep
a form in its previous format if you still need to open the form in a
previous version. If you select No when prompted to update your form,
the form will be saved in its previous format.
Installing OmniForm Filler
OmniForm Filler’s setup program takes you through the entire installation with
instructions on the screen for every step.
▼ Before installing OmniForm Filler:
◆ Log into your computer with administrator privileges if you are installing on
Windows 2000 and Windows NT.
◆ Back up your OmniForm Forms.
◆ Uninstall any previous versions of OmniForm Filler.
◆ Close all other applications, especially anti-virus software.
Installing OmniForm Filler
13
Page 14

Click Install OmniForm
Filler to start installation.
Click OmniForm Filler
Release Notes to read
important last-minute
information before
installing.
▼ To install OmniForm Filler:
1. Insert OmniForm Filler’s CD-ROM in the CD-ROM drive.
The setup program should start automatically. If it does not start, locate your
CD-ROM drive in Windows Explorer and double-click the Setup.exe program
at the top-level of the CD-ROM.
The first setup screen looks like this:
14 Installation and Setup
2. Click Install OmniForm Filler 5.5 to start installation.
3. Follow the installation instructions on each screen.
By default, OmniForm Filler files are installed in this folder location:
c:\program files\scansoft\omniform filler 5.5. You can select a different
location if desired.
Note
If you are experiencing a problem with OmniForm Filler after installation,
sometimes uninstalling and then reinstalling OmniForm Filler will solve
the problem. See page 94 for more information.
Page 15
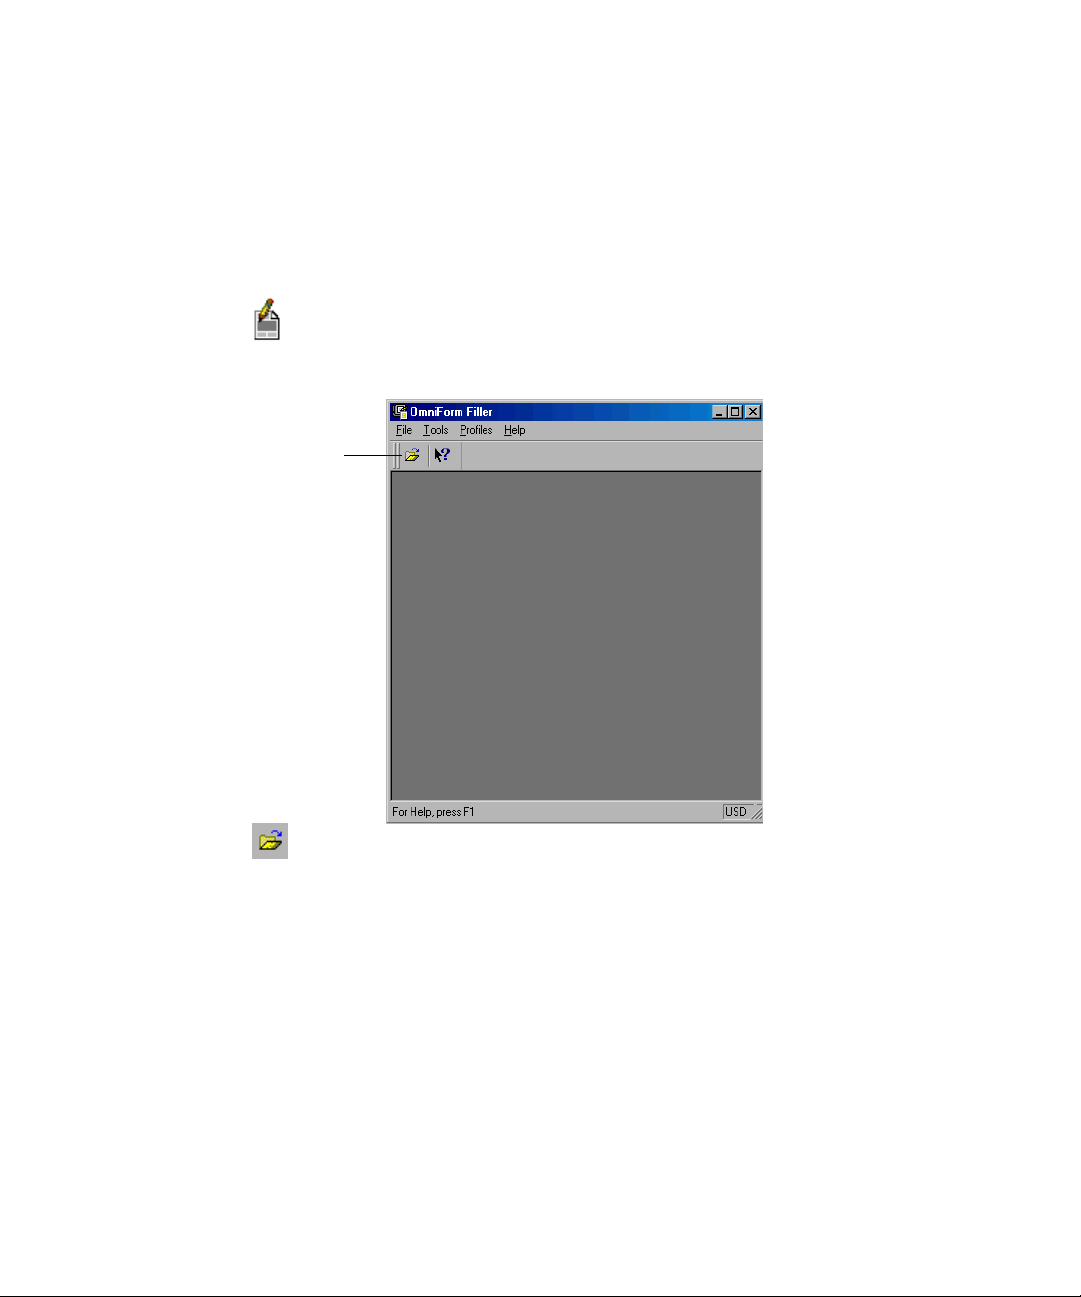
▼ To start OmniForm Filler, do one of the following:
Click the Open button
to open a form.
Chapter 1
Starting OmniForm Filler
◆ Click Start in the Windows taskbar and choose
Programs > ScanSoft OmniForm Filler 5.5 > OmniForm Filler 5.5
◆ Double-click the OmniForm Filler icon in the program’s installation folder.
The OmniForm Filler desktop looks like this when you first open it:
Click the Open button or choose Open... in the File menu to open a form.
If you have forms from a previous version of OmniF orm, you can open them in this
version. OmniForm also has a number of sample forms that you can open in the
Sample Forms folder. The Sample Forms folder location depends on your
operating system. The very first time you use the Open command, OmniForm
defaults to this folder.
Starting OmniForm Filler
15
Page 16
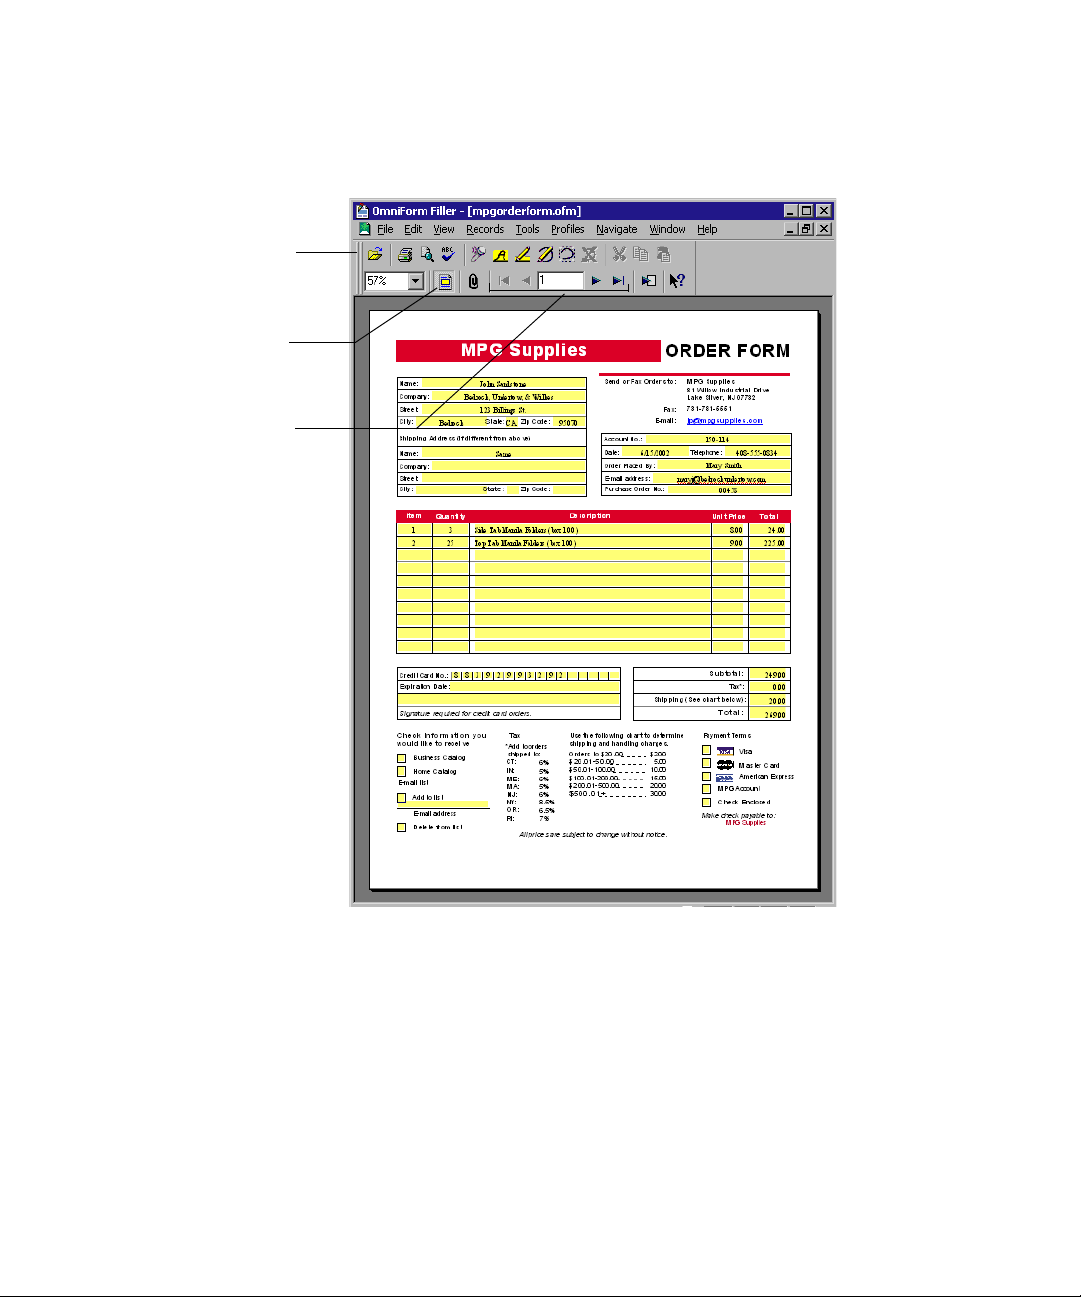
Standard buttons appear
for printing, spell
checking, resizing the
view, and other tasks.
Use this button to
highlight fillable fields.
Use these buttons to
scroll through records in
your database.
After you open a form, more OmniForm tools appear on the desktop:
16 Installation and Setup
Please read Chapter 2 for more information on working with forms in OmniForm
Filler.
Page 17

Chapter 2
Working with Forms
This chapter describes how to work with forms in OmniForm Filler.
It includes the following topics:
◆ Opening a Form for Filling
◆ Moving Through Fields on a Form
◆ Working with Different Field Types
◆ Using the Type Ahead Feature
◆ Shrinking Text to Fit Fields
◆ Adding File Attachments to Form Records
◆ Entering Data Automatically with User Profiles
◆ Entering Data Automatically with Client Profiles
◆ Spell Checking Forms
◆ Saving Forms
◆ Printing Forms
◆ Emailing Forms
17
Page 18
Opening a Form for Filling
You can have multiple forms open at the same time. Use the Window menu to
switch between open forms.
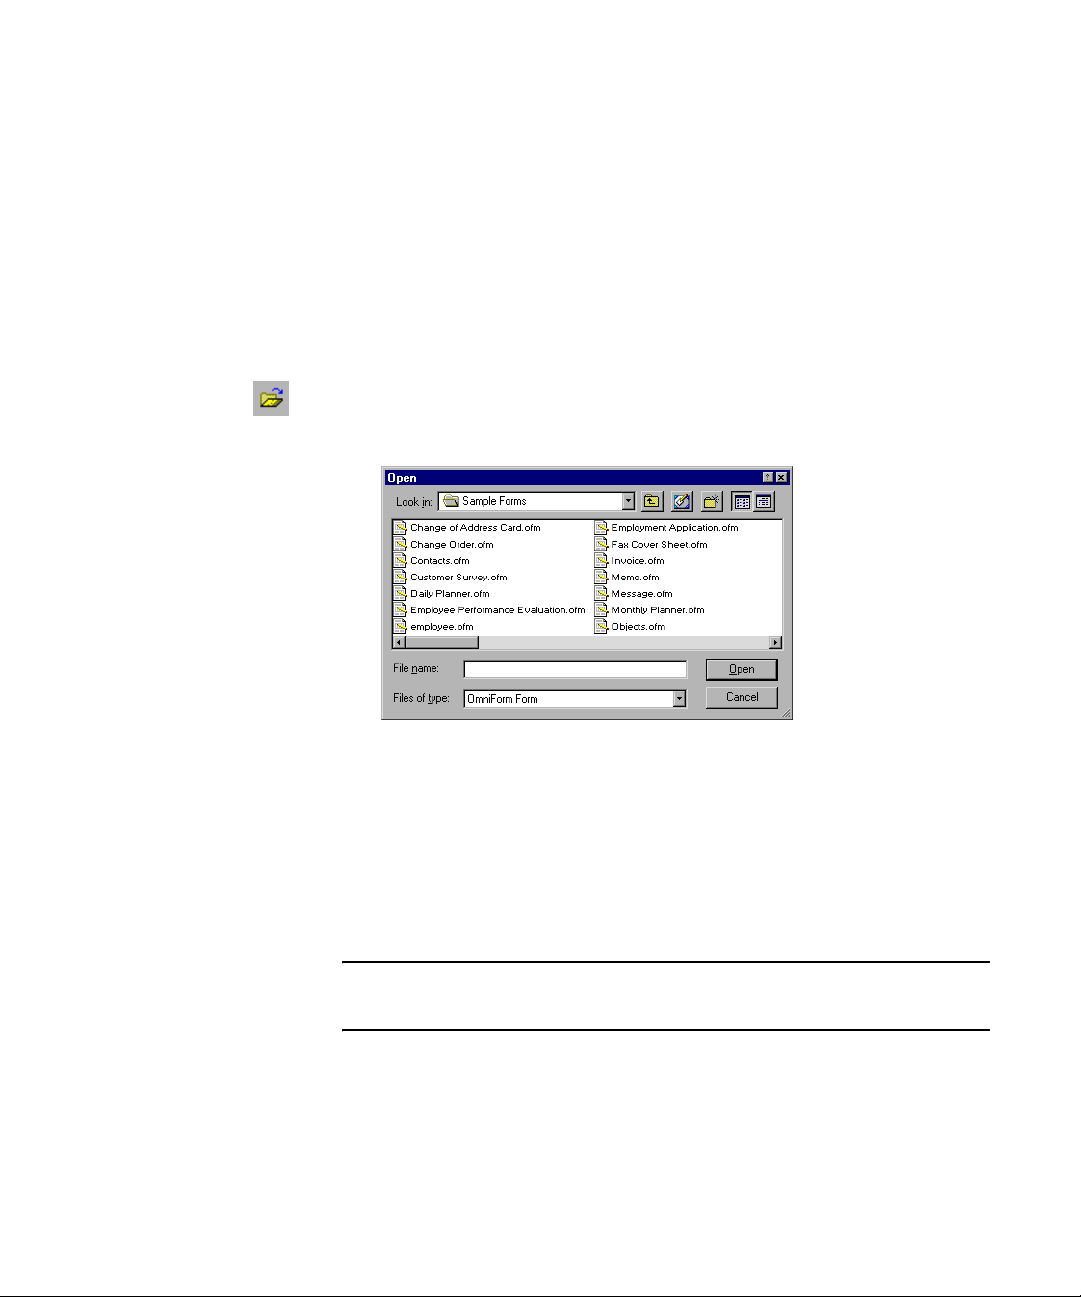
▼ To open a form for filling:
1. Open OmniForm Filler or OmniForm.
2. Click the Open button or choose Open... in the File menu.
The Open dialog box appears.
18 Working with Forms
3. Select OmniForm Form as the file type.
4. Locate and select the desired form.
5. Click Open.
The form opens, and is ready for you to create a new record. For information
on working with records in an OmniForm database, see Chapter 3 .
Tip
Make sure Highlight Fillable Fields is selected in the View menu to
highlight fillable fields in yellow.
Page 19

Chapter 2
Moving Through Fields on a Form
After opening a form in OmniForm Filler, click in any field to place the cursor there
and start entering the desired information. You can continue to move the cursor
from field to field using your mouse. Or, use the following keyboard combinations
to move the cursor within a form.
Action Keyboard Combination
Place the cursor in a
field
Next field Press Tab
Previous field Press Shift-Tab
Next line in a fill
text field
End of a line in a fill
text field
Beginning of a line
in a fill text field
End of all text in a
fill text field
Beginning of all text
in a fill text field
Next word in a field Press Ctrl-right arrow
Previous word in a
field
When a form first opens, press Tab to place the
cursor in the first field.
Press Enter to move to the next line in a multipleline fill text field
Press End
Press Home
Press Ctrl-End
Press Ctrl-Home
Press Ctrl-left arrow
Moving through fields on a form by voice control commands is described in
Chapter 4, Controlling OmniForm Filler by Voice on page 79.
Moving Through Fields on a Form
19
Page 20
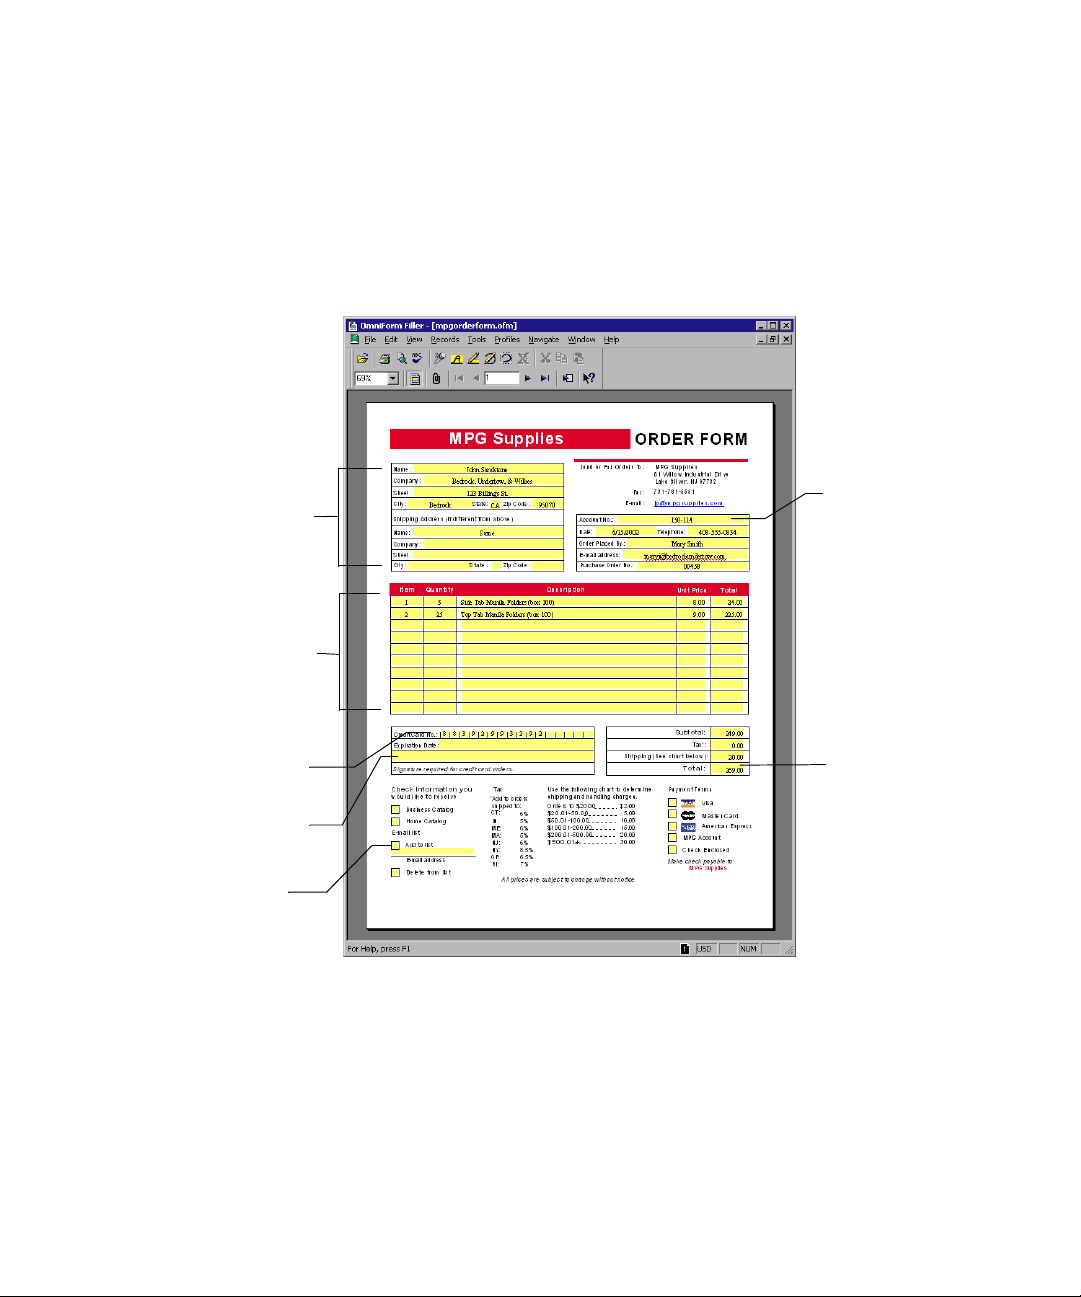
fillable text fields
(see page 21)
table with fillable
text fields
(see page 23)
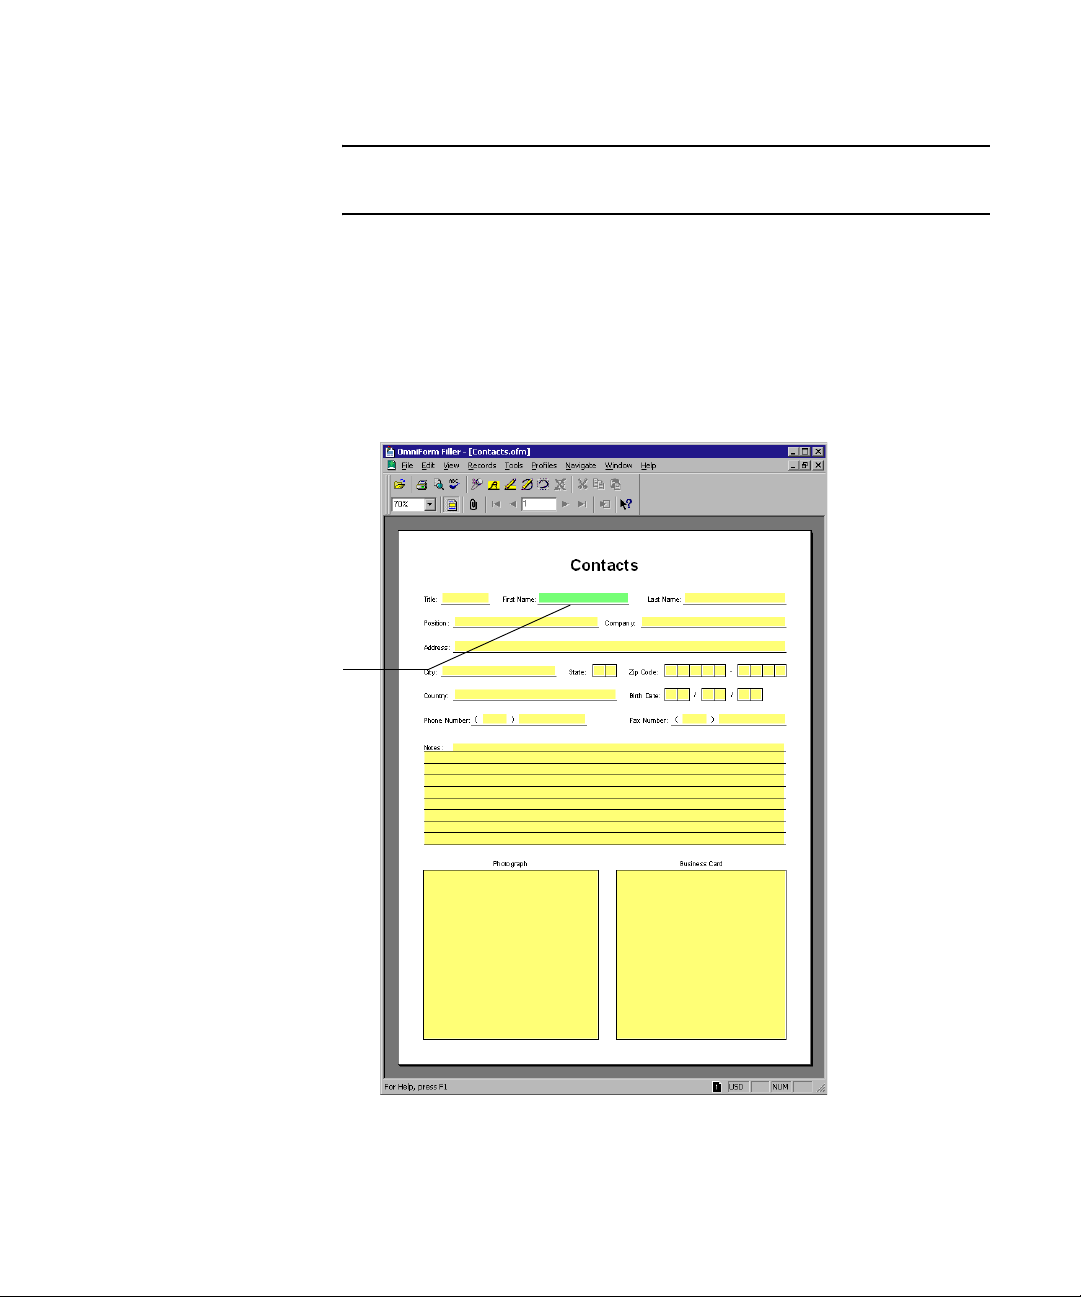
Working with Different Field Types
An OmniForm Form can have a lot of different field types. The following
illustration shows an example of some of the common fields you might find when
filling out forms.
circle text field
(see page 22)
comb field
(see page 21)
signature field
(see page 26)
check boxes
(see page 22)
20 Working with Forms
auto-calculation
field
(see page 28)
For information on designing these types of fields in OmniForm, see the OmniForm
User’s Guide.
Page 21

Chapter 2
Fillable Text Fields
You can enter c haracters in a fillable text field such as letters , n umbers , symbols , and
dates.
Enter text directly in
a fillable text field.
Note
Make sure Highlight Fillable Fields is selected in the View menu to
highlight fillable fields in yellow.
Comb Fields
A comb field is a fillable text field that is broken into separate segments for entering
a set number of characters. Yo u can enter any characters in a comb field that are
appropriate to the field. Comb fields are commonly used for phone numbers and
zip codes.
You do not have to tab from element to
element in a comb field. Just type the
required amount of information, and
OmniForm automatically moves to the
next comb element.
Working with Different Field Types
21
Page 22
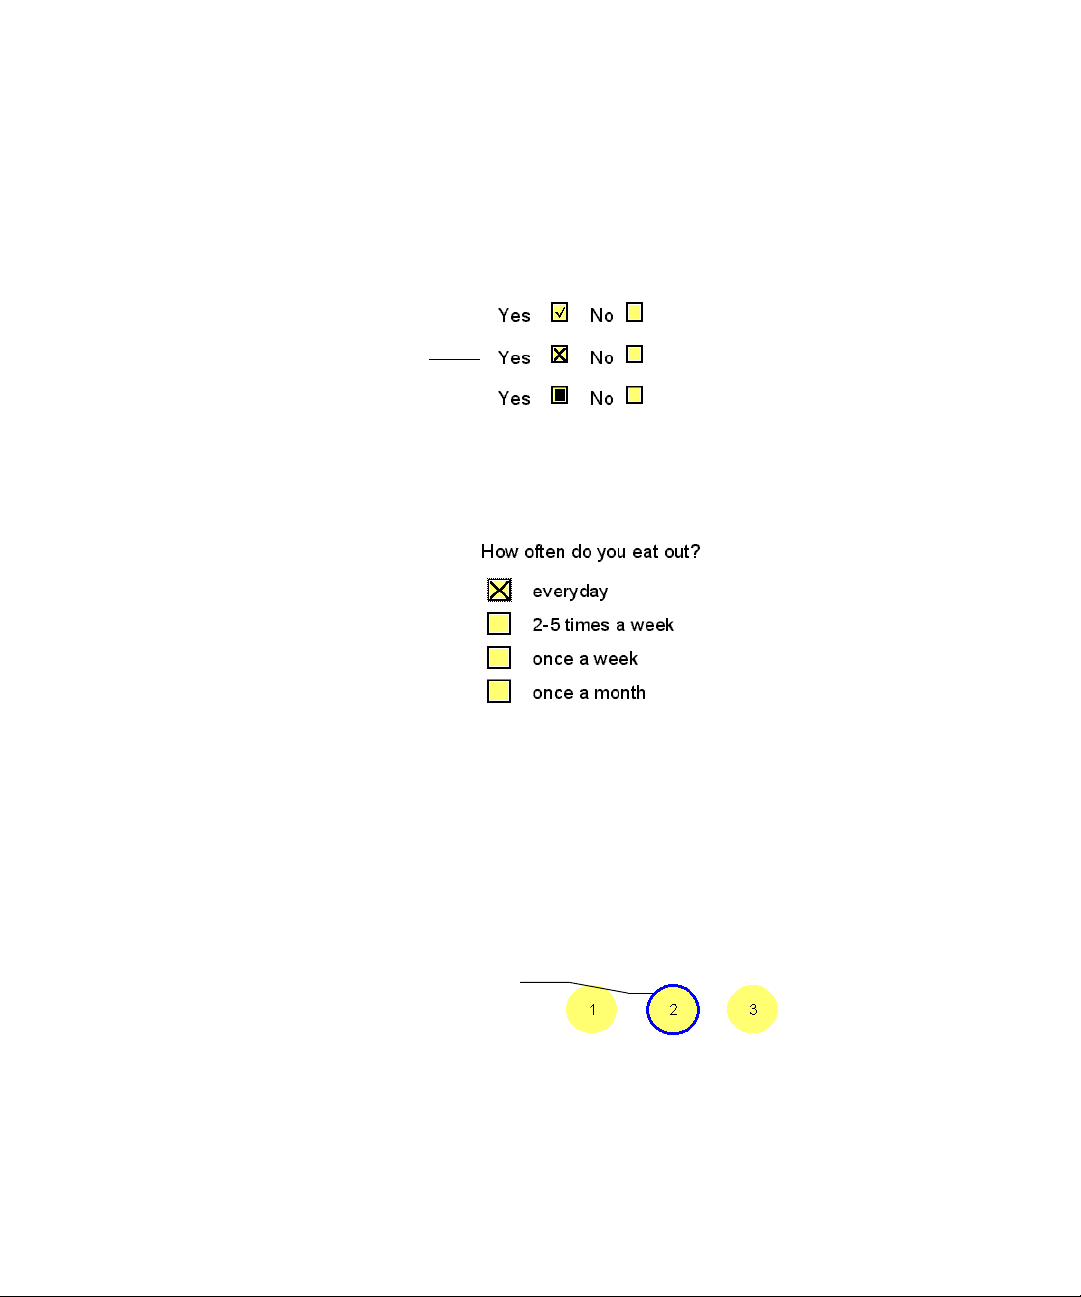
Check Box Fields
Check boxes are commonly used for Yes/No questions and for selecting an item in
a group. Click a check box to fill it. A filled check box field can contain a check
mark, an X mark, or a solid fill:
Depending on how it
was designed, a filled
check box can appear
three different ways.
Check boxes might be grouped so that only one can be selected at a time. In this
case, selecting one check box automatically deselects another check box in the
group.
22 Working with Forms
Circle Text Fields
A circle text field allows you to indicate your selection by making a circle around it.
Click a circle text field to make a selection.
Circle text fields might be grouped so that only one can be selected at a time. In this
case, selecting one circle text field automatically deselects another circle text field in
the group.
A border appears
when you click a
circle text field
Page 23

Chapter 2
Table Fields
A table field consists of individual cells, which are generally fillable text fields. You
can enter characters in these cells just as you would in regular text fields.
A table might also contain other field types, such as check boxes.
Fillable Graphic Fields
A fillable graphic field allows you to insert a graphic into a form.
Click a fillable graphic field, and
you will be prompted to select a
source for the graphic.
Y o u can import an existing graphic file or scan a picture direct ly i n to the field using
a TWAIN-compatible scanner.
Working with Different Field Types
23
Page 24
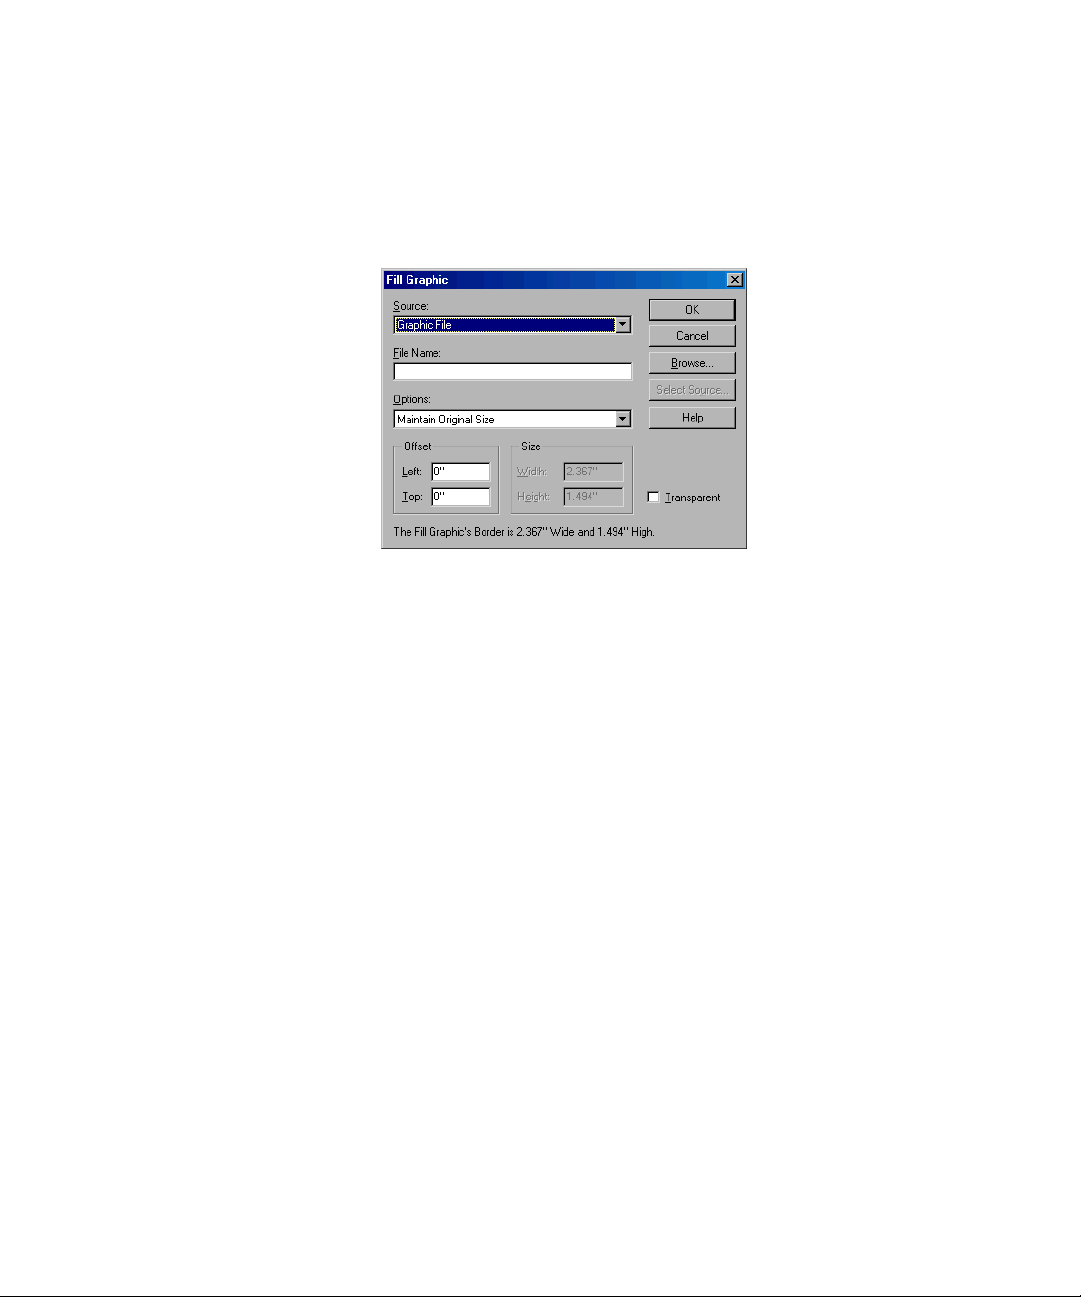
▼ To import an existing graphic:
1. Click the fillable graphic field .
The Fill Graphic dialog box appears.
2. Select Graphic File in the Source drop-down list.
3. Enter a file name in the File Name text box. Or, click Browse... to locate the
file.
4. Select the desired size and other settings for the graphic.
24 Working with Forms
Click Help to get more information on the available settings.
5. Click OK.
OmniForm imports the graphic into the form field.
▼ To import a graphic from a TWAIN source:
1. Click the fillable graphic field .
The Fill Graphic dialog box appears.
2. Select TWAIN in the Source drop-down list.
3. Click Select Source to open the Select Source dialog box.
4. Select your TWAIN source and click OK to return to the Fill Graphic dialog
box.
Page 25
Chapter 2
5. Type a file name in the File Name text box.
The graphic will be saved with this file name after it is scanned.
6. Select the desired size and other settings for the graphic.
Click Help to get more information on the available settings.
7. Place the page with the graphic in your scanner, making sure it is aligned
correctly.
8. Click OK.
OmniForm scans the graphic into the form field.
Tip
T o delete a graphic and leave the fillable graphic field empty, click the field
and then select None in the Source drop-down list in the Fill Graphic
dialog box.
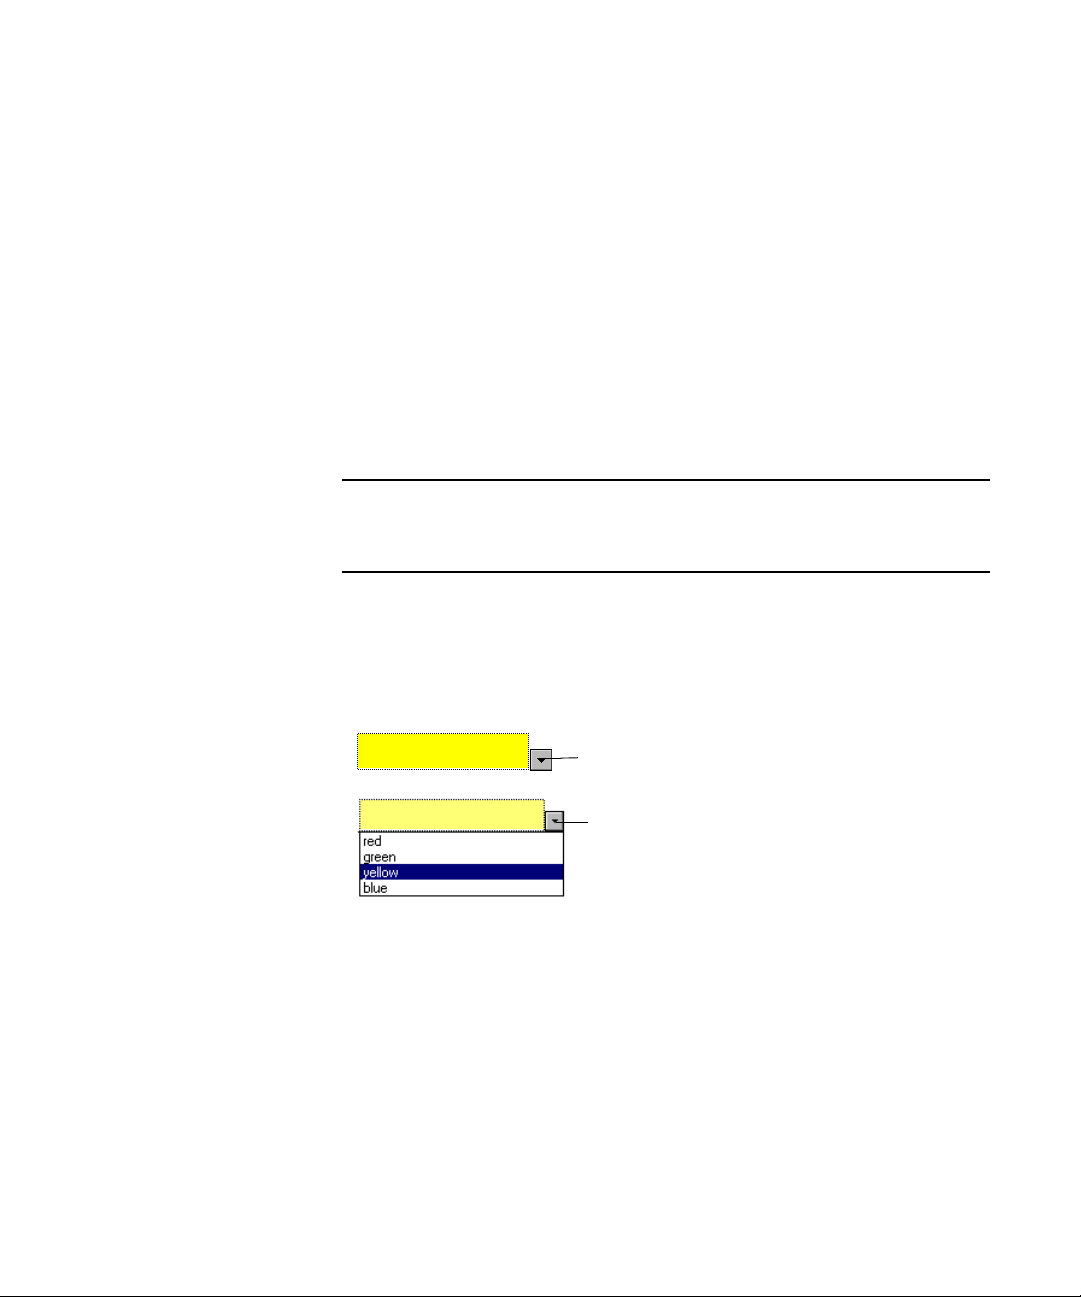
Drop-Down List Fields
A drop-down list contains a group of selectable entries.
A drop-down list arrow appears
when the cursor is in the field
Working with Different Field Types
25
Page 26
Digital Signature Fields
A digital signature field allows you to lock specific fields on a form using a
password. This authenticates a form and protects its data from unauthorized
modification. For example, an expense report form might require a signature. Once
“signed,” certain fields on the form such as expensed items might be locked. You
can only unlock fields and change the data in them if you have the correct password.
Digital signature fields can be set up to work with OmniForm passwords or with a
more secure level of protection provided by an outside authentication service
(Entrust or Microsoft PKI). Check with the form designer or database
administrator for information about how the digital signatures were set up on a
form.
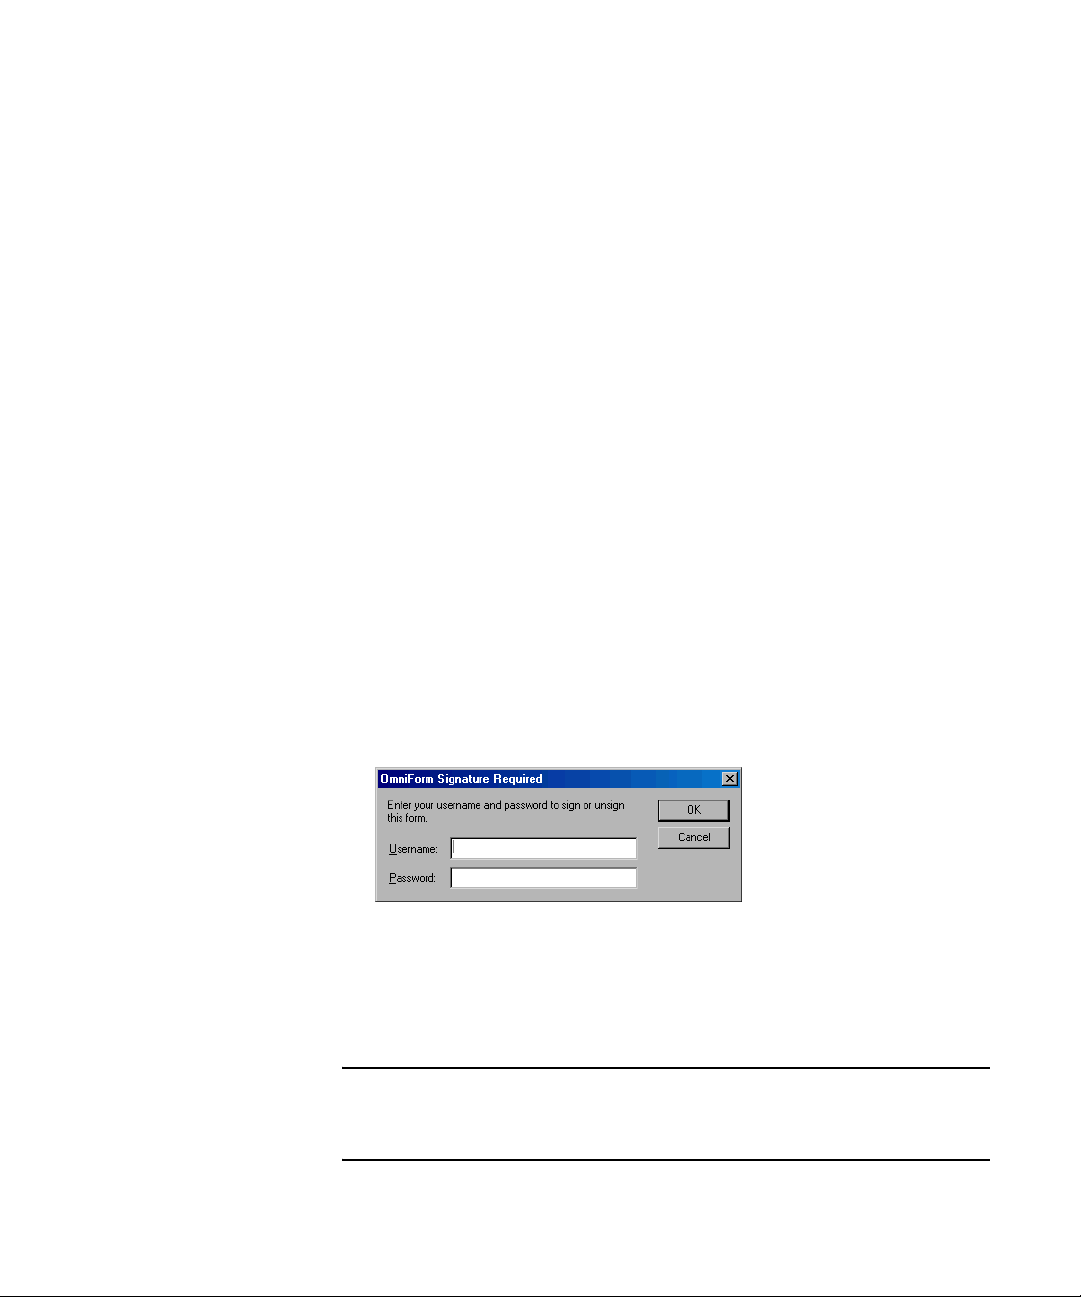
▼ To sign a digital signature field on a form:
1. Click the signature field.
A dialog box appears and prompts you to enter your username and password.
If it is an OmniForm signature field, make sure you have access to the
appropriate OmniForm database.
The dialog box that appears depends on the type of signature field it is. This
example shows the dialog box for an OmniForm signature field. If the digital
signature field type is Entrust or Microsoft PKI, please refer to their
documentation for more information on how they work.
26 Working with Forms
2. Enter your user name and password.
3. Click OK.
To unsign a signature field, click it and enter your password again.
Note
After a signature field is signed, that form’s design becomes locked. All
records must be unsigned before the form design can be changed. Or,
save the form with a different name, and delete all of its records.
Page 27
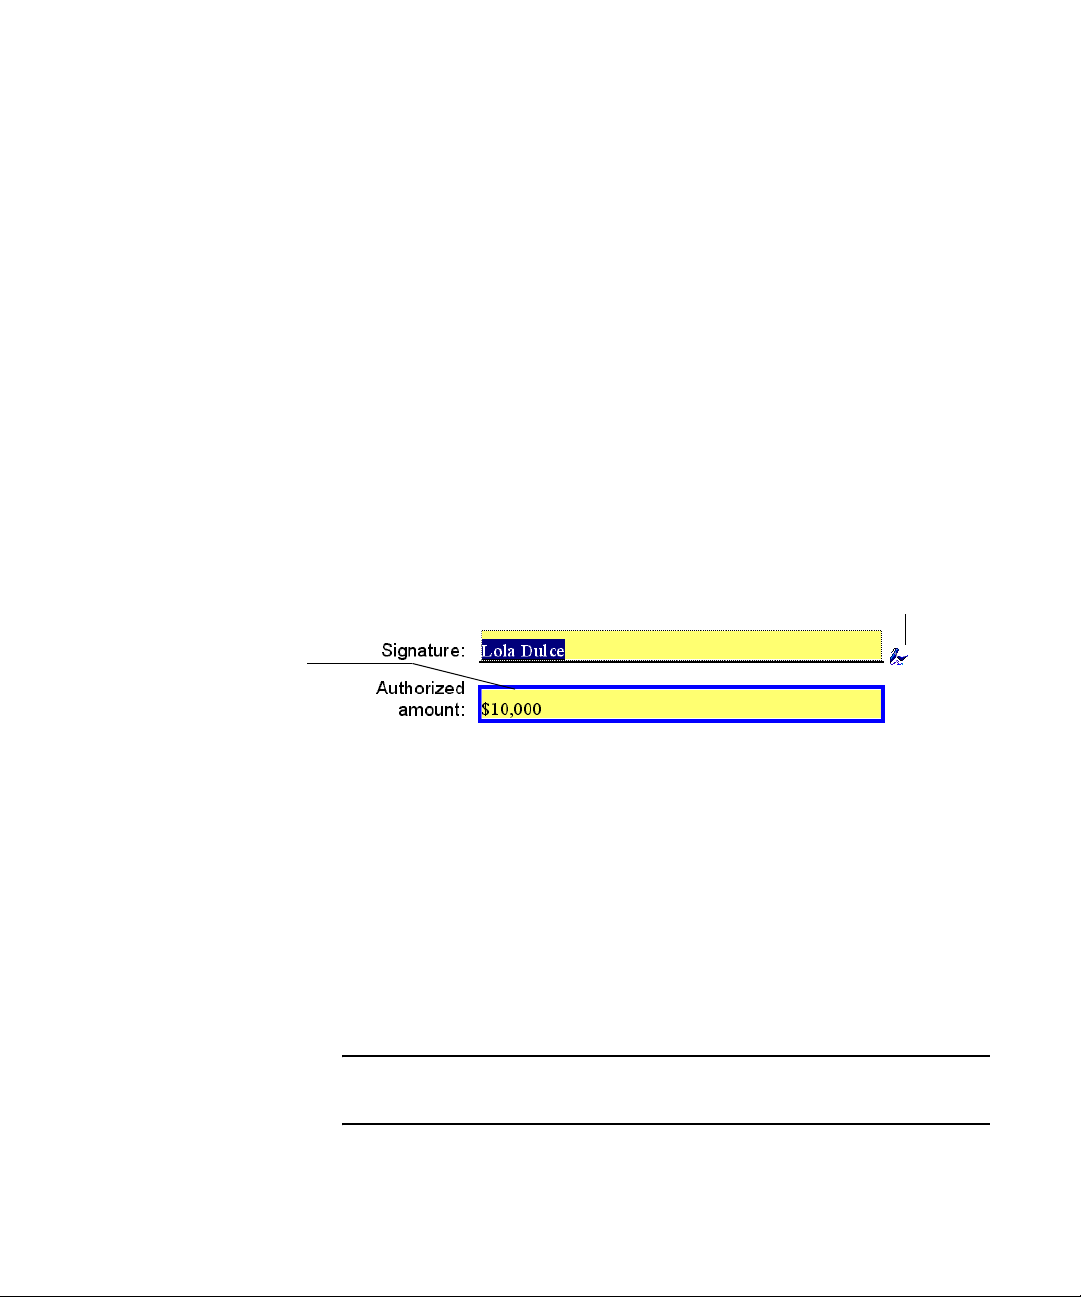
▼ To see the verification status of a signed digital signature field:
Fields that are locked by the
signature are highlighted
with a blue border.
Chapter 2
Verifying Digital Signature Fields
Digital signature fields are only of value if you can verify that the signatures are valid.
After a digital signature field is signed, the authentication process tries to verify the
signature to ensure that it is valid.
1. Open the form in OmniForm Filler.
2. Choose Field Security in the View menu if it is not already turned on.
Icons appear next to signed fields indicating whether signatures have been
verified or not. A pen with a check mark indicates that the signature was
verified to be valid. A pen with a question mark indicates the signature cannot
be verified.
A pen with a check mark indicates that the signature
was verified to be valid. (A pen with a question
mark indicates that the signature cannot be verified.)
If a signature field cannot be verified, it could be for one of these reasons:
◆ The form’s data has changed since the form was first signed.
◆ The form’s design has changed since the form was first signed.
◆ The signer of the form could not be identified, possibly because the
OmniForm user database or authentication service is not accessible, or
because the authentication service could not verify the signer.
◆ The signer of the form could not be identified, possibly because the user
password was changed since the form was first signed. (This reason is only
applicable to OmniForm signature fields.)
Note
You can also choose Security... in the Tools menu to get the verification
status for signed signature fields.
Working with Different Field Types
27
Page 28
Fields with Validation Settings
Some fillable text fields might be designed with validation settings such as:
◆ Requiring information to be entered so that the field is not left blank
◆ Requiring specific information to be entered
◆ Requiring information to be entered from a list of choices
For example, you might be required to enter a valid date in a Date field. You would
receive an error message from OmniForm if you attempted to enter anything other
than a valid date. Depending on how the field was set up, you might be allowed to
override the validation requirement.
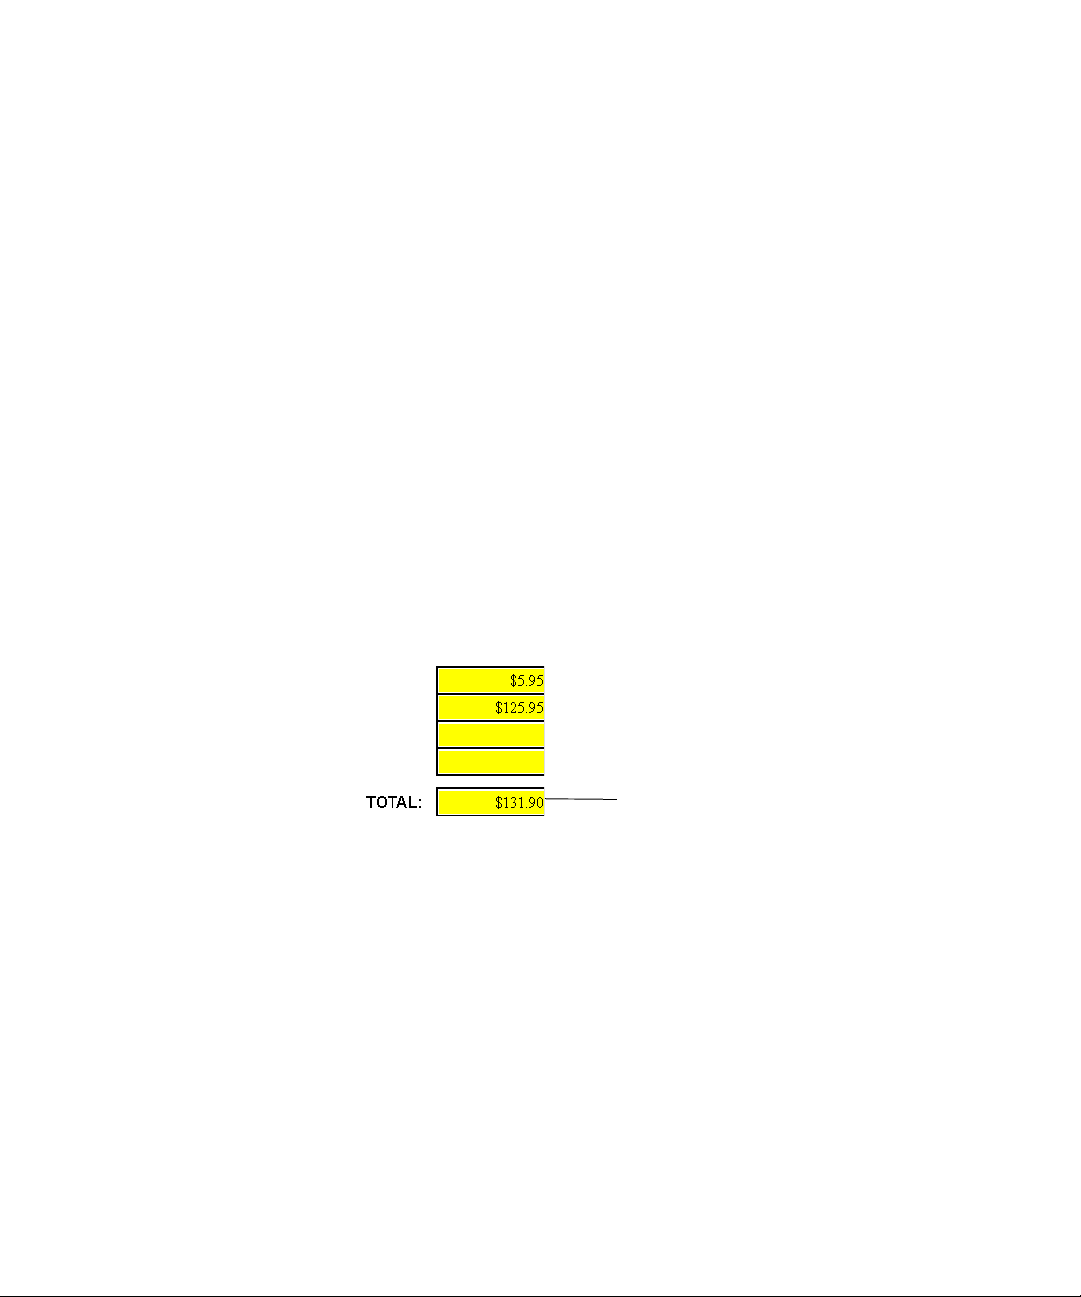
Fields Defined by Calculations
Sometimes fields are designed with calculations that compute and fill information
for you automatically.
In the example below, the TOTAL field automatically added the amounts entered in
the first and second fields. The TOTAL field would increase automatically if
amounts were entered in the third and fourth fields.
28 Working with Forms
The calculation in this field automatically
computes the total for you.
Using the Type Ahead Feature
As you begin to enter a word on a form, OmniForm can automatically complete the
word for you if there is previously filled information that matches the word you are
entering. F or example , if yo u had previously entered the name John in a field, as soon
as you enter J in another field, OmniForm would automatically enter John for you.
▼ To turn the type ahead feature on or off:
1. Choose Options... in the Tools menu.
The Options dialog box appears.
Page 29

2. Click the Filling tab .
3. Select Ena ble T ype Ahead if y ou want to use this feature . Deselect it if you do
not want to use this feature.
4. Click OK.
Shrinking Text to Fit Fields
The text you enter might not always fit in the text fields provided on a form. To fix
this, OmniForm can automatically shrink your text to make it fit in the fields.
▼ To turn the shrink text feature on or off:
1. Choose Options... in the Tools menu.
The Options dialog box appears.
2. Click the Filling tab .
Chapter 2
3. Select Automatically shrink text to fit within fields if you want to use this
feature. Deselect it if you do not want to use this feature.
4. Click OK.
Shrinking Text to Fit Fields
29
Page 30
Adding File Attachments to Form Records
You can attach files to your form records. For example, you might want to attach
scanned receipts to your expense records.
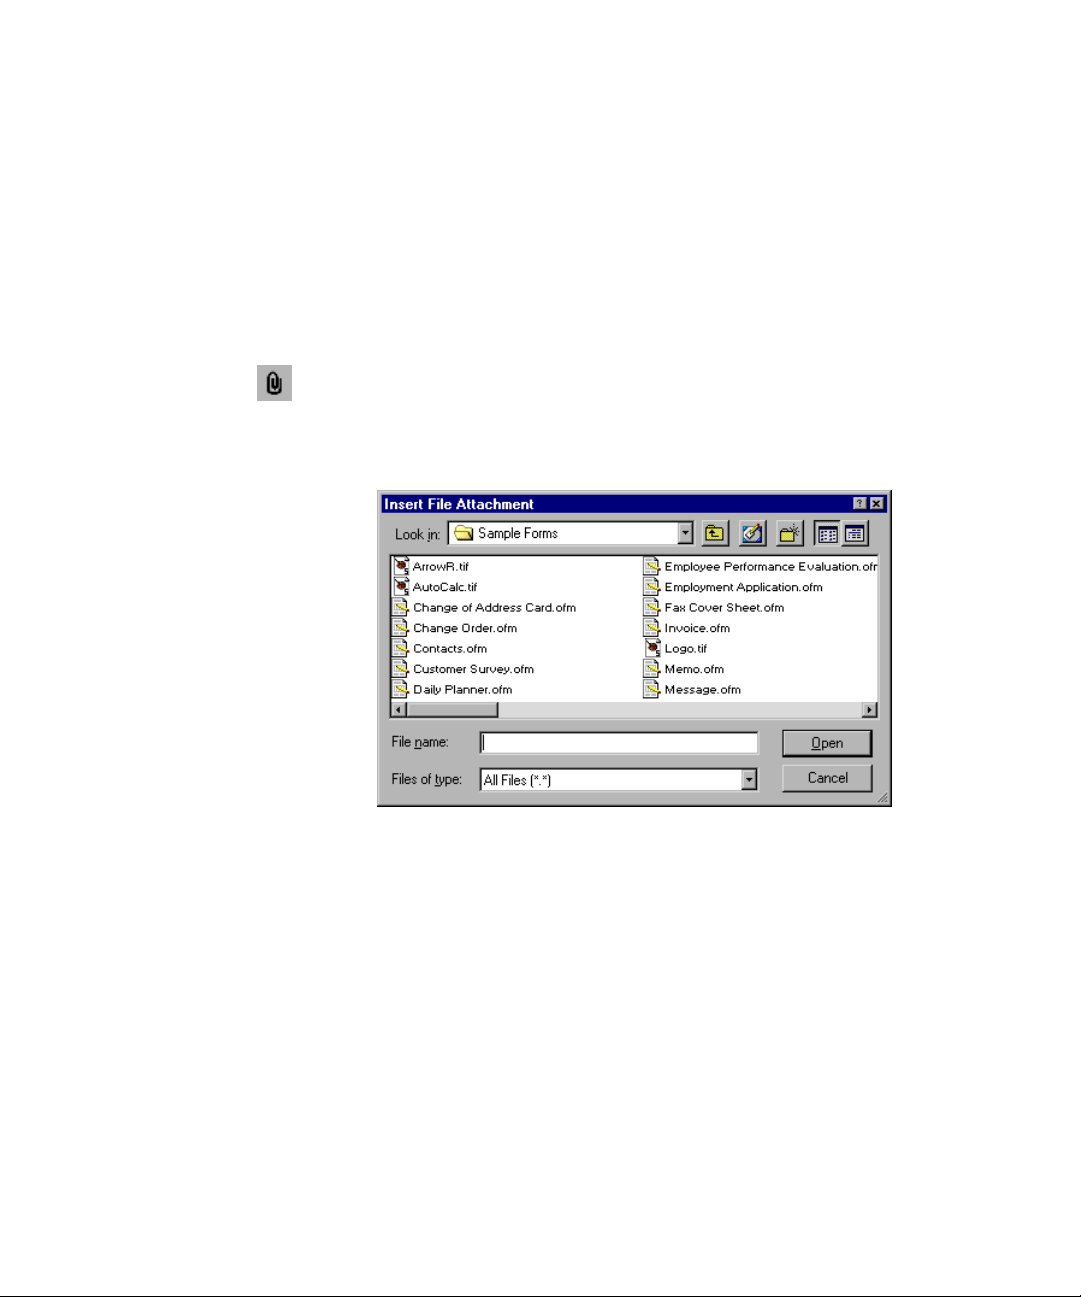
▼ To attach a file to a form record:
1. Open the form in OmniForm Filler.
2. Click the Insert File Attachment button or choose Insert File Attachment...
in the File menu.
The Insert File Attachment dialog box appears.
30 Working with Forms
3. Locate and select the file you want to attach.
Page 31

4. Click Open.
The selected file is attached, and an icon is displayed for it in an attachment
window below the form.
Chapter 2
An icon represents the
file attachment. Doubleclick it to open the file
in its own application.
Right-click the icon to
open, save, or remove
the attachment.
▼ To show or hide file attachments:
An attachment icon in
the status bar indicates
when form records
have attachments.
1. Choose View Attachments in the View menu to show the attachment window.
2. Choose View Attachments in the View menu again to hide the attachment
window.
Adding File Attachments to Form Records
31
Page 32

Entering Data Automatically with User Profiles
A User Profile is a convenient feature that remembers and stores information
about you when you are filling out a form. This information can then be entered
automatically each time you fill out forms for yourself.
This example illustrates how a User Profile would work to automatically insert your
name into a form.
In Form Designer: In Form Filler:
① When the form
is designed, its
Name field is
linked to the Full
Name User Profile
Field.
➃ If your User
Profile has your
name information
filled in for the Full
Name User Profile
Field, then the name
automatically inserts
into this field.
➁ When you open
the form to fill it out,
you see that the
Name field is a User
Profile field because
it is highlighted in a
distinctive color.
➂ Select your User
Profile to use with
this form.
In Form Filler:
OR
➃ If you have not yet added your name to your
User Profile, then you must enter your name on the
form manually. After entering your name, it will
automatically be added to the Full Name field in
your User Profile (as soon as you switch records).
In the User Profile:
Full Name
User Profile
field
32 Working with Forms
Page 33

Select this option if you
want data to be added
automatically to the User
Profile when it is first
entered. (Subsequent
changes would not be
added automatically.)
Chapter 2
▼ To create a User Profile:
1. Choose Edit User Profiles... in the Profiles menu.
2. Click New.
Type the desired name
for your User Profile.
3. Type a name for your User Profile and click OK.
Entering Data Automatically with User Profiles
33
Page 34

The new User
Profile is listed.
Click Edit to open the
selected User Profile and
add data to it directly.
4. Click OK in the confirmation dialog box.
The Edit User Profiles dialog box now lists your new User Profile.
5. Click Edit to edit the User Profile directly. See the next section for more
information.
34 Working with Forms
6. Click Close to close the dialog box.
The User Profile is now selectable for any form by using the Select User
Profile > [User Profile name] command in the Profiles menu.
Note
User Profiles will only work on forms that were designed with fields that
can receive User Profile information. To find out if a form has User
Profile fields, choose Highlight User Profile Fields in the Profiles
menu. User Profile fields are highlighted in orange. For more information
on designing a form with User Profile fields, please see the OmniForm
User’s Guide.
▼ To select a User Profile for filling out a form:
1. Open the desired form.
2. Choose Select User Profile > [User Profile name] in the Profiles menu.
Page 35

3. Click Yes if you are asked to confirm the selection.
The User Profile data will be filled into the applicable User Profile fields. If you
do not yet have any data in the User Profile, see the next section for
information on adding data.
Chapter 2
Note
To turn off a User Profile that is selected with a form record, choose
Select User Profile > None in the Profiles menu.
Adding Data to User Profiles
There are two ways to add data to a User Profile:
◆ Add data to the User Profile as you fill out a form.
◆ Open the User Profile to add data directly.
▼ To add data to a User Profile as you fill out a form:
1. Open a form and select the desired User Profile to use with it. See page 34 for
information on selecting a User Profile for a form.
2. Choose Highlight User Profile Fields in the Profiles menu to highlight all
User Profile fields in orange.
3. Enter or modify the desired data in a User Profile field.
If this is the first time you are entering data in the field, that data will
automatically be added to the User Profile when you switch records.
Note
To add data to your User Profile right away, right-click the field and
choose Update User Profile in the menu that appears. You can also
choose Update User Profile if you change data that was previously
entered and want to update the User Profile.
Entering Data Automatically with User Profiles
35
Page 36

▼ To add data to a User Profile directly:
Select the User
Profile you want to
edit and click Edit.
1. Choose Edit User Profiles... in the Profiles menu.
The Edit User Profiles dialog box appears.
36 Working with Forms
Page 37

Click the page numbers
to get to different types
of data fields.
Chapter 2
2. Select the User Profile you want to edit and click Edit.
The selected User Profile appears.
A User Profile form looks very similar to a regular OmniForm Form. It
contains a standardized list of commonly used fields.
3. Enter the desired information in the fields that you want to be remembered.
Y ou do not hav e to enter da ta in all the User Pr ofile fields; only enter data in t he
fields that you want to be remembered for automatic filling.
4. Click the Private option next to a field if you want to be prompted before it
gets automatically filled on forms.
5. Choose Close in the File menu when you are finished entering information in
your User Profile.
Entering Data Automatically with User Profiles
37
Page 38

Entering Data Automatically with Client Profiles
A Client Profile is a convenient feature that remembers and stores information
about other people, such as your customers, employees, and family members. This
information can then be entered automatically each time you fill out forms on their
behalf. For example, if you ha ve customers for whom y ou hav e to fill out forms, you
can create a Client Profile that remembers and stores specific information for each
customer. Each time you need to fill a form for a particular customer, you can apply
their Client Profile to automatically fill in their data.
Using Client Profiles involves four steps:
① Open a form in
OmniForm Filler.
➂ Create a Client
Profile for a specific
person and apply it
to the form. See
page 42 for more
information.
Or, apply an
existing Client
Profile to the form.
See page 44 for
more information.
➁ Set up fields on
the form to receive
Client Profile
information. You
need to do this only
one time per form.
See page 39 for
more information.
Client Profile fields
are highlighted in
green.
➃ If the Client Profile does not yet
have any information, you must
add information to it by entering
information into the Client Profile
fields on the form. See page 45
for more information.
If the Client Profile already has
information for the corresponding
Client Profile fields, then the
information automatically inserts
into the fields on the form.
You need to add
information only once to a
Client Profile. After that, it
remembers the information
and applies it to
subsequent form records.
38 Working with Forms
Page 39

For example, you might
want to set up the First
Name field on this form
to receive information
from Client Profiles.
Chapter 2
▼ To set up fields on a form so that they can receive Client Profile information:
1. Open the form in OmniForm Filler.
2. Select a field on the form that you want to set up to receive Client Profile
information.
Entering Data Automatically with Client Profiles
39
Page 40

The name of the
currently selected
field appears here.
The name of the
Client Profile field to
which you are linking
appears here. Type in
a new name or select
a name from the list.
The master list of Client
Profile fields appears
here. This will be empty
if this is the first time you
are setting up a Client
Profile field for the form.
3. Choose Link Field to Client Profile... in the Profiles menu. (You can also
right-click the field to choose this command.)
The Link Field to Client Profile dialog box appears.
40 Working with Forms
Page 41

Example of a Client
Profile field name.
Chapter 2
4. Type a name for the Client Profile field that you want to link with the selected
form field. Or, if there is an exist ing Client Profile field that y ou want to link to,
select it in the list box.
The name that you enter will become part of your master list of Client Profile
fields, and will be selectable for future forms.
For example, if the form field is for a person’s first name, you might enter
CP_First Name as the Client Profile field name.
5. Click OK.
The field on the form turns green, which indicates that it is has been linked,
and is ready to receive Client Profile data. (For green highlights to appear,
Highlight Client Profile Fields must be selected in the Profiles menu.)
6. Repeat this procedure, starting at step 2, for other fields that you want to link
with Client Profile fields.
When you are finished, the form fields you linked are ready to receive data from
any Client Profile that you apply. See page 42 for more information.
Entering Data Automatically with Client Profiles
41
Page 42
▼ To create a Client Pr ofile and apply it to a form record:
The green color of this
field indicates that it has
been set up with a
Client Profile field.
Note
To turn off a Client Profile field link, right-click the field and choose
Unlink Field from Client Profile.
1. Open the form in OmniForm Filler.
Fields that have been set up to receive Client Profile information are
highlighted in green when Highlight Client Profile Fields is turned on in the
Profiles menu. See page 39 for information on setting up fields.
42 Working with Forms
Page 43

Select this option to
create a new Client
Profile.
Type a name
for your Client
Profile here.
Client Profiles
that you have
already created
appear here.
Select this option to
keep your Client Profile
turned on so that it is
automatically applied to
each new form record
that you open.
Chapter 2
2. Choose Apply Client Profile... in the Profiles menu.
The Apply Client Profile dialog box appears.
3. Select Create and apply new Client Profile and type the desired name for the
Client Profile in the box below it.
For example, you might want to enter the name of the person for whom you
are creating the Client Profile.
Note
It you are planning to fill out a series of different forms for a particular
person, select Keep the selected Client Profile turned on and apply it
to each new record you create in the Apply Client Profile dialog box.
The Client Profile that you select will stay on until you turn it off or select
a different Client Profile.
4. Click OK.
Y our new Client Profile is now ready for y ou to start adding data to it. See
page 45 for more information.
Entering Data Automatically with Client Profiles
43
Page 44

Client Profiles that you
have already created
appear here. Select the
Client Profile you want
to apply.
▼ To apply an existing Client Profile to a fo rm record:
1. Open the form in OmniForm Filler.
Fields that have been set up to receive Client Profile information are
highlighted in green when Highlight Client Profile Fields is turned on in the
Profiles menu.
2. Choose Apply Client Profile... in the Profiles menu.
The Apply Client Profile dialog box appears.
Select this to keep your
Client Profile turned on
so that it is
automatically applied to
each new form record
that you open.
44 Working with Forms
3. Select Apply existing Client Profile and then select the name of the desired
Client Profile in the list box.
4. Click OK.
The selected Client Profile automatically fills in its data in the appropriate form
fields.
Page 45

▼ To add data to a Client Profile:
The green color of this
field indicates that it has
been set up with a
Client Profile field.
Chapter 2
1. Open the form in OmniForm Filler.
Fields that have been set up to receive Client Profile information are
highlighted in green when Highlight Client Profile Fields is turned on in the
Profiles menu.
2. If you hav e not already done so , apply a Client Profile to this form. See page 42
for more information.
Be sure to apply the particular Client Profile to which you want to add data.
Entering Data Automatically with Client Profiles
45
Page 46

3. Enter information in a field that has been set up to receive Client Profile
information.
The information tha t you enter into the field is automatically added to the
current Client Profile. If you modify the information later, the modified
information is automatically updated in the Client Profile.
4. Repeat step 3 until you have added the desired data to the Client Profile.
▼ To turn off a Client Profile that is associated with a form record:
1. Choose Apply Client Profile... in the Profiles menu.
The Apply Client Profile dialog box appears.
2. Select Do not apply a Client Profile to this record.
3. Click OK.
You will be asked whether or not y ou w ant to also delete the Client Profile data
from the form fields.
Spell Checking Forms
46 Working with Forms
Use OmniForm’ s spell c hec k e r to verify that the text you enter on a form is correct.
You can use OmniForm’s automatic spell check er or use a the Spelling command to
open the regular spell checker.
Note
▼ To turn on automatic spell checking:
1. Choose Options... in the Tools menu.
2. Click the Spelling tab and select Check spelling automatically.
Before you check spelling, make sure the correct language is selected for
your form. Choose Options... in the Tools menu and click the
International tab. For more information, see OmniForm’s Help.
Page 47

▼ To spell check your form:
The suggested spelling, if
there is one, appears in
the Change To text box.
Other suggested spellings
appear in the
Suggestions list box.
Chapter 2
3. Click OK.
On your form, a red wavy line appears under possibly misspelled words and
double entries.
4. Right-click an error and select the desired correction from the menu that
appears.
1. Click the Spelling button or choose Spelling... in the Tools menu.
The Spelling dialog box appears and displays the first questionable word.
2. Click the desired action that you want to take for the questionable word.
3. Click Close when you are finished spell checking.
Saving Forms
OmniForm automatically saves form records as you fill them out. Saving occurs
after various actions, such as moving from one record to another , printing or closing
a form, and before importing or expor ting data.
You only need to use the Save command in the File menu when:
◆ You have the full version of OmniForm and want to save changes that you
made in Form Designer.
◆ You want to save information that you entered in the Print offsets for data
option in the Print dialog box.
Saving Forms
47
Page 48

Tip
Choose Save As... in the File menu if you w ant to sav e a form to another
location or with a different file name.
Printing Forms
▼ To print your form:
1. Click the Print button or choose Print... in the File menu.
The Print dialog box appears.
If you are printing Form
and Data or Data Only ,
select the records you
want to print.
48 Working with Forms
2. Select the desired options for printing.
Tip
If you are printing from OmniForm Filler, you can choose to print Form
and Data, Data Only, or Form Only. Selecting Data Only just prints
the information you have entered in the fillable fields. This is useful if you
want to print data on a preprinted form.
Page 49

3. Click OK to start printing.
OmniForm prints your form with the selected settings.
Emailing Forms
Y ou can send your OmniF orm Forms and form data as email attachments if you use
Lotus cc:Mail, Lotus Notes, Microsoft Exc hange, or Micr osoft Outlook. OmniForm
selects your installed email application by default if you have only one installed. If
you have more than one of these email applications, select which one you want
OmniForm to use by default.
▼ To select a default email application:
1. Choose Options... in the Tools menu.
The Options dialog box appears.
Chapter 2
2. Click the General tab and select an option under Mail System.
3. Click OK.
Emailing Forms
49
Page 50

Specifying What You Want to Email
When you email a form from OmniForm Filler, you have the choice of sending it in
the following ways:
◆ blank OmniForm Form
◆ OmniForm Form and data
◆ data only
▼ To send a form as an email attachment:
1. Open the form that you want to send.
2. Choose Send... in the File menu.
3. Log into your email application if you are prompted to do so.
The Mail Options dialog box appears.
Click Range... to specify a
range of records if you
are sending form data.
50 Working with Forms
4. Select an option for sending your form.
Click Help for more information about the available options.
5. If you are sending form data, click Range... to specify the range of records you
want to send.
If you do not specify a range, OmniForm will send all records.
6. Click OK in the Mail Options dialog box.
A new message from your email application appears with your OmniForm file
attached and ready for addressing.
7. Address your email message and send it as you would any other message.
Page 51

Adding a Routing Slip
If you are a Microsoft Exc hange or Outlook user, you can add a routing slip to email.
Please see your Microsoft documentation for more information on routing slips.
▼ To add a routing slip:
1. Open the form that you want to send.
2. Choose Add Routing Slip... in the File menu.
The Add Routing Slip dialog box appears.
3. Select the recipients and other routing information.
You can send the document either now or later.
4. Click Route to route the document. Or, click Add Slip to close the dialog box
without routing the form.
Chapter 2
Emailing Forms
51
Page 52

52 Working with Forms
Page 53

Chapter 3
Working with OmniForm Databases
Every OmniForm Form is automatically set up with a searchable database. This
chapter describes how to work with OmniForm databases.
It includes the following topics:
◆ About OmniForm Databases
◆ Moving Through Records in a Database
◆ Creating New Records
◆ Duplicating Existing Records
◆ Searching Records
◆ Sorting Records
◆ Recalculating Records
◆ Deleting Records
◆ Setting Up an OmniForm Database to Be Shared
◆ Refreshing Records in a Shared Form
◆ Exporting Data
◆ Importing Data
◆ Protecting Data
53
Page 54

This is the
fourth record in
the database
for this form.
Use these buttons
to scroll through
records in your
database.
About OmniForm Databases
Every OmniForm Fo rm has its own OmniForm database associated with it. An
OmniForm database is a collection of information stored as individual records.
Each record uses the same form design, but can contain different information in its
fields.
The first time you open a form and fill out information, it becomes the first record
in the database. Anyone with access to the form can create new records in it. See
page 55 for information on creating records.
Click the New
Record button to
create a new blank
record to fill out.
Note
54 Working with OmniForm Databases
Y ou cannot create, duplicate, edit, recalculate, delete, or import
information into form records if data protection is turned on for the
form. See page 71 for more information.
Page 55

Chapter 3
Moving Through Records in a Database
If an OmniForm database has more than one record, you can use the Record
buttons in the fill toolbar or the Go To commands in the Records menu to move
through the database records.
Goes to
previous record.
Goes to first
record.
Displays the current record number.
Type the number of the record you
want to view and press Enter.
Creating New Records
You cannot create records if data protection is turned on for the form. See page 71
for more information.
▼ To create a new record:
1. Open a form in OmniForm Filler.
You must fill in at least one field in a form before creating a new record,
because OmniForm cannot create a new record if the current record is empty.
A form with fields filled only by automatic calculations (such as a date field) is
still considered empty.
Goes to next
record.
Creates new
record.
Goes to last
record.
2. Click the New button in the fill toolbar or choose Go To > New in the
Records menu.
OmniForm creates and displays a new, empty record. The record has the same
form design as all the other records in the database.
Moving Through Records in a Database
55
Page 56

3. Enter the desired information in the record.
OmniForm prompts you to save form records as you fill them out. Saving can
occur after various actions, such as moving from one record to another,
printing or closing a form, and before impor ting or exporting data
In all these cases the Save Record warning appears:
Select Do not prompt me again. Automatically save all form data if you do
not want to be prompted to save form data.
Click Yes or No depending on your choice for saving the data.
If you wish to reactivate the Save Record warning later, you can do that in the
Options dialog box by choosing Options… in the Tools menu.
Check the checkbox to reactivate
Save Record warning
56 Working with OmniForm Databases
Page 57

Duplicating Existing Records
You can duplicate an existing form record to create a new record with the same
data. For example, you might d o this if you need to enter most of the sa me
information from an existing for m record into a new record.
You cannot duplicate records if data protection is turned on for the form. See
page 71 for more information.
▼ To duplicate an existing record:
1. Open a form in OmniForm Filler.
2. Go to the particular record that you want to duplicate.
3. Choose Duplicate Record in the Records menu.
The record is copied and added to the end of the record set.
Searching Records
Chapter 3
OmniForm can quickly search and retrieve records with the information that you
need. These retrieved rec ords are call ed a found set. You can print, mail, or export a
found set.
▼ To search for records:
1. Open a form in OmniForm Filler.
2. Choose Search... in the Records menu.
The Search dialog box appears.
Duplicating Existing Records
57
Page 58

3. Select the field that you want to search in the Field Name drop-down list.
This is the field that contains the information you want to find. All the fields in
your form are listed here.
4. Select a condition in the Condition drop-down list.
A condition describes how to look for information entered in the Value text
box. For example, y ou w ould select is equal to to specify that you want to find
an exact match. Click Help for more information on the conditions you can
set.
5. Type the information you want to find in the Value text box.
Information is not case-sensitive, so entering Gatos will hav e the same result as
entering gatos.
6. Select an option under Scope of Search.
◆ Select Search All Records in the Database to search the entire record
set.
◆ Select Only Search Current Record Set to search a subset of records.
This option is only available when you have a found set open from a
previous search.
58 Working with OmniForm Databases
Page 59

After a search, the record
set switches to just the found
records. Use the Record
buttons to move through the
found set.
Click Clear Search to return
to the full record set.
Search results appear here.
In this case, two records
were found.
Chapter 3
7. Click OK to begin the search.
OmniForm searches and retrieves all records that contain the information you
specified in the Search dialog box. The search results are reported directly
above the form, and the active record set switches to just the found records.
8. Click Clear Search above the form to retur n to the full record set.
Tip
You can narrow the search further by choosing Search... in the Records
menu again and selecting Only Search Current Record Set. You can
search each new subset of records as many times as you need to find the
specific information you want. OmniForm maintains the current found
set if it retrieves no records during a subsequent search.
Searching Records
59
Page 60

Sorting Records
You can sort records in OmniForm based on the ascending, descending, or original
order of specific fields. For example, you could sort invoices by date to find the
most delinquent accounts.
▼ To sort records:
1. Open a form in OmniForm Filler.
2. Choose Sort... in the Records menu.
The Sort dialog box appears.
3. Select the field that you want to sort in the Field Name drop-down list.
All the fields in your form are in this list.
4. Select the desired sort order:
◆ Select Ascending Order to sort records from least to greatest. For
◆ Select Descending Order to sort records from greatest to least. For
◆ Select Original Order Entered after sorting by one of the previous
5. Click OK.
OmniForm sorts the records in the specified order.
60 Working with OmniForm Databases
example, from A–Z or from 0–100. Symbols precede numbers and
numbers precede letters: $40, 40, Forty.
example, from Z–A or from 100–0. Letters precede numbers and numbers
precede symbols: Forty, 40, $40.
options to return records to the order in which they were originally
entered.
Page 61

Recalculating Records
Recalculating record s applies any new or c h anged calculations to se lected records in
a database. Until you recalculate records, new or changed calculations apply only to
new records. For information on creating calculations in records, see the OmniForm
User’s Guide.
For example, suppose you changed the mileage calculation in an expense form to
reflect the latest rate. All new records would use the new calculation and reflect this
rate. You would not want older records to use the new calculation because the
original rate was correct at the time they were filled. If you recalculated all records
after adding the new calculation to the expense form, the mileage rates on your old
records would also change. To prevent this, you could search the records for those
records that are newer than the date that you changed the mileage calculation, and
apply the new calculation only to the newer records.
You cannot recalculate records if data protection is turned on for the form. See
page 71 for more information.
▼ To recalculate records:
1. Open a form in OmniForm Filler.
Chapter 3
2. Choose Recalculate... in the Records menu.
The Recalculate dialog box appears.
3. Select the records to recalculate.
◆ Select All Records to apply the new or changed calculation to either the
current found set or to every record in the database if the entire record set
is open.
◆ Select Current Record Only to apply the new or changed calculation to
just the record you are viewing.
Recalculating Records
61
Page 62

◆ Select From/To and enter a range to apply the new or changed calculation
to a range of records. For example, entering 1 in the From text box and 5
in the To text box would recalculate the first five records in your database
or found set.
Note
4. Click OK.
5. Click OK to close the dialog box that informs you how many records were
You cannot undo a recalculation.
OmniForm recalculates the records according to your specifications.
recalculated successfully.
Deleting Records
You cannot delete records if data protection is turned on for the form. See page 71
for more information.
Note
▼ To delete one or more records:
1. Open a form in OmniForm Filler.
You cannot undo a record deletion. You might want to export
information from a record before deleting it if you want to save its data.
See page 64 for instructions.
2. Go to the record that you want to delete.
3. Choose Delete Record in the Records menu to delete just the current record.
Or, choose Delete All Records in the Records menu to delete every record in
the form database.
4. Click Yes when you are asked to confirm the deletion.
62 Working with OmniForm Databases
Page 63

▼ To delete a specific set of records:
1. Open a form in OmniForm Filler.
2. Click Search... in the Records menu to find the specific records to delete.
See page 57 for more information on searching for records.
3. After finding the desired records, choose Delete All Records in the Records
menu.
This deletion only applies to the found set.
4. Click Yes in the confirmation dialog box to permanently delete the found set of
records.
Setting Up an OmniForm Database to Be Shared
If you have the full version of OmniForm, you can set up an OmniForm database
so that it can be shared by multiple users. This allows anyone who has OmniForm
or OmniForm Filler to fill out new records for the form and look through the
existing form records simultaneously.
Chapter 3
▼ To set up a shared form:
1. Open the form in the OmniForm’s Form Designer.
2. Choose Properties in the File menu to open the Properties dialog box .
3. Select the Sharing tab and click Shared.
4. Click OK to apply the change.
5. Save and close the form, and then open it again.
The shared status does not go into effect until you save and reopen the form.
Setting Up an OmniForm Database to Be Shared
63
Page 64

Refreshing Records in a Shared Form
If you are sharing an OmniForm database with other users, you can refresh records
to see if they have been updated by others while you were working on it.
▼ To refresh a record or records:
1. Open a form in OmniForm Filler.
2. Choose Refresh Record or Refresh All Records in the Records menu.
These commands are available only if the form has been set up to be shared.
OmniForm checks to see if records have been updated and then displays the
latest updates.
Exporting Data
Y ou can export data from OmniForm records to:
◆ Share information with other OmniForm databases.
Data exported as a database file takes up considerably less disk space than the
database itself. Therefore, it can be copied or mailed more quickly than the
entire database.
◆ Share information with different databases.
For example, you might have a FoxPro database where you want to enter
information from an OmniForm database. Simply export the needed
information from OmniForm in the appropriate format and use FoxPro’s
commands to import it.
Tip
64 Working with OmniForm Databases
Y ou can also send other OmniForm users an OmniForm Data file. This
is useful for sharing data when you want to send another user only part of
a database. For more information on OmniForm Data files, please see
OmniForm’s or OmniForm Filler’s Help.
Page 65

Previously saved
export selections
appear in this list.
Click New to start
your export.
Chapter 3
▼ To export information:
1. Open a form in OmniForm Filler.
2. Choose Export Data in the File menu.
3. Click New to start the export process.
The Export Setup dialog box appears.
Note
Installed ODBC database drivers appear in the Available Data Sources
list box when you select ODB C Database in the Export To drop-down
list. Depending on your database driver , you can export up to 255 fields at
a time. See OmniForm’ s or OmniForm Filler’ s Help for more information
on exporting data to an ODBC database.
Exporting Data
65
Page 66

The default file name uses the
currently open OmniForm
database. You can change this
file name if desired.
4. Select where you want to export your data in the Export To drop-down list and
click OK.
The type of dialog box that appears next depends on the type of database file
you selected. For example, the Export As dialog box appears if you selected to
export to an OmniForm Database.
5. Enter the desired name for your exported data file and click Save.
The Export dialog box appears.
Click Range to
specify a range
of records to
export.
Otherwise,
OmniForm
exports all
records.
6. Select a field you want to export and click Add.
Shift-click to select multiple adjacent records, or hold down the mouse button
and drag the cursor over adjacent records. Ctrl-click to select multiple
nonadjacent records.
66 Working with OmniForm Databases
Page 67

Chapter 3
7. Repeat step 6 until you are finished selecting the desired fields. Then click OK.
The Export Data dialog box asks you what you want to do next.
Tip
8. Click Run to start exporting the data as specified. Click Save if you want to
9. Enter a name for your saved selections, and then click Save and Run or Save
When you export data from OmniForm, you can save and reuse your
export selections for future exports. This will save you time whenever you
need to export data from OmniForm. To save your settings during
export, click Save in step 8 of this procedure.
save the export settings for future use.
If you clicked Save, a dialog box prompts you to enter a name for your saved
export selections.
and Exit depending on what you want to do.
Exporting Data
67
Page 68

Previously saved
export selections
appear on this list.
▼ To use saved export settings:
1. Open a form in OmniForm Filler.
2. Choose Export Data in the File menu.
Click Delete to remove
the selected saved
export settings.
Click Edit to modify the
selected saved export
settings.
3. Select the name of the export settings file that you want to use.
4. Click Run.
The Run Saved Export Information dialog box appears.
5.
Click OK to start exporting the data as specified.
Importing Data
You can import data into your OmniForm database from these sources:
◆ Another OmniForm database
◆ An OmniForm Mailable Filler file (either HTML or EXE)
◆ Any supported ODBC database source (available sources depend on the
installed database drivers)
Y ou cannot import data if data protection is turned on for the form. See page 71 for
more information.
68 Working with OmniForm Databases
Page 69

▼ To import data into an OmniForm database:
1. Open a form in OmniForm Filler.
If you are going to import from another OmniForm database, make sure that
the OmniForm file is closed.
2. Choose Import Data... in the File menu.
The Import Setup dialog box appears.
3. Select the type of database information to import in the Import From dropdown list.
Chapter 3
4. Click OK.
The type of dialog box that appears next depends on the type of database file
you selected. For example, the Select Import Files dialog box appears if you
selected to import from an OmniForm Database.
Importing Data
69
Page 70

5. Locate and select the OmniForm file you want to import, and click Open.
More dialog boxes may appear depending on the database source you selected.
Select the appropriate options. F or example , the Import dialog box appears
after you select an OmniForm file.
Fields in the open
OmniForm
database appear
on the left.
Click Auto to
automatically link
all fields with the
same name.
Select this option
to apply existing
calculations to the
imported records.
Click Range to
specify a range of
records to import.
Otherwise,
OmniForm imports
all records.
Fields that you
can import from
the other
database appear
on the right.
6. Select a field on the left and a corresponding field on the right, and then click
Link.
This tells OmniForm which field data to import from the other database and
where to import it in the current database.
7. Click OK when you are done linking fields.
OmniForm imports the information into the selected fields, creating as many
new records as necessary in the process.
70 Working with OmniForm Databases
Page 71

Chapter 3
Protecting Data
Any change made to a form’s design affects all records in its database. For example,
if someone deletes a fillable text field, all the information entered for that field in all
form records will be deleted. T herefore, you might want to protect a form’s design
and data from being altered, especially if it is going to be shared by multiple people.
If you have the full version of OmniForm, you can open a form in Form Designer
and choose Protection... in the Tools menu to turn on settings that protect its
design and data. F o r more information turning on protection, please see the
OmniForm User’s Guide.
Protecting Data
71
Page 72

72 Working with OmniForm Databases
Page 73

Chapter 4
Controlling OmniForm Filler by Voice
OmniForm Filler provides capabilities for different voice engines. This chapter
describes how to utilize them.
It includes the following topics:
◆ Speech Recognition Engines in OmniForm Filler
◆ Automatic Speech Recognition
◆ Supporting Dragon NaturallySpeaking
◆ Speech Recognition in Windows XP Tablet PC Edition
73
Page 74

Speech Recognition Engines Supported by OmniForm Filler
You can use three speech recognition engines with OmniForm Filler. These are:
Automatic Speech Recognition
Automatic Speech Recognition (ASR) is a speech recognition engine integrated into
OmniForm Filler. It needs no training, is speaker independent, and requires small
resources from the system. With ASR you can control OmniForm by voice
commands and fill text into forms by spelling.
ScanSoft Dragon NaturallySpeaking
ScanSoft Dragon NaturallySpeaking is a separate speech recognition solution
requiring more resources, and needs training by each individual user for optimal
operation. Dragon offers text dictating, Select and Say, and other sophisticated
services.
Speech Recognition in Windows XP Tablet PC Edition
Microsoft Windows XP Tablet PC Edition has built-in speech recognition
functionality. It needs voice training by each individual user. Tablet PC users who
would like to use Microsoft's Speech Recognition should consult the documentation
of the Windows XP Tablet PC Edition that shipped with their computer.
Note
74 Controlling OmniForm Filler by Voice
If Dragon is installed, OmniForm Filler use s it as a voice engine. If it is
not installed, and Automatic Speech Recognition is enabled, that will be
used. If neither is enabled, and if OmniForm Filler is installed on a Tablet
PC, the Microsoft Speech Recognition can be used.
Page 75

Automatic Speech Recognition
Enabling
You need to enable Automatic Speech Recognition in order to use it during your
work with OmniForm.
▼ To enable Automatic Speech Recognition:
Click the Voice Naviga tion button or choose Voice Navigation from the
Tools menu.
Navigation
The most frequently used functionality with Automatic Speech Recognition is page
navigation, field navigation, editing, zooming and data handling.
Chapter 4
▼ To navigate in OmniForm Filler by ASR:
Use the voice commands in the following table:
Voice Command Effect
Page Navigation
Go To Page Goes to the given page number
Next Page Goes to the next page
Previous Page Goes to the previous page
Page Up Pages up
Page Down Pages down
Field Navigation
Go To Next Selects next field
Go Back Selects previous field
Automatic Speech Recognition
75
Page 76

Editing
Change Option Changes combo box selection
Check Checks checkbox
Delete Backspace
Delete That Deletes selected text
Zooming
Zoom In Zooms in
Zoom Out Zooms out
Zoom Page Width Zooms to page width
Zoom Full Page Zooms to full page
Data Handling
New Record Inserts a new record
Save Saves data
You can also tell your computer a field name on the form, and OmniForm Filler can
locate the field for you.
▼ To Locate a Form Element by Field Name
Say the Field Name into the microphone.
Note
76 Controlling OmniForm Filler by Voice
The Field Name is the identification of the fill element set during form
design using the Object Definition, Properties tab. A field name is not
necessarily equal to its text label, although it is reasonable to design your
forms that way.
Page 77

Filling
Automatic Speech Recognition has also a limited functionality for filling forms.
W ords can be spelled into form fields, and the input of date values is made easier by
recognizing month names and accepting commands like this year, next year, etc.
▼ To spell textual data or dictate dates in OmniForm Filler by ASR:
Use the voice commands in the following table:
Voice Command Effect
Spelling
Spell Initiates spelling mode
Alfa Letter A
Bravo Letter B
Charlie Letter C
Delta Letter D
Chapter 4
Echo Letter E
Foxtrot Letter F
Golf Letter G
Hotel Letter H
India Letter I
Juliett Lette r J
Kilo Letter K
Lima Letter L
Mike Letter M
November Letter N
Oscar Letter O
Papa Letter P
Automatic Speech Recognition
77
Page 78

Quebec Letter Q
Romeo Letter R
Sierra Letter S
Tango Letter T
Uniform L etter U
Victor Letter V
Whiskey Letter W
X-Ray Letter X
Yankee Letter Y
Zulu Letter Z
Special characters in spelling mode
Symbol Initializes special character mode
Dot .
Underline _
At sign @
Comma ,
Percent %
Dollar $
Space
Date input
Date Initiates date input mode
This year This year
Next year Next year
Last year Last year
78 Controlling OmniForm Filler by Voice
Page 79

January January
February February
March March
April April
May May
June June
July July
August August
September September
October October
November November
December December
Today Today
Chapter 4
Supporting Dragon NaturallySpeaking
ScanSoft Dragon NaturallySpeaking is a separate speech recognition product
that enables users to control Windows applications by voice, and dictate text to the
computer instead of typing. OmniForm Filler requires Dragon NaturallySpeaking
Version 7 or higher. For detailed information on using Dragon please refer to its
documentation.
Enabling
If Dragon is installed on your system, it becomes the active voice engine for
OmniForm Filler automatically.
Supporting Dragon NaturallySpeaking
79
Page 80

Navigation
With Dragon NaturallySpeaking you can generally control Windows applications by
voice, thus you can control OmniForm also. For example, menus are controlled by
telling the name of the menu to your computer.
As forms are displayed in OmniForm Filler in WYSIWYG style, form elements
cannot be recognised as usual Windows screen items. OmniForm Filler provides
access to form elements through the Navigate menu. This lists all form elements,
allowing them to be chosen with Dragon NaturallySpeaking.
▼ To select a field:
1. Say Navigate to activate the Navigate menu.
2. Say the name of a form field listed in the Navigate menu.
Filling
With Dragon NaturallySpeaking you can dictate text into the fields of OmniForm
Filler. For detailed information please refer to the documentation of Dragon.
Select and Say
Select and Say is a text selection and correction feature of Dragon
NaturallySpeaking which is also available in OmniForm Filler. For further
information please refer to the documentation of Dragon.
Tip
Speech Recognition in Windows XP Tablet PC Edition
The Windows XP Tablet PC Edition operating system has its own built-in speec h
recognition functionality.
80 Controlling OmniForm Filler by Voice
For example you have dictated the following sentence into a form field:
"The patient had hi blood pressure." Say select hi to go into the text and
select the individual word or phrase not suitable for the sentence and
change it by dictating the correct string.
Page 81

Enabling
If neither Dragon NaturallySpeaking is installed on your system, nor Automatic
Speech Recognition is enabled, the built-in speech recognition in Windows XP
Tablet PC Edition becomes active in OmniForm Filler.
▼ To disable Automatic Speech Recognition:
Click the Voice Navigation button or choose Voice Navigation from the Tools
menu.
Navigation
With Windows XP Tablet PC Edition you can generally control Windows
applications by voice, thus y ou can control OmniF orm also . F or example, menus are
controlled by telling the name of the menu to your computer.
As forms are displayed in OmniForm Filler in WYSIWYG style, form elements
cannot be recognized as usual Windows screen items. OmniForm Filler provides
access to form elements through the Navigate menu. This lists all form elements,
allowing them to be chosen with the built-in speech recognition in Windows XP
Tablet PC Edition.
Chapter 4
▼ To select a field:
1. Say Navigate to activate the Navigate menu.
2. Say the name of a form field listed in the Navigate menu.
Filling
Microsoft Windows XP Tablet PC Edition supports dictating text to any Windows
application. This feature can also be used with OmniForm Filler. You can dictate
text into form fields through the Tablet PC Input Panel. For further information
refer to the documentation of Windows XP Tablet PC Edition
Speech Recognition in Windows XP Tablet PC Edition
81
Page 82

82 Controlling OmniForm Filler by Voice
Page 83

Chapter 5
Utilizing Special Tablet PC Services
OmniForm Filler can be installed and used on Tablet PC computers. This chapter
describes the specific features designed exclusively for Tablet PC users.
It includes the following topics:
◆ Handwritten Filling
◆ Using Annotations and Drawings on Forms
83
Page 84

Handwritten Filling
OmniForm enables a Tablet PC user to use the tablet pen to handwrite directly into
a form field with cursive. This is a special data input mode available only at Tablet
PC computers.
When the field is exited, the handwritten image is automatically converted to ASCII
text.
The handwritten image is stored with the form record and c an be displayed later.
Handwritten Filling of Text Fields
▼ To activate or deactivate Fill By Hand mode:
1. Click the Fill By Hand button or choose Fill by Hand from the Tools menu.
2. The selected field shows as a handwrite frame.
3. Use the tablet pen to handwrite into the frame.
▼ To resize the Handwrite Frame:
84 Utilizing Special Tablet PC Services
The size of fill text fields may not provide enough space to write text
comfortably into them by hand. OmniForm allows resizing of the handwrite
frame to adjust to the requirements of handwriting.
Page 85

Chapter 5
1. Click the Fill By Hand button or choose Fill by Hand from the Tools menu
2. Select a Fill Text Field in order to display the handwrite frame
3. Tap with the tablet pen on the triangular handle at the right bottom corner of
the frame
4. Drag the handle to the desired position in order to resize the handwrite frame
Note
▼ To delete handwritten text with the tablet pen:
1. Click the Fill By Hand button or choose Fill by Hand from the Tools menu.
2. Select a Fill Text Field in order to display the handwrite frame.
3. Scratch out the content of the field by a triple line similar to the picture below.
4. Lift the tablet pen.
5. The field should now be blank and ready to be filled by hand again if desired.
The other option to get more space for handwriting is to set the Zoom of
the form in the View Menu.
Fill Text Fields can be cleared by triple scratch-out in Handwrite Mode.
Handwritten Filling
85
Page 86

View Handwritten image
Use this command to toggle between the handwritten image and the converted text
image.
Click the View Handwritten Image button or choose View Handwritten
Image from the View menu
All the fields on the form are displayed as handwritten images or normal fields. If
the handwritten frame of a field was resized during handwriting, the field image is
stretched on the handwritten image view so it returns to its original size.
Note
The Tablet PC Input Panel can also be used for handwrite data input with
OmniForm Filler. In this case however the handwritten image is not
stored with the form record.
Choosing a Handwrite Recogniser Engine
Windows XP Tablet PC Edition offers alternative handwrite recogniser engines for
different languages. You can select the appropriate engine in OmniForm Filler.
Choose the desired recogniser from the Set Recogniser submenu of the Tools
menu.
Note
The Default item of this submenu sets the handwrite recogniser engine of
the language set in Regional and Language Options of Control Panel in
Windows XP.
86 Utilizing Special Tablet PC Services
Page 87

Using Annotations and Drawings on Forms
In Annotation Mode you can add notes or drawings on any part of the form. These
annotations serve for communication purpose during the process of form filling.
You can put marks, exclamations, frames or your signature on the form. The
annotations are saved in the database as a separate overlay that is unique to each
form record.
▼ To add notes or drawings to your form:
1. Click the Annotate By Hand button or choose Draw from the Annotate
submenu of the Tools menu.
2. Create your notes or drawings with the tablet pen on the form.
Chapter 5
You can toggle between the Annotation Layer and the normal field view.
▼ To toggle Annotation mode:
Click the Annotate By Hand button or choose Draw from the Annotate
submenu of the Tools menu.
Using Annotations and Drawings on Forms
87
Page 88

This will show or hide all annotations on the form.
Note
Selecting annotations and drawings
You can select any of your notes or drawings by enclosing them with a circle or a
similar closed shape. The selection will be shown as a bounding rectangle.
▼ To select notes or drawings on your form:
1. Click the Select Annotation button or choose Select from the Annotate
2. Draw a circle around the desired drawing object.
88 Utilizing Special Tablet PC Services
Handwritten text or annotations are not visible if the form is later opened
and processed with OmniForm Premium 5.0, OmniForm 5.0 or
OmniForm Filler 5.0. The handwritten information however is still
preserved in the form. Opening the form in OmniForm Filler 5.5, the
handwritten text or the annotations will be visible again.
submenu of the Tools menu.
Page 89

3. A drawing box appears around the object.
Chapter 5
Resizing or moving annotations and drawings
You can resize or move the annotation notes or drawings.
▼ To resize annotations or drawings:
1. Click the Select Annotation button or choose Select from the Annotate
submenu of the Tools menu
2. Select the drawing by putting a selection circle around it.
3. Tap on one handle of the drawing rectangle and drag it to resize the object.
▼ To move annotations or drawings:
1. Click the Select Annotation button or choose Select from the Annotate
submenu of the Tools menu
2. Select the drawing by putting a selection circle around it.
Using Annotations and Drawings on Forms
89
Page 90

3. Tap inside the drawing rectangle and drag the object to the desired location.
Deleting annotations and drawings
Annotations or drawings can be deleted after selection.
▼ To delete notes or drawings from your form:
1. Click the Select Annotation button or choose Select from the Annotate
2. Select the drawing by putting a selection circle around it.
90 Utilizing Special Tablet PC Services
submenu of the Tools menu.
Page 91

Chapter 5
3. Click the Delete Annotation button or choose Delete from the Annotate
submenu of the Tools menu.
Using Annotations and Drawings on Forms
91
Page 92

92 Utilizing Special Tablet PC Services
Page 93

Chapter 6
Technical Information
This chapter provides troubleshooting tips and other technical information about
using OmniForm Filler. Please also look in the Release Notes, Help topics, and
ScanSoft Web pages (www.scansoft.com) for updated information about
OmniForm.
It includes the following topics:
◆ Troubleshooting
◆ OmniForm Filler Compatibility and Limits
◆ Uninstalling OmniForm Filler
93
Page 94

Troubleshooting
Although OmniForm Filler is designed to be easy to use, problems sometimes
occur. Many of the error messages contain self-explanatory descriptions of what to
do: check connections, close other applications to free up memory, and so on.
Sometimes that is all the troubleshooting help you need.
Please see your Windows documentation for information on optimizing your
system and application performance.
Solutions to Try First
Try these solutions if you experience problems starting or using OmniForm Filler:
◆ Make sure that your system meets all requirements listed in Chapter 1.
◆ Visit the support section of ScanSoft’s Web site at www.scansoft.com. It
contains information on using OmniForm Filler and troubleshooting
assistance.
◆ Restart your computer. Make sure other applications are functioning properly.
◆ Run ScanDisk for Windows 95, 98, or Me, or Check Disk for Windo ws NT and
Windows 2000 to check your hard disk for errors. See Windows online Help
for more information.
◆ Defragment your hard disk. See Windows Help for more information.
94 Technical Information
◆ Uninstall and reinstall OmniForm Filler, as described in the last section,
Uninstalling OmniForm Filler.
Low Memory Problems
OmniForm Filler may run poorly under low-memory conditions. This may be
indicated by various error messages or if OmniForm works slowly and accesses the
hard drive often. Try these solutions for low memory conditions:
◆ Restart your computer.
◆ Close other open applications to free up memory.
◆ Defragment your hard disk to free up contiguous blocks of disk space. See
Windows Help for instructions.
◆ Delete files to increase the amount of free hard disk space, as described in the
next section.
Page 95

Chapter 6
◆ Increase your computer’s physical memory (RAM). More memory optimizes
OCR performance. See Chapter 1 for more information.
Low Disk Space Problems
Problems may occur if your system runs low on free disk space. Try these solutions
for low disk space problems:
◆ Empty the Windows Recycle Bin.
◆ Close all open applications and delete the TMP files in the Temp folder. This
folder is usually located in your Windows folder.
◆ Run ScanDisk for Windows 95, 98 or Me, or Check Disk for Windows NT or
Windows 2000 to check for errors that may be using disk space. See Windows
Help for instructions.
◆ Back up unneeded files onto other media and delete them from your hard disk.
◆ Remove Windows applications that you do not use.
◆ Defragment your hard disk. See Windows Help for instructions.
◆ Clear the cache for your Web browser and limit its size. See your browser
documentation for information.
OmniForm Filler Compatibility and Limits
Supported Databases
OmniForm uses industry-standard ODBC to exchange information with the
following databases:
◆ Microsoft Access (2.x or higher)
◆ dBASE (III or higher)
◆ Excel (3.0 or higher)
◆ FoxPro (2.0 or higher)
◆ Paradox (3.x or higher)
◆ Microsoft SQL Server (6 or higher)
◆ Text-based and CSV files
OmniForm Filler Compatibility and Limits
95
Page 96

Supported Graphic Formats
OmniForm Filler can import the following file types for fillable graphic fields:
◆ BMP
◆ GIF
◆ JPEG
◆ PCX
◆ TIFF
◆ Macintosh PICT
OmniForm Filler Limits
The following are limits in OmniForm Filler.
Forms open at one time: 20
Records in a database: 10,000, or approximately 5.4 MB of data across all records
Uninstalling OmniForm Filler
Sometimes uninstalling and then reinstalling OmniForm Filler will solve a problem.
96 Technical Information
Note
▼ To uninstall or reinstall OmniForm Filler:
1. Close OmniForm Filler.
2. Click Start in the Windows taskbar and choose Settings > Control Panel.
3. Double-click the Add/Remove Programs icon.
4. Select OmniForm and click Add/Remove.
5. Click Next in the dialog box that appears.
6. Select Remove and then click Next.
7. Follow instructions until the process is finished.
To uninstall from Windows NT or Windows 2000, you must be logged
into your computer with administrator privileges.
Page 97

Index
A
administrator privileges
required for installation
required for uninstallation 96
Annotate By Hand 87
Annotation Layer 87
annotations 88, 89
attaching files to form records 30–
13
31
attachments
to form records
viewing 31
Automatic Speech Recognition 75
30–31
C
calculations in fields 28
check box fields, filling 22
circle text fields, filling 22
Client Profiles
adding data to
applying existing to forms 44
creating and applying to forms
42
entering data automatically
with
setting up fields for 39
comb fields, filling 21
copying records 57
creating new records 55–56
45
38–46
D
data
adding to User Profiles
entering automatically 32–35,
38–46
exporting 64–68
importing 68–70
protecting 71
using saved export settings 68
database
creating new records in
defined 54, 74, 75, 81, 84
deleting records from 62–63
duplicating records in 57
exporting data from 64–68
exporting records using saved
export settings
importing data to 68–70
moving through records in 55,
84
protecting data in 71
recalculating records in 61–62
refreshing records in 64
searching for records in 57–59
sharing 63–64
sorting records in 60
databases supported by
OmniForm Filler
deleting records 62–63
digital signature fields 26
disk space
freeing up disk space
required for installation 12
68
95
94, 95
35–37
55–56
Dragon NaturallySpeaking 79
duplicating records 57
E
email
adding routing slips
mailing forms 49–51
emailing forms 49–51
entering data automatically 32–35,
51
38–46
exporting data from records 64–68
F
fields
calculations in
check box 22
circle text 22
comb 21
digital signatures 26
fill graphic 23
fillable text 21
highlighting fillable fields 21
moving through 19
searching 57–59
shrink text feature 29
spell checking 46–47
table 23
type ahead feature 28
types of 20
validation settings in 28
file attachments
see attachments
28
97
Page 98

Fill By Hand
fill graphic fields
filling
importing graphics into 24–25
fillable fields
see fields
fillable text fields, filling 21
form data
see data
forms
see also records
attaching files to
Client Profiles, adding data to
85
23
21
30–31
45
Client Profiles, applying
existing profile to
Client Profiles, creating and
applying
Client Profiles, for automatic
data entry
emailing 49–51
moving through fields on 19
opening 15, 18
printing 48
protecting design and data 71
refreshing shared 64
saving 47
setting up fields for Client
Profile information
sharing in database 63–64
spell checking 46–47
User Profiles, adding data to
42
44
38–46
35–37
User Profiles, for automatic
data entry
viewing attachments 31
found set
defined
deleting 63
32–35
57, 88, 90
G
graphics
39
formats supported by
OmniForm Filler
importing existing 24
importing from TWAIN
source
24–25
96
H
Handwrite Frame 84
Handwrite Mode 85
handwriting 84
Handwritten Filling 84
Handwritten image 86
handwritten text 85
I
importing data to records 68–70
importing graphics 24–25
installation
default folder location
instructions for 13–14
starting OmniForm after 15
system requirements 12
uninstalling OmniForm Filler
14
96
upgrading from previous
version
12
L
limitations in OmniForm Filler 96
linking field names for import 70
locking fields with digital signatures
26
M
mail
see email
memory
freeing up memory
required for installation 12
94
moving through fields 19
O
OmniForm database
see database
opening forms
18
P
printing forms 48
protecting form design and data 71
R
recalculating records 61–62
records
see also forms
creating new
deleting 62–63
deleting found set 63
duplicating 57
exporting data from 64–68
exporting with saved settings
55–56
68
importing data 68–70
linking fields for import 70
moving through in a database
55, 84
narrowing search for 59
recalculating 61–62
refreshing on shared forms 64
search results 59
searching for 57–59
sharing in database 63–64
sorting 60
refreshing records in a shared form
64
S
scanning graphics from TWAIN
source
24–25
98 Index
Page 99

ScanSoft Web site
support on
searching for records 57–59
security
protecting form design and
verifying signature fields 27
Select and Say 12
shrink text feature 29
signature fields 26
signing fields with digital signatures
data
93
71
26
sorting records 60
Speech Recognition 73
spell checking forms 46–47
starting OmniForm 15
support
see Troubleshooting
system memory required for
installation
system requirements 12
12
T
table fields, filling 23
Tablet PC 83
Tablet PC Input Panel 81
tablet pen 85, 87
troubleshooting
databases supported
disk space problems 94, 95
graphic formats supported 96
memory problems 94
OmniForm Filler limitations
96
ScanSoft Web site 93
solutions to try first 94
support available 93
uninstalling OmniForm Filler
96
TWAIN source, importing
graphics from
type ahead feature 28
95
24–25
U
uninstalling OmniForm Filler 96
upgrading OmniForm Filler 12
User Profiles
adding data to
entering data automatically
with
35–37
32–35
V
validation settings in fields 28
verifying signature fields 26
View Handwritten image 86
Voice Interfaces 74
W
Windows 2000, administrator
privileges for installation
Windows NT, administrator
privileges for installation
13
13
99
Page 100

100 Index
 Loading...