

Page 1

Installation Guide
Open Enterprise Server 11 SP2
January 2014
www.novell.com/documentation
Page 2

Legal Notices
Novell, Inc. makes no representations or warranties with respect to the contents or use of this documentation, and specifically
disclaims any express or implied warranties of merchantability or fitness for any particular purpose. Further, Novell, Inc.
reserves the right to revise this publication and to make changes to its content, at any time, without obligation to notify any
person or entity of such revisions or changes.
Further, Novell, Inc. makes no representations or warranties with respect to any software, and specifically disclaims any
express or implied warranties of merchantability or fitness for any particular purpose. Further, Novell, Inc. reserves the right to
make changes to any and all parts of Novell software, at any time, without any obligation to notify any person or entity of such
changes.
Any products or technical information provided under this Agreement may be subject to U.S. export controls and the trade
laws of other countries. You agree to comply with all export control regulations and to obtain any required licenses or
classification to export, re-export or import deliverables. You agree not to export or re-export to entities on the current U.S.
export exclusion lists or to any embargoed or terrorist countries as specified in the U.S. export laws. You agree to not use
deliverables for prohibited nuclear, missile, or chemical biological weaponry end uses. See the Novell International Trade
Services Web page (http://www.novell.com/info/exports/) for more information on exporting Novell software. Novell assumes
no responsibility for your failure to obtain any necessary export approvals.
Copyright © 2005–2014 Novell, Inc. All rights reserved. No part of this publication may be reproduced, photocopied, stored on
a retrieval system, or transmitted without the express written consent of the publisher.
Novell, Inc.
1800 South Novell Place
Provo, UT 84606
U.S.A.
www.novell.com
Online Documentation: To access the online documentation for this and other Novell products, and to get updates, see the
Novell Documentation Web page (http://www.novell.com/documentation/oes11/).
Novell Trademarks
For Novell trademarks, see the Novell Trademark and Service Mark list (http://www.novell.com/company/legal/trademarks/
tmlist.html).
Third-Party Materials
All third-party trademarks are the property of their respective owners.
Page 3

Contents
About This Guide 9
1 What’s New or Changed in the OES Install 11
1.1 What’s New (OES 11 SP2). . . . . . . . . . . . . . . . . . . . . . . . . . . . . . . . . . . . . . . . . . . . . . . . . . . . . . . . . 11
1.2 What’s New or Changed in OES 11 SP1 Install. . . . . . . . . . . . . . . . . . . . . . . . . . . . . . . . . . . . . . . . .12
1.3 What’s New or Changed in OES 11 Install. . . . . . . . . . . . . . . . . . . . . . . . . . . . . . . . . . . . . . . . . . . . . 12
2 Preparing to Install OES 11 SP2 13
2.1 Before You Install . . . . . . . . . . . . . . . . . . . . . . . . . . . . . . . . . . . . . . . . . . . . . . . . . . . . . . . . . . . . . . . . 13
2.2 Meeting All Server Software and Hardware Requirements . . . . . . . . . . . . . . . . . . . . . . . . . . . . . . . . 13
2.2.1 Server Software . . . . . . . . . . . . . . . . . . . . . . . . . . . . . . . . . . . . . . . . . . . . . . . . . . . . . . . . . . 13
2.2.2 Server Hardware . . . . . . . . . . . . . . . . . . . . . . . . . . . . . . . . . . . . . . . . . . . . . . . . . . . . . . . . . 14
2.3 NetIQ eDirectory Rights Needed for Installing OES. . . . . . . . . . . . . . . . . . . . . . . . . . . . . . . . . . . . . .15
2.3.1 Rights to Install the First OES Server in a Tree . . . . . . . . . . . . . . . . . . . . . . . . . . . . . . . . . . 15
2.3.2 Rights to Install the First Three Servers in an eDirectory Tree . . . . . . . . . . . . . . . . . . . . . . 15
2.3.3 Rights to Install the First Three Servers in any eDirectory Partition . . . . . . . . . . . . . . . . . . 15
2.4 Installing and Configuring OES as a Subcontainer Administrator . . . . . . . . . . . . . . . . . . . . . . . . . . . 15
2.4.1 Rights Required for Subcontainer Administrators . . . . . . . . . . . . . . . . . . . . . . . . . . . . . . . . 16
2.4.2 Providing Required Rights to the Subcontainer Administrator for Installing and
Managing Samba. . . . . . . . . . . . . . . . . . . . . . . . . . . . . . . . . . . . . . . . . . . . . . . . . . . . . . . . .18
2.4.3 Starting a New Installation as a Subcontainer Administrator . . . . . . . . . . . . . . . . . . . . . . . . 20
2.4.4 Adding/Configuring OES Services as a Different Administrator . . . . . . . . . . . . . . . . . . . . . 20
2.5 Preparing eDirectory for OES 11 SP2 . . . . . . . . . . . . . . . . . . . . . . . . . . . . . . . . . . . . . . . . . . . . . . . . 20
2.5.1 If Your Directory Tree Is Earlier than eDirectory 8.6 . . . . . . . . . . . . . . . . . . . . . . . . . . . . . . 20
2.5.2 If Your LDAP Server Is Running NetWare 6.5 SP2 or Earlier . . . . . . . . . . . . . . . . . . . . . . . 21
2.5.3 If Your Tree Has Ever Contained an OES 1 Linux Server with LUM and NSS
Installed . . . . . . . . . . . . . . . . . . . . . . . . . . . . . . . . . . . . . . . . . . . . . . . . . . . . . . . . . . . . . . . . 21
2.5.4 Extending the Schema. . . . . . . . . . . . . . . . . . . . . . . . . . . . . . . . . . . . . . . . . . . . . . . . . . . . . 23
2.6 Deciding What Patterns to Install . . . . . . . . . . . . . . . . . . . . . . . . . . . . . . . . . . . . . . . . . . . . . . . . . . . . 25
2.7 Obtaining OES 11 SP2 Software . . . . . . . . . . . . . . . . . . . . . . . . . . . . . . . . . . . . . . . . . . . . . . . . . . . . 35
2.8 Preparing Physical Media for a New Server Installation or an Upgrade . . . . . . . . . . . . . . . . . . . . . . 35
2.9 Setting Up a Network Installation Source. . . . . . . . . . . . . . . . . . . . . . . . . . . . . . . . . . . . . . . . . . . . . . 36
2.9.1 SUSE Linux as a Network Installation Source Server . . . . . . . . . . . . . . . . . . . . . . . . . . . . . 36
2.9.2 NetWare as a Network Installation Source Server. . . . . . . . . . . . . . . . . . . . . . . . . . . . . . . . 38
2.9.3 Windows as a Network Installation Source Server . . . . . . . . . . . . . . . . . . . . . . . . . . . . . . . 40
2.10 Always Install OES as an Add-On Product . . . . . . . . . . . . . . . . . . . . . . . . . . . . . . . . . . . . . . . . . . . . 40
2.11 Install Only One Server at a Time . . . . . . . . . . . . . . . . . . . . . . . . . . . . . . . . . . . . . . . . . . . . . . . . . . . 41
2.12 What's Next . . . . . . . . . . . . . . . . . . . . . . . . . . . . . . . . . . . . . . . . . . . . . . . . . . . . . . . . . . . . . . . . . . . . 41
3 Installing OES 11 SP2 as a New Installation 43
3.1 Linux Software RAIDs Are Not Cluster Aware . . . . . . . . . . . . . . . . . . . . . . . . . . . . . . . . . . . . . . . . . . 43
3.2 Linux Software RAIDs . . . . . . . . . . . . . . . . . . . . . . . . . . . . . . . . . . . . . . . . . . . . . . . . . . . . . . . . . . . . 44
3.3 Starting the OES 11 SP2 Installation . . . . . . . . . . . . . . . . . . . . . . . . . . . . . . . . . . . . . . . . . . . . . . . . . 44
3.3.1 Installing from Physical Media . . . . . . . . . . . . . . . . . . . . . . . . . . . . . . . . . . . . . . . . . . . . . . . 44
3.3.2 Installing from a Network Source with DHCP . . . . . . . . . . . . . . . . . . . . . . . . . . . . . . . . . . . 45
3.3.3 Installing from a Network Source without DHCP . . . . . . . . . . . . . . . . . . . . . . . . . . . . . . . . . 46
3.4 Specifying the Installation Mode. . . . . . . . . . . . . . . . . . . . . . . . . . . . . . . . . . . . . . . . . . . . . . . . . . . . . 47
Contents 3
Page 4

3.5 Specifying the Add-On Product Installation Information. . . . . . . . . . . . . . . . . . . . . . . . . . . . . . . . . . . 48
3.6 Setting Up the Clock and Time Zone . . . . . . . . . . . . . . . . . . . . . . . . . . . . . . . . . . . . . . . . . . . . . . . . . 48
3.7 Specifying the Installation Settings for the SLES Base and OES Installation . . . . . . . . . . . . . . . . . . 48
3.7.1 Setting Up Disk Partitions . . . . . . . . . . . . . . . . . . . . . . . . . . . . . . . . . . . . . . . . . . . . . . . . . . 49
3.7.2 Customizing the Software Selections . . . . . . . . . . . . . . . . . . . . . . . . . . . . . . . . . . . . . . . . . 52
3.7.3 Accepting the Installation Settings. . . . . . . . . . . . . . . . . . . . . . . . . . . . . . . . . . . . . . . . . . . .54
3.8 Specifying Configuration Information . . . . . . . . . . . . . . . . . . . . . . . . . . . . . . . . . . . . . . . . . . . . . . . . . 55
3.8.1 Specifying the Password for the System Administrator “root” . . . . . . . . . . . . . . . . . . . . . . . 55
3.8.2 Specifying the Hostname and Domain Name . . . . . . . . . . . . . . . . . . . . . . . . . . . . . . . . . . . 55
3.8.3 Specifying Network Configuration Settings . . . . . . . . . . . . . . . . . . . . . . . . . . . . . . . . . . . . . 56
3.8.4 Testing the Connection to the Internet . . . . . . . . . . . . . . . . . . . . . . . . . . . . . . . . . . . . . . . . . 59
3.8.5 Specifying Novell Customer Center Configuration Settings. . . . . . . . . . . . . . . . . . . . . . . . . 59
3.8.6 Updating the Server Software . . . . . . . . . . . . . . . . . . . . . . . . . . . . . . . . . . . . . . . . . . . . . . .61
3.8.7 Specifying Service Configuration Settings . . . . . . . . . . . . . . . . . . . . . . . . . . . . . . . . . . . . . . 63
3.8.8 Typical and Custom OES Configuration . . . . . . . . . . . . . . . . . . . . . . . . . . . . . . . . . . . . . . . 65
3.8.9 Specifying LDAP Configuration Settings . . . . . . . . . . . . . . . . . . . . . . . . . . . . . . . . . . . . . . . 67
3.8.10 Specifying eDirectory Configuration Settings. . . . . . . . . . . . . . . . . . . . . . . . . . . . . . . . . . . . 69
3.8.11 Configuring OES Services . . . . . . . . . . . . . . . . . . . . . . . . . . . . . . . . . . . . . . . . . . . . . . . . . . 77
3.8.12 Configuration Guidelines for OES Services. . . . . . . . . . . . . . . . . . . . . . . . . . . . . . . . . . . . . 78
3.9 Finishing the Installation. . . . . . . . . . . . . . . . . . . . . . . . . . . . . . . . . . . . . . . . . . . . . . . . . . . . . . . . . . 106
3.10 Verifying That the Installation Was Successful. . . . . . . . . . . . . . . . . . . . . . . . . . . . . . . . . . . . . . . . . 106
3.11 What's Next . . . . . . . . . . . . . . . . . . . . . . . . . . . . . . . . . . . . . . . . . . . . . . . . . . . . . . . . . . . . . . . . . . . 107
4 Installing or Configuring OES 11 SP2 on an Existing Server 109
4.1 Before You Install OES Services on an Existing Server. . . . . . . . . . . . . . . . . . . . . . . . . . . . . . . . . . 109
4.1.1 Always Use YaST to Install and Initially Configure OES Services. . . . . . . . . . . . . . . . . . . 109
4.1.2 Don’t Install OES While Running the Xen Kernel . . . . . . . . . . . . . . . . . . . . . . . . . . . . . . . 110
4.1.3 If You Want OES to Use a Local eDirectory Database on the Server . . . . . . . . . . . . . . . . 110
4.2 Adding/Configuring OES Services on an Existing Server . . . . . . . . . . . . . . . . . . . . . . . . . . . . . . . . 110
4.3 Adding/Configuring OES Services on a Server That Another Administrator Installed . . . . . . . . . . . 114
4.4 What's Next . . . . . . . . . . . . . . . . . . . . . . . . . . . . . . . . . . . . . . . . . . . . . . . . . . . . . . . . . . . . . . . . . . . 114
5 Upgrading to OES 11 SP2 115
5.1 Supported Upgrade Paths . . . . . . . . . . . . . . . . . . . . . . . . . . . . . . . . . . . . . . . . . . . . . . . . . . . . . . . . 115
5.2 Planning for the Upgrade to OES 11 SP2 . . . . . . . . . . . . . . . . . . . . . . . . . . . . . . . . . . . . . . . . . . . . 116
5.2.1 Be Sure to Check the Readme . . . . . . . . . . . . . . . . . . . . . . . . . . . . . . . . . . . . . . . . . . . . . 116
5.2.2 Always Upgrade SLES and OES at the Same Time . . . . . . . . . . . . . . . . . . . . . . . . . . . . . 116
5.2.3 Understanding the Implications for Other Products Currently Installed on the Server. . . . 116
5.3 Meeting the Upgrade Requirements . . . . . . . . . . . . . . . . . . . . . . . . . . . . . . . . . . . . . . . . . . . . . . . . 117
5.3.1 Securing Current Data . . . . . . . . . . . . . . . . . . . . . . . . . . . . . . . . . . . . . . . . . . . . . . . . . . . . 117
5.3.2 Ensuring That There Is Adequate Storage Space on the Root Partition . . . . . . . . . . . . . . 117
5.3.3 Preparing the Server You Are Upgrading . . . . . . . . . . . . . . . . . . . . . . . . . . . . . . . . . . . . . 118
5.3.4 Checking the Server’s IP Address . . . . . . . . . . . . . . . . . . . . . . . . . . . . . . . . . . . . . . . . . . . 118
5.3.5 Checking the Server’s DNS Name . . . . . . . . . . . . . . . . . . . . . . . . . . . . . . . . . . . . . . . . . . 119
5.3.6 Ensuring That the Server Has a Server Certificate . . . . . . . . . . . . . . . . . . . . . . . . . . . . . . 119
5.3.7 Changing the Mount Options Before an Upgrade . . . . . . . . . . . . . . . . . . . . . . . . . . . . . . . 119
5.3.8 Preparing an Installation Source . . . . . . . . . . . . . . . . . . . . . . . . . . . . . . . . . . . . . . . . . . . . 122
5.4 Upgrading to OES 11 SP2 . . . . . . . . . . . . . . . . . . . . . . . . . . . . . . . . . . . . . . . . . . . . . . . . . . . . . . . . 122
5.4.1 For Servers with EVMS and LVM on the System Device . . . . . . . . . . . . . . . . . . . . . . . . . 123
5.4.2 To Upgrade Using a Network Installation Source with DHCP (Offline) . . . . . . . . . . . . . . . 123
5.4.3 Upgrading Using a Network Installation Source without DHCP (Offline). . . . . . . . . . . . . . 124
5.4.4 Using Physical Media to Upgrade (Offline) . . . . . . . . . . . . . . . . . . . . . . . . . . . . . . . . . . . . 126
5.4.5 Selecting the Installation Mode Options. . . . . . . . . . . . . . . . . . . . . . . . . . . . . . . . . . . . . . . 126
5.4.6 Specifying the Partition to Update . . . . . . . . . . . . . . . . . . . . . . . . . . . . . . . . . . . . . . . . . . . 127
5.4.7 Specifying the Add-On Product Installation Information. . . . . . . . . . . . . . . . . . . . . . . . . . . 129
5.4.8 Verifying and Customizing the Update Options in Installation Settings . . . . . . . . . . . . . . . 129
4 OES 11 SP2: Installation Guide
Page 5

5.4.9 Accepting the Installation Settings. . . . . . . . . . . . . . . . . . . . . . . . . . . . . . . . . . . . . . . . . . . 134
5.4.10 Specifying Configuration Information. . . . . . . . . . . . . . . . . . . . . . . . . . . . . . . . . . . . . . . . . 134
5.5 Finishing the Upgrade . . . . . . . . . . . . . . . . . . . . . . . . . . . . . . . . . . . . . . . . . . . . . . . . . . . . . . . . . . . 144
5.6 Using AutoYaST for an OES 11 SP2 Upgrade. . . . . . . . . . . . . . . . . . . . . . . . . . . . . . . . . . . . . . . . . 144
5.6.1 Prerequisites . . . . . . . . . . . . . . . . . . . . . . . . . . . . . . . . . . . . . . . . . . . . . . . . . . . . . . . . . . . 145
5.6.2 Remastering the Integrated ISO without the add_on_products.xml . . . . . . . . . . . . . . . . . 145
5.6.3 Creating an Answer File to Provide the eDirectory and DSfW Passwords . . . . . . . . . . . . 145
5.6.4 Upgrading an OES 2 (64-bit), OES 11 or OES 11 SP1 Server to OES 11 SP2. . . . . . . . . 146
5.6.5 Upgrading an OES 2 (64-bit), OES 11 or OES 11 SP1 XEN Guest Server to OES 11
SP2 . . . . . . . . . . . . . . . . . . . . . . . . . . . . . . . . . . . . . . . . . . . . . . . . . . . . . . . . . . . . . . . . . . 147
5.6.6 Troubleshooting an AutoYaST Upgrade . . . . . . . . . . . . . . . . . . . . . . . . . . . . . . . . . . . . . . 148
5.7 Channel Upgrade from OES 11 SP1 to OES 11 SP2. . . . . . . . . . . . . . . . . . . . . . . . . . . . . . . . . . . . 149
5.7.1 Channel Upgrade from OES 11 SP1 to OES 11 SP2 Via Wagon . . . . . . . . . . . . . . . . . . . 149
5.7.2 Channel Upgrade from OES 11 SP1 to OES 11 SP2 Using Zypper . . . . . . . . . . . . . . . . . 152
5.7.3 Upgrading OES 11 SP1 to OES 11 SP2 Using SMT . . . . . . . . . . . . . . . . . . . . . . . . . . . . . 153
5.7.4 Rolling Back the Server in the Middle of a Wagon-based Channel Upgrade . . . . . . . . . . 154
5.8 Using SUSE Manager to Upgrade from OES 11 SP1 to OES 11 SP2. . . . . . . . . . . . . . . . . . . . . . . 154
5.9 Verifying That the Upgrade Was Successful . . . . . . . . . . . . . . . . . . . . . . . . . . . . . . . . . . . . . . . . . . 155
5.10 Moving to Common Proxy Users After an Upgrade . . . . . . . . . . . . . . . . . . . . . . . . . . . . . . . . . . . . . 156
5.11 What's Next . . . . . . . . . . . . . . . . . . . . . . . . . . . . . . . . . . . . . . . . . . . . . . . . . . . . . . . . . . . . . . . . . . . 157
6 Completing OES Installation or Upgrade Tasks 159
6.1 Determining Which Services Need Additional Configuration . . . . . . . . . . . . . . . . . . . . . . . . . . . . . . 159
6.2 Rebooting the Server after Installing NSS . . . . . . . . . . . . . . . . . . . . . . . . . . . . . . . . . . . . . . . . . . . . 161
6.3 Restarting Tomcat . . . . . . . . . . . . . . . . . . . . . . . . . . . . . . . . . . . . . . . . . . . . . . . . . . . . . . . . . . . . . . 161
6.4 Launching and Configuring Firefox for Linux . . . . . . . . . . . . . . . . . . . . . . . . . . . . . . . . . . . . . . . . . . 161
6.5 Implementing Digital Certificates in an OES Environment . . . . . . . . . . . . . . . . . . . . . . . . . . . . . . . . 161
6.5.1 Configuring the Digital Certificate . . . . . . . . . . . . . . . . . . . . . . . . . . . . . . . . . . . . . . . . . . . 162
6.5.2 Reconfiguring Services after Importing the Certificate. . . . . . . . . . . . . . . . . . . . . . . . . . . . 162
7 Updating (Patching) an OES 11 SP2 Server 165
7.1 Overview of Updating (Patching) . . . . . . . . . . . . . . . . . . . . . . . . . . . . . . . . . . . . . . . . . . . . . . . . . . . 165
7.1.1 The Patch Process Briefly Explained. . . . . . . . . . . . . . . . . . . . . . . . . . . . . . . . . . . . . . . . . 165
7.1.2 Update Options . . . . . . . . . . . . . . . . . . . . . . . . . . . . . . . . . . . . . . . . . . . . . . . . . . . . . . . . . 166
7.2 Preparing the Server for Updating . . . . . . . . . . . . . . . . . . . . . . . . . . . . . . . . . . . . . . . . . . . . . . . . . .166
7.3 Registering the Server in the Novell Customer Center . . . . . . . . . . . . . . . . . . . . . . . . . . . . . . . . . . 167
7.3.1 Prerequisites . . . . . . . . . . . . . . . . . . . . . . . . . . . . . . . . . . . . . . . . . . . . . . . . . . . . . . . . . . . 167
7.3.2 Registering the Server in the Novell Customer Center Using the Command Line . . . . . . 168
7.3.3 Registering the Server in the Novell Customer Center Using the GUI . . . . . . . . . . . . . . . 169
7.4 Updating the Server . . . . . . . . . . . . . . . . . . . . . . . . . . . . . . . . . . . . . . . . . . . . . . . . . . . . . . . . . . . . . 171
7.4.1 Updating the Server Using the Command Line . . . . . . . . . . . . . . . . . . . . . . . . . . . . . . . . . 171
7.5 Verifying That Your Repository Subscriptions Are Up-to-Date. . . . . . . . . . . . . . . . . . . . . . . . . . . . . 172
7.6 Frequently Asked Questions about Updating. . . . . . . . . . . . . . . . . . . . . . . . . . . . . . . . . . . . . . . . . .172
7.6.1 Do I apply all the patches in the catalogs? How do I know which patches to apply? . . . . 172
7.7 Patching From Behind a Proxy Server. . . . . . . . . . . . . . . . . . . . . . . . . . . . . . . . . . . . . . . . . . . . . . . 173
7.8 GUI Based Patching. . . . . . . . . . . . . . . . . . . . . . . . . . . . . . . . . . . . . . . . . . . . . . . . . . . . . . . . . . . . . 173
7.9 Using SUSE Manager to Patch an OES Server. . . . . . . . . . . . . . . . . . . . . . . . . . . . . . . . . . . . . . . . 173
7.9.1 Setting Up SUSE Manager . . . . . . . . . . . . . . . . . . . . . . . . . . . . . . . . . . . . . . . . . . . . . . . . 173
7.9.2 Patching an OES 11 or Later Server Using SUSE Manager . . . . . . . . . . . . . . . . . . . . . . . 176
7.10 Quick Path Updating . . . . . . . . . . . . . . . . . . . . . . . . . . . . . . . . . . . . . . . . . . . . . . . . . . . . . . . . . . . . 176
7.10.1 Do Not Use zypper up without the -t Option . . . . . . . . . . . . . . . . . . . . . . . . . . . . . . . . . . . 177
7.10.2 Command Line Quick Path for Updating OES 11 SP2 . . . . . . . . . . . . . . . . . . . . . . . . . . . 177
7.11 Installing the Latest iManager NPMs After Applying OES Patches . . . . . . . . . . . . . . . . . . . . . . . . . 179
7.12 Restarting the OES Instance of Tomcat After Applying a Tomcat Update . . . . . . . . . . . . . . . . . . . . 179
Contents 5
Page 6

8 Using AutoYaST to Install and Configure Multiple OES Servers 181
8.1 Prerequisites . . . . . . . . . . . . . . . . . . . . . . . . . . . . . . . . . . . . . . . . . . . . . . . . . . . . . . . . . . . . . . . . . . 181
8.2 Setting Up a Control File with OES Components. . . . . . . . . . . . . . . . . . . . . . . . . . . . . . . . . . . . . . . 182
8.2.1 Fixing an Automatically Created Control File. . . . . . . . . . . . . . . . . . . . . . . . . . . . . . . . . . . 182
8.2.2 Using the AutoInstallation Module to Create the Control File . . . . . . . . . . . . . . . . . . . . . . 183
8.3 Setting Up an Installation Source . . . . . . . . . . . . . . . . . . . . . . . . . . . . . . . . . . . . . . . . . . . . . . . . . . . 188
8.4 Cloning an OES Server Post OES Installation and Configuration . . . . . . . . . . . . . . . . . . . . . . . . . . 188
8.4.1 Generating the autoinst.xml File . . . . . . . . . . . . . . . . . . . . . . . . . . . . . . . . . . . . . . . . . . . . 189
8.4.2 Using the autoinst.xml to Reinstall an OES Server . . . . . . . . . . . . . . . . . . . . . . . . . . . . . . 189
9 Installing OES as a VM Host Server 191
9.1 Installing the KVM Hypervisor and Tools . . . . . . . . . . . . . . . . . . . . . . . . . . . . . . . . . . . . . . . . . . . . . 191
9.2 Installing the Xen Hypervisor and Tools . . . . . . . . . . . . . . . . . . . . . . . . . . . . . . . . . . . . . . . . . . . . . . 192
9.3 Upgrading an OES 2 Xen VM Host Server to OES 11 . . . . . . . . . . . . . . . . . . . . . . . . . . . . . . . . . . . 194
9.4 Setting Up Bridging After the Upgrade. . . . . . . . . . . . . . . . . . . . . . . . . . . . . . . . . . . . . . . . . . . . . . . 194
10 Installing, Upgrading, or Updating OES on a VM 195
10.1 System Requirements . . . . . . . . . . . . . . . . . . . . . . . . . . . . . . . . . . . . . . . . . . . . . . . . . . . . . . . . . . . 195
10.1.1 OES 11 SP2 VM Host Considerations . . . . . . . . . . . . . . . . . . . . . . . . . . . . . . . . . . . . . . . . 196
10.1.2 Novell Storage Services Considerations . . . . . . . . . . . . . . . . . . . . . . . . . . . . . . . . . . . . . . 196
10.1.3 Setup Instructions . . . . . . . . . . . . . . . . . . . . . . . . . . . . . . . . . . . . . . . . . . . . . . . . . . . . . . . 196
10.2 Prerequisites . . . . . . . . . . . . . . . . . . . . . . . . . . . . . . . . . . . . . . . . . . . . . . . . . . . . . . . . . . . . . . . . . . 197
10.3 Preparing the Installation Software . . . . . . . . . . . . . . . . . . . . . . . . . . . . . . . . . . . . . . . . . . . . . . . . . 197
10.3.1 Downloading the Installation Software. . . . . . . . . . . . . . . . . . . . . . . . . . . . . . . . . . . . . . . . 197
10.3.2 Preparing the Installation Source Files . . . . . . . . . . . . . . . . . . . . . . . . . . . . . . . . . . . . . . . 197
10.4 Installing an OES 11 SP2 VM Guest . . . . . . . . . . . . . . . . . . . . . . . . . . . . . . . . . . . . . . . . . . . . . . . . 197
10.4.1 Specifying Options for Creating an OES 11 SP2 VM Guest . . . . . . . . . . . . . . . . . . . . . . . 198
10.4.2 Specifying the Installation Mode . . . . . . . . . . . . . . . . . . . . . . . . . . . . . . . . . . . . . . . . . . . . 200
10.4.3 Specifying the Add-On Product Installation Information. . . . . . . . . . . . . . . . . . . . . . . . . . . 201
10.4.4 Completing the OES 11 SP2 VM Guest Installation . . . . . . . . . . . . . . . . . . . . . . . . . . . . . 201
10.5 Upgrading an OES 2 VM Guest to OES 11 SP2 . . . . . . . . . . . . . . . . . . . . . . . . . . . . . . . . . . . . . . . 201
10.5.1 Before You Start the Upgrade Process . . . . . . . . . . . . . . . . . . . . . . . . . . . . . . . . . . . . . . . 202
10.5.2 Starting the Upgrade . . . . . . . . . . . . . . . . . . . . . . . . . . . . . . . . . . . . . . . . . . . . . . . . . . . . . 202
10.6 Managing a Virtual Machine Running OES 11 SP2 . . . . . . . . . . . . . . . . . . . . . . . . . . . . . . . . . . . . . 202
10.7 Setting Up an OES 11 SP2 VM Guest to Use Novell Storage Services (NSS) . . . . . . . . . . . . . . . . 202
11 Installing and Managing NetWare on a Xen-based VM 205
11.1 Introduction . . . . . . . . . . . . . . . . . . . . . . . . . . . . . . . . . . . . . . . . . . . . . . . . . . . . . . . . . . . . . . . . . . . 205
11.2 Support Information . . . . . . . . . . . . . . . . . . . . . . . . . . . . . . . . . . . . . . . . . . . . . . . . . . . . . . . . . . . . . 206
11.2.1 OES Registration Is Required for Support. . . . . . . . . . . . . . . . . . . . . . . . . . . . . . . . . . . . . 206
11.2.2 Supported Configurations and Features . . . . . . . . . . . . . . . . . . . . . . . . . . . . . . . . . . . . . . 206
11.2.3 Unsupported Configurations and Features . . . . . . . . . . . . . . . . . . . . . . . . . . . . . . . . . . . . 206
11.3 Preparing to Install a NetWare VM Guest Server. . . . . . . . . . . . . . . . . . . . . . . . . . . . . . . . . . . . . . .207
11.3.1 Planning for VM Host Servers . . . . . . . . . . . . . . . . . . . . . . . . . . . . . . . . . . . . . . . . . . . . . . 207
11.3.2 Planning for NetWare VM Guest Servers . . . . . . . . . . . . . . . . . . . . . . . . . . . . . . . . . . . . . 208
11.3.3 You Must Use Timesync for Time Synchronization . . . . . . . . . . . . . . . . . . . . . . . . . . . . . . 209
11.3.4 Disabling the Alt+Esc Shortcut on the Host . . . . . . . . . . . . . . . . . . . . . . . . . . . . . . . . . . . . 209
11.4 Installing Virtualized NetWare . . . . . . . . . . . . . . . . . . . . . . . . . . . . . . . . . . . . . . . . . . . . . . . . . . . . . 210
11.4.1 Preparing the Installation Media . . . . . . . . . . . . . . . . . . . . . . . . . . . . . . . . . . . . . . . . . . . . 210
11.4.2 Creating a Xen Virtual Machine and Installing a NetWare VM Guest Server . . . . . . . . . . 210
11.5 Managing NetWare on a Virtual Machine. . . . . . . . . . . . . . . . . . . . . . . . . . . . . . . . . . . . . . . . . . . . . 215
11.5.1 Using the Virtual Machine Manager. . . . . . . . . . . . . . . . . . . . . . . . . . . . . . . . . . . . . . . . . . 216
11.5.2 Using the Command Line . . . . . . . . . . . . . . . . . . . . . . . . . . . . . . . . . . . . . . . . . . . . . . . . . 216
6 OES 11 SP2: Installation Guide
Page 7

11.6 If VM Manager Doesn’t Launch on a Xen VM Host Server . . . . . . . . . . . . . . . . . . . . . . . . . . . . . . . 217
12 Disabling OES 11 Services 219
13 Reconfiguring eDirectory and OES Services 221
13.1 Cleaning Up the eDirectory Server . . . . . . . . . . . . . . . . . . . . . . . . . . . . . . . . . . . . . . . . . . . . . . . . . 221
13.1.1 Before You Clean Up . . . . . . . . . . . . . . . . . . . . . . . . . . . . . . . . . . . . . . . . . . . . . . . . . . . . 221
13.1.2 Reconfiguring the Replica Server . . . . . . . . . . . . . . . . . . . . . . . . . . . . . . . . . . . . . . . . . . . 222
13.1.3 Reconfiguring the CA Server . . . . . . . . . . . . . . . . . . . . . . . . . . . . . . . . . . . . . . . . . . . . . . . 222
13.1.4 Cleaning Up eDirectory . . . . . . . . . . . . . . . . . . . . . . . . . . . . . . . . . . . . . . . . . . . . . . . . . . . 222
13.2 Reconfiguring the eDirectory Server through YaST . . . . . . . . . . . . . . . . . . . . . . . . . . . . . . . . . . . . 223
13.3 Reconfiguring OES Services . . . . . . . . . . . . . . . . . . . . . . . . . . . . . . . . . . . . . . . . . . . . . . . . . . . . . . 223
13.3.1 Re-creating eDirectory Objects . . . . . . . . . . . . . . . . . . . . . . . . . . . . . . . . . . . . . . . . . . . . . 224
13.3.2 Services Requiring Reconfiguration . . . . . . . . . . . . . . . . . . . . . . . . . . . . . . . . . . . . . . . . . 225
13.3.3 Manually Starting Services . . . . . . . . . . . . . . . . . . . . . . . . . . . . . . . . . . . . . . . . . . . . . . . . 226
13.4 Re-configuring iManager . . . . . . . . . . . . . . . . . . . . . . . . . . . . . . . . . . . . . . . . . . . . . . . . . . . . . . . . . 227
14 Security Considerations 229
14.1 Access to the Server During an Installation or Upgrade . . . . . . . . . . . . . . . . . . . . . . . . . . . . . . . . . 229
14.2 Remote Installations Through VNC . . . . . . . . . . . . . . . . . . . . . . . . . . . . . . . . . . . . . . . . . . . . . . . . . 229
14.3 Improperly Configured LDAP Servers . . . . . . . . . . . . . . . . . . . . . . . . . . . . . . . . . . . . . . . . . . . . . . . 229
15 Troubleshooting 231
15.1 Deleting the Existing eDirectory Objects when Reinstalling the OES Server or Reconfiguring
the eDirectory. . . . . . . . . . . . . . . . . . . . . . . . . . . . . . . . . . . . . . . . . . . . . . . . . . . . . . . . . . . . . . . . . . 231
15.2 eDirectory User Password Screen Does Not Show Up During an Upgrade . . . . . . . . . . . . . . . . . . 232
15.3 eDirectory Restart Results in an Error Message on a Non-DSfW Server . . . . . . . . . . . . . . . . . . . . 232
15.4 Problem In Assigning IP Address For autoinst.xml-based Installations. . . . . . . . . . . . . . . . . . . . . . 232
15.5 iManager not Configured or Installed Properly. . . . . . . . . . . . . . . . . . . . . . . . . . . . . . . . . . . . . . . . . 233
15.6 eDirectory Restart Results in an Error Message on a Non-DSfW Server . . . . . . . . . . . . . . . . . . . . 233
15.7 The DEFAULT SLP Scope Gets added to the slp.conf File During an Upgrade to OES 11 SP2. . . 233
15.8 zlib-devel and zlib-devel-32bit Package Conflict During the Channel Upgrade to OES 11 SP2 . . . 234
15.9 The change_proxy_pwd.sh Script Fails to Synchronize Password . . . . . . . . . . . . . . . . . . . . . . . . . 234
15.10 OES Installation Fails Due to Encrypted OES Media URL in the autoinst.xml File . . . . . . . . . . . . . 235
15.11 The POODLE Security Vulnerability. . . . . . . . . . . . . . . . . . . . . . . . . . . . . . . . . . . . . . . . . . . . . . . . . 235
A OES 11 File and Data Locations 237
A.1 General Rules . . . . . . . . . . . . . . . . . . . . . . . . . . . . . . . . . . . . . . . . . . . . . . . . . . . . . . . . . . . . . . . . . 237
A.2 Exceptions . . . . . . . . . . . . . . . . . . . . . . . . . . . . . . . . . . . . . . . . . . . . . . . . . . . . . . . . . . . . . . . . . . . . 238
B AutoYaST XML Tags 239
B.1 arkmanager . . . . . . . . . . . . . . . . . . . . . . . . . . . . . . . . . . . . . . . . . . . . . . . . . . . . . . . . . . . . . . . . . . . 239
B.2 edirectory . . . . . . . . . . . . . . . . . . . . . . . . . . . . . . . . . . . . . . . . . . . . . . . . . . . . . . . . . . . . . . . . . . . . . 240
B.3 imanager . . . . . . . . . . . . . . . . . . . . . . . . . . . . . . . . . . . . . . . . . . . . . . . . . . . . . . . . . . . . . . . . . . . . . 245
B.4 iprint . . . . . . . . . . . . . . . . . . . . . . . . . . . . . . . . . . . . . . . . . . . . . . . . . . . . . . . . . . . . . . . . . . . . . . . . . 245
B.5 ncpserver . . . . . . . . . . . . . . . . . . . . . . . . . . . . . . . . . . . . . . . . . . . . . . . . . . . . . . . . . . . . . . . . . . . . . 246
B.6 ncs . . . . . . . . . . . . . . . . . . . . . . . . . . . . . . . . . . . . . . . . . . . . . . . . . . . . . . . . . . . . . . . . . . . . . . . . . . 246
B.7 netstorage . . . . . . . . . . . . . . . . . . . . . . . . . . . . . . . . . . . . . . . . . . . . . . . . . . . . . . . . . . . . . . . . . . . . 248
B.8 novell-afp . . . . . . . . . . . . . . . . . . . . . . . . . . . . . . . . . . . . . . . . . . . . . . . . . . . . . . . . . . . . . . . . . . . . . 248
Contents 7
Page 8

B.9 novell-cifs . . . . . . . . . . . . . . . . . . . . . . . . . . . . . . . . . . . . . . . . . . . . . . . . . . . . . . . . . . . . . . . . . . . . . 249
B.10 novell-dhcp. . . . . . . . . . . . . . . . . . . . . . . . . . . . . . . . . . . . . . . . . . . . . . . . . . . . . . . . . . . . . . . . . . . . 250
B.11 novell-dns . . . . . . . . . . . . . . . . . . . . . . . . . . . . . . . . . . . . . . . . . . . . . . . . . . . . . . . . . . . . . . . . . . . . . 252
B.12 novell-ifolder3. . . . . . . . . . . . . . . . . . . . . . . . . . . . . . . . . . . . . . . . . . . . . . . . . . . . . . . . . . . . . . . . . . 253
B.13 novell-lum. . . . . . . . . . . . . . . . . . . . . . . . . . . . . . . . . . . . . . . . . . . . . . . . . . . . . . . . . . . . . . . . . . . . . 256
B.14 novell-quickfinder . . . . . . . . . . . . . . . . . . . . . . . . . . . . . . . . . . . . . . . . . . . . . . . . . . . . . . . . . . . . . . . 258
B.15 novell-samba . . . . . . . . . . . . . . . . . . . . . . . . . . . . . . . . . . . . . . . . . . . . . . . . . . . . . . . . . . . . . . . . . . 258
B.16 nss . . . . . . . . . . . . . . . . . . . . . . . . . . . . . . . . . . . . . . . . . . . . . . . . . . . . . . . . . . . . . . . . . . . . . . . . . . 260
B.17 oes-ldap . . . . . . . . . . . . . . . . . . . . . . . . . . . . . . . . . . . . . . . . . . . . . . . . . . . . . . . . . . . . . . . . . . . . . . 260
B.18 sms. . . . . . . . . . . . . . . . . . . . . . . . . . . . . . . . . . . . . . . . . . . . . . . . . . . . . . . . . . . . . . . . . . . . . . . . . . 261
C Documentation Updates 263
8 OES 11 SP2: Installation Guide
Page 9

About This Guide
This guide describes how to install, upgrade, and update Novell Open Enterprise Server (OES) 11
SP2. Except where specifically stated, the content of this guide applies to installing OES on a
computer’s physical hardware rather than on a Xen virtual machine host server.
Chapter 1, “What’s New or Changed in the OES Install,” on page 11
Chapter 2, “Preparing to Install OES 11 SP2,” on page 13
Chapter 3, “Installing OES 11 SP2 as a New Installation,” on page 43
Chapter 4, “Installing or Configuring OES 11 SP2 on an Existing Server,” on page 109
Chapter 5, “Upgrading to OES 11 SP2,” on page 115
Chapter 6, “Completing OES Installation or Upgrade Tasks,” on page 159
Chapter 7, “Updating (Patching) an OES 11 SP2 Server,” on page 165
Chapter 8, “Using AutoYaST to Install and Configure Multiple OES Servers,” on page 181
Chapter 9, “Installing OES as a VM Host Server,” on page 191
Chapter 10, “Installing, Upgrading, or Updating OES on a VM,” on page 195
Chapter 11, “Installing and Managing NetWare on a Xen-based VM,” on page 205
Chapter 12, “Disabling OES 11 Services,” on page 219
Chapter 13, “Reconfiguring eDirectory and OES Services,” on page 221
Chapter 14, “Security Considerations,” on page 229
Chapter 15, “Troubleshooting,” on page 231
Appendix A, “OES 11 File and Data Locations,” on page 237
Appendix B, “AutoYaST XML Tags,” on page 239
Appendix C, “Documentation Updates,” on page 263
Audience
This guide is intended for system administrators.
Feedback
We want to hear your comments and suggestions about this guide and the other documentation
included with Novell OES. Please use the User Comment feature at the bottom of each page of the
OES online documentation.
Documentation Updates
The latest version of the OES 11 SP2: Installation Guide is available at the Open Enterprise Server 11
documentation website.
About This Guide 9
Page 10

Additional Documentation
For more information about See
Planning and implementing OES 11 SP2 OES 11 SP2: Planning and Implementation Guide
Migration from and coexistence with other products “Different Migration Tools” in the OES 11 SP2:
Migration T ool Administration Guide
Installing OES 11 SP2 on a Xen Virtual Host Server Chapter 10, “Installing, Upgrading, or Updating
OES on a VM,” on page 195
SLES 11 SP3 Deployment details SUSE LINUX Enterprise Server 11 SP3
Deployment Guide (https://www.suse.com/
documentation/sles11/book_sle_deployment/data/
book_sle_deployment.html)
SLES 11 SP3 Administration details SUSE LINUX Enterprise Server 11 SP3
Administration Guide (https://www.suse.com/
documentation/sles11/book_sle_admin/data/
book_sle_admin.html)
10 OES 11 SP2: Installation Guide
Page 11

1
What’s New or Changed in the OES
1
1.1
Install
This section describes enhancements to Install for Novell Open Enterprise Server (OES) 11:
Section 1.1, “What’s New (OES 11 SP2),” on page 11
Section 1.2, “What’s New or Changed in OES 11 SP1 Install,” on page 12
Section 1.3, “What’s New or Changed in OES 11 Install,” on page 12
What’s New (OES 11 SP2)
In addition to bug fixes, the following enhancements and behavior changes are provided in OES 11
SP2:
Express Install
Beginning with OES 11 SP2, Express Install has been introduced to help you install OES 11 SP2 with
minimal user intervention. For more information, see “Typical and Custom OES Configuration” in the
OES 11 SP2: Installation Guide.
Cloning Post Install or Upgrade
Beginning with OES 11 SP2, you can clone an OES server after the installation or upgrade. For more
information, see “Cloning an OES Server Post OES Installation and Configuration” in the OES 11
SP2: Installation Guide.
NCPFS Package Dependency Replaced with Novell Client for Linux
Beginning with OES 11 SP2, the OES dependency on the NCPFS open source package has been
replaced with the Command Line Utilities for Novell Client,
is no longer supported or bundled.
novell-qtgui-cli
. The NCPFS package
Reconfiguring iManager
If iManager is not configured or installed properly, you can use the reconfiguration scripts to reinstall
it. For more information, see “Re-configuring iManager” in the OES 11 SP2: Installation Guide.
Interoperability with Partnering Vendors
Interoperability with some antivirus and Hierarchical Storage Management (HSM) partner products
has been improved in OES 11 SP2.
What’s New or Changed in the OES Install 11
Page 12

1.2
What’s New or Changed in OES 11 SP1 Install
Unattended upgrade from OES 2 or OES 11 to OES 11 SP1 has been enhanced and has
undergone some changes. For more information, see “Using AutoYaST for an OES 11 SP2
Upgrade” in the OES 11 SP2: Installation Guide.
A single integrated ISO to install or upgrade OES 11 SP1 is now available. This ISO contains
both SLES 11 SP2 and OES 11 SP1.
Channel upgrade support is added in OES 11 SP1. It supports upgrade from OES 11 to OES 11
SP1.
1.3
What’s New or Changed in OES 11 Install
Novell Linux Volume Manager (NLVM) replaces the Enterprise Volume Management System
(EVMS).
Rug and Zen-updater are now replaced with zypper and PackageKit.
OpenWBEM has now been replaced with Small Footprint CIM Broker (SFCB) as the Web-Based
Enterprise Management system.
12 OES 11 SP2: Installation Guide
Page 13

2
2
Preparing to Install OES 11 SP2
In preparation for the installation, perform the tasks and understand the information in the following
sections:
Section 2.1, “Before You Install,” on page 13
Section 2.2, “Meeting All Server Software and Hardware Requirements,” on page 13
Section 2.3, “NetIQ eDirectory Rights Needed for Installing OES,” on page 15
Section 2.4, “Installing and Configuring OES as a Subcontainer Administrator,” on page 15
Section 2.5, “Preparing eDirectory for OES 11 SP2,” on page 20
Section 2.6, “Deciding What Patterns to Install,” on page 25
Section 2.7, “Obtaining OES 11 SP2 Software,” on page 35
Section 2.8, “Preparing Physical Media for a New Server Installation or an Upgrade,” on page 35
Section 2.9, “Setting Up a Network Installation Source,” on page 36
Section 2.10, “Always Install OES as an Add-On Product,” on page 40
Section 2.11, “Install Only One Server at a Time,” on page 41
Section 2.12, “What's Next,” on page 41
2.1
2.2
2.2.1
Before You Install
Before you install Novell Open Enterprise Server 11 (OES 11 SP2), review the following information:
“Planning Your OES 11 SP2 Implementation” in the OES 11 SP2: Planning and Implementation
Guide
“Before You Install” in the OES 11 SP2: Readme
Meeting All Server Software and Hardware
Requirements
Before installing OES 11 SP2, ensure that your system meets the following requirements:
Section 2.2.1, “Server Software,” on page 13
Section 2.2.2, “Server Hardware,” on page 14
Server Software
As part of the OES 11 SP2 installation, you install SUSE Linux Enterprise Server 11 SP3.
IMPORTANT: OES 11 SP2 services were developed and tested on a default and fully-patched SLES
11 SP3 server base.
Preparing to Install OES 11 SP2 13
Page 14

As you install OES 11 SP2, do not change any of the SLES 11 SP3 Base Technologies package
selections, such as Java support. Doing so can cause various problems, such as the installation
failing or one or more OES 11 SP2 services not working properly.
If you are installing on an existing SLES 11 SP3 server, be sure to verify that all of the default SLES
11 SP3 components are installed before attempting to install OES 11 SP2 services.
2.2.2
Server Hardware
Table 2-1 Server Hardware Requirements
System Component Minimum Requirements Recommended Requirements
Computer Any server-class computer that
runs with AMD64 or Intel*
EM64T processors.
Memory 1 GB of RAM 2 GB of RAM for the base system. Additional RAM
Free Disk Space 7 GB of available, unpartitioned
disk space
DVD Drive DVD drive if installing from
physical media
IMPORTANT: OES 11 SP2 is an add-on product
to SLES 11 SP3; it only runs on x86_64. Other
processors that are supported by SLES 11 SP3,
such as Itanium (IA64) and Intel x86(IA32), are not
supported for running OES services.
NOTE: Services such as iManager, SMS, and
NRM run in 32-bit mode on a 64-bit platform.
might be required depending on which OES
components are selected and how they are used.
10 GB of available, unpartitioned disk space.
Additional disk space might be required,
depending on which OES components are
selected and how they are used.
DVD drive if installing from physical media
Hard Drive 20 GB
Network Board Ethernet 100 Mbps
IP address
One static IP address
Subnet mask
Default gateway
Mouse N/A USB or PS/2
Server computer BIOS Using a DVD installation
source, prepare the BIOS on
your server computer so that it
boots from the DVD drive first.
Video Card and Monitor 1024 X 768 resolution or higher
with a minimum color depth of 8
bits (256 colors)
Although it is technically possible to run the
ncurses installation at a lower resolution, some
informational messages aren’t displayed because
text strings don’t wrap to the constraints of the
window.
NOTE: The RAM and disk space amounts shown here are for system components only. The OES
service components that you install might require additional RAM and disk space.
14 OES 11 SP2: Installation Guide
Page 15

Be sure to complete the planning instructions in the OES 11 SP2: Planning and Implementation
Guide for each component that you install.
2.3
2.3.1
2.3.2
NetIQ eDirectory Rights Needed for Installing OES
Section 2.3.1, “Rights to Install the First OES Server in a Tree,” on page 15
Section 2.3.2, “Rights to Install the First Three Servers in an eDirectory Tree,” on page 15
Section 2.3.3, “Rights to Install the First Three Servers in any eDirectory Partition,” on page 15
Rights to Install the First OES Server in a Tree
To install an OES server in a tree, you must have rights to extend the schema, meaning that you need
Supervisor rights to the root of the tree.
You can extend the schema by using the Novell Schema Tool in YaST or by having a user with
Supervisor rights to the root of the eDirectory tree install the first OES server and the first instance of
each OES service that will be used into the tree. For more information, see Section 2.5.4, “Extending
the Schema,” on page 23.
Rights to Install the First Three Servers in an eDirectory
Tree
If you are installing the server into a new tree, the Admin user that is created during the OES
installation has full rights to the root of the tree. Using the account for user Admin allows the installer
to extend the eDirectory schema for OES as necessary. To install the first OES server in an
eDirectory tree, you must have the Supervisor right at the root of the eDirectory tree.
2.3.3
2.4
Rights to Install the First Three Servers in any eDirectory
Partition
By default, the first three servers installed in an eDirectory partition automatically receive a replica of
that partition. To install a server into a partition that does not already contain three replica servers, the
user must have either the Supervisor right at the root of the tree or the Supervisor right to the
container in which the server holding the partition resides.
Installing and Configuring OES as a Subcontainer
Administrator
IMPORTANT: The information explained in Section 2.3, “NetIQ eDirectory Rights Needed for
Installing OES,” on page 15 is prerequisite to the information contained in this section.
This section outlines the required eDirectory rights and explains how a subcontainer administrator
approaches various installation tasks.
Section 2.4.1, “Rights Required for Subcontainer Administrators,” on page 16
Section 2.4.2, “Providing Required Rights to the Subcontainer Administrator for Installing and
Managing Samba,” on page 18
Preparing to Install OES 11 SP2 15
Page 16

Section 2.4.3, “Starting a New Installation as a Subcontainer Administrator,” on page 20
Section 2.4.4, “Adding/Configuring OES Services as a Different Administrator,” on page 20
2.4.1
Rights Required for Subcontainer Administrators
For security reasons, you might want to create one or more subcontainer administrators
(administrators that are in a container that is subordinate to the container that user Admin is in) with
sufficient rights to install additional OES servers, without granting them full rights to the entire tree.
A subcontainer administrator needs the rights listed in Table 2-2 to install an OES server into the tree.
These rights are typically granted by placing all administrative users in a Group or Role in eDirectory,
and then assigning the rights to the Group or Role. Sample steps for assigning the rights to a single
subcontainer administrator are provided as a general guide.
Table 2-2 Subcontainer Administrator Rights Needed to Install
Rights Needed Sample Steps to Follow
Supervisor right to itself 1. In iManager, click View Objects > the Browse tab, then browse to and
select the subcontainer administrator.
2. Click the administrator object, then select Modify Trustees.
3. Click the Assigned Rights link for the administrator object.
4. For the [All Attributes Rights] property, select Supervisor, then click Done
> OK.
Supervisor right to the
container where the server
will be installed
1. Browse to the container where the subcontainer administrator will install
the server.
2. Click the container object and select Modify Trustees.
3. Click Add Trustee, browse to and select the subcontainer administrator,
then click OK.
4. Click the Assigned Rights link for the administrator object.
5. For the [All Attributes Rights] and [Entry rights] properties, select
Supervisor, then click Done > OK > OK.
Supervisor right to the W0
object located inside the KAP
object in the Security
container
Supervisor right to the
Security container when
installing the NMAS login
methods
16 OES 11 SP2: Installation Guide
1. Browse to Security > KAP.
2. In KAP, click W0 and select Modify Trustees.
3. Click Add Trustee, browse to and select the subcontainer administrator,
then click OK.
4. Click the Assigned Rights link for the administrator object.
5. For the [All Attributes Rights] and [Entry rights] properties, select
Supervisor, then click Done > OK > OK.
If the subcontainer administrator will install the NMAS login methods:
1. Browse to and select Security.
2. Select Modify Trustees.
3. Click Add Trustee, browse to and select the subcontainer administrator,
then click OK.
4. Click the Assigned Rights link for the administrator object.
5. For the [All Attributes Rights] and [Entry rights] properties
Supervisor, then click Done > OK > OK.
, select
Page 17

Rights Needed Sample Steps to Follow
Create right to its own
container (context)
Create right to the container
where the UNIX Config object
is located
Read right to the Security
container object for the
eDirectory tree
1. Browse to and select the container where you created the subcontainer
administrator.
2. Select Modify Trustees.
3. Click Add Trustee, browse to and select the subcontainer administrator,
then click OK.
4. Click the Assigned Rights link for the administrator object.
5. For the [Entry Rights] property, select Create, then click Done > OK > OK.
1. Browse to and select the container where the UNIX Config object is
located. By default, this is the Organization object.
2. Select Modify Trustees.
3. Click Add Trustee, browse to and select the subcontainer administrator,
then click OK.
4. Click the Assigned Rights link for the administrator object.
5. For the [Entry Rights] property, select Create, then click Done > OK > OK.
This is not needed if the Supervisor right was assigned because of NMAS.
If the subcontainer administrator won’t install the NMAS login methods, do the
following:
1. Browse to and select Security.
2. Select Modify Trustees.
3. Click Add Trustee, browse to and select the subcontainer administrator,
then click OK.
4. Click the Assigned Rights link for the administrator object.
5. For the [All Attributes Rights] property, select Read, then click Done > OK
> OK.
Read right to the
NDSPKI:Private Key attribute
on the Organizational CA
object (located in the Security
container)
Read and Write rights to the
UNIX Config object
1. Browse to Security and select the Organizational CA object.
2. Select Modify Trustees.
3. Click Add Trustee, browse to and select the subcontainer administrator,
then click OK.
4. Click the
Assigned Rights link for the administrator object.
5. Click the Add Property button.
6. Select NDSPKI:Private Key, then click OK.
The Read right should be automatically assigned.
7. Click Done > OK > OK.
1. Browse to and select the UNIX Config object.
2. Select Modify Trustees.
3. Click Add Trustee, browse to and select the subcontainer administrator,
then click OK.
4. Click the Assigned Rights link for the administrator object.
5. For the [All Attributes Rights] property, select Write (Read is already
selected), then click Done > OK > OK.
Preparing to Install OES 11 SP2 17
Page 18

Rights Needed Sample Steps to Follow
2.4.2
Write right to the [All Attribute
Rights] property for the
admingroup object
1. Browse to and select the admingroup object.
2. Select Modify Trustees.
3. Click Add Trustee, browse to and select the subcontainer administrator,
then click OK.
4. Click the Assigned Rights link for the administrator object.
5. For the [All Attributes Rights] property, select Write (Compare and Read
are already selected), then click Done > OK > OK.
When you install DNS/DHCP into an existing tree with DNS/DHCP, see the following additional
guidelines:
For DNS, see “eDirectory Permissions ” in the OES 11 SP2: Novell DNS/DHCP Services for
Linux Administration Guide.
For DHCP, see “eDirectory Permissions ” in the OES 11 SP2: Novell DNS/DHCP Services for
Linux Administration Guide.
Providing Required Rights to the Subcontainer
Administrator for Installing and Managing Samba
Prior to installing any new OES Samba server in a tree, ensure that you provide supervisor rights to
the subcontainer administrator for the location mentioned in Table 2-3.
Table 2-3 Subcontainer Administrator Rights Needed to Manage Samba
Rights Needed Sample Steps to Follow
Supervisor rights to the container where the Linux
workstation object will be located
1. In iManager, click View Object s, then browse and
select the container where the OES Samba
server will be installed.
2. Click Actions > Modify Trustees.
3. On the Modify Trustees page, click Assigned
Rights next to the trustee name for which you
want to modify rights.
4. Click the desired container admin object to add it
to the Selected Objects section.
5. Click OK.
6. Select Property Name rights (All Attribute Rights
and Entry Rights) and assign Supervisor rights,
then click Done.
18 OES 11 SP2: Installation Guide
Page 19

Rights Needed Sample Steps to Follow
Supervisor rights to the container where the Unix
config object will be located
Supervisor rights to the container where the Samba/
LDAP base context will be located
1. On the Novell iManager, click View Objects, then
in the Tree, browse and select the container
where Unix Config object is located.
2. Select the Unix Config object, then click Actions
> Modify trustees.
3. On the Modify Trustees page, click Assigned
Rights next to the trustee name for which you
want to modify rights.
4. Click the desired container admin object to add it
to the Selected Objects section.
5. Click OK.
6. Select Property Name rights (All Attribute Rights
and Entry Rights) and assign Supervisor rights,
then click Done.
1. On the Novell iManager, click View Objects, then
in the Tree, browse and select the container
where the Samba/LDAP base context will reside.
2. Select the Current Level tree object, then click
Actions > Modify trustees.
3. On the Modify Trustees page, click Assigned
Rights next to the trustee name for which you
want to modify rights.
4. Click the desired container admin object to add it
to the Selected Objects section.
5. Click OK.
6. Select Property Name rights (All Attribute Rights
and Entry Rights) and assign Supervisor rights,
then click Done.
Supervisor rights to the container where the Samba
proxy user will be installed
1. On the Novell iManager, click View Objects, then
in the Tree, browse and select the container
where the Samba proxy user context will be
installed.
2. Select the Samba proxy object, then click Actions
> Modify trustees.
3. On the Modify Trustees page, click Assigned
Rights next to the trustee name for which you
want to modify rights.
4. Click the desired container admin object to add it
to the Selected Objects section.
5. Click OK.
6. Select Property Name rights (All Attribute Rights
and Entry Rights) and assign Supervisor rights,
then click Done
.
Preparing to Install OES 11 SP2 19
Page 20

2.4.3
Starting a New Installation as a Subcontainer Administrator
You can install a new OES server into an existing tree as a subcontainer administrator if you have the
following:
The rights described in “Rights Required for Subcontainer Administrators” on page 16
The rights described in “Providing Required Rights to the Subcontainer Administrator for
Installing and Managing Samba” on page 18
(If applicable) The rights described for the server installations in “NetIQ eDirectory Rights
Needed for Installing OES” on page 15
When you reach the eDirectory Configuration - Existing Tree page, enter your fully distinguished
name (FDN) and password. After verifying your credentials, the installation proceeds normally.
2.4.4
2.5
2.5.1
Adding/Configuring OES Services as a Different
Administrator
To add or configure OES services on an OES server that another administrator installed, see “Adding/
Configuring OES Services on a Server That Another Administrator Installed” on page 114.
Preparing eDirectory for OES 11 SP2
Section 2.5.1, “If Your Directory Tree Is Earlier than eDirectory 8.6,” on page 20
Section 2.5.2, “If Your LDAP Server Is Running NetWare 6.5 SP2 or Earlier,” on page 21
Section 2.5.3, “If Your Tree Has Ever Contained an OES 1 Linux Server with LUM and NSS
Installed,” on page 21
Section 2.5.4, “Extending the Schema,” on page 23
If Your Directory Tree Is Earlier than eDirectory 8.6
If you are installing an OES 11 SP2 server into an eDirectory tree that is earlier than eDirectory 8.6,
do the following before installing your first OES server in an existing NetWare tree:
1 Extend the schema by using Deployment Manager. See “Schema Update” in the NW65 SP8:
Installation Guide.
2 Ensure that the schema is synchronized throughout the tree from root:
2a Enter the following commands at the System Console prompt of the NetWare server with
the Master of root:
set DSTRACE=on
set DSTRACE=nodebug
set DSTRACE=+Schema
set DSTRACE=*SSD
set DSTRACE=*SSA
2b Toggle to the Directory Services screen and look for the message
2c On each server that holds a Master of a partition, enter the following commands at the
System Console prompt:
set DSTRACE=off
20 OES 11 SP2: Installation Guide
All Processed = YES.
Page 21

set DSTRACE=nodebug
set DSTRACE=+Schema
set DSTRACE=*SS
2d Toggle to the Directory Services screen and look for the message
All Processed = YES.
2.5.2
2.5.3
If Your LDAP Server Is Running NetWare 6.5 SP2 or Earlier
If you are installing into an eDirectory tree that is using a NetWare server to supply LDAP, you should
upgrade the LDAP server that the OES installation will communicate with to NetWare 6.5 SP3 or later.
A server running NetWare 6.5 SP2 or earlier will probably abend.
If Your Tree Has Ever Contained an OES 1 Linux Server with
LUM and NSS Installed
Having NSS volumes on OES servers requires certain system-level modifications, most of which are
automatic. For more information, see “System User and Group Management in OES 11 SP2” in the
OES 11 SP2: Planning and Implementation Guide.
“NetStorage, X-Tier, and Their System Users” on page 21
“An NSS Complication” on page 21
“eDirectory Solves the Basic Problem” on page 22
“The OES 2 Solution: Standardizing the UIDs on all OES servers” on page 22
NetStorage, X-Tier, and Their System Users
By default, certain OES services, such as NetStorage, rely on a background Novell service named XTier.
To run on an OES server, X-Tier requires two system-created users (named
novlxregd
) and one system-created group that the users belong to (named
novlxsrvd
novlxtier
and
).
An NSS Complication
The two X-Tier users mentioned above, and their group, are created on the local system when X-Tier
is installed. For example, they are created when you install NetStorage, and their respective UIDs
and GID are used to establish ownership of the service’s directories and files.
For NetStorage to run, these X-Tier users and group must be able to read data on all volume types
that exist on the OES server.
As long as the server has only Linux traditional file systems, such as Ext3 and Reiser, NetStorage
runs well.
However, if the server has NSS volumes, an additional requirement is introduced. NSS data can only
be accessed by eDirectory users. Consequently, the local X-Tier users can’t access NSS data, and
NetStorage can’t run properly.
Preparing to Install OES 11 SP2 21
Page 22

eDirectory Solves the Basic Problem
When NSS volumes are created on the server, the two X-Tier system users and their group are
moved to eDirectory and enabled for Linux User Management (LUM). See “Linux User Management:
Access to Linux for eDirectory Users” in the OES 11 SP2: Planning and Implementation Guide.
After the move to eDirectory, they can function as both eDirectory and POSIX users, and they no
longer exist on the local system.
The OES 2 Solution: Standardizing the UIDs on all OES servers
If your eDirectory tree has ever contained an OES 1 Linux server with NSS and LUM installed, do the
following on each server (including OES 2) that has NSS and LUM installed:
1 Log in as
id novlxregd
id novlxsrvd
The standardized X-Tier IDs are UID 81 for
novlxtier
2 If you see the following ID information, the X-Tier IDs are standardized and you can move to the
root
and open a terminal prompt. Then enter the following commands:
novlxregd
, UID 82 for
novlxsrvd
.
, and GID 81 for
next server:
uid=81(novlxregd) gid=81(novlxtier) groups=81(novlxtier)
uid=82(novlxsrvd) gid=81(novlxtier) groups=81(novlxtier),8(www)
If you see different IDs than those listed above, such as 101, 102, 103, etc., record the numbers
for both X-Tier users and the novlxtier group. You need these IDs to standardize the IDs on the
server.
3 Download the following script file:
fix_xtier_ids.sh (http://www.novell.com/documentation/oes2/scripts/fix_xtier_ids.sh)
4 Customize the template file by replacing the variables in angle brackets (<>) as follows:
<server_name>: The name of the server object in eDirectory.
Replace this variable with the server name.
For example, if the server name is myserver, replace <server_name> with myserver so that
the line in the settings section of the script reads
server=myserver
<context>: The context of the X-Tier user and group objects.
Replace this variable with the fully distinguished name of the context where the objects
reside.
For example, if the objects are an Organizational Unit object named servers, replace
ou=servers,o=company.
<admin fdn>: The full context of an eDirectory admin user, such as the Tree Admin, who
has rights to modify the X-Tier user and group objects.
Replace this variable with the admin name and context, specified with comma-delimited
syntax.
For example, if the tree admin is in an Organization container named company, the full
context is cn=admin,o=company and the line in the settings section of the script reads
admin_fdn="cn=admin,o=company"
22 OES 11 SP2: Installation Guide
Page 23

<novlxregd_uid>: The UID that the system assigned to the local novlxregd user. It might or
might not be the same on each server, depending on whether the
successfully.
Replace this variable with the UID reported for the novlxregd user on this server as listed
when you ran the commands in Step 1 on page 22.
In the example script, the original UID is 101. It is changed to 81 in the third line of the script.
The sixth line changes the UID on all of the files and directories on the server that are
owned by the novlxregd user from 101 to 81.
<novlxsrvd_uid>: The UID that the system assigned to the local novlxsrvd user. It might
not be the same on each server, depending on whether the
successfully.
Replace this variable with the UID reported for the novlxsrvd user on this server as listed
when you ran the commands in Step 1 on page 22.
In the example script, the original UID is 103. It is changed to 82 in the fourth line of the
script. The seventh line changes the UID on all of the files and directories on the server that
are owned by the
<novlxtier_gid>: The GID that the system assigned to the local novlxtier group. It might not
be the same on each server, depending on whether the
Replace this variable with the GID reported for the novlxtier group on this server as listed
when you ran the commands in Step 1 on page 22.
In the example script, the original GID is 101. It is changed to 81 in the second line of the
script. The sixth and seventh lines change the GID from 101 to 81 for all of the files and
directories on the server that are owned by the
5 Make the script executable and run it on the server.
novlxsrvd
user from 103 to 82.
novlxtier
nssid.sh
group.
nssid.sh
nssid.sh
script ran
script ran successfully.
script ran
2.5.4
IMPORTANT: Changes to the X-Tier files are not reported on the terminal.
Error messages are reported, but you can safely ignore them. The script scans the entire file
system, and some files are locked because the system is running.
6 Repeat from Step 1 for each of the other servers in the same context.
Extending the Schema
An eDirectory tree must have its schema extended to accommodate OES 11 servers and services as
explained in the following sections:
“Who Can Extend the Schema?” on page 23
“Which OES 11 SP2 Services Require a Schema Extension?” on page 24
“Extending the Schema While Installing OES 11 SP2” on page 24
“Using the YaST Plug-In to Extend the Schema” on page 25
“Extending the Schema for Novell Cluster Services” on page 25
Who Can Extend the Schema?
Only an administrator with the Supervisor right at the root of an eDirectory tree can extend the tree’s
schema.
Preparing to Install OES 11 SP2 23
Page 24

Which OES 11 SP2 Services Require a Schema Extension?
The following service schema extensions are included with OES 11 SP2.
A single asterisk (*) indicates a service that is either required for OES 11 SP2 servers or for the
default services that are installed on every OES 11 SP2 server.
Unmarked extensions are implemented the first time their respective services are installed, unless
the schema was previously extended using another method, such as the YaST plug-in (see “Using
the YaST Plug-In to Extend the Schema” on page 25).
NetIQ Directory Services*
Novell Linux User Management (LUM)*
Novell iPrint Services
Novell DHCP Services
Novell DNS Services
Novell NCP Server
Novell NetStorage
Novell Storage Services (NSS)
Novell SMS*
Novell iFolder
Novell Domain Services for Windows
NetIQ NMAS*
Novell CIFS
Novell Clustering
Novell Cluster Services requires you to extend the schema manually. Follow the instructions in
“Installing, Configuring, and Repairing Novell Cluster Services” in the OES 11 SP2: Novell
Cluster Services for Linux Administration Guide.
Novell Remote Manager
Novell Samba
Extending the Schema While Installing OES 11 SP2
The simplest way to extend the schema for OES 11 SP2 servers is to have a tree admin install the
first OES 11 SP2 server and the first instance of each OES 11 SP2 service that you plan to run on
your network.
After this initial installation, you can assign subcontainer admins with the required rights to install
additional servers and services. For more information on the required rights for the various OES
services, see “Rights Required for Subcontainer Administrators” on page 16.
24 OES 11 SP2: Installation Guide
Page 25

Using the YaST Plug-In to Extend the Schema
If you want a subcontainer admin to install the first OES 11 SP2 server or the first instance of an OES
11 SP2 service in an existing tree, and you don’t want to grant that admin the Supervisor right to the
root of the tree, someone with the Supervisor right to root can extend the schema by using YaST from
any of the following locations:
An OES 11 SP2 server running in another tree
Install a fully patched SLES 11 SP3 server, then install OES 11 SP2 without installing any of the
services, followed by the
To run the Novell Schema Tool:
1 On the server’s desktop, click Computer and open the YaST Control Center.
2 Click Open Enterprise Server > Novell Schema Tool.
3 Depending on the installation method you used, you might be required to insert your OES 11
SP2 installation media.
4 On the NetIQ eDirectory Extension Utility page, specify the information for an eDirectory server
with a Read/Write replica of the Root partition.
Be sure to provide the correct information to authenticate as an admin user with the Supervisor
right at the root of the target tree. Otherwise, the schema extension fails.
5 Select all of the other services you plan to run on any of the OES 11 SP2 servers in the tree.
6 Click Next.
The schema is extended.
The YaST2 novell-schematool utility writes the schema event messages to the
novell/eDirectory/log/oes_schema.log
yast2 novell-schema
file on the server where the utility is running.
tool installation.
/var/opt/
2.6
Extending the Schema for Novell Cluster Services
If you want a subcontainer administrator to install the first instance of Novell Cluster Services in a
tree, you can extend the schema by following the instructions in “Installing, Configuring, and
Repairing Novell Cluster Services” in the OES 11 SP2: Novell Cluster Services for Linux
Administration Guide.
Deciding What Patterns to Install
A default SLES 11 SP3 installation has the following base technology, graphical environment, and
primary function patterns selected for installation. With the exception explained in the two Important
notes below, you can accept or deselect these patterns and install additional patterns as desired.
Preparing to Install OES 11 SP2 25
Page 26

Table 2-4 Standard SLES 11 SP3 Installation Patterns
Pattern Description
Server Base System Consists of all packages that are common to all Novell SUSE Linux
Enterprise products. Also provides a Linux Standard Base 3.0 compliant
runtime environment.
This pattern is selected for installation by default.
IMPORTANT: You must either install this pattern or the Common Code
Base pattern.
Common Code Base The largest system. It includes all packages available with SUSE Linux,
except those that would result in dependency conflicts.
IMPORTANT: You must either install this pattern or the Server Base
System pattern.
Novell AppArmor Novell AppArmor is an open source Linux application security framework
that provides mandatory access control for programs, protecting against
the exploitation of software flaws and compromised systems. AppArmor
includes everything you need to provide effective containment for
programs (including those that run as
and even zero-day attacks. AppArmor offers an advanced tool set that
largely automates the development of per-program application security so
that no new expertise is required.
root
) to thwart attempted exploits
This pattern is selected for installation by default.
GNOME Desktop Environment The GNOME desktop environment is an intuitive and attractive desktop for
users. The GNOME development platform is an extensive framework for
building applications that integrate into the rest of the desktop.
This pattern is selected for installation by default.
X Window System In continuous use for over 20 years, the X Window System provides the
only standard platform-independent networked graphical window system
bridging the heterogeneous platforms in today's enterprise: from network
servers to desktops, thin clients, laptops, and handhelds, independent of
operating system and hardware.
This pattern is selected for installation by default.
Print Server Sets up a print server to host print queues so that they can be accessed
by other computers on the same network, including machines running
Microsoft Windows operating systems. The print server can accept print
jobs from client computers and direct them to locally attached printers or to
network printers. LPD, CUPS, and SMB print servers and queues are
supported.
This pattern is selected for installation by default.
The OES add-on installation includes the following OES Services patterns:
26 OES 11 SP2: Installation Guide
Page 27

Table 2-5 OES Services Pattern Descriptions
Pattern Description
Novell AFP
Novell Archive and
Version Services
A Novell AFP server allows Macintosh clients to access data stored on NSS
volumes in the same way they access data on a Mac OS X server.
This pattern selects and installs these services:
Novell Backup / Storage Management Services (SMS)
NetIQ eDirectory
Novell Storage Services (NSS)
Novell Linux User Management (LUM)
Novell Remote Manager (NRM)
Novell NCP Server
This pattern cannot be installed on the same server as these services:
Novell Domain Services for Windows
Novell Archive and Version Services systematically captures and stores versions of
your network files in an archive database, on a schedule that you determine. Users
can search for a previous version of a file and quickly restore it.
This pattern selects and installs these services:
Novell Backup/Storage Management Services (SMS)
NetIQ eDirectory
Novell Linux User Management (LUM)
Novell Remote Manager (NRM)
Novell Storage Services (NSS)
Novell NCP Server
Novell Backup/Storage
Management Services
(SMS)
This pattern cannot be installed on the same server as these services:
Novell Domain Services for Windows
The Novell backup infrastructure (called Storage Management Services or SMS)
provides backup applications with the framework to develop a complete backup
and restore solution.
SMS helps back up file systems (such as NSS) or application data (such as data
from GroupWise) on NetWare and SUSE Linux Enterprise Server (SLES) to
removable tape media or other media for off-site storage. It provides a single
consistent interface for all file systems and applications across NetWare and
SLES.
This pattern selects and installs these services:
Novell Linux User Management (LUM)
Novell Remote Manager (NRM)
Preparing to Install OES 11 SP2 27
Page 28

Pattern Description
Novell CIFS CIFS (Common Internet File System) is a network sharing protocol. Novell CIFS
enables Windows, Linux, and UNIX client workstations to copy, delete, move, save,
and open files on an OES 11 SP2 server. CIFS allows read and write access from
multiple client systems simultaneously.
This pattern selects and installs these services:
Novell Backup / Storage Management Services (SMS)
NetIQ eDirectory
Novell Storage Services (NSS)
Novell Linux User Management (LUM)
Novell Remote Manager (NRM)
Novell NCP Server
This pattern cannot be installed on the same server as these services:
Novell Domain Services for Windows
Novell Samba
Novell Cluster Services
(NCS)
Novell Cluster Services is a server clustering system that ensures high availability
and manageability of critical network resources including data, applications, and
services. It is a multinode clustering product for Linux that is enabled for NetIQ
eDirectory and supports failover, failback, and migration (load balancing) of
individually managed cluster resources.
Novell Cluster Services lets you add Linux nodes to an existing NetWare 6.5
cluster without bringing down the cluster, or it lets you create an all-Linux cluster.
With a mixed cluster, you can migrate services between OS kernels, and if services
are alike on both platforms (such as NSS), you can set the services to fail over
across platforms.
Using Novell Cluster Services with iSCSI technologies included in OES, you can
build inexpensive clustered SANs on commodity gigabit Ethernet hardware. You
can leverage existing hardware into a high availability solution supporting Linux
and NetWare clusters.
This pattern selects and installs these services:
Novell Backup/Storage Management Services (SMS)
Novell Linux User Management (LUM)
Novell Remote Manager (NRM)
This pattern cannot be installed on the same server with these services:
High Availability
28 OES 11 SP2: Installation Guide
Page 29

Pattern Description
Novell DHCP Novell DHCP (Dynamic Host Configuration Protocol) uses eDirectory to provide
configuration parameters to client computers and integrate them into a network.
The eDirectory integration lets you have centralized administration and
management of DHCP servers across the enterprise and lets you set up DHCP
subnet replication via NetIQ eDirectory.
This pattern selects and installs these services:
Novell Backup/Storage Management Services (SMS)
NetIQ eDirectory
Novell Linux User Management (LUM)
Novell Remote Manager (NRM)
Novell DNS Novell DNS uses NetIQ eDirectory to deliver information associated with domain
names, in particular the IP address.
This eDirectory integration lets you have centralized administration and
management of DNS servers across the enterprise and lets you set up a DNS zone
via NetIQ eDirectory.
This pattern selects and installs these services:
Novell Backup/Storage Management Services (SMS)
NetIQ eDirectory
Novell Linux User Management (LUM)
Novell Remote Manager (NRM)
Preparing to Install OES 11 SP2 29
Page 30

Pattern Description
Novell Domain Services
for Windows
Novell Domain Services for Windows provides seamless cross-authentication
capabilities between Windows/Active Directory and Novell OES 11 SP2 servers. It
is a suite of integrated technologies that removes the need for the Novell Client
when logging on and accessing data from Windows workstations in eDirectory
trees. This technology simplifies the management of users and workstations in
mixed Novell-Microsoft environments.
This pattern selects and installs these services:
Novell Backup / Storage Management Services (SMS)
NetIQ eDirectory
Novell DNS
Novell Linux User Management (LUM)
Novell Remote Manager (NRM)
Novell Storage Services (NSS)
Novell NCP Server
This pattern cannot be installed on the same server as these services:
Novell Samba
Novell CIFS
Novell AFP
Novell Archive and Version Services
Novell FTP
Novell iFolder
Novell NetStorage
Novell Pre-Migration Server
Novell QuickFinder
NetIQ eDirectory NetIQ eDirectory services are the foundation for the world's largest identity
30 OES 11 SP2: Installation Guide
management, high-end directory service that allows businesses to manage
identities and security access for employees, customers, and partners. More than
just an LDAP data store, eDirectory is the identity foundation for managing the
relationships that link your users and their access rights with corporate resources,
devices, and security policies.
This pattern selects and installs these services:
Novell Backup/Storage Management Services (SMS)
Novell Linux User Management (LUM)
Novell Remote Manager (NRM)
This pattern cannot be installed on the same server as these services:
OpenLDAP
Page 31

Pattern Description
Novell FTP Novell FTP (File Transfer Protocol) is integrated with NetIQ eDirectory so that
users can securely transfer files to and from OES volumes.
This pattern selects and installs these services:
Novell Backup/Storage Management Services (SMS)
NetIQ eDirectory
Novell Linux User Management (LUM)
Novell Remote Manager (NRM)
This pattern cannot be installed on the same server as these services:
Novell Domain Services for Windows
Novell iFolder Novell iFolder 3.9 is a simple and secure storage solution that increases user
productivity by enabling users to back up, access, and manage their personal files
from anywhere, at any time.
This pattern selects and installs these services:
Novell Backup/Storage Management Services (SMS)
NetIQ eDirectory
Novell Linux User Management (LUM)
Novell Remote Manager (NRM)
This pattern cannot be installed on the same server as these services:
Novell Domain Services for Windows
Novell iManager Novell iManager is a Web-based administration console that provides secure,
customized access to network administration utilities and content from virtually
anywhere you have access to the Internet and a Web browser.
iManager provides the following benefits:
Single point of administration for NetIQ eDirectory objects, schema, partitions,
and replicas
Single point of administration for many other network resources
Management of many Novell products by using iManager plug-ins
Role-Based Services (RBS) for delegated administration
This pattern selects and installs these services:
Novell Backup/Storage Management Services (SMS)
Novell Linux User Management (LUM)
Novell Remote Manager (NRM)
Preparing to Install OES 11 SP2 31
Page 32

Pattern Description
Novell iPrint Novell iPrint lets employees, partners, and customers access printers from a
variety of locations across the network and the Internet. From a web browser, users
can easily install any printer on the network from any location.
This pattern selects and installs these services:
Novell Backup/Storage Management Services (SMS)
NetIQ eDirectory
Novell Linux User Management (LUM)
Novell Remote Manager (NRM)
This pattern cannot be installed on the same server as these services:
CUPS
Novell Linux User
Management (LUM)
Novell NCP Server /
Dynamic Storage
Technology
Linux User Management (LUM) enables eDirectory users to function as local
POSIX users on Linux servers. This functionality lets administrators use eDirectory
to centrally manage remote users for access to one or more OES servers.
This pattern selects and installs these services:
Novell Backup/Storage Management Services (SMS)
Novell Remote Manager (NRM)
Novell NCP Server for Linux enables support for login scripts, mapping drives to
OES servers, and other services commonly associated with Novell Client access.
This means that Windows users with the Novell Client installed can be seamlessly
transitioned to file services on OES.
NCP Server includes Novell Dynamic Storage Technology, which allows seldomaccessed files on NSS volumes to be automatically moved, according to policies
set by the administrator, from faster-access storage to lower-cost storage media
where the files can be more easily managed and backed up.
Services included with NCP (NetWare Core Protocol) are file access, file locking,
security, tracking of resource allocation, event notification, synchronization with
other servers, connection and communication, print services and queue
management, and network management.
This pattern selects and installs these services:
Novell Backup/Storage Management Services (SMS)
NetIQ eDirectory
Novell Linux User Management (LUM)
Novell Remote Manager (NRM)
32 OES 11 SP2: Installation Guide
Page 33

Pattern Description
Novell NetStorage Novell NetStorage provides the solution for simple, Internet-based access to file
storage. NetStorage is a bridge between a company's protected Novell storage
network and the Internet. It lets users access files securely from any Internet
location, with nothing to download or install on the user's workstation.
With Novell NetStorage, a user can securely access files from any Internet-enabled
machine. Users can copy, move, rename, delete, read, write, recover, and set
trustee assignments (based on their privilege level) on files between a local
workstation and a Novell storage network. Access is available from any Internetattached workstation, anywhere in the world. There is no need to email or copy
data from one machine to another.
This pattern selects and installs these services:
Novell Backup/Storage Management Services (SMS)
Novell iManager
Novell Linux User Management (LUM)
Novell Remote Manager (NRM)
This pattern cannot be installed on the same server as these services:
Novell Domain Services for Windows
Novell Pre-Migration
Server
A Novell Pre-Migration Server is not actually a service. Rather, it is a specialpurpose server—the target of a Server ID Transfer Migration.
Selecting this option causes this server to be installed without an eDirectory
replica, thus preparing it to assume the identity of another server that you plan to
decommission. For more information, see the OES 11 SP2: Migration Tool
Administration Guide.
You should also select and install all the services that you plan to migrate from the
other server. Services that are not installed on this server prior to the migration
cannot be migrated.
This pattern selects and installs these services:
Novell Backup / Storage Management Services (SMS)
NetIQ eDirectory (without a replica)
Novell Linux User Management (LUM)
Novell Remote Manager (NRM)
This pattern cannot be installed on the same server as these services:
Novell Domain Services for Windows
Preparing to Install OES 11 SP2 33
Page 34

Pattern Description
Novell QuickFinder QuickFinder lets your users find the information they're looking for on any of your
public and private Web sites, your partners' sites, and any number of additional
Web sites across the Internet or internal file servers, all from a single search form
on your Web page.
You can easily modify the look and feel of any of the sample search results pages
to match your corporate design.
You can create full-text indexes of HTML, XML, PDF, Word, OpenOffice.org, and
many other document formats in almost any language with the QuickFinder
Unicode indexing engine.
You can configure and maintain your indexes remotely from anywhere on the
network with the QuickFinder Web-based administration module.
This pattern selects and installs these services:
Novell Backup/Storage Management Services (SMS)
Novell Linux User Management (LUM)
Novell Remote Manager (NRM)
This pattern cannot be installed on the same server as these services:
Novell Domain Services for Windows
Novell Remote Manager
(NRM)
Novell Remote Manager lets you securely access and manage one or more
servers from any location through a standard Web browser. You can use Novell
Remote Manager to monitor your server's health, change the configuration of your
server, or perform diagnostic and debugging tasks.
This pattern selects and installs these services:
Novell Backup/Storage Management Services (SMS)
Novell Linux User Management (LUM)
Novell Samba Novell Samba provides Windows (CIFS and HTTP-WebDAV) access to files stored
on an OES server's file system using an eDirectory user name and password.
This pattern selects and installs these services:
Novell Backup/Storage Management Services (SMS)
Novell Linux User Management (LUM)
Novell Remote Manager (NRM)
This pattern cannot be installed on the same server as these services:
Novell CIFS
Novell Domain Services for Windows
34 OES 11 SP2: Installation Guide
Page 35

Pattern Description
Novell Storage Services
(NSS)
The Novell Storage Services (NSS) file system provides many unique and powerful
file system capabilities. It is especially suited for managing file services for
thousands of users in an organization. It also includes Novell Distributed File
Services for NSS volumes.
Unique features include visibility, trustee access control model, multiple
simultaneous namespace support, native Unicode, user and directory quotas, rich
file attributes, multiple data stream support, event file lists, and a file salvage
subsystem.
NSS volumes are cross-compatible between kernels. You can mount a nonencrypted NSS data volume on either the Linux or NetWare kernel and move it
between them. In a clustered SAN, volumes can fail over between kernels,
allowing for full data and file system feature preservation when migrating data to
Linux.
This pattern selects and installs these services:
Novell Backup/Storage Management Services (SMS)
NetIQ eDirectory
Novell NCP Server
Novell Linux User Management (LUM)
Novell Remote Manager (NRM)
This pattern cannot be installed on the same server as these services:
2.7
2.8
Xen Virtual Machine Host Server
If you want to install these services, you can select them to install with most other patterns during the
initial server installation by customizing the installation or you can install them after installing your
initial Open Enterprise Server. For more information, see “Customizing the Software Selections” on
page 52 and “Installing or Configuring OES 11 SP2 on an Existing Server” on page 109.
Obtaining OES 11 SP2 Software
For information on obtaining OES software, see “Getting and Preparing OES 11 SP2 Software” in the
OES 11 SP2: Planning and Implementation Guide.
Preparing Physical Media for a New Server
Installation or an Upgrade
To prepare physical media for an installation or upgrade, you must first download ISO image files and
then burn the DVDs that you need for your server. Detailed download instructions are available in
“Getting and Preparing OES 11 SP2 Software” in the OES 11 SP2: Planning and Implementation
Guide.
Table 2-6 lists the image files you need.
Preparing to Install OES 11 SP2 35
Page 36

Table 2-6 Files to Download
Platform Files needed
64-bit server with DVD drive
1 Download the ISO files you need for your hardware capabilities.
2 Ensure that the checksum of the files you have downloaded are the same as those specified on
the download page. To get the checksum, use the
3 Insert a blank, writable DVD into your DVD burner.
4 Select the option to create a DVD from an image file.
5 Select ISO as the file type.
6 Select the first image file (see Table 2-6) from the location you downloaded it to.
7 Complete the DVD creation process.
8 Label the disk.
9 Repeat this process for each of the ISO image files you downloaded.
SLES 11 SP3 DVD ISO (SLES-11-SP3-DVD-
x86_64-GM-DVD1.iso)
OES 11 SP2 DVD ISO (OES11-SP2-addon-
x86_64-DVD1.iso)
Integrated ISO that has SLES 11 SP3 and OES 11
SP2 (OES11-SP2-addon_with_SLES11-SP3x86_64-DVD.iso)
These ISO files can be downloaded from the OES 11
SP2 download page (http://download.novell.com/
Download?buildid=hPn9_LMecxQ~).
md5sum
<file name> command.
2.9
2.9.1
Setting Up a Network Installation Source
The YaST install lets you use installation sources files that are hosted on the network to install a new
server or upgrade an existing server. The following sections describe how to set up a network
installation source server on the following platforms:
Section 2.9.1, “SUSE Linux as a Network Installation Source Server,” on page 36
Section 2.9.2, “NetWare as a Network Installation Source Server,” on page 38
Section 2.9.3, “Windows as a Network Installation Source Server,” on page 40
SUSE Linux as a Network Installation Source Server
To prepare a network installation source on a SUSE Linux server, see:
“Setting Up the Server Holding the Installation Sources” in the SLES 11 SP3 Deployment Guide
The instructions in the following sections:
“Requirements” on page 37
“Procedure” on page 37
“NFS Protocol Configuration” on page 37
“FTP Protocol Configuration” on page 38
“HTTP Protocol Configuration” on page 38
36 OES 11 SP2: Installation Guide
Page 37

Requirements
To set up a network installation source, you need the following:
A YaST Network Installation source server
This source server can be SLES 9 or later, OES 2 or later, Windows, or NetWare 6.5.
An active network connection between the installation source server and the OES server you are
installing or upgrading
Procedure
1 Download or copy the ISO image files to a directory of your choice. See “Getting and Preparing
OES 11 SP2 Software” in the OES 11 SP2: Planning and Implementation Guide.
2 Configure your Linux server to be a YaST installation server and select the location for the root of
the network installation.
The three protocol options to choose from for configuring the YaST installation server are NFS,
FTP, and HTTP. For the protocol configuration procedures, see the following:
“NFS Protocol Configuration” on page 37
“FTP Protocol Configuration” on page 38
“HTTP Protocol Configuration” on page 38
FTP and HTTP do not allow you to serve the files without possible modifications to
NFS is the simplest protocol to configure and is recommended.
3 Create a boot DVD using the
label it with that name.
For information on creating this DVD, see “Preparing Physical Media for a New Server
Installation or an Upgrade” on page 35.
This DVD will be the network installation boot DVD.
.iso
image file for SUSE Linux Enterprise Server 1 1 SP3 DVD and
.conf
files.
With these steps completed, you are ready to perform a new installation or upgrade using a network
installation source. See “Starting the OES 11 SP2 Installation” on page 44 or “Upgrading to OES 11
SP2” on page 115.
NFS Protocol Configuration
An NFS share can be shared easily from almost any location on your file system. Use the following
procedure if you choose to use this protocol:
1 At your network installation server, launch YaST.
2 Select Network Services, then click NFS Server.
You might be prompted to install the NFS server.
3 On the NFS Server configuration screen, select Start in the NFS Server section, select Open
Port in Firewall in the Firewall section, then click Next.
4 In the Directories section, click Add Directory and specify or browse to the directory where you
have created the install root (source directory), then click OK.
5 Accept the defaults in the pop-up window for adding a Host.
If you are experienced with NFS configurations, you can customize the configuration.
6 Click Finish.
Preparing to Install OES 11 SP2 37
Page 38

FTP Protocol Configuration
These instructions use Pure-FTPd and can be implemented through YaST. Depending on the FTP
server you use, the configuration might be different.
If you have created your install root (source directory) within your FTP root, you can forego the
following procedure and simply start Pure-FTPd.
The default configuration of Pure-FTPd runs in chroot jail, so symlinks cannot be followed. In order to
allow FTP access to the install root created outside of the FTP root, you must mount the install root
directory inside of the FTP root.
Complete the following if you have not created your install root within your FTP root and you choose
to use this protocol:
1 Create a directory inside of your FTP root.
2 Run the following command:
mount --bind /path_to_install_root /path_to_directory_in_ftp_root
For example,
mount --bind /tmp/OES /srv/ftp/OES
3 (Optional) If you want to make this install root permanent, add this command to the
file.
4 Start Pure-FTPd.
/etc/fstab
2.9.2
HTTP Protocol Configuration
These instructions use Apache2 as provided by SLES 11 SP3.
If you choose to use this protocol:
1 Modify the
create directory indexes.
The
of the
to the
2 (Conditional) If the install root is outside of the HTTP root, create a symbolic link to the install root
with the following command:
ln -s /path_to_install_root /path_to_link
For example,
ln -s /tmp/OES /srv/www/htdocs/OES
3 Restart Apache.
default-server.conf
default-server.conf
default-server.conf
Options
directive, then save the changes.
file of your HTTP server to allow it to follow symlinks and
file is located in the
file, remove
None
/etc/apache2
if it is there, add
directory. In the
FollowSymLinks
Directory
and
Indexes
NetWare as a Network Installation Source Server
Complete the instructions in this section to set up an Open Enterprise Server (OES) 11 SP2
installation source on an existing NetWare 6.5 SP8 server.
tag
“Prerequisites” on page 39
“Copy the Files and Mount Them as NSS Volumes” on page 39
“Create the Boot DVDs” on page 40
38 OES 11 SP2: Installation Guide
Page 39

Prerequisites
You need the following:
A NetWare 6.5 SP8 server accessible on the network where you plan to install the OES 11 SP2
servers with the following:
6 GB free disk space on the server
The Apache Web Server for NetWare installed and running
The following ISO image files from Novell:
Image File Purpose
SLES-11-SP3-DVD-x86_64-GMDVD1.iso
OES11-SP2-addon-x86_64-DVD1.iso
OES11-SP2-addon_with_SLES11-SP3x86_64-DVD.iso
Boot DVD for x86_64 (64-bit) SLES 11 SP3 installations
Install source for x86_64 (64-bit) OES 11 SP2 services
Integrated ISO has the install source for x86_64 (64-bit)
SLES 11 SP3 and OES 11 SP2. It is also acts as the boot
DVD using SLES 11 SP3.
For information on downloading these image files, see the Novell Open Enterprise Server 11
Download Instructions (http://www.novell.com/documentation/oes11/esd/di_oes11.html).
Copy the Files and Mount Them as NSS Volumes
The following instructions create unrestricted access to OES 11 SP2 installation files on a NetWare
server on your network. Restricting access to the installation files requires additional configuration
through Apache Manager or requires manual editing of the Apache configuration files.
For more information on restricting access, see information about the Options, Order, Deny, Allow,
and other directives on the Apache.org Web Site (http://httpd.apache.org/docs-2.0/mod/
directives.html).
To provide unrestricted access to the OES 11 SP2 image files:
1 Create a directory at the root of a server volume with at least 6 GB of free disk space.
For example, you might create a directory named
2 Restrict access to the directory to only those administrators who copy image files to the directory.
OES11_INSTALL
in a volume named
TOOLS
.
This is important because if someone attempts to access these files after they are mounted as
NSS volumes, the volumes are immediately dismounted and are no longer available.
3 Copy the DVD image files listed in “Prerequisites” on page 39 to the directory you just created.
4 At the server console, mount each image file as an NSS volume:
4a Enter the following command:
nss /MountImageVolume=volume:directory/filename.iso
Replace volume with the NSS volume name, directory with the directory you created in
Step 1, and filename with the name of the ISO file.
For example:
nss /MountImageVolume=TOOLS:OES11_INSTALL/SLES-11-SP3-DVD-x86_64-GMDVD1.iso
Preparing to Install OES 11 SP2 39
Page 40

4b Note the assigned volume name.
For the first SLES DVD you mount, the name is
name in the image file. For the second image you mount, the assigned name is DVD_
followed by a four-digit number, starting with 0000.
The same principle applies to the OES 11 image files. The first file mounted is the actual
OES 11 volume name, but the second image is assigned a DVD_xxxx name.
Knowing which volume is for which platform is critical as you create an access URL to the
volume in Apache Manager.
5 In a supported browser, start Apache Manager by entering the following URL:
https://server_ip_address:2200/apacheadmin/login.jsp
Replace server_ip_address with the IP address of the NetWare server.
6 Log in as the Admin user or a user with administrative rights to the Apache server.
7 Click the Content Manager icon .
8 Click Additional Document Directories.
9 In the URL Prefix field, specify an alias name you want people to use to access one of the
mounted volumes.
10 Click the Search icon next to the File Path field.
11 Click the volume name that matches the alias name you specified in Step 9, then click Finish.
12 Click Save > Save and Apply > OK.
The path to the volume is added as an additional document.
13 Repeat from Step 9 for the other three volumes.
SLES11SP_3
, which is the actual volume
2.9.3
2.10
All of the ISO files are now available for access through the Apache Web Server running on the
NetWare server.
Create the Boot DVDs
See Section 2.8, “Preparing Physical Media for a New Server Installation or an Upgrade,” on
page 35.
Windows as a Network Installation Source Server
To prepare a network installation source on a Windows server, see “Using a Microsoft Windows
Workstation” in the SLES 11 SP 3 Deployment Guide.
Always Install OES as an Add-On Product
You must always install OES by adding it as an add-on product while running the YaST install. This is
not the same as adding the OES installation media as an installation source.
Failure to do this will prevent the server from registering as an OES 11 SP2 server with the Novell
Customer Center.
40 OES 11 SP2: Installation Guide
Page 41

2.11
Install Only One Server at a Time
You should install one server at a time into a tree. Then wait for the installation program to complete
before installing an additional server into the same tree.
2.12
What's Next
Proceed to one of the following sections, depending on the task that you want to perform:
“Installing OES 11 SP2 as a New Installation” on page 43
“Upgrading to OES 11 SP2” on page 115
“Using AutoYaST to Install and Configure Multiple OES Servers” on page 181
“Installing, Upgrading, or Updating OES on a VM” on page 195
“Installing or Configuring OES 11 SP2 on an Existing Server” on page 109
Preparing to Install OES 11 SP2 41
Page 42

42 OES 11 SP2: Installation Guide
Page 43

3
Installing OES 11 SP2 as a New
3
Installation
Novell Open Enterprise Server (OES) 11 SP2 is an add-on product to SUSE Linux Enterprise Server
(SLES) 11 SP3. When you install and configure OES, you can also install and configure SLES 11
SP3. Therefore, it is helpful to understand how to perform a SLES 11 SP3 installation. This section
provides information on the integrated installation of SLES 11 SP3 and OES 11 SP2.
For detailed information on performing a SLES installation, see the SLES 11 SP3 Deployment Guide
(https://www.suse.com/documentation/sles11/book_sle_deployment/?page=/documentation/sles11/
book_sle_deployment/data/book_sle_deployment.html).
TIP: You can also use the integrated iso (
for OES 11 SP2 installation. This ISO has both OES 11 SP2 and SLES 11 SP3. When you use this
ISO, you are not require to select OES as an add-on product in the Installation Mode screen.
This section does not provide step-by-step installation instructions because the installation interface
is mostly self-explanatory. It does, however, provide information about important steps in the process
that might require additional explanation.
Section 3.1, “Linux Software RAIDs Are Not Cluster Aware,” on page 43
Section 3.2, “Linux Software RAIDs,” on page 44
Section 3.3, “Starting the OES 11 SP2 Installation,” on page 44
Section 3.4, “Specifying the Installation Mode,” on page 47
Section 3.5, “Specifying the Add-On Product Installation Information,” on page 48
Section 3.6, “Setting Up the Clock and Time Zone,” on page 48
Section 3.7, “Specifying the Installation Settings for the SLES Base and OES Installation,” on
page 48
Section 3.8, “Specifying Configuration Information,” on page 55
Section 3.9, “Finishing the Installation,” on page 106
Section 3.10, “Verifying That the Installation Was Successful,” on page 106
Section 3.11, “What's Next,” on page 107
OES11-SP2-addon_with_SLES11-SP3-x86_64-DVD.iso
)
3.1
Linux Software RAIDs Are Not Cluster Aware
Do not use Linux Software RAIDs for devices that you plan to use for shared storage objects. Linux
Software RAID devices do not support concurrent activation on multiple nodes; that is, they are not
cluster aware. They cannot be used for shared-disk storage objects, such as the OCFS2 file system,
cLVM volume groups, and Novell Cluster Services SBD (split-brain-detector) partitions.
For shared disks, you can use hardware RAID devices on your storage subsystem to achieve fault
tolerance.
Installing OES 11 SP2 as a New Installation 43
Page 44

3.2
Linux Software RAIDs
We recommend that you do not use Linux software RAIDs (such as MD RAIDs and Device Mapper
RAIDs) for devices that you plan to use for storage objects that are managed by NSS management
tools. The Novell Linux Volume Manager (NLVM) utility and the NSS Management Utility (NSSMU)
list Linux software RAID devices that you have created by using Linux tools. Beginning with Linux
Kernel 3.0 in OES 11 SP1, NLVM and NSSMU can see these devices, initialize them, and allow you
to create storage objects on them. However, this capability has not yet been fully tested.
IMPORTANT: In OES 11, a server hang or crash can occur if you attempt to use a Linux software
RAID when you create storage objects that are managed by NSS management tools.
For NSS pools, you can use hardware RAID devices or NSS Software RAID devices to achieve disk
fault tolerance.
For Linux POSIX volumes, LVM volume groups, and cLVM volume groups, you can use hardware
RAID devices on your storage subsystem to achieve disk fault tolerance.
3.3
3.3.1
Starting the OES 11 SP2 Installation
1 Insert the SUSE Linux Enterprise Server 11 SP3 installation media that you created into the DVD
drive of the computer that you want to be your OES server.
2 Boot the machine.
3 Continue with one of the following procedures:
Section 3.3.1, “Installing from Physical Media,” on page 44
Section 3.3.2, “Installing from a Network Source with DHCP,” on page 45
Section 3.3.3, “Installing from a Network Source without DHCP,” on page 46
Installing from Physical Media
1 From the DVD boot menu, select the second option (Installation), then press Enter.
2 Select the language that you want to use, then click Next.
3 Read and accept the license agreement, then click Next.
4 (Conditional) If you haven’t already verified that the media you burned is valid, you can check it
by using the Media Check option; otherwise, click Next to continue with the installation.
5 Follow the prompts, using the information contained in the following sections:
5a “Specifying the Installation Mode” on page 47.
5b “Specifying the Add-On Product Installation Information” on page48.
5c “Setting Up the Clock and Time Zone” on page 48.
5d “Specifying the Installation Settings for the SLES Base and OES Installation” on page 48.
5e “Specifying Configuration Information” on page 55.
5f “Finishing the Installation” on page 106.
6 Complete the server setup by following the procedures in “Completing OES Installation or
Upgrade Tasks” on page 159.
44 OES 11 SP2: Installation Guide
Page 45

3.3.2
Installing from a Network Source with DHCP
1 From the DVD boot menu, select one of the following Installation options that matches your
environment, but do not press Enter.
Installation: The normal installation mode. All modern hardware functions are enabled.
Installation—ACPI Disabled: If the normal installation fails, it might be because the
system hardware does not support ACPI (advanced configuration and power interface). If
this seems to be the case, use this option to install without ACPI support.
Installation—Local APIC Disabled: If the normal installation fails, it might be because the
system hardware does not support local APIC (advanced programmable interrupt
controllers). If this seems to be the case, use this option to install without local APIC
support.
If you are not sure, try Installation—ACPI Disabled or Installation—Safe Settings first.
Installation—Safe Settings: Boots the system with the DMA mode (for DVD drives) and
power management functions disabled. Experts can also use the command line to enter or
change kernel parameters.
At this point you can either
Skip to with Step 4 and input everything as the install prompts you.
or
Pre-specify the IP address information and/or the boot options parameters on the Boot
Options line (see “Using Custom Boot Options” in the SUSE Linux Enterprise Server
Installation and Administration Guide (http://www.suse.com/documentation/sles11/
book_sle_deployment/data/sec_deployment_remoteinst_bootinst.html)).
2 (Optional) If you want to specify the IP address information, do it now.
Otherwise, continue with Step 3.
3 (Optional) If you want to specify boot options parameters, do it now. Then press Enter and
continue with Step 7.
Otherwise, continue with Step 4.
4 Press F4, and then select the network installation type (SLP, FTP, HTTP, NFS, SMB/CIFS) that
you set up on your network installation server.
See Step 2 on page 37 of the SUSE Linux as a Network Installation Source Server procedure.
5 Specify the required information (server name and installation path), then select OK.
6 Press Enter to begin the installation.
7 Follow the screen prompts, referring to the information in the following sections as needed
(remember that not all required selections are documented):
7a “Specifying the Installation Mode” on page 47.
7b “Specifying the Add-On Product Installation Information” on page48.
7c “Setting Up the Clock and Time Zone” on page 48.
7d “Specifying the Installation Settings for the SLES Base and OES Installation” on page 48.
7e “Specifying Configuration Information” on page 55.
7f “Finishing the Installation” on page 106.
8 Complete the server setup by following the procedures in “Completing OES Installation or
Upgrade Tasks” on page 159.
Installing OES 11 SP2 as a New Installation 45
Page 46

3.3.3
Installing from a Network Source without DHCP
1 From the DVD boot menu, select one of the following Installation options that matches your
environment.
Installation: The normal installation mode. All modern hardware functions are enabled.
Installation—ACPI Disabled: If the normal installation fails, this might be because of the
system hardware not supporting ACPI (advanced configuration and power interface). If this
seems to be the case, use this option to install without ACPI support.
Installation—Local APIC Disabled: If the normal installation fails, this might be because
of the system hardware not supporting local APIC (advanced programmable interrupt
controllers). If this seems to be the case, use this option to install without local APIC
support.
If you are not sure, try Installation—ACPI Disabled or Installation—Safe Settings first.
Installation—Safe Settings: Boots the system with the DMA mode (for DVD drives) and
power management functions disabled. Experts can also use the command line to enter or
change kernel parameters.
2 At this point you can pre-specify the IP address information, and so forth, on the Boot Options
line (see “Booting the Target System for Installation” in the SUSE Linux Enterprise Server
Deployment Guide (http://www.suse.com/documentation/sles11/book_sle_deployment/data/
sec_deployment_remoteinst_bootinst.html)
If you want to specify the IP address information, and so forth, do it now. Then press Enter and
continue with Step 19 on page 47.
Otherwise, press Enter, continue with Step 3, and input everything as the install prompts you.
3 When you receive the following error, select OK and press Enter:
Could not find the SUSE Linux Enterprise Server 11 SP3 Installation source.
Activating manual set up program
4 Select the language, then select OK and press Enter.
5 Select a keyboard map, then select OK and press Enter.
6 Select Start Installation or System, then select OK and press Enter.
7 Select Start Installation or Update, then select OK and press Enter.
8 Select Network, press Enter, then select OK and press Enter.
9 Select the network protocol that matches the configured protocol on your network installation
server, then press Enter.
10 (Conditional) If you have more than one network interface card, select one of the cards, then
press Enter.
We recommend eth0.
11 When prompted whether you want to use DHCP, select No, then press Enter.
12 Specify the IP address for the server, then press Enter.
13 Specify the subnet mask, then press Enter.
14 Specify the gateway, then press Enter.
15 Specify the IP address of a name server, then press Enter.
16 Specify the IP address of the network installation server, then press Enter.
17 (Conditional) Depending on the protocol you specified, you might see additional screens for FTP
or HTTP. Select the options that are appropriate for your network, then continue with Step 18.
18 Specify the path to your installation source on the network installation server, then press Enter.
.
46 OES 11 SP2: Installation Guide
Page 47

19 Follow the prompts, using the information contained in the following sections:
19a “Specifying the Installation Mode” on page 47.
19b “Specifying the Add-On Product Installation Information” on page48.
19c “Setting Up the Clock and Time Zone” on page 48.
19d “Specifying the Installation Settings for the SLES Base and OES Installation” on page 48.
19e “Specifying Configuration Information” on page 55.
19f “Finishing the Installation” on page 106.
20 Complete the server setup by following the procedures in “Completing OES Installation or
Upgrade Tasks” on page 159.
3.4
Specifying the Installation Mode
1 When the Installation Mode page displays, select the following two menu options, then click
Next:
New Installation
Include Add-On Products from Separate Media
NOTE: If you have used the integrated iso (
DVD.iso
Media.
2 Continue with Section 3.5, “Specifying the Add-On Product Installation Information,” on page 48.
) for the OES 11 SP2 installation, do not select Include Add-On Products from Separate
OES11-SP2-addon_with_SLES11-SP3-x86_64-
Installing OES 11 SP2 as a New Installation 47
Page 48

3.5
Specifying the Add-On Product Installation
Information
1 When the Add-On Product Installation page displays, click Add.
2 If you are installing OES 11 SP2 from a DVD, do the following:
2a On the Add-On Product Media page, click DVD, then click Next.
2b On the Insert the Add-On Product DVD page, select the appropriate drive where you want
to insert the OES 11 SP2 DVD.
2c Click Eject.
2d Insert the DVD labeled Novell Open Enterprise Server 11 DVD 1, then click Continue.
3 If you are using an alternate installation source, such as a network installation source, click the
appropriate option for your situation, then click Next and supply the required information.
4 Read and accept the Novell Open Enterprise Server 11 SP2 license agreement, then click Next.
5 Confirm that the Add-On Product Installation page shows the correct path to the OES media,
then click Next.
6 Continue with Section 3.6, “Setting Up the Clock and Time Zone,” on page 48.
NOTE: During this add-on method of OES installation, the Import Untrusted GnuPG Key pop-up
is displayed. Import the key and then proceed.
3.6
3.7
Setting Up the Clock and Time Zone
1 Ensure the Clock, Region, Timezone, and Time and Date settings are what you want, then click
Next.
You can configure this information after the installation is complete, but it is easier to do it during
the installation.
2 Continue with Section 3.7, “Specifying the Installation Settings for the SLES Base and OES
Installation,” on page 48.
Specifying the Installation Settings for the SLES
Base and OES Installation
The Installation Settings page lets you specify which software and services are installed on your
server.
Overview tab: This lets you specify everything that is normally required for an OES installation.
Expert tab: This lets you fully customize your SLES installation settings. For detailed
information, see “Deployment” in the SLES 11 SP3 Deployment Guide (http://www.suse.com/
documentation/sles11/book_sle_deployment/data/book_sle_deployment.html). Keep in mind,
however, that the SLES guide does not contain instructions for OES-specific components or
configurations.
IMPORTANT: If you accept the defaults at this point in the installation process, only the base OES
components are installed.
48 OES 11 SP2: Installation Guide
Page 49

You can add OES services later, but you should at least read the guidelines and follow the applicable
procedures in the following sections:
“Setting Up Disk Partitions” on page 49
“Customizing the Software Selections” on page 52
“Accepting the Installation Settings” on page 54
3.7.1
Setting Up Disk Partitions
In most cases, YaST proposes a reasonable partitioning scheme that can be accepted without
change. You can also use YaST to customize the partitioning.
“Guidelines” on page 49
“NSS on the System Disk” on page 50
“Security Flag Recommendations” on page 50
“Partitioning X86 Machines” on page 51
“Disk Partition Statistics” on page 51
“Combining Hard Disk Partitions” on page 52
Guidelines
Table 3-1 presents guidelines for setting up disk partitions on your OES server. For more information,
see “Installation Settings” in the SLES 11 SP3 Deployment Guide (https://www.suse.com/
documentation/sles11/book_sle_deployment/data/book_sle_deployment.html).
Table 3-1 Partition Guidelines
Partition to
Create
Other Considerations
/boot
swap
/
/var
Depending on the hardware, it might be useful to create a boot partition (
boot mechanism and the Linux kernel.
You should create this partition at the start of the disk and make it at least 8 MB or 1 cylinder.
As a rule of thumb, always create such a partition if it was included in the YaST original
proposal. If you are unsure about this, create a boot partition to be on the safe side.
IMPORTANT: In a Xen VM installation, format the
system. For a technical explanation of why this is necessary, see “Paravirtual Mode and
Journaling File System” in the Virtualization with Xen (http://www.suse.com/documentation/
sles11/book_xen/data/book_xen.html) guide.
This should normally be twice the size of the RAM installed on your server. If you create a
partition, create the
boot
Define this partition as 3 GB or more. In all cases, create this partition after you create the
partition. Keep in mind that this root (
you don’t specifically create.
This contains system logs and should therefore be a separate partition to avoid impacting
system and service stability because of a disk-full condition.
Define this partition as 4 GB or more.
swap
partition second. Otherwise, create the
/
) partition contains all of the partitions listed below that
/boot
partition using Ext2 as the file
/boot
swap
partition first.
) to hold the
/
swap
Installing OES 11 SP2 as a New Installation 49
Page 50

Partition to
Create
Other Considerations
/opt
/usr
/srv
/home
/tmp
Some (mostly commercial) programs install their data in
Define this partition as 4 GB or more.
Creating this as a separate partition makes updating the server easier if you need to reinstall
the system from the beginning because you can keep the partition intact.
Define this partition as 4 GB or more.
This contains the web and FTP servers.
Consider making this a separate partition to avoid having someone flood the disk by accident
or on purpose, which impacts system and service stability.
User Home directories go here.
Consider making this a separate partition to avoid having someone flood the disk by accident
or on purpose, which impacts system and service stability.
You can allocate the rest of the disk space to this partition.
Creating this as a separate partition is optional. However, because it is writable by everyone,
best practices suggest creating a separate partition to avoid having someone flood the disk by
accident or on purpose, which impacts system and service stability.
Place application-specific files on a separate partition.
If you are building a mail server, note where the mail spools reside because they can grow
quite large, and you need to anticipate this when you are defining partition sizes.
/opt
.
NSS on the System Disk
For OES, Novell Storage Services (NSS) volumes can be used only as data volumes, not as system
volumes.
Additionally, they cannot be created as part of the install process.
However, you must consider whether you will be creating them in the future on the storage device
where you are installing Linux. (Creating NSS volumes on storage devices that don’t contain Linux
system partitions requires no special handling.)
The default volume manager for Linux POSIX volumes on SUSE Linux is LVM (Linux Volume
Manager).
Security Flag Recommendations
The following table indicates the recommended security flags for each partition. A question mark
indicates that some software might not work if this flag is set.
50 OES 11 SP2: Installation Guide
Page 51

Mount Point Mount Options
/
/var nosuid
/tmp nosuid
,
/home nosuid
nodev, noexec
?
/srv nosuid
installation)
/usr/local nosuid
IMPORTANT: Proprietary software installations
might fail if executables in
file owner (suid), and devices might not work in
usr/local
partitions temporarily with security deactivated.
?,
nodev
?,
noexec
?,
nodev
?, ro? (after installation)
, etc. In such cases, remount those
?, ro? (after
/tmp
cannot run as the
/
Partitioning X86 Machines
There can be a maximum of four primary partitions or three primary partitions and one extended
partition. An extended partition can hold 15 (SCSI) or 63 (IDE) logical partitions.
Each partition is assigned a partition type, depending on the file system planned for the partition.
Each partition holds its own file system.
Partitions are mounted into the file system tree at mount points. The content of the partition is
visible to users with sufficient access privileges below the mount point.
One of the partitions must hold the root (
root file system by using the
The
/etc/fstab
file holds partition and mount point information to allow automatic mounting at
mount
boot time.
Device files in the “device” (
/dev
) partition are used to represent and address partitions; for
example:
/
) file system. Other partitions can be integrated into the
command.
/dev/hda
/dev/hda1
/dev/hda5
/dev/sdb
/dev/sdb3
Master disk on the first IDE channel
First primary partition on the IDE channel disk
First logical partition within the extended partition on that disk
Second SCSI disk
Third primary partition on the second SCSI disk
Disk Partition Statistics
Use the following commands to get information about system storage usage:
Installing OES 11 SP2 as a New Installation 51
Page 52

df
Displays information about partitions
3.7.2
df -h
du
du /dirA
du -sh
Displays information in megabytes or gigabytes as applicable (human readable
format)
Displays disk usage
Displays the size of each file and directory in dirA
Prints a summary of information in megabytes or gigabytes
Combining Hard Disk Partitions
Partitions from two or more hard disks can be combined by using the logical volume manager
(LVM).
Partitions (physical volumes) can be combined into a volume group, which in turn can be divided
into logical volumes that contain their own file systems.
Doing this increases flexibility because physical volumes can be easily added to the volume group if
more storage space is needed. Logical volumes can be added while the machine is up and running.
Customizing the Software Selections
IMPORTANT: To install any of the OES patterns, you must customize the software selections. If you
don’t make any selections, only the base SLES 11 SP3 and the base OES packages are installed.
However, you can install any of the patterns after the base SLES 11 SP3 installation is complete. See
“Installing or Configuring OES 11 SP2 on an Existing Server” on page 109.
To customize which software packages are installed on the server:
1 On the Installation Settings page, click Software.
The Open Enterprise Server add-on adds the OES Services category of patterns to the base
software selection categories offered by the SLES 11 SP3 installation. OES Services include
patterns that contain Novell services or products such as Novell DNS and DHCP services, iPrint,
or iManager.
None of the OES Services is selected by default. This lets you fully customize your OES server.
2 At this point, you can do the following to customize your software selections:
Select OES Services: You can select any number of the OES Services patterns as long as
you avoid unsupported service combinations (see “Unsupported Service Combinations” in
the OES 11 SP2: Planning and Implementation Guide).
52 OES 11 SP2: Installation Guide
Page 53
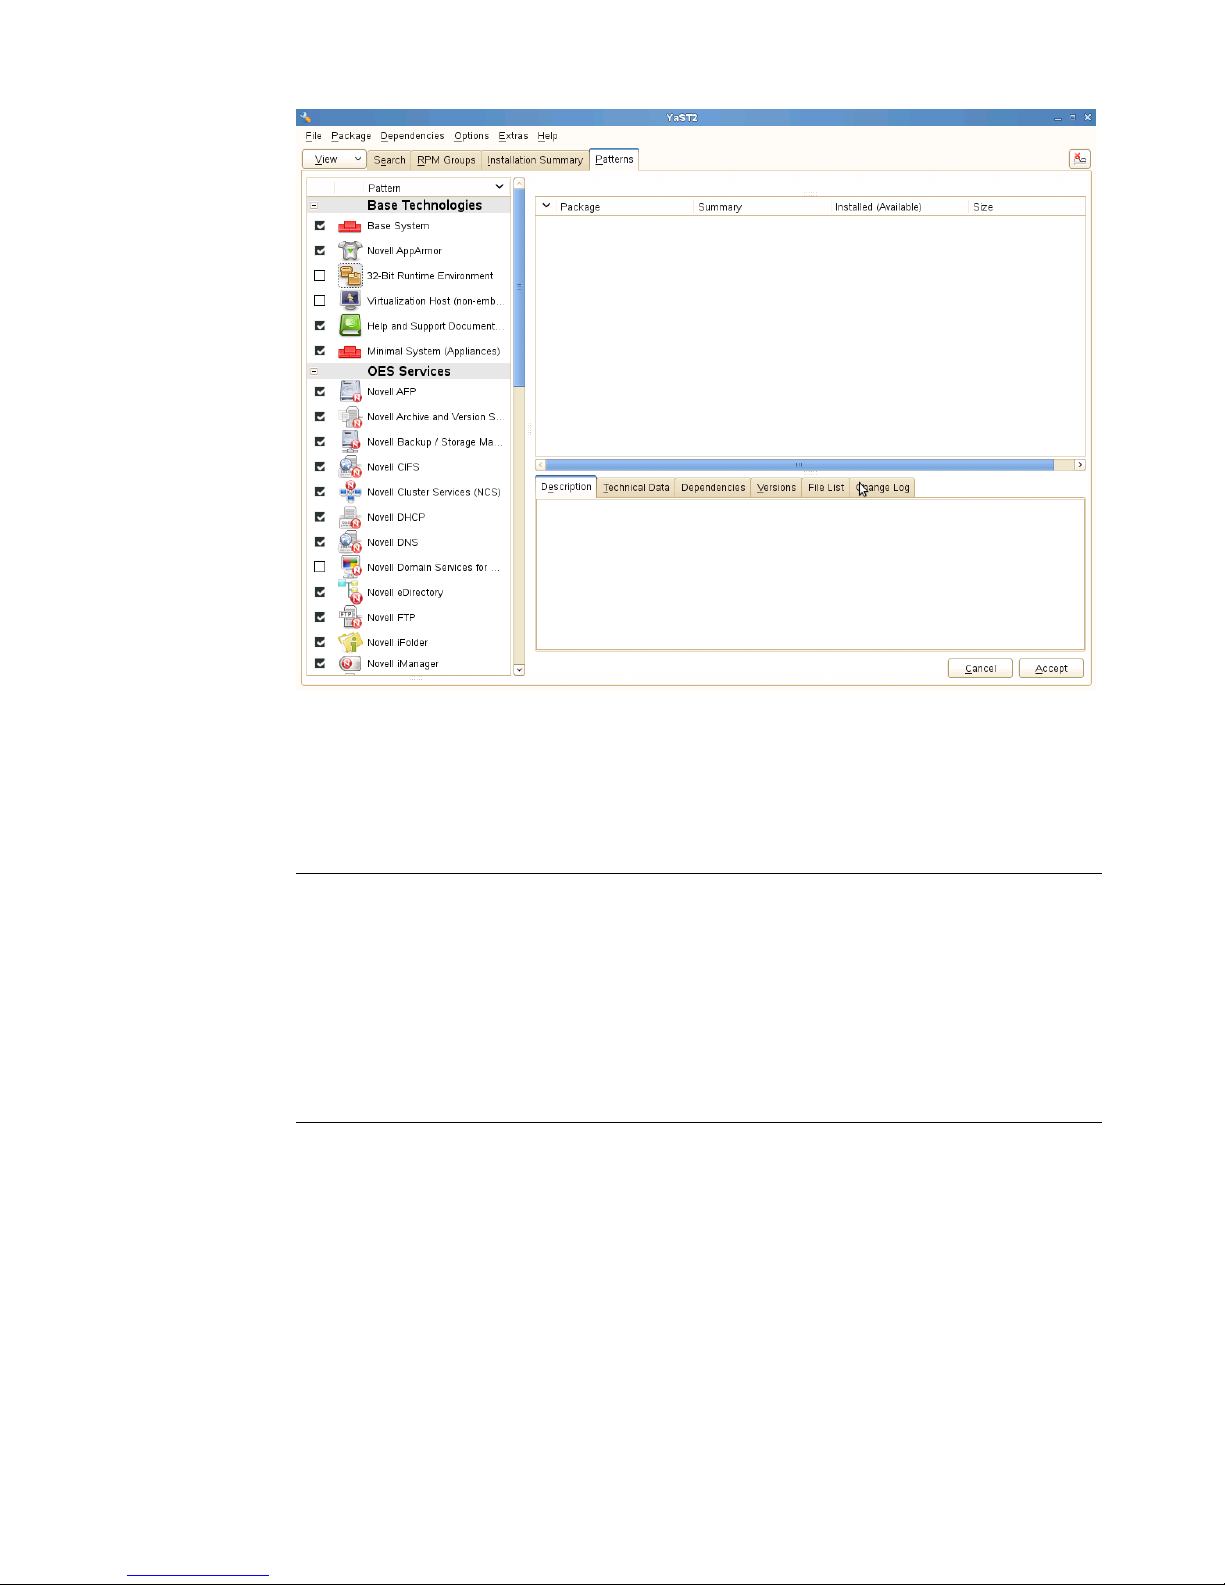
A description of each pattern displays to the right of the pattern when it is selected. For a
description of OES Services patterns and the components selected with each pattern, see
Table 2-5 on page 27.
You can manually change the default SLES selections by changing the install status and
selecting the patterns offered in each category.
IMPORTANT: If you deselect a pattern after selecting it, you are instructing the installation
program to not install that pattern and all of it dependent patterns. Rather than deselecting a
pattern, click Cancel to cancel your software selections, then click the Software heading
again to choose your selections again.
Selecting only the patterns that you want to install ensures that the patterns and their
dependent patterns and packages are installed.
If you click Accept and then return to software pattern selection page, the selections that
you made become your base selections and must be deselected if you want to remove
them from the installation proposal.
You must install at least one of the SLES Base Technologies patterns.
Selecting a pattern automatically selects the other patterns that it depends on to complete
the installation.
Installing OES 11 SP2 as a New Installation 53
Page 54
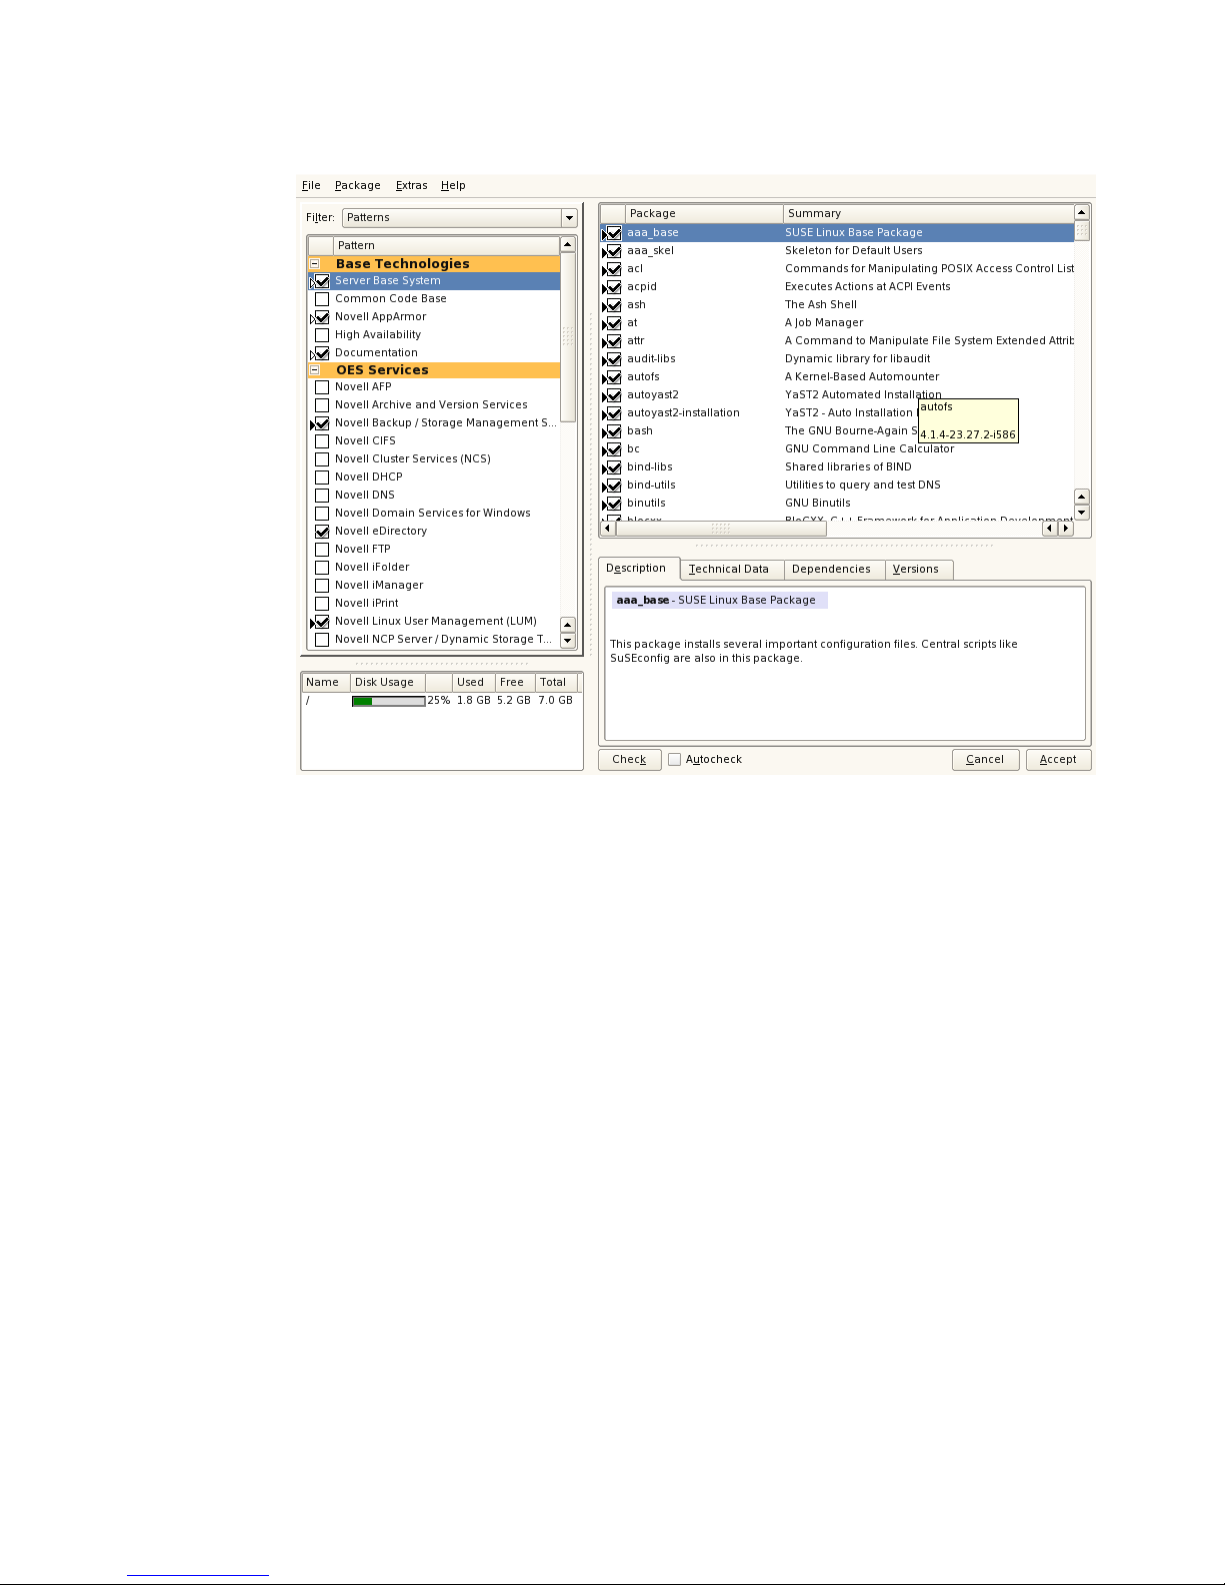
Customize Your Selections: You can view the details of your selection and add or remove
specific packages for the installation by clicking Details.
3.7.3
3 When you have selected the software components that you want to install, click Accept.
4 If you are prompted with the license agreement for Professional TrueType Fonts, click Accept.
5 (Conditional) If the prompt for Automatic Changes displays, click Continue.
6 (Conditional) If prompted, resolve any dependency conflicts.
Accepting the Installation Settings
1 Review the final Installation Summary page to ensure that you have all the Installation settings
you desire.
2 After you have changed all the Installation Settings as desired, click Accept.
3 On the Confirm Installation page, click Install.
The base installation settings are applied and the packages are installed.
4 For installations using a network installation source, you can remove the network boot DVD
(SLES 11 SP3 DVD 1) from the DVD drive.
or
For installations using a DVD installation source, leave the DVD in the DVD drive.
5 After the server reboot, proceed with “Specifying Configuration Information” on page 55.
54 OES 11 SP2: Installation Guide
Page 55

3.8
Specifying Configuration Information
When the server reboots, you are required to complete the following configuration information:
Section 3.8.1, “Specifying the Password for the System Administrator “root”,” on page 55
Section 3.8.2, “Specifying the Hostname and Domain Name,” on page55
Section 3.8.3, “Specifying Network Configuration Settings,” on page 56
Section 3.8.4, “Testing the Connection to the Internet,” on page 59
Section 3.8.5, “Specifying Novell Customer Center Configuration Settings,” on page 59
Section 3.8.6, “Updating the Server Software,” on page 61
Section 3.8.7, “Specifying Service Configuration Settings,” on page 63
Section 3.8.8, “Typical and Custom OES Configuration,” on page 65
Section 3.8.9, “Specifying LDAP Configuration Settings,” on page 67
Section 3.8.10, “Specifying eDirectory Configuration Settings,” on page 69
Section 3.8.11, “Configuring OES Services,” on page 77
Section 3.8.12, “Configuration Guidelines for OES Services,” on page 78
3.8.1
3.8.2
Specifying the Password for the System Administrator
“root”
In the Password for the System Administrator root page:
1 Specify the password for the
For security reasons, the
should contain a mixture of both uppercase and lowercase letters and numbers. Passwords are
case sensitive.
The default password length limit is 8 characters. The maximum possible length for passwords is
72 characters. If you have a password longer than eight characters, click Expert Options >
Blowfish > OK.
2 Confirm the password.
3 Click Next.
root
administrator.
root
user’s password should be at least five characters long and
Specifying the Hostname and Domain Name
On the Hostname and Domain Name page:
1 Specify the hostname associated with the IP address you have or will assign to the server.
2 Specify the domain name for the server.
3 Deselect Change Hostname via DHCP.
4 Click Next.
Installing OES 11 SP2 as a New Installation 55
Page 56

3.8.3
Specifying Network Configuration Settings
On the Network Configuration page, you can change the configuration for the following, most of which
do not apply in an OES server installation scenario:
Network Mode
Firewall
IPv6
Network Interfaces
DSL Connections
ISDN Adapters
Modems
VNC Remote Administration
Proxy
In this section, we provide details only for the components that apply to OES servers.
“Network Interface” on page 56
“Firewall” on page 57
Network Interface
Configuration success is directly tied to specific networking configuration requirements. Ensure that
the settings covered in the steps that follow are configured exactly as specified.
Specify the setting for each network board on the server:
1 On the Network Configuration page, click Network Interfaces.
2 On the Network Card Configuration Overview page, select the network card you want to
configure, then click Edit.
3 Select Static Address Setup, then specify the IP address and the subnet mask for the interface.
OES requires a static IP address.
4 In the Detailed Settings list, select Hostname and Name Server.
4a In the Name Servers and Domain Search List panel, specify from one to three DNS server
IP addresses.
4b Click OK to return to the Detailed Settings list.
5 In the Detailed Settings list, select Routing.
5a Specify the IP address of the default gateway on the subnet where you are installing the
OES server.
5b Click OK to return to the Detailed Settings list.
6 Click Next to return to the Network Card Configuration Overview page.
7 Complete Step 2 through Step 6 for each network board, then click Next to return to the main
Network Configuration page.
56 OES 11 SP2: Installation Guide
Page 57

Firewall
For security reasons, a firewall is started automatically on each configured interface. The
configuration proposal for the firewall is updated automatically every time the configuration of the
interfaces or services is modified.
Many of the OES services require an open port in the firewall. Table 3-2 shows the ports that are
automatically opened when each listed OES service is configured.
Table 3-2 Open Enterprise Server Services and Ports
Service Default Ports
Domain Services for Windows
NetIQ eDirectory
1636 (LDAPS)
1389 (LDAP)
88 (Kerberos TCP and UDP)
135 (RPC Endpoint Manager TCP and UDP)
1024 - 65535 (RPC Dynamic Assignments TCP)
3268 (Global Catalog LDAP TCP)
3269 (Global Catalog LDAP over SSL TCP)
123 (Network Time Protocol UDP)
137 (NetBIOS Name Service TCP and UDP)
138 (NetBIOS Datagram Service TCP and UDP)
139 (NetBIOS Session Service TCP and UDP)
8025 (Domain Service Daemon TCP)
445 (Microsoft-DS traffic TCP and UDP)
389 (LDAP)
636 (secure LDAP)
IMPORTANT: The scripts that manage the common proxy
user require port 636 for secure LDAP communications.
8028 (HTTP for iMonitor)
8030 (secure HTTP for iMonitor)
524 (NCP)
iManager
iPrint
Novell AFP
Novell Archive and Version Services
Novell CIFS
80 (HTTP)
443 (secure HTTP)
80 (HTTP)
443 (secure HTTP)
631 (IPP)
548
26029
636 (secure LDAP)
IMPORTANT: The scripts that manage the common proxy
user require port 636 for secure LDAP communications.
Installing OES 11 SP2 as a New Installation 57
Page 58

Service Default Ports
Novell DHCP
Novell DNS
Novell FTP
Novell Information Portal
Novell NetWare Core Protocol (NCP)
Novell Remote Manager
SFCB
QuickFinder
Samba
67
953 (secure HTTP)
53 (TCP)
53 (UDP)
21
80 (HTTP)
443 (secure HTTP)
524
8008 (HTTP)
8009 (secure HTTP)
5988 (HTTP)
5989 (secure HTTP)
80 (HTTP)
443 (secure HTTP)
139 (Netbios)
445 (Microsoft-ds)
Secure Shell
Storage Management Services (Backup)
Time Synchronization
22
40193 (smdr daemon)
123 (Network Time Protocol UDP)
To adapt the automatic settings to your own preferences:
1 Click Change > Firewall.
2 In the left panel, select the settings you want to change, then make the changes in the right
panel.
3 When you are finished, click Accept.
For more information about the firewall, see “Configuring the Firewall with YaST” in the SUSE Linux
Enterprise Server 11 Security Guide (http://www.suse.com/documentation/sles11/book_security/data/
sec_fire_suse.html).
To disable the firewall:
1 On the Network Configuration page, under Firewall, click enabled on the Firewall is enabled
status line.
When the firewall is disabled, the status for Firewall should read Firewall is disabled.
2 Verify that the settings on the Network Configuration page are set as desired, then click Next to
save the configuration. Continue with “Testing the Connection to the Internet” on page 59.
58 OES 11 SP2: Installation Guide
Page 59

3.8.4
Testing the Connection to the Internet
On the Test Internet Connection page:
1 Select Yes, Test Connection to the Internet, then click Next.
Obtaining the latest SUSE release notes might fail at this point. If it does, view the log to verify
that the network configuration is correct, then click Next.
If the network configuration is not correct, click Back > Back and fix your network configuration.
See “Network Interface” on page 56.
IMPORTANT: Do not skip this test. For a successful install, you must configure the Novell
Customer Center and update SLES 11 SP3 from the patch repository before configuring OES
services.
2 Continue with “Specifying Novell Customer Center Configuration Settings” on page 59.
3.8.5
Specifying Novell Customer Center Configuration Settings
OES 11 SP2 requires that the SLES 11 SP3 base be updated prior to installing and configuring OES
11 SP2 services. If not, some OES services, such as Novell FTP, will not function properly after the
installation and will need to be configured again after the SLES patches are applied.
Therefore, when you are entering the Novell Customer Center configuration information, it is critical
that you enter either your purchased SLES 11 SP3 code or the 60-day evaluation code available with
your SLES 11 SP3 download.
1 On the Novell Customer Center Configuration configuration page, select all of the following
options, then click Next.
Option What it Does
Configure Now Proceeds with registering this server and the SLES 11 SP3 and OES 11 SP2
product in the Novell Customer center.
Hardware Profile Sends the information to the Novell Customer Center about the hardware that
you are installing SLES 11 SP3 and OES 11 SP2 on.
Optional Information Sends optional information to the Novell Customer Center for your registration.
For this release, this option doesn’t send any additional information.
Registration Code Makes the registration with activation codes mandatory.
Regularly Synchronize
with the Customer
Center
Keeps the installation sources for this server valid. It does not remove any
installation sources that were manually added.
2 After you click Next, the following message is displayed.
Wait until this message disappears and the Manual Interaction Required page displays.
3 On the Manual Interaction Required page, note the information that you will be required to
specify, then click Continue.
Installing OES 11 SP2 as a New Installation 59
Page 60

4 On the Novell Customer Center Registration page, specify the required information in the
following fields, then click Submit:
Field Information to Specify
Email Address The email address for your Novell Login account.
Confirm Email Address The same email address for your Novell Login account
SUSE Linux Enterprise
Server 11 SP3 (optional)
Open Enterprise Server
11 SP2 (optional)
System Name or
Description (optional):
Specify your purchased or 60-day evaluation registration code for the SLES 11
SP3 product.
If you don’t specify a code, the server cannot receive any updates or patches.
Specify your purchased or 60-day evaluation registration code for the OES 11
SP2 product.
If you don’t specify a code, the server cannot receive any updates or patches.
Specify a description to identify this server.
5 When the message to complete the registration displays, click Continue.
6 After you click Continue, the following message is displayed with the Manual Interaction
Required screen.
Wait until this message disappears and the Novell Customer Center Configuration page
displays.
7 Select Configure Now to download any updates that are available for the server, then click Next.
60 OES 11 SP2: Installation Guide
Page 61

8 Continue with “Updating the Server Software” on page 61.
3.8.6
Updating the Server Software
When you have a successful connection to the Internet and have registered the server in the Novell
Customer Center, the server displays the Online Update page. You must run the online update now
for a successful OES installation.
1 On the Online Updates page, click Run Update > Next.
Installing OES 11 SP2 as a New Installation 61
Page 62
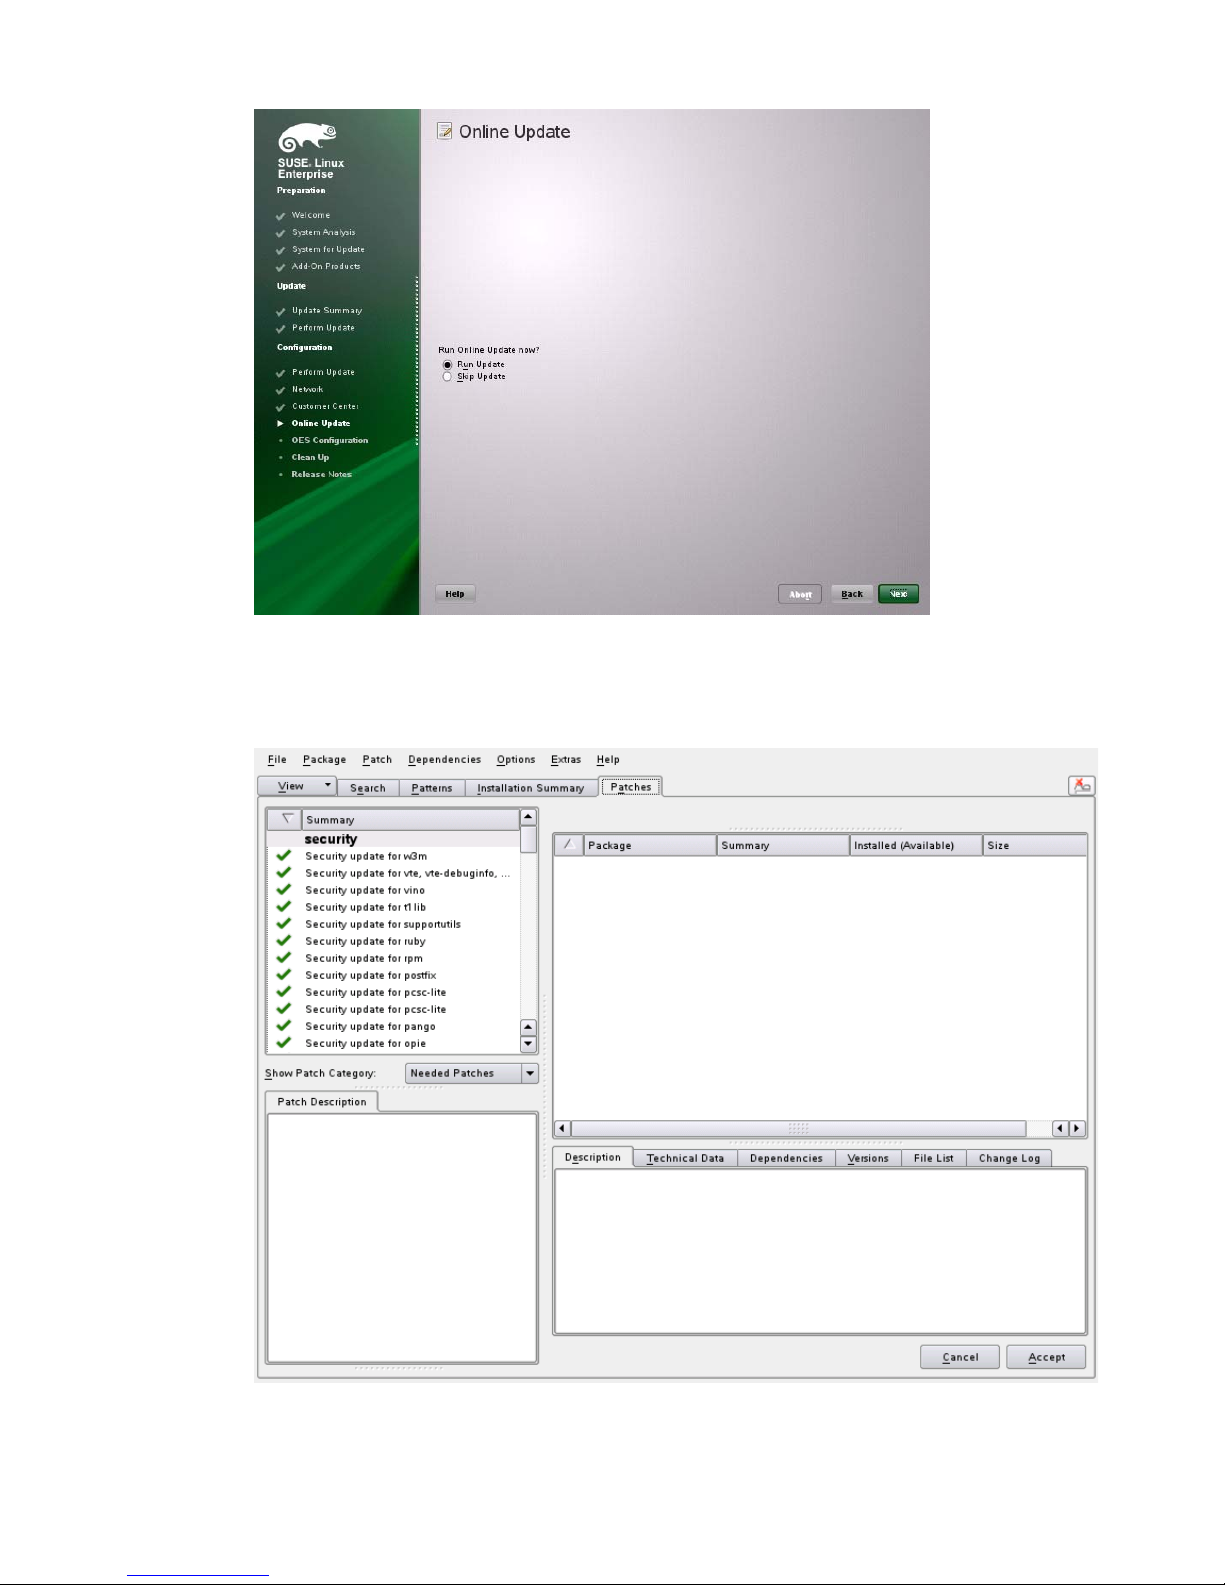
2 On the page that shows that updates are available, click Accept.
The check marks that are shown on the summary portion of the page are the patches that will be
installed on your system after clicking Accept.
3 When you see the following message, click Next.
62 OES 11 SP2: Installation Guide
Page 63

4 In the pop-up that informs you about the kernel update, click OK.
The system reboots before continuing the installation.
5 Continue with “Specifying Service Configuration Settings” on page 63.
3.8.7
Specifying Service Configuration Settings
Because the server was rebooted during the installation, the default settings for CA management lost
the root password as indicated by the red text under CA Management.
1 Reset the password for
root
.
Installing OES 11 SP2 as a New Installation 63
Page 64

2 Observe the settings on the Installation Settings page.
CA Management: This indicates the certificate that is used by the Apache web server if
another certificate is not specified.
By default, OES creates and installs a replacement eDirectory certificate later in the
installation process. We recommend that you accept the eDirectory certificate option
because it is much more secure than the certificate that is proposed.
Alternatively, you can install a third-party certificate.
In all cases, do not disable the configuration at this point because the services that use
Apache will not work if you do.
For more information about OES certificate management, see “Certificate Management” in
the OES 11 SP2: Planning and Implementation Guide.
OpenLDAP Server: Do not enable this option. On OES servers, NetIQ eDirectory LDAP
server replaces the SLES 11 SP3 OpenLDAP server.
3 If you are not installing a third-party certificate, click Next.
or
If you are installing a third-party certificate, click CA Management and refer to the information
about Certificate Authority Management on SLES. See in the “Managing X.509 Certification” in
the SUSE LINUX Enterprise Server 11 Sec urity Guide (http://www.suse.com/documentation/
sles11/book_security/data/cha_security_yast_ca.html). Then return to these instructions to
continue your OES installation.
64 OES 11 SP2: Installation Guide
Page 65

4 If you did not select the NetIQ eDirectory pattern for this server, continue with “Specifying LDAP
Configuration Settings” on page 67.
Otherwise, skip the next section and continue with “Specifying eDirectory Configuration Settings”
on page 69.
3.8.8
Typical and Custom OES Configuration
Beginning with OES 11 SP2, you can configure OES in two methods: Typical Configuration and
Custom Configuration. The Typical Configuration is also called as Express Install. It helps to install
OES 11 SP2 with minimal user intervention and the Custom Configuration is the detailed usual
method to configure OES.
Typical Configuration
In the OES Configuration screen, if you have chosen to configure OES using Typical Configuration,
you only need to provide the following minimum configuration details:
SLP Server and SLP Scopes: In these fields, specify the host name or the IP address of the
server where the SLP agent is running and the SLP scopes. If you don't enter any SLP details,
multicast SLP mode is chosen by default.
NOTE: If you would like to use the current server as the DA server, click Back and choose the
custom configuration instead of typical configuration.
Installing OES 11 SP2 as a New Installation 65
Page 66

NTP Time Server: Specify the IP address or the host name of the Network Time Protocol (NTP)
server.
New or Existing Tree: If you would like to configure OES using an existing eDirectory tree,
choose Existing Tree else New Tree.
eDirectory Tree Name: Provide the eDirectory tree name.
IP Address of an existing eDirectory Server with a replica: If you have chosen to configure
OES using an existing tree, this field is enabled to provide the IP address of an existing
eDirectory serer.
IMPORTANT: Ensure that you verify the status of the eDirectory tree using the Validate button. If
the validation is unsuccessful, do not proceed further with the OES configuration until the
eDirectory server is up and running.
FDN of the tree administrator: Specify the fully distinguished name of the administrative user.
Admin Password and Verify the Admin Password: In these two fields, specify the eDirectory
administrative passwords.
Enter Server Context: Specify the location of the server context in the eDirectory tree.
After providing all these details, click Next. OES will be installed and configured without any user
intervention.
Custom Configuration
This is the normal method of installing and configuring OES by providing every configuration detail
that OES requires instead of using the default configuration details. Custom configuration is
explained in detailed in Section 3.8.9, “Specifying LDAP Configuration Settings,” on page 67,
66 OES 11 SP2: Installation Guide
Page 67

Section 3.8.10, “Specifying eDirectory Configuration Settings,” on page 69, Section 3.8.11,
“Configuring OES Services,” on page 77, and Section 3.8.12, “Configuration Guidelines for OES
Services,” on page 78.
3.8.9
Specifying LDAP Configuration Settings
Many of the OES services require eDirectory. If eDirectory was not selected as a product to install on
this server but other OES services that do require LDAP services were installed, the LDAP
Configuration service displays, so that you can complete the required information.
To specify the required information on the Configured LDAP Server page:
1 In the eDirectory Tree Name field, specify the name for the existing eDirectory tree that you are
installing this server into.
2 In the Admin Name and Context field, specify the name and context for user Admin in the
existing tree.
3 In the Admin Password Name field, specify a password for the Admin user in the existing tree.
4 Add the LDAP servers that you want the services on this server to use. The servers that you add
should hold the master or a read/write replica of eDirectory. Do the following for each server you
want to add:
4a Click Add.
4b On the next page, specify the following information for the server to add, then click Add.
IP address
Installing OES 11 SP2 as a New Installation 67
Page 68

LDAP port and secure LDAP port
5 When all of the LDAP servers that you want to specify are listed, click Next.
6 Verify that the Novell Open Enterprise Server Configuration page displays the settings that you
expected, then click Next.
68 OES 11 SP2: Installation Guide
Page 69

7 Continue with “Configuring OES Services” on page 77.
3.8.10
Specifying eDirectory Configuration Settings
When you specify the eDirectory configuration settings, you can specify information to create a new
tree and install the server in that new tree, or you can install the server into an existing tree by
specifying the information for it. Use the following instructions as applicable:
“Specifying SLP Configuration Options” on page 69
“Specifying Synchronizing Server Time Options” on page 70
“Creating a New eDirectory Tree and Installing the Server in It” on page 71
“Installing the Server into an Existing eDirectory Tree” on page72
“Selecting the NetIQ Modular Authentication Services (NMAS) Login Method” on page 74
“Specifying OES Common Proxy User Information” on page 75
Specifying SLP Configuration Options
1 On the eDirectory Configuration - SLP page, specify the SLP options as desired.
You have the following options for configuring SLP:
Use Multicast to Access SLP: This option allows the server to request SLP information by
using multicast packets. Use this in environments that have not established SLP DAs
(Directory Agents).
IMPORTANT: If you select this option, you must disable the firewall for SLP to work
correctly. Multicast creates a significant amount of network traffic and can reduce network
throughput.
Installing OES 11 SP2 as a New Installation 69
Page 70

Configure SLP to use an existing Directory Agent: This option configures SLP to use an
existing Directory Agent (DA) in your network. Use this in environments that have
established SLP DAs. When you select this option, you configure the servers to use by
adding or removing them from the SLP Directory Agent list.
Configure as Directory Agent: This option configures this server as a Directory Agent
(DA). This is useful if you plan to have more than three servers in the tree and want to set
up SLP during the installation.
DASyncReg: This option causes SLP, when it starts, to query the Directory Agents
listed under Configured SLP Directory Agents for their current lists of registered
services. It also causes the DA to share service registrations that it receives with the
other DAs in the SLP Directory Agent list.
Backup SLP Registrations: This option causes SLP to back up the list of services
that are registered with this Directory Agent on the local disk.
Backup Interval in Seconds: This specifies how often the list of registered services is
backed up.
Service Location Protocols and Scope: This option configures the scopes that a user
agent (UA) or service agent (SA) is allowed when making requests or when registering
services, or specifies the scopes a directory agent (DA) must support. The default value is
DEFAULT. Use commas to separate each scope. For example, net.slp.useScopes =
myScope1,myScope2,myScope3.
Configured SLP Directory Agents: This option lets you manage the list of hostname or IP
addresses of one or more external servers on which an SLP Directory Agent is running.
2 Click Next and confirm your selection if necessary, then continue with Selecting the NetIQ
Modular Authentication Services (NMAS) Login Method.
Specifying Synchronizing Server Time Options
eDirectory requires that all OES servers are time-synchronized.
1 On the eDirectory Configuration - NTP page, click Add.
2 In the Time Server text box, specify the IP address or DNS hostname of an NTP server, then
click Add.
For the first server in a tree, we recommend specifying a reliable external time source.
When you install multiple servers into the same eDirectory tree, ensure that all servers point to
the same time source and not to the server holding the master replica.
For servers joining a tree, specify the same external NTP time source that the tree is using, or
specify the IP address of a configured time source in the tree. A time source in the tree should be
running time services for 15 minutes or more before connecting to it; otherwise, the time
synchronization request for the installation fails.
3 If you want to use the server’s hardware clock, select Use Local Clock.
For servers joining a tree, the installation does not let you proceed if you select this option. You
must specify the same external NTP time source that the tree is using, or specify the IP address
of a configured time source in the tree that has been running time services for 15 minutes or
more.
4 Continue with “Specifying SLP Configuration Options” on page 69.
For more information on time synchronization, see “Implementing Time Synchronization” in the OES
11 SP2: Planning and Implementation Guide.
70 OES 11 SP2: Installation Guide
Page 71

Creating a New eDirectory Tree and Installing the Server in It
1 On the eDirectory Configuration - New or Existing Tree page, select New Tree.
2 In the eDirectory Tree Name field, specify a name for the eDirectory tree that you want to create.
On OES servers, services that provide HTTPS connectivity are configured to use one of the
following certificates:
An eDirectory certificate issued by the Novell International Cryptographic Infrastructure
(NICI)
A third-party server certificate
The YaST self-signed common server certificate created in Step 2 on page 64
Self-signed certificates provide minimal security and limited trust. Unless you have invested
in a third-party certificate, we recommend that you use the eDirectory certificates instead.
By default, the Use eDirectory Certificates for HTTPS Services check box is selected. This
means that the existing server certificate and key files (YaST or third-party) will be replaced with
eDirectory server certificate and key files.
The default YaST server certificate and key files are:
Key file:
Certificate file:
The eDirectory server certificate and key files are:
Key file:
Certificate file:
For more information, see “Certificate Management” in the OES 11 SP2: Planning and
Implementation Guide.
3 On the eDirectory Configuration - New Tree Information page, specify the required information:
The fully distinguished name and context for the user Admin on the existing server
The password for user Admin on the existing server
4 Click Next.
5 On the eDirectory Configuration - Local Server Configuration page, specify the following
information:
The context for the server object in the eDirectory tree
A location for the eDirectory database
The default path is
to change the location if you expect to have a large number of objects in your tree and if the
current file system does not have sufficient space.
The ports to use for servicing LDAP requests
The default ports are 389 (non-secure) and 636 (secure).
/etc/ssl/servercerts/serverkey.pem
/etc/ssl/servercerts/servercert.pem
/etc/ssl/servercerts/eDirkey.pem
/etc/ssl/servercerts/eDircert.pem
/var/opt/novell/eDirectory/data/dib
, but you can use this option
IMPORTANT: The scripts that manage the common proxy user introduced in OES 11 SP2
require port 636 for secure LDAP communications.
The ports to use for providing access to the iMonitor application
The default ports are 8028 (non-secure) and 8030 (secure).
6 Click Next. Then continue with “Specifying Synchronizing Server Time Options” on page 70.
Installing OES 11 SP2 as a New Installation 71
Page 72

Installing the Server into an Existing eDirectory Tree
1 On the eDirectory Configuration - New or Existing Tree page, select Existing Tree.
2 In the eDirectory Tree Name field, specify a name for the eDirectory tree you want to join.
On OES servers, services that provide HTTPS connectivity are configured to use either of the
following:
An eDirectory certificate issued by the Novell International Cryptographic Infrastructure
(NICI)
The YaST self-signed common server certificate created in Step 2 on page 64
Self-signed certificates provide minimal security and limited trust. We recommend that you
use the eDirectory certificates instead.
By default, the Use eDirectory Certificates for HTTPS Services check box is selected. This
means that the existing YaST server certificate and key files will be replaced with eDirectory
server certificate and key files.
The default YaST server certificate and key files are:
Key file:
Certificate file:
/etc/ssl/servercerts/serverkey.pem
/etc/ssl/servercerts/servercert.pem
The eDirectory server certificate and key files are:
Key file:
Certificate file:
/etc/ssl/servercerts/eDirkey.pem
/etc/ssl/servercerts/eDircert.pem
72 OES 11 SP2: Installation Guide
Page 73
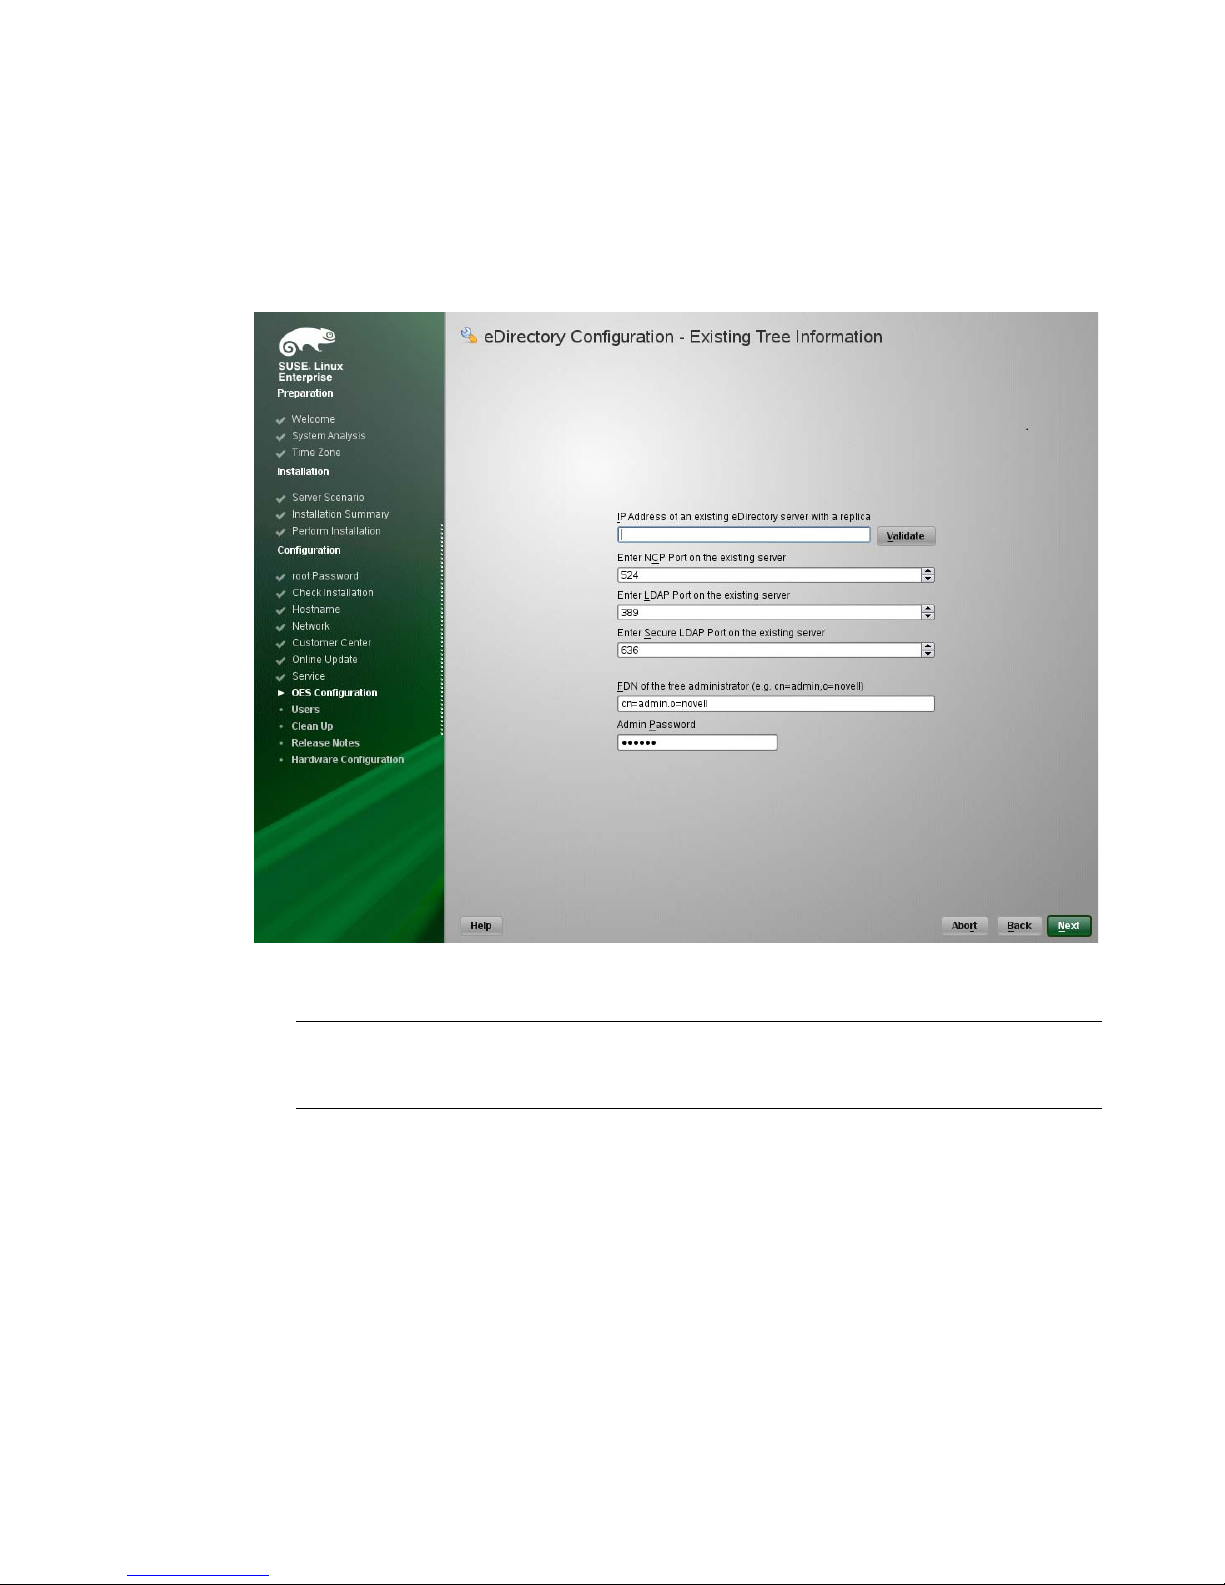
For more information on certificate management, see “Certificate Management” in the OES 11
SP2: Planning and Implementation Guide.
Select Enable NMAS-based login for LDAP authentication to enforce the use of a single-
secure password for all Novell and partner products. The Secure Password Manager of the
NMAS module manages this universal password implementation.
3 On the eDirectory Configuration - Existing Tree Information page, specify the required
information:
The IP address of an existing eDirectory server with a replica.
IMPORTANT: Ensure that you verify the status of the eDirectory tree using the Validate
button. If the validation is unsuccessful, do not proceed further with the OES configuration
until the eDirectory server is up and running.
The NCP port on the existing server
The LDAP and secure LDAP port on the existing server
The fully distinguished name and context for the user Admin on the existing server
The password for user Admin on the existing server
4 Click Next.
5 On the eDirectory Configuration - Local Server Configuration page, specify the following
information:
Installing OES 11 SP2 as a New Installation 73
Page 74

The context for the server object in the eDirectory tree
A location for the eDirectory database
The default path is
to change the location if you expect to have a large number of objects in your tree and if the
current file system does not have sufficient space.
The ports to use for servicing LDAP requests
The default ports are 389 (non-secure) and 636 (secure).
IMPORTANT: The scripts that manage the common proxy user introduced in OES 11 SP2
require port 636 for secure LDAP communications.
The ports to use for providing access to the iMonitor application
The default ports are 8028 (non-secure) and 8030 (secure).
6 Click Next. Then continue with “Specifying Synchronizing Server Time Options” on page 70.
/var/opt/novell/eDirectory/data/dib
, but you can use this option
Selecting the NetIQ Modular Authentication Services (NMAS) Login
Method
1 On the NetIQ Modular Authentication Services page, select all of the login methods you want to
install.
IMPORTANT: The NMAS client software must be installed on each client workstation where you
want to use the NMAS login methods. The NMAS client software is included with the Novell
Client software.
74 OES 11 SP2: Installation Guide
Page 75

The following methods are available:
CertMutual: The Certificate Mutual login method implements the Simple Authentication and
Security Layer (SASL) EXTERNAL mechanism, which uses SSL certificates to provide
client authentication to eDirectory through LDAP.
Challenge Response: The Challenge Response login method works with the Identity
Manager password self-service process. This method allows either an administrator or a
user to define a password challenge question and a response, which are saved in the
password policy. Then, when users forget their passwords, they can reset their own
passwords by providing the correct response to the challenge question.
DIGEST-MD5: The Digest-MD5 login method implements the Simple Authentication and
Security Layer (SASL) DIGEST-MD5 mechanism as a means of authenticating the user to
eDirectory through LDAP.
NDS: The NDS login method provides secure password challenge-response user
authentication to eDirectory. This method is installed by default and supports the traditional
NDS password when the NMAS client is in use. Reinstallation is necessary only if the NDS
login method object has been removed from the directory.
Simple Password: The Simple Password NMAS login method provides password
authentication to eDirectory. The Simple Password is a more flexible but less secure
alternative to the NDS password. Simple Passwords are stored in a secret store on the user
object.
SASL GSSAPI: The SASL GSSAPI login method implements the Generic Security
Services Application Program Interface (GSSAPI) authentication. It uses the Simple
Authentication and Security Layer (SASL), which enables users to authenticate to
eDirectory through LDAP by using a Kerberos ticket.
For more information about installing and configuring eDirectory, see “Installing or Upgrading
NetIQ eDirectory on Linux in the NetIQ eDirectory 8.8 SP8 Installation Guide.
For more information on these login methods, see the online help and “Managing Login and
Post-Login Methods and Sequences” in the Novell Modular Authentication Services 3.3.4
Administration Guide.
2 Click Next. Then continue with “Specifying OES Common Proxy User Information” on page 75.
Specifying OES Common Proxy User Information
For an OES service to run successfully, you need to use a separate proxy account to configure and
manage each service. However, using multiple proxy user accounts means more overhead for the
administrator. To avoid this overhead, the common proxy user has been introduced. Each node in a
tree can have a common proxy user for all of its services. This enables administrators to configure
and manage multiple services with just one proxy user.
NOTE: Two nodes in a tree cannot have the same common proxy user.
For information about this option, see “Common Proxy User” in the OES 11 SP2: Planning and
Implementation Guide.
1 On the OES Common Proxy User Information page, specify the configuration settings for this
user, then click Next.
Installing OES 11 SP2 as a New Installation 75
Page 76

Use Common Proxy User as Default for OES Products: Selecting this option configures
the common proxy user for the following services: CIFS, DNS, DHCP, iFolder, NetStorage,
and NCS. Optionally, you can specify that LUM uses it.
OES Common Proxy User Name: For a host, the common proxy user's name is
OESCommonProxy_hostname
. You cannot specify any other name than what is given by the
system. This restriction prevents possible use of the same common proxy user name
across two or more nodes in a tree. For more information, see “Can I Change the Common
Proxy User Name and Context?” in the OES 11 SP2: Planning and Implementation Guide.
OES Common Proxy User Context: Provide the FDN name of the container where the
common proxy needs to be created. By default, this field is populated with the NCP server
context. For example,
organization unit name,
ou=acap,o=novell
o
is the organization, and
. Where ou is the organization unit,
novell
acap
is the
is the new organization name. For
an existing tree, click Browse and select the container where the Common Proxy User must
be created.
OES Common Proxy User Password: You can accept the default system-generated
password or specify a new password for the common proxy user.
NOTE: If you choose to provide your own password, it should conform to the policy that is in
effect for the common proxy user. If the password contains single (') or double (") quotes,
OES Configuration will fail. These characters have to be escaped by prefixing \. For
example, to add a single quote, escape it as nove\'ll. The system-generated password will
always be in conformance with the policy rules.
Verify OES Common Proxy User Password: If you specified a different password, type
the same password in this field. Otherwise, the system-generated password is automatically
included.
76 OES 11 SP2: Installation Guide
Page 77

Assign Common Proxy Password Policy to Proxy User: The initial common proxy
password policy is a simple password policy created with default rules. If desired, you can
modify this policy after the installation to enforce stricter rules regarding password length,
characters supported, expiration intervals, and so forth.
IMPORTANT: We recommended against deselecting the Assign Common Proxy Password
Policy to Proxy User option. If deselected, the common proxy user inherits the password policies
of the container, which could lead to service failures.
2 Continue with “Configuring OES Services” on page 77.
3.8.11
Configuring OES Services
After you complete the LDAP configuration or the eDirectory configuration, the Novell Open
Enterprise Server Configuration summary page is displayed, showing all of the OES components that
you installed and their configuration settings.
1 Review the setting for each component. Click the component heading to change any settings.
For help with specifying the configuration information for OES services, see the information in
“Configuration Guidelines for OES Services” on page 78.
2 When you are finished reviewing the settings for each component, click Next.
3 When you confirm the OES component configurations, you might receive the following error:
The proposal contains an error that must be resolved before continuing.
If this error is displayed, check the summary list of configured products for any messages
immediately below each product heading. These messages indicate products or services that
need to be configured. If you are running the YaST graphical interface, the messages are red
text. If you are using the YaST text-based interface, they are not red.
For example, if you selected Linux User Management in connection with other OES products or
services, you might see a message similar to the following:
Linux User Management needs to be configured before you can continue or disable
the configuration
If you see a message like this, do the following:
3a On the summary page, click the heading for the component.
3b Supply the missing information in each configuration page.
When you specify the configuration information for OES services, see the information in
“Configuration Guidelines for OES Services” on page 78, or if you are reading online, click a
link below:
AFP
Archive and Version Services
Backup/Storage Management Services (SMS)
CIFS
Clustering (NCS)
DHCP
DNS
Domain Services for Windows (DSfW)
eDirectory
FTP
.
Installing OES 11 SP2 as a New Installation 77
Page 78

iFolder
iManager
iPrint
Linux User Management (LUM)
NCP Server/Dynamic Storage Technology
NetStorage
Pre-Migration Server
QuickFinder
Novell Remote Manger (NRM)
Novell Samba
Novell Storage Services
When you have finished the configuration of a component, you are returned to the Novell
Open Enterprise Server Configuration summary page.
3c If you want to skip the configuration of a specific component and configure it later, click
Enabled in the Configure is enabled status to change the status to Re co nfigur e is disabl ed.
If you change the status to Reconfigure is disabled, you need to configure the OES
components after the installation is complete. See “Installing or Configuring OES 11 SP2 on
an Existing Server” on page 109.
4 After resolving all product configuration issues, click Next to proceed with the configuration of all
components.
5 When the configuration is complete, continue with Section 3.9, “Finishing the Installation,” on
page 106.
3.8.12
Configuration Guidelines for OES Services
“Service Configuration Caveats” on page 79
“LDAP Configuration for Open Enterprise Services” on page 80
“Novell AFP Services” on page 81
“Novell Archive and Version Services” on page 81
“Novell Backup/Storage Management Services (SMS)” on page 82
“Novell CIFS for Linux” on page 82
“Novell Cluster Services” on page 83
“Novell DHCP Services” on page 85
“Novell DNS Services” on page 88
“Novell Domain Services for Windows” on page 89
“NetIQ eDirectory Services” on page 89
“Novell FTP Services” on page 94
“Novell iFolder” on page 94
“Novell iManager” on page 99
“Novell iPrint” on page 100
“Novell Linux User Management” on page 100
“Novell NCP Server / Dynamic Storage Technology” on page 102
78 OES 11 SP2: Installation Guide
Page 79

“Novell NetStorage” on page 102
“Novell Pre-Migration Server” on page 103
“Novell QuickFinder” on page 103
“Novell Remote Manager” on page 104
“Novell Samba” on page 104
“Novell Storage Services (NSS)” on page 105
Service Configuration Caveats
Keep the following items in mind as you configure the OES 11 SP2:
Table 3-3 Caveats for Configuring OES Services
Issue Guideline
Software Selections
When Using TextBased YaST
Specifying a State
identifier for a
Locality Class object
Specifying Typeful
Admin Names
Some older machines, such as a Dell 1300, use the text mode install by default when the
video card does not meet SLES 11 SP3 specifications. When you go to the Sof tware
Selection, and then to the details of the OES software selections, YaST doesn’t bring up
the OES selections like it does when you use the graphical YaST (YaST2).
To view the Software Selection and System Task screen, select Filter > Pattern (or press
Alt+F > Alt+I).
If you to specify a state identifier, such as California, Utah, or Karnataka, as a Locality
Class object in your eDirectory tree hierarchy, ensure to use the correct abbreviation in
your LDAP (comma-delimited) or NDAP (period-delimited) syntax.
When using LDAP syntax, use “st” to specify a state. For example:
ou=example_organization,o=example_company,st=utah,c=us
When using NDAP syntax, use “s” to specify a state. For example:
ou=example_organization.o=example_company.s=utah.c=us
When you install OES, you must specify a fully distinguished admin name by using the
typeful, LDAP syntax that includes object type abbreviations (cn=, ou=, o=, etc.). For
example, you might specify the following:
cn=admin,ou=example_organization,o=example_company
Installing OES 11 SP2 as a New Installation 79
Page 80

Issue Guideline
Using Dot-Delimited
or Comma-Delimited
Input for All
Products
For all parameters requiring full contexts, you can separate the names by using commadelimited syntax. Ensure that you are consistent in your usage within the field.
The OES installation routine displays all input in the comma-delimited (LDAP) format.
However, it converts the name separators to dots when this is required by individual
product components.
IMPORTANT: After the OES components are installed, be sure to follow the conventions
specified in the documentation for each product. Some contexts must be specified using
periods (.) and others using commas (,). However, eDirectory supports names like
cn=juan\.garcia.ou=users.o=novell. The period (.) inside a name component must be
escaped.
When using NDAP format (dot), you must escape all embedded dots. For example:
cn=admin.o=novell\.provo
When using LDAP format (commas), you must escape all embedded commas. For
example:
The installation disallows a backslash and period (\.) in the CN portion of the admin
name.
For example, these names are supported:
cn=admin,o=novell\,provo
cn=admin.o=novell
cn=admin.o=novell\.provo
cn=admin.ou=deployment\.linux.o=novell\.provo
These names are not supported:
cn=admin\.first.o=novell
cn=admin\.root.o=novell
Before LUM-enabling users whose cn contains a period (.), you must remove the
backslash (\) from the unique_id field of the User object container.
For example, cn=juan.garcia has a unique_id attribute = juan\.garcia. Before such a user
can be LUM-enabled, the backslash (\) must be removed from the unique_id attribute.
LDAP Configuration for Open Enterprise Services
Table 3-4 LDAP Configuration for Open Enterprise Services Values
Page and Parameters
Configured LDAP Servers
eDirectory Tree Name: The eDirectory tree name that you specified when configuring eDirectory.
The tree that you are installing this server into.
Admin Name and Context: The eDirectory Admin name you specified when configuring
eDirectory.
Admin Password: The password of the eDirectory Admin user.
80 OES 11 SP2: Installation Guide
Page 81

Page and Parameters
Configured LDAP Servers: You can specify a list of servers that can be used to configure other
OES services on this server.
Each added server must have either the master or a read/write replica of the eDirectory tree. The
first server added to the list becomes the default server for the installed and configured OES
services to use.
For each server you must specify an IP Address, LDAP Port, Secure LDAP Port, and Server Type.
For information about specifying multiple LDAP servers for Linux User Management (LUM), see
“Configuring a Failover Mechanism” in the OES 11 SP2: Novell Linux User Management
Administration Guide.
Default: The eDirectory server you specified when configuring eDirectory.
Novell AFP Services
Table 3-5 Novell Apple Filing Protocol Parameters and Values
Page and Parameters
AFP Configuration - Mac Client Access to NSS Volumes
Directory Server Address: The IP address of the eDirectory server.
Proxy user name with context: Specify the FQDN of the eDirectory containers that contain AFP
users, for example ou=afp_users.o=novell. In an existing tree, you can select the context using
Browse.
For additional configuration instructions, see “Installing and Setting Up AFP” in the OES 11 SP2:
Novell AFP for Linux Administration Guide.
Novell Archive and Version Services
Table 3-6 Novell Archive and Version Services Parameters and Values
Page and Parameters
Archive and Version Services Configuration
Database Port Number: Specify a port number to use for the archive database communications.
Default: 5432
Database Username: Specify a user name for the administrator of the archive database (the
PostgreSQL database for the archived data).
IMPORTANT: The Postgres user must be an unprivileged user, not the root user.
Default: arkuser
Database Password: Specify and validate a password for the database user.
Enter the password for the eDirectory Admin user.
Installing OES 11 SP2 as a New Installation 81
Page 82

For additional configuration instructions, see “Setting Up Archive and Version Services ” in the OES
11 SP2: Novell Archive and Version Services Administration Guide.
Novell Backup/Storage Management Services (SMS)
Table 3-7 Novell Backup/Storage Management Services Parameters and Values
Page and Parameters
SMS Configuration
Directory Server Address: If you do not want to use the default shown, select a different LDAP
server in the list.
If you are installing into an existing tree, ensure that the server you select has a master replica or
read/write replica of eDirectory. If you need to add another LDAP server to the list, add it by using
the LDAP Configuration for Open Enterprise Services dialog box.
Default: The first server selected in the LDAP Configuration list of servers.
For additional configuration instructions, see “Installing and Configuring SMS” in the Installing and
Configuring SMS guide.
Novell CIFS for Linux
Table 3-8 Novell CIFS Parameters and Values
Page and Parameters
Novell CIFS Service Configuration
eDirectory server address or host name: Leave the default or select from the drop-down list to
change to a different server.
LDAP port for CIFS Server: Displays the port value.
Local NCP Server context: Displays the NCP Server context.
82 OES 11 SP2: Installation Guide
Page 83

Page and Parameters
CIFS Proxy User
Use existing user as CIFS Proxy User: Select this option to use an existing proxy user for
the CIFS service.
If you specified the server’s common proxy user, this option is selected.
Create a new CIFS Proxy User: Select this option to create a new proxy user for the CIFS
service.
CIFS Proxy User Name: Specify the FQDN (fully qualified distinguished name) of the CIFS
proxy user.
For example: cn=user, o=novell
NOTE: This user is granted rights to read the passwords of any users, including non-CIFS
users, that are governed by any of the password policies you select in the Novell CIFS
Service Configuration page.
CIFS Proxy User Password: Specify a password for the CIFS proxy user to use when
authenticating to the CIFS server, and verify the password if you are specifying an existing
proxy user.
For more information on proxy user and password management, see “Planning Your Proxy
Users” in the OES 11 SP2: Planning and Implementation Guide.
Credential Storage Location: Accept CASA or specify the Local File option.
The CIFS proxy user password is encrypted and encoded in the credential storage location.
Default: CASA
Novell CIFS Service Configuration (2)
eDirectory Contexts: Provide a list of contexts that are searched when the CIFS User enters a
user name. The server searches each context in the list until it finds the correct user object.
For additional configuration instructions, see “Installing and Setting Up CIFS” in the OES 11 SP2:
Novell CIFS for Linux Administration Guide and the OES 1 1 SP2: Novell AFP for Linux Administration
Guide
Novell Cluster Services
Table 3-9 Novell Cluster Services Parameters and Values
Page and Parameters
Before you configure a node for a Novell Cluster Services cluster, ensure that you have satisfied
the prerequisites and have the necessary Administration rights described in “Planning for Novell
Cluster Services” in the OES 11 SP2: Novell Cluster Services for Linux Administration Guid e .
Novell Cluster Services (NCS) Configuration
New or Existing Cluster: Specify whether the server is part of a new cluster or is joining an
existing cluster.
Default: Existing Cluster
Installing OES 11 SP2 as a New Installation 83
Page 84

Page and Parameters
Before you configure a node for a Novell Cluster Services cluster, ensure that you have satisfied
the prerequisites and have the necessary Administration rights described in “Planning for Novell
Cluster Services” in the OES 11 SP2: Novell Cluster Services for Linux Administration Guid e .
Directory Server Address: The IP addresses shown are the LDAP servers that are
available for this service to use. The selected IP address is the default LDAP server for this
service.
Default: The local LDAP server.
The LDAP servers that you select must have a master replica or a Read/Write replica of
eDirectory. You can add, remove, or change the order of available LDAP servers for the node
after the setup is complete by using the
script. For more information, see “Changing the Administrator Credentials or LDAP Server IP
Addresses for a Cluster” in the OES 11 SP2: Novell Cluster Services for Linux Administration
Guide.
/opt/novell/ncs/install/ncs_install.py
Cluster FDN: Browse to select an existing eDirectory context where the Cluster objects will
be created. The fully distinguished name (FDN) of the cluster is automatically added to the
field with a suggested cluster name. You can specify a different cluster name.
You can also specify the typeful FDN for the cluster. Use the comma format illustrated in the
example. Do not use dots.You must specify an existing context. Specifying a new context
does not create a new context.
Cluster names must be unique. You cannot create two clusters with the same name in the
same eDirectory tree. Cluster names are case-sensitive on Linux.
Cluster IP Address: If you are creating a new cluster, specify a unique IP address for the
cluster.
The cluster IP address is separate from the server IP address and is required to be on the
same IP subnet as the other servers in the cluster.
Storage Device With Shared Media: If you are creating a new cluster, select the device
where the Split Brain Detector (SBD) partition will be created.
An SBD is required if you plan to use shared disks in the cluster. The drop-down menu
shows only devices that have been initialized and shared. If a device is not available, accept
the default (none). You must create the SBD manually before adding a second server to the
cluster.
Default: none
Optional Device for Mirrored Partitions: If you want to mirror the SBD partition for greater
fault tolerance, select the device where you want the mirror to be. You can also mirror SBD
partitions after installing Novell Cluster Services.
Default: none
Desired Partition Size of the Shared Media: Specify the size in MB (megabytes) of the
SBD partition, or select Use Maximum Size to use the entire shared device. We recommend
at least 20 MB for the SBD partition. If you specified a device to mirror the partition, the
setting is also applied to the mirror.
Default: 8
Novell Cluster Services (NCS) Proxy User Configuration (2)
84 OES 11 SP2: Installation Guide
Page 85

Page and Parameters
Before you configure a node for a Novell Cluster Services cluster, ensure that you have satisfied
the prerequisites and have the necessary Administration rights described in “Planning for Novell
Cluster Services” in the OES 11 SP2: Novell Cluster Services for Linux Administration Guid e .
Specify one of the following users as the NCS Proxy user.
OES Common Proxy User: If the OES common proxy User is enabled in eDirectory, the
Use OES Common Proxy User check box is automatically selected and the NCS Proxy User
Name and Specify NCS Proxy User Password fields are populated with the credentials of the
OES common proxy User.
LDAP Admin User: If the OES common proxy User is disabled in eDirectory, the Use OES
Common Proxy User check box is automatically deselected and the NCS Proxy User Name
and Specify NCS Proxy User Password fields are populated with the credentials of the LDAP
Admin user. The fields are also automatically populated with the LDAP Admin credentials if
you deselect the Use OES Common Proxy User check box.
Another Administrator User: Deselect the Use OES Common Proxy User check box, then
specify the credentials of an administrator user.
Novell Cluster Services (NCS) Configuration (3)
Name of This Node: This is the hostname of the server.
IP Address of this Node: This field contains the IP address of this node. If this server has
multiple IP addresses, you can change the default address to another value if desired.
Start Cluster Services Now: Select this box if you want clustering to start now. If you want
clustering to start after rebooting, or if you want to manually start it later, deselect this box.
This option applies only to installing Novell Cluster Services after the OES installation
because it starts automatically when the server initializes during the installation.
If you choose to not start Novell Cluster Services software, you need to either manually start
it after the installation, or reboot the cluster server to automatically start it.
You can manually start Novell Cluster Services by going to the
entering
Default: Selected
./novell-ncs start
at the server console of the cluster server.
/etc/init.d
directory and
For additional instructions, see the OES 11 SP2: Novell Cluster Services for Linux Administration
Guide.
Novell DHCP Services
Table 3-10 Novell DHCP Services Parameters and Values
Page and Parameters
Novell DHCP Services Configuration
DHCP Server Context: Specify a context for the DHCP Server object.
Default: o=example
Installing OES 11 SP2 as a New Installation 85
Page 86

Page and Parameters
DHCP Server Object Name: Specify the name of the Server object that these DHCP services will
be running on.
This is the DHCP server object that contains a list of DHCP Services (configuration) served by the
DHCP Server.
Default: DHCP_example_server
Common DHCP Configuration Object Contexts
Locator Object: Specify the context for the DHCP Locator object.
The DHCP Locator object has references to dhcpServer and dhcpService objects.
Group Context: Specify the context for the DHCP Group object.
This object is used to grant the necessary rights to the eDirectory user used by the DHCP
server to access the DHCP objects.
Default: o=example
Log File Location: Specify the path and file name for the DHCP server to dump the configurations
it reads from eDirectory. Specify the path manually or click Browse to locate the log.
Default: Usually
/var/log/dhcp-ldap-startup.log
LDAP Method
Static: Select this option if you do not want the DHCP server to query the LDAP server for
host details.
Dynamic: Select this option if you want the DHCP server to query for host details from the
LDAP server for every request.
Selecting the dynamic LDAP method ensures that the responses you receive to queries are
accurate, but the server takes a longer time to respond.
Default: Static
Referrals
A referral is a message that the LDAP server sends to the LDAP client informing it that the server
cannot provide complete results and that more data might be on another LDAP server.
Chase Referral: Select this option if you want the DHCP server to follow referrals.
Do Not Chase Referral: Select this option to ignore LDAP referrals.
Default: Chase referral
Novell DHCP LDAP and Secure Channel Configuration
eDirectory Server Address or Host Name: The IP address shown is the default LDAP server for
this service. If you do not want to use the default, select a different LDAP server in the list.
If you are installing into an existing tree, ensure that the server you select has a master replica or
read/write replica of eDirectory. If you need to add another LDAP server to the list, add it by using
the LDAP Configuration for Open Enterprise Services dialog box.
Default: The first server is selected in the LDAP Confi g uration list of servers.
86 OES 11 SP2: Installation Guide
Page 87

Page and Parameters
Use Secure Channel for Configuration: This option is selected by default. When you are
configuring DHCP services, it ensures that all configuration is transferred over a secure channel.
Deselecting the option lets a user with fewer privileges configure LDAP services and allows
configuration information to be transferred over a non-secure channel.
Default: Selected
LDAP User Name with Context: Specify a distinguished name and context for an LDAP user. For
example: cn=joe, o=novell. This user should be an eDirectory user that can access the DHCP
server.
During eDirectory configuration, if you have selected the Use Common Proxy User as default for
OES Products check box, then the proxy user and password fields are populated with common
proxy user name and password.
Default: cn=OESCommonProxy_host name, o=novell
LDAP User Password: Type a password for the LDAP user.
LDAP Port for DHCP Server: Select a port for the LDAP operations to use.
IMPORTANT: The scripts that manage the common proxy user introduced in OES 11 SP2 require
port 636 for secure LDAP communications.
Default: 636
Use Secure channel for DHCP Server: Selecting this option ensures that the data transferred
between the DHCP server and the LDAP server is secure and private.
If you deselect this option, the data transferred is in clear text format.
Default: Selected
Certificates (optional)
Request Certificate: Specifies what checks to perform on a server certificate in a SSL/TLS
session. Select one of the following options:
Never: The server does not ask the client for a certificate. This is the default
Allow: The server requests a client certificate, but if a certificate is not provided or a
wrong certificate is provided, the session still proceeds normally.
Try: The server requests the certificate. If none is provided, the session proceeds
normally. If a certificate is provided and it cannot be verified, the session is immediately
terminated
Hard: The server requests a certificate. A valid certificate must be provided, or the
session is immediately terminated.
Paths to Certificate Files: Specify or browse the path for the certificate files.
The LDAP CA file contains CA certificates.
The LDAP client certificate contains the client certificate.
The LDAP client key file contains the key file for the client certificate.
Novell DHCP Services Interface Selection
Network Boards for the Novell DHCP Server: From the available interfaces, select the network
interfaces that the Novell DHCP server should listen to.
Installing OES 11 SP2 as a New Installation 87
Page 88

For additional configuration instructions, see “Installing and Configuring DHCP ” in the OES 11 SP2:
Novell DNS/DHCP Services for Linux Administration Guide.
Novell DNS Services
Table 3-11 Novell DNS Services Parameter s and Values
Page and Parameters
Novell DNS Configuration
Directory server address: If you have specified multiple LDAP servers by using the LDAP
Configuration for Open Enterprise Services dialog box, you can select a different LDAP server than
the first one in the list.
If you are installing into an existing tree, ensure that the selected server has a master or read/write
replica of eDirectory.
Default: The first LDAP server in the LDAP Server Configuration dialog box.
Local NCP Server Context: Specify a context for the local NCP Server object.
Default: The eDirectory context specified for this OES server.
Use Secure LDAP Port: Selecting this option ensures that the data transferred by this service is
secure and private.
If you deselect this option, the transferred data is in clear text format.
Default: Selected
Proxy User for DNS Management: Specify the FDN of the DNS proxy user.
An existing user must have eDirectory read, write, and browse rights under the specified context. If
the user doesn’t exist, it is created in the context specified.
Default: If you specified a common proxy user, it is used by default. If you didn’t specify a common
proxy user, the eDirectory Admin name and context that you specified when configuring eDirectory
is specified.
Specify Password for Proxy User: Specify the password for the DNS proxy user.
For more information on proxy user and password management, see “Planning Your Proxy Users”
in the OES 11 SP2: Planning and Implementation Guide.
Default: The password that you specified for the OES server you are installing.
Credential Storage Location: Specify where the DNS proxy user’s credentials are to be stored.
Default: For security reasons, the default and recommended method of credential storage is
CASA.
88 OES 11 SP2: Installation Guide
Page 89

Page and Parameters
Common DNS Configuration Object and User Contexts:
Get Context and Proxy User Information from Existing DNS Server: Select this option if
you are configuring DNS in an existing tree where DNS is already configured, and you want to
use the existing Locator, Root Server Info, Group and Proxy User contexts.
Existing Novell DNS Server Address: If you have enabled the previous option, you can
type the IP address of an NCP server (must be up and running) that is hosting the existing
DNS server.
To automatically retrieve the contexts of the objects that follow, click Retrieve.
If you do not want to use the retrieved contexts, you can change them manually.
Novell DNS Services Locator Object Context: Specify the context for the DNS Locator
object.
The Locator object contains global defaults, DHCP options, and a list of all DNS and DHCP
servers, subnets, and zones in the tree.
Default: The context you specified for the OES server you are installing.
Novell DNS Services Root Server Info Context: Specify the context for the DNS Services
root server.
The RootSrvrInfo Zone is an eDirectory container object that contains resource records for
the DNS root servers.
Default: The context you specified for the OES server you are installing.
Novell DNS Services Group Object Context: Specify the context for the DNS Group object.
This object is used to grant DNS servers the necessary rights to other data within the
eDirectory tree.
Default: The context you specified for the OES server you are installing.
Create DNS Server Object: Select this check box if you want to create the DNS server object in
the eDirectory tree associated with the NCP server.
Host Name: Type the unique host name for the DNS server object.
Domain Name for the DNS Server: Type the domain name for the server object.
For additional configuration instructions, see “Installing and Configuring DNS ” in the OES 11 SP2:
Novell DNS/DHCP Services for Linux Administration Guide.
Novell Domain Services for Windows
There are multiple configuration scenarios, depending on your deployment. For information, see
“Installing Domain Services for Windows” in the OES 11 SP2: Domain Services for Windows
Administration Guide.
NetIQ eDirectory Services
IMPORTANT: You specified the eDirectory configuration for this server in either “Specifying LDAP
Configuration Settings” on page 67 or “Specifying eDirectory Configuration Settings” on page 69, and
the settings you specified were extended to your OES service configurations by the OES install.
If you change the eDirectory configuration at this point in the install, your modifications might or might
not extend to the other OES services. For example, if you change the server context from o=example
to ou=servers.o=example, the other service configurations might or might not reflect the change.
Installing OES 11 SP2 as a New Installation 89
Page 90

Be sure to carefully check all of the service configuration summaries on the Novell Open Enterprise
Server Configuration summary screen. If any of the services don’t show the eDirectory change you
made, click the service link and modify the configuration manually. Otherwise, your installation will
fail.
Table 3-12 NetIQ eDirectory Parameters and Values
Page and Parameters
eDirectory Configuration - New or Existing Tree
New or Existing Tree
New Tree: Creates a new tree.
Use this option if this is the first server to go into the tree or if this server requires a separate
tree. Keep in mind that this server will have the master replica for the new tree, and that
users must log in to this new tree to access its resources.
Existing Tree: Incorporates this server into an existing eDirectory tree.
This server might not have a replica copied to it, depending on the tree configuration. For
details, see “Guidelines for Replicating Your Tree (https://www.netiq.com/documentation/
edir88/edir88/data/a2iiie1.html)” in the NetIQ eDirectory 8.8 Administration Guide (https://
www.netiq.com/documentation/edir88/edir88/data/bookinfo.html).
Default: New Tree
eDirectory Tree Name: Specify a unique name for the eDirectory tree you want to create or the
name of the tree you want to install this server into.
Use eDirectory Certificates for HTTPS Services: Selecting this option causes eDirectory
to automatically back up the currently installed certificate and key files and replace them with
files created by the eDirectory Organizational CA (or Tree CA).
Most OES services that provide HTTPS connectivity are configured by default to use the selfsigned common server certificate created by YaST. Self-signed certificates provide minimal
security and limited trust, so you should consider using eDirectory certificates instead.
For all server installations, this option is enabled by default and is recommended for the
increased security it provides.
To prevent third-party CA certificates from being accidentally backed up and overwritten,
deselect this option.
For more information on certificate management and this option, see “Security” in the OES
11 SP2: Planning and Implementation Guide.
Require TLS for Simple Binds with Password: Select this option to make connections
encrypted in the Session layer.
Install SecretStore: Select this option to install Novell SecretStore (SS), an eDirectory-
based security product.
eDirectory Configuration - New/Existing Tree Information
IP Address of an Existing eDirectory Server with a Replica: Specify the IP address of a server
with an eDirectory replica.
This option appears only if you are joining an existing tree.
90 OES 11 SP2: Installation Guide
Page 91

Page and Parameters
NCP Port on the Existing Server: Specify the NCP port used by the eDirectory server you
specified.
This option appears only if you are joining an existing tree.
Default: 524
LDAP and Secure LDAP Ports on the Existing Server: Specify the LDAP ports used by the
eDirectory server you specified.
This option appears only if you are joining an existing tree.
IMPORTANT: The scripts that manage the common proxy user introduced in OES 11 SP2 require
port 636 for secure LDAP communications.
Default: 389 (LDAP), 636 (Secure LDAP)
FDN Admin Name with Context: Specify the name of the administrative user for the new tree.
This is the fully distinguished name of a User object that will be created with full administrative
rights in the new directory.
Default: The eDirectory Admin name and context that you specified when initially configuring
eDirectory.
Admin Password: Specify the eDirectory administrator's password.
This is the password of the user specified in the prior field.
Verify Admin Password: Retype the password to verify it.
This option only appears if you are creating a new tree.
eDirectory Configuration - Local Server Configuration
Enter Server Context: Specify the location of the new server object in the eDirectory tree.
Enter Directory Information Base (DIB) Location: Specify a location for the eDirectory
database.
Default: The default path is
option to change the location if you expect the number of objects in your tree to be large and the
current file system does not have sufficient space.
/var/opt/novell/eDirectory/data/dib
Enter LDAP Port: Specify the LDAP port number this server will use to service LDAP requests.
Default: 389
Enter Secure LDAP Port: Specify secure LDAP port number this server will use to service LDAP
requests.
IMPORTANT: The scripts that manage the common proxy user introduced in OES 11 SP2 require
port 636 for secure LDAP communications.
Default: 636
, but you can use this
Installing OES 11 SP2 as a New Installation 91
Page 92

Page and Parameters
Enter iMonitor Port: Specify the port this server will use to provide access to the iMonitor
application.
iMonitor lets you monitor and diagnose all servers in your eDirectory tree from any location on
your network where a web browser is available.
Default: 8028
Enter Secure iMonitor Port: Specify the secure port this server will use to provide access to the
iMonitor application.
Default: 8030
eDirectory Configuration - NTP and SLP
Network Time Protocol (NTP) Server: Specify the IP address or DNS hostname of an NTP
server.
For the first server in a tree, we recommend specifying a reliable external time source.
For servers joining a tree, specify the same external NTP time source that the tree is using,
or specify the IP address of a configured time source in the tree. A time source in the tree
should be running time services for 15 minutes or more before connecting to it; otherwise,
the time synchronization request for the installation fails.
If the time source server is NetWare 5.0 or earlier, you must specify an alternate NTP time
source, or the time synchronization request fails. For more information, see “Time Services”
in the OES 11 SP2: Planning and Implementation Guide.
Use Local Clock: Alternatively, you can select Use Local Clock to designate the server’s
hardware clock as the time source for your eDirectory tree.
This is not recommended if there is a reliable external time source available.
(SLP Options)
Use Multicast to Access SLP: Allows the server to request SLP information by using
multicast packets. Use this in environments that have not established SLP DAs (Directory
Agents).
IMPORTANT: If you select this option, you must disable the firewall for SLP to work correctly.
Multicast creates a significant amount of network traffic and can reduce network throughput.
Configure as Directory Agent: Configures this server as a Directory Agent (DA). This is
useful if you plan to have more than three servers in the tree and want to set up SLP during
the installation.
DASyncReg: Causes SLP, when it starts, to query the Directory Agents listed under
Configured SLP Directory Agents for their current lists of registered services. It also
causes the DA to share service registrations that it receives with the other DAs in the
SLP Directory Agent list.
Backup SLP Registrations: Causes SLP to back up the list of services that are
registered with this Directory Agent on the local disk.
Backup Interval in Seconds: Specifies how often the list of registered services is
backed up.
Configure SLP to use an existing Directory Agent: Configures SLP to use an existing
Directory Agent (DA) in your network. Use this in environments that have established SLP
DAs. When you select this option, you configure the servers to use by adding or removing
them from the SLP Directory Agent list.
92 OES 11 SP2: Installation Guide
Page 93

Page and Parameters
Service Location Protocols and Scope: Configures the scopes that a user agent (UA) or
service agent (SA) is allowed when making requests or when registering services, or specifies the
scopes that a directory agent (DA) must support. The default value is DEFAULT. Use commas to
separate each scope. For example, net.slp.useScopes = myScope1,myScope2,myScope3.
This information is required when selecting the Use Multicast to Access SLP or Configure SLP to
Use an Existing Directory Agent option.
Default: Default
Configured SLP Directory Agents: Lets you manage the list of hostname or IP addresses of one
or more external servers on which an SLP Directory Agent is running.
It is enabled for input only when you configure SLP to use an existing Directory Agent.
NetIQ Modular Authentication Services
IMPORTANT: NMAS client software (included with Novell Client software) must be installed on each
client workstation where you want to use the NMAS login methods.
CertMutual: The Certificate Mutual login method implements the Simple Authentication and
Security Layer (SASL) EXTERNAL mechanism, which uses SSL certificates to provide client
authentication to eDirectory through LDAP.
Challenge Response: The Challenge-Response login method works with the Identity Manager
password self-service process. This method allows either an administrator or a user to define a
password challenge question and a response, which are saved in the password policy. Then,
when users forget their passwords, they can reset their own passwords by providing the correct
response to the challenge question.
DIGEST-MD5: The Digest MD5 login method implements the Simple Authentication and Security
Layer (SASL) DIGEST-MD5 mechanism as a means of authenticating the user to eDirectory
through LDAP.
NDS: The NDS login method provides secure password challenge-response user authentication
to eDirectory. This method supports the traditional NDS password when the NMAS client is in use.
Reinstallation is necessary only if the NDS login method object has been removed from the
directory.
Simple Password: The Simple Password NMAS login method provides password authentication
to eDirectory. The Simple Password is a more flexible but less secure alternative to the NDS
password. Simple Passwords are stored in a secret store on the user object.
SASL GSSAPI: The SASL GSSAPI login method implements the Generic Security Services
Application Program Interface (GSSAPI) authentication by using the Simple Authentication and
Security Layer (SASL) that enables users to authenticate to eDirectory through LDAP by using a
Kerberos ticket.
If you want to install all of the login methods into eDirectory, click Select All.
If you want to clear all selections, click Deselect All.
For more information on these login methods, see “Managing Login and Post-Login Methods and
Sequences” in the Novell Modular Authentication Services 3.3.4 Administration Guide.
Defaults: Challenge Response and NDS
OES Common Proxy User Information
Installing OES 11 SP2 as a New Installation 93
Page 94

Page and Parameters
Use Common Proxy User as Default for OES Products: Selecting this option configures the
specified common proxy user for the following services: CIFS, DNS, DHCP, iFolder, NetStorage,
and NCS. Optionally, you can specify that LUM use it.
OES Common Proxy User Name: By default, the common proxy user’s name is
OESCommonProxy_hostname, but you can specify any name that fits your naming methodology.
By default, the common proxy user is created in the container that you specify for the server
object.
You can specify a different container, but it must meet one of the following qualifications:
New Tree Installation: The container must be included in either the path specified for the
eDirectory Admin user or the path for Server object.
Existing Tree Installation: The container must already exist in eDirectory.
IMPORTANT: You cannot create a new container by specifying a non-qualifying path. If you
attempt this, the installation program will appear to proceed normally until the eDirectory
Configuration (ndsconfig) runs. At that point the installation will fail with an
Common Proxy User: 32
OES Common Proxy User Password: You can accept the default system-generated password
or specify a new password for the common proxy user.
Verify OES Common Proxy User Password: If you specified a different password, type the
same password in this field. Otherwise, the system-generated password is automatically included.
Assign Common Proxy Password Policy to Proxy User: The initial common proxy password
policy is a simple password policy created with default rules. You can modify this policy after the
installation to enforce stricter rules regarding password length, characters supported, expiration
intervals, and so forth.
Error creating
error, and you will need to install the server again.
For additional configuration instructions, see “Installing or Upgrading NetIQ eDirectory on Linux” in
the NetIQ eDirectory 8.8 SP8 Installation Guide.
Novell FTP Services
No additional configuration is required.
Novell iFolder
When you configure iFolder as part of the OES install and configuration, you can specify only an
EXT3 or ReiserFS volume location for the System Store Path, which is where you store iFolder data
for all your users. You cannot create NSS volumes during the system install.
If you want to use an NSS volume to store iFolder data, you must reconfigure iFolder after the initial
OES installation. To reconfigure, use Novell iManager to create an NSS volume, then go to YaST >
Open Enterprise Server > Install and Configure Open Enterprise Services and select iFolder 3.9 to
enter new information. All previous configuration information is removed and replaced.
Table 3-13 Novell iFolder 3.9 Parameters and Values
Page and Parameters
Novell iFolder System Configuration Options
94 OES 11 SP2: Installation Guide
Page 95

Page and Parameters
iFolder Component to Be Configured
iFolder Server: Lets you configure the settings for the iFolder server that is the central
repository for storing user iFolders and synchronizing files for enterprise users.
iFolder Web Admin: Lets you create and configure settings for the administrator user.
The iFolder Admin user is the primary administrator of the iFolder Enterprise Server. The
Web Admin server does not need to be configured on the iFolder Enterprise Server. Devoting
a separate server to the Web Admin application improves the performance of the iFolder
Enterprise Server by reducing the admin traffic.
iFolder Web Access: Lets you configure the Web Access server, which is an interface that
lets users have remote access to iFolders on the enterprise server.
The Web Access server lets users perform all the operations equivalent to those of the
iFolder client through using a standard web browser.
The Web Access server does not need to be configured in the same iFolder Enterprise
Server. Directing the user tasks to a separate server and thereby reducing the HTTP
requests helps to improve the performance of the iFolder Enterprise Server.
Default: All three items are selected.
Novell iFolder System Configuration
Name Used to Identify the iFolder System to Users: Specify a unique name to identify your
iFolder Enterprise Server.
Default: iFolder
System Description (optional): Specify a descriptive label for your iFolder Enterprise Server to
identify it to the users.
Default: iFolder Enterprise System
Path to Server's Data Files: Specify the case-sensitive address of the location where the iFolder
Enterprise Server stores iFolder application files as well as the user iFolders and files.
IMPORTANT: This location cannot be modified after iFolder is installed.
Default:
/var/simias/data/
Path to the Recovery Agent Certificates (optional): Specify the path to the recovery agent
certificates that are used for recovering the encryption key.
Default:
Novell iFolder System Configuration (2)
/var/simias/data/simias
Name of iFolder Server: Specify a unique name to identify your iFolder Enterprise Server. For
example: Host1.
Default: The name of the OES server
iFolder Public URL: Specify the public URL for users to reach the iFolder Enterprise Server.
Default: The OES server’s IP address
iFolder Private URL: Specify the private URL corresponding to the iFolder Enterprise Server to
allow communication between the servers within the iFolder domain. The private URL and the
public URL can be the same.
Default: The OES server’s IP address
Installing OES 11 SP2 as a New Installation 95
Page 96

Page and Parameters
Select SSL Option for iFolder: Select the SSL option you want to use to set up a secure
connection between the iFolder server and the iFolder clients.
There are three options for the channel for data transfer: SSL, Non SSL, and Both. However,
authentication is always over SSL (not optional).
Both: (default) This option lets you select a secure or a non-secure channel for
communication among the iFolder server, Web Admin server, Web Access server, and the
clients. By default, these components use the HTTPS (secure) communication channel.
However, all components can also be configured to use HTTP.
Non SSL: Select this option to enable non-secure communication between the iFolder
server, Web Admin server, Web Access server, and the clients. The iFolder uses the HTTP
channel for communication.
SSL: Select this option to enable a secure connection among the iFolder server, iFolder Web
Admin server, iFolder Web Access server, and the iFolder clients. The iFolder uses the
HTTPS channel for communication.
Default: Both
iFolder Port to Listen On: Specify the port for the iFolder to listen on.
Default: 443
Install into Existing iFolder Domain: Select this option when you want to attach to an existing
iFolder domain.
If this option is not selected, this server becomes the Master iFolder server.
Default: Deselected
Private URL of the Master Server: Specify the private URL of the Master iFolder server that
holds the master iFolder data for synchronization to the current iFolder Enterprise Server.
Configure LDAP Groups Plugin: Select this option to configure the LDAP Groups plug-in.
If this option is left unselected, iFolder does not have LDAP Group support enabled.
Novell iFolder LDAP Configuration
Directory server address: The IP address shown is the default LDAP server for this service. If
you do not want to use the default, select a different LDAP server in the list.
If you need to add another eDirectory LDAP server to the list, use the LDAP Configuration for
Open Enterprise Services dialog box.
If you are installing into an existing tree, ensure that the server you select has a master replica or
read/write replica of eDirectory.
If you are installing into an existing tree, you must enter the password of an admin user in the tree.
Default: The first server selected in the LDAP Configuration list of servers
96 OES 11 SP2: Installation Guide
Page 97

Page and Parameters
Use Alternate LDAP server: If you need to add another LDAP server to the list, select this option
and enter the following information:
Alternate Directory Server Address: Specify the host or IP address of the alternate LDAP
server that iFolder will use.
LDAP Port: Specify the LDAP port to use for this alternate server.
LDAP Secure Port: Specify the LDAP secure port to use for this alternate server.
Admin Name and Context: Specify the administrator name and context for the alternate
LDAP server.
Admin Password: Type the specified administrator’s password.
Novell iFolder System Configuration
The iFolder Default Administrator: Specify the user name for the default iFolder administrative
user. Use the full distinguished name of the iFolder administrative user.
Default: The eDirectory Admin user you specified while configuring eDirectory.
iFolder Admin Password: Specify a password for the iFolder administrative user.
Verify iFolder Admin Password: Type the password for the iFolder administrative user again.
LDAP Proxy User: Specify the full distinguished name of the LDAP Proxy user.
This user must have the Read right to the LDAP service. This user is used to provision the users
between iFolder Enterprise Server and the LDAP server. If it does not already exist, this user is
created and granted the Read right to the root of the tree. The LDAP proxy user's domain name
(DN) and password are stored by iFolder.
Default: If you specified a common proxy user, it is used by default if possible. If you didn’t specify
the common proxy user, a user object named iFolderProxy is created in the server context you
specified.
The common proxy user cannot be used if iFolder is running on a cluster node. If the NCS pattern
is selected along with iFolder, this field will be populated with the iFolderProxy by default.
LDAP Proxy User Password: Specify a password for the LDAP Proxy user.
For more information on proxy user and password management, see “Planning Your Proxy Users”
in the OES 11 SP2: Plannin g and Implementation Guide.
Default: A system-generated password
Verify LDAP Proxy User Password: Type the password for the LDAP Proxy user again.
LDAP Search Context: Click Add, then specify an LDAP tree context to be searched for users to
provision them in iFolder. For example, o=acme, o=acme2, or o=acme3
If no context is specified, only the iFolder administrative user is provisioned for services during the
install.
Default: The server context you specified while configuring eDirectory.
Installing OES 11 SP2 as a New Installation 97
Page 98

Page and Parameters
LDAP Naming Attribute: Select which LDAP attribute of the User account to apply when
authenticating users. This setting cannot be changed after the install.
Each user enters a user name in this specified format at login time. Common Name (CN) is the
default, and an email address (email) is the other option.
For example, if a user named John Smith has a common name of jsmith and email of
john.smith@example.com, this field determines whether the user enters jsmith or
john.smith@example.com as the user name when logging in to the iFolder Enterprise Server.
Default: Common Name (CN)
Require a Secure Connection Between the LDAP server and the iFolder Server: If the LDAP
server co-exists on the same computer as the iFolder Enterprise Server, you can deselect this
option, which increases the performance of LDAP authentications.
Default: Selected
Novell iFolder Web Access Configuration
An Apache Alias That Will Point to the iFolder Web Access Application: This is a user-
friendly pointer for the Apache service.
Default: /ifolder
The Host or IP Address of the iFolder Server That Will Be Used by the iFolder Web Access
Application: This Web Access application performs all the user-specific iFolder operations on the
host that runs the iFolder Enterprise Server.
Default: The IP address of the OES server you are installing
Redirect URL for iChain/Access Gateway (optional): Specify the redirect URL for iChain/
Access Gateway that will be used by the iFolder Web Access application. This URL is used for the
proper logout of iChain/Access Gateway sessions along with the iFolder session.
Connect to the iFolder Server Using SSL: Select the check box to establish a secure
connection between the iFolder enterprise server and the iFolder Web Admin application.
Default: Selected
iFolder Server Port to Connect on: Specify the port for the iFolder server to connect to the Web
Access application.
Default: 443 (SSL communications), 80 (non-SSL communication)
Require a secure connection between the web browser and the iFolder Web Access
application: Select the check box to establish a secure connection between the web browser and
the iFolder Web Access application.
Default: Selected
Novell iFolder Web Admin Configuration
An Apache Alias That Will Point to the iFolder Web Admin Application: This is an admin-
friendly pointer for the Apache service.
Default: /admin
The Host or IP Address of the iFolder Server That Will Be Used by the iFolder Web
Application: The iFolder Web Admin application manages this host.
Default: The IP address of the OES server you are installing
98 OES 11 SP2: Installation Guide
Page 99

Page and Parameters
Redirect URL for iChain/Access Gateway (optional): Specify the redirect URL for iChain/
Access Gateway that will be used by the iFolder Web Admin application. This URL is used for the
proper logout of iChain/Access Gateway sessions along with the iFolder session.
Connect to the iFolder Server Using SSL: Select the check box to establish a secure
connection between the iFolder Enterprise Server and the iFolder Web Admin application.
iFolder Server Port to Connect on: Specify the port for the iFolder server to connect to the Web
Admin application. Port 443 is the default. Port 80 is the default value for non-SSL communication.
Require a secure connection between the web browser and the iFolder Web Access
application: Select the check box to establish a secure connection between the web browser and
the iFolder Web Admin application.
For additional configuration instructions, see “Installing and Configuring iFolder Services” in the
Novell iFolder 3.9.2 Administration Guide.
Novell iManager
Table 3-14 Novell iManager Parameters and Values
Page and Parameters
iManager Configuration
eDirectory Tree: Shows the name of a valid eDirectory tree that you specified when configuring
eDirectory.
To change this configuration, you must change the eDirectory configuration.
FDN Admin Name with Context Shows the eDirectory Admin name and context that you
specified when configuring eDirectory. This is the user that has full administrative rights to
perform operations in iManager.
To change this configuration, you must change the eDirectory configuration.
For additional configuration instructions, see “Installing iManager” in the NetIQ® iManager Inst allation
Guide.
Installing OES 11 SP2 as a New Installation 99
Page 100

Novell iPrint
Table 3-15 Novell iPrint Parameters and Values
Page and Parameters
iPrint Configuration
Directory server address: The IP address shown is the default LDAP server for this
service. If you do not want to use the default, select a different LDAP server in the list.
If you are installing into an existing tree, ensure that the server you select has a master
replica or read/write replica of eDirectory. If you need to add another LDAP server to the
list, add it by using the LDAP Configuration for Open Enterprise Services dialog box.
Top-Most Container of eDirectory Tree: iPrint uses LDAP to verify rights to perform
various iPrint operations, including authenticating users for printing and performing
management tasks such as uploading drivers.
During the installation of the iPrint software, iPrint attempts to identify the topmost container
of the eDirectory tree and sets the base dn to this container for the AuthLDAPURL entry in
/etc/opt/novell/iprint/httpd/conf/iprint_ssl.conf
For most installations, this is adequate because users are often distributed across
containers.
IMPORTANT: If you have multiple peer containers at the top of your eDirectory tree, leave
this field blank so that the LDAP search begins at the root of the tree.
.
For additional configuration instructions, see “Installing and Setting Up iPrint on Your Server” in the
OES 11 SP2: iPrint Linux Administration Guide.
Novell Linux User Management
Table 3-16 Novell Linux User Management Parameters and Values
Page and Parameters
Linux User Management Configuration
Directory Server Address: The IP address shown is the default LDAP server for this service. If
you do not want to use the default, select a different LDAP server in the list.
If you are installing into an existing tree, ensure that the server you select has a master replica or
read/write replica of eDirectory. If you need to add another LDAP server to the list, add it by using
the LDAP Configuration for Open Enterprise Services dialog box.
For information about specifying multiple LDAP servers for Linux User Management (LUM), see
“Configuring a Failover Mechanism” in the OES 11 SP2: Novell Linux User Management
Administration Guide.
Default: The first server selected in the LDAP Configuration list of servers
100 OES 11 SP2: Installation Guide
 Loading...