

Page 1

Nokia C2 Tava
Nokia C2 Tennen
User Guide
1
Page 2

Contents
Get started ....................................................................................................... 4
Keep your phone up to date ......................................................................... 4
Keys and parts .............................................................................................. 4
Insert SIM and memory card ........................................................................ 5
Charge your phone ....................................................................................... 7
Switch on and set up your phone ................................................................. 7
Lock your phone ........................................................................................... 7
Protect your phone with a screen lock ......................................................... 8
Use the touch screen .................................................................................... 8
Basics .............................................................................................................. 10
Personalize your phone .............................................................................. 10
Notifications ............................................................................................... 11
Control volume ........................................................................................... 12
2
Screenshots ................................................................................................ 12
Battery life ................................................................................................. 13
Automatic text correction .......................................................................... 13
Google Assistant ........................................................................................ 14
Accessibility ................................................................................................ 14
Connect with your friends and family ............................................................ 15
Calls ............................................................................................................ 15
Contacts ..................................................................................................... 16
Send and receive messages ....................................................................... 16
Mail ............................................................................................................ 16
Camera ........................................................................................................... 17
Your photos and videos ............................................................................. 18
Internet and connections ............................................................................... 19
Activate Wi-Fi ............................................................................................. 19
Page 3

Browse the web .......................................................................................... 19
Access codes .................................................................................................. 26
Bluetooth® .................................................................................................. 20
VPN ............................................................................................................. 21
Organize your day .......................................................................................... 22
Date and time ............................................................................................. 22
Alarm clock ................................................................................................. 22
Calendar ..................................................................................................... 22
Maps ............................................................................................................... 23
Use location services .................................................................................. 24
Apps, updates, and backups ........................................................................... 25
Get apps from Google Play ......................................................................... 25
Update your phone software ..................................................................... 25
Back up your data ....................................................................................... 26
Restore original settings and remove private content from your phone ... 26
3
Copyrights and notices .................................................................................. 27
Page 4

Get started
Keep your phone up to date
Keep your phone up to date and accept available software updates to get
new and enhanced features for your phone. Updating the software may also
improve your phone’s performance.
4
Keys and parts
1. Flash
2. Camera
3. Headset connector
4. The Google Assistant key
Page 5

5. Front camera
6. Earpiece
7. Volume keys
8. Power/Lock key
9. USB connector
10. Microphone
11. Loudspeaker
Important: The device screen is made of glass. This glass can break if the
device is dropped on a hard surface or receives a substantial impact. If the
glass breaks, do not touch the glass parts of the device or attempt to remove
the broken glass from the device. Stop using the device until the glass is
replaced by authorized service personnel.
Parts of the device are magnetic. Metallic materials may be attracted to the
device. Do not place credit cards or other magnetic stripe cards near the
device for extended periods of time, since the cards may be damaged.
Insert SIM and memory card
Do not connect to products that create an output signal, as this may damage
the device. Do not connect any voltage source to the audio connector. If you
connect an external device or headset, other than those approved for use
with this device, to the audio connector, pay special attention to volume
levels.
5
1. Place your fingernail in the seam between the back cover and the
display, bend the back cover open, and remove it.
2. Lift and remove the battery.
Page 6

3. Hold the SIM card with metal contacts facing downward and the cut
corner at the upper left. Slide the card into the SIM card slot.
4. If applicable, hold the microSD card (sold separately) with metal
contacts facing downward and the cut corner at the upper right.
Slide the card into the microSD card slot.
6
5. Insert the battery, making sure the gold contacts line up.
6. Replace the cover on the back of the phone; making sure it is lined
up before pressing it into place around all of the edges.
Warning!
To avoid damage to the phone, only use the SIM included in the box or
provided to you by Cricket.
Use only compatible memory cards approved for use with this device.
Incompatible cards may damage the card and the device and corrupt data
stored on the card.
Do not remove the memory card when an app is using it. Doing so may
damage the memory card and the device and corrupt data stored on the
card.
Switch the device off and disconnect the charger and any other device
before removing any covers. Avoid touching electronic components while
changing any covers. Always store and use the device with any covers
attached.
Page 7

Charge your phone
1. Plug a compatible charger into a wall outlet.
2. Connect the cable to your phone.
TRANSFER DATA FROM YOUR PREVIOUS PHONE
You can transfer data from an old phone to your new phone using your
Google account.
Your phone supports the USB-C cable. You can also charge your phone from
a computer with a USB cable, but it may take a longer time.
If the battery is completely discharged, it may take several minutes before
the charging indicator is displayed.
Switch on and set up your phone
When you switch your phone on for the first time, your phone guides you to
set up your network connections and phone settings.
1. To switch on your phone, press and hold the power key until the
phone vibrates.
2. When the phone is switched on, choose your language and region.
3. Follow the instructions shown on your phone.
7
To back up data on your old phone to your Google account, refer to your old
phone’s user guide.
1. Tap Settings > Accounts > Add account > Google.
2. Select which data you want to restore on your new phone. The sync
starts automatically once your phone is connected to the internet.
RESTORE APP SETTINGS FROM YOUR PREVIOUS ANDROIDTM PHONE
If your previous phone was an Android, and back up to Google account is
enabled on it, you can restore your app settings and Wi-Fi passwords.
1. Tap Settings > System > Backup.
2. Switch Backup to Google Drive on.
Lock your phone
If you want to avoid accidentally making a call when your phone is in your
pocket or bag, you can lock your keys and screen.
Page 8

To lock your keys and screen, press the power key.
UNLOCK THE KEYS AND SCREEN
Press the power key, and swipe up across the screen. If asked, provide
additional credentials.
Protect your phone with a screen lock
You can set your phone to require authentication when unlocking the
screen.
SET A SCREEN LOCK
1. Tap Settings > Security > Screen lock.
2. Choose the type of lock and follow the instructions on your phone.
TAP AND HOLD TO DRAG AN ITEM
Use the touch screen
Important: Avoid scratching the touch screen. Never use an actual pen,
pencil, or other sharp object on the touch screen.
8
Place your finger on the item for a couple of seconds, and slide your finger
across the screen.
Page 9

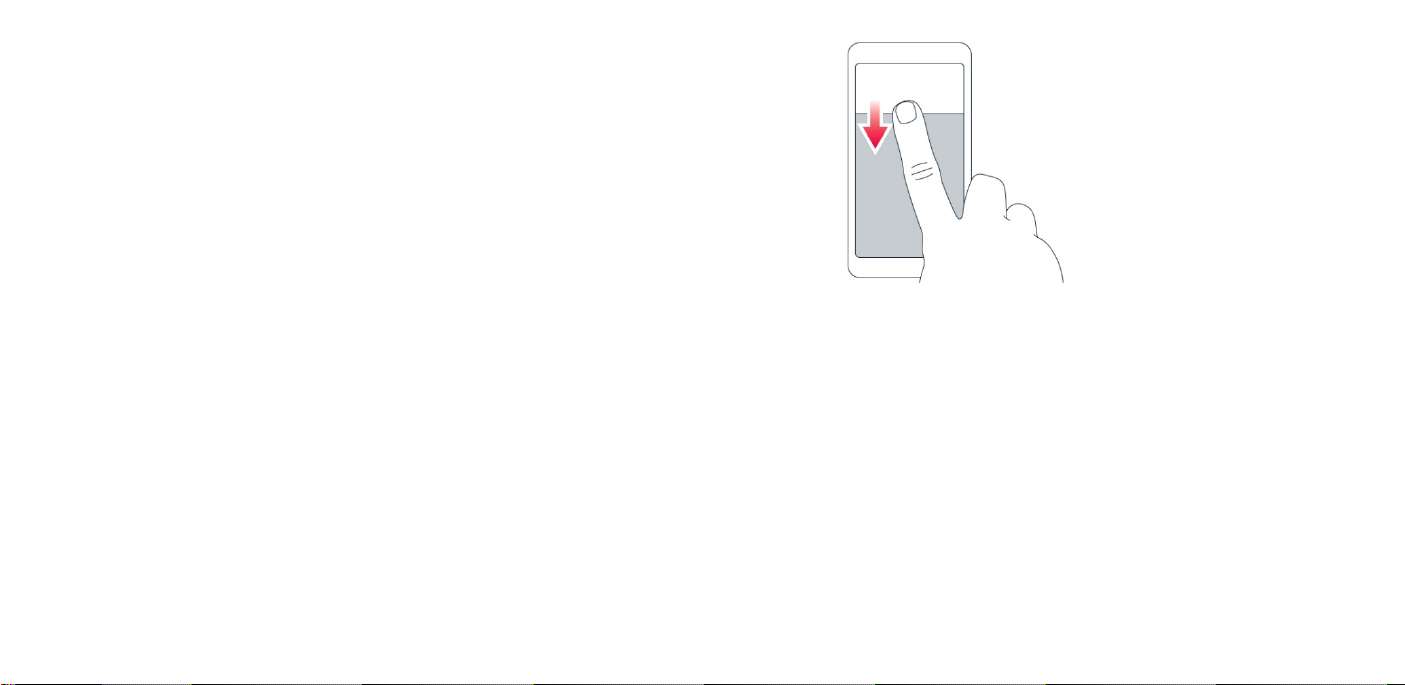
SWIPE
SCROLL THROUGH A LONG LIST OR MENU
Place your finger on the screen, and slide your finger in the direction you
want.
9
Slide your finger quickly in a flicking motion up or down the screen, and lift
your finger. To stop the scrolling, tap the screen.
Page 10

ZOOM IN OR OUT
Place 2 fingers on an item, such as a map, photo, or web page, and slide your
fingers apart or together.
USE THE NAVIGATION KEYS
• To see all your apps, swipe up from the home key .
• To go to the home screen, tap the home key. The app you were in
stays open in the background.
• To see which apps you have open, tap .
o To switch to another open app, swipe right.
o To close an app, swipe it up.
o To close all the open apps, swipe right through all the apps,
and tap CLEAR ALL.
• To go back to the previous screen you were in, tap the back key .
Your phone remembers all the apps and websites you've visited
since the last time your screen was locked.
LOCK THE SCREEN ORIENTATION
The screen rotates automatically when you turn the phone 90 degrees.
To lock the screen in portrait mode, swipe down from the top of the screen,
and tap Auto-rotate.
10
Basics
Personalize your phone
Learn how to personalize the home screen and how to change ringtones.
Page 11
CHANGE YOUR WALLPAPER
Tap Settings > Display > Wallpaper.
CHANGE YOUR PHONE RINGTONE
1. Tap Settings > Sound.
2. Tap Phone ringtone to select the ringtone.
CHANGE YOUR MESSAGE NOTIFICATION SOUND
Tap Settings > Sound > Default notification sound.
Notifications
When you receive new notifications, such as messages or missed calls,
indicator icons appear on the status bar at the top of the screen. To see
more information about the notifications, drag the status bar down. To close
the view, swipe up on the screen.
11
To change the notification settings of an app, tap Settings > Apps &
notifications > Notifications, and tap the app name to open the app settings.
You can turn off or on the notifications for each app individually.
Tip: To see notification dots, tap Settings > Apps & notifications >
Notifications > Advanced, and switch Allow notification dots on. A small dot
will appear on the app icon, if you’ve got a notification, but haven’t attended
to it yet. Tap and hold the icon to see available options. You can tap the
notification to open it, or swipe to dismiss.
Page 12

USE THE QUICK SETTING ICONS
To activate features, tap the quick settings icons on the notification panel. To
see more icons, drag the menu down.
CHANGE THE VOLUME SETTINGS
Press a volume key on the side of your phone to see the volume status bar,
tap , and drag the sliders on the volume bars left or right.
To rearrange the icons, tap , tap and hold an icon, and then drag it to
another location.
Control volume
If you have trouble hearing your phone ringing in noisy environments, or
calls are too loud, you can change the volume to your liking by using the
volume keys on the side of your phone.
Do not connect to products that create an output signal, as this may damage
the device. Do not connect any voltage source to the audio connector. If you
connect an external device or headset, other than those approved for use
with this device, to the audio connector, pay special attention to volume
levels.
12
SET THE PHONE TO SILENT
To set the phone to silent, press the volume down key, tap to set your
phone to vibrate only and tap to set it to silent.
Screenshots
To take a screenshot, press and hold the power key and tap Screenshot. You
can also take a screenshot by pressing and holding the down volume and
power key for 2 seconds.
You can view the captured images in Photos.
It is not possible to capture a screenshot while using some apps and
features.
Page 13

Battery life
Get the most out of your phone while getting the battery life you need.
There are steps you can take to save power on your phone.
• Always charge the battery fully.
• Mute unnecessary sounds, such as touch sounds. Tap Settings >
Sound > Advanced, and under Other sounds and vibrations, select
which sounds to keep.
• Use wired headphones, rather than the loudspeaker.
• Set the phone screen to switch off after a short time. Tap Settings >
Display > Advanced > Screen timeout and select the time.
• Tap Settings > Display > Brightness level. To adjust the brightness,
drag the brightness level slider. Make sure that Adaptive brightness
is disabled.
• Switch on the power saver: tap Settings > Battery > Battery Saver,
and switch on.
• Use location services selectively: switch location services off when
you don't need them. Tap Settings > Location, and disable Use
location.
13
• Use network connections selectively: switch Bluetooth on only
when needed. Use a Wi-Fi connection to connect to the internet,
rather than a mobile data connection. Stop your phone scanning for
available wireless networks. Tap Settings > Network & internet >
Wi-Fi, and switch Use Wi-Fi off. If you're listening to music or
otherwise using your phone, but don't want to make or receive
calls, switch the airplane mode on. Tap Settings > Network &
internet > Advanced > Airplane mode. Airplane mode closes
connections to the mobile network and switches your device’s
wireless features off.
Automatic text correction
USE KEYBOARD WORD SUGGESTIONS
Your phone suggests words as you write, to help you write quickly and more
accurately. Word suggestions may not be available in all languages.
When you start writing a word, your phone suggests possible words. When
the word you want is shown in the suggestion bar, select the word. To see
more suggestions, tap and hold the suggestion.
Page 14

Tip: If the suggested word is marked in bold, your phone automatically uses
it to replace the word you wrote. If the word is wrong, tap and hold it to see
a few other suggestions. If you do not want the keyboard to suggest words
while typing, turn off the text corrections. Tap Settings > System >
Languages & input > Virtual keyboard. Select the keyboard you normally
use. Tap Text correction and switch off the text correction methods you do
not want to use.
CORRECT A WORD
If you notice that you have misspelled a word, tap it to see suggestions for
correcting the word.
SWITCH SPELL CHECKER OFF
Tap Settings > System > Languages & input > Advanced > Spell checker, and
switch Use spell checker off.
Google Assistant
Google Assistant can help you search information online, translate words
and sentences, make notes and calendar appointments, for example. You
14
can use Google Assistant even when your phone is locked. However, Google
Assistant asks you to unlock your phone before accessing your private data.
USE THE GOOGLE ASSISTANT KEY
To access the Google Assistant services, use the Google Assistant key on the
side of your phone:
• Press the key once to start Google Assistant. When you press the
key for the first time, you are asked to sign in with your Google
account or create a new account.
• Press and hold the key to speak with Google Assistant. Ask your
question and release the key. You see Google Assistant’s answer on
your phone’s display.
Accessibility
ADJUST THE FONT SIZE
Do you want to have larger fonts on your phone?
1. Tap Settings > Accessibility.
Page 15

2. Tap Font size. To increase or decrease the font size, drag the font
size level slider.
• To access all your apps, tap on the home screen and then double
tap it.
ADJUST THE DISPLAY SIZE
Do you want to make the items on your screen smaller or larger?
1. Tap Settings > Accessibility.
2. Tap Display size and to adjust the display size, drag the display size
level slider.
USE TALKBACK
With TalkBack, the phone speaks out loud the items you touch on the
screen. This way, you can use the phone without looking at the screen.
Tap Settings > Accessibility > TalkBack, and switch Use service on.
Note that when TalkBack is on, the phone screen behaves differently:
• To activate an item, first tap it to select it, and then double-tap it.
• To scroll on the screen, use two fingers.
15
To switch TalkBack off, tap Settings to select it and then double-tap it. Then
tap Accessibility and double-tap it. Then tap TalkBack and double-tap it. Tap
Use service and double-tap it. Tap OK and double-tap it.
Tip: You can also switch TalkBack off with the volume keys. Press and hold
both volume keys at the same time for 3 seconds. Tap Use shortcut and
double-tap it. Then press and hold the volume keys for 3 seconds again.
From now on, you can switch TalkBack on and off just by pressing and
holding the volume keys for 3 seconds.
Connect with your friends and family
Calls
MAKE A CALL
1. Tap .
Page 16
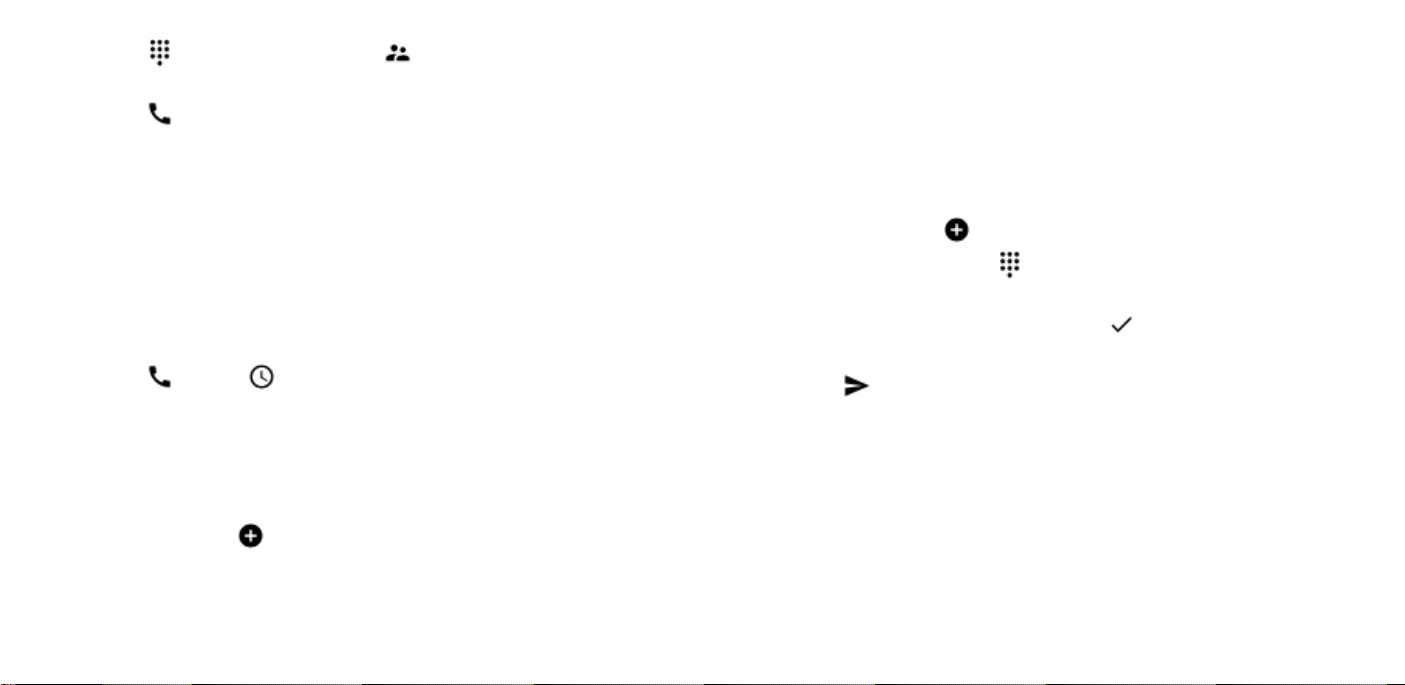
2. Tap , type in a number, or tap and select a contact you want
to call.
2. Fill out the information.
3. Tap SAVE.
3. Tap .
ANSWER A CALL
When the phone rings, swipe up to answer.
REJECT A CALL
To reject a call, swipe down.
Contacts
SAVE A CONTACT FROM CALL HISTORY
1. Tap , and tap to see call history.
2. Tap the number you want to save.
3. Select if you want to Create new contact or Add to a contact.
4. Type in the contact information, and tap SAVE.
ADD A CONTACT
1. Tap Contacts > .
16
Send and receive messages
Keep in touch with your friends and family members through text messages.
SEND A MESSAGE
1. Tap Messages > .
2. To add a recipient, tap and type their number in the To field. To
add a contact, start typing their name and tap the contact.
3. After choosing all the recipients, tap .
4. Write your message in the text box.
5. Tap .
You can use your phone to read and reply to mail when you're on the go.
Page 17
ADD A MAIL ACCOUNT
When you use the Gmail app for the first time, you are asked to set up your
email account.
1. Tap Gmail.
2. You can select the address connected with your Google account or
tap Add an email address.
3. After adding all the accounts, tap TAKE ME TO GMAIL.
SEND MAIL
1. Tap Gmail.
2. Tap .
3. In the To box, type in an address, or tap > Add from Contacts.
4. Type in the message subject and the mail.
5. Tap .
17
Camera
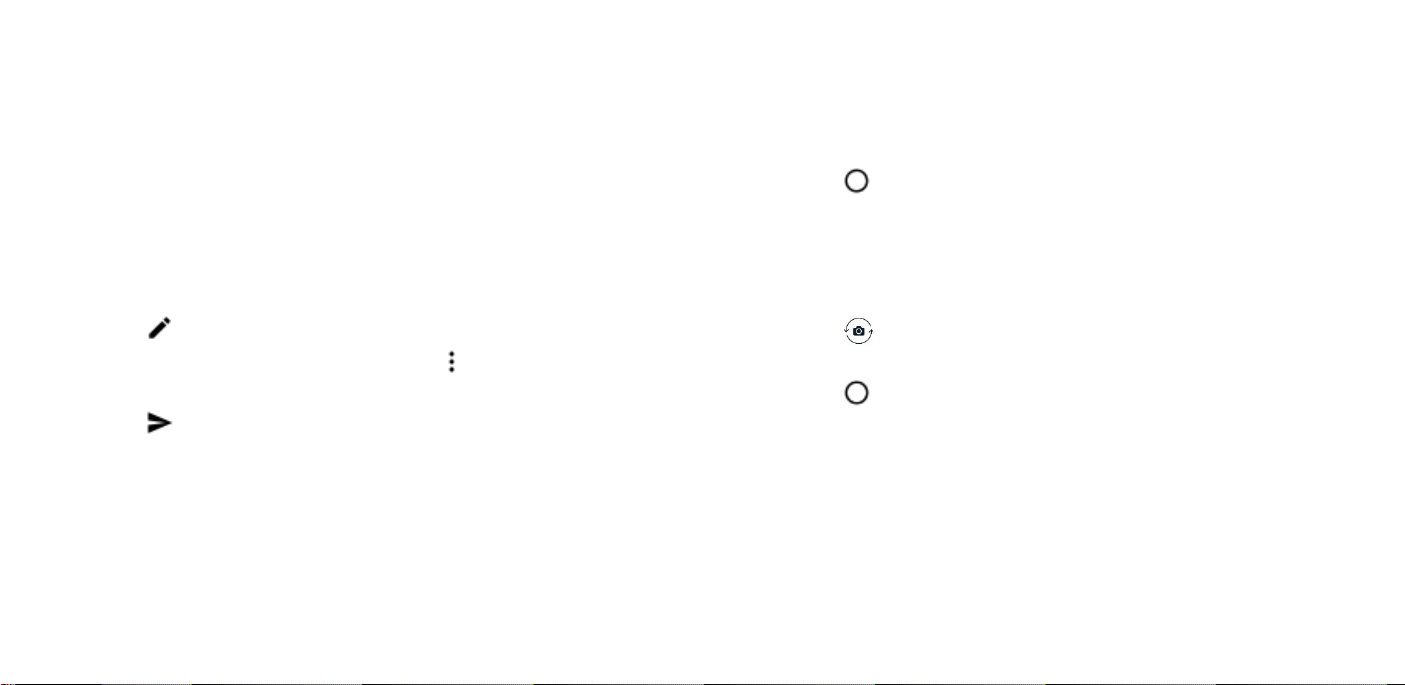
TAKE A PHOTO
1. Tap Camera.
2. Take aim and focus.
3. Tap .
TAKE A SELFIE
Need that perfect selfie? Use the phone's front camera to take one.
1. Tap Camera.
2. Tap to switch to the front camera.
3. Take aim and focus.
4. Tap .
USE GOOGLE LENS
With Google Lens, you can use the viewfinder of your camera to identify
things, copy text, scan codes, and search for similar products, for example.
1. Tap Camera.
Page 18
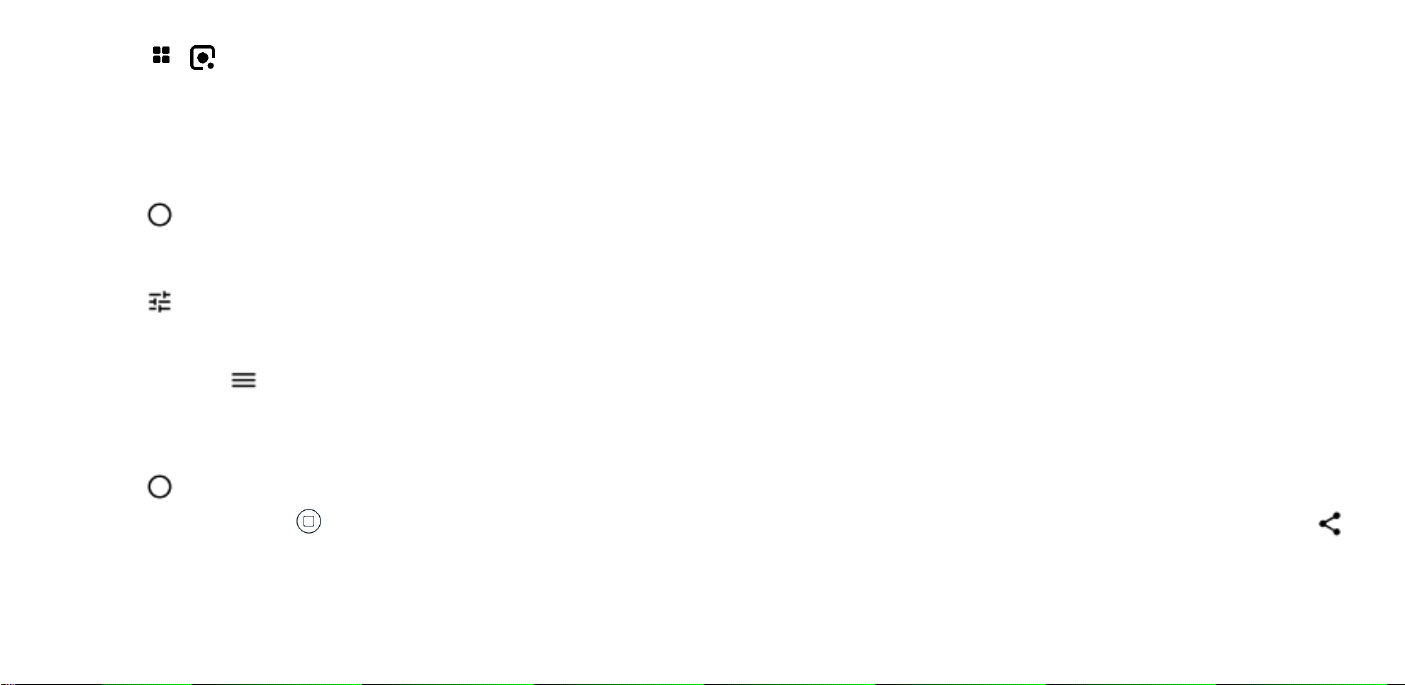
2. Tap > .
3. Point the camera to the thing you want to identify, and follow the
instructions on the display.
Your photos and videos
VIEW PHOTOS AND VIDEOS ON YOUR PHONE
Tap Photos.
ADD EFFECTS TO YOUR PHOTO
1. Tap Camera > Portrait.
2. Tap .
3. Select the photo you just took, you can see it in the bottom right
corner.
4. Tap and select the effect you want.
LEARN ABOUT YOUR CAMERA SETTINGS
In the Camera app, tap to learn more about each setting.
RECORD A VIDEO
1. Tap Camera > Video.
2. Tap to start recording.
3. To stop recording, tap .
18
COPY YOUR PHOTOS AND VIDEOS TO YOUR COMPUTER
Do you want to view your photos or videos on a larger screen? Move them
to your computer.
You can use your computer’s file manager to copy or move your photos and
videos to the computer.
Connect your phone to the computer with a compatible USB cable. To set
the USB connection type, open the notification panel, and tap the USB
notification.
SHARE YOUR PHOTOS AND VIDEOS
You can share your photos and videos quickly and easily for your friends and
family to see.
1. Tap Photos, tap the photo or video you want to share and tap .
Page 19

2. Select how you want to share the photo or video.
Browse the web
Internet and connections
Activate Wi-Fi
Using a Wi-Fi connection is generally faster and less expensive than using a
mobile data connection. If both Wi-Fi and mobile data connections are
available, your phone uses the Wi-Fi connection.
TURN ON WI-FI
1. Tap Settings > Network & internet > Wi-Fi.
2. Switch Use Wi-Fi on.
3. Select the connection you want to use.
Your Wi-Fi connection is active when is shown on the status bar at the
top of the screen.
Important: Use encryption to increase the security of your Wi-Fi connection.
Using encryption reduces the risk of others accessing your data.
19
USE YOUR PHONE TO CONNECT YOUR COMPUTER TO THE WEB
It’s simple to use the internet on your laptop on the go. Turn your phone
into a Wi-Fi hotspot, and use your mobile data connection to access the
internet with your laptop or other device.
1. Tap Settings > Network & internet > Hotspot & tethering.
2. Switch on the Wi-Fi hotspot to share your mobile data connection
over Wi-Fi, USB tethering to use a USB connection, or Bluetooth
tethering to use Bluetooth.
The other device uses data from your data plan, which may result in data
traffic costs. For info on availability and costs, contact your network service
provider.
START BROWSING
1. Tap Chrome.
2. Type a web address and tap .
Page 20

SEARCH THE WEB
1. Tap Chrome.
2. Tap the search bar.
3. Write your search word in the search box.
4. Tap .
You can also select a search word from the proposed matches.
Bluetooth®
You can connect wirelessly to other compatible devices, such as phones,
computers, headsets, and car kits. You can also send your photos to
compatible phones or to your computer.
CONNECT TO A BLUETOOTH DEVICE
You can connect your phone with many useful Bluetooth devices. For
example, with a wireless headset (sold separately), you can speak on the
phone hands-free – you can continue what you’re doing, such as working at
your computer, during a call. Connecting a phone to a Bluetooth device is
called pairing.
20
1. Tap Settings > Connected devices > Connection preferences >
Bluetooth.
2. Switch Bluetooth on.
3. Make sure the other device is switched on. You may need to start
the pairing process from the other device. For details, see the user
guide for the other device.
4. To pair your phone and the device, tap the device on the list of
discovered Bluetooth devices.
5. You may need to type in a passcode. For details, see the user guide
for the other device.
Since devices with Bluetooth wireless technology communicate using radio
waves, they do not need to be in direct line-of-sight. Bluetooth devices must,
however, be within 10 meters (33 feet) of each other, although the
connection may be subject to interference from obstructions such as walls or
from other electronic devices.
Paired devices can connect to your phone when Bluetooth is switched on.
Other devices can detect your phone only if the Bluetooth settings view is
open.
Page 21

Do not pair with or accept connection requests from an unknown device.
This helps to protect your phone from harmful content.
REMOVE A PAIRING
If you no longer have the device with which you paired your phone, you can
remove the pairing.
1. Tap Settings > Connected devices > Previously connected devices.
3. Go to the content you want to send, and tap > Bluetooth.
4. Tap the device to connect to. You can see the Bluetooth devices
within range.
5. If the other device needs a passcode, type in the passcode. The
passcode, which you can make up, must be typed in on both
devices. The passcode in some devices is fixed. For details, see the
user guide of the other device.
2. Tap next to a device name.
3. Tap FORGET.
SEND YOUR CONTENT USING BLUETOOTH
When you want to share your content or send photos you've taken to a
friend, use Bluetooth to send them to compatible devices.
You can use more than one Bluetooth connection at a time. For example,
while using a Bluetooth headset, you can still send things to another device.
1. Tap Settings > Connected devices > Connection preferences >
Bluetooth.
2. Switch Bluetooth on.
21
The passcode is only used when you connect to something for the first time.
VPN
You may need a virtual private network (VPN) connection to access your
company resources, such as intranet or corporate mail, or you may use a
VPN service for personal purposes.
Contact your company IT administrator for details of your VPN configuration,
or check your VPN service’s website for additional info.
USE A SECURE VPN CONNECTION
1. Tap Settings > Network & internet > Advanced > VPN.
Page 22

2. To add a VPN profile, tap .
3. Type in the profile info as instructed by your company IT
administrator or VPN service.
1. Tap Settings > System > Date & time.
2. Switch Use network-provided time on.
3. Switch Automatic time zone on.
EDIT A VPN PROFILE
1. Tap next to a profile name.
2. Change the info as required.
DELETE A VPN PROFILE
1. Tap next to a profile name.
2. Tap FORGET.
Organize your day
Date and time
UPDATE THE TIME AND DATE AUTOMATICALLY
You can set your phone to update the time, date, and time zone
automatically. Automatic update is a network service and may not be
available depending on your region or network service provider.
22
Alarm clock
SET AN ALARM
1. Tap Clock > Alarm.
2. To add an alarm, tap .
3. To modify an alarm, tap it. To set the alarm to repeat on specific
dates, tap Repeat and highlight the days of the week.
SWITCH AN ALARM OFF
When the alarm sounds, swipe the alarm right.
Calendar
Tap Calendar > , and select what type of calendar you want to see.
Page 23

Calendars are added automatically when you add an account to your phone.
To add a new account with a calendar, go to the apps menu and tap Settings
> Accounts > Add account.
ADD AN EVENT
To remember an appointment or an event, add it to your calendar.
1. In Calendar, tap .
2. Type in the details you want, and set the time.
3. To make an event repeat on certain days, tap More options > Does
not repeat, and select how often the event should repeat.
4. To edit the reminder time, tap Add a notification, and select the
time you need.
5. Tap Save.
Maps
FIND A SPOT
Google Maps helps you find specific locations and businesses.
1. Tap Maps.
2. Write search words, such as a street address or place name, in the
search bar.
3. Select an item from the list of proposed matches as you write, or
tap to search.
The location is shown on the map. If no search results are found, make sure
the spelling of your search words is correct.
SEE YOUR CURRENT LOCATION
Tip: To edit an event, tap the event and , and edit the details.
DELETE AN APPOINTMENT
1. Tap the event
2. Tap > Delete.
23
Tap Maps > .
GET DIRECTIONS TO A PLACE
Get directions for walking, driving, or using public transport – use your
current location or any other place as the start point.
Page 24

1. Tap Maps and enter your destination in the search bar.
2. Tap Directions. The highlighted icon shows the mode of
transportation, for example . To change the mode, select the
new mode under the search bar.
3. If you don't want the starting point to be your current location, tap
Your location, and search for a new starting point.
4. Tap Start to start the navigation.
The route is shown on the map, along with an estimate of how long it takes
to get there. To see detailed directions, tap Steps & more.
SWITCH ON LOCATION SERVICES
Your phone shows your location on the map using a satellite positioning
system, Wi- Fi, or network (Cell ID) based positioning.
The availability, accuracy and completeness of the location info depend on,
for example, your location, surroundings, and third-party sources, and may
be limited. Location info may not be available, for example, inside buildings
or underground. For privacy info related to positioning methods, see the
HMD Global Privacy Policy, available at
http://www.nokia.com/phones/privacy.
Use location services
Use Maps to find out where you are, attach your location to the photos you
take. Location info can be attached to a photo or video, if your location can
be determined using satellite or network technology. If you share a photo or
video that contains location info, the location info may be shown to those
who view the photo or video. Some apps can use your location info to offer
you a wider variety of services.
24
Some satellite positioning systems may require transferring small amounts
of data over the mobile network. If you want to avoid data costs, for
example when traveling, you can switch the mobile data connection off in
your phone settings.
Wi-Fi positioning improves positioning accuracy when satellite signals are
not available, especially when you are indoors or between tall buildings. If
you're in a place where the use of Wi-Fi is restricted, you can switch Wi-Fi off
in your phone settings.
Page 25

Tap Settings > Location, and switch Use location on.
Apps, updates, and backups
2. Tap the search bar to look for apps, or select apps from your
recommendations.
3. In the app description, tap Install to download and install the app.
Get apps from Google Play
You need to have a Google account added to your phone to use Google Play
services. Charges may apply to some of the content available in Google Play.
To add a payment method, tap Play Store > > Payment methods. Always
be sure to have a permission from the payment method owner when buying
content from Google Play.
ADD A GOOGLE ACCOUNT TO YOUR PHONE
1. Tap Settings > Accounts > Add account > Google. If asked, confirm
your device lock method.
2. Type in your Google account credentials and tap Next, or, to create
a new account, tap Create account.
3. Follow the instructions on your phone.
DOWNLOAD APPS
1. Tap Play Store.
25
Update your phone software
INSTALL AVAILABLE UPDATES
Tap Settings > Cricket Software updates > Check for updates to check if
updates are available.
When your phone notifies you that an update is available, just follow the
instructions shown on your phone. If your phone is low on memory, you may
need to move your photos and other stuff to the memory card.
Warning: If you install a software update, you cannot use the device, even to
make emergency calls, until the installation is complete and the device is
restarted.
Before starting the update, connect a charger or make sure the device
battery has enough power, and connect to Wi-Fi, as the update packages
may use up a lot of mobile data.
Page 26

Back up your data
To ensure your data is safe, use the backup feature in your phone. Your
device data (such as Wi-Fi passwords and call history) and app data (such as
settings and files stored by apps) will be backed up remotely.
SWITCH ON AUTOMATIC BACKUP
Tap Settings > System > Backup, and switch Back up to Google Drive on.
Restore original settings and remove private content
Access codes
Learn what the different codes on your phone are for.
LOCK CODE
Also known as security code or password.
The lock code helps you protect your phone against unauthorized use. You
can set your phone to ask for the lock code that you define. Keep the code
secret and in a safe place, separate from your phone.
from your phone
Accidents can happen – if your phone is not working properly, you can
restore its settings. Or, if you buy a new phone, or otherwise want to dispose
of or recycle your phone, here’s how you can remove your personal info and
content. Note that it is your responsibility to remove all private content.
RESET YOUR PHONE
1. Tap Settings > System > Advanced > Reset options > Erase all data
(factory reset).
2. Follow the instructions shown on your phone.
26
If you forget the code and your phone is locked, your phone will require
service. Additional charges may apply, and all the personal data on your
phone may be deleted.
For more info, contact the nearest care point for your phone, or your phone
dealer.
IMEI CODE
The IMEI code is used to identify phones in the network. You may also need
to give the number to your care point services or phone dealer.
Page 27

To view your IMEI number, dial *#06#.
Your phone’s IMEI code is also printed either on your phone or on the SIM
tray depending on your phone model. If your phone has a removable back
cover, you can find the IMEI code under the cover.
The IMEI is also visible on the original sales box.
LOCATE OR LOCK YOUR PHONE
If you lose your phone, you may be able to find, lock, or erase it remotely if
you have signed in to a Google Account. Find My Device is on by default for
phones associated with a Google Account.
To use Find My Device, your lost phone must be:
When Find My Device connects with your phone, you see the phone's
location, and the phone gets a notification.
1. Open android.com/find on a computer, tablet or phone connected
to the internet and sign in to your Google Account.
2. If you have more than one phone, click the lost phone at the top of
the screen.
3. On the map, see about where the phone is. The location is
approximate and may not be accurate.
If your device can't be found, Find My Device will show its last known
location, if available. To lock or erase your phone, follow the instructions on
the web site.
• Turned on
• Signed in to a Google Account
• Connected to mobile data or Wi-Fi
• Visible on Google Play
• Location turned on
• Find My Device turned on
27
Copyrights and notices
The availability of products, features, apps and services may vary by region.
For more info, contact your dealer or your service provider. This device may
contain commodities, technology or software subject to export laws and
regulations from the US and other countries. Diversion contrary to law is
prohibited.
Page 28

The contents of this document are provided "as is". Except as required by
applicable law, no warranties of any kind, either express or implied,
including, but not limited to, the implied warranties of merchantability and
fitness for a particular purpose, are made in relation to the accuracy,
reliability or contents of this document. HMD Global reserves the right to
revise this document or withdraw it at any time without prior notice.
To the maximum extent permitted by applicable law, under no
circumstances shall HMD Global or any of its licensors be responsible for any
loss of data or income or any special, incidental, consequential or indirect
damages howsoever caused.
Reproduction, transfer or distribution of part or all of the contents in this
document in any form without the prior written permission of HMD Global is
prohibited. HMD Global operates a policy of continuous development. HMD
Global reserves the right to make changes and improvements to any of the
products described in this document without prior notice.
HMD Global does not make any representations, provide a warranty, or take
any responsibility for the functionality, content, or end-user support of third-
28
party apps provided with your device. By using an app, you acknowledge
that the app is provided as is.
Downloading of maps, games, music and videos and uploading of images and
videos may involve transferring large amounts of data. Your service provider
may charge for the data transmission. The availability of particular products,
services and features may vary by region. Please check with your local dealer
for further details and availability of language options.
Certain features, functionality and product specifications may be network
dependent and subject to additional terms, conditions, and charges.
All specifications, features and other product information provided are
subject to change without notice.
HMD Global Privacy Policy, available at
http://www.nokia.com/phones/privacy, applies to your use of the device.
HMD Global Oy is the exclusive licensee of the Nokia brand for phones &
tablets. Nokia is a registered trademark of Nokia Corporation.
Page 29

Android, Google and other related marks and logos are trademarks of
Google LLC.
The Bluetooth word mark and logos are owned by the Bluetooth SIG, Inc.
and any use of such marks by HMD Global is under license.
Your phone is designed to make it easy for you to access a wide variety of
content. For your protection, we want you to be aware that some
applications that you enable may involve the location of your phone being
shared. For applications available through Cricket, we offer privacy controls
that let you decide how an application may use the location of your phone
and other phones on your account. However, the Cricket privacy tools do not
apply to applications available outside of Cricket. Please review the terms
and conditions and the associated privacy policy for each location-based
service to learn how location information will be used and protected. In
addition, your Cricket phone may be used to access the internet and to
download, and/or purchase goods, applications, and services from Cricket or
elsewhere from third parties. Cricket provides tools for you to control access
to the Internet and certain Internet content. These controls may not be
available for certain devices which bypass Cricket controls.
29
© 2020 Cricket Wireless LLC. All rights reserved. Cricket and the Cricket logo
are registered trademarks under license to Cricket Wireless LLC.
 Loading...