

Page 1

Page 2

Nokia 8260
User Guide
Page 3

Legal information
Part No. 9352522, Issue 1g
© 2000–2001 Nokia Mobile Phones. All rights reserved.
Printed in Canada 08/01.
Nokia, Nokia Connecting People, and the Original Accessories logos are
trademarks of Nokia Corporation and/or its affiliates.
US Patent No 5818437 and other pending patents. T9 text input software
Copyright © 1999. Tegic Communications, Inc. All rights reserved.
FCC/Industry Canada Notice
Your phone may cause TV or radio interference (for example, when using
a telephone in close proximity to receiving equipment). The FCC or Industry
Canada can require you to stop using your telephone if such interference
cannot be eliminated. If you require assistance, contact your local service
facility.
This device complies with part 15 of the FCC rules. Operation is subject to
the condition that this device does not cause harmful interference.
Export Controls
This product contains commodities, technology or software exported from
the United States in accordance with the Export Administration regulations.
Diversion contrary to U.S. law is prohibited.
Page 4

Contents
1. For your safety. . . . . . . . . . . . . . . . . . . . . . . . . . . . . . . . 1
2. Welcome . . . . . . . . . . . . . . . . . . . . . . . . . . . . . . . . . . . .3
Before you begin . . . . . . . . . . . . . . . . . . . . . . . . . . . . . . 3
Understand network services . . . . . . . . . . . . . . . . . 3
Visit Nokia on the Web. . . . . . . . . . . . . . . . . . . . . .3
Contacting Nokia . . . . . . . . . . . . . . . . . . . . . . . . . . . . . 4
When you need to contact your service provider. . . .4
3. Prepare your phone for use . . . . . . . . . . . . . . . . . . . . .5
Install the battery . . . . . . . . . . . . . . . . . . . . . . . . . . . . . 5
First, remove the back cover . . . . . . . . . . . . . . . . . 5
Next, insert the battery . . . . . . . . . . . . . . . . . . . . . 5
Last, replace the back cover. . . . . . . . . . . . . . . . . . 5
Charge the battery . . . . . . . . . . . . . . . . . . . . . . . . .5
When the charger is not in use . . . . . . . . . . . . . . .6
When you need to remove the battery . . . . . . . . . . . . 6
4. Get to know your phone . . . . . . . . . . . . . . . . . . . . . . . .7
Keys and screen . . . . . . . . . . . . . . . . . . . . . . . . . . . . . . .7
Keys . . . . . . . . . . . . . . . . . . . . . . . . . . . . . . . . . . . . .8
Power key . . . . . . . . . . . . . . . . . . . . . . . . . . . . . . . .9
Start screen . . . . . . . . . . . . . . . . . . . . . . . . . . . . . . .9
Navigation keys . . . . . . . . . . . . . . . . . . . . . . . . . . . . . . . 9
Selection keys . . . . . . . . . . . . . . . . . . . . . . . . . . . . .9
Scroll key . . . . . . . . . . . . . . . . . . . . . . . . . . . . . . . .10
Scroll bar . . . . . . . . . . . . . . . . . . . . . . . . . . . . . . . . 10
Indicators and icons . . . . . . . . . . . . . . . . . . . . . . . . . . 10
[ i ]
Page 5

5. Make and answer calls. . . . . . . . . . . . . . . . . . . . . . . . 13
Make a call . . . . . . . . . . . . . . . . . . . . . . . . . . . . . . 13
Answer a call . . . . . . . . . . . . . . . . . . . . . . . . . . . . 13
Adjust the earpiece volume. . . . . . . . . . . . . . . . . 14
Redial the last-dialed number . . . . . . . . . . . . . . 14
Use caller ID . . . . . . . . . . . . . . . . . . . . . . . . . . . . . 14
Get a strong signal. . . . . . . . . . . . . . . . . . . . . . . . 14
Keep calls private . . . . . . . . . . . . . . . . . . . . . . . . . 15
6. Use phone menus . . . . . . . . . . . . . . . . . . . . . . . . . . . . 16
Navigate menus . . . . . . . . . . . . . . . . . . . . . . . . . . . . . 16
Scroll through menus . . . . . . . . . . . . . . . . . . . . . 16
Use a shortcut . . . . . . . . . . . . . . . . . . . . . . . . . . . 16
Exit menu levels . . . . . . . . . . . . . . . . . . . . . . . . . . 17
Get help . . . . . . . . . . . . . . . . . . . . . . . . . . . . . . . . 17
List of shortcuts . . . . . . . . . . . . . . . . . . . . . . . . . . . . . 17
7. Enter letters and numbers . . . . . . . . . . . . . . . . . . . . . 21
Enter letters . . . . . . . . . . . . . . . . . . . . . . . . . . . . . . . . 21
Edit names . . . . . . . . . . . . . . . . . . . . . . . . . . . . . . 22
Change from capital (uppercase) letters . . . . . . 22
Use punctuation and special characters . . . . . . 22
Enter numbers. . . . . . . . . . . . . . . . . . . . . . . . . . . . . . . 23
List of special characters . . . . . . . . . . . . . . . . . . . 23
8. Use the phone book . . . . . . . . . . . . . . . . . . . . . . . . . . 24
About the phone book . . . . . . . . . . . . . . . . . . . . . . . . 24
Use phone book menus . . . . . . . . . . . . . . . . . . . . . . . 24
Change views . . . . . . . . . . . . . . . . . . . . . . . . . . . . 25
Add names and numbers . . . . . . . . . . . . . . . . . . . . . . 26
[ ii ]
Page 6

Change a stored telephone number. . . . . . . . . . . . . .26
Recall and redial numbers . . . . . . . . . . . . . . . . . . . . .27
Erase stored names and numbers . . . . . . . . . . . . . . .28
Erase the entire phone book. . . . . . . . . . . . . . . . . . . .28
Check memory status . . . . . . . . . . . . . . . . . . . . . . . . .29
9. Use voice mail . . . . . . . . . . . . . . . . . . . . . . . . . . . . . . .30
When you have a message . . . . . . . . . . . . . . . . . . . . .30
Set up your voice mailbox . . . . . . . . . . . . . . . . . . . . .30
Set greetings and passwords . . . . . . . . . . . . . . . . . . .31
Listen to your voice messages . . . . . . . . . . . . . . . . . .31
10. Work with the call log . . . . . . . . . . . . . . . . . . . . . . . .32
Check the call log . . . . . . . . . . . . . . . . . . . . . . . . . . . .32
Check missed calls . . . . . . . . . . . . . . . . . . . . . . . .33
Check previously dialed calls . . . . . . . . . . . . . . . .33
Check received calls . . . . . . . . . . . . . . . . . . . . . . .34
Clear call lists . . . . . . . . . . . . . . . . . . . . . . . . . . . .34
Check call timers . . . . . . . . . . . . . . . . . . . . . . . . . . . . .35
Turn on a current call timer . . . . . . . . . . . . . . . . .36
Clear call timers . . . . . . . . . . . . . . . . . . . . . . . . . .36
11. Use advanced calling features . . . . . . . . . . . . . . . . . .37
Set in-call options. . . . . . . . . . . . . . . . . . . . . . . . . . . .37
Use call waiting. . . . . . . . . . . . . . . . . . . . . . . . . . . . . .38
Store the call waiting feature code. . . . . . . . . . .38
Manage calls . . . . . . . . . . . . . . . . . . . . . . . . . . . . .38
Make a conference call . . . . . . . . . . . . . . . . . . . .39
Recall a number from the phone book
during a conference call. . . . . . . . . . . . . . . . . . . .39
[ iii ]
Page 7

Use call forwarding . . . . . . . . . . . . . . . . . . . . . . . . . . 40
Store the call forwarding feature code . . . . . . . 40
Activate call forwarding . . . . . . . . . . . . . . . . . . . 40
Redial automatically . . . . . . . . . . . . . . . . . . . . . . . . . 41
Use a calling card . . . . . . . . . . . . . . . . . . . . . . . . . . . . 42
Save calling card information (step 1) . . . . . . . . 42
Save calling card information (step 2) . . . . . . . . 43
Choose a calling card to use . . . . . . . . . . . . . . . . 44
Make a calling card call . . . . . . . . . . . . . . . . . . . 44
Send your own number in caller ID. . . . . . . . . . . . . . 44
Store the Send Own Number feature code . . . . 45
Set whether or not your number will appear . . 45
Select a phone number . . . . . . . . . . . . . . . . . . . . . . . 45
Select the phone number . . . . . . . . . . . . . . . . . . 46
Select digital or analog . . . . . . . . . . . . . . . . . . . . 46
Set touch tones. . . . . . . . . . . . . . . . . . . . . . . . . . . . . . 47
Set manual touch tones . . . . . . . . . . . . . . . . . . . 47
Set touch tone length . . . . . . . . . . . . . . . . . . . . . 47
Store touch tone sequences (strings) . . . . . . . . . 48
12. Customize your phone . . . . . . . . . . . . . . . . . . . . . . . . 49
What is a profile? . . . . . . . . . . . . . . . . . . . . . . . . . . . . 49
Select a different profile . . . . . . . . . . . . . . . . . . . . . . 49
Customize a profile . . . . . . . . . . . . . . . . . . . . . . . . . . 50
Set ringing options. . . . . . . . . . . . . . . . . . . . . . . . 50
[ iv ]
Page 8

Set keypad tones. . . . . . . . . . . . . . . . . . . . . . . . . .53
Set warning and game tones . . . . . . . . . . . . . . . .53
Set the message alert tone . . . . . . . . . . . . . . . . .54
Set your phone to answer automatically . . . . . .54
Set the lights (car kit only) . . . . . . . . . . . . . . . . .55
Rename profiles. . . . . . . . . . . . . . . . . . . . . . . . . . . . . .55
Restore factory settings . . . . . . . . . . . . . . . . . . . . . . .56
Set the display language . . . . . . . . . . . . . . . . . . . . . .56
Set and display the clock . . . . . . . . . . . . . . . . . . . . . .56
Set the clock . . . . . . . . . . . . . . . . . . . . . . . . . . . . .56
Display or hide the clock . . . . . . . . . . . . . . . . . . .57
Select the time format . . . . . . . . . . . . . . . . . . . . .57
Set automatic update of date and time . . . . . . . . . .58
Turn on automatic update of date and time . . .58
Automatic update of date and time:
confirm first . . . . . . . . . . . . . . . . . . . . . . . . . . . . .58
Turn off automatic update of date and time . . .58
Add a welcome note . . . . . . . . . . . . . . . . . . . . . . . . . .59
Use 1-touch dialing . . . . . . . . . . . . . . . . . . . . . . . . . .59
Assign a name or number to a 1-touch
dial key . . . . . . . . . . . . . . . . . . . . . . . . . . . . . . . . .60
Change 1-touch dialing numbers . . . . . . . . . . . .60
Erase 1-touch dialing numbers . . . . . . . . . . . . . .60
Use emergency key 9 . . . . . . . . . . . . . . . . . . . . . . . . . 61
Activate the emergency key 9 . . . . . . . . . . . . . . .61
Make an emergency call . . . . . . . . . . . . . . . . . . . 61
[ v ]
Page 9

Use caller groups . . . . . . . . . . . . . . . . . . . . . . . . . . . . 62
Add names to a caller group . . . . . . . . . . . . . . . . 62
Assign a ringing tone to a caller group . . . . . . . 62
Rename a caller group. . . . . . . . . . . . . . . . . . . . . 63
Remove names from a caller group . . . . . . . . . . 63
Display caller group graphics . . . . . . . . . . . . . . . 63
Receive a downloaded graphic . . . . . . . . . . . . . . 63
View the new graphic . . . . . . . . . . . . . . . . . . . . . 64
Save a received graphic . . . . . . . . . . . . . . . . . . . . 64
Discard a received graphic . . . . . . . . . . . . . . . . . 64
13. Security . . . . . . . . . . . . . . . . . . . . . . . . . . . . . . . . . . . . 65
Change your security code. . . . . . . . . . . . . . . . . . . . . 65
Protect your phone with the lock code. . . . . . . . . . . 66
Turn on the phone lock . . . . . . . . . . . . . . . . . . . . 66
Store an unlocked phone number. . . . . . . . . . . . 67
Call the unlocked phone number . . . . . . . . . . . . 67
Answer a call with phone lock on. . . . . . . . . . . . 67
Change your lock code . . . . . . . . . . . . . . . . . . . . 67
Turn off phone lock . . . . . . . . . . . . . . . . . . . . . . . 68
Lock the keypad . . . . . . . . . . . . . . . . . . . . . . . . . . . . . 68
Activate keyguard . . . . . . . . . . . . . . . . . . . . . . . . 68
Deactivate keyguard . . . . . . . . . . . . . . . . . . . . . . 69
Answer a call while keyguard is active . . . . . . . 69
Restrict calls . . . . . . . . . . . . . . . . . . . . . . . . . . . . . . . . 69
Restrict outgoing calls. . . . . . . . . . . . . . . . . . . . . 70
Restrict incoming calls . . . . . . . . . . . . . . . . . . . . 70
[ vi ]
Page 10

14. Set network services features . . . . . . . . . . . . . . . . . . 71
Set up how your phone selects a system . . . . . . . . . 71
[ vii ]
Page 11

16. Send and receive e-mail messages . . . . . . . . . . . . . . 84
Save e-mail addresses . . . . . . . . . . . . . . . . . . . . . . . . 84
Save an e-mail address for an existing name . . 84
Add a new e-mail address . . . . . . . . . . . . . . . . . . 84
Edit an e-mail address . . . . . . . . . . . . . . . . . . . . . 85
Send an e-mail message . . . . . . . . . . . . . . . . . . . . . . 85
Options for a completed e-mail message . . . . . 86
Receive an e-mail message . . . . . . . . . . . . . . . . . . . . 87
Read an e-mail message . . . . . . . . . . . . . . . . . . . 87
Reply to or forward an e-mail message . . . . . . . . . . 88
17. Use your personal assistant . . . . . . . . . . . . . . . . . . . . 90
Use the calendar. . . . . . . . . . . . . . . . . . . . . . . . . . . . . 90
View the calendar . . . . . . . . . . . . . . . . . . . . . . . . 90
Move from day to day . . . . . . . . . . . . . . . . . . . . . 91
Create a calendar note . . . . . . . . . . . . . . . . . . . . 91
View the day’s notes . . . . . . . . . . . . . . . . . . . . . . 94
Erase notes . . . . . . . . . . . . . . . . . . . . . . . . . . . . . . 95
When a calendar alarm goes off. . . . . . . . . . . . . 95
Send or receive calendar notes . . . . . . . . . . . . . . 96
Send and receive business cards . . . . . . . . . . . . . . . . 97
Send a business card . . . . . . . . . . . . . . . . . . . . . . 97
View a received business card. . . . . . . . . . . . . . . 97
Save a viewed business card . . . . . . . . . . . . . . . . 97
Delete a viewed business card . . . . . . . . . . . . . . 98
Download ringing tones. . . . . . . . . . . . . . . . . . . . . . . 98
Notification of received ringing tone . . . . . . . . . 98
Listen to received ringing tones . . . . . . . . . . . . . 98
[ viii ]
Page 12

Save received ringing tones . . . . . . . . . . . . . . . . .98
Discard received ringing tones. . . . . . . . . . . . . . .99
Alarm clock . . . . . . . . . . . . . . . . . . . . . . . . . . . . . . . . .99
Set the alarm clock. . . . . . . . . . . . . . . . . . . . . . . .99
Turn off the alarm clock when it rings . . . . . . .100
Turn off the alarm clock altogether . . . . . . . . .100
Calculator. . . . . . . . . . . . . . . . . . . . . . . . . . . . . . . . . .100
Use the calculator. . . . . . . . . . . . . . . . . . . . . . . .100
Convert currency. . . . . . . . . . . . . . . . . . . . . . . . . 101
18. Games. . . . . . . . . . . . . . . . . . . . . . . . . . . . . . . . . . . . .103
Memory . . . . . . . . . . . . . . . . . . . . . . . . . . . . . . . . . . .103
Snake . . . . . . . . . . . . . . . . . . . . . . . . . . . . . . . . . . . . .104
Logic . . . . . . . . . . . . . . . . . . . . . . . . . . . . . . . . . . . . . .104
Rotation . . . . . . . . . . . . . . . . . . . . . . . . . . . . . . . . . . .105
19. Reference information . . . . . . . . . . . . . . . . . . . . . . .106
Batteries, chargers, and accessories . . . . . . . . . . . .106
Important safety information. . . . . . . . . . . . . . . . . . 107
Traffic safety . . . . . . . . . . . . . . . . . . . . . . . . . . . . 107
Operating environment . . . . . . . . . . . . . . . . . . .108
Electronic devices . . . . . . . . . . . . . . . . . . . . . . . .108
Potentially explosive atmospheres . . . . . . . . . . 110
Vehicles . . . . . . . . . . . . . . . . . . . . . . . . . . . . . . . . 110
Emergency calls. . . . . . . . . . . . . . . . . . . . . . . . . . . . . 111
Make an emergency call . . . . . . . . . . . . . . . . . . 111
Radio frequency (RF) signals . . . . . . . . . . . . . . . 112
Care and maintenance . . . . . . . . . . . . . . . . . . . . 114
[ ix ]
Page 13

Accessories . . . . . . . . . . . . . . . . . . . . . . . . . . . . . . . . 115
Battery. . . . . . . . . . . . . . . . . . . . . . . . . . . . . . . . . . . . 116
Chargers and other accessories . . . . . . . . . . . . . . . . 117
Standard Travel Charger (ACP-7U) . . . . . . . . . . 117
Rapid Travel Charger (ACP-8U). . . . . . . . . . . . . 117
Rapid Mobile Charger (LCH-8/LCH-9) . . . . . . . 118
Desktop Charging Stand (DCV-11) . . . . . . . . . . 118
Troubleshooting . . . . . . . . . . . . . . . . . . . . . . . . . . . . 119
20. Frequently Asked Questions (FAQ) . . . . . . . . . . . . . 120
21. Glossary . . . . . . . . . . . . . . . . . . . . . . . . . . . . . . . . . . . 124
22. Technical Information . . . . . . . . . . . . . . . . . . . . . . . 128
23. NOKIA One-Year Limited Warranty. . . . . . . . . . . . . 129
24. Index . . . . . . . . . . . . . . . . . . . . . . . . . . . . . . . . . . . . . 134
[ x ]
Page 14
For your safety
1. For your safety
This section provides various safety guidelines. Read this information
before using your mobile phone (called phone throughout this guide).
Failure to comply with these guidelines could prove either dangerous
or illegal.
For more detailed safety information, see “Important safety information”
on page 107.
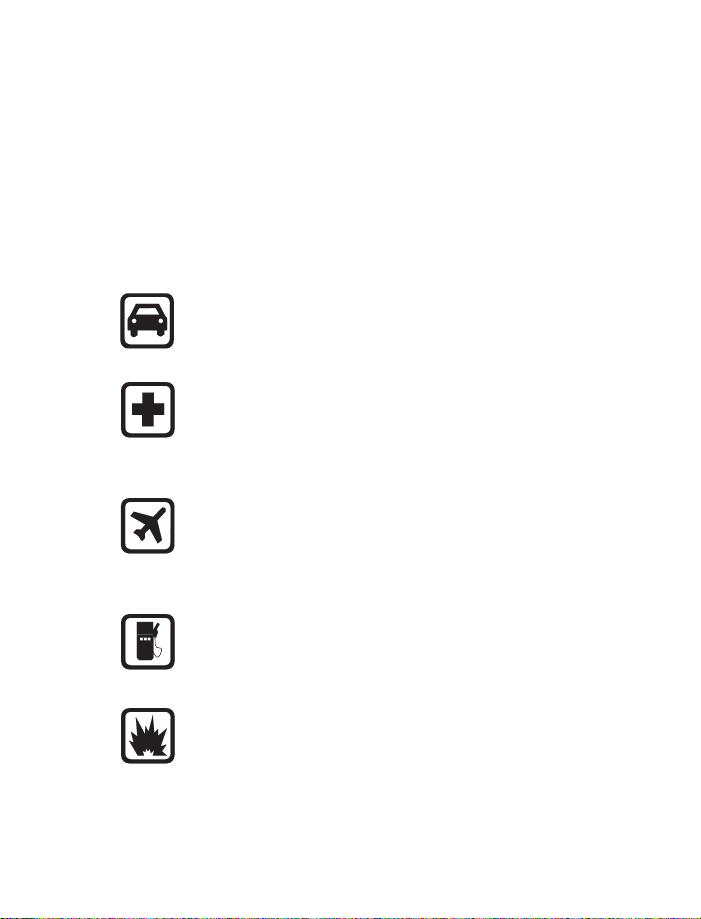
Road safety comes first
Don’t use a phone while driving. Park the vehicle first.
Switch off in hospitals
Switch off your phone when you are in a hospital or when you
are near medical equipment. Follow any regulations or rules
that are in force.
Switch off on aircraft
Do not use phones on airplanes as this can cause interference
with the navigational equipment. Also, the use of phones on
airplanes is illegal.
Switch off when refueling
Do not use your phone at a refueling point or near fuels or
chemicals of any kind.
Switch off near blasting
Do not use the phone where blasting is in progress. Observe
restrictions and follow any regulations or rules that are in force.
[ 1 ]
Page 15
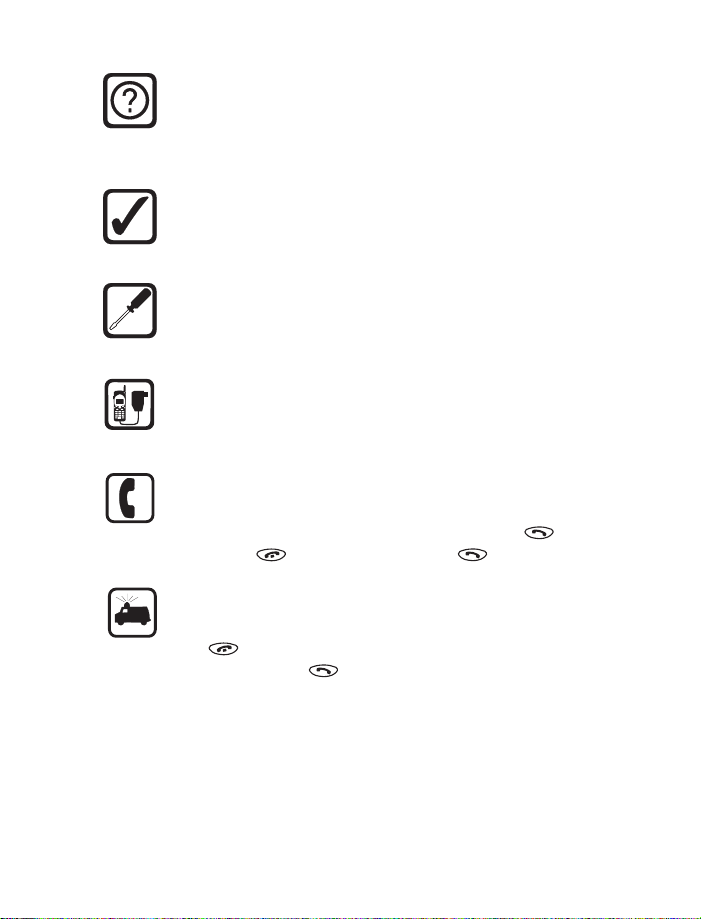
Interference
All phones are susceptible to interference, which could affect
performance. This could impede the making of an emergency
call.
Use sensibly
Use only in the normal position (to ear). Avoid unnecessary
contact with the antenna when phone is on.
Qualified service
Only qualified service personnel can install or repair cellular
phone equipment.
Accessories and batteries
Use only approved accessories and batteries. Do not connect
incompatible products.
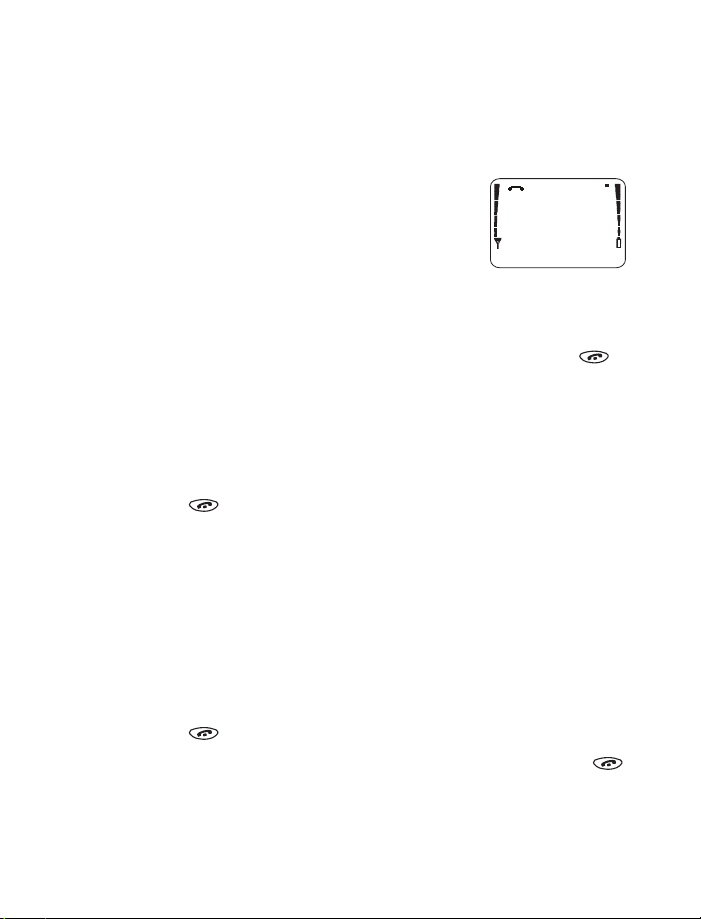
Calling
Make sure the phone is switched on and in service. Enter the
phone number, including the area code, then press . To end
a call press . To answer a call press .
Emergency calls
Make sure the phone is switched on and in service. Press and
hold at any time to clear the screen. Enter the emergency
number, then press . Give your location. Do not end the call
until told to do so.
You can also press and hold the 9 key to make an
Note:
emergency call, if the emergency key 9 feature is
activated.
[ 2 ]
Page 16

2. Welcome
• Before you begin
This section provides information that you need to know before you begin
using your phone.
This guide describes the Nokia 8260 phone, which is approved for use in
the 800/1900 MHz TDMA/AMPS networks.
Understand network services
A number of features known as network services are described in this guide.
These are special services you arrange through your wireless service provider.
Before you can take advantage of these network services features, you
must subscribe to them through your service provider. Your service provider
will give you instructions on how to use these network services. This guide
will instruct you on when you need to contact your service provider for
more step-by-step information.
Some networks may not support all language-dependent characters
Note:
and/or services.
Visit Nokia on the Web
The latest version of this manual may be available on Nokia’s World Wide
Web site at:
www.nokia.com
.
Welcome
Interactive manual
Now, Nokia has a great new way for you to learn how to use all of your
phone features. Go to
Interactive User Guide. It provides an interactive way to get step-by-step
instructions for any of your phone features.
www.nokiahowto.com
[ 3 ]
to access the Nokia
Page 17

• Contacting Nokia
Nokia Customer Care Center
Nokia Inc.
7725 Woodland Center Boulevard, Suite 150
Tampa, FL 33614
Tel: 1-888-NOKIA-2U (1-888-665-4228)
Fax: 1-813-249-9619
For the hearing-impaired only (TTY):
1-800-24-NOKIA (1-800-246-6542)
Customer Care, Canada
Nokia Products Ltd.
575 Westney Rd. South
Ajax, Ontario L1S 4N7
Tel: 1-888-22-NOKIA (1-888-226-6542)
Fax: 1-905-427-1070
• When you need to contact your service provider
Some service providers enable you to contact them by pressing and
holding the 2 key on your phone. This feature can be helpful if you’re
having trouble dialing a number, especially when traveling outside your
home area.
If your service provider deems your problem to be Nokia related, the
service provider will let you know.
This one-key feature might not be available on all systems.
Note:
Contact your service provider for availability.
[ 4 ]
Page 18
Prepare your phone for use
3. Prepare your phone for use
• Install the battery
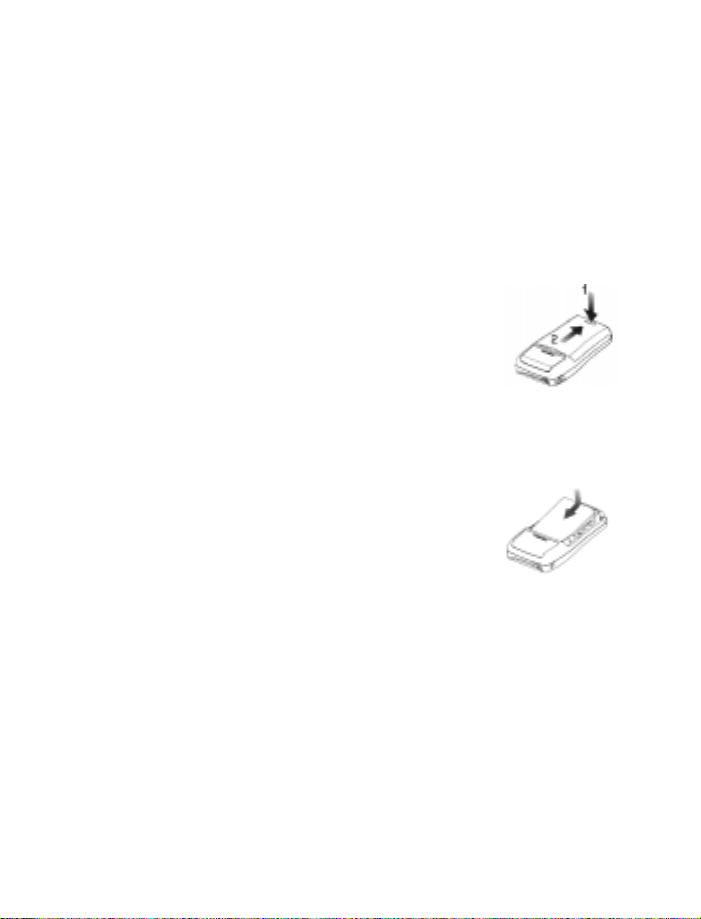
First, remove the back cover
To attach and remove the battery, you need
to first remove the phone’s back cover.
Press down on the tab on the bottom of
1
the cover.
Slide the cover down and lift it off.
2
Next, insert the battery
Before you can use your phone, you must insert the battery.
Place the top of the battery on the phone,
1
with the gold contacts toward the top of the
phone.
Press down on the bottom of the battery
2
until it is fully down.
Last, replace the back cover
Place the cover on top of the battery so that none of the battery is
1
showing.
Slide the cover up until it clicks into place.
2
Charge the battery
Before you use your phone, and when the battery runs down, you need to
charge it.
Connect the lead from the charger to the bottom of the phone.
1
[ 5 ]
Page 19

Connect the charger to an AC wall outlet.
2
If the phone is turned on, the messages Charger connected and then
Charging appear. Then the battery power indicator bar starts to flash
up and down (scroll).
• You can use the phone while the battery is charging.
• Important: Disconnect your phone from the charger if the phone
becomes hot while you’re making a call.
• If the battery is totally empty, it might take a few minutes before
the charging indicator appears on the screen.
• The time it takes to charge the battery depends on the charger you
use.
The battery is fully charged when the battery indicator bar stops
scrolling and the Battery full message appears (if the phone is on).
Disconnect the charger from the AC outlet and the phone.
3
When the charger is not in use
• When a charger is not in use, disconnect it from the power source.
• Do not leave the battery connected to a charger for longer than a
week, since overcharging the battery could shorten its lifespan. If left
unused, a fully charged battery will discharge itself over time.
• When you need to remove the battery
Later on, you may need to remove the battery.
Make sure the phone is off.
1
Remove the phone’s back cover,
2
grasp the ridge at the end of the
battery with a fingernail, and lift
the battery out.
[ 6 ]
Page 20
Get to know your phone
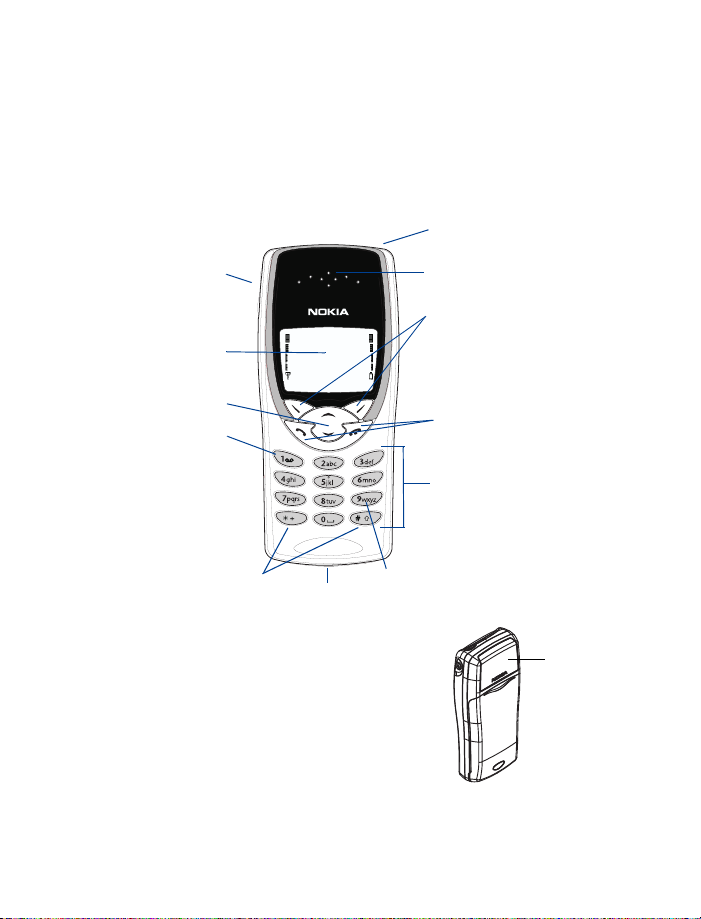
Internal
antenna
4. Get to know your phone
• Keys and screen
1 Volume
keys
2 Screen
3 Scroll
keys
4 Voice mail
key
5 Special
character keys
6 Microphone
1
2
3
4
2
5
Back of phone
Tip: As with any other radio transmitting
device, do not touch the antenna unnecessarily when the phone is switched
on. Contact with the antenna affects
call quality and might cause the phone
to operate at a higher power level than
needed.
7
8
9
10
11
12
6
7 Power key
8 Earpiece
9 Selection
keys
10 Talk and End
keys
11 Number
keys
12 Emergency
key 9
[ 7 ]
Page 21
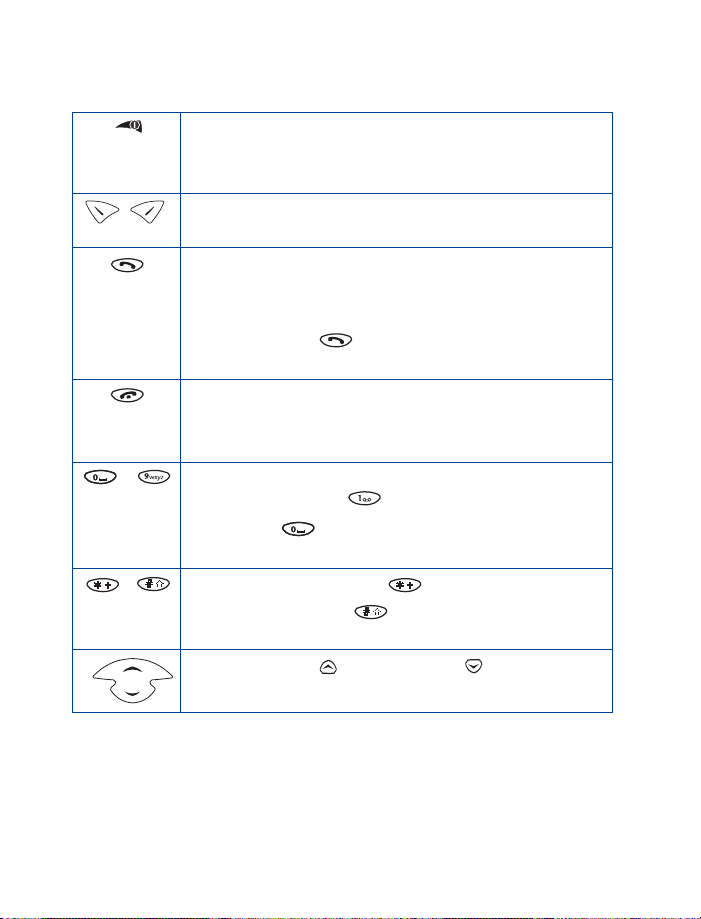
Keys
-
Power key:
off.
Note:
Selection keys:
the text on the screen above the key.
Talk key:
Tip:
Tip:
End key:
incoming call.
Tip:
Number keys:
letters. Press and hold to call your voice mailbox.
Note:
Special character keys:
For example:
changes the letter case.
Scroll keys:
through your phone’s menu or phone book.
Press and hold the key to switch the phone on or
This key is on the top of the phone.
Press to perform the function indicated by
Press to make or answer a call.
Press once to display a list that shows the last-dialed
numbers.
Press 9, then to make an emergency call if the
emergency key 9 feature is activated.
Press to end a call or silence the ringing for an
Press this key once to return to the Start screen.
Use keys 2 through 9 to enter numbers and
Press if you want to insert a blank space while
entering text.
Use to enter special characters.
Pressing while you are entering letters
Press to move up, and to move down,
[ 8 ]
Page 22
Get to know your phone
Left
Right
Power key
• To turn the phone on or off, press and hold the Power key.
The Power key is on the upper-right, top portion of the phone.
Warning:
is prohibited, or where the use of a phone might cause
interference or could be a danger.
Do not switch on the phone where wireless phone use
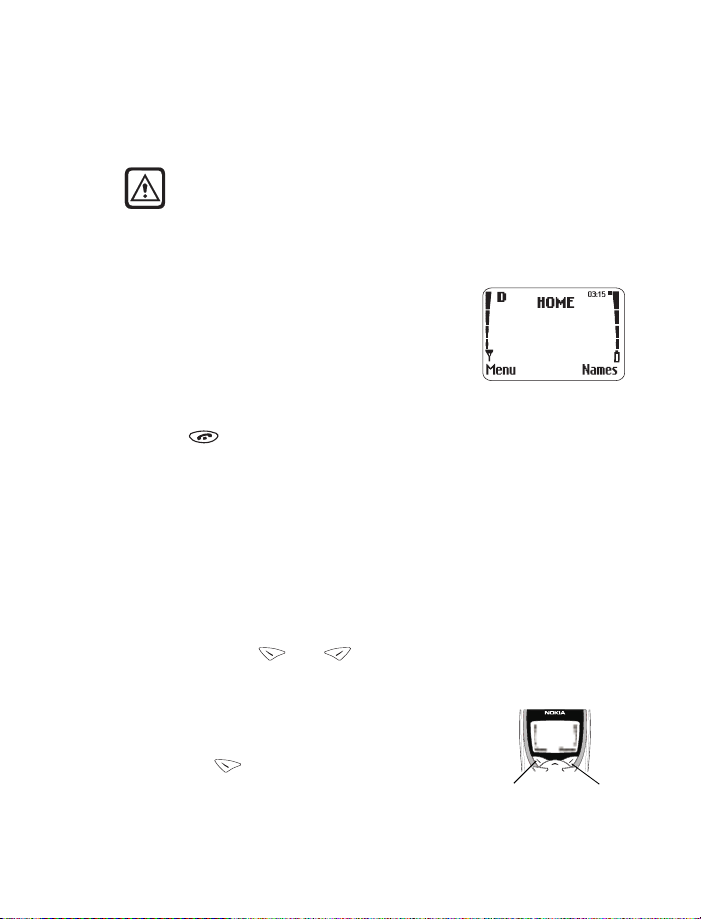
Start screen
When you turn on your phone, a Nokia welcome
appears, and then you see the Start screen. The
Start screen is the “home base" for your phone.
If you have already made a feature choice and are
no longer at the Start screen but wish to return to
this screen:
•Press .
• Navigation keys
Selection keys
Use the selection keys to navigate through and select the phone’s many
options.
At the Start screen, two options appear: Menu and Names.
The selection keys (
• The left selection key appears under Menu.
• The right selection key appears under Names.
At the start screen, when you press the left
selection key , the first menu item, Messages,
appears. The text above the left selection key
becomes Select and the text above the right
selection key becomes Exit.
and ) are just below these options.
[ 9 ]
Page 23
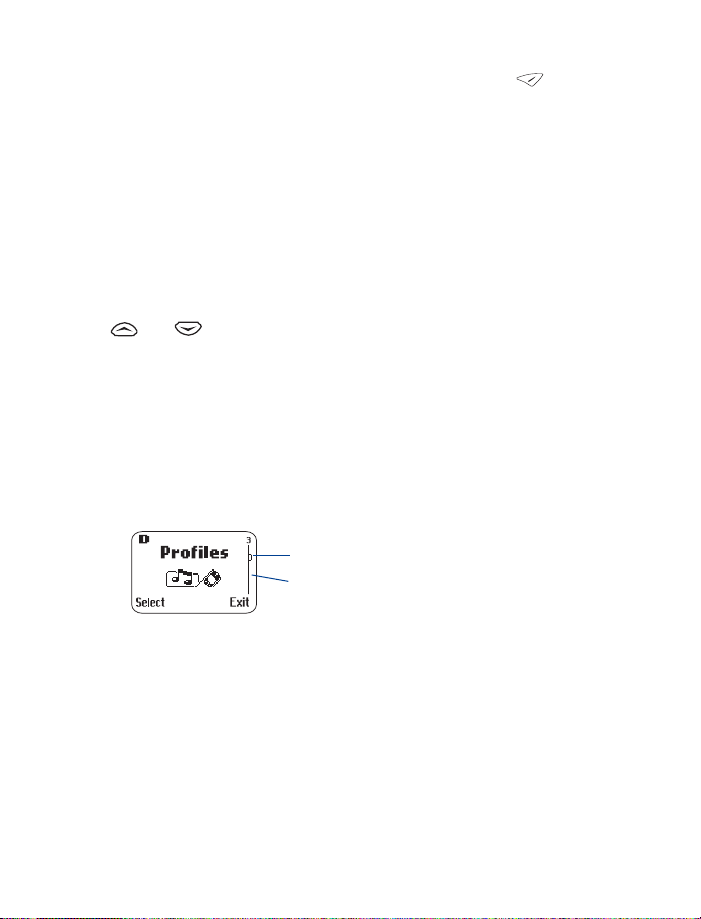
At the start screen, when you press the right selection key , the six
Scroll bar: This view shows the scroll bar
down three tab positions from the beginning
of the menu list. The number 3 appears above
the scroll bar, showing the tab position.
Tab
options for the Names feature appear, along with the same Select and
Exit options that appear when you select Menu.
This guide refers to the selection keys by the names that appear above
them. Example: "Press Menu" means to press the selection key below the
word Menu.
Scroll key
Your phone has a scroll key with an up and a down arrow.
This guide refers to these arrows as if they were two separate keys:
and ).
(
Scroll bar
When you press Menu, a scroll bar appears on the far right side of the
screen. This bar appears as a straight line with one tab, and it indicates
your location in the menu.
As you progress through the menu, the tab moves lower on the scroll bar.
If you move backward through the menu, the tab moves up.
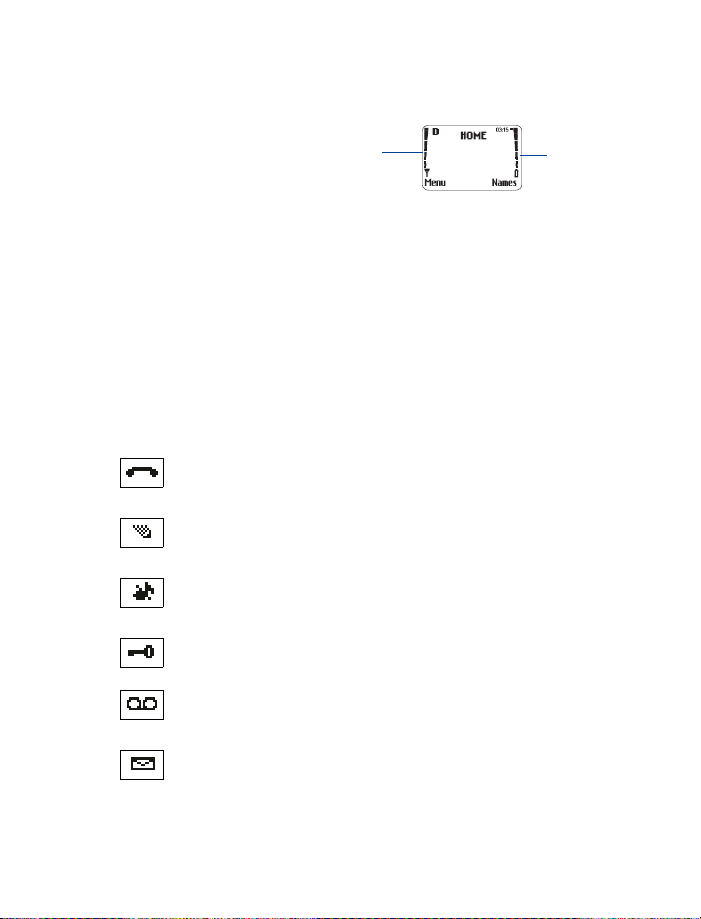
• Indicators and icons
On your phone, you have two types of identifiers: indicators and icons.
Icons are graphical representations of a specific item or situation. For
example, an icon appears when you have a voice message waiting to be
heard.
[ 10 ]
Page 24
Get to know your phone
Indicators show the status of something. The phone uses three types of
indicators:
• Signal strength
indicator
• Battery power
indicator
• Handset volume indicator
Signal strength:
network at your current location. The higher the bar, the stronger the
signal.
Battery power:
the bar, the more power in the battery.
Handset volume:
keys. It illustrates the volume level during a call.
The list below shows what each icon means.
You have an active call.
The phone is waiting for you to enter a response.
You have selected Silent as the current profile.
This indicator shows the signal strength of the wireless
This indicator shows the battery charge level. The higher
This indicator appears only when you press the volume
Signal
strength
indicator
Battery
power
indicator
The keyguard has been activated to prevent any accidental key
presses.
You have one or more voice messages waiting.
You have one or more unread text messages waiting.
[ 11 ]
Page 25
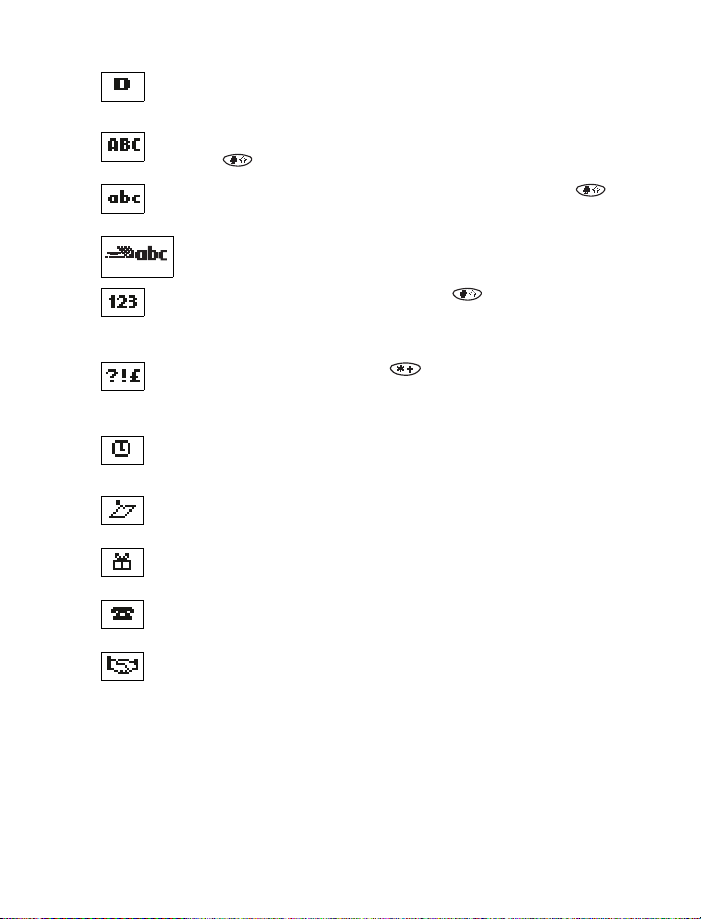
Digital service is available.
Any alpha characters you enter will be uppercase (capital letters).
Press the key to switch between upper and lowercase letters.
Any alpha characters you enter will be lowercase. Press the
key to switch between upper and lowercase letters.
You are in predictive text mode. You can enter words by
pressing each number key only once for each letter.
This appears when you press and hold the key while storing
names. After switching to this numbers mode, you cannot enter
any alpha characters. You can enter only numbers.
This appears when you press the key while storing names.
You are in special character mode. You can select a special
character by pressing Insert.
The alarm clock is set.
You have a reminder in your calendar to do something. (Appears
only on Calendar display.)
You have a reminder in your calendar that it’s someone’s birthday.
(Appears only on Calendar display.)
You have a reminder in your calendar to call someone. (Appears
only on Calendar display.)
You have a reminder in your calendar of a meeting. (Appears only
on Calendar display.)
[ 12 ]
Page 26
Make and answer calls
03:15
12145551212
D
Options
Mute
5. Make and answer calls
Make a call
Hold the phone as you would any other
1
telephone, with the earpiece over your ear
and the microphone near your mouth.
Deactivate the keyguard, if it is on.
2
Nokia recommends that you use the keyguard,
so you need to check to see if it is on and deactivate it before you
make a call.
Enter the phone number—including the area code—and press .
3
Your phone has a built-in antenna. As with any other radio-
Note:
transmitting device, do not touch the antenna unnecessarily
while the phone is on. Contact with the antenna affects call
quality and could cause the phone to operate at a higher power
level than otherwise needed.
Press to end the call or to cancel the call attempt.
4
It is normal for your phone to become hot during use. If the phone
Note:
becomes too hot, it automatically drops the current call and
returns to the Start screen. Until the phone cools, you will be
unable to receive or make calls.
Answer a call
To answer a phone call:
Press any key to answer the call.
1
Press to end the call.
2
Tip:
You can mute the ringing of an incoming call by pressing
or a quick press of the power key.
[ 13 ]
Page 27

Adjust the earpiece volume
You can adjust the earpiece volume (while in a call or at any time) by
pressing the volume keys on the upper left side of the phone.
• Press the key up to increase the volume.
• Press down to decrease the volume.
Redial the last-dialed number
To redial the last-dialed number on your phone:
If not there, return to the Start screen by pressing . Otherwise,
1
proceed to step 2.
Press two times.
2
Use caller ID
Caller ID is a network service that identifies incoming calls. Contact your
service provider to find out how to get this feature.
When Caller ID is active, your phone shows the caller’s phone number
during an incoming call, as long as this number is a part of your service
provider’s wireless network.
The wireless network lets you know if it doesn’t recognize the calling
number. The wireless network will also let you know if the calling party
has blocked the Caller ID feature.
If you have stored the name and number of the calling party in your phone
book and that number is supported by the wireless network, the caller’s
name might also appear.
Get a strong signal
Your phone operates on radio waves, and the quality of radio reception
depends on the strength of the radio signal in your area. This radio coverage
is maintained by a wireless network, and the quality of calls on a wireless
phone depends on the strength of the wireless radio signal.
[ 14 ]
Page 28

Make and answer calls
Check signal strength
When you are at the Start screen or in a call, the strength of the radio
signal is indicated by the signal indicators on the left side of your phone’s
screen. The signal indicators move up as the strength of the signal increases
and down as it decreases. Increasing your phone’s signal may be easy. Try
moving your phone slightly, or move toward a window if you’re calling
from inside a building.
This phone is optimized for digital service in a compact size. Therefore,
when your phone is operating in analog mode, the service area in which
you can place and receive calls may be smaller.
Keep calls private
The Voice Privacy feature encrypts the voice channel so that people
cannot eavesdrop on your phone conversations.
Voice Privacy is a network service, so you must contact your service
provider to obtain access to the feature.
To turn on Voice Privacy:
Press Menu 4 > 5 > 1 (Settings > Network services > Voice privacy).
1
Scroll to On and press OK.
2
During a call, Voice Privacy becomes active and notifies you with a beep.
The message Voice privacy active also appears on the screen.
To turn off Voice Privacy:
• Repeat the steps above except, in step 2, scroll to Off.
If you turn this feature on and Voice Privacy becomes inactive for
Note:
any reason, your phone displays the message Voice privacy not
active and beeps.
[ 15 ]
Page 29

6. Use phone menus
• Navigate menus
A menu is a list of choices you can make. Your phone has 9 main menus.
Each main menu contains numerous submenus that allow you to use the
phone book, change the ringing tone, and so on. You can use menus and
submenus two ways: by scrolling or by using shortcuts.
Scroll through menus
From the Start screen, press Menu, and then scroll through the menus
1
using the and
Press Options, Select, or OK, using the selection keys, at the option
2
you want.
Use the scroll and selection keys to navigate the submenus and to
3
return to the Start screen.
Use a shortcut
To get to options directly, without scrolling through lists, you can use a
shortcut.
Example
Suppose you want to customize a ringing option.
From the Start screen, press Menu, and then press the number of the
1
menu item you want.
For this example, press Menu 3 > 1 > 2 > 1 (the same as pressing
2
Menu > Profiles > Customize > Ringing Options).
When the ringing options appear, scroll through them, select the one
3
you want, and press OK.
Don’t pause too long between numbers. The phone remembers
Note:
the last key pressed for only about 2 seconds. For example, if you
press Menu 3 > 4, and pause too long between 3 and 4, the result
is the same as pressing only Menu 3.
keys.
[ 16 ]
Page 30

Use phone menus
Exit menu levels
• To return to the previous menu level, press Back or Exit.
• To return to the Start screen, press .
No menu setting changes are saved.
Get help
For most of the menu items in your phone, a brief help text is provided. To
view the help text of a menu item, scroll to an item and wait 5 seconds.
• List of shortcuts
Your phone’s menu may differ from the following list, depending on the
network services to which you have subscribed and the accessories you
are using. If you have any questions, call your service provider.
1 Messages
1 Text messages (1 > 1)
1 Inbox
2Saved
3-7.7ve subox3.4(you)5.t-1.9(ge)]TJı˝0 -1.2267 TDı˝-0.003 Tcı˝[41 u box
re83(e)824-aa
6Earasea
As(r)2e83a
Ahl (in)527( )-13.4(in)527(box)]TJı˝0 -1.2133 TDı˝0.8333 Tcı-˝0.879 Twı˝[3As(s)303(a)843(v)832.6(e)3
Ah85(l )-1368((in)547( )-13.4you)5.4((box)]TJı-32.4667 -1.2467 TDı˝0.8333 Tcı-˝0.879 Twı˝[2V)88eessaes
1n tovo(ice)-1026( m)68(ce)-1026(s)915(s)-42(agese)]TJı˝0 -1.2267 TDı˝-0.022 Tcı˝-0.0372 Twı˝[21e mboxenue
eee83x
[ 17 ]
Page 31

2Call log
1 Missed calls
2 Dialed calls
3 Received calls
4 Clear call lists
5 Call timers
3Profiles
1Normal
1 Select (not available for Headset or Car Kit)
2 Customize (the following submenus appear in all profiles)
1 Ringing options
2 Ringing volume
3 Ringing tone
4 Vibrating alert
5 Keypad tones
6 Warning and game tones
7 Message alert tone
8 Lights (available only with Car Kit)
9 Automatic answer (available only with Headset or Car Kit)
3 Rename a profile (not available for Headset, Car, or Normal)
2 Silent
3Meeting
4 Outdoor
5Pager
6 Car (available only with Car Kit)
7 Headset (available only with Headset)
4 Settings
1 Call settings
1 Emergency key 9
2 Automatic redial
3 Calling card
2 Phone settings
1 Clock
2 Alarm clock
[ 18 ]
Page 32

3Touch tones
1 Manual touch tones
2 Touch tone length
4 Restore factory settings
5 Language
1 English
2French
3 Spanish
4 Portuguese
5 Russian
6Hebrew
7 Traditional Chinese
3 Security settings
1 Restrict calls
1 Restrict outgoing calls
2 Restrict incoming calls
2 Access codes
1 Phone lock
2 Unlocked phone number
3 Change lock code
4 Change security code
5 Hidden voice mailbox password
4 Auto update of date and time
1On
2 Confirm first
3Off
5 Network services
1 Voice privacy (must be added manually)
2 Call forwarding (must be added manually)
3 Call waiting (must be added manually)
4 Send own number (must be added manually)
5 Network feature setting
6 Own number selection
Use phone menus
[ 19 ]
Page 33

7 Public system selection (might not be available; see your
service provider)
8 Digital/analog selection (might not be available; see your
service provider)
5System
1 Automatic
2Manual
3New search
6Games
1Memory
2Snake
3 Logic
4 Rotation
7Calculator
8Calendar
9Keyguard
[ 20 ]
Page 34

Enter letters and numbers
7. Enter letters and numbers
For text messages and calendar notes, you can use predictive text
Note:
input. This method is covered in “Write with predictive text input”
on page 76.
• Enter letters
When you want to add new names or when you view names in the phone
book, your phone automatically switches to the ABC mode and displays
the icon.
• Press a key once or several times to enter the letter(s) you want.
For example, press the 2 key three times to enter the letter C.
Key Characters Key Characters
1 . , ’ ? ! @ - 1 7 PQRS7
2 ABC2 8 TUV8
3 DEF3 9 WXYZ9
4 GHI4 0 Enters an empty space or 0
5 JKL5 * Special characters
6 MNO6 # Changes letter case; long
press toggles between ABC/
abc and 123 mode
[ 21 ]
Page 35

Edit names
To edit a name in the phone book:
• Use the scroll key to move the cursor to the left.
• Use the scroll key to move the cursor to the right.
•Press Clear to correct any mistakes.
Change from capital (uppercase) letters
To switch between capital letters (uppercase) and lowercase letters:
•Press the key.
The icon switches to , indicating that you are using
lowercase.
• To switch back to uppercase, press the key again.
Use punctuation and special characters
When in ABC mode, you can enter special characters. To do so, press the
key. The following special characters appear:
. , @ ? ! : ; - + # * ( ) ‘ “ _ & $ % / < > =
• Press or to move to the character that you want to use and
press Insert.
• Press to move quickly up and down between rows of characters.
If you want to access a special character that appears toward the
Tip:
end of this list, press for quicker access.
[ 22 ]
Page 36

Enter letters and numbers
• Enter numbers
You use the 123 mode to enter numbers. When you’re in 123 mode, the
screen shows the icon.
You cannot enter special characters in 123 mode from the special
Note:
characters list.
• If you are in mode, press and hold the key for about
2 seconds.
The icon appears, enabling you to enter only numbers.
• To return to ABC mode, press the key again for a couple of
seconds.
List of special characters
Your phone provides special characters you can use to insert "wait" times
into a number.
• To insert the following characters into a number, press the key
several times.
• Continue entering the rest of the number as usual.
Use to create a pause when a number is dialed.
p
The numbers you enter after this special character
are automatically sent as touch tones after a
2.5-second pause.
Use to create a “wait” when a number is dialed.
w
This means that your phone waits for you to press before it
sends the number as touch tones.
[ 23 ]
Page 37

8. Use the phone book
• About the phone book
Your phone includes a phone book that can store up to 250 names and
associated phone numbers. Stored numbers can be up to 32 digits long.
Stored names can be up to 26 characters long.
Make entries unique
You cannot store identical names in your phone.
Example: You can’t have one entry for John Jones with a home number
and another entry for John Jones with a work number. You need to
store the names as, for example, John Jones Work and John Jones
Home.
If you enter a name that’s already in your phone book, the message
Replace? appears, followed by the currently stored name.
•Press Back to end this sequence without replacing the name.
• Use phone book menus
The phone book has several menus from which you can choose. These
menus appear when you press Names. Use the scroll keys to move to the
menu you want to use.
Search Allows you to search for a specific name.
Add new Allows you to enter new names and numbers.
Options Allows you to choose your scrolling view and to show
the memory status.
1-touch dialing Allows you to assign up to seven 1-touch dial
locations.
[ 24 ]
Page 38

Use the phone book
Caller groups Allows you to rename or change the ringing tone for
a caller group, as well as turn the group graphic on
or off.
Erase all Allows you to erase all names and numbers in the
phone book. To erase only one name and number at
a time, while viewing a name in the phone book
press Details or Options, then scroll to Erase and
press Select.
Change views
You can view your phone book in three different ways:
Name list Shows all the names that are stored in your phone
book. Three names appear on the screen at a time.
Name+number Shows individual names and numbers. Only one name
appears on the screen at a time, with its corresponding
phone number. Name + number is the default
setting.
Name only Displays individual names only. You can view the
corresponding phone number by pressing Details and
then scrolling up or down.
In all views, you can use the scroll keys to move up and down through the
list of names.
Select a scrolling view
Press Names.
1
Scroll to Options, then press Select.
2
At Scrolling view, press Select.
3
Scroll to the view you want and press OK.
4
[ 25 ]
Page 39

• Add names and numbers
Press Names.
1
Scroll to Add new and press Select.
2
Using the keypad, enter the name.
3
Use the key to switch between upper
and lowercase letters.
Press OK.
4
Enter the phone number and press OK.
5
Shortcut
You can also enter numbers by using a shortcut from the Start screen.
Enter a phone number and press Save.
1
Enter a name at Name.
2
Step 2 is optional.
Note:
Press OK.
3
• Change a stored telephone number
You can change a number without changing its associated name.
Press Names.
1
At Search, press Select.
2
Enter the first few letters of the first name of the person for whom
3
you are searching and press OK.
If you chose Name only or Name list as your scrolling view, continue
to step 4. If you chose Name+number as your scrolling view, proceed
to step 5.
Press Details to view the number.
4
Press Options.
5
If Edit is not highlighted, scroll to it and press Select.
6
[ 26 ]
Page 40

Use the phone book
Press OK.
7
The associated number appears.
Press Clear to erase one number at a time, or press and hold Clear to
8
erase all the numbers on the screen.
Use the and keys move within the digits in the number.
Enter the new number.
9
Press OK to save the new number.
10
• Recall and redial numbers
You can recall and dial numbers using one of three methods.
To recall and dial a number:
At the Start screen, press or to display the names and
1
associated numbers that are stored in your phone book.
Scroll to the appropriate name and press to dial the associated
2
number.
OR
At the Start screen, press Names.
1
Begin entering the first few letter of the name you want to call.
2
When the appropriate name/number appears on the screen, press
3
to dial this number.
OR
At the Start screen, press Names.
1
At Search, press Select.
2
Enter the name of the person you want to call and press OK.
3
When the appropriate name/number appears on the screen, press
4
to dial this number.
[ 27 ]
Page 41

• Erase stored names and numbers
You cannot undo Erase functions, so be careful!
Note:
Using one of the methods described in “Recall and redial numbers” on
1
page 27, recall the stored name and its associated number.
If you chose Name only as your scrolling view, continue to step 2.
If you chose Name+number as your scrolling view, proceed to step 3.
Press Details.
2
Press Options.
3
Scroll to Erase, then press Select.
4
The Erase? message appears.
Press OK to erase this name and associated number.
5
• Erase the entire phone book
You can erase the contents of your phone book. Note that this action
cannot be reversed! Once you have performed this procedure, all the
stored information in your phone book is erased.
To erase all the contents of your phone book:
Press Names.
1
Scroll to Erase all and press Select.
2
The message Are you sure? appears.
If you truly want to erase the entire contents of your phone book,
3
press OK.
The Security code field appears.
Enter your security code and press OK.
4
[ 28 ]
Page 42

Use the phone book
• Check memory status
You can check to see how many free and in-use memory locations are in
your directory.
Press Names and scroll to Options.
1
Press Select.
2
Scroll to Memory status and press Select again.
3
A message appears that says Phone: xx free, xx in use, where xx
indicates the number of memory locations (phone entries) available
and in use.
[ 29 ]
Page 43

9. Use voice mail
Voice mail is a network services feature. Colleagues who miss you when
they call can leave a voice message, which you can retrieve later.
• When you have a message
• Your phone beeps when you receive a voice message. Also, the message
New voice message appears on your phone’s screen, along with the
icon.
• If you have received more than one voice mail message, depending on
your wireless network your phone may display the number of messages
that you have received.
To use voice mail, you need to learn the voice mail system’s
Note:
various greetings, passwords, and prompts. Your service provider
can provide instructions.
• Set up your voice mailbox
As part of your network’s voice mail feature, your service provider gives
you a voice mailbox phone number. Save this number in your phone to
make getting your voice messages quick and convenient.
Press Menu 1 > 2 > 2 (Messages > Voice messages > Voice mailbox
1
number).
Enter your voice mailbox phone number.
2
Press OK.
3
•Press Yes if you want to save a hidden voice mailbox password in
your phone.
•Press No if you don’t.
If you selected Yes , enter your security code.
4
Press OK.
5
[ 30 ]
Page 44

Use voice mail
Enter your voice mailbox password and press OK.
6
Your voice mailbox number can be up to 32 digits long and is used until
it’s changed. Therefore, if your phone number changes, you may need to
change your voice mailbox number along with it.
• Set greetings and passwords
These may vary in different wireless systems. If you need information
about how to record your greeting or how to store your password, contact
your service provider.
If you store your voice mailbox password in your phone, the phone
Note:
immediately sends the password after you dial your voice mailbox
number.
• Listen to your voice messages
The way you listen to your voice messages may vary depending
Note:
upon your service provider. Call your service provider if you have
any questions.
When your phone alerts you to new voice messages, press Listen and
1
follow the instructions given on the phone.
If you’d rather listen to your messages later, press Exit.
2
To listen to your voice messages at a later time:
3
Press and hold the 1 key.
OR
Press Menu 1 > 2 > 1 (Messages > Voice messages > Listen to voice
messages).
The message Calling voice mailbox appears on the screen. Follow the
prompts to access your messages.
[ 31 ]
Page 45

10. Work with the call log
The call log keeps track of:
• Missed calls
• Numbers you’ve dialed
• Numbers from which you’ve received calls
• The amount of time you’ve spent on calls
• Check the call log
Press Menu 2 to access Call log, then press Select.
The following submenus are available:
Missed calls
Dialed calls
Received calls
Clear call lists
Call timers
To select any of these options, press the Select key while the option is
displayed on the screen. The Missed calls, Dialed calls, and Received calls
menus include the following options (available when you press the
Options key):
Call time Shows the date and time when the call was connected—
if the clock has been set.
Edit number Allows you to edit the number shown on the screen.
Save Allows you to save the displayed number into your
phone book.
Erase Allows you to erase the displayed number from the call
log.
[ 32 ]
Page 46

Work with the call log
Back
2-2
Select
Dialed
calls
D
View number Allows you to view a number when an associated name
appears on the screen.
This option works only if you have stored the
Note:
associated number in the phone book.
You can dial any numbers that appear on your phone’s screen by
Tip:
pressing .
Check missed calls
Your phone stores up to the last 10 numbers associated with calls you
have missed. When you miss a call(s), the message Missed calls appears
on your phone’s screen, along with the number of calls missed.
You are notified of missed calls only if your phone was turned on in the
original service area of your service provider.
To check missed calls:
Press List.
1
The phone shows the numbers of the calls you missed.
Either scroll through the list using the or
2
a number that you want to dial and press , or press Back to
return to the Start screen.
If you prefer, you can press Menu 2 > 1 (Call log > Missed calls), then
scroll through the list of numbers.
If you chose the Forward if not answered option in Call Forwarding,
Note:
then your phone treats these forwarded calls as missed calls.
keys until you reach
Check previously dialed calls
Your phone stores up to the last 10 numbers
associated with calls that you have dialed.
To check this list of numbers:
[ 33 ]
Page 47

Press Menu 2 > 2 (Call log > Dialed calls).
1
Use or
2
When you reach the number you want to dial, press .
3
You can also access previously dialed numbers by pressing and then
pressing or to scroll through the list.
to scroll through the dialed numbers list.
Check received calls
Your phone stores up to the last 10 numbers associated with calls that you
have answered. To check this list of numbers:
Press Menu 2 > 3 (Call log > Received calls).
1
Use or
2
When you reach the number you want to dial, press .
3
to scroll through the list of received numbers.
Clear call lists
You can erase some or all of the numbers that appear in your phone’s call
log. You can erase dialed numbers, received call numbers, or missed call
numbers.
Warning:
To erase some or all of the numbers listed in your call logs:
1
2
3
Note:
You cannot undo this operation.
Press Menu 2 > 4 (Call log > Clear call lists).
Use or
following options: All, Missed, Dialed, and Received.
Stop at the appropriate option and press OK.
The All option clears every number in every list, whereas the other
options clear only the numbers associated with that option. For
example, the Dialed option clears only the numbers associated
with calls you previously dialed.
to scroll through the options list, which includes the
[ 34 ]
Page 48

Work with the call log
• Check call timers
Your phone tracks the amount of time you spend
on each call. To obtain information about time
spent on phone calls:
Press Menu 2 > 5 (Call log > Call timers).
1
Use or
2
described in the following list:
Last call Shows the call duration of the last call made.
Dialed calls Shows the duration of all outgoing calls since you reset
All calls Shows the call duration of all calls that have been made
Life timer Shows the duration of all calls for the life of your phone.
Clear timers Clears all call timers for the currently selected phone
to scroll through the options
the timers.
and received since you reset the timers.
This option cannot be reset.
number. Your phone includes separate timers for each
number used, with the exception of the Life timer.
Warning:
If you select the Clear timers option, the action cannot be
undone. If you use the call timers to log or track the amount
of time you are using your phone, you might want to record
the information in the call timers before you erase them.
[ 35 ]
Page 49

Turn on a current call timer
You can set your phone to display the running elapsed time while a call is
active. To do so:
Press Menu 2 > 5 (Call log > Call timers).
1
Press Details.
2
Current call timer appears.
Press Select.
3
Use or
4
Press OK.
5
From this point on, each call you make or receive will be timed. After a
call has ended, press any key on your phone to clear the screen.
to scroll to On.
Clear call timers
Press Menu 2 > 5 > 5 (Call log > Call timers > Clear timers).
1
The Security code field appears.
Enter your security code and press OK.
2
[ 36 ]
Page 50

03:15
12145551212
D
Options
Mute
Use advanced calling features
11. Use advanced calling features
• Set in-call options
Your phone allows you to use a number of features
during a call. These features are known as in-call
options.
Many in-call options are network services features. To use these
Note:
options, you must contact your service provider.
You cannot use all these options at all times. This section tells you when
you can use a certain option.
To access an option during a call, press Options.
1
Choose from some or all of the following options:
2
Lock keys This option appears first only if your phone is connected
to a headset. Otherwise, the Mute option (see next)
appears first. Allows you to lock your phone’s keypad.
Mute Mutes the phone’s microphone.
If, somehow, your phone’s microphone has already been
muted, End mute appears instead of Mute.
Press OK to choose either of these options.
These options can affect the microphones of any
Note:
accessories connected to the phone.
Touch tones Allows you to manually enter a touch tone string or
search for a string in your phone.
New call Allows you to make a call while you have a call in progress.
See “Make a conference call” on page 39 for more
information.
Menu Allows you to access the Menu.
Names Allows you to access the phone book.
[ 37 ]
Page 51

• Use call waiting
If you have call waiting, your phone beeps during a call to let you know
that someone else is calling you.
Depending on your caller ID setup, the phone might also display the
number of the incoming call.
Call waiting may not be available in all wireless systems.
Note:
Contact your service provider for details and availability.
Before you can use call waiting, you must first store its feature code.
Then you must activate the call waiting feature.
Store the call waiting feature code
Press Menu 4 > 5 > 5 (Settings > Network services > Network
1
feature setting).
The Feature code box appears.
Enter the feature code your service provider gave to you and
2
press OK.
Scroll to Call waiting and press Select.
3
Make sure that Activate is highlighted and press OK.
4
Activate call waiting
Press Menu 4 > 5 > 3 (Settings > Network services > Call waiting).
1
Use or
2
Your phone calls the network to confirm the feature code you entered.
After the network confirms the feature code, call waiting is activated.
to scroll to Activate and press OK.
Manage calls
Call waiting works with both local and long distance calls.
• To answer an incoming call, press .
• To switch from one call to another, press .
• To end both calls, press .
[ 38 ]
Page 52

Use advanced calling features
Make a conference call
While in a call, you can call another number and "conference in" (add) a
third party to the call.
The conference call feature varies based on wireless systems. Contact your
service provider for details.
While in a call, you can either dial the number you want to conference
1
in and press .
OR
You can press Options, scroll to New call, press OK, enter the phone
number, and press OK again.
If you don’t remember the number of the party you want to include in
the conference, and you know that this number is in your phone book,
you can recall the number.
When the third party answers, press to connect all three parties.
2
To place one of the parties on hold, press again. If you press
Note:
a third time, the party you placed on hold rejoins the call,
and the second party is placed on hold. Once you place one of the
parties on hold, you are unable to rejoin all three parties.
To drop all parties, press .
3
Recall a number from the phone book during a conference call
If you don’t remember a number that you need to call while in another
call, and you know that this number is in your phone book, you can recall
the number without having to quit your current call.
During the call, press Options.
1
Scroll to Names and press OK.
2
Press Select at Search.
3
Enter name and press OK, or scroll through the phone book.
4
Press .
5
[ 39 ]
Page 53

• Use call forwarding
With call forwarding, you can forward incoming calls to another number.
This way, if you are unable to receive calls on your phone, all calls going
to that phone can be forwarded to another phone. You never have to miss
an important call.
The call forwarding feature might not be available in all wireless
Note:
systems. Contact your service provider for details and availability.
Before you can use call forwarding, you must first store its feature code.
Then you must activate the call forwarding feature.
You can use the call forwarding feature code manually as opposed to
storing it. Each time you need to forward phone calls, you must enter the
feature code before the phone number (for example, *72 555 1212).
Store the call forwarding feature code
Press Menu 4 > 5 > 5 (Settings > Network services > Network
1
feature setting).
The Feature code field appears.
Enter the feature code your service provider gave you and press OK.
2
Use or
3
Activate call forwarding
Press Menu 4 > 5 > 2 (Settings > Network services > Call
1
forwarding).
Scroll to the desired call forwarding option, as described in the
2
following table, and press Select.
to scroll to Call forwarding and press Select.
Forward all calls Forwards all incoming calls.
Forward if busy Forwards calls only when you’re on your
phone and do not have voice mail.
[ 40 ]
Page 54

Use advanced calling features
Forward if not
answered
Forward if out of reach Forwards calls if you are out of the serving
Cancel call forwarding Cancels all forwarding options that are
Highlight Activate and press OK.
3
At the Number field, either enter the number to which you want your
4
calls forwarded or press Search to find this number in the phone book
(if the number is indeed in your phone book).
Press OK.
5
Your phone calls the network to confirm the feature code that you entered
in Menu 4 > 5 > 5. After the network confirms the feature code, call
forwarding is activated.
Forwards calls if you don’t answer. This option
is handy if you want to give your phone to
someone for a short period of time, but you
don’t want them to answer the phone.
For example, you could use this option if you
give your child the phone to take out, in case
of an emergency, but you still want to receive
any incoming calls made to this phone.
wireless network, or if your phone is turned
off.
currently active.
• Redial automatically
Automatic redial enables your phone to continue trying to call a number
that was busy due to wireless network problems.
When you call a number and get a busy signal because of network problems,
your phone redials this number up to 3 times. If you want to stop this
process prior to the last attempt, press . This stops the automatic
redialing.
[ 41 ]
Page 55

Before you can use the Automatic Redial feature, you must activate it.
Press Menu 4 > 1 > 2 (Settings > Call settings > Automatic redial).
1
Use or
2
Press OK.
3
to scroll to On.
• Use a calling card
You can use a calling card when you dial long distance calls. First you
must store your calling card information in the phone. Your phone can
store information about a maximum of four calling cards.
Save calling card information (step 1)
Press Menu 4 > 1 > 3 (Settings > Call settings > Calling card).
1
Scroll to the A, B, C, or D calling card and press Options.
2
Scroll to Edit and press OK.
3
The Security code field appears.
Enter your security code and press OK.
4
The Dialing sequence screen appears.
Press Select.
5
Use or
6
described in the following table.
Dialing sequence Use for cards that require you to Associated cards
to scroll through the list of dialing sequences, as
Access no.
+ phone no.
+ card no.
Access no.
+ card no.
+ phone no.
Dial 1-800 access number, then
phone number, then card number
(+ PIN if required).
Dial 1-800 access number, then
card number (+ PIN if required),
then phone number.
[ 42 ]
MCI, Sprint
Canada, Unitel
networkMCI,
WorldPhone MCI,
AT&T
Page 56

Use advanced calling features
Dialing sequence Use for cards that require you to Associated cards
Prefix
+ phone no.
+ card no.
Calling cards shown here are frequently used with the dialing sequences
listed in the first column. However, this information might vary and it
is subject to change at the phone companies’ discretion.
Press Select.
7
Dial the prefix (any numbers that
must precede the phone number)
and phone number you want to
dial, then card number (+ PIN, if
required).
Verizon, PacBell,
AT&T, Stent or
Save calling card information (step 2)
The order of the following steps may vary, depending on which dialing
sequence your card uses.
Enter the number and, when prompted for the calling card’s access
1
number, enter the number and press OK.
This number is usually the 1-800 number that is listed on the back of
the calling card.
You can also retrieve the access number from your phone book if
you’ve stored it. Simply press Search, then use or to find
the number.
When prompted to enter a calling card number (usually shown on
2
the front of the calling card) and PIN number, enter the numbers, and
press OK.
Press OK again when the Save changes? message appears.
3
Use or
4
name using your phone’s keypad.
Press OK.
5
to scroll to Card name, press Select, and enter the card
[ 43 ]
Page 57

Choose a calling card to use
If you have more than one calling card, you’ll need to choose one before
making a call.
Press Menu 4 > 1 > 3 (Settings > Call settings > Calling card).
1
Scroll to the desired card and press Options.
2
Press or to highlight Select and press OK.
3
The Security code field appears.
Enter your security code and press OK.
4
The message Card ready for use appears.
Make a calling card call
To make a calling card call:
Enter the phone number, including any prefix (such as 0 or 1) your
1
calling card might require when you make a calling card call. See your
calling card for instructions.
Press and hold until your phone displays the message Card call,
2
and then shows Wait for tone, press OK again.
After the second tone, press OK again.
3
Your phone displays Card call.
This procedure might not apply to all the calling card options
Note:
that are programmed into your phone. Check the back of your
calling card for more information, or contact your long
distance company.
• Send your own number in caller ID
You can determine, for each call you make, whether your telephone
number appears on another phone’s caller ID.
In most service areas, when you call others, your name is presented to
their caller ID (if they subscribe). With Send Own Number, you can block
(or not) the display of your number to others’ caller ID when you call them.
[ 44 ]
Page 58

Use advanced calling features
Send Own Number might not be available in all wireless systems.
Note:
Contact your service provider for details and availability. Also note
that this feature is effective only when you call a number that is
equipped with caller ID.
Before you can use Send Own Number, you must first store its feature
code. Otherwise, this feature might not appear on your phone’s menu.
Store the Send Own Number feature code
Press Menu 4 > 5 > 5 (Settings > Network services > Network
1
feature setting).
The Feature code box opens.
Enter the feature code your service provider gave you and press OK.
2
Use or
3
Your phone calls the network to confirm the feature code that you
entered in Menu 4 > 5 > 5. After the network confirms the feature code,
Send Own Number is activated.
to scroll to Send own number and press Select.
Set whether or not your number will appear
Press Menu 4 > 5 > 4 (Settings > Network services > Send own
1
number).
Scroll to Yes (to show your number) or No (not to show it).
2
Press OK.
3
Enter the number you wish to call (or press Search to retrieve the
4
number from the phone book), and press OK.
• Select a phone number
Your service provider programs your phone number and system information
into your phone’s memory when your phone is first activated. Your phone
can hold up to three numbers. This means that your phone can be activated
[ 45 ]
Page 59

in three different service areas. For example, your phone could bc9`````o``````9```BTı ]
[ 46 ]
Page 60

Use advanced calling features
• Set touch tones
Touch tones are sounds that are produced when
you press the keys on your phone’s keypad.
Sometimes, touch tones are called DTMF tones,
but this guide calls them touch tones.
You can use touch tones for many automated over-the-phone services
such as checking bank balances and airline schedules and using your voice
mailbox. Touch tones can be sent only when a call is active.
Set manual touch tones
Press Menu 4 > 2 > 3 > 1 (Settings > Phone settings > Touch
1
tones > Manual touch tones).
Select one of the following options, then press OK:
2
Continuous The tone sounds for as long as you press and hold a key.
Fixed Sets the tone length to 0.1 second, regardless of how
long you press a key.
Off Turns off the tones. No tones are sent when you press a
key.
Set touch tone length
You can also set the length of each touch tone. To do this:
Press Menu 4 > 2 > 3 > 2 (Settings > Phone settings > Touch
1
tones > Touch tone length).
Use or
2
to .1 second. Long sets the tone length to .5 second.
Press OK.
3
to scroll to Short or Long. Short sets the tone length
[ 47 ]
Page 61

Store touch tone sequences (strings)
You store touch tone strings the same way that you store names and
numbers in your phone book. You can store an entire digit sequence and
send it as touch tones for frequently used strings of numbers.
Store touch tone strings with phone numbers
Enter the phone number that you want associated with a touch tone.
1
Press w or p where needed.
2
w (wait): When you dial this phone number,
your phone first dials the number, then waits
(because of the w character) for you to press
Send. When you press Send, the phone sends
your touch tone.
p (pause): If you include a p character instead of a w, your phone
pauses for 2.5 seconds, then automatically sends your touch tone.
Enter the touch tone string.
3
Store the number as you normally would.
4
Send a touch tone string
Press Menu 4 > 2 > 3 > 1 (Settings > Phone settings > Touch
1
tones > Manual touch tones).
Make sure that the setting is not set to Off.
2
If it is, use or
press OK.
Then, during your call, press Options, scroll to Touch tones and
3
press OK.
Enter the touch tone string or recall the string from the phone book,
4
and press OK.
Warning:
If you send touch tones while in the analog mode, be careful
not to send confidential information.
to scroll to one of the other options and
[ 48 ]
Page 62

Customize your phone
12. Customize your phone
• What is a profile?
A profile is a "set of settings" you can use to
customize the way your phone works. You can
set your own preferences for these items:
Ringing options
Ringing volume
Ringing tone
Vibrating alert
Keypad tones
Warning & game tones
Message alert tone
Your phone comes with seven profiles:
Normal (default setting)
Silent
Meeting
Outdoor
Pager
Car (available only with car kit)
Headset (available only with headset)
You can customize any of the profiles. If at any time you want to return
to the original settings, you can do so.
• Select a different profile
Quickly press the Power key.
1
Use and to move to the profile you want to use.
2
Profile names are highlighted (selected) as you scroll through them.
Press OK to select a highlighted profile.
3
To select a different profile, your phone cannot be connected to
Note:
a car kit or a headset, and your phone must be at the Start screen.
[ 49 ]
Page 63

• Customize a profile
Press Menu 3 (Profiles).
1
Scroll to the desired profile in the list.
2
The Car and Headset profiles do not
Note:
appear unless your phone has been connected to these
accessories. If you connect your phone to a car kit or to a headset,
these profiles remain in the menu, unless you choose to restore
your phone’s factory settings.
Press Options to view the options for the selected profile.
3
Select one of the following options, then press OK.
4
Select Activates the currently highlighted profile.
Customize Enables you to customize a profile by changing the
current settings.
•Press OK to choose from several lists.
Rename Enables you to rename the profile.
This option does not appear in the Normal, Headset, or
Car kit profiles.
When you change a setting in the current profile, it affects only
Note:
that profile. Your phone’s normal settings do not change.
Set ringing options
You can choose the tone that your phone uses to notify you of an incoming
call. This setting does not affect any incoming text message alert tones.
Press Menu 3 (Profiles).
1
Your phone lists each profile.
Use or
2
want to set the ringing options, and press Options.
to scroll to the desired profile in the list for which you
[ 50 ]
Page 64

Customize your phone
Highlight Customize and press OK.
3
Scroll to Ringing options and press Select.
4
Scroll to one of the ringing options, as described below, and press OK.
5
Ring The phone rings until it is answered.
Ascending Ringing volume increases (gets louder) if the phone is
not answered.
Ring once The phone rings once to indicate an incoming call.
Beep once The phone beeps once to indicate an incoming call.
Caller groups Sets the ring to a silent ring, unless a call comes from a
number within a caller group.
Use or
to scroll to the desired caller group(s),
then press Mark to select or Unmark to deselect them.
Silent The phone makes no sound.
Set the ringing volume
You can set the default ringing volume for
incoming voice calls and message alert tones.
Press Menu 3 (Profiles).
1
Use or
2
you want to set the ringing volume, and press
Options.
Highlight Customize and press OK.
3
Scroll to Ringing volume and press Select.
4
Scroll through the options. When you hear the volume level you wish
5
to use, press OK.
to scroll to the profile for which
[ 51 ]
Page 65

As you scroll through the ringing options, you can listen to a
Note:
sample of each. Although the ringing sample for level 4 and level
5 are the same, ringing level 5 will produce very loud ringing.
The ringing volume setting is stored individually for the handsfree car kit
and the headset.
Set the ringing tone
You can set your phone’s ringing tone to a specific sound—or tune—for
incoming voice calls.
If you have already chosen a ringing option of either Silent or
Note:
Beep once (“Set ringing options” on page 50), the ringing tones
are already turned off.
Press Menu 3 (Profiles).
1
Your phone lists each profile.
Use or
2
ringing tones.
Press Options.
3
Highlight Customize and press OK.
4
Scroll to Ringing tone and press Select.
5
Scroll through the options, and, when you hear the tone you want to
6
use, press OK.
to scroll to the profile for which you want to set the
Set a vibrating alert
You can set your phone to vibrate to indicate an incoming call.
Press Menu 3 (Profiles).
1
Use or
2
vibrating alert, and press Options.
Highlight Customize and press OK.
3
Scroll to Vibrating alert and press Select again.
4
to scroll to the profile for which you want to set the
[ 52 ]
Page 66

Customize your phone
Use or to scroll to On and press OK.
5
The phone does not vibrate when it is connected to or placed in any
charging device.
Set keypad tones
Keypad tones are the sounds you hear when you press your phone’s keys.
You can set the volume for those tones.
Press Menu 3 (Profiles).
1
Use or
2
keypad tones, and press Options.
Highlight Customize and press OK.
3
Scroll to Keypad tones and press Select.
4
Use or
5
Off, no keypad tones are heard.)
If you chose the Silent profile in step 2, the keypad tones are turned off.
to scroll to the profile for which you want to set the
to scroll to one of the levels and press OK. (If you choose
Set warning and game tones
You can set warning tones and the tones used for the games in your phone.
Warning tones include the sounds your phone makes during error
conditions, during confirmations, when a battery is low, and when you
need to recharge the battery.
Press Menu 3 (Profiles).
1
Use or
2
warning tones, and press Options.
Highlight Customize and press OK.
3
Scroll to Warning and game tones, then press Select.
4
Scroll to On and press OK.
5
If you do not want to use warning or game tones, you can turn them off
by scrolling to Off and pressing OK.
to scroll to the profile for which you want to set the
[ 53 ]
Page 67

Set the message alert tone
You can set your phone to use a certain tone to indicate an incoming
text message.
Press Menu 3 (Profiles).
1
Use or
2
message alert tone, and press Options.
Highlight Customize and press OK.
3
Scroll to Message alert tone, then press Select.
4
Use or
5
The phone plays samples of each choice as you scroll to it.
When you find the tone you want, press OK.
6
to scroll to the profile for which you want to set the
to scroll through your choices.
Set your phone to answer automatically
You can set your phone to answer incoming voice calls after one ring.
This feature can be used only when your phone is connected to a headset
or to an approved handsfree car kit that is equipped with the ignition
sense option, with the ignition on.
Press Menu 3 (Profiles).
1
Use or
2
Options.
Note:
Highlight Customize and press OK.
3
Scroll to Automatic answer and press Select.
4
Scroll to On and press OK.
5
to scroll to either the Car or Headset profile and press
Car and Headset do not appear unless your phone has already
been connected to a car kit or headset at least one time.
[ 54 ]
Page 68

Customize your phone
Set the lights (car kit only)
While your phone is connected to a car kit, you can either set its lights to
be on only when you use it, or you can have the lights on continuously.
This feature works only when your phone is connected to a car kit.
Press Menu 3 (Profiles).
1
Use or
2
Note:
Highlight Customize and press OK.
3
Use or
4
Scroll through your choices, which are listed and described in the
5
table below, and press OK.
Automatic Turns off the lights within 15 seconds if no keys are
On Lights remain on the entire time your phone is connected
to scroll to Car and press Options.
Car does not appear in the list unless the phone is connected
to a car kit.
to scroll to Lights and press Select.
pressed.
to the car kit.
• Rename profiles
Press Menu 3 (Profiles).
1
Use or
2
Scroll to Rename and press OK.
3
Enter the new name and press OK again.
4
Note:
to scroll to the desired profile and press Options.
You cannot rename the Normal, Headset, and Car kit profiles.
[ 55 ]
Page 69

• Restore factory settings
Back
4-2-1
Select
Clock
D
03:14
If you have made changes to your phone’s profiles (settings), you can
restore them to their original, or factory settings. You must enter a
security code to reset your phone’s factory settings.
The memory, timers, language selection, security code, and lock
Note:
codes are not reset. However, any profiles you have modified are
reset.
Press Menu 4 > 2 > 4 (Settings > Phone settings > Restore factory
1
settings).
Enter your security code and press OK.
2
• Set the display language
You can set your phone to display a certain
language.
Press Menu 4 > 2 > 5 (Settings > Phone
1
Settings > Language).
Use or
2
want to use and press OK.
You can choose from English, French, Spanish, Portuguese, Russian,
Hebrew, and traditional Chinese.
to scroll to the language you
• Set and display the clock
Your phone has an internal clock that you can set
to display on the Start screen.
The clock is connected to an alarm clock. Refer to
“Alarm clock” on page 99 for more information.
Set the clock
To set the clock to the appropriate time:
Press Menu 4 > 2 > 1 (Settings > Phone settings > Clock).
1
[ 56 ]
Page 70

Customize your phone
Use or to scroll to Adjust time and press Select.
2
The Time field appears.
Enter the time using an xx:xx format and press OK.
3
For example, to set your clock to 9:30, enter 09:30. If you set the time
format for 24-hour time, enter the number the same way: 09:30 or
23:12.
• If you set time format to am/pm, use or
pm and press OK.
• If you set the time format to 24-hour, the time is set as soon as you
press OK after adjusting the time.
to scroll to am or
Display or hide the clock
Once you have set the clock, it displays on the Start screen.
Press Menu 4 > 2 > 1 (Settings > Phone settings > Clock).
1
To hide the clock, with Hide clock highlighted, press Select.
2
Only one of these options appears at a time.
To display the clock once it has been hidden, press Menu 4 > 2 > 1
3
(Settings > Phone settings > Clock). With Display clock highlighted,
press Select.
Select the time format
You can change the way your clock shows the time, whether in am/pm
format or using a 24-hour clock.
Press Menu 4 > 2 > 1 (Settings > Phone settings > Clock).
1
Use or
2
Use or
3
to scroll to Time format and press Select.
to scroll to either am/pm or 24-hour and press OK.
[ 57 ]
Page 71

• Set automatic update of date and time
You can set your phone to automatically update the date and time from the
network. If the clock in your phone is 2 minutes or more off the network
time, the phone will automatically update the time to reflect the network.
Auto update of date and time may not be available in all wireless
Note:
[ 58 ]
Page 72

Customize your phone
Clear
Options
HAVE A GREAT
DAY
• Add a welcome note
You can set your phone to display a welcome note
each time you switch on your phone. This note
could say, for example: Hello. It could include your
name, a reminder, or more. The maximum length
of this note is 36 characters.
Press Menu 1 > 3 (Messages > Welcome note).
1
Enter the text of the welcome note.
2
As you enter characters, they appear to the left of the cursor. Press Clear
to delete characters to the left of the cursor. Press or to move the
cursor right or left.
Press Options.
3
Use or
4
If you ever want to delete (erase) the welcome note, press
Menu 1 > 3 (Options > Erase > OK).
to scroll to Save and press OK.
• Use 1-touch dialing
You must store names and numbers in your phone book before you can
use 1-touch dialing.
You can assign a name from the phone book to a 1-touch dial location,
using your phone’s keys 2 through 8. When you press the key, the
associated number is automatically dialed.
• Keys 1 and 9: The 1 key is used exclusively to dial your voice mailbox.
The 9 key is used exclusively to make calls to the emergency number
that is programmed into your phone.
• Key 2: You can use the 2 key to dial a customer care operator (refer to
“When you need to contact your service provider” on page 4). You can
overwrite this feature and assign a 1-touch dial location to the 2 key.
[ 59 ]
Page 73

Assign a name or number to a 1-touch dial key
Press Names and scroll to 1-touch dialing.
1
Press Select.
2
Use or
3
(empty) and press Assign.
Use or
4
assign this key and press Select.
Repeat these steps as many times as necessary.
To call a number using 1-touch dialing, press and hold the appropriate
5
key for a few seconds.
The phone dials the number.
to scroll to the first number that includes the message
to scroll to the name and number to which you want to
Change 1-touch dialing numbers
After you have assigned 1-touch dialing numbers to a key, you can change
key and number associations at any time.
Press Names.
1
Use or
2
Use or
3
Options.
Use or to scroll to Change and press Select.
4
Use or
5
When you reach the new number, press Select.
6
to scroll to 1-touch dialing and press Select.
to scroll to the key you want to change and press
to scroll to through phone book.
Erase 1-touch dialing numbers
You can erase 1-touch dialing key assignments at any time.
Press Names.
1
Use or
2
to scroll to 1-touch dialing and press Select.
[ 60 ]
Page 74

Customize your phone
Use or to scroll to the key you want to erase and press Options.
3
Use or
4
Press OK.
5
to scroll to Erase and press Select.
• Use emergency key 9
When the emergency key feature is turned on, the phone attempts to
make an emergency call when you press 9 and . The phone dials the
emergency number preprogrammed into your phone.
If you have activated the emergency key 9 feature, you can also
Note:
dial an emergency call by pressing and holding 9 until the phone
indicates it is attempting to make an emergency call. This method
does not work, however, when Keyguard is active.
Activate the emergency key 9
Before you can use the emergency key feature, you must first activate it.
Press Menu 4 > 1 > 1 (Settings > Call settings > Emergency key 9).
1
Use or
2
If you ever want to deactivate this feature, press Menu 4 > 1 > 1 and
3
scroll to Off.
Warning:
to scroll to On and press OK.
Official emergency numbers vary by location. Only one
emergency number is programmed into your phone, and this
is the number that is dialed when you press key 9. However,
this might not be the proper number in all circumstances.
Make an emergency call
• Press 9 and . For more details, see “Emergency calls” on page 111.
[ 61 ]
Page 75

• Use caller groups
You can create groups of names in your phone book and give each group
a different ringing tone. This allows you to recognize who is calling you
by the way your phone rings.
[ 62 ]
Page 76

Customize your phone
Rename a caller group
At the Start screen, press Names.
1
Use or
2
Use or
3
Use or
4
Enter the group name and press OK.
5
to scroll to Caller groups and press Select.
to scroll to the group you want and press Select.
to scroll to Rename group and press Select.
Remove names from a caller group
In the phone book, scroll to select the name you want to remove, and
1
press Options.
Use or
2
Use or
3
to scroll to Caller groups and press Select.
to scroll to No group and press Select.
The name is removed from the group.
Display caller group graphics
When someone calls you from a particular caller group, your phone can
display a picture to identify that person’s caller group.
Press Names.
1
Use or
2
Use or
3
display a graphic and press Select.
Use or
4
Use or
5
The graphic associated with that caller group is now set to appear.
to scroll to Caller groups and press Select.
to scroll to the caller group for which you want to
to scroll to Group graphic and press Select.
to scroll to On.
Receive a downloaded graphic
If you have this service, your phone may receive a downloaded caller-group
graphic. The screen shows the message Group graphic received.
[ 63 ]
Page 77

View the new graphic
If you press Exit at any time before saving the graphic, the new
Note:
graphic will be deleted!
When your phone shows Group graphic received, press Options.
1
Show is selected.
2
Press OK.
3
The phone previews the new group graphic.
Save a received graphic
After previewing the group graphic, press Back.
1
Scroll to Save, then press OK.
2
Choose the caller group graphic you want to replace (Family, Friends,
3
VIP, and so on).
Press OK.
4
The phone saves the group graphic with the caller group you selected.
Discard a received graphic
You can discard a group graphic if you don’t want to save it.
•Press Exit.
OR
Scroll to Discard, then press OK.
[ 64 ]
Page 78

13. Security
Your phone is equipped with a versatile security system that prevents the
unauthorized use of the phone.
You must successfully enter your security code to activate and use certain
phone features.
• The default security code is 12345.
• Nokia highly recommends that you immediately change this code.
Then, write down and store the new code in a safe place, away from
your phone.
When entering your security code, a * appears on the screen each time you
press a number key. This prevents others from seeing your code.
If you incorrectly enter a security code five times in a row, your phone
won’t accept any entries for the next 5 minutes. However, if you realize
that you’ve entered the code incorrectly before pressing OK, you can use
Clear to erase the code, digit by digit, beginning with the last digit.
When this guide describes an action that requires the entry of your
security code, each step necessary to this action is provided.
• Change your security code
Press Menu 4 > 3 > 2 > 4 (Settings > Security settings > Access
1
codes > Change security code).
The Security code field appears.
Enter the default security code and press OK.
2
At the message Enter new security code, enter your new security
3
code and press OK.
At the message Verify new security code, enter your new security
4
code again and press OK.
The message Security code changed appears.
Security
[ 65 ]
Page 79

If you have changed your security code and don’t remember the new code,
contact your service provider. Once you have changed your security code,
the default setting is no longer valid.
• Protect your phone with the lock code
You can prevent unauthorized use of your phone by locking it. When your
phone is locked, it is not possible to navigate the menu or the phone book.
Calls can be received, but can only be made to the unlocked phone number.
• The default lock code is 1234.
• Nokia recommends that you change this code immediately.
You can save an unlocked phone number and make calls to that number
without entering the lock code. Refer to “Store an unlocked phone number”
on page 67 for more information.
If you enter an incorrect lock code five times in a row, your phone
Note:
prompts you for the security code.
Turn on the phone lock
Press Menu 4 > 3 > 2 > 1 (Settings > Security settings > Access
1
codes > Phone lock).
Enter the lock code and press OK.
2
Scroll to On and press OK again.
3
Complete the phone lock activation by turning your phone off and back
on. Once you turn the phone back on, Phone locked displays on the Start
screen, and you are prompted to enter the lock code when you press Menu
or Names.
With phone lock activated, it may still be possible to make emergency
calls, such as 911 or any other official emergency numbers. This means it
may be possible to either enter the emergency number and press ,
or to press and hold 9 if the emergency key 9 has been activated.
[ 66 ]
Page 80

Back
OK
Enter new
lock code
Security
Store an unlocked phone number
Press Menu 4 > 3 > 2 > 2 (Settings > Security settings > Access
1
codes > Unlocked phone number).
Enter the lock code and press OK.
2
The Number box opens.
Enter a phone number or press Search and scroll through the phone
3
book until the number you want to store appears.
Press OK or Options.
4
Scroll to Save and press OK.
5
Call the unlocked phone number
• Press or once, then .
OR
• Manually enter the phone number and press .
Answer a call with phone lock on
• To answer a call while using a lock code, press any key except
and .
Change your lock code
Press Menu 4 > 3 > 2 > 3 (Settings > Security
1
settings > Access codes > Change lock code).
The Enter lock code box opens.
Enter the lock code and press OK.
2
Only numeric characters are accepted.
Enter the new lock code and press OK.
3
Verify the new lock code, and press OK.
4
When you change your lock code, make sure you store it in a safe
place, away from your phone. Avoid entering access codes similar
to emergency numbers to prevent accidental emergency calls.
[ 67 ]
Page 81

Turn off phone lock
Press Menu.
1
The Enter lock code box opens.
Enter the lock code and press OK.
2
Phone unlocked displays briefly, and you are returned to the Start screen.
Press Menu 4 > 3 > 2 > 1 (Settings > Security settings > Access
3
codes > Phone lock).
The Enter lock code box opens again.
Enter the lock code and press OK.
4
Scroll to Off and press OK again.
5
Phone lock deactivated appears briefly.
• Lock the keypad
When you lock the keypad, you prevent accidental key presses—for example,
your
when
Activate keyguard
There are three different ways to activate the
keyguard:
At the Start screen:
•Press and hold .
•Press Menu .
•Press Menu 9 (Keyguard).
When Keyguard is turned on, you might be able to make calls to the
emergency number that is programmed into your phone. For example,
you could dial 911 and press . When keyguard is on, however, you
cannot use the emergency key 9.
Note:
phone is in a pocket or purse. This feature is called keyguard.
Keyguard is automatically turned off when the phone is connected
to a car kit.
[ 68 ]
Page 82

Deactivate keyguard
Press Unlock.
1
Press .
2
OR
• Press and hold until the message Unlock keys? appears.
•Press OK.
Answer a call while keyguard is active
During an incoming call, the keypad automatically unlocks.
• Press to answer the call.
After you end the call, keyguard automatically becomes active again.
• Press the Power key to quickly switch the lights on for 15 seconds.
• Restrict calls
You can restrict incoming and outgoing calls. To restrict outgoing calls,
you create a list of restrictions and apply the appropriate restriction.
Before you define restrictions for outgoing calls, only one restriction
option is available:
• Add restriction, which enables you to create your own list of outgoing
call restrictions. The maximum number of call restrictions you can
define is ten.
After you have used the Add restriction option to add at least one
restriction, the following options are then available:
• Select: Allows you to select call restrictions from the outgoing
calls list.
• Edit: Allows you to edit an existing outgoing call restriction.
• Erase: Erases any existing outgoing call restrictions.
Security
[ 69 ]
Page 83

When calls are restricted, you might be able to make calls to the emergency
number that is programmed into your phone. For example, you could dial
911 and press . However, emergency key 9 might not work, depending
on the type of restriction you choose.
Restrict outgoing calls
Press Menu 4 > 3 > 1 (Settings > Security settings > Restrict calls).
1
Press Select.
2
Enter your security code and press OK.
3
Scroll to Add restriction and press OK.
4
Enter the number you want to restrict and press OK.
5
For example: If you want to restrict all calls that begin with 1, enter 1.
This will restrict all outgoing long distance phone calls. If you want to
restrict all calls that begin with 972, enter 972, and so forth.
After you perform step 5, the Name field appears.
• If you want to add a name for the call restriction, enter the name
using your phone’s keypad and press OK.
• If you don’t want to add a name, simply press OK.
Restrict incoming calls
To restrict incoming calls:
Press Menu 4 > 3 > 1 (Settings > Security settings > Restrict calls).
1
Use or to scroll to Restrict incoming calls and press Select.
2
Enter your security code and press OK.
3
Scroll to All calls and press Mark.
4
Press Unmark to remove incoming call restrictions.
Press Back.
5
The Save changes? message appears.
Press Yes.
6
Press No if you do not want to save the changes.
[ 70 ]
Page 84

Set network services features
14. Set network services features
The following network services can be obtained from your service provider.
These services are not available from all providers or in all areas.
• Voice privacy
• Call waiting
• Call forwarding
• Sending own number
When you subscribe to any of these services, your service provider gives
you a feature code that activates each service. Deactivation codes are
used to deactivate each service.
After you store the appropriate code in your phone, the code is sent to the
network to verify that you’re using the correct feature code. The voice privacy
feature does not require you to store a feature code before using it.
More than one number? If your phone has more than one phone number
assigned to it, any stored feature codes apply only to your primary phone
number.
After you store a feature code, the respective service appears as a menu
option on your phone’s screen. You can use these menus to activate and
deactivate the network services.
• Set up how your phone selects a
system
Your phone is capable of working in residential, private, and public systems
(such as your home system). You can choose how your phone selects a
network to use. Your phone may not show the options described here. For
information, contact your service provider.
[ 71 ]
Page 85

Set up the way your phone selects a network
Press Menu 5.
1
You see the following three options:
• Automatic: Your phone automatically searches for available
networks and chooses the appropriate one. Every time you turn on
your phone, it resets to Automatic.
• Manual: The phone searches for networks and then displays a
listing of all of the possible networks on your phone’s screen. Next
to each network, one of the following appears: Available or Not
available. If a network is designated as Not available, you cannot
use it.
• New Search: Your phone begins a new search for both private and
residential systems. When it finds the best system available, your
phone displays it on its screen. You can then select this system or
start another search by pressing Next.
Use or
2
see the one you want.
If you have two phone numbers, the Manual and New search features are
used only with your primary phone number.
to scroll through the choices, and press OK when you
Switch from a private system to a public system
Press and hold Menu while you are not in a call.
1
Your phone displays the message Search public systems?
Press OK and your phone uses the public system for the next (and only
2
the next) outgoing call.
After you complete this call, your phone returns to the Automatic
system selection.
[ 72 ]
Page 86

Set network services features
Select a public system
When you take your phone outside its home system, the phone is said to
be "roaming." The phone can search for home-type systems—systems that
are the same type as your home system. Or, the phone can search for nonhome-type systems.
The options described here may not be available for your phone.
Note:
See your service provider for information.
Your service provider programs a list of preferred systems into your phone.
These are systems with which your service provider has roaming
agreements. Your phone looks for these systems when you’re roaming.
Press Menu 4 > 5 > 7 to tell your phone how to choose a public
1
system (network). Your selection remains active until you change it.
• Any system: When service is not available in your home system,
the phone searches for a preferred system of either type and then
searches for a home-type system. Then it searches for a nonhome-type system. The search continues until your phone finds a
system that can be used.
• Home type: When service is not available in your home system, the
phone searches for a home-type system first. However, if a nonhome-type system is found, then your phone will use this system.
• Nonhome type: The phone searches for a non-home-type system
only. The home-type system is not used.
• Home only: The phone uses only its home system. It will not roam.
Scroll to the option you want and press OK.
2
[ 73 ]
Page 87

• Roaming
The term roaming is used to indicate when your phone is not in its home
area. Calls made or received while you are roaming are usually more
expensive than calls made in your home area.
While roaming in some systems outside your home area, your phone may
not be recognized by the host system, which is the system in which you’re
travelling. You may not be able to place a call.
Contact your service provider for more specific information on how
roaming works with your phone and for information about coverage
limitations.
Roaming indicators
When your phone begins roaming:
• The phone beeps once and may display the word ROAM on your
phone’s screen, depending on how roaming works with your phone.
Contact your service provider for more details. If your phone is not roaming,
it either displays the word HOME or the name of your service provider.
[ 74 ]
Page 88

Send and receive text messages
15. Send and receive text messages
With the text message network service, you can send and receive short
text messages. You can also send and receive messages that contain a
person’s name and/or number (a "business card").
To get your messages, other phones must have text message capability.
Or, you can ask the service provider to convert the message to other
formats, such as e-mail.
The maximum length of a text message is 160 characters. Your phone
has space for up to 80 text messages, depending on the length of each
message.
The maximum length of a text message differs, depending on the
Note:
capabilities of the network from which it originated. Also, text
messages may appear different at different times because messages
can originate in networks other than your own.
Contact your service provider for more information about the availability
of text messages.
• About writing messages
You can write a message in one of two ways: using standard (ABC) text
input or using predictive text input.
Write with standard text input
Standard text input is the default mode for text entry. When you use
standard text input, the icon appears in the upper left corner of
your phone’s screen.
Find the key that is below the letter you want to enter.
1
Press it as many times as needed for the letter to appear on the screen.
2
[ 75 ]
Page 89

For example, to enter the name John:
Press J
Press O
Press H
Press N
Write with predictive text input
With predictive text input, you need to press each number key only once
for each letter.
For example, to write Nokia with the English dictionary selected:
Press N
Press O
Press K
Press I
Press A
Since the word shown on the screen changes after each key stroke, try to
disregard the word until you have keyed in all the characters.
Turn on predictive text input
Press Menu, then Select.
1
When Text messages appears, press Select.
2
Scroll to Write message and press Select.
3
Enter a character using the keypad.
4
Press Options, scroll to Dictionary and press OK.
5
Scroll to the dictionary you want (for example, English).
6
Press OK.
7
[ 76 ]
Page 90

Send and receive text messages
T9 dictionary activated appears. ("T9" is the technical name for
predictive text input.) This means you can use predictive text input to
enter messages.
The T9 icon is also visible in the text message window when
the feature is activated.
Keys and tools for predictive text input
Key Purpose
- Use for word entry. Press each key only once for each
letter.
Press to view the next matching word if the underlined
word is not the word you intended. To change the
underlined word, press repeatedly until the word
you want appears. Press and hold to insert a special
character or punctuation.
Spell If the dictionary sees a word it doesn’t recognize, you see
Spell above the left selection key. Press Spell, enter the
word you want to enter, and press OK.
Press once to accept a word and add a space.
Press once quickly to switch the character case.
indicates uppercase. indicates lowercase.
Press and hold to enter a number. indicates 123
mode. Press and hold again to write text letters.
Clear Press once to delete the character to the left of the cursor.
Press and hold to delete all text.
Press once to add a period.
160
Maximum number of characters available. The character
counter appears in the top right corner of the display
and counts down for each character added.
[ 77 ]
Page 91

Turn off predictive text input
Repeat steps 1 through 7 in “Turn on predictive text input” on page 76.
1
Scroll to Dictionary off and press OK.
2
Or, press to toggle between predictive and standard text input.
Press until the icon in the upper left corner indicates the desired
input type.
Notes about predictive text input
• To insert a symbol, press and hold . The symbol screen appears,
showing the following characters:
. , @ ? ! : ; - + # * ( ) ‘ “ _ & $ % / < > =
• Scroll to the symbol you want and press Insert.
• When you’ve finished writing, make sure the underlined word is the
word you intended to write.
If the word is correct
• Insert a punctuation mark, if needed.
• Press to confirm the change and enter a space.
• Start writing the next word.
If the word is not correct
• Press repeatedly until the desired word appears, then press
to confirm it.
OR
•Press Options, scroll to Matches, then press OK.
Scroll to the correct word and press Use.
• Start writing the next word.
Add a desired word to the match list
If the ? character appears after a word, the word you intended to write is
not in the dictionary. You can add the word to the dictionary.
Press repeatedly until Spell appears in place of Options.
1
[ 78 ]
Page 92

Send and receive text messages
Press Spell and enter the word(s) using standard text input.
2
Press OK to save the word(s).
3
Insert numbers
To add a number to the message, press and hold until
1
appears. You can also press Options and scroll to Insert number.
Enter the desired numbers, then press and hold to return to ABC
2
mode.
Insert symbols
To put a symbol in the message, press and hold until the symbol
1
screen appears (or press Options and scroll to Insert symbol).
Select the desired symbol (use the scroll keys to move the selection)
2
and press Insert.
Write compound words
Write the first part of the word and press to accept it.
1
Then press Clear once to remove the space.
Write the last part of the compound word and press to enter the
2
word in memory.
• Write and send a text message
Press Menu 1 > 1 > 3 (Messages > Text messages > Write message).
1
The message screen appears.
Enter a message of up to 160 characters.
2
To learn how to enter text quickly, refer to “Write with predictive text
input” on page 76.
When you’ve finished writing, press Options, scroll to Send, then
3
press OK.
[ 79 ]
Page 93

Enter or recall from your phone book the recipient’s 10-digit phone
4
number, then press Send.
Sending message appears.
When the message is successfully sent, Message sent appears.
If you need to exit while writing the message, press at any time.
Later, press Menu 1 > 1 > 3 to return and finish writing the message.
If you turn off the phone without saving the message, the message
will be lost.
Save a message in the saved folder
When writing a text message, it’s a good idea to save it in the saved folder.
Then if there is a message delivery problem, you can easily resend the
message.
While writing the message, press Options.
1
Scroll to Save, then press OK.
2
Resend a message from the outbox
Messages in the outbox show one of two icons.
• The icon shows that you have attempted to send the message
to the text message center.
• The icon shows that you have not yet tried to send the message.
Scroll to the message, then press Read.
1
Press Options.
2
Scroll to Forward, select As a message, and press OK.
3
With Send highlighted, press OK.
4
Enter or find the number where you want to send the message, then
5
press Send.
[ 80 ]
Page 94

Send and receive text messages
• Receive a text message
When you receive a text message, the phone sounds a message alert tone
and the text message icon appears, along with one of the following
messages:
• Message received: Indicates that you have an unread message or
page. If you have more than one message or page, the appropriate
number is listed before this message.
When you receive the above message along with another message
Call, followed by a name and/or number, the message is a page. Only
the names of people who are stored in your phone book appear.
• New emergency message: Means that an emergency message or page
was sent by someone via the service provider. Emergency messages
are sent only in situations where life and/or property are in immediate
danger. Emergency messages are listed first and override all other
messages.
• Urgent: Means the message has a high priority.
Read a text message
Press Read.
1
This takes you to the Inbox, with the new message selected.
Press Read again to read the message.
2
Press Options for a list of choices you have while reading the message
3
(see the list following this section).
Press OK when the option you want is highlighted.
4
In your inbox, text messages are shown in the order in which they
were received, unless one is an emergency message. An emergency
message overrides any order and appears first.
[ 81 ]
Page 95

Choose options for a text message
When you press Options while reading a message, the following choices
are available:
Read next Takes you to the next message.
Erase Erases the current message.
Save Saves this message to the Saved folder.
Call back Calls the person who sent you the text message, if their
phone number is included in the message.
You can also press while the message is displayed
to dial the number.
If more than one number is on the screen, the numbers
appear in a list. Scroll to the phone number you want to
call and press .
Forward Forwards the message to another person. That person
must have the appropriate message service.
Reply Provides a screen where you can write a reply.
• When your phone’s memory is full
When your phone’s message memory is full, one or more messages of the
lowest priority are automatically deleted. These messages are usually
deleted from your phone’s outbox. An incoming emergency message could
force a deletion from your phone’s Saved folder.
If after deleting messages the memory is still full, your phone shows the
message No space: message waiting.
• Clear the notification by pressing OK.
[ 82 ]
Page 96

Send and receive text messages
• Erase a message
While reading a message, press Options.
1
Scroll to Erase, then press OK.
2
Your phone asks you to confirm that you want to erase the message.
Press OK.
3
• Reply to a message
While reading a message, press Options.
1
Scroll to Reply, then press OK and choose whether your message will
2
be sent as a text message or as e-mail.
Enter your message, then press Options.
3
Scroll to Send, then press OK.
4
The phone displays the return number.
Edit the number if needed, then press Send.
5
• Forward a message
While reading a message, press Options.
1
Scroll to Forward, then press OK and choose whether your message
2
will be sent as a text message or as e-mail.
Press Options, or edit the message and press Options.
3
Scroll to Send, then press OK.
4
Enter or find the recipient’s phone number, then press Send.
5
[ 83 ]
Page 97

16. Send and receive e-mail messages
You can use your phone to send and receive e-mail messages. This means
you no longer need to be at your computer to send or receive messages.
E-mail messages may not be available in all wireless systems.
Note:
Contact your serivce provider for details and availability.
• Save e-mail addresses
You can add an e-mail address to a name you’ve already saved in the
phone book. Or, you can add a name and address as a new entry.
Save an e-mail address for an existing name
At the Start screen, press Names and then, at Search, press Select.
1
The Name box opens.
Enter the first two letters of the name you want to find and press OK.
2
Press Options (or press Details if the Name list view is selected in your
3
phone book), scroll to E-mail address, and press Select.
The E-mail address box opens.
Enter the address.
4
Press once to insert a dot (.). Press 6 times to insert the
@ sign.
When you’ve finished entering the address, press OK.
5
The message Saved appears briefly, confirming your action.
Add a new e-mail address
At the Start screen, press Names, scroll to Add new, and press Select.
1
The Name box opens.
Enter the name and press OK.
2
The Number box opens.
[ 84 ]
Page 98

Send and receive e-mail messages
Enter the phone number and press OK.
3
The message Saved appears briefly, confirming your action.
Press Details, then Options, scroll to E-mail address, and press Select.
4
The E-mail address box opens.
Enter the address.
5
Press once to insert a dot (.). Press 6 times to insert the
@ sign.
Press OK.
6
The message Saved appears briefly, confirming your action.
Edit an e-mail address
Follow steps 1 through 3 in “Save an e-mail address for an existing
1
name” (earlier in this section) to find the name whose e-mail address
you want to edit.
Enter any changes, using the scroll keys to move the insertion point
2
backward and forward in the address.
When the address is the way you want it, press OK.
3
The message Saved appears briefly, confirming your action.
• Send an e-mail message
Press Menu 1 > 1 > 5 (Messages > Text messages > Write e-mail).
1
The E-mail address box opens.
If your phone asks for an e-mail gateway number, contact your service
provider.
Enter the e-mail address, or press Search.
2
•If you press Search, the phone lists only those names in your phone
book that are saved with corresponding e-mail addresses. Scroll
through the names and then press OK.
• If you enter the e-mail address, press OK when you've finished.
The Subject box opens.
[ 85 ]
Page 99

Enter a subject and press OK.
3
The subject line can hold a maximum of 26 characters. You can leave
the line blank if you wish.
When the message screen appears, enter your message.
4
The maximum number of characters for message length varies;
Note:
contact your service provider for details.
You can turn on predictive text input if you wish. For information, see
“Write with predictive text input” on page 76.
When you've finished the message, press Options, select Send, and
5
press OK.
A status message tells you the mail is being sent.
[ 86 ]
Page 100

Send and receive e-mail messages
• Receive an e-mail message
When you receive an e-mail message, the phone sounds a message alert
tone and the text message icon appears, along with one of the
following messages:
• Message received: Indicates that you have an unread e-mail message,
text message or page. If you have more than one new e-mail message,
text message or page, the appropriate number is listed before this
message. For more information on text messages and pages, refer to
“Receive a text message” on page 81.
• New emergency message: Means that an emergency message or page
was sent by someone via the service provider. Emergency messages are
sent only in situations where life and/or property are in immediate danger.
Emergency messages are listed first and override all other messages.
• Urgent: Means the message has a high priority.
Read an e-mail message
When you receive an e-mail message, press Read.
1
This takes you to the Inbox, with the new e-mail message selected.
OR
From the Start screen, press Menu 1 > 1 > 1 (Message > Text messages >
Inbox). Select the e-mail message you received and press Read.
Press Read again to read the e-mail message.
2
Press Options for the following options available while reading
3
the e-mail message:
Read next Takes you to the next e-mail message.
Erase Erases the current e-mail message.
Save Saves this e-mail message to the Saved folder.
[ 87 ]
 Loading...