


After Sales Technical Documentation
SERVICE SOFTWARE
(DEALER VERSION)
INSTRUCTIONS
FOR NHA–2
Original, 47/95
NHA–2 Service Software (Dealer Version) Instructions
AMENDMENT RECORD SHEET
After Sales
Technical Documentation
Amendment
Number
Date Inserted By Comments
Page 2
Original, 47/95

After Sales
Technical Documentation
NHA–2 Service Software (Dealer Version) Instructions
SERVICE SOFTWARE INSTRUCTIONS (DEALER VERS.)
Contents
Introduction Page 4
General Page 4
Required Equipment Page 4
Mechanical Connections Page 5
Start Up Procedure Page 6
Service Software (Dealer version) Menu Structure Page 7
Using Menus Page 8
Menu Bar Page 8
Windows Page 9
Dialog Boxes Page 10
File Selection Dialog Box Page 11
PCLocals Menu Functions Overview Page 12
Dealer Menu Page 13
Subscriber (NAM) Data Page 13
Short Code Memory Page 16
User Menu Settings Page 17
User Data Transfer Page 17
Phone Identification Page 17
Warranty Information Page 18
Help Menu Page 18
Original, 47/95
Page 3

NHA–2 Service Software (Dealer Version) Instructions
Introduction
General
Service software ”PCLocals” is specially designed to facilitate the servicing of
fifth generation cellular telephones.
The software can be used to control the phone according to the user’s requirements merely by entering commands via the keyboard / mouse of a PC connected to the phone.
This section refers to AMPS PCLocals Version 1.00. NMP After Sales will notify
service personnel about future upgrades via Technical Bulletins. Software upgrades will be available from your local NMP outlet.
Required Equipment
– Computer: IBM PC / AT or compatible with one unused serial port (COM1 or
COM2*), one parallel port (LPT1), hard disk recommended.
After Sales
Technical Documentation
– Operating System: DOS Version 3.3 or later
– 500 kB free memory under DOS
– Display: Any 80–character text display
– Dealer software; product code 0774014 for 3.5” disk or Dealer software;
product code 0774013 for 5.25” disk.
– Software Protection Key PKD–1 (product code 0750018)
– M2BUS interface cable DAU–4S (product code 0730057)
Page 4
*)
Note: A number of PC’s of an older generation use the Intel, National Semiconductor, or
United Microelectronics IC 8250 as the serial port UART. This is a comparatively
inefficient circuit for current purposes and does not necessarily support the
M2BUS adapter at 9600 baud. The newer UART’s NS16450 and NS16550AF of
National Semiconductor offer solutions for these problems.
Original, 47/95

After Sales
Technical Documentation
Mechanical Connections
Caution: Ensure that you have switched off the PC and the printer before
making connections !
Caution: Do not connect the PKD–1 to the serial port. This could damage
the PKD–1 !
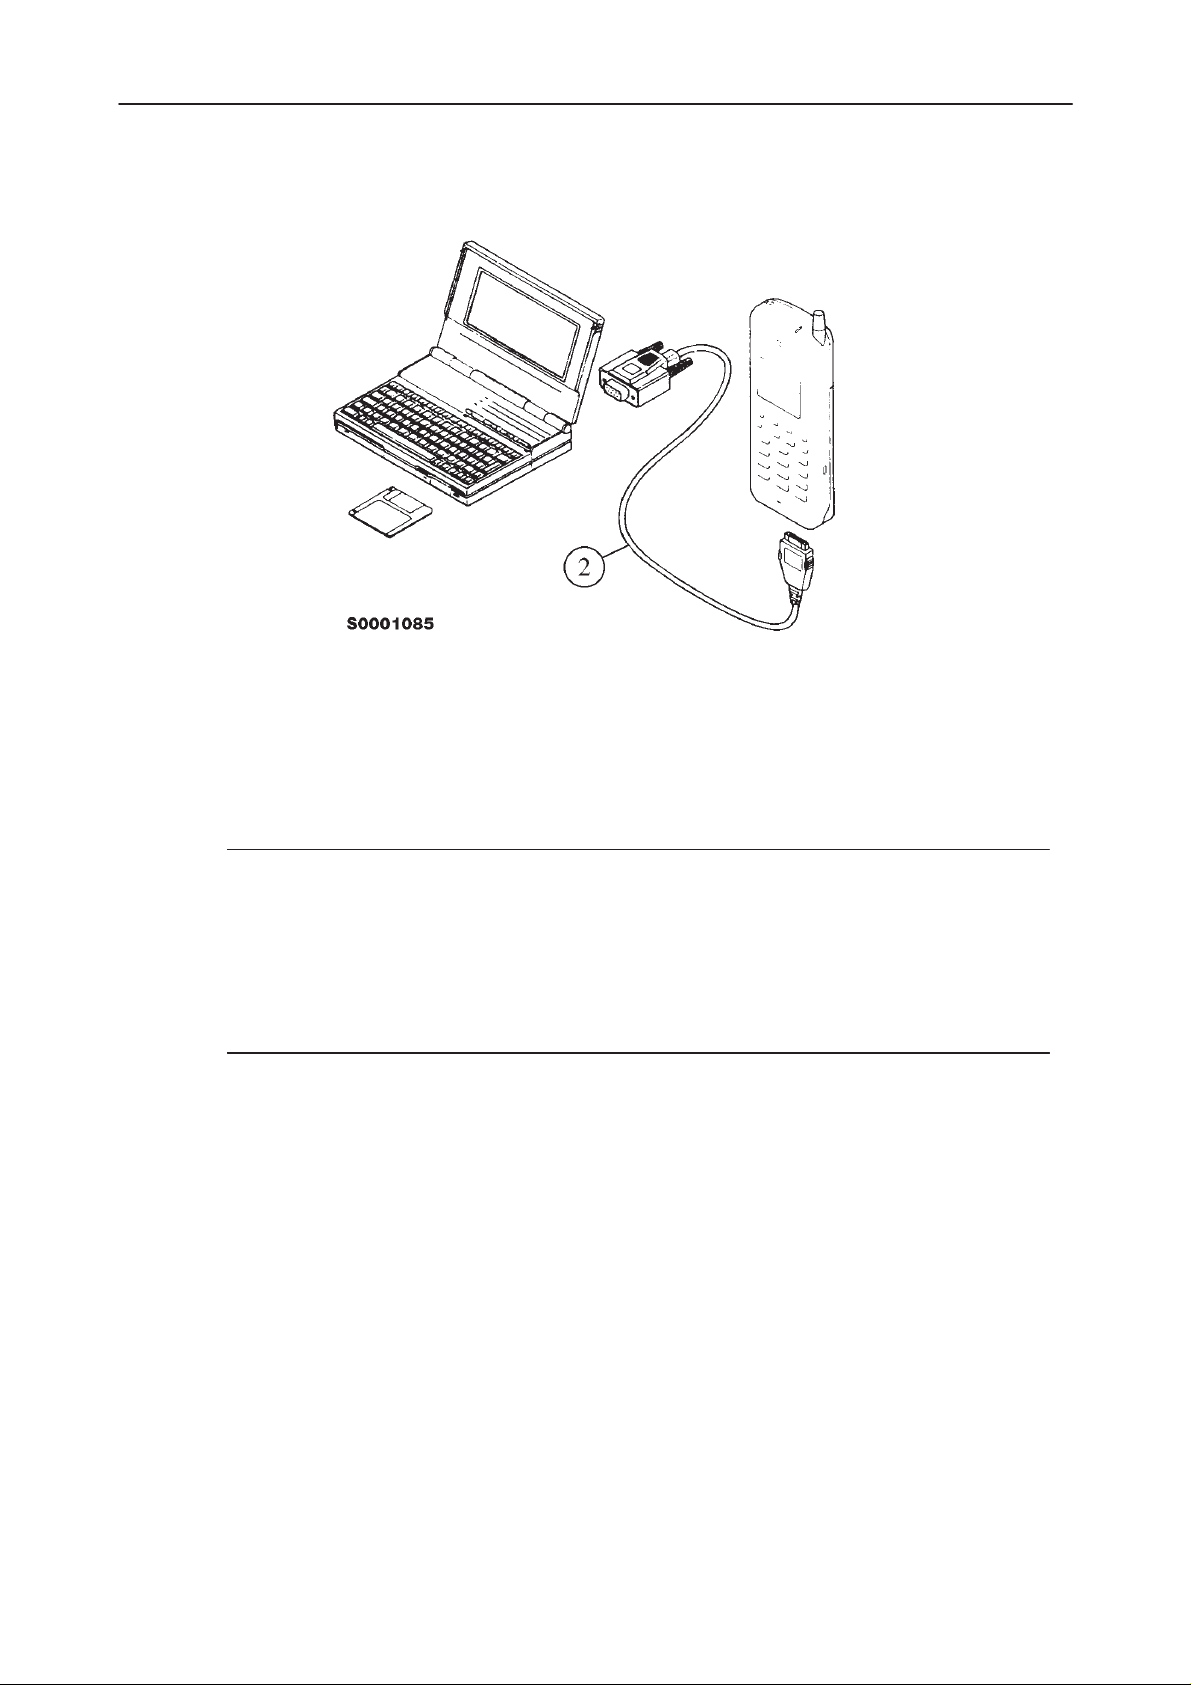
The software controls the phone via a separate adapter connected to the serial
port of the PC and to the telephone’s M2BUS (DAU–4S and XCM–1).
Attach the protection key PKD–1 to parallel port one (25–pin female D–connector) of the PC. When connecting the PKD–1 to the parallel port be sure that you
insert the PC end of the PKD–1 to the PC (male side). If you use a printer on
parallel port one, place the PKD–1 between the PC and your printer cable.
The PKD–1 should not effect devices working with it. If some errors occur (errors in printing are possible) please try printing without the PKD–1. If printing is
OK without the PKD–1 please contact your dealer. We will offer you a new
PKD–1 in exchange for your old one.
NHA–2 Service Software (Dealer Version) Instructions
Original, 47/95
Page 5
NHA–2 Service Software (Dealer Version) Instructions
Attach one end of the M2BUS interface cable, DAU–4S (2), to the PC serial
port and the other end to the bottom connector of the phone.
After Sales
Technical Documentation
Start Up Procedure
Start the phone by pressing the power–on button of the handset. Switch PC
power on.
To start the software on diskette, proceed as follows:
1. Insert PC Locals disk into
drive A of your PC
2. Log into drive A: type
3. Start service software: write
To start the software on hard disk (if installed), proceed as follows:
1. Log into drive C: type
2. Start service software: write
The service software starts by loading the configuration file. After it has been
loaded, a menu bar is shown at the top line of the display. Refer to section ”Using Menus” for how to proceed through the menus. In the middle of the display
will be a Phone Identification Window which displays some basic information
about the connected phone.
A:
and press
NHA2SUBD
C:
and press
NHA2SUBD
Enter
and press
Enter
and press
Enter
Enter
Page 6
Press
Enter
to close the Phone Identification Window.
Original, 47/95
 Loading...