

Introduction Guide

Nokia, Nokia Connecting People and Navi Bars are registered trademarks of Nokia Corporation. Other product and company names mentioned herein may be trademarks or trade names of their owners.
Nokia operates a policy of continuous development. Therefore we reserve the right to make changes and
improvements to any of the products described in this manual without any prior notice.
Copyright © 2004 Nokia. All rights reserved.
Mediamaster 112 T & 120 T
Contents
Remote control 4
Connecting the Mediamaster 5
Front and Rear panel 5
Connecting the Mediamaster 5
Preparing the remote control 5
Common Connections 6
Connecting to the TV with SCART 6
Connecting to the TV without SCART 6
Connecting a Video recorder with SCART 7
Connecting a Video recorder without SCART 7
About Smart card 8
Connecting a Hi-fi system 8
About digital transmission 8
Connecting to the TV aerial 8
This Introduction Guide describes how to connect the Mediamaster and how to perform the first-time
installation. It also describes the main features of the product.
A more detailed User Guide in the English language is available from the Nokia.com support pages
on the Internet.
Connecting the Mediamaster
& First-time installation 9
First-time installation general information 9
First-time installation 10
Switching on for the first time and start 10
Watching TV & listening to the radio 11
Navigating with the Navi Bars 11
The Menus in the Settings folder 11
Edit lists folder 12
Sorting channels 14
Programme Guide: EPG 14
Nokia Mediamaster software
end-user license 15
Technical specifications 16
Read this before using the Mediamaster
• Do not use any power supply other than the original unit delivered with the
Mediamaster.
• Allow 10 cm of space around the Mediamaster for sufficient ventilation.
• Do not cover the Mediamaster's ventilation openings with items such as
newspapers, tablecloths, curtains, etc.
• Do not place the Mediamaster on top of a heat-emitting unit.
• Do not place naked flame sources, such as lit candles, on the Mediamaster.
• Use a soft cloth and a mild solution of washing-up liquid to clean the casing.
• Do not expose the Mediamaster to the dripping or splashing of liquids.
• Do not place any objects filled with liquids, such as vases, on the Mediamaster.
• To give your Mediamaster extra protection, e.g. during a thunderstorm, we
recommend that you connect it via an external surge protection device.
• Do not connect or modify cables when the Mediamaster is plugged in.
• Do not remove the cover.
• Do not allow the unit to be exposed to hot, cold or humid conditions.
• Service should only be carried out at a Nokia Authorised Service Centre.
• Please note that the only way to isolate the Mediamaster completely from
the mains supply is to unplug the power supply!
GB 3
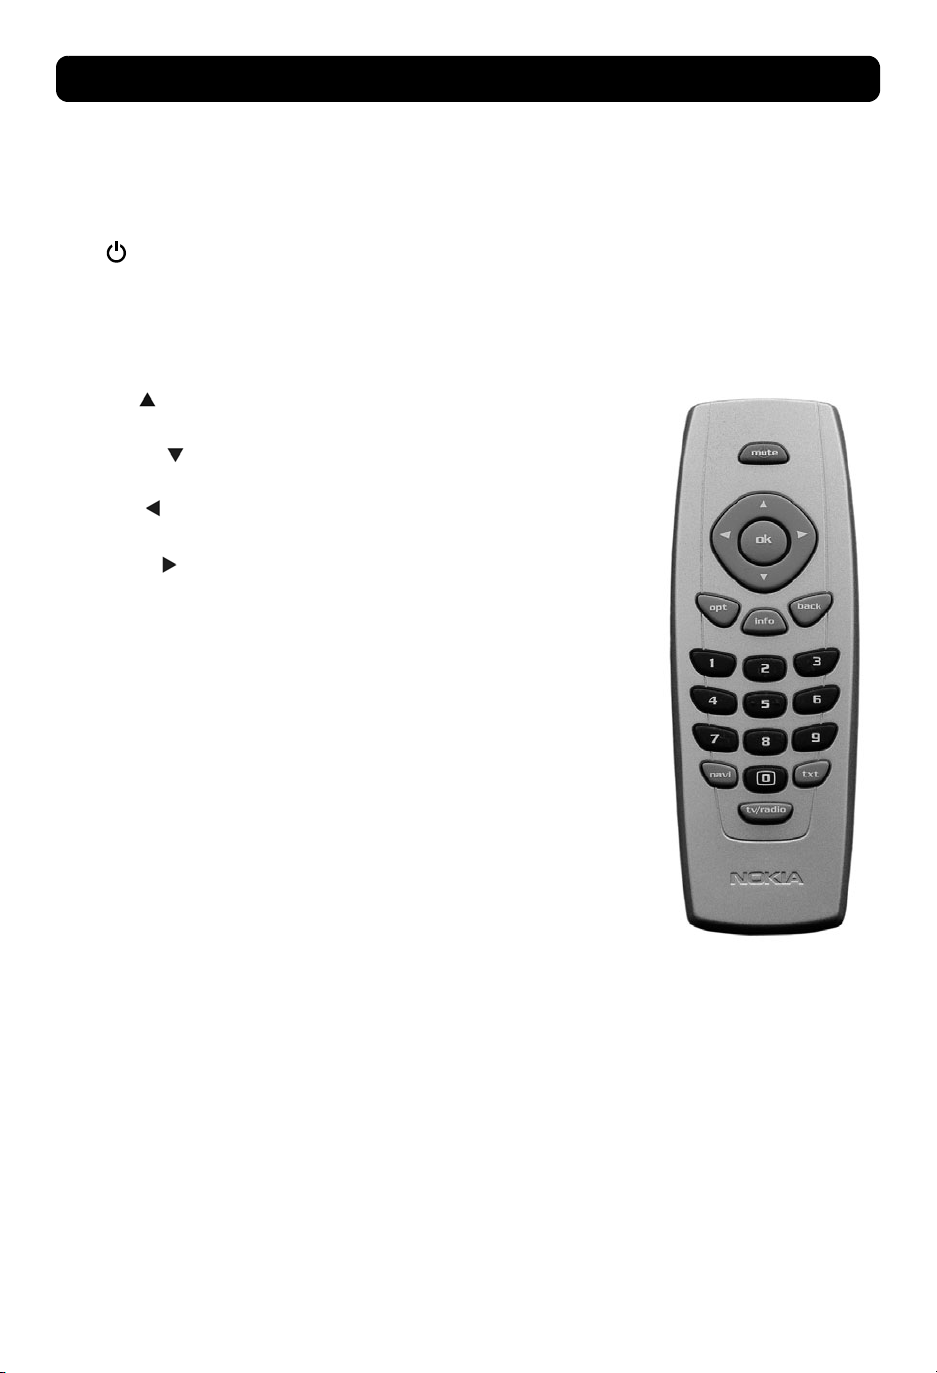
Remote control
This section describes how to operate the Mediamaster using the buttons on the remote control.
mute Press once to turn the sound off/on (mute/unmute).
Press and hold for a few seconds to switch the
Mediamaster into standby mode. In addition,
press this button to switch the Mediamaster on.
ok To confirm a selection.
To open Navi Bars
cursor up Move up in the menus and change to the next channel in
cursor down Move down in the menus and change to the previous
cursor left Move left/change settings in menus.
cursor right Move right/change settings in menus.
opt To display temporary settings (options) while watching TV.
info Three different functions:
back To go back one level at a time within menus.
0 - 9 To change the channel and to select individual menu
0 To toggle between the Mediamaster reception, or any
viewing mode.
channel in viewing mode.
Decrease the volume level in viewing mode.
Increase the volume level in viewing mode.
Activate Channel Filtering & Sorting in Navi Bars mode.
Pressing once will show current programme name.
Pressing twice will show information about the current
and next programme.
Pressing three times will give the 7-day programme guide
(EPG).
To close the Navi Bars.
Toggle between the current and previous channel.
options.
NOTE: If 0 is entered as the first digit, the TV Release
functionality is activated (see below).
other reception and your TV (depending on the TV model.)
navi To open and close the Navi Bars.
txt Press to enter Teletext (if available).
tv/radio Toggle between TV and radio mode.
GB 4
Connecting the Mediamaster
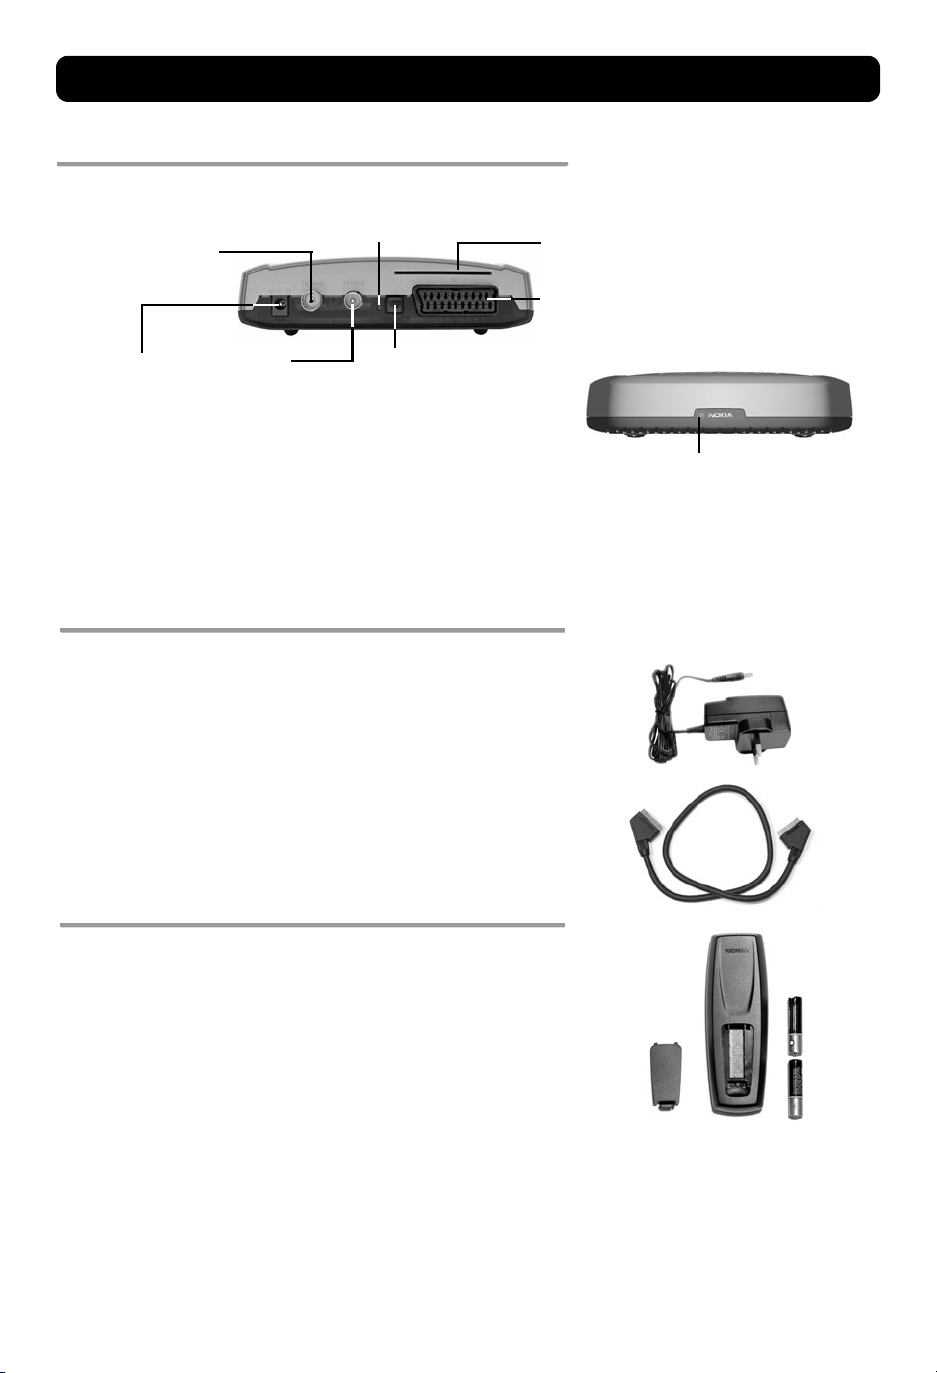
Front and Rear panel
TV aerial
for connection of the antenna.
Also, a Nokia active indoor antenna is
powered from this
connection *
Reset button
Slot
112 T = for a Viaccess smart card
120 T = for a Conax smart card
TV SCART socket * *
for connection to the TV SCART
DC in
for connecting the cable
from the external power
supply
TV/VCR
For connecting to the
RF socket on the TV,
or to a Video
recorder
* IMPORTANT. PLEASE SEE INFORMATION
ON PAGE 9 ON HOW TO SWITCH OFF THE
ANTENNA POWER.
Digital audio
Digital audio output
(TOS-link optical
connection)
A constant green light indicates that the Mediamaster is
switched ON.
A constant red light indicates standby mode.
The light flashes red when commands from the remote control
are received.
The light flashes green during software updates.
Connecting the Mediamaster
The box for your Mediamaster should contain the following items:
• the Mediamaster
• a remote control with 2 AAA batteries
• a SCART cable (fully connected; 1.0 m)
• an Introduction Guide
• a separate power supply
Preparing the remote control
Power supply
SCART
cable
• Remove the cover from the battery compartment at the bottom
of the remote control.
• Insert the 2 AAA (1.5 V) batteries as shown in the diagram,
taking care to observe the + and - markings indicated inside.
• Replace the cover.
* * The TV SCART Socket
When you connect other devices to this socket, always use a fully
connected SCART cable like the one supplied. There are SCART
cables available that do not have all the pins connected,
which could reduce picture quality if you were to use them.
GB 5
Connecting the Mediamaster
Common Connections
In this section, you will see some of the most common ways to
connect your equipment.
If you have problems with your connections and need help, contact
your retailer or Nokia Support.
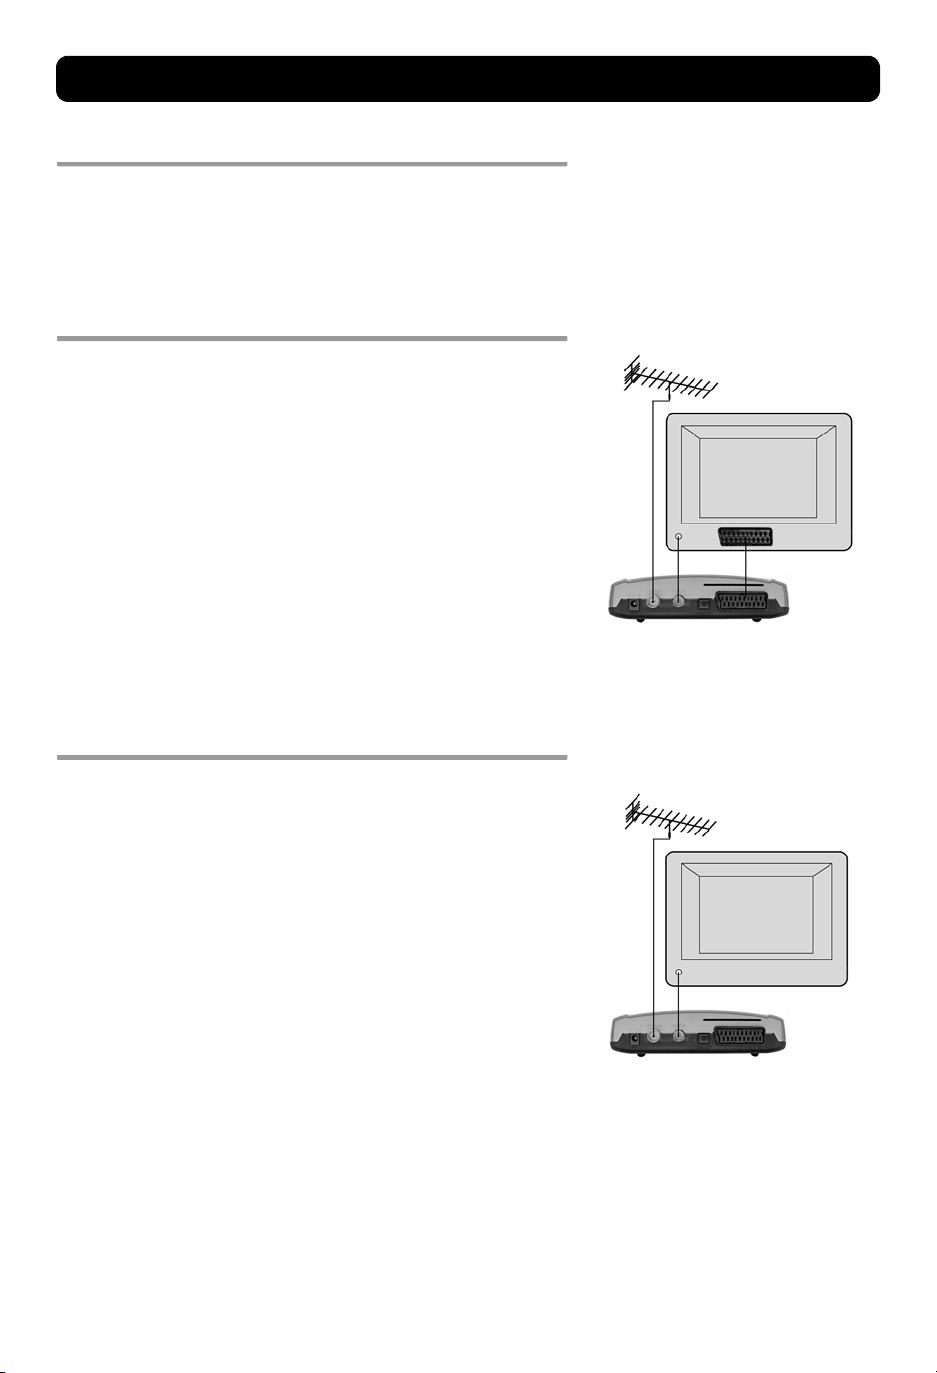
Connecting to the TV with SCART
• Connect the antenna cable to the TV aerial input on the
Mediamaster.
• Connect an RF cable from the TV/VCR output on the Mediamaster
to the antenna input socket on the TV.
• Connect a SCART cable between the main SCART socket on the TV
and the TV SCART socket on the Mediamaster.
• Switch on your TV, then plug in and switch on your Mediamaster.
You may need to select the AV (SCART) channel on your TV to
watch digital TV. In some cases, your TV will automatically
select this channel when the Mediamaster is switched on.
NOTE: The RF lead will need to be connected in order to watch
analogue channels (the old 1, 2, 3, 4, 5)
It is always advisable to consult the user guide that came
with your TV.
Connecting to the TV without SCART
• Remove the aerial lead from your TV and connect this to the TV
aerial input socket on the Mediamaster.
• Connect an RF cable from the TV/VCR output on the Mediamaster
to the RF input socket on the TV.
• Switch on your TV, plug in and switch on your Mediamaster.
• Select a programme number on the TV that is not currently used
for other TV channels.
• Follow the instructions in your TV manual to tune the TV to the
channel where you see the First-time installation menu from the
Mediamaster.
• Follow the instructions in your TV manual to store this channel.
• When the First-time installation menu is visible, press the ok
button on the Mediamaster's remote control to start the
installation procedure.
If the picture quality is bad, you can later change the pre-defined
UHF channel 43 to any other number between 21 and 69. You will
also have to tune your TV to the same (= the new) channel number.
GB 6
 Loading...