

Wichtige Sicherheitshinweise ..................... 2
Important safety notes................................ 4
Consignes de sécurité importantes ............ 6
Belangrijke veiligheidsinstrukties .............. 8
Avvertenze importanti per la sicurezza ... 10
Viktige sikkerhetsinstrukser...................... 12
Viktiga säkerhetsanvisningar.................... 14
Vigtige sikkerhedshenvisninger ............... 16
Tärkeitä turvallisuusohjeita ...................... 18
Pomembni varnostni predpisi ................... 20
Vane sigurnosne upute .................................
Dôleité bezpeènostné upozornenia.............
Dùleitá bezpeènostní upozornìní ................
Wa¿ne wskazówki bezpieczeñstwa ...............
Fontos biztonsági útmutatások .....................
Avisos de seguridad importantes ............. 32
Avisos de segurança importantes............. 34
УзмбнфйкЭò õðпдеЯоейт бóöÜëåéáò .............
Önemli güvenlik bilgileri ........................... 38
22
24
26
28
30
36

FOR YOUR OWN
SAFETY
Before putting the
cleaner into operation, be
sure to also read the
enclosed operating
instructions thoroughly
and keep them close at
hand for future reference.
The cleaner may only be
used by persons trained in
its use and expressly
authorised to use it.
GENERAL
Operation of this cleaner
is subject to the
applicable national
regulations.
In addition to these
operating instructions and
the binding regu
lations on accident
prevention
applicable in the country
of use, the generally
acknowledged technical
rules for safe and correct
working must also be
observed.
*)
4
For tested safety cleaners of dust clases L,M, H and B1, observe
the instructions in the operating manual.
Any method of work
endangering health or
safety is forbidden!
HEALTH-ENDANGERING
DUSTS
*
)
This cleaner is not suitable
for picking up health-
endangering dusts.
FIRE AND EXPLOSION
HAZARD
The following materials
must not be picked up
with the cleaner:
_ Hot materials (glowing
cigarettes, hot ashes,
etc.)
_ Inflammable, explosive
or aggressive fluids
(e.g. petrol, solvents,
acids, alkalines, etc.)
_ Inflammable, explosive
dusts (e.g. magnesium
or aluminium dust,
etc.).
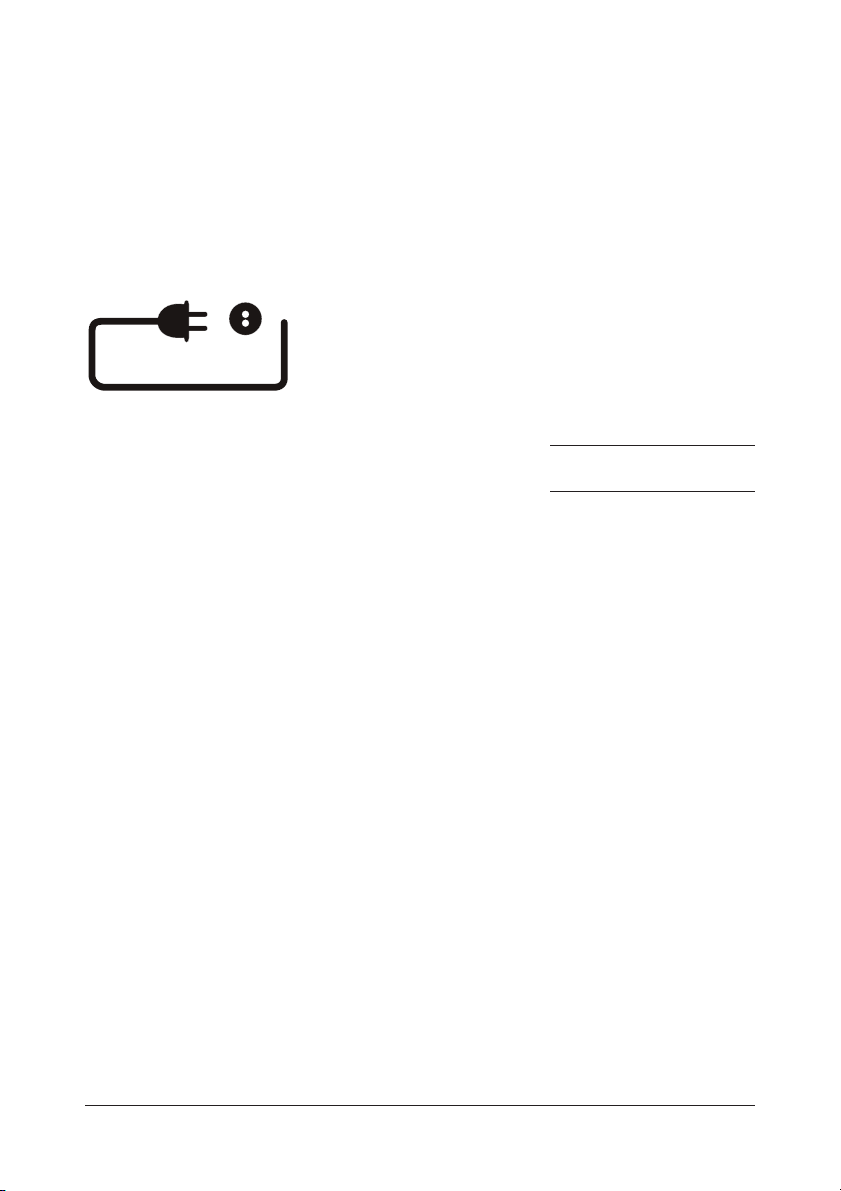
APPLIANCE PLUG
SOCKET
Before connecting any
appliance to the appliance
plug socket, the cleaner
must always be
switched off.
If appliances are
connected to the
appliance plug socket,
ensure that these
appliances are also
switched off when being
connected to the
appliance plug socket.
CAUTION!
The operating
instructions and the
safety precautions
contained therein must
be observed when
using appliances
connected to the
appliance plug socket
of the cleaner.
USING FOR THE FIRST
TIME
Before using the cleaner
for the first time, check
that it is in a good and
safe condition.
Plugs and connectors of
mains leads must be at
least splash water-proof.
Check the mains
connection and mains
plug.
Inspect the mains lead at
regular intervals for
damage or signs of
ageing. Use the cleaner
only
when the mains lead is in
a good and safe
condition.
(Damaged mains leads
present a danger of
electric shocks!)
Use the cleaner only with
an undamaged filter
element.
DURING OPERATION
Take care not to damage
the mains lead (e.g. by
driving over, pinching or
dragging). Pull out the
mains plug only directly at
the plug, i.e. not by
pulling at the mains lead.
Before picking up liquids,
the filter bag must be
removed and the function
of the float switch
checked.
If foaming is observed,
stop work immediately
and empty the tank.
MAINTENANCE AND
REPAIR
CAUTION!
Before cleaning and
servicing the cleaner,
always remove the
mains plug.
Carry out only
maintenance operations
described in these
operating instructions.
Use only original Wap
spare parts.
Do not make any
technical modifications to
the cleaner.
CAUTION!
Your safety could be
endangered as a result!
For all other
maintenance and repair
work, please contact
the Wap Service
department or an
authorised specialist
workshop!
ELECTRICAL
EQUIPMENT
Check the rated voltage
of the cleaner before
connecting it to the mains
power supply. Ensure
that the voltage specified
on the rating plate
corresponds to the local
mains voltage.
When connected to the
mains power supply with
a mains lead of type H 07
RN-F 3G 1.5 mm², the
cleaner may also be used
outdoors.
When using an extension
lead or replacing the
mains lead, the lead type
specified by the
manufacturer must always
be used.
We recommend that the
power supply to the
cleaner be connected via
an earth-leakage circuit
breaker which interrupts
the power supply either if
the earth leakage current
exceeds 30 mA for 30
ms, or it contains an
earthing test current
circuit.
When using an extension
lead, observe the
minimum cross-sections of
the leads:
Cable length Cross-section
m mm²
up to 20 1.5
20 to 50 2.5
Always arrange the
current-carrying parts
(plug sockets, plugs and
connectors) and lay
extension leads so that
the protection class of the
cleaner is maintained.
CAUTION!
Never spray the top
section of the cleaner
with water: Danger for
persons, danger of short
circuits.
The latest edition of the
IEC Regulations must be
observed.
5

INTERNET
ü
http://www.alto-online.com
ALTO HEADQUARTERS
Incentive International A/S
Kongens Nytorv 28
P .O .Bo x 2064
1013 Copenhagen K
T el.: +45 33 11 11 42
Fax: +45 33 93 46 36
E-mail: incentive@incentive-dk.com
SUBSIDIARIES
AUSTRALIA
ALTO Overseas Inc.
1B/8 Resolution Drive
P .O .Bo x 797
Caringbah, N.S.W. 2229
T el.: +61 2 95 24 61 22
Fax: +61 2 95 24 52 56
AUSTRIA
AL TO Österreich GmbH
Metzgerstr. 68
5101 Bergheim/Salzburg
T el.: +43 6624 5 64 00-14
Fax: +43 6624 5 64 00-55
E-mail: wap@salzburg.co.at
BRAZIL
Wap do Brasil Ltda.
Rua 25 de Agosto, 608
83323-260 Pinhais/Paraná
Tel.: +55 4 16 67 40 26
Fax: +55 4 16 67 47 99
E-mail: wap@wapltda.com.br
CANADA
AL TO Canada
24 Constellation Road
Rexdale
Ontario M9W 1K1
T el.: +1 416 6 75 58 30
Fax: +1 416 6 75 69 89
CROATIA
Wap ALTO Strojevi za čišćenje, d.o.o.
Siget 18a
10020 Zagreb
Tel.: +385 1 65 54 144
Fax: +385 1 65 54 112
E-mail: admin.wap@wap-sistemi.hr
CZECH REPUBLIC
ALTO Ceská Republika s.r.o.
Zateckých 9
14000 Praha 4
Tel.: +420 2 41 40 84 19
Fax: +420 2 41 40 84 39
E-mail: wap_p@mbox.vol.cz
Web: www.wap-alto.cz
DENMARK
AL TO Danmark A/S
Industrikvarteret
9560 Hadsund
T el.: +45 7218 21 00
Fax: +45 7218 21 05
E-mail: salg@alto-dk.com
ALT O Danmark A/S (food division)
Blytækkervej 2
9000 Aalborg
T el.: +45 7218 21 00
Fax: +45 7218 20 99
E-mail: scanio.technology@alto-dk.com
FRANCE
AL TO F rance S .A.
B.P. 44, 4 Place d’Ostwald
67036 Strasbourg Cedex 2
T el.: +33 3 88 28 84 00
Fax: +33 3 88 30 05 00
E-mail: info@alto-fr.com
GERMANY
Wap ALTO Group
ALTO Deutschland GmbH
Guido-Oberdorfer-Straße 2-8
89287 Bellenberg
Tel.: +49 0180 5 37 37 37
Fax: +49 0180 5 37 37 38
E-mail: info@wap-online.de
GREAT BRITAIN
ALTO Cleaning Systems
(UK) Ltd.
Bowerbank Way
Gilwilly Industrial Estate, Penrith
Cumbria CA11 9BN
Tel.: +44 1 7 68 86 89 95
Fax: +44 1 7 68 86 47 13
E-mail: sales@alto-uk.com
JAP AN
ALT O Danmark A/S Japan
Representative Office
5-2, Sakyo 1-Chome
631-0801 Nara City
T el.: +81 742 72 0555
Fax: +81 742 72 0555
E-mail: alto-jpn@nifty .com
NETHERLANDS
ALT O Nederland B.V .
Postbus 65
3370 AB HardinxveldGiessendam
Tel.: +31 18 46 67 72 00
Fax +31 18 46 67 72 01
E-mail: info@alto-nl.com
NEW ZEALAND
ALTO Overseas Inc.
5A Tarndale Grove
Albany Auckland
T el.: +64 9 414 4520
Fax: +64 9 414 4521
E-mail: altonz@ihug.co.nz
NORWAY
ALT O Norge A/S
Bjørnerudveien 24
1266 Oslo
T el.: +47 22 75 17 70
Fax: +47 22 75 17 71
E-mail: info@alto-no.com
SINGAPORE
ALT O DEN-SIN Singapore Pte Ltd.
No. 17 Link Road
Singapore 619034
T el.: +65 2 68 10 06
Fax: +65 2 68 49 16
E-mail: densin@singnet.com.sg
Web: www .densin.com
SLOVENIA
Wap ALTO čistilni sistemi, d.o.o.
Letališka 33
SLO-1110 Ljubljana
Tel.: +368 15 24 23 42
Fax: +368 15 40 42 94
E-mail: wap.prodaja@siol.com
SLOWAKIA
Wap ALTO čistiace systémy s.r.o.
Remeselnícka 42
83106 Bratislava-Rača
Tel.: +421 2 44 881 402
Fax: +421 2 44 881 395
E-mail: wap@gtinet.sk
Web: www.wap-alto.sk
SPAIN
ALTO Iberica S.L.
Calle de la Majada No. 4
28760 Tres Cantos - Madrid
Tel.: +34 91 8 04 62 56
Fax: +34 91 8 04 64 63
E-mail: info@alto-es.com
SWEDEN
ALTO Sverige AB
Aminogatan 18
431 04 Mölndal
Tel.: +46 3 17 06 73 00
Fax: +46 3 17 06 73 41
E-mail: info@alto-se.com
USA
AL TO Cleaning Systems, Inc.
12249 Nations Ford Road
28134 Pineville
T el.: +1 704 971 1240
Fax: +1 704 971 1241
E-mail: info@altocsi.com
ALT O U .S . Inc.
16253 Swingley Ridge Road, Suite 200
63017-1544 Chesterfield, Missouri
T el.: +1 636 530 0871
Fax: +1 636 530 0872
E-mail: info@alto-us.com
ALT O U .S . Inc.
2100 Highway 265
72764 Springdale, Arkansas
T el.: +1 479 750 1000
Fax: +1 479 756 0719
E-mail: info@alto-us.com
ALT O U .S . Inc.
1100 Haskins Road
43402 Bowling Green
T el.: +1 419 352 75 11
Fax: +1 419 353 71 87
E-mail: info@alto-us.com
65285 020403
SB Station
SB Station Marathon
SB Tandem
SB Tandem Marathon
Betriebsanleitung ................................ 2
Operating Instructions ........................ 8
Notice d'utilisation ............................ 14
Gebruiksaanwijzing ........................... 20
Istruzioni sull'uso ............................... 26
Driftsinstruks ..................................... 32
Bruksanvisning .................................. 38
Driftsvejledning ................................. 44
Käyttöohje ......................................... 50
Navodilo za uporabo ..............................56
Uputstvo za rad .......................................62
Prevádzkový návod ................................. 68
Provozní návod ....................................... 74
Instrukcja obsługi ...................................80
Kezelési utasítás .....................................86
Instrucciones de manejo.................... 92
Instruções de operação ..................... 98
ΟδηγίεΟδηγίε
Οδηγίε
ΟδηγίεΟδηγίε
Ýþletme kýlavuzu................................110
ς λς λ
ς λ
ς λς λ
ειτειτ
ειτ
ειτειτ
οο
υρυρ
γίαγία
ςς
ο
υρ
οο
υρυρ
..........................................................
γία
ς
.............................
γίαγία
ςς
..........................................................
11
00
1
0
11
00
44
4
44

EG - Konformitätserklärung
Wap Reinigungssysteme GmbH & Co.
Guido-Oberdorfer-Straße 2-8
D-89287 Bellenberg
Erzeugnis:
Typ:
Beschreibung:
Die Bauart des Gerätes entspricht
folgenden einschlägigen
Bestimmungen:
Angewendete harmonisierte
Normen:
Angwendete nationale Normen und
technische Spezifikationen:
SB SaugStation
SB Station, SB Station Marathon
SB Tandem, SB Tandem Marathon
230 V~, 50 Hz
EG-Maschinenrichtlinie 98/37/EG
EG-Niederspannungsrichtlinie 73/23/EG
EG-Richtlinie EMV 89/336/EG
EN 292
EN 60335-1 und 60335-1 A6
EN 60335-2-69
EN 55014-1, EN 55014-2, EN 61000-3-2
DIN EN 60335-1
IEC 60335-2-69
Déclaration de conformité CE
Wap Reinigungssysteme GmbH & Co.
Guido-Oberdorfer-Straße 2-8
D-89287 Bellenberg
Produit:
Type:
Description:
La construction de l’appareil est
conforme aux réglementations
afférentes suivantes:
Normes harmonisées appliquées:
Normes nationales et spécifications
techniques appliquées:
Aspirateur
SB Station, SB Station Marathon
SB Tandem, SB Tandem Marathon
230 V~, 50 Hz
Directive CE relative aux machines 98/37/EG
Directive CE relative à basse tension 73/23/EG
Directive CE EMV 89/336/EG
EN 292
EN 60335-1, 60335-1 A6
EN 60335-2-69
EN 55014-1, EN 55014-2, EN 61000-3-2
DIN EN 60335-1
IEC 60335-2-69
ppa. Rau, Dipl. Ing. (FH)
Leitung Forschung und Entwicklung
EU Declaration of Conformity Dichiarazione di conformità CE
Wap Reinigungssysteme GmbH & Co.
Guido-Oberdorfer-Straße 2-8
D-89287 Bellenberg
Product:
Type:
Description:
The design of the unit corresponds
to the following pertinent
regulations:
Applied harmonised standards:
Applied national standards and
technical specifications:
ppa. Rau, Dipl. Ing. (FH)
Head of Research and Development
EG-Verklaring van overeenstemming
Wap Reinigungssysteme GmbH & Co.
Guido-Oberdorfer-Straße 2-8
D-89287 Bellenberg
Produkt:
Type:
Beschrijving:
De constructie van het apparaat
voldoet aan de volgende van
toepassing zijnde voorschriften:
Toegepaste geharmoniseerde
normen:
Toegepaste nationale normen en
technische specificaties:
ppa. Rau, Dipl. Ing. (FH)
Chef onderzoek en ontwikkeling
Bellenberg, 23.06.1999
Self Service Vacuum Cleaner
SB Station, SB Station Marathon
SB Tandem, SB Tandem Marathon
230 V~, 50 Hz
EC Machine Directive 98/37/EG
EC Low-voltage Directive 73/23/EG
EC EMV Directive 89/336/EG
EN 292
EN 60335-1, 60335-1 A6
EN 60335-2-69
EN 55014-1, EN 55014-2, EN 61000-3-2
DIN EN 60335-1
IEC 60335-2-69
Bellenberg, 23.06.1999
SB SaugStation
SB Station, SB Station Marathon
SB Tandem, SB Tandem Marathon
230 V~, 50 Hz
EG-machinerichtlijn 98/37/EG
EG-laagspanningsrichtlijn 73/23/EG
EG-richtlijn EMV 89/336/EG
EN 292
EN 60335-1, 60335-1 A6
EN 60335-2-69
EN 55014-1, EN 55014-2, EN 61000-3-2
DIN EN 60335-1
IEC 60335-2-69
Bellenberg, 23.06.1999
ppa. Rau, Dipl. Ing. (FH)
Direction Recherche et Développement
Wap Reinigungssysteme GmbH & Co.
Guido-Oberdorfer-Straße 2-8
D-89287 Bellenberg
Prodotto:
Tipo:
Descrizione:
La costruzione dell' apparecchio è
conforme alle seguenti direttive
specifiche:
Norme armonizzate applicate:
Norme nazionali applicate e
specifiche tecniche:
ppa. Rau, Dipl. Ing. (FH)
Direttore Ricerca e Sviluppo
Atestado de conformidad de la UE
Wap Reinigungssysteme GmbH & Co.
Guido-Oberdorfer-Straße 2-8
D-89287 Bellenberg
Producto:
Modelo:
Descripción:
La construcción de la máquina
corresponde a las siguientes normas
específicas:
Normas armonizadas aplicadas:
Normas nacionales aplicadas y
especificaciones técnicas:
ppa. Rau, Dipl. Ing. (FH)
Director Investigación y Desarrollo
Bellenberg, 23.06.1999
Aspiratore
SB Station, SB Station Marathon
SB Tandem, SB Tandem Marathon
230 V~, 50 Hz
Direttiva CE sulle macchine 98/37/EG
Direttiva CE sulla bassa tensione 73/23/EG
Direttiva CE sulla compatibilità
elektromagnetica 89/336/EG
EN 292
EN 60335-1, 60335-1 A6
EN 60335-2-69
EN 55014-1, EN 55014-2, EN 61000-3-2
DIN EN 60335-1
IEC 60335-2-69
Bellenberg, 23.06.1999
Aspirador
SB Station, SB Station Marathon
SB Tandem, SB Tandem Marathon
230 V~, 50 Hz
R. de la UE para máquinas 98/37/EG
R. de la UE para baja tensión 73/23/EG
R. de la UE para la compatibilidad electromagnética 89/336/EG
EN 292
EN 60335-1 , 60335-1 A6
EN 60335-2-69
EN 55014-1, EN 55014-2, EN 61000-3-2
DIN EN 60335-1
IEC 60335-2-69
Bellenberg, 23.06.1999

Wap Reinigungssysteme GmbH & Co.
Guido-Oberdorfer-Straße 2-8
D-89287 Bellenberg
Produto:
Modelo:
Descrição:
A construção da máquina
corresponde às seguintes normas
específicas:
Normas harmonizadas aplicadas:
Normas nacionais aplicadas e
especificações técnicas:
ppa. Rau, Dipl. Ing. (FH)
Diretor de Pesquisas e Desenvolvimento
Atestado de
conformidade da UE
Aspirador
SB Station, SB Station Marathon
SB Tandem, SB Tandem Marathon
230 V~, 50 Hz
Directiva UE para máquinas 98/37/EG
Directiva UE para baixa tensão 73/23/EG
Directiva para a compatibilidade
electromagnética 89/336/EG
EN 292
EN 60335-1, 60335-1 A6
EN 60335-2-69
EN 55014-1, EN 55014-2, EN 61000-3-2
DIN EN 60335-1
IEC 60335-2-69
Bellenberg, 23.06.1999
∆ήλωση ανταπόκρισης ΕΟΚ
Wap Reinigungssysteme GmbH & Co.
Guido-Oberdorfer-Straße 2-8
D-89287 Bellenberg
Προϊόν:
Τύπος:
Περιγραφή:
Ο κατασκευαστικός τύπος της
συσκευής ανταποκρίνεται στους
ακόλουθους σχετικούς
κανονισµούς:
Εφαρµοσθείσες εναρµονισµένες
προδιαγραφές:
Εφαρµοσθείσες εθνικές
προδιαγραφές και τεχνικοί
προσδιορισµοί:
∆ιπλ. µηχ. A. Rau
Υπεύθυνος ερευνητικού τµήµατος
SB SaugStation
SB Station, SB Station Marathon
SB Tandem, SB Tandem Marathon
230 V~, 50 Hz
Οδηγία περί µηχανών ΕΟΚ 98/37/ΕΟΚ
Οδηγία χαµηλών τάσεων ΕΟΚ 73/23/ΕΟΚ
Οδηγία περί ηλεκτροµαγνητικής
συµβατότητας 89/336/ΕΟΚ
EN 292
EN 60335-1, 60335-1 A6
EN 60335-2-69
EN 55014-1, EN 55014-2, EN 61000-3-2
DIN EN 60335-1
IEC 60335-2-69
Bellenberg, 23.06.1999
EF-konformitetserklæring
Wap Reinigungssysteme GmbH & Co.
Guido-Oberdorfer-Straße 2-8
D-89287 Bellenberg
Produkt:
Type:
Beskrivelse:
Apparatets konstruksjonstype er i
samsvar med følgende gjeldende
bestemmelser:
Anvendte harmoniserte standarder:
Anvendte nasjonale standarder og
tekniske spesifikasjoner:
ppa. Rau, Dipl. Ing. (FH)
Leder forskning og utvikling
EF-overensstemmelsesattest
Wap Reinigungssysteme GmbH & Co.
Guido-Oberdorfer-Straße 2-8
D-89287 Bellenberg
Produkt:
Type:
Beskrivelse:
Konstruktionen af dette apparat
opfylder følgende gældende
bestemmelser:
Anvendte harmoniserede
standarder:
Anvendte tyske standarder og
tekniske specifikationer:
Suger
SB Station, SB Station Marathon
SB Tandem, SB Tandem Marathon
230 V~, 50 Hz
SQ 450, SQ 550, SQ 650, SQ 651
IP X4 220 - 230 V~
EF-maskindirektiv 98/37/EEC
EF-lavspenningsdirektiv 73/23/EEC
EF-direktiv elektromagnetisk
kompatibilitet 89/336/EEC
EN 292
EN 60335-1, 60335-1 A6
EN 60335-2-69
EN 55014-1, EN 55014-2, EN 61000-3-2
DIN EN 60335-1
IEC 60335-2-69
Suger
SB Station, SB Station Marathon
SB Tandem, SB Tandem Marathon
230 V~, 50 Hz
EF-maskindirektiv 98/37/EØF
EF-lavspændingsdirektiv 73/23/EØF
EF-direktiv vedr. elektromagnetisk
fordragelighed 89/336/EØF
EN 292
EN 60335-1, 60335-1 A6
EN 60335-2-69
EN 55014-1, EN 55014-2, EN 61000-3-2
DIN EN 60335-1
IEC 60335-2-69
Bellenberg, 23.06.1999
Wap Reinigungssysteme GmbH & Co.
Guido-Oberdorfer-Straße 2-8
D-89287 Bellenberg
Produkt:
Typ:
Beskrivning:
Apparatens konstruktion motsvarar
följande tillämpliga bestämmelser:
Tillämpade harmoniserade normer:
Tillämpade nationella normer och
tekniska specifikationer:
ppa. Rau, Dipl. Ing. (FH)
Ledare för forskning och utveckling
EY-Vaatimustenmukaisuusvakuutus
Wap Reinigungssysteme GmbH & Co.
Guido-Oberdorfer-Straße 2-8
D-89287 Bellenberg
Tuote:
Tyyppi:
Kuvaus:
Tämän laitteen rakenne vastaa
seuraavia määräyksiä:
Käytetyt harmonisoidut normit:
Käytetyt kansalliset normit ja
tekniset spesifikaatiot:
EG-försäkran om
överensstämmelse
Dammsugare
SB Station, SB Station Marathon
SB Tandem, SB Tandem Marathon
230 V~, 50 Hz
EG-maskindirektiv 98/37/EG
EG-lågspänningsdirektiv 73/23/EG
EG-direktiv EMK 89/336/EG
EN 292
EN 60335-1, 60335-1 A6
EN 60335-2-69
EN 55014-1, EN 55014-2, EN 61000-3-2
DIN EN 60335-1
IEC 60335-2-69
Bellenberg, 23.06.1999
SB SaugStation
SB Station, SB Station Marathon
SB Tandem, SB Tandem Marathon
230 V~, 50 Hz
EY-konedirektiivi 98/37/EG
EY-pienjännitedirektiivi 73/23/EG
EY-direktiivi EMV 89/336/EG
EN 292
EN 60335-1, 60335-1 A6
EN 60335-2-69
EN 55014-1, EN 55014-2, EN 61000-3-2
DIN EN 60335-1
IEC 60335-2-69
ppa. Rau, Dipl. Ing. (FH)
Leder forskning og udvikling
Bellenberg, 23.06.1999
ppa. Rau, Dipl. Ing. (FH)
Kehitys- ja tutkimusjohtaja
Bellenberg, 23.06.1999

1
5
B
7
8
A
9
6
1
2
5
10
3
11
klopfen!
Nicht
6
4
2 3 4
343
643 (Tandem)
473
ø12

5
AB
6
1
2
3
2
7
8
11
14
130 cm
9
10
12 13
15
klopfen!
Nicht

READ THE OPERATING
INSTRUCTIONS AND
OBSERVE THE SAFETY
NOTES!
INTENDED USE
The SB Station is a selfservice vacuum cleaner
suitable for picking up dry,
non-flammable dusts
normally encountered
when cleaning the inside
of motor vehicles. Liquids
and health-endangering
dusts must not be picked
up.
DESCRIPTION
(FIG. 1)
1 Hose retractor
2 Coin verifier
3 Suction hose fitting
4 Crevice nozzle
5 Suction unit
6 Dirt tank
7 Main switch
8 Adapter ring
9 Lock for coin verifier
slot
10 Distance basket
11 Cloth insert filter
SETTING UP THE
STATION
• Release the SB Station
from the pallet.
NOTE!
Do not throw the
packaging carton
away. The drilling
pattern for mounting
the SB Station is
printed on the carton.
(Fig. 2)
• Open the door.
• Take the suction hoses
out of the housing.
• Lift the suction unit
with the brackets and
secure in place.
(Fig. 3).
• Take out the dirt tank
and the accessories in
the tank.
• Mount the SB Station
in the intended
position using the
installation materials
supplied.
NOTE!
Ensure that the SB
Station is mounted on
flat, level ground.
If necessary:
• Level using shims!
• Check that the door
opens and closes
easily!
Have the electrical
connection made by a
qualified electrician:
• Lay the lead (above 15
m, use lead with 2.5
mm² cross-section)
along the bottom of
the SB Station. Lay the
lead into the terminal
box and connect as
shown in the circuit
diagram.
FITTING THE
SUCTION HOSES
SB Station and
SB Sation Marathon:
• Insert the suction hose
from the outside
through the hose
opening (approx. 80
cm, measured from
the inner edge of the
hose opening to the
end of the suction
hose).
(Fig. 4)
SB Tandem and
SB Tandem Marathon:
First fit the suction hose
for cleaner A (Fig. 5).
• Insert the suction hose
from the outside
through the hose
opening. For
- Cleaner A approx.
80 cm
- Cleaner B approx.
80 cm
measured from the
inner edge of the hose
opening to the end of
the suction hose.
(Fig. 4)
8

FITTING THE
CONNECTING
ELBOW, HOSE
HOLDER AND
CREVICE NOZZLE
• Fit the adapter ring
(Fig. 1, No. 8) over the
connection on the dirt
tank.
NOTE!
The connecting elbow
opening should point
upwards.
(Fig. 5)
• Screw adapter fitting
(Fig. 6, Item 2) approx.
35 mm onto suction
hose (Fig. 6, Item 1).
Plug adapter fitting
with suction hose into
connecting elbow (Fig.
6, Item 3).
NOTE!
Push the suction hose
into the housing only
far enough that the
suction unit can still
swing freely when the
suction hose is
connected. This is
important so that the
suction unit fits airtight onto the dirt
tank when lowered.
• Secure the suction
hose with the metal
bracket.
(Fig. 7).
• Secure the hose
bracket to the suction
hose approx. 1.30 m
from the end of the
hose. (Fig. 8).
• Remove screw from
clamping piece and
detach rope end.
Guide the rope
through the eye at
the hose holder. Hook
up rope end to
clamping piece and
secure with screw.
..
(Fig. 9)
.
..
• Screw the crevice
nozzle onto the end
of the hose (left-hand
thread).
OPTIONAL
ACCESSORIES
Hose holder
It is also possible to
operate the SB Station
without the hose
retractor.
Secure the hose holder to
the existing bores with
screws.
After work, the hose is
simply placed into the
hose holder. (Fig. 10).
Art. No. 43064
CAUTION!
Either the hose holder
or the hose bracket
should be installed as
otherwise the suction
hose handling is
restricted.
Electronic coin tester
Allows the SB Station to
be operated with different
coins.
On request.
STARTING
OPERATION
• Place the dirt tank into
the station and lower
the suction unit.
• Fit the suction hose
with the adapter ring
over the connection of
the dirt tank.
Open the cover for the
coin tester tube:
• Pull the knob and turn
through 90° - the
cover can now be
opened (Fig. 11).
• Pull up the cover until
it is horizontal and
secure with the flap
holder (Fig. 12).
• Set the desired
running time per coin
at rotary knob 1 of the
timer. (Fig. 13):
1 = 1 minute
10 = 10 minutes
(Rotary knobs 2-4 are
required only with
electronic coin tester)
Close the cover for the
coin tester tube:
• Push down the cover
and turn the knob
through 90° - the
latching pin engages.
(Continued -->)
9

It is possible to secure
access to the coin box
with a padlock (not
included in the scope of
supply) (Fig. 14).
• Turn the main switch
to position ‘I’.
(Fig. 1, item 9)
THE FOLLOWING
FUNCTIONS ARE
ACTIVE WHEN THE
STATION IS
SWITCHED ON
SB-Station
SB-Station Marathon
suction turbine
switches off
• Manual test function:
Pressing the button
‘Test’ (Fig. 13) on the
timer pcb switches on
the suction turbines
briefly.
To check the function,
the suction turbine
starts briefly. If the
turbine does not start,
remedy the cause -->
See section
"Troubleshooting".
• Insert a coin
• The pulse counter
counts the number of
coins inserted
• At the end of the
preset time, the
suction turbine
switches off
• Manual test function:
Pressing the button
‘Test’ (Fig. 13) on the
timer pcb switches on
the sucton turbine
briefly.
SB-Tandem
SB-TandemMarathon
• Insert a coin
• The push-buttons on
the column start to
flash.
• Select the left-hand or
right-hand hose by
pressing the
corresponding button.
• The push-button of
the selected side now
lights up continuously
and the suction
turbine starts to run.
• The pulse counter
counts the number of
coins inserted
• At the end of the
preset time, the
SWITCHING OFF
• Turn the main switch
on the inside of the
column to position ‘0’.
MAINTENANCE
• Weekly / when
necessary:
Cleaning and changing
the cloth insert filter
(Fig. 15)
• Turn the main switch
to position „0“.
• Before emptying the
dirt tank, hit it gently
with the palm of your
hand so that dirt
drops from the cloth
insert filter into the
dirt tank.
• Lift the suction unit
with the bracket and
secure it (Fig. 3).
• Remove suction hose
with adapter ring
from the connection
of the dirt tank.
• Remove the dirt tank.
• Remove the distance
basket.
• Remove the cloth
insert filter, brush it
10

with a soft brush and
check that it is not
damaged.
NOTE:
The cloth insert filter
can also be cleaned by
dipping it in a slightly
soapy solution at
30(C. Be careful not to
damage the surface of
the cloth insert filter
and allow it to dry
thoroughly after
washing it.
• If necessary, replace a
damaged cloth insert
filter with a new one.
Dispose of damaged
cloth insert filter
according to
regulations.
• Insert cloth insert filter
in the dirt tank in such
a way that the „Do
not hit“ label is in
front of the suction
opening of the dirt
tank.
• Insert the distance
basket in the cloth
insert filter.
• Lower the suction
unit.
NOTE:
Ensure that the wire
ring of the cloth insert
filter is pulled over the
edge of the dirt tank
and that the dirt tank
is fitted air-tight on to
the suction unit.
Cleaning the coin tester
To ensure trouble-free
functioning of the coin
tester, the coin slot
should be cleaned at
regular intervals with a
cloth soaked in white
spirit.
IMPORTANT!
Never oil the coin
tester!
For re-orders:
Cloth insert filter
Art. No. 34106
11

SPARE PARTS
GUARANTEE
Suction hose complete
Art. No. 64084
Crevice nozzle
Art. No. 64386
TROUBLESHOOTING
Fault
Our general terms and
conditions apply to the
guarantee and warranty.
Changes in line with
technical innovation
reserved.
Cause
Remedy
‡ Cleaner does not start
‡ Reduced suction
power
‡ Hose retractor
defective
12
> Fuse or r.c.c.b of the
power supply tripped
> Coin tester soiled or
defective
> Suction turbine, push-
button or timer
defective
> Suction hose clogged
> Cloth insert filter
soiled
> Dirt tank full
> Retractor line broken
• Replace fuse or reset
r.c.c.b
• Clean or replace coin
tester
• Call Service
• Clean suction hose
• See section "Clean/
replace cloth insert
filter"
• Empty dirt tank
• Call Service

TECHNICAL DATA
SB-Station SB-Tandem
SB Station Marathon SB Tandem Marathon
Voltage V/Hz 230/50-60Hz 230/50-60Hz
Power consumption, max. W 1400 2800 (Tandem)
1200 (Marathon) 2400 (Tandem GB,CH)
2000 (Tandem DK)
2400 (Tandem Marathon)
Fuse A 16 16
13 (GB,CH) 13 (GB,CH)
10 (DK) 10 (DK)
Volumetric flow (air), max.. l/min. 4000 2 x 4000 (Tandem)
4200 (Marathon) 2 x 3600 (Tandem GB,CH)
2 x 3000 (Tandem DK)
2 x 4200 (Tandem Marathon)
Vacuum, max. Pa 23500 23500
25000 (Marathon) 25000 (Marathon)
Sound level 1 m from the
Station dB(A) 75 75
Protection class I I
Type of protection IP X4 IP X4
Interference suppression level N N
Suction hose - length m 5 2 x 5
- diameter mm 50 50
Tank volume l 30 2 x 30
Depth m 0.83 1.19
Width m 0.55 0.55
Height m 2.04 2.04
Weight, complete kg 90 115
13

INTERNET
http://www.alto-online.com
ALTO HEADQUARTERS
Incentive International A/S
Kongens Nytorv 28
P.O.Box 2064
1013 Copenhagen K
T el.: +45 33 11 11 42
Fax: +45 33 93 46 36
E-mail: incentive@incentive-dk.com
SUBSIDIARIES
AUSTRALIA
ALTO Overseas Inc.
1B/8 Resolution Drive
P.O.Box 797
Caringbah, N.S.W. 2229
Tel.: +61 2 95 24 61 22
Fax: +61 2 95 24 52 56
AUSTRIA
ALTO Österreich GmbH
Metzgerstr. 68
5101 Bergheim/Salzburg
Tel.: +43 6624 5 64 00-14
Fax: +43 6624 5 64 00-55
E-mail: wap@salzburg.co.at
BRASIL
Wap do Brasil Ltda.
Rua 25 de Agosto, 608
83323-260 Pinhais/Paraná
Tel.: +55 4 16 67 40 26
Fax: +55 4 16 67 47 99
E-mail: wap@wapltda.com.br
CANADA
ALTO Canada
24 Constellation Road
Rexdale
Ontario M9W 1K1
Tel.: +1 41 66 75 58 30
Fax: +1 41 66 75 69 89
CROATIA
Wap ALTO Strojevi za čišćenje, d.o.o.
Siget 18a
10020 Zagreb
Tel.: +385 16 55 41 44
Fax: +385 16 55 41 12
CZECH REPUBLIC
ALTO Ceská Republika s.r.o.
Zateckých 9
14000 Praha 4
Tel.: +420 2 41 40 84 19
Fax: +420 2 41 40 84 39
E-mail: wap_p@mbox.vol.cz
Web: www.wap-alto.cz
DENMARK
AL TO Danmark A/S
Industrikvarteret
9560 Hadsund
Tel.: +45 72 18 21 00
Fax: +45 72 18 21 05
E-mail: service@alto-dk.com
AL TO Danmark A/S (food division)
Blytækkervej 2
9000 Aalborg
Tel.: +45 72 18 21 00
Fax: +45 72 18 20 99
E-mail: scanio.technology@alto-dk.com
FRANCE
ALTO France S.A.
B.P. 44, 4 Place d’Ostwald
67036 Strasbourg Cedex 2
Tel.: +33 3 88 28 84 00
Fax: +33 3 88 30 05 00
E-mail: info@alto-fr.com
GERMANY
Wap ALTO Group
ALTO Deutschland GmbH
Guido-Oberdorfer-Straße 2-8
89287 Bellenberg
Tel.: +49 0180 5 37 37 37
Fax: +49 0180 5 37 37 38
E-mail: info@wap-online.de
GREAT BRITAIN
ALTO Cleaning Systems
(UK) Ltd.
Bowerbank Way
Gilwilly Industrial Estate, Penrith
Cumbria CA11 9BN
Tel.: +44 1 7 68 86 89 95
Fax: +44 1 7 68 86 47 13
E-mail: sales@alto-uk.com
HONG KONG
ALTO Hong Kong
RM 602, Tower B,
Regent Ctr.
70, Ta Chuen Ping Street
Kwai Chung
Hong Kong
Tel.: +852 26 10 10 42
Fax: +852 26 10 10 47
E-mail: waphk@netvigator.com
JAPAN
ALTO Danmark A/S Japan
Representative Office
Naruse-build 4F
7-2 Shinbashi 1-Chome, Minato-Ku
J-T okyo 105-004
Tel.: +81 3 35 69 38 07
Fax: +81 3 35 69 38 08
E-mail: alto-jpn@nifty.com
NETHERLANDS
Wap ALTO Nederland B.V.
Postbus 65
3370 AB HardinxveldGiessendam
Tel.: +31 18 46 67 72 00
Fax +31 18 46 67 72 01
E-mail: info@alto-nl.com
NORWAY
ALTO Norge A/S
Bjørnerudveien 24
1266 Oslo
Tel.: +47 22 75 17 70
Fax: +47 22 75 17 71
E-mail: info@alto-no.com
SINGAPORE
ALTO DEN-SIN Singapore Pte Ltd.
No. 17 Link Road
Singapore 619034
Tel.: +65 2 68 10 06
Fax: +65 2 68 49 16
E-mail: densin@singnet.com.sg
Web: www.densin.com
SLOVENIA
Wap čistilni sistemi, d.o.o.
Letališka 33
SLO-1110 Ljubljana
Tel.: +368 15 24 23 06
Fax: +368 15 40 42 94
E-mail: wap.prodaja@siol.com
SLOWAKIA
Wap čistiace systémy spol. s.r.o.
Vajnorská 135
83237 Bratislava
Tel.: +421 7 44 25 96 64
Fax: +421 7 44 25 79 44
E-mail: wap@gtinet.sk
Web: www.wap-alto.sk
SPAIN
ALTO Iberica S.L.
Calle de la Majada No. 4
28760 Tres Cantos - Madrid
Tel.: +34 91 8 04 62 56
Fax: +34 91 8 04 64 63
E-mail: info@alto-es.com
SWEDEN
ALTO Sverige AB
Aminogatan 18
S-431 04 Mölndal
Tel.: +46 3 17 06 73 00
Fax: +46 3 17 06 73 41
E-mail: info@alto-se.com
SWITZERLAND
ALTO Schweiz AG
Allmendstr. 14
5612 Villmergen
Tel.: +41 56 618 85 00
Fax: +41 56 618 85 10
E-mail: info@alto-ch.com
USA
ALTO U.S.Inc
16253 Swingley Ridge Road
Suite 200
Chesterfield, MO 63017-1544
Tel.: +1 63 65 30 08 71
Fax: +1 63 65 30 08 72
E-mail: info@alto-us.com
ALTO U.S.Inc
2100 Highway 265
Springdale, Arkansas 72764
Tel.: +1 50 17 50 10 00
Fax: +1 50 17 56 07 19
E-mail: info@alto-us.com
ALTO U.S.Inc
1100 Haskins Road
Bowling Green, Ohio 43402
Tel.: +1 41 93 52 75 11
Fax: +1 41 93 53 71 87
E-mail: info@alto-us.com
64525 / 031101
 Loading...