

Page 1
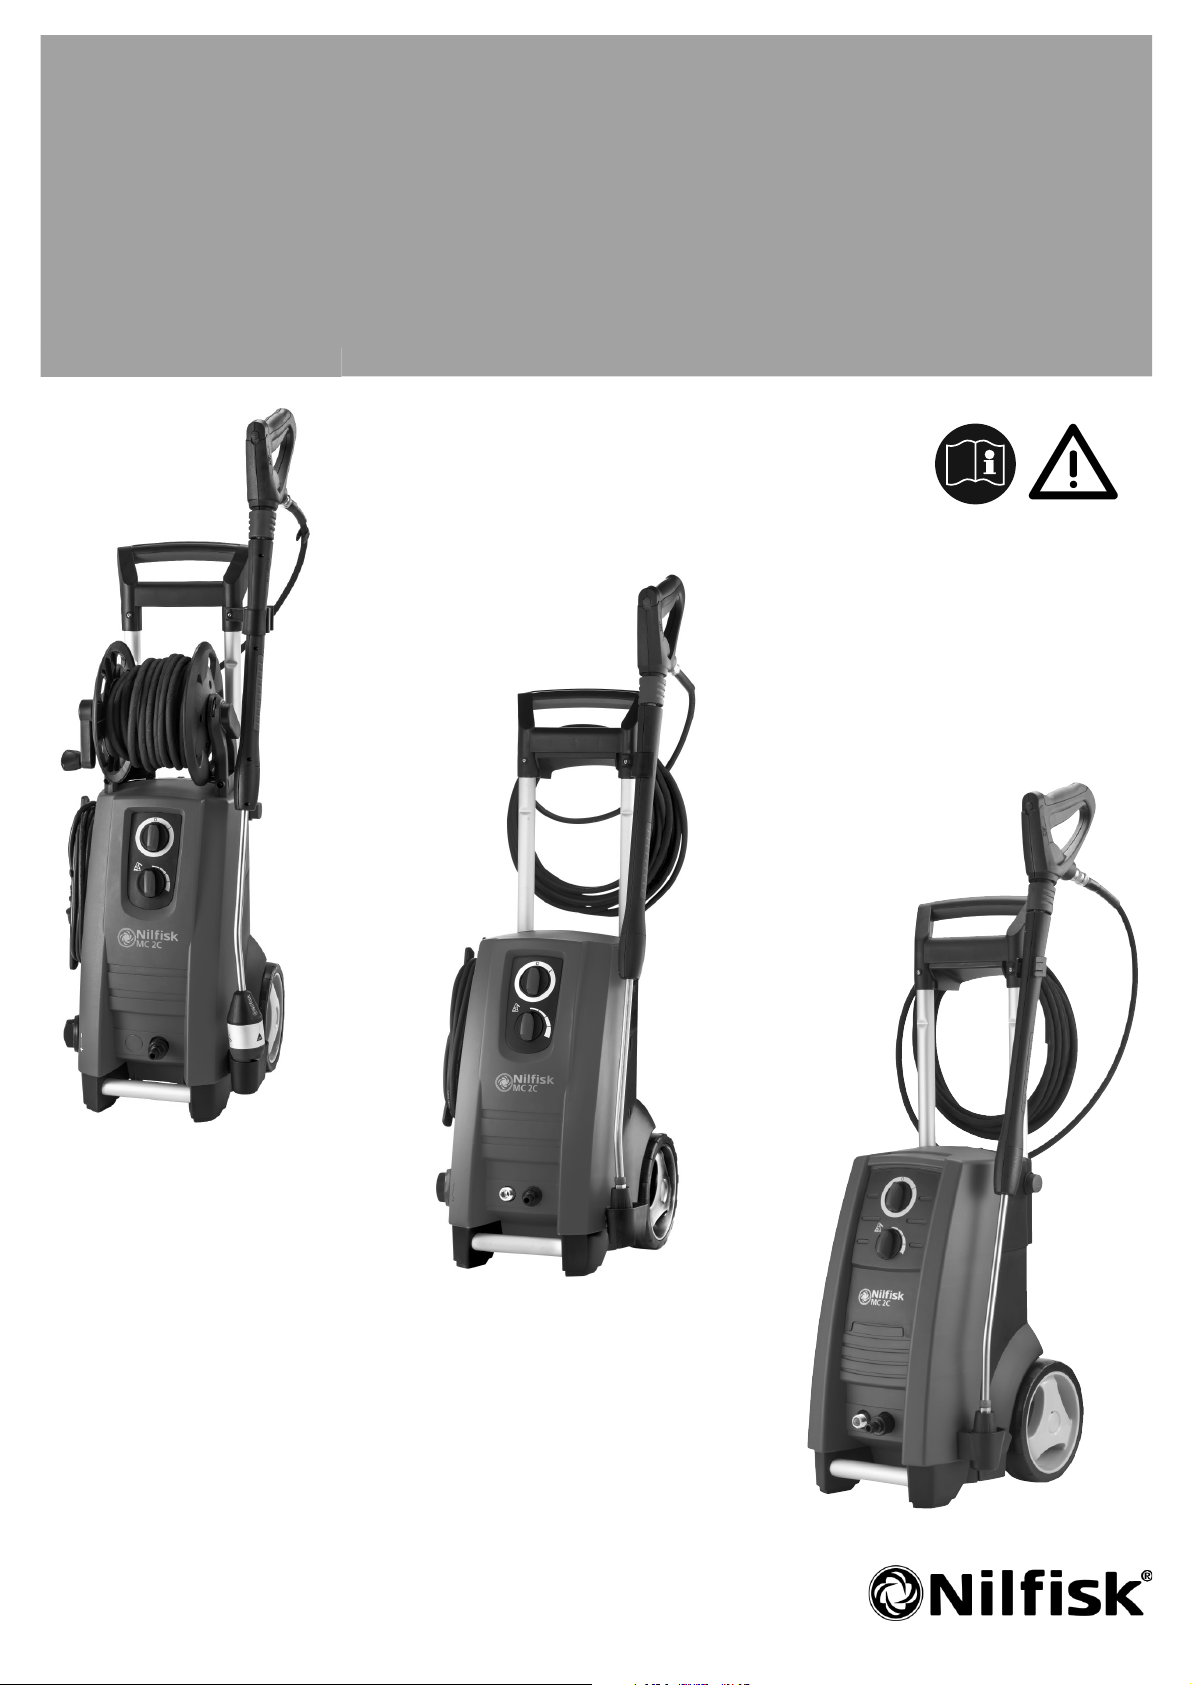
MC 2C -
Instructions for use
128700711 a (10.2017)
EN-DA-NO-SV-FI-DE-FR-NL-IT-ES-PT-EL-TR-CS-HU-PL
Page 2

Instruction manual ........................................................3 - 21
Instruktionsbog ...........................................................22 - 40
Instruksjonsbok ..........................................................41 - 60
Instruktionsbok ...........................................................61 - 80
Käyttöohje ..................................................................81 - 99
Betriebsanleitung ..................................................... 100 - 120
Manuel d'Instructions ............................................... 121 - 142
Gebruikershandleiding ............................................. 143 - 163
Manuale di istruzioni ................................................ 164 - 184
Manual de Instrucciones .......................................... 185 - 205
Manual de Instruções ............................................... 206 - 226
γχειριδιο οδηγιων ..................................................... 227 - 248
Ýþletme kýlavuzu ..................................................... 249 - 270
Návod k obsluze....................................................... 271 - 289
Üzemeltetési útmutató ............................................. 290 - 309
Instrukcja obsługi ..................................................... 310 - 330
Copyright © 2017 Nilfisk A/S
Page 3

Contents
1 Introduction .................................................................................................. 4
1.1 Symbols used to mark instruction .......................................................................4
2 Safety precautions and working techniques ................................................4
3 Description ................................................................................................. 10
3.1 Application ........................................................................................................10
3.2 Operation elements and model survey .............................................................10
4 Before you start using your pressure washer ........................................ 11
4.1 Mounting of holders for spray lance ..................................................................11
4.2 Mounting of hose hook (only models without hose reel) .............................11
4.3 Mounting of hose reel handle (only models with hose reel) ..............................11
4.4 Mounting of quick coupling ...............................................................................12
4.5 Mounting of high pressure hose .......................................................................12
5 Operating your pressure washer ............................................................. 12
5.1 Connection of high pressure hose ....................................................................12
5.2 Mounting of spray lance ....................................................................................13
5.3 Water connection ..............................................................................................13
5.4 Telescopic handle .............................................................................................13
5.5 Start and stop of the machine (when connected to a water supply) .................14
5.6 Start the machine (when connected to open containers (suction mode)) ........14
5.7 Pressure regulation ...........................................................................................14
5.8 Operation with detergents .............................................................................15
5.9 Regulation of pressure / water volume .............................................................16
6 Fields of application and working methods ........................................... 16
6.1 General .............................................................................................................16
7 After using your pressure washer ........................................................... 17
7.1 Storing the washer ............................................................................................17
7.2 Winding up of electric cable and high pressure hose ......................................17
7.3 Storage of accessories .....................................................................................17
8 Maintenance ............................................................................................... 18
8.1 Cleaning of water inlet fi lter .............................................................................18
8.2 Cleaning of nozzle ............................................................................................18
8.3 Cleaning of machine vents ...............................................................................18
8.4 Greasing of couplings ......................................................................................18
9 Trouble-shooting ....................................................................................... 19
10 Further information ................................................................................... 20
10.1 Warranty conditions ........................................................................................20
11 Main Technical Data ................................................................................... 20
12 EU Declaration of Conformity ................................................................... 21
Original Instructions
3
Page 4
1 Introduction
1.1 Symbols used to mark instruction
All pictograms attached to the high pressure washer and its components are shown and explained in this manual.
Safety instructions marked with this symbol must be observed to prevent personal injury or
serious damage to property.
Caution where there is a risk of damaging the machine or its individual components.
This symbol indicates tips and instructions to simplify work and to ensure a safe operation of
the high pressure washer.
2 Safety precautions and working techniques
Before starting up your machine for the fi rst time, this instruction manual must be read through
carefully. Save the instructions for later use.
WARNING!
• Inhalation of aerosols can be hazardous to health.
Where applicable use a device in order to avoid or reduce aerosols production, e.g., a shield covering the
nozzle. For protection against aerosols use a respiratory mask of class FFP 2 or higher.
• The high water pressure generated by the machine
and the power connection are particular sources of
danger.
• Machines shall not be used by children or untrained
personnel. Children should be supervised to ensure
that they do not play with the machine.
• Do not use the machine within range of persons unless they wear protective clothing.
• Before starting up your machine please check it carefully for any defects. If you fi nd any, do not start up
your machine, contact your Nilfi sk distributor. The insulation of the electric cable should be faultless and
without any cracks. If the electric cable is damaged,
an authorized Nilfi sk di stributor should replace it.
• Always unplug the power plug before cleaning or
maintenance and when replacing parts or converting
4
Original instructions
Page 5
the machine to another function.
• Observe the national safety regulations issued, for
example, by the employers liability insurance association, social security institutions, occupational safety
and health authorities or other organizations.
Accessories and spare parts
• To ensure the machine safety only use original spare
parts from Nilfi sk or approved by Nilfi sk.
• High pressure hoses, fi ttings and couplings are important for the safety of the machine. Only use hoses, fi ttings and couplings recommended by Nilfi sk.
Physical, sensory or mental conditions
Applications
• This machine is not intended for use by persons
(including children) with reduced physical, sensory or mental capabilities or lack of experience and
knowledge. If the machine is used by people with reduced physical, sensory or mental capabilities or lack
of experience and knowledge they shall have been
given supervision or instruction concerning use of the
machine in a safe way and understand the hazards involved.
This machine has been developed for domestic use
such as:
• Car, motorbike, boat, caravan, trailer, patio/drive/fl agstones, woodwork, brickwork, barbecue, garden furniture, lawn mower.
Any other use is considered as improper use. Nilfi sk
accepts no liability for any damage resulting from such
use. The risk for such use is borne solely by the user.
Proper use also includes proper operation, servicing
and repairs as specifi ed in this instruction.
Clothing and equipment
Always take action to protect yourself when operating
the machine.
5Original Instructions
Page 6

• Wear shoes with non-slip soles.
• Wear goggles, ear protection and protective clothes
during operation.
Transporting the high pressure washer
• When transporting the machine in or on a vehicle, it
must be secured, e.g. with straps, so that it cannot slip
or tip over.
• Nilfi sk recommends that the machine is positioned
horizontally on the backside, when transported in or
on a vehicle.
Detergents
• This machine has been designed for use with cleaning agents supplied or recommended by Nilfi sk. The
use of other cleaning agents or chemicals may adversely affect the function of the machine.
Before starting the work
Electrical connection
Inspecting the machine
• Do not use the machine if a supply cord or important
parts of the machine are damaged, e.g., safety device, high pressure hose, and spray handle and spray
attachments.
• The trigger of the spray handle must move easily and
automatically return to its starting position when released.
• Always keep high pressure hose and spray attachment in good condition (clean, moving easily) and correctly assembled.
WARNING!
Minimize the risk for electrical shock:
• Voltage and frequency of the machine (see rating
plate) must match the voltage of and frequency of the
mains supply.
• Only connect the machine to electrical installation
made by a certifi ed electrician and com ply with IEC
6
Original instructions
Page 7

60364-1.
• It is recommended that the electrical supply to the
machine should include a residual current device that
will interrupt the supply if the leakage current to earth
exceeds 30 mA for 30 ms.
• Due to the high power of the machine - use motor
start / delayed fuses with characteristic D according to
IEC947-2 or corresponding standards outside IEC.
• Inadequate extension cables can be dangerous. If an
extension cable is used, it shall be suitable for outdoor
use, and the connection has to be kept dry and off the
ground.
• Nilfi sk recommends use of an extension cable drum
when cable extension is needed which keeps the
socket at least 60 mm above the ground.
• If the electric cable is damaged, it must be replaced
by an authorized Nilfi sk distributor or similar qualifi ed
person in order to avoid a hazard.
• Connecting the high pressure washer to a supply
system, the max allowed impedance is = 0,4023
(Zmax). Consult with the supply authority that the
equipment is connected only to a supply of that impedance or less.
Water connection
• This high pressure washer is only allowed to be connected with the drinking water mains, when an appropriate backfl ow preventer has been installed, Type BA
according to EN 60335-2-79.
• The backfl ow preventer can be ordered under number
106411177.
• As soon as drinking water has fl own through the backfl ow preventer, it is no longer regarded as drinking
water.
• Operation by suction (e.g. a rainwater vessel) is carried out without a backfl ow preventer – see “Connec-
ting to a pressureless water supply”. The machine
can be connected to water mains with a max. inletpressure of 1 MPa/10 bars and max. 60°C.
7Original Instructions
Page 8

Safety devices
Locking device on spray handle:
• The spray handle features a locking device. When the
pawl is activated, the spray handle cannot be operated.
Thermal sensor:
• A thermal sensor protects the motor against overloading. The machine will restart after a few minutes when
the thermal sensor has cooled.
Pressure safety device:
• An integrated hydraulic safety valve protects the
system from excessive pressure.
During work
WARNING!
• It is not allowed to clean asbestos-containing surfaces
with high pressure.
• Risk of explosion – Do not spray fl ammable liquids.
• Never draw in fl uids containing solvents (e.g., gasoline, heating oil, paint thinner or acetone) These substances damage the materials used in the machine.
Their spray is highly combustible, explosive and poisonous.
• Never direct the water jet at yourself, other persons,
not even to clean clothing or footwear - risk of injury.
• Never direct the water jet at pets or other animals.
• Never direct the water jet at live electrical equipment
or the machine itself - danger of short-circuiting.
• Hold the spray lance fi rmly with both hands. The spray
lance is affected by a thrust of up to 27.4 N and a sudden torque when activating the trigger of the spray
handle during operation.
• Never start up a frozen machine. Frost damages are
not covered by the guarantee!
• Always ensure fi rm and safe footing.
• The machine shall be operated in an upright position.
• If the machine is left or not used for 5 minutes, it must
be switched off on the start/stop switch "O" (1).
8
Original instructions
Page 9

After fi nishing the work
WARNING!
• Always switch off the machine and unplug the power
plug from the socket after work and when leaving the
machine unattended.
• Disconnect water inlet hose between machine and
water supply.
• Always empty pump, hose and accessories of water
after use of the machine and prior to storing.
Maintenance and repairs
WARNING!
• Always disconnect the electrical plug from the socket
prior to maintenance, cleaning and repair.
• Any repair should always be made in Nilfi sk authorized workshop with original Nilfi sk spare parts.
• Do not attempt any maintenance not described in the
instructions.
• If the machine refuses to start, stops, pulsates, pressure fl uctuates, motor busses, fuse blows or no water comes out, check the trouble shooting diagram
in these instructions. In case other problems occur,
please contact your local Nilfi sk distributor.
Recycling the high pressure washer
Make the old machine unusable immediately.
• Unplug the machine.
• Cut the electric cable.
Do not discard electrical appliances with household
waste. As specifi ed in WEEE Directive 2012/19/EC on
old electrical and electronic appliances, used electrical
goods must be collected separately and recycled ecologically. Contact your local authorities or your nearest
dealer for further information.
9Original Instructions
Page 10

3 Description
3.1 Application
3.2 Operation elements and
model survey
This high-pressure washer has
been developed for semiprofessional routine cleaning:
- Professional craftsman jobs,
cleaning of vehicles, boat,
caravan and minor cleaning
jobs within building and construction
Section 6 describes the use of
the high-pressure washer for
various cleaning jobs.
See illustration at the end of
this manual.
1 Start/stop switch
2 Water inlet (with fi lter)
3 High pressure connection
(only machines without
hose reel)
4 High pressure hose
5 Electric cable
6 Button for regulation of
pressure and water volume
(not standard)
7 Ergo 2000 spray handle
with lock (7a)
8 Flexopower Plus spray
lance (standard models)
9 4-in-1 spray lance (T and
XT models)
Only use the high-pressure
washer for purposes described
in this manual.
The safety precautions must be
observed to prevent damage
to the machine, the surface to
be cleaned or severe personal
injuries.
10 Detachable detergent con-
tainer
11 Nozzle cleaning tool
12 Dosing of detergents
13 Hose reel
14 Hose hook (only machines
without hose reel)
15 Model tag
16 Button for telescopic handle
17 Telescopic handle
18 Turnable cable hook
Specifi cations: See model tag
(15) of machine.
We reserve the right to alter the
specifi cations.
10
Original Instructions
Page 11

4 Before you start using your pressure
washer
4.1 Mounting of holders for
spray lance
Mount the holders for spray
lance on the machine.
4.2 Mounting of hose hook
(only models without
hose reel)
4.3 Mounting of hose reel
handle (only models
with hose reel)
Mount the hose hook (14) on
the handle (2 screws).
Note: the hose hook can be
mounted on the front as well as
on the back. Front position is to
be used if the product is used
together with a special wall
hook for wall storage.
1. Click the hose reel handle
on to the trolley handle (no
screws).
11Original Instructions
Page 12

4.4 Mounting of quick
coupling
1. Screw the quick coupling
tight on to the water inlet (2).
Note: The inlet fi lter must always be fi tted in the water inlet
pipe to fi lter out major impurities as these will damage the
pump valves.
Caution: Failure
to fi t the fi lter will
invalidate the
guarantee.
4.5 Mounting of high
pressure hose
Attach the high pressure hose
(4) to the spray handle (7).
5 Operating your pressure washer
5.1 Connection of high pressure hose
Machines without hose reel: Attach the high pressure hose (4)
to the high pressure connection
of the machine (3).
12
Only max. 7 m additional extension hose can be added.
Machines with hose reel: Unwind the high pressure hose
completely.
Original Instructions
Page 13

5.2 Mounting of spray lance 1. Pull the blue quick-release
A
B
NOTE!
Always remove any dirt from
the nipple before connecting
the spray lance to the spray
handle.
grip (A) of the spray gun
backwards.
2. Insert the nipple of the spray
lance (B) into the quick-release connection and release
it.
3. Pull the spray lance (or other
accessory) forwards to check
that it is securely attached to
the spray gun.
5.3 Water connection An ordinary 1/2" garden hose of
min. 10 m and max. 25 m will
be suitable.
NOTE: Connection to the public
mains according
to regulations.
IMPORTANT! Only use water without any impurities. If
there is a risk of silt, sand or
sediment in the inlet water (i.e.
from your own well), an additional fi lter should be mounted.
1. Let the water run through the
water hose before connecting
it to the machine to prevent
sand and dirt from penetrating the machine.
Note: Check
that the fi lter is
fi tted in the water
inlet pipe and that it is clean
and free from debris.
2. Connect the water hose to
the water supply by means
of the quick connector (inlet
water, max. pressure: 10 bar,
max. temperature: 60°C).
3. Turn on the water.
5.4 Telescopic handle
The machine features a telescopic handle. To raise or lower
the handle, press the button
(16) and move the handle upwards or downwards. When a
click is heard, the handle is in
right position.
13Original Instructions
Page 14

5.5 Start and stop of the machine (when connected
to a water supply)
The spray lance is affected
by a thrust during operation - therefore always hold it
fi rmly with both hands. IMPOR-
TANT: Point the nozzle at the
ground.
to the surface, which is to be
cleaned.
Do not cover the
machine during
operation.
5.6 Start the machine (when
connected to open containers (suction mode))
1. Check that the machine is in
upright position.
NOTE: Do not place the ma-
chine in tall grass!
2. Release the trigger lock.
3. Activate the trigger of the
spray handle and let the water run until all air has escaped from the high pressure
hose.
4. Turn the start/stop switch (1)
to position "I".
5. Activate the trigger of the
spray handle.
Always adjust the distance and
thus the pressure of the nozzle
The washer can take in water
from a rain water tank as an
example. The hose for the water
supply must not be too long,
approx. 5 m.
Make sure that the water tank is
not placed on a lower level than
the machine.
Use an external fi lter if the water contains impurities.
1. Make sure that the water
hose is fi lled completely with
water before connecting to
the machine. Place the entire
hose in a tank or bucket. To
avoid water spillage, crimp
Note: If the machine is left or
not used for 5 minutes, it must
be switched off on the start/stop
switch "O" (1):
1. Turn the start/stop switch to
position "O".
2. Disconnect the electrical plug
from the socket.
3. Shut off the water supply and
activate the trigger to relieve
the machine of pressure.
4. Lock the spray handle.
When releasing the trigger of
the spray handle, the machine
automatically stops. The machine will start again when you
re-activate the spray handle.
the water inlet hose down in
the water and then connect
the hose to the machine with
the quick coupling and fi nally
uncrimp the water inlet hose.
2. Dismount spray handle,
lance and nozzle.
3. Turn the start/stop switch to
position "I" and let the water
run, until the air has escaped
from the water hose and the
pump.
4. Turn the start/stop switch to
position "O".
5. Mount spray handle and
thereafter lance.
6. Turn the start/stop switch (1)
to position "I".
7. Activate the trigger of the
spray handle.
5.7 Pressure regulation Flexopower Plus spray lance
The pressure can be regulated
on the Flexopower Plus spray
lance.
High pressure
Low pressure / Detergent
14
Original Instructions
Page 15

T and XT models:
4-in-1 spray lance
The pressure can be regulated
on the 4-in-1 spray lance.
Low Pressure / detergent
5.8 Operation with
detergents
20°
65°
Application of detergents is
NOT possible if an extension
hose is applied.
1. Fill the container with a detergent.
2. Mount the Flexopower Plus
spray lance and adjust it to
low pressure. Turn the 4-in-1
nozzle to pos Low Pressure/
Detergent (see section 5.7).
3. Adjust the dosing regulator
(12) to the re quired vol ume
of detergent (0-5%).
Tornado / high pressure
Wide angle / high pressure
Turbohammer / high pressure
4. Apply the detergent from
below and up wards.
5. Let the detergent act for the
time stated on the packing of
the detergent and fl ush with
pure water or use a brush.
External detergent container
1. Remove the cover with suction hose from the detergent
container.
2. Mount the cover with suction
hose on the external detergent container.
The cover has a standard thread
and fi ts common detergent containers. If your container does
not have a standard thread,
detach the fi lter from the suction hose and remove the cover.
Remount the fi lter in the suction
hose.
Extra detergent hose can be
pulled out of the machine.
15Original Instructions
Page 16

5.9 Regulation of pressure
/ water volume (only
models with button for
regulation of pressure
and water volume)
Working pressure and water
volume can be regulated on the
machine by turning the button
for regulation of pressure / water volume (6).
6 Fields of application and working
methods
6.1 General Effi cient high pressure cleaning is achieved by following a few
guidelines, combined with your own personal experience of specifi c
cleaning tasks. Accessories and detergents, when correctly chosen, can increase the effi ciency of your pressure washer. Here is
some basic information about cleaning.
6.1.1 Detergent and foam Foam or detergent should be applied onto dry surfaces so that the
chemical product is in direct contact with the dirt. Detergents are
applied from bottom to top, for example on a car bodywork, in order
to avoid "super clean" areas, where the detergent collects in higher
concentration and streams downwards. Let the detergent work for
several minutes before rinsing but never let it dry on the surface being cleaned. Note: It is important that the detergents do not dry up.
Otherwise the surfac that has to be cleaned can be da maged.
6.1.2 Mechanical effect In order to break down tough layers of dirt, additional mechanical
effect may be required. Special wash brushes offer this supplementary effect that removes stubborn dirt, traffi c fi lm or the like.
16
Original Instructions
Page 17

7 After using your pressure washer
7.1 Storing the washer The machine should be sto-
red in a frost-free room!
Pump, hose and accessories
should always be emptied of
water prior to storing as follows:
7.2 Winding up of electric
cable and high pressure
hose
1. Stop the machine (turn the
start/stop switch (1) to position “O” and detach water
hose and accessory.
2. Restart the machine and
activate the trigger. Let the
machine run until no more
water runs through the spray
handle.
3. Stop the machine and unplug. Wind the electric cable
round the hooks placed on
the side of the machine.
4. Separate spray handle and
spray lance.
To avoid accidents, the electric
cable and the high pressure
hose should always be wound
5. Machines without hose reel:
Detach high pres sure hose,
coil it up and place it on the
hose storage.
Machines with hose reel: Coil
the high pressure hose up on
the hose reel.
6. Place spray handle, nozzles
and other ac ces so ries in the
holders of the machine.
Should the machine by mistake
be frozen, let it thaw and check
it for damage.
NEVER START-UP A FROZEN
MACHINE.
Frost damages are not
covered by the guarantee!
up carefully.
1. Wind up the electric cable on
the dedicated hooks. Built-in
clip for good holding.
The lower hook can be
turned to release the electric
cable.
2. The high pressure washer
comes in two models: A) with
hook for storage of high pressure hose (14) - B) with a
hose reel (13).
7.3 Storage of accessories The standard accessories
(spray handle, spray lance
(A) and nozzle cleaning tool)
can be stored on the pressure
A
washer.
17Original Instructions
Page 18

8 Maintenance
8.1 Cleaning of water inlet
fi lter
WARNING! Always disconnect
the electrical plug from the
socket prior to maintenance or
cleaning.
To ensure a long and problem
free working life, please take
the following advice:
Wash off water hose, high
pressure hose, spray lance
and accessories before
mounting.
Clean the connectors of dust
and sand.
Clean the nozzles.
Any repair should always be
made in an authorized workshop with original spare parts.
Clean the water inlet fi lter regularly once a month or more frequently according to use. Carefully loosen the fi lter with a pair
of pliers and clean it. Check that
it is intact before re-mounting it.
The inlet fi lter must always be
fi tted inside the water inlet pipe
to fi lter out various impurities,
as they will damage the pump
valves.
CAUTION: Failure to fi t the fi lter
will invalidate the guarantee.
8.2 Cleaning of nozzle A clogging up in the nozzle
causes a pump pressure which
is too high. This is why cleaning
is required immediately.
1. Stop the machine and dis-
connect the nozzle.
2. Clean the nozzle. IMPOR-
TANT: The cleaning tool (11)
should only be used when
the nozzle is detached!
3. Flush the nozzle backwards
with water.
8.3 Cleaning of machine
vents
8.4 Greasing of couplings To ensure easy connection and
The machine should be kept
clean so as to let cooling air
that o-rings do not dry up, the
pass freely through the machine vents.
couplings should be greased
regularly.
18
Original Instructions
Page 19

9 Trouble-shooting
Please ensure that you check the following before contacting the Nilfi sk service organization:
Symptom Cause Recommended action
Machine refuses to start Machine not plugged in Plug in machine.
Defective socket Try another socket.
Fuse has blown Replace fuse. Switch off other machines.
Defective extension cable Try without the extension cable.
Fluctuating pressure Pump sucking air Check that hoses and connections are air-
tight.
Valves dirty, worn out Clean and replace or refer to local Nilfi sk-
or stuck distributor
Pump seals worn out Clean and replace or refer to local Nilfi sk-
distributor.
Motor busses Low voltage or Activate the trigger of the spray handle.
low temperature
Machine stops Fuse has blown Replace fuse. Switch off other machines.
Incorrect mains voltage Check that the mains voltage corresponds
to specifi cation on the model tag.
Thermal sensor activated Leave the washer for 5 minutes to cool
down.
Nozzle partially blocked Clean the nozzle (see section 7.2)
Fuse blows Fuse too small Change to an installation higher than the
amp. consumption of the machine.
You may try without the extension cable.
Machine pulsating Air in inlet hose/pump Allow machine to run with open trigger until
regular working pressure resumes.
Inadequate supply of Check that the water supply corresponds to
mains water specifi cations required (see model tag)
NB! Avoid using long, thin hoses (min. 1/2")
Nozzle partially blocked Clean the nozzle (see section 7.2)
Water fi lter blocked Clean the fi lter (see section 7.1)
Hose kinked Straighten out hose.
Machine often starts Contact your nearest Nilfi sk Service
and stops by itself Centre.
Spray handle is leaking Replace seat/ball/O-ring in the valve of the
spray handle.
Machine starts, but Pump/hoses or accessory Wait for pump/hoses or accessory to thaw.
no water comes out frozen
No water supply Connect inlet water.
Water fi lter blocked Clean the fi lter (see section 7.1)
Nozzle blocked Clean the nozzle (see section 7.2)
Pump pressure drops Button for regulation of Adjust the button to correct working pres-
pressure / water volume not sure.
correctly adjusted
In case problems other than the above occur, please contact your local Nilfi sk distributor.
19Original Instructions
Page 20

10 Further information
10.1 Service and Mainte-
nance
In case of need for service and
maintenance, please contact
your dealer.
11 Main Technical Data
Type
Rated pressure
Cleaning impact
Water flow
Voltage/phase/
frequency/current
Max. water temp.
bar/MPa
kg/force
Qmax/
QIEC
l/min
V/-/Hz/A
°C
MC 2C-
60/380
69/6.9
-/2.4
gallon
115/1/
60/15
60
2
MC 2C-
80/520 T
80/8.0
2
8.7/8.2
115-127/
60/15
60
MC 2C-
120/520 T
120/12 120/12 140/14 140/14 150/16 150/15 150/15
2.2 2.2 2.5 2.5 2.9 2.9 2.9
8.6/7.8 8.6/7.8 10.2/9.0 10.2/9.0 10.2/9.5 10.2/9.5 10.2/9.5
1/
230/1/
50/10
MC 2C-
120/520 XT
230/1/
50/10
60 60 60 60 60 60 60
MC 2C-
140/610 XT
230/1/
50/12.6
MC 2C-
140/610 P
230/1/
50/12.6
MC 2C150/650
230/1/
50/14.5
MC 2C-
150/650 (KR)
230/1/
60/14.5
MC 2C-
150/650 XT
230/1/
50/14.5
Cable m 5
Pump Rev./min 3400
Nozzle size
Sound pressure
level
Guaranteed
sound power
level
Vibration according to ISO 5349-1
Weight kg 28.1
1/8"
dB(A)
dB(A)
m/s
0.475
77.4
92
2
< 2.5
5
3400
0.475
77.4
92
< 2.5
27.3
5555555
2800 2800 2800 2800 2800 3400 2800
0.350 0.350 0.370 0.370 0.370 0.370 0.370
76.1 76.1 77.4 77.4 73.5 79.7 79.7
91 91 92 92 88 94 94
< 2.5 < 2.5 < 2.5 < 2.5 < 2.5 < 2.5 < 2.5
27.1 27.1 28.1 28.1 28.1 26.3 28.1
20
Original Instructions
Page 21

12 EU Declaration of Conformity
We,
Nilfi sk A/S
Kornmarksvej 1
DK-2605 Broendby
DENMARK
Hereby solely declare, that the
Product: HPW - Consumer
Description: 220-240V, 50 Hz, IPX5
Type: MC 2C
Is in compliance with the following standards:
EN 60335-1:2012+A11:2014
EN 60335-2-79:2012
EN 55014-1:2006+A1:2009+A2:2011
EN 55014-2: 2015
Compliance to harmonic current emissions is documented in TCF_42331_01
EN 61000-3-11:2000
EN 50581:2012
Following the provisions of:
2006/42/EC
2014/30/EC
2011/65/EC
2000/14/EC – Conformity assessment procedure according to Annex V
- Measured sound power level: 73-80 dB(A); Guaranteed sound power level: 88-94 dB(A)
Hadsund, 13-10-2017
Esben Graff
VP Portfolio Management, Consumer
21Original Instructions
Page 22

Page 23

HEAD QUARTER
DENMARK
Nilfi sk A/S
Kornmarksvej 1
DK-2605 Broendby
Tel.: (+45) 4323 8100
Website: www.nilfi sk.com
SALES COMPANIES
ARGENTINA
Nilfi sk Argentina
Herrera 1855 Piso 4° B Ofi c 405
Ciudad de Buenos Aires
Tel.: (+54) 11 6091 1576
Website: www.consumer.nilfi sk.com.ar
AUSTRALIA
Nilfi sk Pty Ltd
Unit 1/13 Bessemer Street
Blacktown NSW 2148
Tel.: (+61) 2 98348100
Website: www.consumer.nilfi sk.com.au
AUSTRIA
Nilfi sk GmbH
Metzgerstrasse 68
5101 Bergheim bei Salzburg
Tel.: (+43) (0)662/45 6400-90
Website: www.nilfi sk.at
BELGIUM
Nilfi sk n.v-s.a.
Riverside Business Park
Boulevard Internationalelaan 55
Bâtiment C3/C4 Gebouw
Bruxelles 1070
Tel.: (+32) 2 467 60 50
Website: www.consumer.nilfi sk.be
BRAZIL
Nilfi sk Equipamentos de Limpeza Ltda.
Rua Professor Aff onso José Fioravante,
110 - City Jaraguá São Paulo SP 02998-010 Brasil
Tel.: (+11) 3959-0300
Website: www.nilfi sk.com.br
CANADA
Nilfi sk Canada
240 Superior Boulevard
Mississauga, Ontario L5T 2L2
Tel.: (+1) 800-668-8400
Website: www.nilfi sk.ca
CHILE
Nilfi sk S.A.
Salar de Llamara 822, Pudahuel
Centro Empresaial Enea (Fase 2)
8320000 Santiago
Tel.: (+56) 2684 5000
Website: www.nilfi sk.cl
CHINA
Nilfi sk
4189 Yindu Road
Xinzhuang Industrial Park
201108 Shanghai
Tel.: (+86) 21 3323 2000
Website: www.nilfi sk.cn
CZECH REPUBLIC
Nilfi sk s.r.o.
VGP Park Horní Počernice
Do Čertous 1/2658
193 00 Praha 9
Tel.: (+420) 244 090 912
Website: www.consumer.nilfi sk.cz
DENMARK
Nilfi sk Danmark A/S
Industrivej 1
Hadsund, DK-9560
Tel.: 72 18 21 20
Website: www.consumer.nilfi sk.dk
FINLAND
Nilfi sk Oy
Kovuhaankuja 1
01510 Vantaa
Tel.: (+358) 207 890 600
Website: www.consumer.nilfi sk.fi
FRANCE
Nilfi sk SAS
26 Avenue de la Baltique
Villebon sur Yvette
91978 Courtaboeuf Cedex
Tel.: (+33) 169 59 87 24
Website: www.consumer.nilfi sk.fr
GERMANY
Nilfi sk GmbH
Guido-Oberdorfer-Straße 2-10
89287 Bellenberg
Tel.: (+49) (0)7306/72-444
Website: www.consumer.nilfi sk.de
GREECE
Nilfi sk A.E.
Αναπαύσεως 29
Κορωπί Τ.Κ. 194 00
Tel.: (30) 210 911 9600
Website: www.consumer.nilfi sk.gr
HOLLAND
Nilfi sk B.V.
Versterkerstraat 5
1322 AN Almere
Tel.: (+31) 36 5460760
Website: www.consumer.nilfi sk.nl
HUNGARY
Nilfi sk Kft.
II. Rákóczi Ferenc út 10
2310 Szigetszentmiklós-Lakihegy
Tel.: +24/507-450
Website: www.nilfi sk.hu
INDIA
Nilfi sk India Limited
Pramukh Plaza, ‘B’ Wing, 4th fl oor, Unit No. 403
Cardinal Gracious Road, Chakala
Andheri (East) Mumbai 400 099
Tel.: (+91) 22 6118 8188
Website: www.nilfi sk.in
IRELAND
Nilfi sk Limited
1 Stokes Place
St. Stephen’s Green
Dublin 2
Tel.: (+353( (0)1 294 3838
Website: www.nilfi sk.ie
ITALY
Nilfi sk SpA
Strada Comunale della Braglia, 18
26862 Guardamiglio (LO)
Tel.: (+39) (0) 377 414021
Website: www.nilfi sk.it
JAPAN
Nilfi sk Inc.
1-6-6 Kita-shinyokohama, Kouhoku-ku
Yokohama, 223-0059
Tel.: (+81) 45548 2571
Website: www.nilfi sk.com
MALAYSIA
Nilfi sk Sdn Bhd
Sd 33, Jalan KIP 10
Taman Perindustrian KIP
Sri Damansara
52200 Kuala Lumpur
Tel.: +603 6275 3120
Website: www.nilfi sk.com
MÉXICO
Nilfi sk de México S. de R.L. de C.V.
Pirineos 515, Int. 60-70
Zona Industrial Benito Juárez
Queretaro, QRO, CP 76120
Tel.: (+52) (442) 427 77 91
Website: www.nilfi sk.com
NEW ZEALAND
Nilfi sk Limited
Suite F, Building E
42 Tawa Drive
0632 Albany Auckland
Tel.: (+64) 9 414 1996
Website: www.nilfi sk.com
NORWAY
Nilfi sk AS
Bjørnerudveien 24
1266 Oslo
Tel.: (+47) 22 75 17 80
Website: www.consumer.nilfi sk.no
PERU
Nilfi sk S.A.C.
Calle Boulevard 162, Of. 703, Lima 33- Perú
Lima
Tel.: (511) 435-6840
Website: www.nilfi sk.com
POLAND
Nilfi sk Sp. Z.O.O.
Millenium Logistic Park
ul. 3 Maja 8, Bud. B4
05-800 Pruszków
Tel.: (+48) 22 738 3750
Website: www.consumer.nilfi sk.pl
PORTUGAL
Nilfi sk Lda.
Sintra Business Park
Zona Industrial Da Abrunheira
Edifi cio 1, 1° A
P2710-089 Sintra
Tel.: (+351) 21 911 2670
Website: www.nilfi sk.pt
RUSSIA
Nilfi sk LLC
Vyatskaya str. 27, bld. 7/1st
127015 Moscow
Tel.: (+7) 495 783 9602
Website: www.consumer.nilfi sk.ru
SINGAPORE
Den-Sin
22 Tuas Avenue 2
639453 Singapore
Tel.: (+65) 6268 1006
Website: www.densin.com
SLOVAKIA
Nilfi sk s.r.o.
Bancíkovej 1/A
SK-821 03 Bratislava
Tel.: (+421) 910 222 928
Website: www.consumer.nilfi sk.sk
SOUTH AFRICA
Nilfi sk (Pty) Ltd
Kimbult Offi ce Park, 9 Zeiss Road
Laser Park, Honeydew
Johannesburg
Tel.: (+27) 118014600
Website: www.nilfi sk.co.za
SOUTH KOREA
Nilfi sk Korea
#204 2F Seoulsup Kolon Digital Tower
25 Seongsuil-ro 4-gil,
Seongdong-gu, Seoul
Tel.: (+82) 2 3474 4141
Website: www.nilfi sk.co.kr
SPAIN
Nilfi sk S.A.U
Paseu del Rengle, 5 Planta. 9-10
08302 Mataró
Tel.: (34) 93 741 2400
Website: www.consumer.nilfi sk.es
SWEDEN
Nilfi sk AB
Taljegårdsgatan 4
431 53 Mölndal
Tel.: (+46) 31 706 73 00
Website: www.consumer.nilfi sk.se
SWITZERLAND
Nilfi sk AG
Ringstrasse 19
Kircheberg/Industri Stelz
9500 Wil
Tel.: (+41) 71 92 38 444
Website: www.consumer.nilfi sk.ch
TAIWAN
Nilfi sk Ltd
Taiwan Branch (H.K)
No. 5, Wan Fang Road
Taipei
Tel.: (+88) 6227 00 22 68
Website: www.nilfi sk.tw
THAILAND
Nilfi sk Co. Ltd.
89 Soi Chokechai-Ruammitr
Viphavadee-Rangsit Road
Ladyao, Jatuchak, Bangkok 10900
Tel.: (+66) 2275 5630
Website: www.nilfi sk.co.th
TURKEY
Nilfi sk A.S.
Serifali Mh. Bayraktar Bulv. Sehit Sk. No:7
Ümraniye, 34775 Istanbul
Tel.: +90 216 466 94 94
Website: www.consumer.nilfi sk.com.tr
UNITED ARAB EMIRATES
Nilfi sk Middle East Branch
SAIF-Zone
P.O. Box 122298
Sharjah
Tel.: (+971) (0) 655-78813
Website: www.nilfi sk.com
UNITED KINGDOM
Nilfi sk Ltd.
Nilfi sk House, Bowerbank Way
Gilwilly Industrial Estate, Penrith
Cumbria CA11 9BQ
Tel: (+44) (0) 1768 868995
Website: www.consumer.nilfi sk.co.uk
UNITED STATES
Nilfi sk Inc.
14600 21st Avenue North
Plymouth, MN-55447
Tel.: (+1) 800-989-2235
Website: www.nilfi sk.com
VIETNAM
Nilfi sk Vietnam
No. 51 Doc Ngu Str.
P. Vinh Phúc, Q.Ba Dinh
Hanoi
Tel.: (+84) 761 5642
Website: www.nilfi sk.com
 Loading...