

Page 1
Safe-PakTM Installation Instructions: CFM 3156
Thank you for your purchase of the Safe-Pak for the CFM Model 3156 vacuum system.
Please be sure to read these instructions thoroughly before operating the 3156 vacuum
in conjunction with this Safe-Pak Kit.
WARNING: This Safe-Pak Kit is designed to be used for the collection of dangerous
and potent materials. It is the responsibility of the end user to comply with all of the
applicable procedures mandated for the specific material that is being handled. Proper
disposal must also comply with local environmental and safety procedures.
Checking Phase Rotation of the Vacuum:
The first and most important step in using the Safe-Pak is to make sure
the rotation of the motor is correct so that the vacuum will draw air into
the inlet rather than blowing air out.
WARNING: It is important to check this rotation prior to each use of the
Safe-Pak. Any collected debris within the Safe-Pak could be blown out
of the container if the rotation of the vacuum motor is incorrect.
To check the rotation simply wire the vacuum to the appropriate
electrical source by either using a quick connect electrical plug, or by
hard wiring the electrical cord to an electrical circuit. A licensed
electrician must perform this operation.
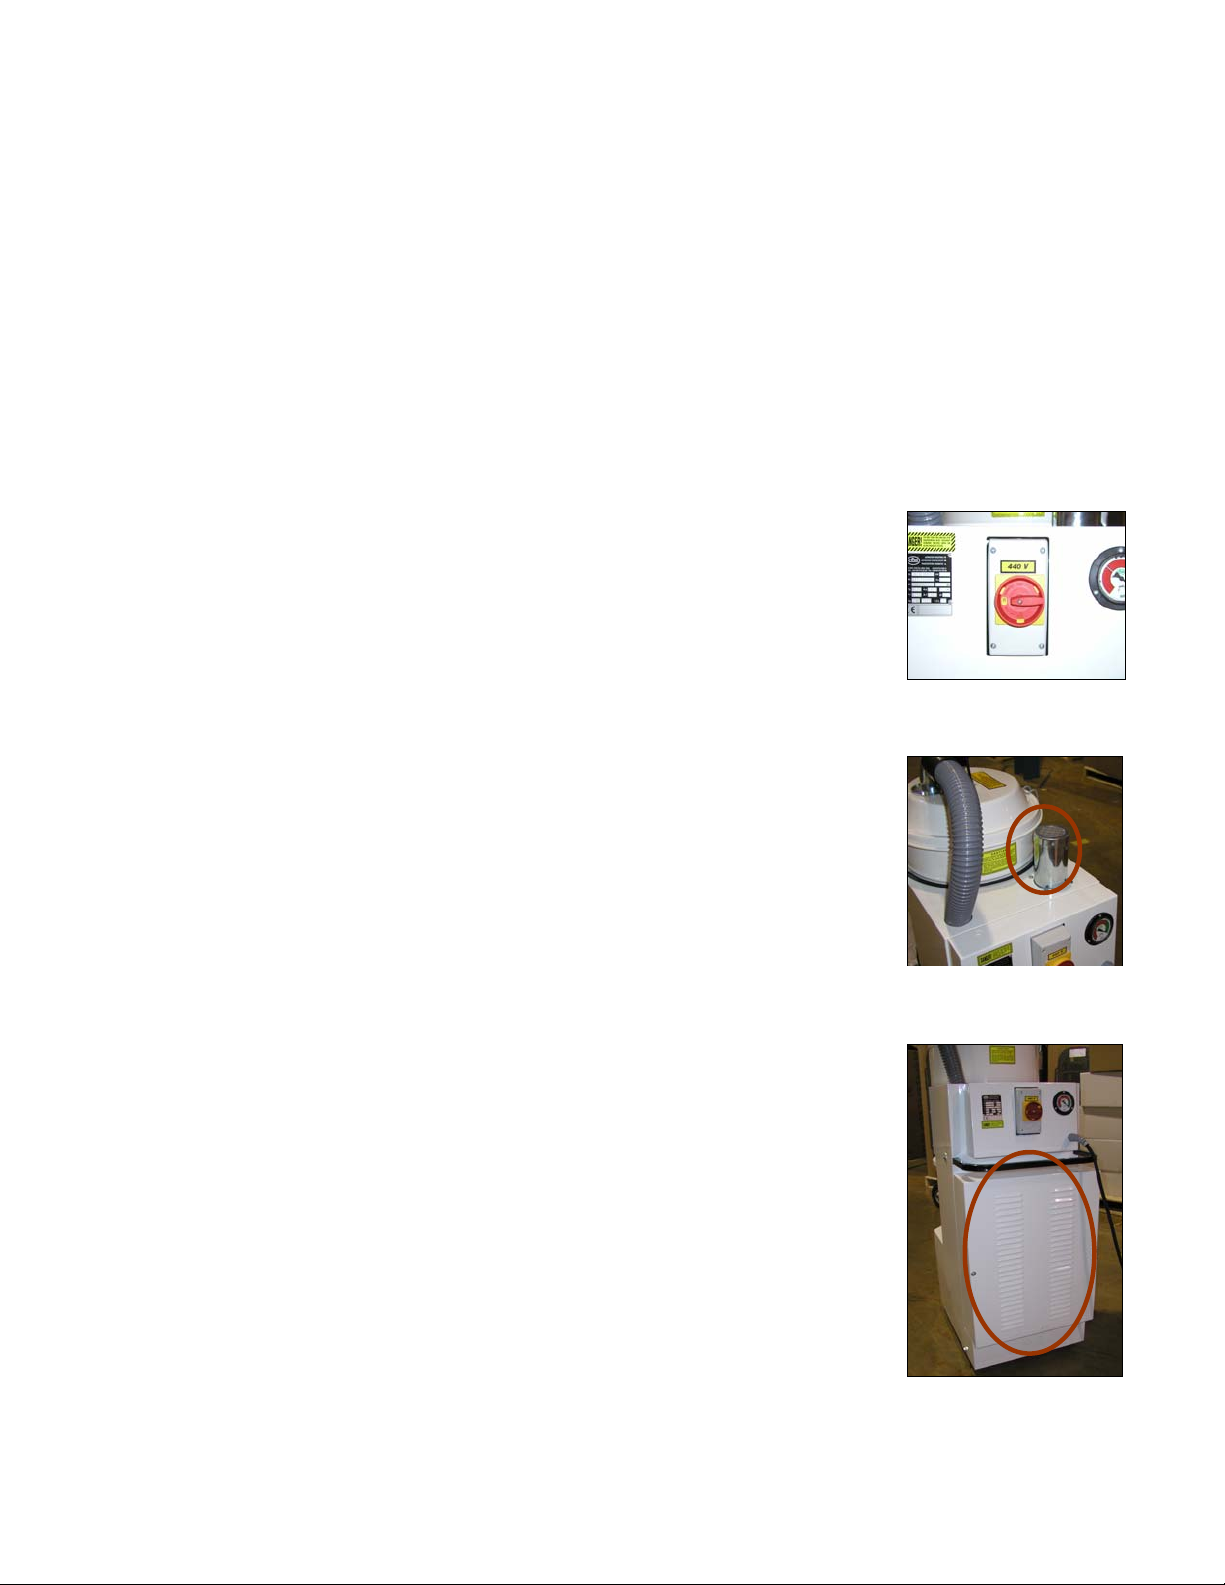
Once this is complete, simply turn the vacuum unit on by turning the red
radial switch (Photo 1) in the clockwise direction. The on (‘I’) position of
the switch is at 12 o’clock, while the off (‘O’) position is at 9 o’clock.
Once the machine has been turned on you will be able to tell if the
vacuum is in the proper rotation by placing your hand over the exhaust
tube (Photo 2). If your machine has a downstream HEPA filter, the air
will exhaust from the area shown in Photo 3.
If you detect that air is blowing out from either of these two places, then
the vacuum is in the proper rotation and is ready for further preparation
for use. If you do not detect air exhausting from either location pictured
in Photo 2 or 3, then the vacuum motor is rotating in the reverse
direction and needs to be corrected.
This phase rotation problem only occurs when dealing with motors
running on three-phase electrical power. If you have a vacuum system
that is running on single-phase power the rotation problem should not
occur. However if you detect that air is not exhausting properly from
the locations pictured in Photo 2 or 3, please contact our Customer
Service Department at 1-800-NILFISK.
Photo 1
Photo 2
Photo 3
Page 2
If your vacuum is powered by three-phase electricity, changing the rotation is fairly easy.
You simply need to exchange the position of two of the leads from the electrical cord to where
they are terminated, either in the electrical plug or the hard-wired electrical circuit. You can
exchange any of the two leads as long as one of them is not the ground connection. Once this
has been completed, check the rotation of the vacuum once again to be sure this has been
done correctly.
Installing Retrofit Hardware for Safe-PakTM Container:
Installing the Safe-Pak into your CFM Model 3156 vacuum may require some additional
hardware in order to work properly. If you purchased this Safe-Pak and the 3156 vacuum
at the same time, this hardware has been installed at the factory. If this is the case the
Safe–Pak is ready to be installed into your 3156 vacuum.
If you have purchased the Safe-Pak previously, you should have already gone through the
steps of installing the retrofit hardware into your vacuum. Your vacuum should be ready to
be used with the Safe-Pak.
If you have previously purchased a 3156 vacuum and have not used the Safe-Pak with it
before, then you should have received some additional components with the Safe-Pak as
part of a kit that will allow the operator to install these components into the 3156 machine.
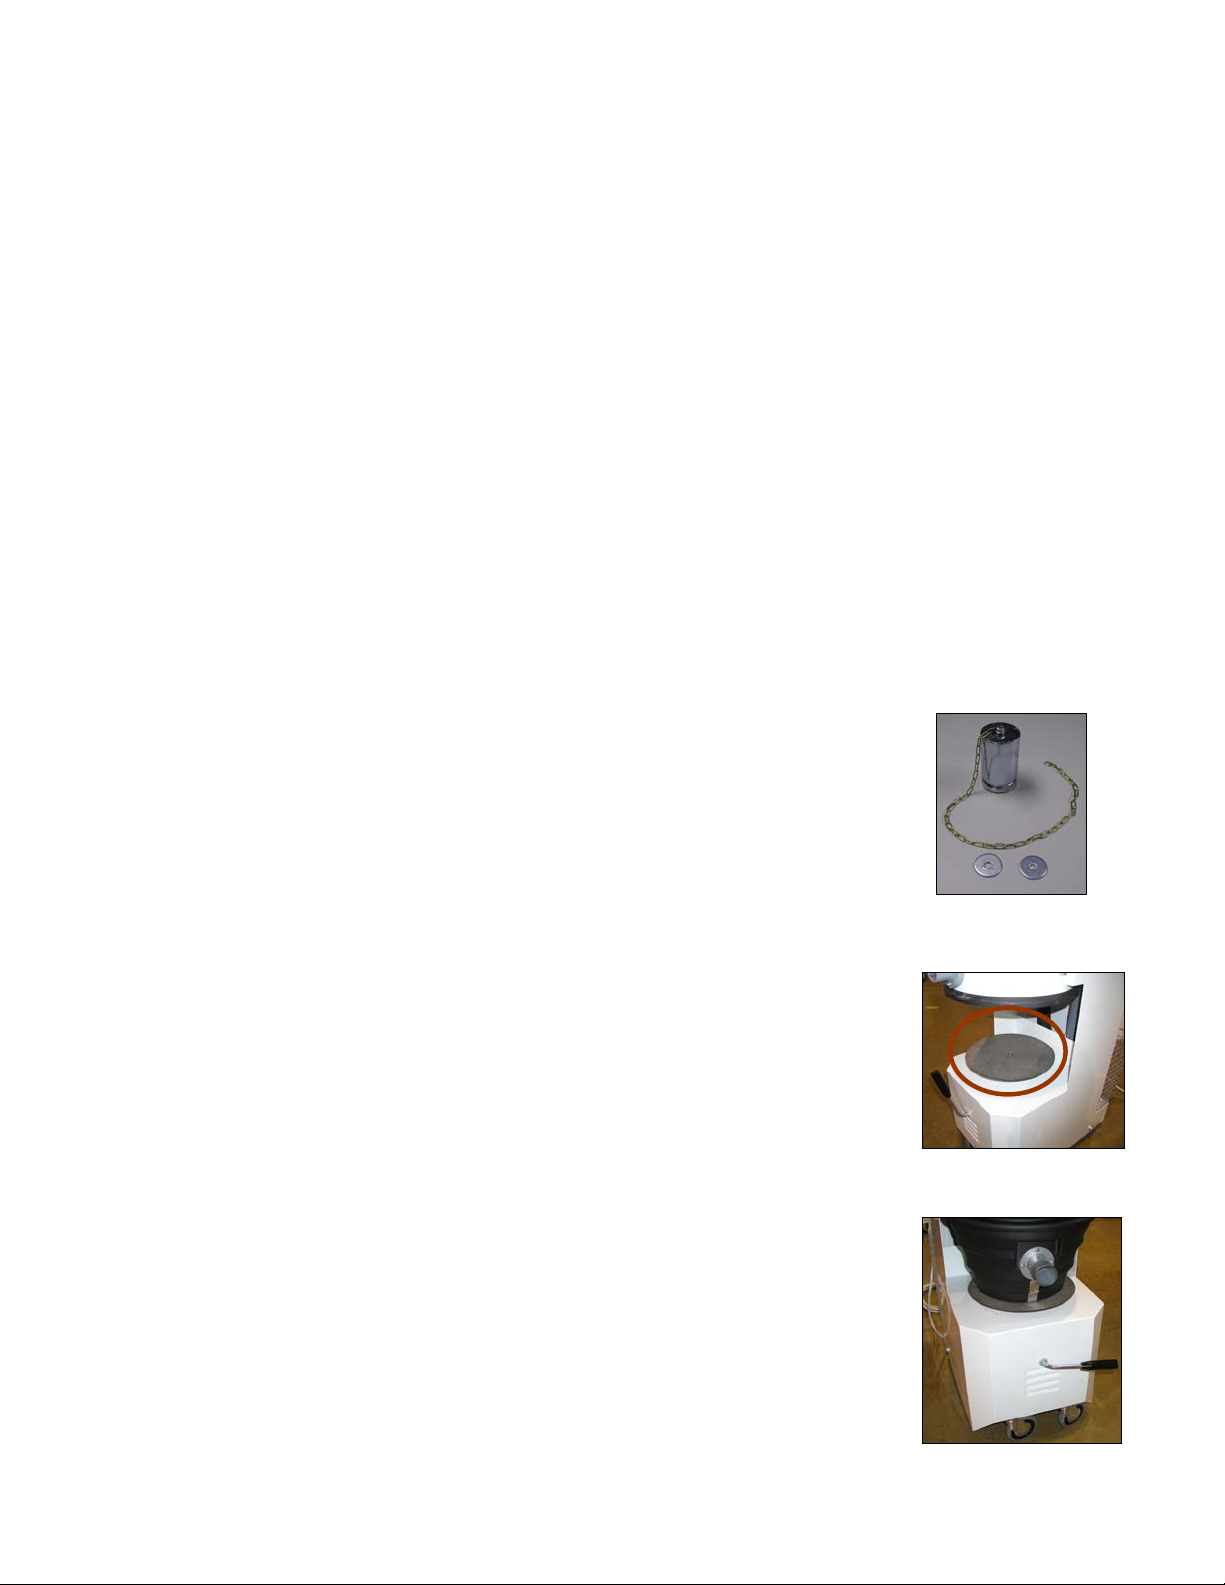
The additional components to retrofit a 3156 for use with a Safe-Pak
include two washers and an inlet plug. These components are pictured
in Photo 4. The washers are designed to elevate the plate (Photo 5) on
which the Safe-Pak will sit. It may be necessary to elevate the Safe-Pak
so that it will seat up against the housing of the vacuum. This will
prevent any air leakage, allowing the vacuum to perform at it’s peak level
and draw in the maximum amount of air.
Check how well the Safe-Pak seals against the vacuum housing by
placing the Safe-Pak on the plate pictured in Photo 5. The plate is raised
by turning the black lever (Photo 6) in a counterclockwise direction.
Make sure the perimeter of the Safe-Pak lines up with the perimeter of
the vacuum housing. While turning the lever in the counterclockwise
direction, you should feel some resistance at about the 1 o’clock position.
You should be able to continue rotating the lever past the 12 o’clock
position until it comes to a stop at about the 11 o’clock position.
Check to see if there are any gaps between the perimeter of the SafePak and the vacuum housing. You might also want to check for any air
leakage by turning the vacuum on and feeling for leaks around the
perimeter of the Safe-Pak. If there are any significant gaps or leaks
around the Safe-Pak, you may want to add one or two washers as
spacers to raise the level of the plate in order to get a tighter seal with
the Safe-Pak.
Photo 4
Photo 5
Photo 6
Page 3

To install the washers simply remove the plate by unscrewing the bolt
from the center of the plate. The bolt fastens the plate to the shaft
underneath (Photo 7). To add height to the shaft, the washers need to
be placed on top of the shaft as pictured in Photo 8. The plate will need
to be placed on top of these washers. The original bolt must be put back
in place to fasten the plate and washers to the shaft. The Safe-Pak
should be placed atop the plate once again and tested to see if the gaps
and leaks are sufficiently closed.
It may be possible that no washers are needed or that only one washer
is needed instead of the two supplied with the kit. There are slight
variances in the manufacturing of the vacuums, so we have supplied two
washers to handle all possible scenarios. It may be necessary to test the
Safe-Pak under all three scenarios (no washers, one washer, or two
washers) and determine which will allow the tightest seal yet still allow
the operator to easily rotate the lever to lock the Safe-Pak in place.
Once you have determined what scenario works best, the machine
should be permanently set up to be used with the Safe-Pak at any time
and should not require further adjustment when a new Safe-Pak is
purchased.
The final step for installing the Safe-Pak is to mount the inlet plug to the
machine. The inlet plug seals the original orifice of the 3156 vacuum, so
that the air must come in by way of the inlet on the Safe-Pak itself.
The inlet plug includes a lanyard that allows the plug to be permanently
fastened to the vacuum, yet still allows the operator to remove it from the
orifice when needed. The lanyard should be attached to the inlet using
one of the screws that fastens the inlet to the housing of the vacuum, as
shown in Photo 9. The plug itself is inserted into the orifice until it ‘snaps’
into place. To remove it you simply depress the button on the orifice to
relieve the tension and pull the plug out of the orifice.
This completes the installation of the retrofit hardware needed for the Safe-Pak. Your CFM
Model 3156 vacuum is now ready to be used with a Safe-Pak. If you intend to use the 3156
for applications other than in conjunction with the Safe-Pak, you must completely remove the
washers used to raise the elevation of the plate pictured in Photo 5. Once this has been done,
the original collection container supplied with the machine can replace the location of the SafePak. The inlet plug must be disconnected from its orifice. Once this has been completed, you
will be able to use your 3156 for standard cleaning applications.
If you have any questions or concerns with the installation of a Safe-Pak, please feel free to
contact our Customer Service Department at 1-800-NILFISK. Thank you for your continued
interest in Nilfisk’s line of industrial vacuums.
Photo 7
Photo 8
Photo 9
 Loading...