


Pocket Guide
DIGITAL CAMERA
COOLPIX 950

2
Contents
Overview ......................................................................5
Taking Photographs .................................................... 5
Composition and Focus ................................................................ 6
Lighting............................................................................................9
Metering .................................................................................... 9
White Balance ........................................................................ 11
Image Adjustment .................................................................. 13
Multi-shot Photography (CONTINUOUS).................................... 15
Best-Shot Selection (BSS) ............................................................. 17
Other Shooting Options .............................................................. 18
Playback .................................................................... 19
Photo Information ........................................................................ 19
The Playback Menu ..................................................................... 19
Other Camera Functions .......................................... 21
Camera Setup ............................................................................. 21
Saving and Clearing Settings ..................................................... 24
Using Folders ................................................................................. 25
Nikon View .................................................................
27
Nikon View
Software Manuals .................................................... 27
Connecting Your Camera to a Computer ............................... 28

3
Contents of the
COOLPIX 950 Refer-
ence Manual
(on CD)
Overview ......................................................................3
First Steps ...................................................................... 4
Putting Batteries in Your Camera ................................................. 4
Inserting and Removing Memory Cards .....................................5
Choosing a Language for the Menus ......................................... 5
Setting the Time and Date............................................................ 6
Taking Your First Photograph ......................................................... 7
Using the Buttons (A-REC, M-REC) ........................... 11
Flash Settings ................................................................................ 11
Focus Settings ............................................................................... 13
Using the Self-Timer ...................................................................... 15
Image Quality and Size ............................................................... 16
Sensitivity ....................................................................................... 17
Exposure Mode ............................................................................ 18
Using the Buttons (PLAY) ........................................... 20
The Camera Menus................................................... 22
The A-REC Menu .......................................................................... 22
Using Folders (A-REC, M-REC) ................................................ 23
LCD Brightness ......................................................................... 25
Sound Settings ......................................................................... 26
Auto Off ................................................................................... 26
Formatting Memory Cards .................................................... 27

4
The M-REC Menu ......................................................................... 28
Digital Zoom (DIG TELE) .......................................................... 30
Black-and-White Photography ............................................. 31
Lens Converter Settings (LENS) .............................................. 32
Making a Panorama—Tips (AE-LOCK) ................................. 33
User Settings ............................................................................ 34
Restoring Default Settings ...................................................... 35
LCD On/Off .............................................................................. 36
The Controls Menu (M-REC) .................................................. 37
SEQ.XFER ..................................................................................38
The Playback Menu ..................................................................... 39
Deleting Multiple Photographs ............................................. 40
Using Folders (Playback) ........................................................ 42
Slideshow .................................................................................42
Protecting Photographs from Deletion ................................ 43
Hiding Photographs During Playback ..................................44
Preparing Photographs for Printing ...................................... 44
The Controls Menu (PLAY) ...................................................... 45
Connections .............................................................. 46
Connecting to a Television or VCR ............................................ 46
Viewing Photos on a Computer................................................. 47
Caring for Your Camera............................................ 48
Cleaning .......................................................................................48
Storage ......................................................................................... 48
Accessories ............................................................... 49
What’s in the Box ......................................................................... 49
Optional Accessories .................................................................. 49
Troubleshooting .........................................................50
General Problems ........................................................................ 50
Error Messages.............................................................................. 53
Specifications ............................................................55

5
Overview
Thank you for buying a COOLPIX 950. This
Pocket Guide
offers advice
concerning the most commonly used features of your camera. It has
been designed for portability and ease of reference. The other documentation for this product includes:
•
Fast Track Guide
(printed)
basic camera operations
•
For Your Safety
(printed)
safety precautions, cautions, and notices
•
Reference Manual
(CD-ROM)
full description of camera functions
• Software manuals (CD-ROM)
detailed instructions on using your camera with Nikon software
Taking Photographs
This chapter provides information on composing photographs, using
autofocus, dealing with different lighting conditions, and on the shooting options available in M-REC mode.
COMPOSE
• Optical
zoom
• Digital
zoom
FOCUS
•
Continuous
autofocus
• Single
autofocus
• Autofocus
lock
LIGHTING
• Metering
• White
balance
• Image
adjustment
SHOOTING
• Multi-shot
mode
• Best-shot
selection
Overview

6
PRACTICE
*
Digital zoom
CONCEPT
In digital zoom, image data from the CCD are processed digitally, enlarging the
center portion of the image to fill the frame. Unlike optical zoom, digital zoom does not
increase the amount of detail visible in the photograph. Instead, details visible at
maximum zoom are enlarged, producing a slightly “grainy” image.
In addition to the automatic digital zoom described in this section, M-REC mode offers
fixed settings for digital zoom of 1.25, 1.6, 2.0, or 2.5 times. This allows you to set a
value for digital zoom and then use optical zoom to compose photos. To use, turn the
mode dial to M-REC and select DIGITAL TELE from the shooting menu, then choose
the desired magnification. This setting will take effect whenever the mode dial is set
to M-REC. To restore automatic digital zoom, choose AUTO from the DIGITAL TELE
menu (more information on menu operations may be found below).
1/301/30
P
Taking Photographs: Composition and Focus
Composition and Focus
The COOLPIX 950 is equipped with motor-driven, ×3 optical zoom
linked to the viewfinder. This feature can be used to frame photographs either in the viewfinder or the LCD monitor. Photographs can
be enlarged electronically a further 1.25, 1.6, 2.0, or 2.5 times using
digital zoom
*
.
Focus can be adjusted according to your composition. Autofocus can
be used to adjust focus automatically to match the distance to your
subject. A variety of manual focus settings are available for situations
in which autofocus may not produce the desired results, as for
example when your subject is poorly lit (see the
Fast Track Guide
).
This section describes how to compose photographs using zoom and
how to get the best results with autofocus.
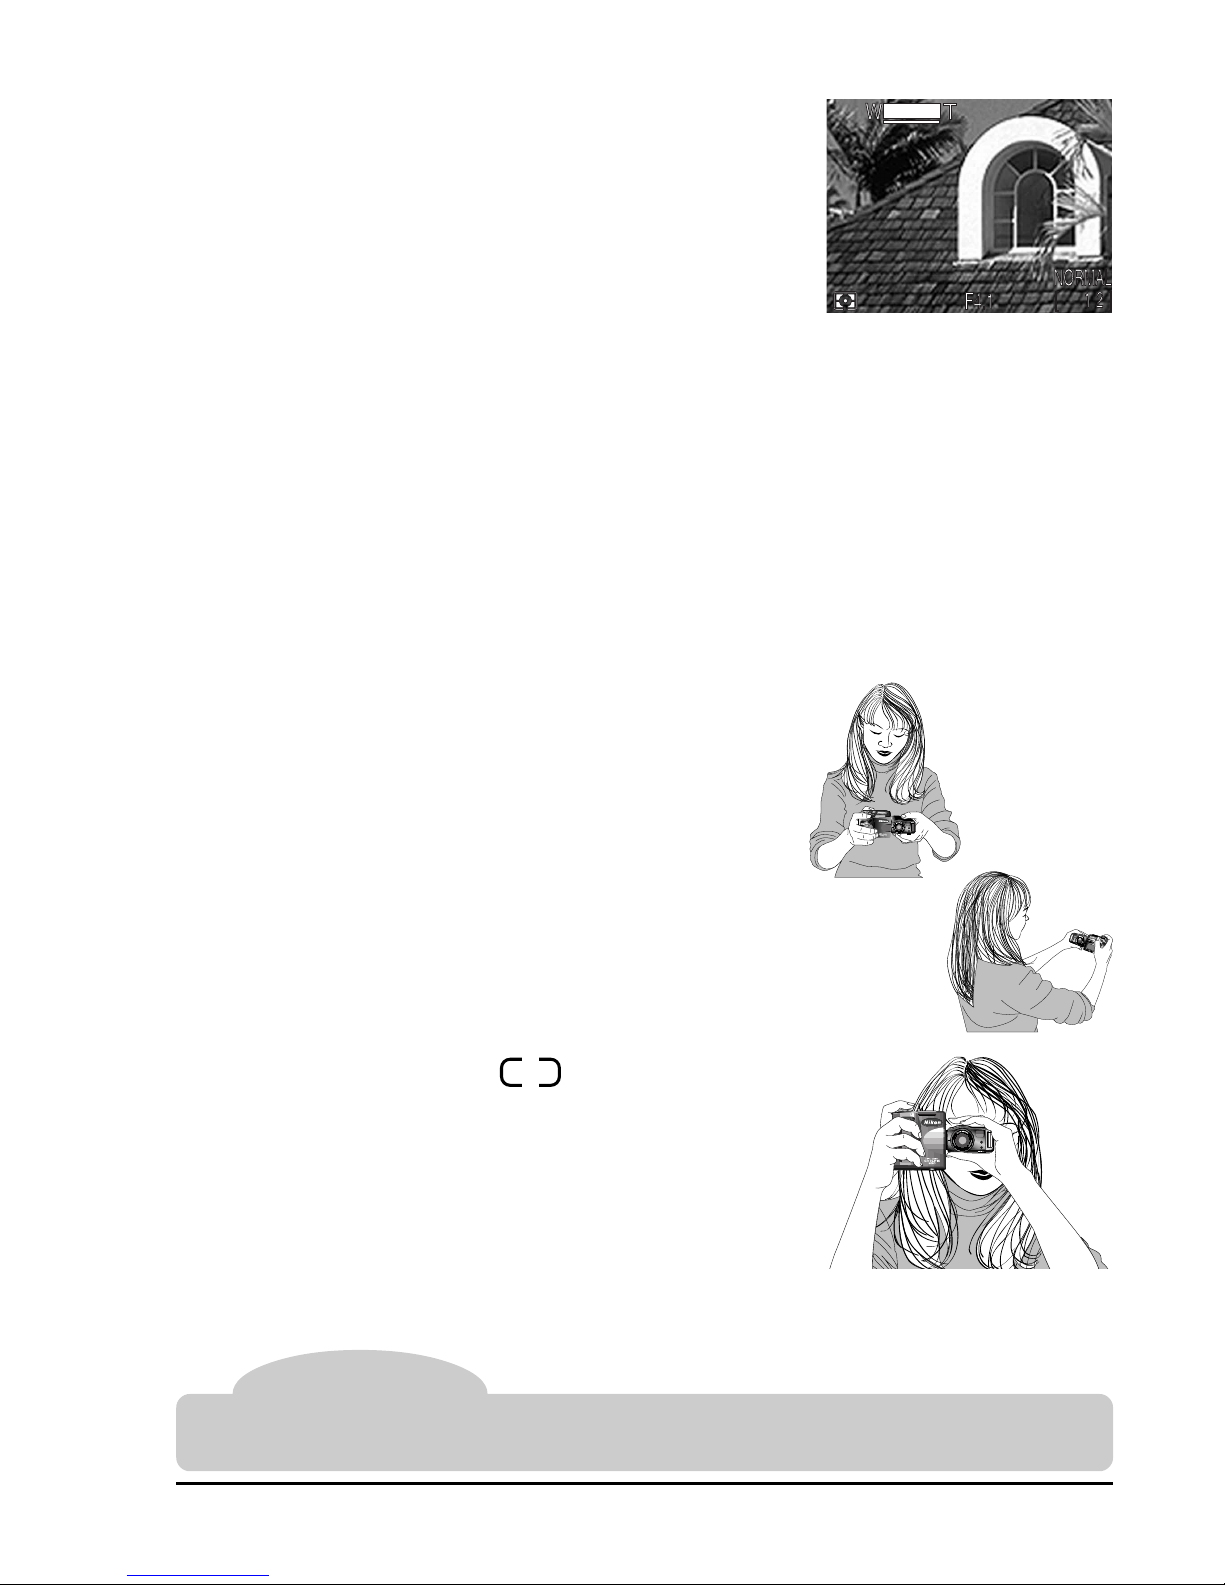
Framing Photographs
Photos can be framed in the viewfinder or LCD
monitor using the zoom buttons. Press the
zoom-in button (T) to magnify the subject so
that only a portion of it fills the frame, or use the
zoom-out button (W) to expand the field-ofview so that more of the subject is visible.
While the zoom switch is pressed, an indicator
showing the amount of zoom is displayed in the
LCD monitor.
7
Tip
When framing photographs, keep your fingers and other objects away from the lens
and flash window.
Taking Photographs: Composition and Focus
Automatic Digital Zoom
At the maximum optical zoom position, hold
the T button down for two seconds to trigger
digital zoom. While digital zoom is in effect, the
zoom indicator and the green AF lamp will
blink, and the amount of magnification produced by digital zoom will be displayed to the
right of the zoom indicator. Four settings from
×1.25 to ×2.5 can be selected using the T and W buttons to increase or
decrease the magnification. To restore optical zoom, press the W
button until the digital zoom indicator disappears.
Note that digital zoom is only available when the LCD monitor is on or
the camera is connected to a television set. The effects of digital zoom
are not visible in the viewfinder.
Framing Photographs in the Monitor
When framing photographs in the LCD monitor, you can take advantage of the rotating lens
section to hold the camera at almost any angle.
You can even rotate the lens to point at yourself and frame self-portraits in the monitor (in
this case, all indicators are hidden and the
monitor shows a mirror image of what will
appear in the final photograph).
Autofocus
The focus brackets ( ) visible in the
viewfinder show the focus point for autofocus
operations. When selecting the focus point, or
when the monitor has been turned off to save
power, you can use the viewfinder to frame
photos as shown at right.
1/30
P
X2.0X2.0

8
Tips
Getting good results with autofocus
Autofocus performs best when:
• There is contrast between the subject and the background. For example,
autofocus may not perform well on subjects that are the same color as the
background.
• The objects in the focus brackets are all at the same distance from the camera.
• The subject is motionless.
• The subject is evenly lit.
• The subject is well lit (the subject should not, however, be too much brighter than
the background).
Autofocus mode
The autofocus system operates in one of two modes: continuous or single. In
continuous AF mode, the camera adjusts focus continuously so that the camera is
ready to take a photo at any time. Note however that this allows you to take pictures
even when the camera is not focused; check the AF lamp before shooting. In single
AF mode, the camera focuses only when the shutter-release button is pressed half
way. This saves battery power, but there will be a slight delay before the camera is
ready to take a picture. In A-REC mode, the autofocus mode is determined by whether
the LCD monitor is on or off: continuous AF is used when the monitor is on, single AF
when it is off. These settings can be changed in M-REC mode; see page 21 of this
manual for more information.
Taking Photographs: Composition and Focus
After framing your photograph, you can check autofocus by gently
pressing the shutter-release button half way. If the camera is able to
focus on the subject framed in the viewfinder focus brackets, the AF
lamp will glow green. Focus will remain constant as long as the shutterrelease button is held halfway down; this “focus lock” can be used to
focus on a subject that is off-center in the final composition (see the
Fast Track Guide
). Zoom can not be adjusted while focus lock is in
effect.
If the camera is unable to focus, the AF lamp will blink rapidly. In this
case, use focus lock to focus on an object at the same distance from
the camera as your subject, then recompose your photograph. Alternatively, you can use a focus setting of Infinity or one of the manual
focus settings available in M-REC mode (see the
Fast Track Guide
).
Note that if the monitor is off, you will not be able to take photographs
while the AF lamp is blinking.

9
Center-
weighted
Camera measures light
in the entire frame, but
assigns greatest weight
to center portion.
Use this setting to preserve background details while letting lighting conditions at the
center of the frame define exposure.
CONCEPT
Taking Photographs: Lighting
Spot Camera measures light
only in a small area at
the center of the frame,
shown by a square in
the LCD monitor.
Ensures that the subject will be correctly
exposed even if the
background is very
bright or very dark.
Matrix Camera measures the
brightness and contrast
of the scene in 256 areas of the frame and
adjusts exposure to a
level that captures both
bright and shaded portions of the image.
Method How it works When to use it
This setting is best for
general use. Exposure
is calculated by comparing measurements
from 256 areas of the
scene with a reference
library of typical compositions, producing
the best possible setting for the photo.
Lighting
The COOLPIX 950 offers a number of functions for dealing with
different lighting conditions. In addition to the flash, sensitivity, and
exposure compensation settings discussed in the
Fast Track Guide
,
you can use metering, white balance, and image adjustment to cope
with different lighting conditions or produce a variety of lighting effects.
Metering
The camera measures the amount of light available and adjusts
exposure accordingly using one of the three metering methods listed
below. Exposure is fixed when the shutter-release button is halfpressed (exposure lock).

10
➔
AUTO
SHOOTING
IMG ADJUST
WHITE BAL
CONTINUOUS
METERING
BESTSHOT
BLACK&WHIT
DIGITALTELE
AUTO
Using the Menus
If the menu does not appear when you press the MENU button, press the MONITOR
button until the LCD monitor comes on. Items can be highlighted using the zoom
buttons and selected using the shutter-release button. You can page through menus
that have multiple pages by pressing the MENU button. To clear a menu from the
screen, highlight BK and press the shutter-release button, or press the MENU button
until the menu disappears.
AUTO
METERING
SPOT
CENTERWEIGHT
MATRIX
Taking Photographs: Lighting
Choosing a metering method
When the mode dial is set to A-REC, the camera automatically uses
matrix metering. To choose another metering method, follow these
steps:
1. Turn the mode dial to M-REC.
2. Press the MENU button to display the shoot-
ing menu.
3. Using the zoom buttons, highlight METERING.
PRACTICE
4. To change the setting,
either
•rotate the command dial (the chosen setting will be shown as an
icon next to the METERING item in the shooting menu; press the
MENU button twice to return to shooting mode once you have
adjusted settings to your satisfaction),
or
•press the shutter-release button and se-
lect the desired setting from the METERING menu.
The chosen metering method will be active whenever the camera is in
M-REC mode. The metering method is shown by icons in the control
panel, LCD monitor, and shooting menu.

11
CONCEPT
Setting When to use it
White preset
■
This option allows you to set white balance by
aiming the camera at a white object, such as a
piece of paper, and selecting MEASURE from
the WHITE PRESET submenu. Alternatively,
you can select CANCEL from the submenu to
use the white-balance setting from the photo
previously taken.
Sunny Use this setting when taking photographs out-
doors in bright sunlight.
Incandescent Use this setting when taking photographs in-
doors under incandescent light.
Fluorescent Use this setting when taking photographs in-
doors under fluorescent light.
AUTO
A
This setting is suited to the widest variety of light
sources.
Cloudy Use this setting when taking photographs out-
doors in overcast weather.
Flash Use this setting when taking photographs with
the flash.
Taking Photographs: Lighting
White Balance
Different lighting conditions may change how the whites in your
photographs look. This is called “white balance.” The COOLPIX 950
automatically adjusts white balance when the shutter-release button
is half-pressed to produce natural coloration. If desired, a whitebalance program suited to specific light sources can be selected. The
COOLPIX 950 offers the following white-balance programs:

12
➔
AUTO
SHOOTING
IMG ADJUST
WHITE BAL
CONTINUOUS
METERING
BESTSHOT
BLACK&WHIT
DIGITALTELE
AUTO
AUTO
WHITE BAL
SUNNY
INCANDESCENT
FLUORESCENT
CLOUDY
FLASH
AUTO
WHITE PRESET
Taking Photographs: Lighting
PRACTICE
Choosing a white-balance program
In A-REC mode, the camera uses automatic white balance. Follow the
steps below to select another white-balance program:
1. Turn the mode dial to M-REC.
2. Press the MENU button to display the shoot-
ing menu.
3. Using the zoom buttons, highlight WHITE
BAL.
4. To change the setting,
either
•rotate the command dial (the chosen setting will be shown as an
icon next to the WHITE BAL item in the shooting menu; press the
MENU button twice to return to shooting mode once you have
adjusted settings to your satisfaction),
or
•press the shutter-release button and se-
lect the desired setting from the WHITE
BAL. menu.
The chosen white-balance program will take effect whenever the
camera is in M-REC mode. The current program is shown by icons in
the shooting menu and LCD monitor (if no white-balance icon appears
in the LCD monitor, automatic white balance is in effect).

13
CONCEPT
Note
Only one image adjustment setting can be used at a time. Selecting a new image
adjustment option cancels the previous setting.
Setting When to use it
Contrast+
Use this setting to increase contrast, making the
difference between light and dark portions of the
image more distinct.
Contrast– Use this setting when you want to reduce con-
trast for a softer, less distinct image.
Lighten This setting increases the brightness of the im-
age.
Darken Use this setting to prevent bright objects from
being “washed out.”
Standard
0
Use this setting for natural brightness and contrast.
Taking Photographs: Lighting
Image Adjustment
Although the sophisticated autoexposure control of the COOLPIX 950
produces excellent results in most cases, there may be some instances in which further adjustment to brightness and contrast can
enhance the image. Brightness can be increased using the
lighten
option to bring out poorly-lit portions of the composition, or decreased
using the
darken
option to prevent bright portions of the composition
from being “washed out.” Unlike exposure compensation, in which
aperture and shutter speed are adjusted to increase or decrease
exposure, the image is processed digitally to increase or decrease
brightness.
Contrast
can be used to adjust the difference between
light and dark portions of the image, making shadows and outlines
more distinct or softening edges.
The COOLPIX 950 offers the following image adjustment options:

14
Using image adjustment
Image adjustment is only available in M-REC mode. To change the
image adjustment setting:
1. Turn the mode dial to M-REC.
2. Press the MENU button to display the shoot-
ing menu.
3. Using the zoom buttons, highlight IMG
ADJUST.
➔
AUTO
SHOOTING
IMG ADJUST
WHITE BAL
CONTINUOUS
METERING
BESTSHOT
BLACK&WHIT
DIGITALTELE
AUTO
AUTO
CONTRASTLIGHTEN
DARKEN
CONTRAST+
IMGADJUST
STANDARD
Taking Photographs: Lighting
PRACTICE
4. To change the setting,
either
•rotate the command dial (the chosen setting will be shown as an
icon next to the IMG ADJUST item in the shooting menu; press the
MENU button twice to return to shooting mode once you have
adjusted settings to your satisfaction),
or
•press the shutter-release button and se-
lect the desired setting from the IMG ADJUST menu.
The chosen setting will be in effect whenever the camera is in M-REC
mode. The current setting is indicated by means of icons in the shooting
menu and LCD monitor (if no image adjustment icon appears in the
LCD monitor, the image adjustment setting is STANDARD).

15
CONCEPT
Multi-shot Photography (CONTINUOUS)
In M-REC mode, you can use the COOLPIX 950 to shoot frames one
after the other while the shutter-release button is held down. Four
settings are available:
Setting How it works
VGA sequence The camera takes a series of photographs 640 ×
480 pixels in size. An image quality of NORMAL
is used to speed processing, allowing photos to
be taken at approximately two frames per second.
16-shots The camera takes up to sixteen consecutive
“thumbnail” images and combines them into a
collage.
Continuous Photographs will be taken one after the other as
long as the shutter-release button is held down.
Single Only one photograph is taken each time the
shutter-release button is pressed.
Selecting a multi-shot mode
The multi-shot mode is automatically set to SINGLE as long as the
mode dial is on A-REC. To choose another multi-shot mode for M-REC:
1. Turn the mode dial to M-REC.
2. Press the MENU button to display the shoot-
ing menu.
Taking Photographs: Multi-shot Photography (CONTINUOUS)
PRACTICE
Note
With CONTINUOUS and VGA SEQUENCE,
the built-in flash will be set to “Off.” An
external flash can however be used.
When battery power is low, the maximum number of shots that can be taken in a single
sequence at a setting of “Continuous” or “VGA Sequence” is ten.

16
3. Using the zoom buttons, highlight CON-
TINUOUS.
AUTO
CONT.MODE
VGA SEQ
CONTINOUS
SINGLE
16SHOTS
The chosen setting will be in effect whenever the camera is in M-REC
mode. The current setting is indicated by an icon in the M-REC menu.
In modes other than single, icons indicating the multi-shot mode also
appear in the control panel and LCD monitor. A setting of VGA
SEQUENCE is indicated by the icon together with the image size
indicator VGA and the image quality indicator NORMAL.
Tip
The COOLPIX 950 is equipped with a
memory buffer for temporary storage of photos
during shooting. This allows you to take several photographs in succession, as you
would with a traditional film camera, without waiting for the images to be transferred
to the memory card. The number of images that can be stored in the buffer depends
on the quality and size of the images. When the buffer becomes full, there will be a
short pause while the camera transfers images to the card for permanent storage. The
time required depends on the number of images in the buffer and the speed of the
CompactFlash memory card.
Do not remove the memory card from the camera while images are being transferred
from the buffer to the card.
Doing so could result in loss of data or in damage to the
camera or the card. Be sure the camera is off before removing the memory card.
Taking Photographs: Multi-shot Photography (CONTINUOUS)
➔
AUTO
SHOOTING
IMG ADJUST
WHITE BAL
CONTINUOUS
METERING
BESTSHOT
BLACK&WHIT
DIGITALTELE
AUTO
4. To change the setting,
either
•rotate the command dial (the chosen setting will be shown as an
icon next to the CONTINUOUS item in the shooting menu; press
the MENU button twice to return to shooting mode once you have
adjusted settings to your satisfaction),
or
•press the shutter-release button and select the desired setting from the CONT.
MODE menu.

17
➔
AUTO
SHOOTING
IMG ADJUST
WHITE BAL
CONTINUOUS
METERING
BESTSHOT
BLACK&WHIT
DIGITALTELE
AUTO
AUTO
BESTSHOT
YES
NO
BSS
Best-Shot Selection (BSS)
The COOLPIX 950 offers a “best-shot selection” (BSS) function that
compensates for camera movement. When this function is on, the
camera shoots photos as long as the shutter-release button is held
down, to a maximum of ten. The camera then compares the images
and selects the photo with the highest level of detail. Only this image
is saved to the memory card.
Turning BSS on and off
Best-shot selection is only available in M-REC mode. To turn BSS on
or off:
1. Turn the mode dial to M-REC.
2. Press the MENU button to display the shoot-
ing menu.
3. Using the zoom buttons, highlight BEST
SHOT.
4. To change the setting,
either
•rotate the command dial (press the MENU
button twice to return to shooting mode
once you have adjusted settings to your
satisfaction),
or
•press the shutter-release button and
choose NO (BSS off) or YES (BSS on)
from the BEST SHOT menu.
Notes
BSS can be used in situations in which inadvertent camera movement may affect the
outcome of the photograph, for example when the camera is zoomed in, macro closeup is used, or shutter speed is low. BSS may not produce the desired results with a
moving subject or if you change the composition during shooting.
T
he flash is set to “Off” when BSS is on.
Taking Photographs: Best-Shot Selection (BSS)
CONCEPT
PRACTICE
The chosen setting will be used whenever the camera is in M-REC
mode. When best-shot selection is on, a check mark appears next to
the BEST SHOT item in the shooting menu and a BSS indicator
appears in the LCD monitor.

18
Other Shooting Options
In addition to items outlined above, the M-REC menu offers the
shooting options listed below. See the
Reference Manual
for details.
Digital zoom (DIGITAL TEL): By default, the camera
automatically enters digital zoom mode when the
zoom-in button (T) is held down for two seconds at the
maximum optical zoom position (see “Composition
and Focus” in this chapter). In M-REC mode, you can
choose a fixed setting for digital zoom, making it
possible to change optical zoom while digital zoom is
in effect. Digital zoom only takes effect when the LCD
monitor is on.
BLACK&WHITE: Choose YES to shoot photos in
black-and-white. Choose NO for color photography.
Taking Photographs: Other Shooting Options
AUTO
D-TELE
X 2 . 0
X 2 . 5
X 1 . 6
X 1 . 2 5
O F F
A U T O
AUTO
B&W
YES
NO
AUTO
ON
RESET
OFF
AE-L
WB-L
AE LOCK
Lens converter (LENS): This menu offers a choice of settings suited to the lens
adapters available separately for the COOLPIX 950. These settings are described
in the
Reference Manual
.
AE-LOCK: Locks exposure and white balance, allowing you to produce a series of photographs with consistent color balance and exposure. The flash is set to
“off” when AE-LOCK is in effect.

19
Playback
In addition to the playback features described in the
Fast Track Guide
,
the COOLPIX 950 offers a menu of playback options that can be used
when viewing photographs stored in the memory card. This section
outlines some of these options. Playback is described in greater detail
in the CD
Reference Manual
.
Photo Information
When the mode dial is set to PLAY, the most
recently recorded photograph will appear in
the LCD monitor. The LCD monitor will also
display the photo information shown at right.
More information on the camera settings used
to take the photograph can be obtained by
turning the command dial.
99.04.14
15:05
NORMAL
VGA
100NIKON
0015.JPG
[ 17/ 17]
Playback: The Playback Menu
Date and
time of
recording
Folder name
File no. and
type
Image size
and quality
Frame no./
total shots
visible
The Playback Menu
To display the playback menu, rotate the mode
dial to PLAY and press the MENU button.
Operations specific to playback are described
below. Camera setup and folder options are
described in the following chapter.
AUTO
PLAY BACK
SLIDESHOW
PROTECT
PRINT SET
SET UP
DELETE
HIDE IMAGE
FOLDERS
Using the Menus
If the menu does not appear when you press the MENU button, press the MONITOR
button until the LCD monitor comes on. Items can be highlighted using the zoom
buttons and selected using the shutter-release button. To clear a menu from the
screen, highlight BK and press the shutter-release button, or press the MENU button
until the menu disappears.

20
PRINT SET
Delete: Delete selected pictures, folders, or all photos
in memory. This menu can also be used to delete
printer information files created using the PRINT SET
option (see below). To delete selected images, choose
SELECTED from the delete menu, then choose the
photos to be deleted from a thumbnail menu.
FRAME INTVL
SLIDESHOW
START
(TEMP. SUSPEND
➔ SHUTTER)
AUTO
DELETE
FOLDER
SELECTED
ALL
PRNT SET
Playback: The Playback Menu
Slideshow: Photographs are displayed one after the
other in the order taken. Choosing SLIDESHOW from
the playback menu displays a start screen. Highlight
START and press the shutter-release button to start
the slideshow. The time each image is displayed can
be altered by selecting FRAME INTVL to display a
menu of interval settings.
Protect: This item is used to protect selected pictures
from deletion. The images to be protected can be
chosen from a thumbnail menu. Protected pictures
are marked with a
icon when played back on the
camera and have read-only status when viewed on a
computer.
Hide: This item is used to conceal selected pictures
during playback and slide shows. Choose the images
you want to hide from a thumbnail menu. Hidden
pictures can only be seen from the hide-image menu,
where they are marked with a
icon. They are
treated as hidden files when viewed from a computer.
Thumbnail Menus
To select multiple photos from a thumbnail menu, highlight images with the zoom
buttons and press the button. Selected images are marked with an icon; to
deselect an image, highlight it and press again. To complete the operation,
highlight the last of the images to be selected and press the shutter-release button.
Print setup: This item is used when you want to print
images using a DPOF-compatible printer or print service. After you have selected the images you want to
print from a thumbnail menu, a menu of print options
will be displayed, from which you can select the number of copies to be printed and whether to print the date
of recording on the photos. This information will be
recorded on the memory card for use when the card is
inserted in an DPOF-compatible printer.

21
Other Camera Functions: Camera Setup
Other Camera Functions
This chapter describes additional camera functions accessible from
the A-REC, M-REC, and PLAY menus. These include camera setup,
options for saving M-REC settings or restoring them to their default
values, and file-management functions for organizing photographs as
you shoot.
Camera Setup
Each mode has its own setup menu for adjusting basic camera settings.
To access the setup menu for A-REC, turn the mode dial to A-REC and
press the MENU button. The setup menus for M-REC and PLAY can
be accessed by choosing SETUP from the menu for each mode. The
options available in the setup menus are outlined below. Details may
be found in the CD
Reference Manual
.
LCD Brightness (all modes): Choose “–” to make the
LCD monitor darker or “+” to make it brighter. Normal
brightness can be restored by selecting “0”.
LCDBRIGHT
Sound (all modes): This option controls the beep made by the camera when
operations are performed.
LCD on/off (M-REC): Controls how the LCD monitor
will behave when the mode dial is set to M-REC. The
following settings are available:
• ON&C-AF: the LCD monitor remains on and the
camera focuses continuously until the shutter-release button is half-pressed. Photos are displayed in
the monitor after shooting.
• ON&S-AF: as above, but the camera only focuses
when the shutter-release button is pressed half way.
• FAST REVIEW: as for ON&C-AF, but photos are not displayed in the LCD monitor
after shooting.
• REVIEW ONLY: monitor comes on only to display photographs immediately after
they are taken.
• LCD OFF: monitor remains off while the camera is in M-REC mode.
AUTO
LCD O/I
ON&S-AF
REVIEW ONLY
LCD OFF
FAST REVIEW
ON&C-AF
ON AT STARTUP
TURNS MONITOR

22
Controls (PLAY): By default, the zoom out (W) button
is used to move the highlight bar down through the
menus and the zoom in (T) button to move it up. This
relationship is reversed when the MENU DIR. option is
checked. See below for a description of the control
options available in M-REC mode.
AUTO
CONTROLS
MENU DIR
AUTO
CONTROLS
MENU DIR.
DIST. FT
INTFLASH
MODE
SAVE
SAVE
SAVE
SAVE
Controls (M-REC): In M-REC mode, the CONTROLS
menu offers the following options:
•
SAVE (FLASH MODE SAVE): When this item
is checked, the camera saves the flash setting active
at the time the mode dial is set to OFF; this setting is
restored when the mode dial is turned to M-REC.
•
SAVE (FOCUS MODE SAVE): As above, but
the camera saves the focus mode setting.
• EXPOSURE MODE SAVE: As for FLASH MODE SAVE, but the camera saves
the exposure-mode setting.
•
SAVE (EXPOSURE COMPENSATION SAVE): As for FLASH MODE SAVE,
but the camera saves the exposure-compensation setting.
• INTL FLASH OFF: The COOLPIX 950 is equipped with an external flash
connector that allows an external flash to be used in combination with the
camera’s built-in flash. This item allows you to turn the internal flash off while you
are using an external flash at settings of “Auto,” “Slow-sync” or “Forced on” (see
the
COOLPIX 950 Reference Manual
for information on using an external flash).
• MENU DIR.: Reverses the roles of the zoom buttons for the purpose of scrolling
through the menus. When this item is checked, the zoom out (W) button is used
to move the highlight bar up and the zoom in (T) button to move it down.
• DIST. FT: Displays the focus distance for manual focus in feet. If this item is not
checked, distance will be shown in meters.
Auto off (all modes): To save power, the LCD monitor
will turn off if no operation is performed for a specified
period of time. The monitor will remain off until the
MONITOR button is pressed or the shutter-release
button is pressed half way. The length of time the LCD
monitor will remain on can be changed using AUTO
OFF. Two settings are available, one for playback and
the other for A-REC and M-REC modes.
AUTO OFF
3 0 S
1 M
5 M
3 0 M
Other Camera Functions: Camera Setup

23
SEQ.XFER. (M-REC): Photographs taken by the
COOLPIX 950 are stored as image files. Each file is
assigned a name which includes a four-digit number.
Because no two photographs on any given memory
card will have the same number at the same time,
there is no possibility of confusion so long as you
continue to use a single memory card without formatting it. If you format the card or use a new card,
however, a number previously assigned may be used again. If you then copy the
new photograph to a computer on which you had saved the earlier photograph, the
earlier photograph may be overwritten. To prevent this, select ON from the
SEQ.XFER menu. Numbers will then continue to be assigned in ascending order,
starting from the lowest available number and continuing to a maximum of 9,999,
even when a new card is inserted in the camera. To reset the number to the lowest
number available on the current card, choose RESET. Choose OFF to restore
normal filename assignment.
Card format (A-REC, PLAY): Formats compact flash-memory cards for use in the
COOLPIX 950 (
note that this erases all data on the card
). The card format option
for M-REC mode is located in the second page of the main M-REC menu, rather
than in the setup menu.
Date (all modes): The camera’s internal clock-calendar puts time stamps on your photographs. The DATE
menu at right is used to set this clock-calendar to the
current time and date. Use the command dial to
highlight the item to be changed and the zoom switches
to change its value. To change the order in which the
year, month, and day are displayed, highlight Y M D
and use the zoom switches to select a new order.
Pressing the shutter-release button when Y M D is selected sets the clock-calender
to the specified values.
Language (M-REC, PLAY): Choose the language for the menus from German
(Deutsch), English, French (Français), and Japanese.
AUTO
SEQ. XFER
RESET
O N
OFF
AUTO
DATE
2 3 : 0 5
➔
SET
SHUTTER
➔
ADJ.
ZOOM SW
1 9 9 9 . 0 3 . 2 0
YMD
Other Camera Functions: Camera Setup

24
Saving and Clearing Settings
The M-REC menu provides the following options for saving camera
settings and restoring settings to their default values.
USER SET: The COOLPIX 950 can “memorize” up to
three combinations of settings, including:
• metering
• white balance
• multi-shot
• image adjustment
• best-shot mode
• digital zoom
• lens converter
• autoexposure and white-balance lock.
By default, whenever you change any of the above settings in M-REC mode, the
changes are automatically saved as Set 1. These settings are restored when the
mode dial is next set to M-REC. To record additional combinations of settings,
select USER SET in the M-REC menu and rotate the command dial until the
number 2 or 3 appears next to the USER SET item. Any changes you make to
settings will be recorded under the new number. The settings recorded for the
current settings number are shown in the USER SET menu, which can be accessed
by pressing the shutter-release button when USER SET is highlighted.
RESET ALL: Restores to their default values any M-REC options modified by the
user. Language, date, MENU DIR., and DIST. FT settings are not affected.
AUTO
USER SET
BSS
A U T O
Other Camera Functions: Saving and Clearing Settings

25
CONCEPT
PRACTICE
AUTO
OPTIONS
RENAME
DELETE
NEW
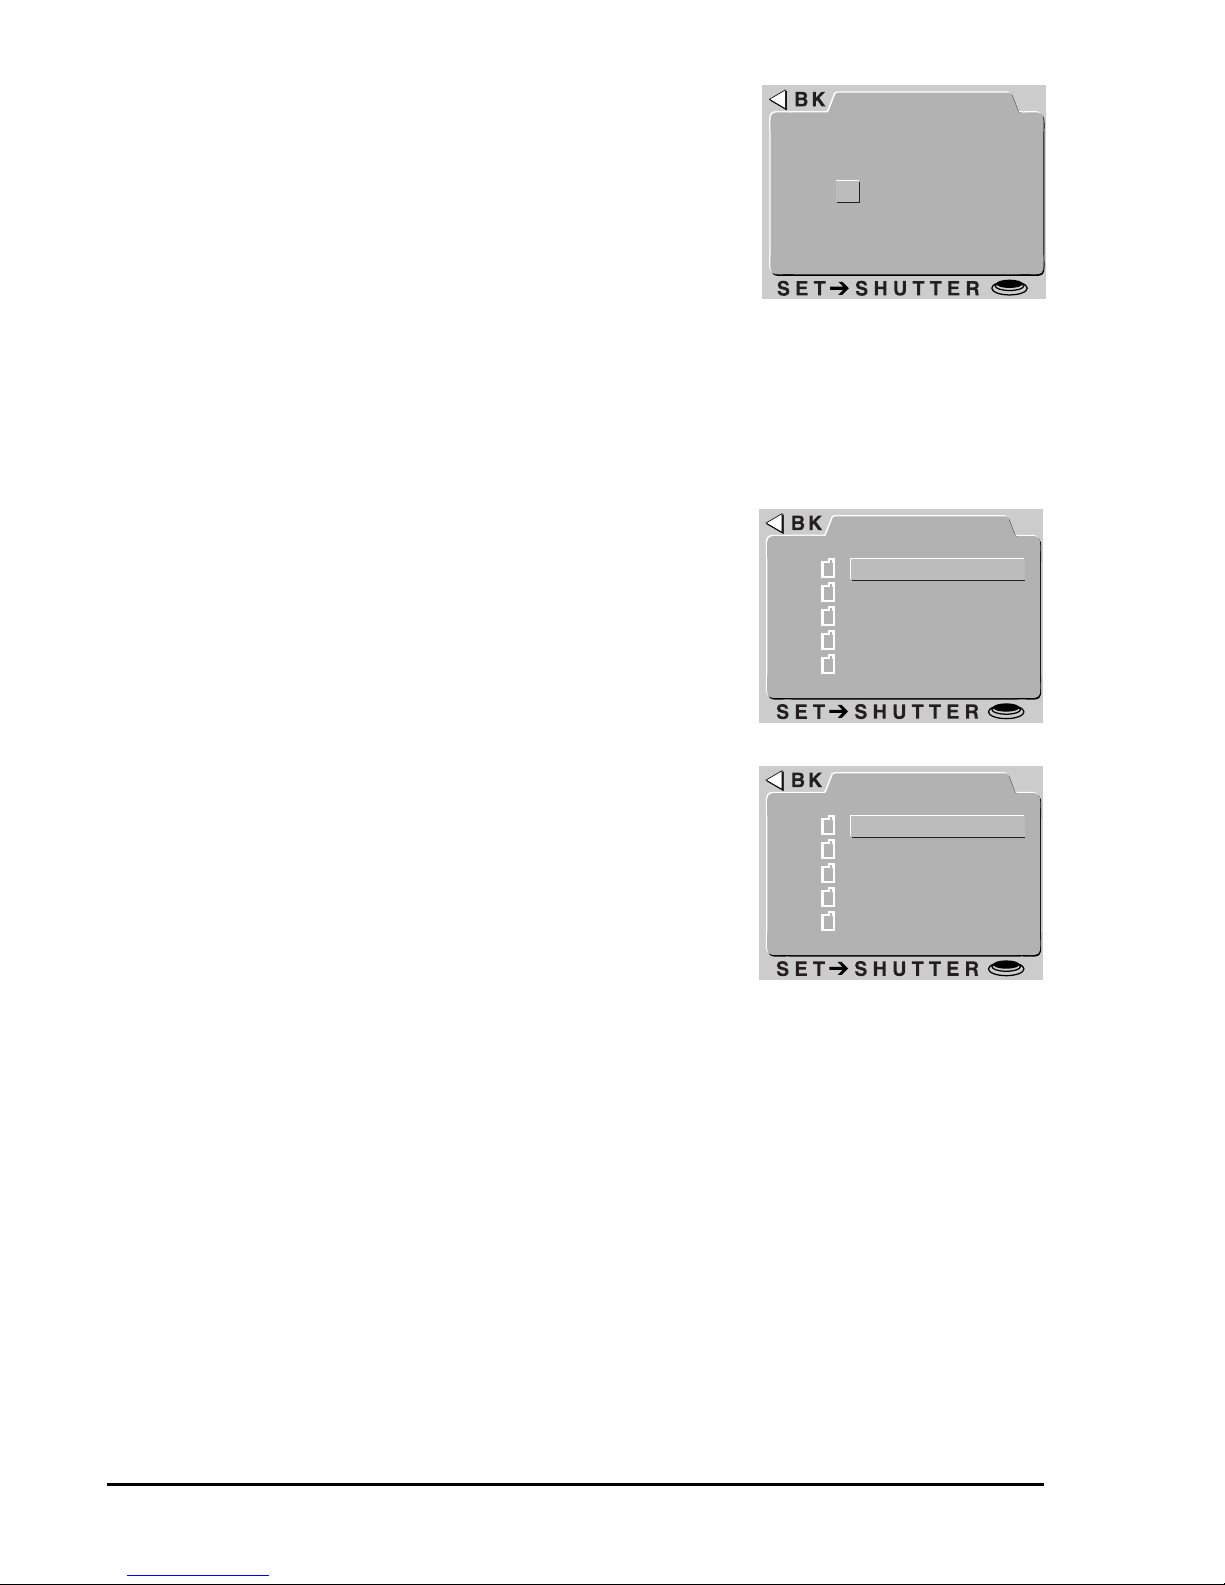
Using Folders
By default, photographs taken with the COOLPIX 950 are stored in the
memory card in a folder labeled NIKON. To make it easier to locate
photographs during playback, you can create additional folders and
organize your photographs by theme. The FOLDERS menu enables
you to select the folder in which subsequent photographs will be
stored or to choose the folder from which photographs will be played
back. You can also create folders, rename existing folders, or delete
folders.
Select FOLDERS from any of the A-REC, MREC, and PLAY menus to display a menu
similar to that shown at right. If more than one
folder exists on the memory card currently in
the camera, select the folder that will be used
for playback or to store subsequent photographs in A-REC and M-REC modes. To
select a folder, simply highlight it using the
zoom buttons and press the shutter-release
button.
The folder options menu
To create a new folder, or to rename or delete
existing folders, choose OPTIONS from the
FOLDERS menu. The menu shown at right will
be displayed.
AUTO
FOLDERS
NIKON
SHOW
APRIL
OPTIONS
Other Camera Functions: Using Folders
26
Creating new folders
Choose NEW from the OPTIONS menu to display the
window shown at right, where you can enter a name for
the new folder. Highlight letters using the command
dial and press the zoom buttons to change the highlighted letter. Press the shutter-release button when
the last letter is highlighted to create a folder with the
specified name and return to normal viewing mode.
Until another folder is selected from the FOLDERS
menu, all subsequent photographs will be stored in the new folder. To exit the
window without creating a new folder, press MENU or use the command dial to
highlight BK, then press the shutter-release button to return to the FOLDERS
menu.
Renaming existing folders
Choose RENAME from the OPTIONS menu to display
a list of user-created folders (the folder name NIKON
can not be changed). Highlight the folder you want to
rename and press the shutter-release button. The
name of the selected folder will be displayed, allowing
you to change the name as described in “Creating New
Folders.”
Deleting folders
Folders can be deleted using the DELETE option in the
playback menu or from the OPTIONS menu. Select
DELETE FOLDER from either menu to bring up a list
of user-created folders (the NIKON folder can not be
deleted). Select the folder you would like to delete and
press the shutter-release button. A confirmation message will appear: select YES to delete the folder or NO
to exit.
Note that all photographs in the folder will be
permanently erased when a folder is deleted.
Folders containing hidden or
protected files can not be deleted.
AUTO
NEW
N I K O N
I K O N
AUTO
RENAME
SHOW
APRIL
AUTO
DELETE
SHOW
APRIL
Other Camera Functions: Using Folders

27
Nikon View
This chapter describes how to connect your camera to a computer
running
Nikon View
(version 2 or later required). Using
Nikon View
, you
can view or print the photographs stored in your camera’s memory, or
copy photographs to your computer for long-term storage.
Nikon View
Software Manuals
The
Nikon View
manuals come in two parts: a
Quick Start Guide
covering installation, and a reference manual detailing operation. To
view the
Quick Start Guide
, insert the reference CD provided with your
camera into your computer’s CD-ROM drive. Then double-click the
“qkstart.html” icon to start your web browser, where the manual will be
displayed (the
Quick Start Guide
can be viewed with
Netscape Naviga-
tor
version 2.0 or higher, or
Internet Explorer
version 3.0 or higher; for
those who do not have a suitable browser, a README text file is
provided describing installation). The reference manuals can be
accessed by following the instructions in the
Quick Start Guide
.
Nikon View: Nikon View
Software Manuals

28
Connecting Your Camera to a Computer
The COOLPIX 950 can be connected to an IBM-compatible computer
(PC) using the serial cable provided. An adapter is also provided for
connection to Macintosh computers. To connect the camera, follow
these steps:
1. Connect the cable to the camera as shown
at right.
Tips
Both the camera and the computer can be on when the
serial cable is connected or
disconnected, but do not disconnect the cable while data transfer is in progress.
To users of IBM-compatible computers:
The cable provided is for connection to a male 9-pin serial connector, standard on
many IBM compatibles. Your PC may however use a different type of serial connector,
in which case you will need to buy an adapter before you will be able to connect the
cable.
To users of iMac computers:
The iMac is not equipped with a serial port. To connect the camera with your computer,
you will require a serial board or a USB-serial adapter.
If you are unable to connect the camera to a computer, you can still transfer photos
from the memory card to your computer using a CF card reader. If your computer is
equipped with a PC-card slot, you can use the CA-20 card adapter (available
separately) to read photos from the memory card (see the
Reference Manual
for
details).
2. If your computer is an IBM-compatible, connect the other end of the cable directly to the
computer’s serial port.
Nikon View
: Connecting Your Camera to a Computer

29
3. If your computer is a Macintosh, connect the adaptor to the other
end of the cable, then connect the adaptor to your computer’s printer
or modem port.
When the cable is connected to the camera and the camera is turned
on, the borders of the number display in the control panel will light up.
The LCD monitor and all other indicators, apart from the battery
indicator, will be off, and all camera functions will be disabled. Normal
functioning will be restored when the serial cable is unplugged.
Consult the
Nikon View Reference Manual
for your platform for infor-
mation on using
Nikon View
to browse the photographs in the camera’s
memory or to copy images to your computer.
✔
Cautions
While data are being transferred between the camera and your computer, the borders
of the number display
in the control panel will flash on and off in sequence to form a
“marching ants” marquee. Do not unplug the serial cable while data transfer is in
progress.
Do not use
Nikon View
with the camera while battery power is low or the batteries are
exhausted. If the battery indicator changes to low or starts to flash while the camera
and computer are connected, wait for the borders of the number display to stop
flashing, then disconnect the camera and replace the batteries or connect the AC
adapter (sold separately).
Nikon View
: Connecting Your Camera to a Computer

30
 Loading...