

Nikon DI Manual (install To Pc)
Windows XP Home Edition / Windows XP Professional
D1 Series
This manual is for those users of D1 Series cameras who are
running Nikon View 4 (Version4.3.1) under Windows XP Home
Edition / Professional.
Using Nikon View 4 with Windows XP Home Edition / Windows XP Professional (D1 Series)
xp-1
Installing Nikon View 4
Follow the installer instructions to install Nikon View 4 .
Device Registration
The camera must be registered as a hardware device when it is connected
to the computer for the first time.
Step 1
Before registering the camera, confirm that your OHCI-compliant IEEE
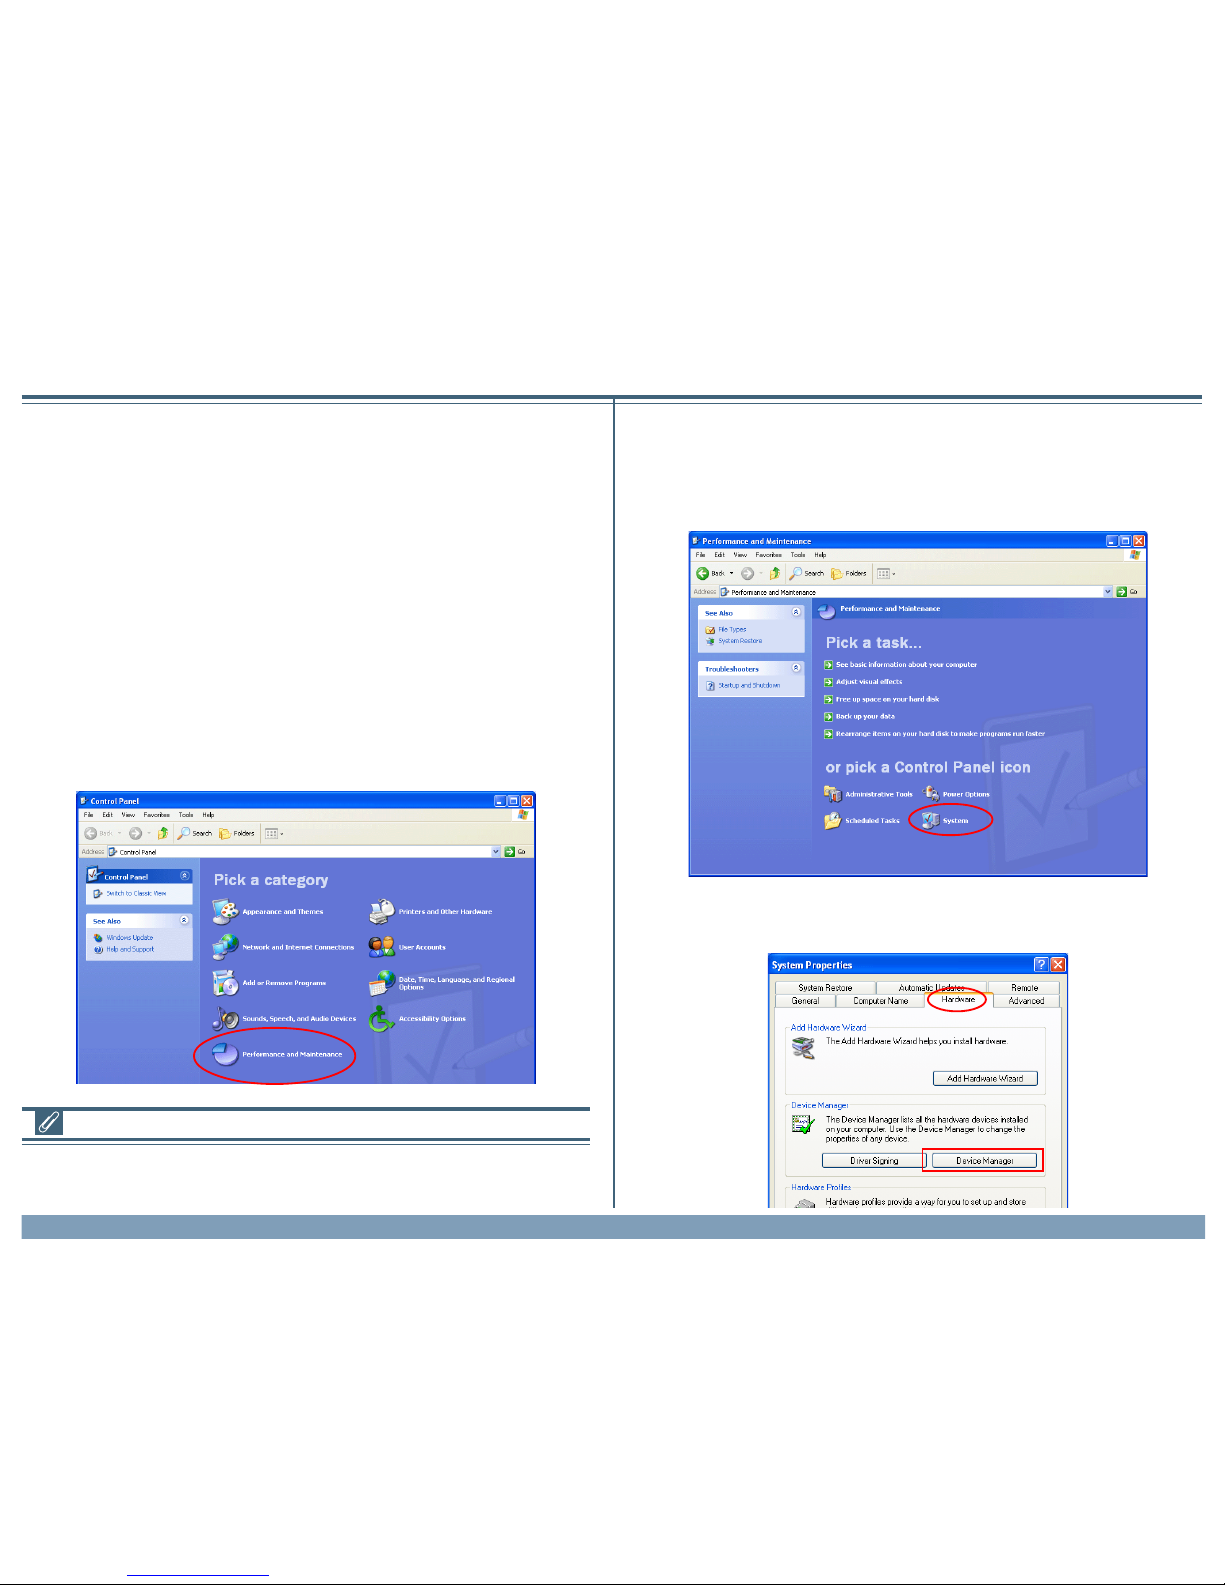
1394 interface board or card has been correctly registered with the system. Select Control Panel from the Start menu to display the window
shown below. Click Performance and Maintenance.
Using Nikon View 4 with Windows XP Home Edition / Windows XP Professional
Step 2
Click System to open the System Properties window.
Step 3
Select the Hardware tab and click the Device Manager button.
D1 Series
Log On
You will need to log on as the “Computer Administrator” when installing,
uninstalling and using Nikon View 4.
Using Nikon View 4 with Windows XP Home Edition / Windows XP Professional (D1 Series)
xp-2
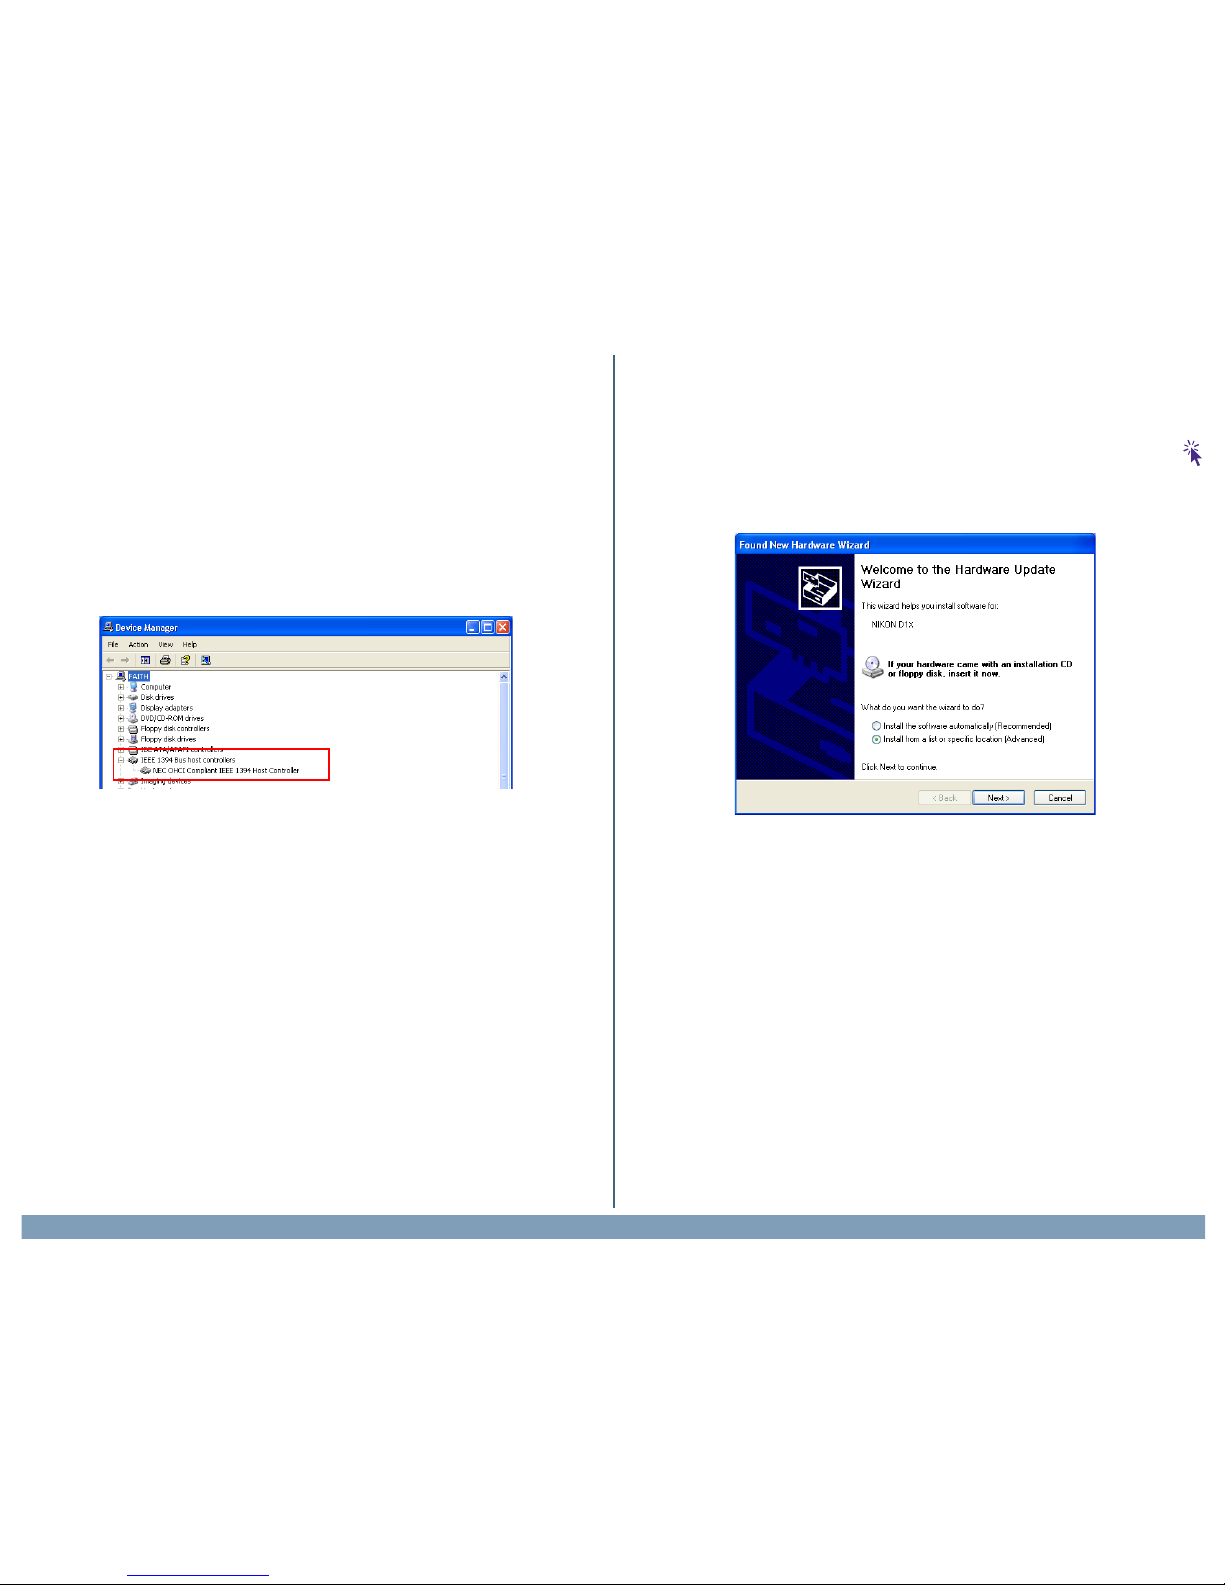
Step 4
If your OHCI-compliant IEEE 1394 interface board or card has been correctly registered with the system, the bus controller for your IEEE 1394
board or card should be listed under “1394 Bus Host Controller”. If “1394
Bus Host Controller” is not listed in the Device Manager, or if your IEEE
1394 interface board or card is listed as an unknown or miscellaneous
device or is preceded by a red or yellow warning icon, follow the instructions in the manual provided with the board to ensure that the drivers are
properly installed.
Step 6
The “Found New Hardware Wizard” will be displayed. Confirm that “Install driver from a list or specified location” is selected and click Next. If
the “Found New Hardware Wizard” dialog does not appear, click here
to refer to Reinstalling the Device Drivers (page xp-5)
Step 5
Turn on the D1 (D1X/D1H), make sure that the mode dial is set to PC, and
then connect the camera to the computer using an IEEE 1394 cable.
Using Nikon View 4 with Windows XP Home Edition / Windows XP Professional (D1 Series)
xp-3
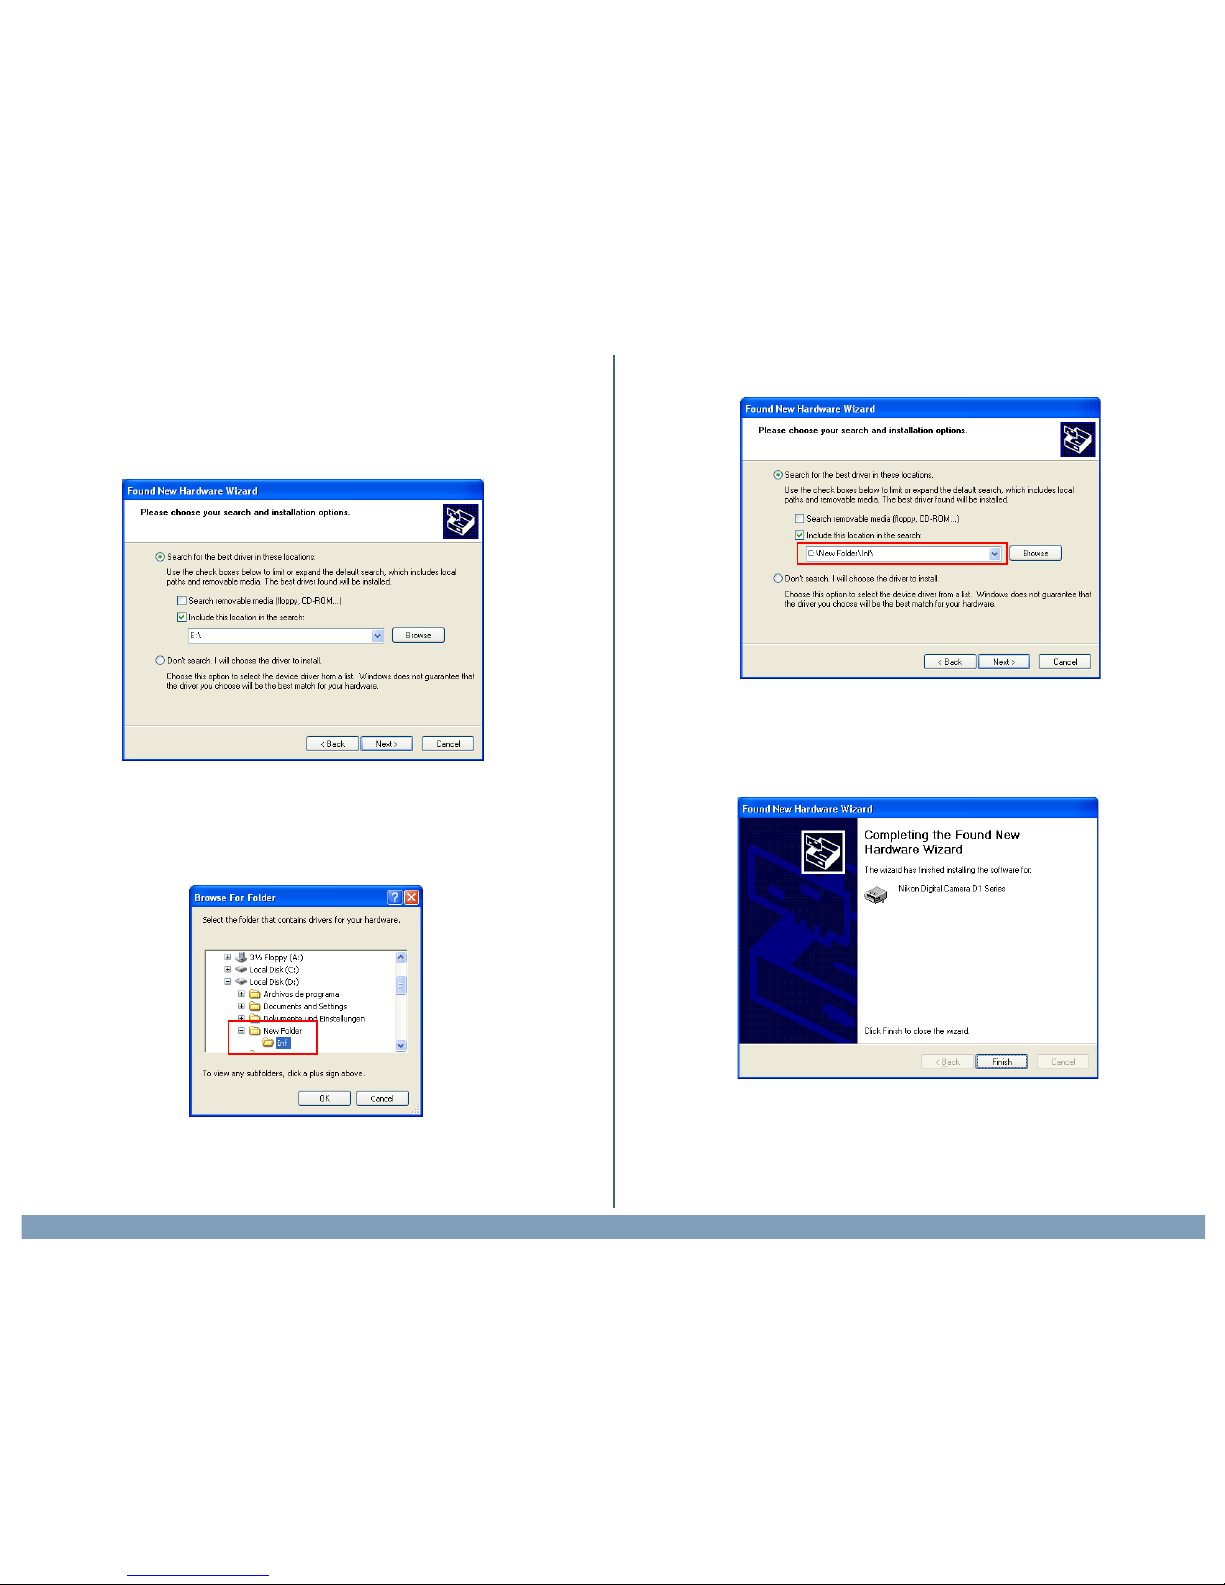
Step 7
The dialog shown below will be displayed. Select “Search for the best
driver in these location” then click “Including this location in the seach”
If the downloaded folder is labelled “New Folder”, click the Browse but-
ton, and select “C:\New FolderInf”.
Step 8
When the driver installation has been completed, the dialog shown below
will be displayed; click Finish to close the wizard.
Click OK; the dialog shown below will be displayed.
 Loading...