

Page 1

Take Pictures/Transfer Pictures to Your Computer
Quick Start Guide
N
En
Page 2
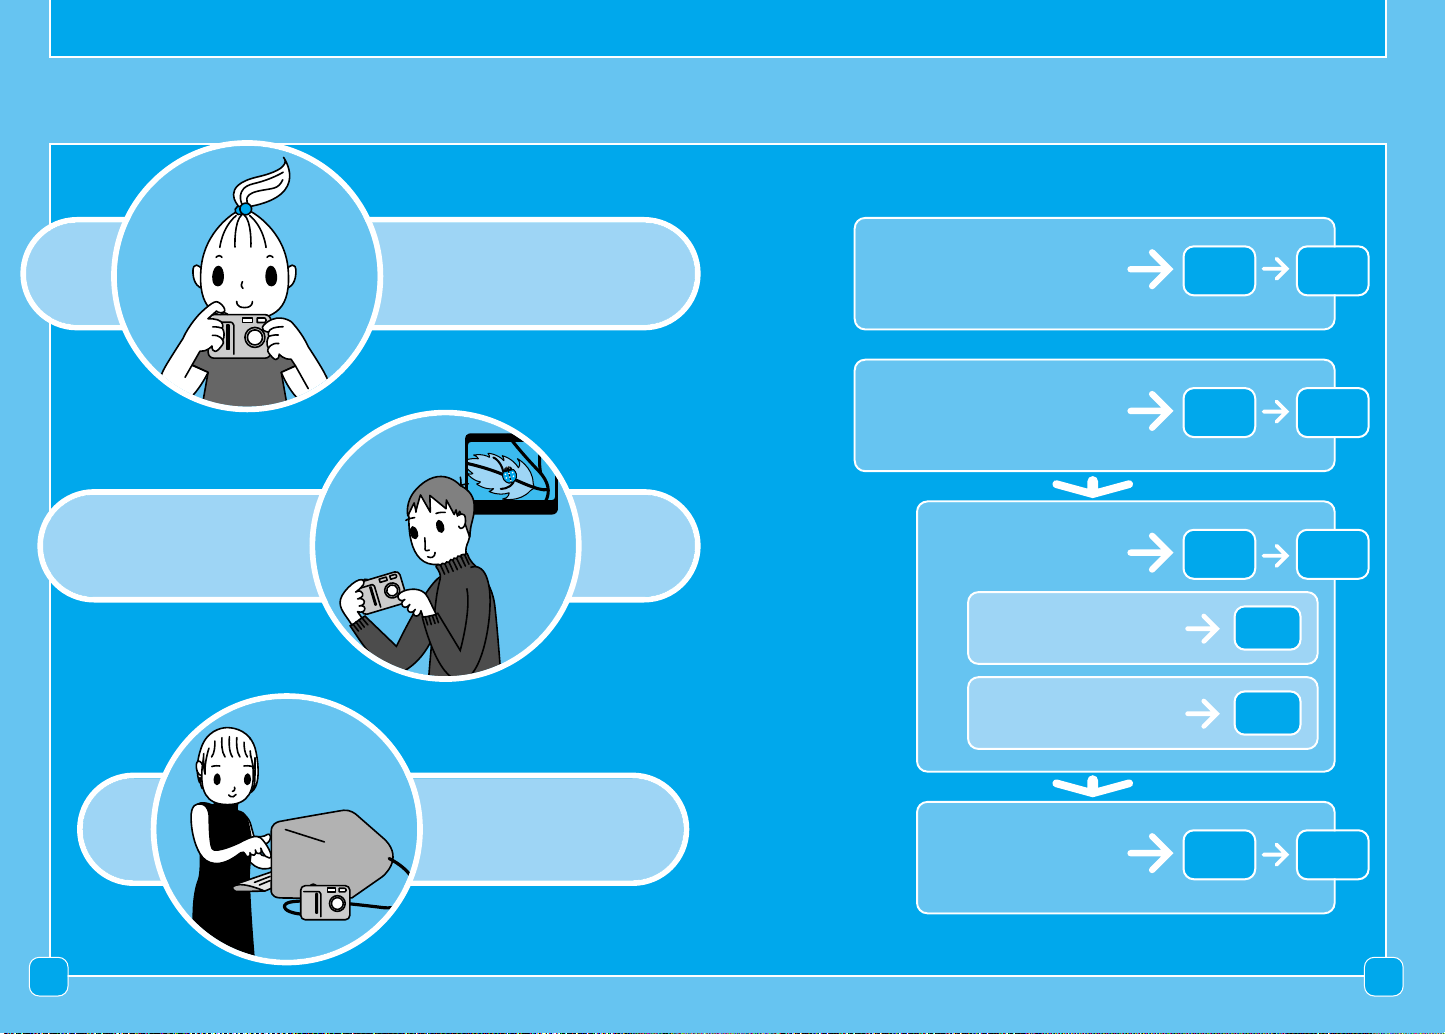
Let’s Use COOLPIX 4300
Contents
Review
Shoot
Transfer
Take Pictures
Transfer Pictures
to Your Computer
Installing
Software
For Windows
For Macintosh
Connecting to
a Computer
P. 1 5P. 4
P. 3 9P. 1 6
P. 2 9P. 1 8
P. 2 2
P. 2 6
P. 3 9P. 3 0
32
Page 3
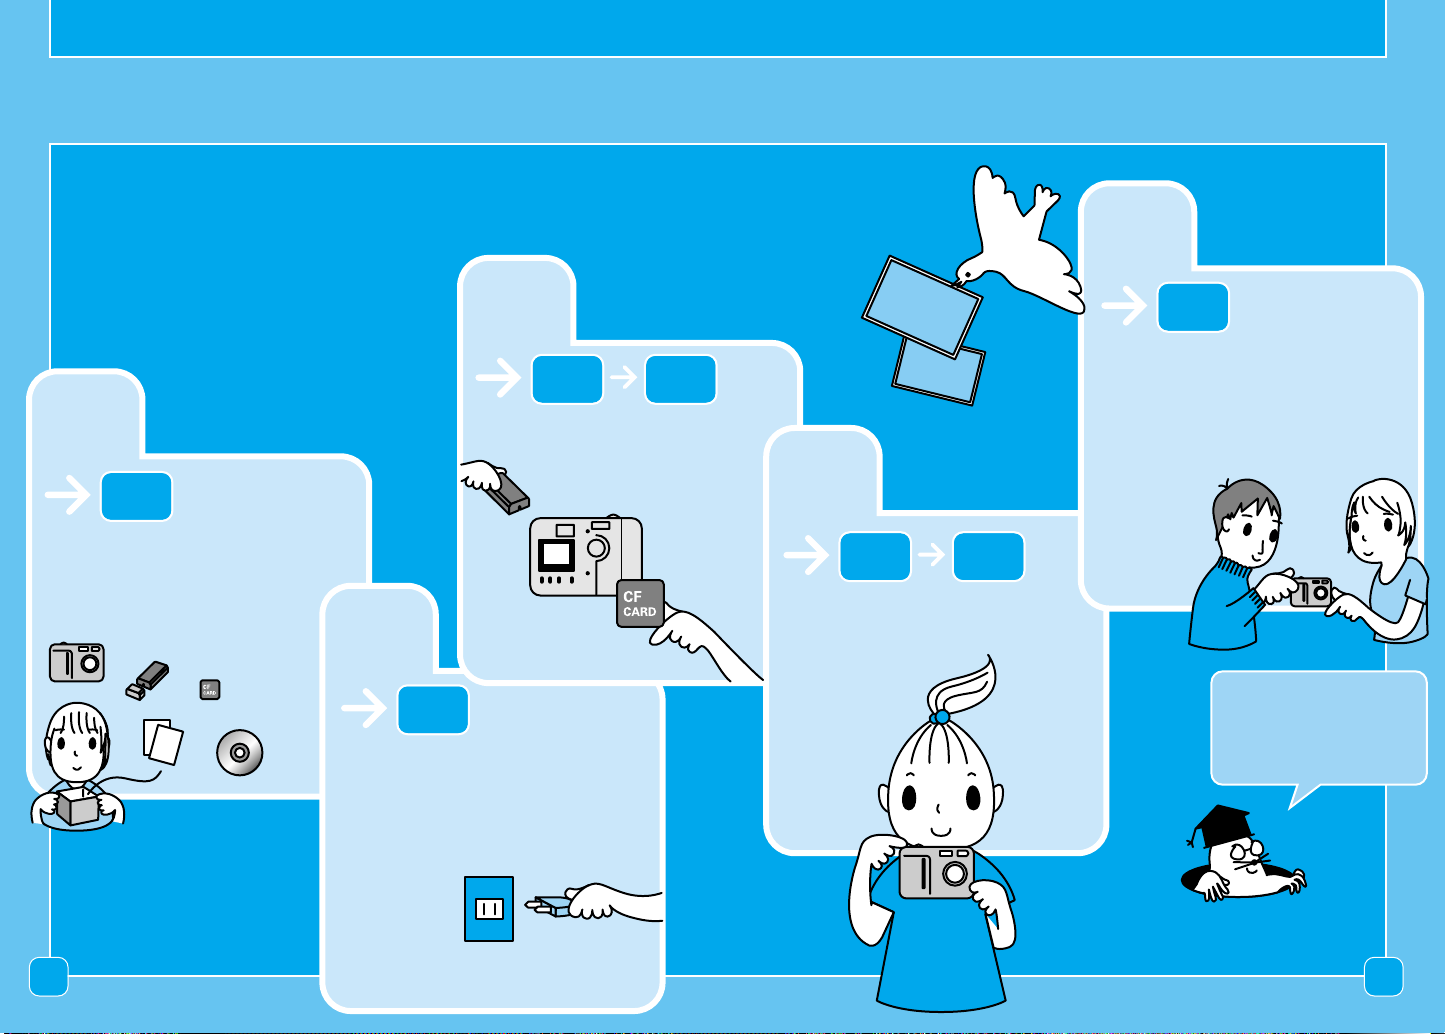
Take Pictures with the COOLPIX 4300
Please take the time to read this Quick Start Guide
and discover how to take and view pictures with your
COOLPIX4300.
5
3
P. 1 3
1
P. 6
Unpack the camera
Prepare the
camera
2
P. 7
Charge the battery
P. 9P. 8
Review your pictures
4
P. 1 2P. 1 0
Take pictures
See the “Nikon Guide to
DIgital Photography” for
details on each operation.
4 5
Page 4

Unpack the camera
CF CARD
CHARGE
MH–53
LITHIUM ION BATTERY CHARGER
CHARGE
MH–53
LITHIUM ION BATTERY CHARGER
CHARGE
MH–53
LITHIUM ION BATTERY CHARGER
CHARGE
CHARGE
1
Check that you have all the items listed below.
Charge the battery
2
1
COOLPIX4300
Warranty
4
Warranty
7
CompactFlash™
Memory Card
10
Video Cable
Take Pictures/Transfer Pictures to Your Computer
Quick Start Guide
2
N
Quick Start Guide
(This Guide)
5
“Important
Information”
Envelope
8
Rechargeable
EN-EL1 battery
with terminal cover
11
USB Interface Cable12Lens Cap with cord
CD-ROMs included with the
product vary with country or
region of purchase.
-----------------------
-------
En
3
Connect to AC power.
1
Guide to Digital
Photography with
the COOLPIX4300
Insert battery.
2
6
Camera Strap
Insert in
direction of
arrow
Terminals
EN-EL1
9
Battery Charger
The CHARGE lamp on the
3
charger will blink while the
battery charges.
CHARGE lamp
with power cable
(Shape of cable depends
on country or region of
purchase)
Charging is complete when
4
the CHARGE lamp remains lit.
6
13
Nikon View 5
CD-ROM
14
Nikon View 5
Reference Manual
CD-ROM
Note: An exhausted battery can be
fully recharged in approximately
2 hours.
7
Page 5
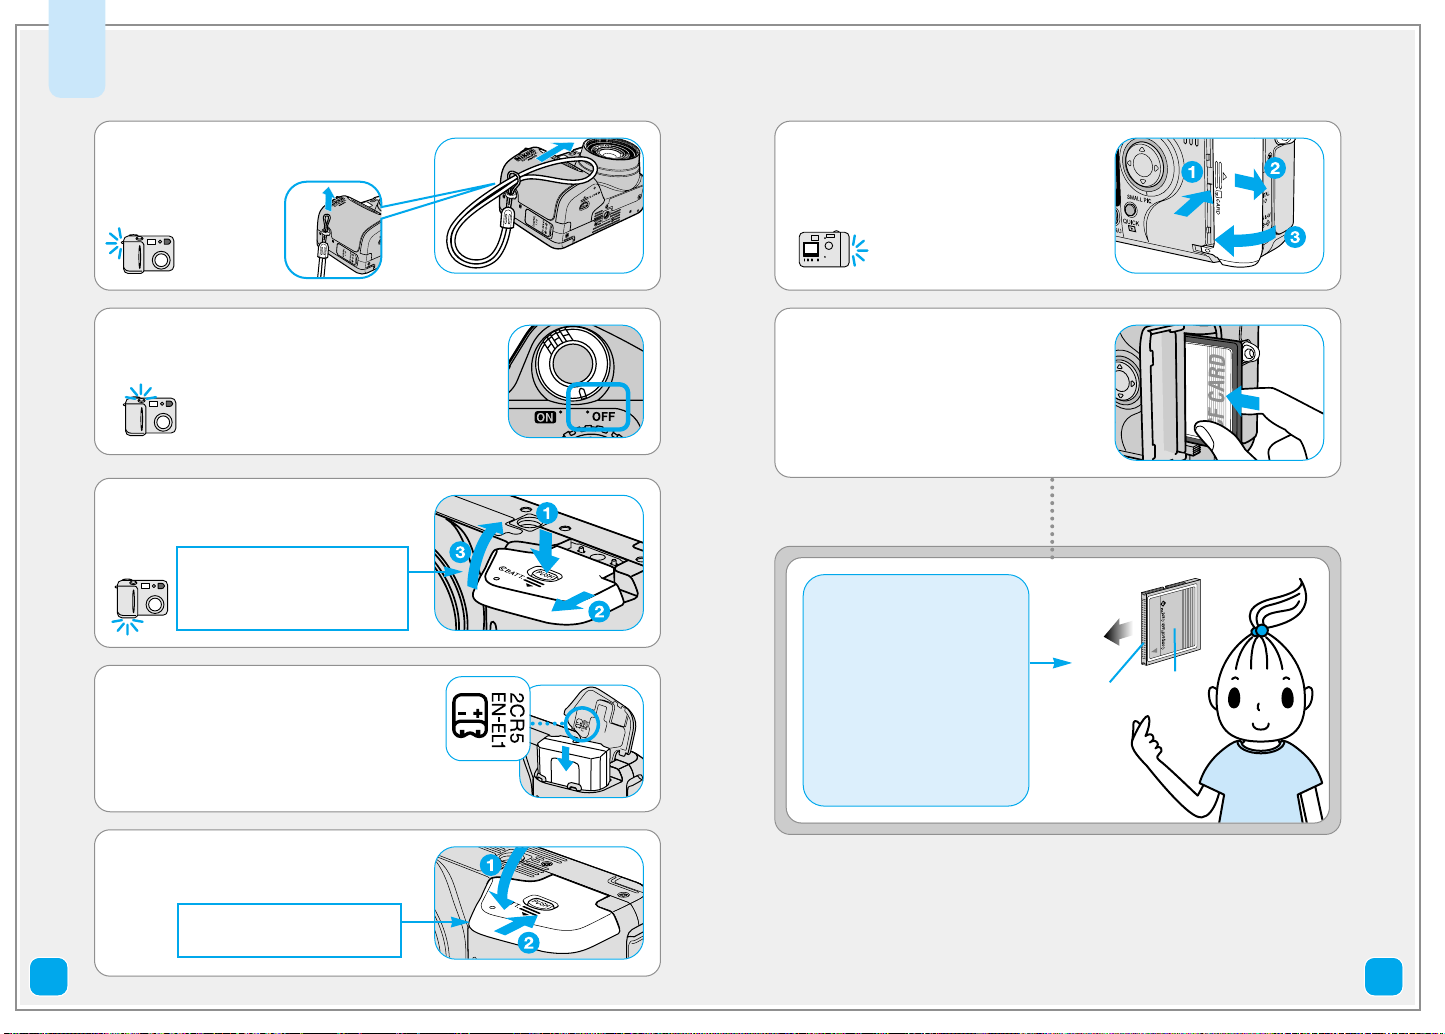
Prepare the camera
3
Attach the camera strap.
1
Camera OFF.
2
Open the battery cover.
3
Pressing the battery-chamber
cover latch ⁄, slide the
battery-chamber cover out ¤
and flip it open ‹.
Insert the battery.
4
Open the memory card-slot
6
cover.
Insert the memory card into
7
the slot and close the cover.
Important: Memory cards
are labeled with an
arrow(s) showing the
direction of insertion. With
this label facing the back
of the camera (the side
with the monitor), insert
the card in the direction of
the arrow, sliding it in until
it is firmly in place.
Direction of
insertion
Terminals
Front of
card
Close the cover.
5
Hold the cover shut, and slide
it to the closed position.
8 9
Page 6
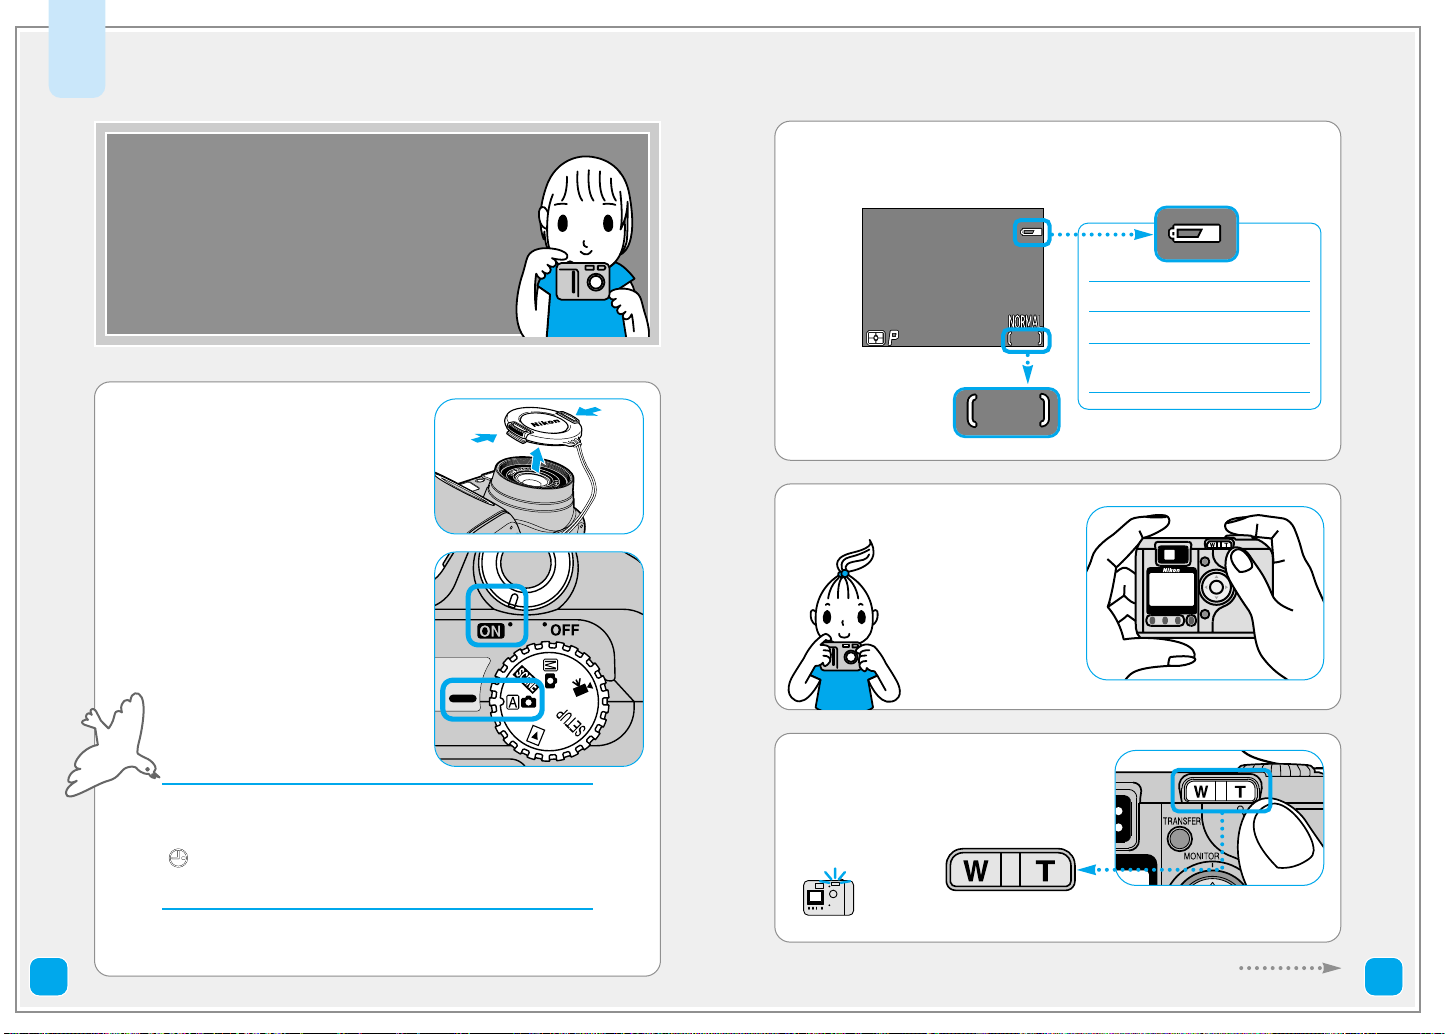
Take pictures
F2.8F2.8F2.81/2501/2501/250
227222722272
101010
1010
4
The steps below explain how to take
pictures using the monitor in a (auto)
mode, where most of the settings are
controlled by the camera.
Remove the lens cap.
1
Mode dial to a.
Camera on.
Check the battery level and the number of exposure
2
remaining in the monitor.
Number of exposures
remaining
Hold the camera steady.
3
• No icon: Battery fully charged.
•
MM: Recharge soon.
• WARNING!! BATTERY
EXHAUSTED: Recharge now!
Frame your subject.
4
Note: The first time you use the camera, the date
and time will not be set, and a flashing clock icon
( ) will appear in the monitor. For more information,
see the Guide to Digital Photography, page 21.
10 11
Press W on zoom button to zoom out,
T to zoom in.
Continues to next page
Page 7
Take pictures (continued)
F2.8F2.8 91/2501/250 9F2.81/250
11
227222722272
F2.8 91/250
1
1/ 1 11/ 1
100100NINIKONKON
0000001.
JPGJPG
100NIKON
0001.
JPG
2002.09.152002.09.15
15:5015:50
22722272
2002.09.15
15:50
2272
2272
4
Review your pictures
5
5
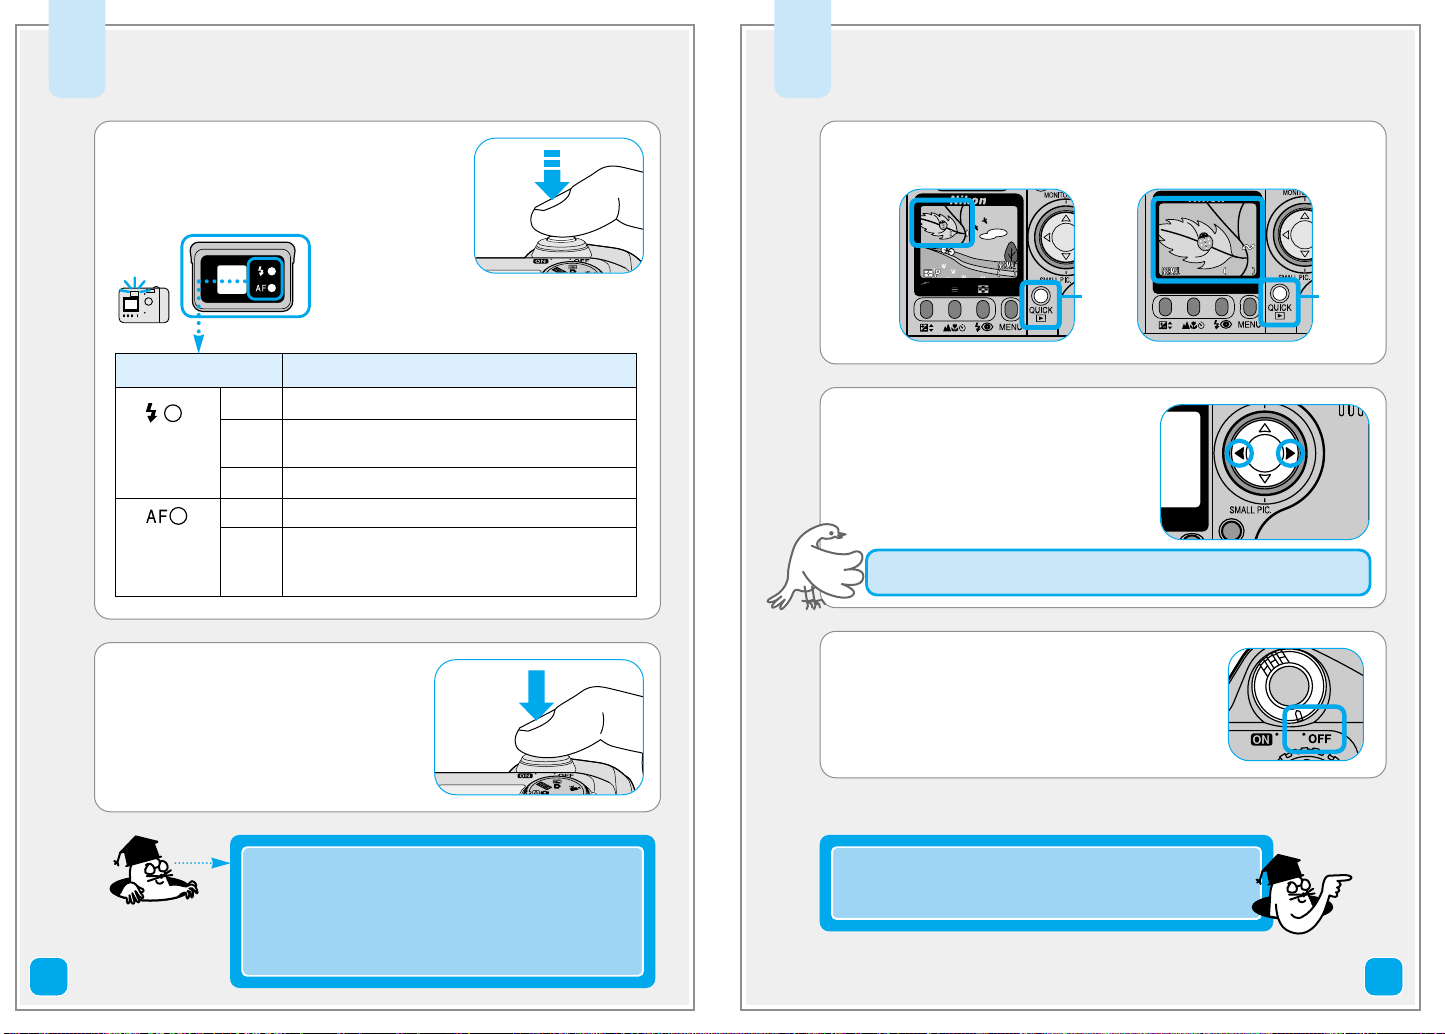
Flash-ready Blinks
lamp (red) rapidly
Autofocus
6
Halfway press to focus.
Check the status of the autofocus
(green) and flash-ready (red) lamps
next to the viewfinder.
Lamp
On
Flash will fire when picture is taken.
Flash charging. Remove finger briefly from
shutter release button, then try again.
Off
Flash not required or flash set to “off”.
On
Subject in focus.
lamp
(green)
Flickers
Press the shutter release
button all the way to shoot.
Camera unable to focus on subject. Use focus
lock to focus on another subject at the same
distance, then recompose your picture.
Meaning
Press the QUICK p button.
1
Press
once
Check all pictures:
2
3
> previous
< next
To end review and focus the camera for your next shot, press the
shutter release button halfway.
When you have finished taking
pictures, turn the camera off.
Press
twice
12
Focus and exposure are locked when the shutter
release button is pressed halfway down. They
remain locked as long as the button is pressed.
Press the shutter release button all the way down
to take your picture.
Congratulations on your first pictures!
See the next page for the Scene mode and page 16
for installing software.
13
Page 8

12 Scene Modes
12 Scene modes are available with the COOLPIX4300.
Scene mode offers a choice of settings for specific
scenes.
Portrait
Set mode dial to i and press
the MENU button to display
SCENE mode menu. Select
desired mode by pressing the
multi selector.
Night Portrait
Sunset
Museum
Night
Landscape
Fireworks Show
Copy
14
Party/Indoor
Beach/
Snow
Close Up
Back Light
See page 34-38 on the Nikon Guide to
Digital Photography for details on each
mode.
Landscape
15
Page 9

Transfer Pictures to Your Computer
Transferring your pictures to a computer allows you to view,
store and organize your pictures. You will need Nikon View 5 to
transfer your pictures. Follow the instructions to carry out the
installation and then transfer your pictures to a computer.
2
Connecting to a
Computer
Installing Software
1
P. 2 9P. 1 8
Step 1 Read the Nikon View 5 Reference
Manual on CD.
Step 2 Before you begin: installing Nikon
View 5
Step 3 Install Nikon View 5
• Windows Users
• Macintosh Users
P. 30
Step 1 Connect your camera by USB cable
Step 2 Copy pictures to your computer
Step 3 Remove the camera from the system
So that you can enjoy your Nikon digital camera to the full, Nikon offers the
following software to help you sort, manipulate, print, and share your pictures
on a computer:
P. 2 5P. 2 2
P. 2 9P. 2 6
• Nikon View 5:
Use this program to copy pictures from the camera or memory card to
your computer. Once transferred, you can view pictures at full size, print
them into folders on your hard disk. See the Nikon View 5 Reference
Manual (on CD) for details.
• FotoStation Easy:
The more adventurous can use this program for more comprehensive
sorting, filing, and image manipulation. FotoStation is only available to
users in Europe.
• Panorama Maker:
This program allows you to join several pictures to make a larger image.
• QuickTime:
Nikon View and FotoStation use this program to play
back movies.
P.39
1716
Page 10

Installing Software
1
Step 1
The first step to installing Nikon View 5 is to read the
instructions. These are included on the reference CD
provided with your camera. To view the instructions,
you will need Adobe Acrobat Reader 4.0 or later. If
you have already installed this version of Acrobat,
skip Step 2.
Read the Nikon View 5 Reference
Manual on CD
Install Adobe Acrobat Reader
2
To install Adobe Acrobat Reader, open the folder for the language of
your choice.
Double-click the installer icon.
The installer start-up screen will be displayed; follow the on-screen
instructions to complete installation.
Insert the reference CD
1
After turning on your computer, place the reference CD in a CDROM drive.
Windows users:
Windows users will need first
to double-click the My
Computer icon and then the
Nikon icon to open the
reference CD window.
Macintosh users:
Under Mac OS 9, the reference CD will open automatically on the
desktop. If you are using Mac OS X, double-click the Nikon CDROM icon to open the reference CD.
Windows
Macintosh
Read installation instructions for Nikon View 5
3
Once you have installed Adobe Acrobat Reader, double-click the
INDEX.pdf icon in the root directory of the reference CD to view a
clickable index of the documentation available for Nikon View 5.
Follow the links to view the installation instructions for your
computer system.
If desired, you can print the installation
instructions using the Print… command in
the Acrobat File menu, and follow along
during installation of Nikon View 5.
Continues to next page
1918
Page 11

Installing Software
1
Before You Begin:
Step 2
To install Nikon View 5, you must have a computer
running one of the following operating systems
Installing Nikon View 5
Windows
Pre-installed versions of:
•Windows XP Home Edition/Professional
•Windows 2000 Professional
•Windows Millennium Edition (Me)
•Windows 98 Second Edition (SE)
Before Connecting the Camera
Before connecting your camera to a computer, make sure that Nikon View 5
is installed.
Already Have Nikon View?
In order to transfer pictures to your computer using the UC-E1 USB cable,
the COOLPIX4300 requires the version of Nikon View 5 provided with the
camera. If you have a version of Nikon View that was included with another
Nikon digital camera, you will need to upgrade to the version provided with
the COOLPIX4300.
Windows Users:
P. 2 2 P. 2 5
Macintosh
Pre-installed versions of:
•Mac OS X (10.1.2 or later)
•Mac OS 9.0, 9.1, or 9.2
Macintosh Users:
Let’s install Nikon View 5!
P. 2 6 P. 2 9
2120
Page 12

for
1
Windows
Installing Software
Coolpix Camera Driver (Windows 98SE Only)
•
Click OK to begin installation of the Coolpix Camera Driver, and click
OK again once installation is complete.
Step 3
When installing, uninstalling or using Nikon View 5, log on as the Computer
administrator (Windows XP Home Edition/Professional) or Administrator
(Windows 2000 Professional).
Turn the computer on and insert the Nikon View 5
1
installer CD into a CD-ROM drive.
Select a language and click Next.
2
The Install Center program will be launched automatically.
3
Click Easy Install to begin installation.
Software installation includes
the Panorama Maker,
QuickTime 5.0.2, Nikon View
5, and FotoStation Easy
(FotoStation is only available
for users in Europe).
Install Nikon View 5
To Users of Windows XP Home Edition/Professional
and Windows 2000 Professional
Windows XP Update (Windows XP Only)
•
Depending on the computer's operating environment, the PTP driver
installation and Setup wizard may start when you click Easy Install. In
such cases, follow the instructions on screen until the wizard's final
dialog box is displayed. Then continue on to install the next application
without restarting your computer.
ArcSoft Panorama Maker 3.0
4
Select a language and click OK.
The dialog shown at right will be
displayed. Follow the on-screen
instructions to complete
installation.
QuickTime 5.0.2
5
No registration number is
required; leave the registration
information blank and click
Next. Follow the on-screen
instructions to complete
installation.
Continues to next page
2322
Page 13

P
.
3
0
for
1
Windows
Installing Software
Complete installation.
9
Step 3
Nikon View 5
6
Once you have accepted the
terms of license agreement, the
destination folder for Nikon View 5
will be displayed. Click Next.
Create a new folder for Nikon View 5.
7
Create a shortcut to Nikon View 5 on the desktop.
8
Install Nikon View 5 (continued)
Click Ye s
Click Ye s
Click Finish
FotoStation Easy
10
Installation opens with a dialog
asking you to select the desired
language. Select a language
and click OK. The dialog shown
at right will be displayed. Follow
the on-screen instructions to
complete installation. If a
message is displayed starting
that a newer version of
QuickTime is already installed,
click OK.
Restart the computer.
11
Click Ye s
Once the computer has restarted, remove the Nikon
12
View 5 installer CD from the CD-ROM drive.
If the Welcome program starts up again after you have restarted
the computer, click Quit to exit the Welcome program then
remove the CD from the CD-ROM drive.
Now you are done with the installation of the
Nikon View 5.
Next step is to transfer pictures to your computer.
2524
Page 14

for
1
Installing Software
Step 3
Turn the computer on and insert the Nikon View 5
1
installer CD into a CD-ROM drive.
Macintosh
Panorama Maker
5
Follow the on-screen
instructions to complete
installation.
Install Nikon View 5
The Nikon View Welcome program will be launched
2
automatically.
• Mac OS X (10.1.2 or later)
Nikon View 5 will not start automatically. Double-click the Nikon
View 5 CD-ROM icon on the desktop, then double-click the
Welcome icon.
Select a language and click Next.
3
The Install Center program will be launched automatically.
4
Click Install to begin installation of all the software
checked in the software tab.
By default, the installation
includes PanoramaMaker,
QuickTime 5.0.2 and Nikon
View 5, and FotoStation Easy
(FotoStation is only available
for users in Europe).
QuickTime 5.0.2 is not
installed under Mac OS X.
Mac OS X (10.1.2 or later)
If you are using Mac OS X, the
Authenticate dialog will be displayed
before the Nikon View 5 installer. Enter
your administrator name and password,
and then click OK.
Nikon View 5
6
The Nikon View 5 installer will
start.
Once you heve accepted the
license agreement and viewed
the ReadMe file, the dialog
shown at right will be
displayed. Click Install to
begin installation.
Continues to next page
2726
Page 15

for
P
.
3
0
1
Installing Software
Step 3
Add to Dock (Mac OS X)/Create an Alias (Mac OS 9)
After you click Install, a dialog will
be displayed where you can click
OK to add Nikon View 5 to the
Dock (Mac OS X) or create an
alias to Nikon View 5 on the
desktop (Mac OS 9).
Click Quit to complete installation of Nikon View 5.
7
FotoStation Easy
8
Follow the on-screen
instructions to complete
installation.
Macintosh
Install Nikon View 5 (continued)
Mac OS X
Mac OS 9
QuickTime 5.0.2
9
Installation of QuickTime 5.0.2 opens
with a welcome dialog.
Click Continue and follow the on-
screen instructions to accept the
license agreement. When the dialog
shown at right is displayed, select
Recommended and click Continue.
The Registration dialog will be
displayed. No registration number is
required; leave the registration
information blank and click Continue.
Follow the on-screen instructions to
complete installation.
One of the two dialogs shown
10
right will be displayed.
Click Restart to restart your
computer.
Once the computer has restarted, remove the Nikon
11
View 5 installer CD from the CD-ROM drive.
If the Welcome program starts up again after you have restarted
the computer, click Quit to exit the Welcome program then
remove the CD from the CD-ROM drive.
Now you are done with the installation of the
Nikon View 5.
Next step is to transfer pictures to your computer.
2928
Page 16

Connecting to a Computer
INTERFACE
Controls
Shot Confirm Lamp
Pic Data/Transfer
Date
Interface
Language
Reset All
Video Mode
USB
SELECT SET
SET-UP2
Controls
Shot Confirm Lamp
Pic Data/Transfer
Date
Interface
Language
Reset All
PAGE1 SELECT SET
USB
Controls
Shot Confirm Lamp
Pic Data/Transfer
Date
Interface
Language
Reset All
PTP
Mass Storage
SELECT SET
USB
2
Readying the Camera for Transfer
Before pictures can be copied to a computer via direct
USB connection, you will need to select a USB setting
according to your computer's operating system and
whether pictures will be transferred using the camera
TRANSFER button (p. 35) or the button in Nikon
View 5 (p. 34). The following options are available: PTP
(Picture Transfer Protocol) and Mass Storage. The
default setting is Mass Storage.
Operating system
Windows XP Home Edition
Windows XP Professional
Mac OS X 10.1.3 or later Choose PTP.
Mac OS X 10.1.2 —*
Windows 2000 Professional
Windows Millennium Edition (Me) Choose Mass Storage.
Windows 98 Second Edition (SE)
* Pictures cannot be transferred using camera TRANSFER button in Mac OS X
10.1.2. Use Nikon View 5 button to transfer pictures.
To select PTP:
Pictures transferred using:
Camera Nikon View 5
TRANSFER button button
Choose Mass Storage or PTP.
Choose Mass
Storage or PTP.
Step 1
Remove the lens cap first
Turn the computer on.
1
INTERFACE
Controls
Shot Confirm Lamp
Pic Data/Transfer
Date
Interface
Language
Reset All
SELECT SET
Video Mode
USB
USB
Controls
Shot Confirm Lamp
Pic Data/Transfer
Date
Interface
Language
Reset All
SELECT SET
PTP
Mass Storage
USB
Highlight USB Display USB menu
USB
Controls
Shot Confirm Lamp
Pic Data/Transfer
Date
Interface
Language
Reset All
SELECT SET
PTP
Mass Storage
USB
SET-UP2
Controls
Shot Confirm Lamp
Pic Data/Transfer
Date
Interface
Language
Reset All
PAGE1 SELECT SET
Choose PTP Make a selection
Connect Your Camera by USB Cable
30
Set the mode dial of the camera to “SETUP”, turn the camera on and
press the MENU button once. SET-UP 2 menu is displayed.
Controls
Shot Confirm Lamp
Pic Data/Transfer
Date
Interface
Language
Reset All
PAGE1 SELECT SET
Use the multi selector to display the USB menu.
Highlight Interface menu Display options
SET-UP2
Connect the camera to your computer as shown in the
2
illustration below, using the USB cable provided.
Choose a Language
Camera menus and messages can be displayed in your choice of
German, English, French, Japanese and Spanish. See the Guide to
Digital Photography, page 20.
Continues to next page
31
Page 17

Connecting to a Computer
2
Step 2
Turn the camera on.
1
• The lens will extend and the camera monitor will be blank.
• Nikon View 5 will automatically detect the camera and display the
Windows
AutoPlay (Windows XP)
When you turn the camera on, the dialog
shown at right will be displayed. Select
Copy pictures to a folder on my
computer using Nikon View 5 and click
OK to start Nikon View 5. To bypass this
dialog in the future, click Always do the
selected action.
Copy Pictures to Your Computer
Nikon Transfer window.
Nikon Transfer window
Select Copy pictures
to a folder on my
computer using
Nikon View 5
Macintosh
On a Macintosh, Nikon
Transfer will start up after
Nikon Browser has started.
Nikon Browser window
Nikon Transfer window
Mac OS X (10.1.2 or later)
Before turning the camera on, select
Applications from the Go menu and doubleclick the Image Capture icon. The dialog
shown at right will be displayed. Select None
from the Hot plug action menu and close
the Image Capture dialog. If you install Apple iPhoto
software after you install Nikon View 5, please repeat this step to
prevent both iPhoto and Nikon View 5 from starting when you
connect your camera.
Select None
Select None
Continues to next page
3332
Page 18

Connecting to a Computer
2
Step 2
Transfer pictures to your computer
2
Click the button to
begin transfer.
To copy all pictures on the
memory card to your
computer, select All
images from the Image
transfer rule menu in Nikon
Transfer window
Copy Pictures to Your Computer
Caution regarding image transfer
While pictures are being copied to the
computer, do not:
• Disconnect the USB cable.
• Turn the camera off.
• Remove the memory card.
You can also transfer pictures to your computer
by pressing the TRANSFER button on the camera.
• When the TRANSFER button on the
camera is pressed, pictures with
D markings are transferred to
computer.
The display in the camera monitor changes as follows:
PREPARING
TO TRANSFER
Mac OS X
Pictures can not be transferred using the camera TRANSFER button in
Mac OS X 10.1.2. Use the button in Nikon Transfer window.
Before using the camera TRANSFER button to transfer pictures in Mac
OS X version 10.1.3 or later, set the USB option in the camera SET-UP
menu to PTP (p. 30).
TRANSFERRING
IMAGE TO
COMPUTER
TRANSFER COMPLETED
Use a Reliable Power Source
When transferring data between the camera
and the computer, be sure that the battery is
fully charged. If in doubt, recharge the battery
before beginning transfer or use the optional
AC adapter.
Continues to next page
3534
Page 19

Connecting to a Computer
2
Step 2
When all pictures have been copied, they will be
3
displayed in the Nikon Browser window.
Windows Macintosh
By default, pictures will be copied to the folder “Imgnnnn” in the My
Documents folder or My Pictures folder, where nnnn is a four-digit number
(starting from 0001) assigned automatically be Nikon View 5.
Copy Pictures to Your Computer
By default, pictures will be copied to the folder “Imgnnnn” in the
Documents folder (Mac OS 9) or Pictures folder (Mac OS X), where nnnn is
a four-digit number (starting from 0001) assigned automatically by Nikon
View 5.
Congratulations!
Now you are done with transferring
pictures to your computer!
Continues to next page
3736
Page 20

Connecting to a Computer
2
System Requirements
(Nikon View 5)
Step 3
• If you have set the USB option in the camera SET-UP menu to PTP
(see p. 30), you can now turn the camera off and disconnect the cable.
• If you have not changed the USB option in the camera SET-UP menu
from its default setting of Mass Storage, you must remove the camera
from the system as shown below before turning the camera off or
disconnecting the cable.
Windows XP Home Edition/Professional
Click the “Safely Remove Hardware” icon
( ) in the taskbar and select Safely
remove USB Mass Storage Device from
the menu that appears.
Windows 2000 Professional
Click the “Unplug or Eject Hardware” icon
( ) in the taskbar and select Stop USB
Mass Storage Device from the menu that
appears.
Windows Millennium Edition (Me)
Click the “Unplug or Eject Hardware” icon
( ) in the taskbar and select Stop USB
Disk from the menu that appears.
Windows 98 Second Edition (SE)
In My Computer, click with the right mouse
button on the removable disk corresponding to the
camera and select Eject from the menu that
appears.
Remove the Camera from the System
Windows
OS Pre-installed versions of Windows XP Home Edition, Windows XP
Professional, Windows 2000 Professional, Windows Millennium
Edition (Me), Windows 98 Second Edition (SE)
Models Only models with built-in USB ports supported
CPU 300 MHz Pentium or better
RAM 64 MB or more recommended
Hard-disk space 25 MB required for installation, with additional free disk space of
10 MB plus double the capacity of the camera memory card
available on system disk when Nikon View 5 is running.
Video resolution 800 x 600 or better with High Color (True Color recommended)
Miscellaneous CD-ROM drive required for installation
Macintosh
OS Mac OS 9.0, Mac OS 9.1, Mac OS 9.2,
Mac OS X (10.1.2 or later)
Models iMac, iMac DV, Power Mac G3 (Blue&White), Power Mac G4 or
later, iBook, PowerBook G3 or later; only models with built-in
USB ports supported
RAM 64 MB or more recommended
Hard-disk space 25 MB required for installation, with additional free disk space of
10 MB plus double the capacity of the camera memory card
available on start-up disk when Nikon View 5 is running.
Video resolution 800 x 600 or better with thousands of colors (millions of colors
recommended)
Miscellaneous CD-ROM drive required for installation
38
Mac OS X
Drag the “NO_NAME” camera volume into
the Trash.
Mac OS 9
Drag the “untitled” disk corresponding to
the camera into the Trash.
Once you have removed the camera from the system, you can
disconnect the interface cable or turn the camera off.
This completes the COOLPIX4300 Quick Start Guide to
Take Pictures/Transfer Pictures to Your Computer.
To make the most of all the features of your
Nikon digital camera, be sure to read the
Guide to Digital Photography.
39
Page 21

No reproduction in any form of this manual, in
whole or in part (except for brief quotation in
critical articles or reviews), may be made without
written authorisation from NIKON CORPORATION.
N
NIKON CORPORATION
FUJI BLDG., 2-3, MARUNOUCHI 3-CHOME,
CHIYODA-KU, TOKYO 100-8331, JAPAN
Printed in Japan K2K05000301 (11)
6MAA3611-02
 Loading...