

Page 1
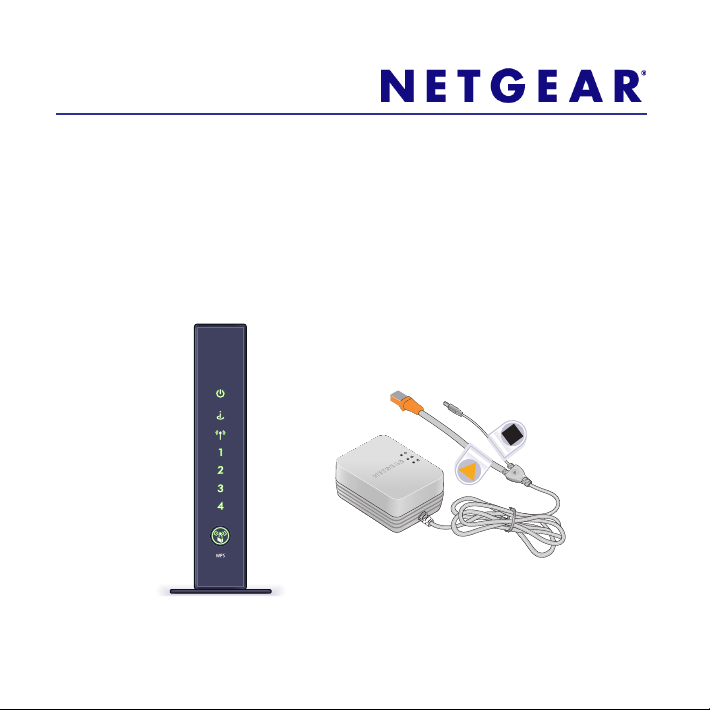
Wireless N 300+ Powerline AV Router
WNXR2000
Installation Guide
NETGEAR
Page 2

©2010 NETGEAR, Inc. All rights reserved.
Technical Support
Thank you for selecting NETGEAR products.
Locate the serial number on the label of your product and use it to register
your product at http://www.NETGEAR.com/register. Registration is required
before you can use the telephone support service. Registration at the
NETGEAR website is strongly recommended.
Go to http://support.netgear.com for product updates and Web support.
For complete DoC please visit the NETGEAR EU Declarations of
Conformity website at: http://kb.netgear.com/app/answers/detail/a_id/
11621/
Trademarks
NETGEAR, the NETGEAR logo, ProSafe, Smart Wizard, and Auto Uplink
are trademarks or registered trademarks of NETGEAR, Inc. Microsoft,
Windows, Windows NT, and Vista are registered trademarks of Microsoft
Corporation. Other brand and product names are registered trademarks or
trademarks of their respective holders.
Statement of Conditions
In the interest of improving internal design, operational function, and/or
reliability, NETGEAR reserves the right to make changes to the products
described in this document without notice. NETGEAR does not assume
any liability that may occur due to the use or application of the product(s) or
circuit layout(s) described herein.
Page 3
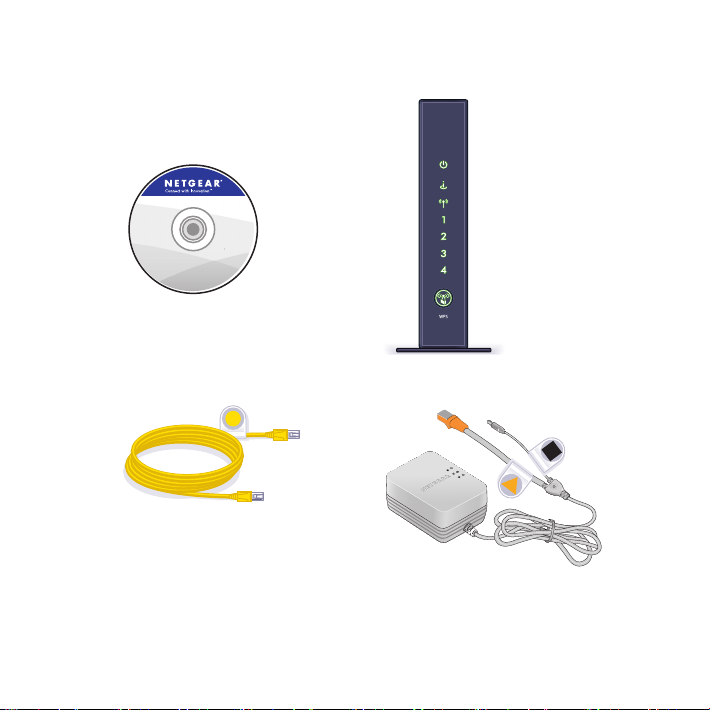
Package Contents
Wireless N 300+ Powerline AV Router
WNXR2000
Resource CD
Ethernet Cable
NETGEAR
N300 Wireless Router
XAVP1000 Y-Cable Adapter
3
Page 4

About Your WNXR2000
The WNR2000 router works with the XAVP1000 Y-cable
adapter to help you create a Powerline and wireless network.
To set up your network, do the following:
• Set Up the XAVP1000 Adapter
• Connect the WNXR2000 Powerline AV Router
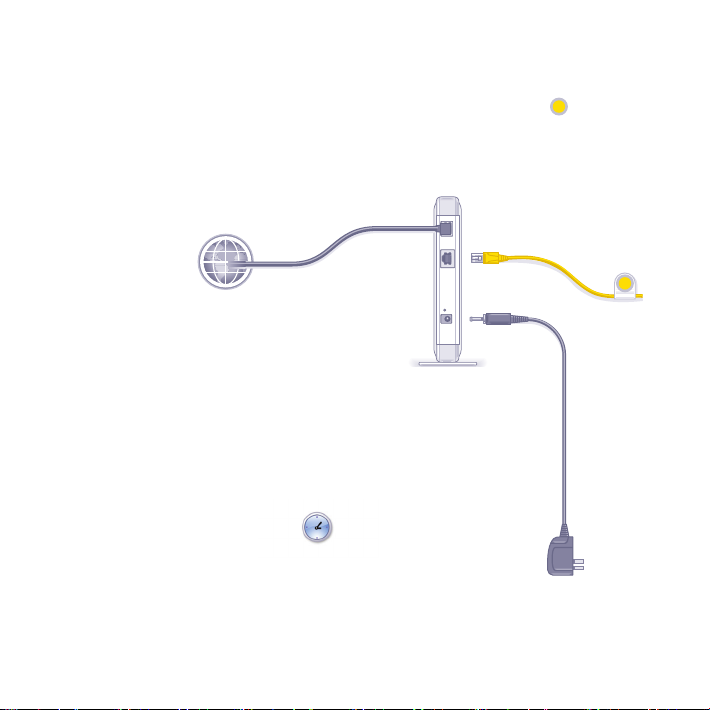
Set Up the XAVP1000 Adapter
Follow these steps to connect the XAVP1000 adapter to the
router:
1. Plug the network connector on the Y-cable adapter into one
of the orange Ethernet ports on the router.
2. Plug the Power connector on the Y-cable adapter into the
power inlet on the router.
3. Plug the XAVP1000 adapter into an electrical outlet.
Make sure that:
• You do NOT plug the adapter into a Power Strip.
• The electrical outlet is not controlled by a wall switch to
avoid someone unknowingly turning off the power to
the outlet.
4
Page 5

4. Power on the router using the Power On/Off button on the
back of the router.
5. Check that the power lights on both the XAVP1000 adapter
and on the router are lit. For more information on the status
lights, see “WNXR2000 Router Status Lights” on page 15
and “XAVP1000 Adapter LEDs and Buttons” on page 17.
6. When the router indicates that the Ethernet port connected to
the Y-cable adapter is linked and active (the LED for the
Ethernet port on the front of the router will be solid
green), check that the Ethernet and Powerline LEDs
on the adapter are also on and blinking.
Connect the WNXR2000 Powerline AV Router
Follow the connection instructions as shown in the drawing on
the next page.
5
Page 6
Step 1:
Unplug the power
to turn off your modem.
DSL
or Cable
Internet
Step 4:
Power on your router.
Wait until the wireless LED
turns on.
Step 2:
Connect one end of the
yellow cable ( ) to your
modem, and connect the
other end to your router.
Modem
6
Page 7
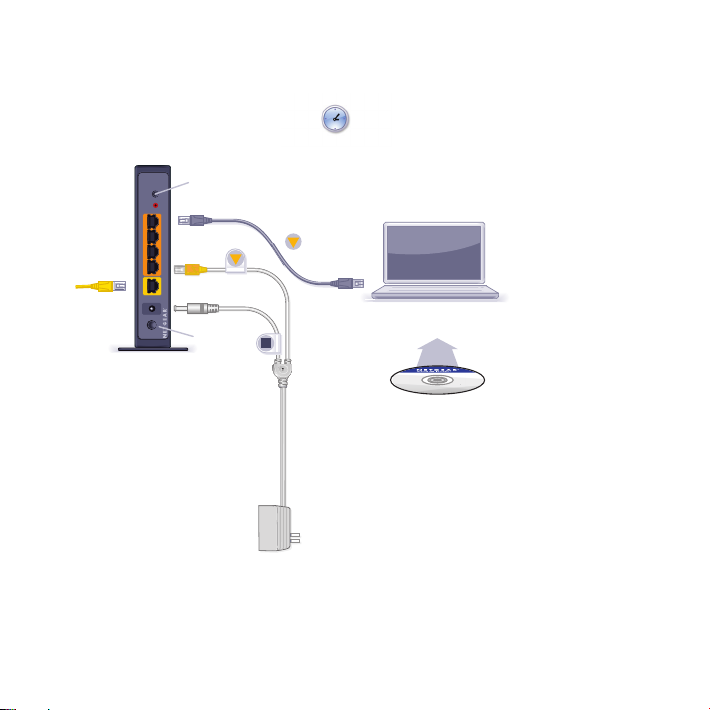
Wireless on/off
N300 Wireless Router
Power on/off
Step 3:
Power on your modem.
Wait until your modem
cycles on (approximately
(not included)
2 minutes).
Laptop or Desktop
Computer
Wireless N 300+ Powerline AV Router
WNXR2000
Resource CD
Note: If you have a modem with a battery-backup,
remove and re-insert the battery before connecting
your modem to power.
Step 5:
Connect your computer.
Connect with a wired connection
(as shown in this diagram) or
connect wirelessly to the router
with these settings:
Wireless Network (SSID): ______________
Wireless Password: ___________________
Step 6:
Insert Your CD.
Click Router Setup and follow
the steps to set up a secure
wireless network.
Note: If your laptop does not have a
CD drive, see “No CD Drive” Installation
on the back to complete your router setup.
Step 7:
Connect your Powerline
devices.
See next page.
7
Page 8

Existing Powerline Network — Room 1 (example)
This drawing (Room 1) shows how the Y-cable Powerline
adapter and WNR2000 router might fit into an existing
Powerline network in your house.
8
Page 9

Existing Powerline Network — Room 2 (example)
Reset
(additional Powerline
adapters not included)
9
Page 10

Setting Up Internet Access
1. In the address field of your browser, type http://
www.routerlogin.net and click Enter.
2. Enter the router User Name
admin and default Password
password to open your
router’s main settings page.
3. When the main settings
page opens, you will be
asked if you want to “Check
for Update.” Click Cancel. You can always check for new
firmware later after you are connected to the Internet.
4. Select the first menu item on the left: Setup Wizard. Make
sure Yes is selected. Then click Next and follow the prompts
to complete the Setup Wizard.
When the Setup Wizard has completed detecting your
connection, the Basic Settings page displays showing your
settings. You are now connected to the Internet.
10
Page 11

Note: If your ISP requires that you enter a User Name or
Password, you will be prompted to enter this information.
If you do not have this information, contact your ISP.
After connecting to the Internet, you can check for firmware
updates by selecting Router Upgrade and following the onscreen prompts.
Setting Up the Wireless Security
You should set up a secure wireless network. Once your router
security is established, your wireless laptops, gaming devices
(such as Wii or Play station 3 with wireless), or other wireless
equipment can safely and securely connect to the Internet.
11
Page 12

1. From the main menu page, select Wireless Settings.*
*Your router menu may display different or additional features
not shown
2. First, name your wireless network. Choose a name that is
easy for you to remember. You might want to write it down
here: ___________________________ (the default name is
NETGEAR).
3. Select your security method. NETGEAR recommends WPA-
PSK (TKIP) +WPA2-PSK (AES). Then, enter a Passphrase. In
the example, we entered HomeNetwork.
You might want to write your Passphrase down
here:________________________.
12
Page 13

Note: Both your Network Name (SSID) and Passphrase are
case sensitive. Your Network name, Security method and
Passphrase must be the same on all the wireless devices
connected to your router.
4. Click Apply and close your browser.
Connecting Wireless Devices to Your Router
Enter your wireless information here:
Wireless Network Name (SSID)
__________________________________
Wireless Security Passphrase
__________________________________
If you don’t remember your Passphrase, type http://
www.routerlogin.net into your browser and log in by
entering your User Name admin and Password (default is
password). Then, select Wireless Settings to retrieve your
Passphrase.
You can add wireless computers and other equipment to your
wireless network:
13
Page 14

1. Open the wireless software that manages your wireless
connections on the wireless device (iPhone, laptop
computer, gaming device) that you want to connect to your
router.
2. The wireless software will scan for all wireless networks in
your area. Look for your network—the one you named when
you set up your router. Select it.
3. If you set up security, you will be prompted for a Passphrase
or network key. Enter the Passphrase you selected and click
Connect.
If your wireless device supports WPS (WiFi Protected Setup)—
NETGEAR calls this method Push 'N' Connect—you might be
prompted to press a WPS button on the router instead of
entering a Passphrase. Then:
1. Press the WPS button on the router. It will look similar to
or .
2. Within 2 minutes, follow the wireless software instructions
on the wireless device to complete the WPS process.
The device will then be connected to your router. Repeat this
process to add other wireless devices.
14
Page 15

LED and Button Descriptions
WNXR2000 Router Status Lights
Item Description
Power
Internet • Solid Green. The wireless router has acquired an Internet
Wireless • Solid Blue. The wireless interface is enabled.
• Solid Green. The power is on and the router is ready.
• Solid Amber. The router is performing the power-on selftest diagnostic.
• Off. Power is not being supplied to the router.
address.
• Solid Amber. No IP address acquired.
• Off. No Ethernet cable is connected to the modem.
• Off. The wireless interface is turned off.
15
Page 16

Item Description
Ethernet
Ports
(Ports 1 – 4)
Push ‘N’
Connect
• Solid Green. The local port is connected to a 100 Mbps
device.
• Solid Amber. The local port is connected to a 10 Mbps
device.
• Off. No link is detected on this port.
• Solid Green. Indicates that wireless security (WEP, WPA-PSK,
or WPA-PSK) is on.
• Off. No WPS connection exists.
16
Page 17

XAVP1000 Adapter LEDs and Buttons
Item Description
Power
LED
Powerline
LED
• Solid green. The electrical power is on.
• Blinking green.The adapter is restarting or setting up
security.
• Amber. Power saving mode.
• Off. There is no electrical power.
• Solid. The adapter is connected to a Powerline network.
• Blinking. The adapter is sending or receiving data.
• Off. The adapter has not found any other compatible
Powerline devices using the same encryption key.
The Pick A Plug feature lets you pick the electrical outlet with
the strongest link rate, indicated by the color displayed by
the LED:
Green:
Link rate > 80
Mbps (Best)
Amber:
Link rate > 50 and
< 80 Mbps (Better)
Red:
Link rate < 50
Mbps (Good)
17
Page 18

Item Description
Ethernet
LED
Factory
Reset
Security
Button
• Solid. The Ethernet port is linked, but there is no activity.
• Blinking. There is traffic on the Ethernet port.
• Off. There is no Ethernet connection.
Press the Factory Reset button for 1 second, then release to
return the Powerline adapter to its factory default settings.
After you plug in your new AV adapter, press the security button for 2 seconds, then press the security button on one of
the other AV adapters in your existing network for 2 seconds.
Both buttons must be pressed within 2 minutes.
Note: The Security button does not work in power saving
mode (see “Power LED is amber” in the “Troubleshooting
Tips” table below).
Warning: Do not press the Security button on the Powerline adapter
until installation is complete and the adapters are communicating
with each other (indicated by the blinking Powerline LED). Pressing
this button too soon can temporarily disable Powerline
communication. If this should occur, use the Factory Reset button to
return the Powerline adapter to its factory default settings.
18
Page 19

Troubleshooting Tips
Power LED is off Make sure that power is supplied to the electrical outlet,
Power LED is
amber
Powerline LED is
off
Powerline LED is
amber or red
Ethernet LED is
not blinking
and that the Powerline devices are not plugged into an
extension cord, power strip, or surge protector.
Power saving mode occurs when the Ethernet LED is off.
This can occur when:
• the Ethernet cable is unplugged.
• the device connected through the Ethernet cable is
turned off.
• the adapter is idle for 10 minutes.
It returns to normal mode within 2 seconds once the
Ethernet link is up.
• If you have set network security, make sure that all
Power line devices are using the same encryption key;
see the online User Manual for details.
• Press the Reset button on each device for 1 second to
return the Powerline adapter to its factory default
settings.
• Move the Powerline device to a closer location.
• Make sure that the Ethernet cables are working and
securely plugged into the devices.
• Press the Reset button on each device for 1 second to
return the Powerline adapter to its factory default
settings.
19
Page 20

Technical Support
Thank you for selecting NETGEAR products.
After installing your device, locate the serial number on the
label of your product and use it to register your product at http://
www.NETGEAR.com/register.
can use our telephone support service. Registration via our
website is strongly recommended.
Go to http://kbserver.netgear.com for product updates and Web
support. For additional information about setting up, configuring
and using your WNXR2000, see the User Manual.
GPL may be included in this product; to view the GPL license
agreement go to ftp://downloads.netgear.com/files/GPLnotice.pdf.
Troubleshooting
For troubleshooting information, see the WNXR2000 User
Manual. A link is located on the Resource CD.
Registration is required before you
20
Page 21

This symbol was placed in accordance with the European Union Directive
2002/96 on the Waste Electrical and Electronic Equipment (the WEEE
Directive). If disposed of within the European Union, this product should be
treated and recycled in accordance with the laws of your jurisdiction
implementing the WEEE Directive.
© 2010 by NETGEAR, Inc. All rights reserved. NETGEAR and the NETGEAR logo are
registered trademarks of NETGEAR, Inc. in the United States and/or other countries.
Other brand and product names are trademarks or registered trademarks of their
respective holders. Information is subject to change without notice.
Page 22

NETGEAR, Inc.
350 East Plumeria Drive
San Jose, CA 95134 USA
September 2010
 Loading...