

Page 1
Powerline 500 Nano PassThru 2-port
XAVB5602 Installation Guide
Page 2

Contents
Package Contents . . . . . . . . . . . . . . . . . . . . . . . . . . . . . . . . . . . . . 3
Hardware Features . . . . . . . . . . . . . . . . . . . . . . . . . . . . . . . . . . . . . 4
LED Descriptions . . . . . . . . . . . . . . . . . . . . . . . . . . . . . . . . . . . . . . . 5
Button Descriptions . . . . . . . . . . . . . . . . . . . . . . . . . . . . . . . . . . . . . 6
Install Your Powerline Adapters. . . . . . . . . . . . . . . . . . . . . . . . . . . . 7
Compatible NETGEAR Powerline Devices . . . . . . . . . . . . . . . . . . 11
Safety Information . . . . . . . . . . . . . . . . . . . . . . . . . . . . . . . . . . . . . 12
2
Page 3
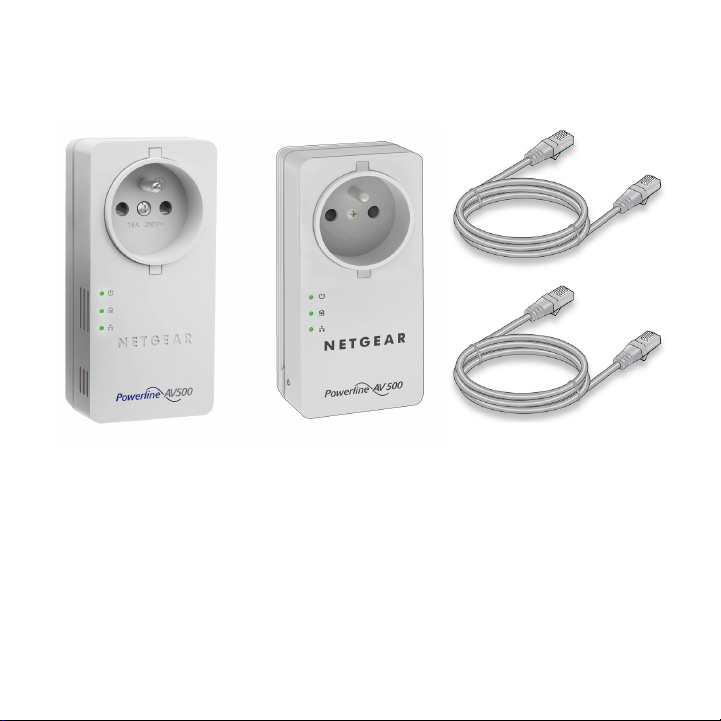
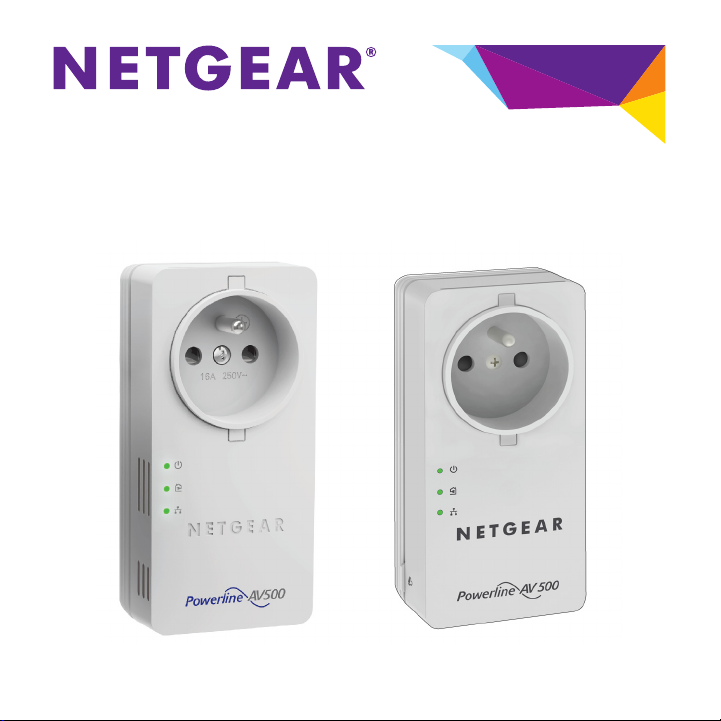
Package Contents
XAV5602 XAV5401 Ethernet cables
Adapters vary by region. Your adapters might look different.
Products sold in some regions include a resource CD.
3
Page 4
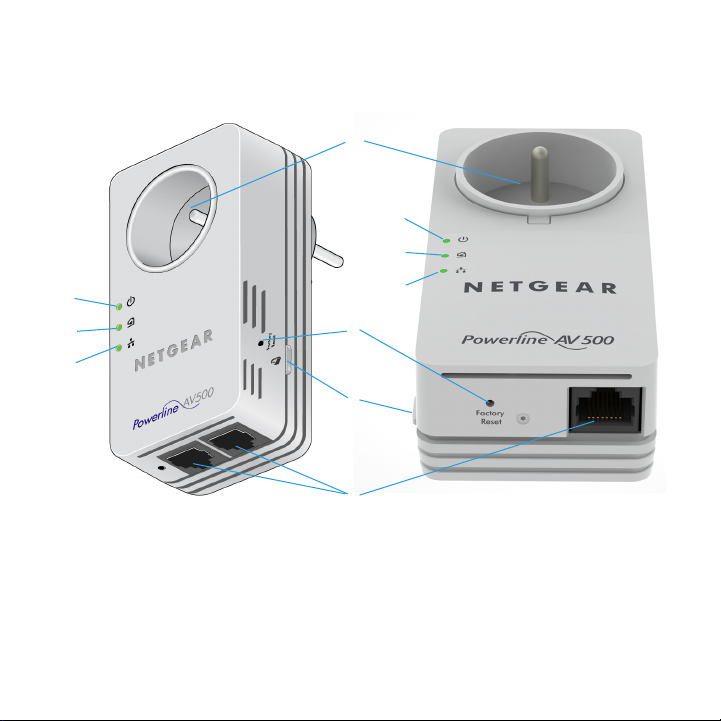
Hardware Features
XAV5602 XAV5401
2
3
4
1
2
3
4
5
6
7
1. Filtered AC socket
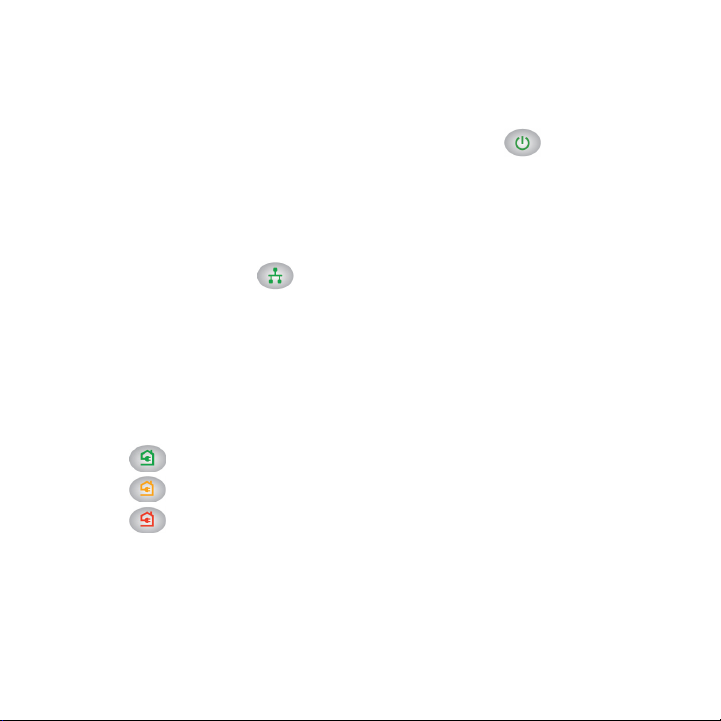
2. Power LED
3. Powerline LED
4. Ethernet LED
5. Factory Reset button
6. Security button
7. Ethernet ports
4
Page 5
LED Descriptions
The LEDs indicate the status of your Powerline adapters.
• When you plug in the adapter, the Power LED lights and
turns green.
If the Ethernet port is inactive for more than 10 minutes, the
adapter enters power saving mode and the Power LED turns
amber. Power saving mode is disabled by default.
• The Ethernet LED lights and turns green when you connect
a powered-on Ethernet device to the adapter’s Ethernet port. If
the Ethernet LED is off, there is no Ethernet connection.
• The Powerline LED lights when the adapter detects at least one
other compatible Powerline device.
The Pick A Plug features lets you pick the electrical outlet with the
fastest link rate:
• Green: Link rate > 80 Mbps (fast)
• Amber: Link rate > 50 and < 80 Mbps (medium)
• Red: Link rate < 50 Mbps (slow)
5
Page 6

Button Descriptions
The buttons on your Powerline adapters let you do the following:
• Factory Reset button. To return your Powerline adapter to its
default factory settings, press the Factory Reset button for 2
seconds, and then release it.
• Security button. Use the Security button to secure your
Powerline network. For information about securing your
Powerline network, see step 2 on page 7. NETGEAR
recommends that you secure your Powerline network to protect
your personal information and media from unwanted access.
6
Page 7

Install Your Powerline Adapters
1. Plug each Powerline adapter into a wall outlet.
2. Secure your Powerline network.
a Make sure that the Power LED is solid green on each
Powerline adapter.
b On the first Powerline adapter, press the Security button for
2 seconds, and then release the button.
The Power LED blinks green while the adapter is setting up
security.
c Within 2 minutes, go to the second Powerline adapter and
press its Security button for 2 seconds, and then release
the button.
7
Page 8

After a few seconds, the security is set and the Power LED turns
solid green. The Powerline adapters can communicate over the
Powerline network in a secure way.
Warning: Do not press the Security button until the Power LED
on each adapter is solid green. Pressing this button too soon can
temporarily disable Powerline communication. If Powerline
communication is disabled, use the Factory Reset button to
return the Powerline adapter to its factory settings.
8
Page 9

3. Plug one of the Powerline adapters into a wall outlet near your
router or gateway.
4. Connect the Powerline adapter to the LAN port of the router or
gateway using an Ethernet cable.
Room A
9
Page 10

5. Plug the other Powerline adapter into a wall outlet where you want
to add Internet access.
6. Connect the Powerline adapter to an Ethernet-based device using
an Ethernet cable.
Room B
Your Ethernet-based device (computer, game console, set-top
box, or Blu-ray player) now has Internet access.
10
Page 11

Compatible NETGEAR Powerline Devices
Your Powerline devices can share a Powerline network with these
compatible NETGEAR devices: XAVB1301, XAVB1401, XAVB2101,
XAVB2602, XAVNB2001, XAVB5601, XAVB5101, XAVB5201,
XAVB5401, XAUB2511, XAVB5004, XAVB1004, XWNB5602,
XWNB5201, and XWNB1601.
For a complete list of HomePlug AV-certified devices, visit
www.homeplug.org/certified_products.
11
Page 12

Safety Information
• For national approvals (approval schemes other than CB),
relevant national standards for plug, socket-outlet, and direct
plug-in units (for example, US) shall also be consulted while
testing and approving such products according to national
standards.
• AC input rating (NA): 100–125V, 0.2A (max.); 50–60 Hz excluding
socket-outlet rating.
• AC input rating (AU, UK, FR, EU): 200–250V, 0.2A (max.),
50–60 Hz excluding socket outlet rating.
• XAVB5602 ratings (maximum load): EU: 16A, 250V;
UK: 13A, 250V; FR: 16A, 250V; NA: 15A, 125V;
AU: 10A, 250V.
• Operating temperature: 0–40°C.
• Check the electrical current for any device plugged into the
filtered AC socket. Do not exceed home and product outlet
ratings and electrical requirements.
• The socket-outlet shall be installed near the equipment and be
easily accessible.
• Only power cords are allowed to be inserted into the filtered AC
outlet; no other equipment with a direct plug-in is allowed. The
12
Page 13

power cord needs to be a maximum of 1 m long and a minimum
of 0.75 mm square of cross-sectional area.
• Do not plug devices that exceed the product ratings into the
XAVB5602 filtered AC outlet. The output voltage of the filtered AC
outlet is the same as the power outlet that the XAVB5602 is
plugged into. To help avoid damaging your system, be sure that
the attached devices are electrically rated to operate with the
power available in your location.
• If the input AC voltage is less than 100 AC, the device plugged
into the filtered AC socket of the XAVB5602 might not perform as
well as expected.
• DO NOT PLUG MAJOR HOME APPLIANCES into the filtered AC
socket or into an attached power strip. The device is not intended
to be used with home appliances such as air conditioners, power
tools, space heaters, fans, hair dryers, ovens, or refrigerators.
13
Page 14

Support
Thank you for purchasing this NETGEAR product. After installing your device,
locate the serial number on the label of your product and use it to register your
product at https://my.netgear.com.
You must register your product before you can use NETGEAR telephone support.
NETGEAR recommends registering your product through the NETGEAR website.
For product updates, additional documentation, and support, visit
http://support.netgear.com.
NETGEAR recommends that you use only the official NETGEAR support
resources. You can get the user manual online at
http://downloadcenter.netgear.com or through a link in the product’s user
interface.
Trademarks
NETGEAR, the NETGEAR logo, and Connect with Innovation are trademarks
and/or registered trademarks of NETGEAR, Inc. and/or its subsidiaries in the
United States and/or other countries. Information is subject to change without
notice. © NETGEAR, Inc. All rights reserved.
Compliance
For the current EU Declaration of Conformity, visit:
http://support.netgear.com/app/answers/detail/a_id/11621/.
NETGEAR, Inc.
350 East Plumeria Drive
San Jose, CA 95134, USA
May 2013
 Loading...