

Page 1
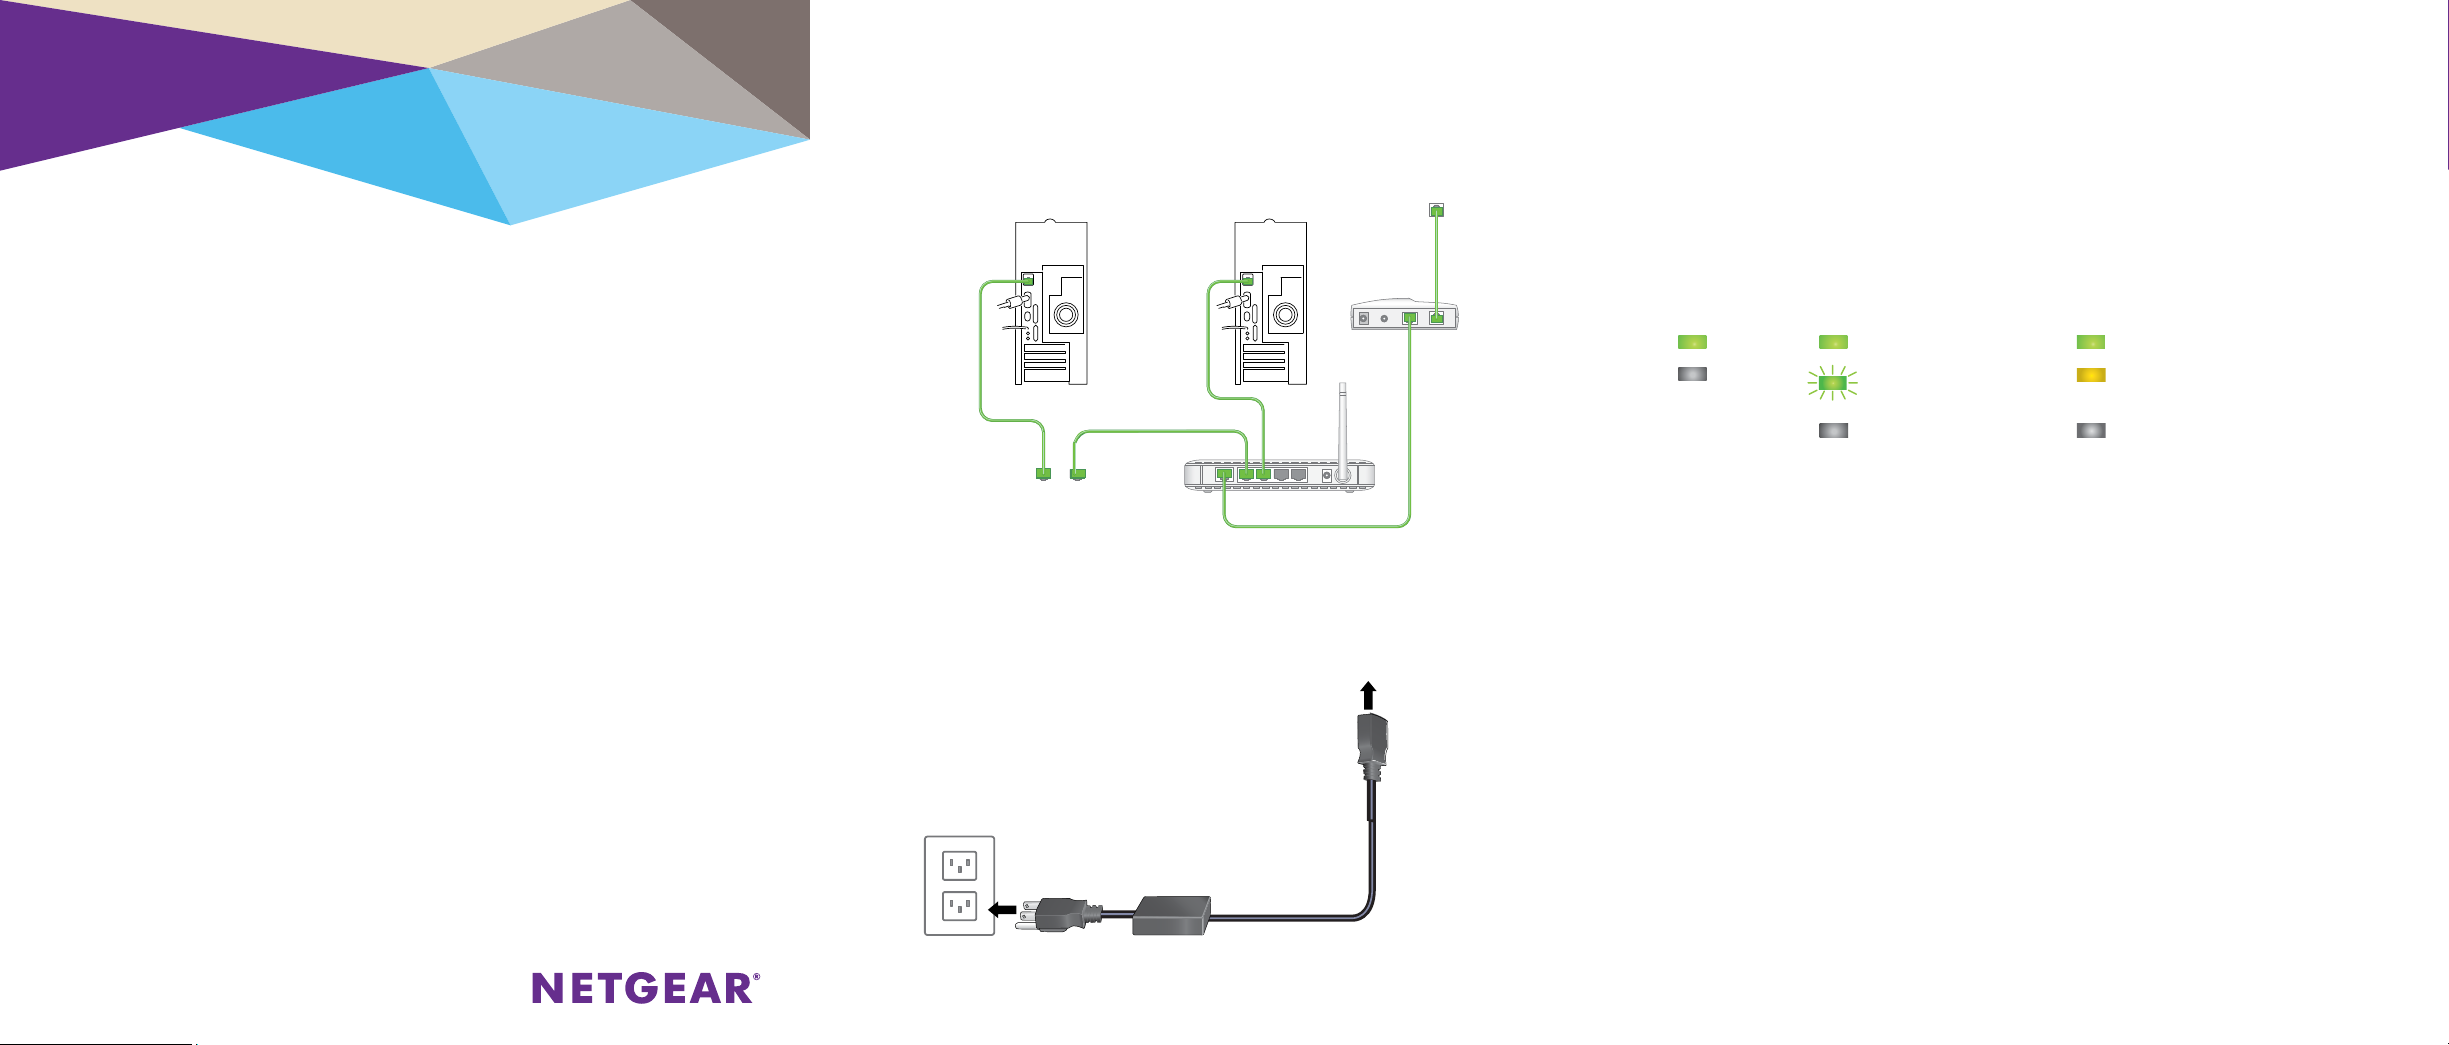
Step 1. Connect the equipment.
Sample connections
Step 3. Check the status.
Installation
ProSAFE Gigabit Ethernet Switches
16-Port Model JGS516v2
24-Port Model JGS524v2
Package Contents
• ProSAFE® Gigabit Unmanaged Switch
Computer
Switch
Server
Optional router
Step 2. Connect to power.
Optional
modem
Power LED Port Link/ACT LEDs Port Speed LEDs
On Link 1000 Mbps
O Activity (blinking) 100 Mbps
No link (o)
Port is not in use (o)
• AC power cord (localized to country of sale)
• Rubber footpads for tabletop installation
• 19-inch rack-mount kit for rack installation
• Installation guide
Page 2
Specifications
Get the Free NETGEAR Insight App
Support
Specification Description
Network interface
Network cable
Ports JGS516: 16
Power 100-240V 0.5A AC, 50/60 Hz internal universal power supply
Power
consumption
Weight JGS516: 3.24 lb (1.47 kg)
Dimensions
(W x D x H)
Operating
temperature
Operating
humidity
Electromagnetic
compliance
Safety agency
approvals
RJ-45 connector for 10BASE-T, 100BASE-TX, or 1000BASE-T
Category 5e (Cat 5e) or better Ethernet cable
JGS524: 24
JGS516: 12W for cable length > 32 feet (10 m)
JGS524: 18W for cable length > 32 feet (10 m)
JGS524: 3.64 lb (1.65 kg)
12.91 in. x 6.65 in. x 1.7 in. (328 mm x 169 mm x 43 mm)
32–122°F (0–50°C)
10%–90% relative humidity, noncondensing
CE Class A, FCC Class A, VCCI Class A, C-Tick Class A, KC, CCC
CE, Commercial UL listed (UL 60950-1), CB, KC, CCC
You can use the NETGEAR Insight app to register your switch.
1. On your iOS or Android mobile device, visit the app store, search for
NETGEAR Insight, and download the app.
2. Connect your mobile device to the WiFi network of the router or
access point.
3. Open the NETGEAR Insight app.
4. If you do not have a NETGEAR account, tap CREATE NETGEAR
ACCOUNT and follow the onscreen instructions.
5. To log in to your NETGEAR account, tap LOG IN and enter your
credentials.
6. Name your network, enter a device admin password that applies to all
devices that you add to this network, and tap NEXT.
7. Add the switch to your account from one of the following pages:
• Day Zero discovery
• Network
• Device List
You might be prompted to connect the switch to power and to an
uplink. Since you already did this,tap NEXT.
Thank you for purchasing this NETGEAR product. You can visit
www.netgear.com/support to register your product, get help, access the latest
downloads and user manuals, and join our community. We recommend that you
use only ocial NETGEAR support resources.
Si ce produit est vendu au Canada, vous pouvez accéder à ce document en
français canadien à http://downloadcenter.netgear.com/other/.
(If this product is sold in Canada, you can access this document in Canadian
French at http://downloadcenter.netgear.com/other/.)
For the current EU Declaration of Conformity, visit
http://kb.netgear.com/11621.
For regulatory compliance information, visit
http://www.netgear.com/about/regulatory/.
See the regulatory compliance document before connecting the power supply.
NETGEAR INT LTD
Building 3 University Technology Centre
Curraheen Road Cork Ireland
The NETGEAR Insight app discovers the switch and registers it on the
network that you named in Step 6.
If the app does not discover the switch, make sure that your mobile
device and the switch are connected to the same WiFi network.
For information about how to connect a NETGEAR Insight Managed Switch
to an existing network, visit kb.netgear.com/000044341.
NETGEAR, Inc.
350 East Plumeria Drive
San Jose, CA 95134, USA
© NETGEAR, Inc., NETGEAR and the NETGEAR Logo
are trademarks of NETGEAR, Inc. Any non‑NETGEAR
trademarks are used for reference purposes only.
February 2018
 Loading...