

Page 1
*ma machine
*
Page 2
Cuttin g marks
*ma machine
Page 3
Cuttin g marks
x 1
x 1
x 1
x 1
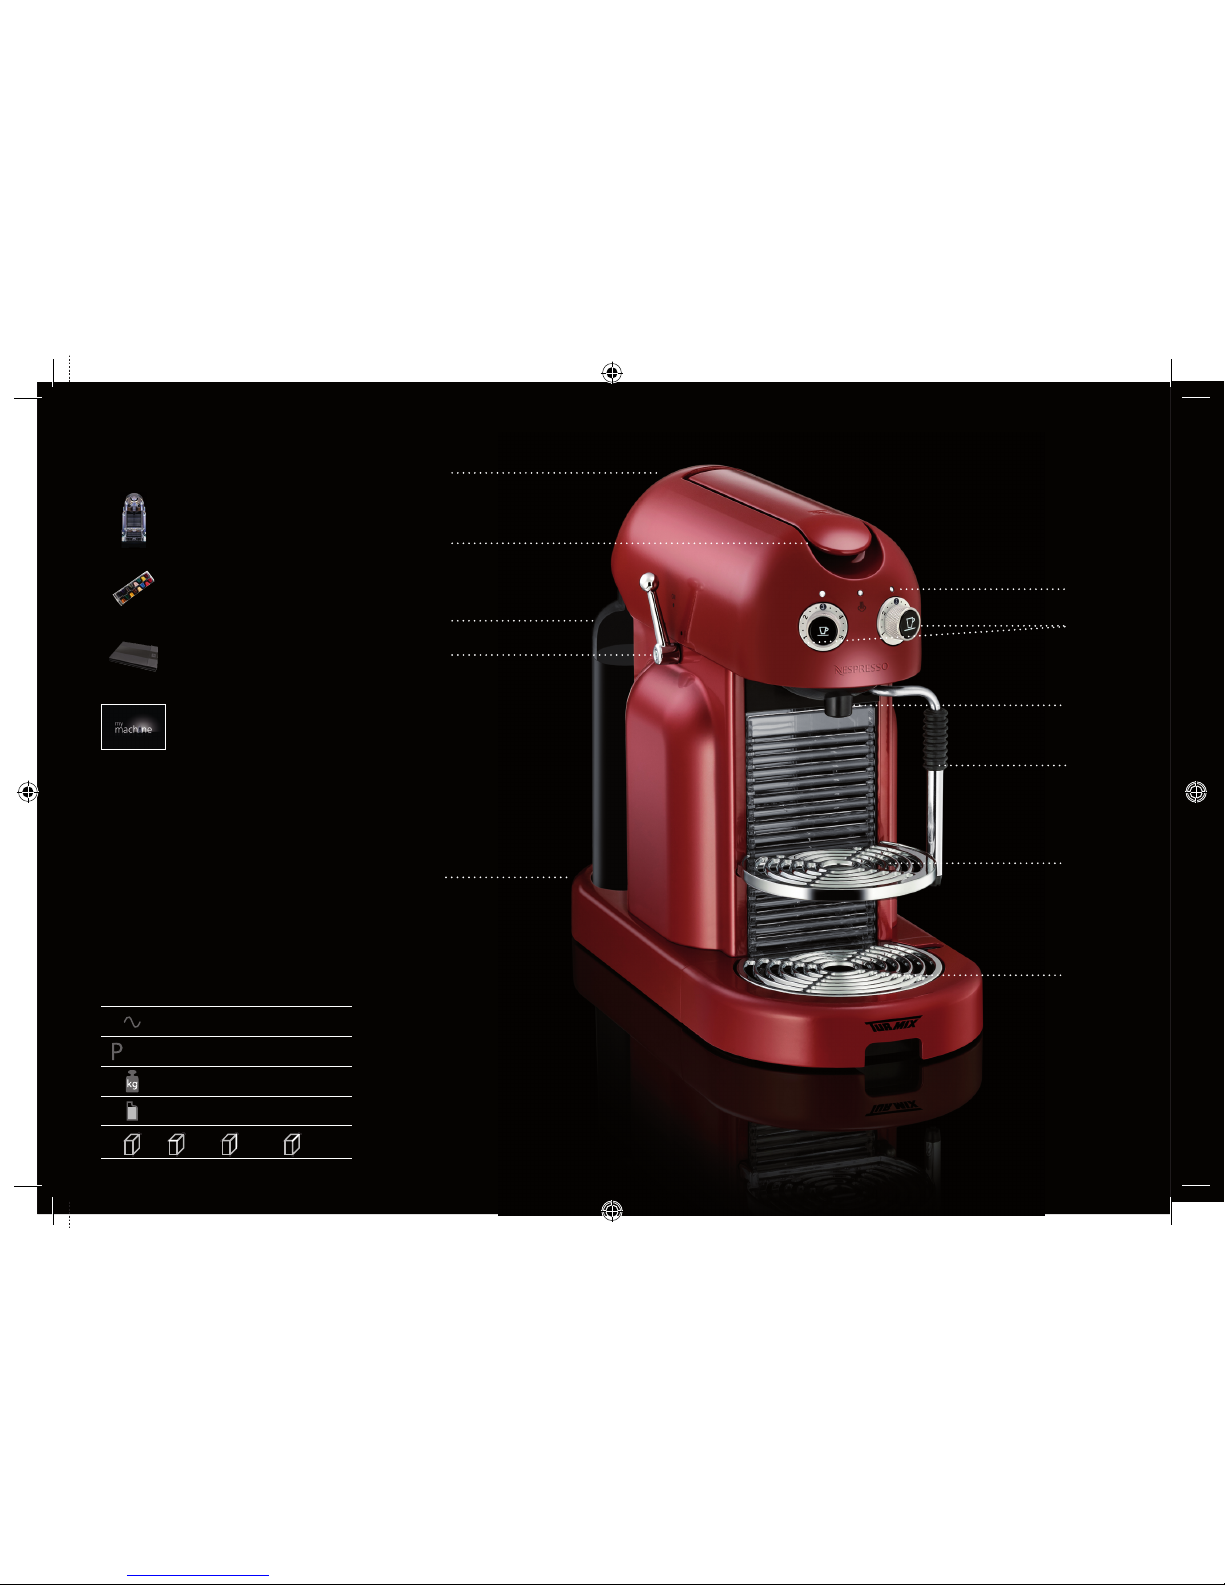
1. Water tank
5. Power cord and storage
Maestria TX300
220-240V 50/60Hz <2300 W
max
19 bar
5.3 kg
1.4 l
47 cm 35.2 cm 19.3 cm
2
3
1
10
5
4
6
9
7
8
11
Page 4
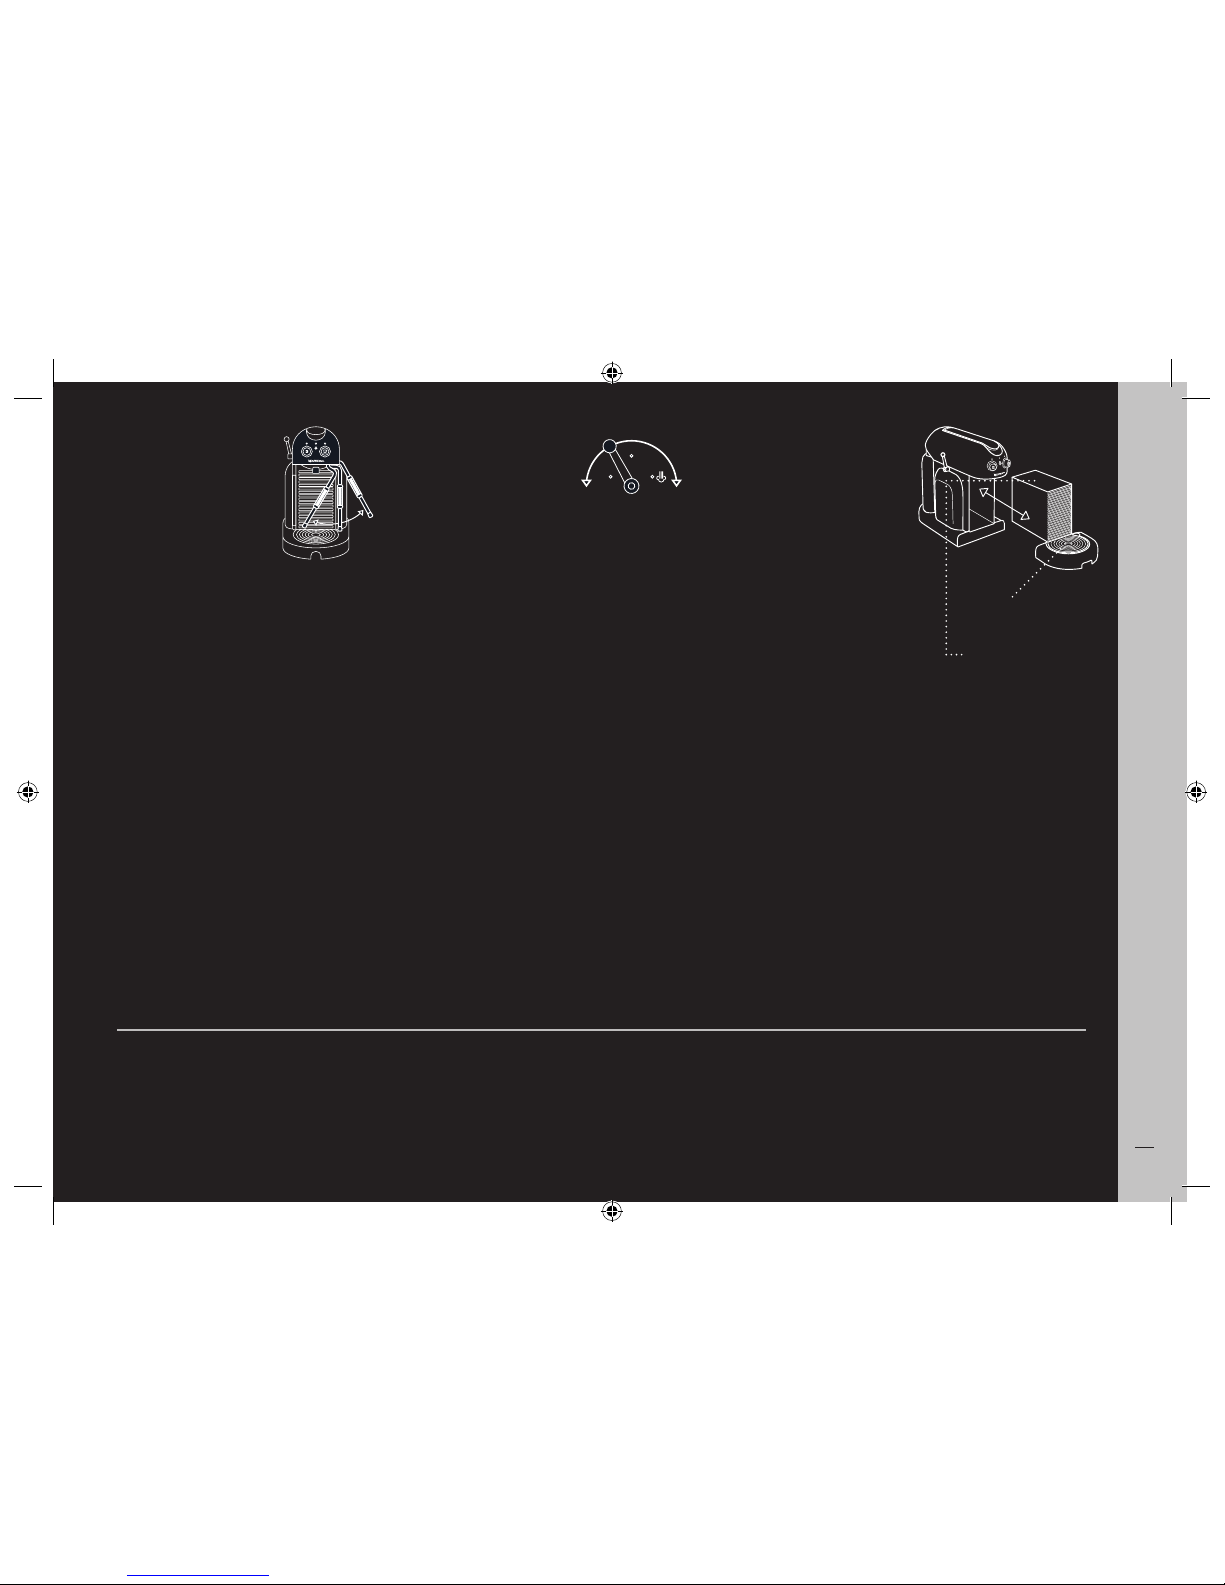
Up right position *
(1)
Reservoir d’eau
Wassertank
Serbatoio acqua
Bouton Marche/Arrêt
Hauptschalter
Pulsante On/Off
Levier
Hebel
Leva
Voyant lumineux
Kontrollleuchten
Indicatori luminosi
1. Water tank
Cordon d’alimentation et rangement
Stromkabel
Cavo di alimentazione
5. Power cord and storage
2. ON/OFF button
Boutons Espresso et Lungo
Espresso- und Lungoauswahl
Pulsanti caffè Espresso e caffè Lungo
6. Espresso and Lungo dial
3. Lever
Sortie Café
7. Coffee outlet
4. Indication lights
Support de tasse
Tassenauflage
Supporto per tazzina
8. Cup support
Kaffeeauslauf
Erogatore di caffè
Page 5
ON
OFF
ON
OFF
1.
1. Frothing position *
(2)
2. Vertical position *
(3)
3. Steam out position *
(4)
Capsule container:
10 –14 capsules *
(6)
Drip tray and grid *
(5)
2.
3.
Unité de maintenance
Reinigungseinheit
Unità di manutenzione
Tube et buse vapeur
Dampfrohr und Aufschäumdüse
Beccuccio ed erogatore vapore
Levier vapeur
Schaumregulierer
Regolatore vapore
11. Maintenance unit 10. Steam handle 9. Steam pipe and nozzle
* (1) jusqu’à la posi tion verticale / Aufre chte Position / posizione co rretta
* (2) position mousse de lait / Auf schäumposition / posiz ione frontale
* (3) position ver ticale / Senkrechte Pos ition / posizione vertic ale
* (4) position so rtie vapeur / Abdampf position / posizione vapo re
* (5) bac et grille d ’égouttage / Ab tropfschale und Git ter / vassoio raccogligocce e g riglia
* (6) bac à capsules usagées (10 –14 capsules) / Kapse lbehälter (für 10 –14 gebrauchte Kapseln) / vasc hetta di recupero c apsule usate (10 –14 capsule)
4
5
Page 6
Nespresso est un système unique offrant un espresso parfait, tasse après tasse.
Toutes les machines Nespresso sont équipées d’un système d’extraction unique à très haute pression allant jusqu’à 19 bar. Chaque paramètre est calculé avec précision pour exprimer la totalité des
arômes de chaque Grand Cru, lui donner du corps et offrir une crèma d’une densité et d’une onctuosité incomparables.
Con te nU
Con SI Gne S D e S ÉCU RI tÉ
PR ÉPa Rez vo tRe ma ChI ne Po UR la PRe mI èRe Ut IlI Sat Ion
la PR ÉPa Rat Ion DU Ca fÉ
Ba RIS ta: faI teS mo US SeR le la It
Re Ce tte S
m oDe me nU
l a v IDa nGe
l’e ntR etI en & l e n et toya Ge
le DÉ taR tRa Ge
le DÉPa nn aGe
C ont aCt ez le ClU B N e sp r e s s o
mI Se aU ReB Ut et P Rot eC tIo n D e l’ en vIR onn em ent
eC ola Bo RatI on: eCo laB oR atIo n.C om
U ne GaR an tIe lI mIt Ée
Nespresso, a exclusive system creating the perfect espresso, time after time.
All Nespresso machines are equipped with a unique extraction system that guarantees up to 19 bar pressure. Each parameter has been calculated with great precision to ensure that all the aromas
from each Grand Cru can be extracted, to give the coffee body and create an exceptionally thick and smooth crema.
Con te nt/
Safet y P ReC aUtIo nS/
PR ePa RIn G y oUR ma ChI ne f oR fIR St U Se/
C of fee PR ePa RatI on/
Ba RI Sta: fR oth In G yo UR mI lK/
ReCIP eS/
me nU mo DeS /
em Pt yIn G m oD e/
C aR e & Cl ean InG /
De SC alI nG/
tR oU Ble Sho otI nG /
Co ntaCt the Ne spr e ss o C lUB /
DI SP oSa l a nD env IR onm ent al PRo teC tI on/
eC ola Bo RatI on: eCo laB oR atIo n.C om/
lI mI teD WaR Ra nt y/
Nespresso is a unique system creating the perfect espresso, time after time.
All Nespresso machines are equipped with a unique system that guarantees up to 19 bar pressure. Each parameter has been calculated with great precision to ensure that all aromas from each Grand
Cru can be extracted, to give the coffee body and create an exceptionally thick and smooth crema.
EN Instruction Manua l FR Manue l d’instructions 6
DE Bedienungsanleitu ng IT Istruzioni per l’uso 28
7− 9
10
11
12 | 13
14 − 17
18
19
20
21 | 22
23
24
25
26
Page 7

EN
FR
Caution –
The safety precautions are part of the appliance. Read them carefully before using your new appliance for the first time. Keep them in a place where you can find and refer to them
later on.
SAFET Y P RE CAUTIONS
Caution –
When you see this sign, please refer to the safety
precautions to avoid possible harm and damage.
Information –
When you see this sign, please take note of
the advice for the correct and safe usage of your appliance.
•
The appliance is intended to prepare beverages according to
these instructions.
•
Do not use the appliance for other than intented use.
•
This appliance has been designed for indoor and non extreme
temperature conditions use only.
•
Protect the appliance from direct sunlight effect, prolonged
water splash and humidity.
•
This appliance is intended to be used in households and similar
applications only such as: staff kitchen areas in shops, offices
and other working environments, farm houses; by clients in
hotels, motels and other residential t ype environments; bed
and breakfast type environments.
•
Keep it out reach of children.
•
The manufacturer accepts no responsability and the warranty
will not apply for any commercial use, inappropriate handling
or use of the appliance, any damage resulting from use for
other purposes, faulty operation, non-professionals repair or
failure to comply with the instructions.
Avoid risk of fatal electric shock and fire.
• In case of an emergency: immediately remove the plug from the
power socket.
• Only plug the appliance into suitable, easely accessible, earthed
mains connections. Make sure that the voltage of the power
source is the same as that specified on the rating plate. The use of
an incorrect connection voids the warranty.
• Do not pull the cord over sharp edges, clamp it or allow it to hang
down.
• Keep the cord away from heat and damp.
• If the supply cord is damaged, it must be replaced by the manu-
facturer, its service agent or similarly qualified persons.
• If the cord is damaged, do not operate the appliance.
• Return the appliance to the Nespresso Club or to a Nespresso au-
thorized representative.
• If an extension cord is required, use only an earthed cord with
a conductor cross-section of at least 1.5mm
2
or matching input
power.
• To avoid hazardous damage, never place the appliance on or
beside hot surfaces such as radiators, stoves, ovens, gas burners,
open flame, or similar.
• Always place it on a horizontal, a stable and even surface. The
surface must be resistant to heat and fluids, like water, coffee,
descaler or similar.
• Disconnect the appliance from the mains when not in use for a
long period. Disconnect by pulling out the plug and not by pul-
ling the cord itself or the cord may become damaged.
• Before cleaning and servicing, remove the plug from the mains
socket and let the appliance cool down.
• Never touch the cord with wet hands.
• Never immerse the appliance or part of it in water or other liquid.
• Never put the appliance or part of it in a dishwaher.
• Electricity and water together is dangerous and can lead to fatal
electrical shocks.
• Do not open the appliance. Hazardous voltage inside!
• Do not put anything into any openings. Doing so may cause re
or electrical shock !
Avoid possible harm when operating the appliance.
• Never leave the appliance unattended during operation.
• Do not use the appliance if it is damaged or not operating per-
fectly. Immediately remove the plug from the power socket.
Contact the Nespresso Club or Nespresso authorized represen-
tative for examination, repair or adjustment.
• A damaged appliance can cause electrical shocks, burns and
fire.
• Always completely close the lever and never lift it during ope-
ration. Scalding may occur.
• Do not put ngers under coee outlet, risk of scalding.
• Do not put ngers into capsule compartment or the capsule
shaft. Danger of injury!
• Water could ow around a capsule when not perforated by the
blades and damage the appliance.
• Never use a damaged or deformed capsule. If a capsule is
blocked into the capsule compartment, turn the machine off
and unplug it before any operation. Call the Nespresso Club or
Nespresso authorized representative.
• Always ll the water tank with fresh, drinking, cold water.
• Empty water tank if the appliance will not be used for an ex-
tended time (holidays,etc.)
• Replace water in water tank when the appliance is not opera-
ted for a weekend or a similar period of time.
• Do not use the appliance without the drip tray and drip grid to
avoid spilling any liquid on surrounding surfaces.
• Do not use any strong cleaning agent or solvent cleaner. Use
a damp cloth and mild cleaning agent to clean the surface of
the appliance.
Descaling
• Nespresso descaling agent, when used correctly, helps ensure
the proper functioning of your machine over its lifetime and
that your coffee experience is as perfect as the first day. For
the correct amount and procedure to follow, consult the user
manual included in the Nespresso descaling kit.
Caution –
The safety precautions are part of the appliance. Read them carefully before using your new appliance for the first time. Keep them in a place where you can find and refer to them
later on.
Caution –
When you see this sign, please refer to the safety precautions to avoid possible harm and damage.
SAFET Y P RE CAUTIONS
Information –
When you see this sign, please take note of
the advice for the correct and safe usage of your appliance.
• The appliance is intended to prepare beverages according to
these instructions.
• Do not use the appliance for other than intented use.
• This appliance has been designed for indoor, non extreme tem-
perature conditions use only.
• Protect the appliance from direct sunlight eect, prolonged water splash and humidity.
• This appliance is intended to be used in households and similar
applications only such as: staff kitchen areas in shops, offices and
other working environments; by clients in hotels, motels and
other residential type environments; bed and breakfast type
environments.
•
This product has not been ceritifed for use on planes, boats,
trains and automobiles. Do not use the appliance for other than
intended use.
• Keep it out reach of children.
• The manufacturer accepts no responsability and the warranty
will not apply for any commercial use, inappropriate handling or
use of the appliance, any damage resulting from use for other
purposes, faulty operation, non-professional repair or failure to
comply with the instructions.
Avoid risk of fatal electric shock and fire.
• In case of an emergency: immediately remove the plug from the
power socket.
• Only plug the appliance into suitable, easily accessible, earthed
mains connections. Appliance must be connected only after ins-
tallation. Make sure that the voltage of the power source is the
same as that specified on the rating plate. The use of an incorrect
connection voids the warranty.
• Do not pull the cord over sharp edges, clamp it or allow it to hang
down.
• Keep the cord away from heat and damp.
• If the supply cord is damaged, it must be replaced by the manu-
facturer, its service agent or similarly qualified persons.
• If the cord is damaged, do not operate the appliance.
• Return the appliance to the Nespresso Club or Nespresso autho-
rized representative.
• If an extension cord is required, use only an earthed cord with
a conductor cross-section of at least 1.5mm
2
or matching the
input power.
• To avoid hazardous damage, never place the appliance on or
beside hot surfaces such as radiators, stoves, ovens, gas burners,
open flame, or similar.
• Always place it on a horizontal, stable and even surface. The
surface must be resistant to heat and fluids, like water, coffee,
descaler or similar.
• Disconnect the appliance from the mains when not in use for a
long period. Disconnect by pulling out the plug and not by pulling the cord itself or the cord may become damaged.
• Before cleaning and servicing, remove the plug from the mains
socket and let the appliance cool down.
• Never touch the cord with wet hands.
• Never immerse the appliance or part of it in water or other liquid.
• Never put the appliance or part of it in a dishwasher.
• Electricity and water together is dangerous and can lead to fatal
electrical shocks.
• Do not open the appliance. Hazardous voltage inside!
• Do not put anything into any openings. Doing so may cause re
or electrical shock !
Avoid possible harm when operating the appliance
•
Never leave the appliance unattended during operation.
•
Do not use the appliance if it is damaged or not operating perfectly. Immediately remove the plug from the power socket.
Contact the Nespresso Club or Nespresso authorized represen-
tative for examination, repair or adjustment.
•
A damaged appliance can cause electrical shocks, burns and
fire.
•
Always close completely the lever and never lift it during operation. Scalding may occur.
•
Do not put fingers under coffee outlet, risk of scalding.
•
Do not put fingers into capsule compartment or the capsule
shaft. Danger of injury!
•
Water could flow around a capsule when not perforated by the
blades and damage the appliance.
•
Never use a damaged or deformed capsule. If a capsule is
blocked into the capsule compartment, turn the machine off
and unplug it before any operation. Call the Nespresso Club or
Nespresso authorized representative.
•
Always fill the water tank with fresh, drinking, cold water.
•
Empty water tank if the appliance will not be used for an extended time (holidays,etc.)
•
Replace water in water tank when the appliance is not operatd
over a weekend or a similar period of time.
• Do not use the appliance without the drip tray and drip grid to
avoid spilling any liquid on surrounding surfaces.
6
7
Page 8
Aver tissement – Le s consignes de sécurité font partie de l’appare il. Veuillez les lire attentivement ava nt d’utiliser votre nouvel appareil. G ardez-les dans un endroit où vou s pourrez les ret-
rouver et vous y ré férer ultèrieurement.
Aver tissement – Lorsque c e symbole apparaît, veuil lez consulter les mesures de s écurité pour éviter d’éventuels d angers et dommages.
CONS IG NE S DE S EC UR IT E
Information – Lorsque ce symbole apparaît, veuillez
prendre connaissance du conseil pour une utilisation sûre et
conforme de votre appareil.
• L’appareil est conçu pour préparer des boissons conformément à ces
instructions.
• N’utilisez pas l’appareil pour d’autres usages que ceux prévus.
• Cet appareil a été conçu seulement pour un usage intérieur, pour un
usage dans des conditions de températures non extrêmes.
• Protégez votre appareil des eets directs des rayons du soleil, des
éclaboussures d’eau et de l’humidité.
• Cet appareil est prévu pour une utilisation domestique et des utilisations similaires seulement comme : les espaces cuisine dans les magasins, les bureaux ou autres environnements de travail, les fermes;
une utilisation par les clients dans les hôtels, les chambres d’hôtes
et autres environnements résidentiels ou du type bed&breakfast.
• Gardez-le hors de portée des enfants.
•
Le fabricant décline toute responsabilité et la garantie ne
s’appliquera pas en cas d’usage commercial, d’utilisations ou de
manipulations inappropriées, de dommages résultant d’un usage
incorrect, d’un fonctionnement erroné, d’une réparation par un
non professionnel ou du non respect des instructions.
Evitez les risques d’incendie et de choc électrique fatal
•
En cas d’urgence : débranchez immédiatement l’appareil de la prise
électrique.
•
Branchez l’appareil uniquement à des prises adaptées, facilement accessibles et reliées à la terre. L’appareil doit être connecté uniquement
après l’installation. Assurez-vous que la tension de la source d’énergie
soit la même que celle indiquée sur la plaque signalétique. L’utilisation d’un branchement inadapté annule la garantie.
•
Ne tirez pas le cordon d’alimentation sur des bords tranchants, attachez-le ou laissez-le pendre.
•
Gardez le cordon d’alimentation loin de la chaleur et de l’humidité.
• When unpacking the machine, remove the plastic lm on the drip
grid and dispose.
• The appliance is not intented for use by persons (including chil-
dren) with reduced physical, sensory or mental capabilities, or lack
of experience and knowledge, unless they have been given super-
vision or instruction concerning use of the appliance by a person
responsible for their safety.
• This appliance uses Nespresso coffe capsules available exclusively
through the Nespresso Club or your Nespresso authorized repre-
sentatvie. Nespresso quality is only guaranteed when Nespresso
capsules are used in the Nespresso Appliances.
• For your own safety, you should use only parts and appliance
accessories from Nespresso that are designed for your appliance.
• All Nespresso appliances pass stringent controls.Reliability tests
under practical conditions are performed randomly on selected
units. This can show traces of any previous use.
• Nespresso reserves the right to change instructions without prior
notice.
SAVE THESE INSTRUCTIONS
Pass them on to any subsequent user
This instruction manual is also available as a PDF at nespresso.com.
•
Do not use any strong cleaning agent or solvent cleaner. Use a
damp cloth and mild cleaning agent to clean the surface of the
appliance.
Descaling
•
Nespresso descaling agent, when used correctly, helps to ensure
the proper functioning of your machine over its lifetime and that
your coffee experience is as perfect as the first day. For the correct
amount and procedure to follow, consult the user manual included
in the Nespresso descaling kit.
•
When unpacking the machine, remove the plastic film on the drip
grid and dispose.
• The appliance is not intented for use by persons (including children) with reduced physical, sensory or mental capabilities, or lack
of experience and knowledge, unless they have been given supervision or instruction concerning use of the appliance by a person
responsible for their safety.
• This appliance uses Nespresso coffe capsules available exclusively
through the Nespresso Club or your Nespresso authorized repre-
sentative. Nespresso quality is only guaranteed when Nespresso
capsules are used in the Nespresso appliances.
•
For your own safety, you should use only parts and appliance
accessories from Nespresso that are designed for your appliance.
•
All Nespresso appliances pass stringent controls. Reliability tests
under practical conditions are performed randomly on selected
units. Some appliances can therefore show traces of previous use.
•
Nespresso reserves the right to change instructions without prior
notice.
SAVE THESE INSTRUCTIONS
Pass them on to any subsequent user
This Instruction Manual is also available as a PDF at nespresso.com.
Page 9

EN
FR
•
Si le cordon d’alimentation est endommagé, il doit être remplacé
par le fabricant, son agent après-vente ou des personnes de même
qualification. Si le cordon d’alimentation est endommagé, ne
faites pas fonctionner l’appareil. Retournez votre appareil au Club
Nespresso ou à un revendeur Nespresso agréé.
•
Si une rallonge électrique s’avère nécessaire, n’utilisez qu’un câble
relié à la terre, dont le conducteur a une section d’au moins 1,5
mm2.
•
Afin d’éviter de dangereux dommages, ne placez jamais l’appareil
sur ou à côté de surfaces chaudes telles que les radiateurs, les cuisinières, les fours, les brûleurs à gaz, les feux nus, ou des sources
de chaleur similaires.
•
Placez-le toujours sur une surface horizontale, stable et régulière.
La surface doit être résistante à la chaleur et aux fluides comme :
l’eau, café, le détartrant ou autres.
•
Débranchez l’appareil de la prise électrique lorsqu’il n’est pas utilisé
pendant une période prolongée.
•
Débranchez l’appareil en tirant sur la fiche et non pas sur le cordon
d’alimentation afin de ne pas l’endommager.
•
Avant le nettoyage et l’entretien de votre appareil, débranchez-le
de la prise électrique et laissez-le refroidir.
•
Ne touchez jamais le fil électrique avec des mains mouillées.
•
Ne plongez jamais l’appareil, en entier ou en partie, dans l’eau ou
dans d’autres liquides.
•
Ne mettez jamais l’appareil ou une partie de celui-ci dans un lave
vaisselle.
•
L’électricité et l’eau ensemble sont dangereux et peuvent conduire
à des chocs électriques mortels.
•
N’ouvrez pas l’appareil. Voltage dangereux à l’intérieur.
•
Ne mettez rien dans les ouvertures. Cela pourrait provoquer un
incendie ou un choc électrique !
Évitez les dommages possibles lors de l’utilisation de l’appareil
•
Ne laissez jamais l’appareil sans surveillance pendant son fonctionnement.
•
N’utilisez pas l’appareil s’il est endommagé ou ne fonctionne pas
parfaitement. Débranchez-le immédiatement de la prise électrique. Contactez le Club Nespresso ou un revendeur Nespresso
agréé, pour la réparation ou le réglage de votre appareil.
•
Un appareil endommagé peut provoquer des chocs électriques,
brûlures et incendies.
•
Refermez toujours bien complètement le levier et ne le soulevez
jamais pendant le fonctionnement, des brûlures peuvent se produire.
•
Ne mettez pas vos doigts sous la sortie café, il y a un risque de
brûlure.
•
Ne mettez pas vos doigts dans le compartiment à capsules ou dans
le bac de récupération des capsules . Il existe un risque de blessure.
•
L’eau peut s’écouler autour d’une capsule, quand celle-ci n’a pas
été perforée par les lames, et endommager l’appareil.
• N’utilisez jamais une capsule endommagée ou déformée. Si une
capsule est bloquée dans le compartiment à capsules, éteignez
l’appareil et débranchez-le avant toute opération. Appelez le Club
Nespresso ou un revendeur Nespresso agréé.
•
Remplissez toujours le réservoir avec de l’eau fraiche, potable et
froide.
•
Videz le réservoir d’eau si l’appareil n’est pas utilisé pendant une
durée prolongée (vacances etc…)
•
Remplacez l’eau du réservoir d’eau quand l’appareil n’est pas utilisé
pendant un week-end ou une période de temps similaire.
•
N’utilisez pas l’appareil sans le bac d’égouttage et sa grille afin
d’éviter de renverser du liquide sur les surfaces environnantes.
•
Ne nettoyez jamais votre appareil avec un produit d’entretien ou
un solvant. Utilisez un chiffon humide et un détergent doux pour
nettoyer la surface de l’appareil.
Détartrage
•
Lorsqu’il est utilisé correctement, le détartrant Nespresso, permet
d’assurer le bon fonctionnement de votre appareil tout au long
de sa vie et vous permet de maintenir une expérience café aussi
parfaite qu’au premier jour. Pour le dosage exact et la procédure
à suivre, consultez le manuel d’utilisation inclus dans le kit de détartrage Nespresso.
•
Lors du déballage de l’appareil, retirer le film plastique sur la grille
d’égouttage.
•
L’appareil n’est pas destiné à être utilisé par des personnes (y
compris les enfants) dont les capacités physiques, sensorielles
ou mentales sont réduites, ou avec un manque d’expérience et
de connaissances, à moins qu’elles ne soient sous surveillance ou
aient reçues des instructions concernant l’utilisation de l’appareil
par une personne responsable de leur sécurité.
•
Cet appareil utilise des capsules de café
Nespresso
disponibles ex-
clusivement via le Club
Nespresso
ou votre revendeur Nespresso
agréé. La qualité
Nespresso
n’est garantie que lorsque les capsules
Nespresso
sont utilisées dans les appareils Nespresso.
•
Pour votre propre sécurité, vous devez utiliser seulement les pièces
et accessoires d’appareils Nespresso qui sont conçus spécialement
pour votre appareil.
•
Tous les appareils Nespresso sont soumis à des contrôles sévères.
Des tests de fiabilité, dans des conditions réelles d’utilisation, sont
effectués au hasard sur des unités sélectionnées. Certains appareils peuvent donc montrer des traces d’une utilisation antèrieure.
•
Nespresso se réserve le droit de modifier sans préavis la notice
d’utilisation.
CONSERVEZ LES INSTRUCTIONS SUIVANTES
Transmettez-les aux utilisateurs ultérieurs
Ce manuel d’instruction est également disponible en version PDF sur nespresso.com
8
9
Page 10
Tout d’abord, lisez les pr écautions de sécuri té afin d’éviter les ris ques d’incendie et de choc é léctrique mort el.
Soulevez le sup port de tasse, enlevez le ré servoir
d’eau et l’unité de maintenance.
Soulevez le sup port de tasse et placez un r écipient
(min 0,5L) sous l’orifice de sor tie café.
Tournez le bouton Lun go sur 5 et appuyez sur le bouton
pour rincer la mac hine. Répetez l’opération 3 fois .
Rincez et remp lissez le réservoir d ’eau avec de l’eau
potable. Reme ttez le réservoir d ’eau et l’unité de
maintenance.
Allumez la machin e.
Mettez le le vier vapeur en position «OFF » et la buse
vapeur en posi tion verticale.
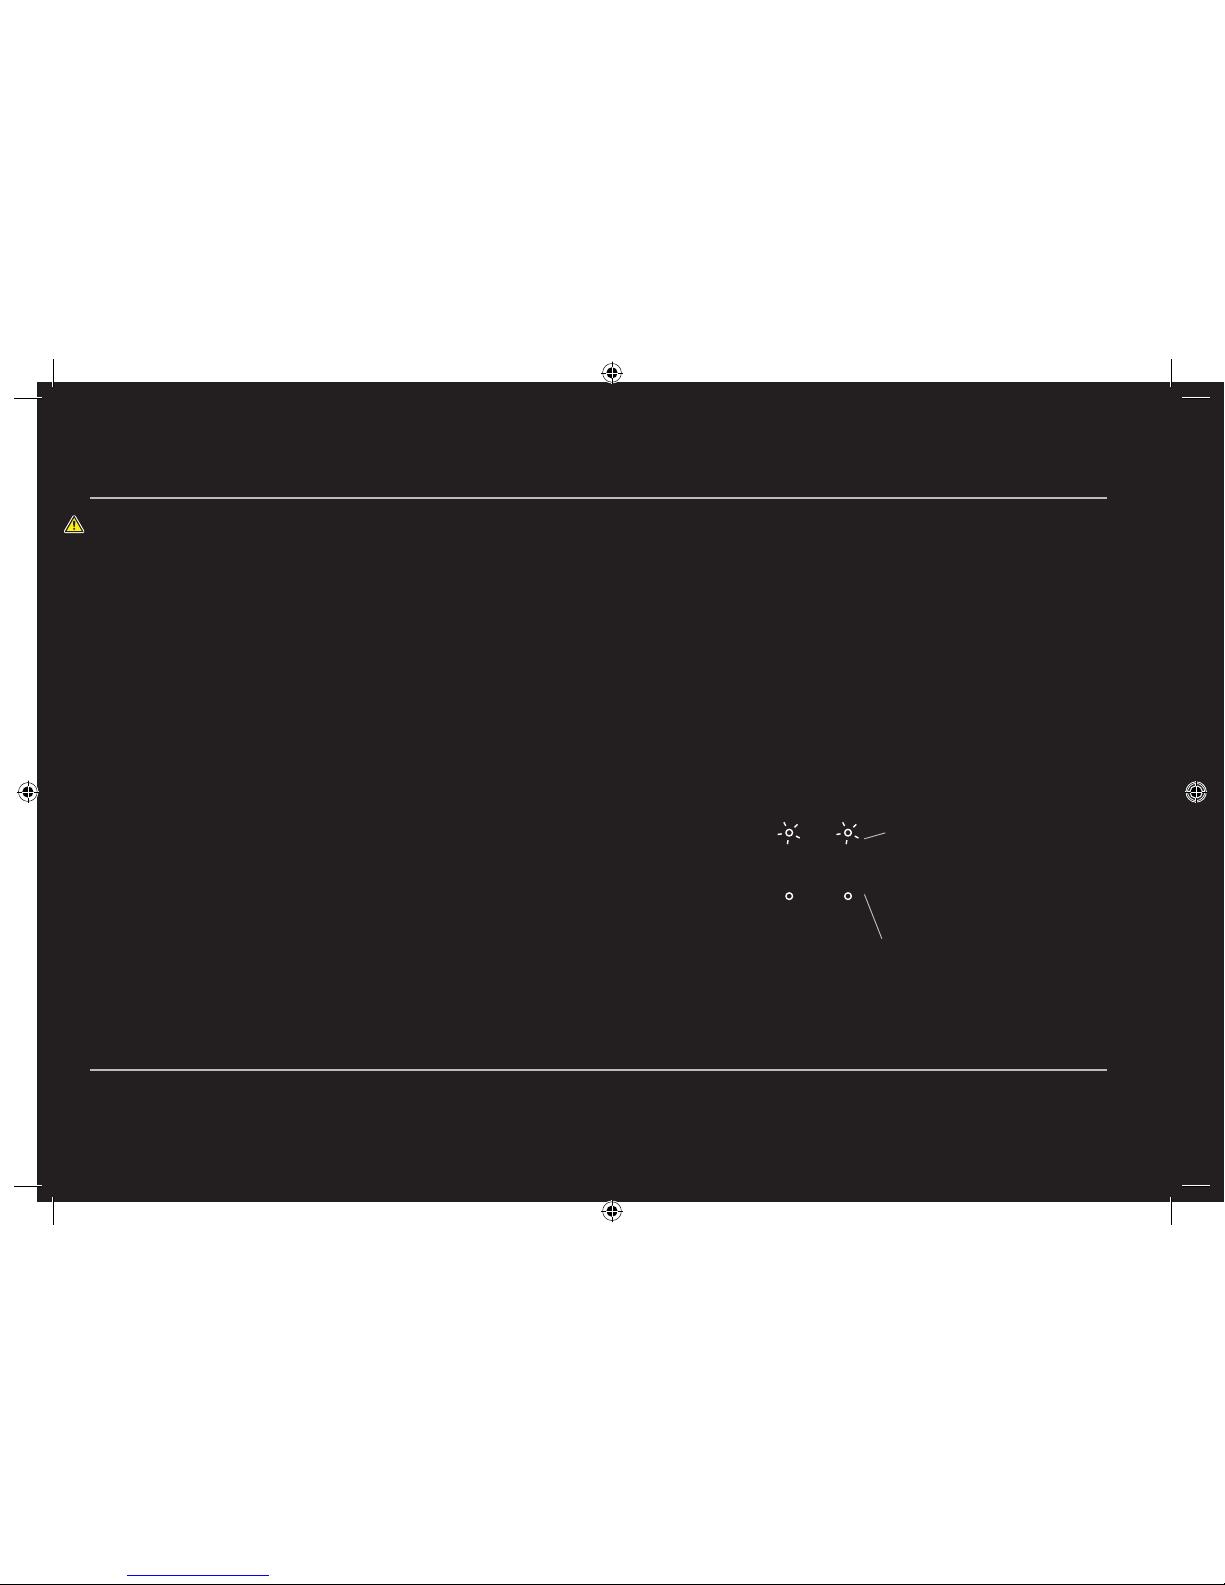
Les voyants lumi neux clignotent :
la machine chauff e (25 sec).
Les voyant lumineu x sont fixes :
la machine est p rête.
Fermez le levi er et branchez la machine.
Ajustez la long ueur du cordon d’alimentation et r angez le
surplus sou s l’appareil à l’aide de la fixa tion de rangement.
Note: L’arrêt automa tique: la machine s’éteint automatique ment après 9 minutes sans uti lisation. Pour retirer cet ar rêt automatique allez dans le m ode menu.
PRÉPAREZ VOTRE MACHINE POUR LA PREMIÈRE UTILISATION
1. Rinse and fill wa ter tank with drinking water.
4. Lift le ver and insert Nespresso capsule.
7. Turn dial to de sired coffee level.
1. Lif t cup support, re move water tank and mainte-
nance unit.
First read the s afety precaution s to avoid risks of fatal elec trical shock and fire.
4. Close lever and plu g into mains.
7. Lif t cup support and place co ntainer
(min. 0.5L) under coffee out let.
8. Se t Lungo button to 5 and press to r inse the machine.
Repeat 3 times .
Note: Automatic powe r off: machine stops automat ically after 9 minutes of n on-use. To change this setting v isit auto shut off sectio n in menu mode.
5. Rins e and fill water tank with drink ing water.
Reposition w ater tank and maintenance unit.
6. Switch machine on.
3. Set steam hand le to OFF and nozzle in vertic al
position.
Blinking light s: Heat up (25 sec.)
Steady: Ready
2. Adjus t cord length and store exce ss under
machine with c ord storage fixation.
PREPARING YOUR MACHINE FOR FIRST USE/
Page 11
ml
ml
ml
ml
ml
ml
ml
ml
1: 25 ml
2: 30 ml
3: 40 ml
4: 50 ml
5: 60 ml
1: 70 ml
2: 90 ml
3: 110 ml
4: 130 ml
5: 150 ml
EN
FR
Rincez et remp lissez le réservoir d ’eau avec
de l’eau potable.
Tournez le bouton ju squ’au
niveau de café dé siré.
Remettez l e réservoir d’eau.
Pressez le bo uton pour commencer l’extra ction.
La préparat ion s’arrêtera automatiqueme nt.
Allumez la machin e.
Le suppor t de tasse peut être relevé po ur y placer un
verre à recet tes.
Levez et baisse z le levier afin d’éjecter la capsule d ans le
bac à capsules .
Levez le levier et i nsérez une capsule Nespresso. Baissez le lev ier et placez une tasse sous la s ortie café.
Note: Pendant la chauff e de la machine (lumières cligno tantes), vous pouvez presser le bou ton café. Le café s’écoulera automat iquement quand la machine sera p rête. Pendant la préparation du caf é, la fonction vapeur n’est pas uti lisable.
Les voyants lumi neux clignotent :
la machine chauff e (25 sec).
Les voyant lumineu x sont fixes :
la machine est p rête.
LA P RÉ PARATION DU C AFÉCOFF EE P RE PARATION/
1. Rinse and fill wa ter tank with drinking water.
4.
Lift leve r and insert Nespresso capsule.
7. Turn dial to de sired coffee level.
Note: During heat up (blinking lights), you can press the coffee button. Coffee will start to flow automatically when machine is ready. During coffee preparation, steam function is not possible.
2. Rep osition water tank .
5. Clo se lever and place cup under coffee o utlet.
8. Pre ss button to start b rewing. The preparation
will stop autom atically.
3. Clo se lever and switch machine on.
6. Cup sup port can be turned up r ight to support Macchiato
glass.
9. Remo ve cup. Lift and close lever to ej ect capsule into
container.
Blinking light s: Heat up (25 sec.)
Steady: Ready
10
11
Page 12

Il est recomm andé de rincer la sortie vap eur de votre machine avant et aprè s chaque préparation à bas e de lait.
Remplissez le r éservoir d’eau avec de l’eau potable.
Tournez le levier vap eur sur
. Faites sorti r de la
vapeur par la bus e pendant 5 secondes.
Soulevez le sup port de tasse et ajuste z le tuyau sur la
position vap eur.
Lorsque c ’est terminé, reme ttez le levier vapeur
sur «ON».
Tournez la levier vap eur sur «ON» :
Le voyant lumineux d u milieu clignote :
la machine chauff e.
Le voyant lumineux e st fixe:
la machine est p rête.
Note: Lorsque l e levier vapeur est sur «ON», la fonc tion vapeur restera en m ode chauffe. Lorsque c’est ter miné mettez le levier vap eur sur «OFF».
BaRIS ta : moUSSeR vot Re l aI t
RIn Ca Ge va Pe UR :
ATTENTION: Le tube de vap eur sera chaud pendant et apr ès l’usage, manipulez le avec soin po ur éviter les brûlures.
Note : Après une p ériode sans utilisatio n, et à cause de l’eau résiduelle des pré parations précédentes r estant dans la machine , de la vape ur peut être libérée lor s du chauffage de la machine.
Ceci est nor mal et ne cause aucun dommage à vo tre machine.
1. Comp lete previous Steam Out steps .
4. Move steam handle to .
BaRIS ta: fRothInG yoUR mIlK/
Ste am oU t: /
1. Fill water tank w ith drinking water.
4. Move steam handl e to . Run steam through
nozzle for 5 s ec. to steam out.
Note: When steam han dle is set to ON, steamer func tion will remain in heat up mode. Wh en done move handle to OFF.
2. Lift c up support and adjust s team pipe into steam
out positio n.
3. Set steam hand le to ON:
5. Move s team handle back to ON when done.
Middle light bli nking: heat up.
Middle light s teady: ready
It is recommend ed to steam out your machine be fore and after each milk pr eparation.
CAUTION: Steam pipe will be ho t during and after usage, han dle with care to avoid burns.
NOTE: After a pe riod of non use and becaus e of residual water in the machine f rom previous preparat ions, steam may release during t he heating up mode. This is normal a nd will not cause any
damage to your mach ine.
Page 13

EN
FR
Poursuivez le s étapes précédentes d e
«RINCAGE VAPEUR».
Tournez les levier su r
.
Astuce: Pour un e mousse de lait parfai te, utilisez du lait frais à tempé rature réfrigérée (auto ur de 4°C). Pour un meilleur résultat, u tilisez un pot à lait pour fair e mousser votre lait.
Veillez à bien eec tuer le rinçage vapeur d e votre machine et à nettoyer vot re tube et votre buse vapeu r après chaque utilisation (voi r section Nettoyag e et entretien).
Remplissez le p ot à lait au niveau requis en fonc tion
de la recett e.
Ajustez le tub e vapeur sur la position mouss e, et tenez-le
dans le fond du pot à la it pour éviter les éclabous sures.
Dès que votre mo usse atteint le niveau ou temp érature désir é (environ 65 ° C), elle est p rête.
Avant de retirer la b use vapeur du pot à lait, met tez le
levier vapeur s ur «ON».
Note: Si vous voulez s eulement chauffer votre lait e t ne pas créer de mousse, assure z vous que le tube vapeur soit p oussé au plus haut point, de sor te qu’il y ait un écart e ntre le bas de la
conduite de vap eur et la buse.
PRÊT A FAIRE VOTRE MOUSSE DE LAIT
Note: If you only want to h eat the milk and not create frot h, ensure that the steam pipe is push ed up to the highest point, s o that there is a gap between th e bottom of the steam
pipe and nozz le.
READY TO FROTH YOUR MILK/
1. Comp lete previous Steam Out steps . 3. Adjust steam pipe into f rothing position, and hold it i n
bottom of ju g to avoid splashes.
4. Move steam handle to .
2. Fill mi lk jug to required amount bas ed on recipe.
5. Once milk froth has reache d desired level or
temperatur e (about 65°C), it is read y.
6. Before removing ste am pipe from milk jug, move steam
handle back to ON.
Tips: For per fect milk froth, us e fresh milk at refriger ator temperature (about 4°C). For be st results, use a milk jug to f roth your milk.
Make sure to steam ou t your machine and clean your stea m pipe and nozzle after eac h usage (see care and cleanin g section).
12
13
Page 14
Proport ions:
1 capsule espr esso
Complétée de mo usse de lait chaud sur le dessus
Préparez un e spresso dans une tasse à Cap pucino et disposez sur le de ssus de la mousse de
lait chaud. Intens e: Grand Cru Ristret to / Léger: Grand Cru Rosab aya de Columbia
Proport ions:
1 capsule lungo
Complétée avec de la m ousse de lait chaud
Préparez un lun go dans un grand verre (350 ml) et dispose z sur le dessus de la mousse de lait
chaud. Intense: G rand Cru Fortissio Lung o / Léger: Grand Cru Vivalto Lu ngo
leS ReC et teS C laSSIq Ue S
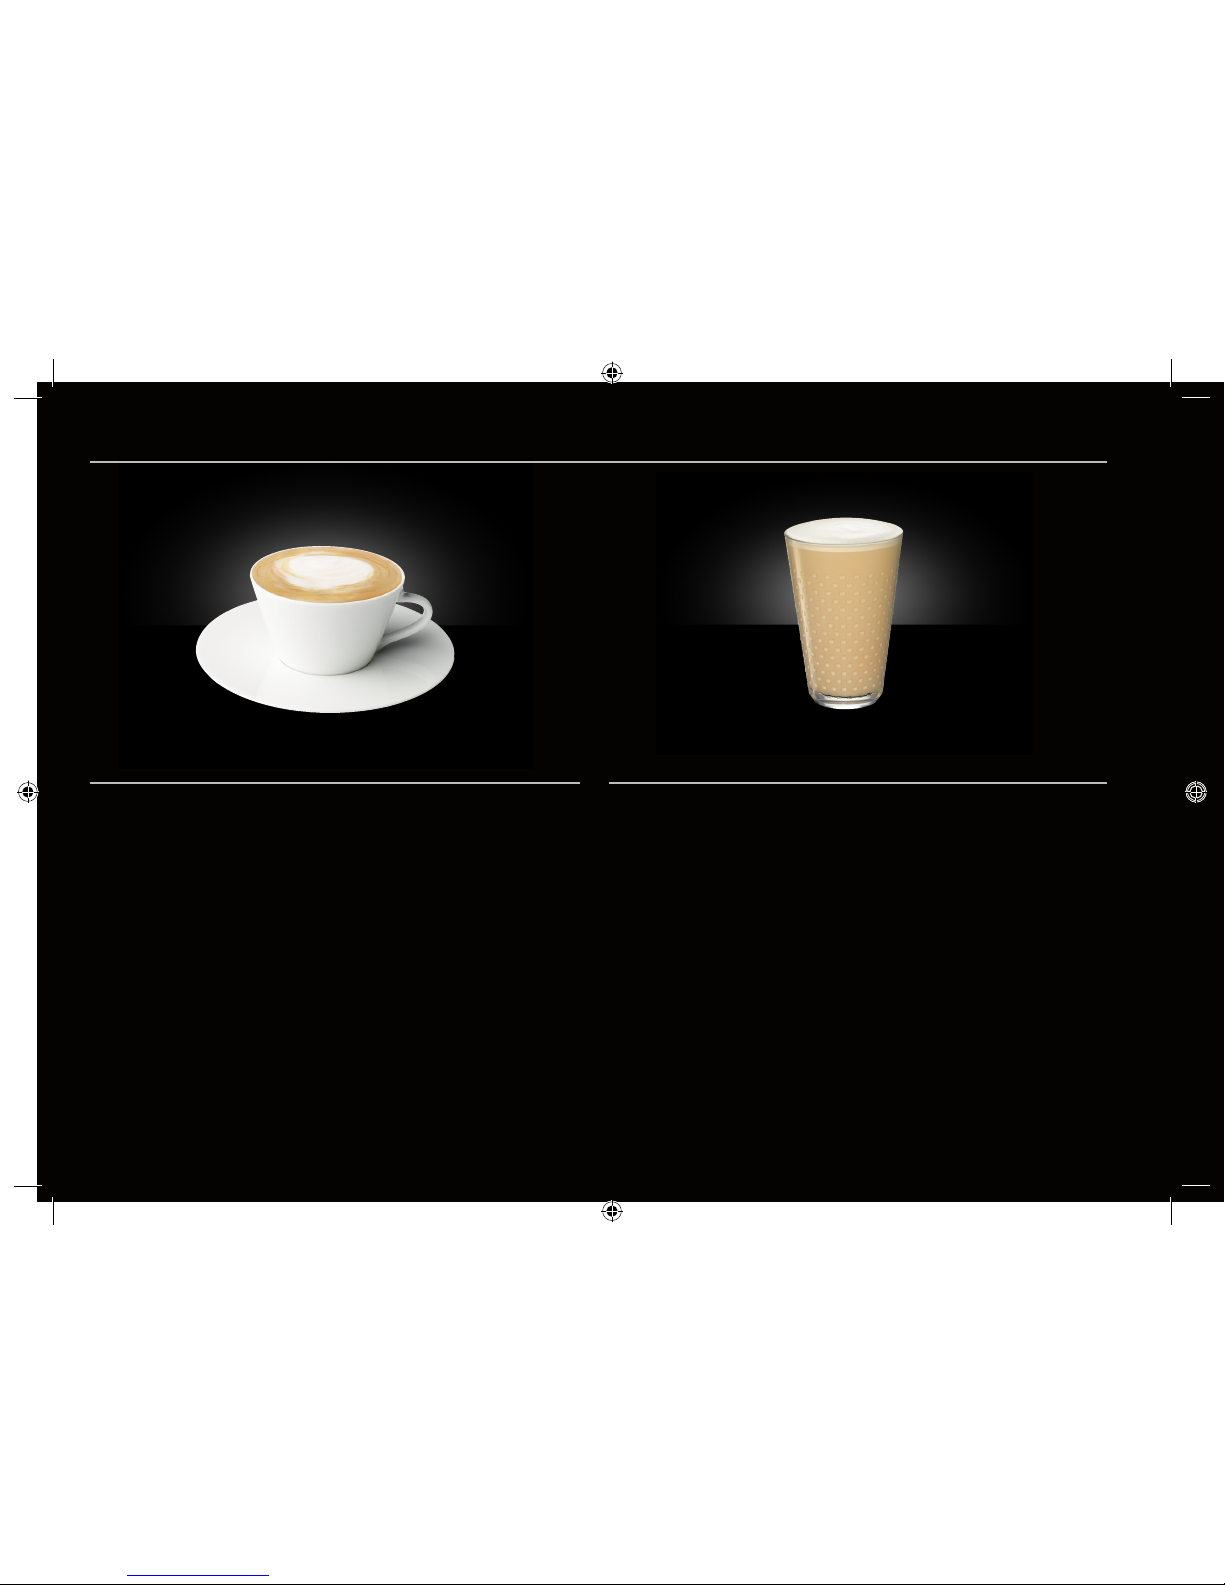
C af è l at teC aP PU CC In o
Proport ions:
1 espresso c apsule
Topped up with hot mil k froth
Prepare an esp resso in a Cappuccino cup an d top up with hot milk froth.
Intense: Rist retto Grand Cru / Light: Ro sabaya de Columbia Grand Cru
Proport ions:
1 Lungo capsule
Topped up with hot mil k
Prepare a Lungo i n a tall glass (350ml) and top up with hot milk .
Intense: For tissio Lungo Grand Cru / Light : Vivalto Lungo Grand Cru
Cl aS SI C Re CI PeS/
C aP PU CC In o/ C af fÉ l att e/
Page 15
EN
FR
Proport ions:
1 capsule espr esso
Complétée de mo usse de lait chaud sur le dessus
Remplir un gran d verre (300ml) de mousse de lait c haud. Complétez-le avec un espre sso.
Intense: Grand Cr u Indriya from India / Lége r: Grand Cru Volluto
Proport ions:
1 capsule espr esso
Complétée de mo usse de lait chaud sur le dessus
Préparez un e spresso dans une tasse à esp resso et disposez sur le de ssus de la mousse
de lait chaud. Inte nse: Grand Cru Indriya fr om India / Léger: Grand Cru Volluto
leS ReC et teS C laSSIq Ue S
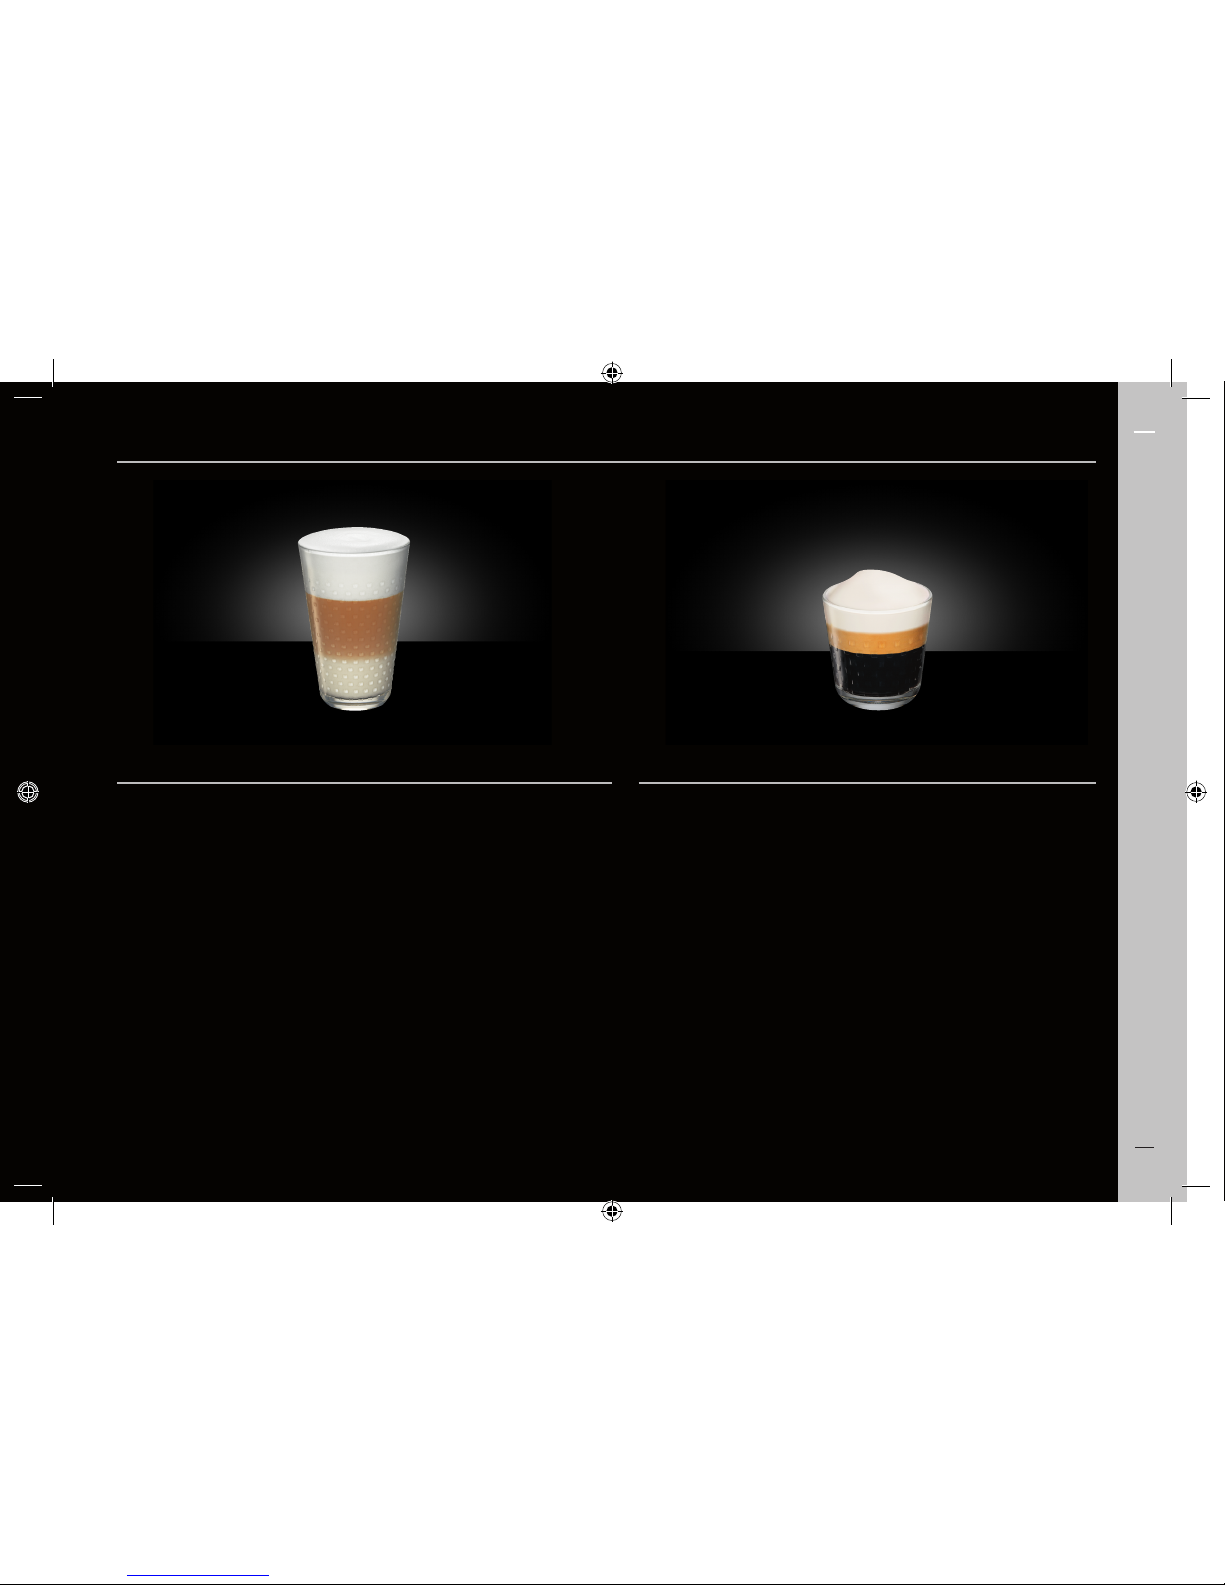
l att e ma CC hI ato e SP Re SS o ma CC hI ato
Proport ions:
1 espresso c apsule
Topped up with hot mil k froth
Fill a tall glass wi th hot milk froth (300ml). Top up with an espr esso preparation.
Intense: Indri ya from India Grand Cru / Ligh t: Volluto Grand Cr u
Proport ions:
1 espresso c apsule
Topped up with hot mil k froth
Prepare an esp resso in an espresso cup an d top up with hot milk froth.
Intense: Indri ya from India Grand Cru / Ligh t: Volluto Grand Cr u
Cl aS SI C Re CI PeS/
l att e ma CC hI ato / eSP Re SS o ma CC hI ato /
14
15
Page 16

Proport ions:
2 capsules es presso Volluto
1 boule de glace vani lle
2 cuillères à c afé de sirop de caramel
1 cuillère à caf é de pépites de chocolat
Complétées de m ousse de lait chaud sur le dessu s
Préparez la mo usse de lait chaud, ajoutez-y le sir op
de caramel et m ettez-la de coté. Préparez d eux cafés
espresso da ns une tasse et versez-le s dans un verre
(350ml) froid. Ajo utez immédiatement la boule de
glace vanille et com plétez avec la mousse de lait chau d.
Décorez le tou t avec des pépites de chocolat .
LES REC ET TES G OU RM ET
C AF É GL ACÉ VA NI LL E CA RA ME L
GOURM ET R EC IP ES/
Proport ions:
2 Volluto espress o capsules
1 scoop of vanilla i ce cream
2 teaspoons of c aramel syrup
1 teaspoon of cho colate chips
Topped up with hot mil k froth
Prepare the hot m ilk froth, add the caramel s yrup to it
and set aside. Pre pare two espresso coffe es into a cup
and pour them in to a cold glass (350ml). Immediately
add the scoop of i ce cream and top up with the hot milk
froth. Dec orate with chocolate chips .
ICE D VANI LL A C AR AM EL CO FF EE /
Page 17

EN
FR
Proport ions:
1 capsule espr esso Capriccio
Du chocolat Af ter Eight à la menthe
Du chocolat au no ugat
Complétée de mo usse de lait chaud sur le dessus
Préparez la c apsule Capriccio dans une tas se à
espresso. Com plétez avec la mousse de lait chau d.
Saupoudre z de copeaux de chocolat au nouga t sur le
dessus et ajou tez pour finir un chocolat Af ter Eight®
à la mousse de lait . Servez immédiatement .
LES REC ET TES G OU RM ET
C AF É AF TE R E IG HT®
GOURM ET R EC IP ES/
Proport ions:
1 Capriccio e spresso capsule
After Eight ® mint chocolate
Nougat choco late
Topped up with hot mil k froth
Prepare the C apriccio capsule into an espr esso cup.
Top it up with hot milk fr oth. Sprinkle shavings
of nougat choco late on top and add an After
Eight® choc olate to the milk froth to finish. Ser ve
immediately.
AFT ER EI GH T® COFF EE /ICE D VANI LL A C AR AM EL CO FF EE /
16
17
Page 18

1:
2:
3:
4:
5:
ml
ml
ml
ml
ml
ml
ml
ml
ml
ml
ml
ml
Réglez le bou ton espresso sur: Réglez le bou ton Lungo sur:
Arrêt automa tique 1: 9min, 2: 30min, 3: 60min, 4: 2h, 5: 8h
Dureté de l’eau
1: fort 2: moyen, 3: léger
Vidange
Voir la sectio n vidange
Réinitialis ation aux réglages usines
Détart rage
Voir la sectio n détartrage
Pressez sim plement le bouton lungo pour ré initialiser les réglages u sines
(économie d’énergie: 9min, ni veau d’intensité de l’eau: fort).
Note: Pour sor tir à tout moment du mode menu, pr essez le bouton espress o prendant 3 secondes.
Pour entrer dans le mode «Menu», pressez le bouton
espresso en même temps que vous allumez la machine.
(la lumière du milieu clignote orange).
Réglez les bo utons pour les paramètre s requis
(voir tableau ci- dessous).
Une fois sélec tionné, appuyez sur le bou ton lungo pour commencer
(la lumière du milie u s’allume en continu po ur confirmer et clignote
orange en fonc tion du numéro sélec tionné).
Mode Me nu
1. While in menu mo de, set espresso butto n to position 3
4. Turn steam h andle to ON.
7. Af ter 5 sec. move steam handle to OFF.
Menu Mo de S/
1. To enter menu mode s press the espresso but ton while
turning the ma chine on. (Middle light blinks o range)
2. Se t the dials to the required set tings (see chart
below).
SET ESPRESSO DIAL TO: SET LUNGO DIAL TO:
Auto Shut Off
1: 9min, 2: 30min, 3: 60min, 4: 2hrs, 5: 8hrs
Water Hardness 1: hard, 2: medium, 3: soft
Emptying
See empty ing section
Reset To Factory S etting
3. Once selected, press lungo the button to confirm (Middle light steady to
confirm, and blinks orange accordingly to selected number).
Note: To exit menu mode at a ny time, press th e espresso button fo r 3 seconds.
Descaling See desca ling section
Simply press t he lungo button to reset to f actory sett ing (power save: 9 min, water hardness le vel: hard).
Page 19

EN
FR
En mode menu, rég lez le bouton expresso s ur la position
3 pour la vidange.
Tournez le levier vap eur sur «ON».
Mettez le le vier vapeur sur «OFF».
Retirez le ré servoir d’eau et levez le levier.
Ajustez le tuy au de vapeur sur la position vape ur.
La machine s’éteint aut omatiquement.
Pressez le bo uton lungo pour vider la machin e (un
clignotement d e la lumière du milieu indique que
la vidange est t erminée).
La lumière du mil ieu clignote : vidange.
Réglez le levie r vapeur sur
:
Note: L’appareil ser a bloqué pendant 15 minutes après la vi dange.
La lumière du mil ieu est fixe : c’est fini
Note : votre machine doit être vidée avant et après toute longue période de non utilisation.
MODE V IDAN GE
C AF E :
TU BE VAPEU R :
EMPT YI NG M OD E/
1. While in menu mo de, set espresso butto n to position 3
for empty ing.
4. Turn steam h andle to ON.
7. Af ter 5 sec. move steam handle to OFF.
2. Remo ve water tank and lift lever.
5. Adjus t steam pipe into steam out po sition.
8. Mac hine switches off automatic ally.
Note: Appliance wil l be blocked for 15 minutes afte r emptying.
3. Pre ss lungo button to empty m achine (ready when
middle light bli nks).
6. Se t steam handle to :
Middle light bli nking: emptying
Middle light s teady: done
COFF EE:/
Note: Your machine should be emptied before and after a long period of non-use.
ST EAM PIPE:/
18
19
Page 20

Pour le montage / dé montage de l’unité de maintenance,
assurez-vous q ue le support de tasse so it en position
vertical e.
L’unité de maintenanc e peut être retirée en un seu l
morceau et sép arée pour un nettoyage plu s facile.
Retirez l’embout d e la buse à mousse de lait en le tourn ant dans le sens des aiguilles d’une mo ntre juste qu’a
ce que ça sor t, ensuite tirez la manche ver s le bas. Le manche peut être lavé à l’eau savonne use. Assurez vous
que les ouver tures sont exemptes de ré sidus.
Essuyez le tu be vapeur avec un chiffon humide
(voir la sectio n pour savoir comment vidange r).
ATTENTION: Soyez extrêmement prudent lorsque vous manipulez le tuyau à vapeur. Tournez le levier vapeur sur «OFF» et attendez qu’il refroidisse avant de la manipuler pour éviter les blessures.
Il est recomm andé de nettoyer votre tube v apeur après chaque utilis ation pour éviter que les rés idus de lait restent à l’intér ieur et l’extérieur de la buse à vap eur.
NE L AVE Z PA S LE S P IÈ CE S AU L AVE VAIS SE LL E
ENTRE TI EN & NET TO YAGE
NET TO YAG E DU TU BE VAP EU R
7. Set steam han dle to .
1. Turn machine off and set espresso button to 4 and
4. To enter descaling m ode press the espresso b utton
CARE & CLEANING/
1. To assembl e/disassembl e maintenance unit, make sure
cup suppor t is in upright position.
3. Wip e down the steam pipe with a damp c loth.
2. Maintenance unit c an be removed in one piece and
separated f or easy cleaning.
4. To remove the frothin g sleeve, twist the nozzle c lockwise until it come s out then pull the sleeve downwa rds.
Sleeve can be wash ed in soapy water. Make sure openings are f ree of residue.
STE AM PI PE C LE AN IN G/
DO NO T WA SH PIECES IN A DISHW ASH ER/
CAUTION: Use extreme caution when handling the steam pipe. Turn steam handle to OFF and allow for it to cool down before handling to avoid injury.
It is recommend ed to clean your steam pipe af ter each usage to avoid milk resid ues from remaining inside an d outside the steam nozz le.
Page 21

EN
FR
Réglez le levie r vapeur sur .
Mettez la machine hors tension et tournez le bouton expresso sur la position 4 et le bouton lungo sur la position 1.
Ouvrez et fermez le levier pour éjecter la capsule.
Videz le bac d’égouttage et le bac à capsules usagées.
Remplissez le réservoir d’eau avec 2 sachets liquides
de détartrant Nespresso et le reste avec de l’eau.
Appuyez sur le bouton lungo pour commencer
le détartrage.
Placez un récipient (min 1,5 l) en dessous de la sortie café
et du tube vapeur.
Un mélange d’opérations entre le débit de café et le tube
vapeur se produira. Ne touchez pas à la machine pendant
l’opération. Une lumière continue sur le voyant du milieu
indique que le détartrage est terminé.
Pour entrer dans le m ode détartrage, pre ssez le bouton expres so tout en allumant votre machine.
Note: La durée ap proximative est de 20min. L’alerte détar trage se met à clignoter lo rsque la machine est prê te à être détartrée (voir se ction dépannage).
LE MODE DÉTAR TR AGEDESCAL IN G MO DE/
Note: Duration a pproximately 20 minutes. Des caling alert will flash whe n machine is ready to be descale d (see troubleshooting s ection).
7.
Set steam hand le to .
1.
Turn machine off and set espresso button to 4 and
lungo button to 1.
2. Open and close the lever to eject the capsule. 3. Empty drip tray and the used capsule container.
5. Fill water tank with 2 Nespresso descaling liquid
agents and the rest with water.
8. Press lungo button to start descaling.
6. Place a container (min 1.5L) below coffee outlet and
steam pipe.
9. A mix of operations between coffee and steam pipe flow will
occur. Do not touch the machine during this operation. Steady
middle light indicates descaling is complete.
4.
To enter descaling mo de press the espresso bu tton
while turnin g the machine on.
20
21
Page 22

(40ml)
fH
36
18
0
20
10
0
CaCO
3
360 mg/l
180 mg/l
0 mg/l
dH
French grade
Degré français
German grade
Degré allemand
Calcium carbonate
Carbonate de
calcium
fh
dh
CaCO
3
800
2400
3200
60min
45min
30min
AVERTISSEMENT La solution de détartrage peut être nocive. Evitez tout contact avec les yeux,
la peau et les surfaces. Afin d’éviter d’endommager votre machine, n’utilisez jamais un autre
produit que le kit de détartrage Nespresso, disponible au Club Nespresso. Sur la base de la dureté
de l’eau, le tableau suivant indique la fréquence de détartrage nécessaire, pour la performance
optimale de votre machine. Pour toutes questions supplémentaires concernant le détartrage,
contactez votre Club Nespresso.
Kit de détartrage Nespresso: Ref. 3035/CBU-2
Remplacez le container vide conformément à l’étape 6.
Une fois terminé, videz et rincez le réservoir d’eau, le
bac d’égouttage et le bac de récupération de capsules.
Tournez le bouton lungo sur la position 2 pour le
rinçage et appuyez sur le bouton lungo. La lumière
continue indique que le rinçage est terminé.
Remplissez le réservoir d’eau avec de l’eau potable.
Une fois terminé, tournez le levier vapeur sur
«OFF» et replacez le bac à capsules vide et le bac
d’égouttage.
Dureté de l’eau : Détartrez après :
CAUTION The descaling solution can be harmful. Avoid contact with eyes, skin and surfaces.
Never use any product other than the Nespresso descaling kit available at the Nespresso Club to
avoid damage to your machine. The following table will indicate the descaling frequency required for the optimum performance of your machine, based on water hardness. For any additional
questions you may have regarding descaling, please contact your Nespresso Club.
Nespresso descaling kit: Ref. 3035/CBU-2
12.
Replace empty container as per step 6. 10. Once done, empty and rinse water tank, drip tray and
capsule container.
13. Turn lungo dial to 2 for rinse mode and press lungo
button. Steady lights indicate rinsing is complete.
11. Fill water tank with drinking water.
14. Once done, move steam handle to OFF. Empty
container and drip tray.
Water hardness: Descale after:
Page 23

EN
FR
Pas de lumière.
➔
La machine s’est éteinte automatiquement; appuyez sur le bouton ON/OFF.
➔
Contrôlez le réseau électrique: prise de courant, la tension, le fusible.
Pas de café, ni d’eau.
➔
Vérifiez l’état du réservoir d’eau, s’il est vide, remplissez-le avec de l’eau potable. Détartrez si nécessaire.
➔
Levez le levier. Appuyez sur une touche café et attendez que l’eau sorte.
Le café est insuffisamment chaud.
➔
Préchauffez la tasse. Détartrez si nécessaire.
Pas de mousse de lai t lors de l’utilisation du
tuyau à vapeur.
➔
Ajustez corr ectement le tuyau à vapeu r et la buse.
Le levier ne peut pas être abaissé entièrement.
➔
Videz le bac à capsules. Vérifiez qu’il n’y a pas de capasule bloquée à l’intérieur de l’appareil.
Fuite ou écoulement anormal de café.
➔
Vérifiez que le réservoir d’eau est bien positionné.
Un voyant lumineux o range qui
clignote cons tamment.
➔
Le détartrage est nécessaire.
Pas de café, juste de l’eau qui coule
(en dépit d’une capsule insérée).
➔
En cas de difficulté, appelez le Club Nespresso.
La machine s’éteint aut omatiquement.
➔
Pour économiser de l’énergie la machine s’éteindra après 9 minutes de non utilisation.
➔
Pour modifier ce paramètre, voir la page 18 «modes menu».
DÉPAN NAGE
No lights.
➔
The machine has switched off automatically; press ON/OFF button.
➔
Check the mains: plug, voltage, fuse.
No coffee, no water.
➔
Check the water tank, if empty, fill with drinking water. Descale it if necessary.
➔
Lift the lever. Press one coffee button and wait until water comes out.
Coffee is not hot enough.
➔
Preheat cup. Descale the machine if necessary.
No milk froth w hen using steam pipe.
➔
Adjust steam pi pe and nozzle correc tly.
The lever cannot be closed completely.
➔
Empt y the capsule container / Check that there is not a capsule blocked inside the machine.
Leakage or unusual coffee flow.
➔
Check that the water tank is in position.
Middle light blinks orange consistently.
➔
Descaling needed.
No coffee, water just comes out (despite
inserted capsule).
➔
In case of diffic ulties, call the Nespresso Club.
Machine swi tches itself off automatic ally.
➔
To save energy the machine will turn itself off after 9 minutes of non use.
➔
To change this setting see ‘menu modes’ page 18.
TROUB LE SH OOTIN G/
22
23
Page 24

Cet appareil est conforme à la directive 2002/96/CE de l’UE. Les matériaux d’emballage et l’appareil contiennent des matériaux recyclables.
Votre appareil contient des matériaux précieux qui peuvent être récupérés ou être recyclables. La séparation des déchets restants, en différentes catégories, facilite le recyclage des
matières premières précieuses Laissez votre appareil à un point de collecte. Vous pouvez obtenir des renseignements sur l’évacuation des déchets auprès de vos autorités locales.
CONTACTEZ LE CLUB Ne s pr e s s o
MISE AU REB UT E T PR OTECTI ON D E L’EN VI RONNEMENT
Si vous avez besoin d’informations supplémentaires, en cas de problèmes ou simplement pour demander conseil, appelez le Club Nespresso ou votre revendeur Nespresso agréé.
Les coordonnées de votre Club Nespresso le plus proche ou de votre représentant Nespresso peuvent être trouvées dans le dossier «Bienvenue chez Nespresso» dans la boîte de vôtre
machine ou sur nespresso.com
As we may not have forseen all uses of your appliance, should you need any additional information, in case of problems or simply to seek advise, call the Nespresso Club or your Nespresso
authorized representative.
Contact details for your nearest Nespresso Club or your Nespresso authorized representative can be found in the «Welcome to Nespresso» folder in your machine box or at nespresso.com
This appliance complies with the EU Directive 2002/96/EC. Packaging materials and appliance contain recyclable materials.
Your appliance contains valuable materials that can be recovered or can be recyclable. Separation of the remaining waste materials into different types facilitates the recycling
of valuable raw materials. Leave the appliance at a collection point. You can obtain information on disposal from your local authorities.
CONTACT TH E Ne s p r e s so CLUB/
DISPO SA L AN D EN VI RO NM EN TAL P ROTEC TION/
Should you need any additional information, in case of problems or simply to seek advise, call the Nespresso Club or Nespresso authorized representative.
Contact details for your nearest Nespresso Club or Nespresso authorized representative can be found in the «Welcome to Nespresso» folder in your machine box or at nespresso.com
Page 25

EN
FR
Nous nous sommes engagés à acheter le café de la plus haute qualité, cultivé de façon respectueuse de l’environnement et des cultivateurs. Depuis 2003, nous travaillons en
collaboration avec la Rainforest Alliance, à développer notre programme Nespresso AAA pour une Qualité DurableTM.
Nous avons choisi l’aluminium comme matière pour nos capsules, car il protège le café et les arômes des Grands Crus Nespresso. L’aluminium est également recyclable à l’infini,
sans pour autant perdre de ses qualités.
Nespresso s’engage à concevoir et fabriquer des appareils qui sont à la fois innovants, performants et conviviaux. Nous intégrons dorénavant des bénéfices environnementaux
dans la conception de nos nouveaux et futurs appareils.
ECOL ABORAT IO N : ECO LABORATIO N.COM
We have comitted to buy coffee of the very highest quality grown in a way that is respectful of the environment and farming communities. Since 2003 we have been working
together with the Rainforest Alliance developping our Nespresso AAA Sustainable Quality
TM
Coffee Program.
We chose aluminium as the material for our capsules because it protects the coffee and aromas of the Nespresso Grand Cru. Aluminium is also infinitely recyclable, without
loosing any of its qualities.
ECOL ABORAT IO N : ECO LABORATIO N.COM/
Nespresso is committed to designing and making appliances that are innovative, high-performing and user friendly. Now we are engineering environmental benefits into the
design of our new and future machine ranges.
24
25
Page 26

UNE GAR AN TI E LI MI TE E
Garantie et responsabilité – Les machines Nespresso Turmix sont garanties en Autriche et en Suisse pendant deux ans (pièces et main d’oeuvre). Pour faire intervenir la garantie, il e st
nécessaire de pouvoir justifier de la date d‘achat au moyen de la facture du revendeur. La garantie ne sera pas assurée en cas d‘absence ou de mauvais détartrage (fréquence et utilisation de
produits inadaptés).
Warranty and Liability – Turmix Nespresso machines are guaranteed in Austria and Switzerland for two years (parts and labour). To claim under this guarantee you will require your store
receipt showing the date of purchase. Guarantee claims cannot be accepted if the machine has not been descaled, or has been incorrectly descaled (infrequently, use of inappropriate products).
DKB Household Switzerland AG, Eggbühlstrasse 28, Postfach, CH- 8052 Zürich, www.turmix.com
SERVICE-CENTER: Grindelstrasse 3-5, CH-8303 Bassersdorf, Switzerland
Tel: +41 43 266 16 00, Fax:+41 43 266 16 10, servicecenter@dkbrands.com
Service Center AT
SZOT, Haushaltgeräte-Service, Erlaaer Strasse 171, A – 1230 Wien, Tel +43 (0) 1 699 90 56, Fax +43 (0) 1 699 90 57
AVMS Audio Video Media Service GmbH, Campus 21 / Businesscenter Wien Süd, Liebmannstrasse F01.102, A – 2345 Brunn/Gebirge, Tel. +43 (0) 1 61052 0, Fax. +43 (0) 1 61052 83999
LIMIT ED WA RR ANT Y/
Page 27

Page 28

Nespresso è un sistema esclusivo per preparare un espresso eccezionale, tazzina dopo tazzina.
Tutte le macchine Nespresso sono dotate di un sistema esclusivo che garantisce l’estrazione a 19 bar di pressione. Ogni parametro è stato calcolato con grande precisione per assicurare che siano
estratti tutti gli aromi di ogni Grand Cru, per dare corpo al caffè e creare una crema particolarmente densa e liscia.
CON TE NU TO
P rEC aU ziO Ni di siC Ur Ezz a
Pr im O U Til izz O
la Pr EPa ra ziO NE dEl C aff è
Ba ris Ta: mON Tar E i l l aTT E
r iCE TT E
m Oda liT à m ENù
sv UOTa rE la ma CCh iNa
CU ra E P Ul izi a
dEC alC ifi Ca zi ONE
ri CEr Ca E r is OlU ziO NE gUa sT i
CON TaTTa rE il Ne spr es so Cl UB
sma lTim EN TO E a mBi ENT E
EC Ola BO raTi ON: ECO laB Or aTiO N.C Om
gar aNz ia li miTa Ta
NESPRESSO ist ein einzigartiges System, das zu jeder Zeit den perfekten Espresso zubereitet.
Alle Nespresso Maschinen sind mit einem patentierten Extraktionssystem ausgestattet, das einen Druck von bis zu 19 bar garantiert. Jeder einzelne Parameter wurde strengen Kontrollen unterzogen, um die Aromenvielfalt, den Körper sowie die unvergleichbare Crema jedes einzelnen Grands Crus zum Ausdruck zu bringen.
iNh alTsv Er zE iC hN is /
si Ch Erh EiT shiN WEi sE /
Er sT E i NBE Tri EB Nah mE/
Ka ff EEz UBE rE iTU Ng/
Ba ri sTa: aU fsC häU mEN vON mi lCh /
rE zE PTE /
mE Nü -Ei NsT El lUN gEN /
EN TlEE rEN dEs sys TEms /
P fl EgE & r Ei Nig UN g/
EN TKal KUN g/
fEh lErB EhE BUNg /
KON TaKT Ne spre sso ClUB /
EN TsOr gUNg UNd U mWElTs ChUT z/
ECO laB OraT iON: ECO laB OraT iON. COm /
ga raNT iE/
EN Instruction Manua l FR Manue l d’instructions 6
DE Bedienungsanleitu ng IT Istruzioni per l’uso 28
29–31
32
33
34 | 35
36–39
40
41
42
43 | 44
45
46
47
48
Page 29

DE
IT
Die Sicherheitshinweise sind Teil des Gerätes. Bitte lesen Sie die Anweisungen und Sicherheitshinweise vor der Inbetriebnahme des Gerätes. Bewahren Sie sie auf, damit Sie sie bei Bedarf schnell
zur Hand nehmen können.
Vorsicht - wenn Sie dieses Zeichen sehen, beachten Sie den Punkt «Sicherheitshinweise» um mögliche Verletzungen und Schäden zu vermeiden.
SICHE RH EI TS HI NW EI SE
Information - wenn Sie dieses Zeichen sehen, nehmen Sie
bitte die Ratschläge für eine korrekte und sichere Handhabung des Gerätes zur Kenntnis.
• Das Gerät ist dazu bestimmt, Getränke nach diesen Anweisungen zuzubereiten.
• Benutzen Sie das Gerät ausschließlich für den vorgesehenen
Gebrauch.
•
Dieses Gerät wurde ausschließlich für die Nutzung innerhalb
von Gebäuden und unter normalen Temperaturbedingungen
entwickelt.
• Schützen Sie Gerät vor direktem Sonnenlicht, Spritzwasser und
Sonnenlicht.
• Dies ist ein Privat-Haushaltsgerät. Es ist nicht bestimmt für:
- Personalküchen in Geschäften, Büros und sonstigen Arbeitsumgebungen;
- landwirtschaftliche Betriebe;
- die Nutzung durch Gäste in Hotels, Motels und anderen
Unterkünften;
- Übernachtungsbetriebe mit Frühstück.
• Außerhalb der Reichweite von Kindern halten.
• Bei kommerziellem Gebrauch, unsachgemäßem Gebrauch, De-
fekten durch andere Anwendung als die vorgesehene, falscher
Anwendung, nicht-professioneller Reparatur oder bei Nichtbeachtung der Anweisungen übernimmt der Hersteller keine
Haftung und die Gewährleistung erlischt.
Vermeiden von tödlichem Stromschlag und Brand
• Im Notfall: Ziehen Sie sofort den Stecker aus der Steckdose.
• Verbinden Sie das Gerät nur mit einem geeigneten, geerdeten
Netzanschluss. Das Gerät muss nach der Installation nur ans
Stromnetz angeschlossen werden. Die auf dem Typenschild
angegebene Spannung muss mit der Netzspannung übereinstimmen. Die Verwendung eines falschen Anschlusses hat die
Aufhebung der Gewährleistung zur Folge.
• Ziehen Sie das Kabel nicht über scharfe Kanten. Befestigen Sie
es oder lassen Sie es herunterhängen.
• Halten Sie das Kabel von Hitze und Feuchtigkeit fern.
• Wenn das Kabel beschädigt ist, muss es durch den Hersteller
oder eine qualifizierte Fachwerkstatt ersetzt werden. Nehmen
Sie das Gerät nicht in Betrieb, wenn das Kabel beschädigt ist.
Wenden Sie sich an den Nespresso Club.
• Wenn ein Verlängerungskabel notwendig ist, darf nur ein Kabel
mit Schutzleiter und einem Leiterquerschnitt von mindestens
1,5mm
2
verwendet werden.
• Um gefährliche Beschädigungen zu vermeiden, stellen Sie das
Gerät niemals auf oder neben heiße Oberächen wie Heizkör-
per, Kochplatten, Gasbrenner, offene Flammen o.ä.
• Stellen Sie das Gerät immer auf eine stabile und ebene Oberfläche. Die Oberfläche muss gegen Hitze und Flüssigkeiten wie
Wasser, Kaffee, Entkalkerlösung o.ä. resistent sein.
• Ziehen Sie den Netzstecker des Geräts, wenn Sie es für längere
Zeit nicht verwenden. Ziehen Sie den Stecker aus der Steckdose,
indem Sie den Stecker anfassen. Niemals am Kabel ziehen, da es
dadurch beschädigt werden könnte.
• Ziehen Sie vor der Reinigung den Netzstecker und lassen Sie das
Gerät abkühlen.
• Das Kabel niemals mit nassen Händen berühren.
• Tauchen Sie das Gerät oder Teile davon niemals in Wasser oder
andere Flüssigkeiten.
• Stellen Sie das Gerät oder Teile davon niemals in die Spülmaschine.
• Die Verbindung von Elektrizität und Wasser ist gefährlich und
kann zu tödlichen Stromschlägen führen
• Önen Sie das Gerät nicht. Die im Inneren vorhandene Spannung ist gefährlich!
• Stecken Sie nichts in die Önungen. Dies könnte Feuer verursachen oder zu einem Stromschlag führen!
Vermeiden Sie mögliche Verletzungen beim Gebrauch des
Geräts
• Lassen Sie das Gerät während der Anwendung nicht unbeaufsichtigt.
• Nehmen Sie das Gerät nicht in Betrieb, wenn es beschädigt ist
oder nicht ordnungsgemäß funktioniert. Ziehen Sie sofort den
Stecker aus der Steckdose. Wenden Sie sich zur Prüfung, Reparatur oder Einstellung des Gerätes an den Nespresso Club.
• Ein beschädigtes Gerät kann zu Stromschlag, Verbrennungen
und Brand führen. Schließen Sie immer den Hebel und önen
Sie diesen niemals, wenn das Gerät in Betrieb ist. Dies könnte
zu Verbrühungen führen.
• Halten Sie die Finger nicht unter den Kaeeauslauf. Verbrühungsgefahr!
• Stecken Sie keine Finger in das Kapselfach oder den Kapselhalter. Verletzungsgefahr!
• Wenn die Kapsel nicht von den Klingen perforiert wird, könnte
Wasser um die Kapsel herum laufen und das Gerät beschädigen.
• Verwenden Sie niemals eine beschädigte oder deformierte Kapsel. Sollte eine Kapsel im System feststecken, schalten Sie die
Maschine aus und ziehen Sie den Netzstecker. Kontaktieren Sie
den Nespresso Club.
• Verwenden Sie stets frisches, kaltes Trinkwasser.
• Leeren Sie den Wassertank, wenn Sie das Gerät für einen länge-
28
29
Page 30

Le precauzioni di sicurezza sono parte dell’apparecchio. Leggere attentamente le precauzioni di sicurezza prima di usare l’apparecchio per la prima volta. Conservarle in un posto dove possono essere
trovate facilmente e consultarle in seguito.
Attenzione - se questa spia si accende, leggere le precauzioni di sicurezza per evitare eventuali danni.
PRECAUZI ON I DI S IC UR EZ ZA
Informazioni - se questa spia si accende, leggere le indicazioni
per un uso sicuro e adeguato dell’apparecchio.
•
L’apparecchio è destinato a produrre le bevande conformi a queste istruzioni.
•
Non usare l’apparecchio per un uso diverso da quello previsto.
•
Questo apparecchio è stato progettato per uso interno e solo per
condizioni termiche non estreme.
•
Proteggere l’apparecchio dalla luce diretta del sole, da schizzi
d’acqua e dall’umidità.
•
L’apparecchio è destinato a un uso esclusivamente domestico.
Non utilizzarlo:
- nell’angolo cucina di negozi, uffici e altri ambienti lavorativi,
- in agriturismi
- per i clienti di alberghi, motel, BB e altri tipi di s trutture
d’accoglienza.
•
Tenere fuori dalla portata dei bambini.
•
In caso di uso commerciale, o di uso non conforme alle istruzioni,
il produttore declina qualsiasi responsabilità ed è autorizzato a
non applicare i termini di garanzia.
Per evitare rischi di scosse elettriche letali e incendi
• In caso di emergenza: scollegare l’apparecchio dalla presa di alimentazione.
• Collegare l’apparecchio solo a prese di terra adeguate e facilmente accessibili. L’apparecchio deve essere collegato solo dopo
l’installazione. Verificare che la tensione riportata sull’apparecchio
ren Zeitraum nicht benutzen (Urlaub, usw.).
• Ersetzen Sie das Wasser im Wassertank, wenn Sie das Gerät
während des Wochenendes oder einen längeren Zeitraum nicht
benutzt haben.
• Verwenden Sie das Gerät nicht ohne Abtropfschale und Abtropfgitter zur Vermeidung von Wasserrückständen auf umliegenden
Oberächen.
• Verwenden Sie keine starken Reinigungs- oder Lösungsmittel.
Benutzen Sie ein feuchtes Tuch zur Reinigung der Geräteoberäche.
Entkalkung
• Das Nespresso Entkalkerset hilft bei korrekter Anwendung, die
einwandfreie Funktion Ihrer Maschine und ein perfektes Kaee-
Erlebnis wie am ersten Tag während ihrer gesamten Lebensdauer
zu erhalten. Die korrekte Anwendung entnehmen Sie der im Entkalkerset enthaltene Anleitung.
• Wenn Sie die Maschine auspacken, entfernen Sie die Kunststofolie vom Tropfgitter und entsorgen Sie diese.
• Dieses Gerät ist nicht dafür bestimmt, durch Personen (einschließlich Kinder) mit eingeschränkten physischen, sensorischen oder
geistigen Fähigkeiten oder mangels Erfahrung und/oder mangels
Wissen benutzt zu werden. Es sei denn, sie werden durch eine für
ihre Sicherheit zuständige Person beaufsichtigt oder erhielten von
ihr Anweisungen, wie das Gerät zu benutzen ist
• Diese Maschine wurde speziell für die Verwendung mit Nespresso
Kapseln entwickelt, die nur über den Nespresso Club erhältlich
sind. Die hohe Nespresso Qualität kann nur bei Verwendung der
Nespresso Kapseln garantiert werden.
• Verwenden Sie zu Ihrer eigenen Sicherheit nur original Nespresso
Zubehör, das für ihre Maschine entwickelt wurde.
• Alle Nespresso Maschinen durchlaufen strenge Qualitätskontrol-
len. Belastungstests unter realen Bedingungen werden im Zufalls-
betrieb mit ausgewählten Produktionseinheiten durchgeführt.
Einige Geräte können daher Spuren eines vorherigen Gebrauchs
aufweisen.
• Nespresso behält sich das Recht vor, Anweisungen ohne vorherige
Ankündigung zu ändern.
BEWAHREN SIE DIESE GEBRAUCHSANWEISUNG AUF.
Händigen Sie diese jedem nachfolgenden Benutzer aus.
Diese Bedienungsanleitung ist ebenfalls als PDF-Datei auf www.nespresso.com verfügbar.
Page 31

DE
IT
corrisponda alla tensione di alimentazione. L’uso di collegamenti errati rende nulla la garanzia.
•
Non accostare il cavo a bordi taglienti, fissarlo o lasciarlo pendere.
• Tenere il cavo lontano da fonti di calore e umidità.
• Se il cavo di alimentazione è danneggiato, deve essere sostituito
dal produttore o persone con una qualica simile. Se il cavo è
danneggiato, non utilizzare l’apparecchio. Portare l’apparecchio
al Nespresso Club oppure a un rappresentante autorizzato di
Nespresso.
• Nel caso in cui occorra una prolunga, utilizzare solo un cavo di
messa a terra con un conduttore con sezione di almeno 1,5 mm
2
o potenza di ingresso corrispondente.
• Per evitare eventuali danni, non posizionare mai l’apparecchio
accanto o su ripiani caldi (caloriferi, piano cottura, fiamme, ecc.)
• Posizionare l’apparecchio su una supercie orizzontale, piana e
stabile. La superficie deve essere resistente al calore e ai liquidi
come acqua, caè, decalcicanti e simili.
• Durante lunghi periodi di non utilizzo, scollegare l’apparecchio
dalla presa di alimentazione. Per evitare di provocare danni al
cavo, scollegare l’apparecchio tirando la spina e non il cavo.
• Prima della pulizia e della manutenzione, togliere la spina dalla
presa di corrente e lasciare rareddare l’apparecchio.
• Non toccare mai la spina con le mani bagnate.
• Non immergere mai l’apparecchio o parti di esso in acqua o altro
liquido.
•
Non immergere mai l’apparecchio o parti di esso in lavastoviglie.
• L’acqua in presenza di elettricità genera pericolo e può essere
causa di scariche elettriche.
• Non aprire l’apparecchio. Pericolo di scariche elettriche!
• Non inserire alcun oggetto nelle aperture dell’apparecchio. Pericolo d’incendio o di scariche elettriche!
Evitare eventuali danni durante il funzionamento
• Non lasciare mai l’apparecchio incustodito durante il funzionamento.
• Non usare l’apparecchio in caso di danni o di funzionamento
anomalo. Staccare subito l’apparecchio dalla presa di corrente.
Contattare il Nespresso Club o un rappresentante autorizzato
Nespresso, affinchè l’apparecchio sia esaminato, riparato o re-
golato.
• Un apparecchio danneggiato può causare scariche elettriche,
ustioni e incendi.
• Richiudere sempre la leva completamente e non aprirla quando
l’apparecchio è in funzione. Rischio di scottature.
• Non inserire le dita sotto l’erogatore di caè o latte, rischio di
scottature.
• Non inserire le dita all’interno della vaschetta e del contenitore
di capsule. Rischio di lesioni.
• L’acqua potrebbe scorrere attorno alla capsula non corretta-
mente perforata e causare danni all’apparecchio.
• Non utilizzare capsule danneggiate o deformate. Se una capsula
fosse bloccata nel vano capsula, spegnere la macchina e staccare la spina prima di qualsiasi operazione. Chiamare il Nespresso
Club.
• Riempire il serbatoio con acqua fresca, fredda e potabile.
• Svuotare il serbatoio dell’acqua se l’apparecchio non verrà utiliz-
zato per un periodo prolungato (vacanze, ecc).
• Cambiare l’acqua del serbatoio se la macchina non viene utilizzata per più di due giorni.
• Non utilizzare l’apparecchio senza il vassoio raccogligocce e la
griglia, per evitare fuoriuscite di liquidi sulle superfici circostanti.
• Non utilizzare detersivi abrasivi o solventi. Usare un panno
umido e un detergente delicato per pulire la superficie della
macchina.
Decalcificazione
• La soluzione decalcicante Nespresso, se usata correttamente,
contribuisce a garantire il corretto funzionamento della macchina
durante la sua vita e un’esperienza di degustazione sempre eccezionale, come il primo giorno. Per la corretta quantità e la procedura
da seguire, consultare il manuale incluso nel kit di decalcicazione
Nespresso.
• Quando si apre l’imballo della macchina, rimuovere la pellicola di
plastica sulla griglia.
• L’apparecchio non è destinato a persone (inclusi bambini) con
capacità mentali, fisiche o sensoriali ridotte, fatta eccezione per
i casi in cui tali persone abbiano ricevuto assistenza o formazione
per l’uso dell’apparecchio da una persona responsabile della loro
incolumità. Adottare le dovute precauzioni per evitare che i bambini giochino con l’apparecchio.
• Questo apparecchio funziona solo con capsule Nespresso, di-
sponibili esclusivamente al Nespresso Club. La qualità Nespresso
è garantita solo con l’utilizzo di capsule Nespresso in macchine a
sistema Nespresso.
• Per la propria sicurezza, si consiglia di utilizzare solo parti e accessori Nespresso che sono stati progettati per l’apparecchio.
• Tutti gli apparecchi Nespresso passano attraverso controlli severi.
Devono superare test rigorosi in condizioni reali che vengono ese-
guiti, su selezionate unità, in modo casuale. Per questo motivo,
possono essere presenti tracce di utilizzo.
• Nespresso si riserva il diritto di cambiare le istruzioni senza avviso.
CONSERVARE QUESTE ISTRUZIONI
Consegnarle a qualsiasi consumatore successivo
Questo manuale di istruzioni è disponibile anche in PDF sul sito nespresso.com
30
31
Page 32

In primo luogo l eggere le precauzioni di si curezza per evitar e rischi di scosse elet triche fatali e incendi.
Sollevare il sup porto per tazzina, to gliere il serbatoio dell’acqua e l’unità d i manutenzione.
Supporto p er tazzina pieghevole e r accogligocce
(min. 500 ml) sotto l ’erogatore del caff è.
Posizionare il pu lsante Lungo sul numero 5 e premer e il
pulsante per r isciacquare la macchina. Ripe tere 3 volte.
Sciacquare e ri empire il serbatoio dell’acqua con
acqua potabile. R iposizionare il serbatoi o dell’acqua
e l’unità di manuten zione.
Accendere la macchi na.
Posizionare la man iglia vapore su OFF e il beccuccio i n
posizione ver ticale.
Luci intermit tenti:
fase di risc aldamento (25 sec).
Luci costant i: Pronto
Chiudere la leva e co llegare alla rete elettr ica.
Regolare la lung hezza del cavo e fissare que llo in
eccesso nel po rta cavo sotto la macchi na.
Nota: Spegnime nto automatico: la macchina si arres ta automaticamente dop o 9 minuti di non utilizzo. Per mod ificare questa impos tazione automatica leg gere la sezione auto spegnimento nelle modal ità d’uso.
PRIMO U TI LI ZZO
1. Spülen Sie den Wass ertank und füllen Sie ihn mi t
4. Önen Si e den Hebel vollständig und le gen Sie eine
7. Wähls cheibe entsprechend d er
1. Klap pen Sie das Gitter ein und ent fernen Sie den
Wassertan k und die Reinigungseinheit.
Lesen Sie zunächst d ie Sicherheitshinweise zu r Vermeidung der G efahr eines tödlichen Stro mschlags oder Feuer.
4. Schließen Sie d en Hebel und schliessen dann d ie
Maschine ans el ektrische Netz an.
7. Klapp en Sie das Gitter ein und platz ieren Sie einen
Behälter (mind. 0,5 l Fassungs vermögen) unter dem
Kaffeeauslau f.
8. Dr ücken Sie die Lungotaste um die Ma schine zu spülen.
Den Vorgang dreimal w iederholen.
Anmerkung: Um Ene rgie zu sparen, schaltet sich di e Maschine nach 9 Minuten Nichtg ebrauch aus. Um diese Eins tellung zu ändern siehe Kapitel « Automatischer Energies parmodus».
5. Spül en Sie den Wassertank und fü llen Sie ihn mit
Trinkwasser. Set zen Sie den Wassertank und die
Reinigungsei nheit wieder ein.
6. Schalten Sie die M aschine ein.
3. Stellen Sie den Schau mregulierer auf «OFF» und
bringen Sie den D ampfhahn in senkrech te Position.
Blinkendes Lic ht:
Aufheiz vorgang, ca. 25 Sekunden
Permanentes Lic ht:
Maschine is t betriebsbereit.
2. Pass en Sie die Kabellänge an und führ en Sie das restliche
Kabel durch di e Kabelführung unter der Ma schine.
ERSTE I NB ET RI EB NA HM E/
Page 33

ml
ml
ml
ml
ml
ml
ml
ml
1: 25 ml
2: 30 ml
3: 40 ml
4: 50 ml
5: 60 ml
1: 70 ml
2: 90 ml
3: 110 ml
4: 130 ml
5: 150 ml
DE
IT
Sciacquare e ri empire il serbatoio con acqua p otabile.
Girare la manop ola sul livello di
caffè desi derato.
Riposiziona re il serbatoio dell’acqua.
Premere il puls ante per iniziare la prepara zione.
Si arresta a utomaticamente.
Accendere la macchi na.
Il suppor to per tazzina può esser e ruotato a destra per i
bicchieri da r icetta.
Rimuovere la taz zina. Alzare e chiudere la lev a per
espellere la c apsula nel contenitore.
Sollevare la lev a e inserire una capsula Nespresso. Chiudere la leva e p osizionare la tazzina so tto
l’erogatore.
Nota: Durante la f ase di riscaldamento (luci la mpeggianti), è possibile premer e il pulsante caffè. Il caff è inizierà a fluire automatic amente quando la macchina è pronta . Durante la preparazione del c affè, non è possibile utiliz zare la funzione vapor e.
Luci intermit tenti:
in fase di ris caldamento (25 sec)
Luci costant i: Pronto
LA P RE PARA ZI ON E DE L CAFFÈKA FF EE ZUBERE IT UN G/
1. Spülen Sie den Wass ertank und füllen Sie ihn mi t
Trinkwasser.
4.
Önen Sie de n Hebel vollständig und leg en Sie eine
Nespresso Kapsel ein.
7. Wähls cheibe entsprechend d er
gewünschte n Kaffeemenge
einstellen.
Achtung: Während des Aufheizens (Blinkendes Licht) können Sie die Kaffeetaste drücken. Die Kaffeezubereitung startet automatisch, wenn die Maschine betriebsbereit ist. Während der
Kaffeezubereitung ist keine Dampffunktion möglich.
2. Se tzen Sie den Wassertank wi eder ein.
5. Heb el schließen und Tasse unter den Kae eaus-
lauf stellen.
8. Dr ücken Sie die Tasse, um den Brühvorgang zu
starte n. Die Zubereitung stoppt au tomatisch.
3. Sc halten Sie die Maschine ein.
6. Das Gitter kann für ein Latte Macchiato Glas eingeklappt werden.
9. Tasse entn ehmen. Hebel önen und schl ießen um die
Kapsel in den Ka pselbehälter auszuwer fen.
Blinkendes Lic ht: Aufheizvorgang ,
ca. 25 Sekund en
Permanentes Lic ht: Maschine ist
betriebsb ereit
32
33
Page 34

Si consiglia di far u scire il vapore prima e dop o ogni preparazione con il lat te.
Riempire il ser batoio dell’acqua con acqua potabil e.
Spostare la ma nopola vapore su
. Far uscire il
vapore dal becc uccio per 5 sec.
Sollevare il sup porto per tazzina e si stemare l’erogatore vapore nel la postazione vapore.
Riposiziona re la funzione vapore su ON quan do
terminato.
Impostare l a manopola vapore su ON.
Luce centrale lamp eggiante:
fase di risc aldamento.
Luce centrale fiss a: pronta
Nota: Quando la mano pola vapore è impostat a su ON, la funzione vapore rimar rà in modalità di riscal damento. Una volta terminata, spo stare la manopola su OFF.
BARIS TA: SCHIUM AR E IL L ATT E
VA PORE:
ATTENZIONE: Il tubo del v apore sarà caldo durante e d opo l’uso, maneggiare con cura per ev itare ustioni.
NOTA: Dopo un periodo d i non utilizzo e per l’acqua residua n ella macchina dovuta a prepara zioni precedenti, può ess ere rilasciato del vapore du rante la modalità di riscal damento.
1. Be folgen Sie vorhergehende S chritte der Dampfz ube-
4. Stellen Sie den Schaumregulier er auf die Position .
BARIS TA: AUFSC HÄUM EN VON MILCH/
ABDA MP FE N:/
1. Füllen Sie den Wasser tank mit Trinkwasser.
4.
Stellen Sie den Schau mregulierer auf . Lassen Si e
zum Abdampfe n für 5 Sekunden Dampf ent weichen.
Wenn der Schaumre gulierer auf der ON Position ste ht, verbleibt die Dampffunk tion in der Aufheizp hase. Danach den Schaumregulie rer in die OFF Position bewegen.
2.
Klappen Sie das G itter ein und bringen Sie den
Dampfhahn i n die Aufschäumpositio n.
3. Stellen Sie den Schau mregulierer auf die Positio n ON.
5. Sc hieben Sie den Schaumregulie rer danach wieder
auf die ON Positio n.
Mittler es Licht blinkt: Auf heizvorgang
Mittler es Licht leuchtet permanen t:
betriebsb ereit.
Nach einem Zeitr aum der Nichtnutzung und a ufgrund Wasserrück stände von vorherigen Zub ereitungen ist es möglic h, dass während der Aufheiz phase Dampf aus der Maschine
austrit t. Dies ist normal und kein An zeichen für einen Defek t Ihrer Maschine.
Wir empfehlen e in Abdampfen der Maschine vo r und nach jeder Milch-Anwendun g.
ACHTUNG: Um Verbrennungen zu ver meiden, darf das Dampfro hr während und direkt nach d er Benutzung nicht ber ührt werden.
Page 35

DE
IT
Completare le p recedenti fasi del Vapore.
Spostare la ma nopola vapore nella posizio ne
.
Suggeriment i: Per una schiuma di la tte straordinaria, ut ilizzare latte fre sco a temperatura di fri gorifero (circa 4°C). Per un risult ato migliore, utilizzare un a brocca per il latte.
Assicurar si di spegnere la funzion e vapore e pulire il beccuccio d opo ogni utilizzo (vedi capi tolo Manutenzione e pulizia).
Riempire la bro cca con la quantità di latte ne cessaria in
base alla ricet ta.
Regolare il be ccuccio vapore nella posizio ne schiuma e
mantenerlo nel f ondo della brocca per evit are schizzi.
Una volta che la sc hiuma di latte ha raggiunto il
livello desider ato o la temperatura (circa 65° C),
è pronta.
Prima di rimuo vere il beccuccio vapore dal br icco del
latte, spost are la manopola su ON.
Nota: Se si deside ra solo riscaldare il lat te e non creare la schiuma, assicu rarsi che il beccuccio vap ore sia spinto fino al punto più alto, in mod o che ci sia un divario tra la par te inferiore del
tubo e il beccu ccio.
PRO NTA P ER L A S CH IU MA DI LATT E
Wenn Sie die Milch nur er hitzen und keinen Schaum her stellen möchten, stellen Sie s icher, dass Sie den Dampfhahn in die ti efste Position gebrac ht haben, so dass sich kein Absta nd
zwische n Boden und Aufschäumhil fe befindet.
BER EI T Z UM AUF SC HÄ UM EN/
1. Be folgen Sie vorhergehende S chritte der Dampfz ube-
reitung.
3. Positionieren Sie die Auf schäumdüse in die Aufs chäum-
position und n eigen Sie den Behälter, damit eine
wirbelnde B ewegung in der Milch entste ht. Halten Sie
dabei die Spit ze der Aufschäumdüse kan pp unter die
Milchober fläche.
4. Stellen Sie den Schaumregulier er auf die Position .
2. Füllen Si e den Milchbehälter mit der dem Re zept
entsprec henden Menge kalter Milch.
5. Sobald die gewünschte Ko nsistenz oder die Temperatur
(ca.65°C) erreic ht ist, ist die Milchzuber eitung
abgeschlo ssen.
6. Bevo r Sie den Dampfhahn aus der Milc h entfernen,
stellen Sie den S chaumregulierer zurück a uf die
Position ON.
Tipps: Für einen p erfekten Milchsc haum verwenden Sie am beste n entrahmte kühlschrankk alte (ca. 4°C) Milc h. Das beste Resultat erhalte n Sie bei der Verwendung eines Milc hAufschäum kännchens.
Denken Sie daran, den D ampfhahn und die Aufsc häumdüse nach jeder Verwend ung zu reinigen, siehe Kapitel «P flege und Reinigung».
34
35
Page 36

Proporzi oni:
1 capsula di esp resso
Ricoprire con s chiuma di latte calda
Preparare un e spresso in una tazza da c appuccino e ricoprire con l a schiuma di latte caldo.
Intenso: Grand Cr u Ristretto / Legger o: Grand Cru Ros abaya de Colombia
Proporzi oni:
1 capsula di lungo
Ricoprire con l atte caldo
Preparare un c affè lungo in un bicchiere alto (350m l) e ricoprire con latte cald o.
Intenso: Grand Cr u Fortissio Lungo / Legge ro: Grand Cru Vivalto Lungo
RICET TE CL ASSICH E
C AF FÉ L ATT EC AP PU CC IN O
KL AS SI SC HE R EZEPTE/
Bestand teile:
1 Espresso kapsel
Gekrönt von hei ßem Milchschaum
Bereiten Sie ein en Espresso in einer Capp uccinotasse zu und kröne n Sie ihn mit heißem
Milchschaum . Kräftig: Ristret to Grand Cru / Mild: Rosabaya de Co lombia Grand Cru
Bestand teile:
1 Lungokapse l
Aufgefüll t mit heißer Milch
Bereiten Sie ein en Lungo in einem hohen Glas (350 ml) zu und fü llen Sie ihn mit heißer
Milch auf. Kräf tig: Fortissio Lungo G rand Cru / Mild: Vivalto Lungo Gra nd Cru
C AP PU CC IN O/ C AF FE L ATT E/
Page 37

DE
IT
Proporzi oni:
1 capsula di esp resso
Ricoprire con s chiuma di latte calda
Versare la schiu ma di latte in un bicchiere alto (300 ml). Preparare suc cessivamente un caffè
espresso. Int enso: Grand Cru Indriya fr om India / Leggero: Grand Cru Volluto
Proporzi oni:
1 capsula di esp resso
Ricoprire con s chiuma di latte calda
Preparare un e spresso in una tazzina e r icoprire con schiuma di lat te caldo.
Intenso: Grand Cr u Indriya from India / Legg ero: Grand Cru Volluto
RICET TE CL ASSICH ERICET TE CL ASSICH E
L ATT E MA CC HI ATO ESP RE SS O MA CC HI ATO
KL AS SI SC HE R EZEPTE/
Bestand teile:
1 Espresso kapsel
Gekrönt von hei ßem Milchschaum
Füllen Sie ein hohes G las mit heißem Milchschaum (30 0 ml) und gießen Sie vorsichtig e inen
Espresso h inein. Kräftig: Indri ya from India Grand Cru / Mild: Vollut o Grand Cru
Bestand teile:
1 Espresso kapsel
Gekrönt von hei ßem Milchschaum
Bereiten Sie ein en Espresso in einer Esp ressotasse zu und kröne n Sie ihn mit heißem
Milchschaum. K räftig: Indriya fr om India Grand Cru / Mild: Volluto Gran d Cru
L ATT E MA CC HI ATO / ESP RE SS O MA CC HI ATO /
36
37
Page 38

Proporzi oni:
2 capsule espr esso Volluto
1 pallina di gelato alla v aniglia
2 cucchiai di sci roppo di caramello
1 cucchiaio di sc aglie di cioccolato
Ricoprire con s chiuma di latte
Preparare la s chiuma di latte calda, aggiung ere lo sciroppo di car amello e mettere da par te. Preparare du e
caffè espr esso in una tazzina e ver sarli in un bicchiere
freddo (350ml). Aggiung ere subito la pallina di gelato
e riempire con la s chiuma di latte. Decorare co n scaglie
di cioccolato.
RICET TE GO UR ME T
C AF FÈ F RE DD O VANI GL IA C AR AM EL LO
GOURM ET R EZ EP TE/
Bestand teile:
2 Kapseln Volluto
1 Kugel Vanilleeis
2 Teelöffel flüssiges K aramell
1 Teelöffel Schokolad enraspeln
Gekrönt von Mi lchschaum
Bereiten Sie hei ßen Milchschaum zu, fügen Si e das
Karamell hinz u und stellen Sie alles beiseite. B ereiten
Sie anschließ end zwei Espresso in eine r Tasse zu und
gießen Sie sie in ei n gekühltes Glas (350 ml). Geben Sie
unverzüglic h das Eis hinzu, krönen Sie alles mit d em
Milchschaum u nd dekorieren Sie mit Schokola denraspeln.
HEI SS K ALT ER V AN IL LE KA FF EE MI T K AR AM EL L MI LCH SC HAUM /
Page 39

DE
IT
Proporzi oni:
1 capsula espr esso Capriccio
After Eight ® cioccolato alla menta
Torrone al cioccolat o
Ricoprire con s chiuma di latte caldo
Preparare un c affè Capriccio in una taz zina. Ricoprire
con la schiuma di lat te caldo. Cospargere con le
scaglie di tor rone al cioccolato e aggiunger e un After
Eight ® alla schium a di latte. Servire imme diatamente.
RICET TE GO UR ME T
C AF FÈ A FT ER EI GH T®
Bestand teile:
1 Kapsel Capr iccio
1 After Eight ® Täfelchen
Nougat-Schokolade
Gekrönt von hei ßem Milchschaum
Einen Kaffee in e iner Espressotasse z ubereiten und
mit heißem Milc hschaum krönen. Etwas zer kleinerte Noug atschokolade darüber s treuen und ein
After Eight ® Täfelchen in den Milchsc haum legen.
Sofort s ervieren.
AFT ER EI GH T® KA FF EE /
38
39
Page 40

1:
2:
3:
4:
5:
ml
ml
ml
ml
ml
ml
ml
ml
ml
ml
ml
ml
Regolare il puls ante Espresso su: Regolare il puls ante Lungo su:
Autospegnim ento 1: 9 min, 2: 30 min, 3: 60 min, 4: 2 ore, 5: 8 ore
Durezz a dell’acqua
1: dura, 2: media, 3: dolce
Svuotamento
Vedere sezione s vuotamento
Ritornare alle i mpostazioni di fabb rica
Decalcifi cazione
Vedere sezione de calcificazione
Premere il pulsante Lungo per ritornare alle impostazioni di fabbrica (risparmio energetico: 9 min, livello durezza dell’acqua: dura).
Note: Per uscire dall a modalità menu in qualsiasi mome nto, premere il pulsante Espre sso per 3 secondi.
Per entrare in mo dalità menù premere il pulsa nte Espresso
durante l’accensione d ella macchina. (la luce centrale
lampeggia in ar ancione)
Regolare le mano pole per le impostazion i
necessar ie (vedere grafico q ui sotto).
Una volta selez ionato, premere il pulsante Lungo p er confermare (la
luce centrale è fiss a per confermare, lampeggi a in arancione quando si
seleziona il nu mero).
MODA LI TÀ ME NÙ
1. Wählen Sie in den Me nü-Einstellungen mit der E spres-
4. Stellen Si e den Schaumregulierer auf d ie Position ON.
7. Stellen Si e nach 5 Sekunden den Schaumr egulierer auf
MENÜ EI NS TE LLUN GE N/
1.
Um in die Men ü-Einstellungen zu gelange n, drücken Sie die
Espresso taste und schalten Sie gleich zeitig die Maschine an.
(Mittleres L icht blinkt orange).
2. Wählen Sie den Befehl der gew ünschten
Einstellung (sieh e Übersicht).
Wählen Sie die Esp resso Auswahltaste f ür: Wählen Sie die Lungo Au swahltaste für:
Abschaltau tomatik 1: 9 Min., 2: 30 Min., 3: 60 Min., 4: 2 Std., 5: 8 Std.
Wasserhärt e 1: hart, 2: medium, 3: weich
Entleerung en Siehe Kapitel En tleerung
Werkseins tellung
3. Nach d er Auswahl drücken Sie die Lungot aste zur Bestätigun g
(mittleres Li cht leuchtet daraufhi n konstant und blinkt oran ge
entsprec hend der ausgewählten Progr ammnummer).
Wichtig: Um die Men üeinstellung jederzeit z u verlassen, drücken Sie 3 Sekun den lang die Espressotas te.
Entkalkung Siehe Kapitel En tkalkung
Um die Werksein stellung (Abschaltautomat ik: 9 Min., Wasserhärte Einst ellung: hart) wieder herzu stellen, drücken
Sie bitte die L ungotaste.
Page 41

DE
IT
In modalità me nu, impostare il pulsante E spresso alla
posizione 3 pe r lo svuotamento.
Ruotare la manig lia per il vapore su ON.
Spostare la ma niglia per il vapore su OFF.
Togliere il serbato io dell’acqua e sollevare la leva.
Sistemare l’erogato re vapore nella postazio ne vapore.
La macchina si sp egne automaticamente.
Premere il puls ante Lungo per svuotare la
macchina (pron ta quando la luce centrale
lampeggia).
Luce centrale lamp eggiante:
svuotamen to.
Impostare l a maniglia vapore su
.
Note: L’apparecchi o resterà bloccato per 15 minuti d opo averlo svuotato.
Luce centrale cos tante: terminato
Nota: Svuotamento della macchina prima di un periodo di non-utilizzo.
SVUOTARE LA M ACC HINA
C AF FÈ:
BE CCUC CIO VAP ORE:
ENTLE ER EN D ES S YS TE MS/
1. Wählen Sie in den Me nü-Einstellungen mit der E spres-
sotaste die 3. Posi tion für «Entleeren» aus.
4. Stellen Si e den Schaumregulierer auf d ie Position ON.
7. Stellen Si e nach 5 Sekunden den Schaumr egulierer auf
die Position OFF.
2. Ent fernen Sie den Wassert ank und öffnen Sie den
Hebel.
5. Br ingen Sie die Dampfdüse in die Auf schäumposition.
8. Die M aschine schaltet sich autom atisch aus.
Wichtig: Nach dem E ntleeren ist das System für 15 Minut en nicht betriebsberei t.
3. Dr ücken Sie die Lungotaste um das Sys tem zu
leeren (berei t, wenn das mittlere Licht b linkt).
6. Stellen Si e den Schaumregulierer auf d ie Position .
Mittler es Licht blinkt:
Aufheiz vorgang
Mittler es Licht leuchtet permanen t:
betriebsb ereit.
KA FF EE:/
Wichtig: Bitte entleeren Sie das System vor längerem Nichtgebrauch, vor einem Transport sowie vor einer Reparatur.
DA MPFH AHN: /
40
41
Page 42

Per montare / smon tare l’unità di manutenzione,
assicurar si che il supporto per ta zzine si trovi in posizion e
vertical e.
L’unità di manuten zione può essere rimoss a per una
facile puliz ia.
Per rimuovere il beccuccio dell’erogatore di vapore, girarlo in senso orario fino a che non esce, poi tirare la punta
verso il basso. Il beccuccio può essere lavato con acqua e sapone. Assicurarsi che non siano presenti residui.
Pulire il beccu ccio vapore con un panno umido
(vedere la sezione s vuotare la macchina).
ATTENZIONE: Prestare la massima cautela quando si tocca il beccucio del vapore. Girare l’erogatore di vapore su OFF e lasciare che si raffreddi prima di toccarlo, per evitare lesioni.
Si consiglia di puli re il beccuccio vapore dopo o gni utilizzo per evitar e residui di latte dentro e f uori il tubo.
NON LAVAR E I N L AVA ST OV IG LI E
CURA E PULIZ IA
PUL IZ IA BE CCU CCI O VAPO RE
7. Stellen Sie den Sch aumregulierer auf .
1. Schalten Sie die Maschine aus und stellen Sie die Espresso-
4. Um den Entkalk ungsmodus zu starten, d rücken Sie
PFLEG E & REINIGU NG/
1. Bevo r Sie die Reinigungseinheit ein setzen/herausnehme n,
stellen Sie sich, da ss die Tassenablage ei ngeklappt ist.
3. Rein igen Sie dem Dampfhahn mit ein em weichen
feuchten Tuch (für die Le erung siehe Kapitel
«Entleerun g des Systems»).
2. Die Reinigungs einheit kann vollständig he rausge-
nommen und zerl egt werden.
4. Ent fernen Sie die Aufschäum hilfe vom Dampfhahn, indem Si e sie nach unten ziehen. Die Aufs chäumhilfe
kann in Seifen lauge gereinigt werden. Stellen Sie s icher, dass alle Önungen frei vo n Rückständen sind.
REI NI GU NG DE S DAM PF HA HN S/
ST EL LE N SI E DAS G ER ÄT OD ER TE IL E DAVON NI CH T IN D IE SP ÜL MA SC HI NE /
ACHTUNG: Verwenden Sie die Dampfdüse mit äußerster Vorsicht. Stellen Sie den Dampfhahn auf die OFF Position und lassen Sie ihn, um Verbrennungen zu vermeiden, abkühlen bevor Sie fortfahren.
Es wird empf ohlen, den Dampfhahn nach je der Verwendung mit Milch zu rein igen um Milchablagerungen in ner- und außerhalb des Dampfh ahns zu vermeiden.
Page 43

Impostare l a leva vapore su .
Spegnere la macchina e impostare il pulsante Espresso su 4 e
il pulsante Lungo su 1.
Aprire e chiudere la leva per espellere la capsula.
Svuotare il vassoio raccogligocce e il contenitore per
le capsule usate.
Riempire il serbatoio dell’acqua con 2 soluzioni
decalcificanti Nespresso e aggiungere l’acqua.
Premere il pulsante Lungo per avviare la decalcificazione.
Posizionare un contenitore (min 1500 ml) sotto l’erogatore
di caffè e il beccuccio vapore.
Cominceranno un mix di operazioni tra caffè e vapore. Non
toccare la macchina durante l’operazione. Una luce costante
indicherà il termine della decalcificazione.
Per entrare in mo dalità decalcificazi one premere il
pulsante Esp resso mentre si accende la macc hina.
Nota: Durata 20 mi nuti circa. L’avviso dec alcificazione lampeggi a quando la macchina è pronta per e ssere decalcificata (vede re la sezione ricerca e riso luzione guasti).
DECALCIFICAZIONECURA E PULIZ IA
DE
IT
ENTKALKUN G/
Wichtig: Dauer : Etwa 20 Minuten. Der Entkalku ngsalarm leuchtet auf, wenn die Mas chine entkalkt werden mu ss (siehe Kapitel «Fehlerbehe bung»).
7.
Stellen Sie den Schau mregulierer auf .
1.
Schalten Sie die Maschine aus und stellen Sie die Espresso-
taste auf die Position 4 und die Lungtaste auf die Position 1.
2. Önen und schließen Sie den Hebel zum Auswerfen
der Kapsel.
3. Leeren Sie das Auffangbecken und den Kapselbehälter.
5. Füllen Sie den Wassertank mit zwei Nespresso Entkal-
kerlösungen und füllen Sie den Rest mit Leitungswasser auf.
8. Drücken Sie die Lungotaste um den Entkalkungsvor-
gang zu starten.
6. Stellen Sie ein Gefäß (mind. 1,5 l Fassungsvermögen)
unter den Kaffeeauslauf und den Dampfhahn.
9. Wasser ießt abwechselnd aus dem Kaeeauslauf und dem
Dampfhahn. Berühren Sie die Maschine nicht während dieses
Vorgangs. Der abgeschlossene Entkalkungsvorgang wird durch
das mittlere, permanent leuchtende, Licht angezeigt.
4.
Um den Entkalkun gsmodus zu starten, dr ücken Sie
die Espres sotaste und schalten Sie glei chzeitig die
Maschine an.
42
43
Page 44

(40ml)
fH
36
18
0
20
10
0
CaCO
3
360 mg/l
180 mg/l
0 mg/l
dH
Französische Skala
Livello francese
Deutsche Skala
Livello tedesco
Kalziumkarbonat
(Kesselstein)
Carbonato di calcio
fh
dh
CaCO
3
800
2400
3200
60min
45min
30min
ATTENZIONE La soluzione per la decalcificazione può essere nociva. Evitare il contatto con occhi,
pelle e altre superfici. Per evitare di danneggiare la vostra macchina, non utilizzare prodotti
diversi dal decalcificante dei kit Nespresso, disponibile presso il Nespresso Club. La seguente
tabella indica, in base alla durezza dell’acqua, la frequenza di decalcificazione necessaria per
un funzionamento ottimale della macchina. Per ulteriori informazioni sulla decalcificazione
contattare il Nespresso Club.
Nespresso descaling kit: Ref. 3035/CBU-2
Sostituire il contenitore vuoto come da punto 6.
Una volta terminato, svuotare e risciacquare il serbatoio
dell’acqua, il vassoio raccogligocce e il contenitore capsule
usate.
Ruotare il quadrante Lungo su 2 per sciacquare e
premere il pulsante Lungo. Le luci costanti indicano
che il risciacquo è completo.
Riempire il serbatoio dell’acqua con acqua potabile.
Una volta terminato, impostare il regolatore di
vapore su OFF, svuotare il contenitore e il vassoio
raccogligocce.
Durezza dell’acqua: Decalcificare dopo:
VORSICHT Die Entkalkungslösung kann schädlich sein. Vermeiden Sie Kontakt mit Auge, Haut und
Oberflächen. Wir empfehlen die Verwendung des Nespresso Entkalkungsmittels, das Sie im Nespresso
Club bestellen können, da es speziell für Ihre Maschine entwickelt wurde. Verwenden Sie keine anderen Produkte (z.B. Essig), die Ihre Maschine beschädigen und den Geschmack des Kaffees beeinträchtigen können. Die folgende Tabelle bestimmt die nötige Entkalkungshäufigkeit für einen optimalen
Betrieb Ihrer Maschine basierend auf der Wasserhärte. Für zusätzliche, weiterführende Informationen
bezüglich der Entkalkung wenden Sie sich bitte an Ihren Nespresso Club.
Nespresso Entkalkerset: Art. Nr.. 3035/CBU-2
12. Entfernen Sie den Behälter aus Schritt 6.
10.
Leeren und spülen Sie anschließend den Wassertank,
das Auffangbecken und den Kapselbehälter.
13. Zum Spülen stellen Sie die Lungotaste auf Position 2 und
drücken Sie die Taste: der abgeschlossene Spülvorgang wird
durch das mittlere, permanent leuchtende, Licht angezeigt.
11. Füllen Sie den Wassertank mit Trinkwasser.
14. Stellen Sie anschließend den Schaumregulierer auf
OFF und leeren Sie den Kapselbehälter sowie das
Auffangbecken.
Wasserhärte: Entkalkung nach:
Page 45

RICER CA E RI SO LUZI ON E GUAST I
DE
IT
Nessun indicatore luminoso è acceso.
➔
La macchina si è spenta automaticamente; premere il pulsante ON/OFF.
➔
Controllare l’alimentazione: spina, tensione, fusibile.
Nessuna erogazione di caffè o acqua.
➔
Controllare il serbatoio dell’acqua, se è vuoto, riempirlo con acqua potabile. Se necessario, eseguire la decalcificazione.
➔
Sollevare la leva. Premere uno dei pulsanti caffè e attendere che l’acqua esca.
Il caffè non è abbastanza caldo.
➔
Preriscaldare la tazzina. Se necessario, eseguire la decalcificazione.
Non prepara la s chiuma di latte quando si
usa il beccucc io vapore.
➔
Sistemare il be ccuccio e l’erogatore di vapore cor rettamente.
La leva non si chiude completamente.
➔
Svuotare il contenitore delle capsule / Controllare che non ci siano capsule bloccate all’interno della macchina.
Flusso del caffè non regolare.
➔
Verificare che il serbatoio dell’acqua sia posizionato in modo corretto.
La luce central e lampeggia regolarmente in
arancione.
➔
Decalcificazione necessaria.
Fuoriuscita di acqua ma non di caffè (la
capsula è inserita).
➔
In caso di problemi, contattare il Nespresso Club.
La macchina si sp egne automaticamente.
➔
Per risparmiare energia la macchina si spegne automaticamente dopo 9 minuti di non utilizzo.
➔
Per cambiare queste impostazioni vedere il paragrafo «Modalità Menu» a pagina 40.
Keine Taste leuchtet.
➔
Die Maschine hat sich automatisch ausgeschaltet; drücken Sie die ON/OFF Taste.
➔
Stecker, Spannung und Sicherung kontrollieren.
Kein Kaffee, kein Wasser.
➔
Wassertank ist leer. Wassertank mit Trinkwasser füllen. Entkalken, falls notwendig.
➔
Hebel öffnen. Drücken Sie eine Kaffeetaste und warten Sie, bis Wasser fließt.
Kaee ist nicht heiß genug.
➔
Tasse vorwärmen. Entkalken, falls notwendig.
Kein Milchschau m bei Anwendung der
Dampfdüse.
➔
Die korrek te Positionierung des Dampf hahns und der Dampfdüse.
Hebel kann nicht ganz geschlossen werden.
➔
Kapselbehälter leeren und sicherstellen, dass im Innenraum keine Kapsel blockiert ist.
Undichtigkeit oder unregelmäßiger
Kaffeefluss.
➔
Überprüfen Sie die korrekte Position des Wassertanks.
Mittler es Licht blinkt permane nt orange.
➔
Entkalkung erforderlich.
Es wird kein Kaffee ausgegeben, sondern nur
Wasser (trotz eingesetzter Kapsel).
➔
Kontaktieren Sie den Nespresso Club.
Die Maschine s chaltet sich automatisch au s.
➔
Um Energie zu sparen, schaltet sich die Maschine nach 9 Minuten Nichtbenutzung automatisch aus.
➔
Um diese Einstellung zu ändern, siehe auf Seite 40.
FEHLE RB EH EB UN G/
44
45
Page 46

Questo apparecchio è conforme alla direttiva UE 2002/96/CE. I materiali dell’imballaggio e il contenuto dell’apparecchio sono materiali riciclabili. Il Suo apparecchio contiene materiali
di valore che possono essere recuperati o riciclati. La separazione dei rifiuti rimanenti nei diversi materiali, facilita il riciclo delle materie prime preziose.
Lasciare l’apparecchio in un’isola ecologica. Può ottenere maggiori informazioni contattando le autorità locali.
CONTAT TAR E IL N esp re s so CLUB
SMALTIMENTO E PROTEZ IO NE A MB IE NTA LE
Per ulteriori informazioni, in caso di problemi o semplicemente per chiedere consiglio, può contattare il Nespresso Club o un rappresentante autorizzato Nespresso. I dettagli per
contattare il Nespresso Club si possono trovare nel folder «Benvenuti in Nespresso» all’interno dell’imballo della macchina o sul sito nespresso.com
Für jegliche weiterführende Information, bei auftretenden Problemen oder auch wenn Sie nur Rat suchen, kontaktieren Sie den Nespresso Club. Kontakteinzelheiten zum Nespresso Club
finden Sie im Ordner «Willkommen bei Nespresso» im Maschinenkarton oder auf www.nespresso.com.
Dieses Gerät entspricht der EU-Richtlinie 2002/96/EG. Verpackungsmaterialien und Geräte enthalten recycelfähige Stoffe. Ihr Gerät enthält wertvolle Materialien, die wiedergewonnen und recycelt werden können. Die Trennung der Abfallmaterialien nach ihrer Art erleichtert das Recycling des wiederverwertbaren Materials. Bringen Sie das Gerät zu
einem Recycling- bzw. Wertstoffhof. Mehr Information über deren Wiederverwertung erhalten Sie bei Ihren örtlichen Behörden.
KONTA KT IE RE N SI E DE N Ne sp r es so CLUB/
ENTSORGU NG U ND U MW ELTSCHUTZ/
Page 47

DE
IT
Ci siamo impegnati ad acquistare caffè della migliore qualità, cresciuti nel rispetto dell’ambiente e delle comunità agricole. Dal 2003 stiamo lavorando con la Rainforest Alliance
per sviluppare il nostro programma AAA Nespresso Sustainable Quality
TM
.
Abbiamo scelto l’alluminio come materiale di imballaggio per le nostre capsule, in quanto protegge il caffè e gli aromi dei nostri Grand Cru Nespresso.
L’alluminio è inoltre riciclabile all’infinito, senza perdere alcuna delle sue qualità.
Nespresso si è impegnata a progettare e creare apparecchi innovativi, pratici e di facile utilizzo. Stiamo ora introducendo benefici ambientali nel design delle nostre nuove e
future macchine.
ECOL ABORAT IO N : ECO LABORATIO N.COM
ECOL ABORAT IO N: ECOLABORATIO N.COM/
Wir haben uns verpflichtet, ausschliesslich Kaffee von höchster Qualität zu kaufen, dessen Anbau den Schutz der Natur und der Farmer respektiert.
Seit 2003 arbeiten wir zusammen mit der Rainforest Alliance an der Entwicklung unseres Nespresso AAA Sustainable QualityTM Programms und verpflichten uns nun, bis 2013
80% des Kaffees aus diesem Programm (Rainforest Alliance CertifiedTM), zu beziehen.
Wir haben Aluminium als Verpackungsmaterial für unsere Kapseln ausgewählt, weil es einen perfekten Schutz des Kaffees und der Aromen unserer Nespresso Grands Crus bietet.
Zusätzlich kann Aluminium unendlich oft ohne Qualitätsverlust recycelt werden.
Nespresso hat sich verpflichtet, Maschinen zu entwickeln, die innovativ, leistungsstark und mit attraktivem Design ausgestattet sind. Nun konstruieren wir Maschinen, die die
Vorteile für die Umwelt in das Design der neuen und zukünftigen Maschinenserien integriert.
46
47
Page 48

GARAN ZI A LI MI TATA EINGE SC HR ÄN KT E GE WÄHR LEISTU NG/
Garantie und Haftung – Garantie für Turmix Nespresso Maschinen in Österreich und in der Schweiz beträgt zwei Jahre (Ersatzteile und Arbeits auf wand). Bei Inan spruchnahme der Garantie muss der Kas-
senbeleg des Geschäfts mit dem Kaufdatum vorgelegt werden. Es werden keine Garantiean sprüche akzeptiert, wenn die Maschine nicht oder nicht ordnungsgemäss entkalkt wurde (zu selten, Verwendung
nicht geeigneter Produkte).
Garanzia e responsabilità – Le macchinette Turmix Nespresso sono garantite in Austria e Svizzera per due anni (par ti di ricambio e manodopera). Per usufruire della presente garanzia, occorre conservare
la ricevuta che riporta la data di acquisto. Non saranno accettate richieste di garanzia, se la macchina non è stata sottoposta al processo di decalcificazione, o se è stata decalcificata in modo errato (raramente,
impiego di prodotti non appropriati).
DKB Household Switzerland AG, Eggbühlstrasse 28, Postfach, CH- 8052 Zürich, www.turmix.com
SERVICE-CENTER: Grindelstrasse 3-5, CH-8303 Bassersdorf, Switzerland
Tel: +41 43 266 16 00, Fax:+41 43 266 16 10, servicecenter@dkbrands.com
Service Center AT
SZOT, Haushaltgeräte-Service, Erlaaer Strasse 171, A – 1230 Wien, Tel +43 (0) 1 699 90 56, Fax +43 (0) 1 699 90 57
AVMS Audio Video Media Service GmbH, Campus 21 / Businesscenter Wien Süd, Liebmannstrasse F01.102, A – 2345 Brunn/Gebirge, Tel. +43 (0) 1 61052 0, Fax. +43 (0) 1 61052 83999
Page 49

(1)
Page 50

M a e s t r ia
B Y N E S P R E S S O
 Loading...