

Page 1

User manual
Ahead Software AG
Page 2

Table of contents
1 About InCD....................................................................................... 4
1.1 What is InCD?................................................................................. 4
1.2 Remarks about working with InCD............................................... 4
1.2.1 Operating systems ........................................................................... 4
1.2.2 Available packet-writing software..................................................... 5
1.2.3 CD-MRW (Mount Rainier)................................................................ 5
1.2.4 UDF Reader..................................................................................... 6
1.3 Update............................................................................................. 6
1.3.1 Tips for the InCD 1.3 user................................................................ 6
2 Installation ....................................................................................... 8
2.1 Introduction .................................................................................... 8
2.2 Installation ...................................................................................... 8
2.3 Uninstalling................................................................................... 12
3 Working with InCD......................................................................... 14
3.1 Program start................................................................................ 14
3.2 Inserting the medium................................................................... 14
3.3 Formatting with InCD................................................................... 15
3.3.1 Formatting CD-RW and DVD-RW media.......................................15
3.3.2 Formatting CD-MRW media........................................................... 19
3.3.3 Formatting DVD+RW media........................................................... 23
3.4 Reformatting with InCD ............................................................... 27
3.4.1 Reformatting CD-RW and DVD-RW media....................................27
3.4.2 Reformatting a CD-MRW medium.................................................. 30
3.4.3 Reformatting a DVD+RW medium.................................................33
3.5 Ejecting the medium.................................................................... 36
3.5.1 Ejecting CD-RW and DVD-RW media............................................ 36
3.5.2 Ejecting CD-MRW media ............................................................... 37
3.5.3 Ejecting DVD+RW media............................................................... 37
3.6 Copying onto a medium formatted with InCD...........................38
3.6.1 Copying onto CD-RW and DVD-RW media...................................38
3.6.2 Copying onto CD-MRW media....................................................... 39
3.6.3 Copying onto DVD+RW media....................................................... 39
3.7 Deleting data................................................................................. 40
3.8 Exiting InCD.................................................................................. 41
InCD Table of contents • 2
Page 3

4 Commands..................................................................................... 42
4.1 Introduction .................................................................................. 42
4.2 Properties ..................................................................................... 42
4.2.1 InCD information ............................................................................ 42
4.2.2 InCD settings.................................................................................. 44
4.3 Ejecting ......................................................................................... 46
4.4 Formatting..................................................................................... 46
4.5 Version information ..................................................................... 47
5 Index............................................................................................... 48
InCD Table of contents • 3
Page 4

1 About InCD
1.1 What is InCD?
InCD is a program that formats rewritable media (CD-RW, DVD+RW, DVD-RW)
in such a way that they can be used like hard or floppy disks, i.e. so that data
files can be saved on the media from any application.
InCD only works with rewritable media (CD-RW, DVD+RW, DVD-RW). Thus
1.2 Remarks about working with InCD
CDs and DVDs, which can only be written on once (CD-R, DVD-R or DVD+R)
cannot be written on using InCD.
1.2.1 Operating systems
The following preconditions have to be met before InCD can be used:
Hardware Recorder (CD or DVD)
Software Windows 95 (from Version B / Service Release 2)
Windows 98
Windows Me
Windows NT 4.0, including Service Pack 6
Windows 2000, including Service Pack 2
Windows XP
Disk type Rewritable media (CD-RW, DVD+RW, DVD-RW)
Windows 95/98/Me users should note that InCD is not compatible with the
'Adaptec CD-Burning Plug-in' that comes with Windows Media Player 7.x.
Please uninstall the plug-in first, using the 'ADD/REMOVE SOFTWARE' control
panel option.
InCD About InCD • 4
Page 5
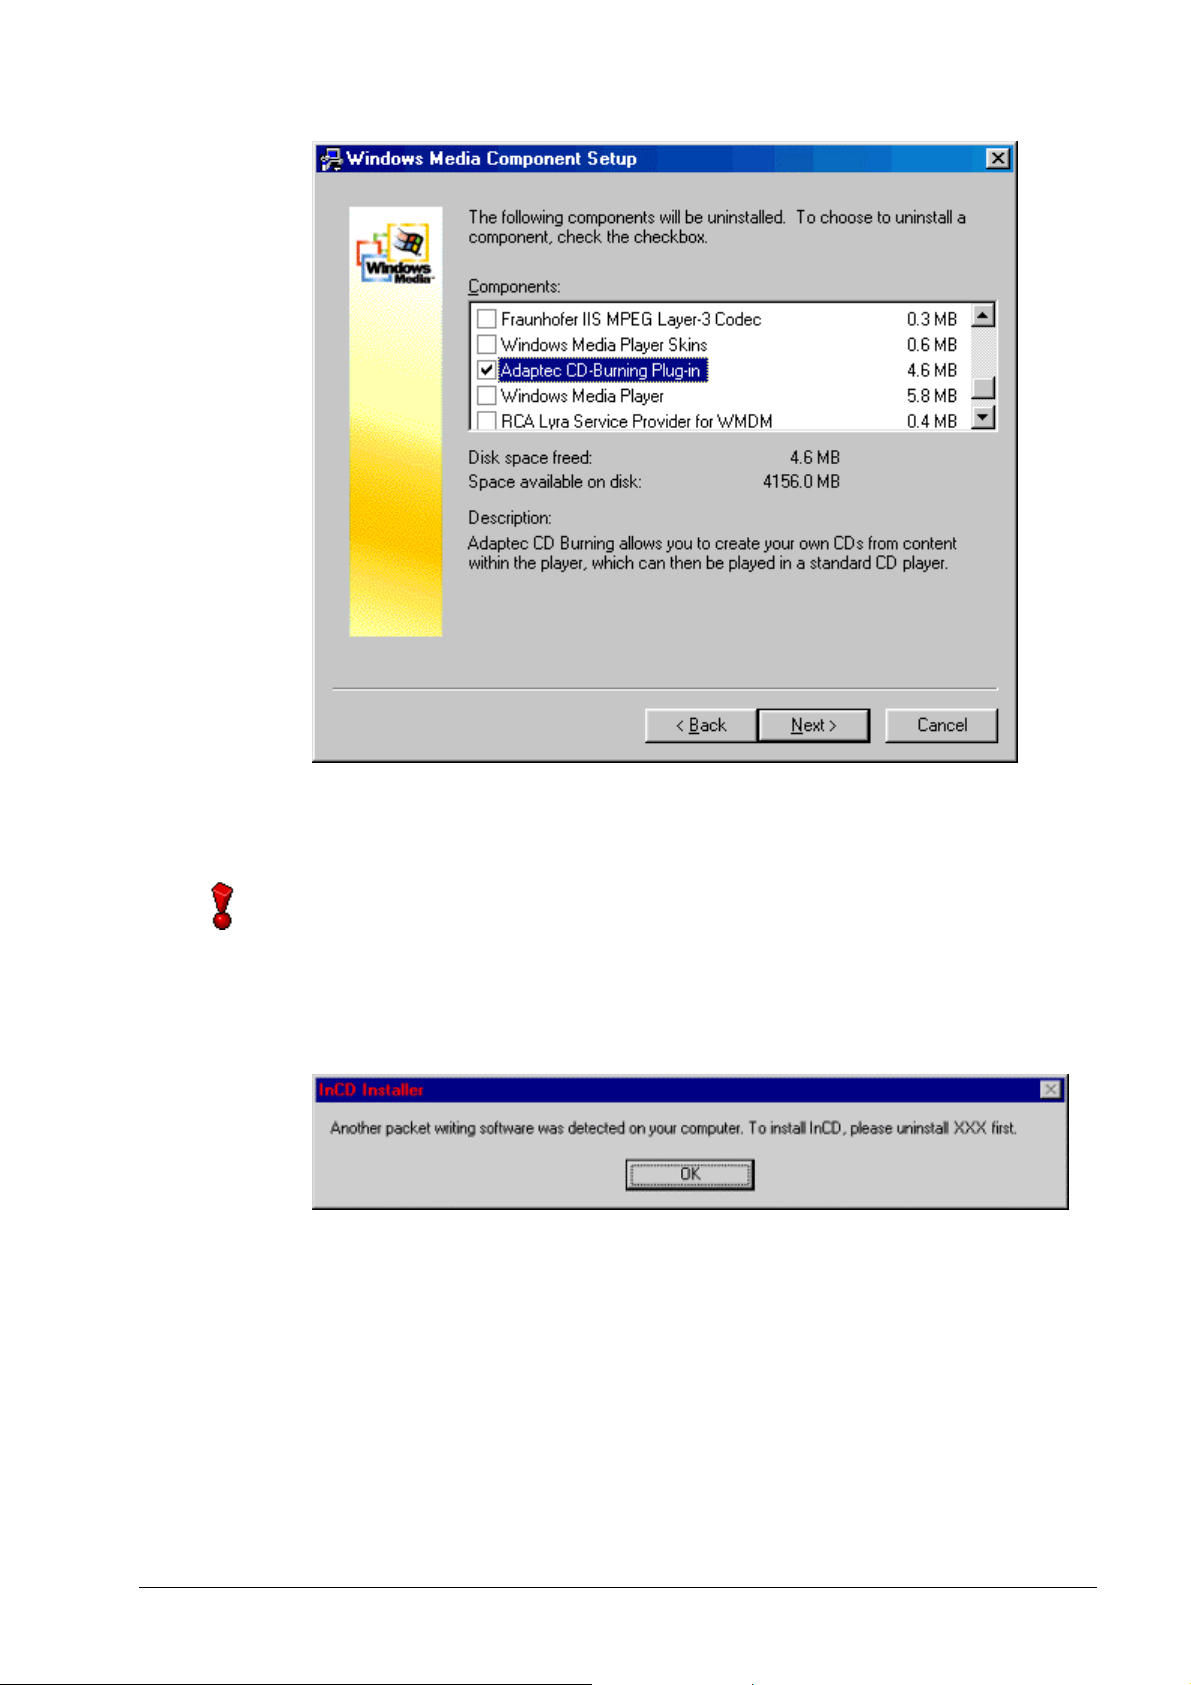
1.2.2 Available packet-writing software
r
InCD is not compatible with other packet-writing software - so any othe
application of this type present must be removed before InCD can be installed.
Prior to installation, InCD will check which applications have already been
installed, and close the setup process if a different packet-writing software
package is found. If this happens, a window will appear to draw your attention to
the fact.
1.2.3 CD-MRW (Mount Rainier)
It is only possible to format media in the Mount Rainier format when using
recorders that support the format.
In order to format media in the so-called CD-MRW (Mount Rainier) format, the
corresponding check box must first be selected when formatting with InCD. This
turns a CD-RW medium into a CD-MRW one. Drives without CD-MRW support
can only use these media with the aid of a 'remapper’ (see also the following
Section 'Remappers'). The check box is located on the 'InCD Page Settings'
card and is only visible if the recorder supports this function. It is described in
detail in the 'CD-MRW' section.
InCD About InCD • 5
Page 6

You can also find out more about Mount Rainier at http://www.mt-rainier.org
1.2.3.1 Remappers
In order to be able to read CDs written with Mt. Rainier drives on drives that do
not support this format (CD-MRW), a so-called 'remapper' is needed. This is
installed automatically during the installation of InCD. The 'remapper' has to be
appropriately installed later on other PCs. Depending on the operating system
used, InCD has to be additionally installed.
Details are provided in the following table:
Windows 98
Windows Me
Windows 2000
Windows XP
Windows 95
Windows NT
1.2.4 UDF Reader
.
CD-MRWs need the 'remapper' in order to be rendered
legible. The remapper can also be downloaded from
http://www.nero.com
CD-MRWs cannot be read with the 'remapper' alone. With
these versions of Windows, the InCD program has to be
installed as well.
.
A UDF read driver is required so that a disk formatted using InCD can also be
read on a PC on which the program is not installed. This driver can be
downloaded free of charge from the Ahead Software AG website
www.nero.com
InCD must be installed on a system in order to read a DVD-RW or DVD+RW
(if not finalized) medium.
The current version of the UDF reader is not supported by Windows NT4.
InCD has to be installed instead.
.
1.3 Update
InCD can only be upgraded to its current version if a registered version of InCD
1.6x (or later) or Nero is installed.
1.3.1 Tips for the InCD 1.3 user
InCD does not support the format used by InCD 1.3. In other words CD-RWs
which have been formatted with InCD 1.3 cannot be used with InCD 2.x (or any
later version).
1. Copy all the data which you have stored with InCD 1.3 onto a hard disk.
2. Uninstall InCD 1.3.
3. Install InCD 2.x. or any later version. (see section 2, 'Installation').
InCD About InCD • 6
Page 7

r
We recommend you follow the following procedure when you have a disk
formatted with InCD 1.3 and you would like to reformat later with InCD 2.x (o
any subsequent version).
Using Nero, fully erase the CD-RW. The contents of the CD-RW can be
quickly and thoroughly deleted without any difficulty.
(In order to do so, select
the Erase ReWritable command from the Recorder menu and activate the
'Full-erase rewritable media' option.
Next, format the CD-RW with InCD 2.x. (or any later version.) See section
'Formatting with InCD'.
InCD About InCD • 7
Page 8
2 Installation
2.1 Introduction
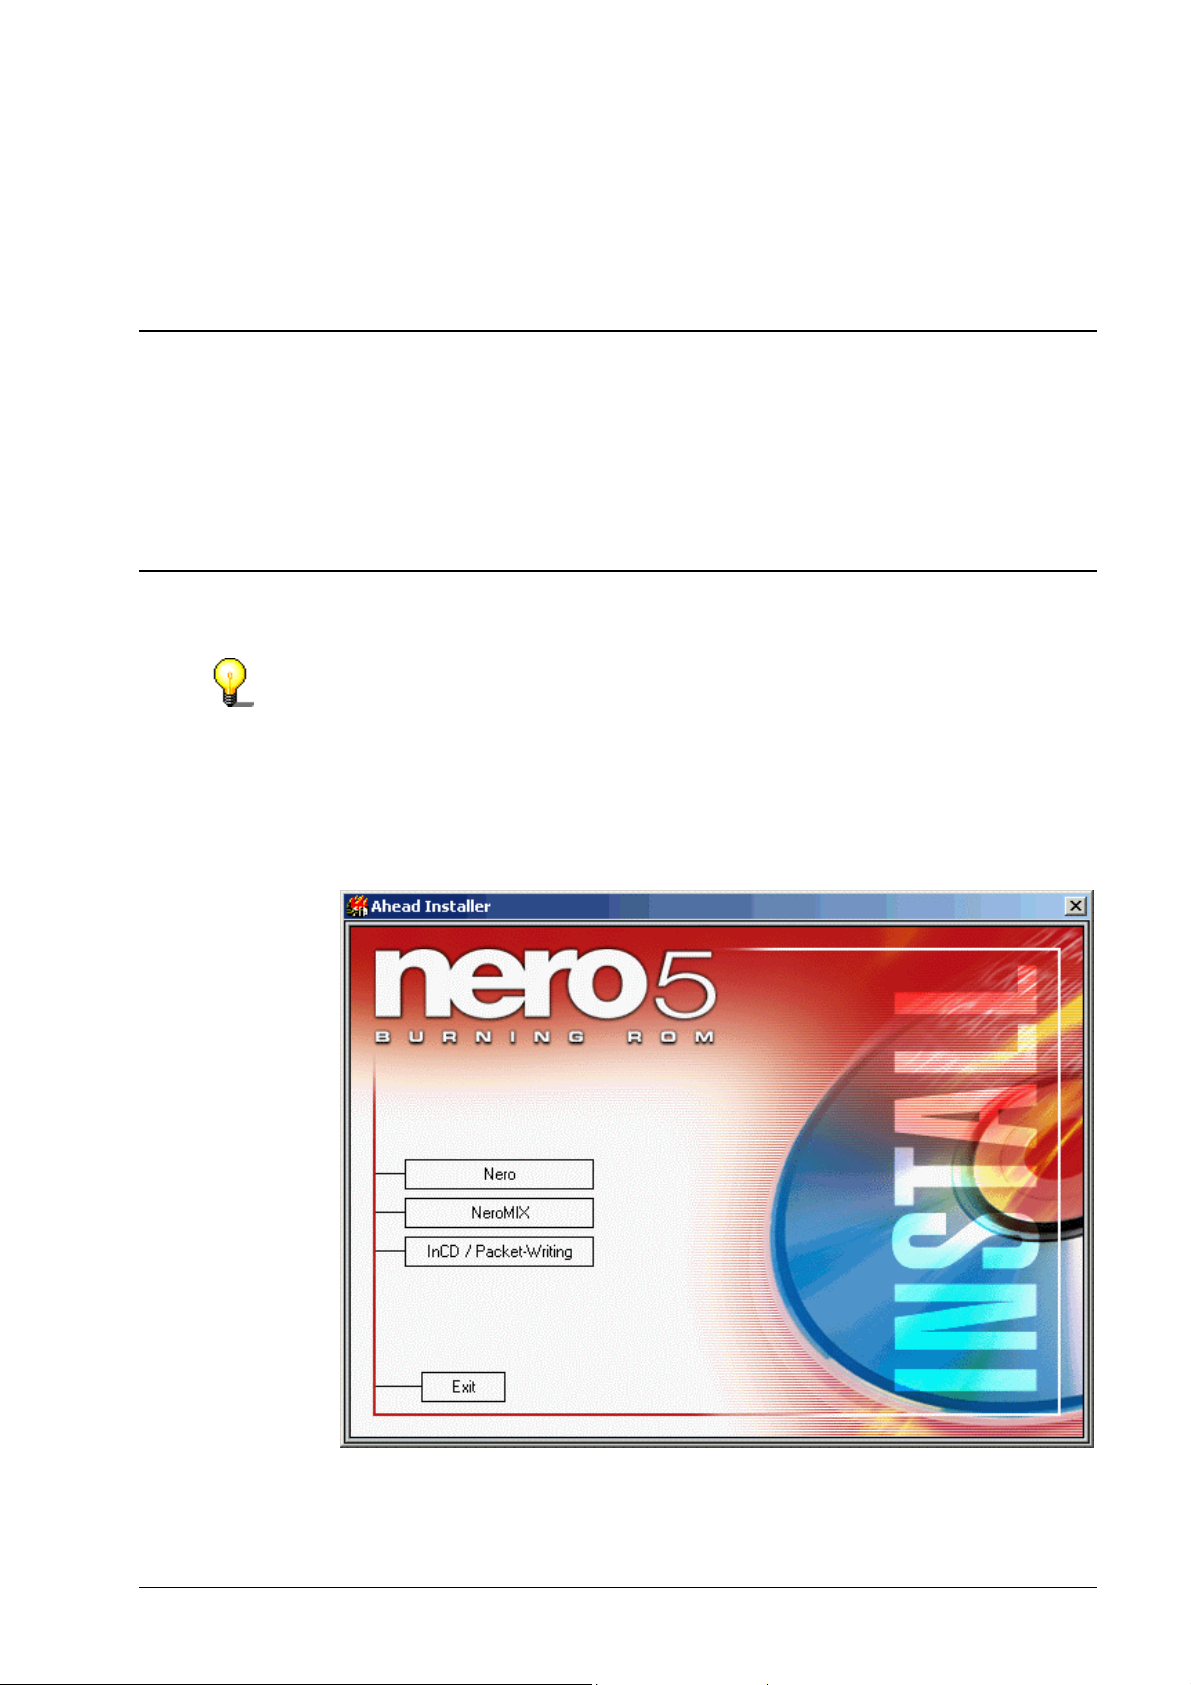
InCD is installed using a multi-installer. This means that the installation process
is begun by clicking on the corresponding InCD area on the start window.
The 'Setup.exe' data file required for installing InCD can be found in the
CD\InCD\ directory.
2.2 Installation
In order to begin installation using Windows NT 4.0 / Windows 2000 /
Windows XP, you will need to have administrator rights.
1. Close any Windows programs not currently needed and switch off any virus
scanner that may be active.
2. Insert the CD with InCD into the DVD/CD-RW drive.
3. Click on the InCD area of the start window.
InCD Installation • 8
Page 9
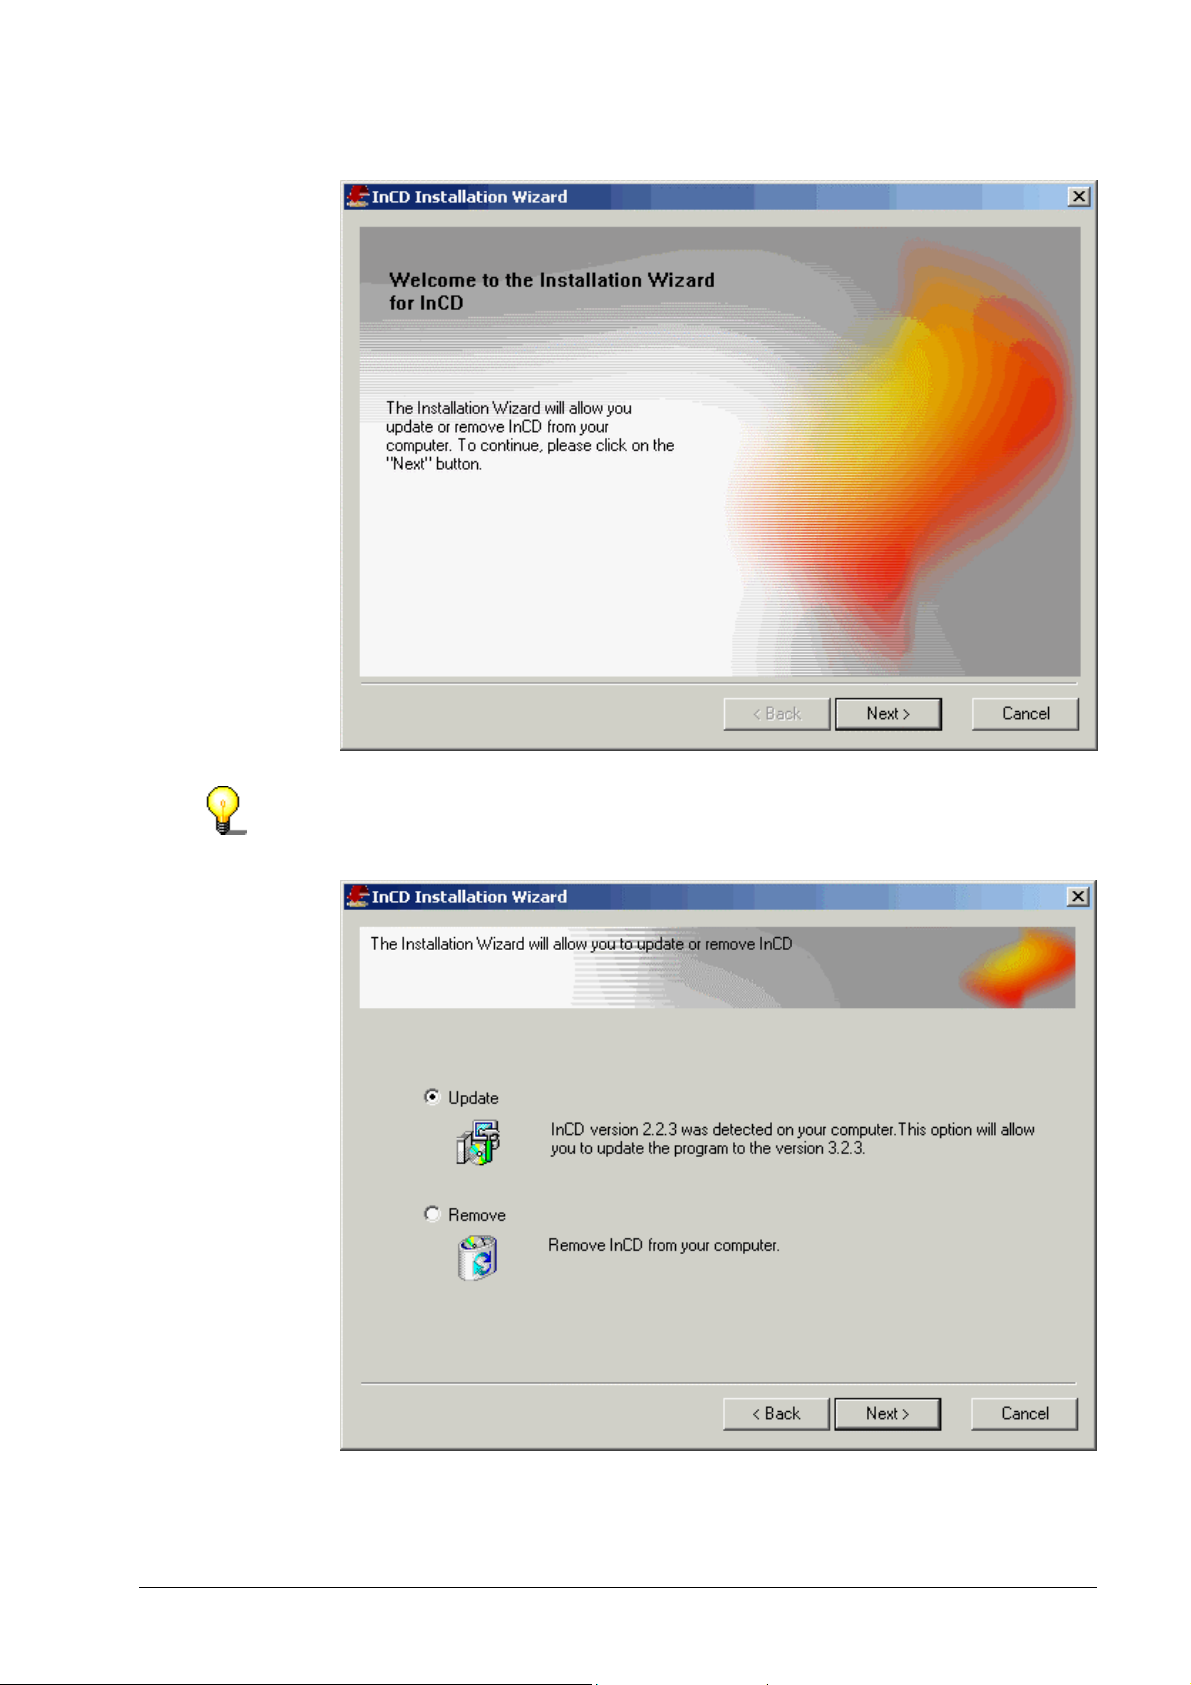
4. In order to install the software, click on the Next button.
If InCD recognizes that a version has already been installed, the 'Update' option
will be activated. Click on Next to update.
InCD Installation • 9
Page 10
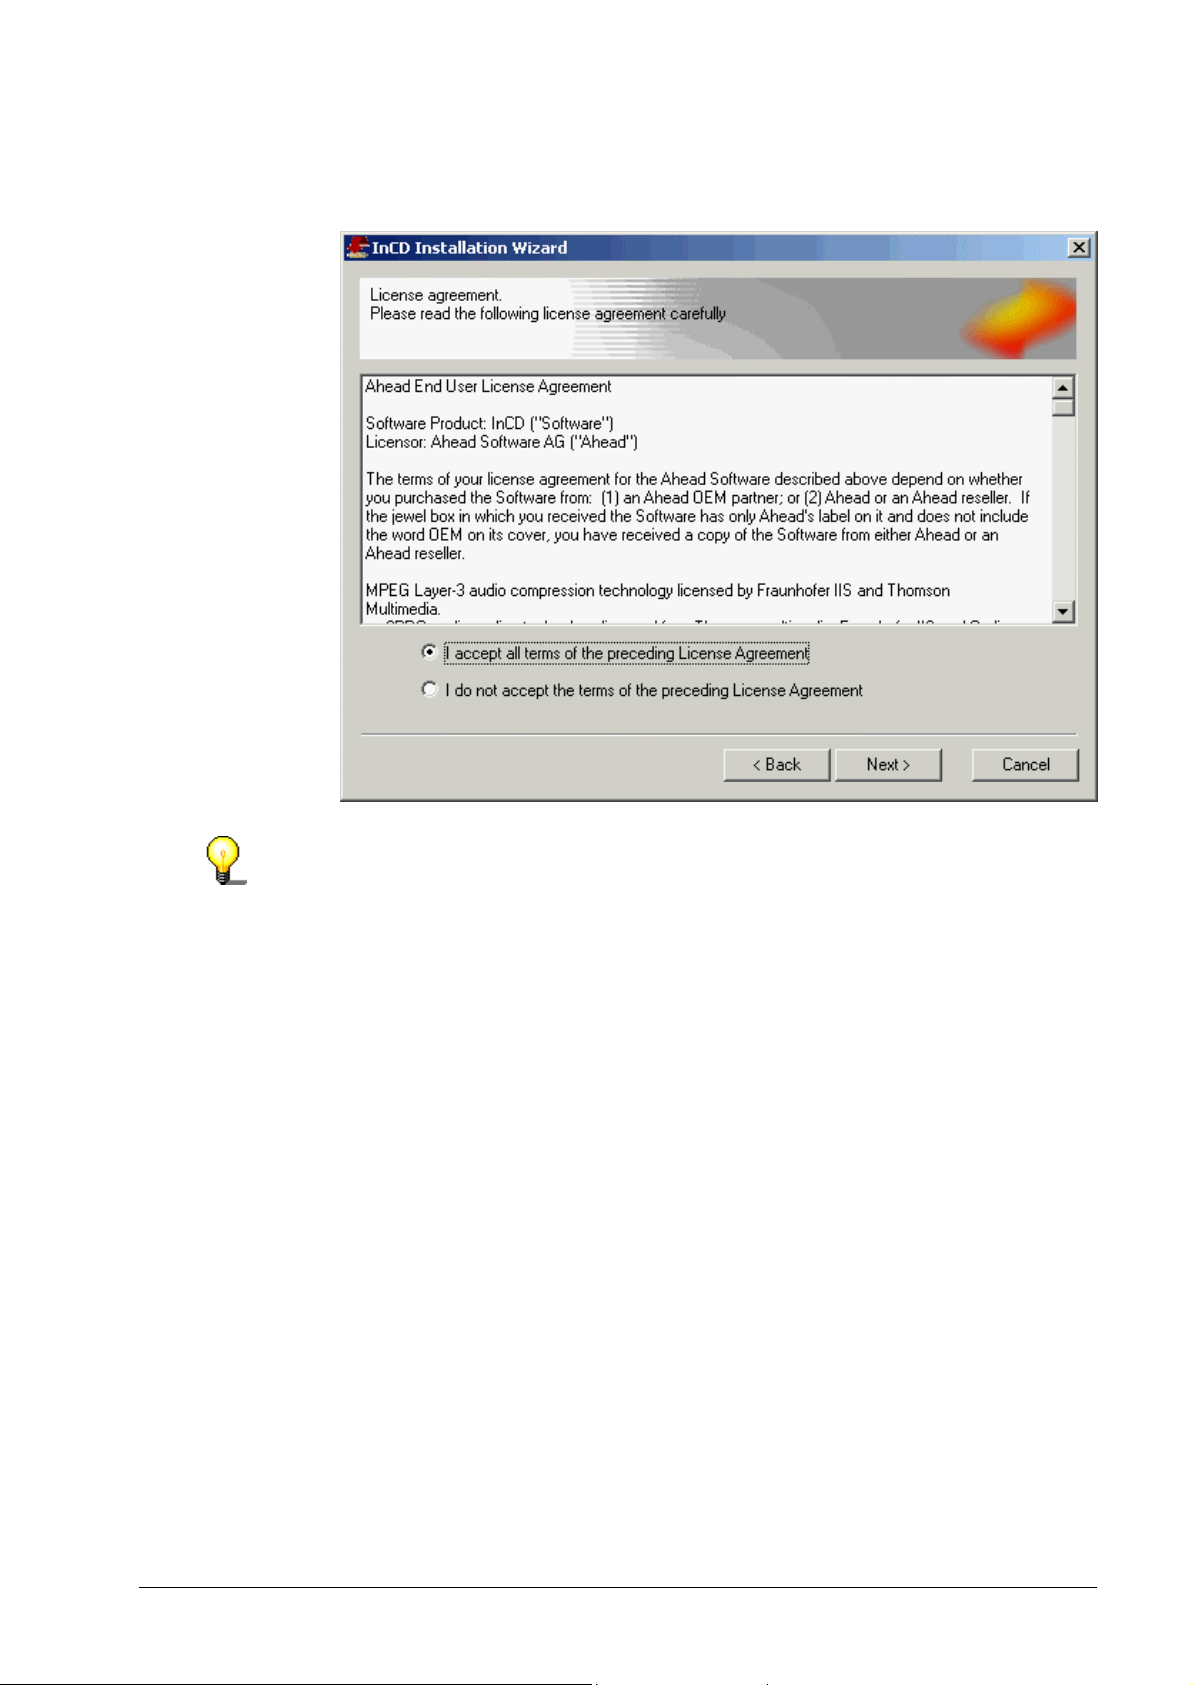
5. Read the provisions contained in the license carefully, and activate the
'I accept the terms in the license agreement' option if you accept them; then
click on the Next button.
You will not be able to install InCD if you do not accept the terms of the license.
6. Enter your own name in the 'User Name' field and (assuming that InCD has
been installed on a company computer) enter that of the company in the
'Company name' field. Because 'Company name' is a mandatory entry (this
field has to contain something) we recommend that private users repeat their
user name at this point.
The preset installation directory is 'C:\Program files\Ahead\InCD'. You may
change this directory by clicking on the Change button and by indicating the
directory you wish to use. Once all the details are correct, click on the Next
button.
InCD Installation • 10
Page 11
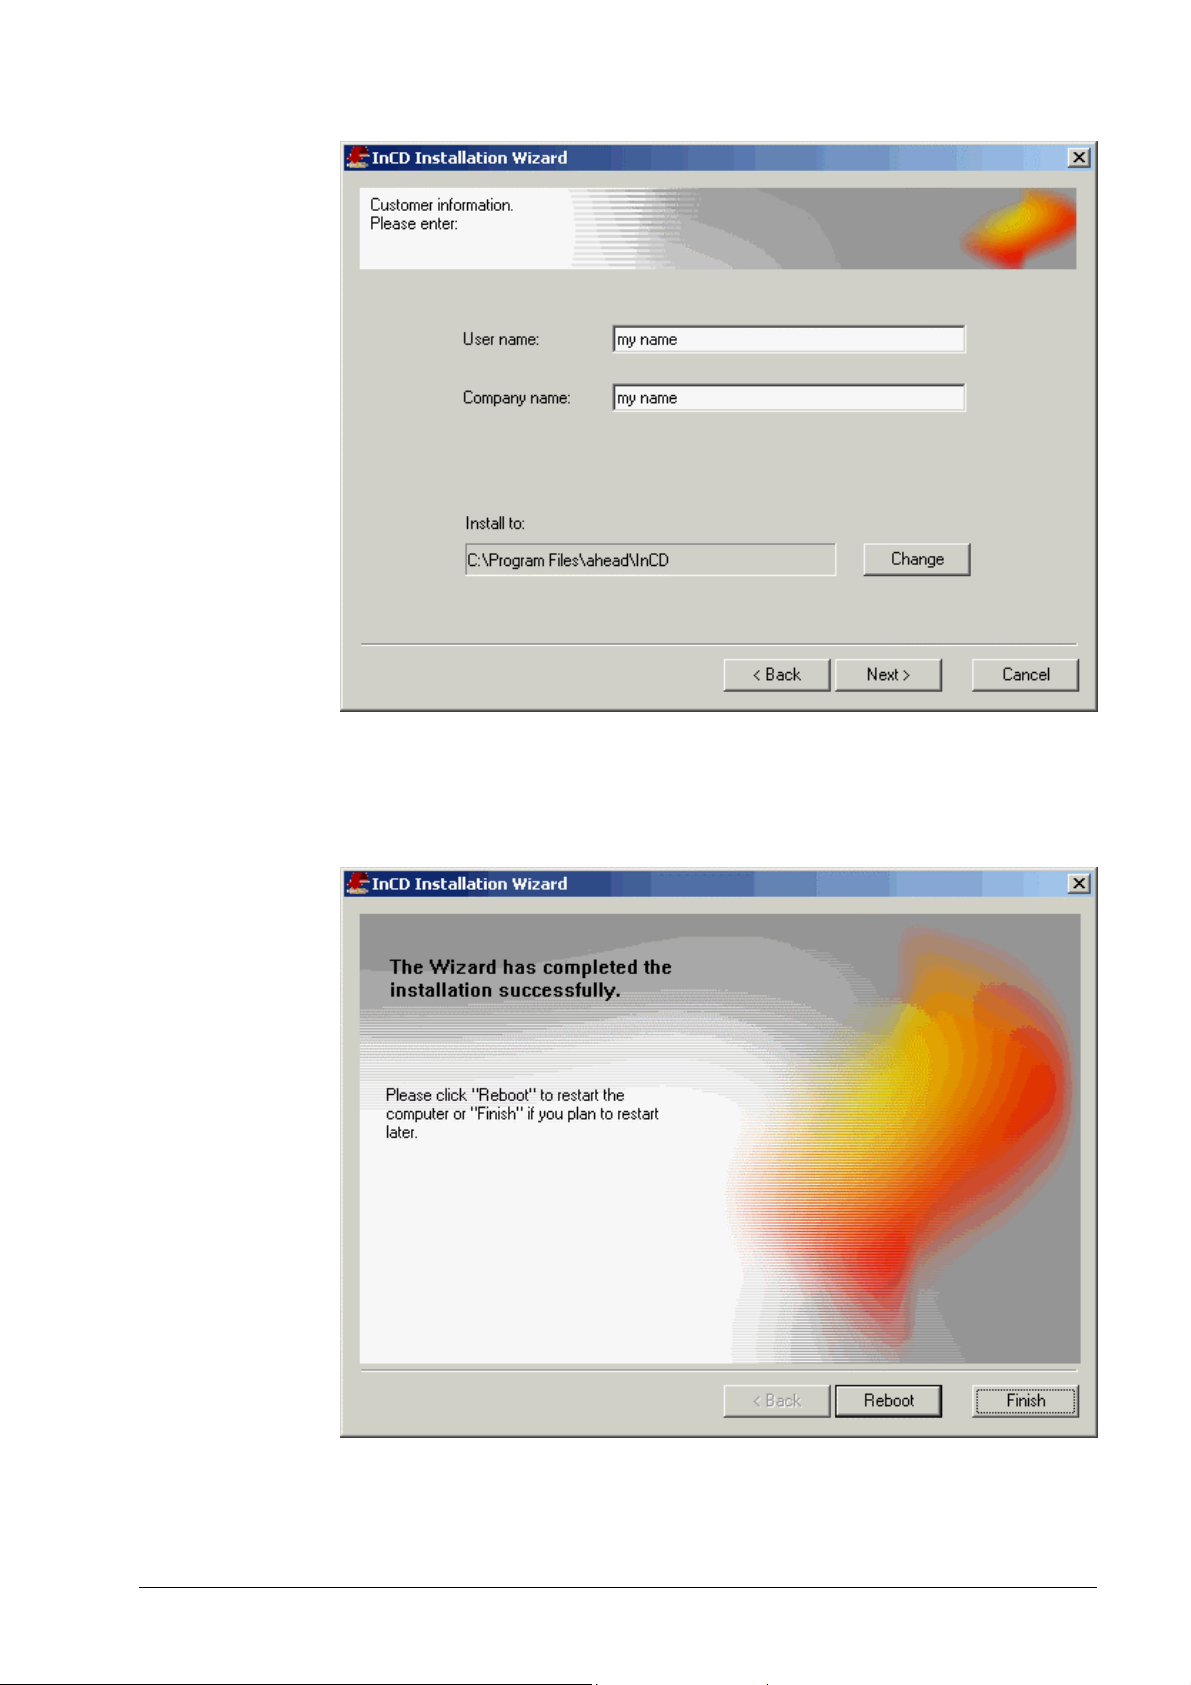
7. The computer must be restarted before InCD can be used.
You can restart the computer by clicking on the Reboot button.
To bring the installation process to an end, click on Finish. Do note
however that you will only be able to use InCD after you have rebooted.
InCD Installation • 11
Page 12
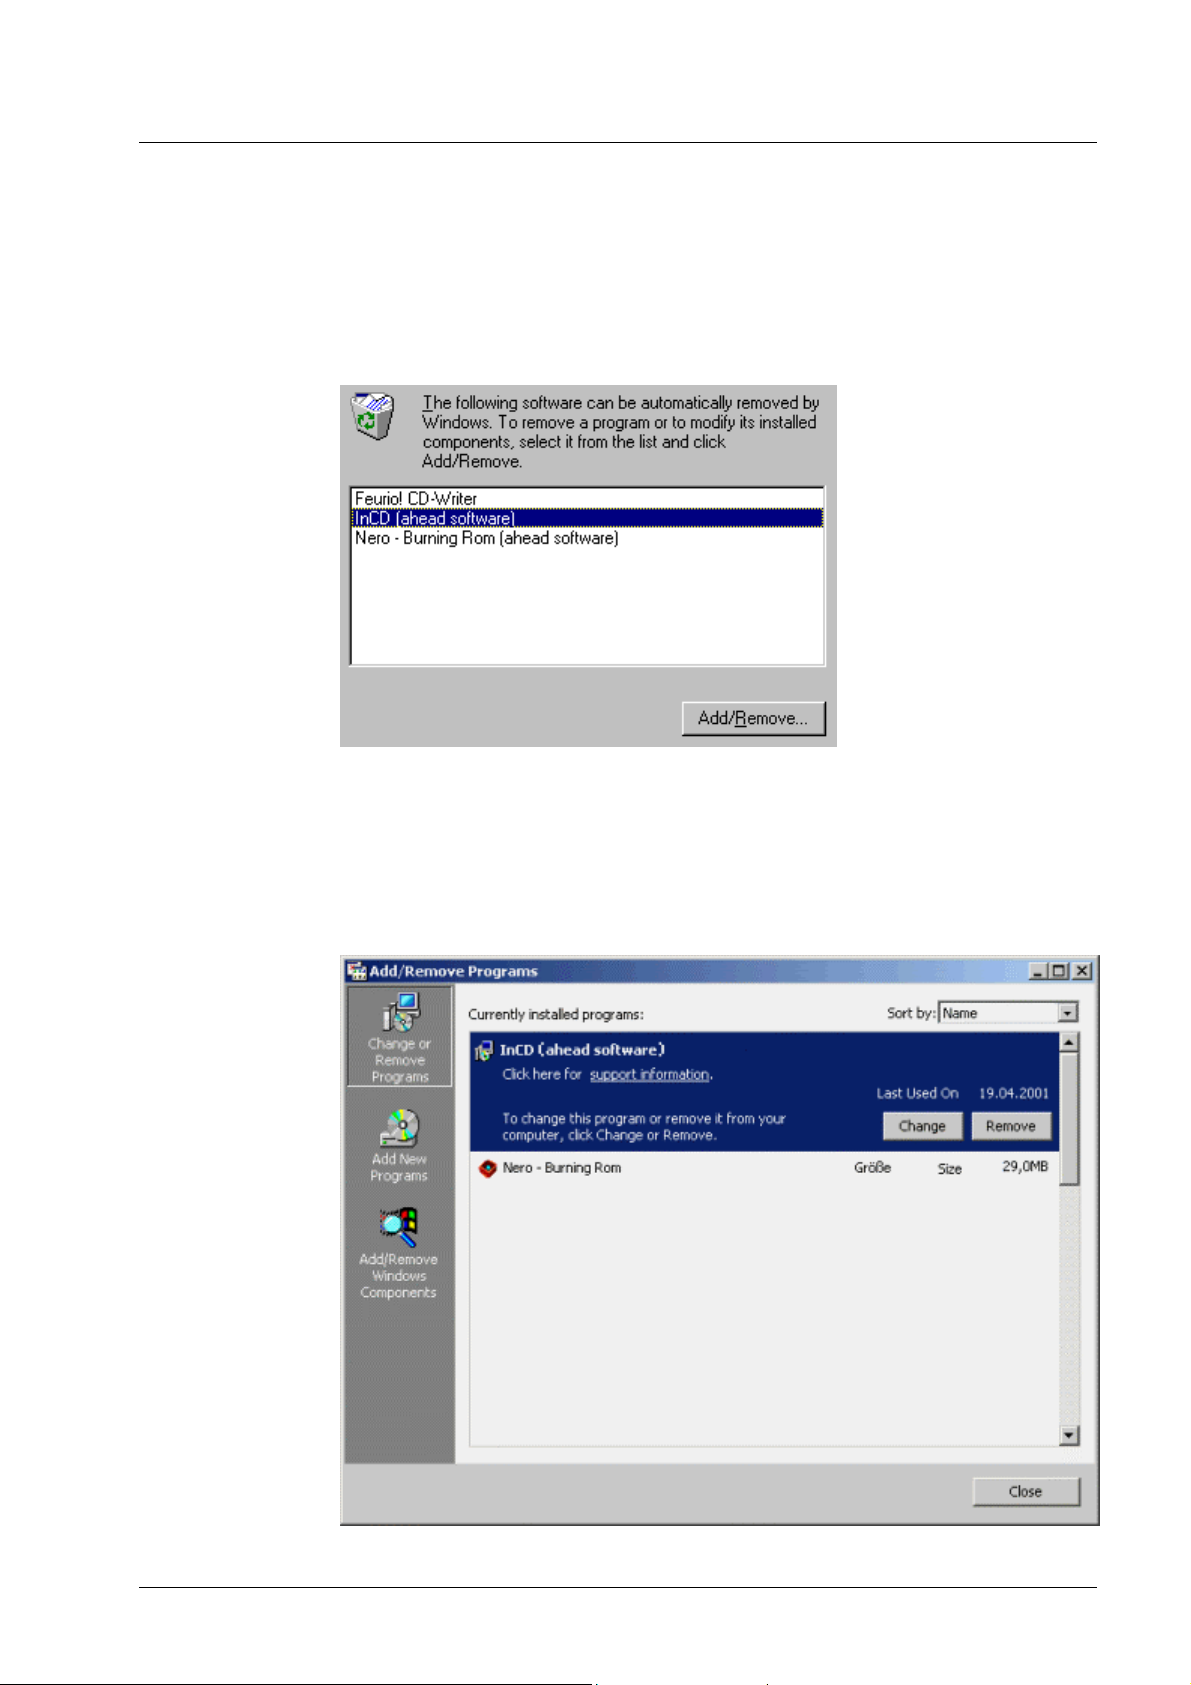
2.3 Uninstalling
The uninstall screen varies depending on the operating system being used.
1. Select START -> SETTINGS -> CONTROL PANEL -> SOFTWARE
2. Proceed in the following manner when Windows 95/98/Me is being used:
Highlight InCD (Ahead Software) and click on the Add/Remove button.
InCD will be uninstalled immediately.
Proceed in the following manner with Windows NT, Windows 2000 or
Windows XP: Highlight InCD (Ahead Software) and click on the Remove
button. InCD will now be uninstalled automatically without any further
prompting. This will delete all the drivers from your PC after you have
rebooted.
The Windows 2000 uninstall screen looks like this:
InCD Installation • 12
Page 13

The Windows XP uninstall screen looks like this:
3. Close both 'Software properties (or software)' and 'Control panel' windows.
InCD Installation • 13
Page 14
3 Working with InCD
3.1 Program start
Once the computer has been rebooted, InCD will be launched automatically and
will indicate that it is loaded by displaying a splash screen and a symbol in the
System Tray. The section 'Options' tells you how to disable the splash screen if
desired. The InCD icon is located in the System Tray in the bottom right corner
of the screen. The InCD icon provides information on the CD in the disk drive, or
to the disk drive itself.
There is no medium or no UDF-formatted medium in the DVD/CD-RW
drive.
There is a UDF-formatted media mounted in the DVD/CD-RW drive.
No DVD/CD-RW drive could be found that is supported by InCD.
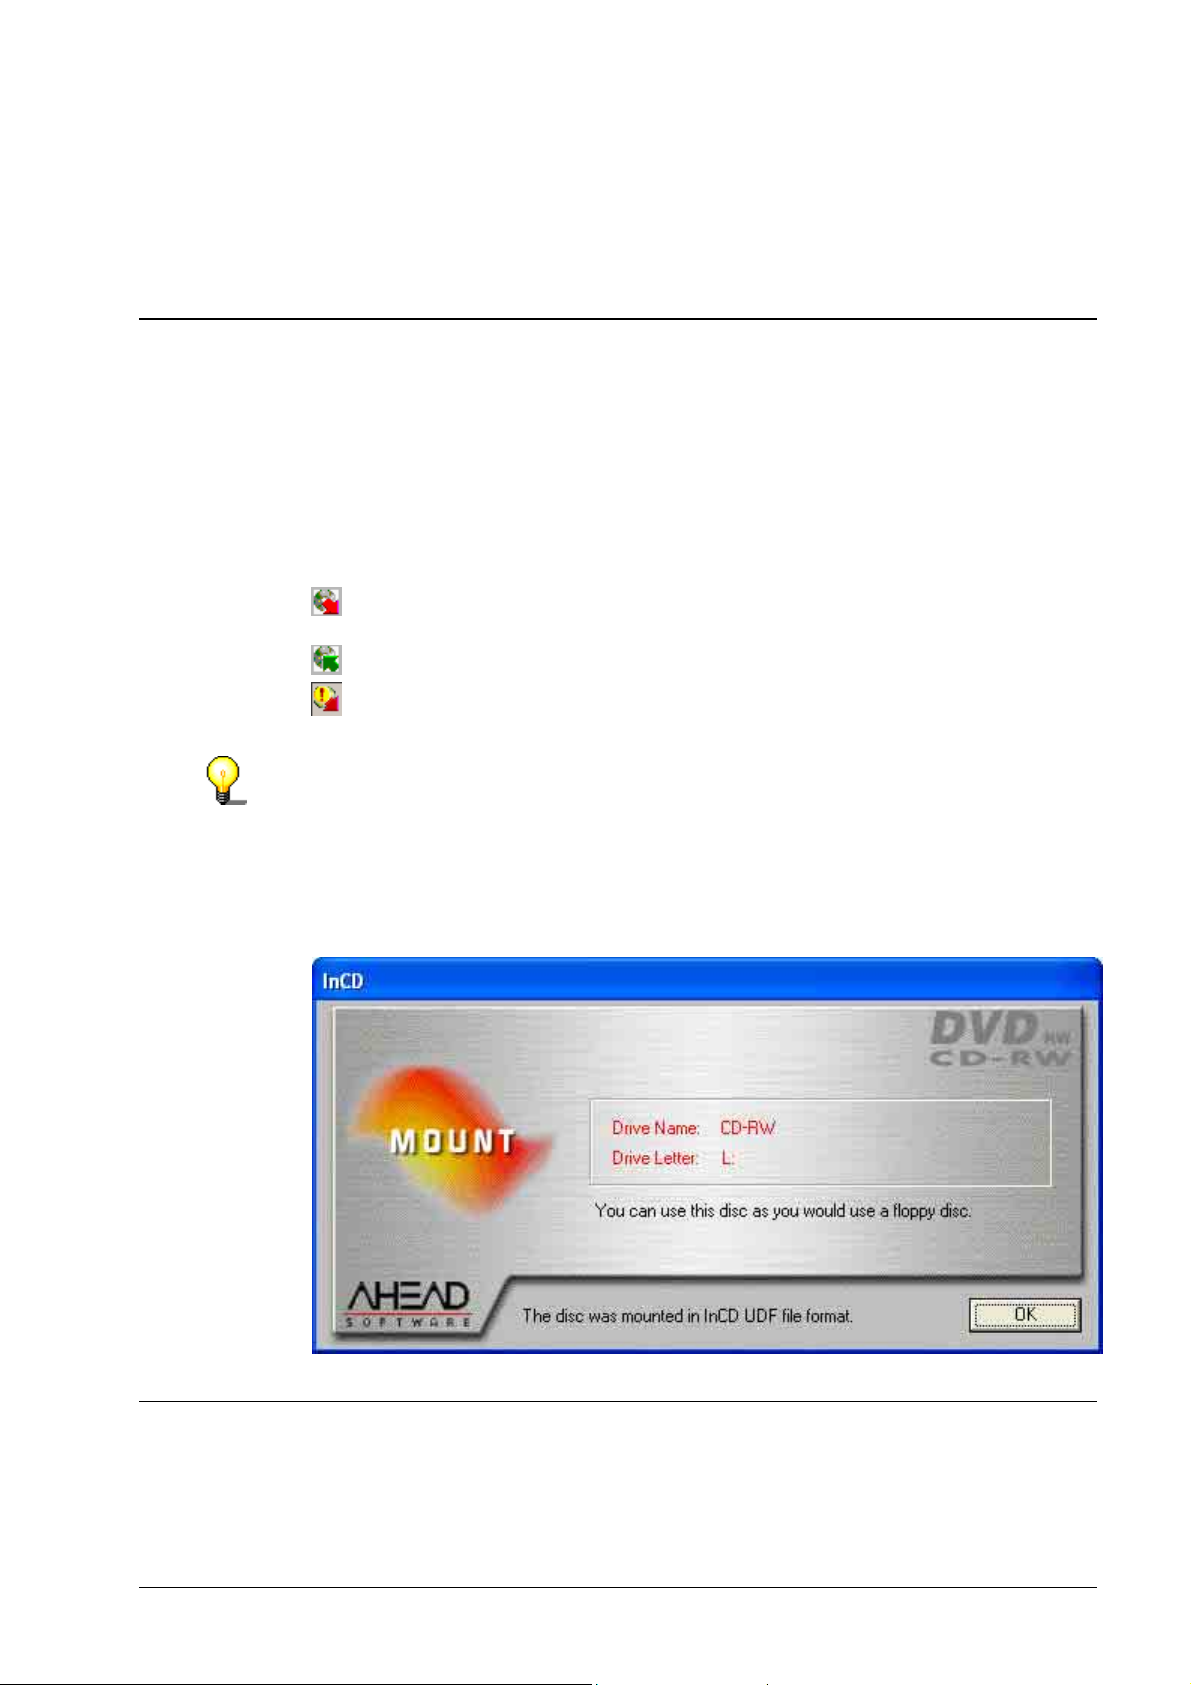
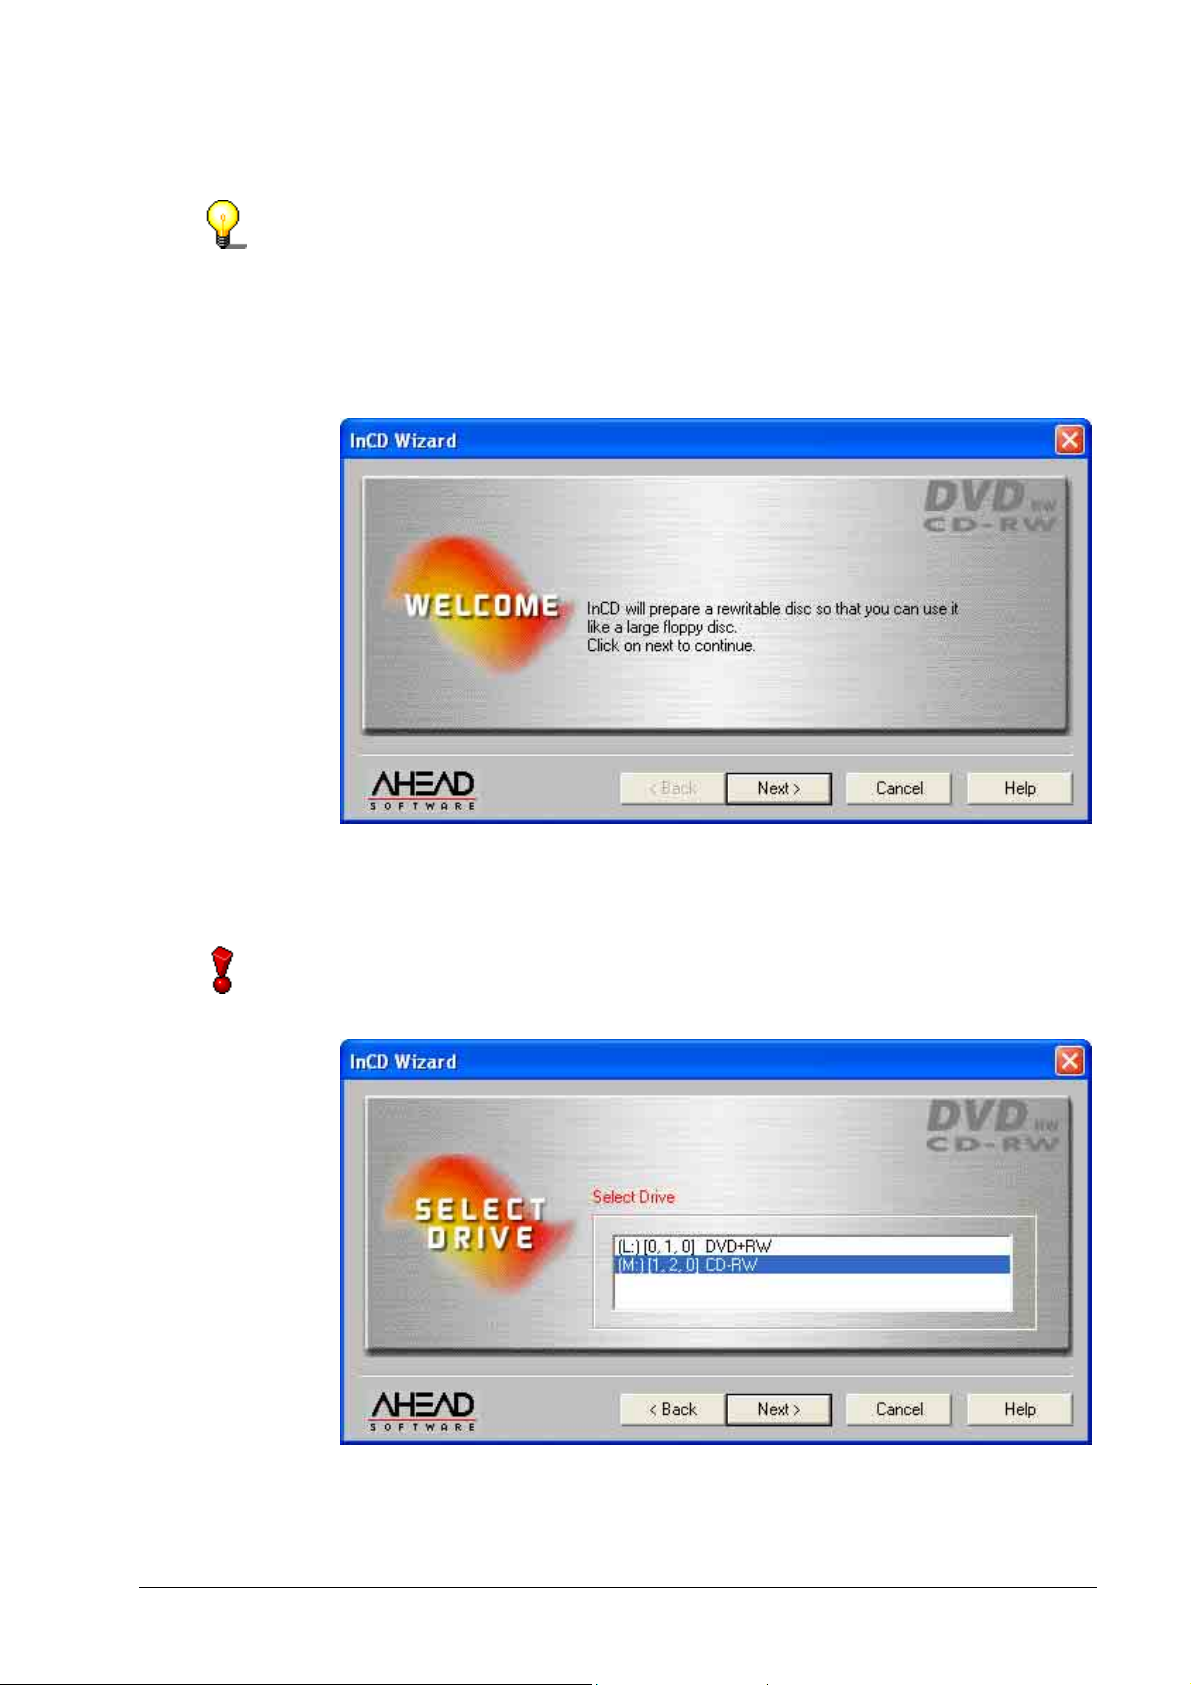
If a UDF-formatted disk is to be found in the drive during the boot process, a
InCD window will appear with the message that InCD has successfully mounted
the disk in the drive.
This message will only appears if the function for 'mounting messages' has not
been disabled. Section 'Options' explains how to disable the mounting
messages.
3.2 Inserting the medium
1. In the built-in recorder, click on the corresponding key. The tray will open.
2. Insert the medium into the disk drive.
3. In order to close the tray, click on the corresponding key in the recorder.
InCD Working with InCD • 14
Page 15

3.3 Formatting with InCD
InCD handles CD-RW, CD-MRW, DVD-RW and DVD+RW media in different
ways. Please refer to the table below for details and read the sections
concerned:
CD-RW With high speed media (burning speed 4 to 10x) the formatting and
reformatting will take about 20 minutes, and approx. 40 minutes with
low speed media (1 to 4x). See section 'Formatting CD-RW and
DVD-RW media'.
CD-MRW The medium can be written on after just 1 to 2 minutes of formatting,
in other words it is possible to store data on the medium while it is
being formatted 'in the background'. See section 'Formatting CDMRW media'.
DVD-RW Formatting and reforma tting take around 120 minutes. See section
'Formatting CD-RW and DVD-RW media'.
DVD+RW The medium can be written on after just 1 to 2 minutes of formatting,
in other words it is possible to store data on the medium while it is
being formatted 'in the background'. See section 'Formatting
DVD+RW media'.
Please note that no high speed medium (4 to 10x) can be used in a low speed
RW recorder (1 to 4x).
3.3.1 Formatting CD-RW and DVD-RW media
Before being used for the first time, a CD-RW or DVD-RW medium must be
formatted like a hard disk. The medium can be given a name; this name may
comprise at most 11 characters.
If you have also installed Nero and an unformatted medium is present in the
recorder when the computer is being booted, a window will appear in which you
will be able to choose the program to be started.
InCD Working with InCD • 15
Page 16
f
No other commands may be executed while the formatting process is taking
place.
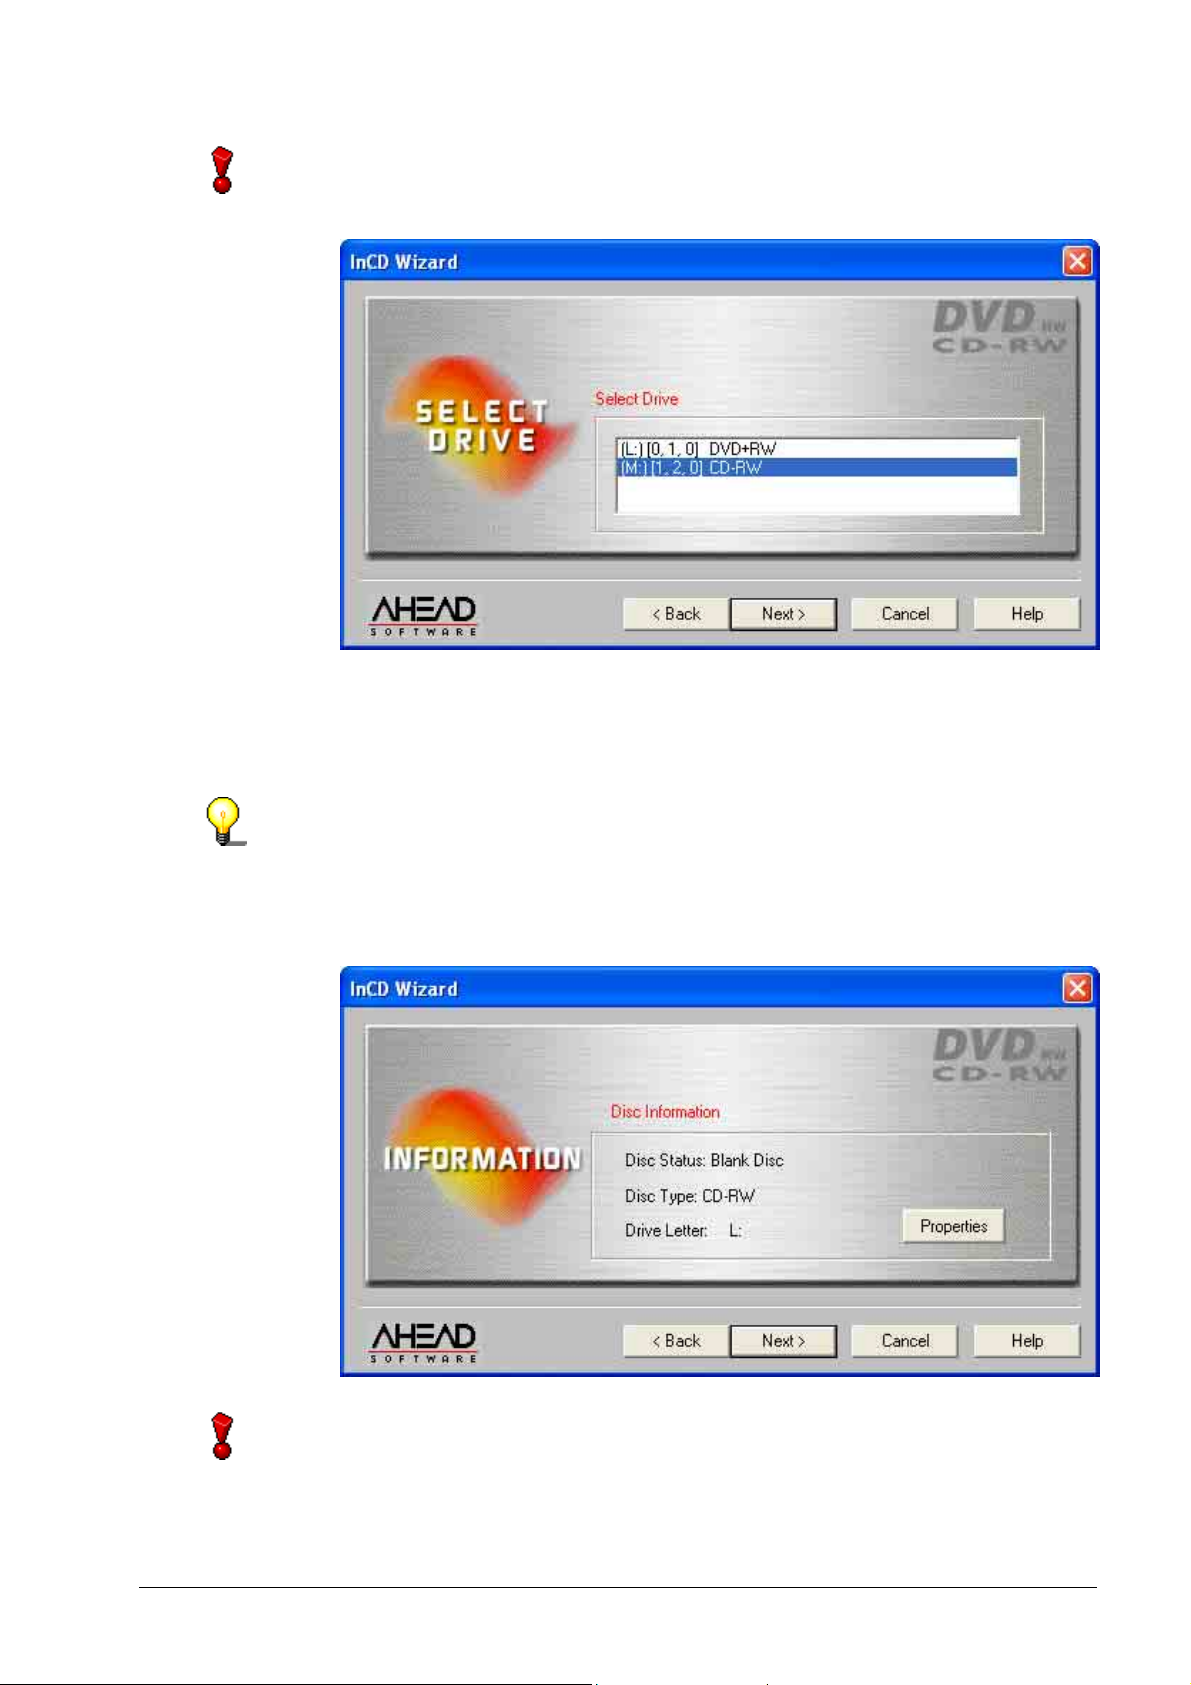
1. Insert a medium into the recorder.
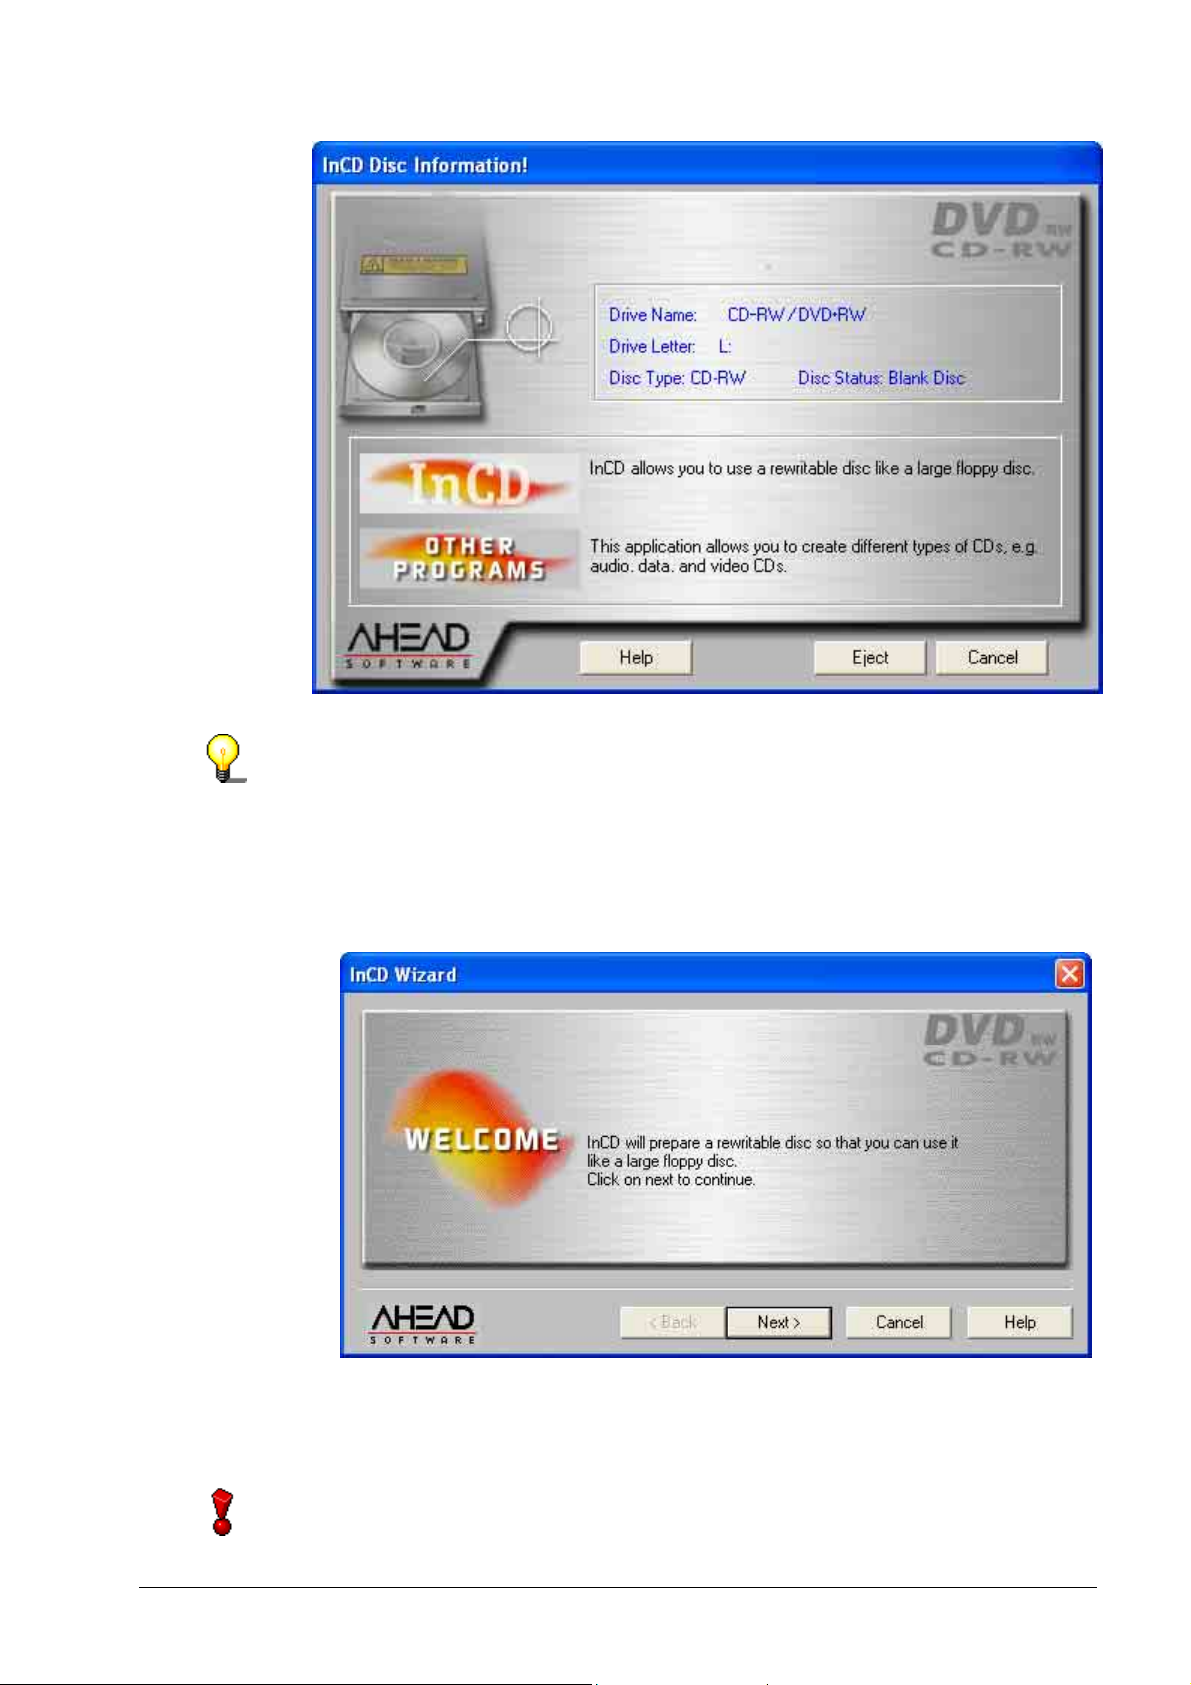
2. Using the right mouse button, click on the InCD icon in the System Tray and
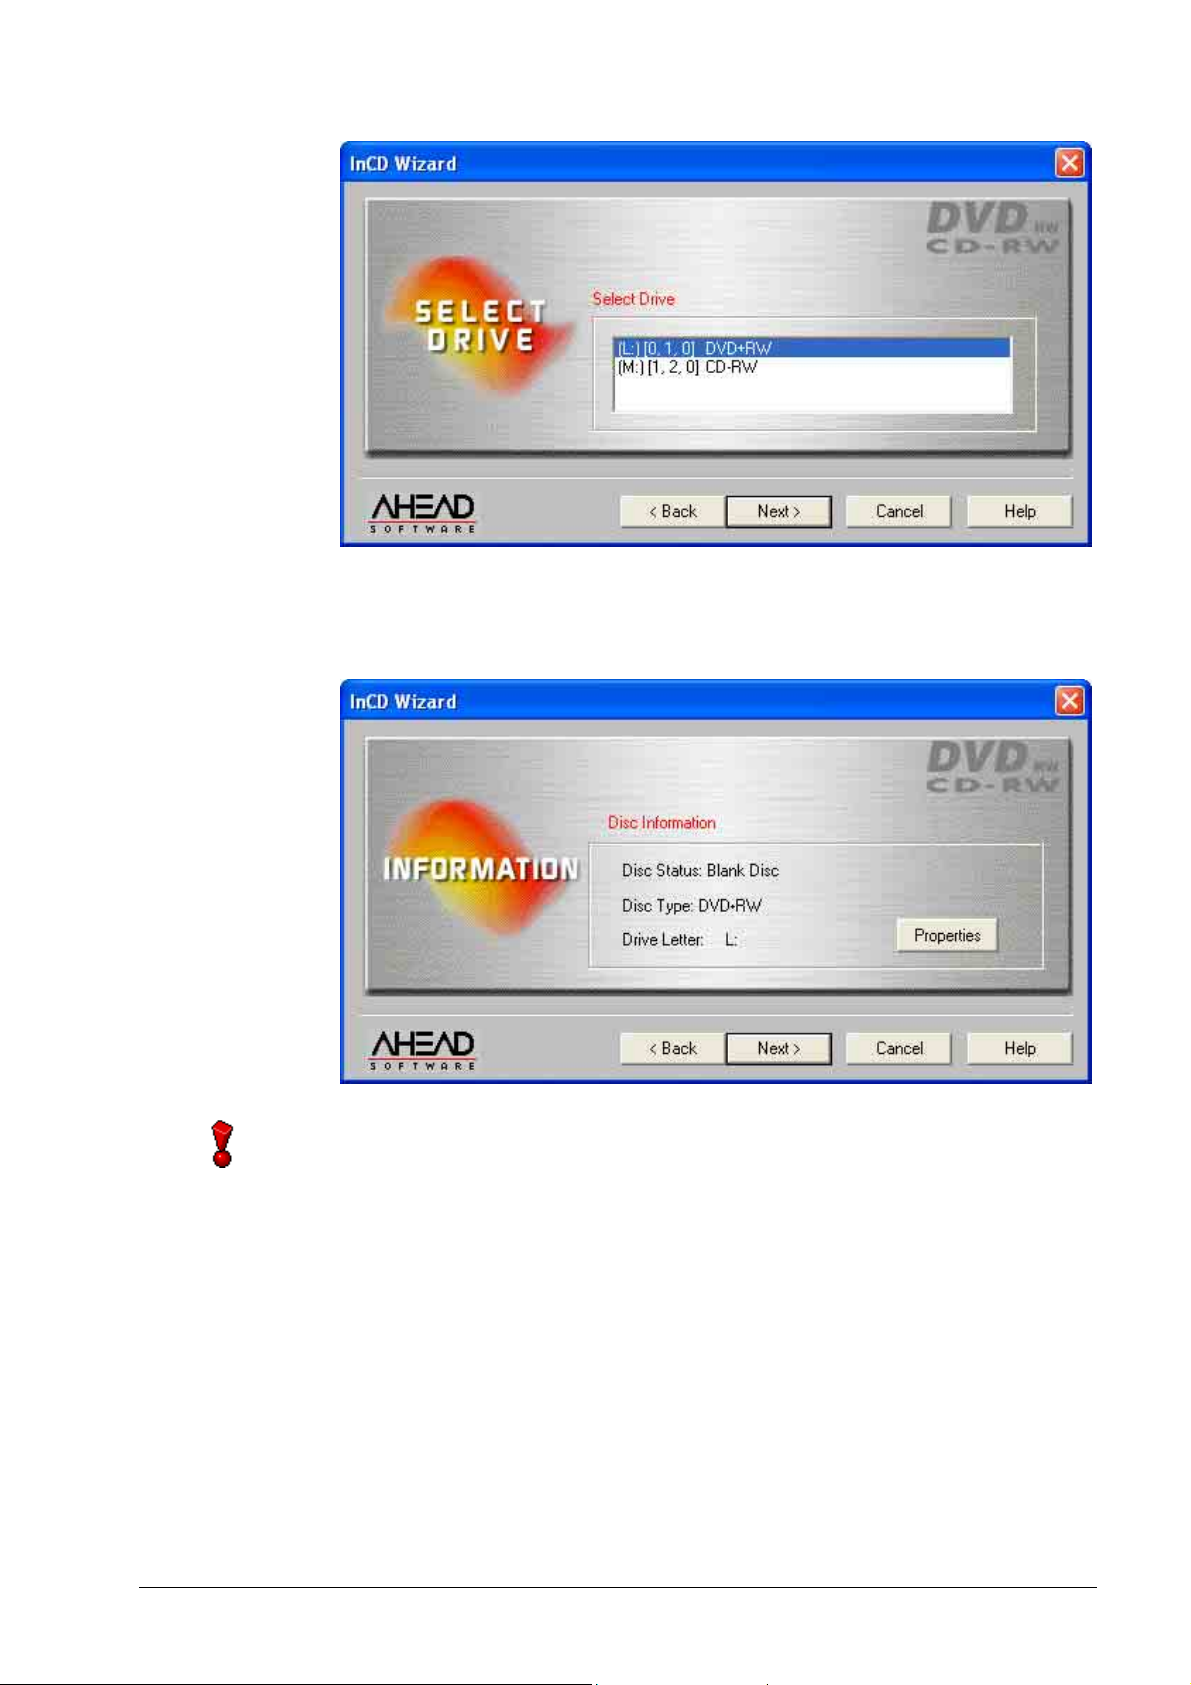
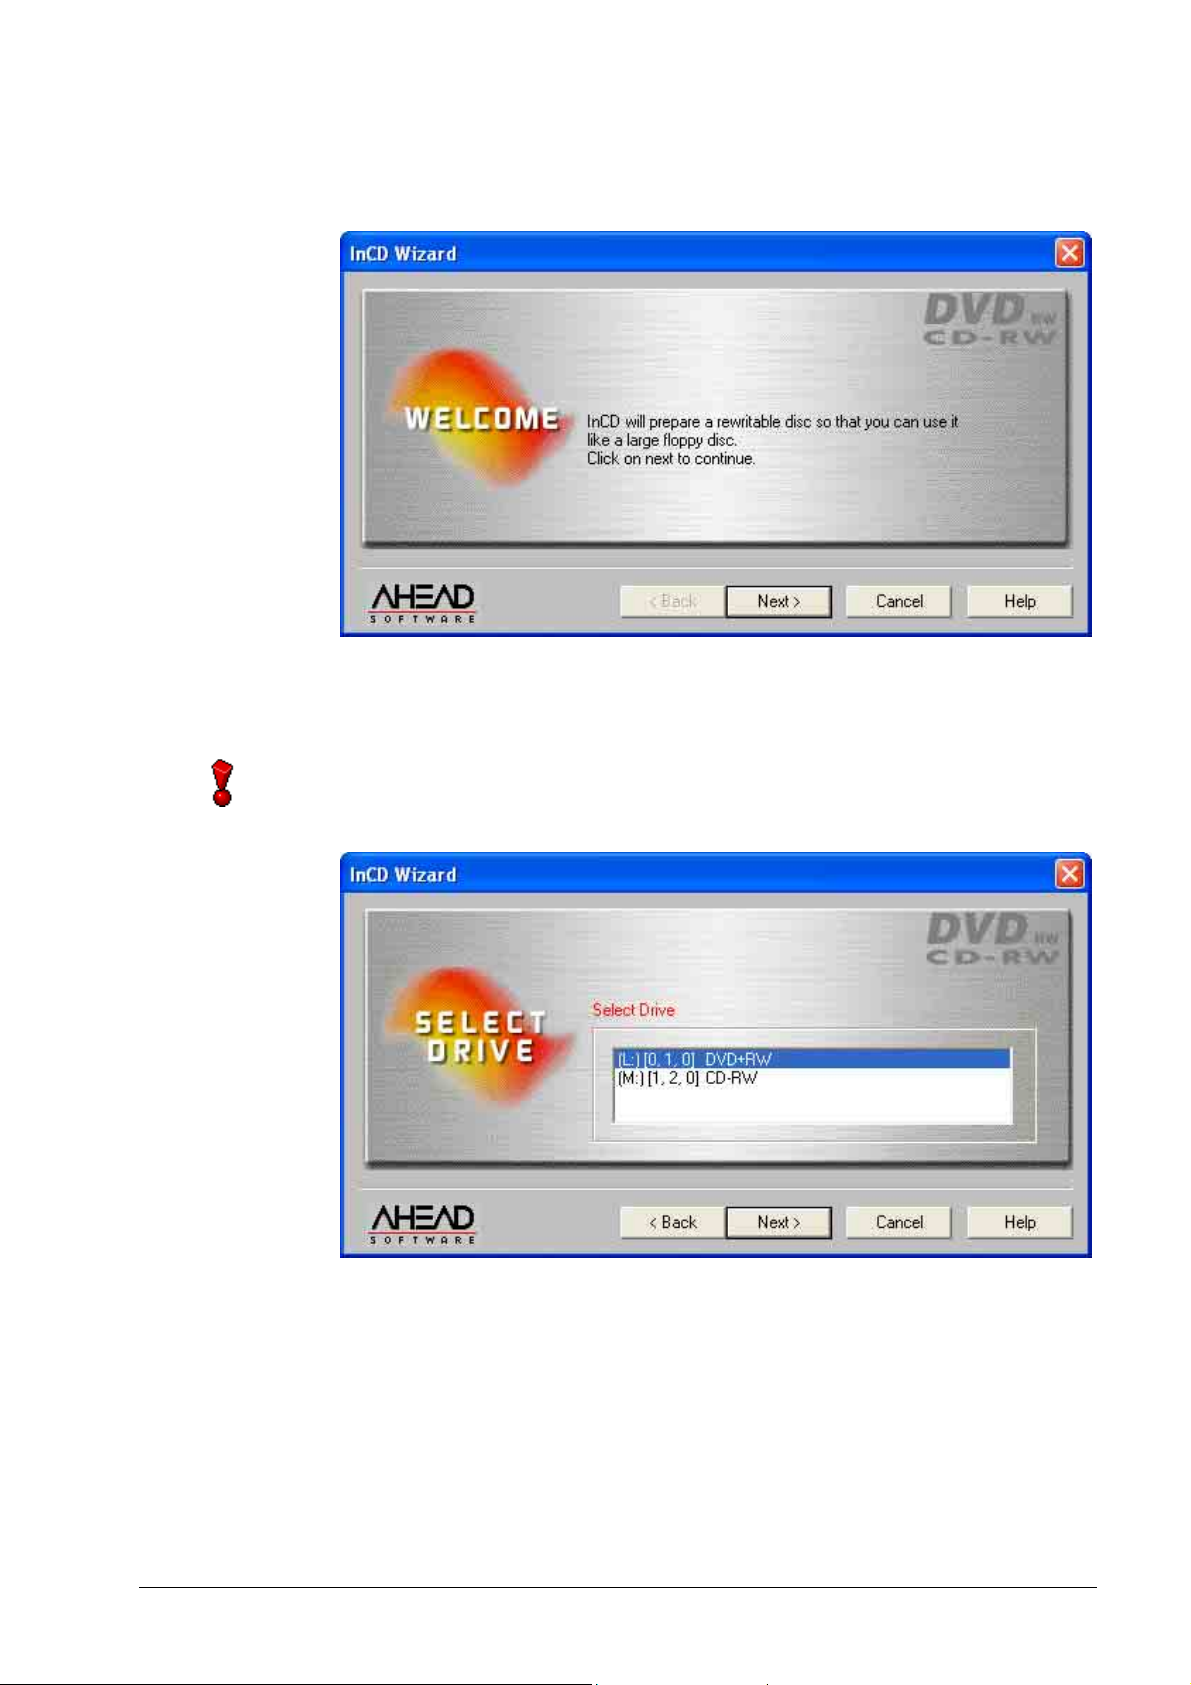
select the Format command. The formatting wizard will now open. Now click
on the Next button.
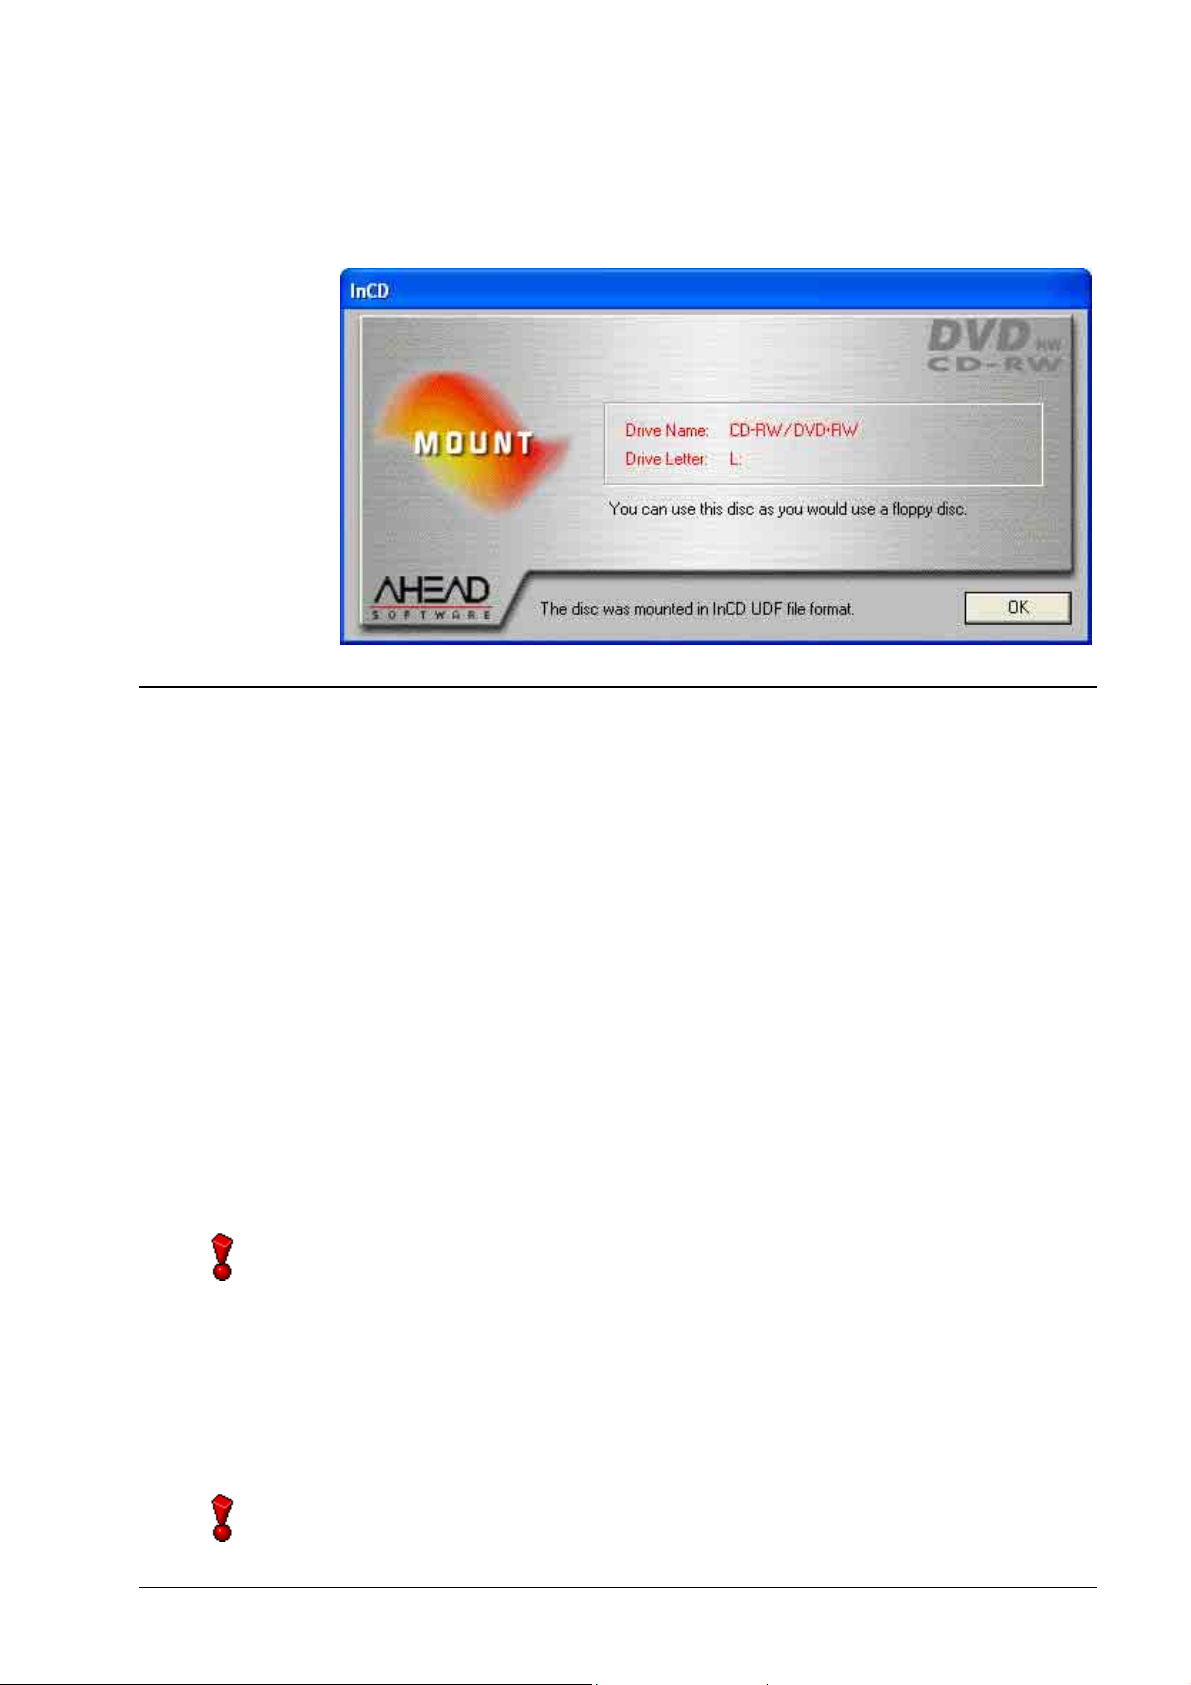
3. If only one recorder is installed, it will be highlighted automatically (if several
are installed, you can highlight the recorder of your choice). Now click on the
Next button.
In contrast to burning with Nero, it will not possible to write on a number o
recorders with InCD, and only one recorder can be selected.
InCD Working with InCD • 16
Page 17

r
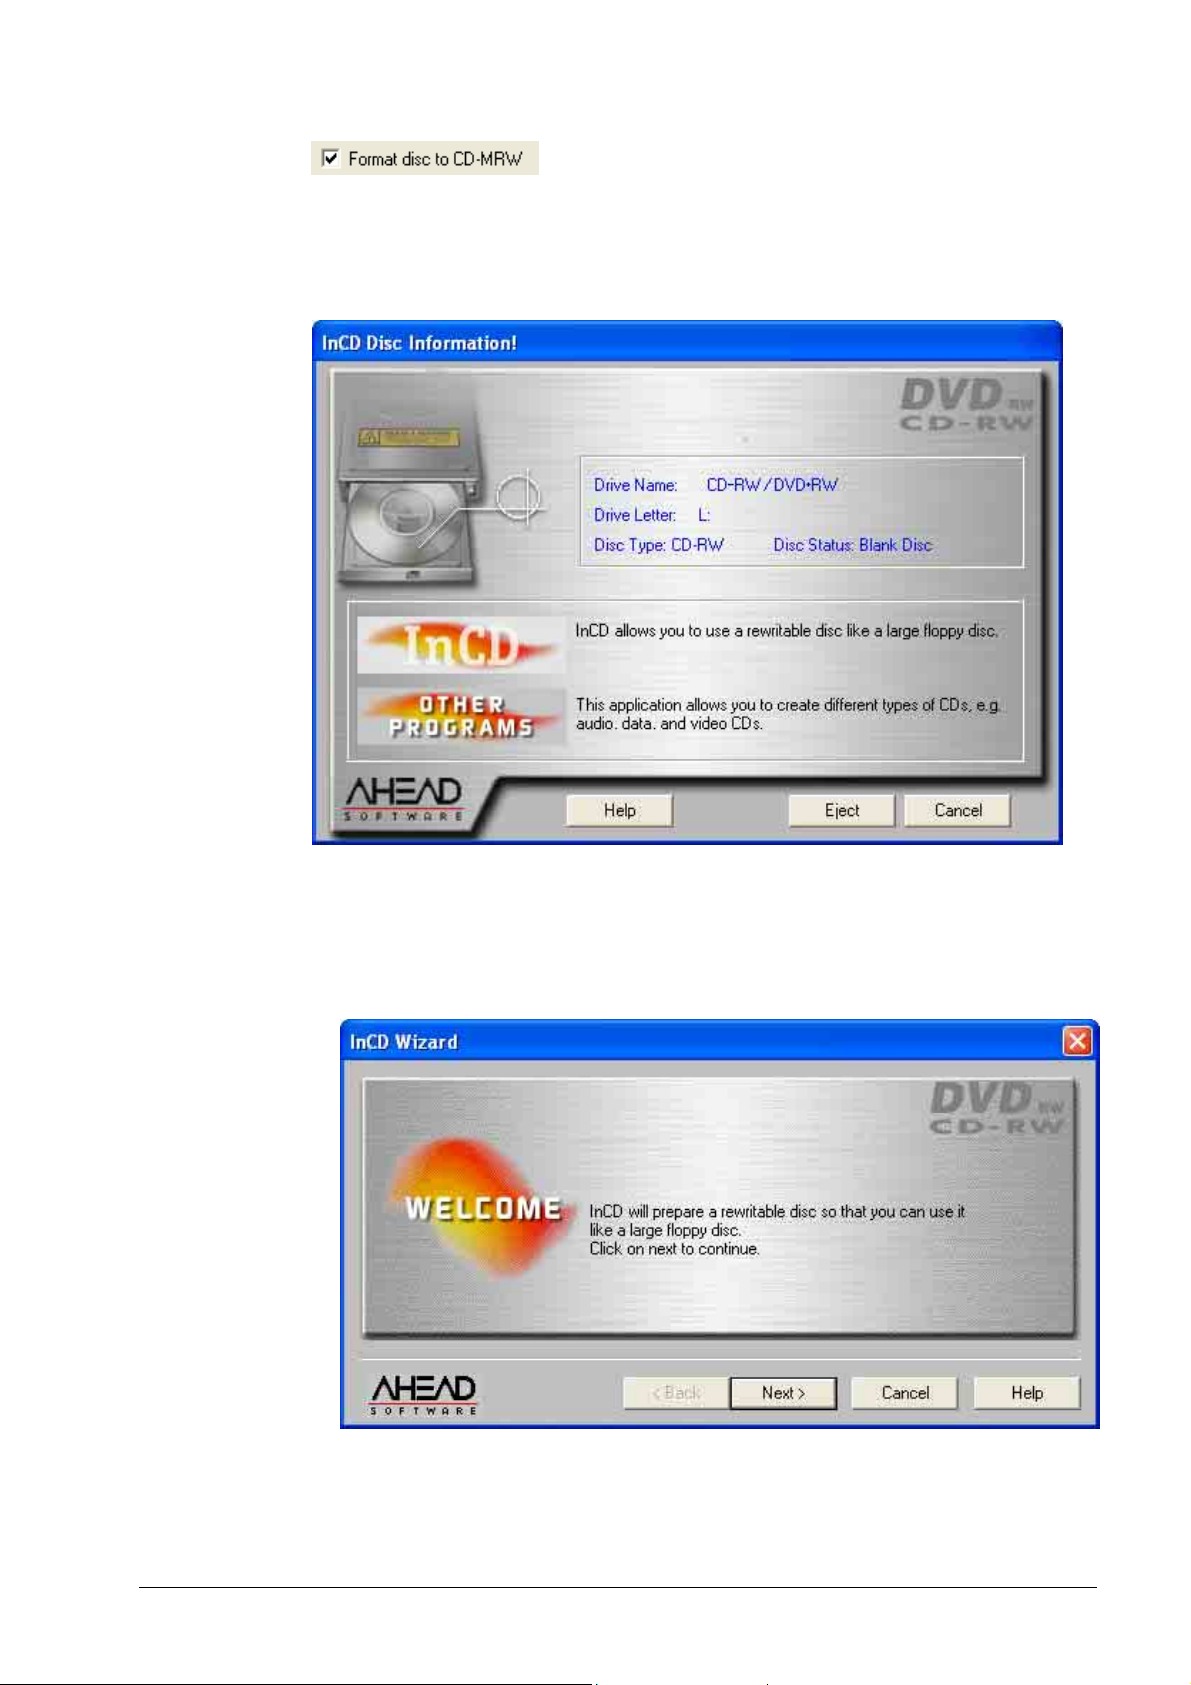
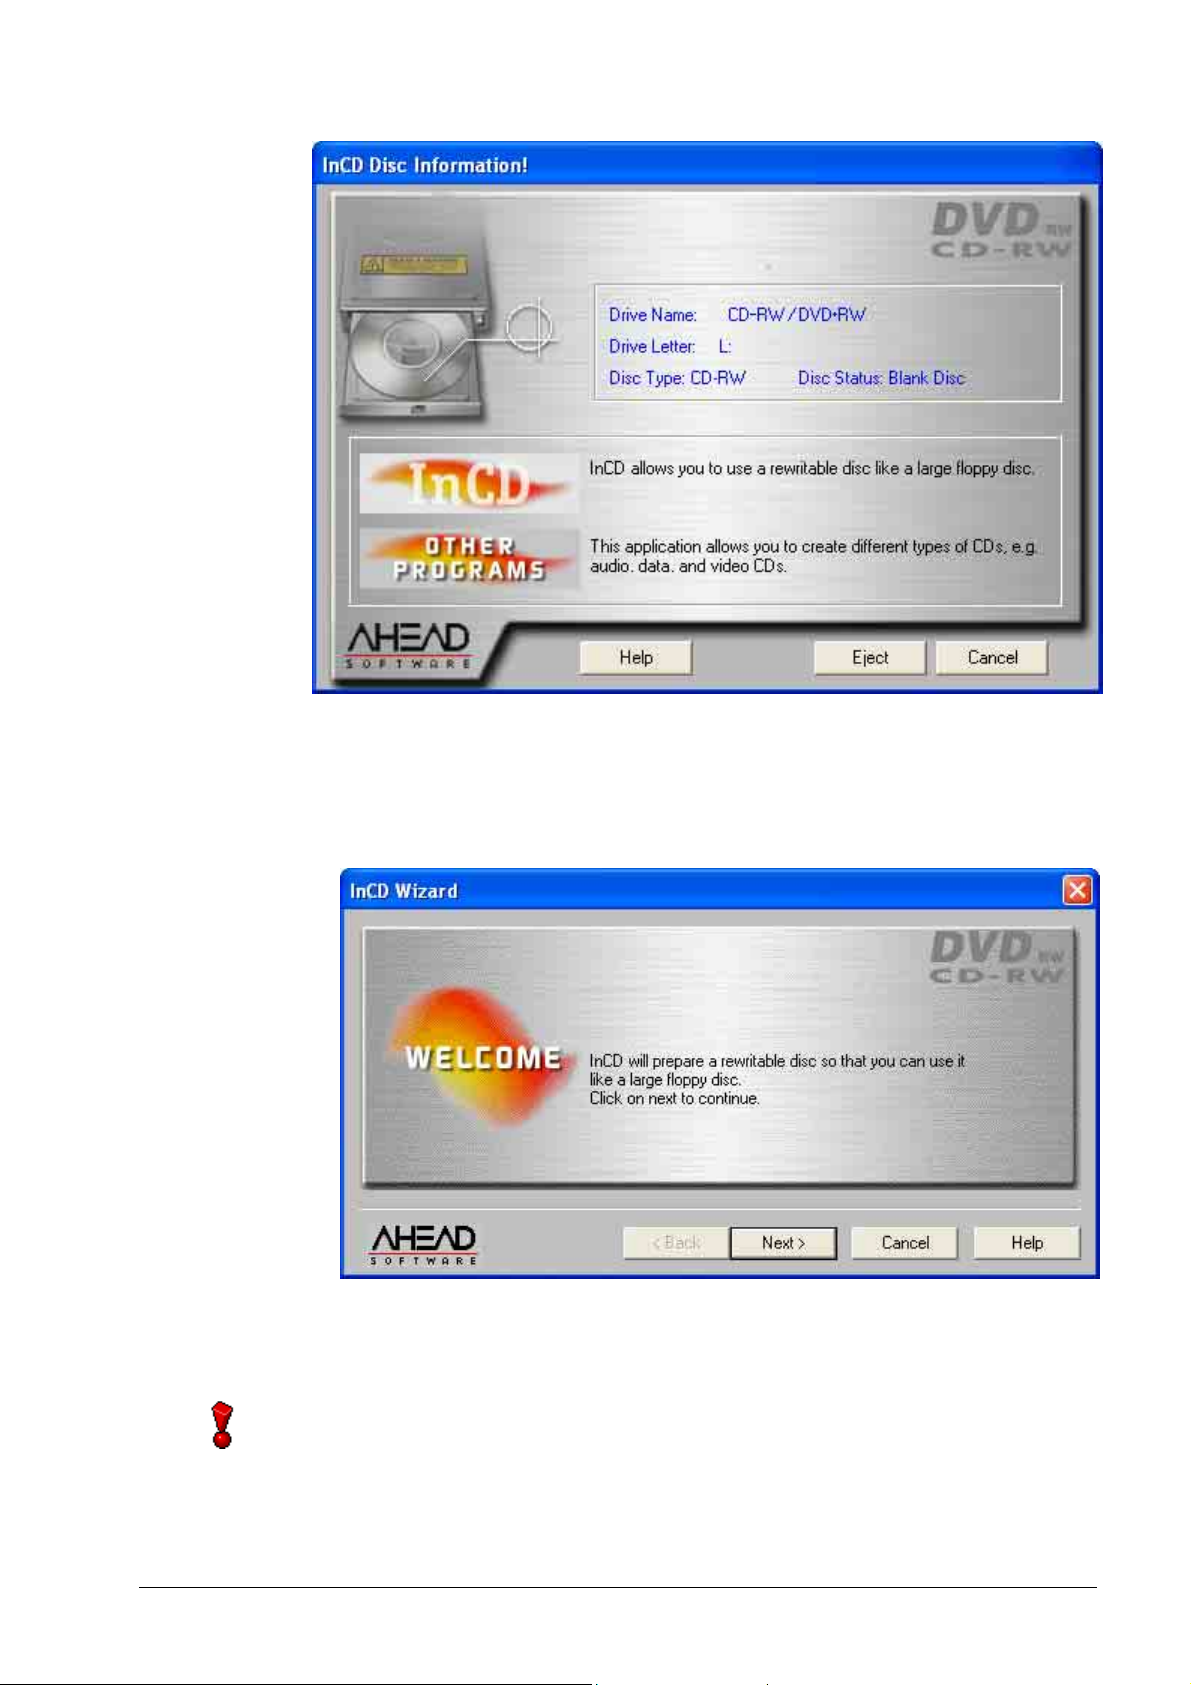
4. The window that appears provides information on the status of the medium;
an unformatted medium is designated as a 'blank disk'. The description of the
type of media concerned will change, depending of the medium inserted.
Click on Next.
Please check whether the 'Auto Insert Notification' option has been activated fo
your recorder, as otherwise a new medium will not be immediately recognized
following insertion.
In this case, leave the program wizard, wait until the recorder has ceased
accessing the drive and then repeat steps 2 to 4.
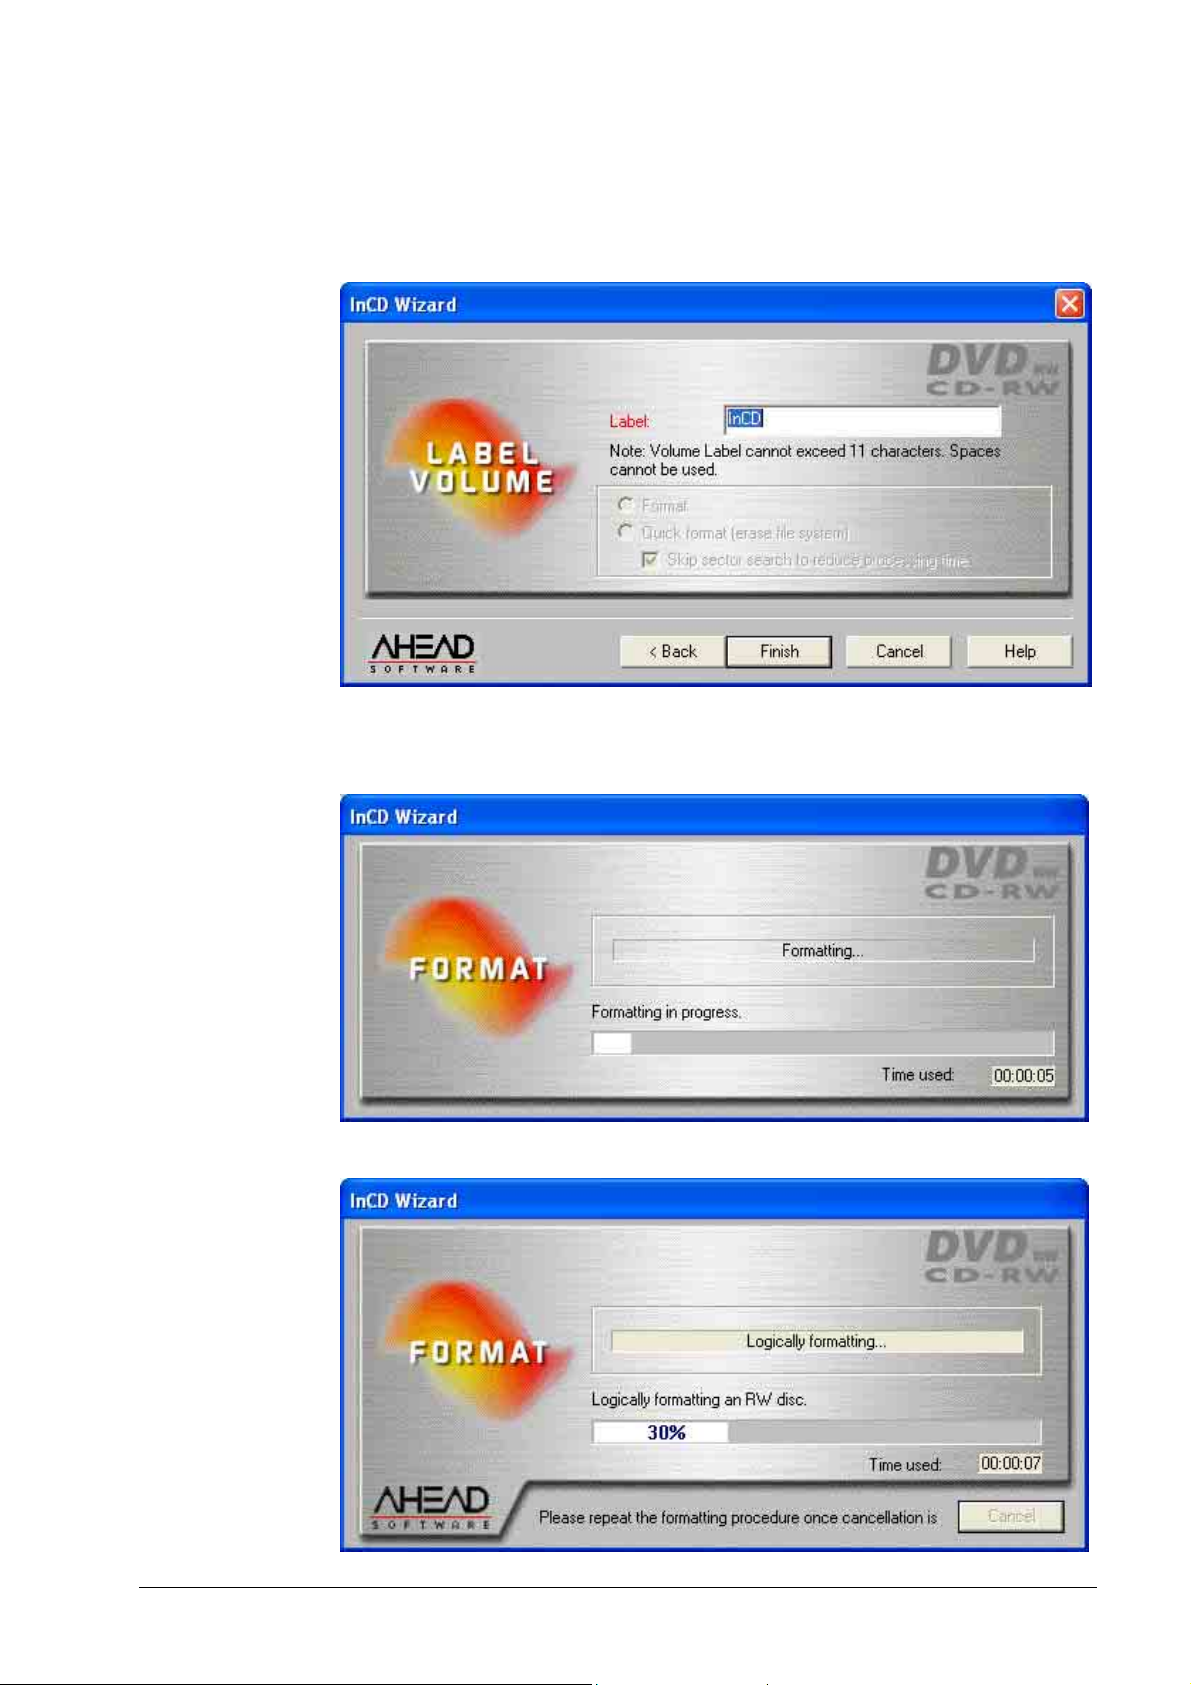
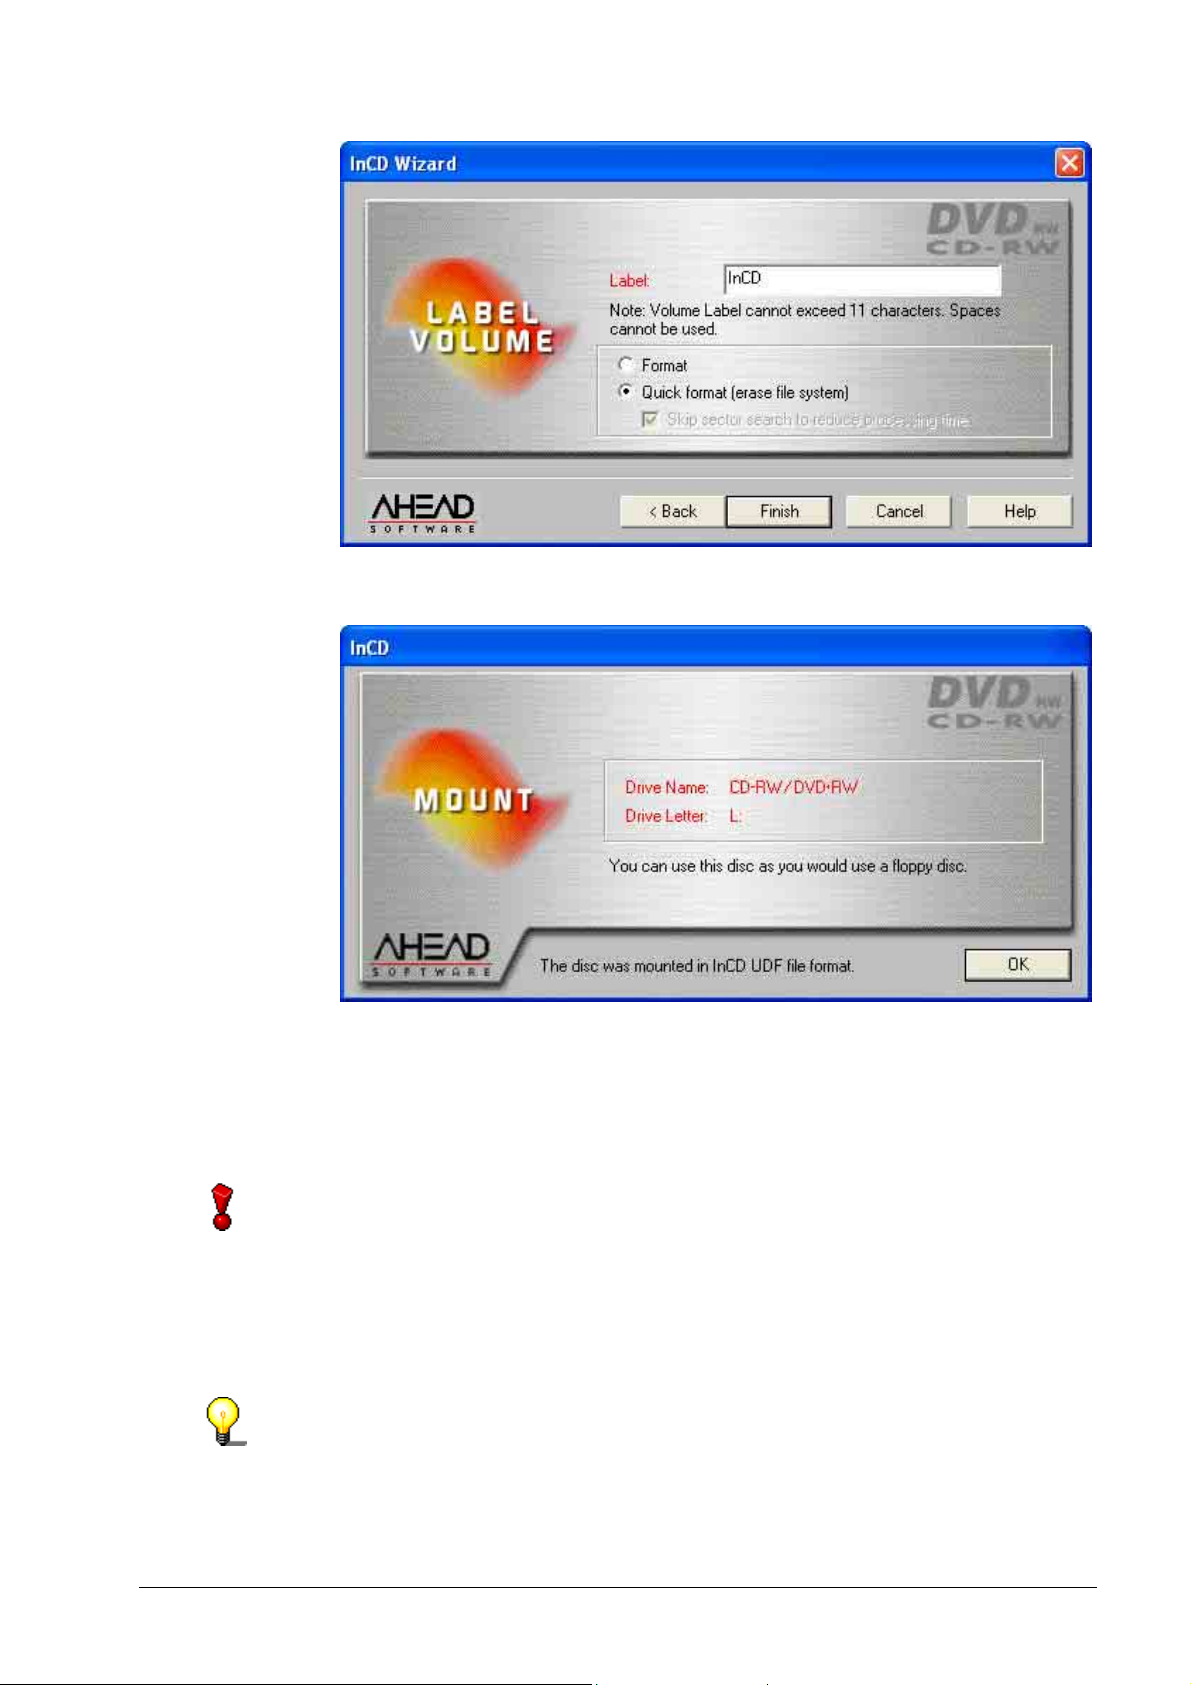
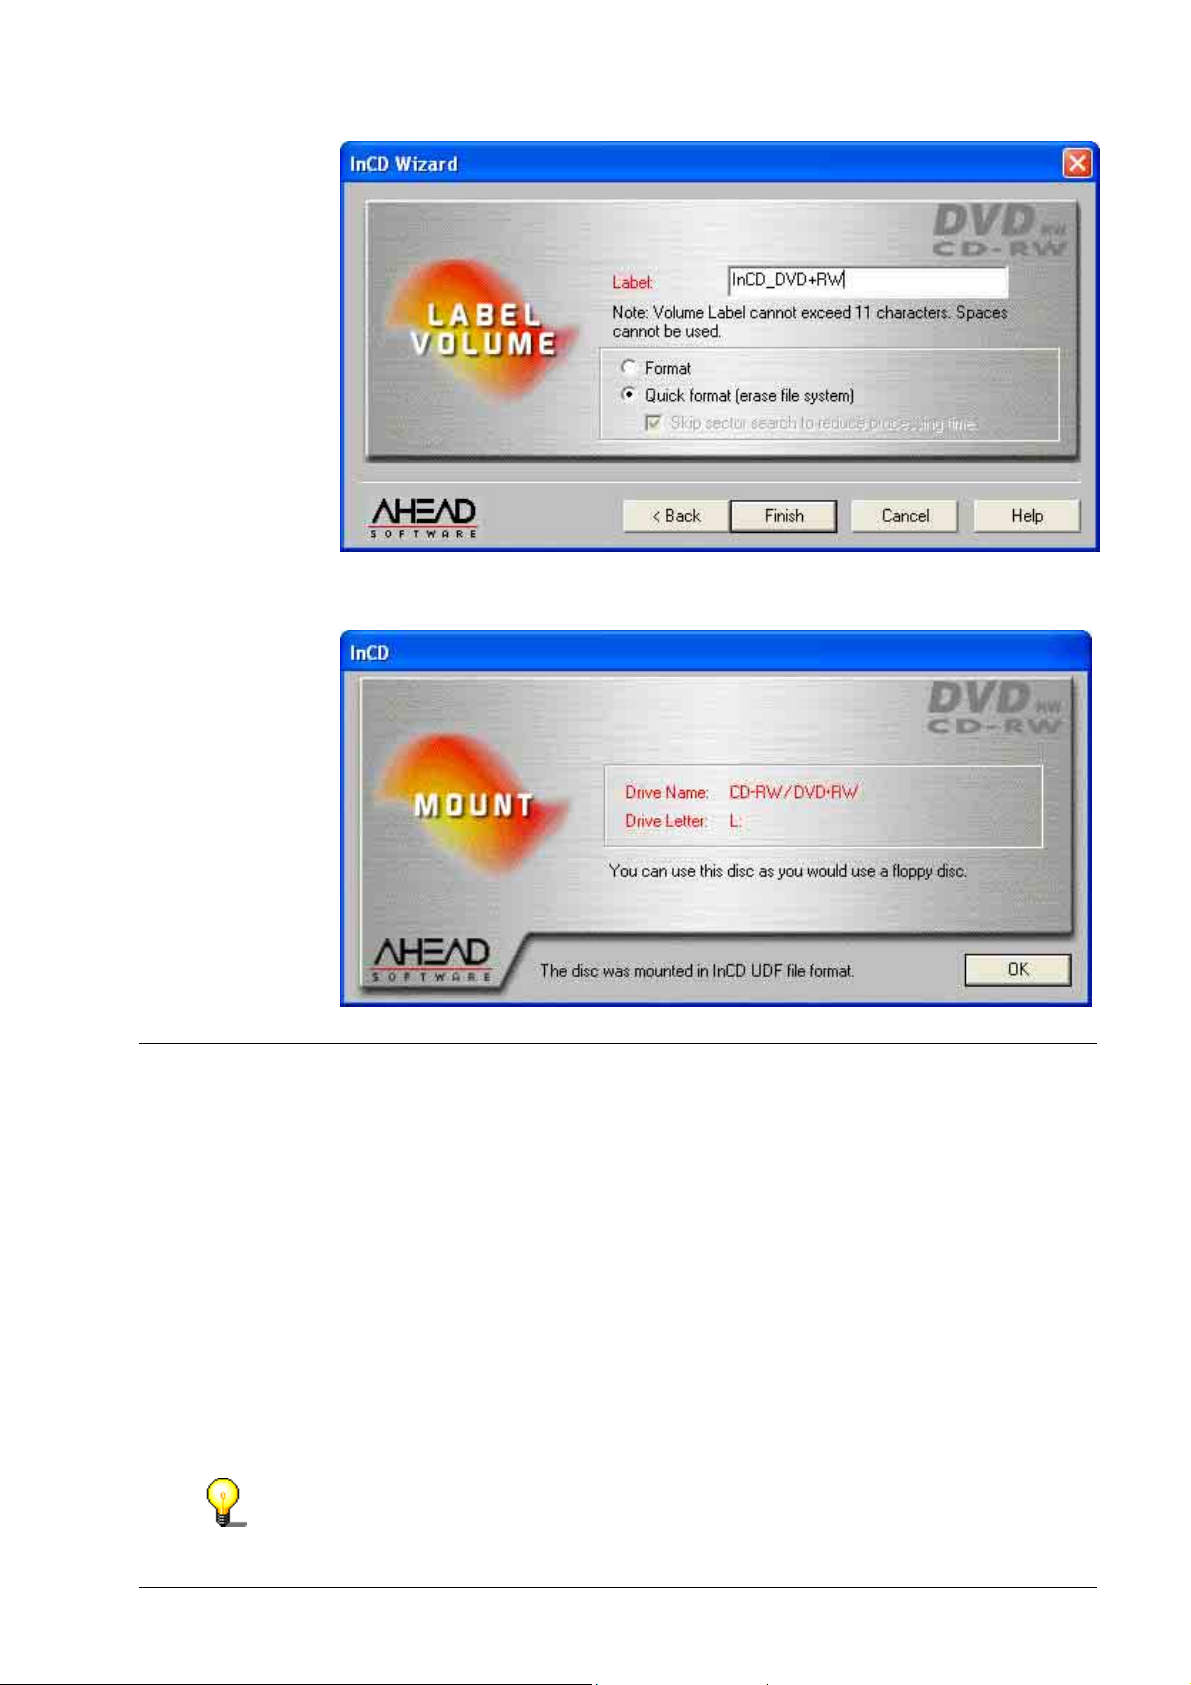
5. If you wish, you can now enter a label for the medium in the 'Label' field. The
volume label must not exceed 11 characters, with no blank spaces allowed
between any of the characters. Since an unformatted medium has been
inserted, the reformatting options are not active. Next, click on the Finish
button.
InCD Working with InCD • 17
Page 18
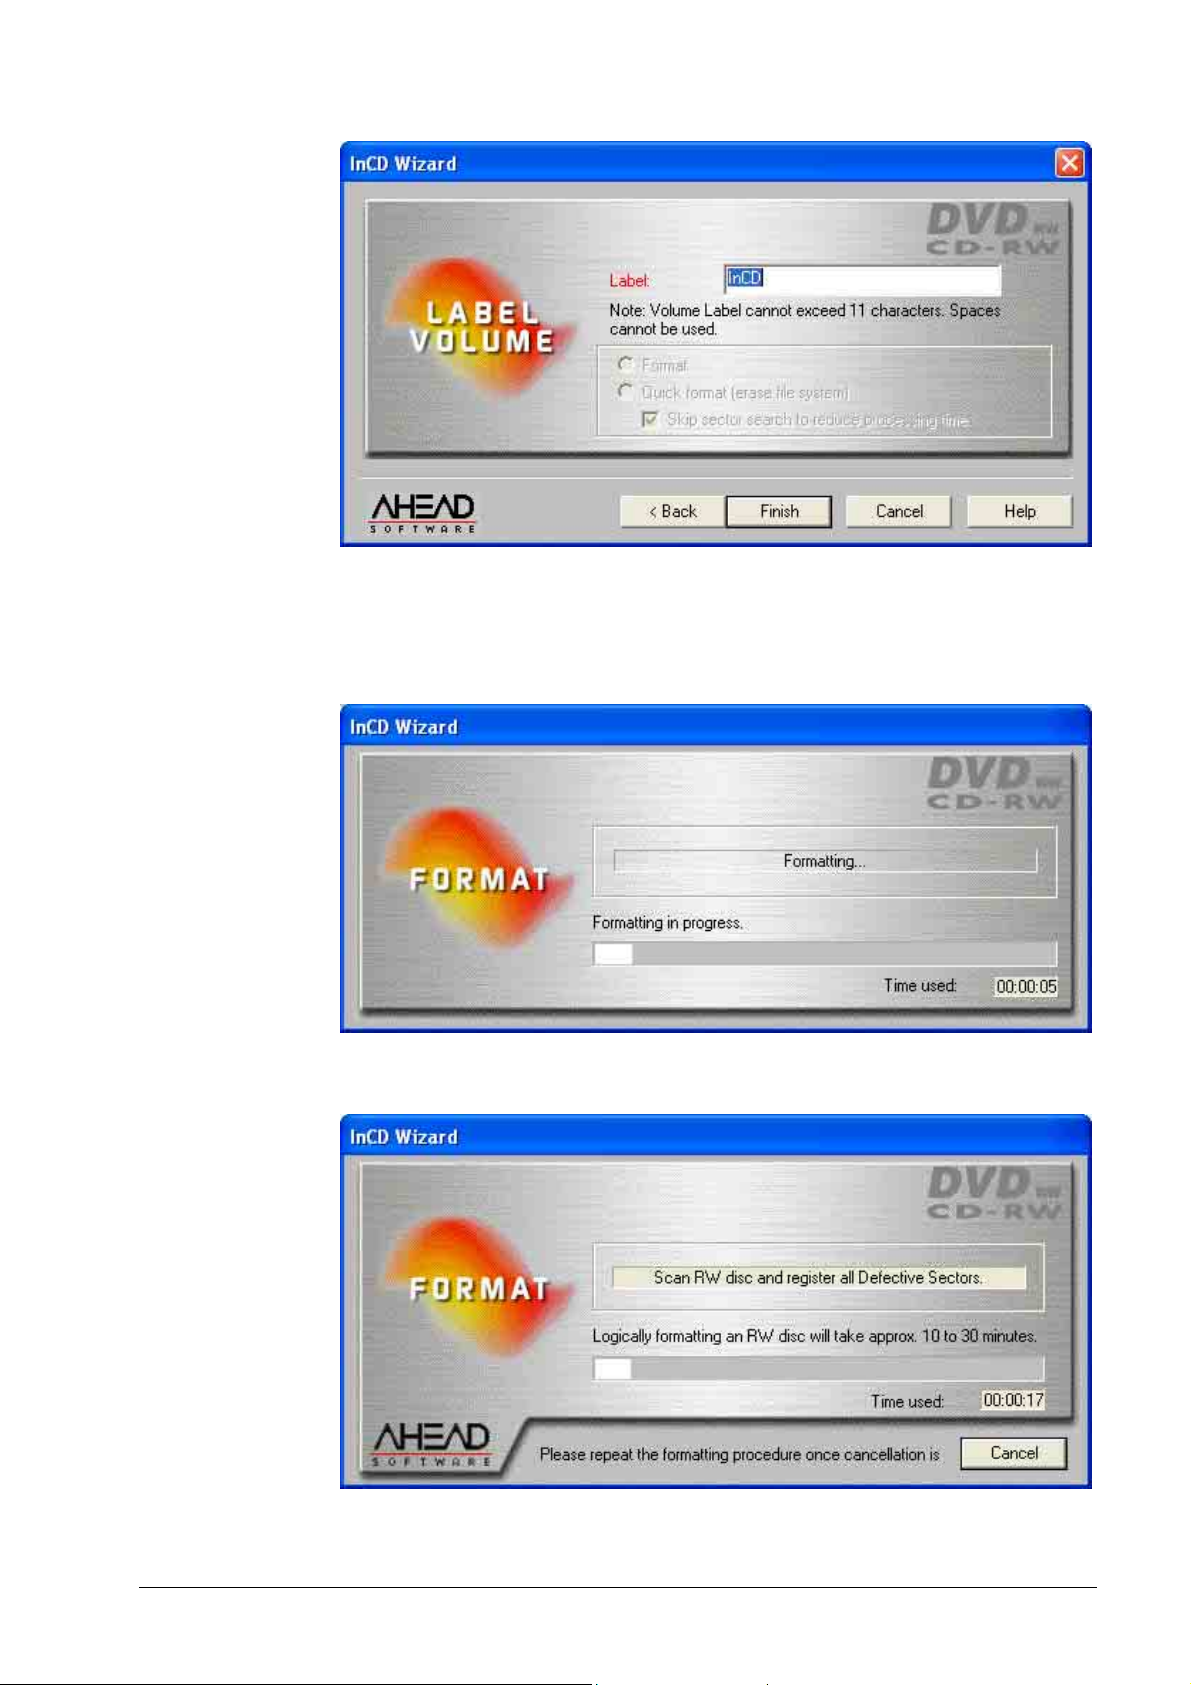
The formatting process is completed in two stages. The medium will be first
physically, then logically formatted.
Depending on the recorder and medium used, the physical formatting
process will take between 20 and 40 minutes for a CD-RW and 2 hours for a
DVD-RW.
The logical formatting process, which occurs later, will take between 10 and
30 minutes for a CD-RW and 120 minutes for a DVD-RW.
Once the formatting process has been completed, the tray will open and you
will able to remove the medium. After you have re-inserted the medium, the
InCD Working with InCD • 18
Page 19

InCD icon in the system tray will change and a green arrow (showing the
r
r
presence of a formatted medium in the drive) will be displayed instead of the
red one. In addition, a message will be displayed telling you that formatting
has been completed successfully.
To abort, click on the Cancel button. The logical formatting process will be
terminated. The medium will not be ready to write on. The tray will open and a
error message will appear.
3.3.2 Formatting CD-MRW media
Unlike CD-RW and DVD-RW media, CD-MRW media can be written on afte
InCD Working with InCD • 19
only about two minutes of formatting. The CD-MRW is not completely formatted
after this time - it is only formatted enough for it to be written on. Furthe
formatting is carried out 'in the background' when additional data is copied onto
the CD-MRW. It starts at the point where the previous formatting was brought to
a close.
It is only possible to write in the CD-MRW format using drives that support this
standard and if the 'Format Disk to CD-MRW' check box has been activated.
This check box is located on the 'InCD Page Settings' register card and is
activated as default.
Page 20
If you have also installed Nero and there is an unformatted medium in the
recorder when the computer is being booted, then a window will appear in which
you can choose the program to be started.
1. Insert a CD-RW disk into the recorder.
2. Using the right mouse button, click on the InCD icon in the System Tray and
select the Format command. The formatting wizard will now open. Now click
on the Next button.
3. If only one recorder is installed, it will be highlighted automatically (if several
are installed, you can highlight the recorder of your choice). Now click on the
Next button.
InCD Working with InCD • 20
Page 21
In contrast to burning with Nero, it is not possible to write on a number o
f
r
recorders with InCD, and only one recorder can be selected.
4. The window that appears provides information on the status of the medium;
an unformatted medium is designated as a 'Blank Disk'. The description of
the type of medium will change depending on the medium inserted. Click on
the Next button.
When you click on the Properties button, the appropriate command will be
executed; both related register cards will be opened. The 'Format Disk to CDMRW' check box is located on the 'InCD Page Settings' register card. This check
box is automatically activated with drives that support writing in CD-MRW format.
Please check this setting if you are not sure whether this is the case or not.
Please check whether the 'Auto Insert Notification' option has been activated fo
your recorder, as otherwise a new medium will not be immediately recognized
following insertion.
In this case, leave the program wizard, wait until the recorder has ceased
accessing the drive, and then repeat steps 2 to 4.
InCD Working with InCD • 21
Page 22
5. If you wish, you can now enter a label for the medium in the 'Label' field. The
volume label cannot exceed 11 characters, with no blank spaces allowed
between any of the characters. Since an unformatted medium has been
inserted, the reformatting options will not be activated. Then, click on the
Finish button.
The formatting process is completed in two stages. The medium will be first
physically, then logically formatted. Depending on the recorder used, the
physical formatting process will take about 2 minutes for a DVD+RW.
The logical formatting process, which occurs later, will take about 1 minute.
InCD Working with InCD • 22
Page 23

Once the formatting process has been completed, the tray will open and you
r
will be able to remove the medium. After you have re-inserted the medium,
the InCD icon in the system tray will change and a green arrow (showing the
presence of a formatted medium in the drive) will be displayed instead of the
red one. In addition, a window will be displayed, telling you that formatting
has been completed successfully.
3.3.3 Formatting DVD+RW media
Unlike CD-RW and DVD-RW media, DVD+RW media can be written on afte
only about three minutes of formatting. The DVD+RW is not completely
formatted after this time - it is only formatted enough for it to be written on.
Further formatting is carried out 'in the background' when additional data is
copied onto the DVD+RW. It starts at the point where the previous formatting
was brought to a close.
If you have also installed Nero and there is an unformatted medium in the
recorder when the computer is being booted, then a window will appear in which
you can choose the program to be started.
InCD Working with InCD • 23
Page 24
f
1. Insert a DVD+RW disk into the recorder.
2. Using the right mouse button, click on the InCD icon in the System Tray and
select the Format command. The formatting wizard will now open. Now click
on the Next button.
3. If only one recorder is installed, it will be highlighted automatically (if several
are installed, you can highlight the recorder of your choice). Now click on the
Next button.
In contrast to burning with Nero, it is not possible to write on a number o
recorders with InCD, and only one recorder can be selected.
InCD Working with InCD • 24
Page 25
r
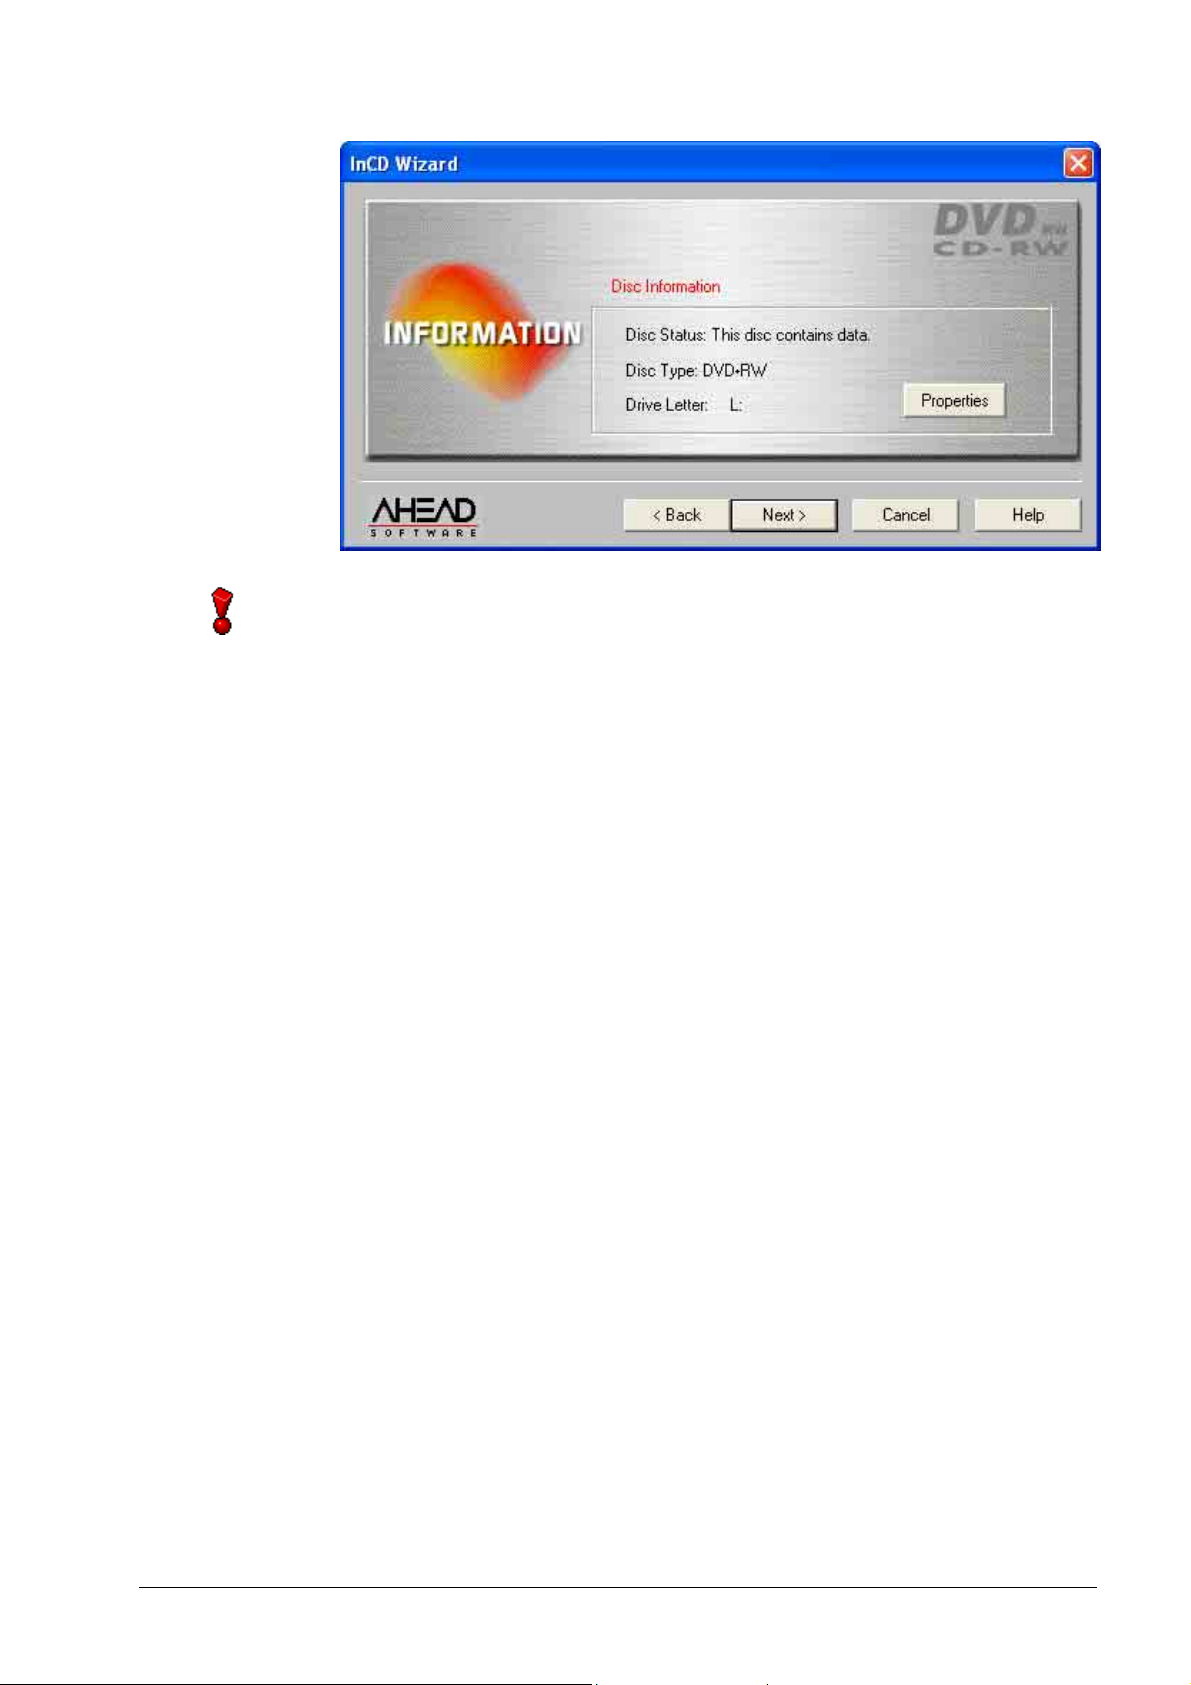
4. The window that appears provides information on the status of the medium;
an unformatted medium is designated as a 'Blank Disk'. The description of
the type of medium will change depending on the medium inserted. Click on
the Next button.
Please check whether the 'Auto Insert Notification' option has been activated fo
your recorder, as otherwise a new medium will not be immediately recognized
following insertion.
In this case, leave the program wizard, wait until the recorder has ceased
accessing the drive, and then repeat steps 2 to 4.
5. If you wish, you can now enter a label for the medium in the 'Label' field. The
volume label cannot exceed 11 characters, with no blank spaces allowed
between any of the characters. Since an unformatted medium has been
inserted, the reformatting options will not be activated. Then, click on the
Finish button.
InCD Working with InCD • 25
Page 26

The formatting process is completed in two stages. The medium will be first
physically, then logically formatted.
Depending on the recorder used, the physical formatting process will take
about 2 minutes for a DVD+RW.
The logical formatting process, which occurs later, will take about 1 minute.
Once the formatting process has been completed, the tray will open and you
will be able to remove the medium. After you have re-inserted the medium,
InCD Working with InCD • 26
Page 27
the InCD icon in the system tray will change and a green arrow (showing the
presence of a formatted medium in the drive) will be displayed instead of the
red one. In addition, a window will be displayed, telling you that formatting
has been completed successfully.
3.4 Reformatting with InCD
InCD handles CD-RW, CD-MRW, DVD-RW and DVD+RW disks in different
ways. Please refer to the table below for details and read the section concerned:
CD-RW With high speed media (burning speed 4 to 10x), reformatting takes
about 20
40 minutes is necessary. See the section on 'Reformatting CD-RW
and DVD-RW media'.
CD-MRW The medium can be written on after just 1 to 2 minutes of reformat-
ting. In other words, it is possible to store data on the medium while
it is being formatted 'in the background'. See 'Reformatting a CDMRW medium' section.
DVD-RW Reformatting takes about 120
'Reformatting CD-RW and DVD-RW media'.
DVD+RW The medium can be written on after just 1 to 2 minutes of reformat-
ting. In other words, it is possible to store data on the medium while
it is being formatted 'in the background'. See the 'Reformatting a
DVD+RW medium' section.
Please note that no high speed medium (4 to 10x) can be used in a low speed
RW recorder (1 to 4x).
minutes. With low speed media (1 to 4x), a period of about
minutes. See the section on
3.4.1 Reformatting CD-RW and DVD-RW media
If a medium which already contains data is formatted, then the data already
contained on it will be erased so that you will be able to write on the whole
medium again.
If a medium has been written on a number of occasions, under certain
InCD Working with InCD • 27
circumstances there may be a breakdown during the reformatting process, due
to errors. In this case we recommend that you delete the data on the medium
Page 28

with Nero.
r
f
In the Recorder menu select the Erase ReWritable command and choose
'Full-erase rewritable media' as deletion method. Depending on the recorde
and medium, the deletion process will take between 10 and 20 minutes.
No other commands may be executed while the formatting process is taking
place.
1. Insert a medium which has been written upon into the recorder.
2. Using the right mouse button, click on the InCD icon in the System Tray and
select the Format command. The formatting wizard will now open. Now click
on the Next button.
3. If only one recorder is installed, it will be highlighted automatically (if several
are installed, you will be able to highlight the recorder of your choice). Now
click on the Next button.
In contrast to burning with Nero, it is not possible to write on a number o
recorders with InCD, and only one recorder can be selected.
InCD Working with InCD • 28
Page 29

4. Click on the Next button to begin the formatting process. If data is already
r
r
stored on the medium, the phrase 'This disk contains data' will appear in the
information box.
Please check whether the 'Auto Insert Notification' option has been activated fo
your recorder, as otherwise a new medium will not be immediately recognized
following insertion.
In this case, leave the program wizard, and wait until the recorder has ceased
accessing the drive. Then repeat steps 2 through 4.
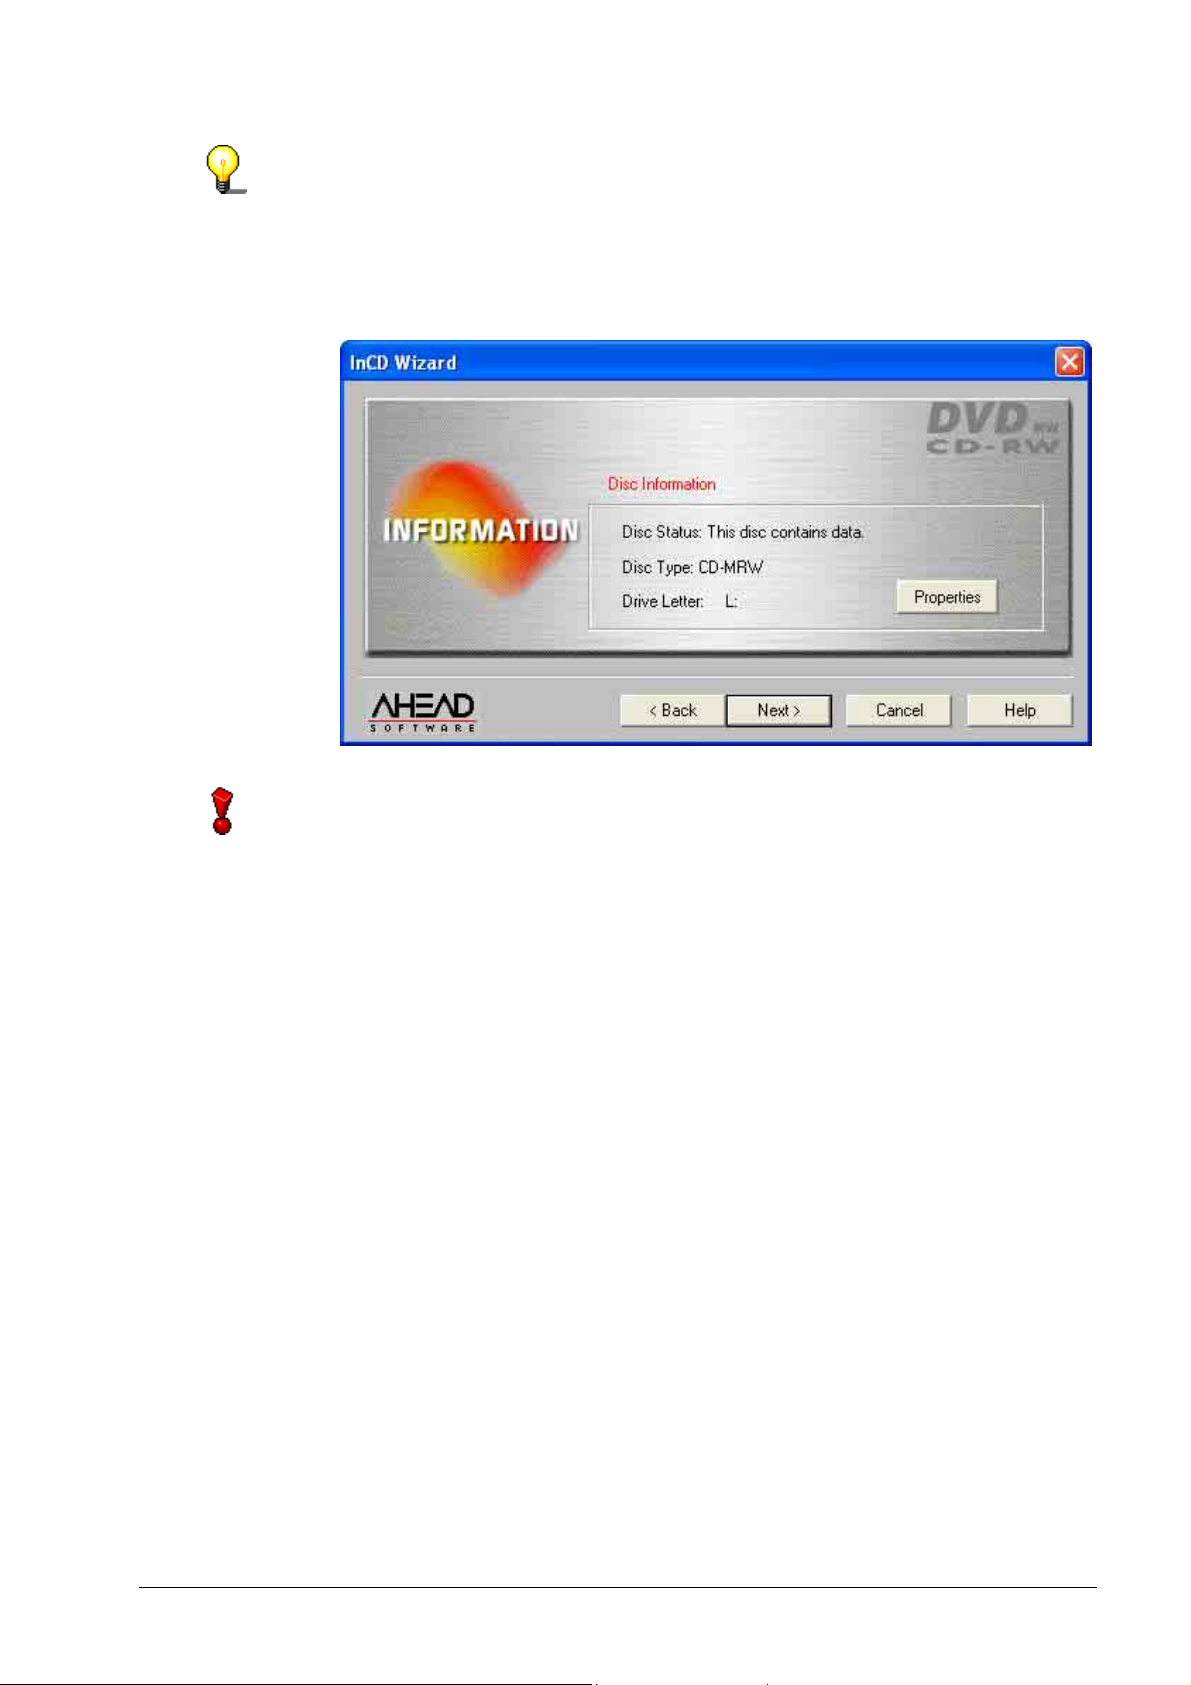
5. The window that appears provides information on the status of the medium. If
the medium has already been formatted, you can decide how it should be
reformatted. Activate the option of your choice, then click on the Finish
button.
Complete Format: The medium is first physically, and then logically
formatted. While this process is taking place, all
the data stored on the medium will be erased.
Normal Format:
The medium is only formatted logically. This
means that only the information on the data
contained on it is erased, not the data itself. The
medium looks as if it has not been written on,
although this is not the case. Since the data can
be recreated by experts, this formatting method is
not suitable for cases where confidential data is
stored on the medium.
Skip sector search to
reduce processing time:
This control field is only active (and therefore,
selectable) if the 'Normal formatting' option has
been selected. This option prevents any secto
searches from being carried out before the
formatting process takes place. This in turn leads
to a significant reduction in formatting time.
InCD Working with InCD • 29
Page 30

The medium will be ejected once it has been successfully formatted. The
r
following window will then appear:
3.4.2 Reformatting a CD-MRW medium
It is only possible to write in the CD-MRW format using drives that support this
standard and if the 'Format Disk to CD-MRW' check box has been activated.
This check box is located on the 'InCD Page Settings' register card and is
activated as default.
If a medium that already contains data is formatted, then all the data on the disk
will be erased so that the medium can be written on again.
If a medium has been written on a number of occasions, under certain
circumstances there may be a breakdown during the reformatting process, due
to errors. In this case we recommend that you delete the data on the medium
with Nero.
In the Recorder menu select the Erase ReWritable command and choose
'Full-erase rewritable media' as deletion method. Depending on the recorde
InCD Working with InCD • 30
Page 31
and medium, the deletion process will take between 10 and 20 minutes.
f
No other commands may be executed while a formatting process is taking
place.
1. Insert a medium which has been written upon into the recorder.
2. Using the right mouse button, click on the InCD icon in the System Tray and
select the Format command. The formatting wizard will now open. Now click
on the Next button.
3. If only one recorder is installed, it will be highlighted automatically (if several
are installed, you will be able to highlight the recorder of your choice). Now
click on the Next button.
In contrast to burning with Nero, it is not possible to write on a number o
recorders with InCD, and only one recorder can be selected.
4. Click on the Next button to begin the formatting process. If data is already
stored on the medium, the phrase 'This disk contains data' will appear in the
information box.
InCD Working with InCD • 31
Page 32
When you click on the Properties button, the appropriate command will be
r
r
executed; both related register cards will be opened. The 'Format Disk to CDMRW' check box is located on the 'InCD Page Settings' register card. This
check box is automatically activated with drives that support writing in CD-MRW
format. Please check this setting if you are not sure whether this is the case o
not.
Please check whether the 'Auto Insert Notification' option has been activated fo
your recorder, as otherwise a new medium will not be immediately recognized
following insertion.
In this case, leave the program wizard, wait until the recorder has ceased
accessing the drive, and then repeat steps 2 to 4.
5. The window that appears will provide information on the status of the
medium. If the medium has already been formatted, you can decide how it
should be reformatted. Activate the option of your choice, then click on the
Finish button.
Complete Format: The medium is first physically, then logically
formatted. While this process is taking place, all
the data stored on the medium will be erased.
Normal Format:
The medium is only logically formatted. This
means that only the information on the data, stored
on the disk, is erased and not the data itself.
Because the data can be restored by experts, this
formatting method is not suitable, e.g. in cases
where confidential data is stored on the medium.
Skip sector search to
reduce processing time:
This check box cannot be deactivated with CDMRW media.
InCD Working with InCD • 32
Page 33
The medium will be ejected once it has been successfully formatted. The
r
following window will then appear:
3.4.3 Reformatting a DVD+RW medium
If a medium that already contains data is formatted, then all the data on the disk
will be erased so that the medium can be written on again.
If a medium has been written on a number of occasions, under certain
InCD Working with InCD • 33
circumstances there may be a breakdown during the reformatting process, due
to errors. In this case we recommend that you delete the data on the medium
with Nero.
In the Recorder menu select the Erase ReWritable command and choose
'Full-erase rewritable media' as deletion method. Depending on the recorde
and medium, the deletion process will take between 10 and 20 minutes.
No other commands may be executed while a formatting process is taking
place.
1. Insert a medium which has been written upon into the recorder.
Page 34
2. Using the right mouse button, click on the InCD icon in the System Tray and
f
select the Format command. The formatting wizard will now open. Now click
on the Next button.
3. If only one recorder is installed, it will be highlighted automatically (if several
are installed, you will be able to highlight the recorder of your choice). Now
click on the Next button.
In contrast to burning with Nero, it is not possible to write on a number o
recorders with InCD, and only one recorder can be selected.
4. Click on the Next button to begin the formatting process. If data is already
stored on the medium, the phrase 'This disk contains data' will appear in the
information box.
InCD Working with InCD • 34
Page 35
r
Please check whether the 'Auto Insert Notification' option has been activated fo
your recorder, as otherwise a new medium will not be immediately recognized
following insertion.
In this case, leave the program wizard, wait until the recorder has ceased
accessing the drive, and then repeat steps 2 to 4.
5. The window which appears will provide information on the status of the
medium. If the medium has already been formatted, you can decide how it
should be reformatted. Activate the option of your choice, then click on the
Finish button.
Complete Format: The medium is first physically, then logically
formatted. While this process is taking place, all
the data stored on the medium will be erased.
Normal Format:
The medium is only logically formatted. This
means that only the information on the data, stored
on the disk, is erased and not the data itself.
Because the data can be restored by experts, this
formatting method is not suitable, e.g. in cases
where confidential data is stored on the medium.
Skip sector search to
reduce processing time:
This check box cannot be deactivated with
DVD+RW media.
InCD Working with InCD • 35
Page 36
The medium will be ejected once it has been successfully formatted. The
following window will then appear:
3.5 Ejecting the medium
InCD handles CD-RW, CD-MRW, DVD-RW and DVD+RW differently. Please
read the section concerned.
3.5.1 Ejecting CD-RW and DVD-RW media
A formatted CD-RW / DVD-RW medium can be ejected by InCD with the Eject
command. An unformatted CD-RW can be ejected by pressing the eject button
on the front panel of the CD-RW drive.
1. Place the mouse cursor on the InCD icon in the System Tray click on the
right mouse button and select the Eject command.
2. Remove the medium from the recorder and close the tray.
The medium can then be ejected by using Windows Explorer. In order to do so,
InCD Working with InCD • 36
highlight the disk drive, click on the right mouse button and select the Eject
command.
Page 37
Future versions will allow the recorder's eject button to be used. For new
version updates please regularly visit our Internet Site at http://www.nero.com
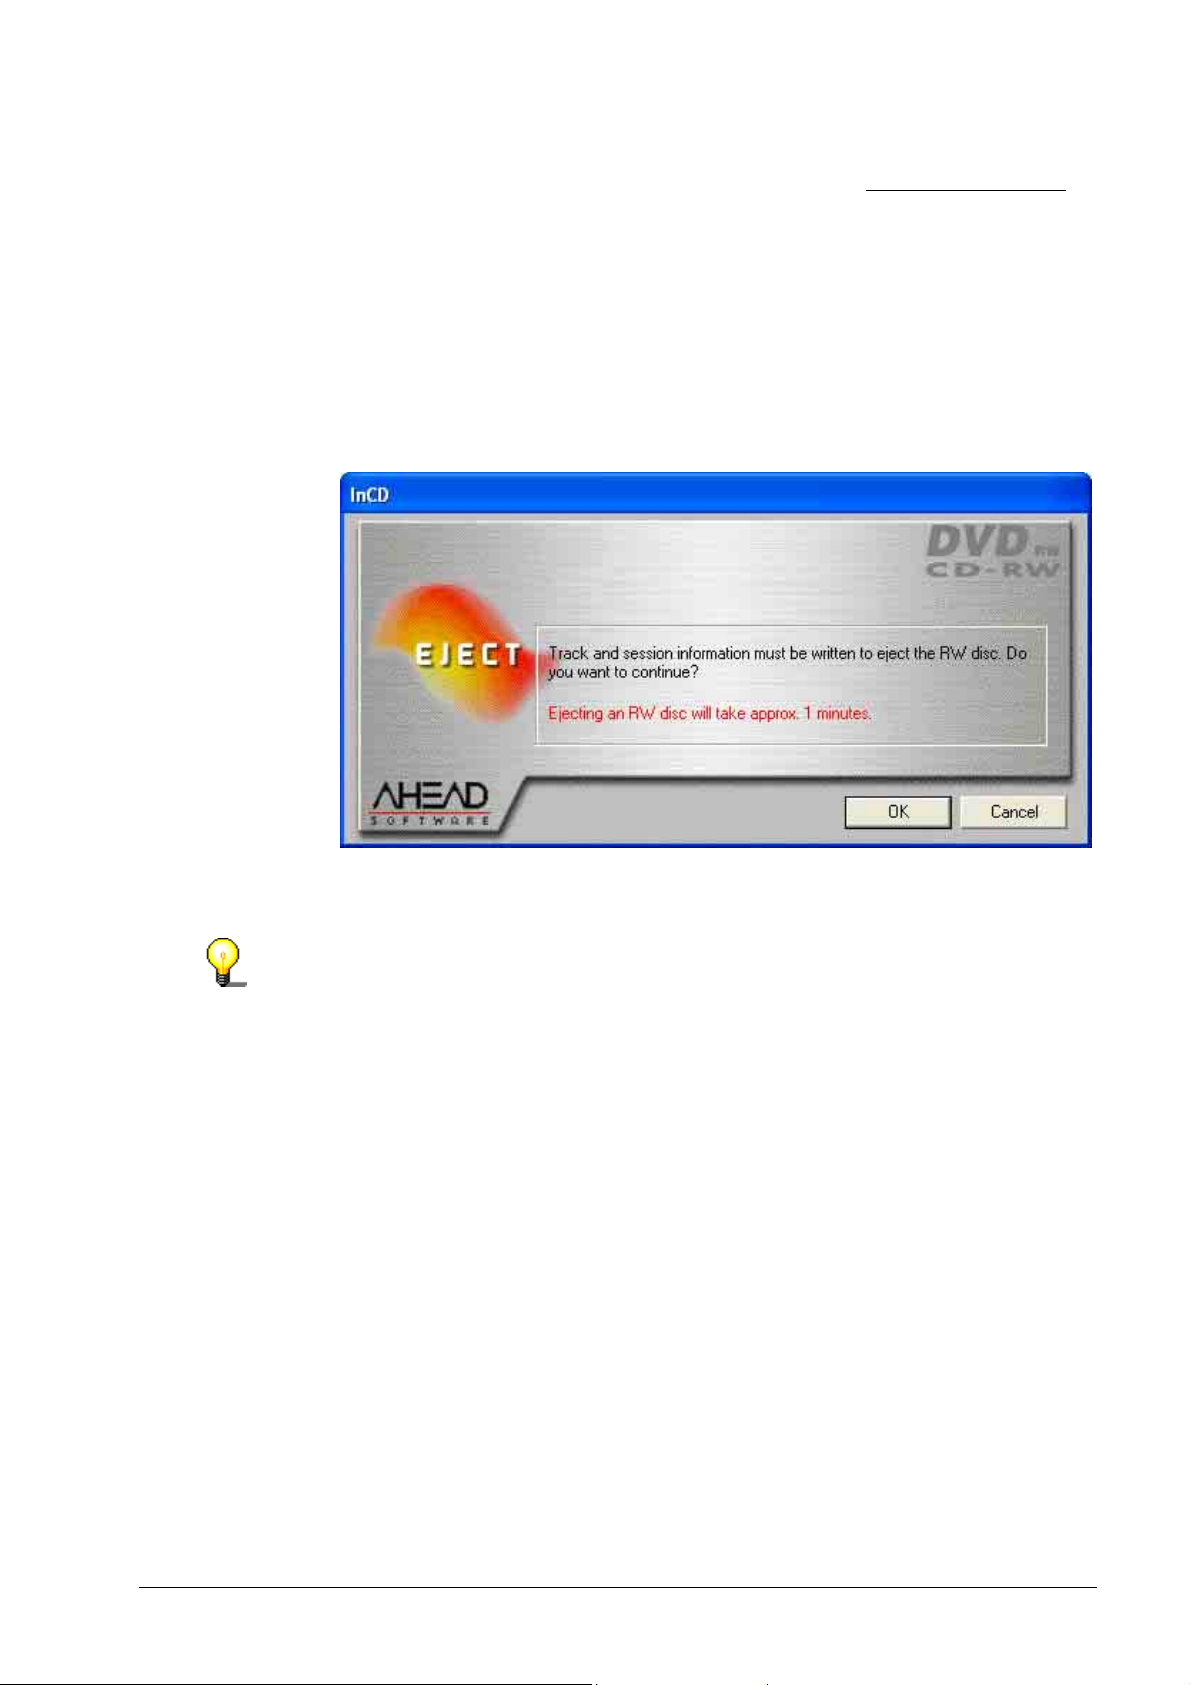
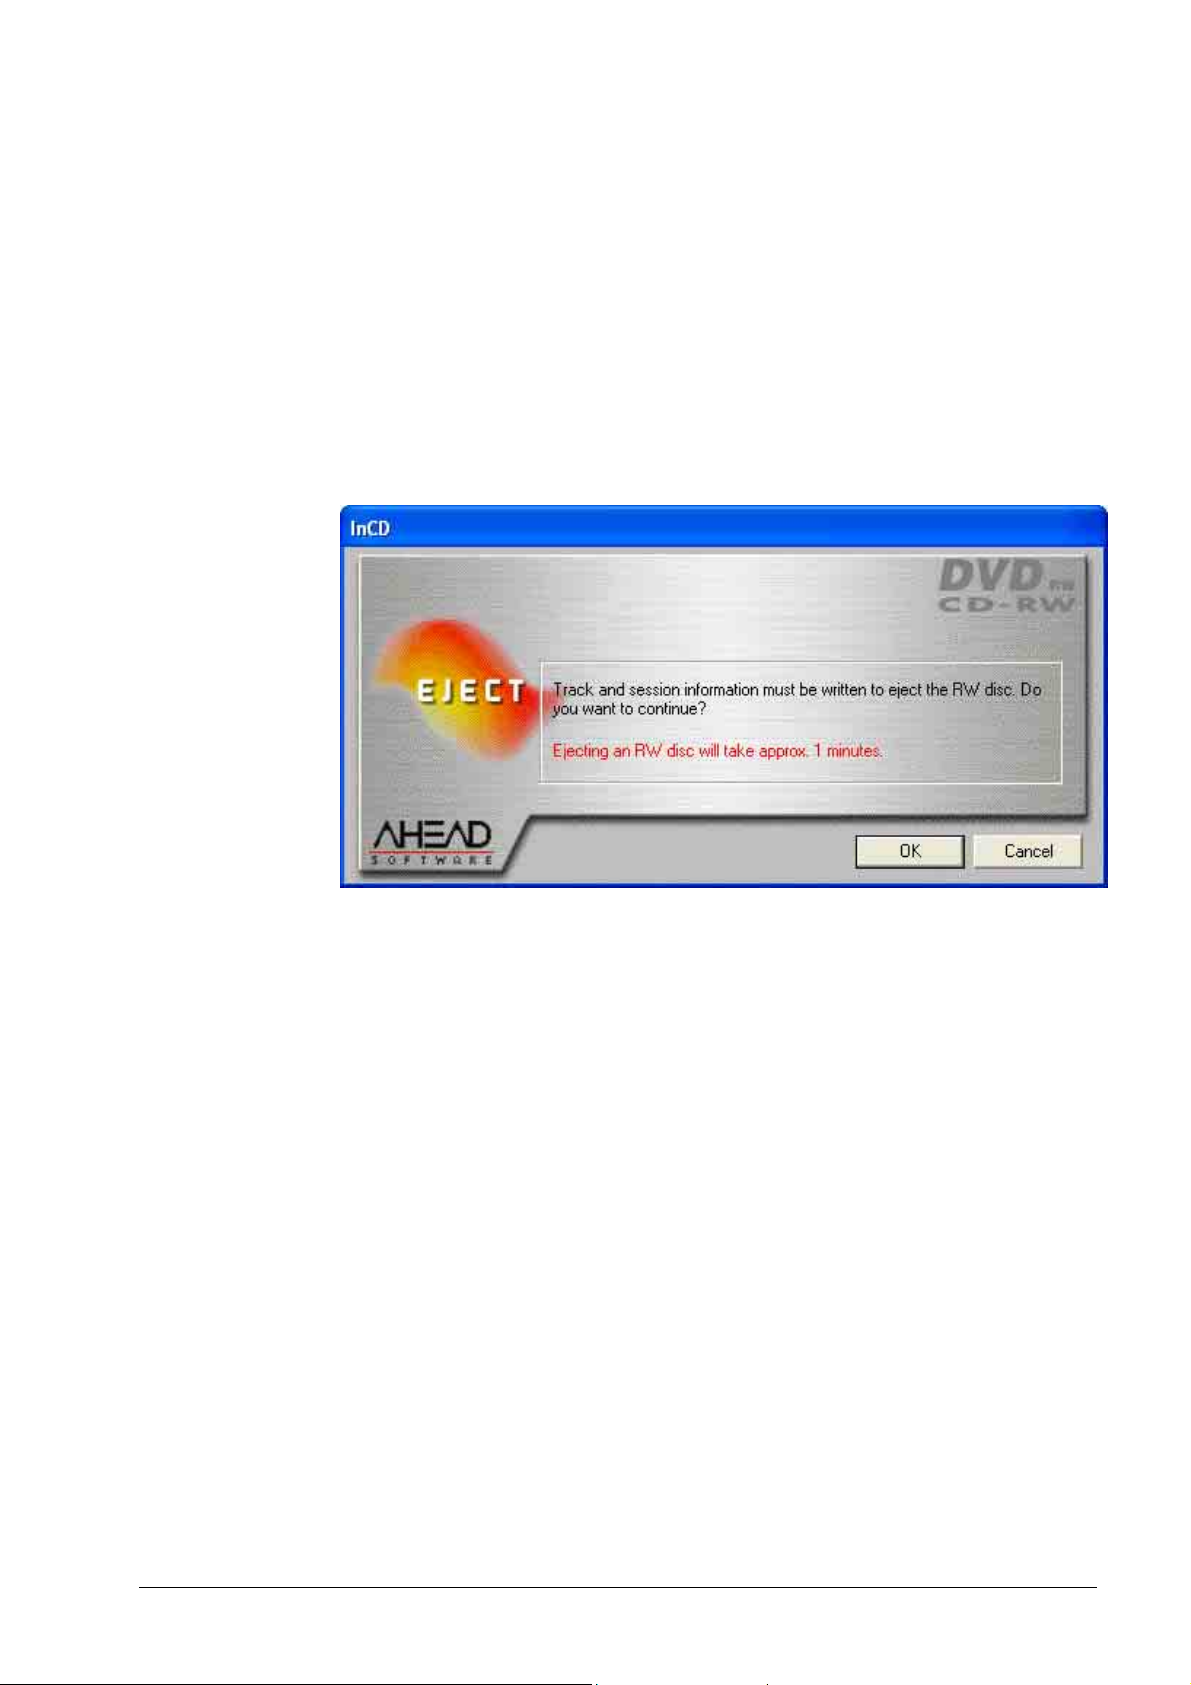
3.5.2 Ejecting CD-MRW media
InCD can eject a formatted CD-MRW medium when the Eject command has
been selected. An unformatted CDF-MRW can be ejected by pressing the eject
button on the front panel of the CD-RW drive
1. Place the mouse cursor on the InCD icon in the System Tray click on the
right mouse button and select the Eject command. A message will appear
informing you that this procedure will take about one minute.
.
2. Remove the CD-MRW medium from the recorder and close the tray.
The medium can also be ejected using Windows Explorer. In order to do so,
highlight the disk drive, click on the right mouse button and select the Eject
command.
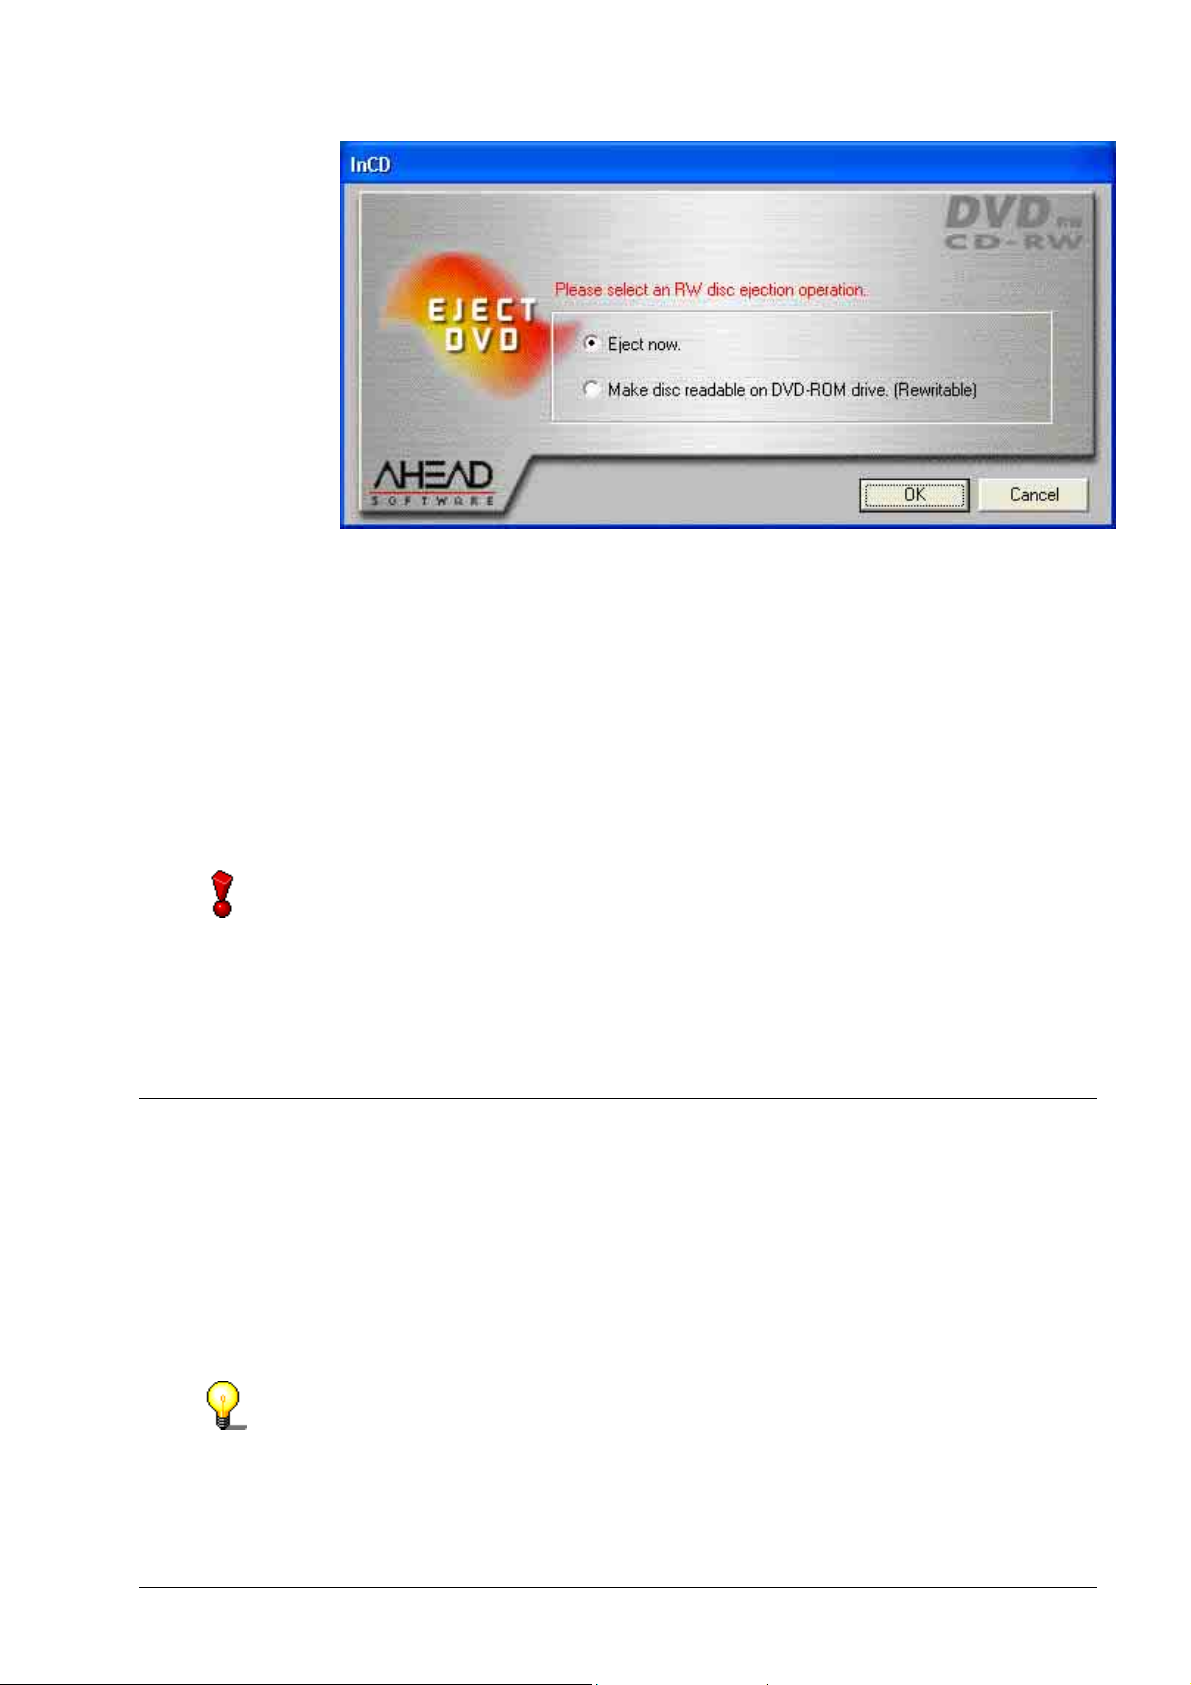
3.5.3 Ejecting DVD+RW media
A formatted DVD+RW medium can be ejected by InCD when the Eject
command has been selected. An unformatted DVD+RW can be ejected by
pressing the eject button on the front panel of the CD-RW drive.
1. Place the mouse cursor on the InCD icon in the System Tray click on the
right mouse button and select the Eject command. The following window will
appear and offer two options that you can choose.
InCD Working with InCD • 37
Page 38

r
The two options have the following effects:
Eject now: The DVD+RW is ejected and can only be read by
a DVD+RW recorder, but not by a DVD-ROM
drive. In this process, no lead-in is written on the
medium.
Make disk readable...: The DVD+RW is ejected and can only be read
both by a DVD+RW recorder as well as a DVDROM drive. In this process, a temporary lead-in is
written on the medium.
Please note that 'No bytes' will be shown as the space still available for saving
data on the DVD+RW if you insert the medium in a conventional DVD-ROM
drive and call for this information via the drive characteristics. The reason fo
this is that the medium has been closed 'temporarily', in order to make reading
at all possible on a conventional DVD-ROM drive.
2. Remove the DVD+RW medium from the recorder and close the tray.
The medium can also be ejected using Windows Explorer. In order to do so,
highlight the disk drive, click on the right mouse button and select the Eject
command. In this case, it will only be possible to read the DVD+RW in a
DVD+RW recorder - but not in a DVD-ROM drive.
3.6 Copying onto a medium formatted with InCD
A medium formatted with InCD can be used as a hard drive or a floppy disk, in
other words, data can be very simply copied onto the medium concerned by
'drag & drop' - or existing data can simply be deleted.
3.6.1 Copying onto CD-RW and DVD-RW media
1. Insert a formatted CD-RW or DVD-RW medium in the recorder.
2. Open Windows Explorer, highlight the desired data and move it onto the
recorder's drive symbol by drag & drop.
InCD Working with InCD • 38
Page 39
3. Place the mouse cursor on the InCD icon in the System Tray click on the
right mouse button and select the Eject command.
4. Remove the medium from the recorder and close the tray.
3.6.2 Copying onto CD-MRW media
1. Insert a formatted CD-MRW medium in the recorder.
2. Open Windows Explorer, highlight the desired data and move it onto the
recorder's drive symbol by drag & drop.
3. Place the mouse cursor on the InCD icon in the System Tray click on the
right mouse button and select the Eject command. A message will appear
informing you that this procedure will take about one minute.
4. Remove the CD-MRW medium from the recorder and close the tray.
3.6.3 Copying onto DVD+RW media
1. Insert a formatted DVD+RW medium in the recorder.
2. Open Windows Explorer, highlight the desired data and move it onto the
recorder's drive symbol by drag & drop.
3. Place the mouse cursor on the InCD icon in the System Tray click on the
right mouse button and select the Eject command. A window will open and
offer you two options to choose from.
InCD Working with InCD • 39
Page 40
r
The two options have the following effects:
Eject now: The DVD+RW is ejected and can only be read by
a DVD+RW recorder, but not by a DVD-ROM
drive. In this process, no lead-in is written on the
medium.
Make disk readable...: The DVD+RW is ejected and can only be read
both by a DVD+RW recorder as well as a DVDROM drive. In this process, a temporary lead-in is
written on the medium.
Please note that 'No bytes' will be shown as the space still available for saving
data on the DVD+RW if you insert the medium in a conventional DVD-ROM
drive and call for this information via the drive characteristics. The reason fo
this is that the medium has been closed 'temporarily', in order to make reading
at all possible on a conventional DVD-ROM drive.
4. Remove the DVD+RW medium from the recorder and close the tray.
3.7 Deleting data
Deleting data from a rewritable medium is as easy as deleting files from a hard
drive or a diskette.
1. Place a rewritable medium in the recorder.
2. Open Windows Explorer, highlight the desired data and click on the
appropriate button on your keyboard - or click on right mouse button and
select the Delete command from the pop-up menu.
You can only delete the data on a rewritable DVD using a DVD recorder.
InCD Working with InCD • 40
Page 41

3.8 Exiting InCD
InCD starts automatically when the computer is booted and should always be
active in the background. Should you no longer wish to use InCD, we
recommend that you uninstall the program (see 'Uninstalling' section).
1. Open the Task manager by holding down the Ctrl, Alt and Delete keys
simultaneously.
2. Highlight InCD and click on the End task button. The task manager will close
and the InCD icon on the System Tray will disappear.
If InCD should crash or be closed down as a result of unforeseen problems you
can start the program again very easily. To do this, use the Windows Explorer to
go to the directory where InCD has been installed (Normally
'C:\Programs\Ahead\InCD') and double-click on the file 'InCD.exe' to launch the
program. It is not necessary to restart the computer.
InCD Working with InCD • 41
Page 42

4 Commands
4.1 Introduction
All commands can be called up when the mouse cursor is placed on the InCD
icon in the System Tray and the right mouse button is clicked on. Commands
are executed by highlighting with the mouse or by entering the letter contained
in brackets.
The following commands are available:
Properties
Eject
Format
Version information
4.2 Properties
The Properties command opens two register cards which contain more detailed information on the medium which has been inserted.
4.2.1 InCD information
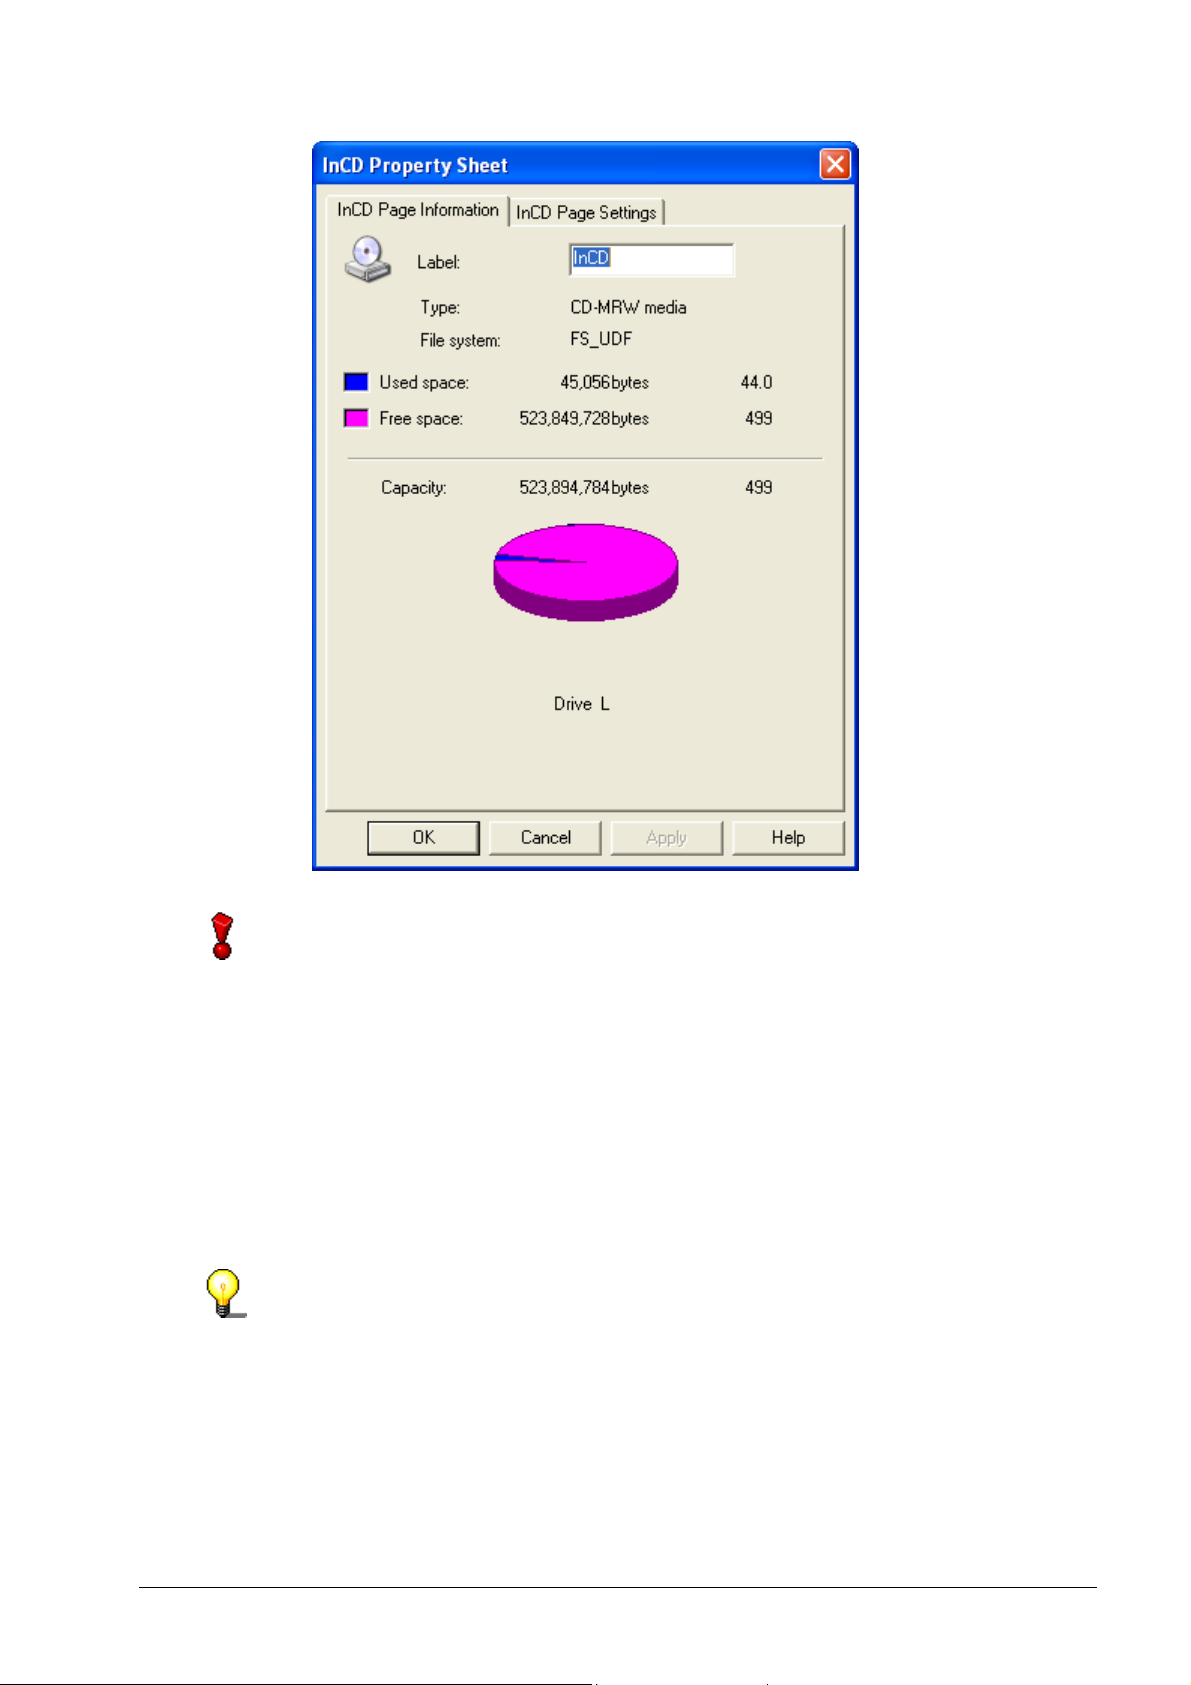
The 'InCD Page Information' register card contains the following information:
Field Content
Label Name of data carrier
Type Type of medium
File system File system ('FS_UDF' appears when the InCD packet writing
package is used)
Used space Storage space used
Free space Storage space still available
Capacity Capacity of the medium
Drive Recorder's disk drive letter
InCD Commands • 42
Page 43
r
Please note that 'Zero bytes' will be shown as the space still available for saving
data on the DVD+RW if you insert the medium in a conventional DVD-ROM
drive and call for this information via the drive characteristics. The reason fo
this is that the medium has been closed 'temporarily', in order to make reading
at all possible on a conventional DVD-ROM drive.
It is possible to change the name of the medium by entering a new one (this
should consist of at most 11 characters and contain no blank spaces). The
Apply button becomes active when the name is being changed.
When the OK button is clicked on, the changes are saved and the register card
is closed. When the Apply button is clicked on, the changes are saved and the
register card is displayed once more.
This register card can be displayed using Windows Explorer. In order to do so,
highlight the disk drive, click on the right mouse button and select the
Properties command. If the register card is called up in this way, it is now
designated as 'General' as opposed to InCD Page Information'.
InCD Commands • 43
Page 44

4.2.2 InCD settings
The 'InCD Page Settings' register card contains setting facilities that determine
how the recorder will behave.
This register card can be displayed using Windows Explorer. In order to do so,
highlight the disk drive, click on the right mouse button and select the
Properties command.
4.2.2.1 Information on the recorder
The 'Drive Information' area contains information on the recorder installed and
on the recorder's ID.
InCD Commands • 44
Page 45

4.2.2.2 Driver information
The 'Driver Information' area contains information on the InCD driver installed.
4.2.2.3 Options
The 'Options' area contains two control fields.
When the 'Do not display startup and RW mount messages' control field has
been set, the following occurs:
Activated:
When InCD has been started, the InCD splash screen will be visible for a short
time, and when a medium is inserted the following window will appear if a
mounted medium has been inserted into the recorder:
Deactivated:
When InCD has been started no splash screen will appear to indicate that the
program has been started, and when a formatted medium is inserted, no
window will appear to indicate that the disk has been mounted successfully. You
will only see that there is a disk mounted by the green arrow in the System Tray.
If the 'Safe Mode (compare after writing onto CD disk)' control field is set, the
following will happen:
Deactivated:
The copied data is not verified, i.e. it is not checked.
Activated:
After the medium has been written on, InCD checks whether or not the data files
copied are the correct ones. Selecting this option reduces the writing speed.
InCD Commands • 45
Page 46

4.2.2.4 CD-MRW
In the case of drives that support the CD-MRW format, the register card also
includes the 'Format disk to CD-MRW' check box.
Activated:
The CD is formatted as a CD-MRW and then needs a so-called 'remapper' so
that it can be read by other drives.
Deactivated:
The CD is formatted as a 'normal' CD-RW.
4.3 Ejecting
The Eject command expels the medium inserted.
The medium can then be ejected by using Windows Explorer. In order to do so,
highlight the disk drive, click on the right mouse button and select the Eject
command.
Future versions will allow the recorder's eject button to be used. For new
version updates please regularly visit our Internet Site at http://www.nero.com
.
4.4 Formatting
No other commands may be executed while the formatting process is taking
place.
The 'Formatting' commands start the formatting wizard.
No further descriptions of how media may be formatted are provided in this
section. You can find detailed information on this topic in the 'Formatting with
InCD' and 'Reformatting with InCD' sections.
InCD Commands • 46
Page 47

4.5 Version information
When the 'Version information' is selected, two windows can be opened.
The first window contains the name of the software – InCD. You can close this
window by clicking on the OK button.
You can open the second window by clicking on the About button. The InCD
version number and the registered license number are shown in this window. To
close this window, click on the OK button.
InCD Commands • 47
Page 48

5 Index
C
CD-MRW
Copying 38
Formatting 19
Reformatting 29
CD-RW
Copying 37
Formatting 14
Reformatting 26
Command
Properties 41
Complete Format
Formatting options 28, 31, 34
Control field
Display mount messages 44
Display startup 44
Safety Mode 45
Copying
CD-MRW 38
CD-RW 37
DVD+RW 38
DVD-RW 37
D
CD-RW 14
Complete Format 28, 31, 34
DVD+RW 23
DVD-RW 14
Logically 17, 21, 25
New medium 15
Normal Format 28, 31, 34
Physically 17, 21, 25
Formatting the medium for the first time 15,
19, 23
I
InCD
Deleting 39
Exiting 39
Program start 13
Uninstalling 11
Update 8
Information
Driver 44
Firmware 43
Recorder 43
L
Logical formatting process 17, 21, 25
N
Normal Format
Formatting options 28, 31, 34
Driver information 44
DVD+RW
Formatting 23
Reformatting 32
DVD+WM
Copying 38
DVD-RW
Copying 37
Formatting 14
Reformatting 26
F
Firmware 43
Formatting 14
CD-MRW 19
InCD Index • 48
P
Physical formatting process 17, 21, 25
Program start 13
R
Recorder information 43
Reformatting 26
CD-MRW 29
CD-RW 26
DVD+RW 32
DVD-RW 26
Register card
InCD Page Information 41
Page 49

U
Uninstalling 11
Update 8
InCD Index • 49
 Loading...