

Page 1
Nero Home Manual
Nero Home
Nero AG
Page 2

Copyright and trademark information
The Nero Home manual and all its contents are protected by copyright and are the property
of Nero AG. All rights reserved. This manual contains material that is protected by
internationally valid copyright. No part of this manual may be reproduced, transmitted or
transcribed without the express written permission of Nero AG.
Nero AG rejects any claims that transcend the clauses of the guarantee rights. Nero AG
does not undertake any liability for the correctness of the content of the Nero Home manual.
The contents of the software supplied, as well as of the Nero Home manual, may be
changed without prior notice.
All trade names and trademarks are the property of their respective owners.
The trademarks mentioned here are named for information purposes only.
Copyright © 2008 Nero AG and its licensors. All rights reserved.
SW 3.0.102.0
Nero Home
Page 3

Contents
Contents
1 General Information 6
1.1 About the manual 6
1.2 About Nero Home 6
1.3 Versions of Nero Home 7
2 System Requirements 8
3 Formats Supported 9
4 Launching the Program 10
5 Nero Home Start Screen 11
5.1 Direct links to the start screen 12
6 Buttons in the Main Screens 14
7 Key Combinations 15
8 Easy Setup Wizard 16
8.1 Basic settings 16
8.2 Advanced features 18
9 Settings Main Screen 20
9.1 General settings 22
9.2 Setting media scanning options 23
9.3 Changing the appearance of the program 25
9.4 Configuring a TV or recording card 26
9.5 Setting Options for TV Recordings 30
9.6 Enabling timeshifting 31
9.7 Defining video settings 32
9.8 Defining DVD settings 33
9.9 Defining audio settings 34
9.10 Defining slide show settings 36
9.11 Defining effects for slide shows 37
9.12 Defining favorite transitions for slide shows 38
9.13 Save slide show as movie 39
9.14 Defining burning options for music collections 40
9.15 Defining burning options for slide shows 42
9.16 Defining burning options for videos 44
9.17 Defining burning options for mixed collections 45
Nero Home
Page 4

Contents
10 Music and Radio Main Screen 46
10.1 Play Music screen 47
10.2 Playing music 48
10.3 Buttons for playback control 48
10.4 Showing buttons for playback control 49
10.5 Burning a music collection 50
10.6 Managing radio channels 51
10.7 Renaming radio channels 52
10.8 Adding radio channels to radio favorites 52
10.9 Removing radio channels from radio favorites 53
11 Photos Main Screen 54
11.1 Displaying View Photo screen 55
11.2 Displaying photos 56
11.3 Creating a slide show with background music 56
11.4 Play Slide Show screen 57
11.5 Playing a slide show 58
11.6 Finding similar photos 59
11.7 Burning a photo collection 60
12 Video and TV Main Screen 62
12.1 Displaying TV channels 63
12.2 Renaming TV channels 63
12.3 Adding TV channels to TV favorites 64
12.4 Removing TV channels from TV favorites 64
12.5 Watching TV programs 65
12.6 Recording programs in progress 65
12.7 Schedule Recordings screen 66
12.8 Scheduling new recordings 66
12.9 Watching TV recordings 67
12.10 Play Video screen 67
12.11 Playing a video 68
12.12 Information panel 69
12.13 TV Programs screen 70
12.14 Configuring electronic program guide (EPG) 71
12.15 Mapping EPG data 72
12.16 Assigning EPG data 73
12.17 Updating electronic program guide (EPG) 73
12.18 Scheduling new recordings with EPG 74
Nero Home
Page 5

Contents
12.19 Displaying picture-in-picture 75
13 Devices Main Screen 76
13.1 Using personal data sources 76
13.2 Live TV streaming in the network 77
14 Collections Main Screen 78
14.1 Creating a music collection 79
14.2 Creating a slide show 79
14.3 Saving a slide show as a movie 80
14.4 Creating a video collection 80
14.5 Creating mixed media collections 81
14.6 Playing a collection 82
14.7 Editing a collection 83
14.8 Burning a collection 83
15 Search Main Screen 85
15.1 Finding media files 86
16 Index 87
17 Contact 90
Nero Home
Page 6
General Information
1 General Information
1.1 About the manual
This manual is intended for all users who wish to learn how to use Nero Home. It takes a
practical approach and explains how to reach a particular objective on a step-by-step basis.
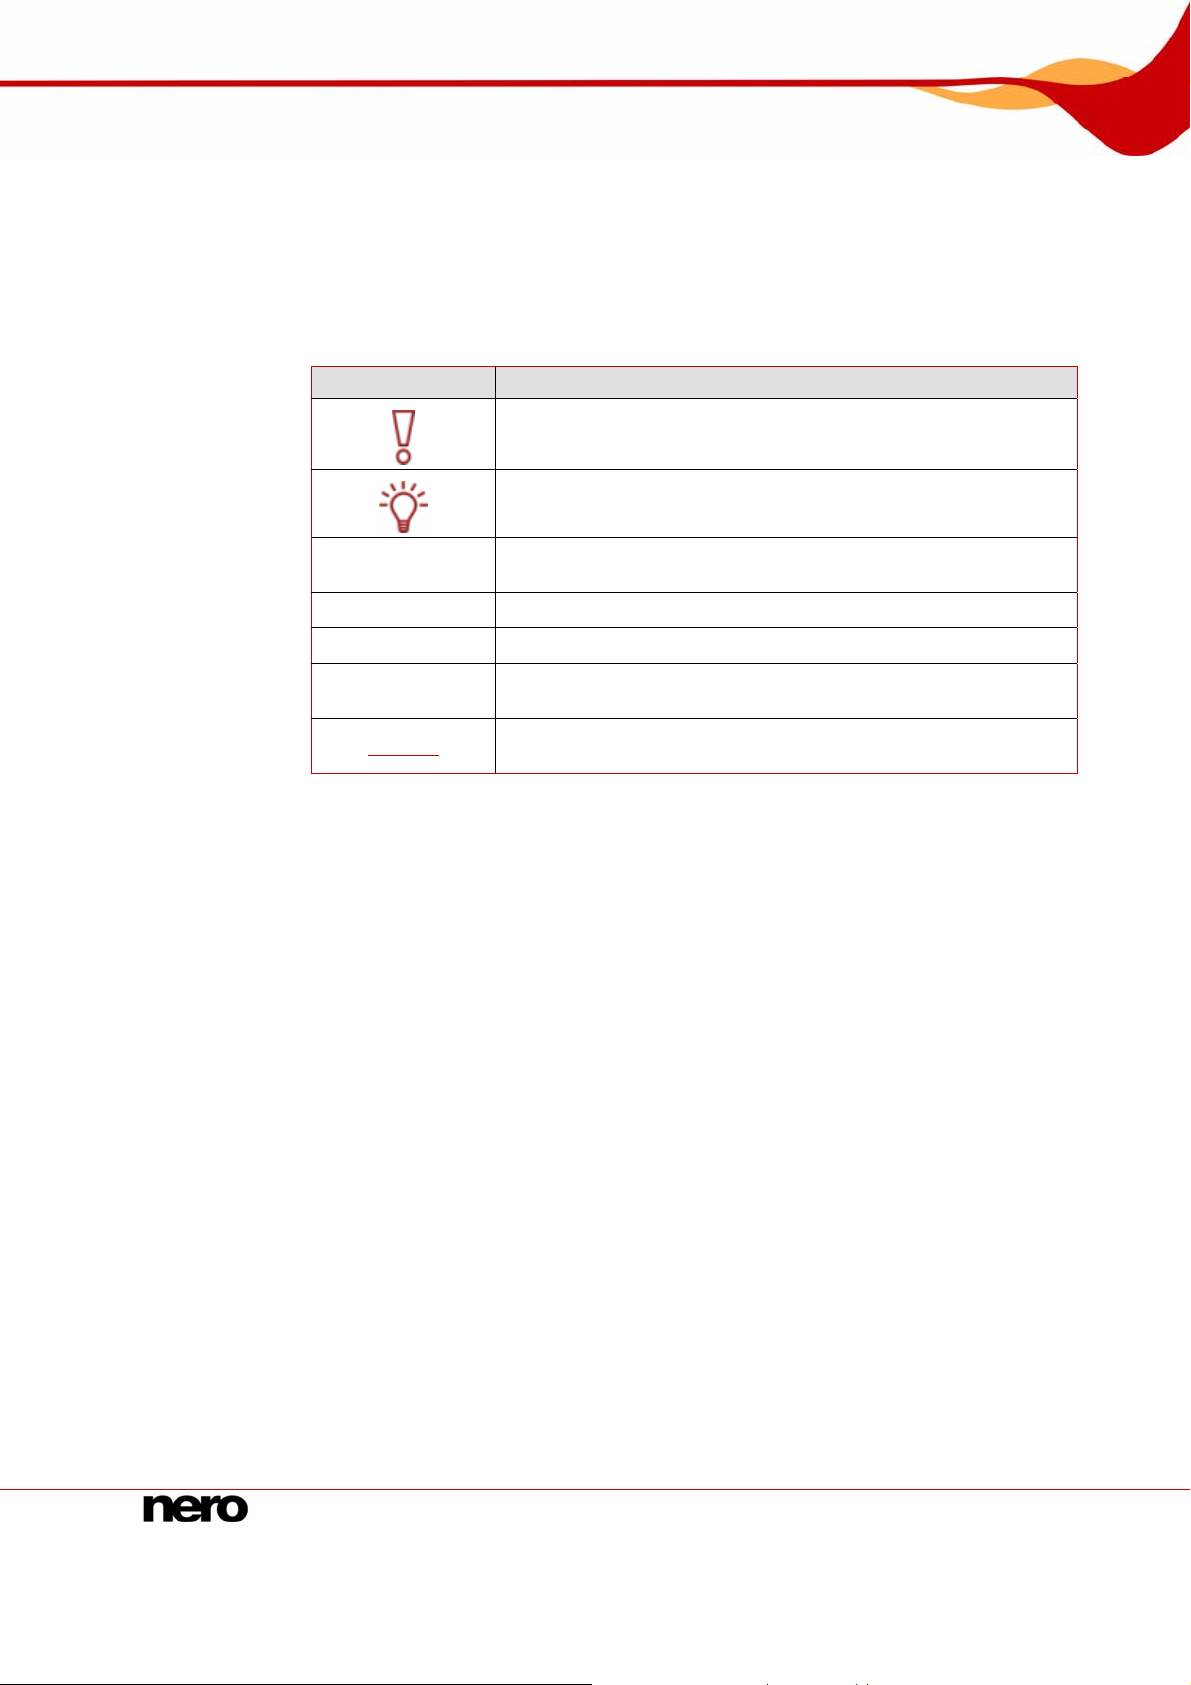
In order to make best use of this manual, please note the following conventions:
Symbol Meaning
Indicates warnings or instructions that have to be followed
1. Start…
Æ
Î
OK
Chapter
strictly.
Indicates additional information or advice.
A number at the beginning of a line indicates a request for
action. Carry out these actions in the order specified.
Indicates an intermediate result.
Indicates a result.
Indicates text passages, entries or buttons that appear in the
program interface. They are displayed in bold face.
Indicates references to other chapters. They are executed as
links and are shown in red and underlined.
1.2 About Nero Home
Nero Home combines TV and the recording of TV channels with the playback of DVD-Videos
and audio/video files in one easy-to-use interface. Not only can Nero Home play all your
media files, but it can also catalog them and organize them in individual libraries. It allows
you to compile files from various media into a playlist; an example of such a compilation
would be a slide show with videos and images accompanied by background music. The
intelligent sorting functions allow you to sort not only by file type, title, artist, album, etc. but
also by additional meta information. Hot-plugging devices such as photo cameras and
memory cards are immediately detected and the content can be added to the database
directly. Wizards help you to easily finish the configuration. Nero Home can be controlled via
computer or various PC remote controllers.
Nero Home 6
Page 7

General Information
1.3 Versions of Nero Home
Nero Home is available in 3 different versions:
Nero Home, Nero Home Essentials, and Nero Home Essentials SE.
Nero Home and Nero Home Essentials offer the full range of functions. The following
functions are available in Nero Home Essentials SE:
Timeshifting (see Enabling timeshifting)
Scheduling the recording of TV programs (see Scheduling new recording s)
Photo collections can only be exported in SVCD/DVD format with a license for the
MPEG-2 codec (see
SVCDs/DVD videos can only be burned with a license for the MPEG-2 codec (see
Defining burning options for videos)
Finding similar photos (see Finding similar photos)
Nero Surround Technology (see Defining audio settings)
Saving a slide show as a movie)
Nero Home 7
Page 8

System Requirements
2 System Requirements
In addition to the general system requirements for the Nero program package, the following
individual system requirements apply to Nero Home:
Optional:
TV tuner or video capture card for analog and digital (DVB-T, DVB-S, DVB-C and ATSC)
recording, compatible with the BDA (Broadcast Driver Architecture) driver standard. Nero
Home does not support video recording via FireWire® (OHCI 1394).
DVD-Video plug-in for DVD-Video functions and encoding in Dolby® Digital 2-channel
sound (the DVD-Video plug-in is already included in the retail version).
For EPG support an XML file is needed from a third party.
Installation of the latest WHQL-certified device drivers is recommended. WHQL stands for
Windows Hardware Quality Labs and means that the device driver certified by Microsoft®
is compatible with Microsoft® Windows® and the relevant hardware.
You will find a list of compatible devices at the Nero website under:
http://www.nero.com/link.php?topic_id=113&gen_id=8.
Operating Nero Home
In addition to using your keyboard and mouse, you can also control Nero Home using a
range of PC remote controls. You will find a list of supported devices at the Nero website
under:
http://www.nero.com/link.php?topic_id=116&gen_id=8.
Nero Home 8
Page 9

Formats Supported
3 Formats Supported
Nero Home supports all current formats for both audio, video, and photo files as well as meta
data.
Metadata includes e.g. information about artist, album, title, playback time, bit rate,
resolution. Metadata can be used to categorize by type (audio, video, photo) and to find files
sorted by various criteria, e.g. artist, album and genre.
Audio formats Video formats
Image
formats
Metadata Disc formats
MP3
MP4 (audio)
WAV
AAC
OGG Vorbis*
WMA*
WMA (DRM-
supported)*
AC3 2.0, 5.1
AIFF
CDA
MPEG-1 audio
MPEG-2 audio
* Codec must be installed
MPEG-1
MPEG-2
MPEG-4
Quicktime
DV-AVI
AVI
WMV*
WMV (DRM-
supported)*
JPEG
PNG
GIF
BMP
TIFF
TGA
WMP
ID3 tags
(V1.1/V2)
JPEG
PNG
BMP
GIF
TIFF
AVI
MPEG-1
MPEG-2
Nero Digital™
(MPEG-4)
WMV
MP3
OGG Vorbis
WAV
DVD-Video
VCD 2.0/SVCD
miniDVD (DVD
files on CD)
Nero Digital™
DVD-Video and
(S)VCD playback
from file
Nero Home 9
Page 10
Launching the Program
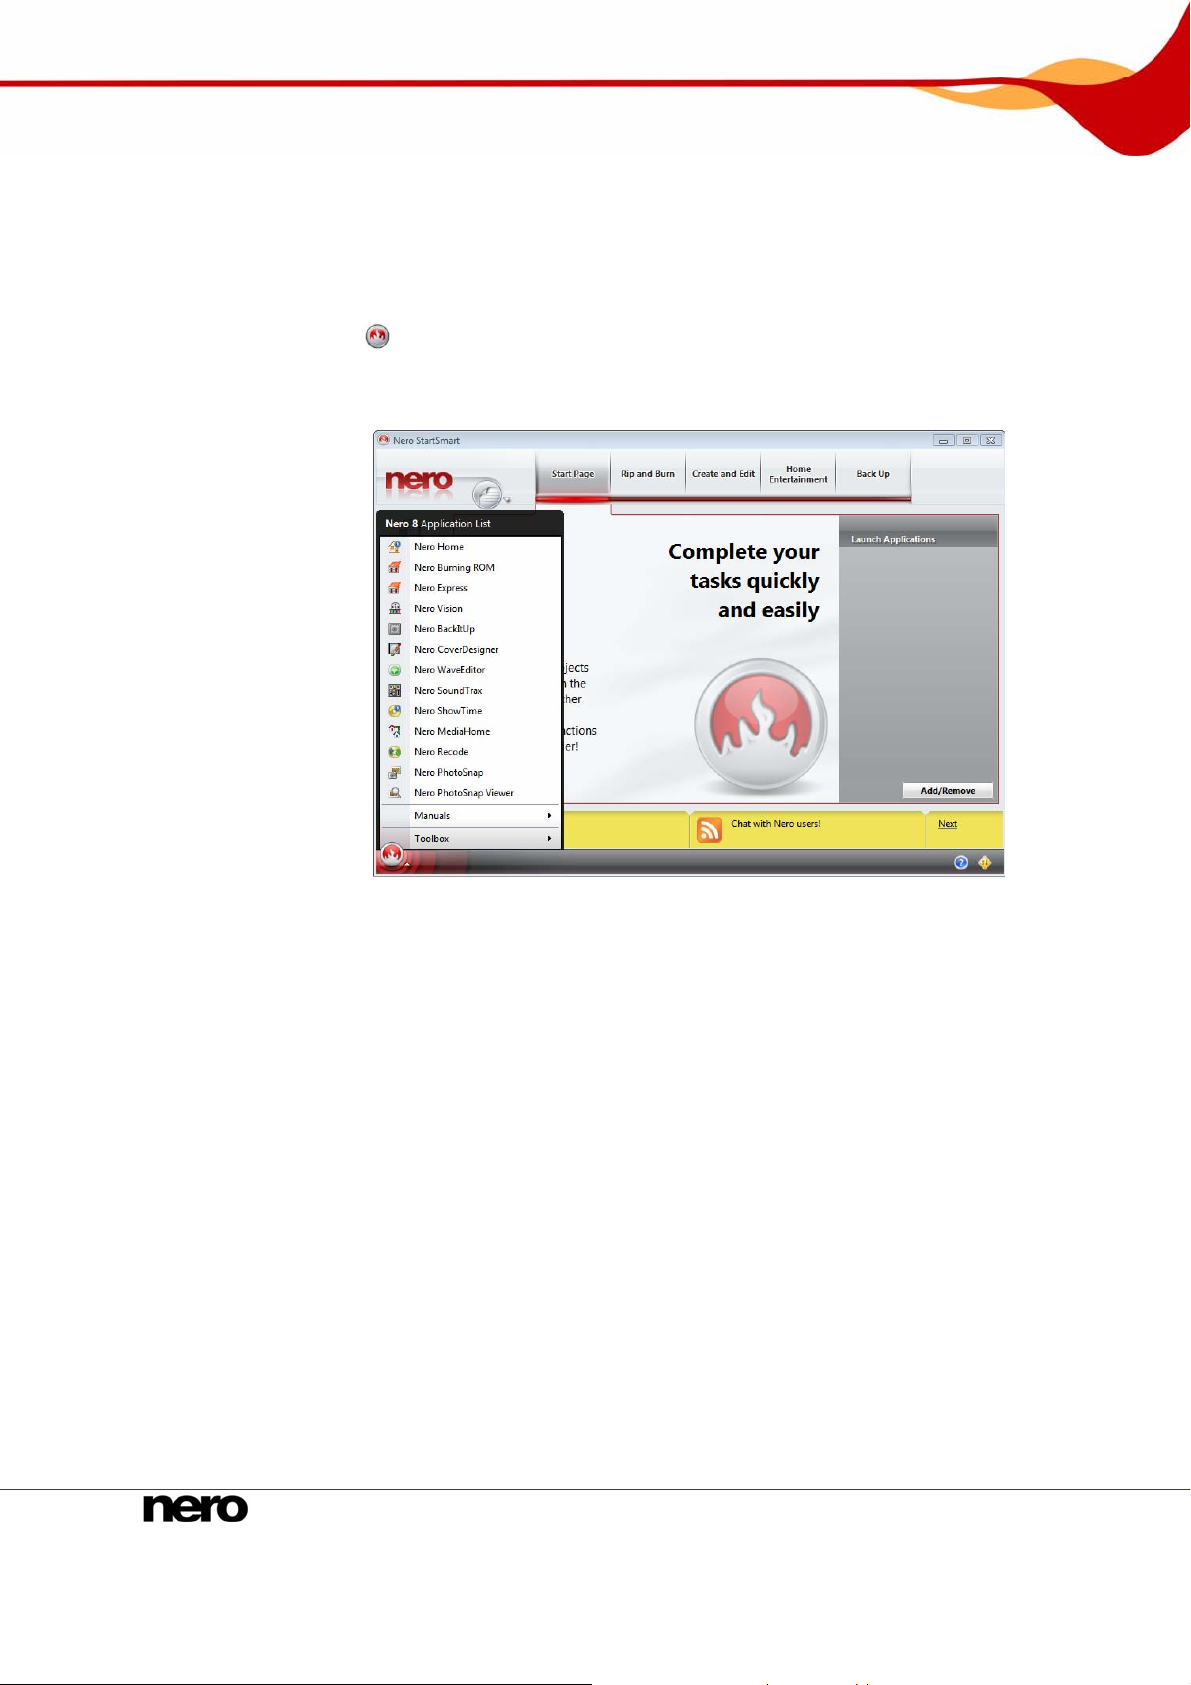
4 Launching the Program
To start Nero Home via Nero StartSmart, proceed as follows:
1. Click the Nero StartSmart icon.
Æ The Nero StartSmart window opens.
2. Click the button.
Æ A list of Nero applications is displayed.
3. Select Nero Home in the Applications selection list.
Æ The Nero Home window opens.
Î Nero Home is launched via Nero StartSmart.
Fig. 1: Nero StartSmart
Nero Home 10
Page 11
Nero Home Start Screen
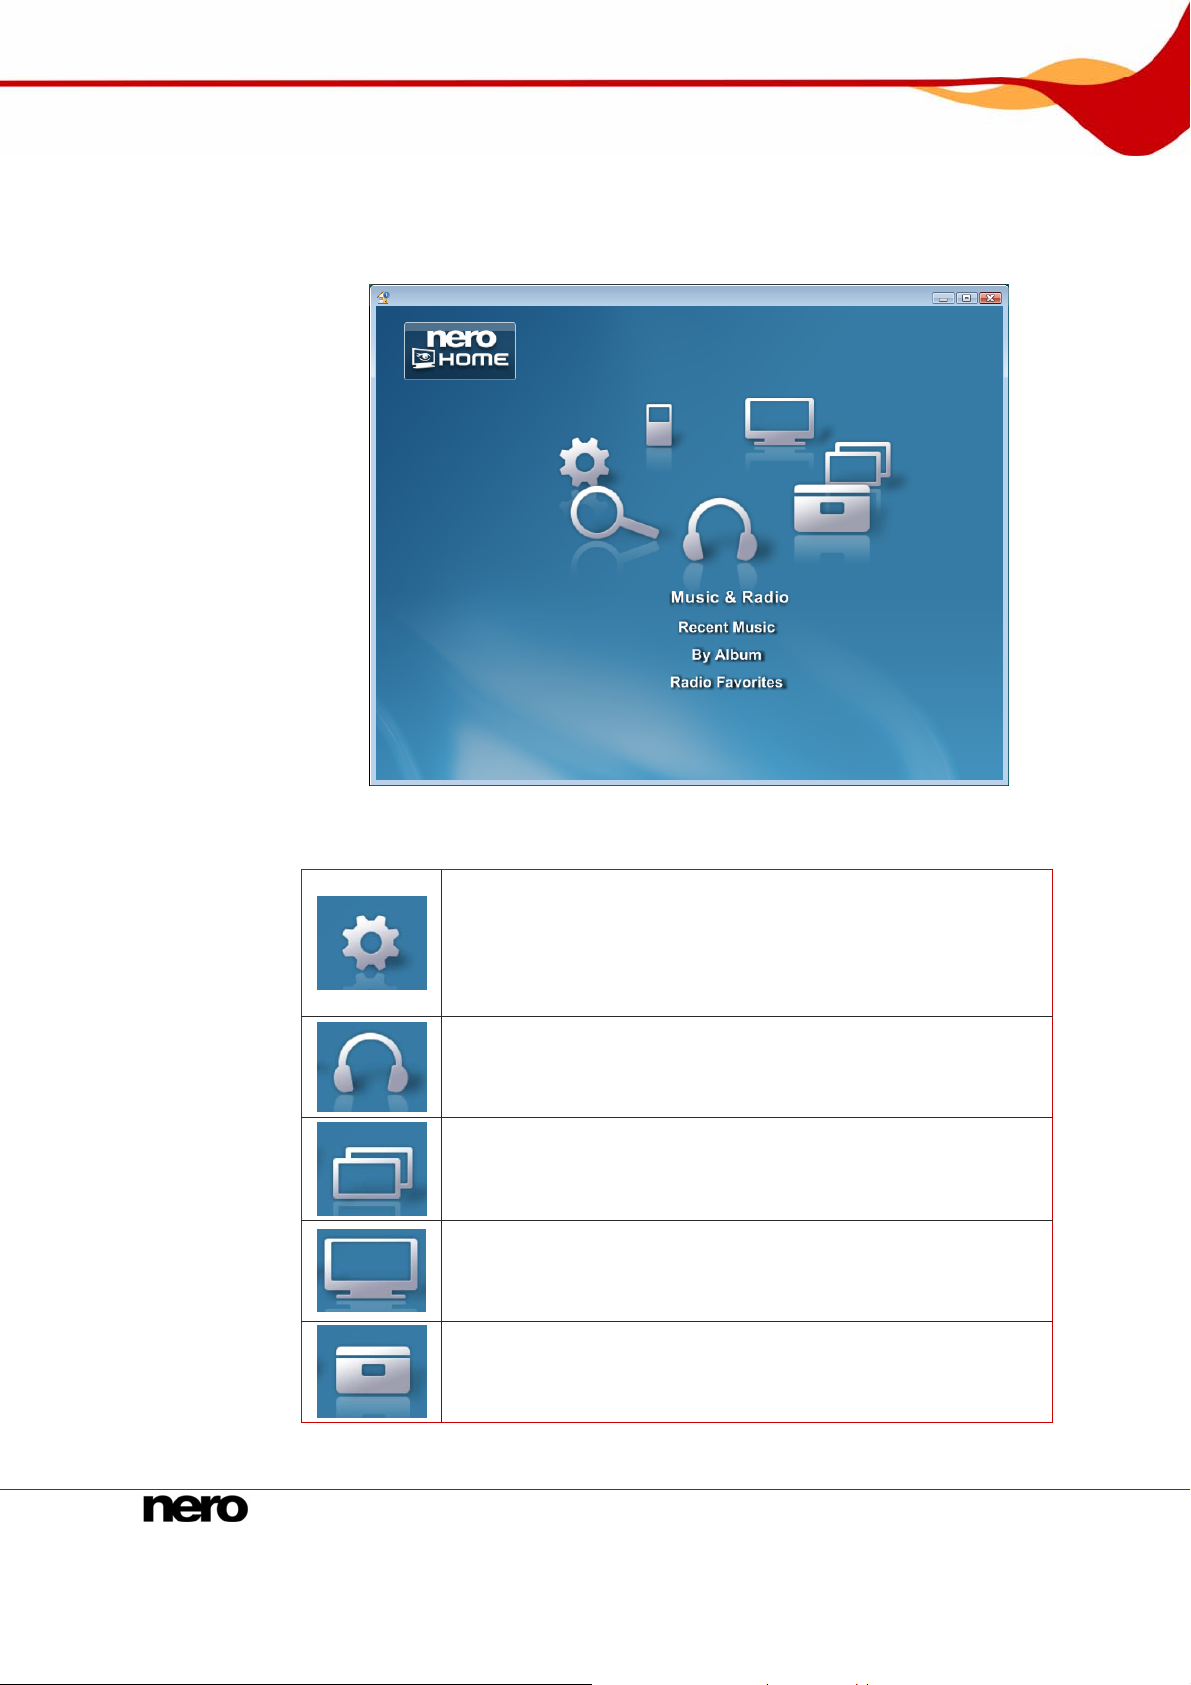
5 Nero Home Start Screen
You display the main screens within Nero Home by double-clicking on the menu icons in the
start screen.
The following menu icons are available:
Opens the main Settings screen. The options available here
include changing the appearance of Nero Home, enabling
timeshifting, configuring the TV card in your computer, slide
show, video and audio functions and burning discs. You can also
reconfigure the basic settings at any time using the Easy Setup
wizard.
Opens the Music & Radio main screen. You can manage and
play your music files here as well as compile and burn new music
collections. You can also manage and play the web and DVB
radio channels available here.
Opens the Photos main screen.
Here you can manage your photos and slide shows, play slide
shows as well as compile new photo collections.
Opens the Video and TV main screen. Here you can manage
and play your videos and compile and burn new video
collections. You can also select the required TV channels and
capture recordings directly or schedule them.
Opens the Collections main screen.
Here you can manage and play existing collections as well as
compile and burn new collections containing music, photos, and
videos.
Fig. 2: Nero Home start screen
Nero Home 11
Page 12
Nero Home Start Screen
Opens the Devices main screen.
Here you can access all local drives and folders.
Enables the search function and opens an input field for search
terms.
5.1 Direct links to the start screen
Three additional direct links are available in the start screen under each of the menu icons
for the Collections, Video and TV, Devices, Music and Radio, Photos and Settings
screens.
The following buttons are available in the Settings screen:
Settings
Easy Setup
Burning
Configure EPG
Starts the Easy Setup wizards (see
Opens the Burning screen. You have the option of configuring
burn options for your media files (see
for music collections
Opens the TV Programs screen. You have the option of
configuring the EPG (see
).
(EPG)
Easy Setup Wizard).
Defining burning options
).
Configuring electronic program guide
The following buttons are available in the Photos screen:
Photos
Recent Photos
By Album
By Date
The following buttons are available in the Music and Radio screen:
Music and Radio
Recent Music
By Album
Radio Favorites
The following buttons are available in the Collections screen:
Opens the Last Viewed screen and displays all the photos you
last added (see
Opens the By Album screen and displays photo files sorted by
album (see
Opens the By Date screen and displays all photo files sorted by
date (see
Opens the Last Listened To screen and displays all music files
you last added (see
Opens the By Album screen and displays music files sorted by
album (see
Opens the Radio Favorites screen and displays the radio
channels you have added to your favorites (see
channels to radio favorites
Displaying photos ).
Displaying photos ).
Displaying photos ).
Playing music).
Playing music).
).
Adding radio
Collections
View Collected
Items
Nero Home 12
Opens the Collected Items screen and displays all media files
you have saved to the Nero Home clipboard to create a
Page 13
Nero Home Start Screen
Slide Shows
Music
The following buttons are available in the Video and TV screen:
Video and TV
Live TV
Video
TV
The following buttons are available in the Devices screen:
Devices
My Computer
MediaHome
Network
My Documents
collection (see Playing a collection ).
Opens the Slide Shows screen and displays all slide shows you
have compiled (see
Creating a slide show).
Opens the Music Collections screen and displays all music
collections you have created (see
Playing a collection ).
Opens the All Channels screen and displays all TV channels
available to you (see
Watching TV programs ).
Opens the Videos screen and displays all videos sorted by
various criteria, e.g. by album, date, etc. (see
Playing a video ).
Opens the All Channels screen and displays all TV channels
available to you (see
Watching TV programs ).
Opens the My Computer screen. If there is a disc inserted in the
drive, a direct link to the corresponding drive is displayed. The
My Computer link is grayed out (see
sources
).
Using personal data
Opens the MediaHome Network screen. Not only does the
MediaHome network allow you to access media files on other
computers, it also allows you to access the TV card of other
computers in the network via live TV streaming (see
streaming in the network
).
Live TV
Opens the My Documents screen and displays all media files
you have saved in Nero Home.
Nero Home 13
Page 14

Buttons in the Main Screens
6 Buttons in the Main Screens
Buttons for navigation on the left side of the main screens Settings, Music and Radio,
Collections, Photos, Video and TV and Devices can be used to access and execute
actions.
The following buttons are available:
Back
Play
Collect
View Collected
Items
Save Collection
Remove from
Nero Scout
Select All
Display As
Returns to the previous screen.
Plays all the highlighted files or all files stored in the
highlighted folders.
Selects individual files for storage in a collection.
Lists all the files currently selected for storage in a
collection.
Saves the current collection under a new name.
Removes selected files from the Nero Scout catalog.
Selects all the folders or files shown on the screen.
Changes how the files found will be displayed. The display
format currently in use is shown in the square brackets.
There are additional buttons in the middle e.g. to configure settings or to access files on
your computer. Descriptions of each button are found in the respective chapters.
Nero Scout is a multimedia database. Nero Scout can be used to catalog all media files on
your computer. Nero Scout not only makes the database available to Nero Suite programs,
but to all other current applications and Windows
Windows
®
Explorer to give you an overview of your media library at any time. The
®
Explorer. Nero Scout creates an entry in
convenient search function enables Nero Scout to quickly find the required files.
Nero Home 14
Page 15

Key Combinations
7 Key Combinations
In Nero Home, you can use key combinations to execute various commands from your
keyboard.
The following key combinations are available:
Ctrl + P
Ctrl + S
Space
Ctrl + I
Ctrl + F
Esc
Backspace
Ctrl + M
Ctrl + C
0
in the file selection
dialog
Interrupts playback. Press the key again to start playback.
Ends playback.
Pauses playback.
Enables/disables the information panel.
Switches from normal view to full-screen mode.
Switches from full-screen mode to normal view.
Returns to the previous screen.
Minimizes the playback area and overlays it as a separate
window in the bottom left-hand corner of the previous screen.
This allows you to control playback at any time while working
in other Nero Home screens.
Displays the Collected Items screen.
The item in focus is selected.
Nero Home 15
Page 16
Easy Setup Wizard
8 Easy Setup Wizard
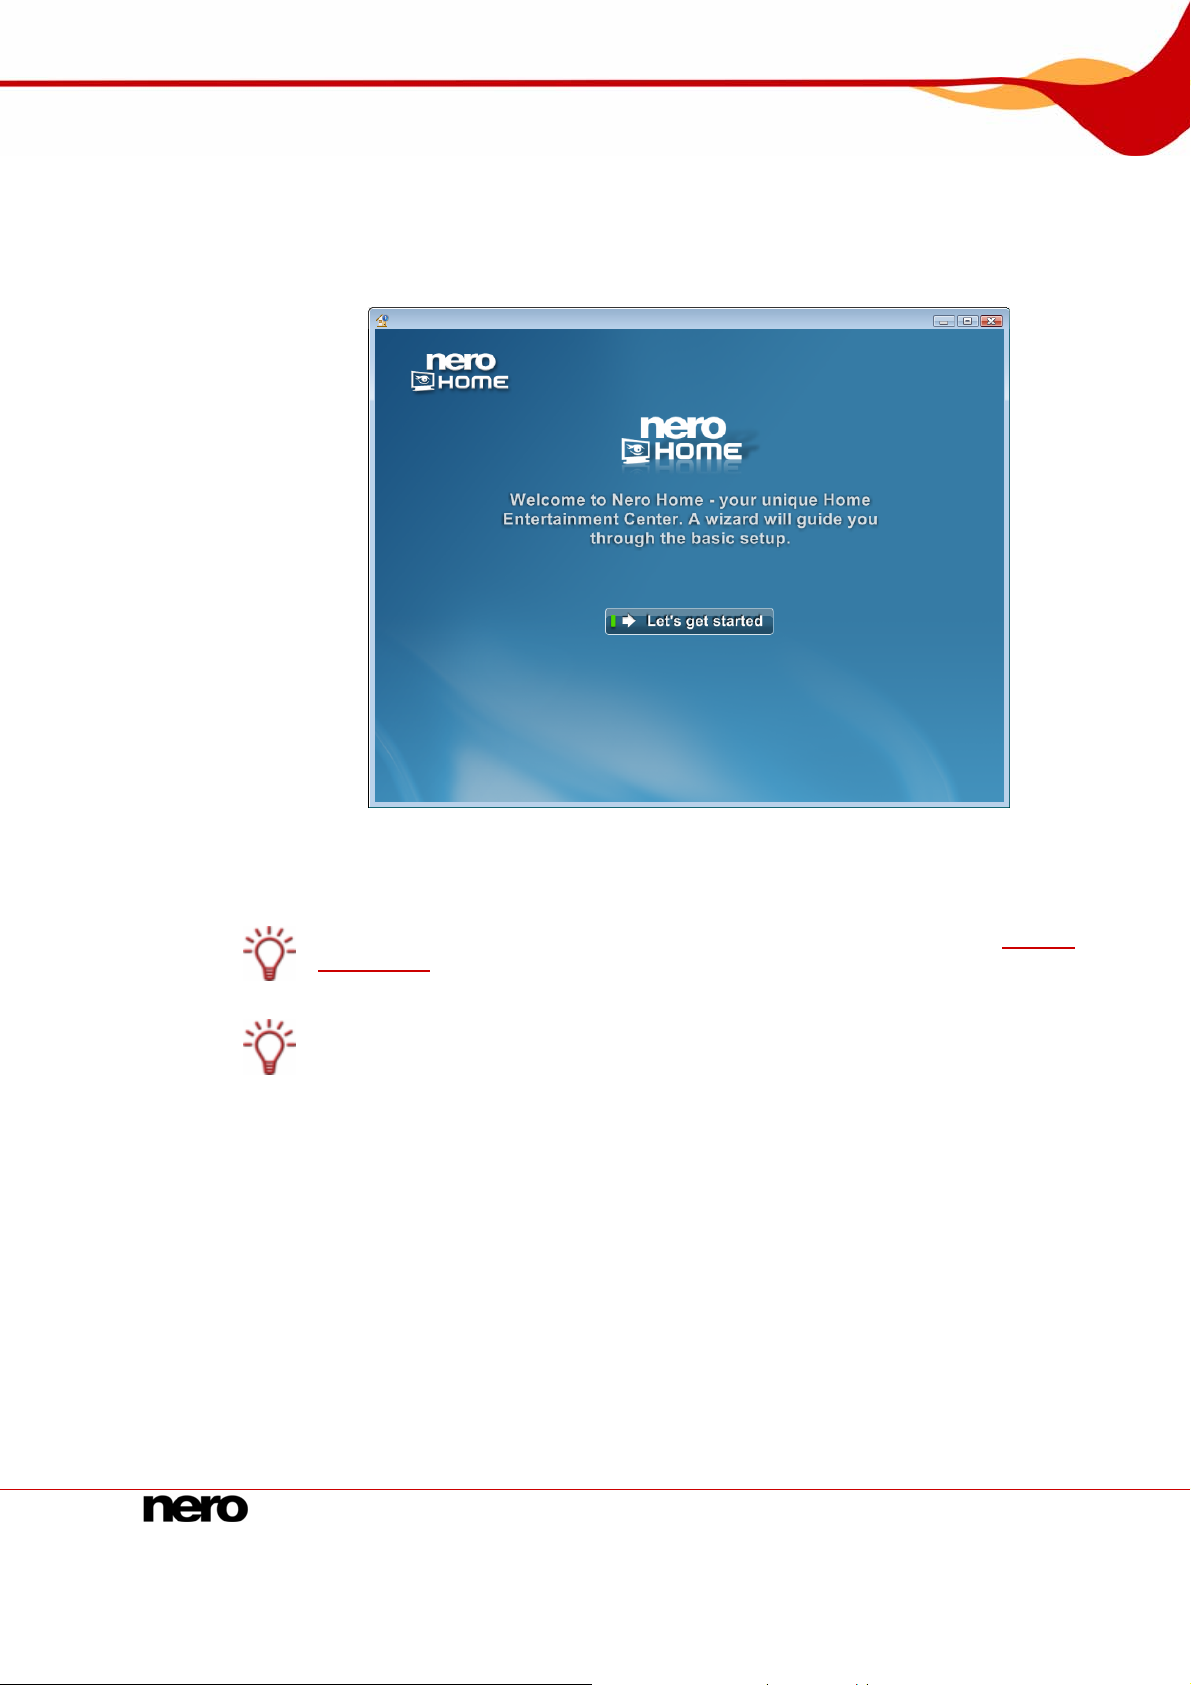
The first time you launch Nero Home, the start screen of the Easy Setup wizard will
automatically appear. This wizard guides you through the basic installation of Nero Home on
a step-by-step basis.
After you have configured the basic settings using the Easy Setup wizard, you can either
launch Nero Home immediately or use the wizard to configure additional settings.
You can change all the settings at any time in the Settings main screen (see
Main Screen
You can reconfigure the basic settings at any time using the Easy Setup wizard. Click
the Settings > Easy Setup menu icon in the Nero Home start screen to start the wizard.
).
8.1 Basic settings
To make the basic settings, proceed as follows:
1. Click the Let's get started button in the start screen of the Easy Setup wizard.
Æ The Your Country and Language screen appears.
2. Make the required settings and click the Continue button. The country settings are used to
search for TV channels and to set the TV standard.
Æ The Screen Settings screen appears.
Fig. 3: Easy Setup wizard
Settings
Nero Home 16
Page 17

Easy Setup Wizard
3. Select the image with the perfect circle and click Continue.
Æ The Background Settings screen appears.
4. Perform the required settings and click the Continue button.
Æ If you have connected a TV card to your computer, the first TV and Radio Settings
Nero Home provides simultaneous support for a number of TV cards, TV card s with dual
tuner, and/or hybrid tuner cards.
You will find a list of supported TV cards on the Nero web page under:
http://www.nero.com/link.php?topic_id=117&gen_id=8.
You will find a list of compatible devices at the Nero website under:
http://www.nero.com/link.php?topic_id=115&gen_id=8.
5. Enable the respective check box of the TV and radio receiver found that you want to use.
You can use the
the wizard.
The progress bar in the top right hand corner shows how many steps have been
completed and how many are still pending.
screen appears.
and Continue buttons to navigate between the various screens of
6. Click the Continue button.
Æ The second TV and Radio Settings screen appears.
7. If you have installed at least one analog TV card, choose the required signal source in the
drop-down menu.
8. If you have installed at least one DVB-S TV card, you should choose the satellite
configuration.
9. Click the Continue button.
Æ The TV and Radio Settings screen appears, and Nero Home scans the TV and radio
tuners to detect all available channels.
10. To restart scanning, click the Scan Again button.
11. To interrupt the scanning process, click the Skip Tuner Setup button.
Æ If the scanning process is complete, a screen appears with the following message: You
have successfully completed the Setup wizard.
12. To start Nero Home, click the Start Nero Home button.
Æ The Nero Home screen appears.
13. If you want to use the Easy Setup wizard to perform advanced settings on a step-by-step
basis, continue under
Advanced features.
Î The basic settings are saved.
Nero Home 17
Page 18
Easy Setup Wizard
8.2 Advanced features
The following requirement has to be fulfilled:
The basic settings for the Easy Setup wizard are complete (see Basic sett ing s).
To use the Easy Setup wizard to configure advanced settings for media files, TV recordings or
audio and slide shows, proceed as follows:
1. Click the Continue button.
Æ The Media Folders in Nero Home screen appears. This lists the folders that Nero
Home uses to obtain information about photos, music and videos.
2. To add a folder:
1. Click the Add Folder button.
2. Mark the required folder in the navigation tree and click the
Æ The folder is added to the list of folders that check photos, music and videos for
Nero Home.
You can move up one level in the navigation tree by clicking the Level Up button. Doubleclick to open the required folder.
button.
3. To remove a folder:
1. Mark the required folder and click the
Æ A dialog box opens.
2. Click the Yes button.
Æ The folder is removed from the list of folders that contain photos, music and videos
for Nero Home.
button.
4. Click the Continue button.
Æ The Folder for recording in Nero Home screen appears. You can select the folder to
which you save television programs you record.
5. Click the Change Folder button.
6. To save recordings in an existing folder, mark the required folder in the navigation tree.
7. To create a new folder for the recordings:
1. In the navigation tree, open the higher folder in which you want to create your new
folder.
2. Click the Create New button.
Æ A dialog box opens.
3. Enter a name for the new folder in the input field and click the OK button.
Æ The new folder is created in the navigation tree.
If you activated the Use on-screen keyboard check box box in the Settings –
Appearance main screen (see
input also displays a keyboard via which you can enter the name using the PC remote
control.
Nero Home 18
Changing the appearance of the program), clicking in the
Page 19
Easy Setup Wizard
8. If you want to rename an existing folder:
1. Mark the folder in the navigation tree.
2. Click the Rename button.
3. Enter the desired new name and click the OK button.
9. If you want to delete a folder:
1. Mark the folder in the navigation tree.
2. Click the Delete button.
10. Click the button.
Æ The selected folder appears in the Folder for recording in Nero Home screen.
11. Click the Continue button.
Æ The Audio Setup screen appears. You can configure the type and arrangement of the
Æ The folder is displayed in the navigation tree with the altered name.
Æ The folder and all subfolders will be deleted.
speaker set, as well as the mixing option in the drop-down menus.
The Default item automatically selects the ideal setting for your audio equipment and the
Mixing Option.
Depending on the speaker type and arrangement of the speaker set you selected in the
drop-down menu, Nero Surround Technology is available in the Mixing Option dropdown menu:
Nero Headphone filters the audio input so that a virtual surround sound – in stereo – is
created for playback with headphones. This can be used for any number of input channels.
Nero VirtualSpeaker filters the audio input so that a virtual surround sound – in stereo – is
created for playback with stereo speakers. This can be used for any number of input
channels.
®
Dolby
of sound effects from each listening position during film playback.
Surround compatible provides especially clear dialogs and improves the location
12. Perform the required settings and click the Continue button.
Æ The Autoplay setup screen appears.
13. Answer the automatic playback questions for audio CDs and DVDs with Yes or No in the
respective drop-down menu and click the Continue button.
Æ The first Slide Shows screen appears. Use the drop-down menus to configure the
settings to play back your slide shows.
14. Perform the required settings and click the Continue button.
Æ The second Slide Shows screen appears. Use the drop-down menus to configure the
settings to play back your slide shows and the slide show effects.
15. Perform the required settings and click the Continue button.
Æ The final screen appears and Nero Home is started automatically after a few seconds.
Î The advanced settings are saved.
Nero Home 19
Page 20
Settings Main Screen
9 Settings Main Screen
Nero Home allows you the option of customizing the Nero Home screen to your
requirements. It also allows you to define the settings for timeshifting, audio and video
playback and burning .
At any time in the Settings screen, you can change the basic settings you defined using the
Easy Setup wizards (see
all the steps of the basic settings again.
Easy Setup Wizard). You can also use the wizards to go through
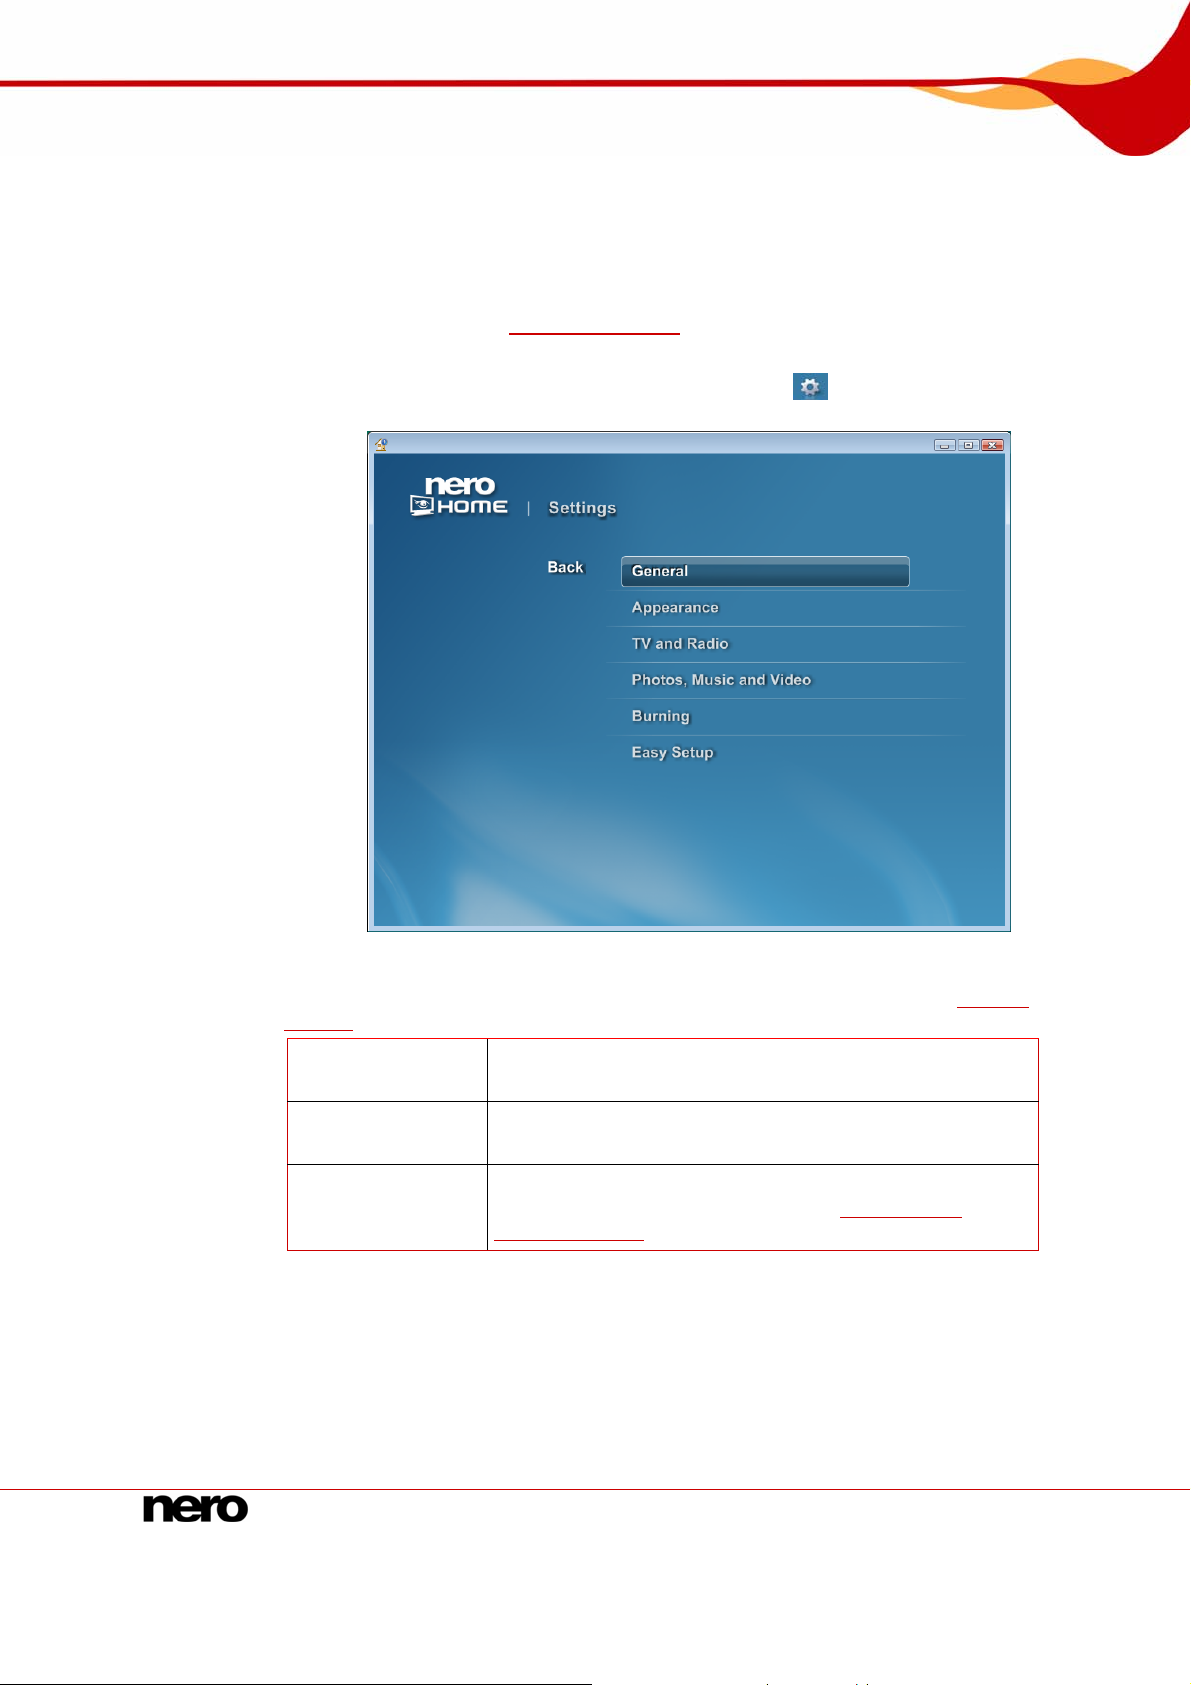
You can display the Settings main screen by clicking the
menu icon in the start screen.
Fig. 4: Settings main screen
You can make the following changes or settings in the General screen (see General
settings
Nero Home 20
):
Drop-down menu
Choice of country
Drop-down menu
Language selection
Button
Media scanning
options
Selects the country in which you want to use Nero Home.
Selects the language in which the Nero Home user interface
should be displayed.
Opens the Media scanning options screen to configure the
basic settings for your media files (see
scanning options
).
Setting media
Page 21

Settings Main Screen
In the Appearance screen (see Changing the appearance of the program) you can make or
change the following settings:
Drop-down menu
Skin Type
Allows you to select the skin types you can use to change
the Nero Home interface.
Drop-down menu
Background
Drop-down menu
Font size
Allows you to select background settings you can use to
customize the Nero Home screens to your requirements.
Defines the font size in which text is displayed on the
screen.
Check boxes
Use on-screen
Allows you to use a virtual keyboard for text input.
keyboard
Button
Screen Format
Opens the Screen Format screen and correctly sets the
screen format.
You can change or set the following in the TV and Radio screen:
Check boxes
Enable Timeshift
Drop-down menu
Timeshift Limit
Button
Configure TV Card
Button
TV Recording
Options
Allows you to use a timer function to play TV programs (see
Enabling timeshifting, available in Windows XP and higher).
Specifies the duration of the timeshift of the TV programs
Enabling timeshifting, available in Windows XP and
(see
higher).
Opens the TV wizards for setting up your TV card (see
Configuring a TV or recording card).
Specifies the TV recording quality. You can also select a
folder in which all TV programs are saved (see
Options for TV Recordings
).
Setting
You can change or set the following in the Photos, Music and Video screen:
Button
Video Settings
Button
DVD Settings
Button
Audio Settings
Button
Slide Show
Settings
Contains setting options for displaying video files (see
Defining video settings).
Gives you the option to start a DVD automatically when
inserted in the DVD drive. You can also set up parental
control (see
Defining DVD settings).
Contains setting options for displaying audio files (see
Defining audio settings).
Allows you to assign different effects to slide shows and to
specify format settings and slide show playback quality (see
Defining slide show settings).
Nero Home 21
Page 22
Settings Main Screen
In the Burning screen you can make or change the following settings:
Button
Burning Music
Button
Burning Slide
Shows
Button
Burning Videos
Button
Burning Mixed
Media
9.1 General settings
Nero Home allows you to customize Nero Home to your requirements. To define the general
settings, proceed as follows:
1. In the Settings main screen, click the General button.
Allows you to define basic settings for burning your music
files (see
Allows you to define basic settings for burning your slide
shows (see
Allows you to define basic settings for burning your video files
(see
Allows you to define basic settings for burning your media
collections (see
collections
Defining burning options for music collections).
Defining burning options for slide shows).
Defining burning options for videos).
Defining burning options for mixed
).
Æ The General screen appears.
You can use the
menu.
and buttons to browse through the various entries in a drop-do wn
2. In the Country drop-down menu, select the required country.
3. In the Language drop-down menu, select the required language.
4. To set the scanner for media files, click the Media Scanning Options button (see Setting
media scanning options
).
5. Click the Back button.
Æ The Settings main screen is displayed.
Î The general settings for Nero Home are saved.
Nero Home 22
Page 23
Settings Main Screen
9.2 Setting media scanning options
The multimedia database Nero Scout can be used to catalog all media files on your
computer.
Nero Scout not only makes the database available to Nero Suite programs, but to all other
current applications and Windows
Explorer to give you an overview of your media library at any time. The convenient search
function enables Nero Scout to quickly find the required files.
Nero Scout is of particular significance for Nero Home, since file searches using Nero Home
only find and display cataloged files.
To set scanning options for media, proceed as follows:
®
Explorer. Nero Scout creates an entry in Windows®
1. In the Settings main screen click the General button.
Æ The General screen appears.
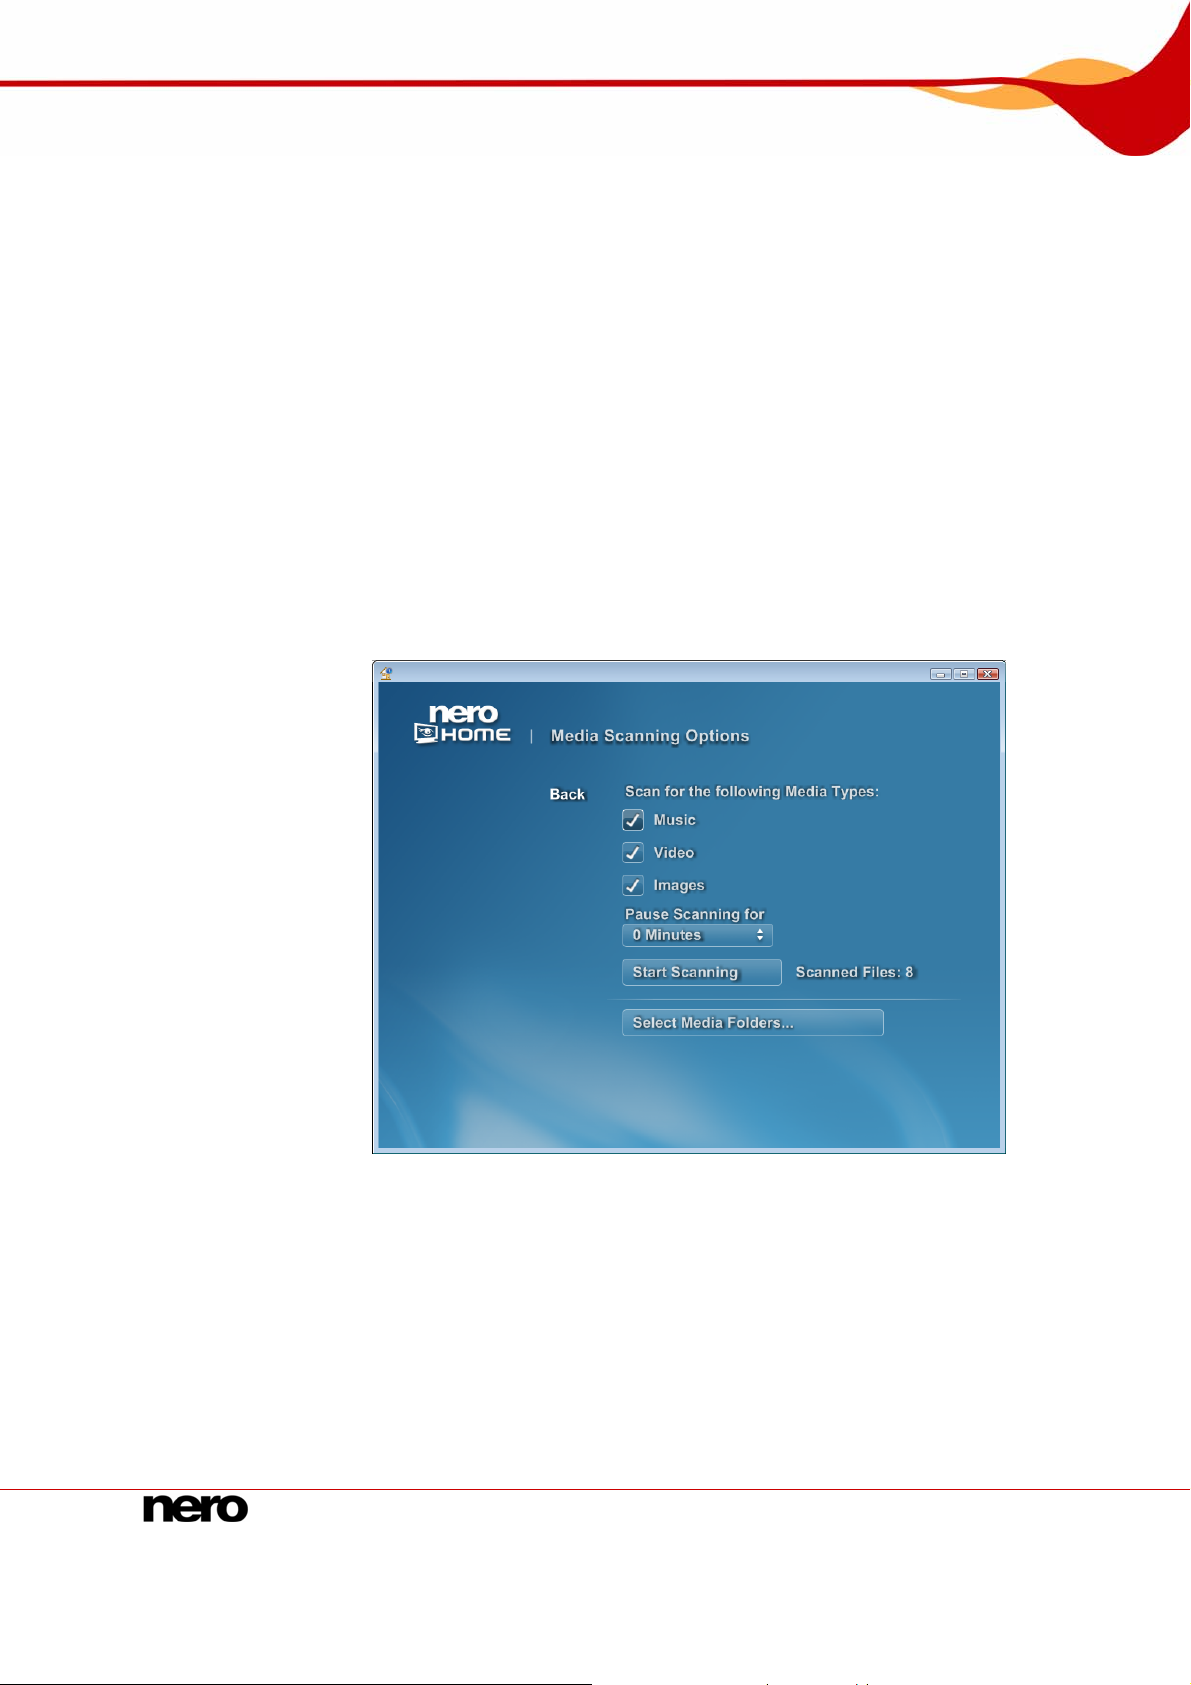
2. Click the Media Scanning Options button.
Æ The Media Scanning Options screen appears.
Fig. 5: Settings main screen – Media Scanning Options screen
3. Check the media type check boxes that you want to scan, i.e. catalog.
4. Click the Select Media Folders button.
Æ The Select Media Folders screen appears. Photos, music and videos are scanned from
folders on your computer and saved there.
Nero Home 23
Page 24

Settings Main Screen
5. To add a folder and all subfolders:
1. Click the Add Folder button.
2. Mark all folders whose media files are to be cataloged and click the Back button.
You can move up one level in the navigation tree by clicking the Folder Level Up button.
Double-click to open the required folder.
6. To remove a folder and all subfolders:
1. Mark the required folder and click the Remove button.
2. Click the Yes button.
Æ The Select Media Folders screen appears.
Æ The selected folder is added to the list of folders that check photos, music and
videos for Nero Home.
Æ A dialog box appears.
Æ The folder is removed from the list of folders that check photos, music and videos for
Nero Home.
7. Click the Back button.
Æ The Media Scanning Options screen appears.
8. To start the scanning process, click the Start Scanning button.
Æ Scanning is started.
Indexing stops automatically as soon as you start working on your computer. This is so as
to offer you the best computing performance when using other applications.
9. If you want to interrupt scanning for a particular time, select the duration of the interruption in
the Pause scanning for selection list.
Æ The scan is paused for the specified time and then starts again automatically.
10. To interrupt scanning, click the Stop Scanning button.
Æ Scanning is interrupted.
11. Click the Back button.
Æ The General screen appears.
Î The settings for scanning options for media are saved.
Nero Home 24
Page 25
Settings Main Screen
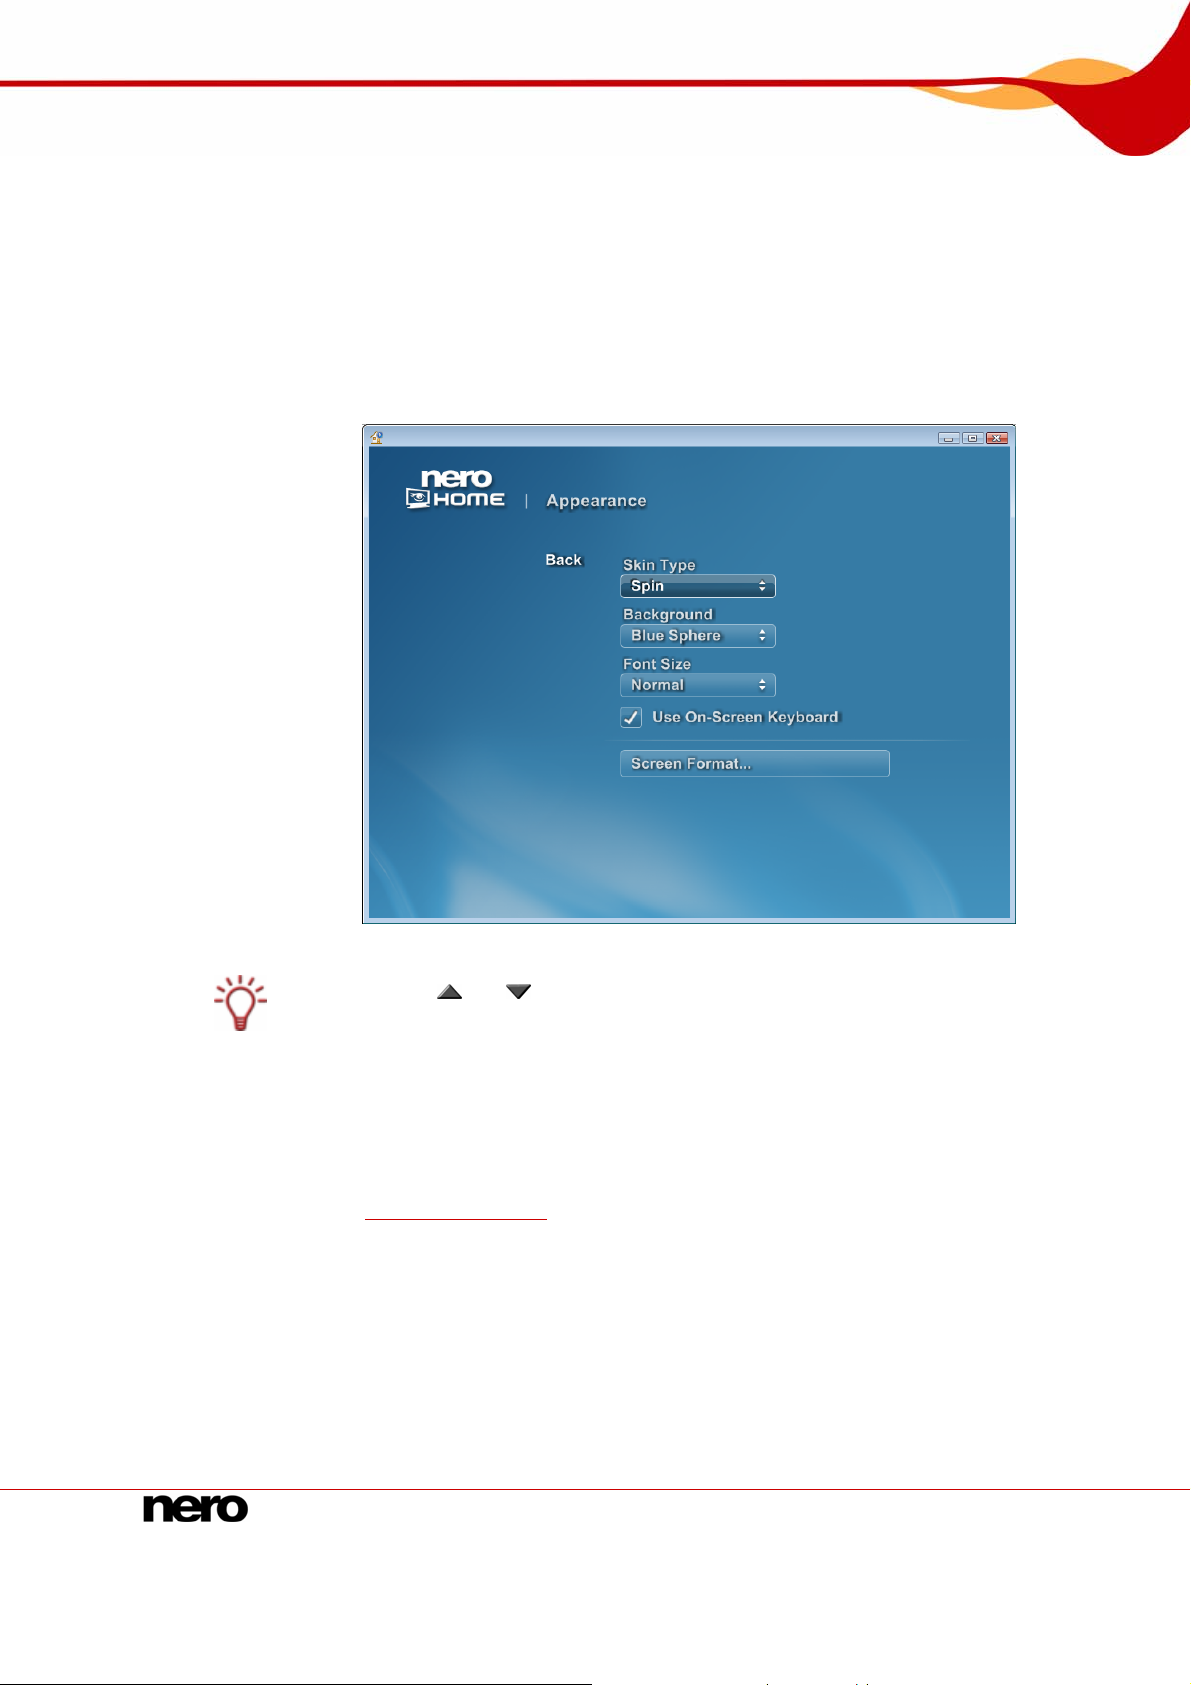
9.3 Changing the appearance of the program
You can make settings to customize the appearance of Nero Home to your requirements.
However, the settings defined here can be modified at any time. To modify the appearance,
proceed as follows:
1. Click the Appearance button in the Settings main screen.
Æ The Appearance screen opens with various selection options for modifying the
appearance.
Fig. 6: Settings main screen – Appearance screen
You can use the
menu.
and buttons to browse through the various entries in a drop-do wn
2. Select the skin you want in the Skin Type drop-down menu.
3. Select the background you want in the Background drop-down menu.
4. Select the font size you want in the Font Size drop-down menu.
5. If you want to use a PC remote control to enter text, check the Use on-screen keyboard
box (see
Search Main Screen).
6. Click the Screen Format button.
Æ The Screen Format screen appears.
Nero Home 25
Page 26

Settings Main Screen
7. Select the icon shown as a perfect circle and click the Back button.
8. Click the Back button to return to the Settings main screen.
Æ If you changed the skin, a dialog box appears.
9. Click the Yes button.
Æ Nero Home is restarted.
Î The appearance settings for Nero Home are saved.
9.4 Configuring a TV or recording card
The following requirement has to be fulfilled:
A TV card must be connected to your computer and on.
Nero Home provides simultaneous support for a number of TV cards, TV card s with dual
tuner, and/or hybrid tuner cards. You will find a list of supported TV cards on the Nero web
page under:
Nero Home will help you configure a TV or capture card by means of a TV wizard, which will
guide you through all the necessary steps. To configure a TV card, proceed as follows:
http://www.nero.com/link.php?topic_id=115&gen_id=8.
1. Click the TV and Radio button in the Settings main screen.
Æ The TV and Radio screen appears.
2. Click the Configure TV Card button.
Æ The TV wizard starts and the Device Selection screen appears.
Fig. 7: TV Wizard - Device Selection screen
Nero Home 26
Page 27
Settings Main Screen
3. Select the entry for your TV card in the Video device drop-down menu.
The entries displayed in the drop-down menu depend on your TV card.
4. If your TV card has several video inputs, select the entry you want in the Video input drop-
down menu.
5. Select the entry for the audio device in the Audio device drop-down menu.
6. If your TV card has several audio inputs, select the entry you want in the Audio input drop-
down menu.
7. Select the recording profile you want in the Recording quality drop-down menu.
8. If you want to change the path where recordings are stored:
1. Click the
2. Select the folder you want.
3. Click the OK button.
button.
Æ The Find Folder dialog box opens.
Æ The dialog box closes and the selected path is accepted.
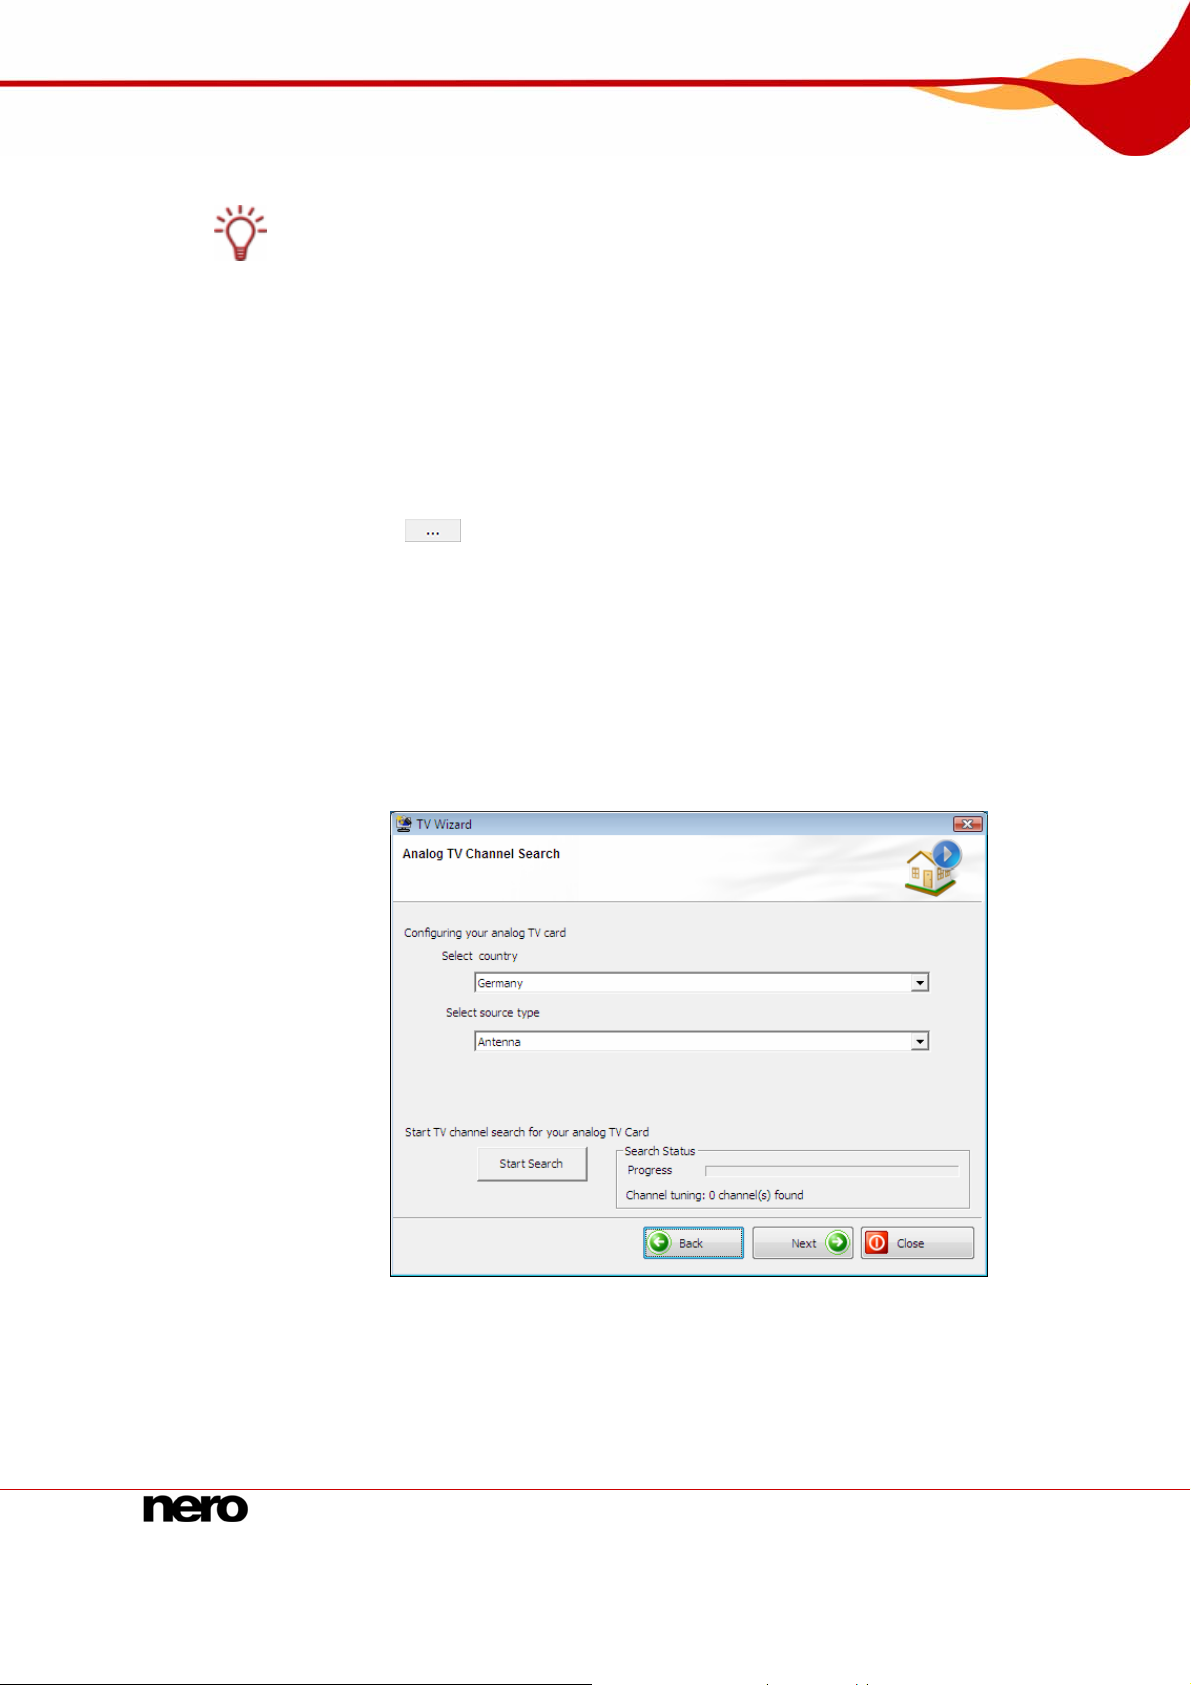
9. Click the Next button.
Æ The Analog TV Channel Search screen appears.
Fig. 8: TV wizard - Analog TV Channel Search screen
10. In the Select Country drop-down menu, select the country in which you are using Nero
Home.
11. Select a signal source in the Select source type drop-down menu.
Nero Home 27
Page 28

Settings Main Screen
12. Click the Start Search button to find TV channels.
Æ The search starts. You can follow the progress of the search in the Search Status area
based on the progress bar. The number of channels found is displayed.
13. When the channel search is finished, click the Next button.
Æ The Edit TV Channel screen appears. The channels found are shown in the selection
lists on the TV Channels and Radio Channels tabs.
14. If you want to rename a channel:
1. Highlight the channel you want in the selection list.
2. Click the Rename button.
3. Enter the desired name in the input field.
4. Click the OK button.
15. To remove a channel:
1. Select the relevant channel.
2. Click the Remove button.
Æ The Rename Channel dialog box opens.
Æ The dialog box closes and the respective channel is renamed.
Æ The channel is removed from the selection list.
16. To change the position of a channel:
1. Select the relevant channel.
2. Click the Up or Down button.
Æ The position of the channel is modified accordingly.
17. Click the Next button.
Æ The Manage TV Channel Groups screen appears.
Fig. 9: TV wizard - Manage TV Channel Groups screen
Nero Home 28
Page 29

Settings Main Screen
18. If you want to manage TV channel groups, click the TV Channel Groups tab.
You have the option of creating Channel groups to manage TV and radio channels. For
instance, you can group all sports channels into one "Sport" channel group.
19. If you want to create a new channel group:
1. Click the Add button.
2. Enter the desired name in the input field.
3. Click the OK button.
20. To change the position of a channel group:
1. Select the desired channel group.
2. Click the Up or Down button.
Æ The Add Group dialog box opens.
Æ The dialog box is closed and the group is added to the selection list.
Æ The position of the channel group is modified accordingly.
21. If you want to view and manage TV channels, click the TV Channels to Groups tab.
Æ The Available Channels selection list shows the channels that have not yet been
allocated to a group.
22. In the Change Groups drop-down menu, select the entry for the group to which you want to
add channels or from which you want to delete channels.
23. Select the channels you want to add to the group from the Available Channels list.
24. Click the button.
25. To change the position of a channel:
1. Select the desired channel in the Modify your groups area.
2. Click the Up or Down button.
Æ The position of the channel is modified accordingly.
26. To delete a channel from the group:
1. Select the desired channel in the Modify your groups area.
2. Click the
button.
Æ The channel is removed from the group and moved to the Available Channels
selection list.
27. Click the Finish button.
Î The settings are saved. You have configured the TV card.
Nero Home 29
Page 30

Settings Main Screen
9.5 Setting Options for TV Recordings
The settings you define apply to all recorded TV programs and can be modified for individual
recordings at any time. To define options for TV recordings, proceed as follows:
1. Click the TV and Radio button in the Settings main screen.
Æ The TV and Radio screen is displayed.
2. Click the TV Recording Options button.
Æ The TV Recording Options screen appears.
3. Select the required quality setting in the TV recording quality drop-down menu.
4. Click the Select Folder for TV Recordings button.
Æ The Select Folder for TV Recordings screen appears. You can select the folder where
TV recordings are saved here.
5. If you want to save the recordings in an existing folder, highlight the respective folder in the
navigation tree.
You can move up one level in the navigation tree by clicking the Folder Level Up button.
Double-click to open the required folder.
6. To create a new folder for your recordings:
1. In the navigation tree, open the higher folder in which you want to create your new
folder.
2. Click the Create New Folder button.
Æ A dialog box opens.
3. Enter a name for the new folder in the input field and click the OK button.
Æ The new folder is created in the navigation tree.
7. To rename an existing folder:
1. Mark the folder in the navigation tree.
2. Click the Rename Folder button.
3. Enter a new name and click the OK button.
Æ The folder is displayed in the navigation tree with the new name.
If you activated the Use on-screen keyboard check box in the Settings – Appearance
main screen (see
you can enter the name using the PC remote control.
General settings), clicking in the input also displays a keyboard via which
8. To delete a folder:
1. Mark the folder in the navigation tree.
2. Click the Delete Folder button.
Æ The folder and all subfolders are deleted.
9. Click the Back button.
Î The TV Recording Options screen appears.The settings for recording are saved.
Nero Home 30
Page 31

Settings Main Screen
9.6 Enabling timeshifting
Timeshifting is particularly useful if you watch TV using Nero Home and have to leave the
room for a short time or have to briefly interrupt your viewing.
Please note that timeshifting is only available in the full version of Nero Home with Windows
XP or higher. Nero Home Essentials does not support this function.
To enable timeshifting, proceed as follows:
1. Click the TV and Radio button in the Settings main screen.
Æ The TV and Radio screen appears.
Fig. 10: Settings main screen – TV and Radio screen
2. Check the Timeshifting enabled box.
3. Select the desired length of the recordings for timeshifted viewing in the Timeshift limit
drop-down menu.
When entering the duration, note that the space required on the hard drive
increases in tandem with the timeshifting duration.
4. To adapt a TV card, click the Configure TV Card button (see Configuring a TV or recording
).
card
5. To set the options for television programs, click the Options for TV Recordings button (see
Setting Options for TV Recordings).
6. Click the Back button.
Î The Settings main screen is displayed.Timeshifting has been enabled.
Nero Home 31
Page 32

Settings Main Screen
9.7 Defining video settings
The video settings defined here apply for all videos, but can bee modified for individual
videos at any time. To define video settings, proceed as follows:
1. In the Settings main screen, click the Photos, Music and Video button.
Æ The Photos, Music and Video screen appears.
2. Click the Video Settings button.
Æ The Video Settings screen appears.
Fig. 11: Settings main screen – Video Settings screen
3. Select the desired screen settings in the Display Mode drop-down menu.
4. Select the display for playback in the Video Profiles drop-down menu.
5. Select the playback mode in the Video Mode drop-down menu.
6. If you want to use deinterlacing, check the Use deinterlacing if possible box.
Deinterlacing
With the deinterlacing feature, video files with interlacing are converted to full-screen.
Modern televisions do not work with interlacing but with full-screen images.
7. If you want to use video padding for videos in Nero Digital™ format, enable the Use Video
Padding for Nero Digital check box.
Nero Home 32
Page 33

Settings Main Screen
Video Padding
Adjusts a Nero Digital video in the Letter Box format to the full-screen format of the Nero
Home playback screen. Subtitles are displayed in the lower third of the video.
8. Click the Back button.
Æ The Photos, Music and Video screen appears.
Î Basic video settings are saved.
9.8 Defining DVD settings
The DVD settings defined here apply to all DVDs, but can be modified for individual DVDs at
any time. To define DVD settings, proceed as follows:
1. In the Settings main screen click the Photos, Music and Video button.
Æ The Photos, Music and Video screen appears.
2. Click the DVD Settings button.
Æ The DVD Settings screen appears.
Fig. 12: Settings main screen – DVD Settings screen
3. If you do not want DVDs to play automatically, disable the DVD Autoplay check box. The
check box is enabled by default.
4. If you want to configure a parental control restriction:
1. Click the Configure Parental Control button.
Æ The Configure Parental Control screen appears.
Nero Home 33
Page 34

Settings Main Screen
2. First check the Enable Parental Control box.
Æ Parental control is enabled.
3. Enter a password in the Set unlock password input field.
4. Select the desired restriction option in the Restriction Level drop-down menu.
5. Click the Back button.
Æ The DVD Settings screen appears.
If a DVD is inserted for which the parental control criteria are relevant, a login window
appears. A user with an established profile can log in to watch the film.
5. Click the Back button.
Æ The Photos, Music and Video screen appears.
Î The DVD settings are saved.
9.9 Defining audio settings
The basic audio settings defined here apply to all audio files, but can be modified at any
time. To define audio settings, proceed as follows:
1. In the Settings main screen click the Photos, Music and Video button.
Æ The Photos, Music and Video screen appears.
2. Click the Audio Settings button.
Æ The Audio Settings screen appears.
Fig. 13: Settings main screen – Audio Settings screen
Nero Home 34
Page 35

Settings Main Screen
3. If you want your audio CDs to play automatically, enable the Audio CD Autoplay check box.
4. Select the available speakers in the Audio Setup drop-down menu.
The Default setting in the Audio Setup drop-down menu autom atically selects the ideal
setting for the audio setup and playback mode. If the Default is selected in the Audio Setup
drop-down menu, only the Default entry is available to you in the Audio Output Mode
drop-down menu.
5. Select the playback mode in the Audio Output Mode drop-down menu.
Depending on the entry you selected in the Audio Setup drop-down menu, Nero
Surround Technology is available to you in the Audio Output Mode drop-down-menu.
Nero Headphone filters the audio input so that a virtual surround sound – in stereo – is
created for playback with headphones. This can be used for any number of input channels.
Nero VirtualSpeaker filters the audio input so that a virtual surround sound – in stereo – is
created for playback with stereo speakers. This can be used for any number of input
channels.
Dolby
6. Click the Back button.
®
ProLogic® changes high-quality stereo content into natural surround sound.
Æ The Photos, Music and Video screen appears.
Î The audio settings are saved.
Nero Home 35
Page 36

Settings Main Screen
9.10 Defining slide show settings
The basic settings defined here apply to all slide shows, but can be modified later for each
individual slide show. To set slide show playback, proceed as follows:
1. Click the Photos, Music and Video button in the Settings main screen.
Æ The Photos, Music and Video screen appears.
2. Click the Slide Show Settings button.
Æ The Slide Show Settings screen appears.
Fig. 14: Settings main screen – Slide Show Settings screen
You can use the
menu.
and buttons to browse through the various entries in a drop-do wn
3. Select an entry in the Playback quality drop-down menu.
4. If the pictures in your slide show are to be played in random order, enable the Play in
random order check box.
5. If your slide show is to be automatically played over and over, enable the Repeat slide
show check box.
6. If you want to assign transitions or background music to your slide shows, click the Effects
button (see
Defining effects for slide shows).
7. To create a selection of transitions that are then available for assignment, click the Favorite
transitions button (see
Nero Home 36
Defining favorite transitions for slide shows).
Page 37

Settings Main Screen
8. To define the basic settings for saving a slide show as a movie, click the Save slideshow as
a movie button (see
Save slide show as movie).
9. Click the Back button.
Æ The Photos, Music and Video screen appears.
Î The settings for slide show playback are saved.
9.11 Defining effects for slide shows
The effects defined here apply to all slide shows, but can be modified for individual slide
shows at any time. To define effects for slide shows, proceed as follows:
1. In the Settings main screen click the Photos, Music and Video button.
Æ The Photos, Music and Video screen appears.
2. Click the Slide Show Settings button.
Æ The Slide Show Settings screen appears.
3. Click the Effects button.
Æ The Effects screen appears.
Fig. 15: Settings main screen – Effects screen
You can use the
menu.
Nero Home 37
and buttons to browse through the various entries in a drop-do wn
Page 38

Settings Main Screen
4. Select the display duration of each picture during a slide show in the Slide duration drop-
down menu.
5. If you want to animate the pictures in your slide show, e.g zoom effect, enable the Animate
slides check box.
6. Select an entry in the Background Music drop-down menu to customize how background
music is matched to your slide show.
Æ If you select the Adapt slide show duration entry, the Slide duration drop-down menu
is grayed out.
7. Select the effect in the Transition to be used when changing from one picture to the next.
If you select the Random from favorites entry in the Transition drop-down menu, the
pictures are assigned the effects you selected in the Favorite transitions screen (see
Defining favorite transitions for slide shows).
8. Select the duration of the transition between the individual pictures in the Transition
duration drop-down menu.
9. Click the Back button.
Æ The Slide Show Settings screen appears.
Î The effects for slide shows are saved.
9.12 Defining favorite transitions for slide shows
The favorite transitions defined here apply to all slide shows, but can be modified for
individual slide shows at any time. To define favorite transitions for slide shows, proceed as
follows:
1. Click the Photos, Music and Video button in the Settings main screen.
Æ The Photos, Music and Video screen appears.
2. Click the Slide Show Settings button.
Æ The Slide Show Settings screen appears.
3. Click the Favorite Transitions button.
Æ The Favorite Transitions screen appears.
Nero Home 38
Page 39

Settings Main Screen
Fig. 16: Settings main screen – Favorite Transitions screen
4. Enable the check boxes for the transitions to be used between the pictures in your slide
show.
5. Click the Back button.
Æ The Slide Show Settings screen appears.
Î The transitions for slide shows are saved.
9.13 Save slide show as movie
The settings defined here apply to all slide shows, but can be modified for individual slide
shows at any time. To save slide shows as movies, proceed as follows:
1. Click the Photos, Music and Video button in the Settings main screen.
Æ The Photos, Music and Video screen appears.
2. Click the Slide Show Settings button.
Æ The Slide Show Settings screen appears.
3. Click the Save Slide Show as Movie button.
Æ The Save Slide Show as Movie screen appears.
4. Select a disc format in the Profile drop-down menu.
5. Select the desired image quality in the Quality drop-down menu.
6. Select the desired color transfer in the TV format drop-down menu.
7. Select an audio format in the Audio format drop-down menu.
Nero Home 39
Page 40

Settings Main Screen
8. Enter a file name in the Export file name input field.
If you activated the Use on-screen keyboard check box in the Settings – Appearance
main screen (see
you can enter the name using the PC remote control.
General settings), clicking in the input also displays a keyboard via which
9. If you want to be prompted for the export file name each time before saving, enable the
Always ask for file name check box.
10. Click the Back button.
Æ The Slide Show Settings screen appears.
Î The settings for saving slide shows are saved.
9.14 Defining burning options for music collections
The settings defined here apply to all burning operations, but can be modified for individual
burning operations at any time. To set burning options for music collections, proceed as
follows:
1. Click the Burn button in the Settings main screen.
Æ The Burning screen appears.
2. Click the Burn Music button.
Æ The Burning Music screen appears.
Fig. 17: Settings main screen – Burning Music screen
You can use the
menu.
Nero Home 40
and buttons to browse through the various entries in a drop-do wn
Page 41

Settings Main Screen
3. Select a disc type in the When the type of disc is drop-down menu.
4. Select a disc format in the Then burn collection as drop-down menu.
5. If you select the CD entry in the When the type of disc is drop-down menu and you select
the Audio CD entry in the Then burn collection as drop-down menu, you skip the next
step.
6. If you select the DVD, HD-DVD or Blu-ray Disc entry in the When the type of disc is drop-
down menu, additional options are displayed.
1. If you always want to be asked to enter a title for your disc before burning starts, enable
2. Select the format in which audio files are to be burned in the Select audio encoding
3. Select the audio quality for audio files in the Select audio encoding quality drop-down
4. Enable the Keep original quality check box. This ensures that files already in the target
5. If you want to add a file with playlists to your disc, enable the Include a playlist file
the Always ask for disc title check box.
format drop-down menu.
menu.
format are not processed again.
(m3u) check box.
7. Click the Back button.
Æ The Burning screen appears.
Î The burning options for music collections are defined.
Nero Home 41
Page 42

Settings Main Screen
9.15 Defining burning options for slide shows
The settings defined here apply to all burning operations, but can be modified for individual
burning operations at any time. To define burning options for slide shows, proceed as
follows:
1. Click the Burn button in the Settings main screen.
Æ The Burning screen appears.
2. Click the Burning Slide Shows button.
Æ The Burning Slide Shows screen will appear.
Fig. 18: Settings main screen – Burning Slideshows screen
You can use the
menu.
and buttons to browse through the various entries in a drop-do wn
3. Select a disc type.
4. Select a disc format in the Then burn collection as drop-down menu.
5. If you select the CD or DVD entry in the When the type of disc is and the Super Video CD,
Video CD or DVD Video entry in the Then burn collection as drop-down menu:
1. If you always want to be asked to enter a title for your disc before burning starts, enable
the Always ask for disc title check box.
2. Select a TV standard in the Select video format drop-down menu.
Nero Home 42
Page 43

Settings Main Screen
NTSC (National Television System Committee) is a US TV standard that refers to the
system used to transmit the video signal.
PAL (Phase Alternation Line) is the TV standard applicable for Europe.
3. Click the Select menu style button and select the required menu template.
6. If you select HD-DVD, Blu-ray Disc in the When the type of disc is drop-down menu, the
Data Disc entry is automatically selected in the Then burn collection as drop-down menu.
Æ Additional options are displayed.
1. Select the format in which audio files are to be burned in the Select audio encoding
2. Select the audio quality for audio files in the Select audio encoding quality drop-down
3. Enable the Keep original quality check box. This ensures that files already in the target
4. If you want to add a file with playlists to your disc, enable the Include a playlist file
Æ The menu template is displayed as a minimized preview in the Burning Slide
Shows screen.
format drop-down menu.
menu.
format are not processed again.
(m3u) check box.
7. Click the Back button.
Æ The Burning screen appears.
Î The burning options for slide shows are defined.
Nero Home 43
Page 44

Settings Main Screen
9.16 Defining burning options for videos
The settings defined here apply to all burning operations, but can be modified for individual
burning operations at any time. To define burning options for videos, proceed as follows:
1. Click the Burn button in the Settings main screen.
Æ The Burning screen appears.
2. Click the Burning Videos button.
The Burning Videos screen appears. To define setting options for burning videos, perform
the steps under
Defining burning options for slide shows.
Fig. 19: Settings main screen – Burning Videos screen
Use the
and buttons to browse through the different entries in the drop-down menu.
3. Click the Back button.
Æ The Burning screen appears.
Î The burning options for videos are defined.
Nero Home 44
Page 45

Settings Main Screen
9.17 Defining burning options for mixed collections
The settings defined here apply to all burning operations, but can be modified for individual
burning operations at any time. To define burning options for mixed collections, proceed as
follows:
1. Click the Burn button in the Settings main screen.
Æ The Burning screen appears.
2. Click the Burn Mixed Media button.
Æ The Burn Mixed Media screen appears. To define setting options for burning mixed
media, perform the steps under
Defining burning options for slide shows.
Use the
and buttons to browse through the different entries in the drop-down menu.
3. Click the Back button.
Æ The Burning screen appears.
Î The burning options for media collections are saved.
Nero Home 45
Page 46

Music and Radio Main Screen
10 Music and Radio Main Screen
In the Music and Radio main screen, you can manage and play your music files and radio
channels and compile and burn new music colle ctions. The audio files cataloged by Nero
Scout are sorted by various criteria.
You can display the Music and Radio main screen by clicking the
Fig. 20: Music and Radio main screen
menu icon.
The following buttons are available for accessing music files or radio channels in the Music
and Radio main screen.
Opens the All Music screen and displays all music files you
All Music
By Artist
By Album
By Genre
Audio Casts
Last Listened To
Radio
There are buttons (on the left of the screen) for navigating and executing actions (see
Buttons in the Main Screens).
have added.
Also displays music files you added last and music files in
WMP format.
Opens the By Artist screen and displays music files sorted by
artist.
Opens the By Album screen and displays music files sorted
by album.
Opens the By Genre screen and displays music files sorted
by genre.
Opens the Audio Casts screen and displays all radio
programs you have downloaded or received as RSS feeds.
Opens the Last Listened To screen and displays all audio
files you last played.
Opens the Radio screen and displays all available radio
channels or web radio channels.
Nero Home 46
Page 47

Music and Radio Main Screen
10.1 Play Music screen
There are various button in the Play Music screen for performing actions.
Fig. 21: Music and Radio main screen – Play Music screen
The following buttons are available:
Back
Visualization
Returns to the previous screen.
Displays an animated graphic as a visual accompaniment to
the music. This is only available when playing music files.
Opens the Edit Collection screen in which the order of the
Edit List
entries in the list can be changed or entries can be removed
Editing a collection).
(see
This is only available when playing music files.
Minimizes the playback area and overlays it as a separate
Minimize
window in the bottom left-hand corner of the previous screen.
This allows you to control playback at any time while working
in other Nero Home screens.
Close
Closes the window and displays the previous screen.
You can display control bars during playback by moving the mouse pointer to the upper or
lower margin of the playback area (see
Showing buttons for playback control).
Nero Home 47
Page 48

Music and Radio Main Screen
10.2 Playing music
To play music, proceed as follows:
1. Double-click the menu icon in the start screen.
Æ The Music and Radio main screen appears and the audio files cataloged by Nero Scout
are displayed and sorted.
2. Double-click the button you want.
Æ The relevant screen is displayed. A list of your music files or radio channels is displayed.
3. Mark the desired music files or radio channel and click the Play button.
Î The selected music file or program of the selected radio channel is played. If you
have selected a music file, the Play Music screen opens and the selected music file
is played back. If you have selected a radio channel, the Radio screen is displayed.
10.3 Buttons for playback control
Control bars are briefly displayed in the standard playback area during playback.
Fig. 22: Tool bar for controlling playback
Control bars are also briefly displayed in the minimized playback area.
Fig. 23: Tool bar for controlling playback in the minimized playback area
Nero Home 48
Page 49

Music and Radio Main Screen
The following buttons are available to execute actions:
Pauses playback. The label on this button changes to
Resumes playback. The label on this button changes to
once playback has been resumed.
Ends playback or recording.
Returns to the previous music title and resumes playback.
Skips to the next music title and resumes playback.
Increases the rewinding speed each time the button is clicked.
Increases the fast-forwarding speed each time the button is
clicked.
Displays the volume. Clicking the circular slider and moving it
to the right increases the volume. Moving it to the left reduces
the volume.
Starts a recording. The button is only available if you are
viewing TV programs and want to record them (see
programs in progress
The bar at the bottom of the playback control shows how
much of the file has already been played. The shorter the bar
is, the less of the file has been played. Clicking on the leading
edge of the bar and moving it to the left resumes playback at
an earlier point. Clicking on the leading edge of the bar and
moving it to the right skips sections and continues playback at
a later point.
).
.
Recording
10.4 Showing buttons for playback control
To show playback buttons, proceed as follows:
1. Move the mouse pointer to the lower margin of the playback area (roughly where the time is
displayed).
Æ The tool bar for controlling playback is displayed.
2. Move the mouse pointer to the upper margin of the playback area window in the minimized
playback area.
Î The tool bar for controlling playback is displayed.
Nero Home 49
Page 50

Music and Radio Main Screen
10.5 Burning a music collection
To burn a music collection, proceed as follows:
1. Insert a recordable disc into your drive.
2. Double-click the menu icon in the start screen.
Æ The Music screen is displayed.
3. Double-click the button with the music collection you would like to burn.
Æ A list of your music files or radio channels is displayed.
4. Mark the required music files and click t he Collect button.
Æ The selected music files are saved to the Nero Home clipboard.
5. Repeat both previous steps if you would like to add additional music tracks to your collection.
6. Click the View Collected Items button.
Æ The Collected Items screen appears.
Fig. 24: Music and Radio main screen – Collected Items screen
7. Click the Burn button.
Æ If you enabled the Always ask for disc title check box in the settings, the corresponding
dialog box opens before burning starts.
Nero Home 50
Page 51

Music and Radio Main Screen
8. Enter a name for your disc in the text field.
If you activated the Use on-screen keyboard check box in the Settings – Appearance
main screen (see
you can enter the name using the PC remote control.
General settings), clicking in the input also displays a keyboard via which
9. Click the OK button.
Î The burn process starts and its progress is displayed in the minimized playback area.
10.6 Managing radio channels
The list of available radio channels of a DVB source in the Radio Channels folder can
contain hundreds of channels, so it makes sense to manage them.
A TV card with DVB capability must be installed on your computer.
Nero Home provides simultaneous support for a number of TV cards, TV card s with dual
tuner, and/or hybrid tuner cards.
You will find a list of supported TV cards on the Nero web page under:
http://www.nero.com/link.php?topic_id=115&gen_id=8.
You can organize selected stations by Favorites. You have the option of renaming, playing
or removing radio channels from a list as required.
If web radio channels have already been cataloged, they are displayed by clicking the Web
Radio button. Required web radio channels can be selected in the Nero Scout Internet
services for the purpose of adding these to the list of scanned media folders.
For detailed instructions on how to set up web radio channels, see the sep arate Nero Scout
user manual.
Fig. 25: Music and Radio main screen – Radio screen
Nero Home 51
Page 52

Music and Radio Main Screen
10.7 Renaming radio channels
To rename radio channels, proceed as follows:
1. Double-click the menu icon in the start screen.
Æ The Music main screen appears.
2. Double-click the Radio button.
Æ The Radio screen appears and all available channels are displayed sorte d by Favorites,
Radio Channels and Web Radio.
3. Double-click the button you want.
Æ The corresponding screen appears and the available radio channels are displayed.
4. Mark the required channel and click the Rename button.
Æ A dialog box opens.
5. Enter a new name in the text field and click the OK button.
If you activated the Use on-screen keyboard check box in the Settings – Appearance
main screen (see
you can enter the name using the PC remote control.
Æ The name of the radio channel is changed in all lists.
General settings), clicking in the input also displays a keyboard via which
6. Repeat both previous steps for each additional channel you want to rename.
Î The radio channel is renamed.
10.8 Adding radio channels to radio favorites
To add radio channels to radio favorites, proceed as follows:
1. Double-click the menu icon in the start screen.
Æ The Music main screen appears.
2. Double-click the Radio button.
Æ The Radio screen appears and all available channels are displayed sorte d by Favorites,
Radio Channels and Web Radio.
3. Double-click the desired Radio Channels or Web Radio button.
Æ The corresponding screen appears and all available radio channels are display ed.
4. Mark the required channel and click the Add as Radio Favorite button.
5. Repeat the last step for each additional channel that you would like to add to your list of
radio favorites.
Î The radio channels are added to your favorites.
Nero Home 52
Page 53

Music and Radio Main Screen
10.9 Removing radio channels from radio favorites
To remove radio channels from the list of favorites, proceed as follows:
1. Double-click the menu icon in the start screen.
Æ The Music main screen appears.
2. Double-click the Radio button.
Æ The Radio screen appears and all available channels are displayed sorte d by Favorites,
Radio Channels and Web Radio.
3. Double-click the Favorites button.
Æ The Favorites screen appears and all selected radio channel s are displayed.
4. Mark the required radio channel and click the Remove from Favorites button.
5. Repeat the previous step for each channel you wish to remove from the list of favorites.
Î The radio channels are removed from the list of radio favorites.
Nero Home 53
Page 54

Photos Main Screen
11 Photos Main Screen
In the Photos main screen, you can manage your photos and display them as slide shows
as well as compile and burn new photo collections and slide shows.
You can display the Photos main screen by clicking the
menu icon.
Fig. 26: Photos main screen
The Photos main screen also contains the following buttons for accessing photo files:
All Photos
By Album
By Date
Image Casts
Last Added
Last Viewed
WMP Pictures
Opens the All Photos screen and displays all photo files you
have added.
Opens the By Album screen and displays photo files sorted
by album.
Opens the By Date screen and displays all photo files sorted
by date.
Opens the Image Casts screen and displays all images you
have downloaded or received as RSS feeds.
Opens the Last Added screen and displays all the photo files
you last added.
Opens the Last Viewed screen and displays all the photo files
you last viewed.
Displays all photo files saved in the WMP format (Windows
Media Photo).
There are buttons (on the left of the screen) for navigating and executing actions (see
Buttons in the Main Screens).
Nero Home 54
Page 55

Photos Main Screen
11.1 Displaying View Photo screen
There are various button in the View Photo screen on the left for performing actions.
Fig. 27: Photos screen – View Photo screen
The following buttons are available:
Back
Play Slide Show
Search in
Region
Find Photos
Like This
Rotate
Close
Returns to the previous screen.
Plays the photo files included in a list as a slide show.
Highlights a section of the displayed photo to be used as a
search criterion for finding similar photos (see
photos
).
Finding similar
Performs a search for similar photos in all cataloged folders on
your computer and displays them in the Search Results
screen.
Turns the displayed photo 90° clockwise with each click.
Closes the View Photo screen and displays the previous
screen.
Please note that the Find Photos Like This function is not available in Nero Home
Essentials SE.
You can display control bars during playback by moving the mouse pointer to the upper or
lower margin of the playback area (see
Showing buttons for playback control).
Nero Home 55
Page 56

Photos Main Screen
11.2 Displaying photos
To display photos, proceed as follows:
1. Double-click the menu icon in the start screen.
Æ The Photos main screen appears.
2. Double-click the button with the photos you wish to display.
Æ A list of your photo files appears.
3. Mark the required photo file and click the Play button.
Æ The View Photo screen appears.
Î The selected photo is displayed.
11.3 Creating a slide show with background music
To create a slide show accompanied by background music, proceed as follows:
1. Double-click the menu icon in the start screen.
Æ The Photos main screen appears.
2. Double-click the button with the photos you would like to display.
Æ A list of your photo files appears.
3. Mark the required photos and click the Collect button.
Æ The selected photo files are saved to the Nero Home clipboard.
4. To add more photos to your slide show, repeat the last two steps.
5. Click the Nero Home button.
Æ The start screen appears.
6. Double-click the menu icon.
Æ The Music main screen appears.
7. Double-click the button you want.
Æ A list of your music files or radio channels is displayed.
8. Mark the required music files and click t he Collect button.
Æ The selected music files together with the photo files already collected are saved to the
Nero Home clipboard.
9. Repeat both previous steps if you would like to add further music files to your slide sh ow.
10. Click the View Collected Items button.
Æ The Collected Items screen appears. All selected files are displayed in a list.
Nero Home 56
Page 57

Photos Main Screen
11. Click the Save as Collection button.
Æ A dialog box opens.
12. Enter a name for your slide show in the text field.
If you activated the Use on-screen keyboard check box in the Settings – Appearance
main screen (see
you can enter the name using the PC remote control.
General settings), clicking in the input also displays a keyboard via which
13. Click the OK button.
Î The slide show with background music is saved and available in the Collections
screen.
11.4 Play Slide Show screen
There are various button in the Play Slide Show screen for performing actions.
Fig. 28: Play Slide Show screen
Nero Home 57
Page 58

Photos Main Screen
The following buttons are available:
You can display control bars during playback by moving the mouse pointer to the upper or
lower margin of the playback area (see
Back
Settings
Edit List
Minimize
Close
Returns to the previous screen.
Opens the Slide Show Settings screen. You can set the
playback quality, specify that your pictures should be played in
random order or that the slide show should always be played
from the beginning. In addition, you can set effects and
favorite transitions, as well as save your slide show as a
movie.
Opens the Edit List window in which the order of the entries
in the list can be changed or entries can be removed.
Minimizes the playback area and overlays it as a separate
window in the bottom left-hand corner of the previous screen.
This allows you to control playback at any time while working
in other Nero Home screens.
Closes the Play Slide Show window and displays the
previous screen.
Showing buttons for playback control).
11.5 Playing a slide show
To play a slide show, proceed as follows:
1. Double-click the menu icon in the start screen.
Æ The Collections main screen appears.
2. Double-click the Slide Shows button.
Æ The Slide Shows screen is displayed.
3. Select a slide show that you would like to play.
4. Click the Play button.
Î The selected slide show is played.
Nero Home 58
Page 59

Photos Main Screen
11.6 Finding similar photos
The Find from Region button lets you use a detail from a photo as a search criterion for
finding similar images. To find from regions, proceed as follows:
1. Click the Find from Region button in the View Photo screen.
Æ A light-colored frame will highlight a detail of the photo shown on the screen.
Fig. 29: View Photo screen – Find from Region screen
2. If you want to enlarge or reduce the detail:
1. Click the Resize Selection button.
2. Click in the frame and drag the frame in the required direction.
3. If you would like to select another detail from the photo:
1. Click the Move Selection button.
2. Click in the frame and drag the frame to the required position.
4. Click the Start Search button.
Æ The photos found are displayed in the Search Results screen.
Î Similar images are displayed.
Nero Home 59
Page 60

Photos Main Screen
11.7 Burning a photo collection
To burn a photo collection, proceed as follows:
1. Insert a recordable disc into your drive.
2. Double-click the menu icon in the start screen.
Æ The Photos main screen appears.
3. Double-click the button you want.
Æ A list of the desired photo files is displayed.
4. Mark the desired photo files and click the Collect button.
Æ The selected photos are saved to the Nero Home clipboard.
5. Click the View Collected Items button.
Æ The Collected Items screen appears.
Fig. 30: Photos main screen – Collected Items screen
Nero Home 60
Page 61

Photos Main Screen
6. Click the Burn button.
Æ If you enabled the Always ask for disc title check box in the settings, the corresponding
7. Enter a name for your disc in the text field.
If you activated the Use on-screen keyboard check box in the Settings – Appearance
main screen (see
you can enter the name using the PC remote control.
8. Click the OK button.
dialog box opens before burning starts.
General settings), clicking in the input also displays a keyboard via which
Î The burn process starts and its progress is displayed in the minimized playback area.
Nero Home 61
Page 62

Video and TV Main Screen
12 Video and TV Main Screen
In the Video and TV main screen, you can set up television channels and select television
programs as well as start or schedule recording of programs. You can make a compilation of
your favorite TV channels in the TV favorites folder and choose names for them. You can
also manage and view your videos. If you have more than one tuner card, you can choose
picture-in-picture playback or recording on two channels.You can display the Video and TV
main screen by clicking the
menu icon in the start screen.
Fig. 31: Video and TV main screen
The Video and TV main screen also contains the following buttons for accessing photo files:
TV Favorites
TV Channels
Web TV
TV Programs
TV Recordings
Videos
Video Casts
There are buttons (on the left of the screen) for navigating and executing actions (see
Buttons in the Main Screens).
Opens the TV Favorites screen and displays all TV channels
you have added (see
Opens the TV Channels screen and displays all available TV
channels.
Opens the Web TV screen and displays all TV channels
available via the Internet.
Opens the TV Programs screen and displays all TV programs
available to you. If you can receive electronic TV guides, you
can use them to show the programs currently being broadcast
Watching TV programs ).
(see
Opens the TV Recordings screen and displays all available
recordings sorted by various criteria (see
recordings
Opens the Videos screen and displays all video files sorted by
various criteria (see
Opens the Video Casts screen and displays all videos you
have downloaded or received as RSS feeds.
).
Adding TV channels to TV favorites).
Watching TV
Playing a video ).
Nero Home 62
Page 63

Video and TV Main Screen
12.1 Displaying TV channels
To view a TV program, proceed as follows:
1. Double-click the menu icon in the start screen.
Æ The Video and TV main screen appears.
2. Double-click the TV Channels button.
Æ The TV Channels screen appears. All the channels found during the station search are
displayed in their appropriate groups.
Nero Home will display a dialog box to inform you if your TV card has not yet been
configured. You can start the configuration immediately from this dialog box (see
Configuring a TV or recording card).
3. Double-click the button with the TV channels you would like to display.
Æ The corresponding screen will appear and the available channels are displayed.
4. Mark the required channel and click the Play button.
Æ The program currently being broadcast on the channel is shown in full-screen mode.
5. Double-click in the screen.
Æ The Watch TV screen appears.
Î The TV program is started.
12.2 Renaming TV channels
To rename TV channels, proceed as follows:
1. Double-click the menu icon in the start screen.
Æ The Video and TV main screen appears.
2. Double-click the desired button with the TV channels you would like to rename.
Æ The corresponding screen appears and the available channels are displayed.
Nero Home will display a dialog box to inform you if your TV card has not yet been
configured. You can start the configuration immediately from this dialog box (see
Configuring a TV or recording card).
3. Mark the required channel and click the Rename button.
Æ A dialog box opens.
4. Enter the required name in the text field and click the OK button.
If you activated the Use on-screen keyboard check box in the Settings – Appearance
main screen (see
you can enter the name using the PC remote control.
General settings), clicking in the input also displays a keyboard via which
Î The TV channel is renamed in all lists. You can now find and play the TV channel
under the selected name in the respective lists of TV channels.
Nero Home 63
Page 64

Video and TV Main Screen
12.3 Adding TV channels to TV favorites
To add TV channels to the TV favorites, proceed as follows:
1. Double-click the menu icon in the start screen.
Æ The Video and TV main screen appears.
2. Double-click the TV Channels button.
Æ The TV Channels screen will appear. All channels found during the station sear ch are
displayed in the respective groups.
Nero Home will display a dialog box to inform you if your TV card has not yet been
configured. You can start the configuration immediately from this dialog box (see
Configuring a TV or recording card).
3. Double-click the button with the TV channels.
Æ The relevant screen appears. A list of all available TV channels is displayed.
4. Mark the required channel and click the Add to TV Favorites button.
5. Repeat the last two steps for each channel you would like to add to the list of your TV
favorites.
Æ The TV channels are added to your TV favorites.
Î You can find and play the channels in the TV Favorites screen.
12.4 Removing TV channels from TV favorites
To remove TV channels from the list of TV favorites, proceed as follows:
1. Double-click the menu icon in the start screen.
Æ The Video and TV main screen appears.
2. Double-click the TV Favorites button.
Æ The TV Favorites screen appears and all selected TV favorites are displayed.
3. Mark the required channel and click the Remove from Favorites button.
4. Repeat the previous step for each channel you would like to remove from the list of TV
favorites.
Î The selected TV channel is removed from the list of TV favorites.
Nero Home 64
Page 65

Video and TV Main Screen
12.5 Watching TV programs
If you would like to watch a television program on a specific channel, proceed as follows:
1. Double-click the menu icon in the start screen.
Æ The Video and TV main screen appears.
2. Double-click the TV Programs button.
Æ The TV Programs screen appears.
3. Double-click the button with the TV program you would like to display.
Æ The corresponding screen appears and a list of TV programs is displayed.
4. Double-click the desired TV program.
5. Click the Playback button.
Æ The selected TV program is shown in full-screen mode.
6. Double-click in the screen.
Æ The Watch TV screen appears.
Î The selected TV program is played.
12.6 Recording programs in progress
You can record a program in progress at any time (see Watching TV programs ). To do so,
proceed as follows:
1. Move the mouse pointer to the lower margin of the playback area (see Showing buttons for
playback control
Æ The tool bar for controlling playback is displayed.
2. Click the button.
Æ The program shown in the playback area is recorded.
3. Click the button.
Æ Recording is ended and a dialog box opens.
4. Enter the name under which you would like to save the recording in the text field shown.
If you activated the Use on-screen keyboard check box in the Settings – Appearance
main screen (see
you can enter the name using the PC remote control.
).
General settings), clicking in the input also displays a keyboard via which
5. Click the OK button.
Æ The Watch TV screen is displayed and you can follow the program in progress.
Î The program in process is recorded. The recording is available in the Recordings
folder under the chosen name.
Nero Home 65
Page 66

Video and TV Main Screen
12.7 Schedule Recordings screen
The following buttons for executing actions are available in the Scheduled Recordings
screen on the left:
Back
New
Edit
Delete
This function is not available in Nero Home Essentials SE.
Returns to the previous screen.
Displays a screen in which you can schedule new recordings.
Displays a separate screen in which you can change the
settings for a scheduled recording.
Deletes the highlighted scheduled recording.
12.8 Scheduling new recordings
To schedule a new recording, proceed as follows:
1. Double-click the menu icon in the start screen.
Æ The Video and TV main screen appears.
2. Double-click the TV Recordings button.
Æ The TV Recordings screen appears.
3. Double-click the Scheduled Recordings folder.
Æ The Scheduled Recordings screen is displayed and lists all recordings already
scheduled.
4. Click the New button.
Æ The relevant screen appears.
You can use the
menu.
and buttons to browse through the various entries in a drop-do wn
5. Select the required settings for Channel, Date, Start and End Time and click the OK button.
Æ The newly scheduled recording is saved and shown in the Scheduled Recordings
screen.
6. To change the settings of a scheduled recording:
1. Click the Edit button.
Æ Check the settings and click the OK button.
7. To delete a scheduled recording:
1. Select the recording you would like to delete.
2. Click the Delete button.
Æ The scheduled recording is deleted.
Î You have scheduled new recordings.
Nero Home 66
Page 67

Video and TV Main Screen
12.9 Watching TV recordings
To watch one of your recordings, proceed as follows:
1. Double-click the menu icon in the start screen.
Æ The Video and TV main screen appears.
2. Double-click the TV Recordings button.
Æ The TV Recordings screen appears and all available recordings are displayed, sorted
by various criteria.
3. Double-click the button with the TV recording you would like to watch.
Æ A list of available recordings is displayed.
4. Mark the recording you want and click the Play button.
Æ The recording is shown in full-screen mode.
5. Double-click in the screen.
Æ The Play Video screen appears.
Î The recording is played.
You can display control bars during playback by moving the mouse pointer to the upper or
lower margin of the playback area (see
12.10 Play Video screen
There are various button on the left side of the Play Video screen for performing actions.
Showing buttons for playback control).
Fig. 32: Video and TV main screen – Play Video screen
Nero Home 67
Page 68

Video and TV Main Screen
The following button is available:
Back
Subtitles
Edit List
Minimize
Close
You can display control bars during playback by moving the mouse pointer to the upper or
lower margin of the playback area (see
12.11 Playing a video
Returns to the previous screen.
Shows subtitles if available.
Opens the relevant screen in which individual photos can be
removed from the slide show or the order of the photos can be
changed.
Minimizes the playback area and overlays it as a separate
window in the bottom left-hand corner of the previous screen.
This allows you to control playback at any time while working in
other Nero Home screens.
Closes the Play Video window and displays the previous
screen.
Showing buttons for playback control).
To play a video, proceed as follows:
1. Double-click the menu icon in the start screen.
Æ The Video and TV main screen appears.
2. Double-click the Videos button.
Æ The Videos screen appears.
3. Double-click the button with the video file you would like to select.
Æ The corresponding list of video files appears.
4. Mark the file you want and click Play.
Æ The video file is played in full-screen mode.
5. Double-click in the screen.
Æ The Play Video screen appears.
Î The video is played.
Nero Home 68
Page 69

Video and TV Main Screen
12.12 Information panel
If you can receive electronic TV guides, you can use the on-screen text in the information
panel to search for information about the program as well as display information on the
program currently showing. The information panel is available when TV programs are
playing in full-screen mode (see
In addition, you can show teletext by clicking the Teletext button in the information panel. To
show subtitles if available, click the Subtitles button in the information panel.
Depending on the country in which Nero Home is used, teletext availability may be limited.
The following options are available to control the information panel:
Remote control
[keyboard]
i [CTRL + I]
Up/down arrow keys Changes the channel.
Right/left arrow keys Changes the program.
Red button [F5] Starts recording.
Green button [F6] Closes the information panel.
Blue button [F8] Closes the information panel.
Depending on the remote control used, the color keys for navigation and executing actions
may not be available. Use the up, down, right and left buttons as well as the OK button on
your remote control instead.
Renaming TV channels).
Function
Enables/disables the information panel in full-screen
mode.
The program information and a preview, if available, is
displayed in the minimized window.
The program information, if available, is displayed.
If the program starts later, the recording will be listed under
the Scheduled Recordings.
Displays the channel last selected in the information panel in
full-screen mode.
Displays the channel last selected in the information panel
as picture-in-picture.
Nero Home 69
Page 70

Video and TV Main Screen
12.13 TV Programs screen
There are various buttons on the left side of the TV Programs screen for performing actions.
The following buttons are available:
Back
Returns to the previous screen.
Updates the data for the electronic program guide (EPG).
EPG Update
If you can receive electronic TV guides, you can use them to
show the programs currently being broadcast.
Displays the second TV Programs screen and shows all
EPG Settings
available EPG sources.
If you can receive electronic TV guides, you can configure them
here.
Map EPG
Channels
Displays the relevant screen for mapping EPG channels. If you
can receive electronic TV guides, you have the option of
assigning channels EPG data.
Fig. 33: Video and TV main screen – TV Programs screen
Nero Home 70
Page 71

Video and TV Main Screen
12.14 Configuring electronic program guide (EPG)
Nero Home supports the digital program guide EPG (Electronic Program Guide). You can
use it to receive TV program information. Nero Home and various TV cards provide you EPG
data for analog and digital broadcasters.
To configure the EPG, proceed as follows:
1. Double-click the menu icon in the start screen.
Æ The Video and TV main screen appears.
2. Double-click the TV Programs button.
Æ The TV Programs screen appears.
3. Click the EPG Settings button.
Æ The second TV Programs screen appears.
Fig. 34: Video and TV main screen – TV Programs screen
4. If you use a digital TV card, enable the Digital Tuner check box.
Æ The EPG data available for the respective TV channel is read automatically.
5. To use an analog TV card:
1. Enable the XML TV check box.
2. Click the Set Up Now button.
Æ The corresponding screen opens.
3. Specify the path of the EPG source file on your hard drive in the text field and click the
Accept button.
Æ The path is accepted. The EPG data is transferred.
Nero Home 71
Page 72

Video and TV Main Screen
6. If you want to update the EPG, click the EPG Update button.
Æ The EPG is updated.
7. If you want to cancel the update, click the Cancel Update button.
Æ The update is cancelled.
8. If the selected EPG source for each EPG update should be updated automatically, click the
Activate button.
Æ The EPG source is updated for each update automatically.
Î You have configured the EPG. EPG data is available by clicking the Map EPG
Channels button.
12.15 Mapping EPG data
To display the EPG, proceed as follows:
1. Double-click the menu icon in the start screen.
Æ The Video and TV main screen appears.
2. Double-click the TV Programs button.
Æ The TV Programs screen appears.
3. Click the Map EPG Channels button.
Î The respective screen appears and shows all TV channels available for the EPG
data.
Nero Home 72
Page 73

Video and TV Main Screen
12.16 Assigning EPG data
A digital TV card can read EPG data for the respective TV channel directly. However, not all
TV channels transmit EPG data. There is the option of assigning an XML file or channel to a
digital TV channel. The XML file must first be downloaded and called up in Nero Home just
like with analog broadcasters (see
EPG data is not automatically received for analog TV cards. If you use an analog TV card,
you have the option of manually assigning EPG data to a channel.
To assign EPG data to a specific channel, proceed as follows:
1. Double-click the menu icon in the start screen.
Æ The Video and TV main screen appears.
2. Double-click the TV Programs button.
Æ The TV Programs screen appears.
3. Click the Map EPG Channels button.
Æ The relevant screen is displayed and shows all TV channels available via active tuner
cards.
Configuring electronic program guide (EPG) ).
4. Mark the desired channel and click the Change button.
Æ The relevant screen is displayed and shows all available EPG IDs.
5. Mark an EPG ID and click the Map button.
Î The channel is assigned to the chosen EPG ID. You can receive EPG data.
12.17 Updating electronic program guide (EPG)
To update an EPG source you have already installed, proceed as follows:
1. Double-click the menu icon in the start screen.
Æ The Video and TV main screen appears.
2. Double-click the TV Programs button.
Æ The TV Programs screen appears.
3. Click the EPG Update button.
Î The EPG source is updated and you receive the latest program information.
Nero Home 73
Page 74

Video and TV Main Screen
12.18 Scheduling new recordings with EPG
To use the EPG to schedule recordings, proceed as follows:
1. Double-click the menu icon in the start screen.
Æ The Video and TV main screen appears.
2. Double-click the All Programs button or depending on the digital channels you want to
manage, click another button with digital channels.
Æ The respective screen appears and the digital EPG shows the programs in prog ress as
well as programs over the coming days with their broadcast times.
3. Mark the program you would like to record and click the New Recording button.
Æ Depending on the button with digital channels you clicked, the relevant screen appears
and shows the Channel, broadcast details (Date, Start time, End time) and the Title of
the chosen program.
You can use the
menu.
and buttons to browse through the various entries in a drop-do wn
4. Check or change the respective settings for Channel, Date, Start time, and End time.
5. Click the OK button.
Æ The desired recording is displayed in the Scheduled Recordings screen (see
Scheduling new recordings).
Î The recording is programmed with the EPG.
Nero Home 74
Page 75

Video and TV Main Screen
12.19 Displaying picture-in-picture
If you have configured multiple TV tuner cards, picture-in-picture playback is available when
watching TV programs (see
channel in full-screen mode and the other as a minimized picture-in-picture.
Please note that multiple TV cards or a TV card with dual tuner are required to be able to
use this function.
Renaming TV channels). Two TV channels are displayed: one
Fig. 35: Picture-in-picture screen
You can use your PC remote control or the keyboard to control various actions.
The following options are available:
Remote control [keyboard] Function
Blue button [F7]
Enables/disables picture-in-picture.
Changes the program.
Red button [F5]
The channel playing in full-screen mode changes to
minimized picture-in-picture and vice versa.
Highlights the picture-in-picture.
Green button [F6]
All further control commands will be applied to the
minimized picture.
Depending on the remote control used, the color keys for navigation and executing actions
may not be available. Use the up, down, right and left buttons as well as the OK button on
your remote control instead.
Nero Home 75
Page 76

Devices Main Screen
13 Devices Main Screen
As well as allowing you to access the files found via the automatic search function (see
Setting media scanning options), Nero Home also allows you to access all other media files
on your computer.
You can display the Devices main screen by clicking the
There are buttons (on the left of the screen) for navigating and executing actions (see
Buttons in the Main Screens).
menu icon.
13.1 Using personal data sources
To access media files on a data medium on your computer, proceed as follows:
1. Double-click the menu icon in the start screen.
Æ The Devices main screen is displayed.
All the data sources available on your computer such as floppy disks, hard drives, USB
removable media, and CD/DVD drives are shown.
2. Double-click the data medium you want.
Æ The media files of the selected data media are displayed.
3. Mark the desired file and click the Play button.
Î The desired file is played.
Nero Home 76
Page 77

Devices Main Screen
13.2 Live TV streaming in the network
Not only does the MediaHome network allow you to access media files on other computers,
it also allows you to access the TV card of other computers in the network via live TV
streaming.
The following requirement has to be fulfilled:
Nero MediaHome is installed on both computers.
If you want to access media files from another computer or via live TV streaming on the TV
card of another computer in the network, proceed as follows:
1. Click the menu icon.
2. Click the MediaHome Network direct link.
If there is a disc inserted in the drive, a direct link to the respective drive is provided under
Devices. The MediaHome Network link is then hidden and no longer available.
Æ The MediaHome Network screen is displayed and shows all the computers available in
the network.
Fig. 36: Devices main screen - MediaHome Network screen
3. Double-click the computer you want.
Æ The relevant screen appears.
4. Double-click the TV Channels button.
Æ The TV Channels screen appears and shows an overview of all the TV channels.
5. Mark the required channel and click the Play button.
Î Playback is started.
Nero Home 77
Page 78

Collections Main Screen
14 Collections Main Screen
In the Collections main screen, you can manage and play your media files as well as edit
and delete compilations or exclude them from automatic cataloging. In addition, you have the
option of burning collections that can also be played without Nero Home.
You can display the Collections main screen by clicking the
menu icon.
Fig. 37: Collections main screen
In the Collections main screen, there are various buttons for navigation and executing
actions on the left.
All Collections
Slide Shows
Music Collections
Video Collections
Mixed Media
Collections
WMP Playlists
There are buttons (on the left of the screen) for navigating and executing actions (see
Buttons in the Main Screens).
Opens the All Collections screen and displays all media
collections you have compiled.
Opens the Slide Shows screen and displays slide shows you
have compiled.
Opens the Music Collections screen and displays all music
collections you have compiled.
Opens the Video Collections screen and displays all video
collections you have compiled.
Opens the Mixed Media Collections screen and displays all
mixed media collections you have compiled.
Opens the WMP Playlists screen and displays all playlists
that contain media files in WMP format.
Nero Home 78
Page 79

Collections Main Screen
14.1 Creating a music collection
To create a music collection, proceed as follows:
1. Double-click the menu icon.
Æ The Music main screen appears.
2. Double-click the button with the music files to be added to your collection.
Æ A corresponding list of your music files is displayed.
3. Mark the required music files and click t he Collect button.
Æ The selected music files together with the music files already collected are saved to the
Nero Home clipboard.
4. Repeat both previous steps to add music files to your collection.
5. Click the Save as Collection button.
Æ A dialog box opens.
6. Enter a name for your collection in the text field.
If you activated the Use on-screen keyboard check box in the Settings – Appearance
main screen (see
you can enter the name using the PC remote control.
7. Click the OK button.
General settings), clicking in the input also displays a keyboard via which
Î The new collection is now available under the selected name and can be displayed
and played in the Collections main screen by clicking the Music Collections button
Playing a collection ).
(see
14.2 Creating a slide show
To create a slide show, proceed as follows:
1. Double-click the menu icon in the start screen.
Æ The Photos main screen appears.
2. Double-click the button with the photo files to be added to the collection.
Æ The corresponding list of your photo files appears.
3. Mark the desired photo files and click the Collect button.
Æ The selected photo files are saved to the Nero Home clipboard.
4. Repeat both previous steps to add photos to your collection.
5. Click the Save as Collection button.
Æ A dialog box opens.
Nero Home 79
Page 80

Collections Main Screen
6. Enter a name for your collection in the text field.
If you activated the Use on-screen keyboard check box in the Settings – Appearance
main screen (see
you can enter the name using the PC remote control.
General settings), clicking in the input also displays a keyboard via which
7. Click the OK button.
Î The new collection is now available under the selected name and can be displayed
and played in the Collections main screen by clicking the Slide shows button (see
Playing a collection ).
You can assign background music to the collection (see
background music
).
14.3 Saving a slide show as a movie
Creating a slide show with
This function is not available in Nero Home Essentials SE.
To save a slide show as a movie, proceed as follows:
1. Double-click the menu icon in the start screen.
Æ The Collections main screen appears.
2. Double-click the Slide Shows button.
Æ The Slide Shows screen appears and displays a list of your slide shows.
3. Mark the desired slide show and click the Save as movie button.
Æ Exporting is started.
Î The export progress is displayed in the minimized playback area. The Slide Shows
screen appears when the export process is complete.
14.4 Creating a video collection
To create a video collection, proceed as follows:
1. Double-click the menu icon.
Æ The Video and TV main screen appears.
2. Double-click the Videos button.
Æ A corresponding list of your video files appears.
3. Mark the required video files and click the Collect button.
Æ The selected video files, along with the photo and music files already collected, are
saved to the Nero Home clipboard.
Nero Home 80
Page 81

Collections Main Screen
4. Repeat both previous steps to add more video files to your collection.
5. Click the Save as Collection button.
Æ A dialog box opens.
6. Enter a name for your collection in the text field.
If you activated the Use on-screen keyboard check box in the Settings – Appearance
main screen (see
you can enter the name using the PC remote control.
General settings), clicking in the input also displays a keyboard via which
7. Click the OK button.
Î The new collection is now available under the selected name and can be displayed
and played in the Collections main screen by clicking the Video Collections button
Playing a collection ).
(see
14.5 Creating mixed media collections
Nero Home allows you to create collections of different files (mixed media collections) in
addition to music, video or photo collections. For example, to create a collection of photos,
music and videos, proceed as follows:
1. Double-click the menu icon in the start screen.
Æ The Photos main screen appears.
2. Double-click the button with the photo files to be added to the collection.
Æ The corresponding list of your photo files appears.
3. Mark the desired photo files and click the Collect button.
Æ The selected photo files are saved to the Nero Home clipboard.
4. Repeat both previous steps to add photos to your collection.
5. Click the Nero Home button.
Æ The start screen appears.
6. Double-click the menu icon.
Æ The Music main screen appears.
7. Double-click the button with the music files to be added to your collection.
Æ A corresponding list of your music files is displayed.
8. Mark the required music files and click t he Collect button.
Æ The selected music files, along with the photo files already collected, are saved to the
Nero Home clipboard.
9. Repeat both previous steps to add music files to your collection.
Nero Home 81
Page 82

Collections Main Screen
10. Click the Nero Home button.
Æ The start screen appears.
11. Double-click the menu icon.
Æ The Video and TV main screen appears.
12. Double-click the Videos button.
Æ A corresponding list of your video files appears.
13. Mark the required video files and click the Collect button.
Æ The selected video files, along with the photo and music files already collected, are
saved to the Nero Home clipboard.
14. Repeat both previous steps to add more video files to your collection.
15. Click the Save as Collection button.
Æ A dialog box opens.
16. Enter a name for your collection in the text field.
If you activated the Use on-screen keyboard check box in the Settings – Appearance
main screen (see
you can enter the name using the PC remote control.
17. Click the OK button.
General settings), clicking in the input also displays a keyboard via which
Î The new collection is now available under the selected name and can be displayed
and played in the Collections main screen by clicking the Mixed Media Collections
button (see
Playing a collection ).
14.6 Playing a collection
To play a collection of media files, proceed as follows:
1. Double-click the menu icon in the start screen.
Æ The Collections main screen appears.
2. Double-click the button with the collection you would like to play.
Æ A list of your collections is displayed.
3. Mark the required collection and click the Play button.
Æ The selected collection is played in full-screen mode.
4. Double-click in the screen.
Æ The playback screen appears.
Î The collection is played.
Nero Home 82
Page 83

Collections Main Screen
14.7 Editing a collection
To edit a collection, proceed as follows:
1. Double-click the menu icon in the start screen.
Æ The Collections main screen appears and the collections displayed in Nero Home are
displayed both complete (All Collections) and sorted by Slide Shows, Music
Collections, Video Collections, Mixed Media Collections and WMP Playlists.
2. Double-click the desired button with the collection you wish to edit.
Æ The corresponding folder with your collections appears.
3. Double-click the desired collection you would like to edit.
Æ The relevant screen appears.
4. Click the Edit List button.
Æ The relevant screen appears.
5. Make the desired changes.
6. Click the Back button.
Æ The previous screen appears.
7. Click the Save Collection button.
Î The changes are saved.
14.8 Burning a collection
Nero Home can be used to burn music, video, photo and mixed media collections or slide
shows.
To burn a collection, proceed as follows:
1. Insert a recordable disc into your drive.
2. Double-click the menu icon in the start screen.
Æ The Collections main screen appears. The collections saved in Nero Home are
displayed both complete (All Collections) and sorted by Slide Shows, Music
Collections, Video Collections, Mixed Media Collections and WMP Playlists.
3. Double-click the button with the collection to be burned.
Æ A corresponding list of your collections is displayed.
4. Mark the required collection and click the Burn button.
Æ If you enabled the Always ask for disc title check box in the settings, the corresponding
dialog box opens before burning starts.
Nero Home 83
Page 84

Collections Main Screen
5. Enter a name for your disc in the text field.
If you activated the Use on-screen keyboard check box in the Settings – Appearance
main screen (see
you can enter the name using the PC remote control.
6. Click the OK button.
Æ Burning is started.
Î The burn progress is displayed in the minimized playback area.
General settings), clicking in the input also displays a keyboard via which
Nero Home 84
Page 85

Collections Main Screen
15 Search Main Screen
Nero Home automatically finds the files that were archived and cataloged by the Nero Scout
database. You will find further information on Nero Scout under
options
as well as in the Nero Scout manual.
Setting media scanning
You can display the Search main screen by clicking the
menu icon.
Fig. 38: Search screen
If you activated the Use on-screen keyboard check box in the Settings – Appearance
main screen (see
you can enter the name using the PC remote control.
General settings), clicking in the input also displays a keyboard via which
Fig. 39: Search screen with keyboard displayed
Nero Home 85
Page 86

Collections Main Screen
15.1 Finding media files
To find a cataloged media file, proceed as follows:
1. Double-click the menu icon in the start screen.
Æ The text field for search terms is displayed..
2. Enter the required keyword in the text field and press the Enter key on the displayed
keyboard.
Æ The result of the search is displayed in the Search Results screen. The search result
shows the number of files found, sorted by the various media types: Music, Photos,
Video and TV. The number in brackets following the media type indicates how many
files of the media type matching the search criterion have been found.
Î The search for cataloged media files is performed.
Nero Home 86
Page 87

Index
16 Index
Information panel 65
A
Appearance
Change 22, 24
Change background 21
Change skin type 20
Change the font size 21
B
Burn Options
Setting 22
Burning options
Define 41, 42, 43
Map 68
Schedule new recordings 69
F
File Formats Supported 9
I
Information panel 65
L
Launch Nero Home 10
Live TV Streaming 13, 72
C
Channel groups 28
Collections 73
Burn 78
Create a music collection 74
Create mixed media collection 76
Create slide show 74
Create video collection 75
Edit 77
Overview 11
Play 13, 74, 75, 76, 77
Save slide show as movie 75
Contact 85
Conventions 6
M
Main screen
Collections 73
Devices 71
Music and Radio 44
Photos 51
Search 80
Settings 20
Video and TV 58
Manual 6
Music
Burn a collection 47, 78
Play 12, 45
Music and Radio
Overview 11
D
Devices 71
Overview 12
DVD
DVD settings 33
N
Nero Scout 11, 14, 46, 80
Configure 14, 22
O
E
Easy Setup wizard 12, 16, 20
EPG 66
Configure 12, 66, 68
Electronic Program Guide 66
On-screen keyboard
Use 21, 25
P
Parental control 33
Nero Home 87
Page 88

PC remote control 25
Photos 51
Burn a collection 56
Create collections 76
Display 12, 52
Find from Region 52, 55
Find similar photos 7, 52, 55
Overview 11
Play slide show 53, 55
Save slide show as a movie 7, 75
Program
Launch 10
R
Radio
Add radio channels to radio favorites 12, 50
Manage radio channels 48
Remove radio channels from radio favorites 50
Rename radio channels 49
Create 13, 74
Create a slide show with background music 53, 75
Define audio format 39
Define favorite transitions 37
Define format 39
Define transitions 37
Favorite transitions 36
Play 55
Save as a movie 36, 38
Select playback quality 36
Set 35
Start screen Nero Home
Direct links 12
Start screen, Nero Home 11
Supported file formats 9
Disc formats 9
Images 9
Metadata 9
Video 9
System requirements 8
S
Search 80
Find from Region 55
Overview 12
Start 25, 80
Settings 16, 20
Appearance 22, 24
Assign effects for slide shows 36
Audio settings 7, 34
Change skin type 25
Configure TV cards 23, 26, 29
Define effects for slideshows 38
Define favorite transitions 35, 38, 39
Define settings for slide shows 31, 36
DVD settings 21, 33
Easy Setup wizard 16
Enable Nero Scout 22
Enable Timeshifting 30
Overview 11
Timeshift 30
TV settings 21, 29, 31
Slide shows 21, 35
Assign effects 36
Capture devices 8, 17, 26, 48
Soundcard 8
T
Television
Screen format 21
Timeshift 21
Timeshift Limit 21
Timeshifting 7, 20
Timeshift 21
Timeshift TV Viewing 7, 21, 30
Timeshifting
Enable 30
TV
Display TV channels 59
Watch TV programs 61
Watch TV recording 58, 63
TV cards
Configure 26
TV channel search 17
TV Cards 21, 26, 29
TV channel search 17
Nero Home 88
Page 89

TV channels
Manage 58, 59, 60, 65, 69
TV programs
EPG 68, 69
Information panel 65
Record 61
Watch 13, 58, 61
TV Programs
Electronic Program Guide 66
TV recordings
Schedule 7
Watch 58, 63
Nero Home Essentials SE 7
Video
Burn collection 78
Create 61
Create collection 75
Play 13, 58, 64
Video settings 21, 31
Video and TV
Overview 11
Record programs in progress 46, 61
Schedule new recordings 62, 69
Video settings
Define 31
V
Versions of Nero Home
Nero Home Essentials 7
W
WHQL-certified driver 8
Nero Home 89
Page 90

Contact
17 Contact
Nero Home is a Nero AG product.
www.nero.com
Nero AG
Im Stoeckmaedle 13-15 Web: www.nero.com
76307 Karlsbad Help:
Germany Fax: +49 724 892 8499
http://support.nero.com
Nero Inc.
330 N. Brand Blvd., Ste 800 Web: www.nero.com
Glendale, CA 91203-2335 Help:
USA Fax: (818) 956 7094
Email:
http://support.nero.com
US-CustomerSupport@nero.com
Nero KK
Rover Center-kita 8F-B, 1-2-2 Nakagawa-chuou, Web: www.nero.com
Tsuzuki-ku, Yokohama, Kanagawa Help:
Japan 224-0003
http://support.nero.com
Copyright © 2008 Nero AG and its licensors. All rights reserved.
Nero Home 90
 Loading...