

Page 1

SA2500/WA2500
NEC Storage NS50
User Guide
Page 2

This page is deliberately left empty.
Page 3

User Guide
Proprietary Notice and Liability Disclaimer
The information disclosed in this document, including all designs and related materials,
is the valuable property of NEC Computers and/or its licensors. NEC Computers and/
or its licensors, as appropriate, reserve all patent, copyright and other proprietary rights
to this document, including all design, manufacturing, reproduction, use, and sales
rights thereto, except to the extent said rights are expressly granted to others.
To allow for design and specification improvements, the information in this document
is subject to change at any time, without notice. Reproduction of this document or
portions thereof without prior written approval of NEC Computers is prohibited.
The NEC Computers product(s) discussed in this document are warranted in
accordance with the terms of the Warranty Statement accompanying each product.
However, actual performance of each product is dependent upon factors such as system
configuration, customer data, and operator control. Since implementation by customers
of each product may vary, the suitability of specific product configurations and
applications must be determined by the customer and is not warranted by NEC
Computers.
www.nec-computers.com
The firmware embedded in this device contains open source components that are
licensed under the terms of the GNU General Public License (GPL), available at http://
www.gnu.org/licenses/gpl.txt, and GNU Lesser General Public License (LGPL),
available at http://www.gnu.org/licenses/lgpl.txt. If you desire the source code for these
components, you may access them on the GNUsupport Web site.
Trademarks
NEC ESMPRO, NEC DianaScope, NEC MWA, and ExpressBuilder are trademarks or
registered trademarks of NEC Corporation.
Adobe, and Adobe Acrobat are registered trademarks of Adobe Systems, Incorporated.
Microsoft, Microsoft Windows, Windows NT, Windows 95, Windows 98, Windows
2000 and Windows Server 2003 are all registered trademarks of Microsoft Corporation.
MS-DOS is a registered trademark of Microsoft Corporation.
Intel and Xeon are registered trademarks of Intel Corporation.
All other product, brand, or trade names used in this publication are the trademarks or
registered trademarks of their respective trademark owners.
rev 1.0 October 2006
Copyright 2006
All Rights Reserved
NEC Computers S.A.S.
10 rue Godefroy
Immeuble OPTIMA
92821 PUTEAUX
3
Page 4

This page is deliberately left empty.
Page 5

User Guide
www.nec-computers.com
Table of Contents
Table of Contents . . . . . . . . . . . . . . . . . . . . . . . . . . . . . . . . . . . . . . . . . . . . . 5
Chapter 1: Overview . . . . . . . . . . . . . . . . . . . . . . . . . . . . . . . . . . . . . . . . . . . 7
About this Guide. . . . . . . . . . . . . . . . . . . . . . . . . . . . . . . . . . . . . . . . . . . . . . . . . . . . . . . . . . . . . . . 7
Audience . . . . . . . . . . . . . . . . . . . . . . . . . . . . . . . . . . . . . . . . . . . . . . . . . . . . . . . . . . . . . . . . . . . . . 7
Warranty and Liability Limitations . . . . . . . . . . . . . . . . . . . . . . . . . . . . . . . . . . . . . . . . . . . . . . . . 7
About the NS50. . . . . . . . . . . . . . . . . . . . . . . . . . . . . . . . . . . . . . . . . . . . . . . . . . . . . . . . . . . . . . . . 8
Software........................................................................................................................... 8
Integrated Management ................................................................................................... 8
Web Interface Management Software Compatibility...................................................... 8
Features............................................................................................................................ 8
Minimum Requirements.................................................................................................. 8
Chapter 2 - Safety and Initial Setup . . . . . . . . . . . . . . . . . . . . . . . . . . . . . . . 9
Before you Begin . . . . . . . . . . . . . . . . . . . . . . . . . . . . . . . . . . . . . . . . . . . . . . . . . . . . . . . . . . . . . . 9
Power Switch Functions . . . . . . . . . . . . . . . . . . . . . . . . . . . . . . . . . . . . . . . . . . . . . . . . . . . . . . . 10
Passwords, Name, and Address . . . . . . . . . . . . . . . . . . . . . . . . . . . . . . . . . . . . . . . . . . . . . . . . . 12
DHCP Server Is not Available....................................................................................... 12
DHCP Server Is Available............................................................................................. 12
Log on and Configure. . . . . . . . . . . . . . . . . . . . . . . . . . . . . . . . . . . . . . . . . . . . . . . . . . . . . . . . . . 13
Restore Default Network Settings. . . . . . . . . . . . . . . . . . . . . . . . . . . . . . . . . . . . . . . . . . . . . . . . 14
Log off or Shut down . . . . . . . . . . . . . . . . . . . . . . . . . . . . . . . . . . . . . . . . . . . . . . . . . . . . . . . . . . 15
Remove and Reinstall a Hard Disk Drive Carrier. . . . . . . . . . . . . . . . . . . . . . . . . . . . . . . . . . . . 16
Remove the HDD Carrier.............................................................................................. 16
Replace the Hard Disk Drive in the Carrier................................................................... 16
Reinstall the HDD Carrier ............................................................................................. 17
Chapter 3 - Managing Settings. . . . . . . . . . . . . . . . . . . . . . . . . . . . . . . . . . 18
Managing Users and Groups on the NS50. . . . . . . . . . . . . . . . . . . . . . . . . . . . . . . . . . . . . . . . . 18
Reserved User and Group Names.................................................................................. 18
Managing Users Locally................................................................................................ 19
Managing Groups Locally............................................................................................. 20
Managing Access to Folders and Shares. . . . . . . . . . . . . . . . . . . . . . . . . . . . . . . . . . . . . . . . . . 23
NFS Mappings............................................................................................................... 23
Managing Shares and Folders........................................................................................ 24
NFS-specific Notes for Folders and Sharing................................................................. 29
Monitoring the NS50. . . . . . . . . . . . . . . . . . . . . . . . . . . . . . . . . . . . . . . . . . . . . . . . . . . . . . . . . . . 31
Checking Status of the NS50. . . . . . . . . . . . . . . . . . . . . . . . . . . . . . . . . . . . . . . . . . . . . . . . . . . . 32
Monitoring Hardware Status.......................................................................................... 33
Change Administrative Password.................................................................................. 34
Change the Date and Time............................................................................................. 35
Changing the Locale...................................................................................................... 35
Shutting Down the NS50 . . . . . . . . . . . . . . . . . . . . . . . . . . . . . . . . . . . . . . . . . . . . . . . . . . . . . . . 37
5
Page 6

User Guide
www.nec-computers.com
Chapter 4 - Configuring Advanced Settings . . . . . . . . . . . . . . . . . . . . . . . 39
Changes to Advanced Settings. . . . . . . . . . . . . . . . . . . . . . . . . . . . . . . . . . . . . . . . . . . . . . . . . . 39
Name and DNS.............................................................................................................. 39
Other Networking Options. . . . . . . . . . . . . . . . . . . . . . . . . . . . . . . . . . . . . . . . . . . . . . . . . . . . . . 42
Obtaining an IP Address from a DHCP Server ............................................................. 43
Authenticating Users and Groups.................................................................................. 45
Advanced Options.......................................................................................................... 50
Configuring UPS............................................................................................................ 51
Updating the NS50 via the Web. . . . . . . . . . . . . . . . . . . . . . . . . . . . . . . . . . . . . . . . . . . . . . . . . . 52
Updating Via a Direct Internet Connection................................................................... 52
Updating Via a Proxy Server......................................................................................... 52
Updating Via the Discovery Application....................................................................... 53
Troubleshooting . . . . . . . . . . . . . . . . . . . . . . . . . . . . . . . . . . . . . . . . . . . . . . . . . . . . . . . . . . . . . . 55
Obtain a Configuration Snapshot................................................................................... 55
Provide Access over USB Console................................................................................ 58
Load Module Manually ................................................................................................. 58
Third-party (ISV) Tools................................................................................................. 59
Chapter 5 - Configuring Storage Settings. . . . . . . . . . . . . . . . . . . . . . . . . 61
Managing Storage Settings . . . . . . . . . . . . . . . . . . . . . . . . . . . . . . . . . . . . . . . . . . . . . . . . . . . . . 61
Available RAID Levels in the NS50 ............................................................................. 61
General Information....................................................................................................... 62
Managing Volumes........................................................................................................ 63
Managing RAID ............................................................................................................ 65
Managing Pools ............................................................................................................. 67
Disk Properties............................................................................................................... 69
Hard Disk Drive Replacement....................................................................................... 70
Using the Appliance....................................................................................................... 71
Working on a Windows Computer................................................................................ 71
Working on a Macintosh Computer............................................................................... 73
Working from a Linux Computer.................................................................................. 74
Chapter 6 - Using the Online Help . . . . . . . . . . . . . . . . . . . . . . . . . . . . . . . 76
On-line Help. . . . . . . . . . . . . . . . . . . . . . . . . . . . . . . . . . . . . . . . . . . . . . . . . . . . . . . . . . . . . . . . . . 76
Viewing On-line Help.................................................................................................... 76
Printing On-line Help Screens....................................................................................... 76
Glossary . . . . . . . . . . . . . . . . . . . . . . . . . . . . . . . . . . . . . . . . . . . . . . . . . . . . 77
6
Page 7

User Guide
Chapter 1: Overview
About this Guide
The NS50 User Guide contains the following information:
■ “Chapter 2 - Safety and Initial Setup” on page 9 includes explanations of the
functions and proper use of its components and initial hardware installation.
■ “Chapter 3 - Managing Settings” on page 18 includes instructions about how to
manage groups and folders, how to check status and user connections, and how to
view settings.
■ “Chapter 4 - Configuring Advanced Settings” on page 39 includes instructions
about how to perform more advanced administrative activities.
www.nec-computers.com
■ “Chapter 5 - Configuring Storage Settings” on page 61 includes instructions about
how to set up storage options.
■ “Chapter 6 - Using the Online Help” on page 76 includes instructions about how
to use the online help.
■ “Glossary” on page 77 provides definitions for many of the terms that are used in
this guide.
Audience
The NEC Storage NS50 is intended for:
■ Network users who are familiar with standard end-user functionality.
■ Administrators who have some knowledge of basic computer networking.
W arranty and Liability Limitations
ATTENTION: USE OF THE SOFTWARE IS SUBJECT TO THE TERMS OF THE
APPLIANCEWARE SOFTWARE LICENSE. USE OF THE SOFTWARE
INDICATES YOUR ACCEPTANCE OF THESE LICENSE TERMS.
7
Page 8

User Guide
About the NS50
Software
The NS50 enables cross-platform file-sharing for Windows, Macintosh, and UNIX/
Linux users. Server software is the engine that drives this network-attached storage
appliance. Setup, configuration, and management are available via the Web-based
interface.
Integrated Management
The NS50 produces simple management tools for locating and configuring devices.
The Web-based user interface unifies access to all NS50s on a network.
Web Interface Management Software Compatibility
The management software does not require installation and is accessible from any
system running Microsoft Internet Explorer 5.0 or later or Mozilla Firefox 1.0 (or later)
Web browsers.
www.nec-computers.com
Features
■ ReiserFS Journaling File System.
■ The Linux 2.6.x-series kernel.
■ Supports the following network protocols: SMB/CIFS (Windows), NFS, and FTP.
■ Available in English, Japanese, French, German, Russian, as well as Traditional
and Simplified Chinese versions.
■ Software RAID levels Linear (JBOD), 0, 1, and 5 available, with RAID
management tools.
■ User and Group management in Local (with the NS50), Native (using Active
Directory Services), or Mixed (using a Primary Domain Controller) security
modes.
■ Folders & Sharing management with Access Control Lists.
■ WINS Server service available.
■ Wizard based installer for easy server setup.
Minimum Requirements
The Web -based administration tool may be used on any system with either Microsoft
Internet Explorer 5.0 or Mozilla Firefox 1.0 (or newer versions) installed. Although
other JavaScript- and HTTPS-capable browsers might work, they are not officially
supported.
8
Page 9

User Guide
www.nec-computers.com
Chapter 2 - Safety and Initial Setup
Before you Begin
■ Read the document titled NS50 Legal Notice, packaged with your NS50.
■ Read and follow the installation instructions in the NS50 Quick Start Guide.
9
Page 10

User Guide
www.nec-computers.com
Power Switch Functions
The table below contains information about the functions available via the power
switch.
Table 1: Power Switch Functions
Function Steps
If system is off:
Power on Press the power switch one time. (Do not press and hold the
power switch.)
If system is on:
a
Power off, software shutdown
Power off, hardware
shutdown
Reset default network
settings
Restore system files
c
Press the power switch 1 time. (Do not press and hold the
power switch.)
Press and hold the power switch.
b
Press the power switch 1 time to power on.
When the power up is complete, quickly press and release the
power switch two times. The IP restore process begins and
completes in a few seconds.
Quickly press and release the power button one time to power
down the NS50.
When the power down is complete, press the power switch one
time to power up with the correct network settings.
This also resets the passwords to secret and admin. To reset or
synchronize the Web interface and root passwords, go to Main-
tenance, Administrator, and check the box beside Synchronize with root password. See “Change Administrative
Password” on page 34 for more information.
With power off, insert the USB device that contains the saved
system files into one of the USB ports.
Press the power switch 1 time to power on.
Immediately after powering on the system, the LED blinks 3
times. While the LED is blinking, press the power switch 1
time. The restore process begins.
a.Total time to power on after you press the power switch can be 15 minutes for the
first power on. Subsequent power ons can take up to nine minutes. Blue LEDs on the
hard disk drive carriers flicker during power on and illuminate during data read and
write.
b.A hard power off is not recommended as it may result in a loss of data.
c.This process assumes that you previously saved system files to a USB device. It
restores those files (not user data) to the NS50 drives. See “Make Backup Copies of
System Files” on page 56.
10
Page 11

User Guide
www.nec-computers.com
Table 2: LED States
LED States Meaning
On Normal state
Off As soon as power switch is pressed to power down the NS50.
Three long blinks Success after a command sequence.
Five rapid blinks Failure after a command sequence.
11
Page 12

User Guide
Passwords, Name, and Address
■ The initial root password is secret.
■ The initial Web interface password is admin.
■ The hostname is HOSTxxxxxxxx, where xxxxxxxx represents the last eight char-
acters of the unit’s MAC address.
DHCP Server Is not Available
If no DHCP server is available, the NS50 uses one of two static IP addresses.
■ For LAN1, the port closest to the power supply input, the static IP address is
https://192.168.0.100. It is recommended that you use an to configure the system.
■ For LAN2, the static IP address is https://192.168.1.100.
Note: Before you start the Discovery application on a nonDHCP network for the first time, ensure that the NS50 and the
client PC are physically plugged into the same subnet.
www.nec-computers.com
DHCP Server Is Available
If a DHCP server is available, at power-up your DHCP server assigns an IP address to
the NS50 that you later use to access the Web-based interface. If a DHCP server is
available, use the Discovery application to locate the NS50 on the network.
To use the Discovery application to locate the NS50:
1. Insert the Discovery CD into the appropriate drive.
2. Open the contents of your CD-ROM drive.
3. Find the Readme file that is included in the list of files and double-click on it
to open it.
4. Follow the instructions under the "How to Install the Discovery Application"
section for your operating system, and install the Discovery application.
5. Follow the instructions under the "How to Run the Discovery Application"
section for your operating system, and start the Discovery application.
6. From the list of optoins, select "...change the configuration of the
appliance."
7. Click Next and a list of NS50s will grow as new units fully boot.
8. Select the desired NS50 from the list and click Next.
9. A web browser window opens and connects to the NS50.
Proceed to the “Log on and Configure” on page 13 section.
12
Page 13
User Guide
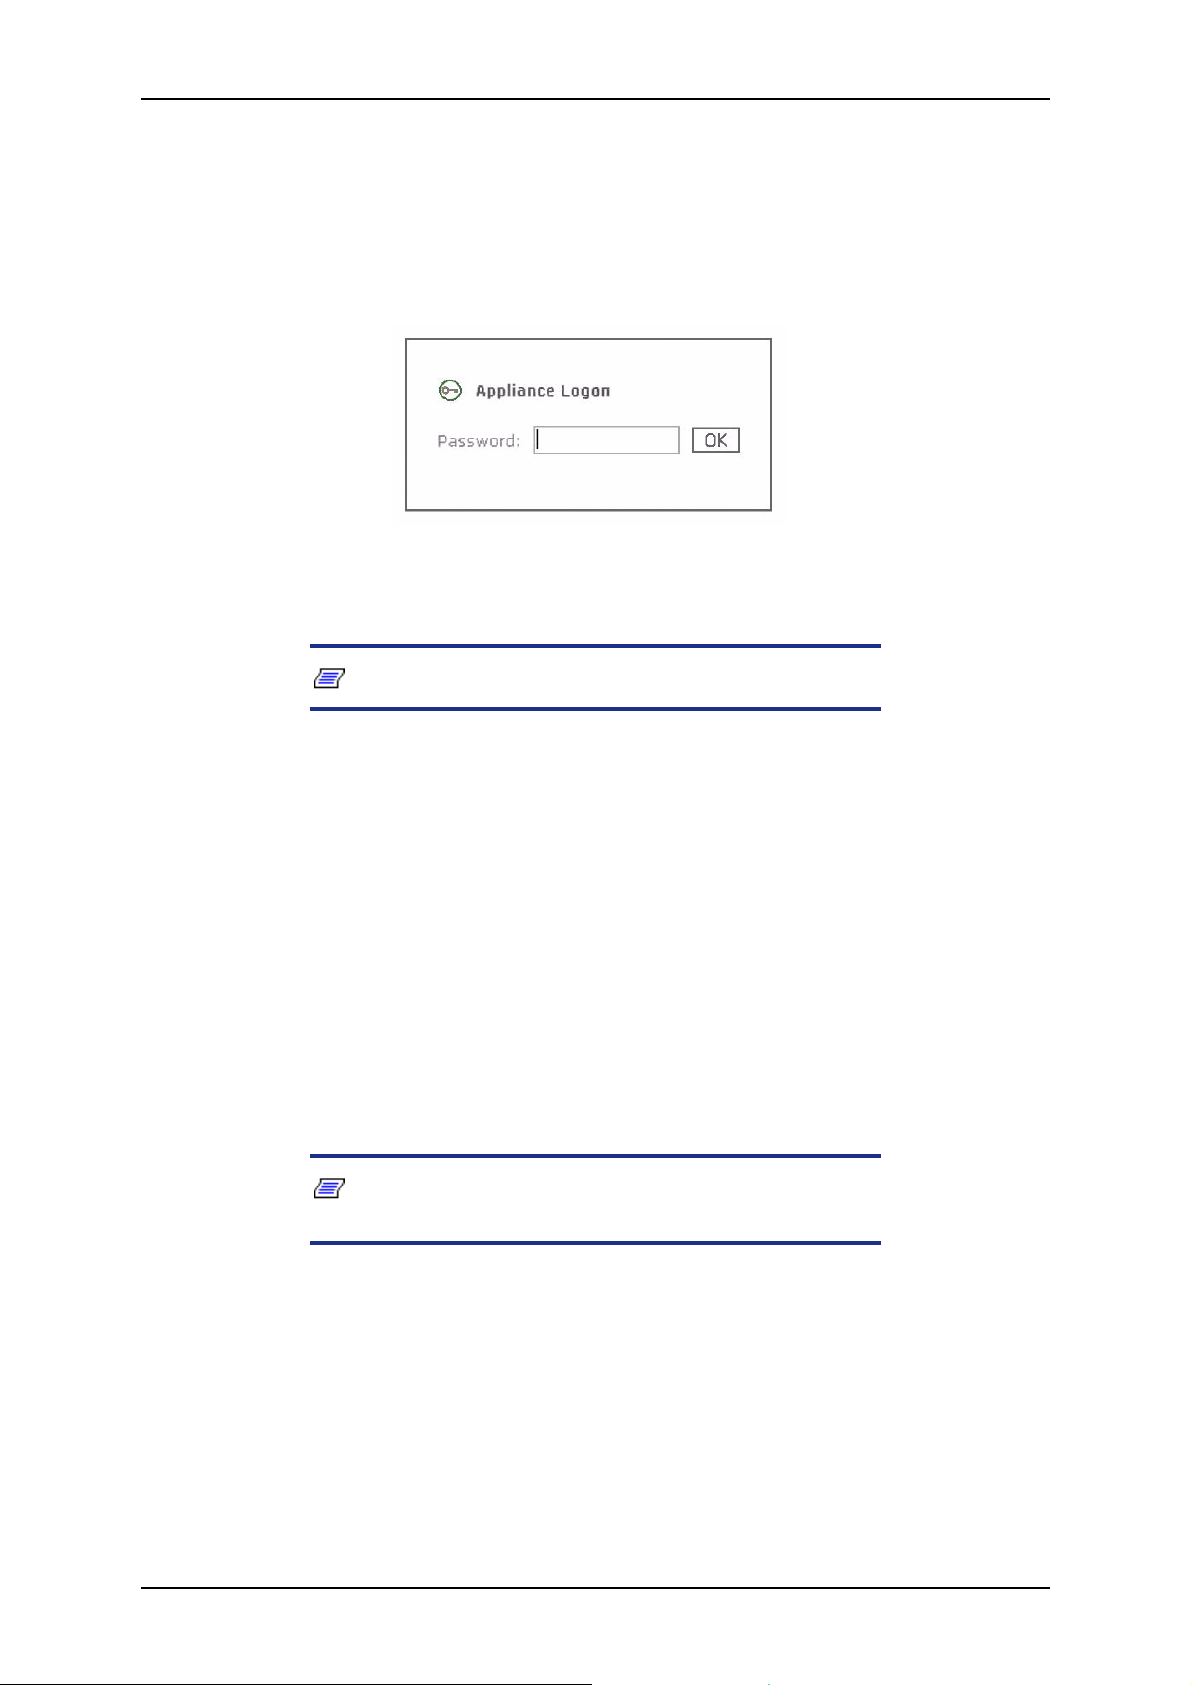
Log on and Configure
1. If you used the Discovery application to connect to the NS50, skip to step 4;
otherwise, open an instance of your Web browser.
2. Click in the Address field and enter the appropriate IP address.
3. Press Enter or click Go. The Logon window displays.
Figure 1: Logon Window
4. Click in the (case-sensitive) Password field and type the default password
admin.
www.nec-computers.com
Note: Default root ssh password is secret.
5. Click OK (or press Enter) to open the Setup Wizard.
6. Accept the default locale or choose your locale, then click Next.
7. Accept defaults or specify IP address, subnet mask, and default gateway for
both LAN1 and LAN2. Click Next.
8. Accept defaults or enter a unique system name of up to fifteen English
characters. Specify your network domain and click Next.
9. Verify date, time, and time zone. Click Next.
10. Accept the default password or create a new password (English characters).
Click Finish.
11. Click OK.
12. The system will reset based on the changes made and a message will state that
the discovery tool must be used to locate the system.
Note: If you changed the system or domain name, you must
restart the NS50 for the change to take effect.
13. Close the browser window.
13
Page 14

User Guide
Restore Default Network Settings
You can reset incorrect network parameters and administrative passwords on the NS50.
This is necessary after you have moved the system between different networks or
forgot the Web interface password, for example.
To restore the default settings:
1. Press the power switch one time to power up the NS50.
2. When the power up is complete (about seven minutes), quickly press and
release the power switch two times.
The IP restore process begins and completes in a few seconds.
3. Quickly press and release the power button one time to power down the NS50.
4. When the power down is complete (about eight to nine minutes), press the
power switch one time to power up with the correct network settings.
Note: The ssh root password is reset to secret and the
Web interface password is reset to admin.
www.nec-computers.com
14
Page 15

User Guide
Log off or Shut down
1. Click Logoff in the Web interface.
2. To shut down, click Shutdown in the Web interface or press the power switch
one time.
www.nec-computers.com
15
Page 16

User Guide
www.nec-computers.com
Remove and Reinstall a Hard Disk Drive Carrier
Caution
Do not remove a hard disk drive (HDD) carrier unless you must
replace a faulty disk. Label the carriers and the slots before you
power on the system. If the NS50 is off, you can remove more
than one HDD carrier, but you must reinstall them in exactly the
same positions they previously occupied. Otherwise, the unit
might not boot and/or data might be lost. If the unit is on and
you have a fault-tolerant RAID volume (RAID level 1 or 5), do
not remove more than one HDD carrier at a time. A fault-tolerant RAID volume handles only a single drive removal.
This section contains instructions for the removal and insertion of an HDD carrier. If
you want to replace the HDD inside the carrier, see the detailed instructions in
"Replace the Hard Disk Drive in the Carrier" on page 16.
Remove the HDD Carrier
1. Open the front door of the unit.
2. Remove the HDD Carrier.
a.Open the front door of the unit.
b.Squeeze the release latch and carefully swing the arm to the left, as far as possible,
to pull the HDD carrier away from the connector.
c.With both hands, grasp the carrier bezel and carefully pull the HDD carrier out of
the drive bay. Do not use the arm as a handle for the removal of the HDD carrier.
Figure 2: Hard Disk Drive Carrier and Latch Release
Replace the Hard Disk Drive in the Carrier
If it is necessary to replace the hard disk drive, continue with the instructions below. If
not, go to “Reinstall the HDD Carrier” on page 17
1. Place the hard disk drive and carrier on a flat, non-slippery surface.
16
Page 17

User Guide
2. Remove the four 6-32 phillips screws that hold the hard disk drive in the
carrier. Set them aside for later use.
3. Remove the hard disk drive from the carrier.
4. Place the new hard disk drive into the carrier . Ensure that the connectors are on
the open end of the carrier and that the screw holes are aligned.
5. Install the four 6-32 phillips screws to secure the hard disk drive. Do not
overtighten the screws.
Reinstall the HDD Carrier
Be certain to install the HDD carrier in the appropriate slot— the
same slot from which you previously removed it.
www.nec-computers.com
Caution
1. To reinstall the HDD carrier in the unit.
a.Unlatch and open the arm of the HDD carrier as far as possible to the left.
b.Grasp the body of the HDD carrier with both hands and carefully guide the
connector end of the carrier into the drive bay, until the arm engages and partially
closes.
c.Push the arm forward and latch it to lock the HDD carrier in place.
2. Close the front door of the unit. The system is now ready to boot.
3. Reconnect the USB, Ethernet and power supply cables to the back of the unit.
17
Page 18

User Guide
www.nec-computers.com
Chapter 3 - Managing Settings
Managing Users and Groups on the NS50
As soon as you install and configure the NS50, as instructed in the previous chapter, it
is available to everyone on your network, by default.
You can change the user authentication from local (on the NS50) to either of these
network user authentication means:
■ Primary Domain Controller
■ Active Directory Services
Note: The choice of security mode should be made early.
Later changes can cause some users to lose access to files
stored on the NS50.
If you use either of these authentication means, you must add,
modify and delete user and group information on the Primary
Domain Controller or Active Directory Services, rather than
through the Web interface window.
Reserved User and Group Names
Some user and group names are reserved for system use. Table 3 contains the user
names that are reserved and Table 4
Table 3: User Names Reserved for System Use
adm halt news postgres ssh
apache iputils nobody root sshd
bin klogd novsftpd rpc sympa
daemon ldap nscd rpcuser sync
exim lp ntpd rsyncd syslogd
ftp mail operator secret uucp
games mailman popa3d shutdown vsftpd
gdm mysql postfix squid xfs
gopher
contains the group names that are reserved.
18
Page 19

User Guide
Table 4: Group Names Reserved for System Use
adm dip loop popa3d shadow
apache disk lp postdrop slocate
audio exim mail postfix squid
auth firewall mailman postgres sympa
bin floppy man postman sys
cdrom ftp mem proc tty
cdwriter ftpadmin mysql radio utmp
chkpwd games named root uucp
console gdm netwatch rpc wheel
cvs gopher news rpcuser wnn
cvsadmin kmem nobody rpm x10
daemon ldap nscd rpminst xfs
Managing Users Locally
If users are authenticated locally on the NS50, add, delete, or edit user information
through Security on the Main Menu, under the Users tab.
www.nec-computers.com
Adding a New User
To add a new user:
1. Click Security on the main menu.
Figure 3: Authenticating Users Locally
19
Page 20

User Guide
2. Click Users tab. The User Management window opens.
3. Click Add User.
4. Enter the user’s Name, Description, and Password. Use the same name and
password the user has for logging into the network.
5. Click Accept.
The new user has been added to the list of users who can access the NS50.
Editing User Information
To edit user information:
1. Click Security.
2. Click the Users tab.
3. Left-click on the name of the user.
4. Change the user’s description and/or password.
Note: If you want to adjust group membership for a user,
click the Group Members button, then use >> and << buttons.
By default, each user is included in a group called “Everyone.”
www.nec-computers.com
5. Click Accept. The information for that user is modified and saved.
Removing a User
To remove a user:
1. Click Security, on the Main Menu.
2. Click the Users tab.
3. Left-click in the checkbox beside the name of the user.
4. Click Remove. The user is removed from the list of users who can access this
NS50.
Managing Groups Locally
If groups are authenticated locally on the NS50, add, delete, and edit group information
through the Groups tab under Security on the Main Menu. Groups are helpful when
you need to assign the same permissions to multiple users at once.
20
Page 21

User Guide
www.nec-computers.com
Note: Non-English characters are not supported as parts of
group names.
Adding a Group
To add a group:
1. Click Security.
2. Click the Groups tab. The Group Maintenance window displays.
3. Click Add.
4. Enter the group’s Name.
5. Enter the group’s Description. (You can leave the Description field blank if
you choose.)
6. Click Accept. The new group is added to the list of groups.
Removing a Group
Figure 4: Authenticating Groups Locally
To remove groups:
1. Click Security.
21
Page 22

User Guide
2. Click the Groups tab. The Group Maintenance window opens.
3. Check the checkboxes beside the desired group names.
4. Click Remove. The selected groups are removed.
Editing an Existing Group
To edit an existing group:
1. Click Security.
2. Click the Group tab. The User Maintenance window opens.
3. Click the desired group name. The selected group’s information displays.
4. Edit the group-related information.
5. Click Accept. The group information is updated.
Note: To browse through large group lists, use the pager at
the bottom of the users list. Simply click a page number and a
new portion of groups appears in the window.
www.nec-computers.com
If you remove a group you do not remove the users who were in
that group. The users will still have their individual permissions
to access folders and shares.
22
Page 23

User Guide
www.nec-computers.com
Managing Access to Folders and Shares
To manage access to files on the NS50, the administrator controls how the folders are
shared. The administrator can define which users and group have access to each shared
folder, or “share.”
NFS Mappings
NFS (Network File System) is a file transfer protocol used by many UNIX and Linux
operating systems. To establish an association between a remote NFS host user and a
local NS50 user, you create an NFS mapping. This technique can be used, for example,
to gain access to a non-public NFS share by a remote Unix or Linux user or group.
Figure 5: Creating NFS Mappings
To add mappings for user or group:
Note: If a user or group doesn't exist create it first and then
enter NFS mapping settings.
1. Click Security.
23
Page 24

User Guide
To remove NFS mappings:
www.nec-computers.com
2. Select the NFS Mappings tab. Existing mappings are displayed (if any).
3. Click Add User if you need to create a user mapping, or Add Group for group
mapping.
4. Fill in the required values: pick a local user or group name, type in an IP
address of a remote host, remote user ID value, and a character set that is used
on remote side.
5. Click Accept. Mapping is created.
Note: Be sure to specify an IP address in the host.
1. Click Security.
2. Select the NFS Mappings tab. Existing mappings are displayed (if any).
3. Check the entries for removal (click appropriate checkboxes on the right). The
top checkbox selects or deselects all of the entries at once.
4. Click Remove Selected.
5. Entries are now removed. An updated list of NFS mappings is displayed.
Note:
■ Adjust NFS mappings before mounting an appropriate NFS
share. They will not have an immediate effect on a currently
mounted share.
■ The Remote charset entry denotes the character set (encod-
ing) that is used on the remote machine. Incorrect setting of
this parameter may result to a "mapped" user/group seeing
garbage characters instead of correct file names when a
connection to an NFS share is established.
Managing Shares and Folders
A share is a folder that has been shared for private or public use on the Network. Share
names must be 12 characters or less and cannot contain any of the following special
characters:
/\:* ? ‘ < > |#. %@
By default, a new share created on the NS50 is accessible to everyone on the network,
until the administrator changes the permissions.
A folder is a subdirectory of a share. Folder names can be up to 31 characters, and
cannot contain any of the special characters listed above.
24
Page 25

User Guide
If you restrict share names to 12 or fewer characters and folder names to 31 or fewer
characters, you can avoid incompatibilities between different systems, such as Linux
and older version of Mac OS. Although Windows naming rules are less restrictive, if
you exceed these limits, you might encounter such difficulties.
www.nec-computers.com
Note:
■ You might want to create several folders, in order to orga-
nize the files in a share. Remember that all folders inherit the
permissions of the share they reside under, unless they are
set otherwise.
■ If users running Windows for Workgroups or DOS will share
the folders, name the folders with eight or fewer alphanumeric characters and without symbols such as spaces,
dashes, underscores, or apostrophes.
Browse through Volumes
To browse through volumes:
1. Click Folders & Sharing on the right. A list of volumes displays.
Figure 6: Folders and Sharing
25
Page 26

User Guide
2. Click the desired volume. The contents of the volume display.
Perform Operations on Shares, Folders, and Files
From this location, you can:
■ Browse through the desired volume.
■ Use hyperlinks at the Content tab.
■ Read Help information on an appropriate page.
Create a New Shared Folder
To create a new shared folder:
1. Browse to the desired volume or folder.
2. Click Create new share on the Content tab. Share creation dialog displays.
3. Enter the new share name.
4. Click Accept. A new share is created.
www.nec-computers.com
Create a Folder
To create a folder:
1. Browse to the desired volume or folder.
2. Click Create new folder on the Content tab. Folder creation dialog displays.
3. Enter the new folder name.
4. Click Accept. A new folder is created.
Share a Folder
To share an existing folder:
1. Browse to the desired volume or folder and click its name. Its content displays.
2. Click Share on the Content tab. The volume or folder now is shared.
Remove Sharing from a Folder
To remove sharing from a folder:
1. Browse to the desired volume or folder, and click its name. Its content displays.
2. Click Unshare on the Content tab. The volume or folder now is no longer
shared.
Rename a Folder or Share
To rename a folder or share:
1. Browse to the desired volume or folder.
26
Page 27

User Guide
2. Click its name. The contents display.
3. Click Rename on the Content tab. The Rename dialog displays.
4. Enter the new name.
5. Click Accept. The folder or share now has a new name.
Note: If Windows Explorer keeps displaying old folder or
share names after renaming them, close its window and reopen it again in a few minutes.
Delete a Folder or Share
To delete a folder or share:
1. Browse to the desired volume or folder.
2. Click its name. The contents display.
3. Click Delete on the Content tab. The folder or volume and all tis subfolders
has been deleted.
www.nec-computers.com
View Properties of a Folder or Share
To view properties of a folder or share:
1. Browse to the desired volume or folder.
2. Click its name. The contents display.
3. Click the Properties tab. The folder or share properties display.
Note: For folders and shares, the “execute” permission
allows the user/group to change path to the given folder or
share.
View or Adjust Access Permissions of a Folder or Share
1. Browse to the desired volume or folder.
2. Click its name. The contents display.
3. Click the Permissions tab. The folder’s or share’s permissions display.
Add Access Permissions
To add access permissions:
1. Browse to the desired volume or folder.
27
Page 28

User Guide
2. Click the Permissions tab. A list of authorized users and groups displays.
3. Click Add. A complete list of network users and groups displays.
4. Select the appropriate users and groups and adjust the appropriate permissions.
5. Click Accept. An updated list of authorized users and groups displays.
6. Click Accept again to save the changes. The new permissions are set.
Note: Setting extra permissions other th an public access to
everyone on a public share makes it non-public.
Edit Access Permissions
To edit access permissions:
1. Browse to a desired volume or folder.
2. Click the Permissions tab. A list of authorized users and groups displays.
3. Select the appropriate entries from the list and click Edit. A list of permissions
displays.
www.nec-computers.com
4. Adjust the permissions.
5. Click Accept. The updated list of authorized users and groups displays.
6. Click Accept again to save the changes. The new permissions are set.
Remove Access Permissions
To remove access permissions:
1. Browse to the desired volume or folder.
2. Click the Permissions tab. A list of authorized users and groups displays.
3. Select the appropriate entries from the list and click Remove. The updated list
of authorized users and groups displays.
4. Click Accept again to save the changes. The new access permissions are set.
Note: Setting extra permissions other th an public access to
Everyone on a public share makes the share non-public. If you
want the access permissions to be propagated to subfolders,
check the Apply to subfolders checkbox at the bottom of the
permissions list.
In the Web interface, the term “OTHER” means all other users
and groups on the NS50. Therefore, if you permit full access to
OTHER, you will permit access to all users on the system.
28
Page 29

User Guide
NFS-specific Notes for Folders and Sharing
Please note that NFS shares can be mounted by any host. There are no per-IP or perhost restrictions for NFS in the NS50 software; only access to specific users and/or
groups can be limited.
www.nec-computers.com
Figure 7: NFS Permissions
To restrict access to an NFS share:
1. Map required remote user or group locally (see “NFS Mappings” on page 23).
29
Page 30

User Guide
www.nec-computers.com
2. Go to the Folders&Sharing section of the Web UI, browse to a desired share,
then click the Permissions tab.
3. Add required local user or group to a list of authorized users and adjust access
permissions.
4. Edit access for the OTHERS group in the permissions list: disallow any type
of access for this group.
5. Click Accept to save permissions that were changed.
Figure 8: Restricting Access to NFS Shares
An NFS share may still be mounted by anyone but only a user or group that you've
determined are allowed to access files and folders in it.
30
Page 31

User Guide
Monitoring the NS50
You can use the Status window to view the space available on each drive partition and
determine which users are currently connected.
www.nec-computers.com
31
Page 32

User Guide
Checking St atus of the NS50
View Disk Space Information
To view disk space information:
1. Click Status on the Main Menu.
2. Select the Monitoring tab at the top of the screen if it is not already selected. A
table displays the amount of free and used space on all partitions of the NS50.
View User Connections
To view user connections:
1. Click Status, on the left side of the window.
2. Click the Active User tab at the top of the window. The names of all users who
currently are connected to the NS50 are listed.
View NS50 Settings
www.nec-computers.com
To view the NS50’s current settings:
1. Click Status, on the left side of the window.
2. Click the Settings tab at the top of the window. the current settings display.
Figure 9: Current Settings
32
Page 33

User Guide
View NS50 Logs
To view event logs of the NS50’s management engine:
1. Click Status, on the left of the window.
2. Select the Log Viewer tab at the top of the window. The log displays.
www.nec-computers.com
Figure 10: Event Log Viewer
Monitoring Hardware Status
Check Status
To check status:
1. Click Status.
2. Click the Monitoring tab.
3. Click the desired object on the tab (Disk, CPU, and so on). The status displays.
Fix Status
To fix the status of a newly inserted disk:
1. Click Status.
33
Page 34

User Guide
2. Click the Monitoring tab.
3. Click Disk.
4. Select the appropriate disk name.
5. Click the Fix button. The status of the disk should change to OK.
Change Administrative Password
To change the administrative password:
1. Click Maintenance, on the Main Menu.
2. Click the Administration tab. Enter your current password in the appropriate
field.
3. Click in the New Password field and enter your new password.
4. Click in the Confirm New Password field and enter your new password again.
5. If you want to use the same new password for root ssh access, ensure the check
box next to Synchronize with root password is checked.
www.nec-computers.com
Caution
By default, this box is checked. However, if you uncheck this
box, the password change affects access to the Web interface
only. Access to the NS50 via ssh will still be possible with the
old password.
6. Click Accept to save the change.
Figure 11: Change Administrative Password
34
Page 35

User Guide
Change the Date and Time
To change the date and time for the NS50:
1. Click Maintenance, on the Main Menu.
2. Click the Date/Time tab.
3. Change the date and time for the NS50.
4. Click Accept to save the changes.
www.nec-computers.com
Changing the Locale
To change the language (locale):
1. Click Maintenance, on the Main menu.
Figure 12: Change Date and Time
35
Page 36

User Guide
www.nec-computers.com
2. Click the Locale tab.
3. From a dropdown list, pick desired language.
4. Click Accept to save the changes.
Figure 13: Change Locale
36
Page 37

User Guide
Shutting Down the NS50
Note: The NS50 is designed to remain powered on most of
the time. If you plan to power off the NS50, ensure that no users
are connected before you do so.
Always power off the NS50 correctly. Use the Web interface or
use the Normal power-down procedure discussed below. Unexpected power-off can lead to data loss.
To power down the NS50:
www.nec-computers.com
Caution
Click Shutdown Appliance, on the Main menu.
■ If you want to completely power off the NS50, select Shutdown and click OK.
■ If you want to restart the NS50, select Restart and click OK.
■ If you want to leave the NS50 powered on, click Cancel.
As explained in “Chapter 2 - Safety and Initial Setup” on page 9 you also can use the
Power switch on the front of the NS50 to power down the server.
To use the power switch to power down the NS50:
■ Normal power-down: Quickly press then release the Power button. The NS50
begins to power down. When the power light is off, you can disconnect the power
cord from the NS50.
37
Page 38

User Guide
■ Hard power-down: If the NS50 does not respond, you can press and hold the power
www.nec-computers.com
switch for a three seconds. This results in an attempted proper shutdown followed
by a hard power-down in about 20 seconds.
Caution
Use hard power-down as little as possible. This method can
result in data loss.
Figure 14: Shutdown Window
38
Page 39

User Guide
www.nec-computers.com
Chapter 4 - Configuring Advanced Settings
Changes to Advanced Settings
Caution
Incorrect changes to advanced settings can negatively affect
the performance of the NS50 and can compromise the security
of your network. Ensure that you understand how to change
these setting properly, before you proceed.
Name and DNS
You can change the name of your NS50 and the settings for your domain name server.
Your network administrator or Internet Service Provider can provide this information.
Change the Name of the NS50
To change the name of the NS50:
1. Click Networking, on the Main menu.
39
Page 40

User Guide
www.nec-computers.com
2. Click the Name/DNS tab.
3. Change the Appliance Name to the name of your choice. Remember that non-
English characters are not supported.
4. Click Accept to save the change.
Figure 15: Change the Name
Network Domain
Note: If your NS50 obtains its address information from a
DHCP server, the network domain information is obtained
automatically.
If your NS50 uses domain mode, to change the network domain:
1. Click Networking, on the Main menu.
2. Click the Name/DNS tab.
3. Change the Network Domain to the appropriate one.
4. Click Accept. The domain for your NS50 has been changed.
DNS Search Order
The DNS search order specifies one or more Domain Name Servers for the NS50 to
use. DNS servers are used in the order they are listed.
40
Page 41

User Guide
To change the DNS Search Order:
www.nec-computers.com
Note: If the NS50 obtains its IP address from a DHCP
server, DNS fields are often automatically filled with the correct
information.
1. Click Networking, on the Main menu.
2. Click the Name/DNS tab.
3. Click the DNS Search Order field.
4. Use Add and Edit and the up and down buttons to arrange DNS addresses.
5. Click Accept. The order the NS50 uses to search for a DNS server is changed.
41
Page 42

User Guide
Other Networking Options
Each NS50 on the network requires an IP (Internet Protocol) address. If your NS50 has
two or more NICs (network interface cards), it can have multiple IP addresses. There
are two methods to assign an IP address to the NS50:
■ Use a DHCP server to assign the IP address automatically.
■ Specify a static IP address.
Note: See your network administrator before you modify
these settings. It is recommended that you give the NS50 a
static IP address or a non-expiring DHCP lease time.
Caution
www.nec-computers.com
It is not recommended to assign IP addresses for both NICs to
the same subnet.
42
Page 43

User Guide
Obtaining an IP Address from a DHCP Server
You can configure the NS50 to receive an IP address from a DHCP server, if one is
attached to the network.
www.nec-computers.com
Figure 16: Obtain DHCP Server-Assigned Address
Obtain DHCP Address
To have the NS50 automatically obtain an IP address:
1. Click Networking, on the Main menu.
43
Page 44

User Guide
www.nec-computers.com
2. Click the NICs tab.
3. Select NIC1 (LAN1).
4. Select the radio button beside Obtain an IP address from a DHCP server.
5. Click Accept. The NS50 is now configured to receive its IP address
automatically.
Note: If the NS50 is unable to contact a DHCP server, it will
search for an IP address in the 169.254.* network.
Caution
If you have a DHCP server on your network, do not configure
both NICs for DHCP. Doing so will result in network connectivity
issues since both NICs will reside on the same subnet!
Set Static IP Address
You can configure the NS50 to use a static IP address. Before you set a static IP
address, ensure that the address you want to assign is not in use by a different computer
on the network.
To specify a static IP address:
1. Click Networking, on the Main menu.
2. Click the NICs tab.
3. Select the NIC that you want to configure.
4. Select Specify an IP address.
5. Enter the IP Address, Subnet Mask, and Default Gateway in the appropriate
fields.
6. Click Accept. The NS50 now uses the fixed IP address to access the network.
Note:
■ NIC enabling option may be set either to “auto”, “enable”, or
“disable.” The latter means that a NIC is always disabled.
The “auto” option means that link presence is always
checked at boot-up time, and NIC status is then set either to
enabled or disabled according to the results of the check.
The “enable” option means that link is consid ered to be up
no matter what.
■ Default gateway option may be automatically re-assigned at
boot up time when no link is detected on default gateway
NIC. In this case, the first available NIC with link detected
will become the default gateway instead.
44
Page 45

User Guide
Authenticating Users and Groups
By default, user security is managed locally on the NS50. Everyone on your network
has access to the NS50, immediately after installation. The Security tab allows you to
change from this local mode to native mode (authenticate Users and Groups against
your Active Directory Services) or to mixed mode (authenticate Users and Groups
against your Primary Domain Controller). You can limit access to the NS50 to
particular users or groups of users in one of three ways:
■ Authenticate Users and Groups against your Active Directory Services (Native
Mode).
■ Authenticate Users and Groups against your Primary Domain Controller (Mixed
Mode).
■ Manage Users and Groups via the Web interface.
Native Mode
If the NS50 authenticates users and groups against your Active Directory Services,
users and groups must be added, modified, and deleted on Active Directory server, not
through the Web interface. In addition, you will not be able to view user and group
information through the Web interface. Users simply are authenticated against the
Active Directory server when they attempt to connect to a share.
www.nec-computers.com
Figure 17: Native Mode User and Group Authentication
The steps below will assist in configuring the ADS servers prior to the NS50 Native
Mode switch.
Examine current ADS server settings:
45
Page 46

User Guide
Examine and change domain name in Web UI:
Before you proceed with switching to Native Mode:
www.nec-computers.com
1. From the ADS server, launch Active Dir ectory Domains and Trusts, and then
right-click the domain where you would like to add the NS50.
2. Select Properties from the popup menu. On the Properties window, write
down both your domain name and pre-Windows 2000 domain name.
Note: For Windows 2000 ADS servers, Service Pack 2 or
later should be installed to join an NS50 into the ADS.
1. Login to the NS50 Web interface.
2. Click Networking on the left, then Name/DNS tab in order to make sure that
the NS50 name on this tab matches the one that you have in your DNS records.
3. If Domain name on the tab does not match the pre-Windows 2000 domain
name discussed above, please change it, and click the Accept button.
1. Synchronize the clock, time zone and date of the NS50 and ADS server, with
maximum time skew of two minutes.
2. Create a separate user account on your ADS server to configure the NS50 for
ADS. This user should be at least the member of Domain Admins group.
Please check that Password never expires and Use DES encryption for this
account options are turned on for this account, and the non-empty password is
set. Other options should be left "as is." This user account should never be
used to open a session on an ADS server directly or through terminal service.
Entering Native Mode settings on the NS50:
1. Click Security on the Main menu.
46
Page 47

User Guide
www.nec-computers.com
2. Click the Modes tab.
3. Select Native Mode.
4. Enter the pre-Windows 2000 domain name into the Domain name field, just
like you did before on the Name/DNS tab.
5. Enter the Active Directory Services name or IP address (it should be your
ADS server).
6. Enter the Realm name, which is just a domain name that you have written
down at the very beginning of your setup. Please use only upper-case
characters in this case.
7. Enter the KDC name, which is usually the same as your ADS server.
8. The WINS Server IP address is an optional value.
9. Enter the user name and password for the user account that you have created on
your ADS server at the previous section.
10. Click Accept. The method of security is changed.
Note:
■ Make changes to users and groups through the Active Direc-
tory Services. Do not manage users and groups through the
Web interface.
■ To verify the NS50 is now a member of ADS, use the MMC
or Network Neighborhood (My Network Places) in recent
versions of Windows.
Cases when joining the ADS might not work:
■ The wrong DNS configuration was set for both the NS50 and ADS server. Ensure
that the ADS server can be resolved by the DNS server in the current domain, or
the ADS server itself is the DNS server for the controlled domain.
■ The administrative user that is used to join the NS50 into ADS is connected
directly or through terminal service to ADS server; you should log this user off and
re-join the NS50 into ADS.
47
Page 48

User Guide
Mixed Mode
To save network resources and improve security, you might want to authenticate users
and groups on a primary domain controller. Except for NFS UID/GID mappings, you
will not be able to edit user and group information through the Web interface. Users
simply are authenticated against the primary domain controller when they attempt to
connect to a share.
www.nec-computers.com
Figure 18: Mixed Mode User and Group Authentication
To authenticate users and groups against your Primary Domain Controller (mixed
mode):
1. Click Security on the Main menu.
2. Click the Modes tab.
3. Select Mixed mode.
4. Enter your NT Domain Name (but not DNS domain name), Primary Domain
Controller, Administrator logon, Administrator password, and WINS
Server in the appropriate fields.
Note: The Administrator’s logon and password will be used
when the NS50 is joining a domain. Your network administrator
can provide this information.
5. Click Accept.
6. Make changes to users and groups on the Primary Domain Controller.
48
Page 49

User Guide
Local Mode
If the NS50 maintains user and group information, users and groups must be added,
modified, and deleted through the NS50.
www.nec-computers.com
Figure 19: Local Mode User and Group Authentication
To manage users and groups via the Web interface:
1. Click Security, on the Main menu.
2. Click the Modes tab.
3. Select Local mode.
4. Enter the name of your workgroup in the appropriate field.
5. Configure WINS support:
■ Click Neither to turn off WINS support.
■ Click WINS Server to configure the NS50 as a WINS server.
■ Click WINS Client to configure the NS50 as a WINS client and enter th e
IP address of the WINS server in the Remote WINS Server field.
49
Page 50

User Guide
6. Click Accept. Users and groups now can be managed locally on the NS50.
Advanced Options
Windows, Macintosh and UNIX/Linux users share files on the appliance via the
Samba/CIFS protocol. In addition, FTP (File Transfer Protocol) and NFS (Network
File System) may be used by these clients. By default, the NFS protocol is enabled and
the anonymous FTP protocol is disabled.
www.nec-computers.com
Figure 20: Enabling FTP Support
Enabling FTP Support
To enable FTP support:
1. Click Networking, on the Main menu.
2. Click the Advanced tab.
3. Select Enable Anonymous FTP.
4. Click Accept.
FTP clients now can connect to the NS50 anonymously and download files from public
shares.
Note: The Anonymous FTP option is for read-only access, it
does not allow any write access.
50
Page 51

User Guide
When the default permissions of a public share are altered, the share becomes
“private”, and thus, inaccessible over FTP.
Configuring UPS
It is possible to use a USB-compatible UPS (Uninterruptible Power Supply) device
with the NS50. UPS devices that use serial connections are not supported.
www.nec-computers.com
Figure 21: UPS Monitoring
To enable UPS monitoring:
1. Click Maintenance.
2. Click the UPS tab. The UPS page is displayed.
3. Click Start under Status. The light color changes to green and the button
caption changes to Stop.
UPS monitoring is now enabled. Now it is possible to observe UPS status on the Status
page.
Note: It is highly recommended to use a UPS with the
NS50. Unexpected power loss may cause either data
corruption, or a very long rebuild time for large RAID arrays.
Using a UPS ensures the NS50 will be shut down properly in
the event of a power outage.
51
Page 52

User Guide
Updating the NS50 via the W eb
It is possible to use a remote repository on the Web to update your NS50’s server
software. This should work in most cases, even if you are behind a firewall. This
method of update is the simplest way to install recent security fixes, for example. Your
NS50 vendor can provide you with repository access information.
www.nec-computers.com
Figure 22: Update via the Web
Updating Via a Direct Internet Connection
To update your NS50 via a direct Internet connection:
1. Click Maintenance.
2. Click the Update tab.
3. Enter the Web address of the repository in the Repository field.
4. Enter the logon and password in the Login and Password fields.
5. Click Accept. The update begins.
Updating Via a Proxy Server
To update your NS50 via a proxy server:
1. Click Maintenance.
52
Page 53

User Guide
2. Click the Update tab.
3. Check Use proxy checkbox.
4. Enter the repository’s Web address in the Repository field.
5. Enter the logon and password in the Login and Password fields.
6. Enter the proxy server’s address in the Proxy server field.
7. Enter the logon and password of the proxy server in the Login and Password
fields.
8. Enter the proxy server’s port value in the Port field (optional).
9. Click Accept.
The update via the proxy server starts.
Updating Via the Discovery Application
To update an Appliance using the Discovery application:
1. Launch the Discovery application.
www.nec-computers.com
53
Page 54

User Guide
www.nec-computers.com
2. Select "... update Appliance" and click the Next button.
3. Follow the on-screen instructions: if the NS50 is turned on, turn it off. Turn the
NS50 back on. Click Next to continue.
4. The NS50 will be auto-detected. Pick the appropriate entry from the list of
NS50s and click Next.
Figure 23: Selecting NS50 to Update
5. Browse for the binary file (.bin) with a new build, then click Next to continue
6. A warning is displayed. Click Next to start the process.
7. Process status is displayed. The update is in progress
8. When the process status changes to "Finished", close the Discovery
application.
54
Page 55

User Guide
T roubleshooting
Obtain a Configuration Snapshot
Use the Troubleshooting feature of the Web interface if the NS50 does not function as
you expect it to.
Enable Debug Logs
To enable debug logs of the NS50’s management engine:
1. From the Web interface menu, click Maintenance.
2. Select the Troubleshooting tab.
3. Click the Enable button. The logs are enabled.
Disable Debug Logs
To disable debug logs of the NS50’s management engine:
www.nec-computers.com
1. In the Web interface, click Maintenance.
2. Select the Troubleshooting tab.
3. Click the Disable button. The logs are disabled.
Enable or Disable Debug Logs at Boot Time
To enable or disable debug logs at boot time:
1. In the Web interface menu, click Maintenance.
2. Select the Troubleshooting tab.
3. Click the checkbox beside Enable debug logs at server start-up.
■ When the checkbox is checked, the NS50 will enable logging at each
boot.
■ When the checkbox is blank, the NS50 will disable logging at each boot.
Note: If you believe that sending configuration files via e-
mail might compromise your security, read the text below to
determine what pieces of information are included and how
information is encrypted, then make a decision.
Obtain the Server Configuration Snapshot
To obtain the server configuration snapshot:
1. In the Web interface menu, click Maintenance.
55
Page 56

User Guide
The configuration snapshot contains:
■ Network configuration (host and domain names, gateway, gateway device, and IP
■ Information about NS50 shares.
■ Status and debug log files of management engine and Samba service.
■ Kernel modules configuration file.
■ A list of hardware devices present in the system, and their specific features.
www.nec-computers.com
2. Select the Troubleshooting tab.
3. Click the Obtain server configuration snapshot button.
4. In a Save File dialog, select a target directory and a file name, then click the
Save File button.
5. Success message is displayed. Click the Ok button.
6. Send the file that you saved in Step 4 to your NS50 vendor's support service.
addresses of the NS50.
Note: The c onfiguration snapshot is a com pressed file that
is encrypted with the PGP key. It means that only an owner of
the key can decrypt the data retrieved fro m your NS50. It can be
the NS50 or server-side software vendor.
No passwords are included into the snapshot, except for the
proxy and Web repository credentials that might be used at
NS50 update time.
Use logging only for troubleshooting and disable this option at
regular operation time in order to avoid server operation slowdowns and waste of a disk space on system partitions.
Make Backup Copies of System Files
It is possible to make backup copies of system files. This can be useful for recovery
procedures.
To make backup copies of system files:
1. Have a USB hard drive or flash drive on hand that contains a valid FAT
partition with at least 256 megabytes of free space. Such a drive can be
partitioned and formatted under Windows.
56
Page 57

User Guide
www.nec-computers.com
2. Connect the USB drive to any USB port at the front of the NS50.
3. Log on using the Web interface.
4. Click Maintenance in the main menu.
5. Click the Backup tab.
6. Pick the desired flash or hard drive from the list of available USB drives.
Refresh the page in a few seconds if no drives display on the list.
7. Click the Backup button to begin the process. The backup of the system files
begins.
8. In about ten to fifteen minutes, the process is over. The success message
displays.
9. Disconnect the USB drive from the NS50.
Note: It is not necessary to activate or deactivate USB
drives when you make backup copies of system files. For
storage use, these operations ar e m an dat o ry.
Restore Broken System Files
If the NS50 does not boot, restore the system files that previously were saved on the
USB drive.
Note: Do not leave the USB drive connected when the
restore is complete. It can lead to an improper device detection
at boot and cause error alarms on the status page in the Web
interface. (User data should remain intact in this case.)
You might lose current settings of the NS50, since they will be
overwritten by an older backup copy from an USB drive. (User
data should remain intact in this case.)
To restore system files:
1. Ensure that the NS50 is powered off.
2. Connect a USB drive, that has a backup copy of system files, to any free USB
port of the NS50.
3. Power on the NS50. As the NS50 begins to boot, the blue LED that is next to
the power switch begins to flash in a series of rapid flashes.
4. While the blue LED flashes, quickly press the power switch. The restore
process begins and the blue LED no longer is illuminated.
57
Page 58

User Guide
When the blue LED begins to flash again then stays on continually, the restore
process is complete.
5. Disconnect the USB drive. The NS50 continued to boot. When boot is
complete, you can use the NS50.
Note: If the restore process results in slow flashes of the
blue LED, the restore has failed.
The restore function is not capable of restoring the broken system partitions. It can restore only broken system files.
Provide Access over USB Console
It is possible to access NS50’s console over a USB, with an appropriate USB Host-toHost Bridge cable.
To access the console over a USB, under Linux:
www.nec-computers.com
1. Connect one end of a USB cable to a USB port on the NS50.
2. Connect the other end of the USB cable to a client PC.
3. If your Linux distribution features hot-plug functionality, the cable should be
detected automatically. Otherwise, see "Load Module Manually" on page 58.
4. A new device appears in the system:
/dev/ttyUSB0
5. Start cu with the following parameters:
cu -eo 0s 115200 -1 /dev/ttyUSB0
6. Press Enter.
7. Logon as root with an appropriate password.
8. Perform the required operations.
9. Type logout to quit the session.
10. Type ~. to quit cu.
Note: If you forgot the root password, you can change it.
See
“Change Administrative Password” on page 34.
Access to the console is recommended only for experienced
users. The software vendor cannot be responsible for changes
that are made manually, via the console.
Load Module Manually
If the USB cable is not detected automatically, follow the instructions below to load an
appropriate module manually.
1. Locate vendor and product IDs for your cable under:
/proc/bus/usb/devices
58
Page 59

User Guide
www.nec-computers.com
2. Logged in as root user, load an appropriate module. In the example below,
replace Vendor and ProdID with the values from the /proc/bux/usb/
devices
files.
modprobe usbserial vendor=Vendor product=ProdID
3. A new device, /dev/ttyUSB0, should appear in the system.
Note: For experienced Linux administrators, the NS50
includes a SSH (Secure Shell) interface that can be used to
diagnose failures. Login with the user ssh and use the root
password you specified at Setup. Then issue the sudo bash
command to obtain root access.
Caution
The SSH interface is a very powerful tool that could allow an
inexperienced administrator to corrupt vital system files on the
NS50!
Third-party (ISV) Tools
Your NS50 software may include third-party tools and plug-ins from independent
software vendors (ISV). For more information on them, please read appropriate
documentation or contact your NS50 vendor.
To access the ISV tools page, perform the following steps:
1. Click Tools from the main menu. A list of third-party tools is displayed.
59
Page 60

User Guide
www.nec-computers.com
2. Click the desired tool name from a list. A page with selected ISV Tool is
displayed.
3. Perform actions with selected ISV Tool.
Figure 24: ISV Tools Page
60
Page 61

User Guide
www.nec-computers.com
Chapter 5 - Configuring Storage Settings
Managing Storage Settings
Through the Web interface, you can create, edit, deconstruct, and view RAID
(redundant array of independent disks) and other storage objects.
Caution
Do not remove a hard disk drive (HDD) carrier unless you must
replace a faulty disk. Label the carriers and the slots before you
power on the system. If the NS50 is off, you can remove more
than one HDD carrier, but you must reinstall them in exactly the
same positions they previously occupied. Otherwise, the unit
might not boot and/or data might be lost. If the unit is on and
you have a fault-tolerant RAID volume (RAID level 1 or 5), do
not remove more than one HDD carrier at a time. A fault-tolerant RAID volume handles only a single drive removal.
Available RAID Levels in the NS50
The NS50 supports three types of RAID configurations for the data partition. RAID 0,
Linear RAID, RAID 1, and RAID 5 are available.
RAID 0: Single Large Volume
This type of RAID also is known as striping. RAID 0 interleaves blocks of data
between several drives. Even though multiple drives exist in the array, to the user a
RAID 0 appears as a single large volume. It is important to understand however, that
there is no form of data backup when using a RAID 0. If a single drive fails, you will
lose the entire array. This type of RAID should not be used for mission-critical data.
RAID 0 is available for any system with two or more drives.
Linear (JBOD): Single Large Volume, No Striping
This type of RAID is similar to RAID 0. However, it does not use striping. Instead, user
data is written sequentially. JBOD works more slowly than RAID 0. RAID Linear can
be built on two or more drives.
61
Page 62

User Guide
RAID 1: Mirroring
This type of RAID is used to create a mirror copy of the information that is contained
on one or more of the disks. In this method, a mirror is created for each drive that
contains data. For example, in a two-drive RAID 1 setup, both drives contain exactly
the same data. Since there is 100% redundancy, there is no risk of data loss if one drive
fails. RAID 1 is available for any system with two or more drives.
RAID 5: Disk Striping with Distributed Parity
This type of RAID features both striping and redundancy. RAID 5 uses a technique
called distributed parity, which enables you to recover data if one drive in the RAID
fails. In addition, data blocks are interleaved evenly across the drives in parity bits.
RAID 5 is available only for systems that have three or more drives.
General Information
This chapter explains how to control your NS50 volume settings. As explained above,
there are several available RAID levels. But volume management involves more than
RAID creation. There are other ways to configure storage settings of your NS50.
www.nec-computers.com
■ If the structure of your storage does not fit in the application Window, you can
maximize Window and/or use scroll bars.
■ Each object can be deleted.
■ Each object has properties that you can view. Just click desired object, then click
the Properties link at the top of the window.
Note: Macintosh users with a single-button mouse can
press Ctrl + mouse-click to open the pop-up menu.
Other users can right-click to open the pop-up menu. To select
multiple items in a list box, press and hold Ctrl while you select
items with mouse-clicks.
Caution
No operations are performed on the NS50 until you press the
Accept button at the bottom of the window. Your storage structure and your data remain unchanged until you “accept” the
changes you make.
Take care when you configure volumes. Improper configuration
can lead to data loss.
62
Page 63

User Guide
Managing Volumes
You can create several separate logical volumes on the NS50.
www.nec-computers.com
Figure 25: Create a Logical Volume
Create a Logical Volume
To create a logical volume:
1. Click Storage in the main menu.
2. On the Volume tab, click Create. A list of available storage objects displays.
3. From the list, select an object on which to build a volume.
4. Click Apply. A dialog window displays.
Note: Resizeable volumes can be built only on Pools.
5. In the dialog window , type th e amount of disk space to be used for this volume.
6. Click Accept. The new logical volume is created.
Note: On a new ly-installed NS50, a volume that is created
on top of a pool, occupies only 80% of the pool size. This is a
by-design behavior to allow for future ISV volumes. A volume
may be then resized by the end-user.
Resizable volumes are indicated with the icon:
63
Page 64

User Guide
www.nec-computers.com
Non-resizable volumes are indicated with the icon:
Figure 26: Volume Properties
View Vo lume Properties
To view properties of a logical volume:
1. Click Storage on the main menu.
2. On the Volume tab, click the appropriate volume name. The Properties page
displays (Figure 26
).
Delete Logical Volume
To delete logical volume:
1. Click Storage on the main menu.
64
Page 65

User Guide
2. On the Volume tab, click the appropriate volume name. The Properties page
displays.
3. Click Delete. The Confirmation window displays.
4. Click OK. The logical volume you selected is deleted.
Resize Logical Volume
To resize logical volume:
1. Click Storage on the main menu.
2. On the Volume tab, click the appropriate volume name. The Properties page
displays.
3. Click Resize. A dialog window displays.
4. Type in the amount of disk space that you want to add to the existing volume.
www.nec-computers.com
Note: Resizing works for pool-based volumes, only.
5. Click OK. The logical volume is resized.
Managing RAID
It is possible to build RAID arrays on an NS50 and to add and remove spare drives for
them.
Figure 27: RAID Array
65
Page 66

User Guide
Create a New RAID Array
To create a new RAID array:
1. Click Storage on the main menu.
2. Click the RAID tab.
3. Click Create. A list of available storage objects appears.
4. Select the appropriate storage objects and select the RAID level from the
combo box.
5. Click Apply. The new RAID array is created.
Delete a RAID Array
1. To delete a RAID array:
2. Click Storage on the main menu.
3. Click the appropriate RAID name. The Properties page displays.
4. Click Delete. The confirmation dialog displays.
5. Click OK. The RAID array you selected is deleted.
www.nec-computers.com
View Properties of a RAID
To view properties of a RAID:
1. Click Storage on the main menu.
2. Click the appropriate RAID name. The Properties page displays.
Add Spare Drives to an Array
To add spare drives to an existing array:
1. Click Storage on the main menu.
2. Click the appropriate RAID name. The Properties page displays.
3. Click Add spare drives. A list of available drives displays.
4. Select the appropriate drives from the list.
5. Click Apply. The spare drives are added to the array you selected.
Note: When you add two or more drives as spares, the
RAID sync process occurs sequentially for each drive. For this
reason, the sync percentage for the whole RAID might change
from about 90% back to 1%. This is not an error.
The addition of spare drives is supported only for RAID1 and
RAID5.
Remove Spare Drives from an Array
To remove spare drives from an existing array:
1. Click Storage on the main menu.
66
Page 67

User Guide
2. Click the appropriate RAID name. The Properties page displays.
3. Click Remove spare drives. A list of available drives displays.
4. Select the appropriate drives from the list.
5. Click Apply. The spare drives are removed and are now available for other
purposes.
Managing Pools
Pool is a logical structure that adds more flexibility to storage devices. With pools, you
can build resizeable logical volumes.
www.nec-computers.com
Build a Pool
To build a pool:
1. Click Storage on the main menu.
Figure 28: Pool Logical Structure
Note: The minimum pool size is equal to 80 megabytes.
67
Page 68

User Guide
2. Click the Pool tab.
3. Click Create. A list of available storage objects displays.
4. Select the appropriate objects.
5. Click Apply. The pool is built.
Delete a Pool
To delete a pool:
1. Click Storage on the main menu.
2. Click the Pool tab.
3. Click the appropriate pool name. The Properties page displays.
4. Click Delete. A confirmation dialog displays.
5. Click OK. The pool you selected is deleted.
View Properties of a Pool
To view properties of a pool:
www.nec-computers.com
1. Click Storage on the main menu.
2. Click the Pool tab.
3. Click the appropriate pool name. The Properties page displays.
Add Components to a Pool
To add new components to a pool:
1. Click Storage on the main menu.
2. Click the Pool tab.
3. Click the appropriate pool name. The Properties page displays.
4. Click Add components. A list of available storage objects displays.
5. Select the appropriate objects.
6. Click Apply. The new components are added to a pool.
Note: Components can be added, only. To free compo nent s
from a pool, it is necessary to delete the entire pool that uses
the components.
68
Page 69

User Guide
Disk Properties
You can view properties of disks that are installed in an NS50.
www.nec-computers.com
Note: In this section, disk is th e same as drive, hard disk
drive, or HDD.
View Installed Disks
To view a list of installed disks:
1. Click Storage.
2. Click the Disk tab. A list of the installed disks displays.
View Properties of a Disk
To view properties of a disk:
1. Click Storage on the main menu.
Figure 29: Disk Properties
69
Page 70

User Guide
2. Click the Disk tab. A list of disks displays.
3. Click the appropriate disk name. The properties for the selected disk display.
Hard Disk Drive Replacement
Hot-swap Disk Replacement
To replace a disk in the NS50 without shutting it down:
1. Click Storage on the main menu.
2. Click the Disk tab. A list of available disks and partitions displays.
3. Click the appropriate disk name. The disk properties page displays.
4. Click Deactivate. A confirmation dialog displays.
5. Click OK to deactivate the selected disk.
6. Follow the instructions in “Chapter 2 - Safety and Initial Setup” on page 9 to
remove the selected disk and carrier.
7. Remove the old disk from the carrier according to the same instructions.
www.nec-computers.com
8. Install the new disk in the carrier according to the instructions.
9. Reinstall the HDD carrier in the NS50. The NS50 automatically detects the
new drive.
10. Refresh the Web page or click any link in it. The Disk Insertion Wizard
opens, with three available options:
■ Treat new drive as legacy non-ApplianceWare drive. A drive is
registered in the system and user data remains unchanged. This option is
useful for USB drives.
■ Treat new drive as legacy ApplianceWare drive. A drive is registered
in the system and user data is completely erased. No further actions are
performed.
■ Add new drive as spare. A drive is registered in the system and user
data is erased. A drive is added to the first available RAID1 or RAID5
array, as a spare.
11. Select the option you want and click OK. The activation process begins.
12. When the activation process is complete, click Status on the main menu. The
Status page opens.
13. Click the Disk tab. A list of disks displays.
14. With the new drive name selected, click Fix to set its status to normal, if
required. The new drive is in place.
Note: The Disk Insertion Wizard can appear one or more
times, depending on how many new disks you insert.
Cold-swap Disk Replacement
To add a new disk to the NS50 after power has been removed:
70
Page 71

User Guide
1. Follow the directions in “Remove and Reinstall a Hard Disk Drive Carrier” on
page 16 to remove the HDD carrier with the old disk.
2. Follow the instructions in that section to remove the old disk from the carrier
and to install the new disk in the carrier.
3. Insert the carrier with the new disk in the NS50.
4. Power on the NS50.
5. Log on to the Web interface. The Disk Insertion Wizard opens.
6. Select the appropriate option and click OK. The activation process begins.
7. When the process is complete, the new disk is available for use.
Notes about Disk Replacement and Addition
■ Deactivation works only for empty drives without volumes or for drives that are
included in RAID arrays.
■ When disk activation is in progress, the Web interface is inaccessible. The Web
browser displays a warning page that states that the system is busy.
■ The removed disk might continue to display under the Monitoring section, marked
as “Error.” Select it and click Fix to remove the non-existent disk from the
Monitoring list.
www.nec-computers.com
■ USB drives have the same requirements as regular hard disk drives when they are
used for storage. In storage use, NTFS file system is not supported. You must
either create a volume on the USB drive via the Web interface or use Windows to
create a FAT32 partition.
Using the Appliance
Naming Folders
Use the following conventions when naming folders that will be shared with users of
Windows 95/98/NT/2000/XP or Macintosh:
■ Use any combination of numbers, letters, spaces, dashes, and underscores.
■ Limit file and folder names to 255 bytes or less. Please note that some languages
use multi-byte characters; this may result in reduced length of file and folder
names.
If folders will be shared with users running Windows for Workgroups or DOS, name
the folders with eight or fewer alphanumeric characters and without symbols such as
spaces, dashes, underscores, or apostrophes.
Working on a Windows Computer
The NS50 is ready for use as soon as the Setup Wizard has been completed. If
necessary, the administrator may limit access to files to particular users or groups.
Otherwise, files on the appliance are available to everyone who has access to your
network. Use the Appliance as you would any other drive or server on the network:
71
Page 72

User Guide
■ Browse for the appliance in Network Neighborhood (it is called My Network
Places in the latest Windows versions) or Windows Explorer.
■ Create and save shared files in folders and shares on the appliance.
■ Back up files stored on the appliance.
■ Create shortcuts to folders and shares that you use often, or just map a network
drive.
Finding the NS50 in Network Neighborhood (My Network Places)
To locate the NS50 in Network Neighborhood:
1. From your computer desktop, double-click on Network Neighborhood (it is
called My Network places in the latest Windows versions).
2. Double-click on Entire Network.
3. Browse to the appliance.
4. By default, the NS50 will initially appear in Workgroup. The administrator
may reassign the NS50 to another workgroup using ApplianceView.
5. The default name of the NS50 is HOSTxxxxxxxx, where xxxxxxxx represents
the last eight digits of the unit's MAC address. The administrator may rename
the appliance using the administration tools.
6. Double-click the appliance icon to view shares and folders.
www.nec-computers.com
Finding the NS50 with Find Computer
To locate the NS50 using Find Computer:
1. From the Windows Start menu, choose Search, and then click Computer. The
Find Computer dialog box opens:
2. T ype the name or IP address of the NS50 in the entry field. The default name of
the NS50 is HOSTxxxxxxxx, where xxxxxxxx is the last eight digits of the
unit's MAC address.
3. Click Search.
4. Locate the correct NS50 and double-click on it to connect.
Saving files to the NS50 (Windows)
You can save files on the NS50 by using the Save As command on the File menu. You
can also drag files to NS50 folders in Network Neighborhood or Windows Explorer.
Assigning a drive letter to the NS50
You can assign, or "map" a drive letter to the NS50. Assigning a drive letter to the
Public1 share or a frequently accessed folder on the appliance gives you a convenient,
direct path to your data.
To map to a shared folder:
1. Double-click on Network Neighborhood.
72
Page 73

User Guide
2. Browse to the NS50 or folder you want to map to.
3. Right click on the folder you want to map to.
4. From the menu, choose Map Network Drive.
5. The Map Network Drive box opens with the path to the folder you selected.
6. In the Drive field, select the drive letter you want to use for this folder.
7. Check Reconnect at Logon to automatically connect to this folder the next
time you start Windows.
8. Click OK.
You can now locate the appliance in My Computer under the drive letter you assigned.
Working on a Macintosh Computer
Note: This version of ApplianceWare software supports
Mac OS X 10.1.2, 10.1.5-based computers (and better).
www.nec-computers.com
The NS50 is ready for use as soon as the setup wizard has finished. If necessary, the
administrator may limit access to files to particular users or groups. Otherwise, files on
the appliance are available to everyone who has access to your network. Use the NS50
as you would any other drive or server on the network:
■ Connect to the NS50 shares over Samba (CIFS) protocol using Finder (Mac OS
X).
■ Create and save shared files in folders and shares on the NS50.
■ Back up files stored on the NS50.
■ Make an alias for folders and shares that you use often.
Connecting through the Finder (Mac OS X)
To connect to the NS50:
1. Select Go, and then Connect to server from the Finder menu, or press the
Apple+K on the keyboard.
2. Select NS50 from the list.
3. Log on the NS50, either as a guest (without password) or with your user name
and password.
4. Select the folder you want and click OK.
5. The NS50 folder is now on the Macintosh desktop.
Saving files to the appliance (Macintosh)
You can save files on the NS50 by dragging the files onto NS50 folders on your
desktop. NS50 folders remain mounted on the Macintosh desktop until you drag them
to the trash.
73
Page 74

User Guide
Working from a Linux Computer
The NS50 is ready for use from clients using CIFS/Samba as soon as the setup wizard
has finished. Use the NS50 as you would any other drive or server on the network:
■ Connect to the NS50 by IP address and directory path to a local mount point.
■ Create and save shared files in folders and shares on the NS50.
■ Backup files stored on the NS50.
■ Create KDE/GNOME desktop icons and symbolic links for convenience and faster
access.
■ To handle Samba (Windows) connections, you can also use the LinNeighborhood
utility with a GUI.
Mounting a share on the NS50 (Linux and UNIX)
You must know the NS50's IP address and public mount point in order to connect to the
appliance. Once the IP address and target mount point are established, the NS50 is
accessed using a mount command with the target IP address or hostname, target mount
point, and local mount point, in the form of 'smbmount //ip-address/target-directorypath local-mount-point'. The target directory path depends on how the NS50 disks are
configured. If the NS50 has been configured with a static IP address, ask the
administrator for this address to connect to the unit. If the NS50 is set to obtain a DHCP
IP address automatically, either get the IP address from ApplianceView application, or
ask the system administrator.
www.nec-computers.com
KDE or Gnome users may also use Konqueror or Nautilus (respectively) in order to
browse local network using SMB/CIFS. Please refer to their manuals for details.
To create a local mount
1. From a Linux console, type: mkdir [directory name] <Enter>
For example, if you want to create a directory named testdir under the user's
home directory, you would type:
mkdir ~/testdir
And then press <Enter>
2. Type: ls [directory name] <Enter>
The contents of the directory are displayed; it is empty.
To view the shares available for CIFS/SMB mounting
1. From a Linux console, type: smbclient -L [//NS50 name or IP address] <Enter>
For example, if the NS50's IP address is 192.168.0.230, you would type:
smbclient -L //192.168.0.230
And then press <Enter>.
2. In case your NS50 is joined into a domain, you may be prompted for a domain
password; otherwise, just press the Enter key at the password prompt.
3. Decide which share path you want to mount from the list displayed on the
screen.
74
Page 75

User Guide
To mount an available share on the NS50 to a local mount point:
To disconnect a share mounted on the Linux client:
www.nec-computers.com
1. From a Linux console type: smbmount //[NS50 IP address]/[path on appliance]
[local mount point] <Enter>
For example, if the NS50's IP address is 192.168.0.230, the share name is
public1, and the local mount point is ~/testdir, you would type:
smbmount //192.168.0.230/public1 ~/testdir
And then press <Enter>
2. Type: ls [directory name] <Enter>
The contents of the directory -- now containing files on the appliance, are
displayed. This directory can now be used as if it were a local directory on the
client.
1. Type: smbumount [directory name] <Enter>
For example, if path on the local Linux client is ~/testdir, you would type:
smbumount ~/testdir
And then press <Enter>.
2. Type: ls [directory name] <Enter>
The contents of the directory are displayed; it is empty.
75
Page 76

User Guide
www.nec-computers.com
Chapter 6 - Using the Online Help
On-line Help
The online help is included with this release of the NS50.
The online help pages are linked to the inactivity timer. If a help
page is open for longer than approximately five minutes without
mouse or keyboard activity, the system will log off the user.
Viewing On-line Help
There are two ways to access online help in the Web interface.
■ Context sensitive help: The context sensitive help can be accessed on each screen
by clicking Help, at the top right of the screen in the Web interface. Help for the
specific screen you are viewing will be displayed in the default Internet browser.
■ Help Index: The help index is available at the left side of each help page. It allows
to browse through help topics quickly.
Printing On-line Help Screens
If you would like to print an on-line help screen, and have a printer connected to the
computer that has the Web interface installed, you may do so from the Internet browser.
To print an on-line help screen:
■ From a Web browser menu, pick File then Print. The help screen is printed.
76
Page 77

User Guide
Glossary
Active Directory Services
An essential component of the Windows 2000 architecture that presents organizations
with directory services designed for distributed computer environments. Active
Directory allows organizations to centrally manage and share information on network
resources and users while acting as the central authority for network security.
Administrative Password
Password that ensures that unauthorized users do not have access to the NS50
management software via the Web interface. The administrator can set the
administrative password by using the Setup Wizard in the Web interface.
AppleTalk Filing Protocol (AFP)
www.nec-computers.com
File-sharing protocol that is used in a Macintosh (AppleTalk) network.
Appliance
The NS50.
ApplianceView
The Web interface management software.
Authentication
The process by which a computer allows a client to connect if a valid username and
password are supplied. The administrator can configure the Web interface to enable the
NS50 server to authenticate users in locally, on the NT domain server, or on the
Primary Domain Controller (PDC).
Authentication Types
See User Authentication Types.
Client PC
A computer that can connect to a server with communication protocols. For example, a
client is a computer that connects to the NS50.
Default Gateway
See Gateway Address.
Disk Segment
Disk partition.
77
Page 78

User Guide
Domain
A group of computers that are connected by both hardware and software so that files
are easily shared among users. The key difference between a workgroup and a domain
is that in the domain, the Primary Domain Controller (PDC) maintains a database
regarding which users and groups have access to the files and shares that exist on the
domain computers. This is in contrast to a Microsoft Windows Workgroup, in which
each computer that belongs to the workgroup maintains a database of the users who can
access its files and shares.
Domain Name Service (DNS) Server
Server that runs software that allows domain names to be converted into IP addresses.
If a user types www.ns50.com in the address field of an Internet browser, a DNS server
converts it to the proper IP address, such as 63.111.5.210. DNS servers can be used in
the same manner for Local Area Networks, so that computer names, rather than IP
addresses can be used to share files. (In a Windows-only network, a Windows Internet
Naming Service (WINS) Server is used to convert computer names to IP addresses.)
Dynamic Host Configuration Protocol (DHCP) Server
www.nec-computers.com
A server that automatically assigns IP (Internet Protocol) addresses to client machines
on a TCP/IP network. Typically, the System Administrator provides the DHCP
manager software a range of available IP addresses, and the DHCP Server assigns
available IP addresses to client PCs, as needed.
Ethernet
See LAN.
EVMS
Enterprise Volume Management System.
Folder Tree
A list of all of the folders and shares on the NS50. The list displays in the Web
interface. The Administrator can double-click the icon of the drive, share, or folder to
view other shares and folders that are lower in the tree.
Gateway Address (Default Gateway)
In a Local Area Network (LAN), the Internet Protocol (IP) address of the router that
allows requests for Internet data to go out of the local network. If the NS50 has a static
IP address, the Default Gateway address must be entered in the Web interface.
Hub
See Network Hub.
78
Page 79

User Guide
Internet Protocol (IP) Address
Each computer in the network, including the NS50 has a unique IP address. This
address is either automatically assigned from a Dynamic Host Configuration Protocol
(DHCP) server, or manually assigned by a system administrator. The IP address allows
the computer to communicate with other computers as part of a TCP/IP network.
Kernel
The low-level, fundamental part of Linux that resides in memory at all times and
provides basic services for all other parts of the operating system. The NS50 uses the
2.6.x kernel.
LAN cable
Cable used to connect devices in a Local Area Network. This is also referred to as a
Patch Cable or an Ethernet Cable.
LDAP
Lightweight Directory Access Protocol. LDAP is an industry standard for organizing
data for easy and flexible retrieval.
www.nec-computers.com
Linux
Linux is an open source, freely distributable version of the UNIX operating system.
The ApplianceWare server is based on the Linux operating system.
Local Appliances
NS50 that is attached to the Local Area Network by an Ethernet cable. Local
appliances are automatically recognized and added to the list of Local Appliances by
the NS50.
Local Area Network (LAN)
Several computers that are networked together using physical connections. Although
there are several types of LAN, Ethernet is the most prevalent and is the only type of
LAN that the NS50 supports.
Logical Drive
In the context of a partitioned disk drive or a RAID, the user’s perception of a disk
drive. This is in contrast to a physical drive, which is the actual disk drive. For
example, a workstation could have one 80GB hard drive (one physical drive), but the
drive might be set up in four partitions of 20GB each (four logical drives). In this case,
the user will view the one physical drive as four distinct drives, since Microsoft
Windows displays each partition as a separate drive. In the case of a Redundant Array
of Independent Disks (RAID), several physical drives actually appear as one logical
drive.
Logical Volume
A mountable storage object.
79
Page 80

User Guide
Logical Volume Manager (LVM)
A group of multiple physical volumes that are pooled into logical volume.
Media Access Control (MAC) Address
The unique 12-digit alphanumeric identification number assigned to the Network
Interface Card (NIC) in the NS50. MAC addresses are written as six sets of two
numbers separated by colons.
NS50
All hardware components and all server software built into and packaged with the unit:
■ All physical components
■ NS50 server software
■ Web interface management software
■ Discovery CD
www.nec-computers.com
Name
See Appliance Name
Network Attached Storage (NAS)
A specialized file server that connects to a network via an Ethernet cable. The NS50’s
Web interface software package enables an OEM to create a robust NAS device.
Network Domain
See Domain.
Network Hub
A device that allows several computers to be connected to a Local Area Network
(LAN) via Ethernet cables.
Network File System (NFS)
The file-sharing protocol that most UNIX computers use. Through NFS, users who
have access can manipulate the shared files and folders on a remote server.
Network Interface Card (NIC)
A piece of hardware that is either built into the motherboard, or a card that plugs into
the motherboard. The function of the NIC is to allow communication from one
computer to another. In order to access the Local Area Network, a computer must have
a NIC installed. Each NIC has a unique Media Access Control (MAC) address that
allows computers to be distinguished from each other on a network. There are several
types of NICs, but the most common is Ethernet. The NS50 was designed to support
most Ethernet NICs.
80
Page 81

User Guide
NIS
Network Information Service. NIS allows multiple computers in a local area network
to share administrative data. The data is stored in a central database, then distributed
over the network.
Partition
A subdivision of the physical hard drive that has been segmented into logical drives for
some purpose. The user will view each of the partitions as a separate physical drive,
even though each partition is a logical drive. In any single physical drive the total disk
space is equal to sum of the total disk space in all the partitions (logical drives). For
example, a workstation could have one 80GB hard drive (one physical drive), but the
drive might be set up in four partitions of 20GB each (four logical drives). In this case,
the user sees the one physical drive as four distinct drives, since Microsoft Windows
displays each partition as a separate drive.
Patch Cable
See LAN cable.
www.nec-computers.com
Physical Drive
In the context of a partitioned disk drive or a RAID, the actual hard disk drive. See
Logical Drive and Partition.
Physical Volume (PV)
A physical medium.
Primary Domain Controller (PDC)
The server that authenticates a user who attempts to connect to a share in a domain. A
large Local Area Network with hundreds or thousands of users might have several
domain controllers. In this case, one or several Backup Domain Controllers (BDC) also
authenticate users.
Redundant Array of Independent Disks (RAID)
A series of multiple physical drives that have been made into a single logical drive,
either through hardware or software. NS50 supports both hardware and software
RAID, but hardware RAID is outside the control of the NS50 and must be configured
and maintained through the hardware RAID controller. There are several different
levels of RAID.
Region
An ordered set of logically contiguous sectors. (In general they are not physically
contiguous).
Reiser File System
A new journaling file system. Following a system crash or power failure, it is not
necessary for the administrator to wait long before the NS50 is available. A record of
file operations is written to a journal that can be checked in the background after the
NS50 becomes available. Reiser File System is faster and supports larger file sizes than
many traditional file systems.
81
Page 82

User Guide
Remote Appliance
An NS50 that is outside the Local Area Network (LAN).
Security
See User Authentication Types.
Server Message Block (SMB)
A file-sharing protocol used for Microsoft DOS and Windows computers. Through
SMB, users on the Local Area Network who have access can manipulate the shared
files and folders on another computer. The NS50 supports SMB connections.
Share
A folder that has been shared for use on the Network. Shares must be 12 characters or
less, and cannot contain any of the following characters \ / : * ? “ < > | # . %. Shares on
the NS50 can be created either in the Web interface, Microsoft Windows, or
Macintosh’s OS.
Single Drive Appliance
An NS50 that uses a single hard drive as the storage medium. All information that is
stored on the NS50 will be contained on the single hard drive.
www.nec-computers.com
Snapshot
A "frozen" image of a volume that represents the status of a volume in a given instance.
This image can be used for backups.
Software RAID Appliance
An NS50 that uses a Redundant Array of Independent Disks (RAID) as the storage
medium. In a Software RAID appliance the disk array is controlled and maintained by
Web interface software, so that no RAID controller card is necessary. All information
that is stored on the NS50 will be contained in the RAID . The NS50 offers Software
RAID levels 0, 1, and 5.
Storage object
Any memory structure in EVMS that is capable of being a block device. (See also
EVMS and Status.) An administrator can view status information about the NS50
through the Web interface. The administrator can view available and used space on
each partition of the NS50, user connections to the NS50, NS50 status, and NS50
name.
Subnet Mask
The number (formatted similar to an IP address) that is used to define a sub-network, so
that IP addresses can be shared on a Local Area Network. If the NS50 has a static IP
address, the Subnet Mask must be entered in the Web interface.
Transmission Control Protocol/ Internet Protocol (TCP/IP)
The protocol that most computers use for communication on the Internet and Local
Area Networks (LANs). TCP/IP is comprised of two distinct parts. The Transmission
Control Protocol (TCP) establishes a connection with both the server and client ends,
82
Page 83

User Guide
and passes data to the connectionless Internet Protocol (IP). TCP is responsible for
correct delivery of data from one computer to another. If data is lost en route to the
destination, TCP retransmits until the data is received successfully, or until a timeout
occurs. The Internet Protocol is responsible for actually moving data from one node of
the network to another. Therefore, each packet of data is forwarded to the correct IP
address using the Internet Protocol.
Uninterruptible Power Supply (UPS)
An AC-powered battery into which computers are plugged. The purpose of a UPS is to
allow a computer to shut down safely when power is lost unexpectedly. NS50 server
software has built-in UPS support so that when the power cord and a serial cable are
plugged in a supported UPS, the built-in can safely shutdown, if the battery level
becomes critical in a power outage. This ensures that no data is lost during power
outages.
UNIX
An operating system that is widely used on servers in a variety of contexts, including
the Internet. UNIX is multi-user (multiple users can access a UNIX-based system at the
same time), thus well-suited to running a server. Clients who wish to log on to a UNIX
server must be running UNIX-based operating systems or must have programs that
allows their workstations to use NFS. The NS50 server is based on the Linux operating
system.
www.nec-computers.com
User Authentication Types
The NS50 offers three methods for user authentication.
■ Users Authenticated on the NS50 (NS50 Server Mode) In this method of
authentication, all user and group information is created and maintained on the
hard drive of the NS50. Therefore, each time a user attempts to connect to a private
share on the NS50, the NS50 software verifies that the user is allowed to access the
share.
■ Users Authenticated on the Primary Domain Controller – PDC (Mixed Mode). In
this method of authentication, all user and group information is created and
maintained on the NT server. When using PDC authentication, user and group
information cannot be viewed or modified in the Web interface. A user connects to
a private share on the NS50 and the PDC verifies that the user is allowed to access
the share.
■ Users Authenticated on the Active Directory Services (Native Mode). In this
method of authentication, all user and group information is created and maintained
through the Active Directory Services. User and group information cannot be
changed via the Web interface. User access rights are verified by Active Directory
Services. See also: Active Directory Services.
Windows Internet Naming Service (WINS) Server
In a Microsoft Windows-only network, a WINS server converts computer names to IP
addresses. Essentially, it operates exactly like a DNS Server, but the WINS server is
used exclusively on Microsoft Windows-only networks.
83
Page 84

User Guide
Workgroup
A group of computers that are connected by both hardware and software, so that files
can easily be shared among users. The key difference between a Microsoft Windows
workgroup and a Microsoft Windows domain is that in the workgroup, each computer
maintains a database regarding which users and groups have access to the files and
shares on the computers that comprise the workgroup. In a Microsoft Windows
domain, a Domain Controller authenticates each user who attempts to access the shares
and files of another computer.
www.nec-computers.com
84
Page 85

This page is deliberately left empty.
Page 86

 Loading...