

Page 1
NDA-24215
STOCK # 151942
®
MATWorX™ 32
User’s Guide
ISSUE 1
December, 1997
NEC America, Inc.
Page 2

LIABILITY DISCLAIMER
NEC America, Inc. reserves the r ight to
change the specifications, functions, or
features, at any time, without notice.
NEC America, Inc. has prepared this
document for the exclusive use of its
employees and customers. The
information contained herein is the
property of NEC America, Inc . and shall
not be reproduced without prior written
approval from NEC America, Inc.
NEAX, MATWorX, DESIWorX, and D
term
are registered trademarks of NEC
Corporation.
Copyright 1997
NEC America, Inc.
Printed in the USA
All other brand or product na mes are or
may be trademarks or registered
trademarks of, and are used to identify
products or services of, the ir respective
owners.
MS-DOS and Microsoft are registered
trademarks of Microsoft Corporation.
Microsoft Windows 95 and Windows NT
are trademarks of Microsoft Corporation.
Page 3

NDA-24215
December, 1997
NEAX2000 IVS
MATWorX 32 User’s Guide
Table of Contents
Page
Chapter 1 About This Guide.................................. 1
Purpose of This Guide................................ 1
How This Guide is Organized..................... 1
Chapter 2 MATWorX 32 Overview ......................... 5
What’s MATWorX 32?................................. 5
MATWorX 32 Tools ..................................... 6
Add-Ins................................................ 6
MACH Script Editor ............................. 6
PBX Configuration Wizard................... 6
MATWorX 32 Applications .......................... 7
PBX Access Module (PAM)................. 7
Scheduler ............................................ 7
DESIWorX........................................... 7
Introduction to Working in Windows 95....... 8
Navigating Through the MATWorX 32
Taskbar ....................................................... 8
PBX Menu .......................................... . 9
System Menu................................. ..... . 9
Station Menu ..................................... 10
Number Plan Menu............................ 10
Trunk Menu ....................................... 10
Features Menu .................................. 10
Add-Ins Menu.................................... 11
Applications Menu............................. 11
Help Menu......................................... 12
Working with MATWorX 32 Dialogs and
Buttons...................................................... 13
Printing a Report....................................... 17
Chapter 3 Installing MATWorX 32 ....................... 19
System Requirements .............................. 19
MATWorX 32 Installation Instructions ....... 20
MATWorX 32 User’s Guide
NDA-24215 Revision 1.0 Page i
Page 4

Table of Contents
(Continued)
Page
Chapter 4 Getting Started .................................... 27
Starting MATWorX 32 ............................... 27
Connecting to a NEAX2000 IVS PBX....... 29
Using the PBX Configuration Wizard. 29
Establishing the Connection.............. 30
Troubleshooting a Failed Connection 31
Disconnecting from the PBX.............. 35
Exiting MATWorX 32 ................................. 35
Chapter 5 PBX Access Module (PAM)................. 37
What’s the PAM?....................................... 37
PAM Communication Overview................. 38
PAM Online Help....................................... 39
Accessing PAM Online Help.............. 40
Chapter 6 Add-Ins................................. ....... ...... ... 41
What’s an Add-In?..................................... 41
Four Categories of Add-Ins....................... 42
Features............................................. 42
Enhanced Features........................... 42
Commands ........................................ 43
Wizards .............................................. 43
Installing an Add-In................................... 44
Starting an Add-In..................................... 45
Removing an Add-In................................. 45
Add-In Online Help.................................... 47
Chapter 7 MACH Script Editor....... ...... ....... ...... ... 49
What’s the MACH Script Editor?............... 49
Starting the MACH Script Editor............... 50
MACH Script Editor Online Help............... 50
Chapter 8 Scheduler.................................... ...... ... 51
What’s a Scheduler?................................. 51
Starting the Scheduler.............................. 52
Scheduler Online Help.............................. 52
Accessing Scheduler Online Help ..... 53
Page ii NDA-24215 Revision 1.0
MATWorX 32 User’s Guide
Page 5

Table of Contents
(Continued)
Page
Chapter 9 DESIWorX................ ...... ...................... 55
What’s DESIWorX?................................... 55
Starting DESIWorX................................... 56
DESIWorX Online Help............................. 56
Accessing DESIWorX Online Help.... 56
Chapter 10 MATWorX 32 Online Help ................... 57
Online Help Features................................ 57
Accessing the Online Help System........... 57
Main Help Contents........................... 58
Dialog-level Help ............................... 58
What’s This? Help ............................. 58
Tool Tips............................................ 58
Printing Help Topics.................................. 59
Tip:..................................................... 59
Appendix A Extended Command Set..................... 61
Appendix B Error Codes......................................... 65
Series 100 Error Codes............................ 65
Series 200 Error Codes (currently not
implemented)............................................ 66
Series 300 Error Codes............................ 67
Series 400 Error Codes............................ 69
Appendix C Directory and File Structure............... 71
MATWorX 32 User’s Guide
NDA-24215 Revision 1.0 Page iii
Page 6

List of Figures
Figure Title Page
Figure 2-1 MATWorX 32 Taskbar ............................9
Figure 2-2 Print Preview Dialog .............................17
Figure 3-1 Run Dialog ............................................21
Figure 3-2 MATWorX Install Dialog .......................21
Figure 3-3 Welcome Dialog ...................................22
Figure 3-4 Software License Agreement ...............22
Figure 3-5 Readme Information Dialog ..................23
Figure 3-6 Choose Destination Location Dialog ....23
Figure 3-7 Select Program Folder Dialog ..............24
Figure 3-8 Start Copying Files Dialog ....................24
Figure 3-9 Setup Progress Windows .....................25
Figure 3-10 Setup Complete Dialog ........................25
Figure 4-1 Starting MATWorX 32 ..........................27
Figure 4-2 User Information Dialog ........................28
Figure 4-3 MATWorX 32 Taskbar ..........................28
Figure 4-4 PBX Configuration Wizard Dialog ........30
Figure 4-5 Connection to PBX Dialog ....................30
Figure 4-6 Disconnect from PBX Dialog ................35
Figure 4-7 MATWorX 32 Taskbar ..........................35
Figure 5-1 PAM Dialog ..........................................37
Figure 5-2 PAM Communication Flow ...................39
Figure 6-1 Feature Add-Ins ....................................42
Figure 6-2 Enhanced Feature Add-Ins ..................42
Figure 6-3 Command Add-Ins ...............................43
Figure 6-4 Wizard Add-Ins .....................................43
Figure 6-5 Add-Ins Manager Dialog .......................44
Figure 6-6 Add-Ins Components Dialog ................44
Figure 6-7 Add-In Installed Dialog .........................45
Figure 6-8 Add-Ins Manager Dialog .......................46
Figure 6-9 Add-In Removed Dialog .......................46
Figure 7-1 MACH Script Editor Dialog ...................49
Figure 8-1 Scheduler Dialog ..................................51
Figure 9-1 DESIWorX Dialog .................................55
Figure C-1 Directory and File Structure ..................71
Page iv NDA-24215 Revision 1.0
MATWorX 32 User’s Guide
Page 7

List of Tables
Figure Title Page
Table 3-1 System Requirements ........................... 19
MATWorX 32 User’s Guide
NDA-24215 Revision 1.0 Page v
Page 8

About This Guide
Chapter 1 About This Guide
Purpose of This Guide
This user guide contains useful information that will
help you successfully install and use the MATWorX
32 program. Included are highlights about many key
features of the program including the MATWorX 32
Taskbar, PBX Access Module (PAM), Add-Ins, PBX
Configuration Wizard, MACH Script Editor,
Scheduler, DESIWorX, Extended Command Set,
Error Codes, and the Online Help System.
This guide is designed to be a supplement to the
MATWorX 32 online Help system. The Help system
provides context-sensitive information and procedures
that will help you perform ta sks using MATWo rX 32.
Refer to Chapter 10 “MATWorX 32 Online Help” for
more information about the Help system and how to
access it.
How This Guide is Organized
The MATWorX 32 User’s Guide is divided into the
following chapters:
◆
MATWorX 32 Overview describes the MATWorX
32 program, its features, buttons, Taskbar
selections, Add-Ins, and application tools.
◆
Installing MATWorX 32 describes the necessary
hardware (computer equipment) required to
efficiently run the MATWorX 32 program as well
as procedures for installing MATWorX 32 o n your
computer’s hard disk.
◆
Getting Started describes how to launch and exit
MATWorX 32 and configure a PBX using the
Wizard feature.
MATWorX 32 User’s Guide
NDA-24215 Revision 1.0 Page 1
Page 9

About This Guide
◆
PBX Access Module (P AM) describes the process
of how MATWorX 32 applications communicate
with the PBX via the P AM. The PAM is a gateway
for 32-bit Microsoft Windows applications to
connect to the NEAX2000 IVS PBX.
◆
Add-Ins describes the concept of Add-Ins,
including what they are and how they work, as well
as how to add and remove them. Add-Ins are the
basic tools of MATWorX 32. Users can also create
custom Add-Ins for specialized business solutions
by purchasing a developer’s kit from NEC or an
authorized NEC dealer.
◆
MACH Script Editor describes the concept and
operation of the MOC Accelerated Command
Heap (MACH) windo w. This window is a separate
and powerful tool that is integrated into the
MATWorX 32 software. It is similar to working
with the Maintenance Operation Console (MOC),
but provides much more functionality by enabling
you to create a list of NEAX2000 IVS commands
(a script) which you can save and run at an y time.
◆
Scheduler describes the features and operations of
the Scheduler application. Using the Scheduler,
you can build a series of MOC commands and sa ve
them in a script. Then you can simply run the script
instead of manually typing them each time you
need them. You can also schedule the script to run
at certain times during a day, week, or month. You
can build complex scripts that can modify
NEAX2000 IVS behavior at scheduled times.
◆
DESIWorX describes the features and operations
of the DESIWorX application. Using DESIWorX,
you can create labels for the function keys of the
Dterm stations on your NEAX2000 IVS. These
labels are saved in a database. You can enter
function key caption information for the label, and
you can print the labels to be placed on the Dterm.
Page 2 NDA-24215 Revision 1.0
MATWorX 32 User’s Guide
Page 10

About This Guide
◆
MATWorX 32 Online Help describes the online
Help system in detail as well as how to access it
and print Help topics.
◆
Appendix A lists the Extended Command Set that
you can use in conjunction with the MACH Script
Editor window. The Extended Command Set
characters are modifiers you type in front of a
NEAX2000 IVS command on the MACH Script
Editor window. Using Extended Commands can
greatly reduce the number of commands needed to
perform certain tasks.
◆
Appendix B lists the error codes and related
descriptions for the entire MATWorX 32 program.
◆
Appendix C describes the directory structure, f iles,
and file locations of the MATWorX 32 suite of
applications installed on your computer.
MATWorX 32 User’s Guide
NDA-24215 Revision 1.0 Page 3
Page 11

About This Guide
This page is for your notes.
Page 4 NDA-24215 Revision 1.0
MATWorX 32 User’s Guide
Page 12

MATWorX 32 Overview
Chapter 2 MATWorX 32 Overview
In this chapter you learn about the following:
◆
What’s MATWorX 32?
◆
MATWorX 32 Tools
◆
MATWorX 32 Applications
◆
Introduction to Working in Windows 95
◆
Navigating through the MATWorX 32 Taskbar
◆
Working with MATWorX 32 dialogs and buttons
◆
Printing a report
What’s MATWorX 32?
MATWorX 32 is a 32-bit Windows-based software
application that enables you to program and maintain
an unlimited number of NEAX2000 IVS PBXs via
your computer. MATWorX 32 utilizes a client/server
architecture that allows multiple dialogs (Add-Ins) to
communicate with a PBX. You can connect to and
program up to four PBXs at the same time.
MATWorX 32 provides a graphical user interface
(GUI) to a NEAX2000 IVS. This design lets you
navigate quickly and intuitively throughout the
program, thus saving you valuable time with your
PBX maintenance tasks.
MATWorX 32 communicates with a PBX via the PBX
Access Module (PAM). The PAM is an application of
MATWorX 32 which acts as a gateway for connection
and communication between the MATWorX 32 t ools
and a specific PBX. This chain of communication is
necessary for the successful operation of all the
MATWorX 32 tools and related PBX applications.
Refer to Chapter 5 “PBX Access Module (PAM)” for
more information about the PAM.
MATWorX 32 User’s Guide
NDA-24215 Revision 1.0 Page 5
Page 13

MATWorX 32 Overview
MATWorX 32 Tools
There are three kinds of tools included in the
MATWorX 32 program: Add-Ins, MACH Script
Editor, and a PBX Configuration Wizard. These tools
are accessible from the Taskbar.
Add-Ins
Add-Ins are the basic tools of MATWorX 32. Each
one provides you with special ized capabilities to
program PBX features and f unctions. MATWorX 32
comes with more than a dozen Add-Ins that can be
accessed from the Taskbar. In addition, you can also
create custom Add-Ins for specialized business
solutions by purchasing a developer’s kit from NEC or
an authorized NEC dealer. Refer to Chapter 6 “AddIns” for more information.
MACH Script Editor
This is a powerful time-saving tool that enables you to
create a list of NEAX2000 IVS commands that
perform tasks in the PBX. This list is referred to as a
script, which can be saved and run at anytime.You ca n
also use the MACH Script Editor to perform many
other operatio ns. Refer to Chapter 7 “MACH Script
Editor” for more information.
PBX Configuration Wizard
The PBX Configuration Wizard is a custo m tool in
MATWorX 32 that enables yo u to establ ish the proper
communication settings between your computer and
the NEAX2000 IVS. The Wizard asks you simple
questions and then uses the information to
automatically configure the connection for the PC and
the PBX. Refer to “Using the PBX Configuration
Wizard” on page 29 for more information on accessing
and using the PBX Configuration Wizard.
Page 6 NDA-24215 Revision 1.0
MATWorX 32 User’s Guide
Page 14

MATWorX 32 Applications
MATWorX 32 software includes three separate
applications that can run independently from one
another. However, when used in conjunction with
MATWorX 32 or each other, these applications
provide a robust suite of PBX maintenance
applications.
PBX Access Module (PAM)
The PAM acts as a gateway between MATWorX 32
tools and connected NEAX2000 IVS PBXs. It
provides connection and communication links for
programming the PBX. Refer to Chapter 5 “PBX
Access Module (PAM)” for more information.
Scheduler
The Scheduler is a versatile application that can be
used stand-alone or in conjunction with the MACH
Script Editor. You can build and schedule scripts
(series of MOC commands) all within the Scheduler,
or you can b uild scr ipts usi ng the MA CH Scr ipt Edito r
and then schedule them to run using the Scheduler.
Refer to Chapter 8 “Scheduler” for more information.
MATWorX 32 Overview
DESIWorX
DESIWorX is a unique application that enables you to
create and print function key labels for your Dterm
stations. The labels are saved in a database and can be
modified and printed when necessary. Refer to
Chapter 9 “DESIWorX” for more information.
MATWorX 32 User’s Guide
NDA-24215 Revision 1.0 Page 7
Page 15

MATWorX 32 Overview
g
Introduction to Working in Windows 95
If you are new to working in Windows 95 or would
like a refresher on Windows terminology, functions,
and navigational procedures, take a minute to access
the Microsoft Windows Tuto rial Tour by following the
steps below.
1. Launch Microsoft W i nd ows 95 on your
computer .
2. Select
3. Select
under the
4. Follow the instructions on your screen.
from the
Help
Tour: Ten Minutes to Usin
Contents
Start
tab.
taskbar.
Windows
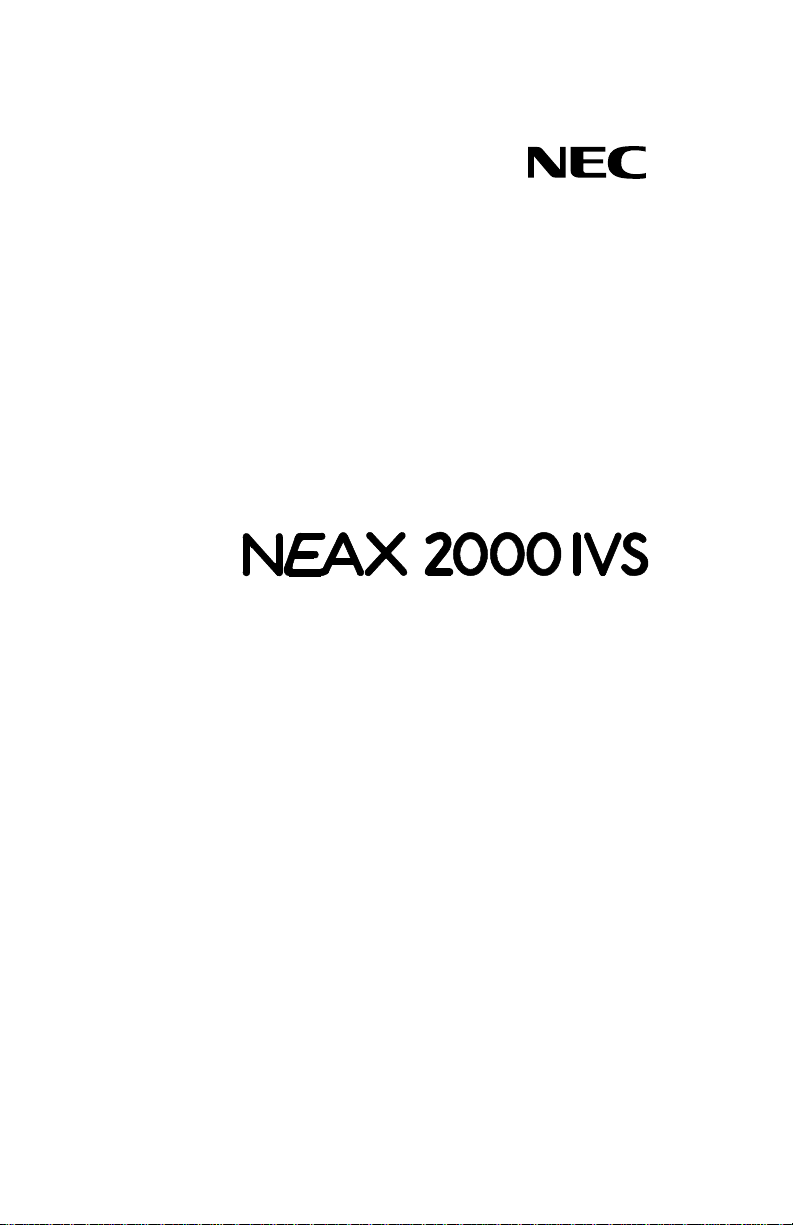
Navigating Through the MATWorX 32 Taskbar
The MATWorX 32 Taskbar (Figure 2-1) is the main
window of the program. It contains buttons and pulldown menus listing the selections available in the
program. Each button or me nu selection provides
access to the tools and applications available in the
program. To activate a selection, click on it.
The Taskbar offers dynamic functionality to the
program by allowing you to change it based on the
Add-Ins you want to use. For example, by default each
Add-In appears as a menu item and a button on the
Taskbar. If you remove an Add-In from the Taskbar
(via the Add-In Manager), it will no longer display as
a menu item or button. If you choose to add it back, it
will re-appear on the Taskbar.
The Taskbar enables you to navigate through the
program and perform various functions. It is also the
launch point for MATWorX 32 tools and applicat ions.
The default Taskbar items and correspon ding button s,
where applicable, are described on the following
pages.
Page 8 NDA-24215 Revision 1.0
MATWorX 32 User’s Guide
Page 16
MATWorX 32 Overview
y
y
y
Note: Some menu items (Add-In Manager, Help
Contents F1, and About MATWorX 32) do
not have a corresponding button. These
items are accessible only fr om the pull-down
menus.
Figure 2-1 MATWorX 32 Taskbar
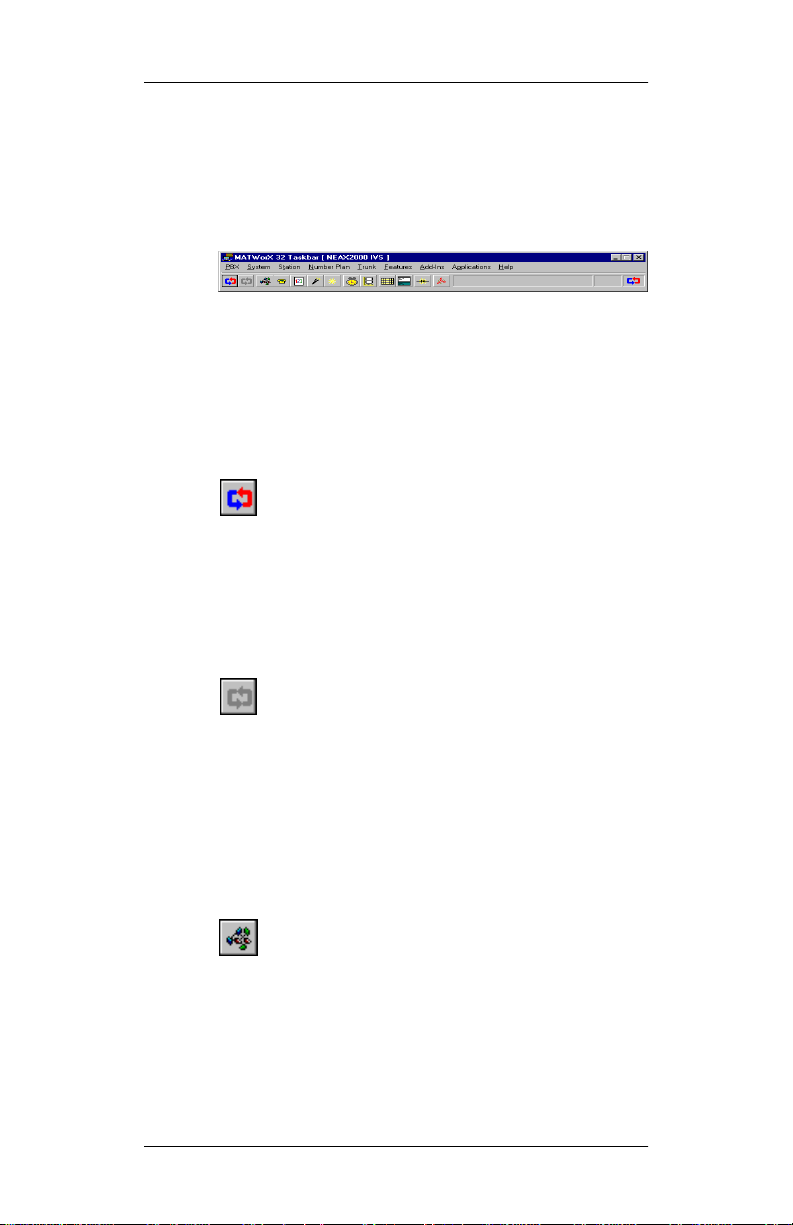
PBX Menu
Connect
Connection to PBX
- Select this menu item to access the
dialog where you can select a
PBX from a list of available PBXs and connect to it.
You can also click the
Connect to PBX
button
to select a PBX from a list of available PBXs and
connect to it.
Disconnect
Disconnect from PBX
- Select this menu item to access the
dialog where you can
disconnect from the current PBX.
You can also click the
Disconnect from PBX
button to disconnect from the current PBX.
S
stem Menu
The
S
stem Menu
is a dynamic menu that contains
system-related Add-Ins. For information about a
particular System Add-In, access the online Help for
that Add-In.
You can also click the
S
stem Tool Palette
button to display a floating palette of bu ttons that can
launch system-related Add-Ins.
MATWorX 32 User’s Guide
NDA-24215 Revision 1.0 Page 9
Page 17
MATWorX 32 Overview
g
Station Menu
The
Station Menu
is a dynamic menu that contains
station-related Add-Ins. For information about a
particular Station Add-In, access the online Help for
that Add-In.
You can also click the
Station Tool Palette
button to display a floating palette of buttons that can
launch station-related Add-Ins.
Number Plan Menu
The
Number Plan Menu
is a dynamic menu that
contains number plan-related Add-Ins. For
information about a particular Number Plan Add-In,
access the online Help for that Add-In.
You can also click the
Palette
button to display a floating palette of buttons
Numberin
Plan Tool
that can launch number plan-related Add-Ins.
Trunk Menu
The
Trunk Menu
is a dynamic menu that contains
trunk-related Add-Ins. For information about a
particular Trunk Add-In, access the online Help for
that Add-In.
You can also click the
Trunk Tool Palette
button to display a floating palette of buttons that can
launch trunk-related Add-Ins.
Features Menu
The
Features Menu
is a dynamic menu that contains
feature-related Add-Ins. For information about a
particular Feature Add-In, access the online Help for
that Add-In.
Page 10 NDA-24215 Revision 1.0
MATWorX 32 User’s Guide
Page 18

MATWorX 32 Overview
g
g
You can also click the
Features Tool Palette
button to display a floating palette of bu ttons that can
launch feature-related Add-Ins.
Add-Ins Menu
Add-In Mana
Add-Ins Mana
- Select this menu item to access the
er
dialog where you can add and
er
remove Add-Ins to/from the MATWorX 32 Taskbar.
Refer to Chapter 6 “Add-Ins” for more information.
Active Add-Ins
- Select this menu item to display a
sub-menu that lists all currently active Add-Ins. Also,
you can choose to “show all”, “hide all”, and “unload
all” active Add-Ins.
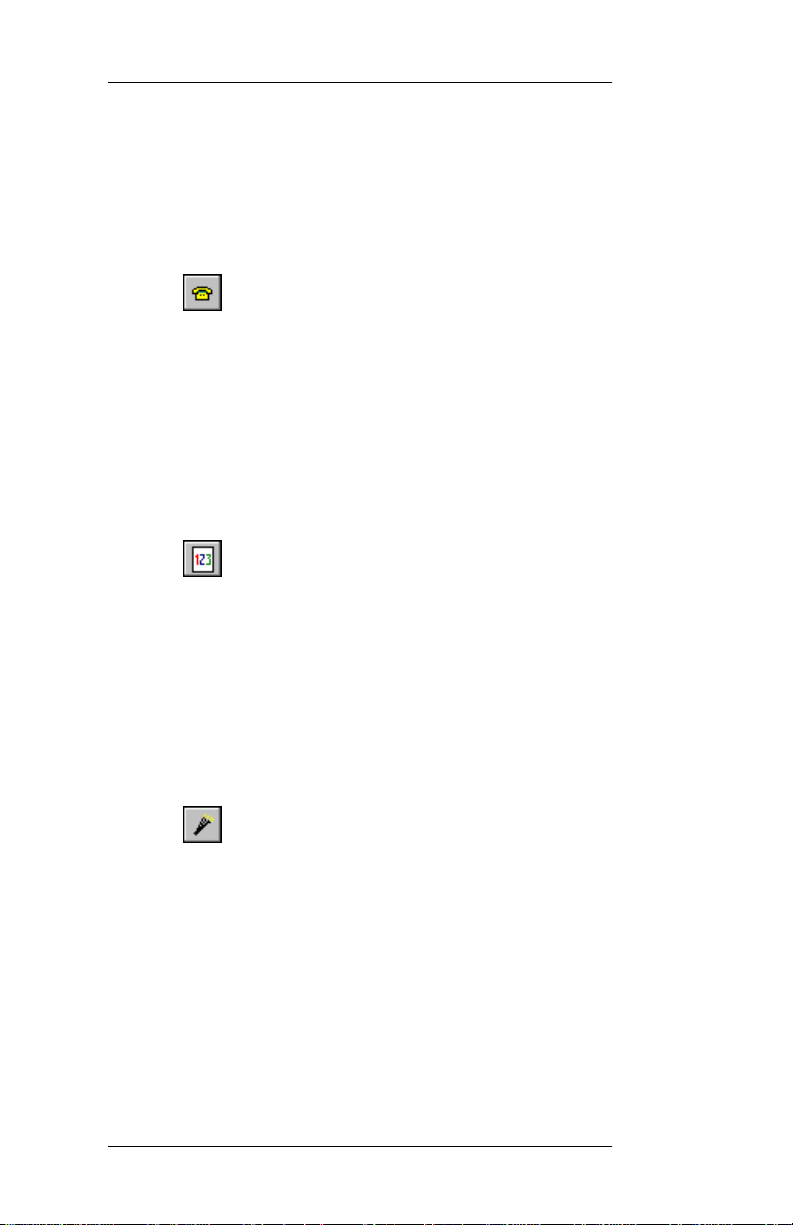
Applications Menu
MACH Script Editor
the
MACH Script Edi to r
- Select this menu item to access
dialog where you can create
and save a list (script) of NEAX2000 IVS commands
to perform tasks in the PBX. You can also use the
MACH Script Editor to perform many other
operations. Refer to Chapter 7 “MACH Script Editor”
for more information.
You can also click the
button to access the
Scheduler
- Select this menu item to access the
MACH Script Editor
MATWorX 32 Scheduler
MACH Script Editor
dialog.
dialog where you can build
and schedule scripts. You can also use the MACH
Script Editor to build scripts and then schedule them to
run using the Scheduler. Refer to Chapter 8
“Scheduler” for more information.
You can also click the
access the
MATWorX 32 User’s Guide
NDA-24215 Revision 1.0 Page 11
MATWorX 32 Scheduler
Scheduler
button to
dialog.
Page 19

MATWorX 32 Overview
g
g
g
g
y
DESIWorX
DESIWorX
- Select this menu item to access the
dialog where you can create and print
function key labels for your Dterm s tations. The labels
are saved in a database and can be modified and
printed when necessary. Refer to Chapter 9
“DESIWorX” for more information.
You can also click the
access the
Confi
access the
DESIWorX
uration Wizard
PBX Confi
DESIWorX
dialog.
- Select this menu item to
uration Wiza rd
button to
where you can
establish the proper communication settings between
your computer and the NEAX2000 IVS. The Wizard
asks you simple questions and then uses the
information to automatically configure the connection
for the PC and the PBX. Refer to “Using the PBX
Configuration Wizard” on page 29 for more
information on accessing and using the PBX
Configuration Wizard.
You can also click the
button to access the
PBX Confi
Confi
uration Wizard
uration Wizard
.
Help Menu
Help Contents F1
- Select this menu item to access
the main contents page of the MATWorX 32 online
Help system. The Help system provi des you with easy
access to information about procedures, tools, AddIns, commands, values, and shortcuts.
Tip of the Da
- Select this menu item to display an
informative tip about using MATWorX 32 and related
tools and applications.
About MATWorX 32
access the
About
- Select this menu item to
box to view MATWorX 32 version
and system information.
Page 12 NDA-24215 Revision 1.0
MATWorX 32 User’s Guide
Page 20

MATWorX 32 Overview
Command Manual
- Select this menu item to launch
Adobe Acrobat Reader (included with MATWorX 32)
and automatically open the NEAX2000 IVS
Command Manual.
You can also click the
Acrobat Reader
button
to launch Adobe Acrobat Reader and automatically
display a menu where you can select and open the
MATWorX 32 User’s Guide, NEAX2000 IVS
Command Manual, Help on Using Acrobat Reader,
and NEC’s Copyright Notice.
Working wi th MATWorX 32 Dialogs and Buttons
The dialogs within MATWorX 32 enable you to
perform various functions in order to program a
NEAX2000 IVS PBX. Many di alogs co nt ai n bu t tons ,
fields, boxes, and other options that are described
within this guide.
You are able to move each MATWorX 32 dialog by
placing your cursor on the title bar and holding down
your left mouse butto n, drag gi ng the d i alo g to i ts new
position, and releasing the mouse button. In addition,
you are able to resize many of the MATWorX 32
dialogs and Help windows by placing your cursor on
the outside border of the dialog, and once you see
double arrows, holding down your left mouse button
and dragging the border to its new size. Refer to
“Introduction to Working in Windows 95” on page 8
for more information about basic Windows concepts.
The following buttons appear on various dialogs
within MATWorX 32. You can view What’s This?
Help for all active buttons in the program by clicking
your right mouse button while positioned over the
button in question. Listed below is a description and
function of each button.
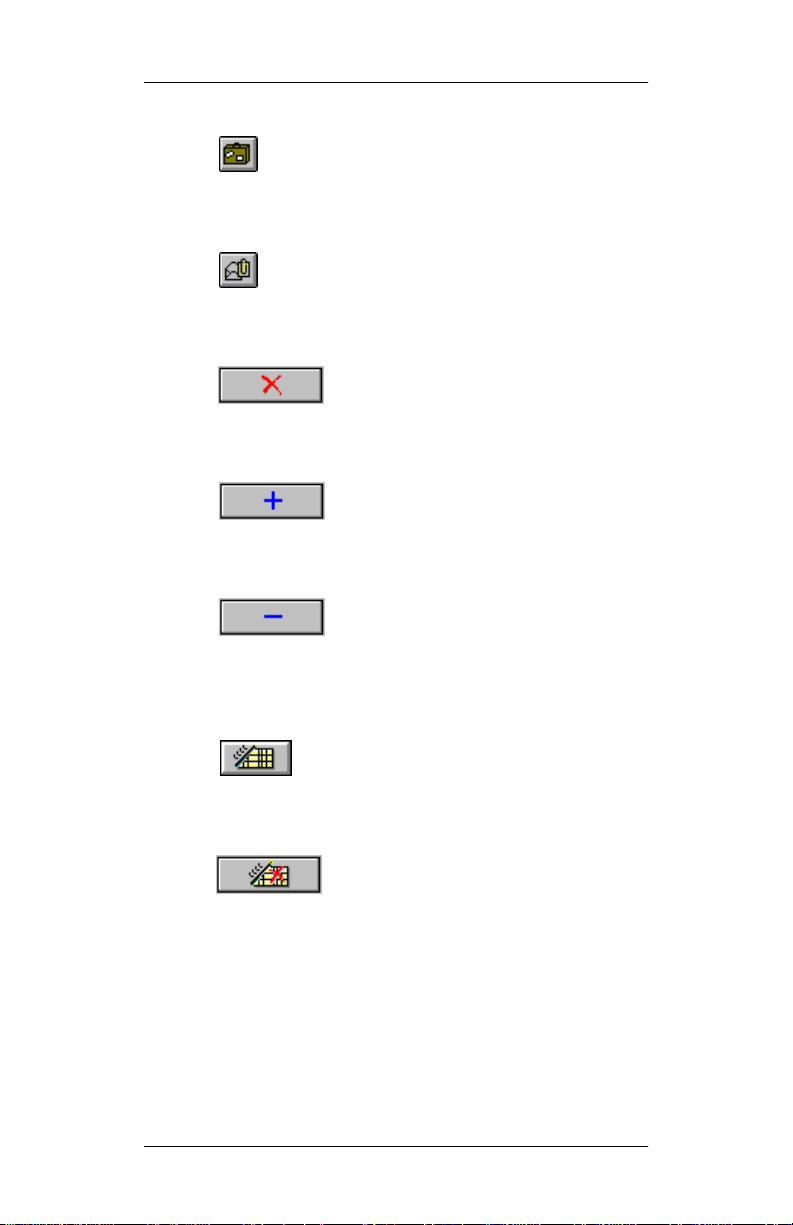
Clicking the Exit Dialog button closes the
dialog.
MATWorX 32 User’s Guide
NDA-24215 Revision 1.0 Page 13
Page 21
MATWorX 32 Overview
Clicking the What’s This? button enables you
to click on a field or button in a dialog to display
What’s This Help for the item.
Clicking the OK button saves changes
and closes the dialog.
Clicking the Lookup Data button
replaces the listed data with the most current data
contained in the PBX.
Clicking the Cancel Data button stops
the lookup process. Data replaced during the lookup
process will remain changed.
Clicking the Update Data button saves
the changes on the dialog to the PBX.
Clicking the Hide Dialog button hides
the Add-In dialog from view, but leaves it loaded in
your PC’s memory so it can appear quickly if you
launch it again. All data is retained until you close the
dialog.
Clicking the Print Data button
launches the
Print Preview
dialog where you can
preview a report before printing. You can then click
the
Print Data
button to print the displayed data to
your default printer.
Clicking the Zoom button on the
Print Preview
dialog enables you to zoom in and out on a report.
Page 14 NDA-24215 Revision 1.0
MATWorX 32 User’s Guide
Page 22
MATWorX 32 Overview
Clicking the Export button on the
Preview
dialog enables you to save and export the
Print
displayed report to a file.
Clicking the Email button on the
Print Preview
dialog enables you to email the report directly from
MATWorX 32 if your email system supports MAPI.
Clicking the Delete Data button clears
the displayed data on the dialog. It does not clear the
data from the PBX.
Clicking the Add button enables you to
add an Add-In to the MATWo rX 32 Task bar. Refer t o
Chapter 6 “Add-Ins” for more information.
Clicking the Remove button enables
you to remove an Add-In from the MATWorX 32
Taskbar. Refer to Chapter 6 “Add-Ins” for more
information.
Clicking the Clear Grid button completely
clears the displayed grid, but does not delete the
information from the database.
Clicking the Delete Grid button clears
the grid and deletes the information from the database.
MATWorX 32 User’s Guide
NDA-24215 Revision 1.0 Page 15
Page 23
MATWorX 32 Overview
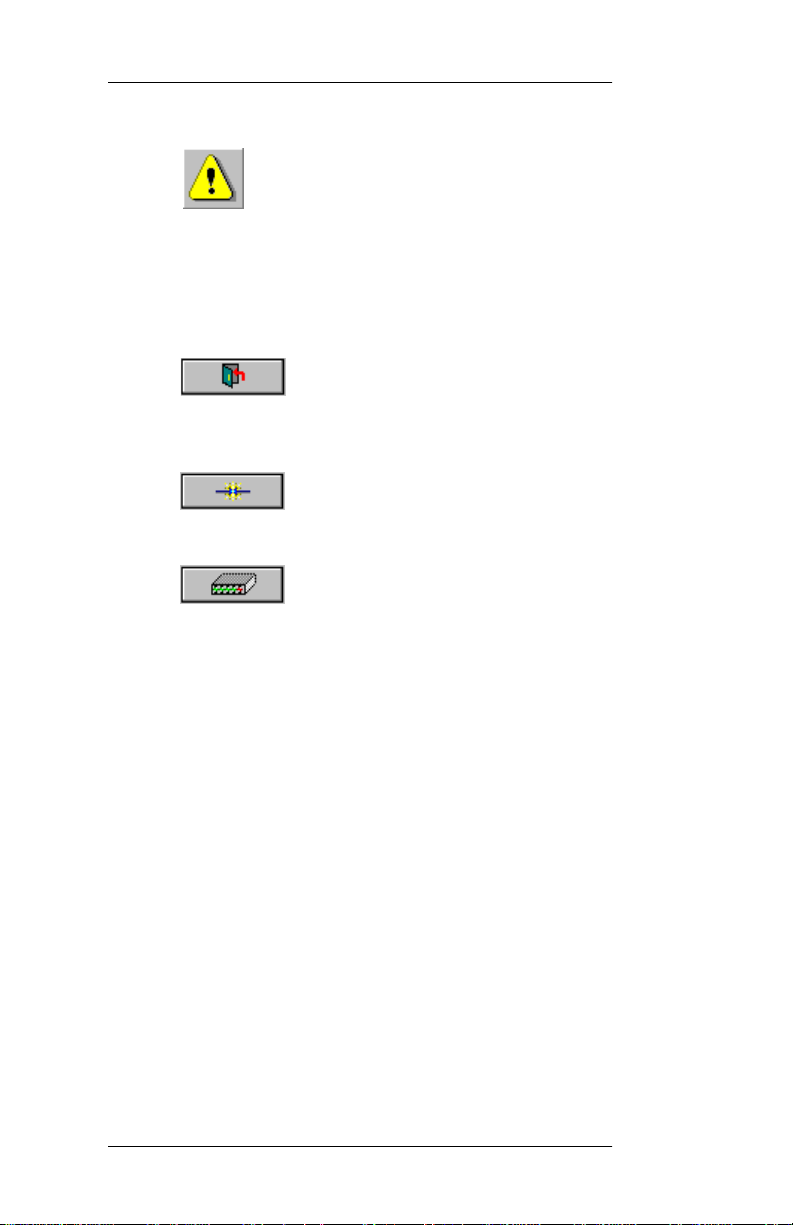
Clicking the Reset PBX button resets the
PBX. A PBX reset is required before an update can
take effect. Note, if you reset the PBX, all existing call
connections will end. Also, if you are connected to the
PBX through a direct connection, your connection will
be lost, but will be automatically reconnected.
Clicking the Close button disregards
any changes not already sent to the PBX and closes the
dialog.
Clicking the PBX Configuration
Wizard button launches the wizard.
Clicking the Setup button displays an
easy way to determine your modem’s Initialization
and Termination strings.
Page 16 NDA-24215 Revision 1.0
MATWorX 32 User’s Guide
Page 24
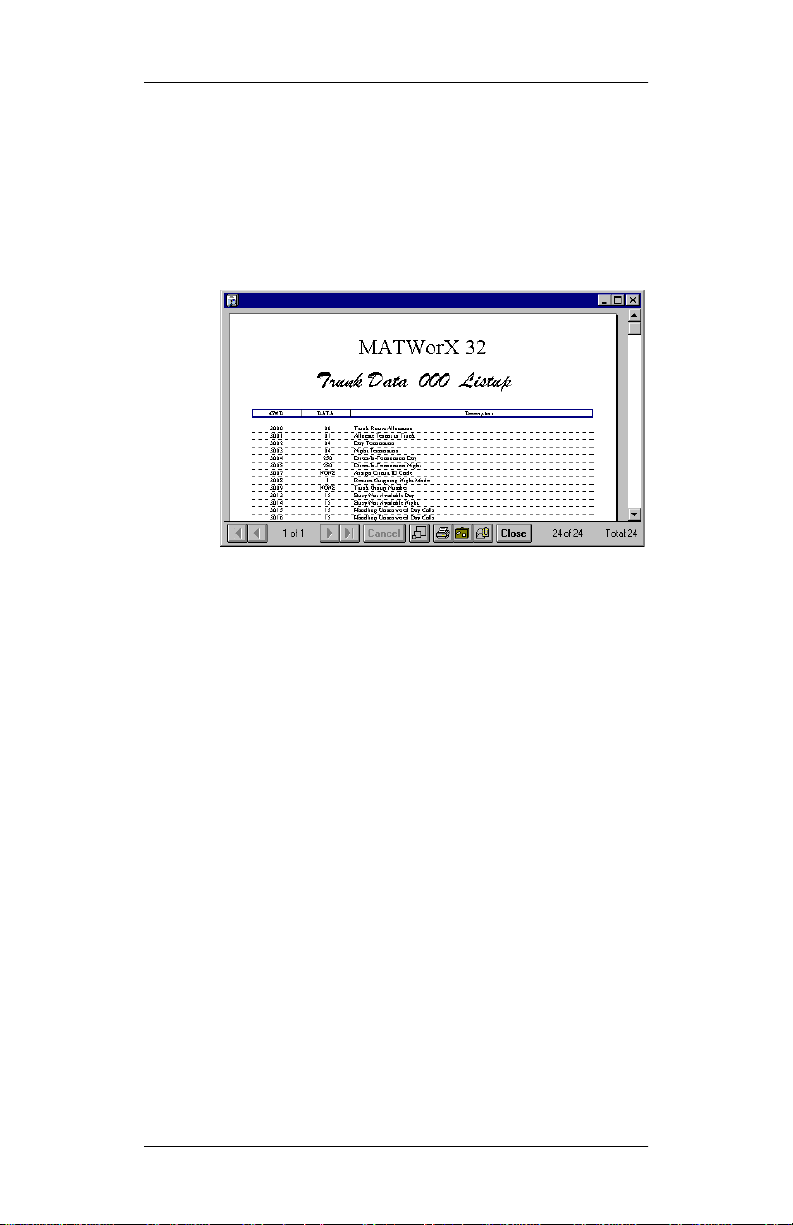
Printing a Report
The MACH Script Editor, Sched uler, and several AddIns enable you to print reports and listup data by
clicking the
dialog (Figure 2-2) automatically di splays so you can
preview the report before printing.
Figure 2-2 Print Preview Dialog
Print Data
MATWorX 32 Overview
button. The
Print Preview
You can use the
◆
Print the displayed report by clicking the
button.
Data
◆
Zoom in and out on the report by clicking the
Zoom
◆
Save and export the displayed report to a file.
◆
Email the report directly from within
Print Preview
button.
dialog to:
Print
MATWorX 32 if your email system supports
MAPI.
MATWorX 32 User’s Guide
NDA-24215 Revision 1.0 Page 17
Page 25

MATWorX 32 Overview
This page is for your notes.
Page 18 NDA-24215 Revision 1.0
MATWorX 32 User’s Guide
Page 26

Installing MATWorX 32
Chapter 3 Installing MATWorX 32
In this chapter you learn about the following:
◆
MATWorX 32 hardware and software “system”
requirements
◆
MATWorX 32 installation instructions for
Windows 95 and NT 4.0 or higher
System Requirements
MATWorX 32 requires an IBM or compatible PC
running Microsoft Windows 95 or NT 4.0 or higher
and a NEAX2000 IVS PBX with 1000 series software
or higher.
Table 3-1 System Requirements
Minimum Requirements Recommended
486/66MHz processor Pentium 166MHz processor
16MB RAM for Windows 95
32MB RAM for Windows NT
50MB available hard-disk
space before installation
SVGA monitor with 800 x 600
resolution
CD-ROM drive
Valid NEAX2000 IVS hardware connection
(direct serial or modem)
MATWorX 32 User’s Guide
NDA-24215 Revision 1.0 Page 19
32MB RAM
75MB available hard-disk
space or more before
installation
15” or larger SVGA monitor
with 1024 x 768 resoluti on
Mouse
Page 27

Installing MA TWorX 32
MATWorX 32 Installation Instructions
To install MATWorX 32 for the first time, or to return
to Setup later to add optional features or Help files you
didn’t install the first time, you must use the
installation CD included in your MATWorX 32
package. You must run Setup from Windows.
Important: Be sure to close all
Windows programs
and screen save r s that are running and
disable any virus detection programs
before using the Setup program.
The following procedure walks you through the
installation of MATWorX 32. The Setup consists of a
series of dialogs that s up pl y yo u wi th default answers
to questions regarding the installation of files to you r
hard disk. To accept the default answers, click the
button. To make changes, click the
Next
Browse
button and select a different directory, then click OK
to return to the dialog box.
Note: The following procedure assumes you are
starting the Setup program from your
computer’s CD-ROM drive
D:
. If you start
from a differ ent drive, substitute the letter of
that drive in this procedure.
1. Launch Microsoft Windows 95 or NT version 4.0
or higher on your computer.
2. Place the MATWorX 32 CD in the CD-ROM
drive.
Page 20 NDA-24215 Revision 1.0
MATWorX 32 User’s Guide
Page 28

Installing MATWorX 32
3. Select
Run
from the
taskbar. A dialog
Start
similar to the following displays (Figure 3-1).
Figure 3-1 Run Dialog
4. Type D:\Setup in the
OK. The
MATWorX Install
text box and click
Open
dialog displays
(Figure 3-2).
Figure 3-2 MATWorX Install Dialog
MATWorX 32 User’s Guide
NDA-24215 Revision 1.0 Page 21
Page 29

Installing MA TWorX 32
g
5. Click Next. The
Welcome
(Figure 3-3).
Figure 3-3 Welcome Dialog
6. Read the information in the
then click Next. The
A
reement
dialog displays (Figure 3-4).
Software License
dialog displays
Welcome
dialog,
Figure 3-4 Software License Agreement
Page 22 NDA-24215 Revision 1.0
MATWorX 32 User’s Guide
Page 30

Installing MATWorX 32
g
7. Read the information in the
A
reement
dialog, then click Yes to accept the
terms of the license agreement. The
Information
Figure 3-5 Readme Information Dialog
dialog displays (Figure 3-5).
8. Read the information in the
Information
dialog, then click Next. The
Choose Destination Location
(Figure 3-6).
Software License
Readme
Readme
dialog displays
Figure 3-6 C hoose Destination Location Dialog
MATWorX 32 User’s Guide
NDA-24215 Revision 1.0 Page 23
Page 31

Installing MA TWorX 32
g
ying
9. To accept the default destination directory, click
Next. To change it, click Browse and select the
desired directory, click OK, and then click Next.
The
Select Pro
(Figure 3-7).
Figure 3-7 Select Program Folder Dialog
10. To accept the default program fold er , click Next.
To change it, select an existing folder or type a
new name in the edit box, then click Next. The
Start Cop
listing the settings you have established thus far.
ram Folder
dialog displays (Fig ure 3-8 )
Files
dialog displays
Figure 3-8 Start Copying Files Dialog
Page 24 NDA-24215 Revision 1.0
MATWorX 32 User’s Guide
Page 32

Installing MATWorX 32
g
11. To accept the settings and begin copying files to
your hard disk, click Next. To change any
setting, click Back to go backwards through the
installation until the desired dialog displays.
Then make the necessary adjustment(s) and click
Next until the Setup program begins copying
files to your hard di sk .
The
Setup Pro
windows display (Figure 3-9),
ress
indicating the progress of the Setup program and the
level of resources available on your computer.
Figure 3-9 Setup Progress Windows
The
Setup Complete
dialog displays (Figure 3-10)
informing you that the Setup program has finished
copying files to your hard disk.
Figure 3-10 Setup Complete Dialog
12. Click Finish to complete the MATWorX 32
installation process. You can now run the
MATWorX 32 program.
MATWorX 32 User’s Guide
NDA-24215 Revision 1.0 Page 25
Page 33

Installing MA TWorX 32
This page is for your notes.
Page 26 NDA-24215 Revision 1.0
MATWorX 32 User’s Guide
Page 34

Chapter 4 Getting Started
g
In this chapter you learn about the following:
◆
Starting MATWorX 32
◆
Connecting to a NEAX2000 IVS PBX
◆
Exiting MATWorX 32
Starting MATWorX 32
This procedure explains how to launch MATWorX 32
each time you want to run the program.
Note: Before you can use MATW orX 32 to program
a NEAX2000 IVS, you must configure a
communication link between your PC and
the PBX. Refer to “Connecting to a
NEAX2000 IVS PBX” on page 29.
1. Launch Microsoft Windows 95 or NT 4.0 or
higher on your compute r.
Getting Started
2. Select
MATWorX 32 User’s Guide
NDA-24215 Revision 1.0 Page 27
Pro
rams / MATWorX 32 / MATWorX
from the
32
Figure 4-1 Starting MATWorX 32
taskbar (Figure 4-1).
Start
Page 35

Getting Started
y
3. If you are launching MATWorX 32, DESIWorX
32, or Scheduler 32 for the first time, the
Information
User
dialog displays (Figure 4-2).
Figure 4-2 User Information Dialog
4. Enter your
Serial Number
then click Next. The
displays (Figure 4-3).
Figure 4-3 MATWorX 32 Taskbar
Name, Compan
in the appropriate text boxes,
MATWorX 32 T askbar
, and
Product
You have now successfully started MATWorX 32.
Page 28 NDA-24215 Revision 1.0
MATWorX 32 User’s Guide
Page 36

Getting Started
g
Connecting to a NEAX2000 IVS PBX
Note: For the best performance using MATWorX
32, establish a direct communication
connection from your computer to the PBX
at 9600 baud. If you must use a modem
connection, connect at 2400 baud.
Usin
the PBX Configuration Wizard
The PBX Configuration Wizard enables you to
establish the proper communication settings between
your computer and the NEAX2000 IVS. The Wizard
asks you simple questions and then uses the
information to automatically configure the connection
for the PC and the PBX.
If you have already established a connection between
your computer and a PBX, you can still run the Wizard
if you want to establish a connection to a different
PBX. The following procedure explains how to launch
the PBX Configuration Wizard.
Note: The PBX Configuration Wizard
automatically starts when you click the
Connect
button if there are no
configurations established for a PBX.
1. Launch MATWorX 32.
MATWorX 32 User’s Guide
NDA-24215 Revision 1.0 Page 29
Page 37

Getting Started
g
g
g
2. Select
Applications
Wizard
Confi
uration Wizard
menu, or click the
button. The
PBX Confi
from the
uration
Confi
uration Wiza rd
dialog displays (Figure 4- 4).
Figure 4-4 PBX Configuration Wizard Dialog
3. Follow the instructions on your screen. Help is
available for each dialog in the Wizard by
clicking the
Help
button.
Establishing the Connection
Once you have established th e communication settings
between your computer and a NEAX2000 IVS, you
can connect to it using MATWorX 32.
1. Launch MATWorX 32.
2. Click the
Taskbar. The
Connect
button on the MATWorX 32
Connection to PBX
dialog
displays (Figure 4-5).
Figure 4-5 Connection to PBX Dialog
Page 30 NDA-24215 Revision 1.0
MATWorX 32 User’s Guide
Page 38

Getting Started
3. Select the PBX that you want to connect to. Click
the down arrow to view all available PBXs.
4. Click the OK button.
You have now successfully connected MATWorX 32
to the PBX.
Troubleshooting a Failed Connection
The following bulleted list provi des possible reasons
for a failed connection between your computer and the
PBX, as well as the action required to correct the
problem.
◆
Have you created a hardware link between your PC
and the PBX?
Yes - Go to the next bullet item.
No - MATWorX 32 will not operate properly
until the hardware link is made. Linking yo ur
PC to the PBX is an important part of the PBX
installation. This is different from configuring
the communication settings between your PC
and the PBX like what is established using the
PBX Configuration Wizard. Please read the
NEAX2000 IVS MAT Operation Guide for
complete instructions on setting up the
hardware link.
I don’t understand the question - Your PC
and the PBX need to be joined by
communications hardware. For example, when
the PC is located near the PBX, it is best to link
them directly using a serial cable. When the PC
is located away from the PBX, they must be
linked over a telephone line, using modems in
the PC and PBX.
MATWorX 32 User’s Guide
NDA-24215 Revision 1.0 Page 31
Page 39

Getting Started
◆
Have you entered configuration information for
your PBX?
◆
Have you run t he PBX Configur ation W izard again
since the connection failed?
◆
Is the failed connection a direct cable link or a
modem connection?
Yes - Go to the next bullet item.
No - Run the PBX Configuration Wizard to
establish the proper communication settings
between your computer and the PBX.
I don’t understand the question - Once
the hardware link is established, configuration
information is necessary for the PC to connect
to the PBX. For example, to dial the PBX, your
PC must know the PBX's phone number. If you
have not entered this data, you must do so by
using the PBX Configuration Wizard.
Yes - Go to the next bullet item.
No - Run the PBX Configuration Wizard to
detect any connection changes and re-establish
the proper communication settings between
your computer and the PBX.
I don’t understand the question Sometimes changes occur with the connection
without you knowing about them. These
changes may cause the connection to fail. Many
failed connections that were originally setup
using the PBX Configuration Wizard can be
repaired by running the Wizard again. The
Wizard detects changes that have occurred
since the last good connection was made.
Direct Connection
Reasons:
✓
The PC COM Port is currently in use by
another application
✓
Defective cable
✓
Loose cable connection
✓
Incorrect cable type
Page 32 NDA-24215 Revision 1.0
MATWorX 32 User’s Guide
Page 40

Getting Started
ging
ging
g
ging
Modem Connection
☞
No Dial Tone
Action: Listen to the modem while it dials to
determine that no dial tone was present.
Reasons:
✓ PC modem's power is off (external only)
✓ PC modem's telephone line is not active or
not properly plugged in
✓ PBX configuration indicates the wrong PC
COM port
✓ PBX Configuration indicates a Direct setting
when the connection is really Modem
✓ External modem data cable is not properly
connected to the PC
✓ External modem data cable is defective
✓ Telephone line cable is defective
☞
No Rin
Action: Listen to the modem after it dials to
determine that no ringing occurred.
Reason: Incorrect phone number (too short)
☞
Rin
recorded messa
Action: Listen to the modem while it dials to
determine that the call was answered.
Reasons:
✓ Too many digits were entered for the phone
number
✓ Incorrect digits
✓ Incorrect access code
✓ Incorrect area code
☞
Rin
Action: Listen to the modem while it dials to
determine that it kept ringing.
Reasons:
✓ Incorrect phone number
✓ PBX Port 1 is not set for the built-in PBX
modem
MATWorX 32 User’s Guide
NDA-24215 Revision 1.0 Page 33
followed by a voice answer or a
e
, But No Answer
Page 41

Getting Started
y
g
g
g
g
✓ PBX power is off
✓ A valid station number is not assigned to the
built-in PBX modem
☞
Bus
Signal
Action: Listen to the modem while it dials to
determine that a busy signal is received.
Reasons:
✓ Incorrect phone number
✓ PBX modem is being accessed by another
user
☞
Rin
and Answer, but no connect
messa
Action: Listen to the modem while it dials to
determine that the PBX answered. Watch for a
Connect message.
Reasons:
✓ PC modem's highest speed is less than the
PBX modem's speed
✓ Inappropriate initialization string
e
☞
Connect messa
messa
Action: Listen to the modem while it dials to
determine that an answer was received. Watch
for the Connect message, followed by the
Carrier Detect message.
Reason: Possible incorrect PBX command.
Do not use PBX Comm and 40, YY=11, Second
Data = 5.
Note: If you are an advan ced user, you can change
any of the PBX configuratio n settings using
the
is accessed from the PAM by selecting
e
PBX Configuration
Configuration
selecting
Page 34 NDA-24215 Revision 1.0
Dialog View
e, but no carrier detect
dialog. Thi s dialo g
from the
Edit
.
MATWorX 32 User’s Guide
PBX
menu, then
Page 42

Getting Started
g
Disconnecting from the PBX
This procedure explains how to disconnect from a
PBX when you are finished working with it.
1. Click the
Disconnect
32 Taskbar. The
displays (Figure 4-6).
Figure 4-6 Disconnect from PBX Dialog
2. Click the OK button. MATWorX 32 disconnects
from the PBX.
Exiting MATWorX 32
This procedure explains how to exit MATWorX 32
when you are finished working in the program. It is
recommended to close all open MATWorX 32 AddIns and applications that may running before exiting
the program.
1. Access the MATWorX 32 Taskbar (Figure 4-7).
button on the MATWorX
Disconnect from PBX
dialog
Figure 4-7 MATWorX 32 Taskbar
2. Click the
Exit Dialo
button in the upper
right corner of the dialog.
You have now successfully shutdown MATWorX 32.
MATWorX 32 User’s Guide
NDA-24215 Revision 1.0 Page 35
Page 43

Getting Started
This page is for your notes.
Page 36 NDA-24215 Revision 1.0
MATWorX 32 User’s Guide
Page 44

PBX Access Module (PAM)
Chapter 5 PBX Access Module (PAM)
In this chapter you learn about the following:
◆
What’s the PAM?
◆
PAM Communication Overview
◆
PAM Online Help
What’s the PAM?
The PAM (Figure 5-1) is an application that acts as a
gateway between MATWorX 32 tools and a
NEAX2000 IVS PBX. It provides connection and
communication links for progra mming the PBX.
When you start MATWorX 32, the PAM
automatically starts. Then, when MATWorX 32 tools
need access to the PBX, they send Maintenance
Operation Console (MOC) commands to the PAM.
This operation is transparent to the user. It is not
necessary for you to manually use the PAM. However,
you can use its features if you are familiar with the
PBX's MOC mode, and you want more control at the
MOC level.
Figure 5-1 PAM Dialog
MATWorX 32 User’s Guide
NDA-24215 Revision 1.0 Page 37
Page 45

PBX Access Module (PAM)
You can use the PAM to:
◆
Modify a dial-up profile (PBX configuration) for
each PBX you access. Use the PBX Config uration
Wizard to create dial-up profile.
◆
Connect to and disconnect from available PBXs.
However, when using MATWorX 32 the
recommended way to do this is with the
Connect
and
PBX Disconnect
MATWorX 32 Taskbar.
◆
View a real-time log of the transactions between
the PAM and the PBX.
◆
Send any of the NEAX2000 IVS PBX commands
to the PBX.
PAM Communication Overview
The PAM provides an Application Programming
Interface (API) that:
◆
Provides high-level Object Linking and
Embedding (OLE) commands that can be us ed b y
Windows-based applications, such as MATWorX
32 tools, to retrieve and program PBX data.
◆
Ensures all OLE client applications yield enough
time to each other to complete command
transactions with the PBX.
PBX
buttons on the
Page 38 NDA-24215 Revision 1.0
MATWorX 32 User’s Guide
Page 46

PBX Access Module (PAM)
Figure 5-2 represents the communication flow
between MATWorX 32 tools, the PAM, and the PBX.
Figure 5-2 PAM Communication Flow
PAM Online Help
The PAM application contains its own contextsensitive online Help system. This guide provides a
simple overview to the features and capabilities of the
PAM. For more detailed information, including
procedures and detailed descriptions, access the PAM
online Help system.
MATWorX 32 User’s Guide
NDA-24215 Revision 1.0 Page 39
Page 47

PBX Access Module (PAM)
g
Accessing PAM Online Help
There are several ways to access and use the PAM
online Help system.
◆
To access the main Help contents, select
Contents F1
from the
menu bar. You can also access the main Help
contents by selecting
PAM Help
◆
To display Help for the current PAM dialog, press
from the
F1.
◆
To display What’s This? Help, click the
button on the title bar of the dialog,
This?
then click on a field or button to display a pop-up
description of the field or button.
◆
T o display What’s This? Help, position your cursor
over a field or button and click your right mouse
button to display the
menu.
Then click on the floating menu to display the popup description of the field or button.
◆
T o display T ool Tips for a b utton, place your cursor
over the button for one or two seconds, then a small
pop-up window displays with the button’s
description.
menu on the PAM
Help
rams / MATW orX 32 /
Pro
taskbar.
Start
What’s This?
floating
Help
What’s
Page 40 NDA-24215 Revision 1.0
MATWorX 32 User’s Guide
Page 48

Chapter 6 Add-Ins
In this chapter you learn about the following:
◆
What’s an Add-In?
◆
Four categories of Add-Ins
◆
Installing an Add-In
◆
Starting an Add-In?
◆
Removing an Add-In
◆
Add-In Online Help
What’s an Add-In?
Add-Ins are the basic tools of MA TW orX 32 . Each one
acts like a separate application by providi n g you wi th
specialized capabilities to program PBX features and
functions. Using Add-Ins, you can program a PBX
with information like station and trunk assignments,
numbering plan data, and caller ID to name a few.
MATWorX 32 comes with several Add-Ins that can be
accessed from the Taskbar. You can run multiple AddIns at the same time. In addition, you can create
custom Add-Ins for specialized business solutions by
purchasing a developer’s kit from NEC or an
authorized NEC dealer.
Add-Ins
Add-Ins can be added (installed) and removed from
the MATWorX 32 taskbar. When an Add-In is
removed, it is not deleted from the program, rather it is
only removed from the Taskbar. It can be easily added
back with just a few clicks of the mouse. This way you
can customize the Taskbar with only the Add-Ins that
you use on a regular basis.
MATWorX 32 User’s Guide
NDA-24215 Revision 1.0 Page 41
Page 49

Add-Ins
y
Four Categories of Add-Ins
Features
Feature Add-Ins (Figure 6-1) simplify PBX return
values by translating them from an encrypted code into
a meaningful message.
are two examples of this type of Add-In.
Issue
Figure 6-1 Feature Add-Ins
Enhanced Features
Enhanced Feature Add-Ins (Figure 6-2) use one or
more related commands to setup a specific task or
feature within the PBX. For example, the
Add-In uses multiple commands such as command 30,
09, 05, 06, 08, etc. to setup this enhanced feature in the
PBX.
Software ID
and
Displa
Caller ID
Figure 6-2 Enhanced Feature Add-Ins
Page 42 NDA-24215 Revision 1.0
MATWorX 32 User’s Guide
Page 50

Add-Ins
g
Commands
Command Add-Ins (Figure 6-3) enable you to setup
data within the PBX for one particular command. For
example,
Trunk Data
and
Trunk Route
Add-Ins
represent commands 30 and 35, respectively.
Figure 6-3 Command Add-Ins
Wizards
Wizard Add-Ins (Figure 6-4) pro vi de a si mpl e way to
perform difficult tasks by walking you through a series
of questions in an automated process. The answers are
then used by the program to perform the task. For
example, the
PBX Confi
uration Wizard
automatically configures the communication
connection between the PC and the PBX.
Figure 6-4 Wizard Add-Ins
MATWorX 32 User’s Guide
NDA-24215 Revision 1.0 Page 43
Page 51

Add-Ins
g
Installing an Add-In
The following procedure explains how to install an
existing Add-In to the MATWorX 32 program s o you
can access it from the Taskbar. By default, all Add-Ins
are installed and accessible from the Taskbar. Unless
you remove an Add-In, you will not need to perform
this procedure.
1. Access the MATWorX 32 Taskbar.
2. From the
Mana
Add-Ins
. The
er
displays (Figure 6-5).
Figure 6-5 Add-Ins Manager Dialog
3. Click the
Add
Components
menu, select
Add-Ins Manager
button. The
Add-In
dialog
Add-Ins
dialog displays (Figure 6- 6).
Figure 6-6 Add-Ins Components Dialog
Page 44 NDA-24215 Revision 1.0
MATWorX 32 User’s Guide
Page 52

Add-Ins
g
4. Select the Add-In you want to install and click
Open
. The
dialog displays (Figure 6-7)
Notice
informing you that the Add-In has been
successfully registered (installed).
Figure 6-7 Add-In Installed Dialog
5. Click OK. The
displays with the Add-In include d in the list of
current Add-In modules. Notice that the Add-In
also appears under the appr opriate menu it em and
tool palette (button) on the Taskbar.
You have now successfully installed an Add-In.
Starting an Add-In
Add-Ins are accessed and run from the MATWorX 32
Taskbar. Simply select one from a pu ll-down men u or
click on a tool palette (button) to open it, then select
the appropriate Add-In.
Removing an Add-In
The following procedure explains how to remove an
existing Add-In from the MATWorX 32 Taskbar. By
default, all Add-Ins are installed and accessible from
the Taskbar. When an Add-In is removed, it is not
deleted from the program, rather it is only removed
from the Taskbar. It can be easily ad ded back with just
a few clicks of the mouse. This way you can customize
the Taskbar with only the Add-Ins that you use on a
regular basis.
Add-Ins Mana
dialog re-
er
1. Access the MATWorX 32 Taskbar.
MATWorX 32 User’s Guide
NDA-24215 Revision 1.0 Page 45
Page 53

Add-Ins
g
g
2. From the
Mana
er
Add-Ins
. The
menu, select
Add-In
Add-Ins Manager
dialog
displays (Figure 6-8).
Figure 6-8 Add-Ins Manager Dialog
3. Select the Add-In module you want to remove
and click the
Remove
button. The
Notice
dialog
displays (Figure 6-9) infor ming you that the AddIn has been successfully removed.
Figure 6-9 Add-In Removed Dialog
4. Click OK. The
Add-Ins Mana
dialog re-
er
displays with the Add-In removed from the list of
current Add-In modules. Notice that the Add-In
no longer appears under the appropriate menu
item and tool palette (button) on the Taskbar.
You have now successfully removed an Add-In.
Page 46 NDA-24215 Revision 1.0
MATWorX 32 User’s Guide
Page 54

Add-In Online Help
This guide provides a simple overview to the features
and capabilities of Add-Ins. For more detailed
information, including procedures and descriptions,
access the online Help for each individual Add-In.
Help for Add-In dialogs is included in the MATWorX
32 online Help system. Refer to Chapter 10
“MATWorX 32 Online Help” for features and ways to
access and print Help topics.
Add-Ins
MATWorX 32 User’s Guide
NDA-24215 Revision 1.0 Page 47
Page 55

Add-Ins
This page is for your notes.
Page 48 NDA-24215 Revision 1.0
MATWorX 32 User’s Guide
Page 56

MACH Script Editor
Chapter 7 MACH Script Editor
In this chapter you learn about the following:
◆
What’s the MACH Script Editor?
◆
Starting the MACH Script Editor
◆
MACH Script Editor Online Help
What’s the MACH Script Editor?
The MOC Accelerated Command Heap (MACH)
dialog (Figure 7-1) is a po wer ful ti me-sa vi ng to ol that
is integrated into MATWorX 32. It is similar to
working with the Maintenance Operation Console
(MOC), but provides much more functionality by
enabling you to create a list of NEAX2000 IVS
commands (a script) to perform tasks in the PBX. The
script can be saved, printed, and run at any time.
Figure 7-1 MACH Script Editor Dialog
MATWorX 32 User’s Guide
NDA-24215 Revision 1.0 Page 49
Page 57

MACH Script Editor
Starting the MACH Script Editor
The following procedure explains how to access and
run the MACH Script Editor from MATWorX 32.
1. Access the MATWorX 32 Taskbar.
2. From the
Script Editor
button on the button bar.
You have now successfully launched the MACH
Script Editor dialog.
Applications
, or click the
menu, select
MACH Script Editor
MACH Script Editor Online Help
This guide provides a simple overview to the features
and capabilities of the MACH Script Editor. For more
detailed information, including procedures and
descriptions, access the online Help for the MACH
Script Editor.
Help for the MACH Script Editor is included in the
MATWorX 32 online Help system. Refer to Chapter
10 “MATWorX 32 Online Help” for features and ways
to access and print Help topics.
MACH
Page 50 NDA-24215 Revision 1.0
MATWorX 32 User’s Guide
Page 58

Chapter 8 Scheduler
In this chapter you learn about the following:
◆
What’s a Scheduler?
◆
Starting the Scheduler
◆
Scheduler Onli ne Help
What’s a Scheduler?
The Scheduler (Figure 8-1) is a versatile application
that can be used stand-alone or in co njunction with the
MACH Script Editor. You can build and schedule
scripts (series of MOC commands) all within the
Scheduler, or you can build the scripts using the
MACH Script Editor and then schedule them to run
using the Scheduler . You can schedule the script to run
at certain times during a day, week, or month. You can
build simple or complex scripts that will modify
NEAX2000 IVS behavior at scheduled times.
Scheduler
Figure 8-1 Scheduler Dialog
MATWorX 32 User’s Guide
NDA-24215 Revision 1.0 Page 51
Page 59

Scheduler
You can use the Scheduler to:
◆
Create MOC command scripts.
◆
Delete a script.
◆
Login to the PBX.
◆
Schedule a script to run.
◆
Schedule PBX system backups.
◆
View the results of a script.
◆
Print a script.
Starting the Scheduler
The following procedure explains how to access and
run the Scheduler from MATWorX 32.
Note: Y ou can als o start the Sc heduler by selectin g
Programs / MATWorX 32 / Scheduler
from the
1. Access the MATWorX 32 Taskbar.
Start
taskbar in Windows.
2. From the
or click the
Applications
Scheduler
menu, select
Scheduler
button on the button bar.
You have now successfully launched the Scheduler
application.
Scheduler Online Help
The Scheduler application contains its own contextsensitive online Help system. This guide pro vides a
simple overview to the features and capabilities of the
Scheduler. For more detailed information, including
procedures, descriptions, tools, and tips, access the
Scheduler online Help system.
Page 52 NDA-24215 Revision 1.0
MATWorX 32 User’s Guide
,
Page 60

Scheduler
g
Accessing Scheduler Online Help
There are several ways to access and use the Scheduler
online Help system.
◆
To access the main Help contents, select
Contents F1
from the
menu on the
Help
Help
Scheduler menu bar. You can also access the main
Help contents by selecting
32 / Scheduler Help
◆
To display Help for the current Scheduler dialog,
Pro
from the
rams / MATWorX
taskbar.
Start
press F1.
◆
T o display T ool Tips for a b utton, place your cursor
over the button for one or two seconds, then a small
pop-up window displays with the button’s
description.
MATWorX 32 User’s Guide
NDA-24215 Revision 1.0 Page 53
Page 61

Scheduler
This page is for your notes.
Page 54 NDA-24215 Revision 1.0
MATWorX 32 User’s Guide
Page 62

Chapter 9 DESIWorX
In this chapter you learn about the following:
◆
What’s DESIWorX?
◆
Starting DESIWorX
◆
DESIWorX Online Help
What’s DESIWorX?
DESIWorX (Figure 9-1) is a unique application that
enables you to create and print function key labels for
the Dterm stations on your NEAX2000 IVS. The
labels are saved in a database and can be modified and
printed when necessary.
DESIWorX
Figure 9-1 DESIWorX Dialog
You can use the DESIWorX to:
◆
Create a label database, including label design.
◆
Add a bitmap to a label.
◆
Create, modify, and delete label macros.
◆
Print labels.
MATWorX 32 User’s Guide
NDA-24215 Revision 1.0 Page 55
Page 63

DESIWorX
g
p
g
Starting DESIWorX
The following procedure explains how to access and
run DESIWorX from MATWorX 32.
Note: You can also start DESIWorX by selecting
Programs / MATWorX 32 / DESI32
Start
the
1. Access the MATWorX 32 Taskbar.
from
taskbar in Windows.
2. From the
or click the
Applications
DESIWorX
You have now successfully launched the DESIWorX
application.
DESIWorX Online Help
The DESIWorX application contains its own contextsensitive online Help system. This guide pro vides a
simple overview to the features and capabilities of
DESIWorX. For more detail ed infor mation, includin g
procedures and descriptions, access the DESIWorX
online Help system.
Accessin
There are several ways to access and use the
DESIWorX online Help system.
◆
To access the main Help contents, select
Contents F1
DESIWorX menu bar. You can also access the
main Help contents by selecting
MATWorX 32 / WORX32 Help
taskbar.
◆
T o display Help for the current DESIWorX dialog,
press F1.
◆
T o display T ool Tips for a b utton, place your cursor
over the button for one or two seconds, then a small
pop-up window displays with the button’s
description.
DESIWorX Online Hel
from the
menu, select
DESIWorX
button on the button bar.
Help
menu on the
Help
Pro
rams /
from the
Start
,
Page 56 NDA-24215 Revision 1.0
MATWorX 32 User’s Guide
Page 64

MATWorX 32 Online Help
Chapter 10 MATWorX 32 Online Help
In this chapter you learn about the following:
◆
Features of the MATWorX 32 online Help system
◆
Accessing the online Help system
◆
Printing Help topics
Online Help Features
Within the online Help system, you will find a wealth
of useful information pertaining to the MATWorX 32
program and its tools (Add-Ins, MACH Script Editor,
and PBX Configuration Wizard). In addition, you will
find separate Help systems for each of the MATWorX
32 Applications (PAM, DESIWorX, and Scheduler).
Some features include:
• Help for each dialog, including a description and
purpose of the dialog and its buttons
• Context-sensitive “What’s This?” Help for every
control (field and button) within a dialog
• Tool Tips when your cursor is positioned over
active buttons
• Step-by-step procedures for configuring and
programming a NEAX2000 IVS PBX
Accessing the Online Help System
There are several ways to access and use the online
Help system within MATWorX 32. You can display
and work in your current MATWorX 32 dialog while a
Help window is open. You can also resize and move
the MATWorX 32 dialog or the Help win dow to make
it easier to display and follow the Help procedures
while you work in MATWorX 32.
MATWorX 32 provides four types of Help. These
include Main Help Contents, Dialog-level Help,
What’s This? Help, and Tool Tips.
MATWorX 32 User’s Guide
NDA-24215 Revision 1.0 Page 57
Page 65

MATWorX 32 Online Help
g
Main Help Contents
To access the main Help contents, select
Contents F1
from the
menu on the MATWorX
Help
Help
32 Taskbar. You can also access the main Help
contents by selecting
MATWorX 32 Help
rams / MATWorX 32 /
Pro
from the
Start
taskbar.
Dialog-level Help
To display Help for the current MATWorX 32 dialog,
press F1.
What’s This? Help
What’s This? Help is a means to display pop-up
information about a particular field or button within a
dialog. To display What’s This? Help for a field or
button, do one of the following:
◆
Click the
What’s This?
button on the title bar
of the dialog, then click on a field or button to
display a pop-up description of the field or button.
◆
Position your cursor o ver a field or button and click
your right mouse button to display the
floating menu.
This?
What’s
Then click on the floating menu to display the popup description of the field or button.
Tool Tips
Tool Tips, sometimes referred to as “Balloon Help”,
provides a brief (one or two word) des cription of an
active button on a dialog or menu. To display Tool
Tips for a button, place your cursor over the button for
one or two seconds, then a small pop-up window
displays with the button’s de scription.
Page 58 NDA-24215 Revision 1.0
MATWorX 32 User’s Guide
Page 66

Printing Help Topics
1. Access the Help topic you want to print.
MATWorX 32 Online Help
2. Click the Print button or select
the
menu. The
File
dialog displays.
Print
Print Topic
from
3. Click OK.
Tip:
You can use your right m ouse button to cl ick inside the
Help window, then click
Print Topic
. This also works
for printing the contents of a pop-up window.
MATWorX 32 User’s Guide
NDA-24215 Revision 1.0 Page 59
Page 67

MATWorX 32 Online Help
This page is for your notes.
Page 60 NDA-24215 Revision 1.0
MATWorX 32 User’s Guide
Page 68

Extended Command Set
Appendix A Extended Command Set
The Extended Command Set is a set of custom
commands that can be used in the MACH Script
Editor. These extended commands provide enhanced
functionality to many of the existing NEAX2 000 IVS
Commands. The purpose of the extended co mmands is
to enable you to quickly and easily perform
complicated tasks within a script by reducing the
number of commands you need to use.
The NEAX2000 IVS Command Set is comprised of
the commands used with a MAT Terminal, as
specified in the “NEAX2000 IVS Command Manual.”
(The commands look like: CM12 YY=03.)
The Extended Command Set characters are
modifiers you type in front of the NEAX2000 IVS
command in the MACH Script Editor window. The
following list represents the Extended Command Set.
@10 Finds the LEN assigned to the station in the
First Data field and displays the LEN in the
Second Data field.
~10 Swaps the LEN assignments of the stations
indicated in the First and Second Data fields.
>10 Moves the station in the First Data field to the
LEN indicated in the Second Data field.
&10 Assigns an Add-On Module to the station in
the First Data field.
%10 Finds the Line Equipment Card type (MP)
associated with the LEN in the First Data
field and then displays it in the Second Data
field.
^12 Copies the Class-1 Feature assignments from
the station in the First Data field to the station
in the Second Data field.
^13 Copies the Class-2 Feature assignments from
the station in the First Data field to the station
in the Second Data field.
MATWorX 32 User’s Guide
NDA-24215 Revision 1.0 Page 61
Page 69

Extended Command Set
@20X (where X represents the Numbering Plan
Group 0 - 3) Finds the Access Codes assigned
to the Feature Code displayed in the First
Data field. The first returned Access Code is
displayed in the SD field. Additional Access
Codes are displayed in the ED field.
^90 Copies the Programmable Key assignments
from the station in the First Data field to the
station in the Second Data field.
@980 Determines whether an Add-On exists for the
station in the First Data field.
?1X (where X represents any command from the
NEAX2000 IVS Command Set) Uses the
First Data specified in the previous command
as the First Data in this command. (Leave this
Second Data field blank.)
?2X (where X represents any command from the
NEAX2000 IVS Command Set) Uses the
Second Data, that was specified or returned
as a result of the previous command, as the
First Data in this command. (Leave this
Second Data field blank.)
*X (where X represents any command from the
NEAX2000 IVS Command Set) Performs a
PBX System Reset after executing the
specified command. This operation will drop
all calls, and should not be used wi th modem
connections—only with direct connections.
! Performs a PBX System Reset. This
operation will drop all calls, and should not
be used with modem connections—only with
direct connections.
Page 62 NDA-24215 Revision 1.0
MATWorX 32 User’s Guide
Page 70

Extended Command Set
LX (where X represents any command from the
NEAX2000 IVS Command Set) Performs a
lookup and listing of all Second Data. (For
example, L10 retrieves all LEN assignments.)
This Extended Command cann ot be used
with any other Extended Commands in a
script; it must be the only command line in
a script.
LFX (where X represents any command from the
NEAX2000 IVS Command Set) Performs a
filtered lookup and listing of all existing
Second Data. (For example, LF10 retrieves
all existing LEN assignment data, but leaves
out data for the unassigned LENs.) This
Extended Command cannot be used with
any other Extended Commands in a
script; it must be the only command line in
a script.
MATWorX 32 User’s Guide
NDA-24215 Revision 1.0 Page 63
Page 71

Extended Command Set
This page is for your notes.
Page 64 NDA-24215 Revision 1.0
MATWorX 32 User’s Guide
Page 72

Appendix B Error Codes
The following error codes are generated by
MATWorX 32 and displayed in the Error text box on
the MATWorX 32 Taskbar. These messages indicate
processing errors generated in the PBX or the PAM
while performing tasks within MATWorX 32.
All error codes contain five digits, the first two
beginning with 10. The remaining three digits are
divided into four series b eginnin g with 100, 200, 3 00,
or 400.
• Series 100 errors are generated by the PBX
Interface Class, indicating an error occurred inside
the PBX while performing a requested operation.
• Series 200 errors are currently not implemented.
• Series 300 errors are generated by the PDQ Comm
Class, indicating a communication error occurred
while talking with the PBX.
• Series 400 errors are generated by the Save/Load/
Verify (SLV) Class, indicating an error occurred
while performing a save, load, or backup
operation.
Error Codes
Series 100 Error Codes
No Error (Message 10100)
Object Not Registered (Error 10101)
Port Not Open (Error 10102)
Port Not Selected (Error 10103)
Failed to Connect (Error 10104)
Data Error (Error 10105)
Digit Error (Error 10106)
Time Out (Error 10107)
Checksum Error (Error 10108)
No File Defined (Error 10109)
MATWorX 32 User’s Guide
NDA-24215 Revision 1.0 Page 65
Page 73

Error Codes
File Error (Error 10110)
Read Header Error (Error 10111)
Write Header Error (Error 10112)
Data Not Found (Error 10113)
Wait Busy Now (Error 10114)
Verify Failed (Error 10115)
Load Failed (Error 10116)
Code Not Used (Error 10117)
Assigned Already (Error 10118)
Invalid Area Number (Error 10119)
PBX Error (Error 10120)
PBX Busy (Error 10121)
Handshake Time Out (Error 10122)
PBX Initialize Error (Error 10123)
Hardware Error (Error 10124)
Wrong Error (Error 10125)
Not Assigned (Error 10126)
Listup Not Supported (Error 10140) Indicates you
tried to use a command to listup data, and th e
command is not used by MATWorX 32 to generate
listup data or t he command being used i s not supported
by the connected PBX.
User Cancelled (Error 10150)
Series 200 Error Codes
(currently not implemented)
No Error (Message 10200)
Object Not Registered (Error 10201)
Port Not Open (Error 10202)
Port Not Selected (Error 10203)
Failed to Connect (Error 10204)
Data Error (Error 10205)
Page 66 NDA-24215 Revision 1.0
MATWorX 32 User’s Guide
Page 74

Digit Error (Error 10206)
Time Out (Error 10207)
Checksum Error (Error 10208)
No File Defined (Error 10209)
File Error (Error 10210)
Read Header Error (Error 10211)
Write Header Error (Error 10212)
Data Not Found (Error 10213)
Wait Busy Now (Error 10214)
Verify Failed (Error 10215)
Load Failed (Error 10216)
Code Not Used (Error 10217)
Assigned Already (Error 10218)
Invalid Area Number (Error 10219)
PBX Error (Error 10220)
Error Codes
PBX Busy (Error 10221)
Handshake Time Out (Error 10222)
PBX Initialize Error (Error 10223)
Hardware Error (Error 10224)
Wrong Error (Error 10225)
Not Assigned (Error 10226)
Listup Not Supported (Error 10240)
User Cancelled (Error 10250)
Series 300 Error Codes
No Error (Message 10300)
Object Not Registered (Error 10301)
Port Not Open (Error 10302)
Port Not Selected (Error 10303)
MATWorX 32 User’s Guide
NDA-24215 Revision 1.0 Page 67
Page 75

Error Codes
Failed to Connect (Error 10304)
Data Error (Error 10305)
Digit Error (Error 10306)
Time Out (Error 10307)
Checksum Error (Error 10308)
No File Defined (Error 10309)
File Error (Error 10310)
Read Header Error (Error 10311)
Write Header Error (Error 10312)
Data Not Found (Error 10313)
Wait Busy Now (Error 10314)
Verify Failed (Error 10315)
Load Failed (Error 10316)
Code Not Used (Error 10317)
Assigned Already (Error 10318)
Invalid Area Number (Error 10319)
PBX Error (Error 10320)
PBX Busy (Error 10321)
Handshake Time Out (Error 10322)
PBX Initialize Error (Error 10323)
Hardware Error (Error 10324)
Wrong Error (Error 10325)
Not Assigned (Error 10326)
Listup Not Supported (Error 10340) Indicates you
tried to use a command to listup data, and th e
command is not used by MATWorX 32 to generate
listup data or t he command being used i s not supported
by the connected PBX.
User Cancelled (Error 10350)
Page 68 NDA-24215 Revision 1.0
MATWorX 32 User’s Guide
Page 76

Series 400 Error Codes
No Error (Message 10400)
Object Not Registered (Error 10401)
Port Not Open (Error 10402)
Port Not Selected (Error 10403)
Failed To Connect (Error 10404)
Data Error (Error 10405)
Digit Error (Error 10406)
Time Out (Error 10407)
Checksum Error (Error 10408)
No File Defined (Error 10409)
File Error (Error 10410)
Read Header Error (Error 10411)
Write Header Error (Error 10412)
Data Not Found (Error 10413)
Wait Busy Now (Error 10414)
Error Codes
Verify Failed (Error 10415)
Load Failed (Error 10416)
Code Not Used (Error 10417)
Assigned Already (Error 10418)
Invalid Area Number (Error 10419)
PBX Error (Error 10420)
PBX Busy (Error 10421)
Handshake Time Out (Error 10422)
PBX Initialize Error (Error 10423)
Hardware Error (Error 10424)
Wrong Error (Error 10425)
Not Assigned (Error 10426)
MATWorX 32 User’s Guide
NDA-24215 Revision 1.0 Page 69
Page 77

Error Codes
Listup Not Supported (Error 10440) Indicates you
tried to use a command to listup data, and th e
command is not used by MATWorX 32 to generate
listup data or t he command being used i s not supported
by the connected PBX.
User Cancelled (Error 10450)
Page 70 NDA-24215 Revision 1.0
MATWorX 32 User’s Guide
Page 78

Directory and File Structure
Appendix C Directory and File
Structure
Appendix C provides information abo ut th e directory
structure, files, and file locations of the MATWorX 32
suite of applications installed on your computer.
Note:
If you changed the destinati on dir e ctory
or program folder name during the
installation process, the information
below may be differ ent on your mac hine.
MATWorX 32 and related applications use many
different files. The information here can be benef icial
for troubleshooting if one or more files shoul d
accidentally become lost, corrupted, or renamed.
Figure C-1 displays the directo ri es and s ubd irectories
that contain the MATWorX 32 application files.
Figure C-1 Directory and File Structure
MATWorX 32 User’s Guide
NDA-24215 Revision 1.0 Page 71
Page 79

Directory and File Structure
guag
p
p
The following list represents the directo r ies and
related subdirectories included in the MATWorX 32
suite of applications.
Caution:
Do not rename any of the MA TWorX
32 files, subdirectories, or
directories once they have been
installed on your computer.
WorX32
located (the name of this d irect ory may b e di ffer ent if
you changed it during the installatio n)
- main directory where all subdirectories are
-
AddIns
Configwiz
where Add-In files are located
- where PBX Configuration Wizard
files are located
DESIWorX
- where DESIWorX label program
files are located
- subdirectory of DESIWorX where
Db
DESIWorX database files are located
Lan
- where language database files are
e
located
-
MATWorX
subdirectories are located
Hel
where MATWorX program files and
- subdirectory of MATWorX where
Add-In Help files are located
Reader
- subdirectory of MATWorX where
Adobe Acrobat Reader files and MATWorX
32 supporting documentation are located
- subdirectory of Reader where
Fonts
Adobe Acrobat Reader fonts are located
- subdirectory of Fonts where
PFM
additional Adobe Acrobat Reader
fonts are located
- subdirectory of Reader where the
Hel
Adobe Acrobat Reader Help file is
located
Page 72 NDA-24215 Revision 1.0
MATWorX 32 User’s Guide
Page 80

Directory and File Structure
Pam - where PAM program files are located
Reports - where report templates are located
SETWorX - where Scheduler program files are
located
Userdat - where database files are located
MATWorX 32 User’s Guide
NDA-24215 Revision 1.0 Page 73
Page 81

Directory and File Structure
This page is for your notes.
Page 74 NDA-24215 Revision 1.0
MATWorX 32 User’s Guide
 Loading...