

Page 1

installation guide
1 System Connections
av source
av2 processor
nap 150 power amplifier
nap v175 power amplifier
1.1 av source and av2 with nap v175 and nap 150
digital
coax
or opt
4-pin DIN
4-pin DIN x 2
centre
left front
left surround
right surround
right front
av source
av2 processor
nait 5
nat 05
cd 5
1.2 nait 5 system with av source, av2 and nap v175
digital coax or opt
5-pin DIN
5-pin DIN
centre
left front
nap v175 power amplifier
left surround
right surround
right front
Reverse wired 5 pin DIN
from nait 5 AV socket to
av2 analog input 3.
4-pin DIN x 2
Page 2
aav2
installation guide
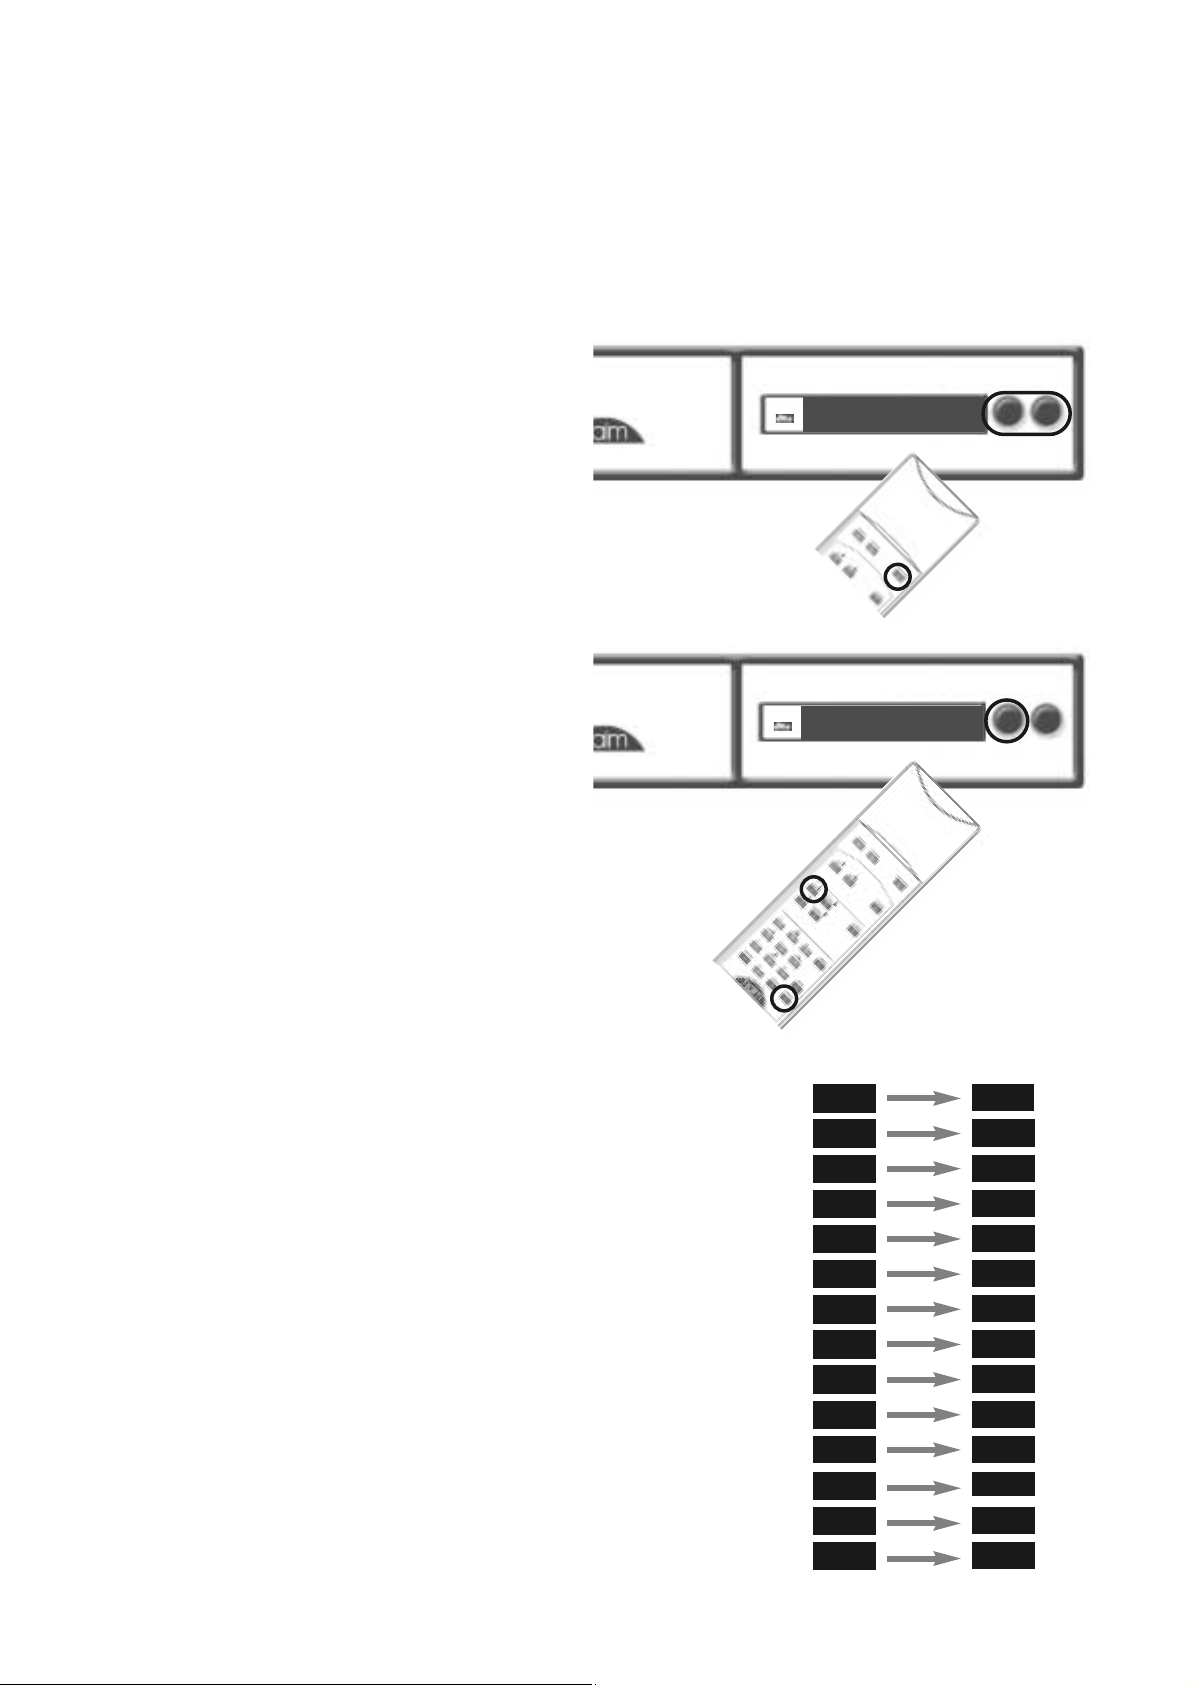
2 Switch On and Input Setup
2.1 av2 switch on
Once all signal connections are made the av2 can be
switched on. Connect the av2, using the supplied mains
cable, to an appropriate mains socket and operate the
power switch on the rear panel. A single flashing dot will
be seen on the display while the av2 starts-up. The dot will
stop flashing to indicate that the av2 is ready for use.
When initially switched on the av2 will be in Standby
mode. Standby is indicated by an illuminated Naim logo
and a single dot indicator on the display. To wake the av2
from standby press and hold the handset standby key or
the front panel input or mode buttons. The av2 will wakeup in either the default state if it is previously unused, or in
the state in which it was last shut-down.
2.2 av2 input setup
The av2 Input Setup routine defines input names, turns-off
any unused inputs, and sets some control and decode
parameters.
To switch the av2 into Input Setup mode press the handset
menu key followed by the i/p
key, or press and hold the
front panel input button. The front panel input button will
flash.
To scroll down or up the setup parameters press the
handset 8
or 2 keys or the front panel input or
mode buttons.
To select a setting for each parameter press the handset
4 or 6 keys or use the front panel rotary control.
The diagram opposite shows the list of input setup
parameters with some typical settings chosen. In this
example, a VCR is nominated for input AN1, a CD player for
input AN2, a Satellite Receiver for input OP1. and a DVD
player for input CO1. All the other inputs are turned off and
both the remote handset control and Pro Logic II
parameters are left at their default settings.
To return all input setup parameters to their default state
press and hold the handset disp key while the av2 is in
input setup mode.
To exit from Input Setup mode press the handset menu key
followed by the i/p
key, or press and hold the front panel
input button.
input
mode
•
•
•
•
vol 00
2D
2PLII
stereo
setup parameters settings
vcr
versatile analog input 1
Vi2
Vi1
cd
versatile analog input 2
AN3
---
analog input 3
AN4
---
analog input 4
an5
---
analog input 5
an6
---
sat
---
analog input 6
op1
optical digital input 1
op2
dvd
---
rc5
optical digital input 2
co1
coaxial digital input 1
co2
coaxial digital input 2
ext
remote control
Pro Logic II “Panorama”
Pro Logic II “Dimension”
Pro Logic II “Centre Width”
D
w
Pan
off
0
0
input
mode
•
•
•
•
vi1 an1
2D
2PLII
stereo
Page 3

3 Speaker Setup
3.1 av2 speaker setup
The av2 Speaker Setup routine both defines the presence
and type of speakers to be used in the system and sets their
listening distance and volume level parameters.
To switch the av2 into Speaker Setup mode press the
handset menu key followed by the mode
key, or press
and hold the front panel mode button. The front panel
mode button will flash.
To scroll down or up the setup parameters press the
handset 8
or 2 keys or the front panel input or
mode buttons.
To select a setting for each parameter press the handset
4 or 6 keys or use the front panel rotary control.
The diagram opposite shows the list of speaker setup
parameters with some typical settings chosen. In this
example, large (full bandwidth) front speakers, a large
centre speaker, small (restricted bandwidth) surround
speakers and a sub-woofer have been specified.
Distances in metres from the speakers to the listening
position have been specified and relative volume levels
between the speakers have been adjusted using the test
signal. Distance and level parameters for extra rear speakers
don’t appear because they have been specified as not used.
To use the speaker test signal, set the av2 volume to a
moderate level (use the handset vol
and vol keys - a
value of 40 - 50 should be fine) and set TST to ON. Press
the handset 8
key. A noise signal should be heard from
the left front speaker.
Listen to the noise through each speaker (handset 8
key)
before making any adjustments - this will confirm the
speaker connections are correct and reduce the possibility
of unnecessary volume level adjustments being made.
Listen to each speaker once again (the av2 user interface
cycles around the speaker volume level setup stages) and
adjust the levels so that each one is equally loud from the
normal listening position. In the example diagram the
centre channel has been adjusted upward slightly while the
surround channels have been lowered. The sub-woofer
volume level is best set somewhere between the highest
and lowest levels for the other speakers and then adjusted
using its volume adjustment.
To return all input setup parameters to their default state
press and hold the handset disp key while the av2 is in
input setup mode.
To exit from Speaker Setup mode press the handset menu
key followed by the mode
key, or press and hold the
front panel mode button.
input
mode
•
•
•
•
lr lg
2D
2PLII
stereo
installation guide
setup parameters settings
3
right surround distance
rs
3
right main distance
r
2.5
centre distance
cen
3
left main distance
l
M
distance units
unt
yes
sub-woofer
sub
no
extra rear speakers
er
sm
surround speakers
sur
lg
centre speaker
cen
lg
main speakers
lr
ls
3
left surround distance
sub
2
sub-woofer distance
tst
on
0
+5
test signal
l
main left volume
cen
0
-4
centre volume
r
right main volume
rs
right surround volume
sub-woofer volume
left surround volume
sub
ls
-4
0
Page 4

4 av2 in use
installation guide
4.1 input selection and volume control 4.2 decode mode selection
To select an input use the handset input key followed by
one of the numeric keypad numbers 1 to 0, or the front
panel input button.
To adjust the overall volume use the handset vol
or vol
keys or the front panel rotary control.
Access and use of further functions is described in the av
system owners manual.
4.3 switching off
The av2 can be put in standby mode using the standby key
on the remote or pressing and holding both the front panel
input and mode buttons.
To select a decode mode use the handset mode key
followed by one of the numeric keypad numbers, or the
front panel mode button. The selected decode option will
flash on the display until the av2 has successfully “locked”
to the signal. The display then reverts back to indicating
volume. The decode options available for each type of
programme material and the corresponding av2 display are
illustrated in the table below:
Programme Material
Analog Stereo Dolby Digital Dolby Digital DTS DTS-ES DTS-ES
PCM (digital) (2/0) (3/2.1) (3/2.1) Discrete Matrix
direct
2D
2PLII
stereo
Decode
Mode
Direct
Mono
Stereo
Dolby PL II
Music
Dolby PL II
Movie
DTS NEO:6
Cinema
DTS NEO:6
Music
DTS NEO:6
Auto
mono
2D
2PLII
stereo
mono
2D
2PLII
stereo
mono
2D
2PLII
stereo
mono
2D
2PLII
stereo
mono
2D
2PLII
stereo
mono
2D
2PLII
stereo
stereo
2D
2PLII
stereo
stereo
2D
2PLII
stereo
stereo
2D
2PLII
stereo
music
2D
2PLII
stereo
music
2D
2PLII
stereo
music
2D
2PLII
stereo
movie
2D
2PLII
stereo
movie
2D
2PLII
stereo
movie
2D
2PLII
stereo
neo i 6c
2D
2PLII
stereo
neo i 6c
2D
2PLII
stereo
neo i 6c
2D
2PLII
stereo
neo i 6m
2D
2PLII
stereo
neo i 6m
2D
2PLII
stereo
neo i 6m
2D
2PLII
stereo
stereo
2D
2PLII
stereo
stereo
2D
2PLII
stereo
neo:6
2D
2PLII
stereo
auto
2D
2PLII
stereo
auto
2D
2PLII
stereo
auto
2D
2PLII
stereo
auto
2D
2PLII
stereo
3/2.1
2D
2PLII
stereo
2/0
2D
2PLII
stereo
3/2.1
2D
2PLII
stereo
ES-disc
2D
2PLII
stereo
auto
2D
2PLII
stereo
ES-mtrx
2D
2PLII
stereo
stereo
2D
2PLII
stereo
mono
2D
2PLII
stereo
stereo
2D
2PLII
stereo
input
mode
•
•
•
•
.
2D
2PLII
stereo
Naim Audio Southampton Road Salisbury England SP1 2LN
Tel: +44 (0)1722 332266 www.naim-audio.com
Manufactured under licence from Dolby Laboratories.
“Dolby”, “Pro Logic” and the double-D symbol are trademarks of Dolby Laboratories.
Confidential unpublished works. Copyright 1992-1997 Dolby Laboratories. All rights reserved.
“DTS”, “DTS-ES Extended Surround” and “Neo:6” are trademarks of Digital Theater Systems Inc.
 Loading...