

Page 1
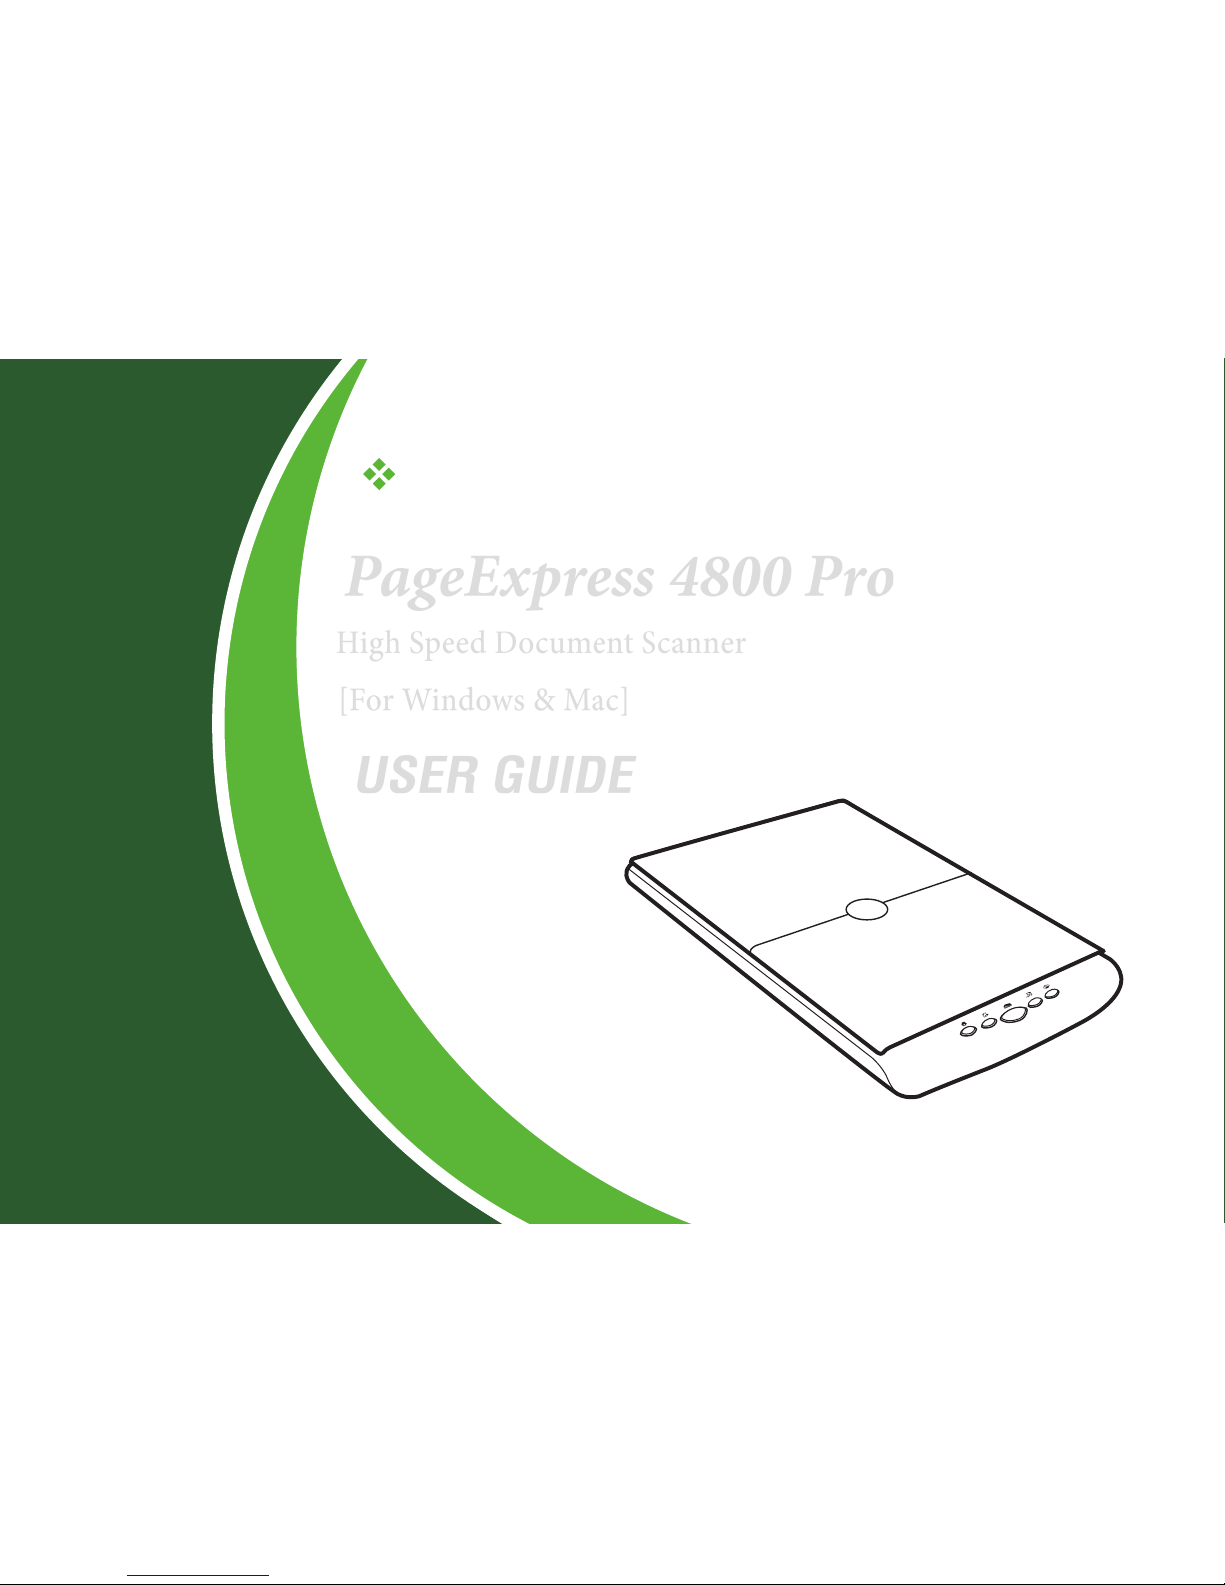
PageExpress 4800 Pro
High Speed Document Scanner
[For Windows & Mac]
USER GUIDE
English
V1.4
All trademarks
are the property
of their respective
owners and all rights
are acknowledged.
Images and screenshots
shown inside this User
Guide are example only,
which may vary according
to the devices used and its
operating system.
All contents and specifications of
this User Guide are subject to change
without notice.
Page 2

2
SAFETY AND PRECAUTIONS
General Precautions
•
Keep away from water or moisture and dusty areas.
•
Never store in hot and very cold areas.
•
Only use attachments/accessories specified by the manufacturer.
•
No objects filled with liquids, such as vases, shall be placed on the Scanner.
•
Avoid dust contamination when the Scanner is not in use.
•
When left unused for a long period of time, unplug the Scanner from the computer.
•
Avoid environments where the Scanner would be exposed to direct sunlight (or any other source of excessive heat) for long periods of time.
•
Protect the Scanner from potential liquid spills such as soda, coffee, tea, and etc.
•
Be carefully to keep it without dropping it or strong impact.
•
Operate the Scanner on a level, well-grounded work surface, free of excessive vibration.
•
Do not open the Scanner case alone without technical support because there is danger of electrical shock.
•
Position the Scanner near the computer where it can be easily accessed when plugged in.
Environmental Information
Discarded electrical and electronic appliances are recyclable and should separate from the household waste. Please actively support in
conserving resources and protecting the environment by returning this appliance to the collection centers (if available).
Page 3

3
CONTENTS
SAFETY AND PRECAUTIONS ............................................................. 2
CONTENTS ......................................................................................... 3
UNPACKING THE SCANNER ..............................................................4
BUNDLED DRIVERS AND SOFTWARE ............................................... 5
SYSTEM REQUIREMENTS ................................................................. 6
SCANNER PARTS ............................................................................... 7
INSTALLING DRIVERS AND SOFTWARE ........................................... 8
How to Uninstall the Drivers and Software ......................................... 9
Showing/Hiding Tooltips .................................................................... 9
CONNECTING THE SCANNER ............................................................ 10
Turning Power Off .............................................................................. 10
PLACING THE ORIGINALS ................................................................. 11
SCANNING PROCEDURES IN WINDOWS ......................................... 12
Setting iDocScan Touch and Buttons ................................................. 12
Scanning Using iDocScan Touch and Buttons ................................... 18
Setting iDocScan Touch (Advanced Scan) ......................................... 19
Destination Tab ............................................................................ 19
Scan Settings Tab ........................................................................ 22
Scanning in Advanced Scan Mode ..................................................... 28
Preview Window Controls .................................................................. 30
Continue to Scan More Pages ............................................................ 31
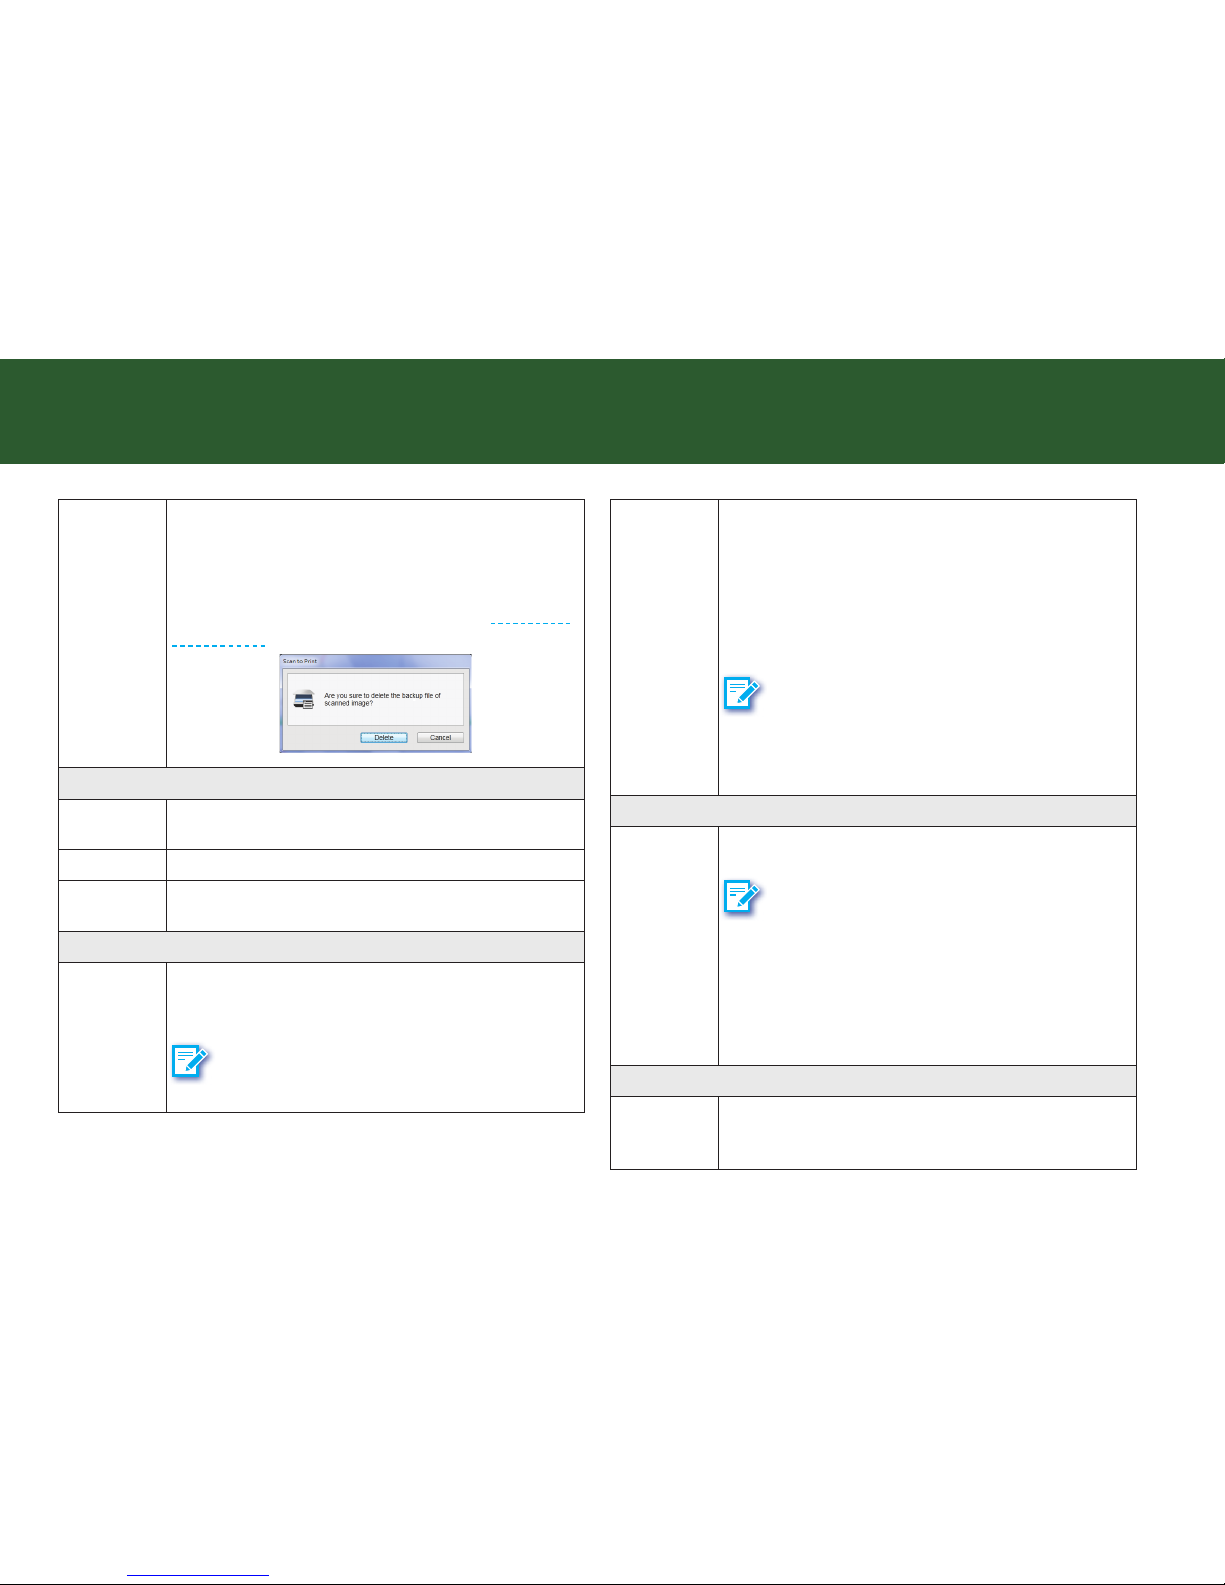
Delete the Backup Files ...................................................................... 31
Cancel a Scan ..................................................................................... 31
SCANNING PROCEDURES IN MAC .................................................... 32
Setting ScanMust and Buttons ........................................................... 32
Scanning Using ScanMust and Buttons ............................................. 36
Continue to Scan More Pages ............................................................ 37
Cancel a Scan ..................................................................................... 38
Delete the Backup Files ...................................................................... 38
SCANNING USING TWAIN INTERFACE IN WINDOWS .......................39
Acquire the Scanner TWAIN Interface ............................................... 39
The TWAIN Interface .......................................................................... 40
The Main Tab...................................................................................... 40
The Enhance Tab ................................................................................ 41
The Filters Tab .................................................................................... 43
The Preview Window and Controls .................................................... 44
Prescan the Image ............................................................................. 45
Set Up the Scan Parameters .............................................................. 45
Execute the Scan Command .............................................................. 45
Using Batch Scan .............................................................................. 46
The Batch Scan Dialog Box ................................................................ 46
SCANNING USING TWAIN INTERFACE IN MAC ................................. 48
Acquire the Scanner TWAIN Interface ................................................ 48
The TWAIN Interface .......................................................................... 49
The Main Tab...................................................................................... 49
The Enhance Tab ................................................................................ 50
The Filters Tab .................................................................................... 50
The Preview Window ......................................................................... 51
Prescan the Image ............................................................................. 51
Set Up the Scan Parameters .............................................................. 51
Execute the Scan Command .............................................................. 52
Using Batch Scan .............................................................................. 52
The Batch Scan Dialog Box ................................................................ 52
CLEANING THE SCANNER ................................................................. 54
TROUBLESHOOTING ......................................................................... 55
SPECIFICATIONS ...............................................................................56
Page 4
4
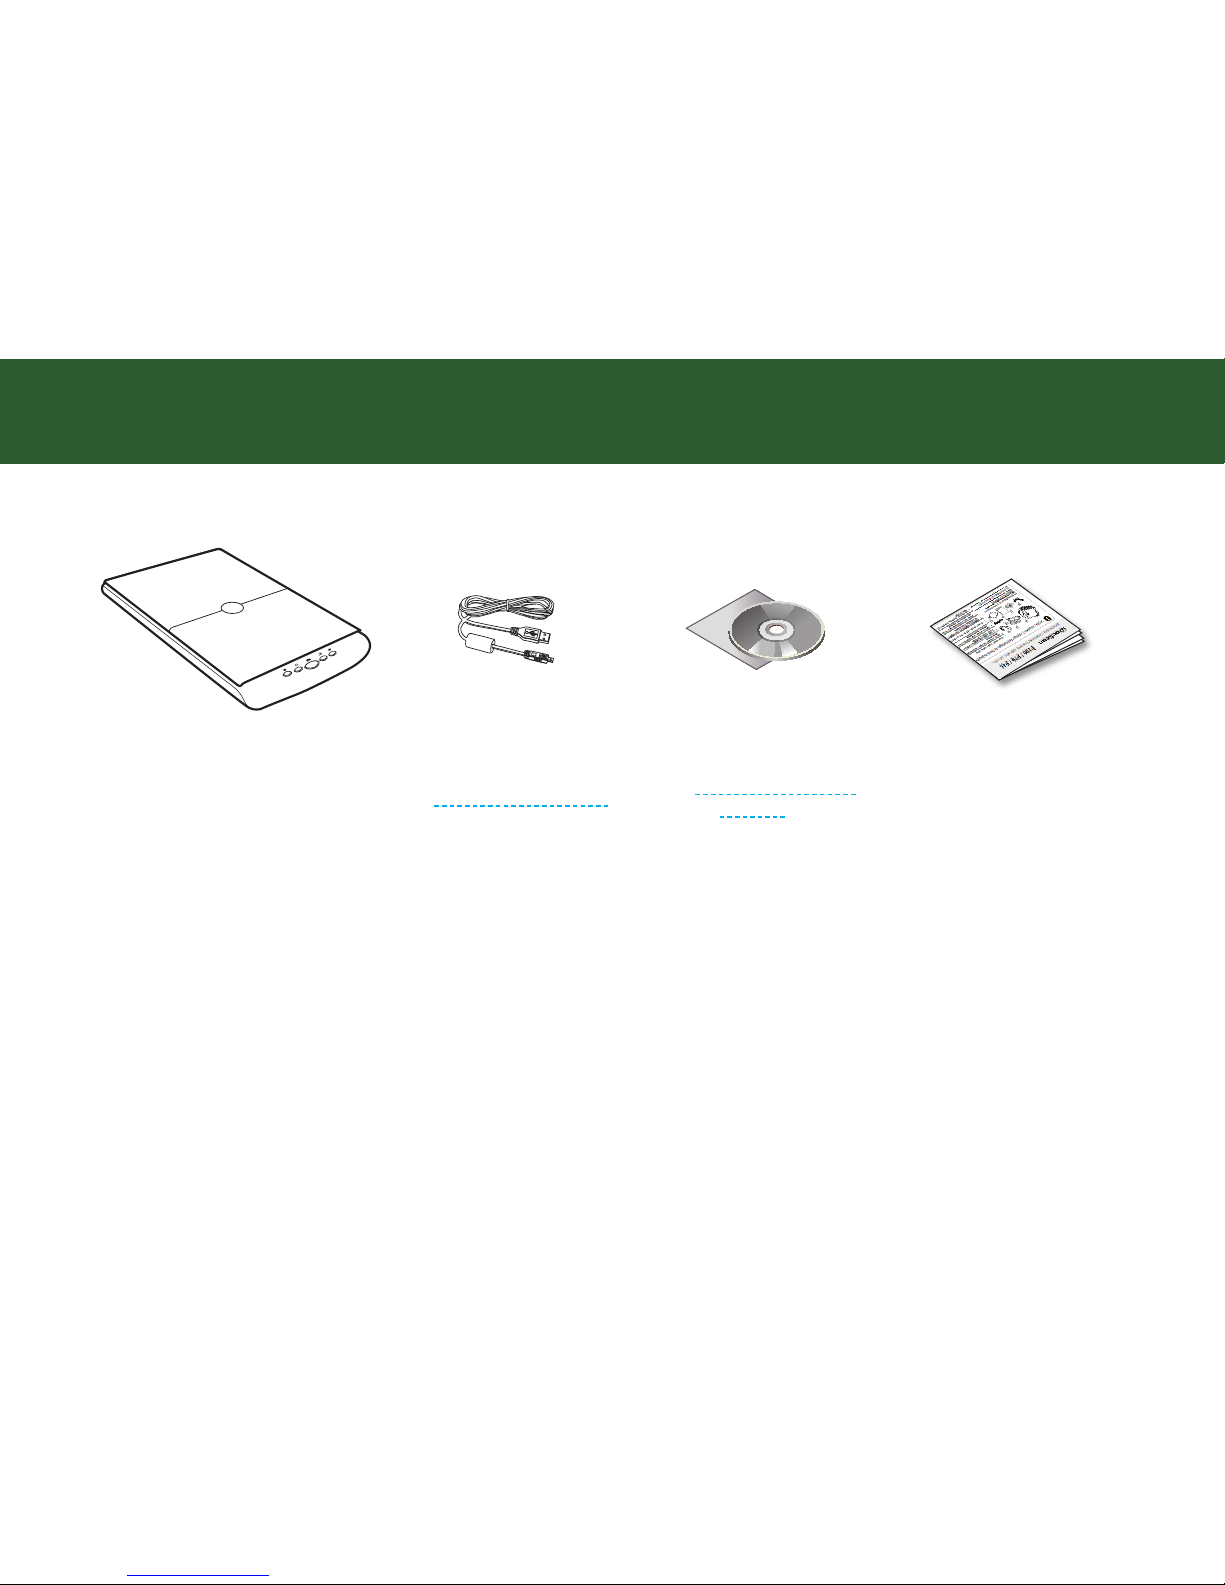
UNPACKING THE SCANNER
Make sure following items are included in this package.
Scanner
AC Adapter
(see Connecting the Scanner)
Installation DVD
(see Installing Drivers and
Software)
Quick Start Guide
Page 5

5
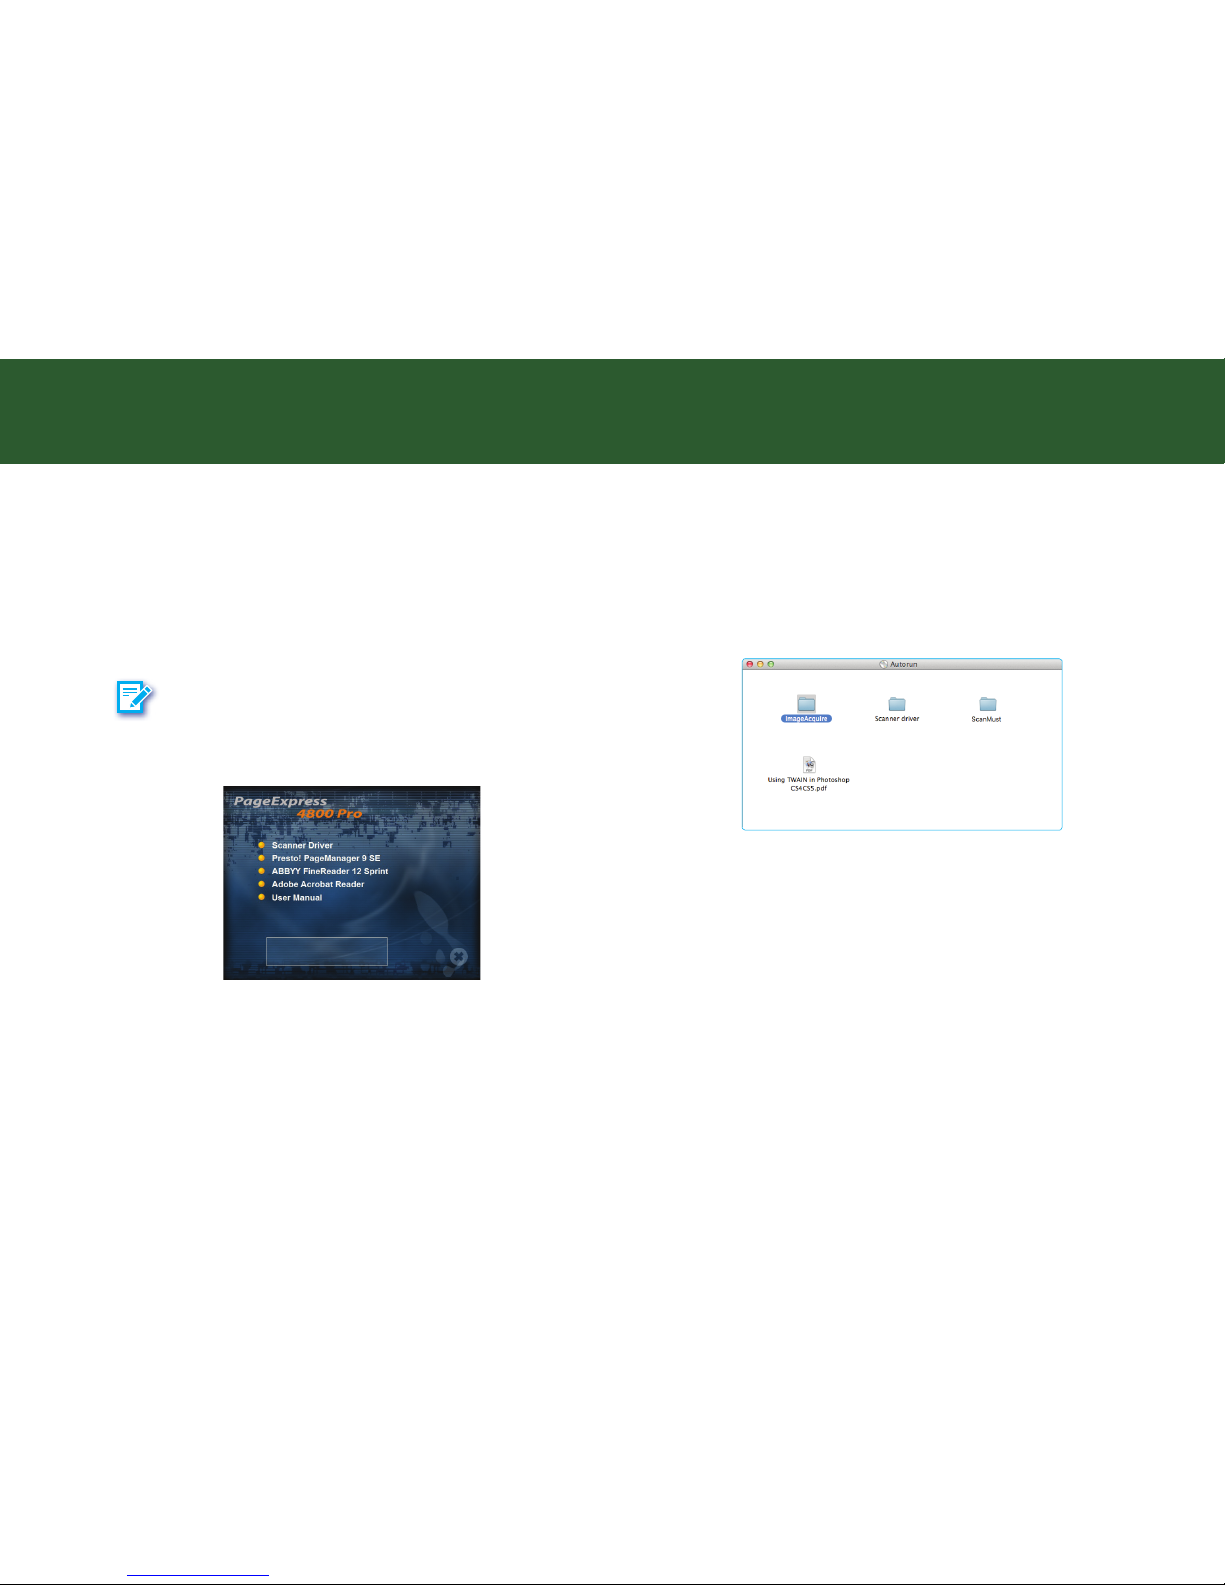
BUNDLED DRIVERS AND SOFTWARE
YOU MUST FIRST INSTALL SCANNER DRIVER IN ORDER TO USE THE
SCANNER ON YOUR COMPUTER.
[Windows]
1.
Scanner Driver - Scanner Driver includes following:
a. TWAIN and WIA driver: it comes with TWAIN interface to use the
Scanner from within any WIA or TWAIN-compliant host software
applications such as MediaImpression, Photoshop.
b. iDocScan Touch: it is consisted of 5 Scan-to functions, including
Scan to Folder, Scan to PDF, Scan to Application (Default: E-Mail),
Scan to Cloud, and Scan to Print destinations, and Advanced
Scan with a Preview Window for displaying the prescanned
image.
c. Help files: this includes detailed instructions of iDocScan Touch
and of the TWAIN interface.
d. Clean Calibration: Run this tool to clear the calibration data left
from the previous scanner, when you use another same model
scanner on the same computer with a previous driver.
2.
Presto! PageManager - this TWAIN-compliant application serves
as a host application that enables image scanning via the TWAIN
interface. For detailed information of this application, see the “Help”
file integrated within this application.
3.
ABBYY FineReader - this application converts scanned text
into searchable text when using the PDF function. For detailed
information of this application, see the “Help” file integrated within
this application.
4.
Adobe Acrobat Reader - this application opens the scanned image
that is converted into a PDF format using the PDF function.
[Mac]
1.
ImageAcquire - this TWAIN-compliant application serves as a host
application that enables image scanning via the TWAIN interface.
For detailed instructions of ImageAcquire, see the PDF file inside
the ImageAcquire folder.
2.
Scanner Driver - it comes with TWAIN interface to use the
Scanner from within any TWAIN-compliant host application such
as ImageAcquire, Photoshop. Refer to the PDF file inside the
Scanner Driver folder for detailed instructions of TWAIN interface.
3.
ScanMust - this application allows you to easily scan from
the Scanner buttons or within this software. For the detailed
instructions of ScanMust, see the “Help” file integrated within this
software.
Page 6
6
SYSTEM REQUIREMENTS
Following minimum system requirements are recommended to achieve the best performance from the Scanner.
Windows Mac
Processor Intel Core Duo or faster Intel Core Duo or faster
Support OS Windows XP (Service Pack 3) / Vista / 7 / 8 / 8.1 /10 Mac OS X 10.7 to 10.11 and above
Color Display 1024 x 768 resolution or above 1024 x 768 resolution or above
RAM 4GB RAM or greater 4GB RAM or greater
Free Hard Drive Space 2GB 1GB
Drive DVD-ROM Drive for software installation DVD-ROM Drive for software installation
Interface Available USB port Available USB port
NOTE
The scanning speed and performance are determined by the specifications of your computer. The higher specification of your computer, the better
the Scanner will be performed.
Page 7
7
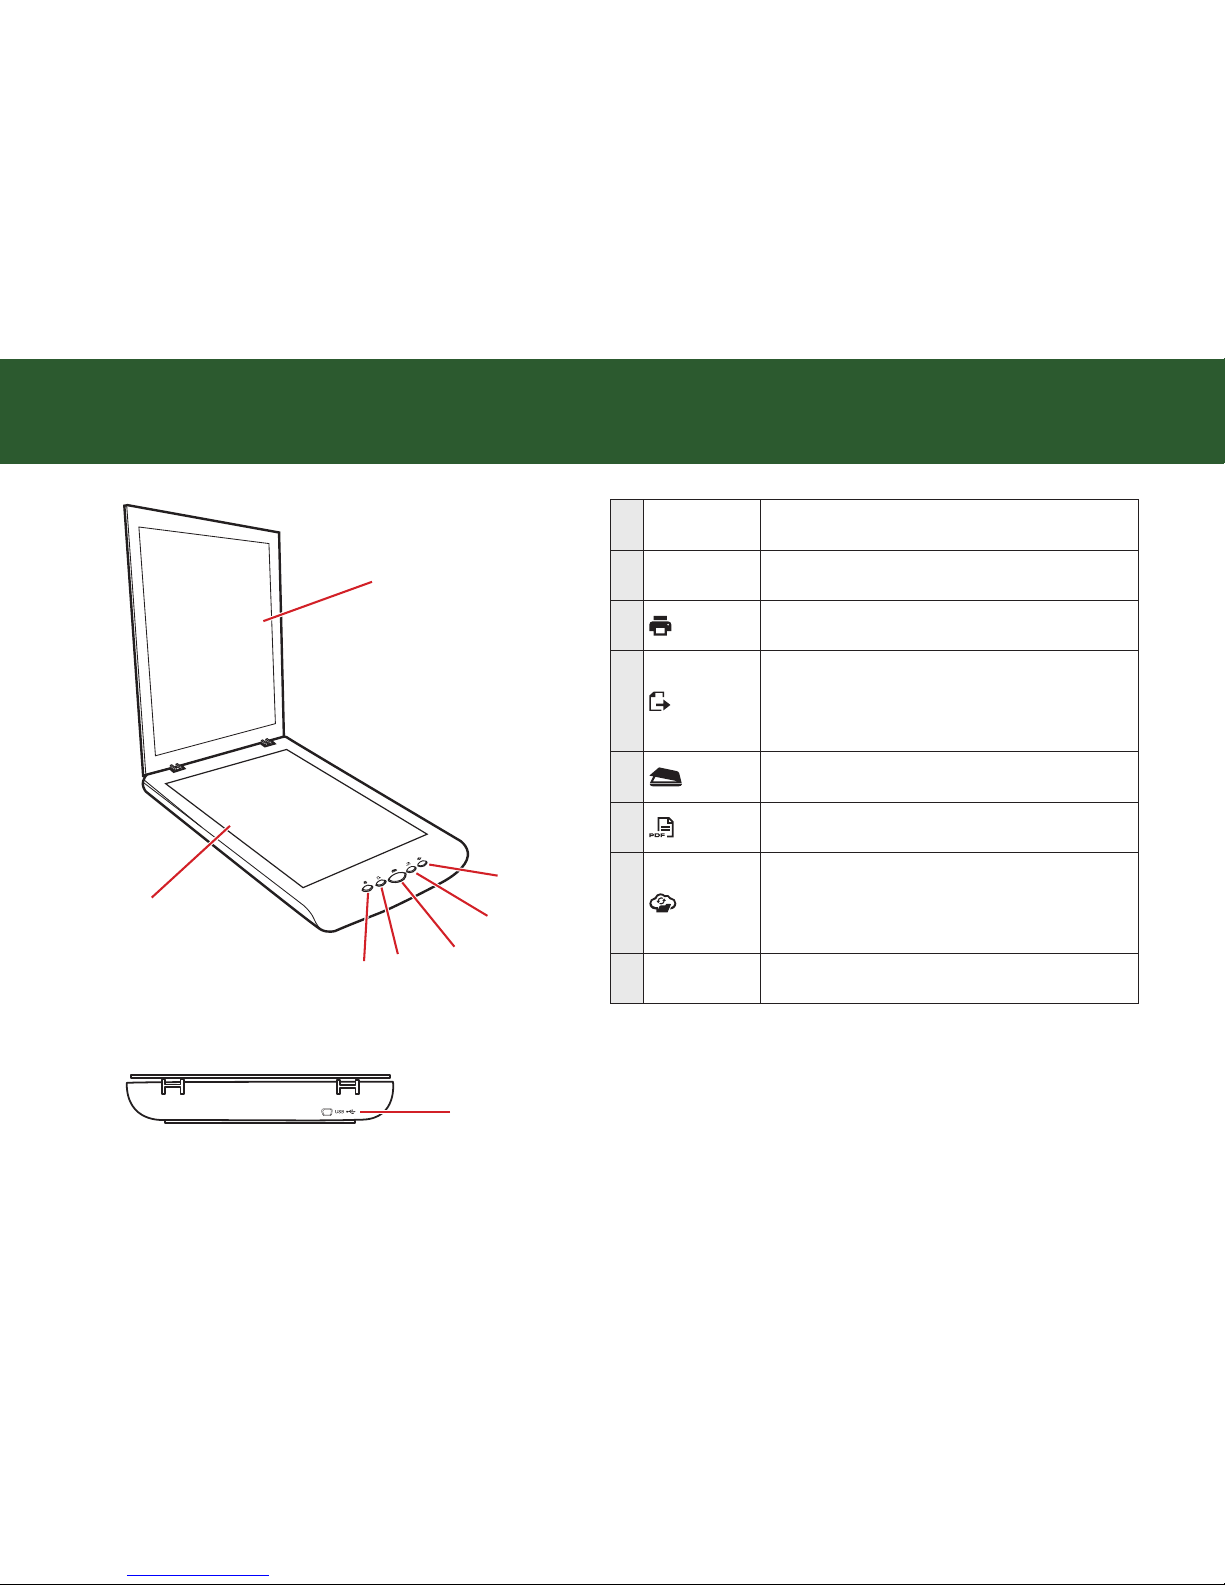
SCANNER PARTS
Rear Side
1
2
3
4
5
6
7
8
1
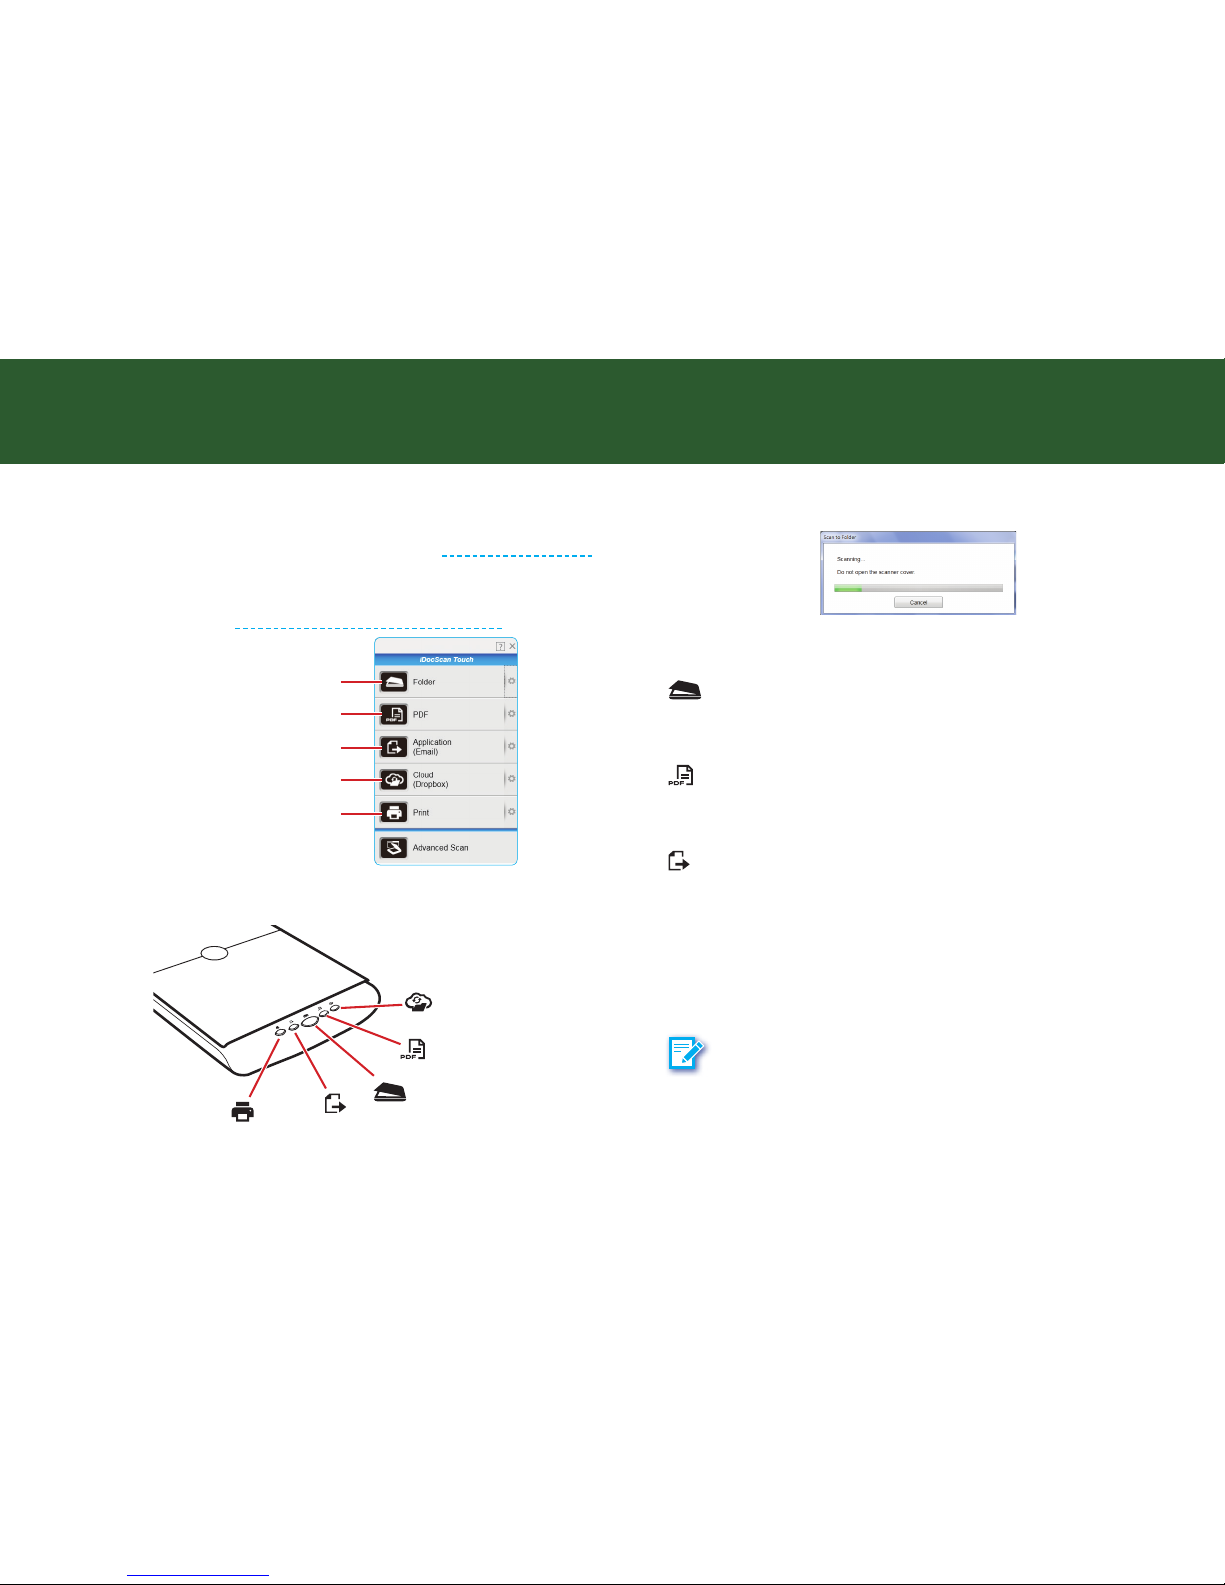
Scanner Lid Opens to reveal the Flatbed Glass.
2
Flatbed Glass Used to scan single pages or book pages.
3
Scan directly to your printer to make copies of a
scan.
4
Scan directly to your email program.
For Windows, you can select either email or
application (default: MS Paint) as the destination
of your scan.
5
Scan directly to the selected folder.
6
Scan directly to the PDF file format.
7
For Windows, scan directly to either Google Drive
or Dropbox shared folder in your computer.
For Mac, scan directly to the selected application
(default: Preview).
8
USB Port
Connect the USB Cable to a computer for power
supply.
Page 8
8
INSTALLING DRIVERS AND SOFTWARE
PLEASE COMPLETE THE DRIVERS AND SOFTWARE INSTALLATION
BEFORE CONNECTING THE SCANNER. DO NOT CONNECT THE USB
CABLE TO THE SCANNER OR COMPUTER AT THIS MOMENT.
[Windows]
1.
Insert the Installation DVD into the DVD-ROM drive of the
computer. The DVD will run automatically, and then the installation
window appears on the screen as following:
NOTE
If the DVD does not run automatically, locate the drive on the
computer and double click on "AUTORUN.exe" file.
2.
Click “Scanner Driver” from the installation window.
3.
Select a preferred language from the “Choose Setup Language”
list.
4.
Click “Next” when the Welcome screen appears, and then follow
on-screen instructions to complete installation.
5.
Return to the installation window to install other software to your
computer to enable certain functions.
[Mac]
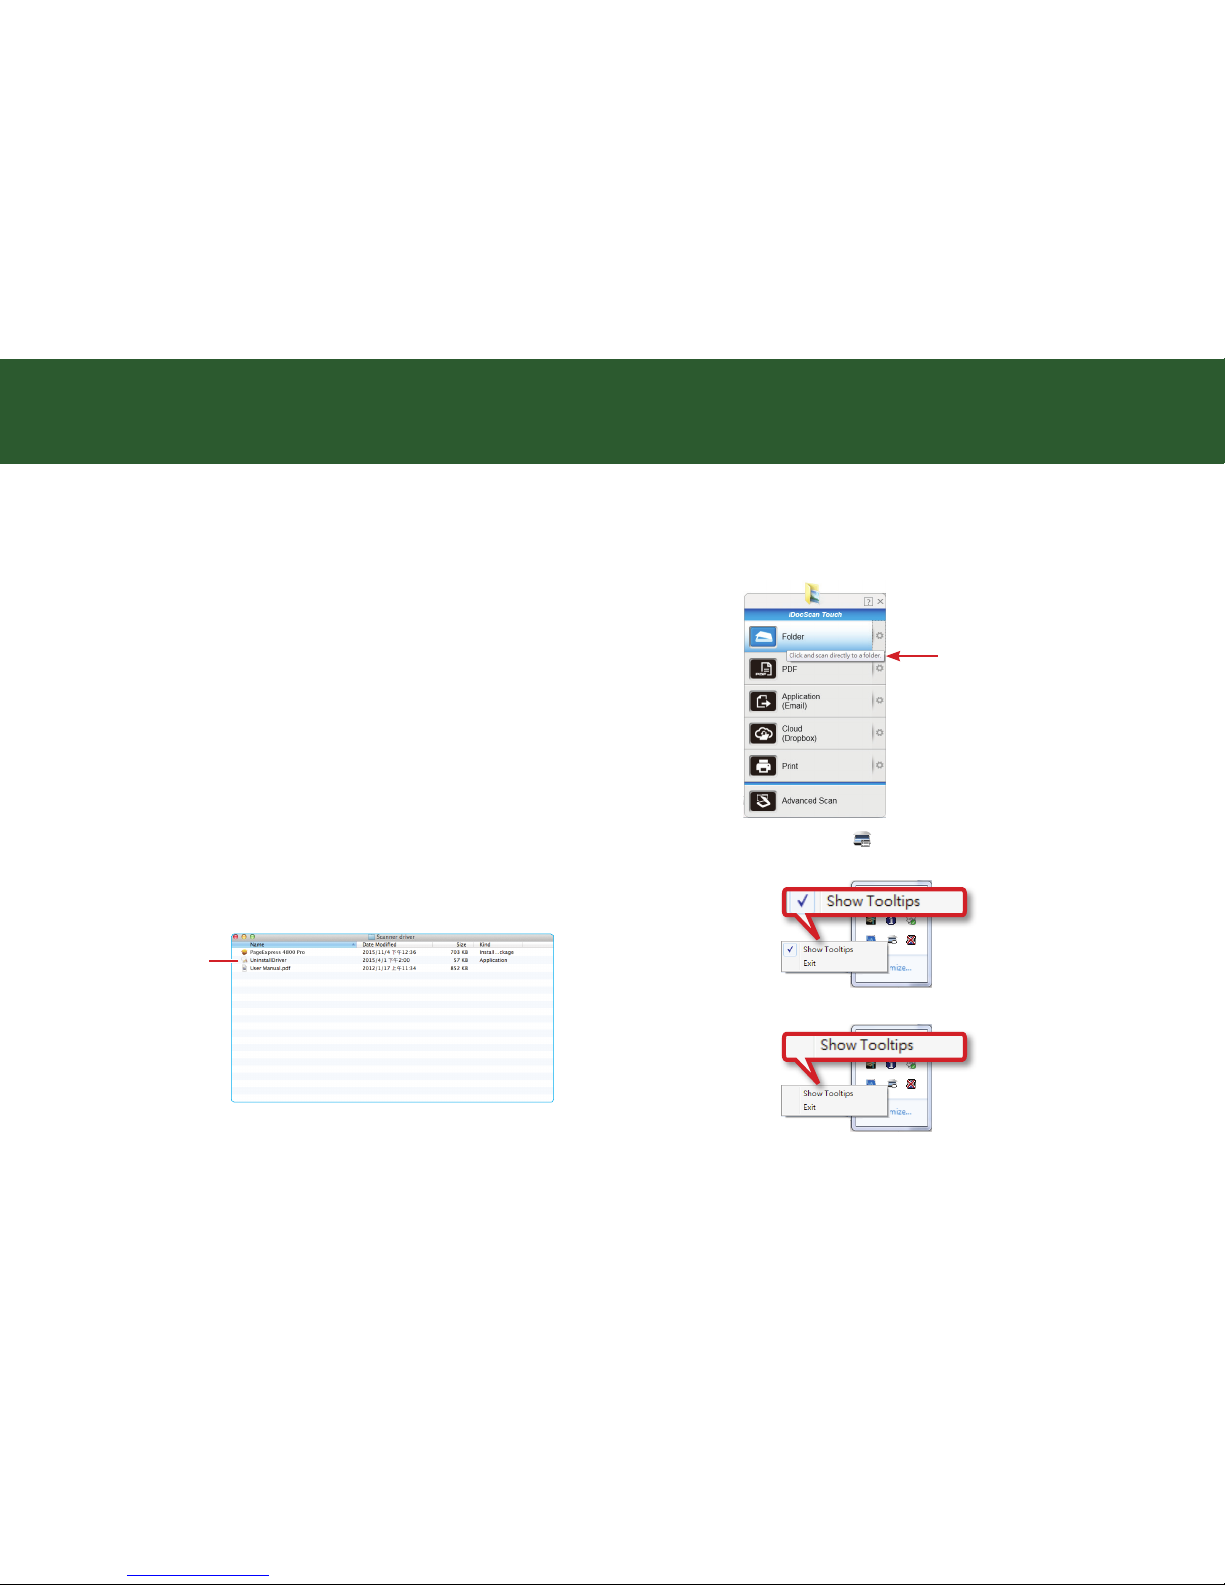
1.
Insert the Installation DVD into the DVD-ROM drive of the Mac.
The Autorun disc icon appears on your desktop.
2.
Double click on the Autorun disc icon.
The content of the disc is displayed in the Autorun folder as
following:
3.
Double click the “Scanner Driver” folder, then “PageExpress 4800
Pro.pkg” to start the installation process.
Follow on screen instructions to complete the installation
procedures.
4.
Return to the Autorun folder. Double click the “ScanMust” folder,
and then “ScanMust Installer.pkg” to start the installation process.
Follow on screen instructions to complete the installation
procedures.
5.
Return to the Autorun folder. Double click the “ImageAcquire”
folder, and then “ImageAcquire.pkg” icon to start the installation
process.
Follow on screen instructions to complete the installation
procedures.
Page 9
9
INSTALLING DRIVERS AND SOFTWARE (CONTINUED)
How to Uninstall the Drivers and Software
When you need to remove the scanner drivers and software from your
computer, uninstall as following:
[Windows]
1.
Unplug the USB Cable connecting from the computer.
2.
Exit all running applications.
3.
Go to the “Start” menu, select “(All) Programs”,
“PageExpress 4800 Pro”, and then click “Uninstall”.
4.
Follow the on-screen instructions to remove the Scanner Driver.
[Mac]
1.
Unplug the USB Cable connecting from the computer.
2.
Exit all running applications.
3.
Insert the Installation DVD.
4.
Double click on the UninstallDriver icon in the Scanner Driver
folder to remove it.
Uninstall Driver
5.
Drag ImageAcquire icon and ScanMust icon from the “Application”
folder to Trash.
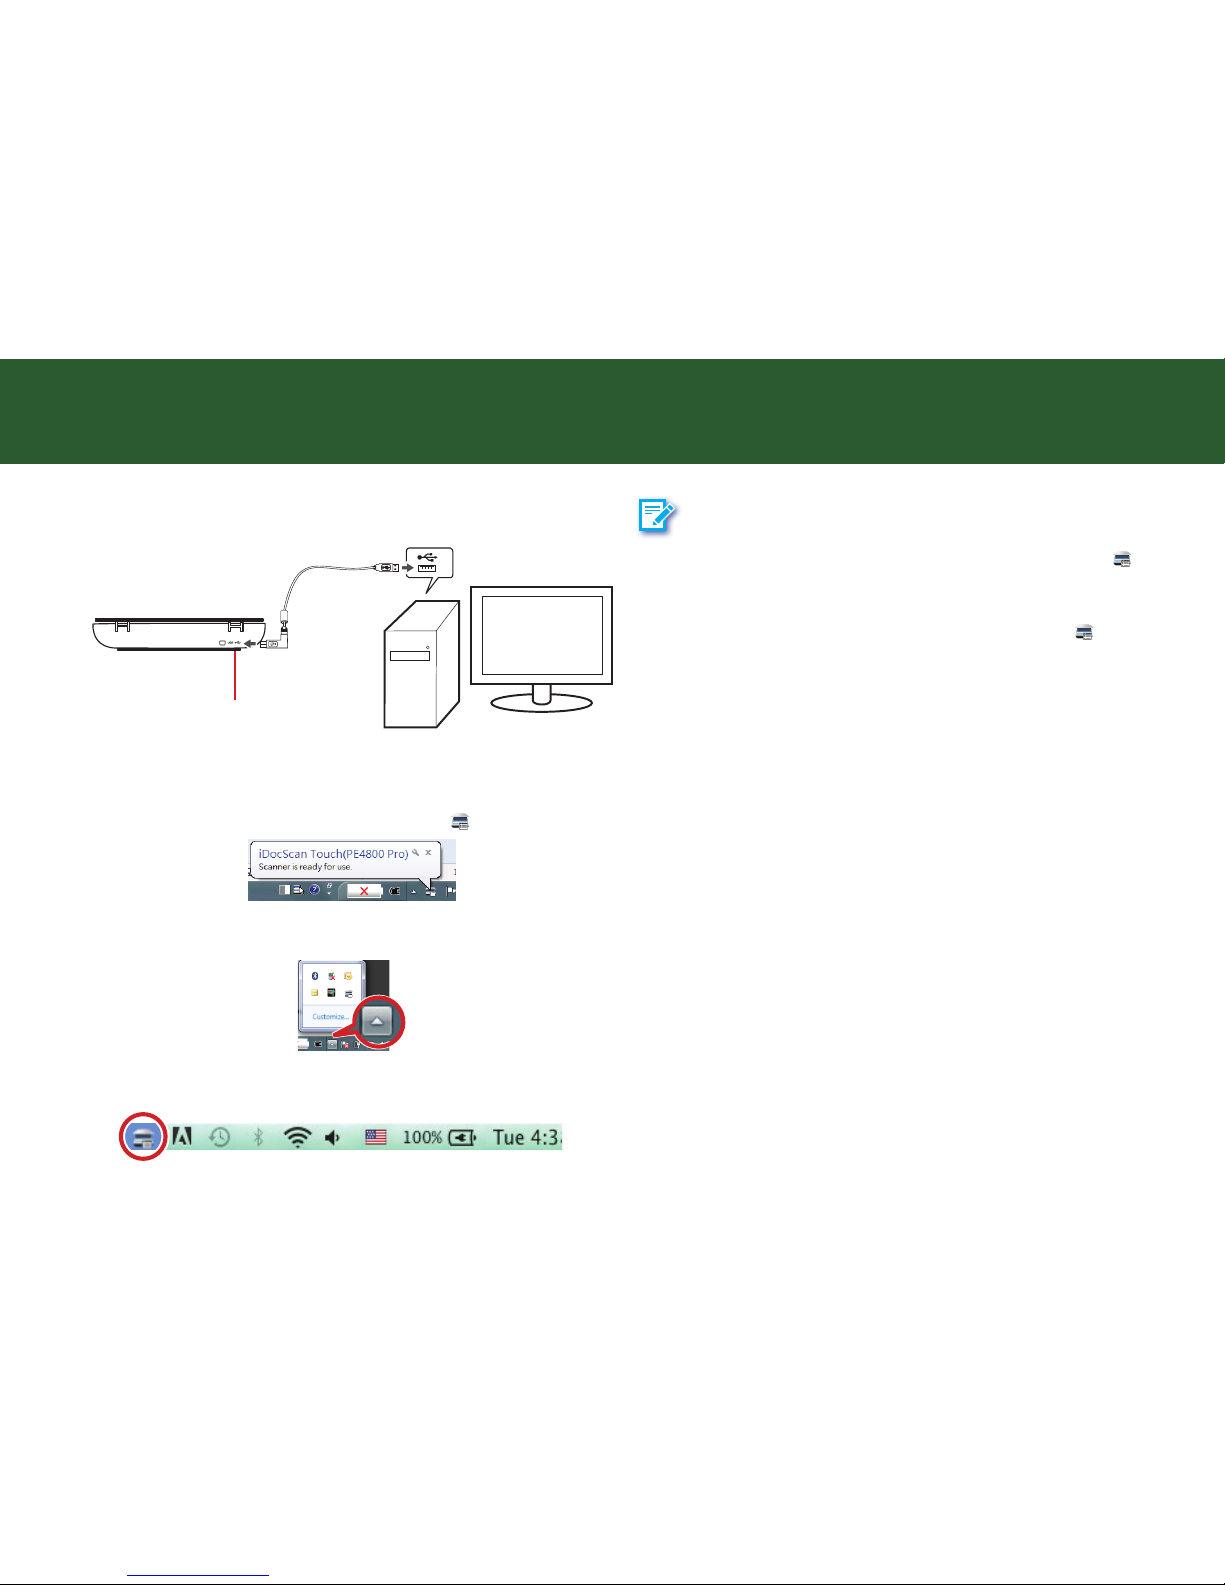
Showing/Hiding Tooltips
You can show (default) or hide the tooltips for the iDocScan Touch panel
and the settings page when you are familiar with the instructions.
Tooltips
Right-click on the Scanner icon [ ] from the system tray to bring up
the following menu, then click on Show Tooltips.
The check mark disappears, indicating that the tooltips is hidden.
To show the tooltips again, click on Show Tooltips to check mark it.
Page 10
10
CONNECTING THE SCANNER
1.
With the
computer
on, connect supplied USB Cable to the
Scanner’s USB Port and the other end to the computer.
USB Port
2.
After a few moments, your computer will automatically detect your
scanner:
(a) Windows computer will detect the Scanner as a Removable Disk
and automatically loads iDocScan Touch [
] in the system tray.
iDocScan Touch icon might be hidden, and require that you click
the arrow in the system tray to reveal it.
(b) Mac computers will automatically launch the ScanMust software
in the menu bar.
NOTE
•
If your Windows computer does not appear the Scanner icon [
]
in the system tray, from the “Start” menu, click “(All) Programs” >
“PageExpress 4800 Pro” > “iDocScan Touch(PE4800 Pro)”.
•
If your Mac computer does not appear the Scanner icon [
] in the
menu bar, open “Finder”and then click “Applications”. Find ScanMust
in the Application folder, and then double click on it to open it in the
menu bar.
Turning Power Off
To turn off the power, unplug the USB Cable from the computer.
Page 11
11
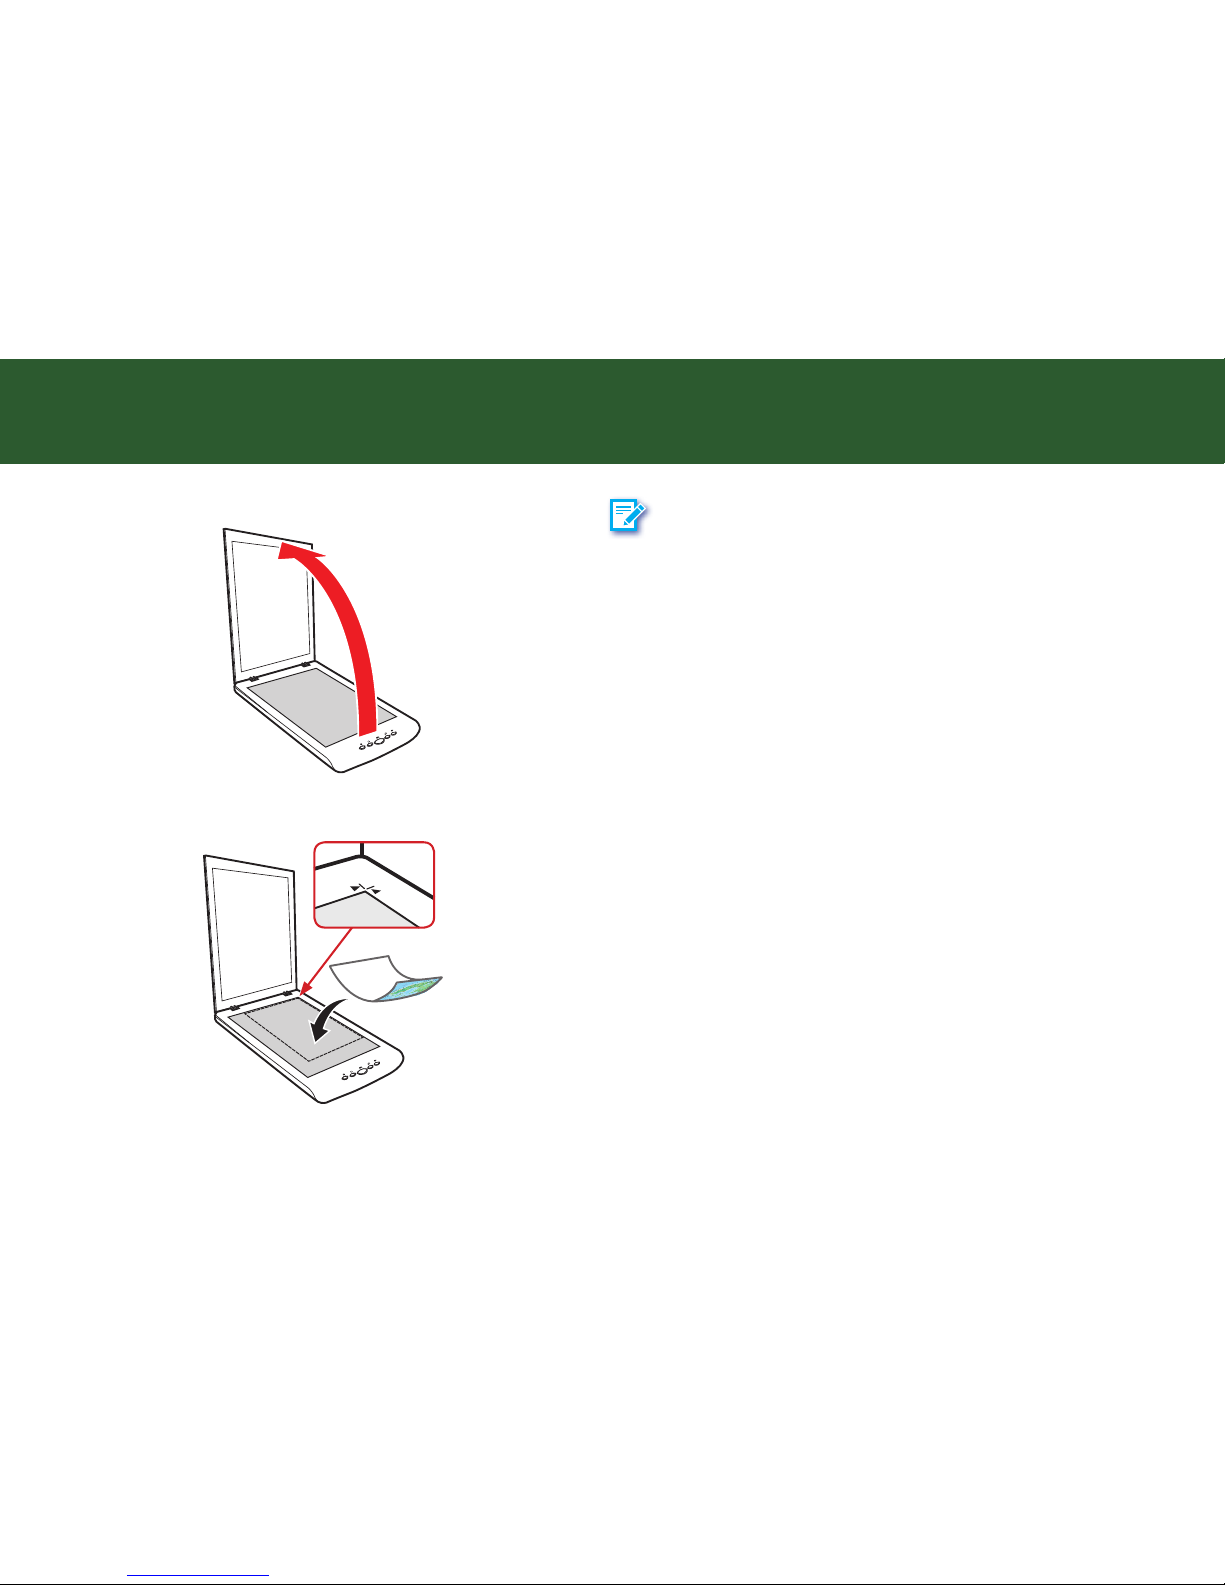
PLACING THE ORIGINALS
1.
Open the Scanner Lid.
2.
Place the original facing down on the Flatbed Glass, and then align
the original at the top right corner.
3.
Close the Scanner Lid.
NOTE
•
Do not place heavy items on the Scanner Glass or press on the
Scanner Glass with too much force as this will cause damage to the
glass surface.
•
Do not place any objects which may scratch the glass on the scanner.
Page 12
12
SCANNING PROCEDURES IN WINDOWS
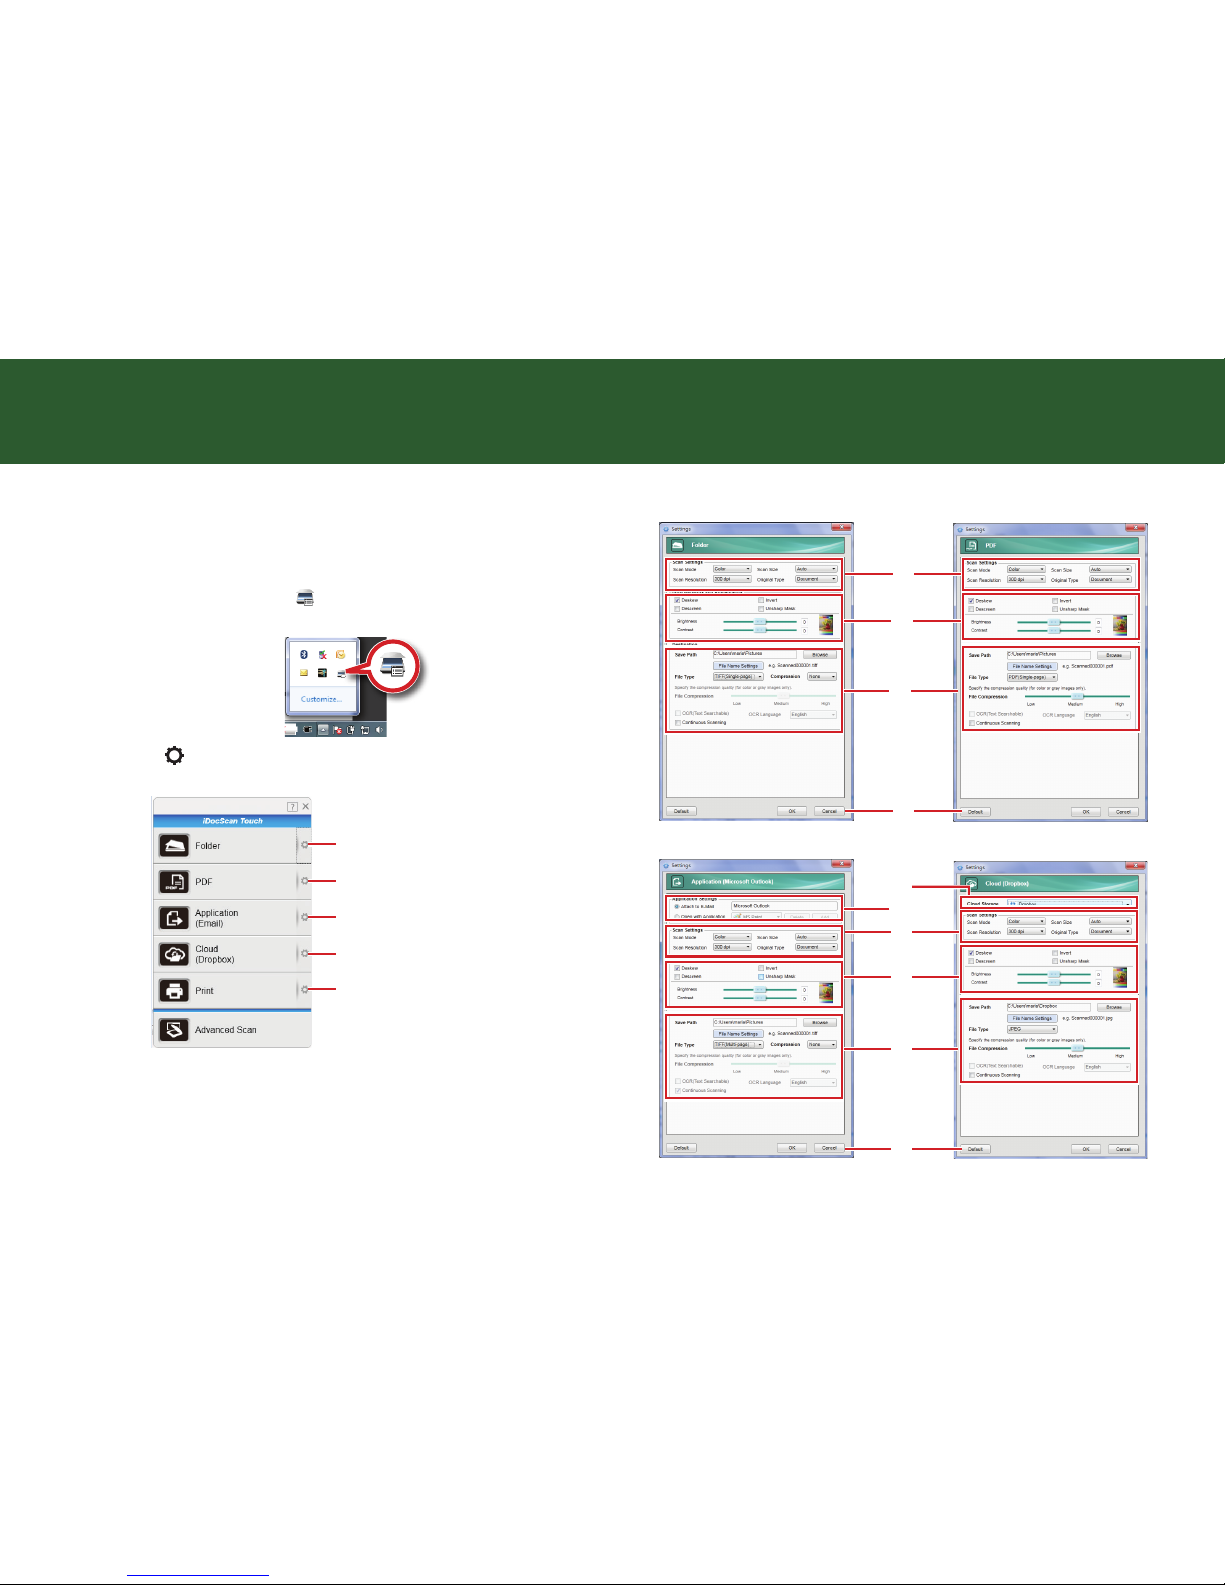
Setting iDocScan Touch and Buttons
You can setup the scanner buttons to perform certain actions within the
iDocScan Touch software.
1.
Click the Scanner icon [
] from the system tray to bring up the
iDocScan Touch panel.
2.
Click [ ] (Settings) by the following 5 scan to functions to open
the Settings dialog box.
Scan to Folder Settings
Scan to PDF Settings
Scan to Application Settings
Scan to Cloud Settings
Scan to Print Settings
3.
The Settings window appears. You can change the settings as
following:
Scan to Folder Settings
Scan to PDF Settings
A
B
C
D
Scan to Application Settings
Scan to Cloud Settings
A
E
F
B
C
D
Page 13
13
SCANNING PROCEDURES IN WINDOWS (CONTINUED)
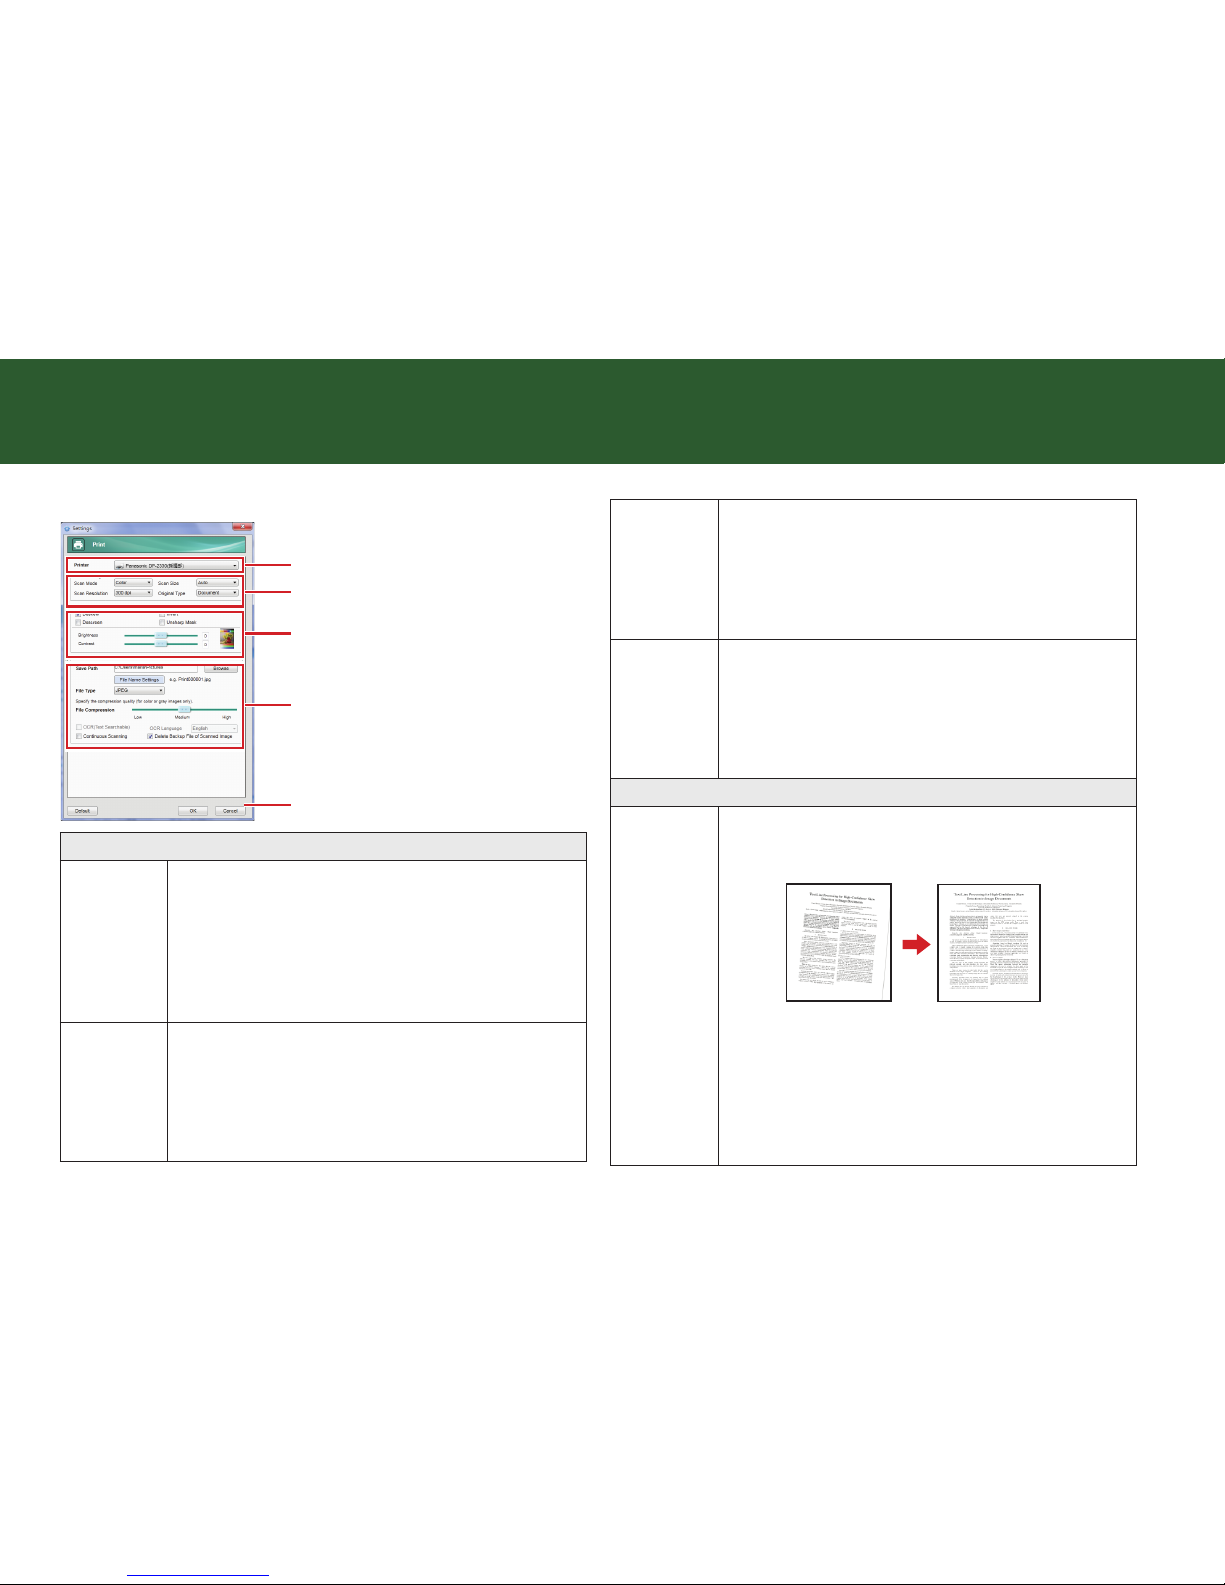
Scan to Print Settings
A
G
B
C
D
A. Scan Settings
Scan Mode
Select a mode to scan your originals with following
choices: “Color”, “Gray”, “B/W” .
•
Color: Select it to scan the color photographs,
documents, and items containing colors in full color.
•
Gray: Select it to scan the image in grayscale using
varying shades of gray.
•
B/W:
Select it to scan text-only originals or line drawings.
Scan
Resolution
Select the resolution of the image to be scanned with
following choices: “100dpi”, “200dpi”, “300dpi”,
“600dpi”, “1200dpi”.
•
The higher the resolution, the bigger the file size.
•
“100dpi” is disabled when “OCR (Text Searchable)”
is checked.
Scan Size
Select the output size of the image to be scanned with
following choices: “Auto”, “A4”, “B5”, “Letter”
•
Select “Auto” to automatically detect the paper size
and crop scanned image. When scanning darker
originals (i.e. night scenery photos), over-cropping
may occur.
Original Type
Select an option according to the type of original to
auto-adjust overall brightness and contrast for the
scanned image.
•
Document: Originals with mainly text.
•
Photo: Originals with mainly color pictures.
•
Magazine: Originals with both text and color pictures.
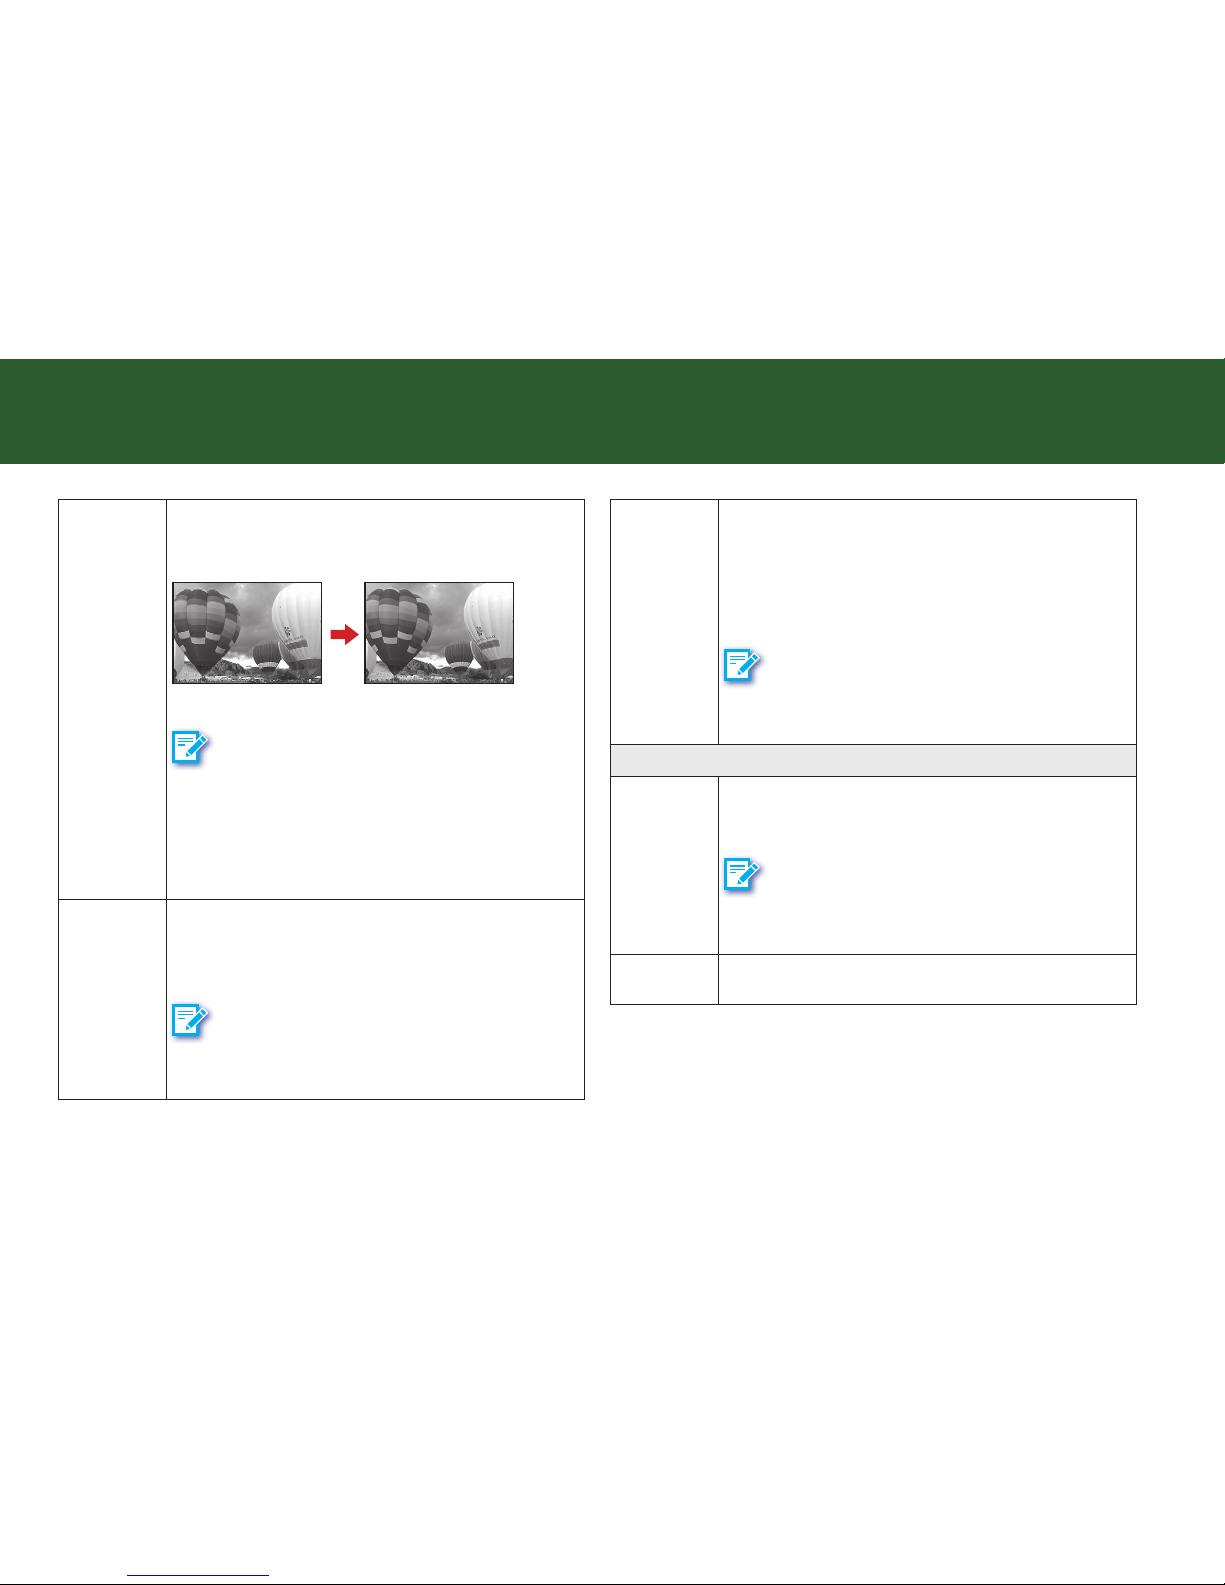
B. Improvements and Adjustments
Deskew
Correct the skew image approximately +/-15 degrees.
(The results of Deskew do not appear in the preview
image, only in the scanned image.)
Original
Deskew applied
•
Deskew is enabled when the Scan Size set to “Auto”.
•
Originals with darker backgrounds and dark text are
difficult to deskew. Deskew may not work properly
when deskewing dark images.
•
Deskew can only correct one skew image at a time.
•
This function cannot work with a large skew angle.
Page 14

14
Descreen
Descreening helps to reduce moire patterns in
magazines or other printed materials. After descreening,
the image may appear blurry.
Example:
Descreen appliedOriginal
NOTE
•
If the “Unsharp Mask” function is enabled, some
moire pattern may not reduce even when the
Descreen is enabled. In such cases, disable the
“Unsharp Mask”.
•
Scanning takes longer than usual when you enable
the Descreen function.
SCANNING PROCEDURES IN WINDOWS (CONTINUED)
Invert
This function reverses the colors of the scanned image
to the opposite colors.
Example of black text with white background to be
inverted:
Original Invert applied
Example of grayscale picture to be inverted:
Original Invert applied
Example of colored picture to be inverted:
Original Invert applied
Page 15
15
SCANNING PROCEDURES IN WINDOWS (CONTINUED)
Unsharp
Mask
This function helps to emphasize edges in the image
more clearly for an overall sharper image.
Example:
Unsharp Mask appliedOriginal
NOTE
•
The Unsharp Mask may not work properly for poorly
focused or out of focus images.
•
You are recommended to disable the Unsharp Mask
when the moire is not being reduced even with the
“Descreen” function enabled.
Brightness
Use the slider to increase or decrease the value (-127
~ +127) and to adjust the image brighter or darker. You
can view the sample image to the right side of the slider
for the result of the value.
NOTE
Brightness is enabled in “Color” and “Gray” mode, but
not in the B/W mode.
Contrast
Use the slider to increase or decrease the value (-127
~ +127) and to adjust the contrast higher or lower.
The bigger the value is to set towards +127, the more
contrast is between lighter and darker areas. You can
view the sample image to the right side of the slider
for the result of the value.
NOTE
Contrast is enabled in “Color” and “Gray” mode, but not
in the B/W mode.
C. Destination
Save Path
Indicate the folder where image files are saved. Click
Browse to specify a file folder to save the scanned
image.
NOTE
•
You cannot specify folders where root privileges are
required.
File Name
Setting
The filename can be created with a prefix in the Prex
field up to 20 characters, i.e. Scanned000001.jpg
Page 16
16
File Type
Select a file format to save scanned image with
following choices: “JPEG”, “BMP”,“TIFF (Single-page)”,
“TIFF (Multi-page)”, “PDF (Single-page)”, “PDF (Multipage)”.
NOTE
•
PDF (Single-page) and TIFF (Single-page) are used
for splitting the multi-page originals into single files.
•
PDF (Multi-page) and TIFF (Multi-page) are used
for combining multiple scans into one file. The
“Continuous Scanning” dialog will be triggered
automatically for scanning more page.
Compression
When TIFF file is selected in the File Type, the
Compression format is enabled with following
choices:
•
None: No compression is used.
•
LZW: LZW is a compression method that results in
no loss of data. The file size is closer to the actual
size of the color data.
•
JPEG: JPEG is a lossy compression method that
results in some data is lost. This method is best used
to reduce the large file size.
NOTE
•
The Compression is only available in the Color and
Gray mode.
•
TIFF (JPEG compression) is enabled up to 600 dpi.
This option to compress 1200 dpi is not available.
Compression
Quality slider
When JPEG, PDF or TIFF (Compression: JPEG) file
is selected in the File Type, the Compression Quality
slider is enabled. Use the slider to compress a file to
reduce the total size in High, Medium, or Low. The
higher the compression level, the lower the file size,
and vice versa.
NOTE
The Compression Quality is only available in the Color
and Gray mode, but not in the B/W mode.
OCR (Text
Searchable)
This function is checked by default when selecting PDF
(Multi-page) and PDF (Single-page) file in the File
Type. It can recognize and convert your scanned image
into a text based file that can be searched and edited.
OCR
Language
This function is enabled when OCR (Text Searchable) is
selected.
Ensure to select the correct language of the original text
from the drop-down menu to perform text recognition.
Continuous
Scanning
Check this option to trigger the continuous scanning
dialog box after the current page is scanned, allowing
you to continue scanning for more pages. (See
Continue to Scan More pages).
SCANNING PROCEDURES IN WINDOWS (CONTINUED)
Page 17
17
Delete
Backup File
of Scanned
Image
This function is enabled when Scan to Application
(Email) or Scan to Print is selected.
Check this option to trigger the delete backup file
dialog box after the scanning process completes,
allowing you to delete the backup file (See Delete the
Backup Files).
D. Buttons
Default
Reset the Settings to the default for respective scan-to
function.
Cancel Cancel the changes, and close the Settings window.
OK
Apply the scan-to function with the settings you
changed, and close the Settings window.
E. Application Settings (Available in Scan to Application)
Attach to
E-Mail
Select "Attach to E-Mail" as the destination of your scan.
The system detects and displays the default email client
(e.g. Outlook) on your computer.
NOTE
Make sure an email account has been configured.
Open with
Application
Select "Open with Application" (default: MS Paint) as
the destination of your scan.
To add a new application, click Add and navigate to the
.exe files in the Program folder, then select it to add in
the application list.
To delete the application, select it from the dropdown
menu, then click Delete to remove the application.
NOTE
•
Please make sure the application supports the File
Type selected.
•
The default application (MS Paint) cannot be deleted.
F. Cloud Storage (Available in Scan to Cloud)
Cloud
Storage
Select either "Dropbox" or "Google Drive" from the
dropdown menu as the destination of your scan.
NOTE
•
To use this function, you must have a Dropbox and
a Google Drive account. Dropbox and Google Drive
must be installed on your computer and has been
logged in.
•
If Dropbox or Google Drive shared folder is not
detected, a warning message will appear.
G. Printer (Available in Scan to Print)
Printer
Select an available printer as the destination of your
scan. The system can detect and display the default
printer which is connected to your computer.
SCANNING PROCEDURES IN WINDOWS (CONTINUED)
Page 18
18
Scanning Using iDocScan Touch and Buttons
1.
Place the original on the Flatbed Glass (see Placing the Originals).
2.
Click a scan-to function from the iDocScan Touch panel to start
scanning to the destination with the Settings you previously
configured (see Setting iDocScan Touch and Buttons).
Scan to PDF
Scan to Application
Scan to Cloud
Scan to Print
Scan to Folder
Alternatively, you can press a button on the Scanner to start
scanning to the destination.
Scan to Print
Scan to Application
(Default: Email)
Scan to Folder
Scan to PDF
Scan to Cloud
SCANNING PROCEDURES IN WINDOWS (CONTINUED)
The “Processing...” bar appears showing the current scan status.
3.
After scanning completes, the scanned image is saved and opened
according to the scan-to function you select as below:
Scan to Folder
The specified folder opens automatically with the scanned image
selected in it.
Scan to PDF
The scanned image is saved in the PDF format and opened
automatically in the Acrobat Reader.
Scan to Application
The scanned image opens automatically in the specified application
(default: Email). The default email application opens up with the
scanned image attached in a blank email.
If you set the Application Settings to “Open with Application”, the
scanned image opens automatically in the specified application
(default: MS Paint).
NOTE
•
Maximum of 20 files can be attached within an email.
•
If the total file size is exceeded the attachment size limit set at
the mail server, the file cannot be sent.
Page 19

19
SCANNING PROCEDURES IN WINDOWS (CONTINUED)
•
Applications that do not support multi-page scanning will open
and display only the first page of the originals.
•
If the application cannot support the File Type selected, an error
message will appear. Refer to the instructions of the application
for the formats supported.
Scan to Cloud
The scanned image opens automatically in the specified cloud folder
(default: Dropbox). You can specify either Google Drive or Dropbox
in the Settings.
NOTE: To use this function, you must have a Dropbox and a Google
Drive account. Dropbox and Google Drive must be installed on your
computer and has been logged in prior to scanning.
Scan to Print
The computer’s print dialog box opens up with the image in it. Use
the print dialog box to set the available settings of the printer driver
to print the scanned image.
Setting iDocScan Touch (Advanced Scan)
The Advanced Scan is only available by using the iDocScan Touch panel.
It includes a Preview Window with controls and tools. You can preview
the image after you make any changes in the Settings window.
Click Advanced Scan to open the Settings dialog box.
Advanced Scan
The Settings window appears. You can change the settings as following
in the Destination and Scan Settings tabs:
Destination Tab
1
2
3
4
5
6
7
8
9
10
11
12
13
15
14
17
16
Page 20

20
1
Destination Tab
Click the Destination tab to display the
settings options.
2
Save Path
Indicates the folder where image files are
saved. Click Browse to specify a file folder to
save the scanned image.
NOTE
•
You cannot specify folders where root
privileges are required.
3
File Name Setting
The filename can be created with a prefix
in the Prex field up to 20 characters, i.e.
Scanned000001.jpg.
4
File Type
Select a file format to save scanned image
with following choices: “JPEG”, “BMP”,“TIFF
(Single-page)”, “TIFF (Multi-page)”, “PDF
(Single-page)”, “PDF (Multi-page)”
NOTE
•
PDF (Single-page) and TIFF (Singlepage) are used for splitting the multi-page
originals into single files.
•
PDF (Multi-page) and TIFF (Multi-page) are
used for combining multiple originals into
one file.
SCANNING PROCEDURES IN WINDOWS (CONTINUED)
5
Compression
When TIFF file is selected in the File Type, the
Compression format is enabled with following
choices:
•
None: No compression is used.
•
LZW: LZW is a compression method that
results in no loss of data. The file size is
closer to the actual size of the color data.
•
JPEG: JPEG is a lossy compression
method that results in some data is lost.
This method is best used to reduce the
large file size.
NOTE
•
The Compression is only available in the
Color and Gray mode.
•
TIFF (JPEG compression) is enabled up to
600 dpi. This option to compress 1200 dpi
is not available.
6
Compression
Quality slider
When JPEG, PDF or TIFF (Compression:
JPEG) file is selected in the File Type, the
Compression Quality slider is enabled. Use
the slider to compress a file to reduce the total
size in High, Medium, or Low. The higher the
compression level, the lower the file size, and
vice versa.
NOTE
The Compression Quality is only available in the
Color and Gray mode.
Page 21

21
SCANNING PROCEDURES IN WINDOWS (CONTINUED)
7
OCR (Text
Searchable)
This function is checked by default when
selecting PDF (Multi-page) and PDF (Singlepage) file in the File Type. It can recognize and
convert your scanned image into a text based
file that can be searched and edited.
NOTE
•
The function is not available when “Scan
Resolution’ is set to 100 dpi.
•
It is recommended to use 300 dpi resolution
for the OCR function.
8
OCR Language
This function is enabled when OCR (Text
Searchable) is selected.
Ensure to select the correct language of the
original text from the drop-down menu to
perform text recognition.
9
Delete Backup File
of Scanned Image
This function is enabled when Scan to
Application (Email) or Scan to Print is selected.
This will trigger the delete backup file dialog
box after the scanning process completes,
asking if you want to delete the backup file.
Click “Delete” to delete the backup file. Click
“Cancel” not to delete the file.
10
Scan to Folder
Select "Scan to Folder" as the destination of
your scan.
11
Open with
Application
Select "Open with Application (default: MS
Paint)" as the destination of your scan.
To add a new application, click Add... from the
dropdown menu. Click Add to navigate to the
.exe files in the Program folder, then select it
to add in the application list.
To delete the application, select it from the
dropdown menu, then click Delete to remove
the application.
NOTE
•
Please make sure the application supports
the File Type selected.
•
The default application (MS Paint) cannot be
deleted.
12
Attach to Email
Select "Attach to E-Mail" as the destination of
your scan.
The system detects and displays the default
email client (e.g. Outlook) on your computer.
NOTE
Make sure an email account has been configured.
Page 22

22
13
Sent to Print
Select "Send to Print" as the destination of
your scan.
Select an available printer from the dropdown
menu as the destination of your scan. The
system can detect and display the default
printer which is connected to your computer.
14
Preview
Click to preview the image using the current
settings.
15
Scan
Click to scan the final image using the current
settings.
16
Close
Click to save the settings you changed and
close the Settings window.
17
Default
Reset Destination and Scan Settings to the
default settings.
Scan Settings Tab
1
2
3
4
5
6
7
8
9
10
11
12
13
14
15
17
18
20
19
16
1
Scan Settings Tab
Click the Scan Settings tab to display the
settings options.
2
Scan Mode
•
Color: Select it to scan the color
photographs, documents, and items
containing colors in full color.
•
Gray: Select it to scan the image in
grayscale using varying shades of gray.
•
B/W: Select it to scan black and white
documents or photos, and render the image
in black and white color.
•
Multi-Color Output: Select it to enable the
Multi-Color Output controls.
SCANNING PROCEDURES IN WINDOWS (CONTINUED)
Page 23

23
3
Multi-Color
Output Controls
Tick the checkbox to select the modes
including: “Color”, “Gray”, “B/W”. You can
make a single scan to be saved up to 3
separate images simultaneously.
Press the “Color”, “Gray”, or “B/W” button
to change the settings for each mode. A thick
line will appear on the button pressed (i.e.,
). You can set different settings for
each mode to be scanned.
Original
One scan into 3 images
4
Scan Size
Select the output size of the image to be
scanned with the following choices: “Custom”,
“A4”, “B5”, “Letter”.
NOTE
•
Select “Custom” to automatically detect the
paper size and crop scanned image. When
scanning darker originals (i.e. night scenery
photos), over-cropping may occur.
•
Select "Custom" to specify a custom page
size by resizing the cropping frame in the
Preview Window.
5
Scan Resolution
Select the resolution of the image to be
scanned with following choices: “100dpi”,
“200dpi”, “300dpi”, “600dpi”, “1200dpi”,
“2400dpi”, “4800dpi”.
•
The higher the resolution, the bigger the file
size.
•
“100dpi” is disabled when “OCR (Text
Searchable)” is checked.
NOTE
The change of Scan Resolution will apply to
the selected cropping frame only.
6
Original Type
Select an option according to the type of
original to auto-adjust overall brightness and
contrast for the scanned image.
•
Document: Originals with mainly text.
•
Photo: Originals with mainly color pictures.
•
Magazine: Originals with both text and color
pictures.
NOTE
Press the Preview button to update the
preview image with the change made in the
Original Type.
7
Output Size
Display the width and height of the cropping
frame. You can adjust the output size by
dragging the edges or corners of the cropping
frame in the Preview Window.
SCANNING PROCEDURES IN WINDOWS (CONTINUED)
Page 24

24
8
(Brightness/
Contrast)
Brightness: use the slider to increase or
decrease the value (-127 ~ +127) and to adjust
the image brighter or darker.
Example:
Brightness: -50
Brightness: 0
Brightness: +50
Contrast: use the slider to increase or decrease
the value (-127 ~ +127) to adjust the contrast
higher or lower. The bigger the value is to set
towards +127, the more contrast is between
lighter and darker areas.
Example:
Contrast: -50
Contrast: 0
Contrast: +50
NOTE
Brightness/Contrast is enabled in “Color” and
“Gray” mode only.
9
(B/W Conversion
Settings)
This function is only available when scanning
in B/W, or Multi-color Output (B/W) mode. You
can convert the scanned image in black and
white using following method:
Auto Threshold: It finds an adequate threshold
value automatically to obtain a clear image and
remove dark backgrounds from the image.
Original
After processed
Manual Threshold: You may manually adjust
the Threshold value (-127 ~ +127) until you
are satisfied with the result.
Halftone: This provide 5 halftone patterns,
each creates a halftone effect using a pattern
of black and white dots that can represent
darker or lighter color values. Check the
Advanced to enable the Edge Renement
value (-127~+127) if you want to increase or
decrease the edge weight of patterns.
Original
After processed
SCANNING PROCEDURES IN WINDOWS (CONTINUED)
Page 25

25
10
(Color Dropout)
This setting removes a single color (Red,
Green or Blue) such as marks, stamps and
retains the black text. If “None” is selected, No
color is dropped out.
Example of removing the red stamp:
Original Color Dropout applied
Check the Advanced checkbox to activate the
Filter Threshold slider when the color selected
cannot drop out. Drag the slider toward
“Maximum” to remove more selected color,
and toward “Minimum” to keep more selected
color in.
NOTE
•
Color Dropout can only be specified in
“Gray” and “B/W” mode.
•
Color Dropout may not remove all of
the contents for the selected color when
scanning colored backgrounds, or colored
paper.
11
Invert
This function reverses the colors of the
scanned image to the opposite colors.
Example of black text with white background
to be inverted:
Original Invert applied
Example of grayscale picture to be inverted:
Original Invert applied
Example of colored picture to be inverted:
Original Invert applied
SCANNING PROCEDURES IN WINDOWS (CONTINUED)
Page 26

26
12
Deskew
Correct the skew image approximately +/-15
degrees. (The results of Deskew do not appear
in the preview image, only in the scanned
image.)
Original
Deskew applied
•
Deskew is enabled when the Scan Size set
to “Custom”.
•
Originals with darker backgrounds and dark
text are difficult to deskew. Deskew may not
work properly when deskewing dark images.
•
This function cannot work with a large skew
angle.
13
Descreen
Descreening helps to reduce moire patterns
in magazines or other printed materials. After
descreening, the image may appear blurry.
Example:
Descreen appliedOriginal
NOTE
•
If the Unsharp Mask function is enabled,
some moire pattern may not reduce even
when the Descreen is enabled. In such
cases, disable the Unsharp Mask.
•
Scanning takes longer than usual when you
enable the Descreen function.
SCANNING PROCEDURES IN WINDOWS (CONTINUED)
Page 27

27
14
Unsharp Mask
This function helps to emphasize edges in
the image more clearly for an overall sharper
image.
Example:
Unsharp Mask appliedOriginal
NOTE
•
The Unsharp Mask may not work properly
for poorly focused or out of focus images.
•
You are recommended to disable the
Unsharp Mask when the moire is not being
reduced even with the Descreen enabled.
15
Color Match
This function helps to more accurately reflect
the actual colors of the original image.
•
Color Match is only enabled when the Scan
Mode set to “Color”.
16
Photo Refresh
This function helps to automatically lighten
and sharpen the scanned image.
•
Photo Refresh is only enabled when the
Scan Mode set to “Color”.
17
Scan
Click to scan the final image using the current
settings.
18
Preview
Click to preview the image using the current
settings.
19
Close
Click to save the settings you changed and to
close the Settings window.
20
Default
Reset Destination and Scan Settings to the
default settings.
SCANNING PROCEDURES IN WINDOWS (CONTINUED)
Page 28

28
Scanning in Advanced Scan Mode
The Advanced Scan mode includes a Preview Window allowing you to
preview the image before scanning the final image.
1.
Place the original on the Flatbed Glass (see Placing the Originals).
2.
Click on the Preview button to prescan and preview your original.
A quick, low-resolution preview of your original will be made and
appear in the Preview Window.
3.
Adjust or add the cropping frames as following methods.
•
Move the cursor to a corner or an edge of the crop frame (the
cursor will change to
). Click and drag the cursor to
enlarge or shrink the cropping frame to the desired size.
Enlarge/shrink
cursor
•
Move the cursor within the cropping frame (the cursor will
change to
). Click and drag the cursor to move the entire
cropping frame to the desired area.
Move cursor
•
If more than one originals are placed on the Flatbed, all images
will be contained in one cropping frame. click the
in the
Preview toolbar to adjust the frame size and add another
cropping frame to the image.
Multiple Cropping
Frames
4.
You can make changes in the Settings as necessary. Your changes
are automatically reflected in the Preview Window.
NOTE
•
The Deskew function cannot show in the Preview Window, and the
results can only be seen after scanning.
•
The change of Scan Resolution you made will apply to the selected
cropping frame only, and the change of the other settings will apply to
the selected and unselected cropping frames.
SCANNING PROCEDURES IN WINDOWS (CONTINUED)
Page 29

29
5.
When you are satisfied with the results, click the Scan button to
start scanning with the settings.
The “Processing...” bar appears showing the current scan status.
6.
After scanning completes, the scanned image is saved and opened
according to the Choose a Destination you select.
Scan to folder
The specified folder opens automatically with the scanned image
selected in it.
Open with application
The scanned image opens automatically in the specified application
(default: MSPaint).
NOTE
If the application cannot support to open the File Type, an error
message may appear. The scanned image is saved, but cannot be
opened.
Attach to E-Mail
The scanned image opens automatically in the default email
application. The default email application opens up with the scanned
image attached in a blank email.
NOTE
•
Maximum of 20 files can be attached within an email.
•
If the total file size is exceeded the attachment size limit set at
the mail server, the file cannot be sent.
•
Applications that do not support multi-page scanning will open
and display only the first page of the originals.
•
If the application cannot support the File Type selected, an error
message will appear. Refer to the instructions of the application
for the formats supported.
Sent to Print
The computer’s print dialog box opens up with the image in it. Use
the print dialog box to set the available settings of the printer driver
to print the scanned image.
SCANNING PROCEDURES IN WINDOWS (CONTINUED)
Page 30

30
Preview Window Controls
There are several useful tools in the Preview toolbar to assist you to
check the details of the preview image.
1
7
5
3
2 8964
13
14
12
11
10
1
Create a new cropping frame in the Preview
Area. You can create maximum 12 cropping
frames in the Preview Area.
2
Click and drag to move the image when
zoomed in.
3
Zoom in on the image. The image will be
enlarged every time you click it.
4
Zoom out on the image. The image will reduce
every time you click it.
5
Select all cropping frames.
This is available when two or more cropping
frames are created. All frames turns into thick
dashed lines, which allows you to change the
Scan Resolution to all cropping frames.
6
Delete the selected cropping frame(s).
7
Rotate the image 90º counterclockwise.
8
Rotate the image 90º clockwise.
9
Preview Area Display the preview image.
10
Thin dashed lines Represent the unselected cropping frame.
11
Moving thick
dashed lines
Represent the currently selected cropping
frame. You can enlarge or shrink the cropping
frame by dragging the corners or edges of the
cropping frame.
The change of Scan Resolution you made will
apply to the selected cropping frame only.
12
Multi-color output
controls
Click the “Color”, “Gray”, or “B/W” button to
view the preview image in the Preview Window
in color, grayscale, or black and white.
A thick line will appear on the button pressed
(i.e., ).
13
Close the Advanced Scan window.
14
Display the preview help information.
SCANNING PROCEDURES IN WINDOWS (CONTINUED)
Page 31

31
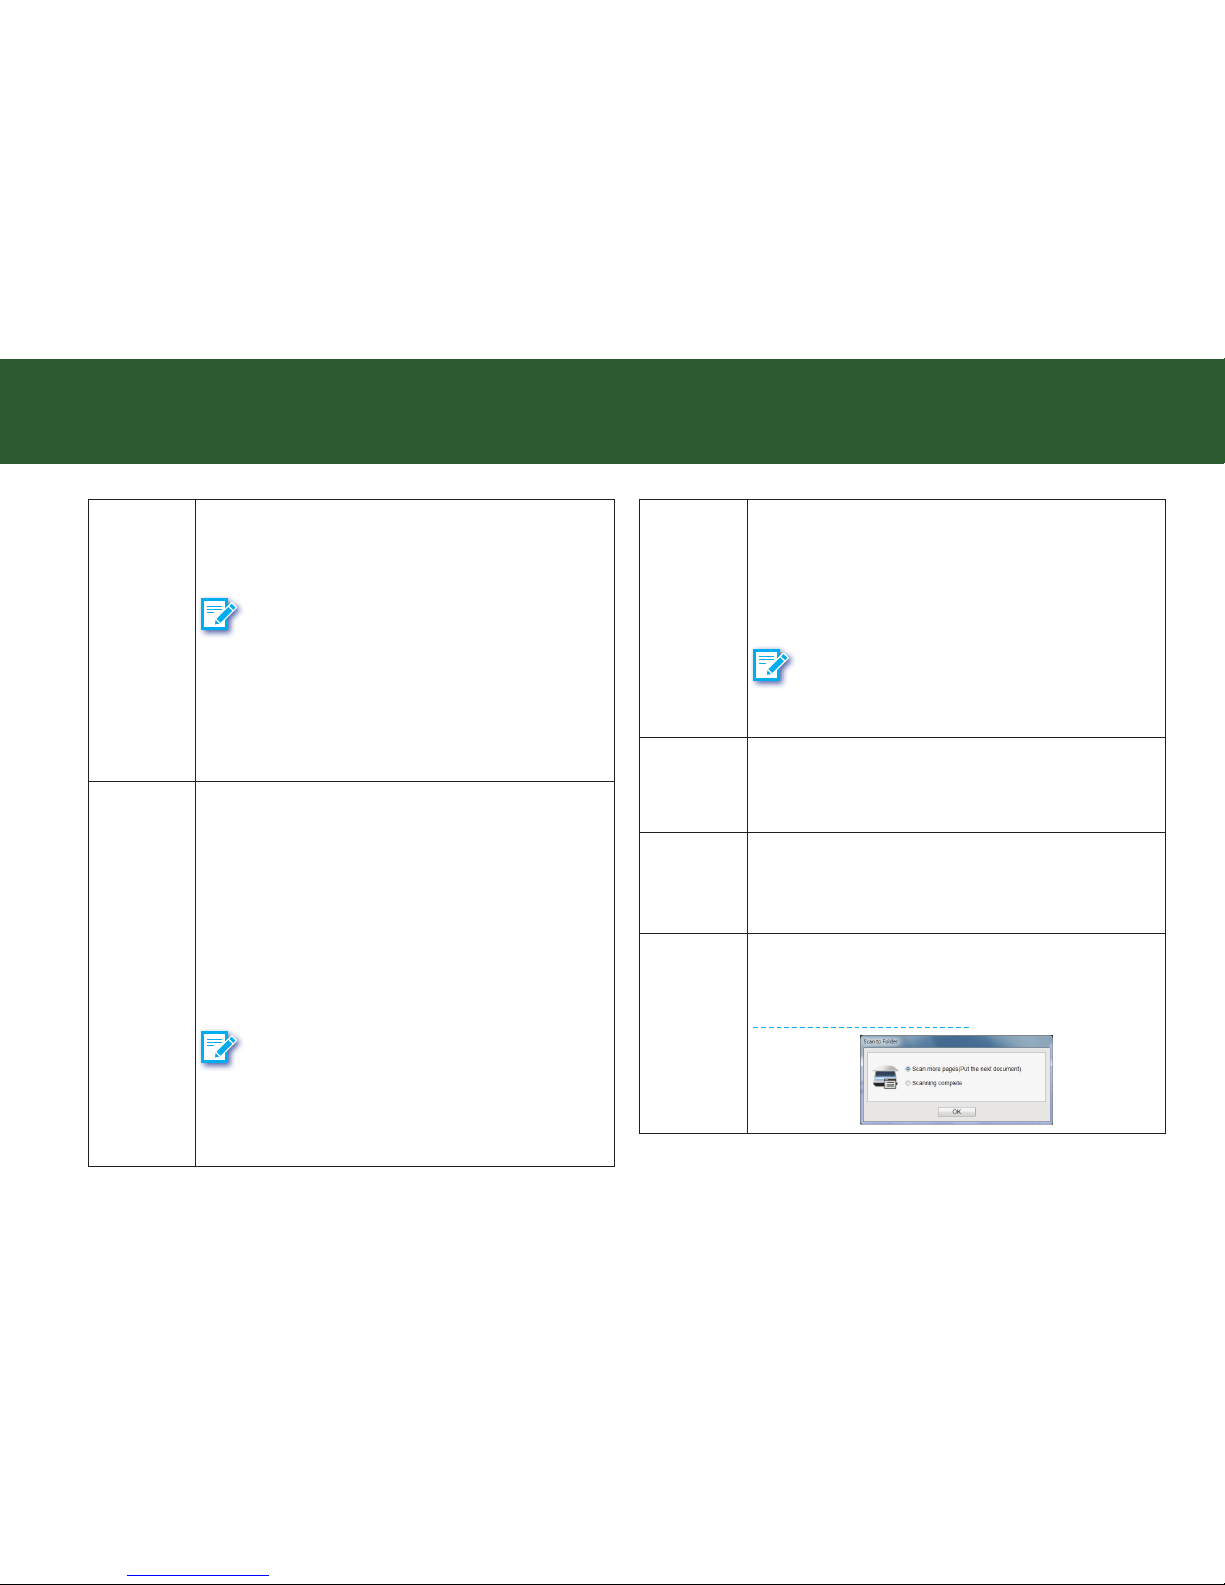
Continue to Scan More Pages
When “Continuous Scanning” is checked in the Setting, a dialog box
appears after the previous scan finishes, asking if you want to scan the
next document.
To continue the next scan, place the next original on the Scanner’s
Flatbed Glass. Select “Scan more pages (put the next document)”, then
click OK.
To finish the scan, select “Scanning complete”, and then click OK. The
scanned image will be sent to the destination selected.
Delete the Backup Files
When “Delete Backup File of Scanned Image” is checked in the Settings,
a dialog box appears after the scanning to Email application or printer,
asking if you want to delete the scanned image.
To confirm the deletion, click Delete.
To keep the scanned image without deletion, click Cancel.
Cancel a Scan
To stop the scanning process, click Cancel during scanning.
A “Scan has been cancelled.” dialog box appears and the scanned
image is cancelled. Click OK to close the dialog box.
If you cancel a scan during the continuous scanning process, the
following cancel dialog box appears, asking if you want to save the
image already scanned before cancelling the scan. Click Yes to save the
file, otherwise click No to discard the file.
SCANNING PROCEDURES IN WINDOWS (CONTINUED)
Page 32

32
Setting ScanMust and Buttons
You can setup the scanner buttons to perform certain actions within the
ScanMust software.
1.
Click the Scanner icon [
] in the menu bar of your computer to
bring up the ScanMust menu.
2.
Click Settings... in the ScanMust menu.
The Settings window appears, in which you can change settings for
each Scan-to function in the Destination and Scan Settings tabs.
Destination
Click the Destination tab to bring up the setting page for the Scan-to
option selected. You can make change as following:
Scan to Folder
6 7 8 9
1
4
5
2
3
Scan to PDF
6 7 8 9
1
4
5
2
3
Scan to Application
6 7 8 9
1
10
4
5
2
3
Scan to Email
6 7 8 9
1
4
5
11
12
2
3
Scan to Print
6 7 8 9
1
4
5
13
12
2
3
SCANNING PROCEDURES IN MAC
Page 33

33
1 Save Path
Indicates the folder where image files are saved.
Click Browse to specify a file folder to save the
scanned image.
NOTE
•
You cannot specify folders where root
privileges are required.
•
Save Path cannot reset to the default folder
once changed.
2
File Name
Settings
You can create a filename format for the scanned
image with either one of this setting.
•
yyyyMMddHHmmss: The filename is created
in the “yyyyMMddHHmmss” format, i.e.
20150811-154649.jpg.
•
Custom: The filename is created with a prefix
specified in the File Name, i.e. Scanned000001.
jpg
3 File Type
Select a file format to save scanned image.
Availability of the File Type may vary in different
scan-to destination.
Choices: “JPEG”, “TIFF (Single-page)”, “TIFF
(Multi-page)”, “PDF (Single-page)”, “PDF (Multipage)”, “PNG”
NOTE
•
PDF (Single-page) and TIFF (Single-page) are
used for saving originals into single page PDF
and TIFF files.
•
PDF (Multi-page) and TIFF (Multi-page) are
used for combining multiple scans into one
file. The “Continuous Scanning” dialog will
be triggered automatically for scanning more
page.
•
JPEG is not available for “B&W” images.
4
File
Compression
Move the slider to compress and reduce the JPEG
or PDF file size into a smaller size. The higher
the compression, the lower the file size, and vice
versa.
NOTE
The File Compression is only available in the
Color and Gray mode.
SCANNING PROCEDURES IN MAC (CONTINUED)
Page 34

34
5
Continuous
Scanning
Check this option to trigger the continuous
scanning dialog box after the current page is
scanned, allowing you to continue scanning for
more pages. (See Continue to Scan More Pages)
6 Default
Reset both Destination and Scan Settings to the
default for the currently selected scan-to function.
7 Apply
Apply the selected scan-to function with the
settings you changed.
NOTE
If you did not apply the changes to the currently
selected scan-to function, and then select another
scan-to function, the following setting change
dialog box appears asking if you want to save the
changes.
8 Cancel
Cancel the changes and close the Settings window.
9 OK
Apply the selected scan-to function with the
settings you changed and close the Settings
window.
10 Application
The system detects and displays the applications
installed in your computer which support to open
the File Type.
To add a new application, click Add and navigate
to the .exe files in the Application’s folder, then
click “Add” to add it to the application list. To
delete the application, select the application, then
click Delete.
NOTE
Make sure to add the application which can open
the File Type.
11 Email Client
The system detects and displays the default email
client using either Mail or Outlook that has been
installed on your computer.
NOTE: Make sure an email account has been
configured properly.
12
Delete
Backup File
of Scanned
Image
Check this option to trigger the delete backup file
dialog box after the scanning process completes,
asking if you want
to delete the backup file (See
Delete the Backup Files).
13 Printer
The system detects and displays the default
printer which is connected to your computer.
SCANNING PROCEDURES IN MAC (CONTINUED)
Page 35

35
Scan Settings
Click the Scan Settings tab to bring up the setting page for the Scan-to
option selected. You can make change as following:
6 7 8 9
1
5
2
3
4
1 Scan Mode
Choices: “Color”, “Gray”, “B&W”
•
Select “Color” to scan the color photographs,
documents, and items containing colors in full
color.
•
Select “Gray” to scan the image in grayscale
using varying shades of gray.
•
Select “B&W” to scan text-only originals or line
drawings.
2 Scan Size
Select the output size of the image to be scanned.
Choices: “Auto Detect”, “A4(210x297mm)”,
“B5(176x250mm)”, “Letter(216x279mm)”
NOTE
Select “Auto Detect” to automatically detect the
paper size and crop the image. When scanning
darker originals, over-cropping may occur.
3 File Size
The File Size is calculated based on the Scan Size
and Scan Resolution you select. The File Size
given here is only an estimate. The actual file size
can be different than the estimate.
4
Scan
Resolution
Select the resolution of the image to be scanned.
Choices : “100”, “200”, “300”, “600”, “1200”
NOTE
The higher the resolution, the bigger the file size.
5
Image
Adjustments
Brightness: Use the slider to increase or decrease
the value (-100 ~ +100) and to adjust the image
brighter or darker. You can view the test image
to the right side of the slider for the result of the
value.
Contrast: Use the slider to increase or decrease
the value (-100 ~ +100) and to adjust the contrast
higher or lower. The bigger the value is to set
towards +100, the more contrast is between
lighter and darker areas. You can view the test
image to the right side of the slider for the result
of the value.
NOTE
Brightness/Contrast is enabled in “Color” and
“Gray” mode, but not in the B/W mode.
6 Default
Reset both Destination and Scan Settings to the
default for the currently selected scan-to function.
SCANNING PROCEDURES IN MAC (CONTINUED)
Page 36

36
7 Apply
Apply the selected scan-to function with the
settings you changed.
NOTE
If you did not apply the changes to the currently
selected scan-to function, and then select another
scan-to function, the following setting change
dialog box appears asking if you want to save the
changes.
8 Cancel
Cancel the changes and close the Settings
window.
9 OK
Apply the selected scan-to function with the
settings you changed and close the Settings
window.
Scanning Using ScanMust and Buttons
1.
Place the original on the Flatbed Glass (see Placing the Originals).
2.
Click a scan-to function from the ScanMust menu to start scanning
to the destination with the Settings you previously configured (see
Setting ScanMust and Buttons).
Scan to PDF
Scan to Application
Scan to Cloud
Scan to Print
Scan to Folder
Alternatively, you can press a button on the Scanner to start
scanning to the destination.
Scan to Print
Scan to Email
Scan to Folder
Scan to PDF
Scan to Application
SCANNING PROCEDURES IN MAC (CONTINUED)
Page 37

37
The “Processing...” bar appears showing the current scan status.
3.
After scanning completes, the scanned image is saved and opened
according to the scan-to function you select.
Scan to Folder
The specified folder opens automatically with the scanned image
selected in it.
Scan to PDF
The scanned image is saved in the PDF format and opened
automatically in the Acrobat Reader.
Scan to Application
The scanned image opens automatically in the specified application
(default: Preview).
NOTE
If the application cannot support to open the File Type, an error
message will appear. The scanned image is saved, but cannot be
opened.
SCANNING PROCEDURES IN MAC (CONTINUED)
Scan to Email
The default email application opens automatically with the scanned
image attached in a blank email. Use the send email method of the
email application to send the scanned image.
NOTE
•
If the file size of the scanned image exceeds the attachment size
limit set at your mail server, then the image cannot be sent.
•
Scan to Email only supports Apple Mail and MS Outlook as
Email clients.
Scan to Print
Your computer’s print dialog box opens automatically. Use the print
dialog box to set the available settings of the printer driver to print
the scanned image.
Continue to Scan More Pages
When “Continuous Scanning” is checked in the Destination tab, a dialog
box appears after the previous scan finishes asking if you want to scan
the next document.
Page 38

38
To continue the next scan, place the next original on the scanner, then
click Scan.
To finish the scan, click Finish to complete the scanning process. The
scanned image will be saved to the folder specified in the Destination
tab.
To cancel the scan without saving, click Cancel.
Cancel a Scan
To stop the scanning process, click Cancel during scanning.
A “Scanning has been cancelled” dialog box appears and the scanned
image is cancelled. Click OK to close the dialog box.
If you cancel a scan during the continuous scanning process, the
following cancel dialog box appears, asking if you want to save the
image already scanned before cancelling the scan. Click Yes to save the
file, otherwise click No to discard the file.
Delete the Backup Files
When “Delete Backup File of Scanned Image” is checked in the Settings,
a dialog box appears after the scanning to Email application or printer,
asking if you want to delete the scanned image.
To confirm the deletion, click Delete.
To keep the scanned image without deletion, click Cancel.
SCANNING PROCEDURES IN MAC (CONTINUED)
Page 39

39
Acquire the Scanner TWAIN Interface
The TWAIN driver is the scanning module provided with your scanner.
It is easily accessed from within the bundled scanner software or from
within any TWAIN-compliant program, such as Presto! PageManager
or Photoshop. Before you start with the steps below, be sure you have
installed and configured the bundled scanner software from the DVD
included.
Following is an example of using Presto! PageManager.
1.
Open the “Start” menu, then open “Presto! PageManager” from “All
Program” list.
2.
Click File, then Select Source. Select PageExpress 4800 Pro from
the Select Source list.
PageExpress 4800 Pro
3.
Click File, Acquire Image Data.The TWAIN interface appears as
following.
The TWAIN interface contains control settings, which you must set prior
to scanning a document. The basic steps to scan a document are:
1.
Click on the Preview button to prescan and preview your original.
2.
Set the desired image area to be scanned.
3.
Select the scan source.
4.
Select the scan mode.
5.
Select the resolution.
6.
Click on the Scan button.
SCANNING USING TWAIN INTERFACE IN WINDOWS
Page 40

40
The TWAIN Interface
The TWAIN interface is divided into two sections: the left section where
most of the control settings are located, and the right section, which is
the Preview Area.
Settings Tabs
Contain different
control settings,
including Main,
Enhance, and Filters.
Preview Area
Used for viewing the
prescan image.
Help
Click to open the
detailed instructions
of TWAIN dialog box.
NOTE
For the detailed instructions of TWAIN dialog box, please click “?” (Help)
on the TWAIN interface to open the Help file.
The Main Tab
Scan Source
Sets the media type of the document
to be scanned.
Scan Mode
Determines how the scanner will read
the image and refers to how the image
will be reproduced after it is scanned.
Scan Size
Refers to the size of the image or
document that you are about to scan.
JPEG2000 Scan
The latest image compression
standard that usually provides smaller
file size and higher image quality than
the original JPEG.
Width and Length
Show the dimensions of the image
area inside the Cropping Frame.
Picture Dithering
Converts lineart image into a series
of dots with different densities to
represent the image. This function is
available in B/W mode.
SCANNING USING TWAIN INTERFACE IN WINDOWS (CONTINUED)
Page 41

41
SCANNING USING TWAIN INTERFACE IN WINDOWS (CONTINUED)
Resolution
Sets the resolution in dots per inch
(dpi).
Output Scaling
Changes the dimensions of the final
output.
Photo Refresh
Enables to automatically lighten and
sharpen the scanned image. This
function is applicable when you are
scanning images in Color 24bit.
Descreen
Sets the media type of the document
to be scanned to reduce image noise.
Image Size
Displays the amount of computer
space needed to display or save the
selected image area.
Color Matching Control
Color Matching allows the scanner
to more accurately reflect the actual
colors of the original image.
Whiten Background
Removes the unpleasant background
shade. This function is available in
Gray mode.
The Enhance Tab
Brightness/Contrast Control
Brightness Control
Allows you to adjust the overall
amount of light in the image through a
range of values (–127 ~0~+127).
Contrast Control
The Contrast Control allows you to
adjust the overall amount of black areas
or white areas in the image through a
range of values (–127~0~+127).
Brightness/Contrast Control
Preview Button
This button allows you to see the effect
of any changes made to the image.
Thumbnails
Are used to see the effects of any
changes in the control settings.
Channel Selector Control
Allows you to select the channel layers
(red, green and blue) that make up
a color image. You can choose to
change the channels individually or
choose master to change all channels
equally and simultaneously.
Page 42

42
SCANNING USING TWAIN INTERFACE IN WINDOWS (CONTINUED)
Level Control
Histogram
Shows the distribution of the brightness
levels in the image.
Level Control
Use the level slider to adjust an image’s
contrast and brightness.
Level Control
Eyedropper tools
Eyedroppers are used to identify an
image’s highlights and shadows.
Thumbnails
Are used to see the effects of any
changes in the control settings.
Channel Selector Control
Allows you to select the channel layers
(red, green and blue) that make up a
color image. You can choose to change
the channels individually or choose
master to change all channels equally
and simultaneously.
Preview Button
This button allows you to see the effect
of any changes made to the image.
Curve Control
Curve Control
Applying a curve to an image enhances
favored brightness ranges at the cost
of others.
Add Anchor
To make a curve, simply place an
anchor on the diagonal line and adjust
its position. Add more anchors if you
have to make a more complex curve.
Curve Control
Remove Anchor
You can also remove anchors.
Thumbnails
Are used to see the effects of any
changes in the control settings.
Channel Selector Control
Allows you to select the channel layers
(red, green and blue) that make up
a color image. You can choose to
change the channels individually or
choose master to change all channels
equally and simultaneously.
Preview Button
This button allows you to see the effect
of any changes made to the image.
Page 43

43
Hue/Saturation Control
Hue Slider
is composed of two color bars. The
upper one is static and the lower one
movable. Slide the latter, and you will
see the image shift its overall coloring.
Saturation Slider
Lets you adjust an image’s color purity.
Hue/Saturation Control
Thumbnails
Are used to see the effects of any
changes in the control settings.
Channel Selector Control
Allows you to select the channel layers
(red, green and blue) that make up a
color image. You can choose to change
the channels individually or choose
master to change all channels equally
and simultaneously.
Preview Button
This button allows you to see the effect
of any changes made to the image.
SCANNING USING TWAIN INTERFACE IN WINDOWS (CONTINUED)
The Filters Tab
The Filters Tab allows you to adjust the individual effects of the scanned
image by applying various filters to the image, prior to scanning.
Emboss
Makes the elements in the image
appear raised or sunken.
Thumbnails
Are used to see the effects of any
changes in the control settings.
Filter Control Buttons
Use these buttons to add /subtract a
degree of the Blur or Sharpen filter.
None
No filter is applied.
Blur
Smooths or softens the image.
Sharpen
Enhances the detail in the image.
Invert
Reverses an image to its negative or
compliment.
Flip
Creates a mirror image of the original.
Unsharp Mask
Emphasizes shape edges and color
boundaries.
Page 44

44
SCANNING USING TWAIN INTERFACE IN WINDOWS (CONTINUED)
The Preview Window and Controls
Zoom Tool Button
Allows you to enlarge/shrink an area of
the image in the Preview Window.
Cropping Tool
Selects the area in the Preview
Window that will be used as the final
scan.
Crop Frame
Outlines the scan area or region that
will be included in the final scan.
Preview Button
Allows you to see the effect of any
changes made to the image.
Load Button
Loads previously
saved image
settings.
Save Button
Saves the current
image settings.
Previous Button
Returns the most recent selection
to its previous setting. (Reloads
the last saved image settings.)
Reset Button
Returns settings to their
default values.
Info Button
Lists information about the
current settings being used.
Batch Scan Button
Allows creation of up to 30 scan
regions (or Crop Frames) for multiple
scanning.
Language Setting
Allows you to select the desired
language that the dialog box will be
displayed in.
Help Button
Provides On-line Help.
Exit Button
Click to exit (or close) the TWAIN or
Batch Scan Dialog boxes.
Scan Button
processes the pre-scanned image, and
displays it in the host software (where
you opened up the TWAIN dialog box).
Page 45

45
Crop frame
SCANNING USING TWAIN INTERFACE IN WINDOWS (CONTINUED)
Prescan the Image
A Preview is a quick low-resolution scan of the
entire original image. From this low-resolution
scan you can get a clearer idea of the image
area you want to include when you click Scan.
To Preview, the steps are:
1.
Place the document face down on the scan window glass.
2.
Click the Preview button in the dialog box. After the scanner has
scanned the document, the scanned image will appear in the
Preview Window. From the preview image, you can now set the
exact image area you wish to include in your final scan.
Set Up the Scan Parameters
1.
Set the desired image area to be scanned.
Use the Crop Frame in the Preview Window to outline the image
area you wish to scan. Click one
of the sides or corners of the
Crop Frame and drag it out or in
to the desired length and width.
To move the entire Crop Frame,
position the mouse cursor
inside it and drag with the left
mouse button.
Only the area inside the Crop Frame will be included in the resulting
scanned image when you click Scan. The size information at the
bottom of the dialog box is automatically updated when the Crop
Frame is resized.
2.
Select the scan source.
Since we are going to scan a color photograph, choose Reflective.
Reective:
when scanning paper-based documents such as photographs or text
(magazines, books, or images).
3.
Select the desired scan mode.
The Scan Mode determines how the scanner will read the image.
•
Color (48-bit) captures 48 bits of color image information for
every pixel in the screen image. Reproduce billion of colors.
This option is disabled when the TWAIN-compliant program you
used does not support 48-bit color output.
•
Color (24-bit) captures 24 bits of color image information for
every pixel in the screen image. Reproduce over 16.7 million
colors.
•
Gray (16-bit) captures 16 bits of grayscale image information for
every pixel in the screen image. Reproduce up to 65536 shades
of gray.
This option is disabled when the TWAIN-compliant program you
used does not support 16-bit grayscale output.
•
Gray (8-bit) captures 8 bits of grayscale image information for
every pixel in the screen image. Reproduce up to 256 shades of
gray.
•
Lineart (1-bit) is used for text documents or black-and-white
images.
Page 46

46
SCANNING USING TWAIN INTERFACE IN WINDOWS (CONTINUED)
4.
Select the desired resolution.
Resolution is a measure of how much image detail information
the scanner is to capture in a scan. A higher resolution results to a
sharper image but requires more disk space for file saving. For this
session, set the resolution to 300 dpi.
Execute the Scan Command
When you are finished with the control
settings, click on the Scan button. The
scanner begins to scan the document and
a message box appears on the screen
displaying the progress of the scan.
When the scan is finished, the image will be displayed in the main
screen of the host software.
Using Batch Scan
Batch scanning is an easy way to multi-scan any part of your document
using different scan modes and resolutions. In batch scanning, you can
specify up to a maximum of 30 scan regions, or you can scan a single
region several times using different combinations of scan modes and
resolutions.
To activate batch scanning, click on the Batch Scan
button. This will bring up the Batch Scan dialog box.
The Batch Scan Dialog Box
The Batch Scan dialog box contains several controls that make batch
scanning simple and easy to use. It will also display the number of
batch jobs that you make when you create the scan regions.
•
New Batch Button
Click on this button to create a new scan region on the
image in the Preview Window.
•
Duplicate Batch Button
Click on this button to duplicate a batch job. You can
then specify different control settings for this particular
batch job.
•
Trash Batch Button
Click on this button to delete the selected or highlighted
batch job.
Page 47

47
SCANNING USING TWAIN INTERFACE IN WINDOWS (CONTINUED)
•
Cancel Batch Button
Click on this button to cancel batch scan and exit the
Batch Scan dialog box.
To perform a batch scan, the steps are:
1.
Click the Batch Scan button. The Batch Scan dialog box appears.
2.
Create a scan region:
(a) Move the cursor inside the Preview Window.
(b) Hold down the Shift key, press the left mouse button and drag
the mouse to create a crop frame.
(c) Reposition or resize the crop frame if necessary.
3.
Set the desired scan mode and resolution for the current scan
region.
4.
Repeat steps 2 and 3 if you wish to create additional scan regions.
NOTE
Using the Batch Scan arrows allows you to view the different batch
jobs.
5.
Click Scan. The scanner will begin to scan the batch jobs one after
the other.
The Batch Box contains the thumbnail image, DPI,
scan mode and image size of each batch scan. The
batch number (e.g. 1/3, number one out of three) is
always displayed at the top of the batch box along with
the Batch Scan Status.
Page 48

48
Acquire the Scanner TWAIN Interface
The TWAIN driver is the scanning module provided with your scanner.
It is easily accessed from within the bundled scanner software or
from within any TWAIN-compliant program, such as ImageAcquire,
Photoshop. Before you start with the steps below, be sure you have
installed and configured the bundled scanner software from the DVD
included.
Following is an example of using ImageAcquire.
1.
Open “Finder”, and then click “Applications”. Find ImageAcquire
[
] icon in the Application folder, and then double click on it.
2.
Select the Scanner model from the Image Acquire window, and
then click “Acquire” to open the TWAIN interface.
NOTE
In some programs, the Acquire command will appear in a submenu
under the Import command.
Select "PageExpress
4800 Pro"
Acquire
3.
The TWAIN interface appears as following.
The TWAIN interface contains control settings, which you must set prior
to scanning a document. The basic steps to scan a document are:
1.
Click on the Preview button to prescan and preview your original.
2.
Set the desired image area to be scanned.
3.
Select the scan source.
4.
Select the scan mode.
5.
Select the resolution.
6.
Click on the Scan button.
SCANNING USING TWAIN INTERFACE IN MAC
Page 49

49
The TWAIN Interface
The TWAIN interface is divided into two sections: the left section where
most of the control settings are located, and the right section, which is
the Preview Window.
Settings Tabs
Contain different
control settings,
including Main,
Enhance, and Filters.
Preview Window
Used for viewing the
prescan image.
The Main Tab
The main folder contains the control settings needed for specifying the
scanning parameters such as scan mode, resolution, etc.
Scan Source
Sets the media type of the document
to be scanned.
Scan Mode
Sets the scanner to read color,
grayscale, lineart, etc.
Scan Size
Refers to the size of the image or
document that you are about to scan.
Width and Length
Show the dimensions of the image
area inside the Cropping Frame.
Resolution
Sets the resolution in dots per inch
(dpi).
Color Matching Control
Color Matching allows the scanner
to more accurately reflect the actual
colors of the original image.
Image Size
Displays the amount of computer
space needed to display or save the
selected image area.
Reset Button
Returns settings
to their default
values.
SCANNING USING TWAIN INTERFACE IN MAC (CONTINUED)
Page 50

50
SCANNING USING TWAIN INTERFACE IN MAC (CONTINUED)
The Enhance Tab
The Enhancement folder contains preprocessing controls you can apply
to the image before making your final scan.
Brightness Control
Allows you to adjust the overall
amount of light in the image through
a range of values (–127 ~0~+127).
Contrast Control
The Contrast Control allows you to
adjust the overall amount of black areas
or white areas in the image through a
range of values (–127~0~+127).
Preview Button
This button allows you to see
the effect of any changes made
to the image.
Thumbnails
Are used to see the effects of any
changes in the control settings.
Channel Selector Control
Allows you to select the channel
layers (red, green and blue) that make
up a color image. You can choose to
change the channels individually or
choose master to change all channels
equally and simultaneously.
Gamma Control
Adjusts the brightness level in the
highlights, midtones, and shadows of
the image.(0.1~7.9)
Reset Button
Returns settings
to their default
values.
The Filters Tab
The Filters folder contains preprocessing controls that allow you to
apply special effects to the image before making your final scan.
Emboss
Makes the elements in the image
appear raised or sunken.
Thumbnails
Are used to see the effects of any
changes in the control settings.
None
No filter is applied.
Blur
Smooths or softens the image.
Sharpen
Enhances the detail in the image.
Invert
Reverses an image to its negative or
compliment.
Flip
Creates a mirror image of the
original.
Unsharp Mask
Emphasizes shape edges and color
boundaries.
Reset Button
Returns settings
to their default
values.
Page 51

51
Crop frame
The Preview Window
The Preview Window is where you can view the prescanned image. The
first time you want to scan a document, it is better that you do a precan.
Zoom Tool Button
Allows you to enlarge/shrink an area of
the image in the Preview Window.
Crop Frame
Outlines the scan area or region that
will be included in the final scan.
Save Button
Processes the pre-scanned image, and displays it in the host
software (where you opened up the TWAIN dialog box).
Previous Button
Allows you to see the effect of any
changes made to the image prior to
scanning.
Batch Scan Button
Allows creation of up to 10 scan
regions for Crop Frames for multiple
scanning.
Language Setting
Allows you to select the desired
language that the dialog box will be
displayed in.
Exit Button
Click to exit (or close) the TWAIN or
Batch Scan Dialog boxes.
Prescan the Image
A Preview is a quick low-resolution scan of the entire original image.
From this low-resolution scan you can get a clearer idea of the image
area you want to include when you click Scan.
To Preview, the steps are:
1.
Place the document face down on the scan window glass.
2.
Click the Preview button in the dialog
box. After the scanner has scanned the
document, the scanned image will appear
in the Preview Window. From the preview
image, you can now set the exact image area you wish to include
in your final scan.
Set Up the Scan Parameters
1.
Set the desired image area to be scanned.
Use the Crop Frame in the
Preview Window to outline the
image area you wish to scan.
Click one of the sides or corners
of the Crop Frame and drag it
out or in to the desired length
and width.
Only the area inside the Crop
Frame will be included in the resulting scanned image when you
click Scan. The size information at the bottom of the dialog box is
automatically updated when the Crop Frame is resized.
SCANNING USING TWAIN INTERFACE IN MAC (CONTINUED)
Page 52

52
2.
Select the scan source.
Since we are going to scan a color photograph, choose Reflective.
Reective:
when scanning paper-based documents such as photographs or text
(magazines, books, or images).
3.
Select the desired scan mode.
The Scan Mode determines how the scanner will read the image.
•
Color (48-bit) captures 48 bits of color image information for
every pixel in the screen image. Reproduce billion of colors.
This option is disabled when the TWAIN-compliant program you
used does not support 48-bit color output.
•
Color (24-bit) captures 24 bits of color image information for
every pixel in the screen image. Reproduce over 16.7 million
colors.
•
Gray (16-bit) captures 16 bits of grayscale image information for
every pixel in the screen image. Reproduce up to 65536 shades
of gray.
This option is disabled when the TWAIN-compliant program you
used does not support 16-bit grayscale output.
•
Gray (8-bit) captures 8 bits of grayscale image information for
every pixel in the screen image. Reproduce up to 256 shades of
gray.
•
Lineart (1-bit) is used for text documents or black-and-white
images.
4.
Select the desired resolution.
Resolution is a measure of how much image detail information
the scanner is to capture in a scan. A higher resolution results to a
sharper image but requires more disk space for file saving. For this
session, set the resolution to 300 dpi.
Execute the Scan Command
When you are finished with the control settings,
click on the Scan button. The scanner begins to
scan the document and a message box appears
on the screen displaying the progress of the scan.
When the scan is finished, the image will be displayed in the main
screen of the host software.
Using Batch Scan
Batch scanning is an easy way to multi-scan any part
of your document using different scan modes and
resolutions. In batch scanning, you can specify up to a
maximum of 10 scan regions, or you can scan a single
region several times using different combinations of scan
modes and resolutions.
To activate batch scanning, click on the Batch Scan
button. This will bring up the Batch Scan dialog box
(ImageAcquire does not support the Batch Scan).
SCANNING USING TWAIN INTERFACE IN MAC (CONTINUED)
Page 53

53
SCANNING USING TWAIN INTERFACE IN MAC (CONTINUED)
The Batch Scan Dialog Box
The Batch Scan dialog box contains several controls that make batch
scanning simple and easy to use. It will also display the number of batch
jobs that you make when you create the scan regions.
•
Copy Batch Button
Click on this button to duplicate a batch job. You can
then specify different control settings for this particular
batch job.
•
New Batch Button
Click on this button to create a new scan region on the
image in the Preview Window.
•
Delete Batch Button
Click on this button to delete the selected or highlighted
batch job.
•
Exit Batch Button
Click on this button to cancel batch scan and exit the
Batch Scan dialog box.
To do a batch scan, the steps are:
1.
Click the Batch Scan button. The Batch Scan dialog box appears.
2.
Create a scan region:
(a) Move the cursor inside the Preview Window.
(b) Hold down the Shift key, press the left mouse button and drag
the mouse to create a crop frame.
(c) Reposition or resize the crop frame if necessary.
3.
Set the desired scan mode and resolution for the current scan
region.
4.
Repeat steps 2 and 3 if you wish to create more scan regions.
You can have up to 10 scan regions. If you want to duplicate the
current scan region, simply click on the Duplicate Batch Button.
5.
Click Scan. The scanner will begin to scan the scan regions one
after the other.
For scanning multiple documents or images, Batch Scan is equipped
with an auto crop function that is not available in the regular scanning
mode. Batch Scan auto-detects the borders of the images or paper
edges of the documents, allowing you the option of scanning any or all
of these images/documents without having manually select, and scan
them individually (as required in the regular mode.)
The Batch Box contains the thumbnail image, DPI, scan mode and
image size of each batch scan. The batch number (e.g. 1/3, number one
out of three) is always displayed at the top of the batch box along with
the Batch Scan Status.
Page 54

54
Dust and residues can build up on the Scanner’s Flatbed Glass to affect
image quality. Clean the Scanner periodically to get the best scanning
performance.
CAUTION
•
Never spray the cleaner directly onto the Scanner.
•
Do not use any abrasive surfaces to clean the Scanner. Doing so may
damage it.
•
Do not press on the Scanner Glass with too much force as this will
cause damage to the glass surface.
1.
Unplug the USB Cable.
2.
Use a clean, soft cloth moistened with water or mild detergent to
clean the outside of the Scanner.
3.
Use a clean, soft cloth moistened with a small amount of glass
cleaner to remove dust, grease, and stains on the Flatbed Glass.
Wipe off all remaining liquid.
CLEANING THE SCANNER
Page 55

55
TROUBLESHOOTING
Problems Solutions
The "Found New Hardware" appears on
your Windows screen.
•
Unplug the USB Cable from the computer, and click “Cancel” button to close it. Ensure to install
Scanner Driver before connecting the Scanner.
Cannot scan.
•
Make sure that the USB Cable between the Scanner and your computer is connected firmly.
•
Make sure the correct scanner is selected in the select source field.
The scanned image becomes dirty.
•
Check if the document is written in lead pencil or wet ink.
•
Make sure to clean the Scanner’s Flatbed Glass frequently.
Scanning speed is very slow.
•
Scanning takes longer than usual when you scan at high resolution and large size.
•
Set a lower resolution in the settings to prioritize the scanning speed.
•
Scanning with multiple image processing can slow down the scanning speed.
Cannot acquire the Scanner from
Photoshop.
•
You need to install the Photoshop TWAIN plug-in prior to use. Refer to "Using TWAIN in Photoshop
CS4-CC version.pdf" in the Installation DVD.
Scanned image edges are cropped.
•
Make sure your original is placed correctly for scanning.
•
When scanning darker originals (i.e. night scenery photos), over-cropping may occur.
Text created by the OCR software is
incorrect.
•
Select a resolution of minimum 300 dpi in the software settings. The OCR software may not always
convert all text correctly. Please check the document for any errors that the OCR may have missed.
•
The OCR recognition result is generally more accurate with the text-based digital images. Images
with mixed content (text, images, and graphics all in the one page) may result less accurate.
•
Set the Scanner color settings to “B/W” if the text is black against a white background.
•
Check if the quality of the original document is poor through the OCR recognition process.
The preview image appears blurry or
fuzzy
•
The preview image appears in the Preview Area is a scaled down lower resolution image, meant to
quickly display the preview image.
Page 56

56
Model PE4800 Pro
Scanning Element Contact Image Sensor (CIS)
Light Source Three-color (RGB) LEDs
Scan Mode
Color: 48-bit, 24-bit
Gray: 16-bit, 8-bit
Line art: 1-bit
* Color (48-bit) and Gray (16-bit) are available in the TWAIN interface only.
* Color (48-bit) and Gray (16-bit) are disabled when the TWAIN-compliant program you used
does not support 48-bit color and 16-bit output.
Scan Area (Max.) A4 / Letter (216mm x 297mm / 8.5” x 11.68”)
Optical Resolution 4800 dpi x 4800 dpi
Effective Pixels
11744 × 11744 pixels at 4800 dpi
(Scanning area in the Advanced Mode of iDocScan Touch will be restriced if the Scan Resolution
setting is large)
Enhanced Resolution
19200 dpi x 19200 dpi
* Enhanced Resolution is available in the TWAIN interface only.
Interface USB 2.0
Scanner Buttons 5 Function Buttons
Power Supply by USB Bus Power (5V, 500mA)
Power Consumption
In operation : 2.5 W (Max)
Standby: 1 W
Operation Temperature and Humidity 10 °C - 35 °C (50 °F - 95 °F) ; 10% to 85%
Dimension (L x W x H) 385 x 252 x 50 mm (15.16" x 9.92" x 19.69")
SPECIFICATIONS
Page 57

57
Page 58

PageExpress 4800 Pro
 Loading...