

Page 1

Portable DVD Player
User Manual
Playable Disk Format:
DVD/VCD/CD/CD-R/CD-RW
English
Manufactured under license from Dolby Laboratories. “Dolby” and the double-D symbol are trademarks of Dolby Laboratories.
Confidential Unpublished Works. ©1992-1997 Dolby Laboratories, Inc. All rights reserved.
82-154-00171
Page 2

Table of Contents
FCC and Safety Information.................................................................................. 4
Important Safety Instructions............................................................................... 5
Precautions..................................................................................................... 6
Selecting the type of disc for the type of TV connected................................................ 7
Chapter 1. DVD
1-1 DVD Playback.............................................................................................. 8
Basic Playback......................................................................................................................... 8
Stopping Playback and Returning to The Menu Screen (If a Menu Is Available on The Disc)...................8
Stopping Playback.................................................................................................................... 9
Rapid Advance (Rapid Reverse)...................................................................................................9
Skipping Ahead or Back to Chapters............................................................................................ 9
Still Picture(PAUSE)................................................................................................................... 9
Repeat Viewing....................................................................................................................... 10
1-2 Convenient functions..................................................................................11
Displaying the Information of the Scene...................................................................................... 11
Changing Audio Soundtrack Language......................................................................................... 11
Clearing/Displaying Subtitles(A).................................................................................................. 11
Changing Subtitle Language(B)...................................................................................................12
Viewing From Another Angle................................................................................. .....................12
To Mute the DVD Player............................................................................................................ 13
Using a DVD Menu................................................................................................................... 13
Using the Menu Function.........................................................................................................13
Chapter 2. Audio CD
2-1 Audio CD Playback..................................................................................... 14
Basic Playback........................................................................................................................ 14
Stopping Playback................................................................................................................... 14
Rapid Advance (Rapid Reverse).................................................................................................. 14
Skipping Ahead or Back to Tracks.............................................................................................. 15
Pause Playback....................................................................................................................... 15
2-2 Information [Audio CDs]................................................................................15
Displaying the Information of the Playing Track............................................................................ 15
Chapter 3. Special Functions
3-1 Playing Kodak Picture CDs........................................................................... 16
Basic Playback........................................................................................................................ 16
Slide Show.............................................................................................................................. 17
Rotate Mode.......................................................................................................................... 17
Program Mode........................................................................................................................ 18
Thumbnail Mode..................................................................................................................... 18
3-2 Playing JPEG picture CDs.............................................................................19
Basic Playback........................................................................................................................ 19
File Manager........................................................................................................................... 20
Playing Mode......................................................................................................................... 20
Program Mode........................................................................................................................ 21
Thumbnail Mode..................................................................................................................... 21
En 2
Page 3
Table of Contents-continued
Chapter 4. Setup
4-1 Language Setup........................................................................................ 22
On Screen Display (OSD) Language Setting.................................................................................. 22
DVD MENU Language Setting..................................................................................................... 23
AUDIO Soundtrack Language Selection [DVD]............................................................................... 24
SUBTITLE Language Selection [DVD]............................................................................................ 25
4-2 Screen Setup............................................................................................26
TV Type Setting....................................................................................................................... 26
Screen Saver Setting................................................................................................................ 27
TV System Setting.................................................................................................................... 28
Video Out Setting....................................................................................................................29
4-3 AUDIO Setup............................................................................................ 31
Digital Out Setting.................................................................................................................. 31
Analog Out Setting...................................................................................................................32
4-4 Custom Setup........................................................................................... 33
Parental Control Setting [DVD]................................................................................................... 33
Password Setting [DVD]............................................................................................................ 34
Angle Mark Setting [DVD]......................................................................................................... 35
Default Setting........................................................................................................................ 36
4-5 LCD Setup............................................................................................... 37
Panel Setting......................................................................................................................... 37
Color Setting.......................................................................................................................... 37
Bright Setting..........................................................................................................................38
Invert Setting......................................................................................................................... 38
Panel Close Setting.................................................................................................................. 39
Chapter 5.For Your Reference
5-1 Troubleshooting....................................................................................... 40
5-2 Disc Handling and Maintenance.................................................................... 41
5-3 Definition of Terms................................................................................... 42
En 3
Page 4
FCC and Safety Information
CAUTION:
This unit employs a laser. Due to possible eye injury, only qualified service personnel should remove the
cover or attempt to service this device. Use of controls or adjustments or performance of procedures
other than those specified herein may result in hazardous radiation exposure.
NOTE:
This equipment has been tested and found to comply with the limits for a Class B digital device pursuant to part 15 of the
FCC Rules. These limits are designed to provide reasonable protection against harmful interference in a residential
installation. This equipment generates, uses and can radiate radio frequency energy and, if not installed and used in
accordance with the instructions, may cause harmful interference to radio communications. However, there is no
guarantee that interference will not occur in a particular installation. If this equipment does cause harmful interference to
radio or television reception, which can be determined by turning the equipment off and on, the user is encouraged to try
to correct the interference by one or more of the following measures:
– Reorient or relocate the receiving antenna.
– Increase the separation between the equipment and receiver.
– Connect the equipment into an outlet on a circuit different from that to which the receiver is connected.
– Consult the dealer or an experienced radio/TV technician for help.
This product incorporates copyright protection technology that is protected by method claims of certain U.S. patents and
other intellectual property rights owned by Macrovision Corporation and other rights owners. Use of this copyright protection
technology must be authorized by Macrovision Corporation, and is intended for home and other limited viewing uses only
unless otherwise authorized by Macrovision Corporation. Reverse engineering or disassembly is prohibited.
Since it is usual for DVD movies to be released at different times in different regions of the world, all players have region
codes and disc can have an optional region code. If you load a disc of a different region code to your player, you will see the
region code notice on the screen. The disc will not play, and should be unloaded.
(Possible region codes:)
There are 6 regions (also called “locals”). Each DVD player and disc will be played in one region ONLY.
1: Canada, U.S., U.S. Territories
2: Japan, Europe, South Africa, Middle East (including Egypt)
3: Southeast Asia, East Asia (including Hong Kong)
4: Australia, New Zealand, Pacific Islands, Central America, Mexico, South America, Caribbean
5: Former Soviet Union, Indian Subcontinent, Africa (also North Korea, Mongolia)
6: China
Never make or change connections with the power switched on.
CAUTION VISIBLE AND INVISIBLE LASER RADIATION WHEN OPEN AVOID EXPOSURE TO BEAM
(WARNING LOCATION: INSIDE ON LASER COVERSHIELD)
For DVD Players with 525p, but not 625p, progressive scan output:
‘CONSUMERS SHOULD NOTE THAT NOT ALL HIGH DEFINITION
TELEVISION SETS ARE FULLY COMPATIBLE WITH THIS PRODUCT
AND MAY CAUSE ARTIFACTS TO BE DISPLAYED IN THE PICTURE.
IN CASE OF 525 PROGRESSIVE SCAN PICTURE PROBLEMS, IT IS
RECOMMENDED THAT THE USER SWITCH THE CONNECTION TO
THE ‘STANDARD DEFINITION’ OUTPUT. IF THERE ARE QUESTIONS
REGARDING OUR TV SET COMPATIBILITY WITH THIS MODEL 525p
DVD PLAYER, PLEASE CONTACT OUR CUSTOMER SERVICE
CENTER.’
En 4
Page 5
Important Safety Instructions
1. Read these instructions.
2. Keep these instructions.
3. Heed all warnings.
4. Follow all instructions.
5. Do not use this apparatus near water.
6. Clean only with a damp cloth.
7. Do not block any of the ventilation openings. Install in accordance with the manufacturer’s instructions.
8. Do not install near any heat sources such as radiators, heat registers, stoves, or other apparatus (including
amplifiers) that produce heat.
9. Do not defeat the safety purpose of the polarized-type plug. A polarized plug has two blades with one wider than the
other. The wide blade is provided for your safety. When the provided plug does not fit into your outlet, consult an
electrician for replacement of the obsolete outlet.
10. Protect the power cord from being walked on or pinched particularly at plug, convenience receptacles, and the point
where they exit from the apparatus.
11. Only use attachments/accessories specified by the manufacturer.
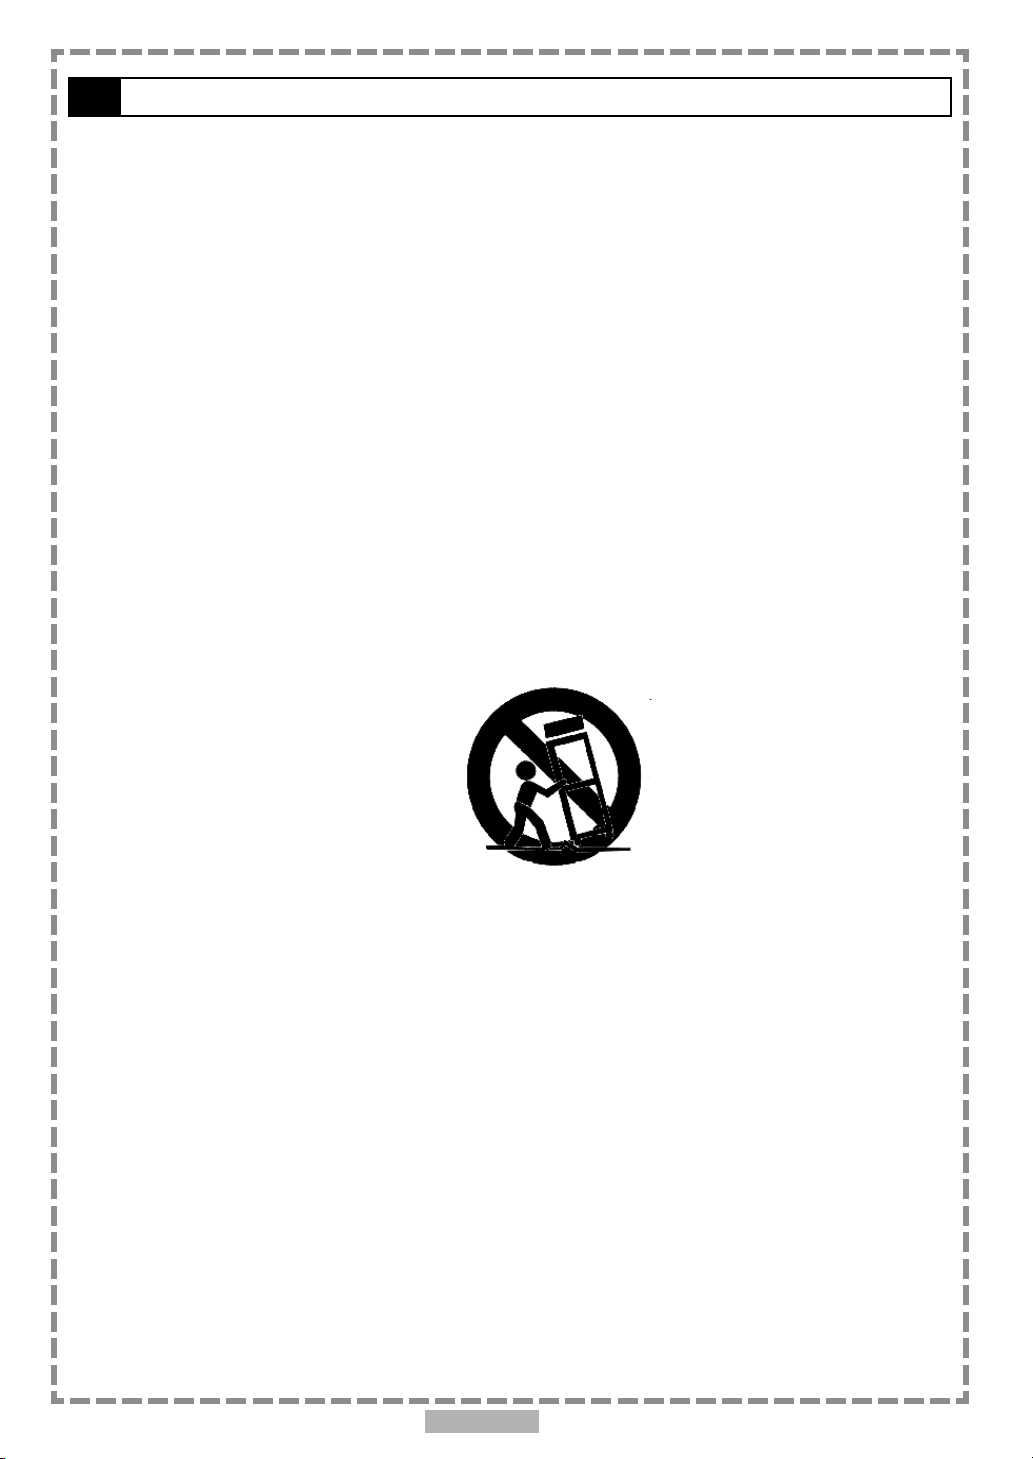
12. Use only with a cart, stand, tripod, bracket, or table specified by the manufacturer or sold with the apparatus. When a
cart is used, use caution when moving the cart/apparatus combination to avoid injury from tip-over.
13. Unplug this apparatus during lighting storms or when unused for long periods of time.
14. Refer all servicing to qualified service personnel. Servicing is required when the apparatus has been damaged in
any way; such as when the power-supply cord or plug is damaged, liquid has been spilled or objects have fallen
into the apparatus, the apparatus has been exposed to rain or moisture, does not operate normally, or has been
dropped.
Outdoor use or wet location applications:
An apparatus that does not comply with the requirements in Appendix A# (Outdoor Use and Wet Location Apparatus) shall be
marked or the instruction manual packed with the word “WARNING” and the following or equivalent: “To reduce the risk of fire
or electric shock, do not expose this apparatus to rain or moisture.
A Class II APPARATUS shall be permanently marked with the words “DOUBLE INSULATION” or “Double insulated” and
“When servicing use only identical replacement parts.”
WARNING: To reduce the risk of fire or electric shock, do not expose this apparatus to rain or moisture. The apparatus shall
not be exposed to dripping or splashing and that no objects filled with liquids, such as vases, shall be placed on the apparatus.
En 5
Page 6

Precautions
Please read these precautions before operating this unit.
Power cord protection
To avoid any malfunctions of the unit, and to protect against electric shock, fire or personal injury, please observe
the following.
Hold the plug firmly when connecting or disconnecting the AC power cord.
Keep the AC power cord away from heating appliances.
Never put any heavy object on the AC power cord.
Do not attempt to repair or reconstruct the AC power cord in any way.
Placement
Avoid placing the unit in areas of:
direct sunlight or heating radiators, or closed automobiles
high temperature (over 35
much dust as the internal parts may be seriously damaged.
Non-use periods
When the unit is not being used, turn it off. When left unused for a long period of time, the unit should be unplugged
from the household AC outlet.
No fingers or other objects inside
Touching internal parts of this unit is dangerous, and may cause serious damage to the unit. Do not attempt to
disassemble the unit.
Do not put any foreign object on the disc tray.
0
C) or high humidity (over 90%)
Keep away from water/magnet
Keep the unit away from flower vases, tubs, sinks, etc. If liquids are spilled into the unit, serious damage could
occur.
Never bring a magnet or magnetized object near the unit.
Stacking
Place the unit in a horizontal position, and do not place anything heavy on it.
Condensation
Moisture may form on the lens in the following conditions:
immediately after a heater has been turned on
in a steamy or very humid room
when the unit is suddenly moved from a cold environment to a warm one
If moisture forms inside this unit, it may not operate properly. In this case, turn on the power and wait about one
hour for the moisture to evaporate.
If there is noise interference on the TV while a broadcast is being received
Depending on the reception condition of the TV, interference may appear on the TV monitor while you watch a TV
broadcast and the unit is left on. This is not a malfunction of the unit or the TV. To watch a TV broadcast, turn off
the unit.
En 6
Page 7
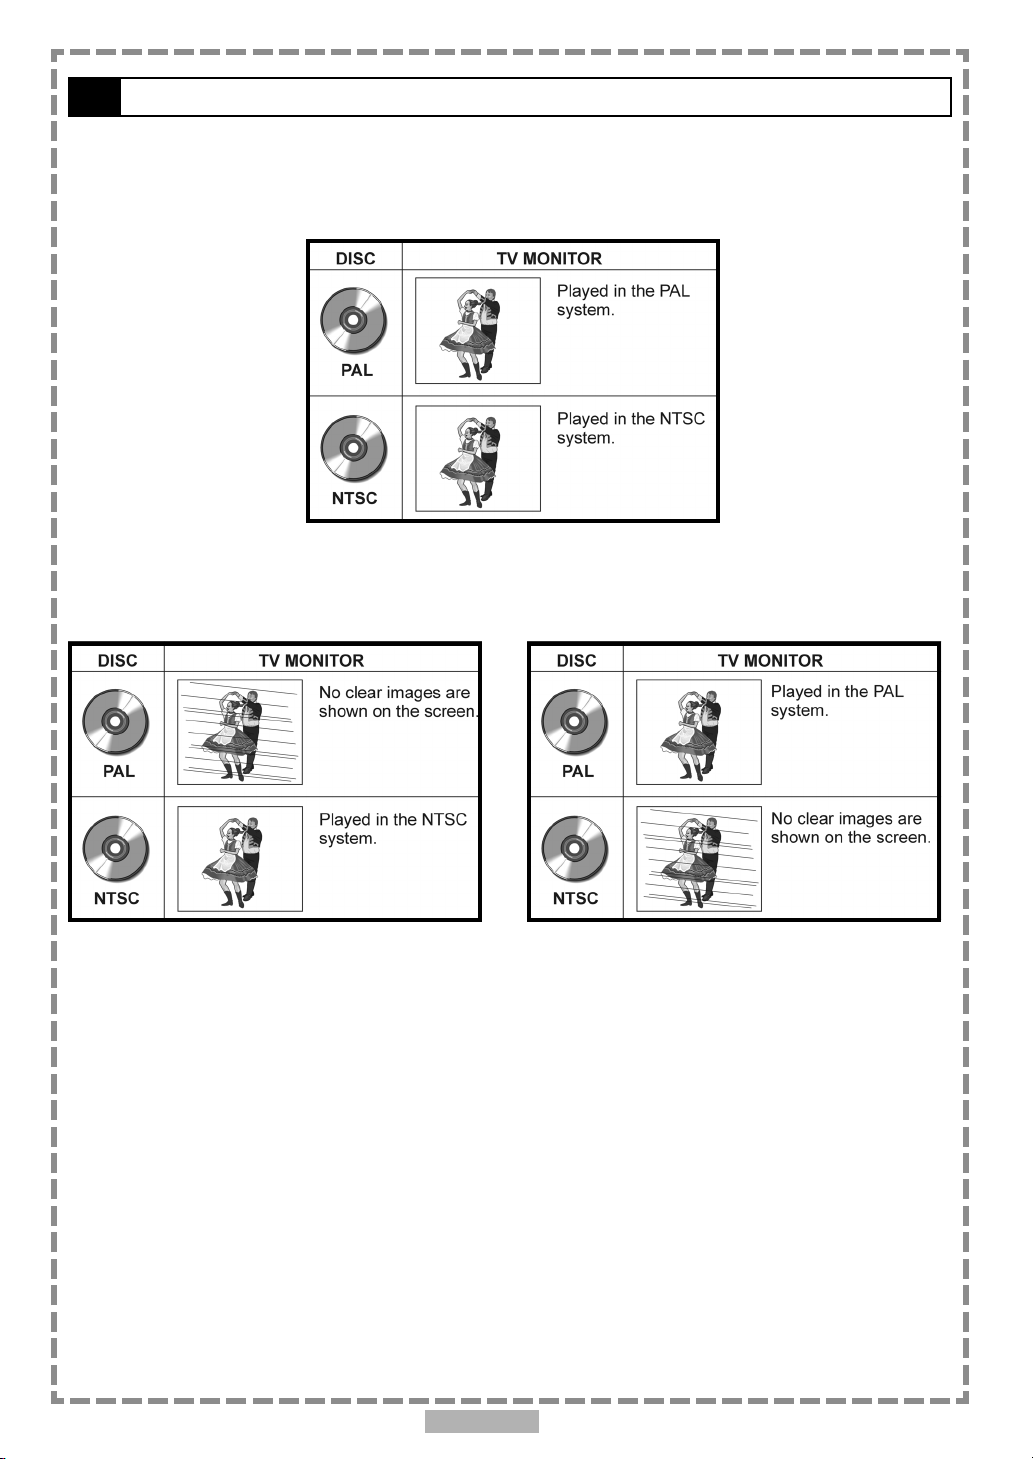
Selecting the type of disc for the type of TV connected
DVD discs have the material recorded in the PAL and NTSC systems. Refer to the table below to select the correct
disc type for the type of connected TV.
Connecting to the multi-system TV
Connecting to the NTSC TV
Connecting to the PAL TV
En 7
Page 8
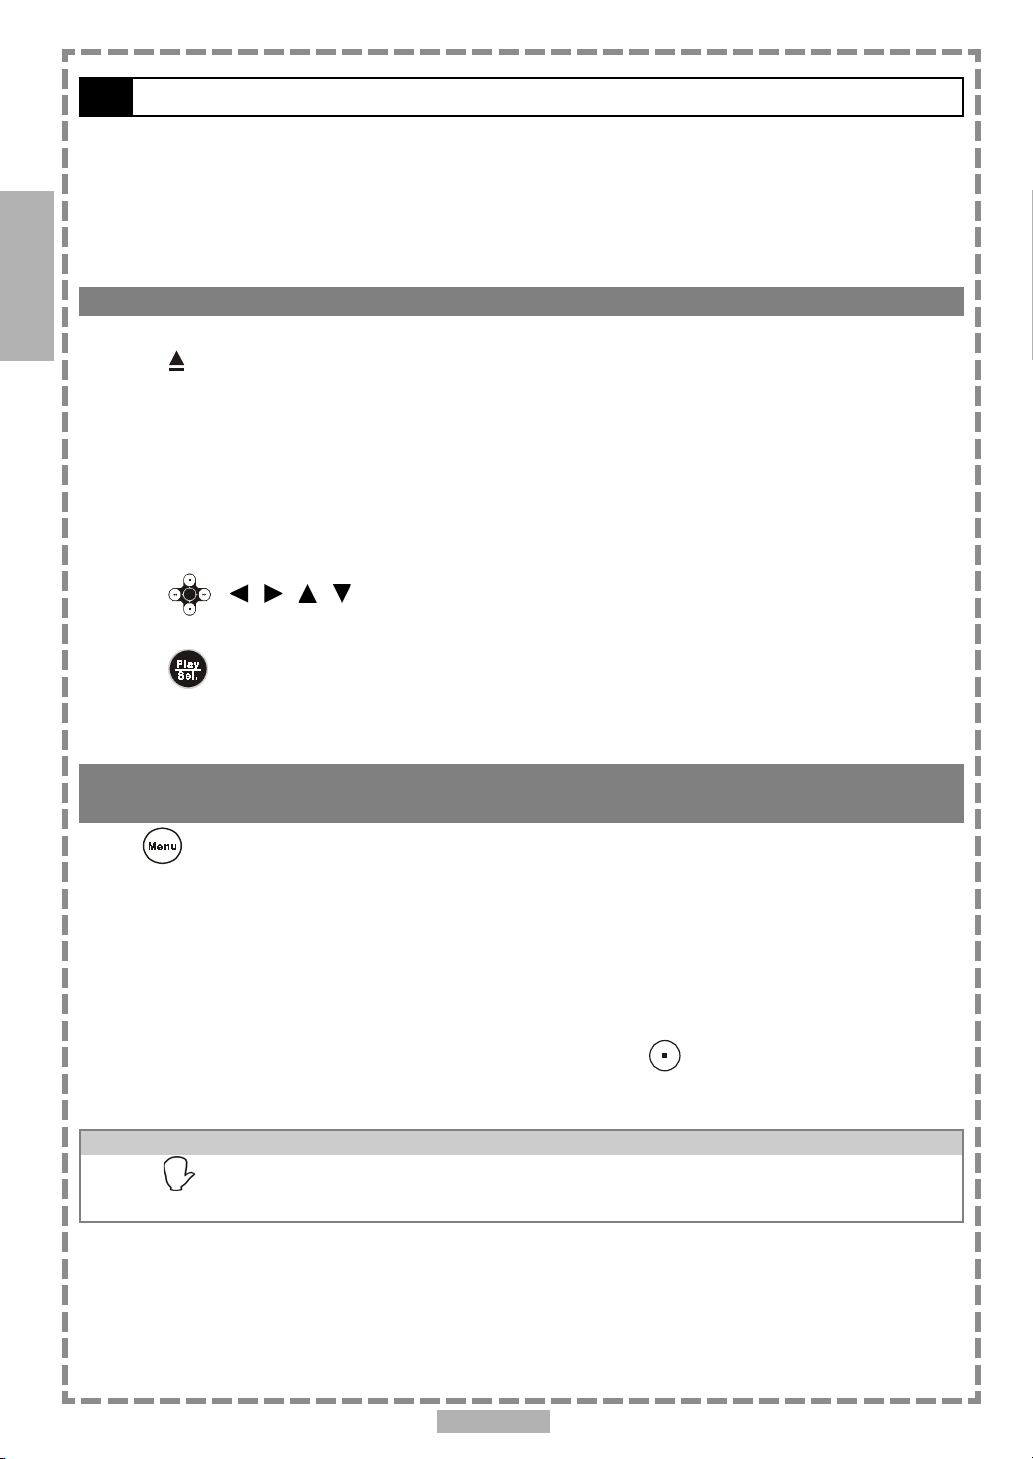
1
1-1 DVD Playback
Preparations
Please connect the portable DVD player to Power and connect it with earphones/headphones or
connect it to external equipment. If connect it to external equipment:
Press on the power button of the TV set, and select “Video” as the TV input.
Press on the power button of the stereo system if the player has been connected to a stereo system.
DVD
Push the AV OUT/IN slide switch to AV OUT.
Basic Playback
1 Press POWER on.
2 Press <OPEN> to open the disc cover.
3 Hold the edge of the disc to put it in the center with the printed side up.
Hold the disc without touching its surfaces, position it with the printed title side facing up, align it with the
guides, and place it in its proper position.
4 Close the disc cover.
Close the disc cover and the portable DVD player starts playback if the disc does not have any menus recorded
on it.
If the disc has one or more titles recorded on it, a menu screen will appear on the screen.
<< NOTE: Proceed with steps 5 and 6 when a menu is available on the disc. >>
5 Press < / / / > or the number button(s) to select the preferred title.
<< NOTE: To select a title, input the number, i.e. 1 for chapter 1, 10 for chapter 10, and etc. >>
6 Press <PLAY/SEL.> .
The player now starts playback the selected item.
Stopping Playback and Returning to The Menu Screen (If a Menu Screen Is Available on
The Disc)
Press <MENU>.
The portable DVD player stops playback, and then displays the menu screen.
After operation
When the portable DVD player is not in use, remove the disc and press POWER to turn off the player.
Then close the display panel.
<< NOTE >>
The disc continues to rotate while the menu is displayed even after the player has finished playing a particular
disc. When no further selections are to be played, be sure to press the <STOP> button to clear the menu
screen.
If the disc is placed in upside down (and it is a single sided disc), the player’s display will appear “NO DISC”.
For your reference:
When “ ” appears while a button is being operated, it means that the corresponding operation is prohibited
by the player.
En 8
Page 9

1-1 DVD Playback-continued
Stopping Playback
Press <STOP> once to prestop. Press <STOP> twice to stop.
Rapid Advance (Rapid Reverse)
Press <F.BWD> or <F.FWD> during playback.
Normal playback is resumed when you press <PLAY/SEL.>.
The speed of advance ( x2, x4, x8, x16, x32) or reverse ( x2, x4, x8, x16,
x32) changes for each press of the <F.FWD> or <F.BWD> button.
Skipping Ahead or Back to Chapters
You can skip a specific chapter or track to playback.
Skipping Ahead
1
DVD
Press
Skips a chapter each time you press the button.
Skipping Back
Press
When you press the button once midway through a chapter, the portable DVD player returns to the beginning of
the chapter to playback. The player skips a chapter each time you press the button.
<NEXT> during playback.
<PREVIOUS> during playback.
Still Picture (PAUSE)
Press <PAUSE> once during playback.
The screen is paused.
To return to normal playback
Press <PLAY/SEL.>.
En 9
Page 10
1
1-1 DVD Playback-continued
Repeat Viewing
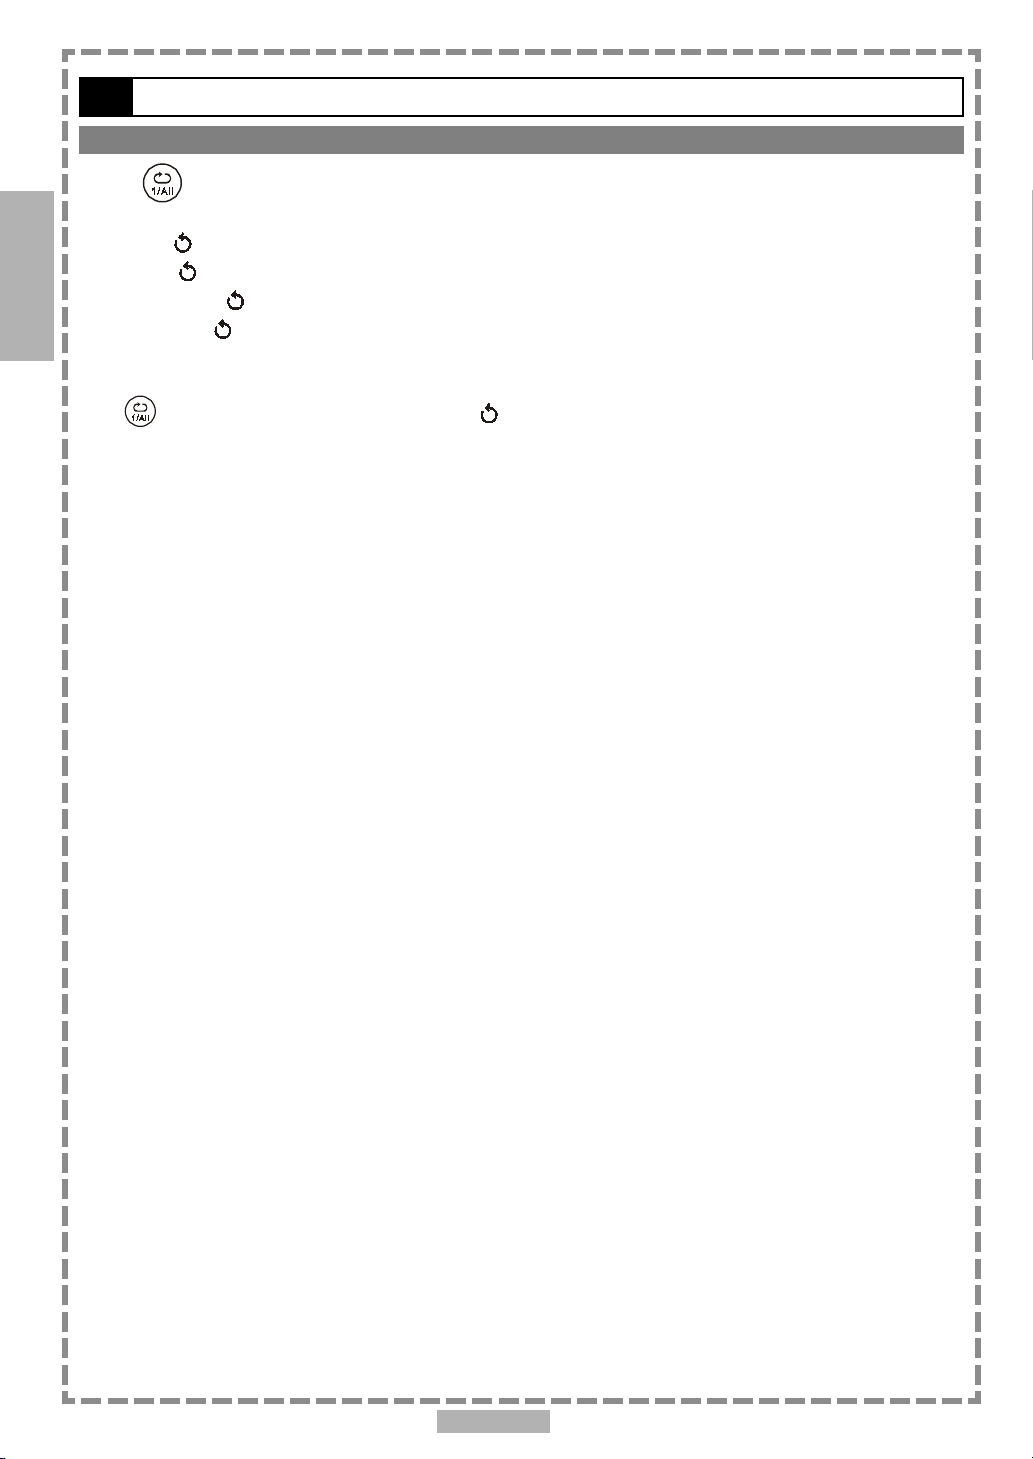
Press <1/ALL REPEAT> during playback.
Each time you press the button, the disc will repeat a chapter or title.
Press once: CHAPTER (Repeat chapter)
DVD
Press twice: TITLE (Repeat title)
Press three times: DISC (Repeat disc)
Press four times: off (Repeat cancelled)
To return to normal playback
Press <1/ALL REPEAT> several times until “ Off” appears on the screen.
<< NOTE >>
Repeat playback works only with discs for which the elapsed playing time appears on the player’s display during
playback.
Repeat playback may not work correctly with some DVDs.
En 10
Page 11
1-2 Convenient functions
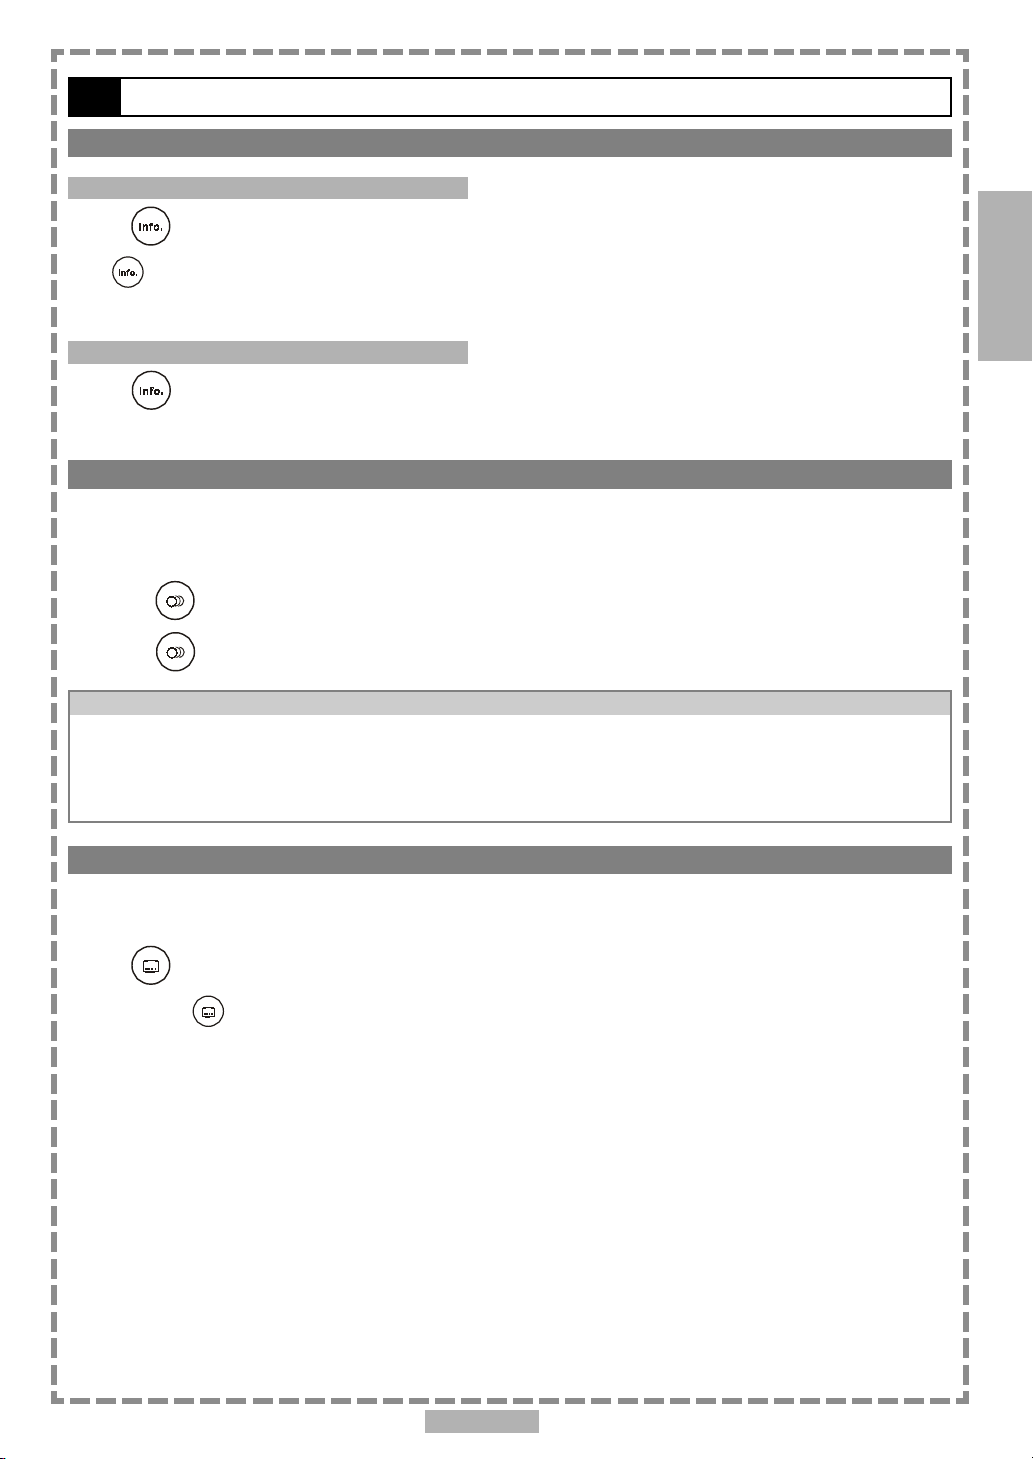
Displaying the Information of the Scene
Displaying the Information of the Scene
1
Press
Press <INFO.> a number of times, the title number, chapter number, and other information will show on the
screen.
Stop Displaying the Information of the Scene
Press
<INFO.> during playback.
<INFO.> a number of times until the information disappears.
Changing Audio Soundtrack Language
You can change the audio language from the one selected at the initial settings to a different language, if available. (This operation functions only with discs on which multiple audio soundtrack
languages are recorded.)
1 Press <AUDIO> during playback.
2 Press <AUDIO> a number of times until the preferred language is selected.
For your reference:
When the preferred language is not selected even after pressing the button several times, it may indicate that
language is not available on the disc.
When you turn on or remove the disc, the portable DVD player will playback the language which is selected at
the initial setting. If you select a language which is not recorded on the disc, the portable DVD player will
playback a prior language programmed on the disc.
DVD
Clearing/Displaying Subtitles (A)
If a disc provides subtitles, you can choose to hide or display them. (This operation works only
with discs that provide subtitles.)
Press <SUBTITLE> during playback to display subtitles or hide them.
When you press <SUBTITLE> once, the first subtitle recorded on the disc will display. The rest of the
subtitles recorded will display in sequence as you press the button.
You may change to another language with this function, or you can clear the subtitle by pressing this button a
number of times until “SUBTITLE OFF” appears on the screen.
En 11
Page 12
1
1-2 Convenient functions-continued
Changing Subtitle Language (B)
You can change the subtitle language with the initial settings , if available. (This operation works
only with discs on which multiple subtitle languages are included.)
DVD
1 Press <SUBTITLE> during playback.
When no subtitles are recorded, “ ” will display instead of the language number.
2 Press <SUBTITLE> a number of times until the preferred language is selected.
<< NOTE: In some cases, the subtitle language may not change immediately to the selected one. >>
For your reference:
When the preferred subtitle language is not selected even after pressing the button several times, it may
indicate that the language is not available on the disc.
When you turn on or remove the disc, the portable DVD player will playback the subtitle language which is
selected at the initial setting. If you select a subtitle language which is not recorded on the disc, the portable
DVD player will playback a prior subtitle language programmed on the disc.
Viewing From Another Angle
Some DVD discs may contain scenes which have been shot simultaneously from a number of
different angles. For these discs, the same scenes can be viewed from each of these different
angles using the <ANGLE> button. (The recorded angles vary depending on the disc pro-
grammed.)
1 Press <ANGLE> during playback.
2 Press <ANGLE> a number of times until the preferred viewing angle is selected.
Press <ANGLE> button a number of times to change the viewing angle.
<< NOTE >>
ANGLE will only function on discs where different angles have been recorded.
The viewing angles are shown on the player’s display and you can select one from them for viewing.
En 12
Page 13
1-2 Convenient functions-continued
To Mute the DVD Player
In some cases, you may need to mute the portable DVD player temporarily. The portable DVD player
provides a MUTE function for your selections.
1
Press <MUTE> button during playback.
When “MUTE” appears on the screen, the portable DVD player is mute. To resume the sound, press the button
a number of times until “MUTE OFF” appears on the screen.
Using a DVD Menu
Some DVD discs have unique menu structures called DVD menus. For example, DVDs programmed
with complex contents provide guide menus, and those recorded with various languages provide
menus for audio and subtitle language. Although the DVD menu’s contents and operation vary from
disc to disc, the following explains basic operation when this feature is used.
1 Press <TITLE> in stop mode.
The DVD menu available on the disc now appears.
2 Press < / / / > to select the preferred item.
3 Press <PLAY/SEL.>.
You now enter to the selected item.
To enter other menu screen
Repeat steps 2 and 3.
To return to the previous menu screen
DVD
Press <TITLE>.
Using the MENU Function
1 Press <PLAY/SEL.>.
2 Press <MENU>.
A DVD chapter menu with brief broadcast of each paragraph now appears. You may see the introduction of each
chapter and then decide with which chapter to start first.
3 Press < / / / > or number button(s) to select the preferred item.
<< Note: The menu details vary depending on discs recorded. >>
En 13
Page 14

2
Audio CD
2-1 Audio CD Playback
Preparations
Please connect the portable DVD player to Power and connect it with earphones/headphones or
connect it to external equipment. If connect it to external equipment:
Press on the power button of the TV set, and select “Video” as the TV input.
Press on the power button of the stereo system if the player has been connected to a stereo system.
Push the AV OUT/IN SWITCH button to AV OUT.
Basic Playback
1 Press POWER on.
2 Press <OPEN> to open the disc cover.
3 Hold the edge of the disc to put it in the center with the printed side up.
Hold the disc without touching its surfaces, position it with the printed title side facing up, align it with the
guides, and place it in its proper position.
4 Close the disc cover.
For audio CDs without playback control:
The portable DVD player starts to playback.
For audio CDs provided with playback control:
A menu appears after a few seconds.
Stopping Playback
Press <STOP> once to prestop. Press <STOP> twice to stop.
Rapid Advance (Rapid Reverse)
Press <F.BWD> or <F.FWD> during playback.
Normal playback is resumed when you press <PLAY/SEL.>.
The speed of advance ( x2, x4, x8, x16, x32) or reverse ( x2, x4, x8, x16,
x32) changes for each press of the <F.FWD> or <F.BWD> button.
En 14
Page 15

2-1 Audio CD Playback-continued
Skipping Ahead or Back to Tracks
Skipping Ahead
2
Press
A track is skipped each time you press the button.
Skipping Back
Press
When you press the button once midway through a track, the portable DVD player returns to the beginning of the
track to playback. The player skips a track each time the button is pressed.
<NEXT> during playback.
<PREVIOUS> during playback.
Pause Playback
Press <PAUSE> once during playback.
The player will pause playback.
To return to normal playback
Press <PLAY/SEL.>.
Audio CD
2-2 Information [Audio CDs]
Displaying the Information of the Playing Track
Displaying the Information of the Playing Track
Press
Press <INFO.> a number of times, the elapsed time, track number and other information will show on the
screen.
Stop Displaying the Information of the Playing Track
Press
<INFO.> during playback.
<INFO.> a number of times until the information disappears.
En 15
Page 16

3
3-1 Playing Kodak Picture CDs
Basic Playback
You can play Kodak picture CDs for viewing on the screen.
Load a kodak picture CD.
After few seconds, the portable DVD player starts to play back the pictures in slide show automatically.
OR
You can press the number buttons corresponding to the order of the picture, then press
<PLAY/SEL.>.
Press <INFO.>, the current track number and total track numbers will show on the screen. And press the
number buttons corresponding to the order of the picture, then press <PLAY/SEL.>. The portable DVD
player will begin the slide show from the selected picture.
To pause slide show
Press <PAUSE>, the slide show will pause.
Special Functions
To stop slide show
Press <STOP>, then enter Thumbnail mode.
<<Note: Press <TITLE>, you can also enter Thumbnail mode.>>
To resume slide show
Press <PLAY/SEL.> again.
Mode switch
There are four modes while playing Kodak picture CD: “Thumbnail Mode”, “Slide show”, “Rotate Mode”
and “Program Mode”.
1 Press <STOP> a number of times to stop and exit the present mode, then press
<RIGHT> button or <LEFT> button to select the preferred mode.
2 Press <PLAY/SEL.> to enter the selected mode.
En 16
Page 17

3-1 Playing Kodak Picture CDs-continued
Slide Show
1 Press <NEXT> to view the next picture or <PREVIOUS> to view the previous
picture.
2 Press <RIGHT> button or <LEFT> button to rotate the picture.
Press <RIGHT> button to rotate right by 90 degree.
Press <LEFT> button to rotate left by 90 degree.
To pause slide show
Press <PAUSE>, the slide show will pause.
To stop slide show
Press <STOP>, then enter Thumbnail mode.
3
<<Note: Press <TITLE>, you can also enter Thumbnail mode.>>
To resume slide show
Press <PLAY/SEL.> again.
Rotate Mode
1 Press <NEXT> or <PREVIOUS> to select the preferred page, then press
< / / / > to select the preferred picture.
2 Press <PLAY/SEL.> to rotate the picture.
Every time you press
To stop Rotate mode
Press <STOP> to stop Rotate mode.
To reset the rotated pictures
Press <STOP> to stop Rotate mode and select “Reset” by pressing <RIGHT> button or
<PLAY/SEL.>, the picture is rotated right by 90 degree.
Special Functions
<LEFT> button; then press
To exit Rotate mode
Press <STOP> to stop Rotate mode and select “Return” by pressing <RIGHT> button or
<LEFT> button; then press <PLAY/SEL.> to exit Rotate mode.
<PLAY/SEL.> to reset all rotated pictures.
En 17
Page 18

3
3-1 Playing Kodak Picture CDs-continued
Program Mode
1
Press
<PLAY/SEL.>; the selected picture is marked by the yellow frame and add it in the
program list.
To unmark the selected picture, press <PLAY/SEL.> again until the yellow frame is cancelled.
< <
/ /
/ /
/ /
<
/
< <
/ /
/
/ /
>>
/
> to choose the preferred picture, then press
/ /
>>
2 Repeat the above step to complete the program list.
3 Press <STOP> a number of times to back to menu bar and press <RIGHT>
button to select “Program list” and press <PLAY/SEL.>.
4 Press <STOP> to back to menu bar and press <RIGHT> button to select “ ”
and press <PLAY/SEL.> to play the programmed files.
Special Functions
To delete the file from the program list
Press <RIGHT> button or <LEFT> button to select the file, then press <PLAY/SEL.>
to delete the file from the program list.
To delete all files from the program list
Select “CLEAR ALL”, then press <PLAY/SEL.> to delete all files from the program list.
To exit the program list
Press <STOP> and select “Return” by pressing <RIGHT> button or <LEFT> button;
then press
To exit Program mode
Press <LEFT> button.
<PLAY/SEL.> to return to Program mode.
Thumbnail Mode
While in Thumbnail mode, there are 15 pictures per page for viewing.
1 Press < / / / > to select the picture in thumbnail. If you want to view the
selected picture in original size, press
When you view the picture in original size, you can press <STOP> to view the pictures in thumbnail.
<PLAY/SEL.>.
2 Press <NEXT> or <PREVIOUS> to view the next or previous thumbnail page.
To exit Thumbnail mode
Press <STOP> once to stop, and then press <STOP> a number of times to exit.
En 18
Page 19

3-2 Playing JPEG picture CDs
Basic Playback
You can play JPEG pictures CDs for viewing on the screen.
Load a JPEG picture CD.
After few seconds, the portable DVD player starts to play back the pictures in slide show automatically.
OR
You can press the number buttons corresponding to the order of the picture, then press
<PLAY/SEL.>.
Press <INFO.>, the current track number, total track numbers and other information will show on the
screen. And press the number buttons corresponding to the order of the picture, then press <PLAY/SEL.>.
The portable DVD player will begin the slide show from the selected picture.
To pause slide show
Press <PAUSE>, the slide show will pause.
3
To stop slide show
Press <STOP>, then enter the File Manager.
To resume slide show
Press <PLAY/SEL.> again.
Mode switch
There are four modes while playing JPEG picture CD: “File Manager”, “Playing Mode”, “Program Mode”
and “Thumbnail Mode”.
1 Press <STOP> to stop the present mode, and press <LEFT> button a number
of times to exit the present mode, then press <RIGHT> button or <LEFT>
button to select the preferred mode.
2 Press <PLAY/SEL.> to enter the selected mode.
Special Functions
En 19
Page 20

3
3-2 Playing JPEG picture CDs-continued
File Manager
1 Under File Manager Menu, press < / / / > to choose the preferred picture,
then press
<PLAY/SEL.> to playback the picture.
2 Press <NEXT> to skip for the next six pictures or <PREVIOUS> to skip for the
previous six pictures.
To exit File Manager
Press <LEFT> a number of times to exit File Manager Menu.
Playing Mode
1 Press <NEXT> to view the next picture or <PREVIOUS> to view the previous
Special Functions
picture.
2 Press <RIGHT> button or <LEFT> button to rotate the picture.
Press <RIGHT> button to rotate right by 90 degree.
Press <LEFT> button to rotate left by 90 degree.
To pause playback
Press <PAUSE>.
To stop playback
Press <STOP>, then enter to the File Manager.
To resume playback
Press <PLAY/SEL.> again.
En 20
Page 21

3-2 Playing JPEG picture CDs-continued
Program Mode
3
1
Press
<PLAY/SEL.>; the selected picture is marked by the yellow frame and add it in the
program list.
To unmark the selected picture, press <PLAY/SEL.> again until the yellow frame is cancelled.
< <
/ /
/ /
/ /
<
/
< <
/ /
/
/ /
> >
/
> to choose the preferred picture, then press
/ /
> >
2 Repeat the above step to complete the program list.
3 Press <LEFT> button a number of times to back to menu bar and press
<RIGHT> button to select “Program list” and press <PLAY/SEL.>.
4 Press <LEFT> button to back to menu bar and press <RIGHT> button to
select “
To delete the file from the program list
Under program list, press <UP> button or <DOWN> button to select the file, then press
<PLAY/SEL.> to delete the file from the program list.
To delete all files from the program list
Select “CLEAR ALL”, then press <PLAY/SEL.> to delete all files from the program list.
To exit the program list
Press <LEFT> button to back to menu bar and select “Return” by pressing <RIGHT>
” and press <PLAY/SEL.> to play the programmed files.
Special Functions
button or <LEFT> button; then press
To exit Program mode
Press <LEFT> button a number of times.
<PLAY/SEL.> to return to Program mode.
Thumbnail Mode
While in Thumbnail mode, there are 15 pictures per page for viewing.
1 Press < / / / > to select the picture in thumbnail. If you want to view the
selected picture in original size, press
When you view the picture in original size, you can press <STOP> to view the pictures in thumbnail.
<PLAY/SEL.>.
2 Press <NEXT> or <PREVIOUS> to view the next or previous thumbnail page.
To exit Thumbnail mode
Press <STOP> once to stop, and then press <STOP> a number of times to exit.
En 21
Page 22

4
4-1 Language Setup
On Screen Display (OSD) Language Setting
Allows you to set various languages for the on screen display (OSD).
1 Press <SETUP> in the stop mode.
2 Press <UP> button / <DOWN> button to select “Language Setup”, and then
press <PLAY/SEL.>.
3 Press <UP> button / <DOWN> button to select “OSD”, and then press
<PLAY/SEL.>.
4 Press <UP> button / <DOWN> button to select the preferred language.
5 Press <PLAY/SEL.>.
Language Setup
OSD
Menu
Audio
Subtitle
English
French
German
Italian
Spanish
Setup
: Move : Select SETUP: Quit
To return to the SETUP MENU screen
Press
To finish the setup operation
Press <SETUP> to exit or select EXIT from SETUP MENU screen.
<LEFT> button.
En 22
Page 23

4-1 Language Setup-continued
DVD Menu Language Setting
You can select a preferred language among various languages that has been recorded on discs for
the disc menu messages display.
1 Press <SETUP> in the stop mode.
2 Press <UP> button / <DOWN> button to select “Language Setup”, and then
press <PLAY/SEL.>.
3 Press <UP> button / <DOWN> button to select “Menu”, and then press
<PLAY/SEL.>.
4 Press <UP> button / <DOWN> button to select the preferred language.
5 Press <PLAY/SEL.>.
Language Setup
4
OSD
Menu
Audio
Subtitle
English
Chinese
Japanese
French
German
: Move : Select SETUP: Quit
To return to the SETUP MENU screen
Press <LEFT> button.
To finish the setup operation
Press <SETUP> to exit or select EXIT from SETUP MENU screen.
Setup
En 23
Page 24

4
4-1 Language Setup-continued
AUDIO Soundtrack Language Selection [DVD]
You can select a preferred soundtrack language among various languages that have been recoreded
on DVD discs.
1 Press <SETUP> in the stop mode.
2 Press <UP> button / <DOWN> button to select “Language Setup”, and then
press <PLAY/SEL.>.
3 Press <UP> button / <DOWN> button to select “Audio”, and then press
<PLAY/SEL.>.
4 Press <UP> button / <DOWN> button to select the preferred language.
5 Press <PLAY/SEL.>.
ORIGINAL:
The top-priority language of each disc will always playback first.
Language Setup
English
Chinese
Japanese
French
German
Setup
OSD
Menu
Audio
Subtitle
: Move : Select SETUP: Quit
To return to the SETUP MENU screen
Press
To finish the setup operation
Press <SETUP> to exit or select EXIT from SETUP MENU screen.
For your reference:
If the language selected is not recorded on the disc, the portable DVD player will playback the top-
<LEFT> button.
priority language of the disc.
En 24
Page 25

4-1 Language Setup-continued
SUBTITLE Language Selection [DVD]
You can select a preferred language among various languages that has been recorded on DVD discs.
1 Press <SETUP> in the stop mode.
2 Press <UP> button / <DOWN> button to select “Language Setup”, and then
4
press
3 Press <UP> button / <DOWN> button to select “Subtitle”, and then press
<PLAY/SEL.>.
4 Press <UP> button / <DOWN> button to select the preferred language.
5 Press <PLAY/SEL.>.
<PLAY/SEL.>.
Language Setup
OSD
Menu
Audio
Subtitle
English
Chinese
Japanese
French
German
Setup
: Move : Select SETUP: Quit
To return to the SETUP MENU screen
Press
To finish the setup operation
Press <SETUP> to exit or select EXIT from SETUP MENU screen.
For your reference:
If the language selected is not recorded on the disc, the portable DVD player will playback the top-
<LEFT> button.
priority language of the disc.
En 25
Page 26

4
4-2 Screen Setup
TV Type Setting
The kind of TV set (4:3 or 16:9) connected to the player and a wide-screen picture type for a 4:3 TV
can be selected.
1 Press <SETUP> in the stop mode.
2 Press <UP> button / <DOWN> button to select “Screen Setup”, and then
press <PLAY/SEL.>.
3 Press <UP> button / <DOWN> button to select “TV Type”, and then press
<PLAY/SEL.>.
4 Press <UP> button / <DOWN> button to select a preferred TV display.
5 Press <PLAY/SEL.>.
Screen Setup
TV Type
Screen Saver
TV System
Video Output
Setup
: Move : Select SETUP: Quit
To finish the setup operation
Press
4:3 Pan Scan
Select 4:3 PS for a conventional size TV set. Video material formatted in the pan &
scan style is played in that style (the left and right edges are cut off).
<SETUP> to exit or select EXIT from SETUP MENU screen.
4:3 PS
4:3 LB
16:9
4:3 Letter Box
Select 4:3 LB for a conventional size TV set. Black bands appear at top and bottom
of screen (letter-box style).
Video material not formatted in the pan & scan style is played in the letter-box
style.
16:9 Wide
Select 16:9 for a wide-screen TV set. Played in “FULL” size.
Setting the wide-screen TV to “FULL” mode is also necessary.
Each screen shows an example when the video material for a wide-screen is
played.
En 26
Page 27

4-2 Screen Setup-continued
Screen Saver Setting
If you have set the screen saver ON by the following method, then you may see it functioning in the
stop mode. This function will ONLY function in the stop mode.
1 Press <SETUP> in the stop mode.
2 Press <UP> button / <DOWN> button to select “Screen Setup”, and then
press <PLAY/SEL.>.
3 Press <UP> button / <DOWN> button to select “Screen Saver”, and then
press <PLAY/SEL.>.
4 Press <UP> button / <DOWN> button to select “On” or “Off ”.
5 Press <PLAY/SEL.>.
The waiting time of the screen saver is set to 10 minutes. In other words, when you are in the stop mode and have
not operated the portable DVD player over 10 minutes; then the screen saver will appear automatically on the
screen.
4
Screen Setup
TV Type
Screen Saver
TV System
Video Output
On
Off
: Move : Select SETUP: Quit
To return to the SETUP MENU screen
Press
To finish the setup operation
Press <SETUP> to exit or select EXIT from SETUP MENU screen.
<LEFT> button.
Setup
En 27
Page 28

4
4-2 Screen Setup-continued
TV System Setting
The player provides “PAL”, “NTSC” and “AUTO” settings for your selection. When connecting the
portable DVD player to your TV, set the “TV SYSTEM” from the on-screen display to the format that
is compatible with your TV’s system. Set ”NTSC” from on-screen display if connecting to NTSC TV
system, set “PAL” if it is PAL TV, or set “AUTO” if it is a multi-TV system that supports both PAL
and NTSC.
1 Press <SETUP> in the stop mode.
2 Press <UP> button / <DOWN> button to select “Screen Setup”, and then
press <PLAY/SEL.>.
3 Press <UP> button / <DOWN> button to select “TV System”, and then
press <PLAY/SEL.>.
4 Press <UP> button / <DOWN> button to select the appropriate TV system for
your clearest view.
5 Press <PLAY/SEL.>.
Screen Setup
Setup
TV Type
Screen Saver
TV System
Video Output
NTSC
PAL
AUTO
: Move : Select SETUP: Quit
To return to the SETUP MENU screen
Press
To finish the setup operation
Press <SETUP> to exit or select EXIT from SETUP MENU screen.
<LEFT> button.
En 28
Page 29

4-2 Screen Setup-continued
Video Output Setting
Please choose the preferred video output according to the output format.
1 Press <SETUP> in the stop mode.
2 Press <UP> button / <DOWN> button to select “Screen Setup”, and then
press <PLAY/SEL.>.
3 Press <UP> button / <DOWN> button to select “Video Output”, and then
press <PLAY/SEL.>.
4 Press <UP> button / <DOWN> button to select the preferred video output
setting.
5 Press <PLAY/SEL.>.
Screen Setup
4
TV Type
Screen Saver
TV System
Video Output
S-Video
P-SCAN
: Move : Select SETUP: Quit
To return to the SETUP MENU screen
Press <LEFT> button.
To finish the setup operation
Press <SETUP> to exit or select EXIT from SETUP MENU screen.
Setup
En 29
Page 30

4
4-2 Screen Setup-continued
Video Output Setting-continued
If you choose “P-Scan”, the following will show on the screen as the reminder.
Screen Setup
TV Type
Screen Saver
TV System
Please make sure your
Video Output
TV support P-Scan
S-Video
P-SCAN
Continue Press PLAY
Stop Press STOP
4
: Move : Select SETUP: Quit
If your TV supports P-Scan feature, press
<< NOTE >>
If you choose “P-Scan” as the video output setting, make sure your TV set supports P-Scan input feature and
the YUV cable be properly connected to your TV and the portable DVD player.
<PLAY/SEL.>.
Setup
If your TV doesn’t support P-Scan feature, press <STOP>.
<<Troubleshooting>>
What if the screen turns black while operating...
Solution: Press
<Mode> to switch to “P-Scan” mode.
En 30
Page 31

4-3 Audio Setup
Digital Out Setting
The portable DVD player provides three options, “SPDIF/PCM”, “SPDIF/RAW” and “Off” for the
digital out setting.
1 Press <SETUP> in the stop mode.
2 Press <UP> button / <DOWN> button to select “Audio Setup”, and then
press <PLAY/SEL.>.
3 Press <UP> button / <DOWN> button to select “Digital Out”, and then
press <PLAY/SEL.>.
4 Press <UP> button / <DOWN> button to select the preferred digital out
setting.
5 Press <PLAY/SEL.>.
Audio Setup
4
Digital Out
Analog Out
SPDIF/PCM
SPDIF/RAW
Off
: Move : Select SETUP: Quit
To return to the SETUP MENU screen
Press
To finish the setup operation
Press <SETUP> to exit or select EXIT from SETUP MENU screen.
For your reference:
If you have a Dolby Digital 5.1 or DTS capable amplifier, you must set the audio output to SPDIF/RAW.
<LEFT> button.
If you have a 2-channel Dolby Digital amplifier, you must set the audio output to SPDIF/PCM.
Setup
En 31
Page 32

4
4-3 Audio Setup-continued
Analog Out Setting
1 Press <SETUP> in the stop mode.
2 Press <UP> button / <DOWN> button to select “Audio Setup”, and then
press <PLAY/SEL.>.
3 Press <UP> button / <DOWN> button to select “Analog Out”, and then
press <PLAY/SEL.>.
4 Press <UP> button / <DOWN> button to select the preferred analog out
setting.
5 Press <PLAY/SEL.>.
Audio Setup
Digital Out
Analog Out
2 Channel
Setup
: Move : Select SETUP: Quit
To return to the SETUP MENU screen
Press
To finish the setup operation
Press <SETUP> to exit or select EXIT from SETUP MENU screen.
<LEFT> button.
En 32
Page 33

4-4 Custom Setup
Parental Control Setting [DVD]
A built-in viewer rating setting enables you to lock the videos that you do not want children to
view. For example, if you set it to PG-13, then the portable DVD player will not play the videos
rated R, NC-17 or X unless the correct password is entered.
1 Press <SETUP> in the stop mode.
2 Press <UP> button / <DOWN> button to select “Custom Setup”, and then
4
press
<PLAY/SEL.>.
3 Press <UP> button / <DOWN> button to select “Parental Ctrl”, and then
press <PLAY/SEL.>.
4 Enter a 4-digit password before selecting ratings and press <PLAY/SEL.>.
Factory pre-set password: 0000
You need to enter “0000” to set the rating for the first time when purchasing your DVD from the store.
5 Press <UP> button / <DOWN> button to select the preferred ratings.
6 Press <PLAY/SEL.>.
Custom Setup
Parental Ctrl
Password ...
Angle Mark
Default
1
2
3: PG
4: PG13
5
Setup
: Move : Select SETUP: Quit
To return to the SETUP MENU screen
Press
To finish the setup operation
Press <SETUP> to exit or select EXIT from SETUP MENU screen.
For your reference:
You can use the parental control lock ONLY with DVD discs featured with the parental lock func-
Some discs may not be encoded with specific rating leve information though its disc jacket says
<LEFT> button.
tion.
that it’s for “adults”. For those discs, RATINGS lock will not function.
En 33
Page 34

4
4-4 Custom Setup-continued
Password Setting [DVD]
You can change the password to the portable DVD player by selections.
1 Press <SETUP> in the stop mode.
2 Press <UP> button / <DOWN> button to select “Custom Setup”, and then
press <PLAY/SEL.>.
3 Press <UP> button / <DOWN> button to select “Password”, and then
press <PLAY/SEL.>.
4 Enter your old password and then press <PLAY/SEL.>.
Factory pre-set password: 0000
5 Enter your new password and then press <PLAY/SEL.>.
6 Re-enter your password to verify it and then press <PLAY/SEL.>.
Custom Setup
Setup
Parental Ctrl
Password ...
Angle Mark
Old: _ _ _ _
Default
New: _ _ _ _
Verify: _ _ _ _
: Move : Select SETUP: Quit
To return to the SETUP MENU screen
Press
To finish the setup operation
Press <SETUP> to exit or select EXIT from SETUP MENU screen.
<LEFT> button.
En 34
Page 35

4-4 Custom Setup-continued
Angle Mark Setting [DVD]
You can choose to display or hide the angle mark “ ” on the screen.
1 Press <SETUP> in the stop mode.
2 Press <UP> button / <DOWN> button to select “Custom Setup”, and then
4
press
3 Press <UP> button / <DOWN> button to select “Angle Mark”, and then
press <PLAY/SEL.>.
4 Press <UP> button / <DOWN> button to select “On” or “Off ”, and then
press <PLAY/SEL.>.
<< NOTE >>
Whether the ANGLE MARK is set to “On” or “Off” with this setting, when you press <ANGLE> button,
the portable DVD player will still playback multi-angles that are available on the dvd discs.
<PLAY/SEL.>.
Custom Setup
Parental Ctrl
Password ...
Angle Mark
Default
On
Off
Setup
: Move : Select SETUP: Quit
To return to the SETUP MENU screen
Press
To finish the setup operation
Press
<LEFT> button.
<SETUP> to exit or select EXIT from SETUP MENU screen.
En 35
Page 36

4
4-4 Custom Setup-continued
Default Setting
You may re-set the previous settings in CUSTOM SETUP to the default setting.
1 Press <SETUP> in the stop mode.
2 Press <UP> button / <DOWN> button to select “Custom Setup”, and then
press <PLAY/SEL.>.
3 Press <UP> button / <DOWN> button to select “Default”, and then
press <PLAY/SEL.>.
4 Press <RIGHT> button to select “Read”, and then press <PLAY/SEL.>.
<< EXCEPTION>>
The viewer rating and the password setting will NOT be changed even though you re-set to the default setting.
Custom Setup
Read
Setup
Parental Ctrl
Password ...
Angle Mark
Default
: Move : Select SETUP: Quit
To return to the SETUP MENU screen
Press
To finish the setup operation
Press <SETUP> to exit or select EXIT from SETUP MENU screen.
<LEFT> button.
En 36
Page 37

4-5 LCD Setup
Panel Setting
The portable DVD player provides three options about the panel adjustment: “Normal”, “16:9” or
“4:3”.
1 Press <LCD>, the LCD setting information shows on the screen.
2 Press <LCD> a number of times to select “Panel”.
3 Press <LEFT> button or <RIGHT> button to choose the preferred panel
setting, and then the panel will change to the selected setting.
PP
anel:anel:
P
anel:
PP
anel:anel:
Panel: 16:9Panel: 16:9
Panel: 16:9
Panel: 16:9Panel: 16:9
Panel: 4:3Panel: 4:3
Panel: 4:3
Panel: 4:3Panel: 4:3
To finish the setup operation
Press
<LCD> again until the LCD setting information disappears.
Nor Nor
Nor
Nor Nor
malmal
mal
malmal
4
Color Setting
You can adjust the color of video with this setting to a soothing view for your eyes.
1 Press <LCD>, the LCD setting information shows on the screen.
2 Press <LCD> a number of times to select “Color”.
3 Press <LEFT> button or <RIGHT> button to choose the preferred color
setting, and then the panel will change to the selected setting.
ColorColor
Color
ColorColor
ColorColor
Color
ColorColor
ColorColor
Color
ColorColor
ColorColor
Color
ColorColor
ColorColor
Color
ColorColor
ColorColor
Color
ColorColor
ColorColor
Color
ColorColor
To finish the setup operation
Press
<LCD> again until the LCD setting information disappears.
::
+3 +3
:
+3
::
+3 +3
::
+2 +2
:
+2
::
+2 +2
::
+1 +1
:
+1
::
+1 +1
::
0 0
:
0
::
0 0
::
-1 -1
:
-1
::
-1 -1
::
-2 -2
:
-2
::
-2 -2
::
-3 -3
:
-3
::
-3 -3
Setup
En 37
Page 38

4
4-5 LCD Setup-continued
Bright Setting
You can manually increase or decrease the brightness of the video.
1 Press <LCD>, the LCD setting information shows on the screen.
2 Press <LCD> a number of times to select “Bright”.
3 Press <LEFT> button or <RIGHT> button to choose the preferred bright
setting, and then the panel will change to the selected setting.
Bright: +3Bright: +3
Bright: +3
Bright: +3Bright: +3
Bright: +2Bright: +2
Bright: +2
Bright: +2Bright: +2
Bright: +1Bright: +1
Bright: +1
Bright: +1Bright: +1
Bright: 0Bright: 0
Bright: 0
Bright: 0Bright: 0
Bright: -1Bright: -1
Bright: -1
Bright: -1Bright: -1
Bright: -2Bright: -2
Bright: -2
Bright: -2Bright: -2
Bright: -3Bright: -3
Bright: -3
Bright: -3Bright: -3
To finish the setup operation
Press
<LCD> again until the LCD setting information disappears.
Setup
Invert Setting
In some cases, you may need to invert the LCD screen of the portable DVD player. For example, if
you would like to fix the portable DVD player within your car for viewing, then you can set the
invert function to “On”.
1 Press <LCD>, the LCD setting information shows on the screen.
2 Press <LCD> a number of times to select “Invert”.
3 Press <LEFT> button or <RIGHT> button to select “On” or “Off ”, and then the
LCD screen will change to the selected setting.
InIn
vv
erer
t:t:
InIn
vv
erer
t:t:
er
t:
erer
t:t:
Invert Off
Of Of
Of
Of Of
In
v
InIn
vv
To finish the setup operation
Press
<LCD> again until the LCD setting information disappears.
On On
t:
On
t:t:
ff
f
ff
Invert On
On On
er
erer
In
v
InIn
vv
En 38
Page 39

4-5 LCD Setup-continued
Panel Close Setting
1 Press <LCD>, the LCD setting information shows on the screen.
2 Press <LCD> a number of times to select “Close”.
3 Press <LEFT> button or <RIGHT> button to choose the preferred panel
setting, and then the panel will change to the selected setting.
Close: OffClose: Off
Close: Off
Close: OffClose: Off
Close: OnClose: On
Close: On
Close: OnClose: On
<< NOTE: When you choose “Close” in the panel setting, the LCD turns off and the power indicator will blink in
yellow light.>>
To finish the setup operation
Press <LCD> again until the LCD setting information disappears.
4
Setup
En 39
Page 40

5
5-1 Troubleshooting
Before requesting service for the portable DVD player, check the chart below for a possible cause of
the problem you are experiencing. Some simple checkups or a minor adjustment on your part may
eliminate the problem and restore proper operation.
SYMPTOM (COMMON) REMEDY
No power. · Insert the power plug securely into the power outlet.
The player does not start playback · Condensation has formed: wait about 1 to 2 hours to allow the player to dry out.
when PLAY is pressed. · This player cannot play discs other than DVDs and audio CDs.
The player starts playback but stops · The disc may be dirty and may require cleaning.
immediately. · Ensure that the disc is installed with the label side up.
No picture. · Ensure that the equipment is connected properly.
No sound. · Ensure that the equipment is connected properly.
Distorted sound. · Ensure that the input settings for the TV and stereo system are proper.
No audio at Digital Output. · Check the digital connections.
capabilities.
Distorted picture. · Check the disc for fingerprints and clean it with a soft cloth, wiping it from center
Completely distorted picture or no color · The disc format is not according to the TV-set used (PAL/NTSC).
in picture.
Picture is distorted during rapid · The picture will be somewhat distorted at times: this is normal.
advance or rapid reverse.
No rapid advance (or rapid reverse) · Some discs may have sections which prohibit rapid advance (or rapid reverse).
playback.
No 4:3 (16:9) picture. · Choose the correct setup “TV DISPLAY” item which matches the TV set used.
Picture is distorted during rapid · The picture will be somewhat distorted at times: this is normal.
For Your Reference
advance or rapid reverse.
No operations perform with the · Check the batteries are installed with the correct polarity (+ and –).
remote control. · The batteries are depleted: replace them with new ones.
No key operation (by the DVD player · Turn the unit off and then back to on. Alternatively, turn off the unit, disconnect the
AC power and/or the remote control) is cord and then re-connect it. (The player may not be operating properly due to
effective. lightning, static electricity or some other external factor.)
PLAY does not start playback even · This may be a result of the parental lock function that has been set.
when title is selected. Confirm the “PARENTAL” setup.
Audio soundtrack and/or subtitle · If the audio soundtrack and/or subtitle language does not exist on the disc, the
language is not the one selected language selected at the initial settings will not be seen/heard.
at the initial settings.
No subtitles. · Subtitles appear only with discs that contain them.
Alternative audio soundtrack · An alternative language can not be selected may result of no more than one language
(or subtitle) languages cannot be selected. available.
Angle cannot change. · This function depends on software availability. Even if a disc has a number of angles
recorded, these angles may be recorded for specific scenes only.
· Check if the ON/OFF button on the right of the player is set to on.
· Check if no power at the AC outlet by plugging in another appliance for a test.
· Check if the disc is defective by trying another disc.
· Check the region (local) code.
· Ensure that the input setting for the TV is “Video”.
· Check if external equipment is on.
· Select the same channel and source on the TV as on the player.
· Check if the LCD is on.
· If using a HiFi amplifier, try another sound source.
· Check the Audio Output Setting menu to make sure that Analog Output is selected.
· Check the Volume Adjustment.
· No sound is heard during still picture (pause).
· Check the settings menu to make sure that the digital output is set to on.
· Check if the audio format of the selected audio language matches your receiver
to edge.
· Sometimes a small amount of picture distortion may appear. This is not a malfunction.
· Point the remote control unit at the remote control signal sensor and operate.
· Operate the remote control unit at a distance but no more than 6 meters from the
remote control signal sensor.
· Remove the obstacles between the remote control unit and remote control signal sensor.
· Subtitles are hidden from the TV screen. Press SUBTITLE to display the subtitles.
En 40
Page 41

5-2 Disc Handling and Maintenance
Handling Precautions
Hold the disc by the edges so the surface will not be soiled with fingerprints. (A)
Fingerprints, dirt and scratches can cause skipping and distortion.
Do not write on the label side with a ball-point pen or other writing utensils.
Do not use record cleaning sprays, benzene, thinner, static electricity prevention liquids or any other solvent.
Be careful not to drop or bend the disc.
Do not install more than 1 disc on the disc tray.
Do not try to close the disc cover when the disc is not installed properly.
Be sure to store the disc in its exclusive case when not in use.
If the surface is soiled (B)
Wipe gently with a soft, damp (water only) cloth.
When wiping discs, always move the cloth from the center hole toward the outer edge.
(If you wipe the discs using a circular motion, circular scratches are likely to occur, which will cause noise.)
(A) (B)
5
If the disc is brought from a cold to a warm environment, moisture may form on the disc
Wipe this moisture off with a soft, dry, lint-free cloth before using the disc.
Improper disc storage
You can damage discs if you store them in the following places:
Areas exposed to direct sunlight
Humid or dusty areas
Areas directly exposed to a heat outlet or heating appliance
Disc which cannot be played with this player
CD-ROM (Application Program)
CVD
CD-G
DVD with a Locale No. other than that shown on the DVD unit’s Region Code Label on the rear panel
Maintenance
Be sure to turn the unit off and disconnect the AC power cord before maintenancing the unit.
Wipe this unit with a dry soft cloth. If the surfaces are extremely dirty, wipe clean with a cloth which has been
dipped in a weak soap-and-water solution and wrung out thoroughly, and then wipe again with a dry cloth.
Never use alcohol, benzene, thinner, cleaning fluid or other chemicals. And do not use compressed air to remove
dust.
For Your Reference
En 41
Page 42

5
5-3 Definition of Terms
Angle
Recorded onto some DVD discs are scenes which have been simultaneously shot from a number of different angles (the same scene is shot from the front, from the left side, from the right side, etc.). With such
discs, the ANGLE button can be used to view the scene from different angles.
Chapter Number
These numbers are recorded on DVD discs. A title is subdivided into many sections, each of which is
numbered, and specific parts of video presentations can be searched quickly using these numbers.
DVD
These refer to a high-density optical disc on which high-quality pictures and sound have been recorded
by means of digital signals. Incorporating a new video compression technology (MPEG II) and high-density
recording technology, DVD enables aesthetically pleasing full-motion video to be recorded over long
periods of time (for instance, a whole movie can be recorded).
DVD has a structure consisting of two 0.6 mm thin discs which are adhered to each other. Since the
thinner the disc, the higher the density at which the information can be recorded, a DVD disc has a
greater capacity than a single 1.2 mm thick disc. Since the two thin discs are adhered to each other,
there is the potential to achieve double-sided play sometime in the future for even longer duration play.
Subtitles
These are the printed lines appearing at the bottom of the screen which translate or transcribe the
dialogue. They are recorded on DVD discs.
Time Digit
This indicates the play time which has elapsed from the start of a disc or a title. It can be used to find a
specific scene quickly. (It may not work with some discs.)
Title Number
These numbers are recorded on DVD discs. When a disc contains two or more movies, these movies are
numbered as title 1, title 2, etc.
Track Number
For Your Reference
These numbers are assigned to the tracks which are recorded on audio CDs. They enable specific tracks
to be located quickly.
En 42
 Loading...