

Page 1

A3 Scanner
English
User Manual
Page 2
Acquire the Scanner
TWAIN Driver
The TWAIN driver is the scanning module provided
with your scanner. It is easily accessed from within
the bundled scanner software or from within any
TWAIN-compliant program. Before you start with
the steps below, be sure you have installed and
configured the bundled scanner software.
1. Launch Windows.
2. Run the host TWAIN-compliant software (e.g.
Photo Express)
3. Call up the TWAIN Data Source by selecting
Acquire from the File menu. (In some programs,
the Acquire command will appear in a submenu
under the Import command.) The TWAIN
dialog box will appear in a submenu under the
Import command.
The TWAIN dialog box contains control settings,
which you must set prior to scanning a document.
The basic steps to scan a document are:
1. Prescan the document.
2. Set the desired image area to be scanned.
3. Select the scan source.
4. Select the desired scan mode.
5. Select the desired resolution.
6. Click on the Scan button.
Page 3

Folders
Contain different
control settings
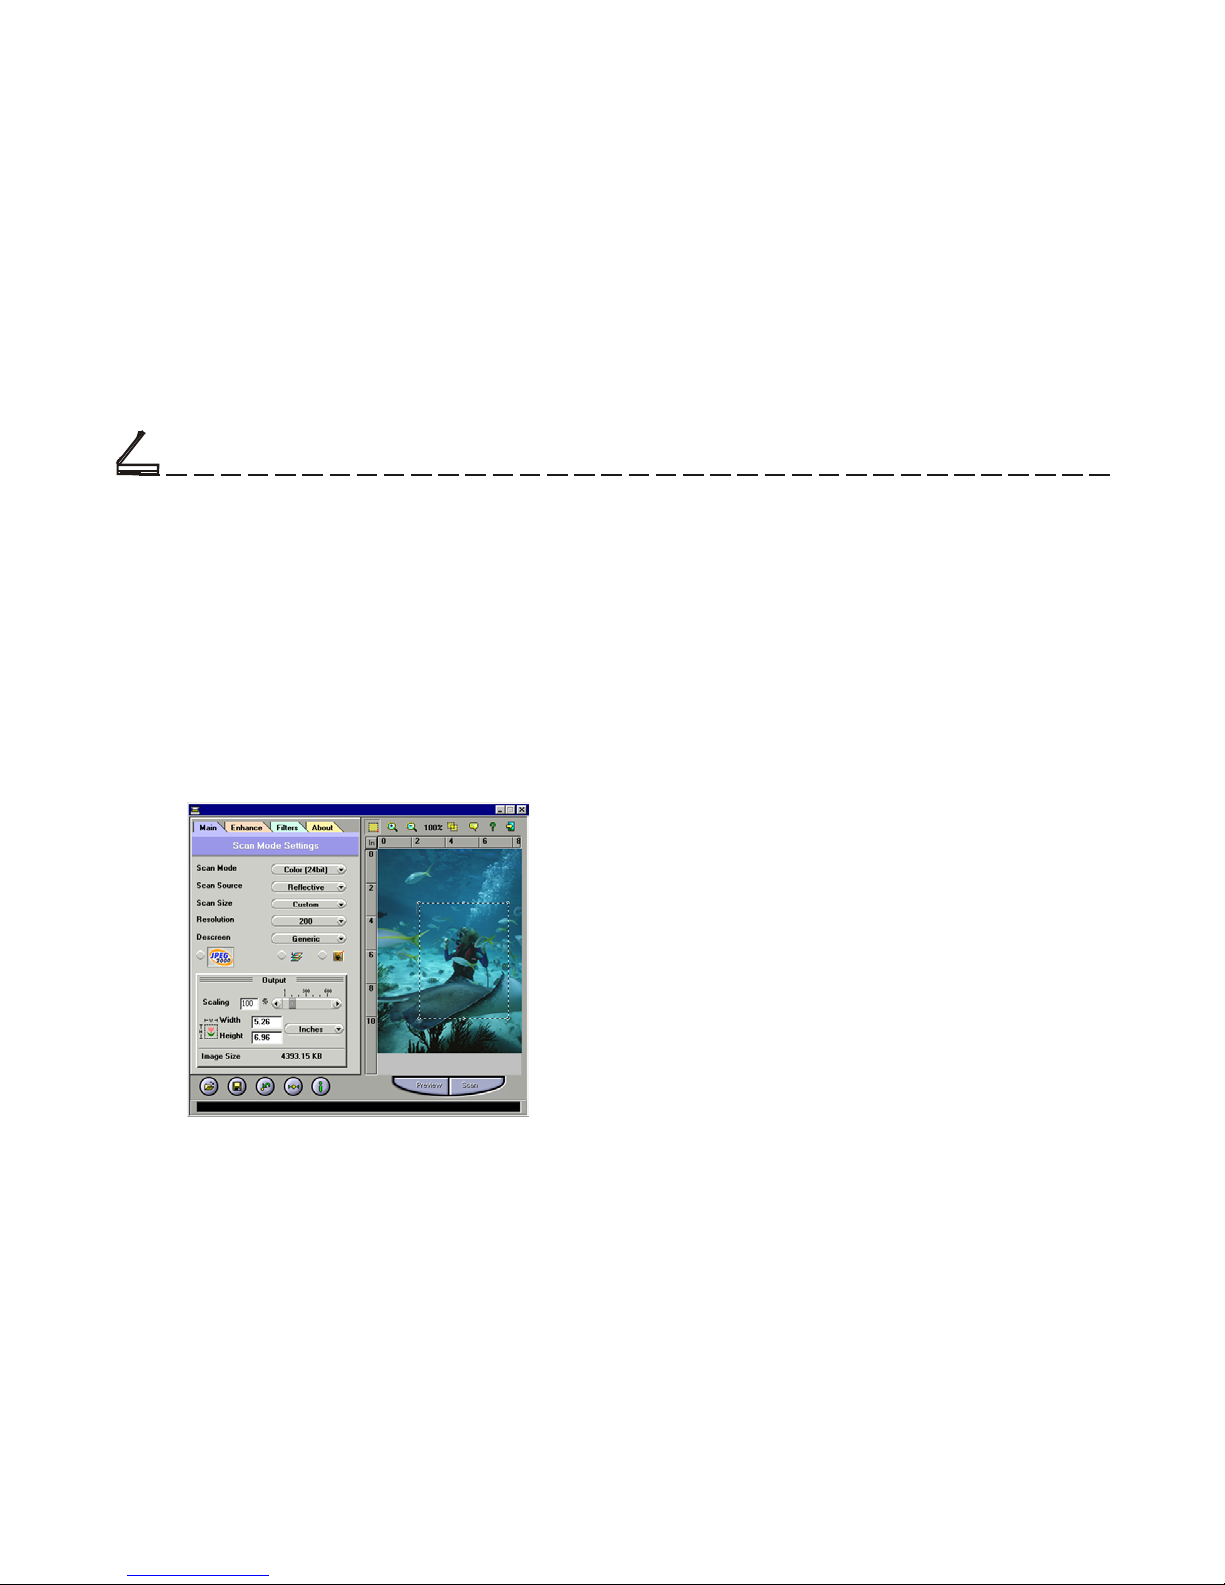
The Dialog Box
The TWAIN dialog box is divided into two sections: the left section where most of the control settings are
located, and the right section, which is the Preview Window.
Preview Window
Used for viewing the
prescan image and
selecting the final
scan area
Page 4

Resolution
Sets the resolution in dots per inch
(dpi).
Output Scaling
Changes the dimensions of the
final output.
Scan Source
Sets the media type of the
document to be scanned.
Scan Mode
Determines how the scanner
will read the image and refers
to how the image will be
reproduced after it is scanned.
Photo Refresh
Photo Refresh allows you to automatically lighten and sharpen the
scanned image by clicking on its
icon. This function is applicable
when you are scanning images in
Color 24bit.
Descreen
Sets the media type of the document
to be scanned to reduce image
noise.
Image Size
Displays the amount of computer
space needed to display or save the
selected image area.
Scan Size
Refers to the size of the image or document that you are
about to scan.
JPEG2000 Scan
The latest image compression
standard that usually provides
smaller file size and higher
image quality than the original
JPEG.
Width and Length
Show the dimensions of the
image area inside the Crop
Frame.
Color Matching Control
Color Matching allows the scanner
to more accurately reflect the actual
colors of the original image.
The Main Folder
Page 5
Thumbnails
Are used to see the effects of
any changes in the control
settings.
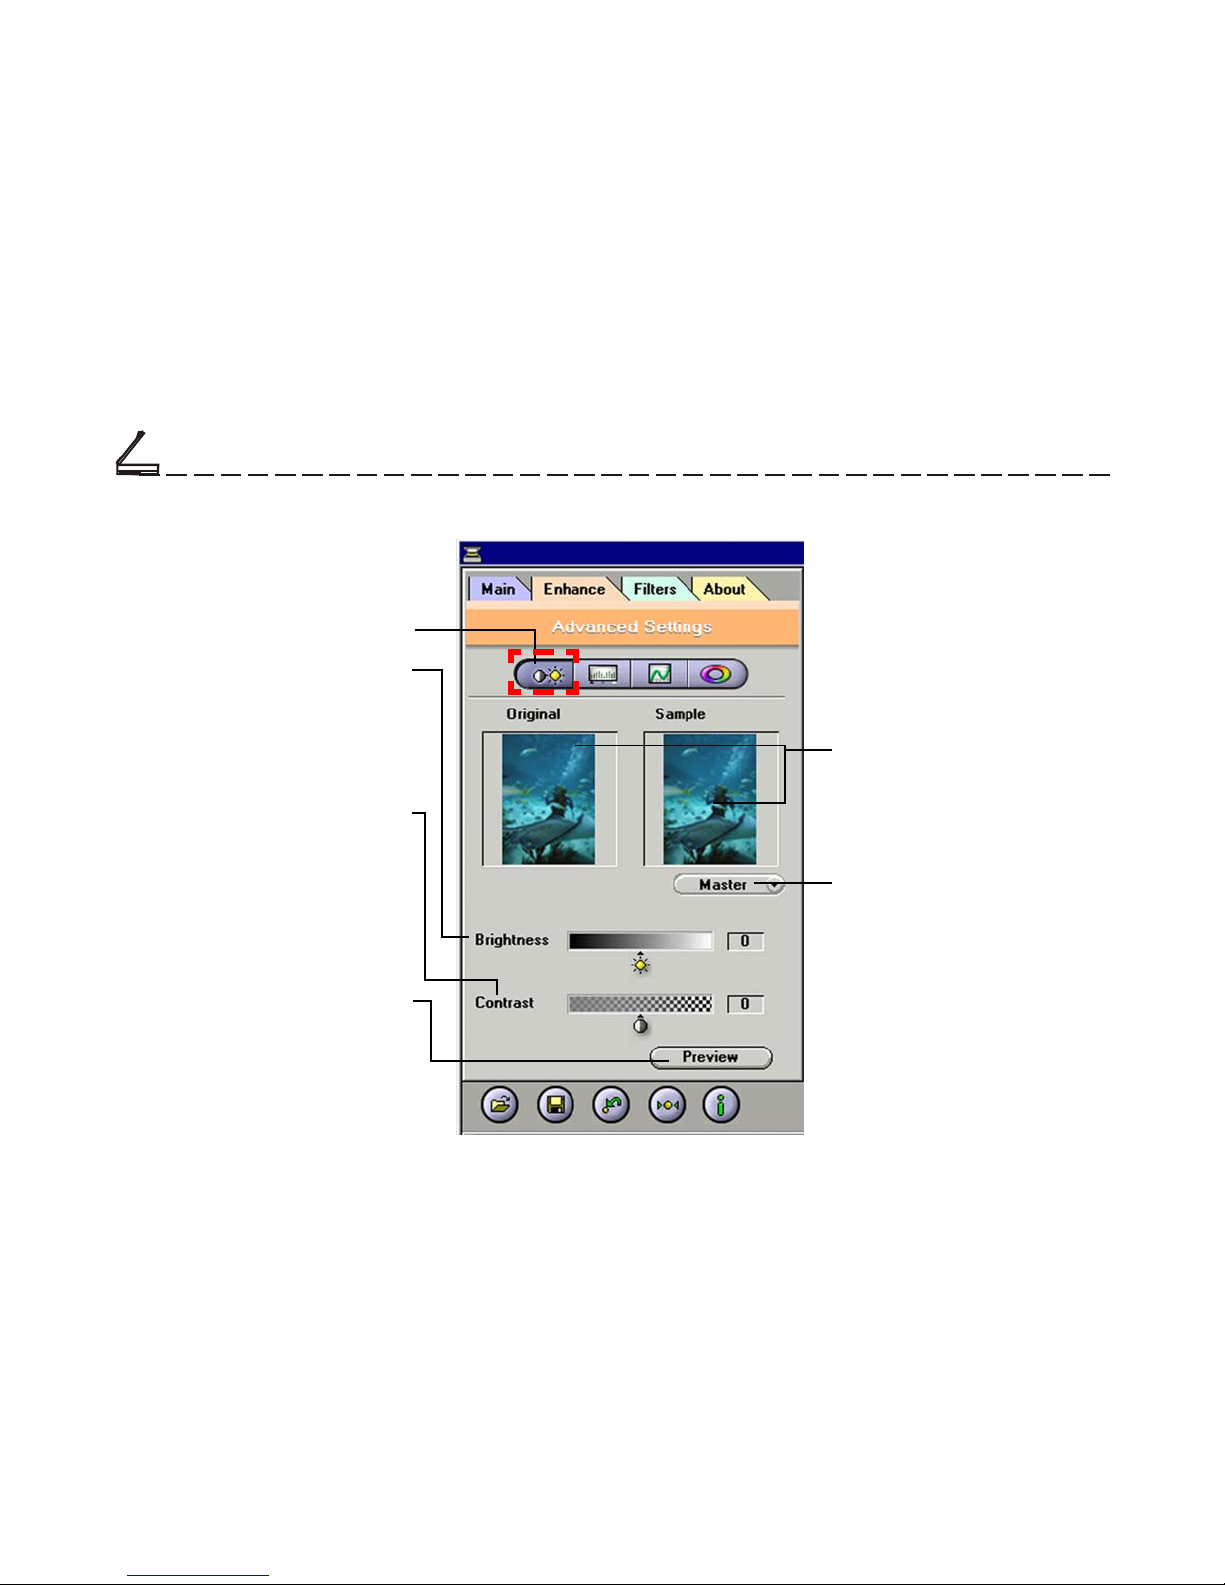
The Enhancement Folder:
Brightness/Contrast Control
Brightness Control
Allows you to adjust the overall
amount of light in the image
through a range of values (–127
~0~+127).
Channel Selector Control
Allows you to select the
channel layers (red, green
and blue) that make up a color
image. You can choose to
change the channels individually or choose master to
change all channels equally
and simultaneously.
Contrast Control
The Contrast Control allows you
to adjust the overall amount of
black areas or white areas in the
image through a range of values
(–127~0~+127).
Brightness/Contrast Control
Preview Button
This button allows you to see the
effect of any changes made to
the image prior to scanning. Any
changes will appear in the
preview window.
Page 6

Level Control
Use the level slider to adjust an
image’s contrast and brightness.
Histogram
Shows the distribution of the
brightness levels in the image.
Eyedropper tools
Eyedroppers are used to identify an image’s highlights and
shadows.
Thumbnails
Are used to see the effects of
any changes in the control
settings.
The Enhancement Folder: Level Control
Channel Selector Control
Allows you to select the channel layers (red, green and
blue) that make up a color
image. You can choose to
change the channels individually or choose master to
change all channels equally
and simultaneously.
Level Control
Preview Button
This button allows you to see the
effect of any changes made to
the image prior to scanning. Any
changes will appear in the
preview window.
Page 7

Curve Control
Applying a curve to an image
enhances favored brightness
ranges at the cost of others.
Add Anchor
To make a curve, simply place
an anchor on the diagonal line
and adjust its position. Add
more anchors if you have to
make a
more complex curve.
Remove Anchor
You can also remove anchors.
Thumbnails
Are used to see the effects of
any changes in the control
settings.
The Enhancement Folder: Curve Control
Channel Selector Control
Allows you to select the
channel layers (red, green and
blue) that make up a color
image. You can choose to
change the channels individually or choose master to change
all channels equally and
simultaneously.
Curve Control
Preview Button
This button allows you to see the
effect of any changes made to
the image prior to scanning. Any
changes will appear in the
preview window.
Page 8

Thumbnails
Are used to see the effects of
any changes in the control
settings.
The Enhancement Folder: Hue/Saturation Control
Hue/Saturation Control
Preview Button
This button allows you to see
the effect of any changes
made to the image prior to
scanning. Any changes will
appear in the preview window.
Saturation Slider
Lets you adjust an image’s color
purity.
Hue Slider
Is composed of two color bars.
The upper one is static and the
lower one movable. Slide the
latter, and you will see the image
shift its overall coloring.
Page 9

The Filters Folder
None
No filter is applied.
Invert
Reverses an image to its
negative or compliment.
Flip
Creates a mirror image of
the original.
Blur
Smooths or softens the
image.
Emboss
Makes the elements in the
image appear raised or
sunken.
Sharpen
Enhances the detail in the
image.
Thumbnails
Are used to see the effects
of the selected filter.
Unsharp Mask
Emphasizes shape edges
and color boundaries.
Filter Control Buttons
Use these buttons to add
/subtract a degree of the
Blur or Sharpen filter.
The Filters Tab allows you to
adjust the individual effects of the
scanned image by applying
various filters to the image, prior
to scanning.
Page 10

Batch Scan Button
Allows creation of up to 30 scan
regions (or Crop Frames) for
multiple scanning.
Crop Frame
Outlines the scan area or region
that will be included in the final
scan.
The Preview Window
Preview Button
Allows you to see the effect of
any changes made to the image
prior to scanning.
Zoom Tool Button
Allows you to enlarge/shrink an
area of the image in the preview
window
Cropping Tool
Selects the area in the Preview
Window that will be used as the
final scan.
Language Setting
Allows you to select the desired
language that the dialog box will
be displayed in.
Help Button
Provides On-line Help.
Exit Button
Click to exit (or close) the TWAIN
or Batch Scan Dialog boxes.
Scan Button
Processes the pre-scanned
image, and displays it in the host
software (where you opened up
the TWAIN dialog box).
Page 11

Previous Button
Returns the most recent selection to its
previous setting. (Reloads the last saved
image settings.)
Reset Button
Returns settings to their default values.
Load Button
Loads previously saved image settings.
Save Button
Saves the current image settings.
Info Button
Lists information about the current settings
being used.
Prescan the Image
A Preview is a quick lowresolution scan of the entire
original image. From this lowresolution scan you can get a
clearer idea of the image area you want to include
when you click Scan. To Preview, the steps are:
1.Place the document face down on the scanner
window glass.
2. Click the Preview button in the dialog box. After
the scanner has scanned the document, the scanned
image will appear in the Preview Window. From
the Preview image, you can now set the exact
image area you wish to include in your final scan.
Page 12

2. Select the scan source.
Since we are going to scan a color photograph,
choose Reflective.
Reflective:
When scanning paper-based documents such as
photographs or text (magazines, books, or images).
3. Select the desired scan mode.
The Scan Mode determines how the scanner will read
the image.
• 48-Bit Color captures images in 281 trillion colors
• 24-Bit Color captures images in 16.7 million colors
• CMYK captures images for output to a color printer
• 256 Color captures images in its
optimum palette
• 256 Gray captures images in 256 grayscale
Set Up the Scan Parameters
1. Set the desired image area to be scanned.
Use the Crop Frame in the Preview Window to
outline the image area you wish to scan. Click one
of the sides or corners of the Crop Frame and drag it
out or in to the desired length
and width.
To move the entire Crop
Frame, position the mouse
cursor inside it and drag with
the left mouse button.
Only the area inside the Crop Frame will be included
in the resulting scanned image when you click Scan.
The size information at the bottom of the dialog box
is automatically updated when the Crop Frame is
resized.
Crop frame
Page 13

• Gray (16 bit) captures 16 bits of grayscale image
information for every pixel in the screen image
• Text/Line Art is used for text documents or black-
and-white images
4. Select the desired resolution.
Resolution is a measure of how much image detail
information the scanner is to capture in a scan. A
higher resolution results to a sharper image but
requires more disk space for file saving. For this
session, set the resolution to 300 dpi.
Execute the Scan Command
When you are finished with the
control settings, click on the
Scan button. The scanner
begins to scan the document and a message box appears on the screen displaying the progress of the
scan.
When the scan is finished, the image will be displayed
in the main screen of the host software.
Page 14

Using Batch Scan
Batch scanning is an easy way to multi-scan any part
of your document using different scan modes and
resolutions. In batch scanning, you can specify up to
a maximum of 30 scan regions, or you can scan a
single region several times using different combinations of scan modes and resolutions.
To activate batch scanning, click on the
Batch Scan button. This will bring up the
Batch Scan dialog box.
The Batch Scan Dialog Box
The Batch Scan dialog box contains several controls
that make batch scanning simple and easy to use. It will
also display the number of batch jobs that you make
when you create the scan regions.
Page 15

• New Batch Button
Click on this button to create a new
scan region on the image in the
Preview Window.
• Duplicate Batch Button
Click on this button to duplicate a
batch job. You can then specify
different control settings for this
particular batch job.
• Trash Batch Button
Click on this button to delete the
selected or highlighted batch job.
• Cancel Batch Button
Click on this button to cancel batch
scan and exit the Batch Scan dialog
box.
 Loading...