

Page 1

User's Guide
Page 2

Manuals for browsing
After inserting the attached CD-ROM, Click [Manuals] in the opening screen to display
the list of manuals you can browse.
Select the manual to start browsing.
You can browse the following manuals:
�Reference Manual
Electronic manual describing all the functions of OfficeBridge Pro by category. You can
install this manual in your PC when setting up OfficeBridge Pro.
�User's Guide
Introduction manual describing OfficeBridge Pro simply.
First of all, read this manual.
�Operation Guide
This manual describes how to scan the documents and send the faxes by Internet.
�Hardware Installation
This manual describes how to install the OfficeBridge Pro board in the MFX-2830.
�Administrator's Manual
This manual describes how to register the administrator's rights and the device
information with OfficeBridge Pro.
Page 3

User’s Guide
Page 4

Page 5

Table of Contents
Preface ........................................................................................................... iii
How to use this guide ................................................................................ iv
Configuration options ................................................................................ iv
Chapter 0 Getting Started
1. Operating system ...................................................................................
Chapter 1 What is OfficeBridge Pro?
1. What is it used for? .................................................................................
2. What makes up OfficeBridge Pro? ........................................................ 7
3. How does it work? .................................................................................. 9
Chapter 2 What Can be Done with OfficeBridge Pro
1. “Boxes” ..................................................................................................
2. “Send & Receive Fax” function ............................................................. 16
Send & receive PC fax .......................................................................... 16
Sending Internet fax ............................................................................ 18
3. “Scanner” function ................................................................................ 19
4. “Printer” function ................................................................................. 20
5. “Bulletin Board” function ..................................................................... 21
6. “Circulation” function ........................................................................... 22
7. “Processing” function ............................................................................ 23
Chapter 3 OfficeBridge Pro
(Basic) 1. Viewing / sending a document .................................................
Step 1: Launching the Browser ........................................................... 26
Step 2: Understanding the screen layout ............................................ 30
Step 3: Importing documents ............................................................... 33
Step 4: View the imported document ................................................... 34
Step 5: Fax an imported document ...................................................... 37
Step 6: Confirm the transmission of a selected document ................. 39
(Application) 2. Sending a document ...................................................... 41
Directly fax a document created on a word processor ........................ 41
Sending a document using the Internet .............................................. 44
Request action on an order form or other document by a co-worker ... 47
(Basic) 3. Using Documents Effectively .................................................. 51
Post documents as company announcements ..................................... 51
Circulate a document among co-workers ............................................ 53
Downloading documents ...................................................................... 56
(Basic) 4. Printing Documents ................................................................. 58
Printing Documents ............................................................................. 58
Use the MFX-2830 as a printer ........................................................... 59
12
26
2
4
i
Page 6

Chapter 4 Installing OfficeBridge Pro Programs
1. What kind of program is “installed?” ...................................................
2. Installing ............................................................................................... 65
To delete programs ............................................................................... 78
Chapter 5 Learning More About the OfficeBridge Pro Operation
1. How to use the electronic manual .......................................................
What is the “Electronic Manual?” ........................................................ 82
Opening the electronic manual ............................................................ 83
Viewing the contents of the electronic manual ................................... 85
2. Making Reference to the electronic manual ....................................... 88
Performing a full-text search ............................................................... 88
Performing an ID search ...................................................................... 90
Chapter 6 Troubleshooting
1. Issues with the screen operation ........................................................
2. Printing problems ............................................................................... 100
3. Issues with “OB Pro InfoMonitor” ..................................................... 104
4. Issues with OfficeBridge Pro ............................................................. 106
Appendix
Glossary .................................................................................................. 110
Specifications .......................................................................................... 115
Index ....................................................................................................... 118
62
82
92
ii
Page 7

Preface
Thank you for purchasing “OfficeBridge Pro.”
Installed on the MFX-2830, OfficeBridge Pro is a network management system that
lets you manage faxes and other documents over the network.
This guide explains the OfficeBridge Pro system usage from basic to advanced,
in simple terms. Reading this guide will allow you to have an understanding of
OfficeBridge Pro basic operation.
For more detailed usage information, see the “OfficeBridge Pro Reference Manual.”
The “OfficeBridge Pro Reference Manual” is an electronic manual, which has an
interface similar to an Internet web-page. To learn how to use the electronic manual,
see “Chapter 5 - Learning more about OfficeBridge Pro Operation” in this guide.
Mic rosoft, Windows, Internet Explorer, and Word are trademarks o r registered
trademarks of Microsoft Corporation in the United States and other countries.
Other company names or product names are the trademarks or registered trademarks
of their respective owners.
Please note that TM, and ®, © marks are omitted in the text of this document.
The company and personal names shown on screens in this guide are fictional.
iii
Page 8
How to use this guide
Delete after transmission
High LowMedium
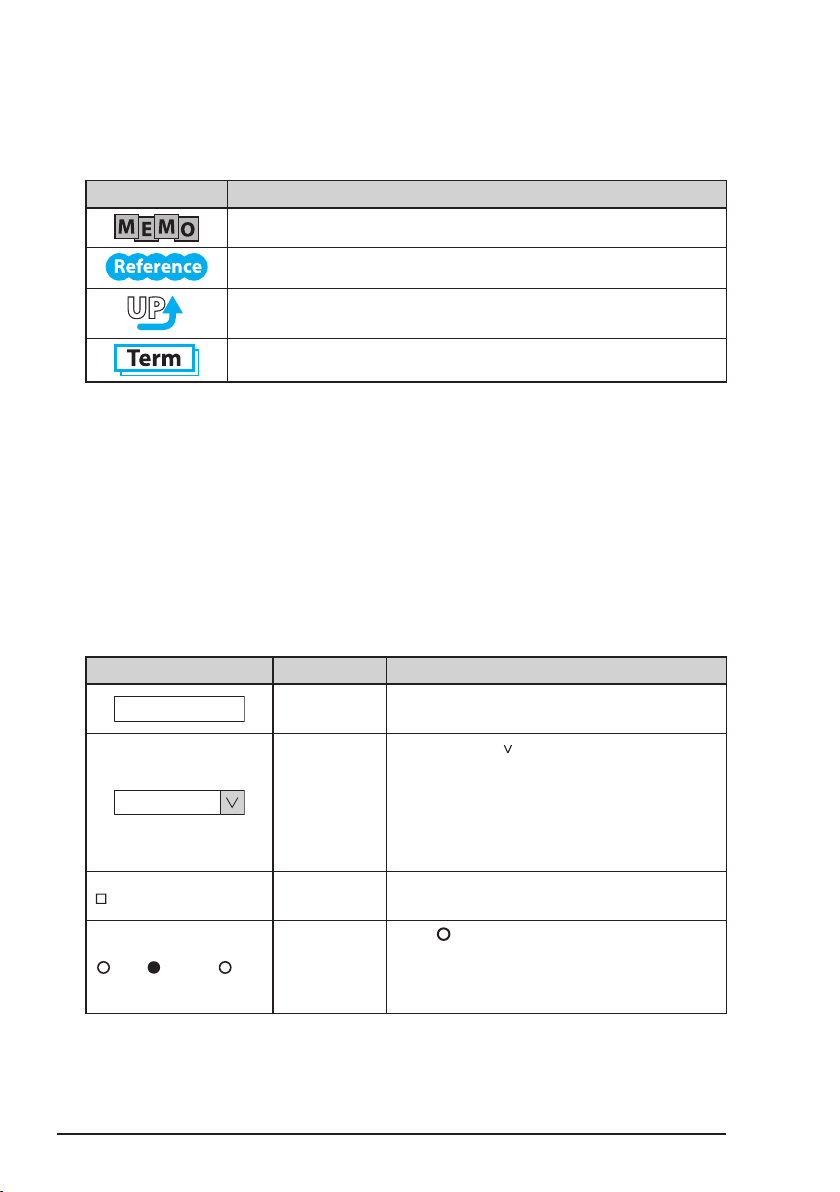
Throughout this guide, icons (symbols) are used.
The meanings of these icons are as follows.
Icon Meaning
This indicates useful information.
This indicates related content is available.
This indicates more detailed related information is available in
the “OfficeBridge Pro Reference Manual.”
This indicates a term definition used in the text instruction.
Also, a 3 digit number in parentheses [ ] is shown after explanations in this guide.
This number is required to perform an ID search of the “OfficeBridge Pro Reference
Manual.”
For details, see “Performing an ID search” in “Cha pter 5: Learning more a bout
OfficeBridge Pro Operation” - 2. Referencing the electronic manual” (page 90).
Configuration options
This guide and the “OfficeBridge Pro Reference Manual” shows setting screens and
configuration options of each dialog as follows.
Display example Name Operation
iv
Text box Enter the text.
By clicking [ ] (List b utton), av ailable
selections are displayed (if all the available
List box
Checkbox
Radio button
selections cannot be shown at once, a scroll
bar is displayed on the right).
Move the mouse pointer over the list and
click to confirm a selection.
Cl i ck in the squar e to sel ect it. W h en
selected a check mark appears.
Click ● (Off) to select it.
Clicking it causes the status to change to ●
(On).
Only one item can be selected.
Page 9

Chapter 0 Getting Started
This chapter explains the operating environment and
other items to be checked before using OfficeBridge Pro.
0
1. Operating system .........................................................
2
Page 10

1
Operating system
To ensure optimum operation of “OfficeBridge Pro,” we recommend the
following operating systems.
●Base software (operating system)
Japanese version of Microsoft Windows95
Windows NT4.0*2, Windows2000*3, or Windows XP
●Computer
Any PC/AT compatible computer with an Ethernet network interface
running any of the above operating systems
●CPU
Follow the recommended guidelines for the above listed operating system
●Memory
Follow the recommended guidelines for the above listed operating system
●Hard disk
40MB or more (addi tio nal space is r equ ire d t o dow nlo ad and save
documents)
●Removable media
CD-ROM drive
●Network protocol
TCP/IP protocol must be installed
●Browser
Microsoft Internet Explorer 6 or later
Netscape Navigator 7.0 or later
*4
*1
, Windows98, Windows ME,
●Other
A graphic adapter capable of displaying 256 or more colors at a resolution
of 800 x 600 pixels or greater and a network interface card is required
*1
: System version must be Windows 95 Service Pack 1 or higher
*2
: System version must be NT Workstation 4.0 SP 6a or higher
*3
: Compatible with Windows 2000 Professional
*4
: This product is only distributed on CD-ROM. Please contact the place of
purchase or the Information Center to learn how to install on a computer.
2
Page 11

1
Chapter 1
What is OfficeBridge Pro?
To answer the question of exactly what is OfficeBridge
Pro, this chapter explains the system concept.
1. What is it used for? ......................................................
2. What makes up OfficeBridge Pro? .............................. 7
3. How does it work? ........................................................ 9
4
Page 12
1
What is it used for?
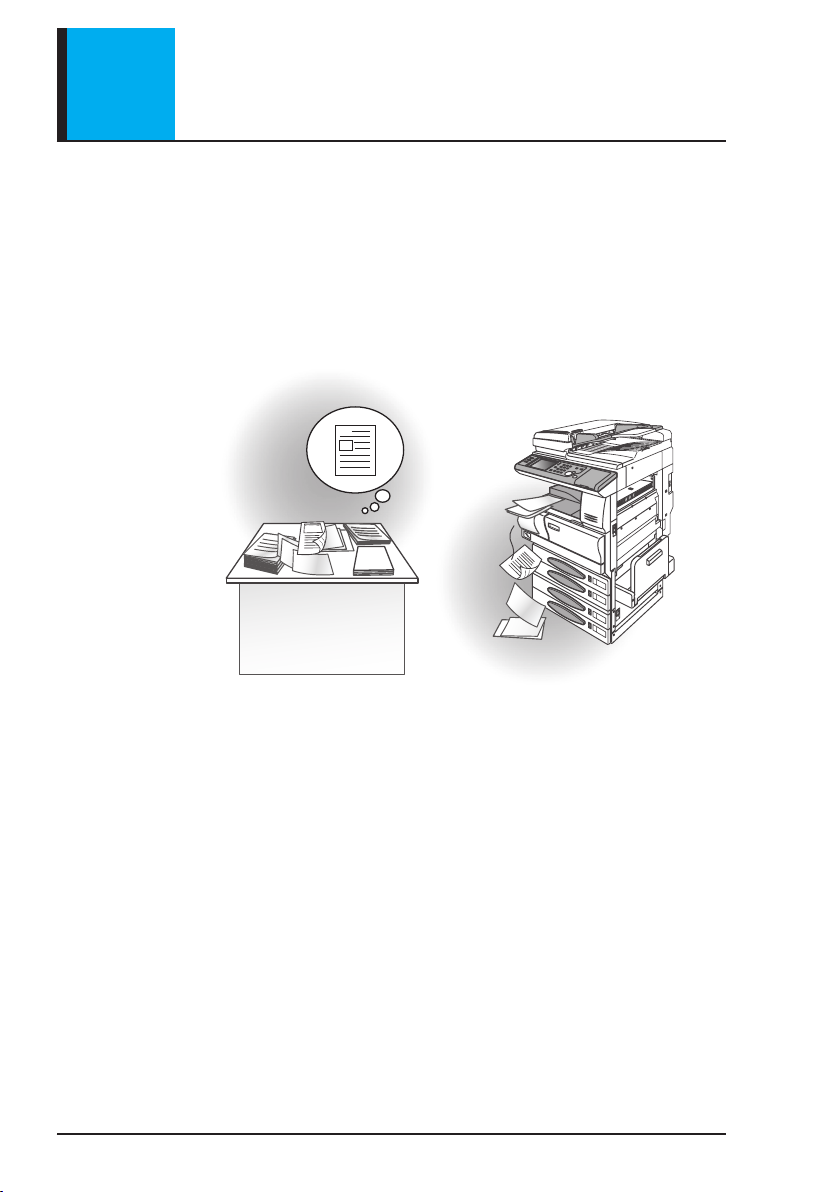
In offices everywhere scenes like the following are commonplace: “Has the
fax arrived from Company A yet?” “Where’s that order form that Company
B sent to us?” “Whose fax is this from Company C?”
Faxes received on paper are difficult to manage, often being lost before they
are delivered to the recipient or mixed in with other documents.
Also, printing out documents (quotations or orders, etc.) on the computer
and faxing this paper results in wasted productivity.
Have you ever experienced any of these?
4
Page 13

What is it used for?
OfficeBridge Pro solves these problems in one fell swoop.
1. Centralized fax/e-mail management
With OfficeBridge Pro, you can check received faxes at your computer.
Since they are not printed on paper like normal fax documents, there is no
risk of lost faxes or wasting paper. Also, as digital documents they can be
saved to a computer hard disk or removable media, saving filing space in
the office.
With OfficeBridge Pro, from your computer, you can receive faxes and
email and also send faxes and email to other users in your company.
Received documents are stored
as “electronic documents”
Chapter 1
2. Re-using received faxes
With OfficeBridge Pro, you can re-use received faxes right away. For
example, you can send an order form or estimate to a co-worker without
printing it on paper.
5
Page 14

What is it used for?
3. Sending faxes of documents created on a computer
With “OfficeBridge Pro,” you can send faxes prepared in Microsoft Word or
other programs directly to a recipient without printing them first.
* In this guide faxes, quotations, order forms, etc. are collectively referred to as
“documents”.
Create documents with
application software
Send the documents
directly to recipients
6
Page 15

What makes up
2
· Hardware Configuration
The OfficeBridge Pro system consists of a MFX-2830 and computer. The
MFX-2830 and computer are connected through a network. Also, for
sending/receiving faxes and connecting to the Internet, the multifunction
copy/fax is connected to an outside line.
OfficeBridge Pro?
Outside line
e-mail
MFX-2830
Fax
Chapter 1
7
Page 16

What makes up OfficeBridge Pro?
· OfficeBridge Pro Prerequisites
Using OfficeBridge Pro does not require special software.
OfficeBridge Pro can be used by any network-connected computer with a
web browser.
Browser software
Application software used for viewing web pages.
Mic rosoft’s Internet Ex plorer and Ne tscape Navigator by Ne tscape
Communications are two examples.
8
Page 17

3
How does it work?
Users must first register before using OfficeBridge Pro. Registered users
are assigned a box inside OfficeBridge Pro, and received faxes or other
documents are stored here automatically.
User A User B
Several types of boxes are provided for different types of usage. Documents
are categorized by type and delivered to the appropriate box.
Each user confirms if they have any documents by opening their box in
OfficeBridge Pro.
Chapter 1
To box 1
of user A
After checking for documents, users can display content on their web
browser on their computers.
To box 1
of user B
9
Page 18

10
Page 19

2
Chapter 2
What Can be Done with OfficeBridge Pro
Th i s ch a pte r e xpl a in s fu nct ion s av ail a bl e wi th
OfficeBridge Pro.
1. “Boxes” ........................................................................
2. “Send & Receive Fax” function .................................. 16
3. “Scanner” function ...................................................... 19
4. “Printer” function ....................................................... 20
5. “Bulletin Board” function ........................................... 21
6. “Circulation” function ................................................. 22
7. “Processing” function .................................................. 23
12
Page 20

1
“Boxes”
Chapter 1 explained how each user is assigned their own box inside
OfficeBridge Pro.
Here, actual OfficeBridge Pro functions will be explained in detail.
The following box types are created when a user is registered.
“Scan”
A personal box for storing documents when using the “Scanner” function
(see page 19).
Scanned documents are displayed on the OfficeBridge Pro screen (hereafter
this screen will be called the “Scan” document list screen).
12
Page 21

“Personal Outbox”
A personal box for storing documents sent by fax when using the “Send &
Receive Fax” function (see page 16).
Sent documents are displayed on the OfficeBridge Pro screen (hereafter
this screen will be called the “Personal Outbox” document list screen).
“Personal Inbox”
A personal box for storing received documents when using the “Send &
Receive Fax” function (see page 16).
Delivery conditions must be set before received documents can be delivered
to a specified user’s box (Received Fax Delivery Settings [001]).
Received documents are displayed on the OfficeBridge Pro screen (hereafter
this screen will be called the “Personal Inbox” document list screen).
“Boxes”
Chapter 2
13
Page 22

“Boxes”
“Public Inbox”
This is a box shared by all registered users for storing documents received when
using the “Send & Receive Fax” function (see page 16).
Documents will be delivered to this “Public Inbox” if incoming fax delivery
options are not set, or if the received document does not meet any specified
delivery conditions.
All registered users can view documents delivered to the “Public Inbox”.
Public Inbox documents are displayed on the OfficeBridge Pro screen
(hereafter this screen will be called the “Public Inbox” document list screen).
14
“Bulletin Board”
A box shared by all registered users for storing documents when using the
“Bulletin Board” function (see page 21).
Posted documents are displayed on the OfficeBridge Pro screen (hereafter
this screen will be called the “Bulletin Board” document list screen).
Page 23

“Circulated”
A personal box for storing documents when using the “Circulation” function
(see page 22).
Circulated documents are displayed on the Offi ceBridge Pro screen
(hereafter this screen will be called the “Circulated” document details
screen).
“Processing”
A box shared by all registered users for storing documents when using the
“Processing” function (see page 23).
All documents are displayed on the OfficeBridge Pro screen (hereafter this
screen will be called the “Processing” document list screen).
“Boxes”
Chapter 2
15
Page 24

“Send & R eceive Fax”
2
function
“Send & receive fax” is the main function of OfficeBridge Pro.
There are two types of “Send & receive fax”: “Send & receive PC fax” using
a computer to directly send and receive faxes, and “Internet Fax,” using the
Internet to send faxes as e-mail.
Send & receive PC fax
<Send>
Documents created with an application like Microsoft Word are directly
transmitted to a specified fax number.
This process eliminates the need to create a hardcopy original, reducing
paper consumption, and also eliminates the need to physically leave your
workstation to perform a fax transmission.
For information on PC-faxing, see “Directly fax a document created on a
word processor” in “(Application) 2. Sending a document” (page 41).
Sending a fax
“Send” document list
16
Page 25

“Send & Receive Fax” function
<Receive>
Incoming fax documents can be viewed on your PC.
This process insures that documents reach the appropriate users.
For information on PC-Fax reception, see “Step 4: View the imported
document” in “ (Basic) 1. Viewing/Sending a document” (page 34).
Receiving a fax
“Personal Inbox”
document list
Chapter 2
17
Page 26

“Send & Receive Fax” function
Sending Internet fax
Docu ments imp orted usin g the “ Scann er” function ( see page 19) or
documents created with applications like Microsoft Word can be sent as
e-mail by specifying the recipient’s mail address. This allows users to
receive important communications if they are out of the office, or if they
do not have access to a traditional fax machine. Scanned and created
documents are delivered as file attachments (PDF or TIFF files).
For infomation on Internet faxing, see “Sending a document using the
Internet” in “(Application) 2. Sending a document” (page 44).
Creating a document
Internet
18
File attachment
A document sent or received by e-mail as an attachment. The contents of
attached files cannot be directly viewed with e-mail software. Attached
files must be viewed with other applications like image viewers or Adobe
Acrobat.
PDF file
A file format used by an application called Acrobat, from Adobe Systems.
Co nve rtin g f i les to PDF for mat all ows the m to b e e lect ron i cal ly
distri bu ted to recipient s regar dl ess of their com puter p la tform o r
environment. Also, the original image can be rendered without any
corruption of the document’s layout.
TIFF file
A graphical image file format. Image resolution or color depth for an
image and different encoding algorithms can be saved into a single file.
Page 27

3
“Scanner” function
OfficeBridge Pro can import illustrations, photographs and text documents
into the MFP. Imported documents can be faxed, posted to the bulletin
board or circulated to relevant persons.
Also, using a TWAIN-compatible application, scanned documents can be
imported to a computer and freely edited. [002]
See “Internet Fax / Network Scan Operation Manual” to learn how to scan
documents.
Scanning a document
“Scan” document
details
Chapter 2
Import images using a TWAIN-compatible
application
The “Muratec OB Pro TWAIN Connector” must be installed to import
scanned documents to your computer (see page 63).
TWAIN specification
A specification for data communication between image input devices,
such as scanners, and graphic editing software. Images scanned with
a TWAIN scanner can be imported to a computer by using a TWAINcompatible graphic editing software.
19
Page 28

4
“Printer” function
OfficeBridge Pro allows the MFX-2830 to be used as a network printer.
Computers on the network can print created or downloaded documents at
600 dpi resolution on up to ledger size paper.
Users can also incorporate two-sided printing and tray distribution options
on the MFX-2830.
See “Use the MFX-2830 as a printer” in “ (Basic) 4. Printing Documents”
(page 59) to learn how to print documents.
Downloaded documents
Created documents
20
“Muratec OB Pro MFX-2830 Printer” must be installed to use the digital
MFX-2830 as a printer. (see page 63).
Page 29

5
“Bulletin Board” function
OfficeBridge Pro has a function to allow the posting of scanned or received
documents to a bulletin board.
Posted contents can be viewed easily from your computer so there is no
need to set aside space in the office for a physical bulletin board.
Company announcements can be quickly communicated to all employees.
To use the “bulletin board” function, send scanned or received documents
to the “Bulletin board” box.
See “Post documents as company announcements” in “(Basic) 3. Using
Documents Effectively” (page 51) to learn how to post documents.
Chapter 2
Browsing
bulletin board
documents
Posting scanned
documents
“Bulletin Board” document list
Browsing
bulletin board
documents
Posting received
documents
21
Page 30

6
“Circulation” function
OfficeBridge Pro has a function to circulate scanned or received documents.
This function is useful to ensure everyone in the company is notified
about a company document, or to confirm attendance in an office event, for
instance.
The sender can determine who the document will be sent to.
Users receiving the circulated document set their status to confirmed (read)
when they check its contents. A check of whether the circulated document
is confirmed (read) or not confirmed (not read) can be performed by not
only the sender but any of the users in the circulation.
See “Circulate a document among co-workers” (page 53) to learn how to
circulate a document.
Circulating a received
document
Circulating a scanned
document
“Circulated”
document details
Circulation to User A User
B User C (si mul ta neo us
transmission)
22
User A
Confirmed
The “Circ ulation” function di stributes the document to all recipients
simultaneously, not individually.
User B
Confirmed
User B
Unconfirmed
Page 31

7
“Processing” function
OfficeBridge Pro has a function to add a process time period and comments
to a received document and to request other users to take action.
For example, a salesperson can request processing of faxed order forms
or quotation requests, adding comments such as points to consider when
processing or a deadline for action.
The requestor can check the processing status (processed / not processed).
If the recipients cannot process the request, they may forward the request
to another user to have them perform the request. (Re-request processing).
Comments can be added in this case as well.
The original sender can receive confirmation that this request forwarding
has taken place.
For information how to send a process request, see “Request action on an
order form or other document by a co-worker” in “(Application) 2. Sending
a document” (page 47).
Order Form
Receiving an
order form
Chapter 2
User B
User A
(1) Request processing
(2) Re-request processing
“Processing” document list
User A requests processing of order form to
User B, but User B cannot process it so he
re-requests processing to User C.
User C
23
Page 32

24
Page 33

Chapter 3
OfficeBridge Pro
This chapter will outline the connection and operational
methods of OfficeBridge Pro.
3
(Basic) 1. Viewing / sending a document ............
(Application) 2. Sending a document ............................ 41
(Basic) 3. Using Documents Effectively .............. 51
(Basic) 4. Printing Documents ............................ 58
26
Page 34

(Basic)
V i e w i n g / s e n d i n g a
1
document
Here, the basic operation of OfficeBridge Pro is explained in 6 steps.
Step 1: Launching the Browser
As menitioned in Chapter 1, OfficeBridge Pro does not require special
application software in order to run.
If your computer, or any computer, has Internet access, you can use
OfficeBridge Pro.
Launching the browser
First, prepare to connect to OfficeBridge Pro by launching the browser.
The method to launch the browser varies slightly dependin g on the
Windows version.
This guide will explain how to launch Microsoft Internet Explorer when
using Windows XP.
It is assumed that the computer is already turned on.
1.
From “All Programs” in the “Start” menu, select “Internet
Explorer”.
“Internet Explorer” will open.
26
Page 35

Viewing / sending a document
Connecting to OfficeBridge Pro
After the browser opens, prepare to login to OfficeBridge Pro.[003]
“L ogi n” is the proces s of checkin g the u ser in ord er t o conne ct to
OfficeBridge Pro.
Before connecting to OfficeBridge Pro, confirm that the MFX-2830’s power
is ON ( | ).
1.
Enter the IP address of the MFX-2830 into “Internet Explorer’
s” “Address” field.
Use the format http://XXX.XXX.XXX.XXX (XXX denotes numbers).
Enter the IP address
Chapter 3
If you don’t know the IP address, check with your company’s system
administrator.
27
Page 36

Viewing / sending a document
2.
After entering the IP address, press <Enter> on your keyboard
the [User list] screen is displayed.
28
If the [User list] screen is not displayed, check that the IP address is
correct. If the IP address was correct, see “Chapter 6 Troubleshooting”.
3.
Select the user ID that you wish to use.
T h is scr e e n is di s p layed if a pa ssword was se t durin g user
registration.
If no password was set, the document list screen is displayed. (To Step
4 Screen)
<If a password was set>
Page 37

4.
Enter the password, and click [Login].
The document list screen will be displayed.
Viewing / sending a document
Chapter 3
To logout from OfficeBridge Pro, click on the [Log Out] button at the upper
right corner of the document screen. [004]
The display will return to the
[User List] screen.
29
Page 38

(1)
(2)
(3)
(4)
(5)
(8)
(10)
(6)
(7)
(9)
(11)
Viewing / sending a document
Step 2: Understanding the screen layout
Login has completed successfully and the document list screen is shown on
the computer display.
The operation of OfficeBridge Pro starts from this screen.
Before initiating operation, take a moment to familarize yourself with the
icons and functions on the document list screen.
30
(1) “Remaining Disk Space”
Received documents are stored in the internal memory of OfficeBridge
Pro. This display shows the remaining available internal memory in
percent.
(2) Forward Setting”
If a user is not available due to travel or other reason, by setting this to
“ON” received documents are forwarded to a specified destination.
For more on forwardin g setti ngs, see “Setting Forwarding” in the
“OfficeBridge Pro Reference Manual”.[005]
(3) “Auto Refresh”
When set to [ON] the document screen will be refreshed automatically at
regular intervals.
(4) “Login User”
This shows the name of the user currently logged in.
Page 39

(5) [Log Out]
Click this button to logout.
The display will return to the [User List] screen after logging out.
Viewing / sending a document
(6) Category display switch tab
Available OfficeBridge Pro categories are displayed as tabs. When a
is selected the display will change. An “envelope” bar
appear on tabs that contain new documents.
(7) Feature buttons
Features that can be used in the currently displayed document screen
are shown as buttons.
The buttons shown differ depending on which document list screen is
currently displayed.
: The selected document is forwarded to the specified user.
: The selected document is sent to the specified user.
: Wh en t he o utgo ing doc umen t is in “qu eued ” “wai ting ” or
“executing” status, transmission will be canceled.
: Prints the selected document.
: Downloads the selected document.
: Deletes the selected document.
: Posts the selected document to the bulletin board.
will
tab
Chapter 3
: Circulates the selected document among specified users.
: Requests document processing by a specified user.
: Ends processing of the selected document.
: Re-assigns a document processing request to another user (by
the requestee).
(8) [Refresh]
Click on
This will reload or refresh the document list, even if “Auto Refresh” is set to
[On].
to manually reload the document display.
31
Page 40

Viewing / sending a document
(9) Display page settings
Switch the document list display page.
The number between “ ” and “ ” is the number of pages that can be
displayed in the document list.
The underlined number indicates pages which can be displayed, while a
number without an underline indicates the currently displayed page.
Click on “ ” to go to the previous page which can be displayed and “ ” to
go to the next page that can be displayed.
(10) Displayed number of items setting
Set the number of items to be displayed on one page in the document list
(10, 20, All).
Click on the list button and select the number of items to be displayed.
(11) Document list
Displays a list of received documents.
Click on a checkbox to select a document.
For each item in the list with a list button, it is possible to narrow the
display based on selected items.
For example, by selecting “order form” from the “category” item, only those
documents belonging to the “order form” category will be displayed.
32
Page 41

Viewing / sending a document
Step 3: Importing documents
Prepare the document for transmission.
Import the document to be sent as an OfficeBridge Pro scanned document.
“Scanning” refers to the process of converting hardcopy originals into
electronic data files.
Perform this scanning operation at the MFX-2830.
The following is an example of scanning using a customer quotation as the
document.
1.
Place the completed quotation on the glass surface of the
MFX-2830.
2.
Use the touch screen to scan the document.
For furth er instr uction, see the “I nte rnet Fax / Net wor k S can
Operation Manual”.
Chapter 3
Documents created with word processing software such as Microsoft Word
can also be directly sent to a recipient’s fax. For a detailed explanation, see
“Directly fax a document created on a word processor” in “(Application) 2.
Sending a document” (page 41).
33
Page 42

Viewing / sending a document
Step 4: View the imported document
Le t’s view the quotat ion tha t was imp orte d in “St ep 3 : Impo rti ng
documents.”
This operation is identical to that for viewing a received fax. Switch to
either “Personal Inbox” or “Public Inbox” (click on either the “Personal
Inbox” or “Public Inbox” tab) and proceed in the same manner. [006]
Confirm that your browser is launched and you are logged into OfficeBridge
Pro.
At the document screen click (“Refresh”).
The document just scanned will be added to the “Scan” document list. Next,
confirm if the document was actually scanned.
1.
Click on the [Scan] tab on the document list.
The view is switched to the “Scan” document list.
34
2.
In the “Scan” document list, the scanned quotation is added
as a 14-character file name.
At the left of the file is an envelope icon showing whether the item is
read or unread .
The file is currently in the unread state.
Page 43

Viewing / sending a document
3.
Click on the scanned document’s file name.
Click
A separate window will open to display the contents of the scanned
document.
Chapter 3
The window displaying the scanned document is an image viewer, a type of
application software. However, depending on the version of your operating
system, the image viewer that is launched may vary.
35
Page 44

Viewing / sending a document
4.
To close the window, choose “Close” from the application
menu or click on in the upper-right corner of the window.
The envelope icon in the document list changes to read status.
View detailed information about the scanned document
By clicking [Document Properties] of any file, the [Properties]
window is displayed.
The [Properties] window shows all of the list items in one window.
In “File name,” the 20-character file name is shown. The “document
category” is blank. This information can be changed freely depending
on requirements.
36
“File name”
Enter the name of the scanned document. Enter a name that clearly
identifies the document from the file name (i.e., “ABC Company
Quotation”).
“Document Type”
Enter a category name useful in organizing the document.
Information entered here is displayed in the category items in the
document list. By clicking the list button and choosing categories to
display, it is possible to narrow the list of displayed documents.
By clicking [Save], the entered “File name” and “Document Type” are
saved and the [Properties] window closes.
Clicking on [Close] closes the [Properties] window without saving
the changed fields.
Page 45

Viewing / sending a document
Step 5: Fax an imported document
Once the imported document has been confirmed, specify a receipient and
fax the document. [007]
1.
Select the document to be faxed from the “Scan” document
list.
Select the checkbox on the left side of the document list.
Click
Chapter 3
2.
Click (“Send”).
The “Fax Transmission Settings” dialog will appear.
37
Page 46

(1) Enter the fax number
(2) Click [Add]
(3) Add to the list box
Viewing / sending a document
3.
Enter the recipient’s fax number in the “Fax Destination” text
box and click [Add].
The entered fax number will be displayed in the list box. The fax
destination has been set.
4.
The file name of the document selected from the document
list will be displayed in the “Document” list box.
Clicking [Preview] will launch the image viewer to confirm the document
contents.
5.
Click [Send].
OfficeBridge Pro will initiate the document transmission process.
When transmission i s complete, the doc ument name chosen in
the “Scan” document list will be copied to the “Personal Outbox”
document list.
38
Page 47

Viewing / sending a document
Step 6: Confirm the transmission of a selected document
How to confirm the document was sent.
1.
Click the [Personal Outbox] tab.
The “Personal Outbox” document list the appear. In the “Personal
Outbox” document list, the transmitted document appears in the list.
Chapter 3
2.
Th e reci p ien t s fax num ber is sho w n in t h e dest inat ion
column.
If the destination is registered in the Address Book, the registered names
(company or personal) are displayed in this column.
39
Page 48

Viewing / sending a document
To confirm the transmission status, look at the “Result” column display.
The display items contents are as follows.
“Queued”
A transmission request has been received and is waiting to be sent.
“Waiting”
When performing a scheduled transmission, waiting for the specified
transmission time.
“Executing”
Transmission is currently being processed.
“OK”
Sending was successful.
“Error”
An error occurred during transmission.
By clicking
when the status is “Queued” or “Waiting,” you can
cancel the document transmission.
View detailed information about the sent document
By clicking the
window will be displayed.
The [Properties] window shows all of the list items in one window.
[Document Properties] of any file, the [Properties]
In t he “File name ” and “ Documen t Typ e” columns t he deta ils
previously entered in the scan document the [Properties] window
will be displayed. The details can be changed as needed.
40
By clicki ng [Sav e], the modified information is s aved and the
[Properties will close.
Clicking on [Close] closes the [Properties] window without saving
the changed details.
Page 49

Application
Sending a document
2
Based on basic fax o perations, this sect ion explains more advanc ed
OfficeBridge Pro functions.
Directly fax a document created on a word processor
In “(Basic) 1. Viewing/Sending a document” we faxed a document imported
using the OfficeBridge Pro scanning feature.
This section explains how to directly send a document created in Microsoft
Word to a recipient’s fax. [008]
“Muratec OB Pro Fax” must be installed on your computer to perform
this operation. See “Chapter 4 Installing OfficeBridge Pro Programs” to
learn how to install.
1.
Create the document to be sent.
2.
Select “Print” from the “File” menu.
The “Print” dialog will appear.
3.
Click the “Printer Name:” list button, select “Muratec OB Pro
Fax” and click [OK].
The “Document Operation” dialog will appear.
Chapter 3
41
Page 50

Sending a document
(1) Enter the fax number
(2) Click [Add]
(3) Add to the list box
4.
The “Fax Transmission Settings” dialog will appear.
5.
The entered fax number will be displayed in the list box. The Fax
6.
OfficeBridge Pro will begin the document transmission process.
7.
By clicking
Click [Send].
Enter the recipient’s fax number in the “Fax Destination” text
box and click [Add].
destination has been set.
Click [Send].
After transmission, the “Fax Transmission Settings” dialog
box will close and the “Would you like to review the Outbox”
message will appear.
[OK] the “Personal Outbox” document list is displayed. In
the “Personal Oubox” document list, the fax number of the recently
sent transmission will be displayed.
42
Page 51

Sending a document
Chapter 3
The sent document can be saved temporarily.
By saving the quotation temporarily in OfficeBridge Pro, after scanning
a picture or other document, they can be transmitted together as one
document. [009]
Docu men t t ran smi ssion can b e p erformed smoot hly by reg ist eri ng
destinations in the Address Book. [010]
A cover page can be added to the top of the transmitted document. [011]
Cover Page
An attachment to the front of the transmitted document that provides
information to a recipient about the document.
43
Page 52

Sending a document
Sending a document using the Internet
Scanned or application documents can be sent to recipients by e-mail over
the Internet.
Documents are mailed to the recipient as file attachments.
This operation can be performed from your computer or directly from the
MFX-2830.
This section explains how to send a document over the Internet from your
computer. To learn how to send a document directly from the MFX-2830,
see the “Internet Fax / Network Scan Instruction Manual”.
1.
For more on scanne d docume nts see “Step 5: Fax an importe d
Prepare the document to be sent and open the “Send” dialog.
document” (page 37) in “(Basic) 1. Viewing/Sending a document”;
for more on word processed documents see “Directly fax a document
created on a word processor” (page 41).
44
2.
S elect the address t yp e from “To: (addressee )” “Cc ( se nd
a copy o f the mai l con te nts t o rec ipients oth er than t he
addressee” and “Bcc (send a copy of the mail contents to other
recipients but hide these addressees).
Page 53

3.
(1) Enter the e-mail address
(2) Click [Add]
(3) Add to the list box
Enter the recipient’s mail address in the “E-mail Destination”
text box and click [Add].
The entered E-mail address will be displayed in the list box. The
recipient e-mail address has been set.
4.
Click the [Edit E-mail Template] at the “E-mail Template”
dialog.
The “Edit E-mail Template” dialog will appear. From this dialog add a
“Subject” and “Text” like a normal e-mail message.
Sending a document
Chapter 3
45
Page 54

Sending a document
5.
Enter the e-mail’s title in the “Subject” box. Up to 80 characters may
Enter the e-mail contents in the “Text” box. Up to 1,024 characters
6.
The “Edit E-mail Template” dialog will close.
Enter the “Subject” and “Text.”
be entered.
may be entered.
When finished entering the “Subject” and “Text,” click [Save].
46
7.
Click [Send].
OfficeBridge Pro will begin the document transmission process.
8.
Wh en t r ansm issi o n is compl ete, th e “ Fax Tran smis s ion
Settings” dialog will close.
For inf orm ati o n o n t rans mis sion status, see “ Ste p 6 : Conf irm the
transmission of a selected document” in “(Basic) 1. Viewing/Sending a
document” (page 39).
Page 55

Request action on an order form or other document by a co-worker
When an order form or request for quotation is received from a customer, it
is possible to add deadline information or comments to the received fax and
request processing to a co-worker. [012]
■ Requesting document processing
1.
From the “Personal Inbox” document list, select the document to request
processing.
Select the checkbox next to the document.
Sending a document
Click
2.
Click (“Process”).
The “Request Processing” dialog will appear.
Chapter 3
47
Page 56

Sending a document
3.
Click the list button and select from the registered user names.
4.
Enter a title for the request in the “Subject” box. Up to 80 characters
Enter the details of the request process in the “Comment” box. Up to
Select a user to process the request.
Enter the “Subject” and “Comment”.
may be entered.
1,024 characters may be entered.
48
Page 57

5.
Click [Set period] for “Priority”.
The “Set Processing Period” dialog will appear. From this dialog, set
the document processing period (“Month” “Date” “Time”).
Sending a document
(1) Click and select both “Month” and “Date” for the time period.
(2) Click the list button and select the “Time”.
Chapter 3
(3) Click [Save].
The “Set Processing Period” dialog will close and the processing period set in
the “Priority” field will be displayed in the “Request Processing” dialog box.
49
Page 58

Sending a document
6.
The following message will be displayed: “Do you want to delete the
After closing the message, OfficeBridge Pro will initiate the document
When the request process is complete, the selected document from the
■ Checking request processing information
Check the document status by viewing the “Processing” document list.
1.
The “Processing” document list will appear.
Click [Request].
original after the process request has been made?” By clicking [OK] the
selected document will be deleted from the “Personal Inbox” document
list; if [Cancel] is clicked the selected document will remain in the
“Personal Inbox” document list.
request process.
“Personal Inbox” document list will be copied to the “Processing” document list.
Click the [Processing] tab.
50
In the “Subject” field, the subject entered in the “Request Processing”
dialog will be displayed.
The current processing status will be displayed in “Status.”
The contents of the displayed items are as follows:
“Unprocessed”
This indicates the processing reguest has not been processed.
“Completed”
This indicates the processing has been completed.
“Alert”
This indicates that today is the deadline for the specified “Set
Processing Period” dialog.
“Deadline passed”
This indicates that the deadline for the specified “Set Processing
Period” dialog has passed.
Page 59
(Basic)
Using Documents
3
This section also instructs you on how to download, arrange and save
documents to MO or CD-R digital media.
Post documents as company announcements
OfficeBridge Pro can be used to announce received faxes to the entire
company as “General information” or post application documents as
company announcements to a bulletin board. [013]
This section explains how to post scanned or received documents to a
bulletin board.
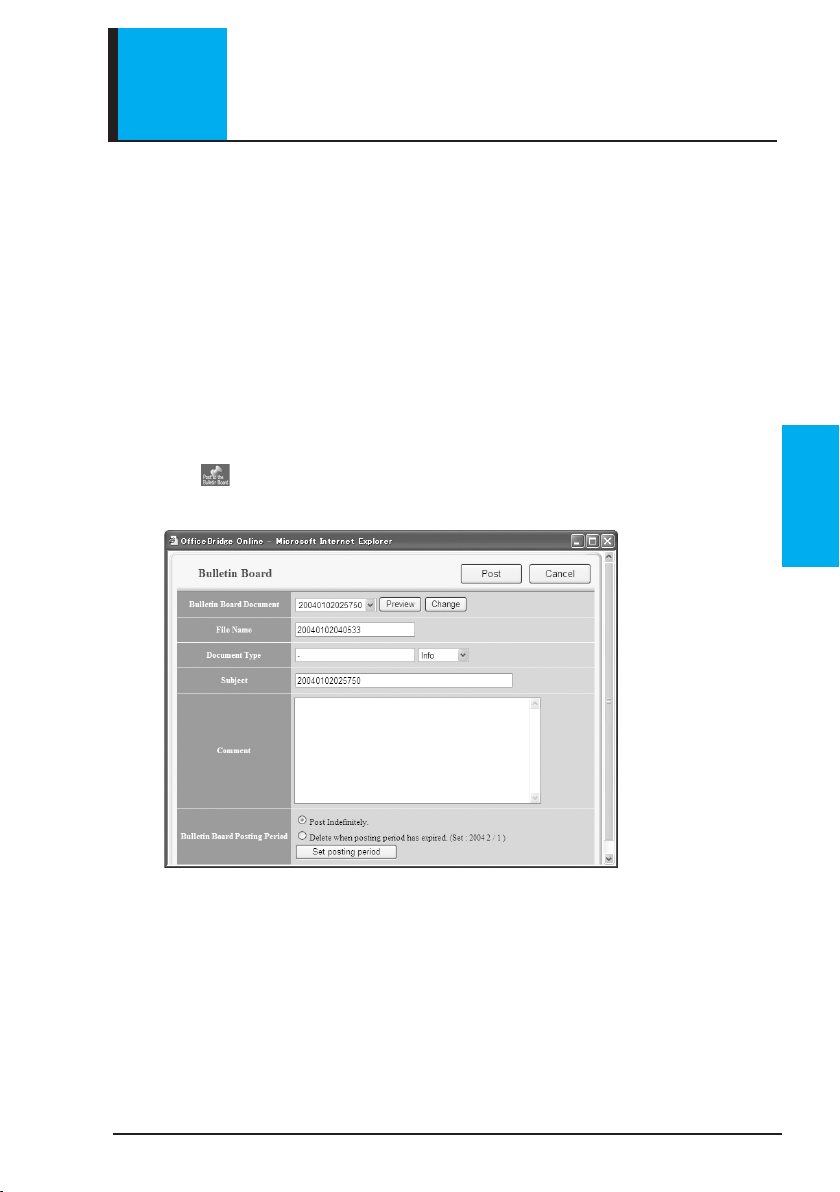
1.
Select the document to be posted from the document list.
2.
Click (“Post to the Bulletin Board”).
The “Bulletin Board” dialog will appear.
Effectively
Chapter 3
51
Page 60

Using Documents Effectively
3.
Enter the “Subject” of the document to be posted.
Up to 80 characters may be entered in the “Subject.”
4.
Click [Post].
The following message will be displayed: “Do you want to delete the
original after posting?” By clicking [OK] selected document will be
deleted from the document list; if [Cancel] is clicked the selected
document will remain in the document list.
After closing the message, OfficeBridge Pro will initiate the document
post process.
When the post process is complete, a document selected from the
document list will be copied to the “Bulletin Board” document list.
52
By setting a “Bulletin Board Posting Period”, the document can be
made available for browsing and then automatically deleted after a
preset time period. [014]
Page 61

Using Documents Effectively
Circulate a document among co-workers
OfficeBridge Pro allows received fax information or application documents
to be circulated to specified users. [015]
This section explains how to circulate scanned or received documents to
selected users.
1.
Select the document to be circulated from the document list.
2.
Click (“Circulate”).
The “Circulation” dialog appears.
Chapter 3
53
Page 62

Using Documents Effectively
3.
Select receipients. Click [Select] for “Destination”.
The “Circulaton Destination” dialog will appear.
54
(1) Click “User Name” on the left.
The registered user names will appear on the right.
(2) In the “Select user” list, click the checkbox for users to add
to the circulation.
Multiple user selection is allowed.
(3) After selecting users for circulation, click [Add].
Selected users will be displayed in the “Circulating Destination”
list.
This completes the process of selecting users for circulation.
(4) Click [Save].
The “Circulaton Destination” dialog will close.
Page 63

Using Documents Effectively
4.
Enter the title of the document using the “Subject” field.
5.
Click [Circulate].
The following message will be displayed: “Do you want to delete the
original after circulation?” By clicking [OK] the selected document
will be deleted from the document list; if [Cancel] is clicked the
selected document remains in the document list.
After closing the message, OfficeBridge Pro will initiate the document
circulation process.
When the circulation process is complete, the selected document will
be copied to the “Circulate” document list.
Chapter 3
By setting a “preservation period”, after circulation the document can be
automatically deleted after a specified number of days. [016]
55
Page 64

Using Documents Effectively
Downloading documents
Documents that you would like to preserve can be downloaded to your
computer and saved on a hard disk, MO, CD-R or other storage medium.
[017]
To ensure sufficient free disk space on “OfficeBridg e Pro,” docume nt
downloading is recommended. Also, periodically delete documents from the
document list that are no longer needed.
1.
From the document list, select the document to be downloaded.
2.
Click (“Download”).
The following message will be displayed: “Are you sure you want to
download the selected document in PDF (TIFF) format?”
56
Depending on the file format setting the displayed message will vary (The
[Admin Tools] tab - “Setup” - “Initial settings” - “Download Settings”).
3.
By clicking [OK] the “Save as” dialog will be displayed.
Clicking [Cancel] stops the download operation.
Page 65

4.
Specify a location for downloading and click [Save].
The download will begin.
5.
After download is complete, click [Close].
This will complete the document download.
Using Documents Effectively
Chapter 3
Deleting outdated documents:
(1) Select the file to be deleted from the document list.
(2) Click “Delete” feature button.
The following message will be displayed: “Are you sure you want to
delete the selected document?”
(3) Click
[OK].
The selected document will be deleted from the document list.
Download
This is th e op e r a t io n of tr a n s f e r r i n g do c u me n t s st o r e d in
OfficeBridge Pro memory to your computer.
57
Page 66

(Basic)
4
Printing Documents
The “Print” function allows you to print documents from the document list
or application software.
Printing Documents
This section explain s how to select and print a do cumen t fro m the
document list. [018]
1.
From the document list, select the document to be printed.
2.
Click (“Print”).
A print confirmation message will be displayed. Press
printing.
[OK] to begin
58
Page 67

Using the MFX-2830 as a printer
This section explains how to print an application document. [019]
This example uses Microsoft Word as the application program.
“Muratec OB Pro MFX-2830 Printer” must be installed on your computer
to print application documents. See “Chapter 4 Installing OfficeBridge Pro
Programs” to learn how to install.
1.
Create the document with using Microsoft Word.
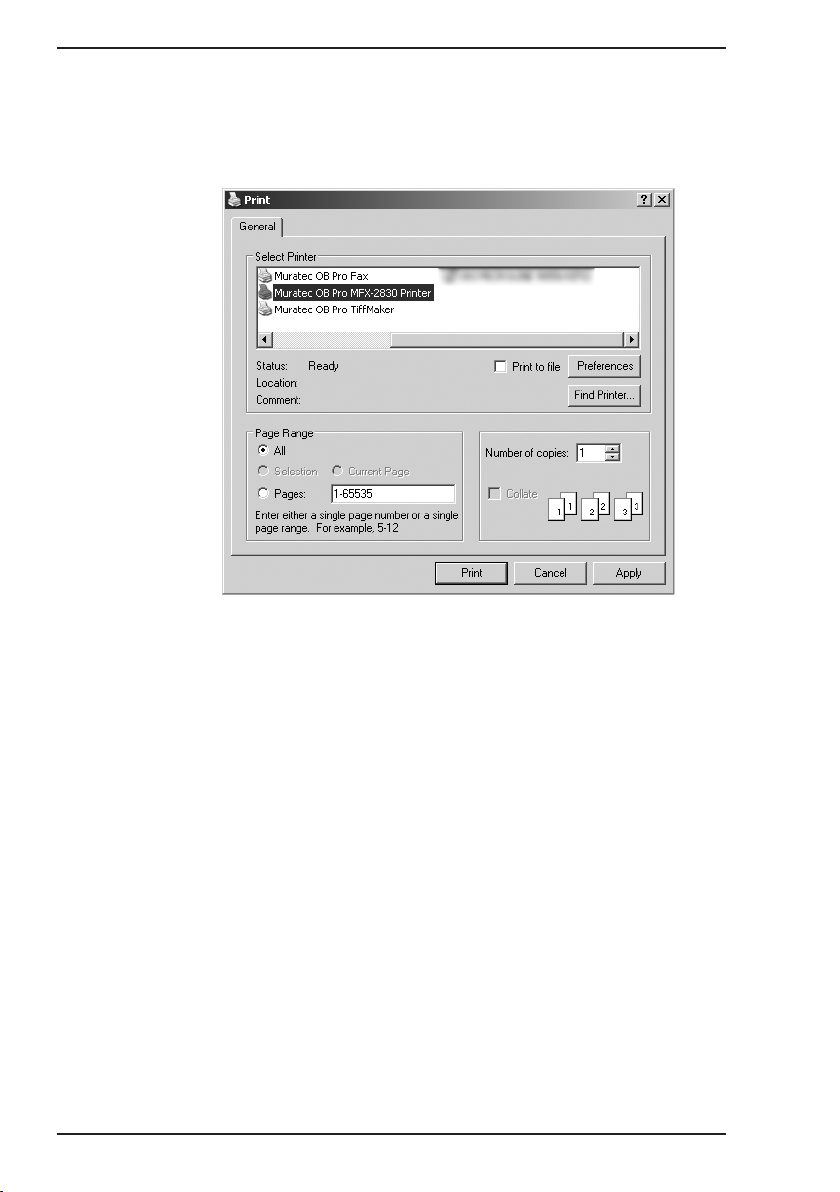
2.
Select “Print” from the “File” menu.
The “Print” dialog will appear.
Printing Documents
Chapter 3
59
Page 68
Printing Documents
3.
The document will begin to print.
Fro m “Selec t Prin ter” sel ec t “Murate c OB Pro M FX-2830
Printer” and click [Print].
60
Page 69

4
Chapter 4 Installing OfficeBridge Pro Programs
This chapter explains the types of programs used with
OfficeBridge Pro and how to install them.
1. What kind of program is “installed?” ........................
2. Installing .................................................................... 65
62
Page 70

What kind of program is
1
“installed?”
To this point, this guide has explained how to use the various features of
OfficeBridge Pro.
To take full advantage of the features of OfficeBridge Pro, software to
support these features must be installed. There are several OfficeBridge
Pro support programs contained in the “Setup Disk” CD. These programs
are separated into utility programs and drivers.
<Utility Programs>
OfficeBridge Pro has the following four kinds of utility programs.
●“OB Pro InfoMonitor”
This program alerts users when new documents arrive.
It can also be configured to send alerts for not only new documents but
also the result status of sending and printing.
For more on how to use “OB Pro InfoMonitor,” see “Setting notification for
newly arrived documents (OB Pro InfoMonitor)” in the “OfficeBridge Pro
Reference Manual”. [020]
●“OB Pro Document Download Manager”
This utility program automatically downloads received documents. You
can specify the type of document, where to download it, at what time to
download it and the appropriate file format.
62
For more on how to use “OB Pro Document Download Manager,” see “Setting
autom at ic download (OB Pro Document Do wn lo ad Manager)” in the
“OfficeBridge Pro Reference Manual”. [021]
Page 71

What kind of program is “installed?”
●“OB Pro CoverPage Editor”
This program is used to create and edit the cover page attached to the
beginning of a fax when sending. Recipient information (company name,
department, personal name, etc.) is automatically inserted, so you do not
need to create cover pages for each user.
For more on how to use “OB Pro CoverPage Editor”, see “Making a cover
page (OB Pro CoverPage Edito r)” in the “OfficeBri dge Pro Reference
Manual”. [022]
●“Muratec OB Pro TWAIN Connector”
This program is used to read images imported using the OfficeBridge Pro
scanner utility into a graphical image editing application.
For more on how to use the “Muratec OB Pro TWAIN Connector,” see
“Taking in a document with the TWAIN driver” in the “OfficeBridge Pro
Reference Manual”. [023]
Chapter 4
<Drivers>
OfficeBridge Pro has the following three kinds of driver software.
●“Muratec OB Pro MFX-2830 Printer”
This driver is required to use OfficeBridge Pro to print documents
created using application software.
●“Muratec OB Pro Fax”
This driver is required to use OfficeBridge Pro to directly fax documents
created using application software.
●“Muratec OB Pro TiffMaker”
This driver converts documents created in application programs into
TIFF image files.
Converted image files can be sent as file attachments.
63
Page 72

What kind of program is “installed?”
<Electronic Manual>
The OfficeBridge Pro “Setup Disk” CD contains not only these programs
but also the “OfficeBridge Pro Reference Manual”, an electronic manual.
This electronic manual is written in a language called HTML, and can be
viewed in a browser application the same way as OfficeBridge Pro.
This “OfficeBridge Pro Reference Manual” has more detailed explanations
of OfficeBridge Pro features than contained in this guide. Configuration
options are also explained.
For more on “OfficeBridge Pro Reference Manual”, see “Chapter 5 Learning
More About the OfficeBridge Pro Operation” in this guide.
64
Utility Programs
Simple programs designed to perform a specific objective. These
programs add missing features to improve the usability of application
software and systems.
Drivers
Progra ms that ser ve as a bri dge b etwee n peripheral s suc h as
printers or scanners, and the application software that uses them. For
example, if no compatible printer driver is configured for your computer
when printing a document created with a word processor, proper printing
is not possible.
Page 73

2
Insert the setup disk
Select an installation location
Select the programs to install
Select the program folder
Create shortcuts
Begin installation
Installing
How to install these programs:
Please prepare the “Setup Disk” CD included in the OfficeBridge Pro
package.
Installation is performed as follows.
Chapter 4
* Each step is separated and titled for the sake of clarity, but the actual
installation is a continuous operation.
· Install utility programs or drivers on each computer.
· Before installing, scan for viruses and close any running applications.
Failing to do so may interfere with proper installation.
· When installing utility programs or printer drivers on Windows NT 4.0,
Windows 2000 or Windows XP, login and install with a user account that
has administrator privileges.
· The screens shown in this explanation are from Windows XP. Depending
on your operating system, displayed screens may be slightly different.
65
Page 74

Installing
Insert the setup disk
1
1.
Start up your computer.
2.
Insert the “Setup disk” CD into the CD-ROM drive.
The opening screen will be displayed.
66
3.
Select [Setup] and click [OfficeBridge Pro].
The “Setup Wizard” will be displayed.
Page 75

Select an installation location
2
In this step, specify where to install the program.
1.
Click [Next >] on the “Setup Wizard”.
The “License Agreement” will be displayed.
Installing
Chapter 4
2.
After carefully reading the “License Agreement”, click [Yes] if
you agree.
The “Choose Destination Location” dialog will appear.
The default setting is “C:\Program Files\Muratec\OB Pro”.
3.
If you will not be changing the installation location, click [Next >].
The “Select Components” dialog will appear.
67
Page 76

Installing
To change the install location
If you will be installing to another location, first you must first create
the folder in which the program will be installed.
(1) Click [Browse] in the “Choose Destination Location” dialog.
The “Choose Folder” dialog will appear.
68
(2) From the displayed directories, choose the folder to install
the program and click [OK].
The “Choose Folder” dialog will close and the “Installation Folder”
directory in the “Choose Destination Location” dialog will be
updated.
Page 77

Select the programs to install
3
In this step, select the electronic manual or programs to install to your
computer.
1.
Sel ect the programs to install from the “Select Features”
dialog.
By default, all programs will be checked. If installation continues, all
programs will be installed.
Installing
Chapter 4
If you do not want to install a particular program, simply uncheck the
corresponding checkbox.
2.
When you have finished selecting programs, Click [Next >].
The “Select Program Folder” dialog will appear.
69
Page 78
Installing
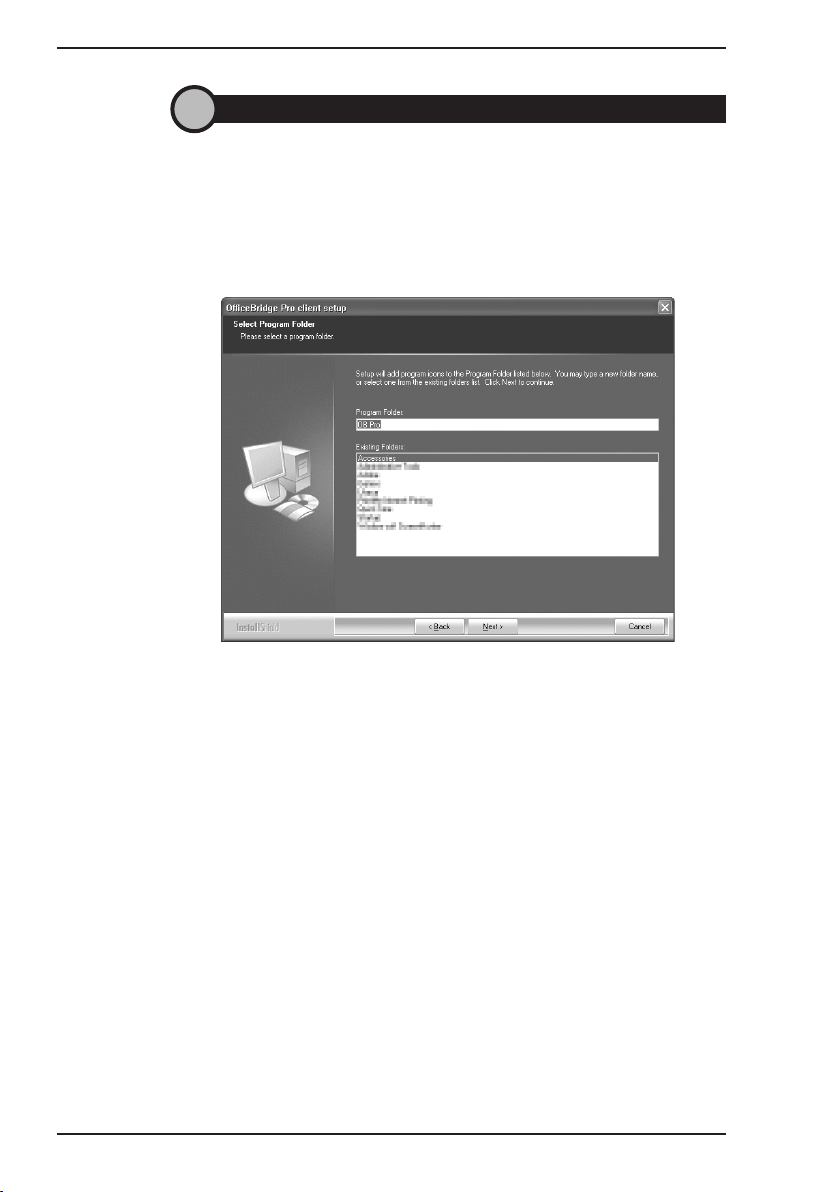
Select the program folder
4
In this step, specify which program folder you want to use when launching
programs from the “Start” menu.
1.
From the “ Sel ect Pro gram Fold er” d ial og, c hoose which
program folder to use to store the installed program.
70
“OB Pro” is the set default.
2.
To use the default, click [Next >].
To specify another folder, enter the folder name in “Program Folders:”.
To use a pre-existing program folder, select it from the “Existing
Folders:” list.
The “Create Shortcuts” dialog will appear.
Page 79

Create shortcuts
5
In this step, select which program shortcuts to create on the desktop.
1.
In the “C reat e Sho rtcu t ” dialo g , s e l ect whic h pr ogra m
shortcuts you wish to create.
All shortcuts are selected as the default.
Installing
Chapter 4
If you do not want to install a particular shortcut, simply uncheck the
corresponding checkbox.
2.
When you have finished choosing program shortcuts, Click
[Next >].
The “Create Startup Shortcut” dialog appears.
71
Page 80

Installing
3.
Select which programs to add to the Startup group.
When programs are added to the startup group, they will be launched
automatically when the computer is starts up.
If you do not want to install a particular shortcut, simply uncheck the
corresponding checkbox.
72
4.
When you have finished adding programs to Startup, Click
[Next >].
The “Start Copying Files” dialog will appear.
Shortcut
Icons placed on the desktop to allow easy launching of programs
without opening the “Start” menu. For example, double clicking “OB
Pro InfoMonitor” icon on the desktop allows you to quickly launch “OB
Pro InfoMonitor”.
Page 81

Begin installation
6
In this step, installation begins based on the based on the previous settings
entered.
1.
In the “Start Copying Files” dialog, the settings previously
entered will be displayed.
Installing
Chapter 4
If you would like to change any of these, click the [< Back] button to
go back and modify the previous settings.
2.
Click [Next >].
The installation will begin.
73
Page 82
Installing
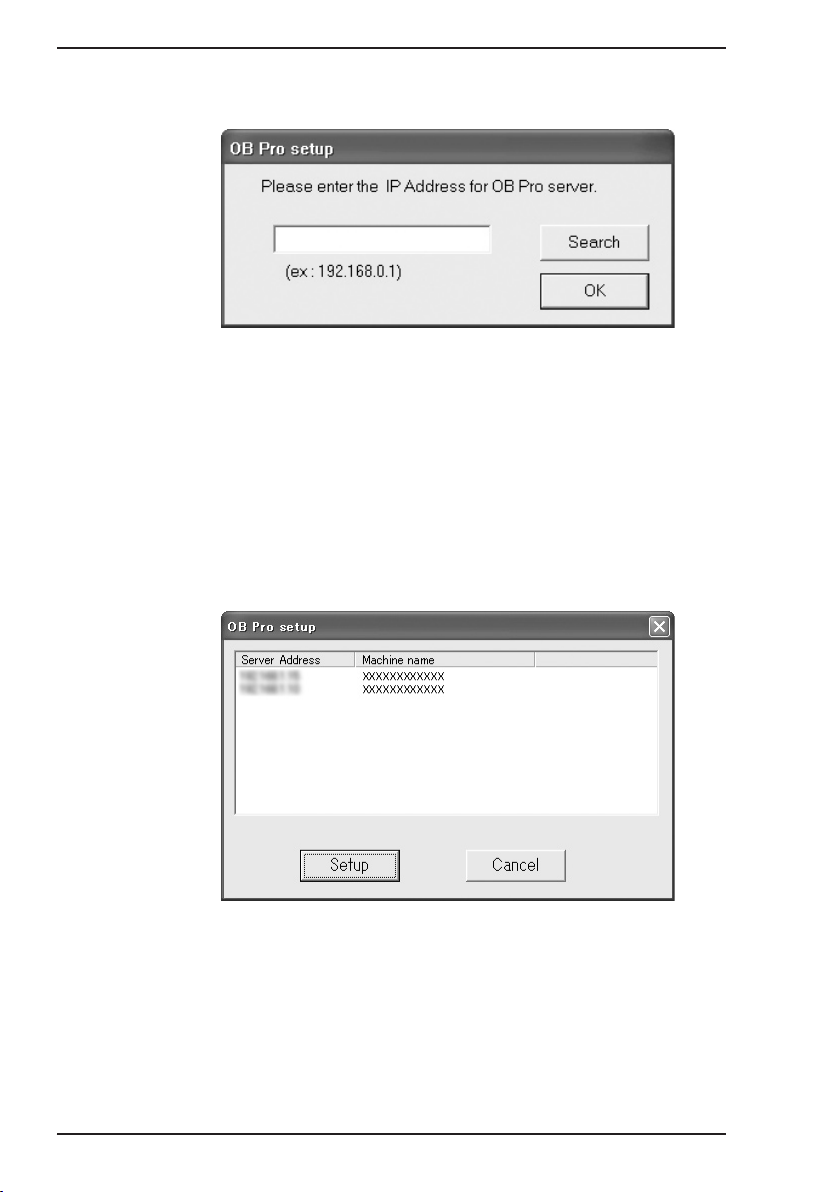
After a few moments the “OB Pro setup” dialog will appear.
3.
Enter the server IP address like the following:
“XXX.XXX.XXX.XXX” (XXX refers to numerals).
To search for the server:
(1) Click
The machine will search for the server. After a few moments the
[Search] in the “OB Pro setup” dialog box.
“OB Pro setup” dialog will appear.
This dialog displays a list of IP addresses of all digital MFX-2830s
on the network with OfficeBridge Pro installed.
74
Page 83

(2) Select a server.
Clicking either the “Server Address” or “Machine name” will
highlight the selection.
(3) Click [Setup].
The “OB Pro setup” dialog will close and the selected server’s IP
address will appear in the “OB Pro setup” dialog.
4.
Click [OK].
The “OB Pro Setu p” d ialog will clo se and the installatio n wil l
continue.
5.
When installation is complete the completion wizard will be
displayed.
Installing
Chapter 4
6.
Select the “Yes, I want to restart my compater now.” radio
button and click [Finish].
The computer will restart.
After completing the installation, installed programs cannot be used until
the computer is restarted.
75
Page 84

Installing
Confirm installation
7
After your computer restarts, confirm that the programs are correctly
installed.
After restarting, the screen should appear as follows:
Shortcut
76
Startup
<Startup>
Create shortcuts
5
restart your computer if you selected to add a shortcut to startup.
<Shortcut>
Create shortcuts
5
created on your desktop if you selected to create shortcuts.
This window automatically appears when you
After resta rting your computer, t his icon is
Page 85

Show the “Start” menu by clicking on [Start].
Installing
Chapter 4
77
Page 86

Installing
To delete programs
If you wish to delete programs for any reason, perform the following steps.
By performing this step, all programs will be deleted.
You cannot choose which programs to delete.
1.
Select “Control Panel” from [Start].
The “Control Panel” window will appear.
78
2.
From the “Control Panel” window, click on “Add or Remove
Programs”.
The “Add or Remove Programs” dialog will appear.
Page 87
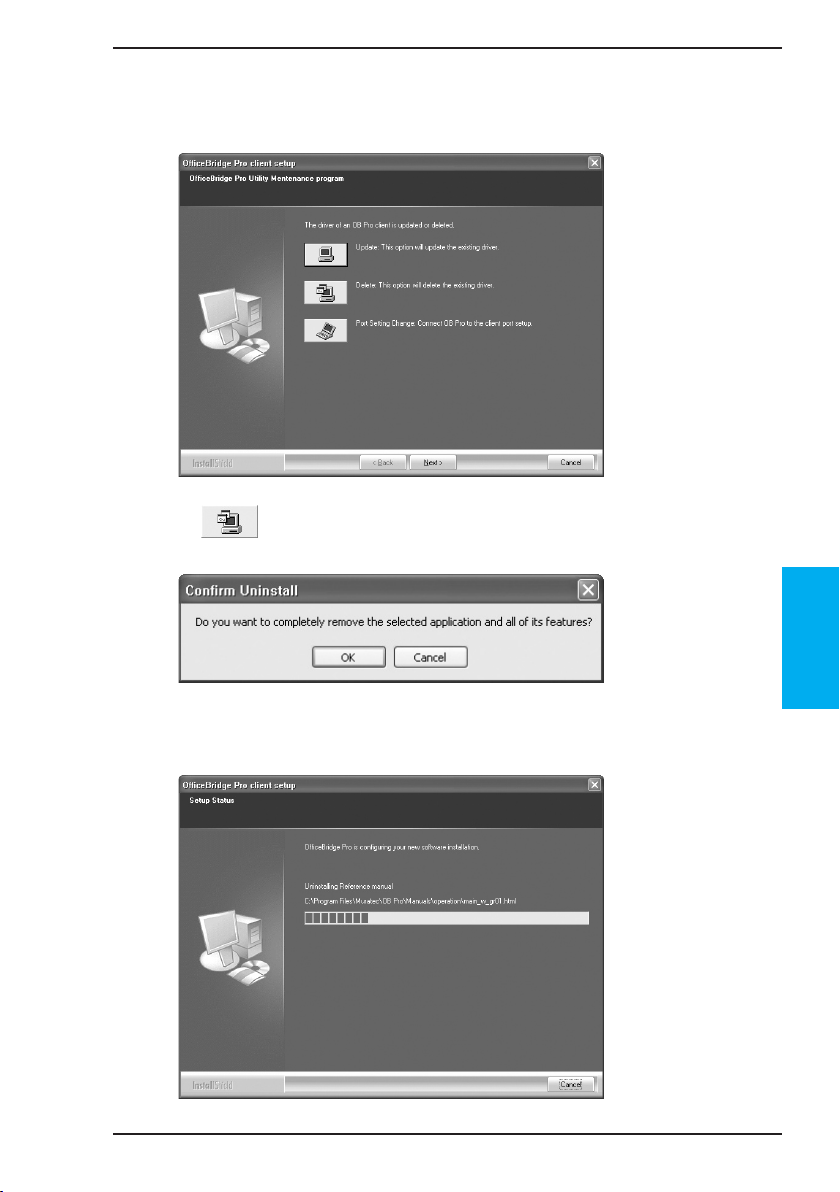
3.
Click [Change / Remove] for “OB Pro”.
“OfficeBridge Pro Utility Mentenance program” will be displayed.
4.
Click “Delete”.
A “Confirm Uninstall” message will be displayed.
Installing
Chapter 4
5.
Click [OK].
The program deletion process will begin.
79
Page 88

Installing
6.
If a “Shared File Detected” message is displayed, click [Yes].
Che cking “Do n’t display this message aga in.” will p reven t the
message from being displayed again.
7.
When the “Install Shield Wizard Complete” dialog is displayed,
the program deletion is complete.
Select from the following actions after installing.
Selecting “Yes, I want to restart my computer now” will cause the
computer to immediately restart.
Selecting “No, I will restart my computer later” will not restart the
computer.
80
8.
Click [Finish].
Operations selected in Step 7 will be performed.
Shortcuts will be deleted from the desktop and OfficeBridge Pro will
be deleted from the “Start” menu.
Page 89

5
Chapter 5
L e a r n i n g M o r e A b o u t t h e
OfficeBridge Pro Operation
This chapter explains how to use the electronic manual
installed in Chapter 4.
1. How to use the electronic manual .............................
2. Making Reference to the electronic manual ............. 88
82
Page 90

How to use the electronic
1
manual
What is the “Electronic Manual”?
The electronic manual (“OfficeBridge Pro Reference Manual”) contains
detailed explanations on how to use OfficeBridge Pro. However, unlike a
printed household appliance manual, a computer is used to read it. Like
OfficeBridge Pro, the contents of the electronic manual are displayed using
your browser.
· Compact, convenient
An advantage of an electronic manual is that instead of turning the pages
of a book, you can turn the page with a click of the mouse. They don’t take
up space like books and are compact and easy to use.
Printed manuals are lost or can’t be found when needed. This defeats the
purpose of a manual. By installing the electronic manual to your computer,
it is available for use whenever needed. By displaying the electronic
manual together with OfficeBridge Pro, you can quickly consult it when
you come across something unfamiliar.
· Excellent search ability
Another advantage of electronic manuals is the ability to quickly reach
desired information.
For printed manuals, after looking up the page number in the table
of contents, readers open the page with the desired contents. Users of
electronic manuals can quickly open the desired page by simply clicking on
its reference in the table of contents.
While using OfficeBridge Pro, you will probably encounter usage questions
which cannot be found from the table of contents, such as “What does this
word mean on this screen?” or “What does this setting do?” With electronic
manuals, entering a “keyword” returns a list of pages matching the request.
Then, like the table of contents, clicking on an item opens that page.
82
Page 91

Opening the electronic manual
Please open the electronic manual.
1.
Click [Start] and select “All Programs”.
How to use the electronic manual
2.
Select OfficeBridge Pro and click “Reference Manual” in the
menu that appears.
The browser software will launch and load the “OfficeBridge Pro
Reference Manual”.
This displayed page is the top page (front door) of the “OfficeBridge
Pro Reference Manual”.
Chapter 5
83
Page 92

How to use the electronic manual
If the contents cannot all be displayed in the window, a scroll bar will
appear to the right.
Either click on the up/down arrows or drag the scroll bar up or down to
view the hidden portions.
Organization of the electronic manual
The contents of this “OfficeBridge Pro Reference Manual” are organized
into three sections.
●Before Use
Th is secti on expla ins impor tant thin gs to know befo re using
OfficeBridge Pro.
●How to operate
This section explains in detail the operation of OfficeBridge Pro,
focusing on its features.
●Creating Settings
This section explains in detail how to configure and setup OfficeBridge
Pro, System administrators should read this section.
84
Page 93
How to use the electronic manual
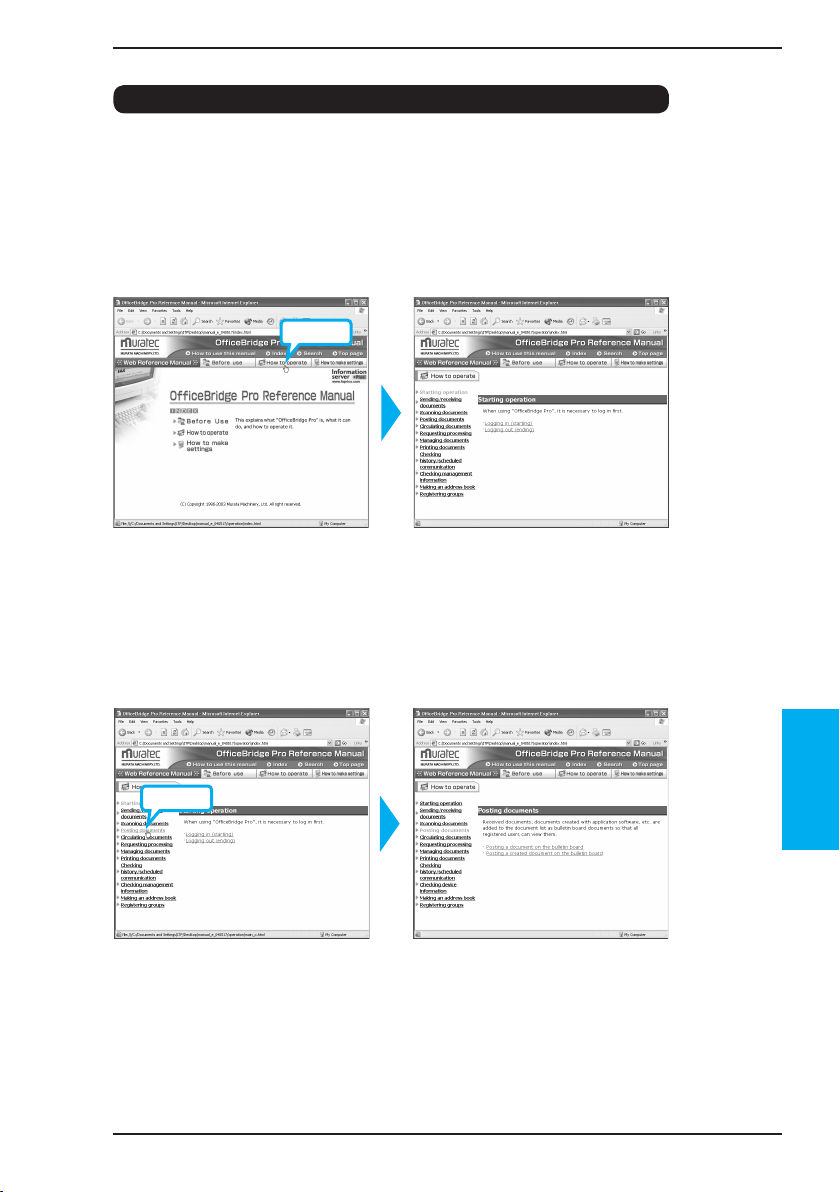
Viewing the contents of the electronic manual
Let’s look up “Posting a document” from the “Operation” section of the
manual.
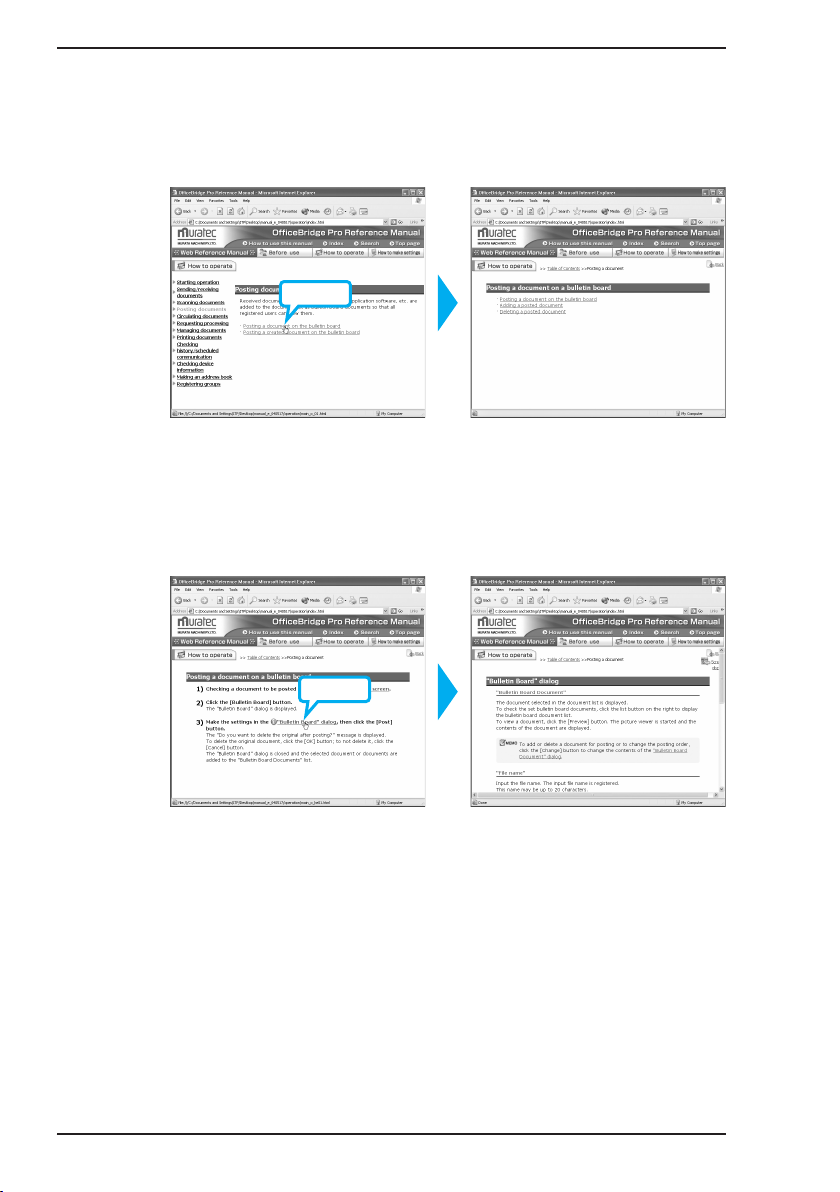
1.
Click on the “How to operate” tab on the top page.
The “How t o opera te” top page (“Star ting ope rati on”) will b e
displayed.
Click
On the left the “How to operate” table of contents will be displayed.
The contents will be displayed on the right. The table of contents item
for the currently opened content on the right will be shown in orange.
2.
Click on “Posting documents” in the table of contents.
The page explaining document posting will be displayed.
Click
In addition to the text explanation, some underline d items are
also displayed. These underlined items are linked to other pages
and by clicking on them you can jump to pages with more detailed
explanations.
Chapter 5
85
Page 94
How to use the electronic manual
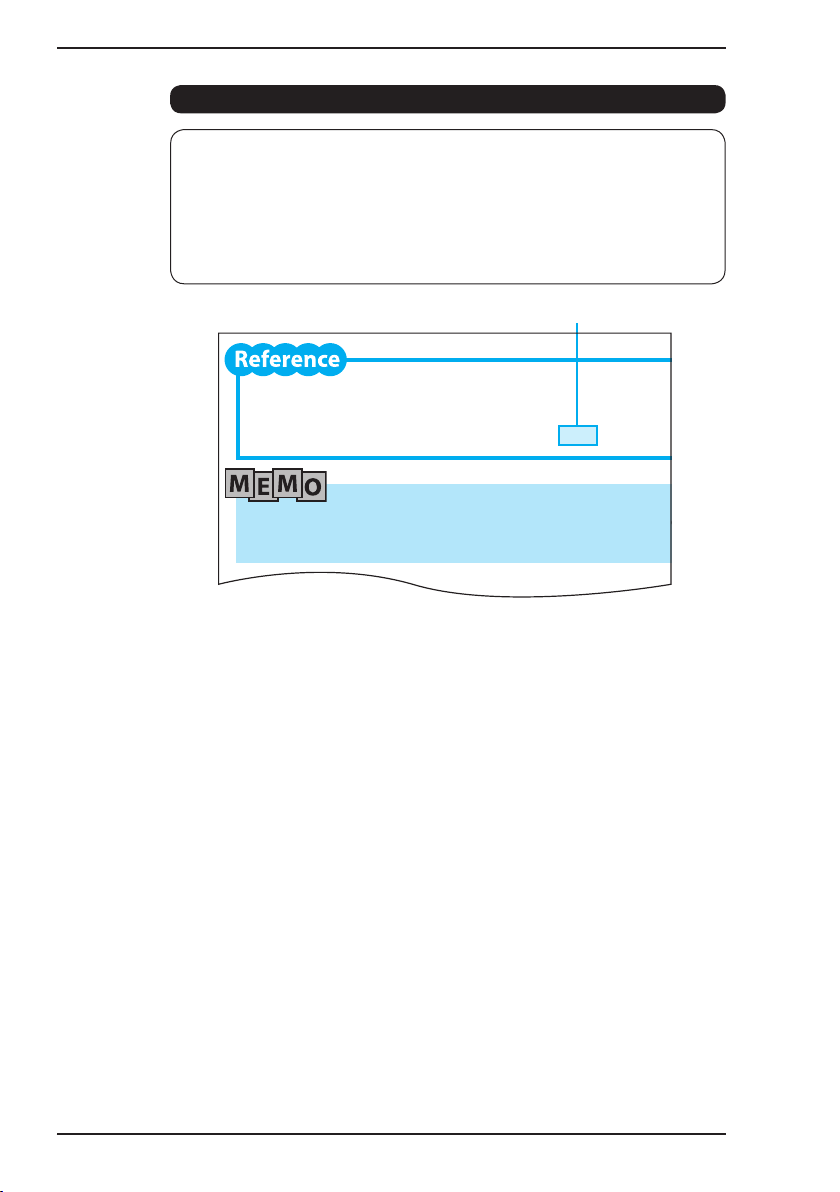
3.
Click on “Posting a document on the bulletin board”.
A page containing an explanation of “Posting a document on the
bulletin board” will be displayed.
In the text are items together with (i) icons. These are linked to pages
explaining each dialog.
4.
Click on the (i) “Bulletin Board” dialog.
The page explaining “Bulletin Board” will be displayed.
Click
86
Click
Page 95

How to use the electronic manual
When the “Screen display” on the upper-right is clicked, the dialog
being explained will be displayed in a separate window.
Click on
5.
To return to the tabl e of contents page click on “Table of
contents” at the top of the window.
in the upper-right corner of the window to close it.
Click
· You can return to the previous screen by clicking on “Back” at the upperright of the screen.
· Other opened windows will not automatically close. After viewing please
close them using
· Close the electronic manual by selecting “Close” from the browser “File”
menu or clicking on
.
at the upper-right of the window.
Chapter 5
87
Page 96

Making Reference to the
2
electronic manual
Reading this guide will give you a good understanding of the content and
operation of OfficeBridge Pro.
However, for detailed instruction on using OfficeBridge Pro, please consult
the reference guide.
So then, how can we find the relevant page in the electronic manual?
There are two ways to do this. The first is a “full-text search” and the
second is an “ID search”.
Performing a full-text search
1.
Click at the top of the electronic manual.
The search screen will be displayed.
88
Page 97

Making Reference to the electronic manual
2.
Click the “Full-text search” radio button.
3.
Type the keyword into the search box.
(Example: Enter “Process request”)
4.
Click [Search].
Phrases or item titles containing the keyword will be displayed.
5.
By c lic king on the title, the corre spond ing pag e w ill be
displayed.
89
Chapter 5
Page 98
Making Reference to the electronic manual
Performing an ID search
Getting started
A 3 digit number in par entheses ([ ]) wil l b e displayed a fter an
explanation in the guide, this number serves as a “quick link” to this
explanation.
By entering this three-digit number in the search screen, the page with
a more detailed explanation of the numbered item will be displayed.
This operation is identical to that for viewing a received fax. Switch to
either “Received” or “Public Inbox” (click on either the “Received” or “Public
Inbox” tab) and proceed in the same manner. [006]
Confirm that your browser is launched and you are logged into OfficeBridge
Pro.
ID
90
1.
Click “search” at the top of the electronic manual.
The search screen will be displayed.
2.
Click the “ID search” radio button.
3.
Type the three-digit number into the text box.
4.
Click [Search].
The matching page will be displayed.
Page 99

Chapter 6 Troubleshooting
This chapter details operational issues with OfficeBridge
Pro and how to resolve them.
Please contact your authorized Muratec service provider
if you cannot resolve the issue after consulting the guide.
(see the “Appendix: Maintenance,” page 119).
6
1. Issues with the screen operation ...............................
2. Printing problems .................................................... 100
3. Issues with “OB Pro InfoMonitor” ........................... 104
4. Issues with OfficeBridge Pro ................................... 106
92
Page 100

Issues with the screen
1
Unable to connect to
OfficeBridge Pro
operation
Problem Devices to check Checkpoint Resolution
Computer Is the IP address for OfficeBridge Pro
entered correctly?
Are the OfficeBridge Pro network
settings configured correctly?
Is the browser configured correctly? Check the browser settings as below.
Is the LAN cable loose or disconnected? Check the LAN cable connection and and secure it firmly.
Is the LAN cable damaged? Replace the LAN cable.
Is the network card (LAN card)
damaged?
Does Windows have sufficient system
memory?
Has the user information been
registered?
Is the password correct? Enter the password that was entered in the OfficeBridge Pro “User Registration”
The size of tables on
the screen, character
spacing, or line spacing
is different from the
screens in the manual.
92
MFX-2830 Is the power on? Turn the power on.
Is the LAN cable loose or disconnected? Check the LAN cable connection and secure it firmly.
Is the LAN cable damaged? Replace the LAN cable.
Are the network settings correct? Consult the instruction manual for the MFX-2830 and correct the network settings.
Network
peripherals (LAN
hub, router, etc.)
Computer Is a browser other than the previous
Is the power on? Turn the power on.
Is the LAN cable loose or disconnected? Check the LAN cable connectivity and secure it firmly.
Is the LAN cable damaged? Replace the LAN cable.
The device(s) may be damaged. Or, only
one of the ports may be damaged.
Are the network settings correct? Consult the device’s instruction manual and correct the network settings.
specified browser being used?
 Loading...