

Page 1

Information Server Kit
OfficeBridge
User’s Guide
for
MFX-2500
MFX-2530
Page 2

Introduction
Thank you for purchasing Muratec’s Information Server Kit OfficeBridge.
This manual describes the procedures for installing, adjusting settings and operating OfficeBridge. Please read
this manual carefully before starting operation of OfficeBridge.
* OfficeBridge operates after installation of the information server kit on to the fax main unit.
Registered trademarks and trademarks
Windows
®
95, Windows®98, Windows NT®, Windows®Millennium Edition and Windows®2000 are the registered
trademarks of Microsoft Corporation in the U.S.A. and/or other countries.
Screen copies in this manual are shown under permission of Microsoft Corporation.
IBM, OS/2, NuOffice are the registered trademarks of IBM Corporation in the U.S.A. and/or other countries.
Salutation is the registered trademark of Salutation Consortium, Inc.
All other brand names and product names mentioned in this manual are trade names, trademarks or registered
trademarks of their respective owners.
i
Page 3

Major features of OfficeBridge
Data
Fax
PC
Data
Fax
PC
I
n
t
e
r
n
e
t
E-mail
P
r
i
n
t
o
u
t
E-mail
I
n
t
e
r
n
e
t
Original
document
Internet fax transmission and reception
◆ A fax can be transmitted and received via the Internet.
The internet fax function contributes to savings on communication costs, especially for long-distance
and overseas fax transmissions.
◆ Transmission to an ordinary e-mail address is also possible.
PC-FAX transmission
◆ When sending a document composed on a PC by fax, it can be transmitted directly from the PC with no
need of a printout copy, keeping a high image quality with no deterioration.
◆ Direct transmission saves consumption of paper, which is otherwise needed to print a copy only for fax
transmission.
PC-FAX reception
◆ A message received by the fax main unit can be downloaded into a PC without printing, and printout
can be limited to only the message truly needing it. Paper consumption can be reduced by not printing
unimportant incoming messages. Circulation of a received fax can be handled easily from a PC.
ii
Page 4

Network scanner function
Fax
PC
PC
P
r
i
n
t
o
u
t
Data
PC
Original
document
◆ Using the main unit scanner, a paper document can be scanned into a PC.
◆ ADF enables efficient scanning of high volume documents.
Network printer function
◆ The unit can be efficiently used as a shared printer for multiple networked PCs with no need for
additional printer installation.
Received fax forwarding
◆ Based on a preset condition like the sender’s fax number, a received fax meeting this condition can be
forwarded to the designated user PC.
◆ Because an e-mail address can be specified as the forwarding destination,a person away from the office
can receive a message simply by checking for e-mail arrival if carrying a mobile computer.
◆ A received fax can be stored and managed as electronic data, which eliminates concerns about paper
filing locations and space. Integrated data management is possible if a shared folder is produced on the
network.
iii
Page 5

Fax main unit operation panel
FAX key
Numeric keys
One-touch keys
Cursor keys
MENU key
STOP key
NEXT key
START key
iv
Page 6

Contents
Introduction ........................................................................................................................................................i
Major features of OfficeBridge .........................................................................................................................ii
Fax main unit operation panel ................................................................................................. .......................iv
Contents .............................................................................................................................................................v
Chapter 1 Before use
Safety precautions ..................................................................................................................................2
Product package .....................................................................................................................................3
System configuration .............................................................................................................................4
Software and hardware requirements .......................................................................................4
Network schematic ............................................................................................................. ........5
Software functionality ................................................................................................................6
Printer driver functionality ........................................................................................................6
Installation and uninstallation .............................................................................................................7
Installing the program ...............................................................................................................7
Installing OfficeBridge ...............................................................................................................7
Installing IS Printer : Printer driver for network printing ...................................................14
Installing OfficeBridge FAX : Printer driver for fax transmission ........................................27
Installing TiffFormer : Printer driver for image file format conversion ...............................44
Uninstalling OfficeBridge ........................................................................................................61
Chapter 2 Basic operations
OfficeBridge ..........................................................................................................................................66
What is OfficeBridge? ......................................................................................................... ......66
How to log on ........................................................................................................................................67
How to log on ............................................................................................................................67
Multi-user operation .................................................................................................................68
Sending fax ...........................................................................................................................................69
How to send fax ........................................................................................................................69
Scanning ...............................................................................................................................................70
How to scan ...............................................................................................................................70
Printing .................................................................................................................................................72
How to print ..............................................................................................................................72
Chapter 3 Useful functions
Useful functions at a glance ................................................................................................................74
Settings .................................................................................................................................................75
Receiving fax with PC ..............................................................................................................75
Forwarding received fax ....................................................................................................... ....81
One-touch dial registration ......................................................................................................84
Speed dial registration .............................................................................................................86
v
Page 7

Fax operations ......................................................................................................................................88
Viewing received fax .................................................................................................................88
Sending data by fax from PC ...................................................................................................88
Sending fax to recipient in the log ...........................................................................................93
ReSend .......................................................................................................................................94
Set a time to send fax ...............................................................................................................95
Batch transmission ...................................................................................................................96
Scanner operations ...............................................................................................................................97
Viewing scanned image ............................................................................................................97
Setting scanner .........................................................................................................................97
Specifying folder to save scanned data ....................................................................................99
Internet fax operations ......................................................................................................................100
SendConfirmation ...................................................................................................................100
ReadConfirmation ...................................................................................................................101
Other operations ................................................................................................................................102
Reading image using TWAIN driver .....................................................................................102
Converting image to TIFF format .........................................................................................104
Backing up information ..........................................................................................................107
Chapter 4 Management with OfficeBridge
Environment settings ........................................................................................................................112
Deleting file after fax transmission .......................................................................................112
Auto log-on ................................................................................................................... ...........113
Minimized screen setting .......................................................................................................114
Managing data ...................................................................................................................................115
Creating a new folder .............................................................................................................115
Renaming a folder ...................................................................................................................115
Deleting a folder .....................................................................................................................115
Moving a folder .......................................................................................................................115
Copying a folder ......................................................................................................................115
Sharing data .......................................................................................................................................116
Sharing data on single PC .....................................................................................................116
Sharing data with multiple PCs on the network ..................................................................116
Making print output ..........................................................................................................................119
Searching for file ................................................................................................................................120
Registering sender .............................................................................................................................122
Registration of sender ............................................................................................................122
Changing password ............................................................................................................................124
Others .................................................................................................................................................125
How to use Trash ....................................................................................................................125
Showing and hiding toolbars .................................................................................................126
Checking fax transmission information ................................................................................127
Checking fax reception information ......................................................................................128
Switching selection in tree view or in list view ....................................................................129
How to set printer ...................................................................................................................129
Sorting data .............................................................................................................................131
vi
Page 8

Chapter 5 Using Address Book
Address Book overview ......................................................................................................................134
What is Address Book? ...........................................................................................................134
Startup .....................................................................................................................................134
Registering address ............................................................................................................................138
Registration on Private Address ............................................................................................138
Registration on Share Address ..............................................................................................141
Registration on Private Group ...............................................................................................14 3
Registration on Share Group .................................................................................................146
Modification, copy, paste and deletion ..............................................................................................148
Modification .............................................................................................................................148
Copy .........................................................................................................................................148
Paste ........................................................................................................................................149
Deletion ...................................................................................................................................149
Sharing address .................................................................................................................................150
Importing and exporting address ......................................................................................................152
Importing address ...................................................................................................................152
Exporting address ...................................................................................................................154
Chapter 6 Using CoverPage Editor
CoverPage Editor overview ...............................................................................................................156
What is CoverPage Editor? ....................................................................................................156
Startup .....................................................................................................................................156
CoverPage Editor operations .............................................................................................................159
Entering text ...........................................................................................................................159
Creating objects ......................................................................................................................160
Object setup .............................................................................................................................162
Changing objects layout .........................................................................................................163
Cut, copy and paste of object ..................................................................................................166
Deleting object ........................................................................................................................167
Viewing image .........................................................................................................................168
Inserting information ......................................................................................................... ....168
Inserting graphics ............................................................................................................ .......171
Scrolling screen .......................................................................................................................171
Print preview ..........................................................................................................................172
Print .........................................................................................................................................172
Save .........................................................................................................................................172
vii
Page 9

Chapter 7 Using Image Viewer
Image Viewer overview ......................................................................................................................174
What is Image Viewer? ...........................................................................................................174
Startup .....................................................................................................................................174
Image Viewer operations ...................................................................................................................177
Entering text ...........................................................................................................................177
Creating objects ......................................................................................................................178
Object setup .............................................................................................................................180
Erasing image .........................................................................................................................181
Changing objects layout .........................................................................................................182
Cut, copy and paste of object ..................................................................................................185
Deleting object ........................................................................................................................186
Viewing image .........................................................................................................................187
Adjusting angle .......................................................................................................................188
Print .........................................................................................................................................190
Save .........................................................................................................................................190
Chapter 8 Device Management on PC
Viewing fax communication history ..................................................................................................192
Viewing e-mail communication history ............................................................................................194
Mail transmission history check ............................................................................................194
Mail reception history check ..................................................................................................196
Confirming or canceling Scheduled communication ........................................................................198
Confirming or canceling print job .....................................................................................................200
Chapter 9 Troubleshooting guide
Troubleshooting guide .......................................................................................................................204
Main specifications.........................................................................................................................................206
Index................................................................................................................................................................208
viii
Page 10

Chapter 1
Before use
Safety precautions......................................................................2
Product package..........................................................................3
System configuration..................................................................4
Installation and uninstallation..................................................7
Page 11
Chapter 1 Before use
Safety precautions
● Please read “Safety precautions” in the operation manual of the fax main unit.
● The following notations are used to alert the user to harm or damage that could result from mishandling due to
negligence of precautions.
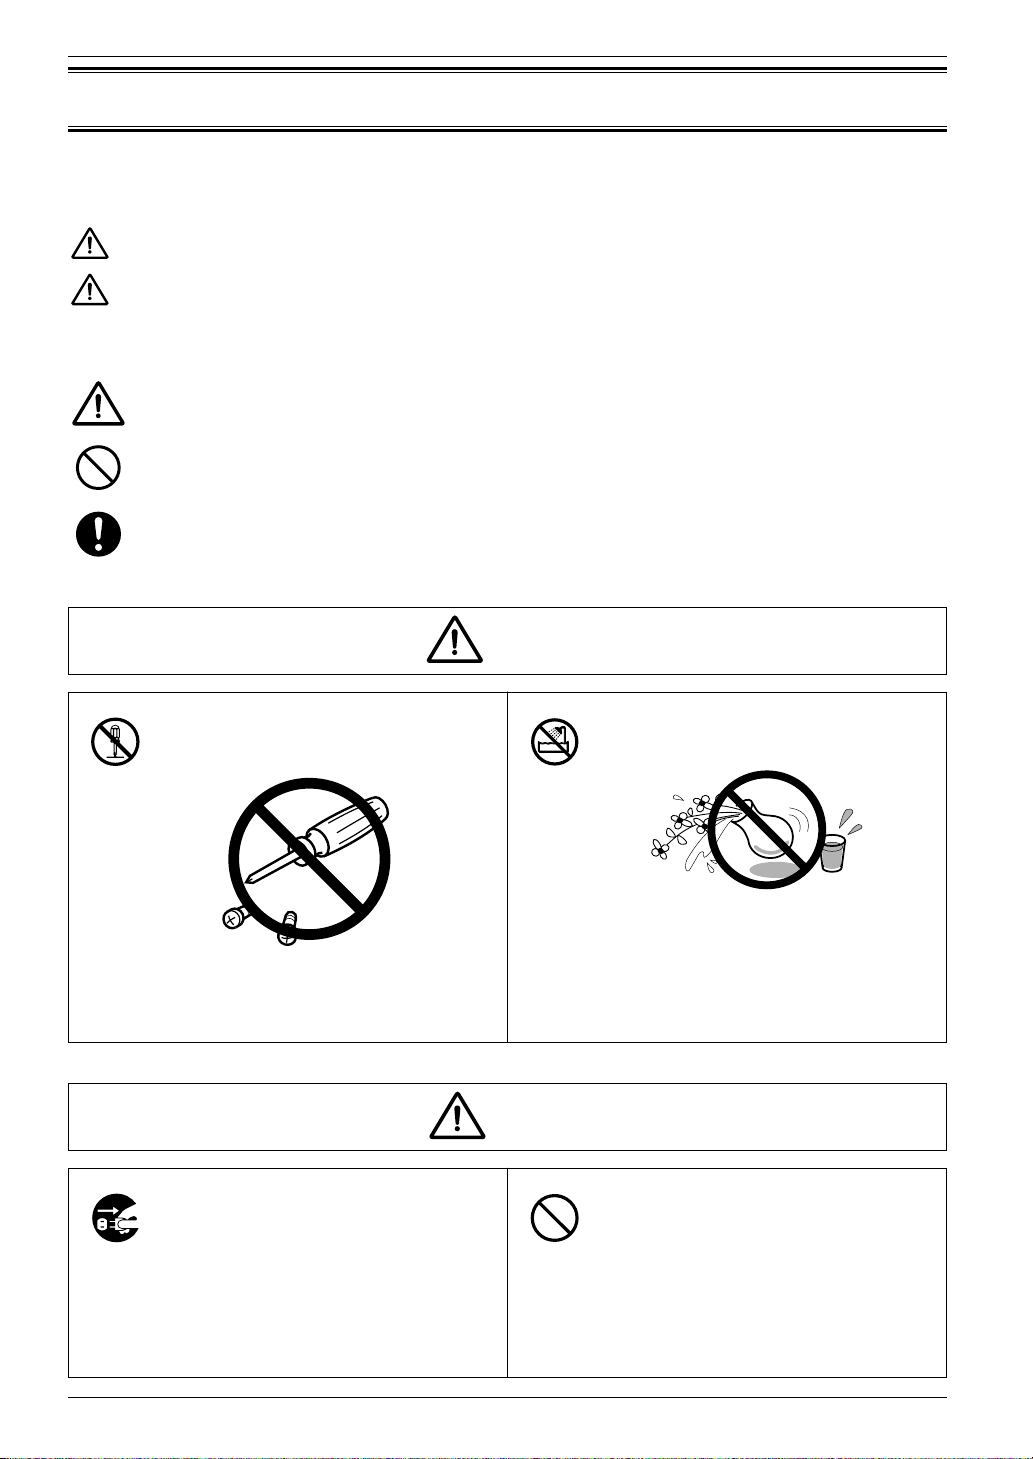
Warning
Caution
● The following symbols are used to distinguish the types of alerts. (Shown below are the examples.)
This notation alerts the user to the potential for serious injury or death.
This notation alerts the user to the potential for bodily harm or damage to hardware.
This symbol indicates warning or caution. An illustration will give a concrete description.
This symbol indicates prohibition in handling. An illustration will give a concrete description.
This symbol indicates mandatory handling. An illustration will give a concrete description.
Warning
Never attempt to disassemble, repair or
modify the device.
Do not place anything that contains
water or chemical drug on the device.
Do not place on the device such articles as
flower vases, potted plants, beverage cups,
cosmetics, containers of chemical drugs or
water, or small metallic articles. These
It may cause electric shock or machine
failure. Request repairs from the Customer
Information Center.
substances, once overturned and dropped
inside of the device, may cause a fire or
electric shock.
Caution
When any of the following occurs, stop
operation immediately, unplug the
power cable of the fax main unit from
the power outlet, and call our
Information Center.
◆ Smoke generation or an unusually heated
machine housing
◆ Abnormal noise
2
Never attempt anything that is not
specified in this manual.
It may cause unexpected accidents or
machine failure.
Page 12

Chapter 1 Before use
Product package
Before starting to use this software,please check the contents of the product package and confirm that the
following items are included.
Contact your dealer or our Information Center (shown on back cover of this manual) if you find any item
missing, or if there is a missing page or anything unclear in this manual.
Setup CD ......................................................... 1 piece
End-user license agreement........................... 1 sheet
Operation manual........................................... 1 copy
1
Caution
An end-user license agreement is a legal instrument to permit the use of this product.
Be sure to read this agreement before you start to use this product, and to make a user
registration. Be careful to keep the document so that you can refer to it anytime later.
3
Page 13

Chapter 1 Before use
System configuration
Software and hardware requirements
Basic software (Operating system: OS)
Microsoft
Computer
PC/AT compatible model able to run any of the above operating systems with Ethernet network
connectivity
CPU
Pentium
RAM
Windows®95 / Windows®98 / Windows®ME .........................32MB minimum
Windows NT
Hard disk
Approx. 20MB of free space for installation of OfficeBridge
Adequate free space to save faxes and scanned data
®
Windows®95 *1, Windows®98, Windows®ME, Windows NT®and Windows®2000
®
166MHz or higher microprocessor (or equivalent)
®
/ Windows®2000...............................................64MB minimum
Disk drive device
CD-ROM drive *
2
Network protocol
TCP/IP protocol must be installed.
Browser
Netscape Navigator 4.0 or later version *
3
Microsoft®Internet Explorer 4.01 SP1 or later version
Other requirements
Minimum 800 ✕ 600 pixels resolution and 256 colors display capability graphic accelerator board,
network interface board
*1 Version 4.00.950 needs to be updated by Microsoft Windows
®
95 Service Pack 1.
*2 This product is supplied only in the media of CD-ROM. For procedures to install on a computer without
a CD-ROM drive, please consult your dealer or our Information Center (shown on back cover).
®
*3 Even when you use Netscape Navigator,it is necessary that your PC has Microsoft
Internet Explorer
4.01 SP1 or a later version installed.
4
Page 14

Network schematic
Client Client
Mail server
Internet fax / E-mail
Sending and receiving fax
through telephone line
MFX-2500 (IS-100) server
ABC
ABC
ABC
Print output
Scanning
ABC
Chapter 1 Before use
1
Installation of a MFX-2500 (IS-100) server on the network provides the following capabilities.
◆ Print output of the data composed by a PC application program, as well as fax transmission and
reception
◆ Internet fax transmission and reception
◆ Scanned data loading
The following requirements need to be met in order to make the above capabilities available.
◆ Connection to a mail server (SMTP/POP3) *
◆ Connection of a MFX-2500 (IS-100) server to client PCs in the same LAN segment
* There is no need for a mail server connection if Internet fax is not used.
5
Page 15

Chapter 1 Before use
Software functionality
OfficeBridge Client
OfficeBridge Client enables fax transmission of a document or image produced by application
software, as well as the image data scanned by MFX-2500.
It is also possible to manage fax messages, both sent and received.
An image can be scanned to save it as image data using the fax main unit scanner.
Scanned image data can be managed as well.
CoverPage Editor
CoverPage Editor produces a cover page used when sending a fax. You can design your own cover
pages in different styles to be used on different occasions.
Address Book
Recipients of a fax or Internet fax can be registered in Address Book. The recipient’s department
name and address can be registered as well for efficient database management.
Image Viewer
Image Viewer displays a received fax or scanned image. It is also possible to retouch the image.
Printer driver functionality
MFX-2500/IS Printer
This printer driver is used to make print output of a document or image composed by application
software. Make sure to install this driver when printer functionality is required.
Muratec OfficeBridge Fax
This printer driver is used to send by fax a document or image composed by application software.
Make sure to install this driver when fax functionality is required.
Muratec OfficeBridge TiffFormer
This printer driver is used to convert a document or image composed by application software into Tiff
image format.
6
Page 16
Chapter 1 Before use
Installation and uninstallation
Installing the program
To use this product, it must first be installed on the PC that will use it.
Besides installing the program directly from the Setup CD, another installation method is also available
in which the Setup CD is copied and used for installation.
The descriptions offered in this manual are limited to the procedure to install the program directly from
the Setup CD. Depending on the user’s environment, please follow whichever procedure is appropriate.
This product requires a Microsoft Windows
installation, please check if your PC meets the software and hardware requirements.
When you install the program on a PC with either a Windows
consult your system administrator and follow its instructions.
Installing OfficeBridge
®
95 or later operating system environment. Before
®
2000 or Windows NT®operating system,
* See ‘Software and hardware requirements’ on p.4.
1
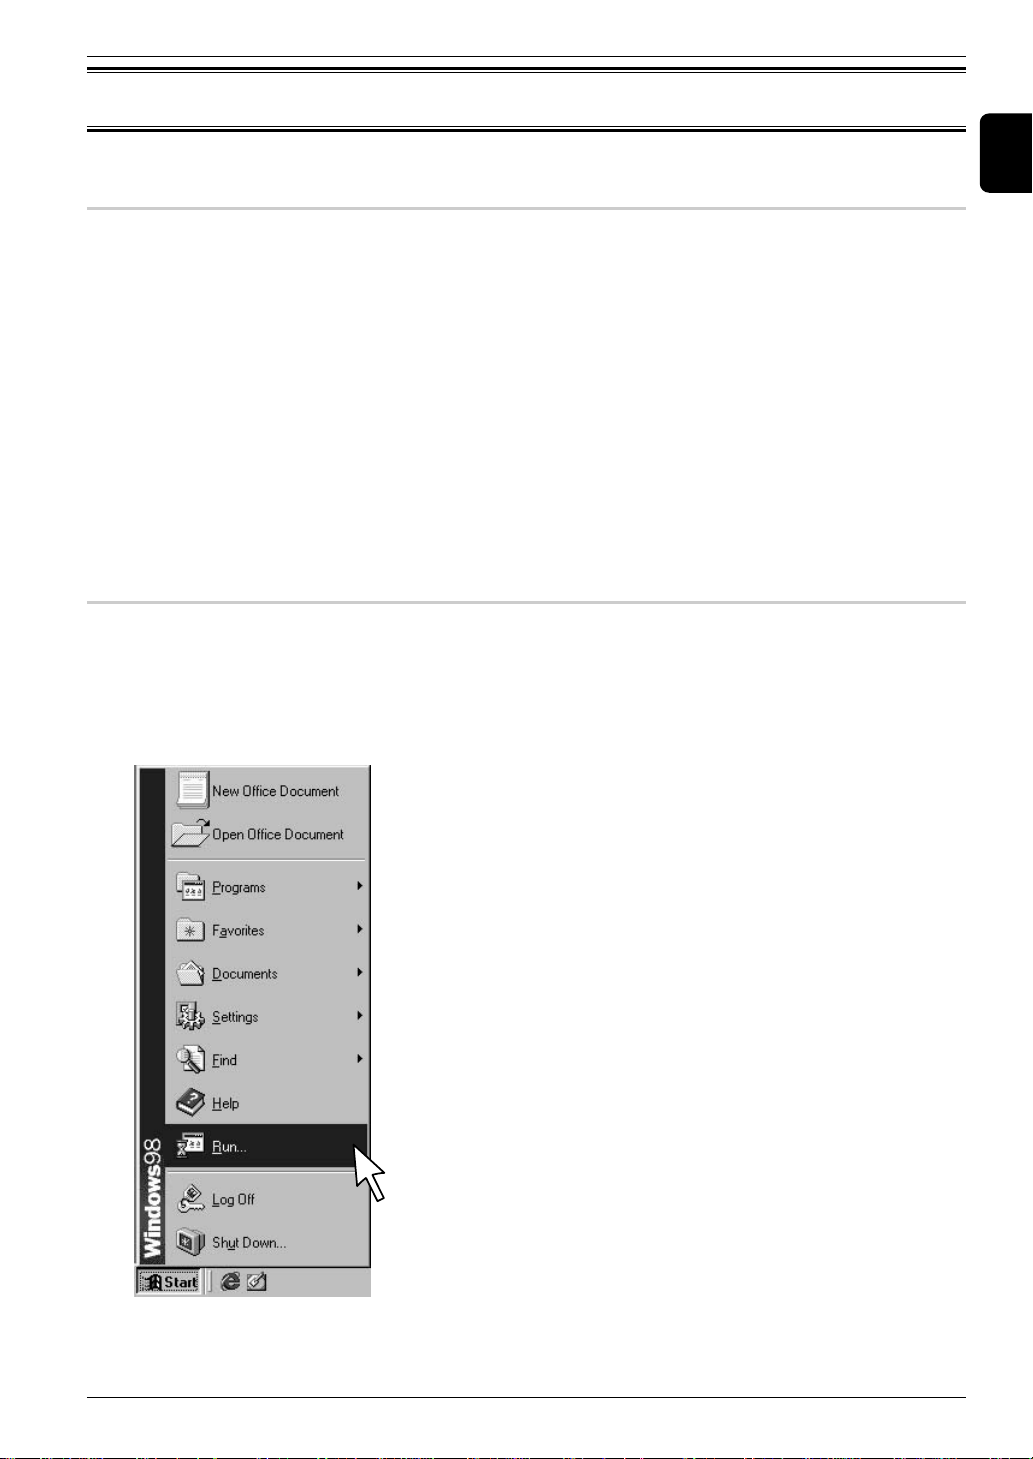
1 Start your computer.
2 Insert the Setup CD into your CD-ROM drive.
3 Click the [Start] button, and then click [Run].
7
Page 17
Chapter 1 Before use
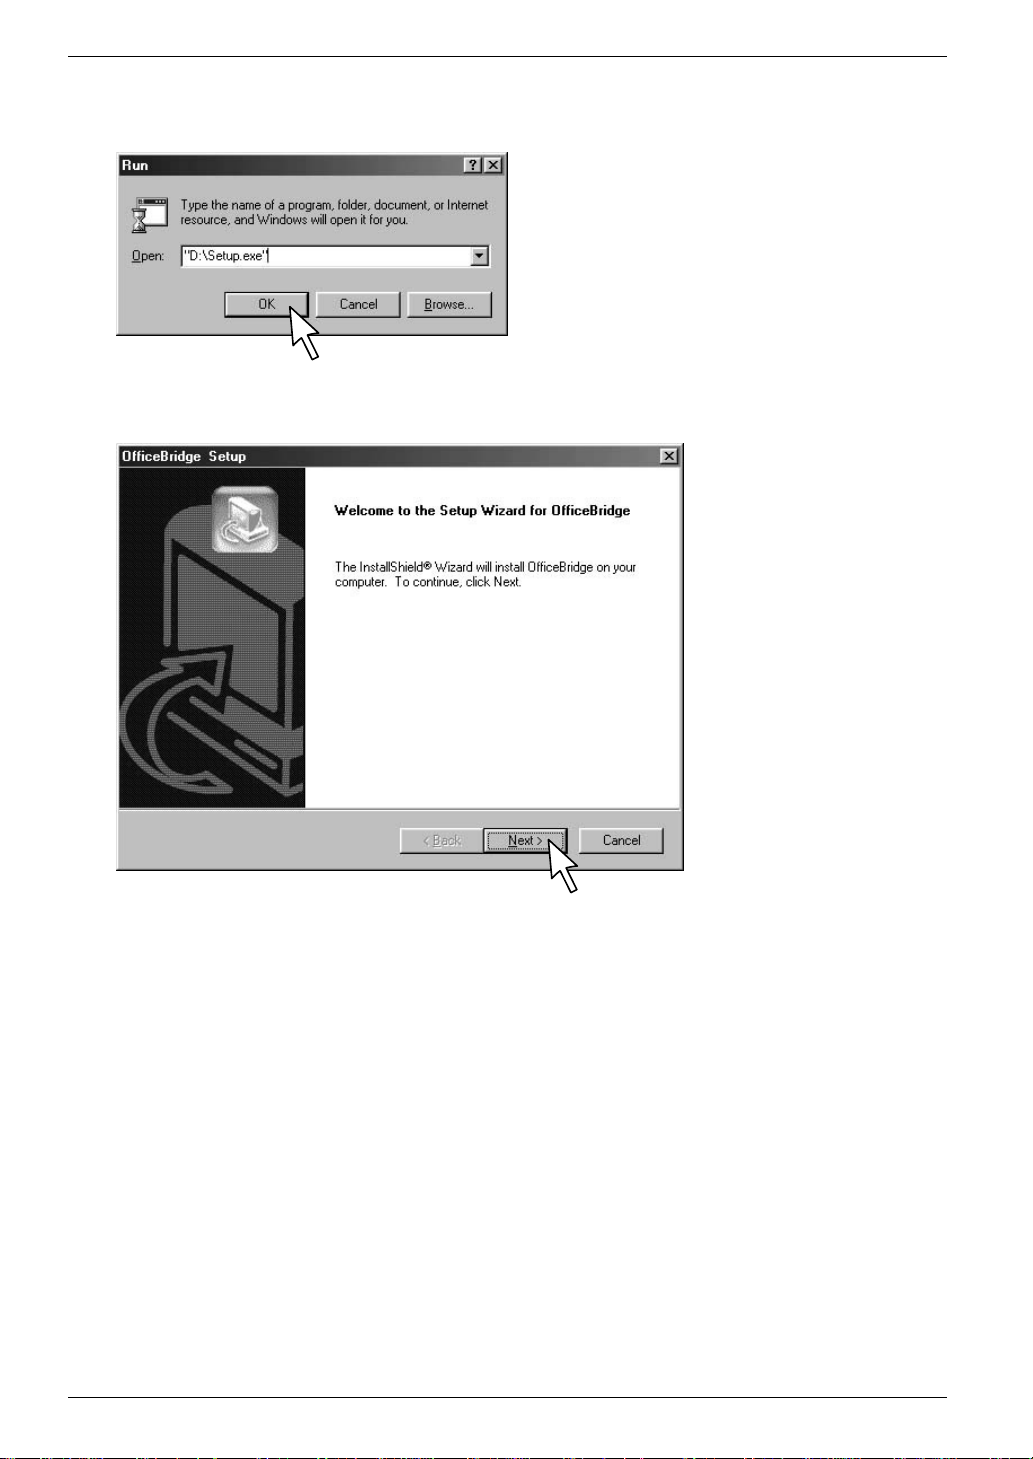
4 The [Run] screen appears.
Enter [(Drive letter):\Setup.exe] in [Open], and click [OK].
* (Drive letter) is the letter assigned to your CD-ROM drive.
5 The [OfficeBridge Setup] screen appears.
Click [Next>].
8
Page 18
Chapter 1 Before use
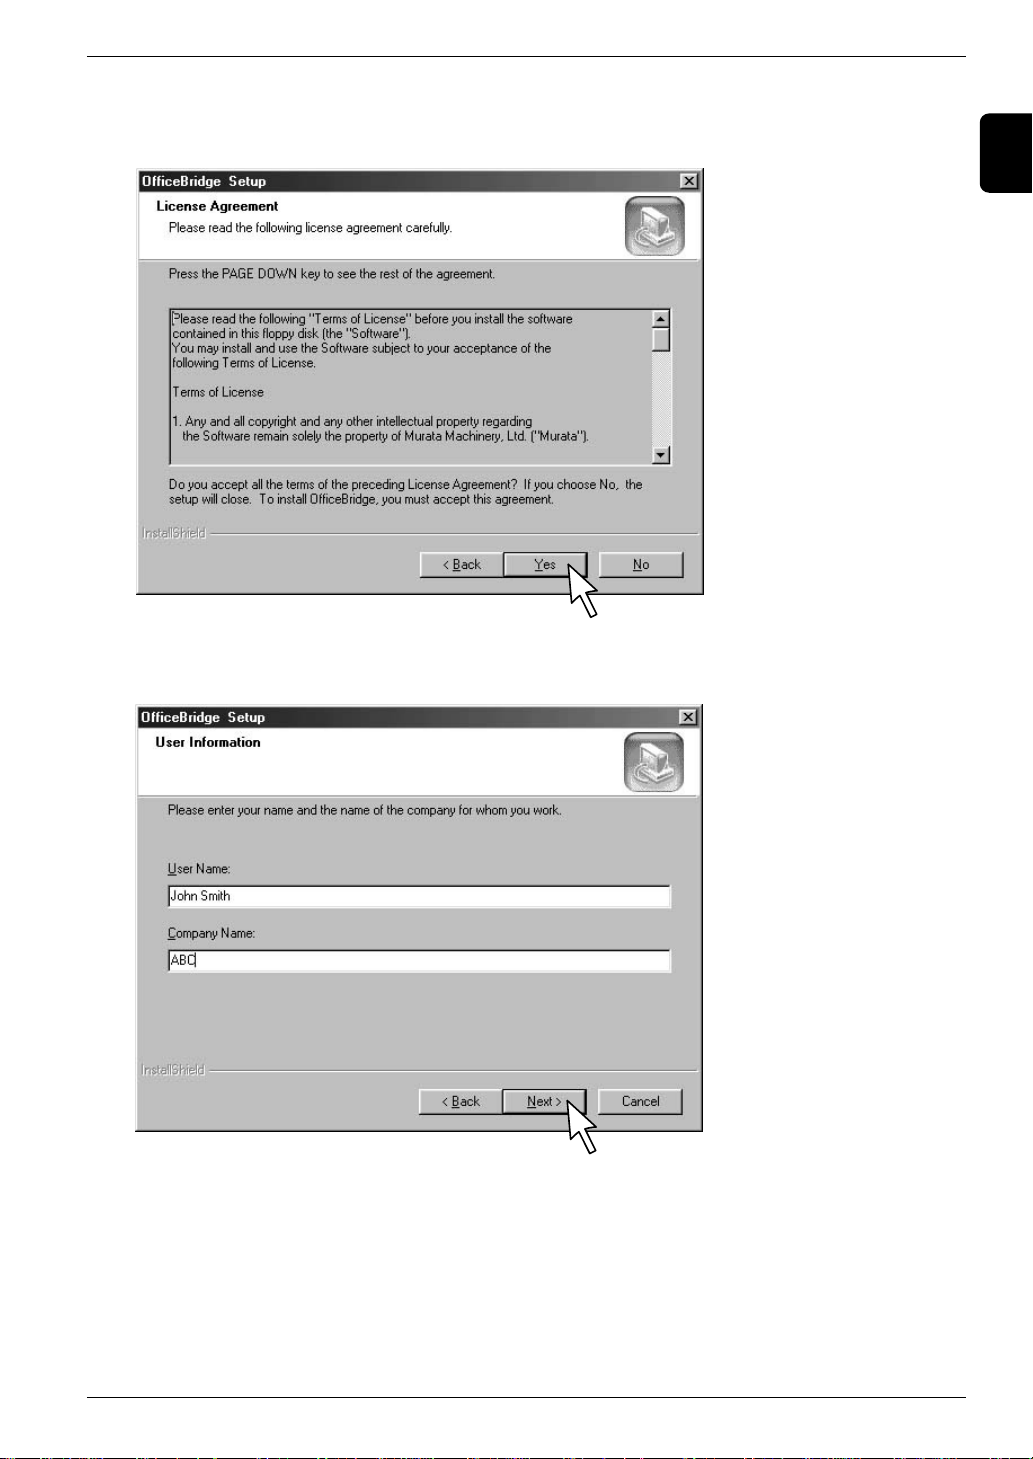
6 The [License Agreement] screen appears. Read the agreement carefully and, if you agree, click
[Yes].
* OfficeBridge cannot be installed unless you agree.
* To cancel the setup, click [No].
1
7 The [User Information] screen appears.
Enter (or confirm) [User name] and [Company name]. Then click [Next>].
9
Page 19

Chapter 1 Before use
8 The [Choose Destination Location] screen appears.
If the folder shown is agreeable, click [Next>].
To change the installation folder, click [Browse].
Determine the installation folder, and then click [OK].
The previous screen appears.
Click [Next>].
10
Page 20

9 The [Select Program Folder] screen appears.
Click [Next>].
10 The [Server address setting] screen appears.
Enter the IP address of the server (fax main unit), and click [Next>].
Chapter 1 Before use
1
11
Page 21
Chapter 1 Before use
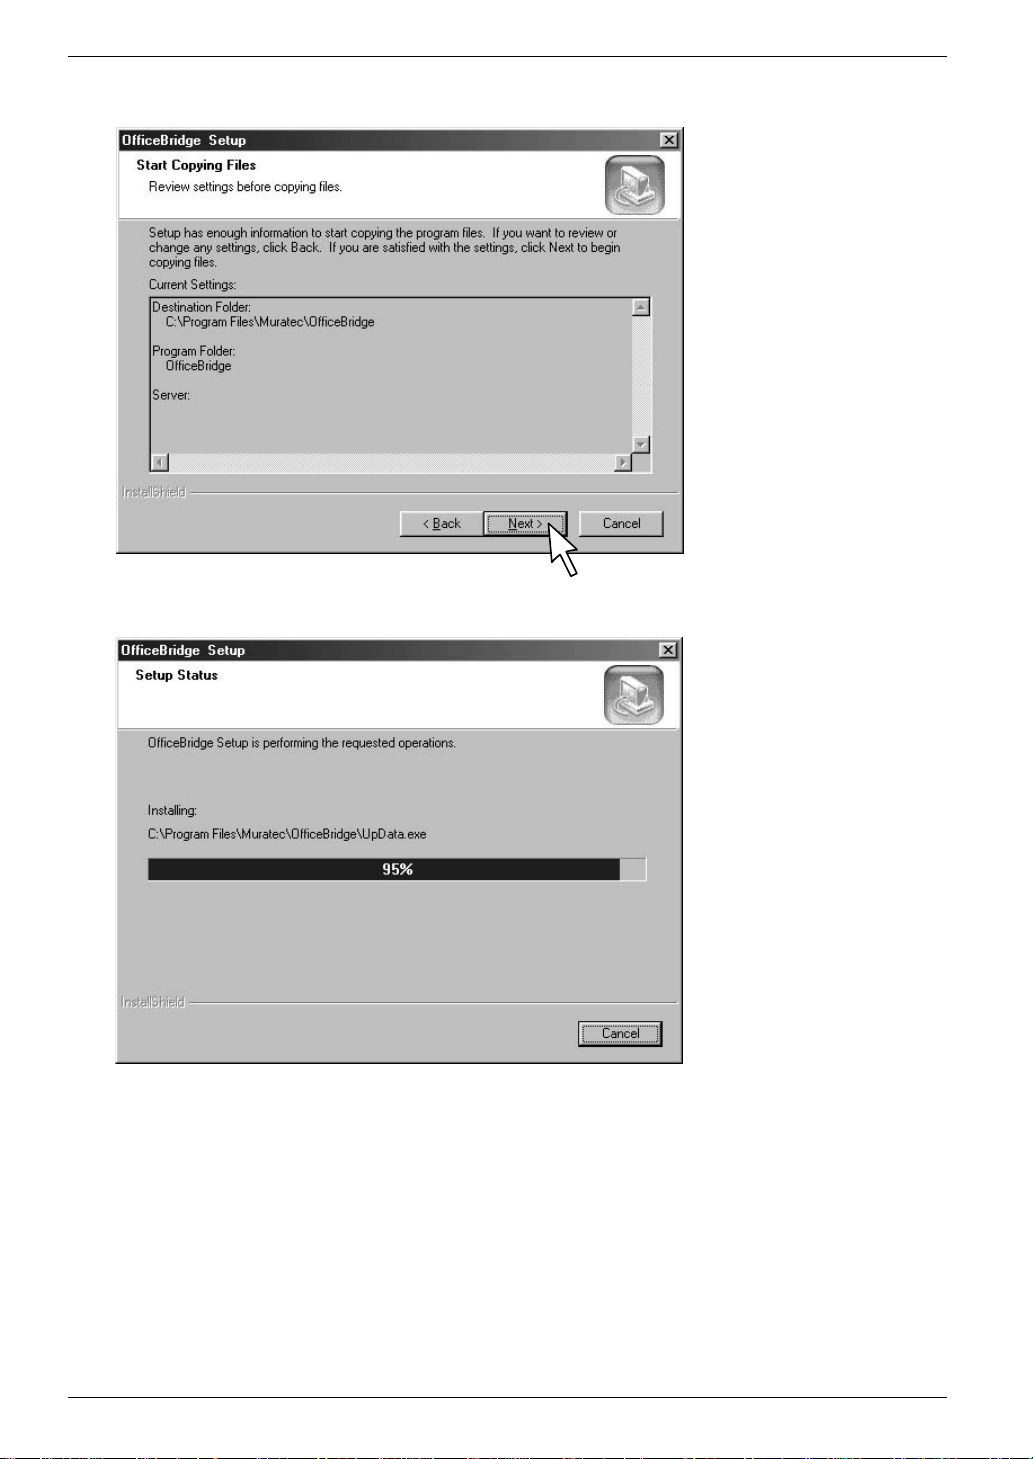
11 The [Start Copying Files] screen appears.
Check [Current Settings], and click [Next>] to start installation.
12 Installation status is displayed.
12
Page 22
Chapter 1 Before use
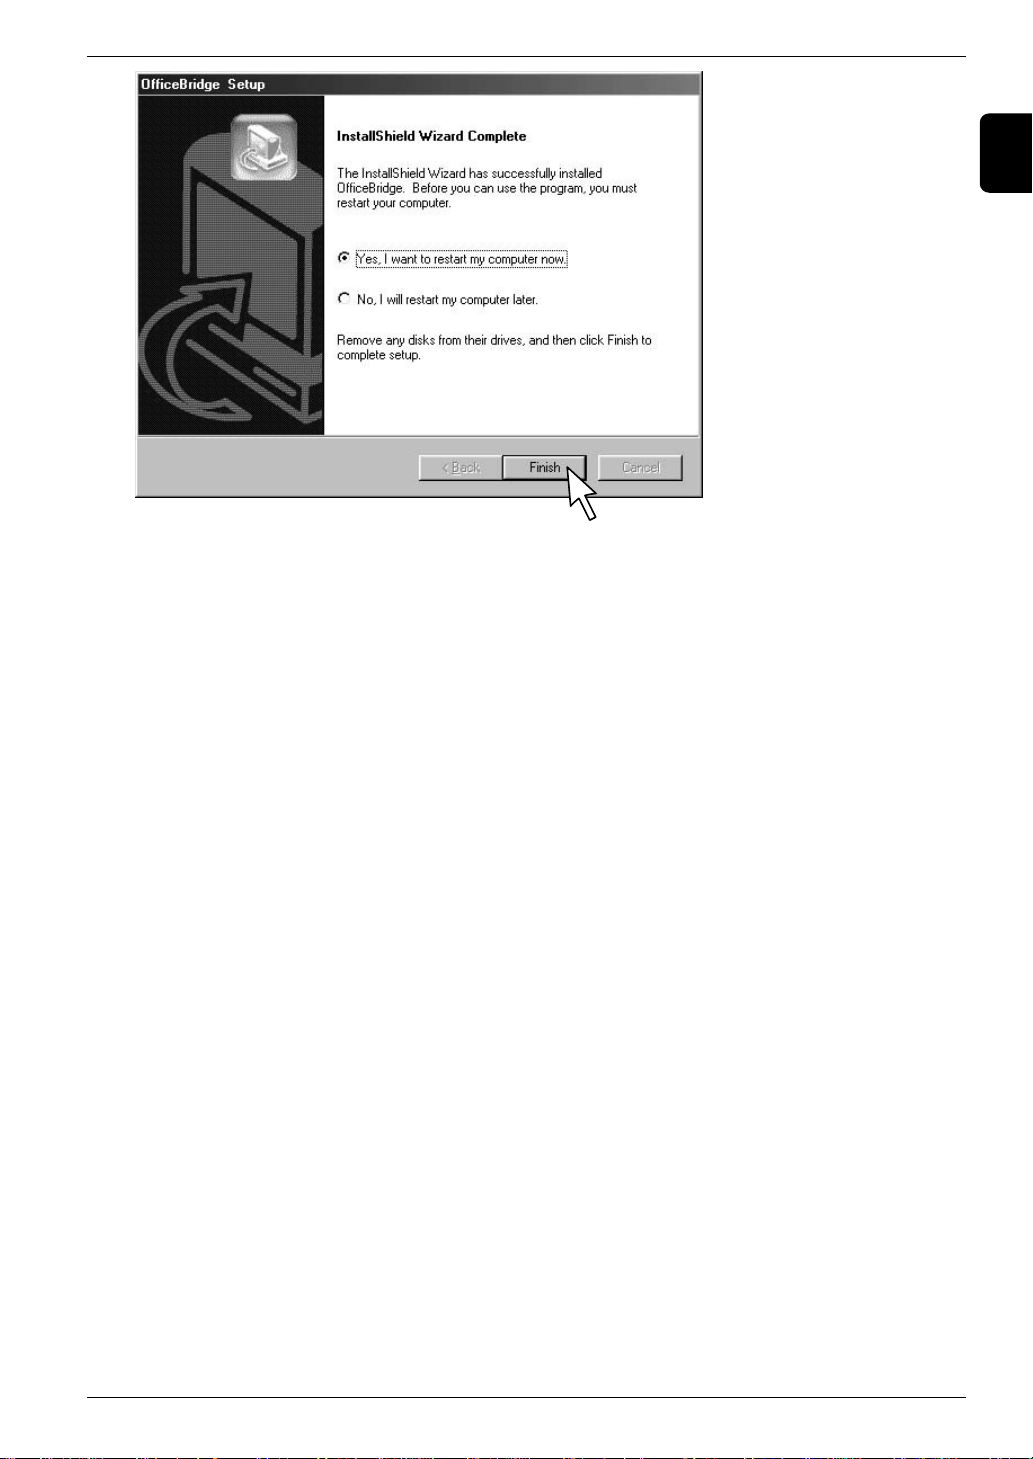
13
If you select the [Yes, I want to restart my computer now] button and click [Finish], the
computer will be restarted.
* If you are running other application programs, end the session after saving the data. Then, click
[Finish].
* If you select the [No, I will restart my computer later] button and click [Finish], the
installation has not been completed correctly. Make sure to restart your computer.
1
13
Page 23
Chapter 1 Before use
Installing IS Printer : Printer driver for network printing
* This printer driver is used to make print output from the fax main unit.
Caution : Make sure that OfficeBridge has been installed before installing the printer driver.
Windows 9x
1 Insert the Setup CD into your CD-ROM drive.
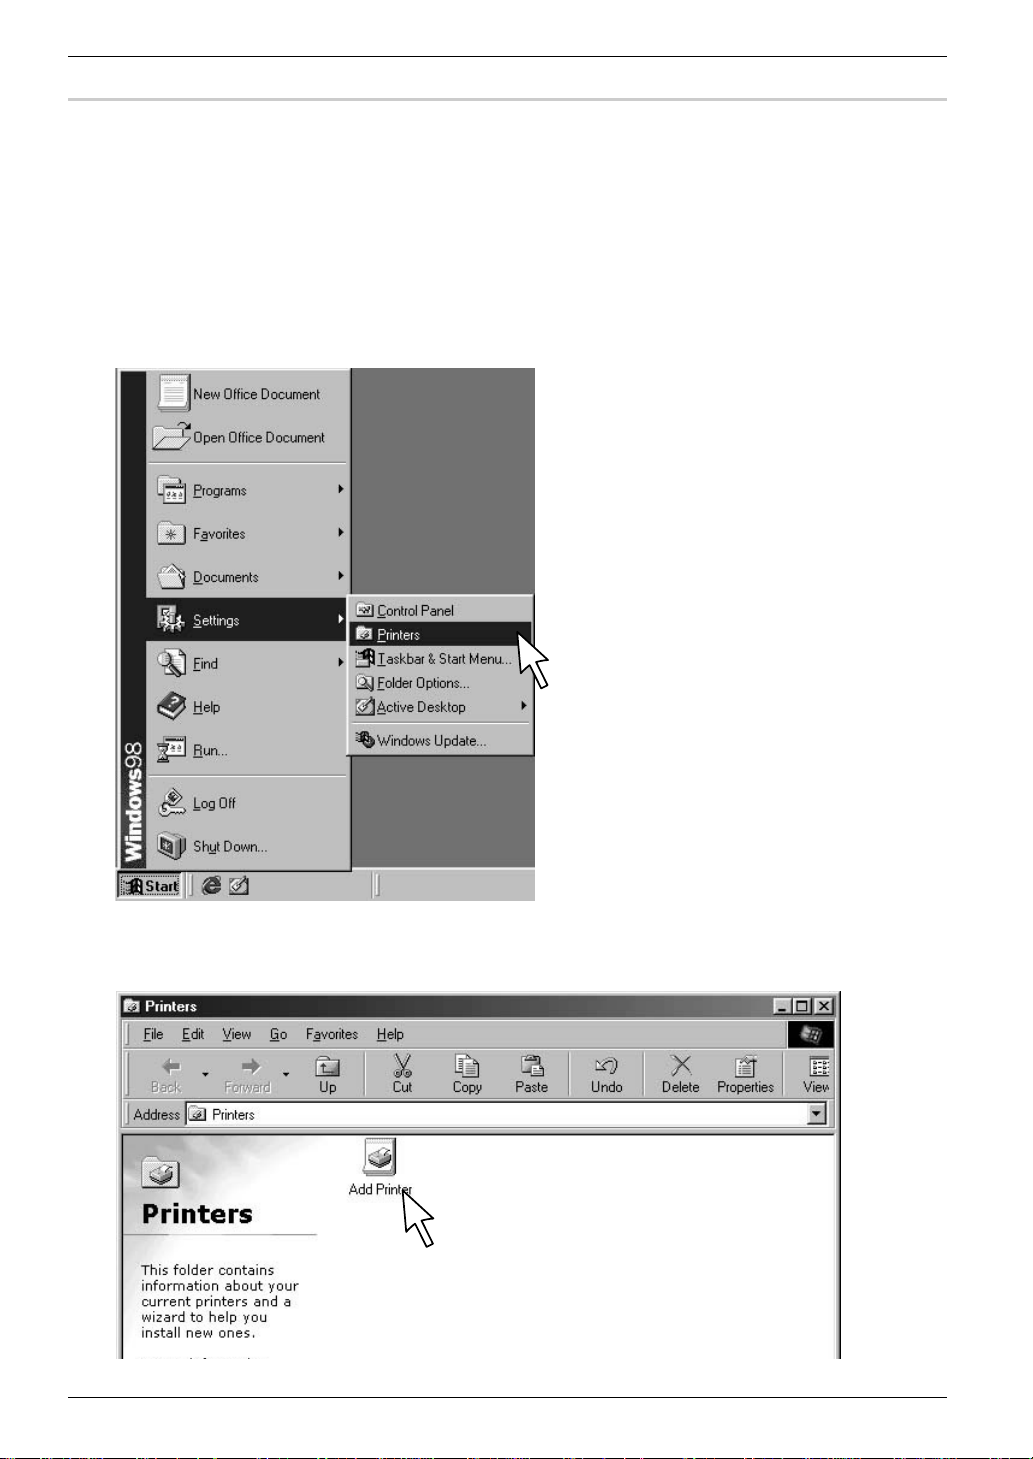
2 Click the [Start] button, point to [Settings] and then click [Printers].
3 The printer folder opens.
Double-click the [Add Printer] icon.
14
Page 24
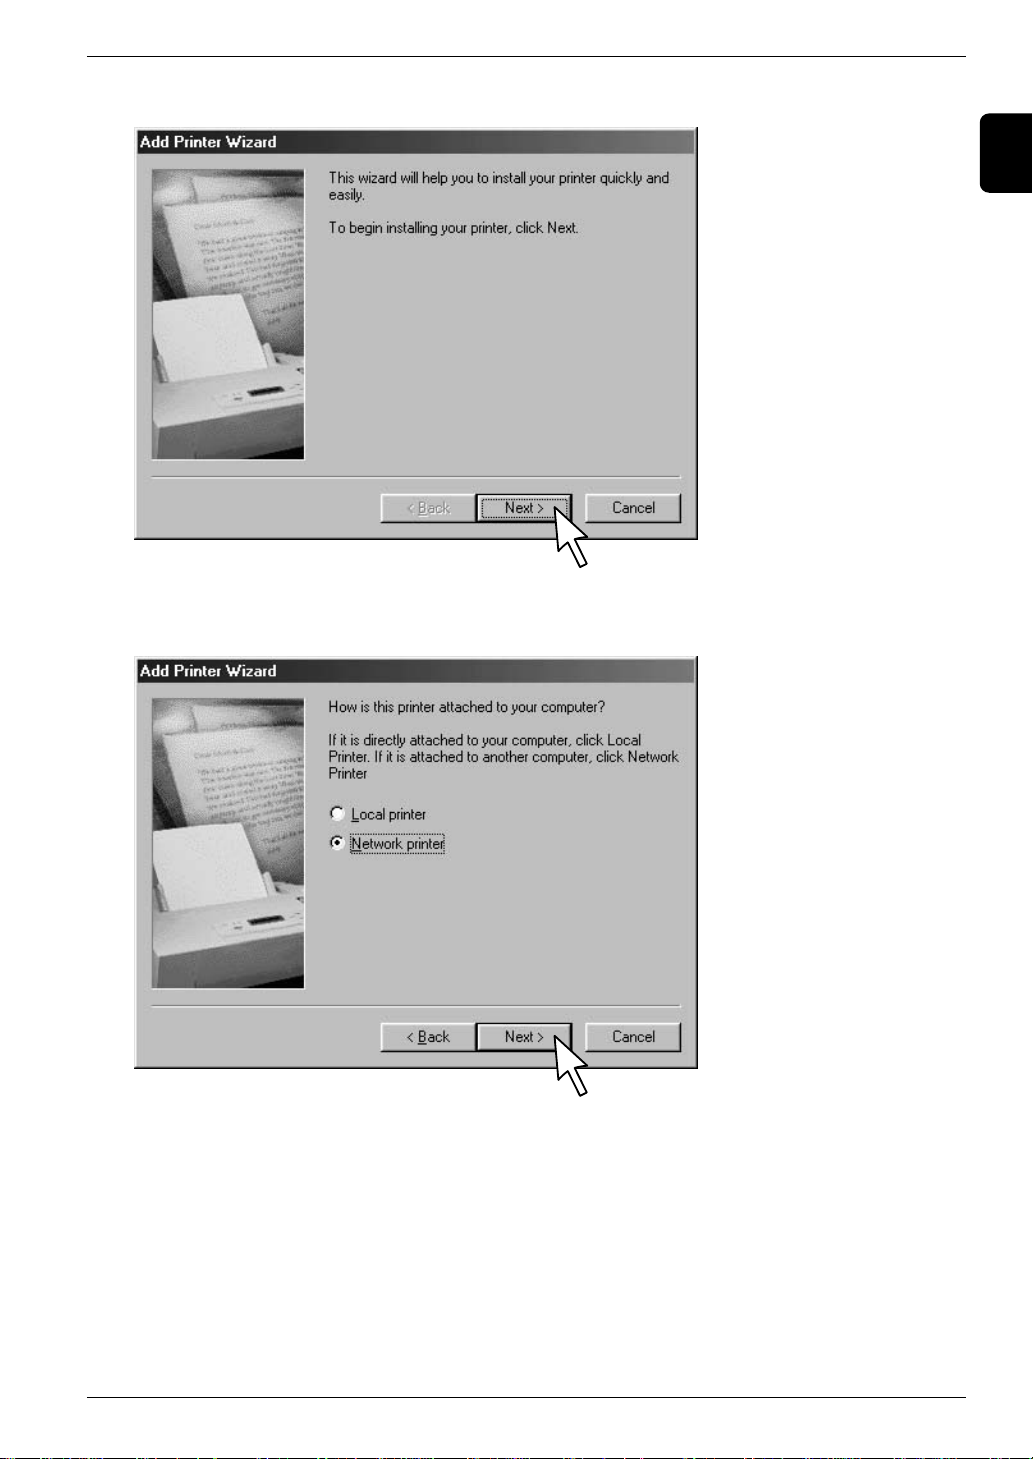
4 The [Add Printer Wizard] screen appears.
Click [Next>].
5 Specify the printer connection.
Select the [Network printer] check box, and click [Next>].
Chapter 1 Before use
1
15
Page 25
Chapter 1 Before use
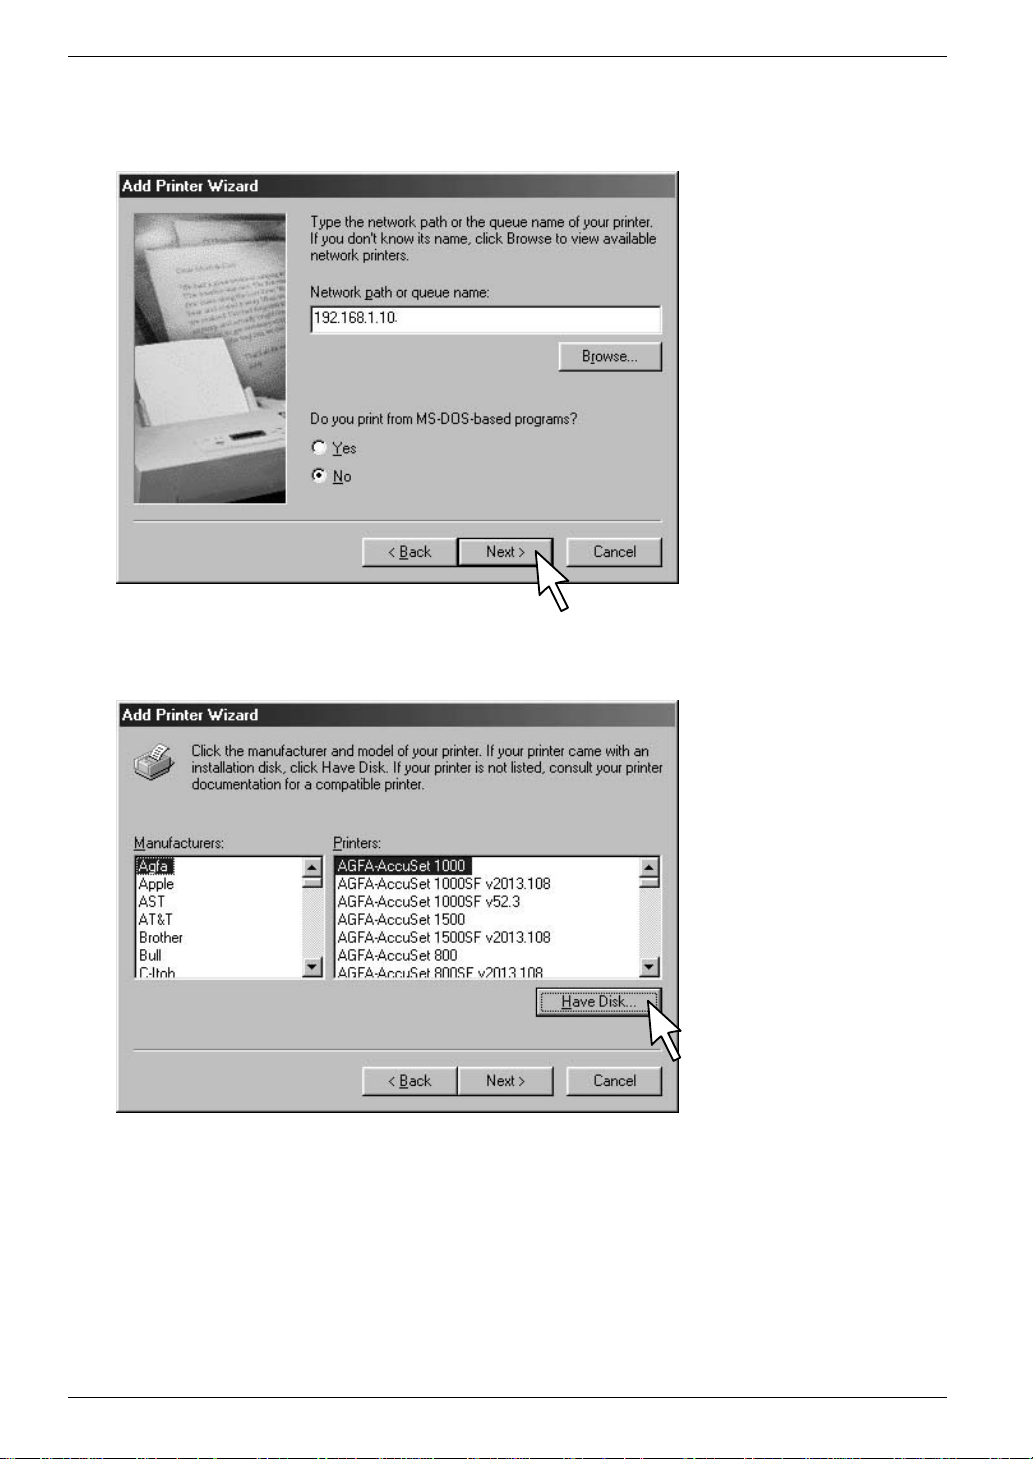
6 The network path entry screen appears.
Enter the IP address of the server (fax main unit) in [Network path or queue name]. Select [No]
under [Do you print from MS-DOS-based programs?].
Click [Next>].
7 Select the manufacturer and model of your printer.
Click [Have Disk].
16
Page 26
Chapter 1 Before use
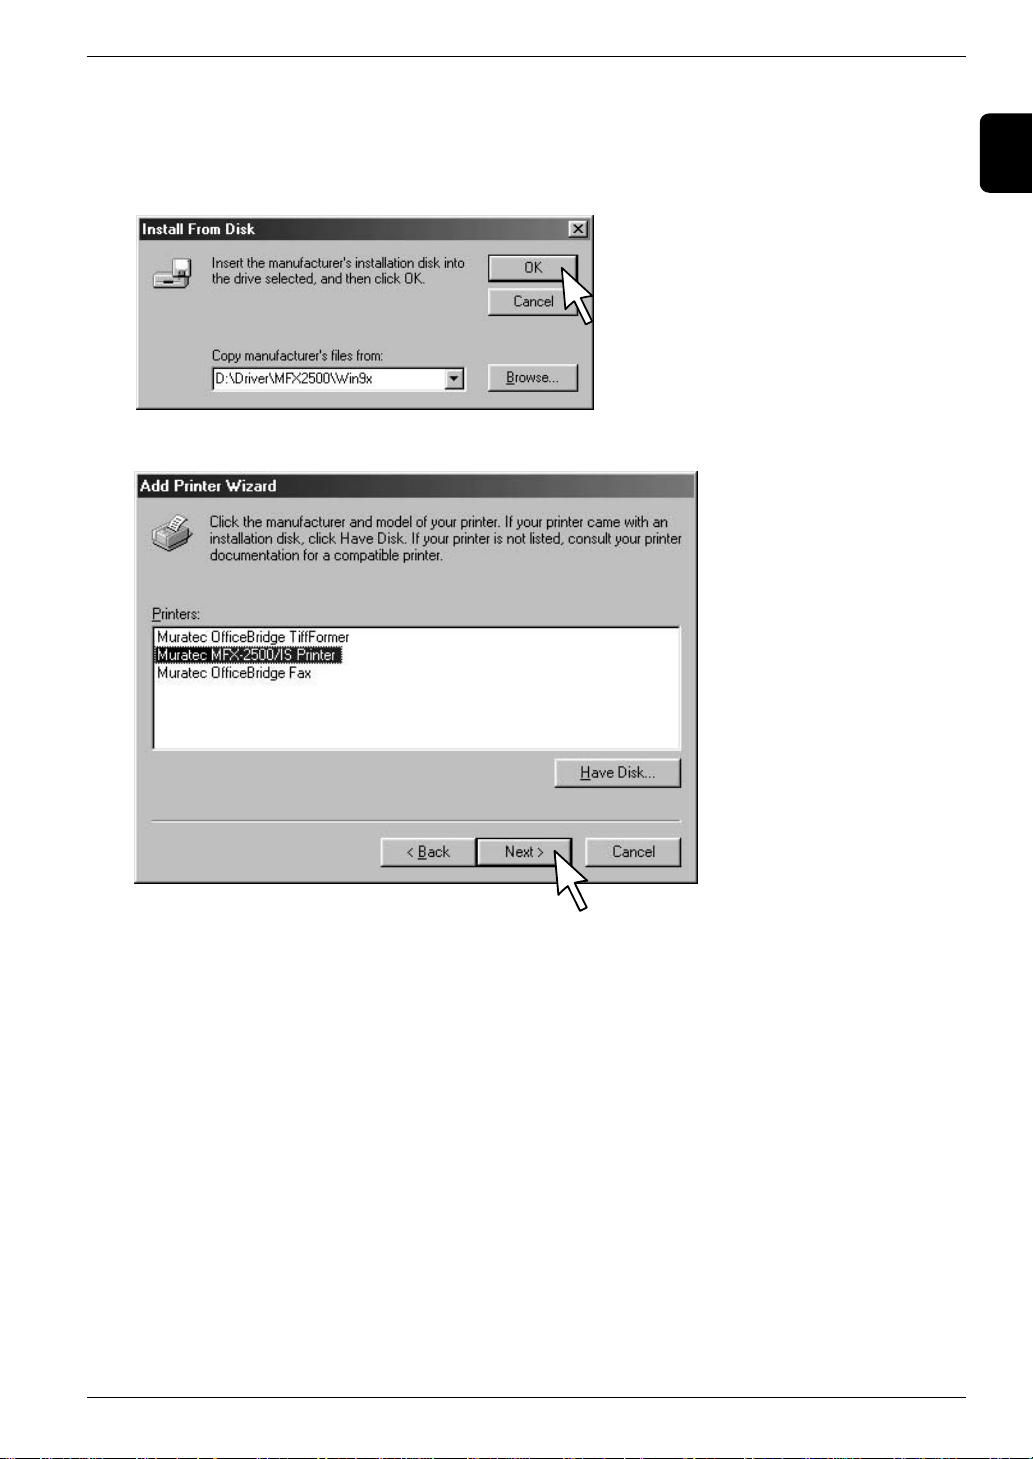
8 The [Install From Disk] screen appears.
Under [Copy manufacturer’s files from], type [(Drive letter):\Driver\(Model name)\Win9x],
and click [OK].
* It is also possible to click [Browse] and choose the folder.
* (Drive letter) is the letter assigned to your CD-ROM drive.
* (Model name) is the model name of the fax main unit.
9 Select [Muratec MFX-2500/IS Printer], and click [Next>].
1
17
Page 27
Chapter 1 Before use
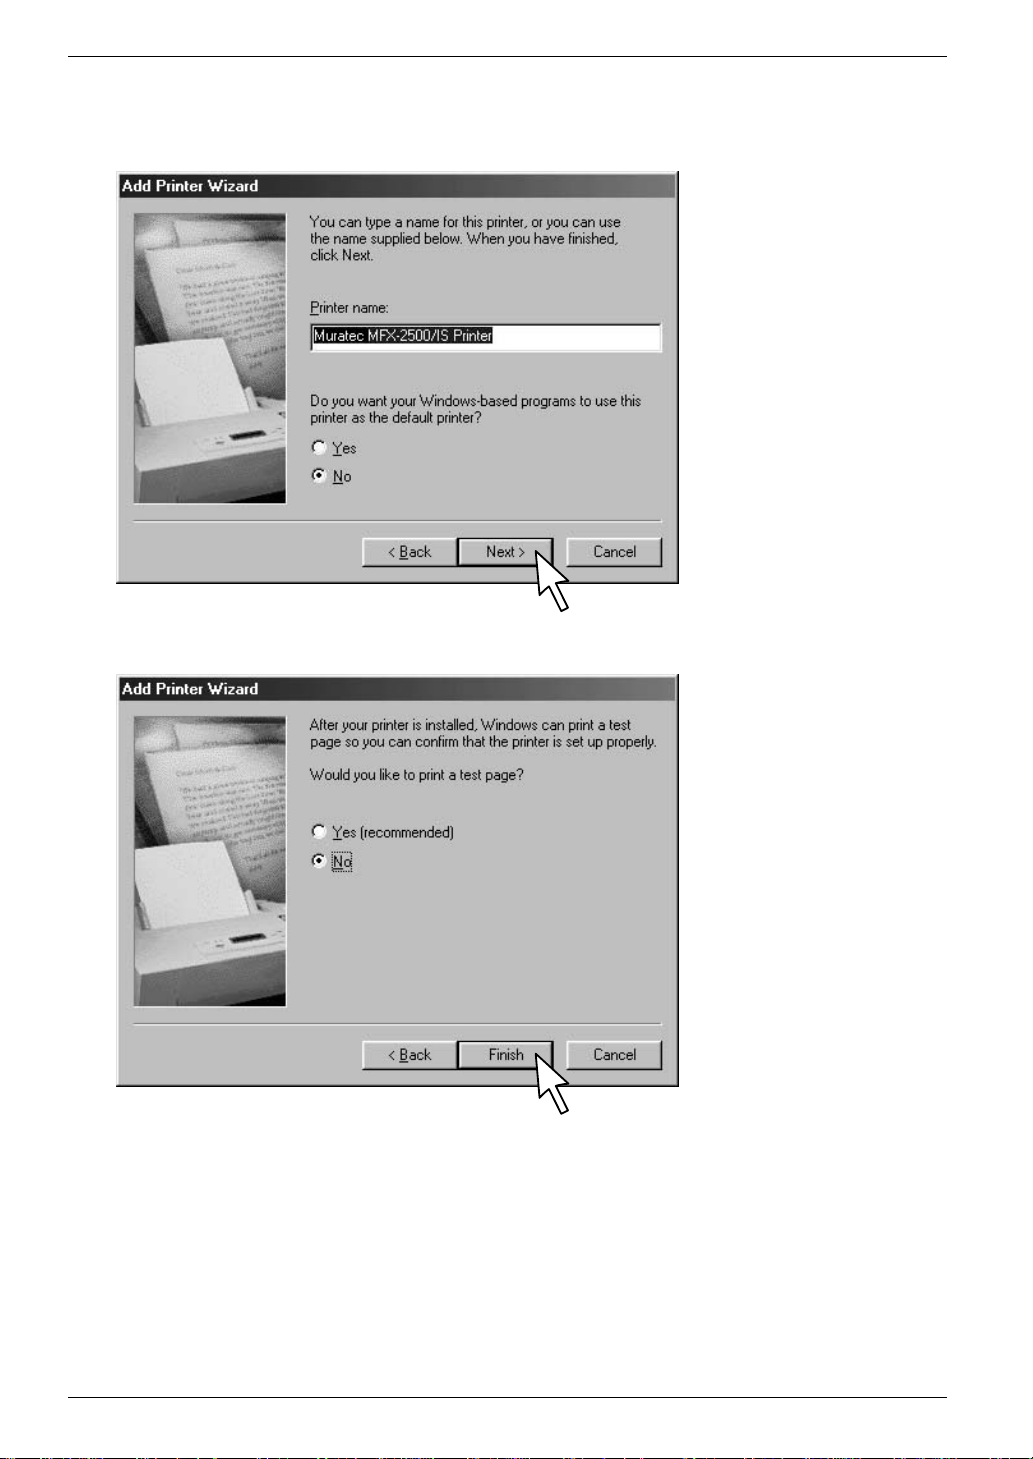
10 Confirm that [Muratec MFX-2500/IS Printer] is shown under [Printer name].
When any other printer driver has already been installed, the message [Do you want your
Windows-based programs to use this printer as the default printer?] appears.
Select either the [Yes] or [No] button, and click [Next>].
11 Select the [No] button, and click [Finish].
18
Page 28

Windows 2000
1 Insert the Setup CD into your CD-ROM drive.
2 Click the [Start] button, point to [Settings] and then click [Printers].
3 The printer folder opens.
Double-click the [Add Printer] icon.
4 The [Add Printer Wizard] screen appears.
Click [Next>].
Chapter 1 Before use
1
5 The [Local or Network Printer] selection screen appears.
Select the [Network printer] button, and click [Next>].
19
Page 29

Chapter 1 Before use
6 The [Locate Your Printer] screen appears.
Select the [Type the printer name…] button, type the IP address of the server (fax main unit) into
[Name], and click [Next>].
7 The [Connect to Printer] screen appears.
Click [OK].
20
Page 30

Chapter 1 Before use
8 Select the manufacturer and model of your printer.
Click [Have Disk].
9 The [Install From Disk] screen appears.
Under [Copy manufacturer’s files from], type [(Drive letter):\Driver\(Model name)\
Winnt4_2k], and click [OK].
* It is also possible to click [Browse] and choose the folder.
* (Drive letter) is the letter assigned to your CD-ROM drive.
* (Model name) is the model name of the fax main unit.
1
10 Select [Muratec MFX-2500/IS Printer], and click [OK].
21
Page 31

Chapter 1 Before use
11 The [Default Printer] screen appears.
When any other printer driver has already been installed, the message [Do you want your
Windows-based programs to use this printer as the default printer?] appears.
Select either the [Yes] or [No] button, and click [Next>].
12 The [Completing the Add Printer Wizard] screen appears.
Check the contents, and click [Finish].
22
Page 32

Windows NT
1 Insert the Setup CD into your CD-ROM drive.
2 Click the [Start] button, point to [Settings] and then click [Printers].
3 The printer folder opens.
Double-click the [Add Printer] icon.
4 The [Add Printer Wizard] screen appears.
Select the [Network printer server] button, and click [Next>].
Chapter 1 Before use
1
5 The [Connect to Printer] screen appears.
Type the IP address of the server (fax main unit) into [Printer], and click [OK].
23
Page 33

Chapter 1 Before use
6 The message notifying invalid printer name appears.
Click [OK].
7 The [Printer wizard] screen appears.
Click [Have Disk].
8 The [Install From Disk] screen appears.
Under [Copy manufacturer’s files from], type [(Drive letter):\Driver\(Model name)\
Winnt4_2k], and click [OK].
* It is also possible to click [Browse] and choose the folder.
* (Drive letter) is the letter assigned to your CD-ROM drive.
* (Model name) is the model name of the fax main unit.
24
Page 34

Chapter 1 Before use
9 Select [Muratec MFX-2500/IS Printer], and click [OK].
* When any other printer driver has already been installed, the message [Do you want your
Windows-based programs to use this printer as the default printer?] appears.
Select either the [Yes] or [No] button, and click [Next>].
1
25
Page 35

Chapter 1 Before use
10 The message notifying installation is finished appears.
Click [Finish].
26
Page 36

Chapter 1 Before use
Installing OfficeBridge FAX : Printer driver for fax transmission
* This printer driver is used to perform fax transmissions from a computer.
Caution : Make sure that OfficeBridge has been installed before installing the printer driver.
Windows 9x
1 Insert the Setup CD into your CD-ROM drive.
2 Click the [Start] button, point to [Settings] and then click [Printers].
1
3 The printer folder opens.
Double-click the [Add Printer] icon.
27
Page 37

Chapter 1 Before use
4 The [Add Printer Wizard] screen appears.
Click [Next>].
5 Specify the printer connection.
Select the [Local printer] button, and click [Next>].
28
Page 38

Chapter 1 Before use
6 Select the manufacturer and model of your printer.
Click [Have Disk].
7 The [Install From Disk] screen appears.
Under [Copy manufacturer’s files from], type [(Drive letter):\Driver\(Model name)\Win9x],
and click [OK].
* It is also possible to click [Browse] and choose the folder.
* (Drive letter) is the letter assigned to your CD-ROM drive.
* (Model name) is the model name of the fax main unit.
1
29
Page 39

Chapter 1 Before use
8 Select [Muratec OfficeBridge Fax], and click [Next>].
9 Select the printer port.
Select [LPT1], and click [Next>].
30
Page 40

Chapter 1 Before use
10 Confirm that [Muratec OfficeBridge Fax] is shown under [Printer name].
When another printer driver has already been installed, the message [Do you want your
Windows-based programs to use this printer as the default printer?] appears.
Select either the [Yes] or [No] button, and click [Next>].
1
11 Select [No], and click [Finish].
31
Page 41

Chapter 1 Before use
12 Click the [Start] button, point to [Settings] and then click [Printers].
The printer folder opens.
Right-click [Muratec OfficeBridge Fax], and click [Properties].
13 The properties screen appears.
Select the [Details] tab, and click [Add Port].
32
Page 42

14 Select the type of port to be added.
Select the [Other] button and [Local port], and then click [OK].
15 Enter the port name.
Under [Enter a port name], type [Muratec FAX:] and click [OK].
Chapter 1 Before use
1
16 Click [OK] to close the properties screen.
33
Page 43

Chapter 1 Before use
Windows 2000
1 Insert the Setup CD into your CD-ROM drive.
2 Click the [Start] button, point to [Settings] and then click [Printers].
3 The printer folder opens.
Double-click the [Add Printer] icon.
4 The [Add Printer Wizard] screen appears.
Click [Next>].
5 The [Local or Network Printer] selection screen appears.
Select the [Local printer] button, and click [Next>].
34
Page 44

6 The [Select the Printer Port] screen appears.
Select the [Use the following port] button and [Muratec FAX], and then click [Next>].
Chapter 1 Before use
1
7 Select the manufacturer and model of your printer.
Click [Have Disk].
35
Page 45

Chapter 1 Before use
8 The [Install From Disk] screen appears.
Under [Copy manufacturer’s files from], type [(Drive letter):\Driver\(Model name)\
Winnt4_2k], and click [OK].
* It is also possible to click [Browse] and choose the folder.
* (Drive letter) is the letter assigned to your CD-ROM drive.
* (Model name) is the model name of the fax main unit.
9 Select [Muratec OfficeBridge Fax], and click [Next>].
36
Page 46

Chapter 1 Before use
10 The [Printer name] screen appears.
Confirm that [Muratec OfficeBridge Fax] is shown under [Printer name].
When any other printer driver has already been installed, the message [Do you want your
Windows-based programs to use this printer as the default printer?] appears.
Select either the [Yes] or [No] button, and click [Next>].
1
11 The [Printer Sharing] screen appears.
Select the [Do not share this printer] button, and click [Next>].
37
Page 47

Chapter 1 Before use
12 The [Print Test Page] screen appears.
Select the [No] button, and click [Next>].
13 The [Completing the Add Printer Wizard] screen appears.
Check the contents, and click [Finish].
38
Page 48

14 The [Digital Signature Not Found] screen appears.
Click [Yes].
Chapter 1 Before use
1
Windows NT
1 Insert the Setup CD into your CD-ROM drive.
2 Click the [Start] button, point to [Settings] and then click [Printers].
3 The printer folder opens.
Double-click the [Add Printer] icon.
4 The [Add Printer Wizard] screen appears.
Select the [My Computer] button, and click [Next>].
39
Page 49

Chapter 1 Before use
5 Select the printer port.
Under [Available ports], select the [Muratec FAX] check box, and click [Next>].
6 Select the manufacturer and model of your printer.
Click [Have Disk].
40
Page 50

Chapter 1 Before use
7 The [Install From Disk] screen appears.
Under [Copy manufacturer’s files from], type [(Drive letter):\Driver\(Model name)\
Winnt4_2k], and click [OK].
* It is also possible to click [Browse] and choose the folder.
* (Drive letter) is the letter assigned to your CD-ROM drive.
* (Model name) is the model name of the fax main unit.
8 Select [Muratec OfficeBridge Fax], and click [Next>].
1
41
Page 51

Chapter 1 Before use
9 The [Printer name] screen appears.
Confirm that [Muratec OfficeBridge Fax] is shown under [Printer name].
When any other printer driver has already been installed, the message [Do you want your
Windows-based programs to use this printer as the default printer?] appears.
Select either the [Yes] or [No] button, and click [Next>].
10 The [Sharing printer] screen appears.
Select the [Not shared] button, and click [Next>].
42
Page 52

11 The [Test page print] screen appears.
Select [No], and click [Finish].
Chapter 1 Before use
1
43
Page 53

Chapter 1 Before use
Installing TiffFormer : Printer driver for image file format conversion
* This printer driver is used to convert image data’s file format to Tiff.
Caution : Make sure that OfficeBridge has been installed before installing the printer driver.
Windows 9x
1 Insert the Setup CD into your CD-ROM drive.
2 Click the [Start] button, point to [Settings] and then click [Printers].
3 The printer folder opens.
Double-click the [Add Printer] icon.
44
Page 54

4 The [Add Printer Wizard] screen appears.
Click [Next>].
5 Specify the printer connection.
Select the [Local printer] button, and click [Next>].
Chapter 1 Before use
1
45
Page 55

Chapter 1 Before use
6 Select the manufacturer and model of your printer.
Click [Have Disk].
7 The [Install From Disk] screen appears.
Under [Copy manufacturer’s files from], type [(Drive letter):\Driver\(Model name)\Win9x],
and click [OK].
* It is also possible to click [Browse] and choose the folder.
* (Drive letter) is the letter assigned to your CD-ROM drive.
* (Model name) is the model name of the fax main unit.
46
Page 56

8 Select [Muratec OfficeBridge TiffFormer], and click [Next>].
9 Select the printer port.
Select [Muratec FAX], and click [Next>].
Chapter 1 Before use
1
47
Page 57

Chapter 1 Before use
10 Confirm that [Muratec OfficeBridge TiffFormer] is shown under [Printer name].
When any other printer driver has already been installed, the message [Do you want your
Windows-based programs to use this printer as the default printer?] appears.
Select either the [Yes] or [No] button, and click [Next>].
11 Select [No], and click [Finish].
48
Page 58

12 Click the [Start] button, point to [Settings] and then click [Printers].
The printer folder opens.
Right-click [Muratec OfficeBridge TiffFormer], and click [Properties].
Chapter 1 Before use
1
13 The properties screen appears.
Select the [Details] tab, and click [Add Port].
49
Page 59

Chapter 1 Before use
14 Select the type of port to be added.
Select the [Other] button and [Local port], and then click [OK].
15 Enter the port name.
Under [Enter a port name], type [Muratec FAX:] and click [OK].
16 Click [OK] to close the properties screen.
50
Page 60

Windows 2000
1 Insert the Setup CD into your CD-ROM drive.
2 Click the [Start] button, point to [Settings] and then click [Printers].
3 The printer folder opens.
Double-click the [Add Printer] icon.
4 The [Add Printer Wizard] screen appears.
Click [Next>].
Chapter 1 Before use
1
5 The [Local or Network Printer] selection screen appears.
Select the [Local printer] check box, and click [Next>].
51
Page 61

Chapter 1 Before use
6 The [Select the Printer Port] screen appears.
Select the [Use the following port] button and [Muratec FAX], and then click [Next>].
7 Select the manufacturer and model of your printer.
Click [Have Disk].
52
Page 62

Chapter 1 Before use
8 The [Install From Disk] screen appears.
Under [Copy manufacturer’s files from], type [(Drive letter):\Driver\(Model name)\
Winnt4_2k], and click [OK].
* It is also possible to click [Browse] and choose the folder.
* (Drive letter) is the letter assigned to your CD-ROM drive.
* (Model name) is the model name of the fax main unit.
9 Select [Muratec OfficeBridge TiffFormer], and click [Next>].
1
53
Page 63

Chapter 1 Before use
10 The [Name Your Printer] screen appears.
Confirm that [Muratec OfficeBridge TiffFormer] is shown under [Printer name].
When any other printer driver has already been installed, the message [Do you want your
Windows-based programs to use this printer as the default printer?] appears.
Select either the [Yes] or [No] button, and click [Next>].
11 The [Printer Sharing] screen appears.
Select the [Do not share this printer] button, and click [Next>].
54
Page 64

12 The [Print Test Page] screen appears.
Select [No], and click [Next>].
Chapter 1 Before use
1
13 The [Completing the Add Printer Wizard] screen appears.
Check the contents, and click [Finish].
55
Page 65

Chapter 1 Before use
14 The [Digital Signature Not Found] screen appears.
Click [Yes].
Windows NT
1 Insert the Setup CD into your CD-ROM drive.
2 Click the [Start] button, point to [Settings] and then click [Printers].
3 The printer folder opens.
Double-click the [Add Printer] icon.
4 The [Add Printer Wizard] screen appears.
Select the [My computer] button, and click [Next>].
56
Page 66

5 Select the printer port.
Under [Available ports], select the [Muratec FAX] check box, and click [Next>].
6 Select the manufacturer and model of your printer.
Click [Have Disk].
Chapter 1 Before use
1
57
Page 67

Chapter 1 Before use
7 The [Install From Disk] screen appears.
Under [Copy manufacturer’s files from], type [(Drive letter):\Driver\(Model name)\
Winnt4_2k], and click [OK].
* It is also possible to click [Browse] and choose the folder.
* (Drive letter) is the letter assigned to your CD-ROM drive.
* (Model name) is the model name of the fax main unit.
8 Select [Muratec OfficeBridge TiffFormer], and click [Next>].
58
Page 68

Chapter 1 Before use
9 The [Printer name] screen appears.
Confirm that [Muratec OfficeBridge TiffFormer] is shown under [Printer name].
When any other printer driver has already been installed, the message [Do you want your
Windows-based programs to use this printer as the default printer?] appears.
Select either the [Yes] or [No] button, and click [Next>].
1
10 The [Sharing printer] screen appears.
Select the [Not shared] button, and click [Next>].
59
Page 69

Chapter 1 Before use
11 The [Test page print] screen appears.
Select [No], and click [Finish].
60
Page 70

Uninstalling OfficeBridge
Chapter 1 Before use
Caution : Before you uninstall OfficeBridge, close all applications in use.
The printer drivers (IS Printer / OfficeBridge Fax / TiffFormer) must be removed before
uninstalling OfficeBridge.
1 Click the [Start] button, point to [Settings] and then click [Control Panel].
1
2 Double-click the [Add/Remove Programs] icon.
61
Page 71

Chapter 1 Before use
3 Select [OfficeBridge], and click [Add/Remove].
4 The [OfficeBridge Maintenance Program] screen appears.
Select [Remove] button, and click [Next>].
62
Page 72

5 The [Confirm File Deletion] screen appears.
Click [OK] to start uninstalling.
6 The [Shared File Detected] screen appears.
Click [Yes] to remove the shared file.
Chapter 1 Before use
1
7 The [Maintenance completed] screen appears.
Click [Finish].
63
Page 73

Chapter 1 Before use
If the following screen appears, click [Yes] and then click [Finish] to restart the computer.
◆When you are running other programs, save your sessions and end the programs. Then, click [Ye s].
◆ When you click [No], OfficeBridge is not uninstalled correctly. Be sure to restart your computer.
64
Page 74

Chapter 2
Basic operations
OfficeBridge ..............................................................................66
How to log on ............................................................................67
Sending fax ...............................................................................69
Scanning....................................................................................70
Printing.....................................................................................72
Page 75

Chapter 2 Basic operations
OfficeBridge
Scanning
See p.97.
See p.88.
Fax
See p.155.
CoverPage Editor
(Fax cover page making)
See p.133.
Address Book
(Telephone directory)
See p.173.
Image Viewer
(Image display)
OfficeBridge
What is OfficeBridge?
OfficeBridge offers the following functions.
◆ Fax transmission and reception with a PC
◆ Scanning data from a paper document
◆ Print data output
◆ Recipients management
* OfficeBridge cannot be used unless it is connected to a network by an Information Server. After you
have logged on once, however, you can start it offline and perform a job such as checking image
data.
66
Page 76

How to log on
How to log on
Chapter 2 Basic operations
1 Click the [Start] button,point to [Programs] and [OfficeBridge], and click [OfficeBridge Client].
2 Type your user ID and password on the log-on screen.
Once the [Add into User List] check box is selected, a user ID can be chosen from a drop down list
by clicking the ▼ button next time you start up.
2
Information : In order to log on to OfficeBridge, user registration to the fax main unit is needed.
For the user registration procedure,see the IS-100 operation manual (p.33).
67
Page 77

Chapter 2 Basic operations
Multi-user operation
It is possible to log on with a user ID different from the one used in the above example.
* OfficeBridge has a limit on the number of usable PCs, but there is no limit for the number of users on a
single PC.
*** Benefit ***
In multi-user operation, the Personal Folder of each user can be utilized for orderly data management.
Screen of user ID ‘murata’ Screen of user ID ‘akiyama’
68
Page 78

Chapter 2 Basic operations
Mail Adr
Sending fax
How to send fax
* The explanations offered below are about the Internet fax, which sends a fax by e-mail.
For the procedure for sending a fax to a recipient’s fax machine, see in the fax main unit operation
manual.
1 Place the original on the ADF (Automatic Document Feeder) or on the book scanner.
2 Designate the recipient.
Direct entry
1 On the fax standby screen, press the NEXT key twice and then press [Mail Adr] key.
2
2 Enter the recipient’s e-mail address using a one-touch key and the dial key (numeric keypad).
One-touch key operation
1 Press the one-touch key on which the destination is registered.
* See ‘One-touch dial registration’ (p.84).
Speed dial operation
1 Press the SPEED DIAL TEL INDEX key.
2 Enter the registered abbreviated numbers using the dial key (numeric keypad).
* See ‘Speed dial registration’ (p.86).
3 Press the START key to begin transmission.
69
Page 79

Chapter 2 Basic operations
ID
Scanner
Net Func
Scanning
How to scan
1 Place the original on the ADF (Automatic Document Feeder) or on the book scanner.
2 Press the NEXT key twice and then press [Net Func] key.
3 Press [Scanner] key.
4 Designate the user.
Direct entry
1 Press [ID] key.
2 Enter the user ID using a one-touch key and the dial key (numeric keypad).
70
Page 80

One-touch key operation
1 Press the one-touch key on which the user ID is registered.
* See ‘One-touch dial registration’ (p.84).
Speed dial operation
1 Press the SPEED DIAL TEL INDEX key.
2 Enter the registered abbreviated numbers using the dial key (numeric keypad).
* See ‘Speed dial registration’ (p.86).
5 Press the START key to begin scanning.
Chapter 2 Basic operations
2
* For the procedure to view a scanned image,see p.97.
71
Page 81

Chapter 2 Basic operations
Printing
How to print
1 Open the data file to be printed, using the related application program.
2 On the [Print] screen of the program, select [Muratec (Model name) / IS Printer] as the printer
name.
3 Click [OK] to start printing.
72
Page 82

Chapter 3
Useful functions
Useful functions at a glance ....................................................74
Settings .....................................................................................75
Fax operations...........................................................................88
Scanner operations...................................................................97
Internet fax operations...........................................................100
Other operations.....................................................................102
Page 83

Chapter 3 Useful functions
Useful functions at a glance
Settings
Receiving fax with PC ...............................................................75
Forwarding received fax............................................................81
One-touch dial registration ......................................................84
Speed dial registration..............................................................86
Operations
Fax Viewing received fax.................................................................88
Sending data by fax from PC ...................................................88
Sending fax to recipient in the log...........................................93
ReSend.......................................................................................94
Set a time to send fax ...............................................................95
Batch transmission ...................................................................96
Scanner Viewing scanned image.............................................................97
Setting scanner..........................................................................97
Specifying folder to save scanned data....................................99
Internet fax SendConfirmation...................................................................100
ReadConfirmation...................................................................101
Others Reading image using TWAIN driver......................................102
Converting image to TIFF format..........................................104
Backing up information..........................................................107
74
Page 84

Chapter 3 Useful functions
Settings
Receiving fax with PC
1 Start up ‘Web Manager’.
1 Log on to OfficeBridge. Cross-reference / Page 67
2 Click [Web Manager].
Information : Clicking [Tool] in the menu bar and then [Web Manager] can also start up ‘Web
Manager’.
3
75
Page 85

Chapter 3 Useful functions
2 Settings for Received fax forwarding
1 Click [Received fax forwarding] under [Operation setting].
2 Click the number in the list you want to register.
76
Page 86

3 Fill in each field, and click the [SET] button.
A
B
C
D
Chapter 3 Useful functions
3
Descriptions
A. [<<Prev] [List] [Next>>]
[<<Prev]
The previous registration number screen appears.
[List]
B. Search condition
The list screen appears.
[Next>>]
The next registration number screen appears.
The sender’s number or a sub-address designated by the sender can be the condition to enable delivery.
Enter the sender’s number or sub-address you want to set as the condition.
Also enter the password if the password accompanying the sub-address is to be included in the condition.
It is not possible to set the password without designating the sub-address.
The sender’s number can be entered in up to 20 digits of numbers and symbols (0-9, *, #, - and +).
The sub-address can be entered in up to 20 digits of numbers 0-9.
The password can be entered in up to 20 digits of numbers and symbols (0-9, * and #).
Check either of the following two search conditions.
[Include any of the conditions below]
Delivery is carried out when a received fax conforms to either the sender’s number or sub-address
(plus password).
[Include all of the conditions below]
Delivery is carried out when a received fax conforms to all settings including the sender’s number
and sub-address (plus password).
77
Page 87

Chapter 3 Useful functions
C. Delivery destination
This setting is used to decide where to deliver a received fax which conforms to search conditions.
The following deliveries are available.
[Deliver to user]
When a user is selected as the destination, the received fax is delivered to the user if it conforms to
search conditions.
Multiple users are selectable. Click users while keeping the <Ctrl> key pressed.
[Forward to remote fax machine]
When a fax number is designated as the destination, the received fax is forwarded to that remote fax.
When making multiple fax number entries, separate them with a semicolon (;).
A single fax number can be entered with up to 40 digits of numbers and symbols (0-9, *, #, -, / and !).
For multiple entries, up to 1000 characters are allowed (including semicolons).
[Forward by e-mail]
When an e-mail address is designated as the destination, the received fax is delivered by e-mail as
an attachment file.
When making multiple e-mail address entries, separate them with a semicolon (;).
A single e-mail address can be entered with up to 80 characters.
For multiple entries, up to 1000 characters are allowed (including semicolons).
D. Print
Choose ON for this setting to deliver and simultaneously print out received fax documents.
Choose OFF for this setting when you want to deliver, but not print out, received fax documents.
(When a gateway user is designated, print setting becomes invalid.)
[SET] button
Click this button to register the entry.
After registration, the next number registration screen appears.
[REDO] button
Click this button to restore the current settings.
78
Page 88

Chapter 3 Useful functions
B
A
3 Exceptions Handling
This setting is used to decide in advance how to handle a received fax that does not conform to any
of the registered delivery settings.
1 Click [Change] under Exceptions Handling in the Received fax forwarding screen.
3
2 Fill in each field, and click the [SET] button.
79
Page 89

Chapter 3 Useful functions
Descriptions
A. Print
Click ON if the received fax is to be printed out with this device’s printer.
B. Deliver
Click ON if the received fax is to be delivered to a user, remote fax or e-mail address.
[Deliver to user]
When a user is selected as the destination, the received fax is delivered to that user if it conforms to
search conditions.
Multiple users are selectable. Click users while keeping the <Ctrl> key pressed.
[Forward to remote fax machine]
When a fax number is designated as the destination, the received fax is forwarded to that remote fax.
When making multiple fax number entries, separate them with a semicolon (;).
A single fax number can be entered in up to 40 digits of numbers and symbols (0-9, *, #, -, / and !).
For multiple entries, up to 1000 characters are allowed (including semicolons).
[Forward by e-mail]
When an e-mail address is designated as the destination, the received fax is delivered by e-mail as
an attachment file.
When making multiple e-mail address entries, separate them with a semicolon (;).
A single e-mail address can be entered with up to 80 characters.
For multiple entries, up to 1000 characters are allowed (including semicolons).
[SET] button
Click this button to register the entry.
[REDO] button
Click this button to restore the current settings.
80
Page 90

Chapter 3 Useful functions
Forwarding received fax
The fax delivered to each user by means of "Received Fax Forwarding" can be forwarded to further
destinations.
1 Start up ‘Web Manager’. Cross-reference / Page 75
2 Make the settings for Individual fax forwarding.
1 Click [Individual fax forwarding] under [Operation setting].
3
2 Enter the user ID and password,and click the [ENTER] button.
81
Page 91

Chapter 3 Useful functions
A B C D E F
3 Fill in each field, and click the [SET] button.
Descriptions
A. Setting
Check the box to activate forwarding with specified conditions.
To suspend the forwarding operation temporarily, clear the check. No forwarding will be carried out.
B. Destination type
Select the type of destination from user, e-mail address or remote fax.
C. Forwarding destination
Set the destination to which the delivered fax should be forwarded.
Enter the user ID, fax number or e-mail address.
Only one address can be entered. No multiple entries are allowed.
D. Interval type
Select the type to designate the period that will activate the forwarding operation.
Select [Month/day], [Day-of-week] or [Time].
E. Interval
Set the starting and ending times of the period that will activate the forwarding operation.
In [Month/day] designation, set the month, day and time for both starting and ending. There is no need
to set the day of the week.
In [Day-of-week] designation, set the day of the week and time for both starting and ending. There is no
need to set the month and day.
In [Hour] designation, set the time for both starting and ending. There is no need to set the month, day
and day of the week.
F. Repeat
Check here to activate the set period repeatedly.
In [Month/day], the check is invalid.
In [Day-of-week], the set period becomes effective every week.
In [Hour], the set period becomes effective every day.
82
Page 92

[SET] button
Click this button to register the entry.
[REDO] button
Click this button to restore the current settings.
Deletion of setting
Select the setting number, and click the [ERASE] button.
Chapter 3 Useful functions
3
83
Page 93

Chapter 3 Useful functions
One-touch dial registration
1 Start up ‘Web Manager’. Cross-reference / Page 75
2 Make a one-touch dial registration.
New registration
1 Click [One-touch dialing] under [Operation setting].
2 Click the number in the list to be registered.
84
Page 94

Chapter 3 Useful functions
A
B
C
D
E
3 Fill in each field, and click the [SET] button.
Descriptions
A. [<<Prev] [List] [Next>>]
[<<Prev]
The previous registration number screen appears.
[List]
The list screen appears.
[Next>>]
The next registration number screen appears.
B. Contact number
Enter the fax number, e-mail address or user ID. Select the Type.
An e-mail address can be entered with up to 80 characters.
A fax number can be entered with up to 40 digits of numbers and symbols (0-9, *, #, -, / and !).
C. Contact name
Enter the recipient’s name.
D. Group No. (0-32)
Specify the group number from 0-32.
For multiple entries, separate them with a comma (,).
Group 0 means it belongs to all groups from 1 to 32.
E. Attached file format
Select the image data format for the attachment out of TIFF-S, TIFF (Expansion) and PDF.
3
[SET] button
Click this button to register the entry.
After registration, the next number registration screen appears.
[REDO] button
Click this button to restore the current settings.
85
Page 95

Chapter 3 Useful functions
Editing
Click the number in the list to be edited, and enter the editing data.
Click the [SET] button.
Deletion
Click the [ERASE] button in the list for the number to be deleted.
Speed dial registration
1 Start up ‘Web Manager’. Cross-reference / Page 75
2 Make a speed dial registration.
New registration
1 Click [Speed dialing] under [Operation setting].
86
Page 96

2 Click the number in the list to be registered.
A
B
C
D
E
3 Fill in each field, and click the [SET] button.
Chapter 3 Useful functions
3
* Entry items are the same as described in ‘One-touch dial registration’.
Cross-reference / Page 85
Editing
Click the number in the list to be edited, and enter the editing data.
Click the [SET] button.
Deletion
Click the [ERASE] button in the list for the number to be deleted.
87
Page 97

Chapter 3 Useful functions
Fax operations
Viewing received fax
1 When a fax is received, the Complete Fax message box appears.
* When you have not yet logged on, this notification appears the next time you log on.
2 Click [Yes]. Image Viewer starts up and shows the image.
When there are multiple faxes received, the fax that was received most recently appears.
(If you do not want to view the fax, click [No].)
The received fax is saved in the ‘InBox’ folder.
* See ‘Using Image Viewer’ (p.173).
Sending data by fax from PC
Sending data in OfficeBridge
1 Select the data to send, and click [SendFax].
88
Page 98

2 The SendFax screen appears.
Chapter 3 Useful functions
3
3 Designate the Receiver.
Direct entry
1 Enter the recipient’s fax number or e-mail address under Receiver.
* Recipients can be registered in Private Address. See ‘Recipient registration on the SendFax
screen’ (p.92).
Sending to registered recipient
1 Click [Browse].
2 Select the Catalog.
Information : When [Arrange] and [Company] are clicked, the recipients are sorted in
company name order.
3 Click the recipient,and the Add (>) button.
4 Click [OK].
89
Page 99

Chapter 3 Useful functions
4 Select Cover.
* Click [View] to see the selected cover page.
* See ‘Using CoverPage Editor’ (p.155).
5 Enter the subject and comment in each text box, and click [Send].
6 With the [Send Confirmation] message, confirm that the transmission has been directed. Click
[OK].
90
Page 100

Chapter 3 Useful functions
Sending data made by other programs
1 Open the data file you want to send, using the related application program.
2 On the [Print] screen of the program, select [Muratec OfficeBridge Fax] as the printer name.
3
3 Click [OK] to start printing.
After this, follow steps 2-6 in ‘Sending data in OfficeBridge’ mentioned above.
* When OfficeBridge has not yet been started, the log-on screen appears. Log on to OfficeBridge.
91
 Loading...