

Page 1
Start Here...
Thank you for purchasing
. The RG11B is designed for high throughput and fully function
that leads you into the wireless network environment. With the
RG11B, networking and sharing information throughout the
house/office becomes an easy and flexible task. In addition, the
RG11B is also a switching device as an aggregating point of the
wireless LAN and wired LAN clients, and as a router between LAN and
WAN traffic; with the USB port, it can also serve as a printer server in
your network.
MSI RG11B combines the SPI firewall, wireless Access Point, printer
server, and LAN switch into one compact and stylish package to
provide security and IP sharing function. These features build the
RG11B as a cutting-edge, cost-effective device that fits to SOHO/
home application.
MSI Wireless 11b Residential Gateway
RG11B
This Quick Start Guide is to help you install the RG11B quickly and
easily. In this guide, you can know your RG11B well and complete
the installation through the "Instruction Box":
After unpacking, check the product and system requirements:
see 1a, 1b, 1c.
To know the components on your RG11B:
see 2a, 2b.
Connecting your RG11B:
see 2c.
Using the Configuration Utility:
see 3a, 3b, 3c.
Please note that all figures in this guide are for reference only; the
actual setup screens may be vary on different system. For more
information, please refer to the User's Guide in the CD-ROM or visit
MSI website: .http://www.msi.com.tw
One Wireless 11b Residential Gateway One AC power adapter (12VDC/1A)
One Ethernet cable (RJ-45)
This Quick Start Guide
One CD-ROM containing the User's Guide and Quick Start Guide
RG11B
After installing the RG11B, you need the followings to configure and
manage your network:
One computer with Ethernet adapter installed
Microsoft Windows 98SE/ME/2000/XP operating system
JavaScript-enabled web browser (e.g. Internet Explorer 6.0 and later)
Connect Hardware...
c
a
aa
a
aa
Package Contents
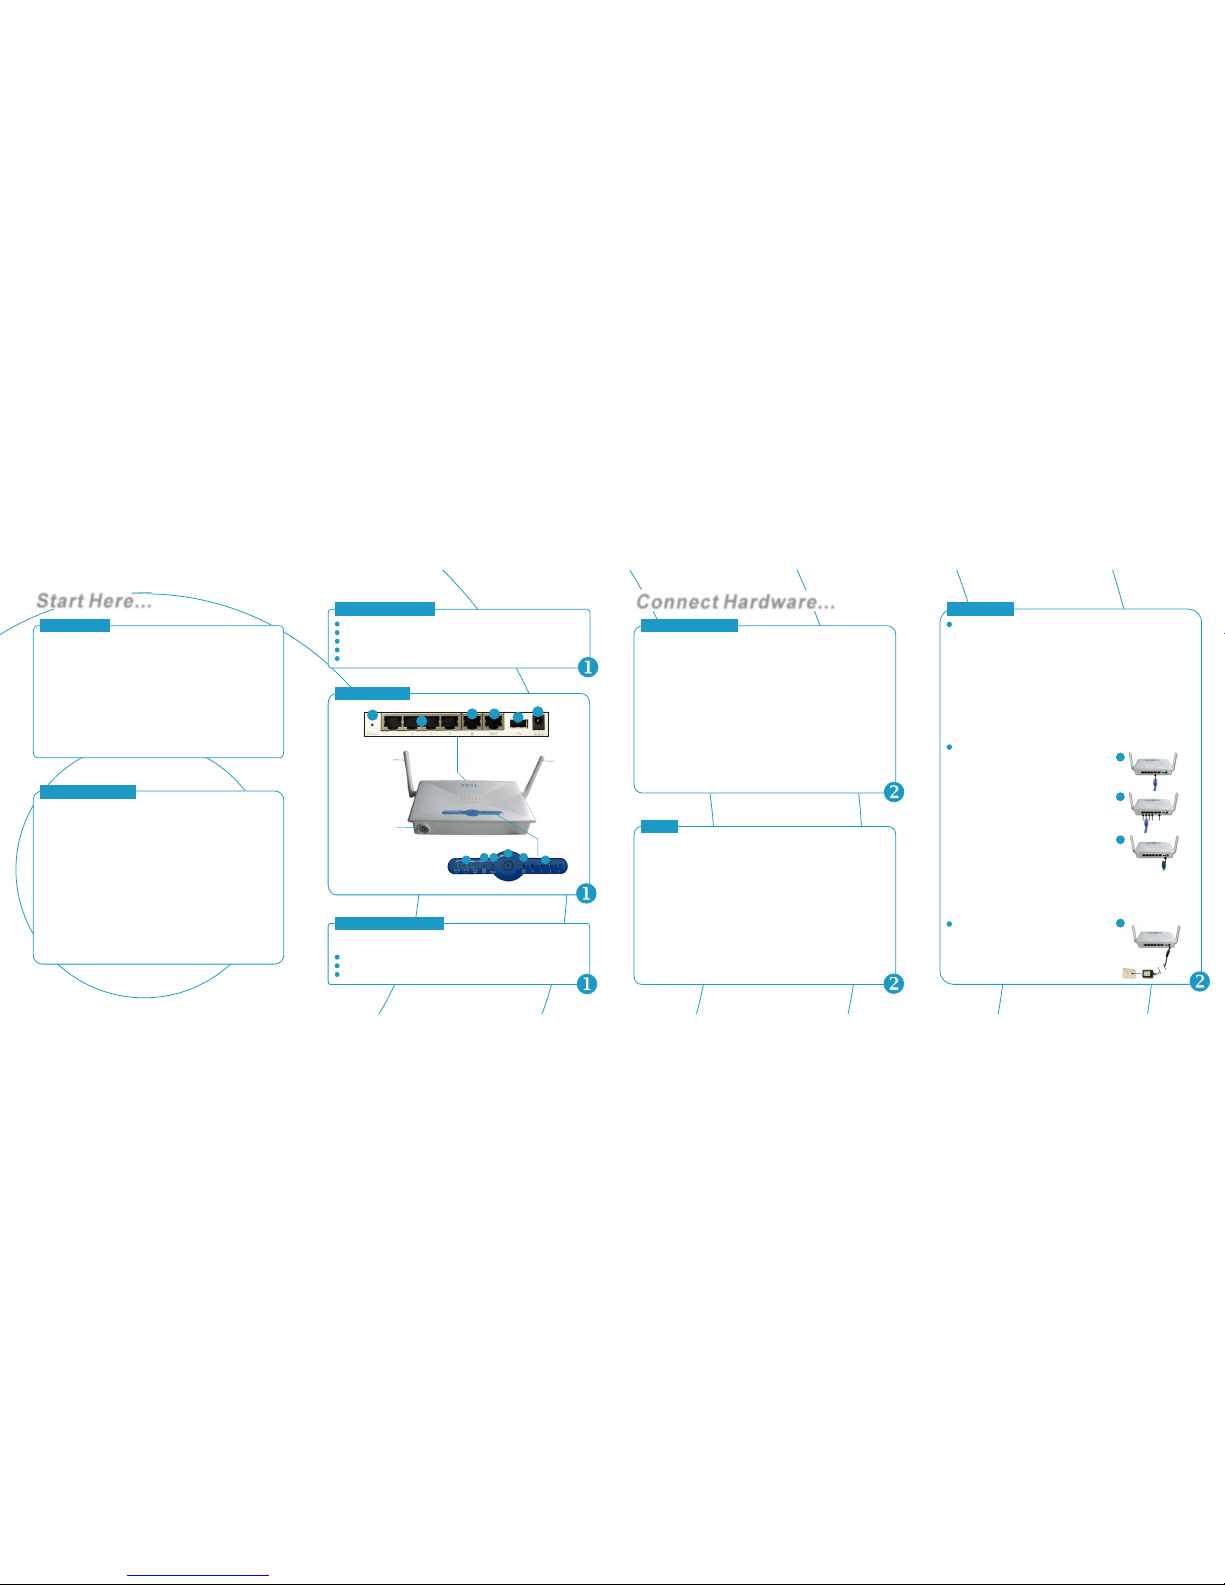
Connection Ports
LEDs
Connecting
Device Management
About This Guide
Introduction
Product View
LEDs
Antenna
Connection Ports
Antenna
RG11B
Parental Lock
Reset Button
LAN Ports
(1~4)
WAN Port
DMZ Port
USB Port
Power
Connector
A
B
C
D
E
F
Press and hold (using a pointed object, such as
a stretched clip) this button longer than 1
second to restart the RG11B. Press and hold
this button longer than 5 seconds, the system
will reload the factory default settings.
The RG11B provides four 10/100 Mbps RJ-45
ports, allowing connection to the computers and
other network devices.
This 10/100Mbps Ethernet port provides
connection to your xDSL/Cable modem or
Ethernet connection.
The RG11B provides one 10/100 Mbps RJ-45
DMZ port, allowing connection to the
computers and other network devices.
The USB 1.1 port is used to connect the printer
to provide printer server function.
Connect the enclosed power adapter and
provide power to the RG11B.
Power
LAN (1~4)
WAN
DMZ
Parental
Lock
Wireless
Status
G
H
I
J
K
L
A steady light glows to indicate the power
adapter is connected.
A light glows when a computer/device
connected to respective port, and it will blink
when receiving/transmitting data on the link.
A light glows when the system connects
to the xDSL/Cable Modem or Ethernet
connection, and it will blink when receiving/
transmitting data on the link.
A light glows when a computer/device
connected to respective port, and it will blink
when receiving/transmitting data on the link.
A light glows when the system is locked;
when accessing to the limited IP is detected, it
glows .
Three indicators ( , , )
showing the status of wireless network.
Blue
Green
Green
Green
Green
Green
Orange
OrangeYellow
Positioning
To Power Up...
To operate normally, the RG11B should be put on a flat surface, and do
not put any heavy object on it. Before connecting the RG11B to your
devices, please note that the RG11B should be placed in a location where
is:
- Easy to access; so that you can conveniently connect it to the xDSL/
Cable Modem through the WAN port, and to the computers/devices
through the LAN ports.
- Allows you to observe the LEDs clearly; so that you may monitor the
real-time networking status and take instant measures as problems
arise.
Tip: The location of the RG11B should be the optimum position to obtain
the best signal; sometimes, you may adjust the direction of the antenna(s).
1. To access to the Internet, connect
one end of an Ethernet cable to
the RG11B's WAN port, and the
other end to your xDSL/Cable
Modem. (Figure a.)
2. For wired connection to the network
devices, connect one end of an
Ethernet cable to the RG11B's LAN
port (1~4) or DMZ port, and the other
end to your computers/devices.
(Figure b.)
2. To connect the USB printer, connect
one end of the USB cable to the
RG11B's USB port, and the other end
to your printer. (Figure c.)
3. For wireless connection, install the wireless adapters onto your
computers, and you have to configure respective settings on
your computers (refer to your wireless adapter's manual) to take
full advantages of the RG11B.
Plug the DC end of the power adapter into the
power connector of the RG11B; then, plug the
AC end to an electrical outlet. The RG11B is
powered up immediately. (Figure d.)
Connecting Cables
c
cc
A
B
C
D
E
F
G
H
IJ
K
L
a
b
c
b
bb
b
bb
d
cc
Page 2
Default Settings of RG11B
MSI Configuration Utility(1)
SSID
Channel
User Name
Password
IP Address
Subnet Mask
Encryption
Printer Sever
RG11B
11
admin
admin
192.168.1.254
255.255.255.0
Disable
lpt1
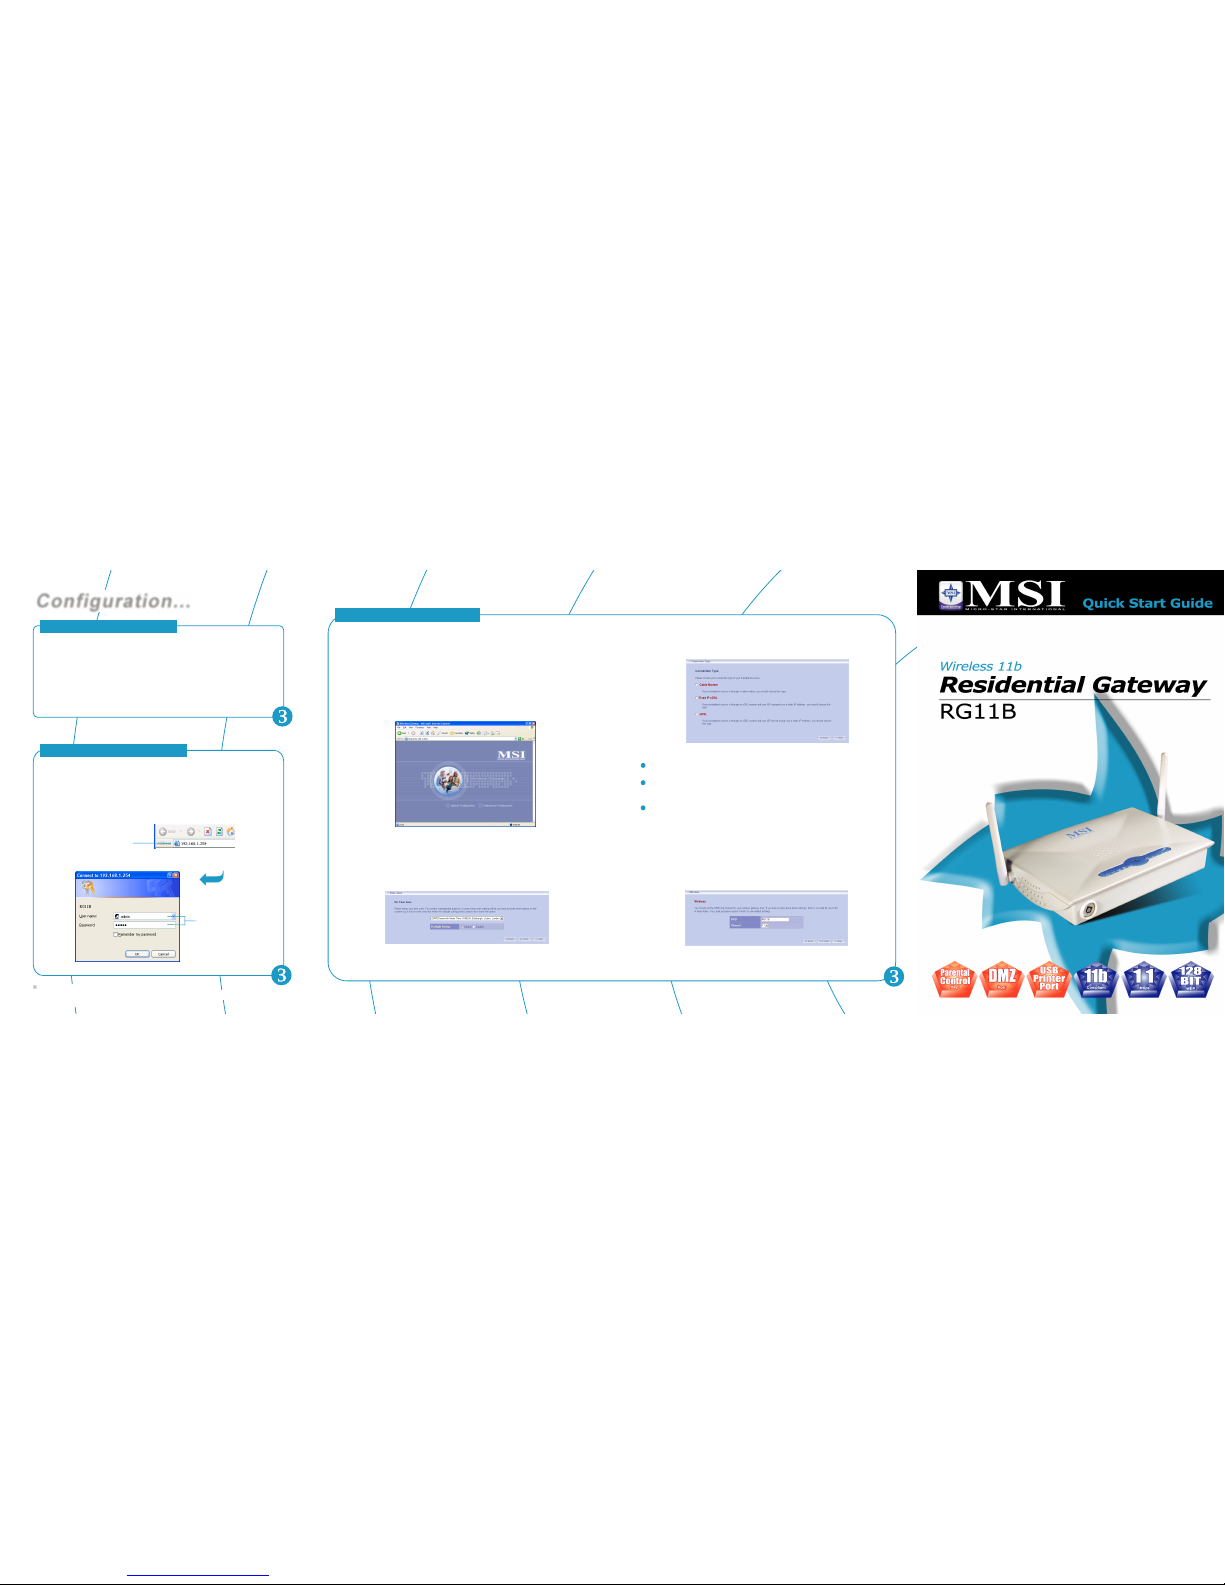
The MSI RG11B provides you a convenient utility to customize the
network settings. Whenever you want to configure the respective
settings, open your web browser (e.g. Internet Explorer), and type the
default IP address in the Address bar and press
[Enter]. Then, type in the User Name box and in the
Password box, and click .
192.168.1.254
admin admin
OK
Enter the default IP
address of the RG11B
Enter the default User
Name and Password
a
aa
c
cc
b
bb
MSI Configuration Utility(2)
The Home window of the Configuration Utility will appear as below, which
provides two options to select: and
In Typical Configuration, we provide a step-by-step Setup Wizard to
guide you through the basic settings of the gateway. Generally, after
completing the four steps in this option, your RG11B can connect to the
ISP and your client computers can access to the Internet without any
problem. If you want to configure the settings according your network
environment, please refer to the instruction in the User's Guide to
complete the settings in Customized Configuration.
Typical Configuration Customized
Configuration.
Step 1. Setting the Time Zone
First, you should set the Time Zone. For system management purpose, a
correctly time zone setting will let you have accurate time stamps on the
system log. If you are in the area that within the daylight saving period,
please also check the Daylight Saving option.
When completed, click to save your settings and return to the
Home window.
Finish
Step 2. Setting the Connection Type
According to the connection type your are using, click the respective
option to configure the settings.
Step 3. Setting the Connection Type (continue)
Next
Cable Modem
If your broadband access is through a cable modem, select this option.
Fixed IP xDSL
If your broadband access is through a xDSL modem and your ISP
assigned you a static IP address, select this option.
xDSL
If your broadband access is through a xDSL modem and your ISP did not
assign you a static IP address, select this option.
Click one of the three options above and enter the information required,
and then click to continue step 4.
You could set the SSID (Network Name) and channel for your wireless
gateway.
Step 4. Setting the Wireless Network Settings
Click Next to continue step 2.
2003 MICRO-STAR INTERNATIONAL. All Rights Reserved.
Microsoft Windows and Internet Explorer are registered trademarks or trademarks of Microsoft Corporation.
All brand names, icons, and trademarks used in this manual are the properties of their respective owners.
Version 1.0 August 2003 PN/G52-C6811X1-G22
Configuration...
 Loading...