

Page 1

msi Digi@nywhere A/D Plus Installation Manual
Contents
V1.0
Chapter 1: msi Digi@nywhere A/D Plus Hardware Installation.................................................................2
1.1 Package Contents...........................................................................................................................2
1.2 System Requirements.....................................................................................................................2
1.3 Hardware Installation.....................................................................................................................3
Chapter 2: msi Digi@nywhere A/D Plus Quick Installation........................................................................4
2.1 The Driver Installation of msi Digi@nywhere A/D Plus...............................................................5
2.2 T otalMedia Application Installation...............................................................................................5
2.3 The Remote Installation of msi Digi@nywhere A/D Plus.............................................................7
Chapter 3:msi Digi@nywhere A/D Plus Quick Uninstallation .................................................................8
3.1 The Driver Uninstallation of msi Digi@nywhere A/D Plus..........................................................8
3.2 T otalMedia Application Uninstallation..........................................................................................9
3.3 The Remote Uninstallation of msi Digi@nywhere A/D Plus........................................................9
Chapter 4: FAQ..............................................................................................................................................11
4.1 How to check if the driver has been installed successfully or not?............................................. 11
4.2 How to check if the Remote Control can work fine?...................................................................11
4.3 How to uninstall all of device driver and software utility?..........................................................12
Chapter 5: Remote Control...........................................................................................................................13
Chapter 6 : Use the TotalMedia at the First Time......................................................................................14
1
Page 2

Chapter 1: msi Digi@nywhere A/D Plus Hardware Installation
1.1 Package Contents
Unpack your msi Digi@nywhere A/D Plus package and make sure that all items are included. The following
items should be included in your package:
• Digi@nywhere A/D Plus x 1
• Software Pack CD x 1
• Mobil Antenna x 1
• A/V Cable x 1
• IR Remote Controller x 1
• IR Receiver Cable x 1
• Users Manual x 1
• Low Profile Bracket x 1
1.2 System Requirements
• Pentium ® IV 2.4GHz or above
• 512MB RAM of system memory or above
• Graphics card (Must support Microsoft DirectX® 9.0c or above)
• Sound card (AC97 compatible sound card)
• PCI 2.2 Compliant Slot
• 2GB free HD space for recording
• CD-ROM or DVD-ROM drive (for software installation)
• Windows ® XP SP2 / MCE 2005 / Vista (when using MCE 2005 OS, an extra 3
must be installed).
• Outdoor antenna TV connection for ATSC
• Outdoor antenna/cable TV connection for Analog TV.
rd
party DVD decoder
-2-
Page 3
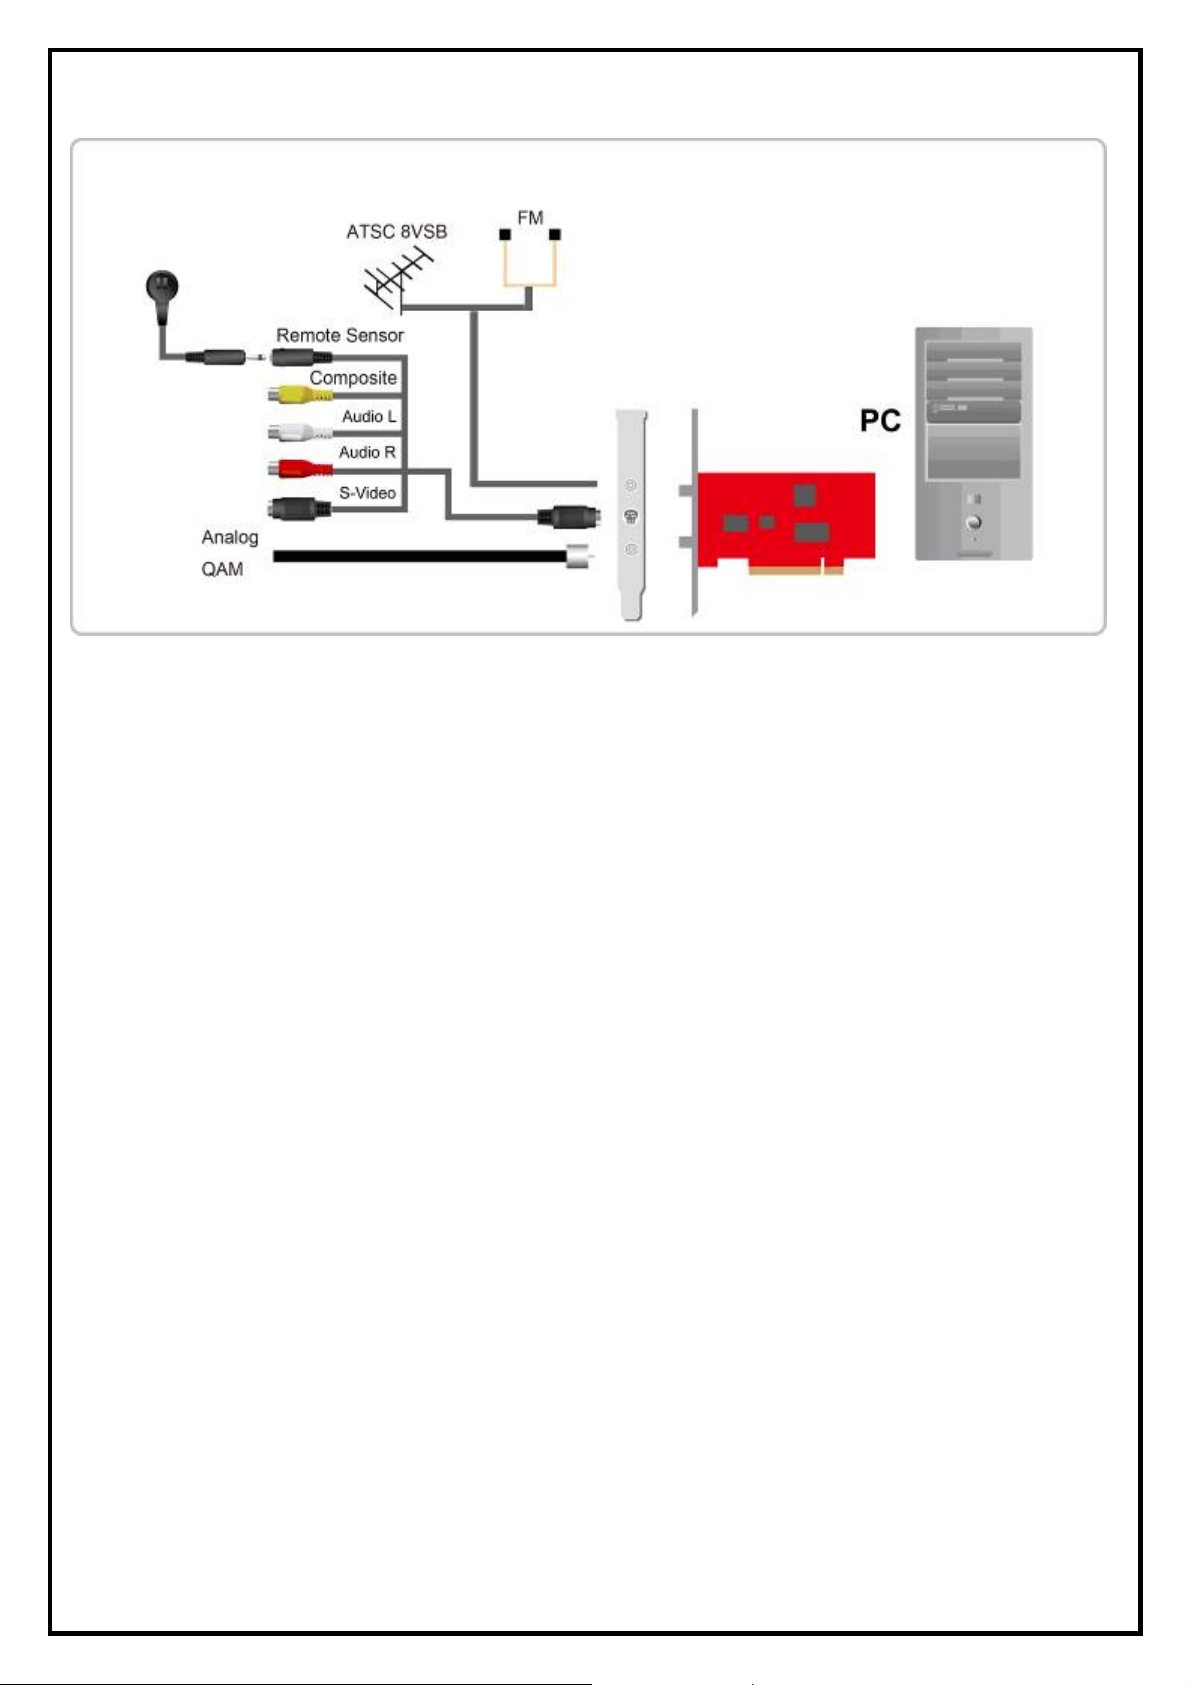
1.3 Hardware Installation
Follow the steps shown below for installation of your TV card and use the pictorial guide below for
peripheral connections.
1. Turn off your computer.
2. Select a PCI slot and remove the slot cover, screw, etc.
3. Place msi Digi@nywhere A/D Plus card firmly into the slot and secure the card.
4. Close the computer's case and turn on the power.
-3-
Page 4

Chapter 2: msi Digi@nywhere A/D Plus Quick Installation
The msi Digi@nywhere A/D Plus card package comes with complete Windows software utilities. These
utilities can be found on the installation CD included in the package. Before installation, we recommend that
you exit all background programs. These include applications such as anti-virus software and system
monitoring applications.
1. Once you finish the hardware installation,
restart your system. A window labeled: “Found
New Hardware Wizard” will connect to
Windows Update to search software. Choose
“No, not this time” and click “Next: to run the
utilities setup included in the CD.
2. Insert the installation CD into the CD ROM
device. The Autorun page will appear as the
left image. Please choose “Quick
Installation”.
3. The Quick Installation provides you with two
choices to install. If you want to install device
driver and software utility completely, please
choose “Typical Installation”. Or if you want
to install them partially, please choose
“Custom Installation”. Finally click “Install”
to continue.
-4-
Page 5
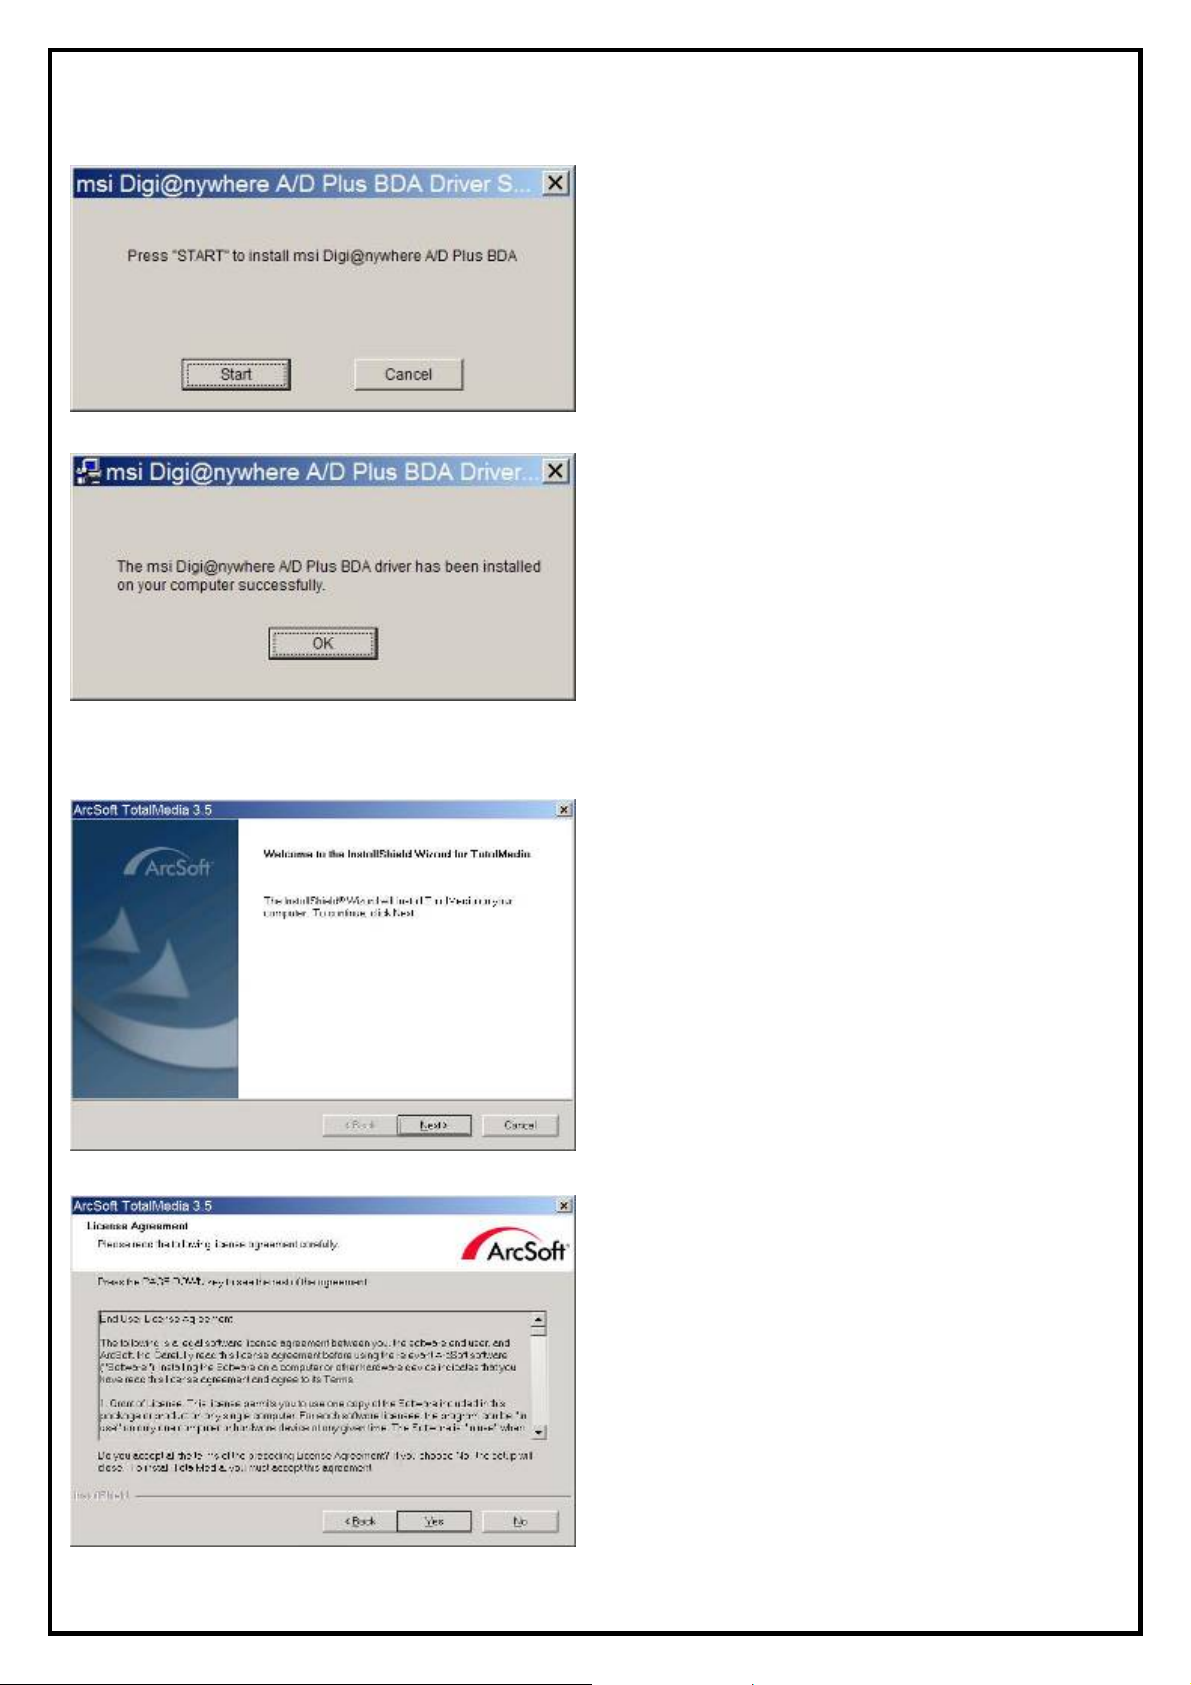
2.1 The Driver Installation of msi Digi@nywhere A/D Plus
4. Click “Start” to install the msi Digi@nywhere
A/D Plus driver. Please wait, while the
installation is in process.
5. Now the driver has been installed successfully
on your computer and click “OK” to finish
driver installation and go to next step.
2.2 TotalMedia Application Installation
6. The InstallShield Wizard will guide you
through installation of TotalMedia application.
Click “Next” to continue.
7. Click “Yes” accept all the terms of the
proceeding License Agreement to install
TotalMedia.
-5-
Page 6
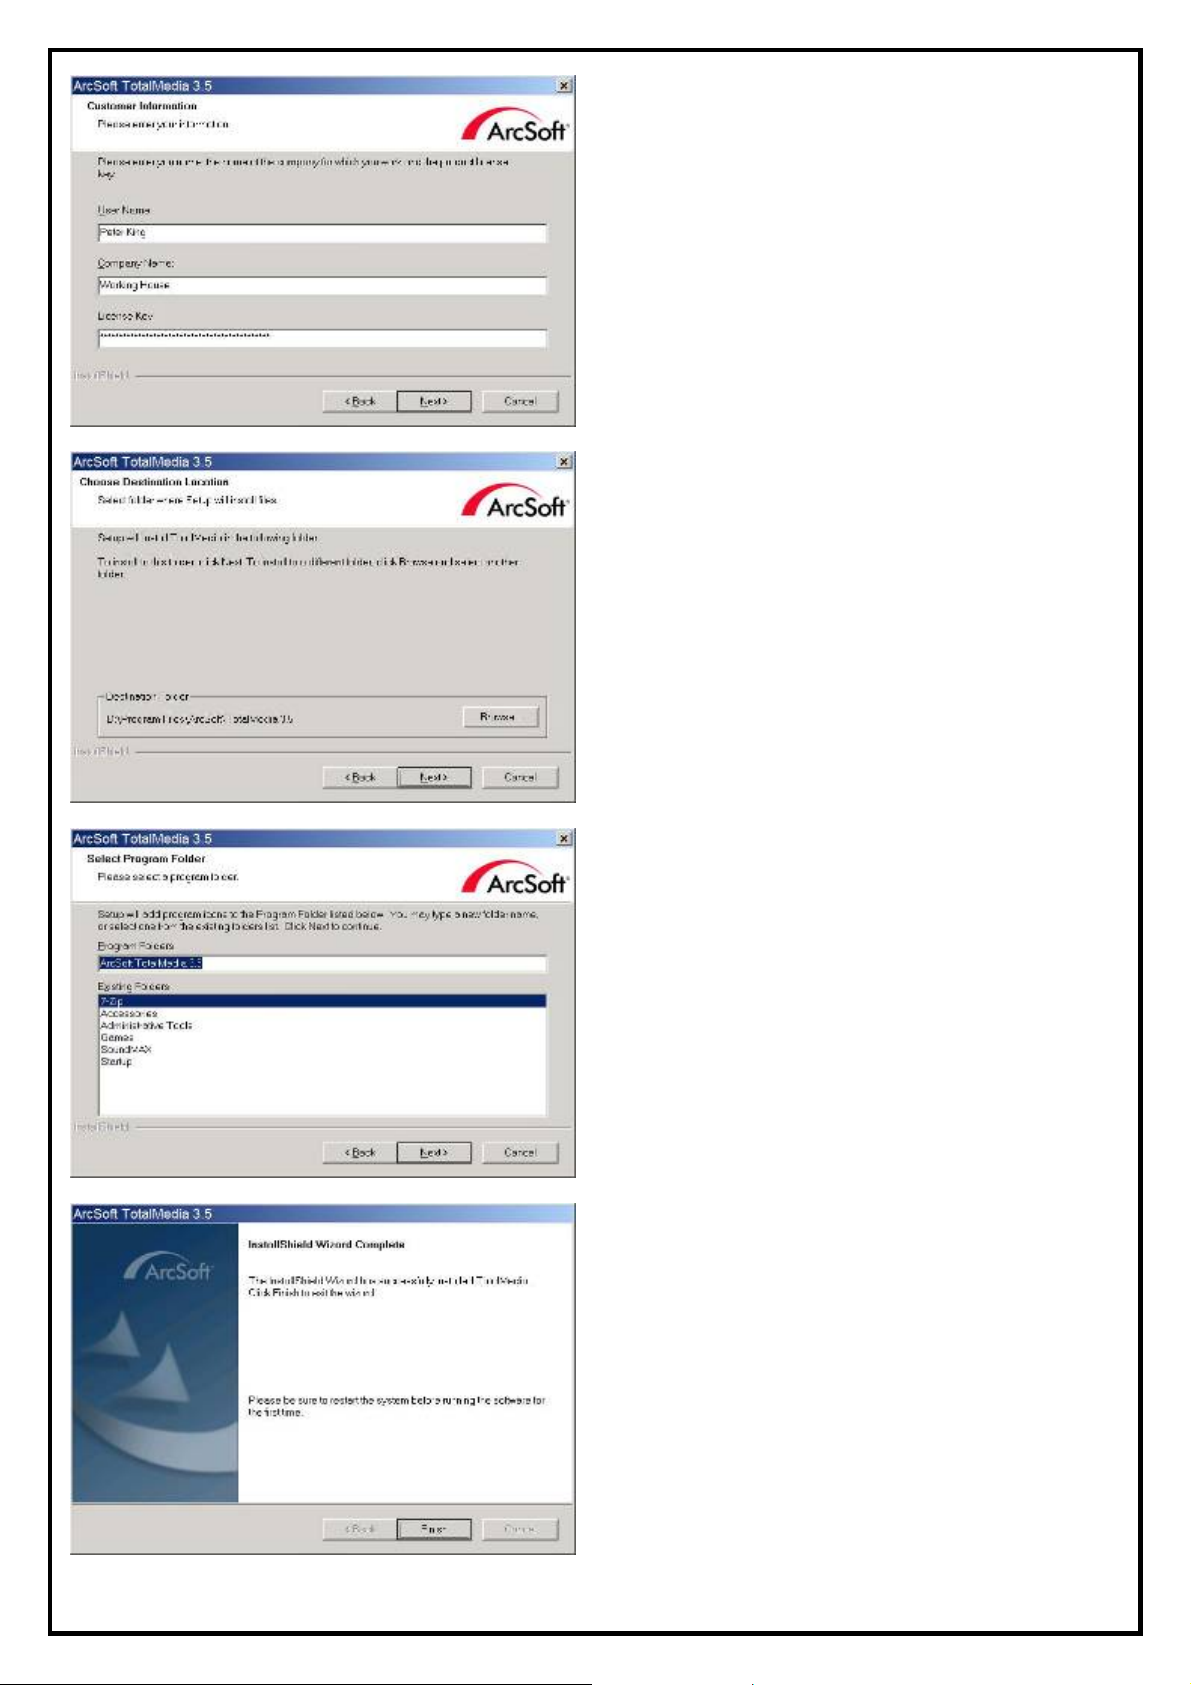
8. Please input user information and your
TotalMedia serial number. Click “Next” to
continue.
Note: While installing TotalMedia, it requires serial
number. The serial number is printed on the front
side of CD paper bag. Please check it from the CD
bag
9. Please choose the destination folder where you
want to install the files. You can click
“Browse” to change the destination folder.
Finally click “Next” to go to next step.
10. Setup will add program icons to the Program
Folder’s list. You may type a new folder name,
or select one from the existing folders list.
Click “Next” to start installing. Please wait
while installation is in process.
11. When the message as the one on the left image,
click “Finish” to end the installation.
Note: For more detailed TotalMedia instruction,
please refer to the TotalMedia HELP
-6-
Page 7

2.3 The Remote Installation of msi Digi@nywhere A/D Plus
This step will instruct you to install the Controller application of msi Digi@nywhere A/D Plus. Please follow
the steps below for installation.
12. The InstallShield Wizard will guide you
through installation of msi Digi@nywhere A/D
Plus Remote Controller application. Please
wait for a while and it will complete the
installation automatically.
13. All the drivers and applications have been
installed successfully. Please choose “Yes, I
want to restart my computer now” to restart
your computer (Recommend) and click
“Finish” to end the installation.
-7-
Page 8

Chapter 3:msi Digi@nywhere A/D Plus Quick Uninstallation
1. Please choose “Quick Installation”.
2. The Quick Uninstallation provides you with
two choices to uninstall. If you want to
uninstall device driver and software utility
completely, please choose “Typical
Uninstallation”. Or if you want to uninstall
them partially, please choose “Custom
Uninstallation”. Finally click “Uninstall” to
continue.
3.1 The Driver Uninstallation of msi Digi@nywhere A/D Plus
3. Click “OK” to uninstall the msi Digi@nywhere
A/D Plus driver. Please wait, while the
uninstallation is in process.
4. Now BDA driver has been removed
successfully on your operation system and
click “OK” to go to next step.
-8-
Page 9

3.2 TotalMedia Application Uninstallation
This step will instruct you to uninstall TotalMedia Application. Please follow the steps below for
uninstallation.
5. This step is going to remove TotalMedia
application. If yes, please select “Remove”
option and click “Next”.
6. This step is to confirm that if you really want
to remove TotalMedia application. If yes,
please click “OK”.
7. When the windows as the one on the left
image, it means the TotalMedia has been
removed completely. Please click “Finish” to
end.
3.3 The Remote Uninstallation of msi Digi@nywhere A/D Plus
This step will instruct you to uninstall the Remote Controller application of msi Digi@nywhere A/D Plus.
Please follow the steps below for uninstallation.
8. This step is to confirm that if you really want to
remove Remote Controller application. If yes,
please click “OK”.
-9-
Page 10

9. When the windows as the one on the left image,
it means the Remote Controller application has
been removed completely. Please click “Finish”
to end.
10. All the drivers have been removed completely.
Please choose “Yes, I want to restart my
computer now.” to restart your computer
(Recommend) and click “Finish” to end the
uninstallation.
-10-
Page 11

Chapter 4: FAQ
4.1 How to check if the driver has been installed successfully or not?
Ans :Right click on “My Computer” on the desktop and choose “Properties”. Once in “Properties”
window, click on “Device Manager” in Hardware panel. Click on the plus icon of “Sound, video and
game controllers” to open the device list. See Fig. 1 below.
Fig. 1
4.2 How to check if the Remote Control can work fine?
Ans : 1) You have to check if the “Remote Control” utility is installed or not. Please refer to Fig. 2.
2) You have to check if the driver has been installed or not. See FAQ-1.
3) You can check if the “Remote Control” tray icon is loaded in the right-bottom of task bar.
See Fig.3. below.
Fig. 2
Fig. 3
-11-
Page 12

4.3 How to uninstall all of device driver and software utility?
Ans: 1) You can put the installation CD into CD-ROM device to execute “Quick Uninstallation”.
Please refer to Fig.4
Fig.4
-12-
Page 13

Chapter 5: Remote Control
Button Function
Turn on / off TotalMedia
Shut down the PC
Video Source switch (Antenna, Cable, Memory,
Composite, S-Video)
Audio switch (Stereo, SAP or MONO)
Number keys (0~9)
Recall
Mute
Channel Preview
Switch between full screen and window mode
Return to main page
Return to last page
Arrow keys
Enter
Volume up / down
Channel up / down
Time-Shifting
Record
Playback
EPG (Electronic Program Guide)
Teletext
Sound: Stereo/SAP/Mono
Adjust screen ratio between 4:3 / 16:9 / 16:10
SnapShot
Setup
Go Radio
Go TV
Go V ideo
Go Picture
-13-
Page 14

Chapter 6 : Use the TotalMedia at the First Time
Before you start to watch TV with TotalMedia, you have to follow the instructions to scan all available
channels in your region.
1. Open the TotalMedia, and click “TV” to next
step.
2. On the TV Signal Setting, please click “Next”
to next step.
3. Please select your region and click “Next”
-14-
Page 15

4. Select video device and click “Next” .You can
select one of them and set the other after this
step. We select Analog TV first to perform the
steps.
5. Usually we can keep the default audio pin
source and click “Next” to the next step.
6. Please select analog cable TV or analog
antenna TV for channel scanning. click “Next”
to the next step.
7. Click “Start” to scan. All scanned channels
will be shown on channel list. When channels
were found, please click “Next” to the next
step.
-15-
Page 16

8. When channels were found, please click “OK”
to continue.
9. After setting up one tuner, click “Yes” to setup
the second tuner.
10. Now, it will perform the ATSC channel
scanning. Cable TV is for unencrypted QAM
channel. Antenna TV is for free to air 8VSB
channel.
11. Click “Start” to scan. All scanned channels
will be shown on channel list. When channels
were found, please click “Next” to the next
step.
-16-
Page 17

12. In Setting Digital EPG, please choose “NO”
now, and Click “Next” to next step.
13. Click “Finish” to finish the Total Media
channel scanning.
14. You can enjoy watching TV with TotalMedia
now.
-17-
 Loading...