

Page 1
Installation Instructions
Wireless Motion Sensor LED Slim Safety Light
MB970
What is included per light:
• Wireless LED Slim Safety Light
• 2 Screws & 2 Anchors
• Mounting Bracket
What you need to install:
• 4 C-cell Alkaline Batteries
Tips:
•
Use only new alkaline C-Cell batteries with 1.5V rating.
•
Do not mix old and new batteries. If bat teries are not new, it may cause the light to malfunction.
•
Install batteries with polarity in correct position.
•
Light may activate when batteries are inser ted. Simply take light into a dark room, allow
batteries to set tle, the n test activation.
•
If your light will not turn o, it means that it is time to replace the batteries.
• Screwdriver or Drill
Slim Safety Light Features:
Motion/Light Sensor: The light instantly turns on when it
LED Light
detects motion from up to 15 feet away. The light sensor
conserves battery life by preventing activation in daylight.
Auto Shut-o: Light shuts o automatically after 20
seconds if no motion is detected.
Bright LED: 100 lumens covers up to 260 sq ft.
Durable, Weather Resistant: Tight seals and UV resistant
material allow the light to work in all weather conditions.
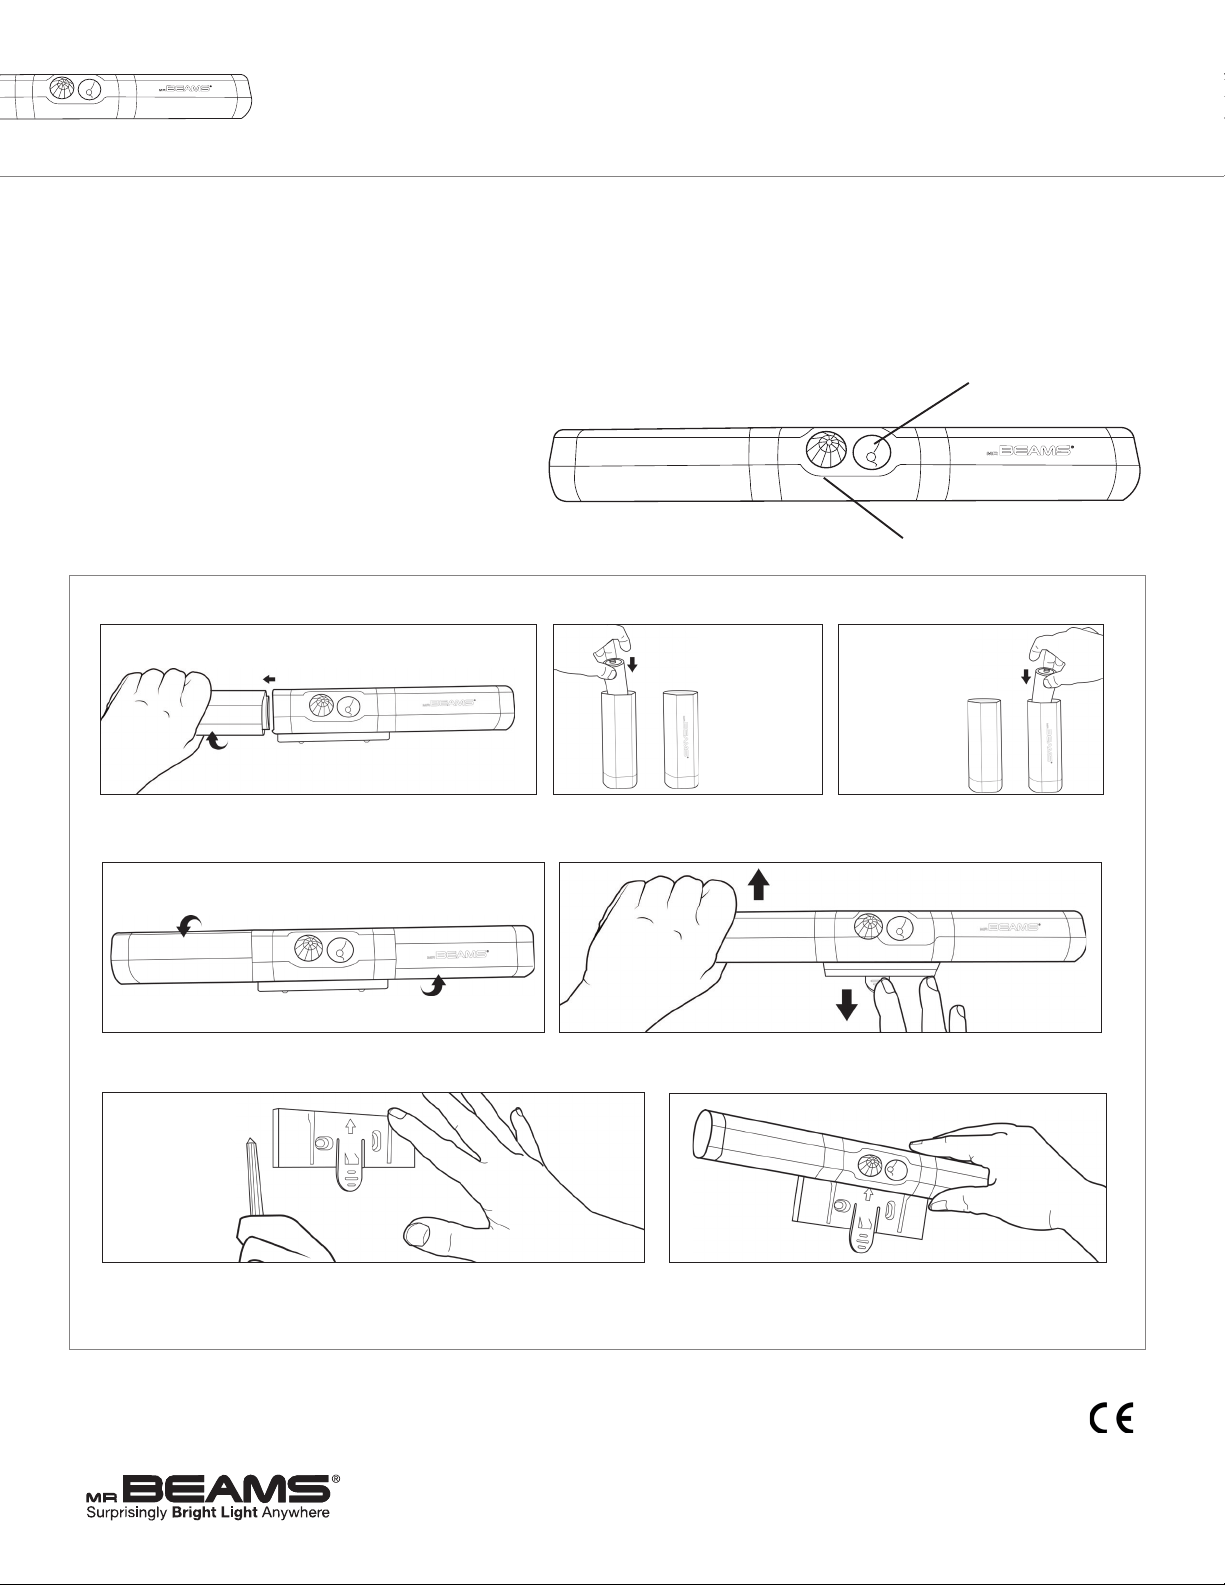
Motion & L ight
Sensor
NOTE: Light sensor only allows light to activate in darkness. We recommend you test in a dark room or closet before installation.
1. Remove the battery compartment by twisting the left side of the
light counterclockwise and the right side counterclockwise.
4. Twist the compartments back into place.
6. Determine mounting location for the light. Place the mounting plate on the surface
so that the tab is pointing down, and mark the pilot holes. Use a drill to insert the
anchors then line up the mounting plate with the pilot holes and drill screws in.
Battery Caution:
1) Do not mix ol d and new ba tteri es
2) Do not mix Alkali ne, Stan dard (Ca rbon-Zi nc) or Rec harge able (Ni ckel Cadmium)
or (Nic kel Metal Hydride ) batter ies
3) Do not di spose of batter ies in re
4) Batte ries sh ould be re cycled o r dispo sed of as pe r state an d local g uideli nes
2. In the lef t compartme nt insert 2 C-cell
batteries with the negative side down.
5. To remove the mounting plate from the light, use your nger to push up on the
mounting bracket tab. This will unlock the bracket. Then slide the light o the bracket.
3. In the right compartme nt insert 2 C-cell
batteries with the negative side down.
7. Line up the light with the mounting plate and slide the light into
the grooves. Then rotate the light to desired angle.
* Visit our website to view installation video.
* 1 year limited warranty. Visit site for details.
www.mrbeams.com
600 Beta Drive, U nit 100, May eld V illage, O H 44143
877.298.9082
 Loading...