

Page 1
Installation Instructions
Wireless Motion Sensor LED Step/Stair Light
MB520-530
Thank you for purchasing the Mr Beams
Step/Stair Light. We are committed to eliminating
darkness using the latest in Light-Emitting Diodes
(LEDs). LEDs are the most ecient and durable
light sources available. We are certain that your
light will contribute to a safer environment and
®
Tips:
•
Use only new alkaline C-Cell batteries with 1.5V rating.
•
Do not mix old and new batteries. If batteries are not new, it may cau se the light to malfunction.
•
Install batteries with polarity in correct position.
•
Light may activate when batteries are inserted. Simply take light into a dark room. Allow
batteries to settle, then test activation.
•
If your light will not turn o, it means that it is time to replace the batteries.
provide light where you need it at a very
reasonable cost.
What is included per light:
• Motion Sensor Step/Stair Light
• 2 Screws
• 2 Anchors
What you need to install:
• 1 Small Screwdriver
• 3 C-Cell Alkaline Batteries
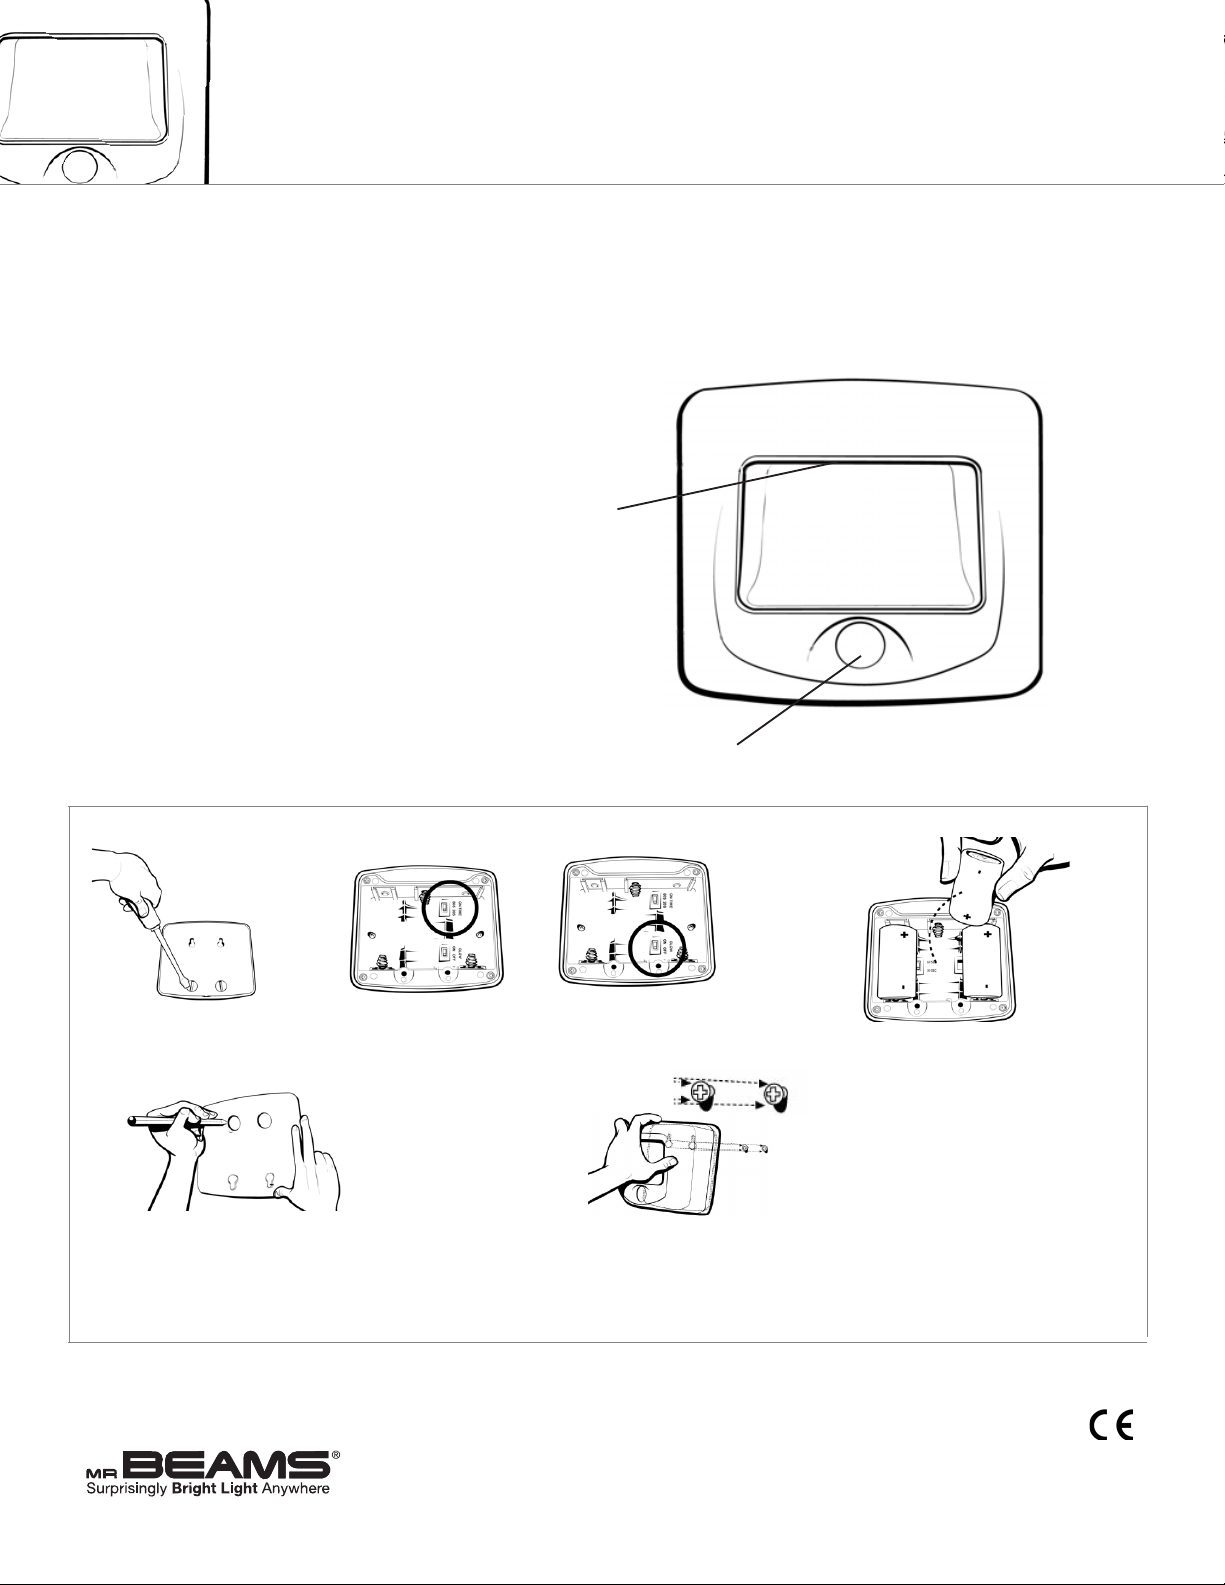
LED Light
Step/Stair Light Features:
Motion/Light Sensor: Light instantly turns on when it
detects motion from up to 15 feet away. The light sensor
conserves battery life by preventing light from activating in
daylight.
Auto Shut-o: Light shuts o automatically after 20 or 60
seconds (optional) if no motion is detected.
Glow Mode Option: Emits soft glow when darkness is
sensed for safety.
Bright LED: 35 Lumens covers up to 120 sq ft.
Durable, Weather Resistant: Tight seals and UV resistant
material allow the Mr. Beams Light to work in all weather
conditions.
NOTE: Light sensor only allows light to activate in darkness. We recommend you test in a dark room or closet.
Motion & L ight
Sensor
1. Remove rear cover of light by
removing 2 screws on back.
5. Determine location for mounting the light. Flip rear cover upside
down and use holes for thumb screws as template to mark two
holes for anchors and/or screws ( included). We recommend
mounting the screws parallel to the ground if mounting on a ver tical
surface. Make sure that screws are precise distance from each
other as dened by the distance of the thumb screw holes. Replace
rear cover and tighten screws.
Battery Caution:
1) Do not mix ol d and new b atter ies
2) Do not mix Alkali ne, Sta ndard (Carbo n-Zinc) or R echargeab le (Nickel Cadmi um)
or (Nic kel Meta l Hydrid e) batte ries
3) Do not di spose o f batte ries in re
4)Batteries s hould b e recycl ed or dispose d of as per s tate and l ocal guideli nes
www.mrbeams.com
2. Set auto shut-o to 20 or
60 seconds. Setting to min
will extend battery life.
3. Set “GLOW ” to on if you want it to
glow in darkness or o for no glow.
Setting to o will ex tend battery life.
6. If using anchors, use 3/16” drill bit to drill holes and insert anchors. Drive screws
into anchors so that screw head potrudes 1/8” from the surface. If using only screws,
us 1/8” drill bit to drill holes and inser t screws so that screw head protrudes 1/8” from
the surface.
7. Slide light down so screws are securely held by track.
4. Inser t 3 C-Cell bat terie s.
* Visit our website to view installation video.
* 1 year limited warranty. Visit site for details.
32333 Au rora Rd. Suite 100 So lon, OH 4 4139
877.298.9082
 Loading...