

Motorola MOTOROKR E8 User Manual [vi]

MOTOROKR
Höôùng Daãn Söû Duïng
™
E8

HELLOMOTO
Introducing your new MOTO
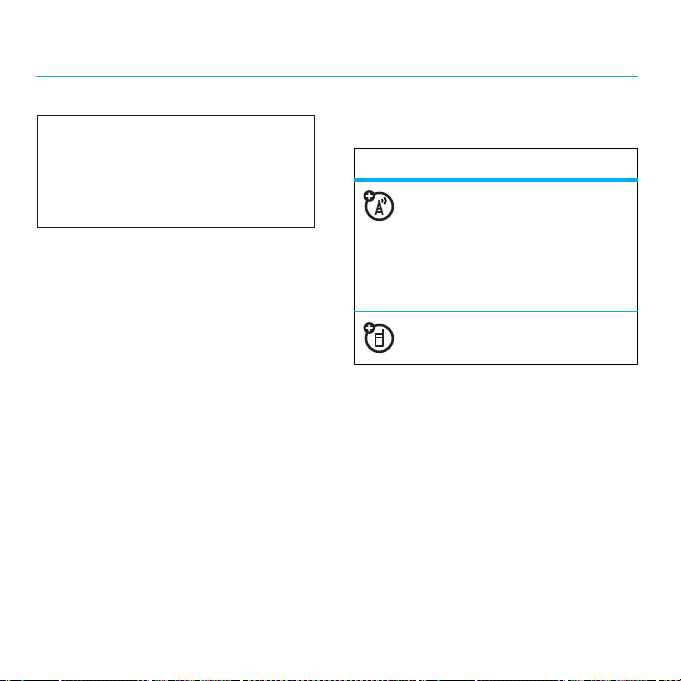
Lanyard Hook Headset Jack
Volume Keys
Side Select Key
ROKR™
E8 GSM wireless phone. Here’s a quick anatomy lesson.
(on top of phone)
HELLOMOTO
Camera Lens
(on back of phone)
Micro USB Port
Power ON/OFF Key
& Lock Key
Handsfree Speaker
(on back of phone)
1
Home Screen Main Menu
Slide down &
1
hold the power
Service Provider 10:10
ON/OFF key
until the display
lights up.
10/15/2009
Note:
and main menu may be different.
Main Menu
Shortcuts
Press
2
s
to open the
Main Menu
.
This is the standard home screen and main menu layout.
To change your home screen shortcuts and main menu
appearance, see your Quick Start Guide.
HELLOMOTO
2
Press S
3
up/down/
Music
left/right to
scroll to a
menu feature.
Back
Options
Press
4
4
s
to select it.
Your phone’s home screen

Motorola, Inc.
Consumer Advocacy Office
1307 East Algonquin Road
Schaumburg, IL 60196
www.hellomoto.com
Certain mobile phone features are dependent on the
capabilities and settings of your service provider’s
network. Additionally, certain features may not be
activated by your service provider, and/or the provider’s
network settings may limit the feature’s functionality.
Always contact your service provider about feature
availability and functionality. All features, functionality,
and other product specifications, as well as the
information contained in this user’s guide are based
upon the latest available information and are believed
to be accurate at the time of printing. Motorola reserves
the right to change or modify any information or
specifications without notice or obligation.
MOTOROLA and the Stylized M Logo are registered
in the US Patent & Trademark Office. The Bluetooth
trademarks are owned by their proprietor and used
by Motorola, Inc. under license. Java and all other
Java-based marks are trademarks or registered
trademarks of Sun Microsystems, Inc. in the U.S. and
other countries. Microsoft and Windows are registered
trademarks of Microsoft Corporation; and Windows XP
and Windows Media are trademarks of Microsoft
Corporation. Macintosh is a registered trademark of
Apple Computer, Inc. All other product or service names
are the property of their respective owners.
© 2008 Motorola, Inc. All rights reserved.
Caution:
Changes or modifications made in the radio
phone, not expressly approved by Motorola, will void
the user’s authority to operate the equipment.
Software Copyright Notice
The Motorola products described in this manual may
include copyrighted Motorola and third-party software
stored in semiconductor memories or other media.
Laws in the United States and other countries preserve
for Motorola and third-party software providers certain
exclusive rights for copyrighted software, such as the
exclusive rights to distribute or reproduce the copyrighted
software. Accordingly, any copyrighted software
contained in the Motorola products may not be modified,
reverse-engineered, distributed, or reproduced in any
manner to the extent allowed by law. Furthermore,
the purchase of the Motorola products shall not be
deemed to grant either directly or by implication,
estoppel, or otherwise, any license under the copyrights,
patents, or patent applications of Motorola or any
third-party software provider, except for the normal,
non-exclusive, royalty-free license to use that arises
by operation of law in the sale of a product.
3

contents
Use and Care. . . . . . . . . . . . . . . . . . . . . . 6
EU Conformance. . . . . . . . . . . . . . . . . . . 7
get started . . . . . . . . . . . . . . . . . . . . . . . . 8
about this guide . . . . . . . . . . . . . . . . . . 8
battery . . . . . . . . . . . . . . . . . . . . . . . . . 8
basics. . . . . . . . . . . . . . . . . . . . . . . . . . . 12
display . . . . . . . . . . . . . . . . . . . . . . . . 12
volume . . . . . . . . . . . . . . . . . . . . . . . . 14
side select key . . . . . . . . . . . . . . . . . . 14
text entry . . . . . . . . . . . . . . . . . . . . . . 14
voice commands . . . . . . . . . . . . . . . . 17
talking phone . . . . . . . . . . . . . . . . . . . 19
handsfree speaker . . . . . . . . . . . . . . . 19
codes & passwords . . . . . . . . . . . . . . 19
lock & unlock phone. . . . . . . . . . . . . . 20
customize . . . . . . . . . . . . . . . . . . . . . . . 21
profiles . . . . . . . . . . . . . . . . . . . . . . . . 21
time & date. . . . . . . . . . . . . . . . . . . . . 23
themes. . . . . . . . . . . . . . . . . . . . . . . . 23
display appearance . . . . . . . . . . . . . . . 25
answer options. . . . . . . . . . . . . . . . . . 26
contents
4
calls . . . . . . . . . . . . . . . . . . . . . . . . . . . . 27
turn off a call alert. . . . . . . . . . . . . . . . 27
recent calls . . . . . . . . . . . . . . . . . . . . . 27
redial. . . . . . . . . . . . . . . . . . . . . . . . . . 27
return a call . . . . . . . . . . . . . . . . . . . . . 28
caller ID. . . . . . . . . . . . . . . . . . . . . . . . 28
emergency calls . . . . . . . . . . . . . . . . . 28
voicemail. . . . . . . . . . . . . . . . . . . . . . . 29
entertainment . . . . . . . . . . . . . . . . . . . . 30
browser . . . . . . . . . . . . . . . . . . . . . . . 30
messages . . . . . . . . . . . . . . . . . . . . . . . . 32
text messaging. . . . . . . . . . . . . . . . . . 32
connections . . . . . . . . . . . . . . . . . . . . . . 36
sync . . . . . . . . . . . . . . . . . . . . . . . . . . 36
file manager . . . . . . . . . . . . . . . . . . . . 36
cable connections. . . . . . . . . . . . . . . . 38
Bluetooth® wireless. . . . . . . . . . . . . . 39
phone software updates. . . . . . . . . . . 43
other features . . . . . . . . . . . . . . . . . . . . 44
advanced calling . . . . . . . . . . . . . . . . . 44
contacts . . . . . . . . . . . . . . . . . . . . . . . 47

personalize . . . . . . . . . . . . . . . . . . . . . 51
call times & costs . . . . . . . . . . . . . . . . 52
handsfree . . . . . . . . . . . . . . . . . . . . . . 53
network . . . . . . . . . . . . . . . . . . . . . . . 54
personal organizer . . . . . . . . . . . . . . . 54
security. . . . . . . . . . . . . . . . . . . . . . . . 56
fun & games . . . . . . . . . . . . . . . . . . . . 57
SAR Data . . . . . . . . . . . . . . . . . . . . . . . . 58
OSS Information . . . . . . . . . . . . . . . . . . 59
index . . . . . . . . . . . . . . . . . . . . . . . . . . . 60
contents
5
Use and Care
Use and Care
To care for your Motorola phone, please keep it away from:
liquids of any kind dust and dirt
Don’t expose your phone to water,
rain, extreme humidity, sweat, or
other moisture. If it does get wet,
don’t try to accelerate drying with
the use of an oven or dryer, as this
may damage the phone.
extreme heat or cold cleaning solutions
Avoid temperatures below 0°C/32°F
or above 45°C/113°F.
microwaves the ground
Don’t try to dry your phone in a
microwave oven.
Don’t expose your phone to dust,
dirt, sand, food, or other
inappropriate materials.
To clean your phone, use only a dry
soft cloth. Don’t use alcohol or other
cleaning solutions.
Don’t drop your phone.
6
Use and Care
European Union Directives Conformance Statement
EU Conformance
The above gives an example of a typical Product Approval
Number.
You can view your product’s Declaration of Conformity
(DoC) to Directive 1999/5/EC (to R&TTE Directive) at
www.motorola.com/rtte
Product Approval Number from your product’s label in
the “Search” bar on the Web site.
Hereby, Motorola declares that this
product is in compliance with:
•
The essential requirements
and other relevant provisions
of Directive 1999/5/EC
•
All other relevant EU Directives
0168
. To find your DoC, enter the
Product
Approval
Number
EU Conformance
7
get started
CAUTION:
Before using the phone
for the first time, read the Important
Safety and Legal Information guide
included in the box.
about this guide
This guide shows how to locate a menu
feature as follows:
Find it:
This means that, from the home screen:
1
2
3
8
s >< Multimedia
Press the center keys to open the
menu.
Press the navigation keyS to scroll to
< Multimedia
PressS to scroll to
s
, and press s to select it.
to select it.
>
Camera
Camera
, and press
get started
This guide uses the following symbols:
symbols
This means a feature is network,
SIM card, or subscription
dependent and may not be
available in all areas. Contact
your service provider for more
information.
This means a feature requires an
optional accessory.
battery
battery charging notes
For instructions on charging the battery,
see your Quick Start Guide.
Tip:
Motorola batteries have circuitry that
protects the battery from damage from
overcharging.
Note:
You can charge your
battery by connecting a cable
from your phone’s micro
USB port to a USB port on a
computer. Both your phone and the
computer must be turned on, and your
computer must have the correct software
drivers installed. A Motorola Original USB
cable and supporting software may be
included with your phone. These tools are
also sold separately.
battery use & safety
IMPORTANT: HANDLE AND STORE
BATTERIES PROPERLY TO AVOID INJURY
OR DAMAGE.
from improper handling of batteries,
and particularly from the continued use
of damaged batteries.
DON’Ts
•
Most battery issues arise
Don’t disassemble, crush,
puncture, shred, or otherwise
attempt to change the form
of your battery.
•
Don’t let the phone or battery
come in contact with water.
Water can get into the phone’s
circuits, leading to corrosion.
If the phone and/or battery get wet,
have them checked by your carrier
or contact Motorola, even if they
appear to be working properly.
•
Don’t allow the battery to touch
metal objects.
such as jewelry, stay in prolonged
contact with the battery contact
points, the battery could become
very hot.
•
Don’t place your battery near a
heat source.
damage the phone or the battery.
High temperatures can cause
the battery to swell, leak, or
malfunction. Therefore:
•
Do
with an appliance or heat source,
such as a hair dryer or microwave
oven.
•
Avoid leaving your phone in your
car in high temperatures.
If metal objects,
Excessive heat can
not
dry a wet or damp battery
get started
9

DOs
•
Do avoid dropping the battery
or phone.
especially on a hard surface,
can potentially cause damage.
•
Do contact your service provider
or Motorola if your phone or
battery has been damaged from
dropping or high temperatures.
IMPORTANT: USE MOTOROLA ORIGINAL
PRODUCTS FOR QUALITY ASSURANCE
AND SAFEGUARDS.
in identifying authentic Motorola batteries
from non-original or counterfeit batteries
(that may not have adequate safety
protection), Motorola provides holograms on
its batteries. Consumers should confirm that
any battery they purchase has a “Motorola
Original” hologram.
Motorola recommends you always
use Motorola-branded batteries and
chargers.
designed to work with Motorola batteries.
If you see a message on your display
Invalid Battery
such as
following steps:
Dropping these items,
To aid consumers
Motorola mobile devices are
or
UnabletoCharge
, take the
•
Remove the battery and inspect it
to confirm that it has a “Motorola
Original” hologram;
•
If there is no hologram, the battery
is not a Motorola battery;
•
If there is a hologram, replace
the battery and retry charging it;
•
If the message remains, contact a
Motorola Authorized Service Center.
Important:
cover damage to the phone caused by
non-Motorola batteries and/or chargers.
Warning:
charger may present a risk of fire, explosion,
leakage, or other hazard.
PROPER AND SAFE BATTERY DISPOSAL
AND RECYCLING
Proper battery disposal is not only important
for safety, it benefits the environment.
Consumers may recycle their used batteries
in many retail or service provider locations.
Additional information on proper disposal
and recycling may be found on the Web:
Motorola’s warranty does not
Use of a non-Motorola battery or
•
www.motorola.com/recycling
10
get started

•
www.rbrc.org/call2recycle/
(in English only)
Disposal:
batteries in accordance with local
regulations. Contact your local
recycling center or national recycling
organizations for more information on
how to dispose of batteries.
Warning:
because they may explode.
Promptly dispose of used
Never dispose of batteries in a fire
get started
11
basics
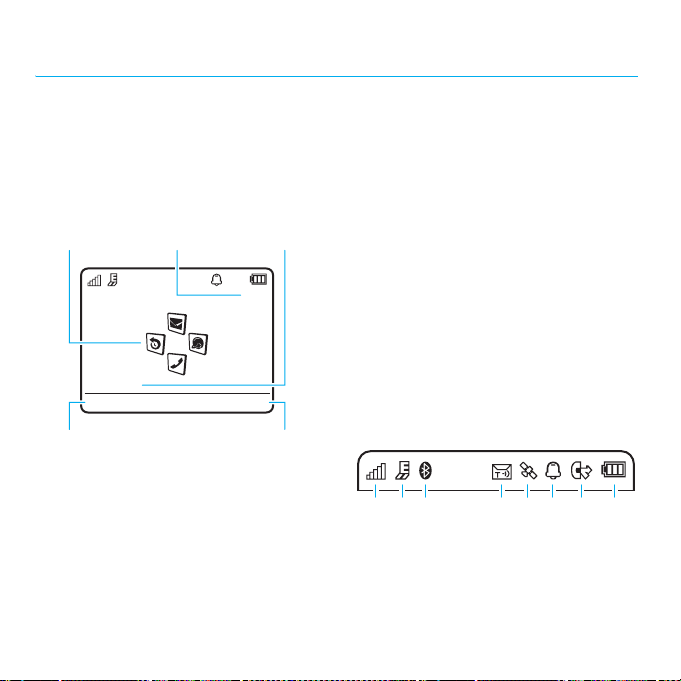
display
The home screen appears when you turn on
the phone.
Feature
Icons
Service Provider 10:10
10/15/2009
Shortcuts
Left Soft Key Label Right Soft Key Label
Note:
Your home screen may look different,
depending on your service provider.
To dial a number from the home screen,
press number keys and
basics
12
Main Menu
N
DateClock
.
Press the center key
soft key to open the main menu.
Shortcuts
Press
some frequently-used phone features.
Press the navigation key
or right in the home screen to open basic
features. To show, hide, or change feature
icons in the home screen, see your
Quick Start Guide.
Tip :
Want some help? Press s>
~ Office Tools
to find information about phone features.
Status indicators appear at the top of the
home screen:
1 Signal Strength Indicator –
>
28413
the strength of the wireless network
connection.
s
or the
Main Menu
in the home screen to access
S
up, down, left,
Help
. Select a
Help
topic
7
5
6
Shows
2 EDGE/GPRS Indicator –
when your phone is using a
high-speed Enhanced Data for
GSM Evolution (EDGE) network
Z
connection
Service (GPRS) network connection
3 Bluetooth Indicator –
Bluetooth status:
&
(solid blue) = Bluetooth
&
(solid green) = Bluetooth
&
(flashing blue) = Bluetooth
4 Message Indicator –
when you receive a new text or
voice message. Other indicators
can include:
]
V
, or General Packet Radio
powered on
connected
= text
message
= email
message
Shows
discoverable mode
Shows
(
Shows
= voicemail
message
5 Location Indicator –
when your phone is providing
location information to the
network, or
g
.
information is turned off.
6 Profile Indicator –
profile setting:
N
= ring only
H
= vibrate
7 Active Line Indicator –
B
to indicate an active call, or E
to indicate when call forwarding is on.
Indicators for dual-line-enabled SIM
cards can include:
G
= line 1
D
8 Battery Level Indicator –
bars show the battery charge level.
Recharge the battery when your phone
shows
Q
only
active
= line 1 call
forward on
Low Battery
Shows P
when location
Shows the alert
J
= silent
I
= vibrate
then ring
Shows
F
= line 2
active
C
= line 2 call
forward on
Vertical
.
basics
13
volume
p
side select key
Press the volume
keys to:
•
turn off an
incoming
call alert
•
change
earpiece
or speakerphone volume during a call
•
change playback volume for a song
or video
•
change radio volume
•
set your phone’s alert profile in
the home screen (press the volume
keys to scroll to a profile, then
s
press
to select it)
14
or the side select key
basics
The side select key
gives you another
way to do things.
For example, when
you scroll to a menu
item, you can press
the side select key
to select it (instead
of pressing
s
).
text entry
Some features let you enter text.
#
to select a
Press
text entry mode.
Create Message
ÊË
Options
Change text entry
options.
Character Counter
SMS:0
Send To
Flashing cursor indicates
insertion
oint.

text entry modes
Ê
É
È
Ã
To
languages:
Find it:
Text Entry
Change text case:
press
letters (
or next letter lowercase (no symbol).
Set word learning:
the words you enter, to improve text
prediction and completion. In a text entry
screen, press
Prediction
when word learning is active.
“word” mode (see page 15)
“abc” mode (see page 16)
numeric mode (see page 17)
symbol mode (see page 17)
change
your global text entry settings or
s >@ Settings
0
to change text case to all capital
Ä
), next letter capitalized (Í),
Options >Text Entry >Set Text
>
Learn My Words
>
In a text entry screen,
Your phone can learn
. Your phone shows Ç
Phone Settings
>
Set text completion:
complete words based on the characters
you enter. In a text entry screen, press
Text Entry >Set Text Prediction >Offer Completions
>
Your phone shows
is active.
Enter punctuation:
press and hold
other characters.
Edit or delete text:
S
press
right of text you want to edit. Press the
clear/back key
left of the cursor. Hold
by word.
to move the cursor to the
Set your phone to
Æ
when text completion
In a text entry screen,
*
to enter punctuation or
In a text entry screen,
D
to delete the character
D
to delete word
Options
.
word mode
To switch to “word” predictive text entry
mode, press
you see
Word mode lets you enter words using one
keypress per letter. The phone predicts each
word as you enter it.
#
in a text entry screen until
Ê
in the display.
basics
15
For example, if you press
your display might show:
Press
*
to enter
Prog
& a space.
Create Message
ÊÆ
Prog ram
Options
S
up/down to
Press
see other words. Press
s
to select a word.
Tip :
Need to enter a symbol or punctuation
in word mode? Press and hold
and choose from a list of available symbols.
7764
You can turn text completion
Æ
) or off (Ç).
on (
SMS:4
Send To
Press
D
to delete
character to left
of cursor.
*
to see
abc mode
To switch to “abc” text entry mode, press
#
in a text entry screen until you see É
in the display.
,
To enter text, press a keypad key repeatedly
to cycle through the letters and number on
the key. Repeat this step to enter each
letter.
For example, if you press
your display might show:
7
Character displays at
insertion point.
Create Message
ÉÆ
P rog
Options
Send To
After two seconds, the character is accepted
and the cursor moves to the next position.
When text completion is activated, your
phone tries to guess the rest of the word:
•
Press s to select the suggested
word.
•
Press S right to enter the
suggested word and a space.
one time,
SMS:1
16
basics

•
If you want a different word, press
keypad keys to enter the remaining
letters.
numeric mode
Press # in a text entry screen until you
È
. Press the number keys to enter
see
the numbers you want.
Tip:
Just need one number? To enter a
number quickly, press and hold a number
key until the number appears.
symbol mode
Press # in a text entry screen until
Ã
you see
associated with each keypad key. Press
S
symbols. To insert a symbol, press its key,
or scroll to it and press
. The display shows the symbol
up/down repeatedly to see different
s
.
voice commands
You can use voice commands to tell your
phone what to do.
Note:
Not all languages support voice
commands.
voice dial a call
You can dial a contact list entry by speaking
its name, or dial any phone number by
speaking its digits.
1
Press and holdN. The phone loads
the voice recognition software, then
prompts you to say a command or
name.
2
Wait for the beep, then say the
of the contact as it appears in
name
your contact list (for example, “John
Smith”). Your phone confirms the name
and makes the call.
or
Say “Dial Number.” Your phone
prompts you to speak the digits in the
phone number. Speak the digits. Your
phone confirms the number and makes
the call.
Tips :
•
You can say a contact’s name and
number type together. For example,
say “John Smith mobile” to call
the mobile number stored for John
Smith.
full
basics
17
•
For voice command help, press and
N
hold
, then press
Help
.
voice activate phone
functions
You can use voice commands to open
applications and perform many basic
phone functions.
1
Press and holdN. The phone prompts
you to say a command.
2
Wait for the beep, then say a command
from the list.
voice commands
“
<Name>
”
Dial Number
“
Send Message To <Name>
“
Check Calendar
“
Check New Message
“
Check New Email
“
Add New Contact
“
Talking Phone
“
”
”
”
”
”
”
”
voice commands
“
Check Battery
Check Signal
“
Check Time
“
Check Date
“
Open Setup
“
Open Recent Calls
“
Open Theme
“
Open Camera
“
Open Web Access
“
Set Normal
“
Set Vibrate
“
Set Silent
“
Set Ring
“
Set Airplane
“
Set Airplane Off
“
Tip:
Press and holdN to see the list of
voice commands.
”
”
”
”
”
”
”
”
”
”
”
”
”
”
”
18
basics

talking phone
You can set your phone to recite caller ID
information for incoming messages, read
the names of menu features or contact
list entries, read messages you receive (in
English only), and/or provide audio feedback
for phone functions.
Find it:
s >@ Settings
Talking Phone
Shortcut:
phone prompts you to say a command,
say “Talking Phone.”
Press and holdN. When the
>
Phone Settings
>
handsfree speaker
During a call, press
turn the handsfree speaker on. Your display
shows the speakerphone indicator until you
turn it off (press
the call.
Note:
The use of wireless phones while
driving may cause distraction. Discontinue
a call if you can’t concentrate on driving.
Additionally, the use of wireless devices
Options >Speaker On
Options >Speaker Off
to
) or end
and their accessories may be prohibited or
restricted in certain areas. Always obey the
laws and regulations on the use of these
products.
codes & passwords
Your phone’s four-digit
originally set to
is originally set to
code
service provider didn’t change these codes,
you should change them:
Find it:
Change Passwords
You can also change your
call barring password.
If you forget your unlock code:
Please verify the Unlock Code
1234 or the last four digits of your phone
number. If that doesn’t work, press
to enter your six-digit security code instead.
If you forget other codes:
your security code, SIM PIN code, PIN2
code, or call barring password, contact your
service provider.
s >@ Settings
unlock code
1234
. The six-digit
000000
>
Security
SIM PIN
prompt, try entering
If you forget
is
security
. If your
>
codes or
At the
#
basics
19

lock & unlock phone
You can lock your phone to keep others
from using it. To lock or unlock your phone,
you need the four-digit unlock code.
manually lock
To
Find it:
Lock Now
>
To
automatically lock
whenever you turn it off:
Find it:
Lock at Power On >On
>
your phone:
s >@ Settings
your phone
s >@ Settings
>
Security >Phone Lock
>
Security >Phone Lock
20
basics

customize
profiles
You can quickly change your phone’s alert
style or profile to match your activity or
environment. Each profile uses a different
set of ringtones or vibrations for incoming
calls and other events. The alert profile
indicator shows at the top of the home
screen.
N Ring Only J Silent
H Vibrate Only I Vibrate then Ring
To change your profile:
screen, press the volume keys on the side
of your phone. Alternatively, from the home
screen press
Change Profile
The
you set another profile.
Shortcut:
and hold
Vibrate Only
Shortcuts >Change Alert Style
.
Silent
profile silences your phone until
From the home screen, press
#
to quickly set the profile to
.
From the home
or
change alert style settings
You can change the ringtones that a
standard alert style uses to notify you of
incoming calls and other events. You can
also change the alert style’s ring volume,
keypad tone volume, and media playback
volume settings. For dual-line-enabled SIM
cards, you can set different ringtones to
identify incoming calls on line 1 or line 2.
Note:
You can’t edit the
change some settings for some alert styles.
Find it:
> alert style
1
2
3
4
s >@ Settings
Press S left/right to select the
[
,
volume
tab
]
, or
tab
Press S up/down to scroll to the alert
or volume setting you want to change,
then press
Select the setting value you want.
Press
changes.
settings
Back
to exit and save your
s
Silent
>
tabi,
tab#.
.
customize
alert style, or
Profiles >Alert Style
messages
alerts
21

reset default alert styles
To
reset
the default settings for all alert
styles:
Find it:
Options >Reset
s >@ Settings
>
Profiles
, press
create a new profile
To create a
and volume settings you specify:
Find it:
> alert style
1
2
3
To c r ea t e
Find it:
Options >Create New Profile
Note:
set by the theme. When you apply a new
theme, you can choose to apply the theme’s
new
profile with the ringtones
s >@ Settings
Change alert style settings as described
in the previous section.
Press
Options >Save as Profil e
Enter a name for the profile, then press
Save
to save it.
additional
s >@ Settings
Profile alert settings also can be
>
profiles:
>
Profiles >Alert Style
.
Profiles
, press
alert settings to the current profile. Selecting
changes
this option
use the theme alert settings.
the current profile to
edit or delete profiles
To
edit
a profile:
Find it:
s >@ Settings
the profile, press
Note:
You can’t edit the
change some settings for some profiles.
delete
To
Find it:
the profile, press
a user-defined profile:
s >@ Settings
>
Options >Edit
Silent
>
Options >Delete
Profiles
profile, or
Profiles
restore alert style settings
To delete all user-defined profiles and
restore your phone’s original alert style
settings:
Find it:
s >@ Settings
Options >Restore Sound Settings
>
Profiles
, scroll to
, scroll to
, press
22
customize
time & date
Your phone can automatically update the
time and date. It uses the time and date
Calendar
for the
synchronize
To
the network:
Find it:
Time & Date >Auto-Update Time >On
To
manually
Find it:
Time & Date >Auto-Update Time >Off
to and select
To adjust time and date, pressS left/
right to scroll to a setting, then press
up/down to change it. Press
settings.
To show a
in the home screen:
Find it:
Time & Date >Time Format >12 Hour Clock
To s e t t h e
Find it:
Time & Date >Date Format
.
time and date with
s>@ Settings
set the time and date:
s>@ Settings
Time
12-hour or 24-hour
s>@ Settings
date format
s>@ Settings
>
>
and
Date
>
in the home screen:
>
Phone Settings
Phone Settings
, then scroll
Set
to save your
digital clock
Phone Settings
or
24HourClock
Phone Settings
>
>
S
>
>
To set your
Find it:
Time & Date >Time Zone
your time zone
Shortcut:
first letters of the city you want.
time zone
s>@ Settings
, then select a city in
Press keypad keys to enter the
themes
Use a phone theme to personalize
the look and sound of your phone.
Most themes include a wallpaper
image, screensaver image, and ringtones.
apply
a theme:
To
Find it:
To
browser, see your Quick Start Guide.
To
Find it:
the theme, then press
Note:
themes or custom themes you create.
s >@ Settings
download
delete
a theme using your phone’s
a theme:
s >@ Settings
You can delete only downloaded
:
>
Phone Settings
>
Themes
>
Themes
Options >Manage >Delete
>
> theme
, scroll to
customize
23

preview ringtones
To preview the ringtones on your phone, and
choose the ringtone a theme uses to notify
you of incoming calls:
Find it:
s >@ Settings
Edit >Ringtone >Ringtones
>
1
Press S up/down to scroll and listen
to each ringtone in turn.
2
Press s to select the highlighted
ringtone.
3
Press
Save
to save your selection.
>
Themes
>
Preloaded Ringtones
, press
Options
apply a photo as wallpaper
To use a photo as a background wallpaper
image in your home screen:
Find it:
Options >Edit
1
2
s >@ Settings
Press S right to select the
$
.
tab
Press S down to scroll to
then press
s
to select it.
>
Themes
, press
images
Wallpaper
,
3
Scroll to the photo you want to use,
Select
then press
Note:
installed memory card, select
>
Pictures
MyPhotos
memory card.
4
Press
Photos that you copy to your phone from
another device may not scale correctly
when applied as wallpaper images. To
resize a wallpaper photo
at the correct size:
Find it:
s >@ Settings
Options >Edit
1
Press S right to select the
$
tab
2
Press S down to scroll to
, then press s to select it.
Layout
3
Scroll to
4
Press
.
If the photo is stored on an
Back to My Files >Memory Card
to search for photos on the
Save
to save your selection.
so it displays
>
.
Fit-to-Screen
, then press
Save
to save the setting.
Themes
Back to
>
, press
images
Wallpaper
Select
.
24
customize

modify a theme
Find it:
s >@ Settings
the theme, press
1
Press S left/right to select the
sounds
tab[ or
2
Press S up/down to scroll to the
setting you want to change, then
s
press
3
Scroll to the image or sound file you
want, then select it.
4
Press
Wallpaper
The
in your home screen.
Screensaver
The
a period of inactivity.
Skins
set the look and feel of your phone’s
display.
reset
To
theme:
Find it:
press
.
Save
to save your theme changes.
appears as a background image
appears in the display after
the standard settings for a modified
s >@ Settings
Options >Manage >Reset
>
Options >Edit
images
>
Themes
tab$.
Themes
, scroll to
> theme,
To
restore
the default theme on your phone:
Find it:
Options >Manage >RestoretoDefault
s >@ Settings
>
Themes
, press
create a new theme
Find it:
Options >Create Theme
s >@ Settings
or
Create a Copy
>
Themes
, press
display appearance
To set your display
Find it:
Display Settings >Brightness
To save battery life, the
when you’re not using your phone. To set
the display timeout delay interval:
Find it:
Display Settings >Display Timeout
The display
when the display timeout delay interval is
reached. To turn the screensaver on or off:
Find it:
Display Settings >Screensaver >On
Tip:
screensaver.
s >@ Settings
s >@ Settings
s >@ Settings
To extend battery life, turn off the
brightness
screensaver
:
>
Phone Settings
display
turns off
>
Phone Settings
appears briefly
>
Phone Settings
or
Off
customize
>
>
>
25
answer options
You can use different ways to answer an
incoming call. To turn an answer option on
or off:
Find it:
In-Call Setup >Answer Options
Note:
a call.
s >@ Settings
option
Any Key
Answer
Answer by pressing any key.
You can always pressN to answer
>
Call Settings
>
26
customize

calls
turn off a call alert
Press the volume keys on the side of
your phone to turn off the ringer before
answering a call.
recent calls
Your phone keeps lists of incoming and
outgoing calls, even for calls that didn’t
connect. The most recent calls are listed
first. The oldest calls are deleted as new
calls are added.
Find it:
s >~ Office Tools
Shortcut:
go to the
1
2
Press N in the home screen to
Dialed Calls
list.
Press S left/right to select a call list:
All Calls, Dialed Calls, Answered Calls, Missed Calls
Frequent Calls
or
Press S up/down to scroll to a phone
number.
.
>
Recent Calls
Icons indicate if the call was incoming
+
outgoing
next to the icon indicates a connected call.
, or missed=. A check mark
•
To call the number, press N.
•
To check if a missed call left you
a voicemail message, see page 29.
•
To see call details (like time and
date), press
•
Press
operations on the number (send
a message, save to contacts),
or to set recent call options.
s
Options
to perform other
redial
1
Press N from the home screen to see
Dialed Calls
,
the
2
Scroll to the number you want to call,
then press
list.
N
.
-
,
.
calls
27

If you hear a
Call Failed
the number. When the call goes
through, your phone shows
and connects the call.
busy signal
, press N or
Retry
and see
to redial
Connected
return a call
Your phone keeps a record of your
unanswered calls, and shows
X
is the number of missed calls.
where
When you see the
s
press
the call you want to return, then press
XMissedCalls
to see the
Missed Calls
XMissedCalls
message,
list. Scroll to
N
Tip:
Want to know who’s calling without
even looking at your phone? To give one
of your contacts a special ringtone, see
page 49.
To show or hide your phone number for the
next outgoing call, enter the number you
want to call, then press
Hide ID
.
,
To show or hide
all calls:
Find it:
s >@ Settings
Dialing Setup >My Caller ID >All Calls
or
.
Hide ID
Options >Show ID
your phone number
>
Call Settings
>
Show ID
or
for
>
caller ID
Calling line identification (caller ID)
shows the phone number for an
incoming call.
Your phone shows the caller’s name and
picture when they’re stored in your contact
Incoming Call
list, or
isn’t available.
Note:
contacts stored on the SIM card.
28
when caller ID information
Picture IDs aren’t available for
calls
emergency calls
Your service provider programs one or more
emergency phone numbers, such as 911
or 112, that you can call at any time, even
when your phone is locked or the SIM card
is not inserted.
Note:
Check with your service provider,
as emergency numbers vary by country.
Your phone may not work in all locations,
and sometimes an emergency call cannot
 Loading...