

Page 1
UIDE
G
S
’
SER
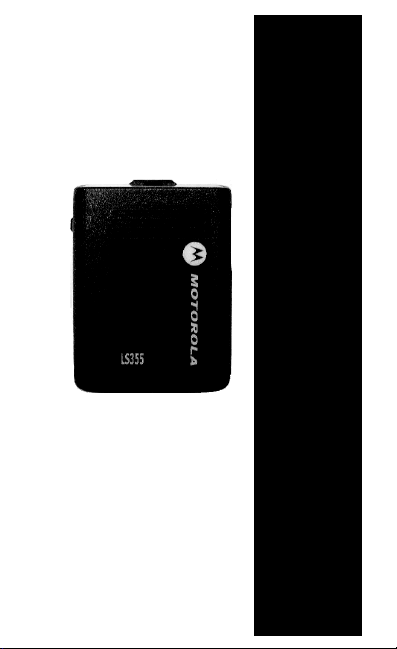
LS355
Numeric Pager
U
Page 2

Introduction. . . . . . . . . . . . . . . . . . . . 3
Capabilities. . . . . . . . . . . . . . . . . . . . 4
Features . . . . . . . . . . . . . . . . . . . . . . 5
Icons. . . . . . . . . . . . . . . . . . . . . . . . . 6
Battery Information. . . . . . . . . . . . . . 7
Turning Your Pager On/Off . . . . . . . 9
To turn your pager off . . . . . . . . 9
Setting Alert Mode . . . . . . . . . . . . . 10
Setting alert tone. . . . . . . . . . . 10
Setting Vibrate Mode. . . . . . . . 11
Setting Date and Time . . . . . . . . . . 12
Message Management. . . . . . . . . . 13
Viewing messages . . . . . . . . . 13
Deleting a single message . . . 14
Deleting all messages. . . . . . . 14
When pager memory is full . . . 15
Error Messages . . . . . . . . . . . . . . . 15
Caring For Your Pager. . . . . . . . . . 16
Cleaning . . . . . . . . . . . . . . . . . 16
Removing the Belt Clip . . . . . . 16
Warranty. . . . . . . . . . . . . . . . . . . . . 18
Intrinsically Safe Radio Information 21
Regulatory Agency Compliance. . . 23
2
Page 3

Introduction
Congratulations on purchasing the
LS355 Numeric Pager by Motorola®.
Your new pager is reliable, convenient,
and designed for easy operation.
This guide describes how to use and
care for your pager and provides helpful suggestions for first-time and experienced users.
3
Page 4

Capabilities
• Display: up to 12 digits at once.
Maximum 20 digits per message.
Message number and time message was received are displayed at
the end of message.
• Memory: Stores up to 16 messages.
• Simple to use: only one button acti-
vates all pager functions.
• Alert methods: vibration, tone, or
melody. 7 different alerting tones.
• Unread message indicator.
• Delete one or all messages.
• Warns that memory is full when
there are more than 16 messages.
• Time display: 12 or 24 hour mode.
• Built-in backup power: When chang-
ing the battery, the message and
time are stored in memory for up to
20 seconds. After 20 seconds, messages are lost and the time must be
reset.
4
Page 5

Features
LCD Display
Audio Alert
speaker
Battery Cover
Belt Clip
Alert LED
Power Off
position
Button
(slide or
M
N
press)
Vibration
(Mute)
position
Normal Alert
position
5
Page 6

Icons
12 3
5
1. In range
2. Date
3. Time
4. Message in memory indicator
5. Available Alert mode
6. Message continuation
6
4
6
Page 7

Battery Information
Your pager is designed to operate with
a single AA-size alkaline battery.
Always ensure that polarity (+ and -)
markings on battery match diagram
beside the battery compartment
when changing the battery.
Caution: Do not insert the battery
backwards or the messages stored in
memory will be erased.
Installing or replacing battery
1. Turn the pager off.
2. Unlock the battery door lock by sliding
the door latch away from the battery
door.
7
Page 8

3. Slide the battery door in the direction of
the arrow (toward the outer edge).
4. Lift the outer edge of the battery door
to open. Remove battery.
5. To install a new battery, reverse this
procedure, taking note of the positive
(+) and negative (-) markings.
8
Page 9

Turning Your Pager On/Off
1. Ensure battery is installed (see p. 8).
2. Slide the button to N or M position to
turn your pager on. The pager performs its self-test by emitting one short
beep, lighting the red LED, displaying
all icons and numbers, vibrating, and
illuminating its backlight for 2 seconds.
The pager then displays
speaker icon for 4 seconds, indicating
that it is ready to receive messages.
The pager then displays the time and
date, indicating that it is in standby
mode.
LS355 and the
LS355
To turn your pager off
Slide the button to the
The pager display turns off.
● (off) position.
9
Page 10

Setting Alert Mode
1. Slide the button to the N (Normal)
position to select Alert Mode. When
switched to Alert Mode, the pager
sounds a beep tone for 2 seconds, and
the speaker icon is displayed. You can
choose a beep or one of six melodies
as the alert tone.
Setting alert tone
2. Push and hold the button until the
pager displays:
SET TONE
3. Release the button, then push it again.
The beep alert sounds and the pager
displays:
BEEP
4. When you push the button again, the
first of 6 melody alerts activates and
the pager displays:
10
Page 11

5. When you push the button again, the
second melody alert activates and the
pager displays:
6. Continue pressing the button until you
hear a melody you want to use as the
alert tone.
7. When you have selected the desired
tone or melody, return the pager to
standby mode by either holding the
button for 2 seconds, or allowing the
pager to time out for 8 seconds.
Setting Vibrate Mode
1. Slide the button to the M (Mute)
position to select vibrate mode. When
in vibrate mode, the pager will vibrate
for 2 seconds. No alert tone will be
heard when a page is received.
11
Page 12

Setting Date and Time
1. Slide the button to M position.
2. Press and hold the button for
2 seconds. The pager displays:
12 HOU
24 HOU
3. Slide the button to the N position or
return it to M position to choose 12
hour or 24 hour mode.
4. After choosing 12 hour or 24 hour
mode, press the button again to set
time and date. Slide the button to the N
position to choose the number which
you want to change (the number you
choose will flash), then press the button to enter the number.
5. Slide the button between N and M position to shift the cursor.
6. To return to standby mode at any time
during the date and time setting procedure, allow the pager to time-out for 8
seconds.
12
Page 13

Message Management
Viewing messages
1. When a page is received, press and
release the button to display the
message.
2. Messages longer than 12 digits will
continue on a second screen. This is
indicated by the icon in the lower
right corner of the display.
3. The icon is displayed if there are
any unread messages.
4. When a message is received without
numeric data, the pager displays:.
TONE ONLY
5. The number of unread messages and
time received are indicated on the display.
6. Up to sixteen 20-digit messages can
be stored in the pager. To read other
messages, continue pressing the button to scroll through the messages.
13
Page 14

Deleting a single message
1. Display the message to be deleted by
pressing the button for 2 seconds.
2. Press and hold the button until the
pager displays:
3. Release the button. The pager displays
the next message. If there are no more
messages, the pager displays:
Deleting all messages
1. In standby mode, press and hold the
button until the pager displays:
2. Release the button. This deletes all
messages except unread messages.
3. The pager resumes standby mode.
14
Page 15

When pager memory is full
When there are 16 messages in memory, the pager displays:
If this happens, an incoming message
deletes the first (oldest) message
(read or unread) from memory. After
you scroll through all of your messages, the standby screen is displayed:
Error Messages
If a flashing error message occurs,
turn the pager off and back on. If the
error recurs or the pager needs to be
serviced or repaired, contact Motorola
Customer Care by calling
800-422-4210.
15
Page 16

Caring For Your Pager
Do not subject the pager to extreme
temperatures or moisture.
Cleaning
To clean smudges and grime from the
exterior of the housing, use a soft,
nonabrasive cloth moistened with a
mild soap and water solution. Rinse
the surface using a second cloth
moistened with clean water.
Do not immerse the pager in water.
Do not use any other cleaning solutions.
Removing the Belt Clip
1. Insert the pointed end of a non-metallic
item into the top end of the belt clip.
16
Page 17

2. Push down on the tab to release the
belt clip.
3. Slide the belt clip to separate it from the
pager.
To order a replacement belt clip (part
number 4280384P13), call Motorola
Customer Care at 1-800-422-4210.
17
Page 18

Warranty
ONE (1) YEAR STANDARD LIMITED WARRANTY AND PROVISIONS (U. S. ONLY)
Motorola warrants the pager against defects in
material and workmanship under normal use and
service for the period of time specified below. This
express warranty is extended by Motorola to the
original end user purchaser only and is not
assignable or transferable to any other party. This
warranty sets forth the full extent of MOTOROLA’s responsibilities regarding the pager.
Repair, replacement, or refund of the purchase
price, at MOTOROLA’s option, is the exclusive
remedy.
THIS WARRANTY IS GIVEN IN LIEU OF ALL
OTHER WARRANTIES, EXPRESS OR IMPLIED,
INCLUDING WITHOUT LIMITATION, IMPLIED
WARRANTIES OF MERCHANTABILITY AND
FITNESS FOR A PARTICULAR PURPOSE. THIS
WARRANTY IS LIMITED TO THE DURATION
CHOSEN. IN NO EVENT SHALL MOTOROLA
BE LIABLE FOR DAMAGES IN EXCESS OF
THE PURCHASE PRICE OF THE MOTOROLA
PAGER, FOR ANY LOSS OF USE, LOSS OF
TIME,
INCONVENIENCE, COMMERCIAL LOSS, LOST
PROFITS OR SAVINGS OR OTHER INCIDENTAL, SPECIAL OR CONSEQUENTIAL DAMAGES ARISING OUT OF THE USE OR
INABILITY TO USE SUCH PRODUCT, TO THE
FULL EXTENT SUCH MAY BE DISCLAIMED BY
LAW.
Motorola pagers are shipped from the factory with
a standard limited warranty of one (1) year on
parts and labor from date of purchase by the original end user purchaser, based on proof of purchase. In the event of a defect, malfunction, or
18
Page 19

failure to conform to specifications during the warranty period, Motorola, at its option, will either
repair, replace or refund the purchase price of the
pager. Repair, at Motorola’s option, may include
the replacement of parts or boards with functionally equivalent reconditioned or new parts or
boards. Replaced parts and boards are warranted for the balance of the original warranty
period. All par ts and boards removed in the
replacement process shall become the property
of Motorola. This warranty does not cover defects,
malfunctions, performance failures or damages to
the unit resulting from use in other than its normal
and customary manner, misuse, accident or
neglect, the use of non-conforming parts, or
improper alterations or repairs. This warranty
does not cover wear and tear on covers or housings, nor the coverage or range over which the
pager will receive signals.
For information on how to receive service on
Motorola pagers or covered accessories, call
1- 800-422-4210 or 1- 800- 522-5210 (TTY).
Pager warranty will be VOID if any of the following
conditions occur:
• Pagers that are incomplete such as those in
which boards or components are missing and/
or incompatible.
• Pagers whose serial numbers do not match on
the boards, or pagers in which the board serial
numbers don't match the housing.
• Pagers that have been opened by, or had work
performed by, anyone other than a Motorola
authorized pager ser vice center.
• Pagers received with non-conforming or non-
Motorola housings or parts.
Flat rate repair fees apply to pagers and accessories not covered under warranty.
19
Page 20

STATE LAW RIGHTS
SOME STATES DO NOT ALLOW THE EXCLU-
SION OR LIMITATION OF INCIDENTAL OR
CONSEQUENTIAL DAMAGES, OR LIMITATION
ON HOW LONG AN IMPLIED WARRANTY
LASTS, THEREFORE THE ABOVE LIMITATIONS OR EXCLUSIONS MAY NOT APPLY.
20
Page 21

Intrinsically Safe Radio Information
Anyone intending to use a radio in a location
where hazardous concentrations of flammable
materials exist (hazardous atmosphere) is
advised to become familiar with the subject of
intrinsic safety and with the National Electric
Code NFPA 70 (National Fire Protection Agency)
Article 500 (hazardous [classified] locations).
UL Approval labels are attached to the LS355
Pager to identify the unit as being UL Approved
for specified hazardous atmospheres. This label
specifies the hazardous Class/Division/Group
which will appear as follows:
RAD DEV FOR HAZ LOC
U
DlV 2, I, ABCD, II, FG
L
RAD DEV FOR HAZ LOC
U
L
EXIA: DIV 2, I, ABCD; II, FG
Substitution of components may impair the suitability for Division 2.
The following are the approved batteries to be
used for the UL Approved LS355 Pager: 1.5 AA
ALK, Duracell® MN2400 or Energizer® E92
21
Page 22

• Do not operate equipment in a hazardous
atmosphere unless it is a type especially
qualified (for example, UL Approved) for such
use. An explosion or fire may result.
• Do not operate a UL Approved Product in a
hazardous atmosphere if it has been physically
damaged (for example, cracked housing). An
explosion or fire may result.
• Do not replace or charge batteries in a
hazardous atmosphere. Contact sparking may
occur while installing or removing batteries
and cause an explosion or fire.
• Do not replace or change accessories in a
hazardous atmosphere. Contact sparking may
occur while installing or removing accessories
and cause an explosion or fire.
• Turn a radio off before removing or installing a
battery or accessory.
• Do not disassemble a UL Approved Product
unit in any way that exposes the internal
electrical circuits of the unit.
• Do not substitute components. This could void
the intrinsic safety rating.
WARNING: Substitution of components may
impair the suitability for Division 2.
WARNING
22
Page 23

Regulatory Agency Compliance
This device complies with part 15 of the FCC
Rules. Operation is subject to the following two
conditions: (1) This device may not cause harmful
interference, and (2) this device must accept any
interference received, including interference that
may cause undesired operation.
This equipment has been tested and found to
comply with the limits for a Class B digital device,
pursuant to part 15 of the FCC Rules. These limits are designed to provide reasonable protection
against harmful interference in a residential installation. This equipment generates, uses and can
radiate radio frequency energy and, if not
installed and used in accordance with the instructions, may cause harmful interference to radio
communications. However, there is no guarantee
that interference will not occur in a particular
installation.
If this equipment does cause harmful interference
to radio or television reception, which can be
determined by turning the equipment off and on,
the user is encouraged to try to correct the interference by one or more of the following measures:
• Reorient or relocate the receiving antenna.
• Increase the separation between the
equipment and receiver.
• Connect the equipment into an outlet on a
circuit different from that to which the receiver
is connected.
• Consult the dealer or an experienced radio/TV
technician for help.
23
Page 24

Canada:
109Q-3GRS5961
Customer Care Services
1307 E. Algonquin Road - 1st floor
Schaumburg, IL 60196 USA
Product Services Technical Support
Motorola and the stylized M logo are
registered in the US Patent & Trademark office. All other product or service
names are the property of their respective owners. © Motorola, Inc. 2003
800-909-5153
6880309P61-O
 Loading...