

Page 1

Welcome
Welcome to the world of Motorola digital wireless
communications from a global leader in
communications technology! We are pleased you
have chosen the Motorola Talkabout cellular phone
to keep you connected with ease.
All Motorola phones are designed and
manufactured to meet Motorola’s rigorous
specifications and world-class quality standards.
During development, our testing team took the
Motorola Talkabout through rigorous durability tests
including temperature, humidity, shock, dust,
vibration, and drop tests—and the phone still
worked!
We are confident that you and your callers will find
your wireless phone to be a convenient and reliable
way to stay in touch. Thank you for choosing
Motorola Talkabout, and enjoy your new phone!
Page 2

Contents
Welcome
Safety Information
Overview
Package Content Options . . . . . . . . . . . . . . . . 11
Phone Overview . . . . . . . . . . . . . . . . . . . . . . . . 12
Phone Diagram . . . . . . . . . . . . . . . . . . . . . . . . 14
Understanding the Guide . . . . . . . . . . . . . . . . 15
Using the Battery
Storing and Disposing of Batteries . . . . . . . . . 16
Removing and Attaching Battery Covers . . . . 17
Installing and Removing Batteries . . . . . . . . . . 18
Checking Battery Levels . . . . . . . . . . . . . . . . . 20
Charging Batteries . . . . . . . . . . . . . . . . . . . . . . 21
Using the Phone
Turning the Phone On and Off . . . . . . . . . . . . . 26
Reading the Indicators . . . . . . . . . . . . . . . . . . 27
Standby Mode . . . . . . . . . . . . . . . . . . . . . . . . . 30
Storing Your Phone in Its Holster . . . . . . . . . . . 30
Using the Smart Button . . . . . . . . . . . . . . . . . . 30
Viewing Your Phone Number . . . . . . . . . . . . . . 31
Placing a Call . . . . . . . . . . . . . . . . . . . . . . . . . . 32
Ending a Call . . . . . . . . . . . . . . . . . . . . . . . . . . 33
Receiving a Call . . . . . . . . . . . . . . . . . . . . . . . . 33
Redialing a Number . . . . . . . . . . . . . . . . . . . . . 34
Controlling Volume . . . . . . . . . . . . . . . . . . . . . . 35
Using Phone Memory
Using Your Phone’s Built-in Phone Book . . . . . 37
Storing Names and Numbers . . . . . . . . . . . . . 38
Recalling an Entry by Name . . . . . . . . . . . . . . 41
Recalling an Entry by Memory Location . . . . . 41
Clearing a Phone Memory Entry . . . . . . . . . . . 42
Shortcuts for Recalling Phone Book Entries . . 42
Making Notes on the Scratchpad . . . . . . . . . . 43
. . . . . . . . . . . . . . . . . . . . . . . . . . . . . . . . 1
. . . . . . . . . . . . . . . . . . . . . . . . 6
. . . . . . . . . . . . . . . . . . . . . . . . . . . . . . . 11
. . . . . . . . . . . . . . . . . . . . . . . . 16
. . . . . . . . . . . . . . . . . . . . . . . . . 25
. . . . . . . . . . . . . . . . . . . . 36
2
Page 3

Using the Menu System
. . . . . . . . . . . . . . . . . . .44
Introducing the Menu Features . . . . . . . . . . . . 44
Navigating the Menu . . . . . . . . . . . . . . . . . . . . 45
Road Maps . . . . . . . . . . . . . . . . . . . . . . . . . . . .45
Managing Recent Calls
. . . . . . . . . . . . . . . . . . .46
Road Map for Recent Calls . . . . . . . . . . . . . . . 47
About Recent Calls . . . . . . . . . . . . . . . . . . . . . 47
Reviewing Received Call . . . . . . . . . . . . . . . . . 49
Reviewing Dialed Calls . . . . . . . . . . . . . . . . . . 50
Clearing Caller Line ID . . . . . . . . . . . . . . . . . . . 51
Managing the Phone Book
. . . . . . . . . . . . . . . .52
Road Map for Phone Book . . . . . . . . . . . . . . . . 53
Recalling an Entry by Name . . . . . . . . . . . . . .54
Recalling an Entry by Location . . . . . . . . . . . . 55
Storing with the Menu . . . . . . . . . . . . . . . . . . .55
Storing and Placing Numbers with
Pause Dialing . . . . . . . . . . . . . . . . . . . . . . . . . .56
Storing and Placing Numbers for
Calling Card Information . . . . . . . . . . . . . . . . .58
Editing a Memory Location . . . . . . . . . . . . . . . 62
Editing an Email Address . . . . . . . . . . . . . . . . .64
Assigning an Individual Ring Style to
a Phone Book Entry . . . . . . . . . . . . . . . . . . . . .65
Setting the Time and Date
. . . . . . . . . . . . . . . . .66
Road Map for Time and Date . . . . . . . . . . . . . .67
Setting the Time . . . . . . . . . . . . . . . . . . . . . . . . 68
Setting the Date . . . . . . . . . . . . . . . . . . . . . . . .69
Changing Your Date Format . . . . . . . . . . . . . .69
Changing the Time Format . . . . . . . . . . . . . . .70
Turning Autoupdate On and Off . . . . . . . . . . . . 70
Timing Y our Calls
. . . . . . . . . . . . . . . . . . . . . . . .71
Road Map for Call Timers . . . . . . . . . . . . . . . . 72
Viewing Call Timers . . . . . . . . . . . . . . . . . . . . .73
Displaying the Individual Timer
Automatically . . . . . . . . . . . . . . . . . . . . . . . . . .75
Setting the One-Minute Audible Timer . . . . . . . 75
Setting the Repeating Audible Timer . . . . . . . .76
Setting the Single Timer . . . . . . . . . . . . . . . . . .77
3
Page 4

Adjusting T one Controls
. . . . . . . . . . . . . . . . . . 78
Road Map for Tone Controls . . . . . . . . . . . . . . 79
Selecting Call Alert Type . . . . . . . . . . . . . . . . . 80
Selecting Message Alert Type . . . . . . . . . . . . . 81
Selecting a Ring Style . . . . . . . . . . . . . . . . . . . 82
Turning Keypad Tones On and Off . . . . . . . . . 83
Turning Scratchpad Tones On and Off . . . . . . 84
Using Lock/Security Features
. . . . . . . . . . . . . . 85
Road Map for Lock Security . . . . . . . . . . . . . . 86
Activating Voice Privacy . . . . . . . . . . . . . . . . . 87
Locking/Unlocking Your Phone . . . . . . . . . . . . 88
Activating Priority Calling . . . . . . . . . . . . . . . . . 89
Viewing and Changing the Lock Code . . . . . . 90
Restricting Call Placement . . . . . . . . . . . . . . . 91
Resetting All Options . . . . . . . . . . . . . . . . . . . . 94
Clearing All Stored Information . . . . . . . . . . . . 95
A-Key Entry . . . . . . . . . . . . . . . . . . . . . . . . . . . 95
Customizing Phone Options
. . . . . . . . . . . . . . 96
Road Map for Phone Options . . . . . . . . . . . . . 97
Activating Pager Mode . . . . . . . . . . . . . . . . . . 98
Viewing Your Own Number . . . . . . . . . . . . . . . 98
Switching Between Numbers . . . . . . . . . . . . . 99
Reviewing Feature Settings . . . . . . . . . . . . . . 100
Activating Automatic Hands-Free . . . . . . . . . 101
Activating Multiple Key Answer . . . . . . . . . . . 102
Deactivating Open to Answer . . . . . . . . . . . . 102
Activating Automatic Answer . . . . . . . . . . . . . 103
Selecting Battery Options—Status Light . . . . 104
Displaying System Identification . . . . . . . . . . 104
Selecting a Language . . . . . . . . . . . . . . . . . . 105
Selecting a Network
. . . . . . . . . . . . . . . . . . . . . 106
Road Map for Selecting a Network . . . . . . . . 107
Performing a Manual Network Search . . . . . . 108
Selecting a New Network . . . . . . . . . . . . . . . 109
Selecting a Public Network . . . . . . . . . . . . . . 110
Specifying an Automatic Search . . . . . . . . . . 111
Viewing All Non-Public Networks . . . . . . . . . 111
4
Page 5

Using the Message Center
. . . . . . . . . . . . . . .112
Road Map for Message Center . . . . . . . . . . .113
Voice Mail Alerts . . . . . . . . . . . . . . . . . . . . . . .114
Dialing Voice Mail . . . . . . . . . . . . . . . . . . . . . .114
Reading and Managing Text Messages . . . . .115
Sending Text Messages . . . . . . . . . . . . . . . . .124
Sending, Creating, Editing, and
Deleting Quick Notes . . . . . . . . . . . . . . . . . . .127
Reading and Sending Draft Messages . . . . .130
Reviewing Messages in Your Outbox . . . . . . .131
Deleting Unsent Messages from
the Outbox . . . . . . . . . . . . . . . . . . . . . . . . . . .135
Editing the Voice Mail Number . . . . . . . . . . . .136
Reference Information
. . . . . . . . . . . . . . . . . . .137
Accessory Options . . . . . . . . . . . . . . . . . . . . .137
Troubleshooting . . . . . . . . . . . . . . . . . . . . . . .141
Glossary
Patent Information
Index
. . . . . . . . . . . . . . . . . . . . . . . . . . . . . . .143
. . . . . . . . . . . . . . . . . . . . . .157
. . . . . . . . . . . . . . . . . . . . . . . . . . . . . . . . . .160
5
Page 6

Safety Information
Important:
wireless handheld phone.
Read this information before using your
Exposure to Radio Frequency Signals
Your wireless handheld portable telephone is a low
power radio transmitter and receiver . When it is ON,
it receives and also sends out radio frequency (RF)
signals.
In August 1996, The Federal Communications
Commission (FCC) adopted RF exposure
guidelines with safety levels for handheld wireless
phones. Those guidelines are consistent with safety
standards previously set by both U.S. and
international standards bodies:
•
American National Standards Institute (ANSI)
IEEE. C95. 1-1992
•
National Council on Radiation Protection and
Measurement (NCRP). Report 86
•
International Commission on Non-Ionizing
Radiation Protection (ICNIRP) 1996
•
Ministry of Health (Canada), Safety Code 6
Those standards were based on comprehensive
and periodic evaluations of the relevant scientific
literature. For example, over 120 scientists,
engineers, and physicians from universities,
government health agencies, and industry
reviewed the available body of research to develop
the ANSI Standard (C95.1).
The design of your phone complies with the FCC
guidelines (and those standards). For additional
information concerning exposure to radio
frequency signals, see the statement by the FDA at
the end of this user guide.
6
Page 7

To maintain compliance with FCC RF exposure
guidelines, if you wear a handset on your body , use
the Motorola-supplied or approved carrying case,
holster, or other body-worn accessory.
If you do not use a body-worn accessory, ensure
the antenna is at least one inch (2.5 centimeters)
from your body when transmitting. Use of nonMotorola accessories may violate FCC RF exposure
guidelines.
Antenna Care
Use only the supplied or an approved replacement
antenna. Unauthorized antennas, modifications, or
attachments could damage the phone andmay
violate FCC regulations.
Phone Operation
Normal Operation
Hold the phone as you would any other telephone,
with the antenna pointed up and over your
shoulder.
Tips on Efficient Operation
Observe the following guidelines to operate your
phone most efficiently.
•
Extend your antenna fully, if applicable.
Do not touch the antenna unnecessarily
•
when the phone is in use. Contact with the
antenna affects call quality and may cause
the phone to operate at a higher power level
than otherwise needed.
Batteries
Caution:
injury, or burns if a conductive material, such as
jewelry, keys or beaded chains, touches exposed
terminals. The material may complete an electrical
circuit and become quite hot. To protect against
such unwanted current drain, exercise care in
handling any charged battery, particularly when
All batteries can cause property damage,
7
Page 8

placing it inside your pocket, purse, or other
container with metal objects. When the battery is
detached from the phone, your batteries are
packed with a protective battery cover; please use
this cover for storing your batteries when not in use.
Driving
Check the laws and regulations on the use of
wireless telephones in the areas where you drive.
Always obey them. Observe the following
guidelines when using your phone while driving.
•
Give full attention to driving--driving safely is
your first responsibility.
•
Use hands-free phone operation, if available.
Pull off the road and park before making or
•
answering a call if driving conditions so
require.
Electronic Devices
Most modern electronic equipment is shielded from
RF signals. However , certain equipment may not be
shielded against the RF signals from your wireless
phone.
Pacemakers
The Health Industry Manufacturers Association
recommends that a minimum separation of six
inches (6") be maintained between a handheld
wireless phone and a pacemaker to avoid potential
interference with the pacemaker. These
recommendations are consistent with the
independent research by and recommendations of
Wireless Technology Research.
Persons with pacemakers:
•
should ALWAYS keep the phone more than
six inches from their pacemaker when the
phone is turned ON
•
8
Page 9

•
should use the ear opposite the pacemaker
to minimize the potential for interference
•
should turn the phone OFF immediately if you
have any reason to suspect that interference
is taking place
Hearing Aids
Some digital wireless phones may interfere with
some hearing aids. In the event of such
interference, you may want to consult your hearing
aid manufacturer to discuss alternatives.
Other Medical Devices
If you use any other personal medical device,
consult the manufacturer of your device to
determine if it is adequately shielded from external
RF energy. Your physician may be able to assist
you in obtaining this information.
Turn your phone OFF in health care facilities when
any regulations posted in these areas instruct you
to do so. Hospitals or health care facilities may be
using equipment that could be sensitive to external
RF energy.
Vehicles
RF signals may affect improperly installed or
inadequately shielded electronic systems in motor
vehicles. Check with the manufacturer or its
representative regarding your vehicle. You should
also consult the manufacturer of any equipment
that has been added to your vehicle.
Posted Facilities
Turn your phone OFF in any facility where posted
notices so require.
9
Page 10

Aircraft
Switch OFF your phone before boarding an aircraft.
Airline regulations prohibit using your phone while
in the air. Check and comply with the policy of your
airline regarding the use of your phone while the
aircraft is on the ground.
Blasting Areas
To avoid interfering with blasting operations, turn
your phone OFF when in a "blasting area" or in
areas posted: "Turn off two-way radio." Obey all
signs and instructions.
Potentially Explosive Atmospheres
Turn your phone OFF, do not remove your battery
when you are in any area with a potentially
explosive atmosphere, and obey all signs and
instructions. Sparks from your battery in such areas
could cause an explosion or fire resulting in bodily
injury or even death.
Areas with a potentially explosive atmosphere are
often but not always clearly marked. They include:
fueling areas such as gasoline stations; below deck
on boats; fuel or chemical transfer or storage
facilities; areas where fuel odors are present (for
example, if a gas/propane leak occurs in a car or
home); areas where the air contains chemicals or
particles, such as grain, dust, or metal powders;
and any other area where you normally would be
advised to turn off your vehicle engine.
10
For Vehicles Equipped with an Air Bag
An air bag inflates with great force. Do NOT place
objects, including both installed or portable
wireless equipment, in the area over the air bag or
in the air bag deployment area. If in-vehicle
wireless equipment is improperly installed and the
air bag inflates, serious injury could result.
US021600
Page 11
Overview
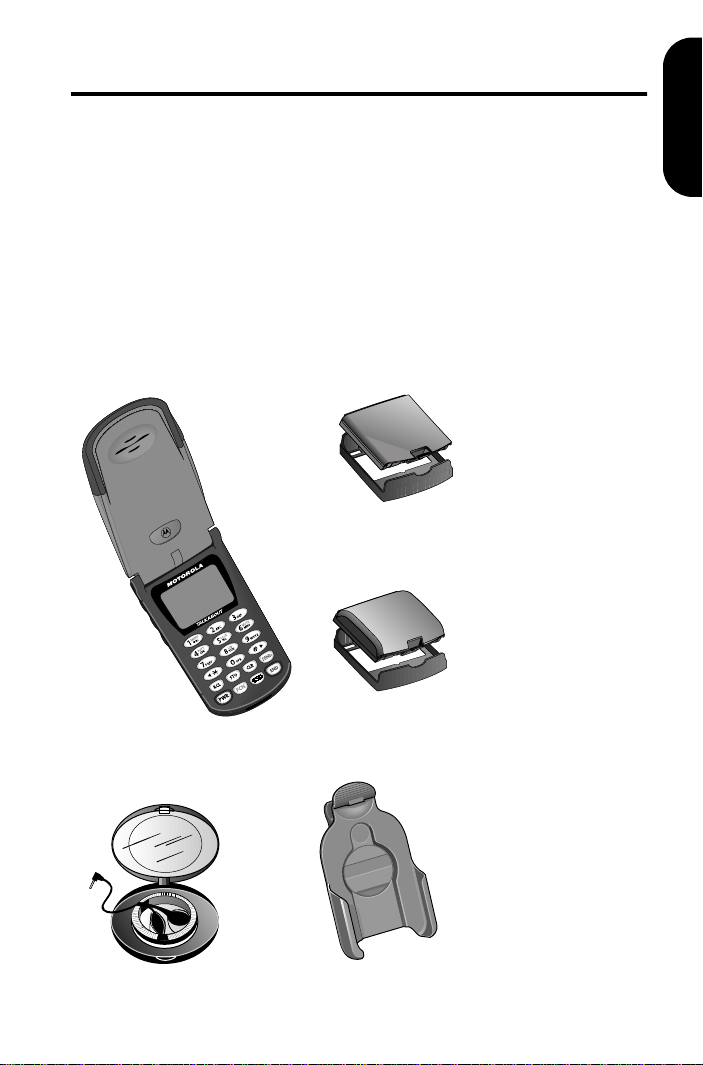
Package Content Options
Your digital cellular phone typically comes
equipped with a transformer charger and at least
one battery. A large selection of accessory options
can customize your wireless package for maximum
performance and portability. Below is a sampling of
the different package options.
Note:
Your phone and accessories may not look
exactly as pictured.
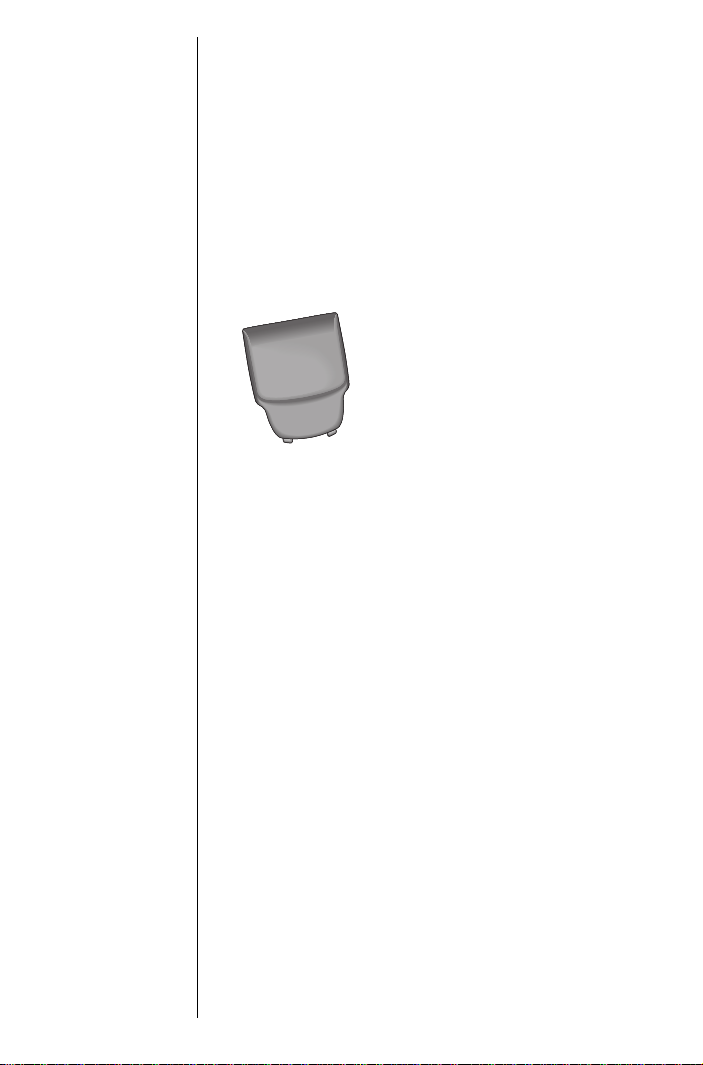
Slim Battery with
Battery Cover
Overview
Cellular Telephone
Headset
Extra Capacity Battery
with Battery Cover
Holster
11
Page 12
12
Phone Overview
See “Phone Diagram” on page 14 for an illustration
of the components described below.
Earpiece
Headset Jack—Connects an optional headset.
Power/Status Indicator—Provides status
information on the current type of service and
message status.
Signal Strength Indicator—Indicates the strength
of your phone’s connection with the local cellular
system.
> and < Volume Keys—The upper and lower
volume keys can adjust keypad, earpiece, and
ringer volume. After pressing the Smart Button, the
volume keys also scroll through memory entries
and menu features.
—Ultra-compact phone speaker.
Page 13

= Smart Button—Use the Smart Button to recall
information from memory, place and end calls,
select menu features, and toggle features on and
off. The symbol
Smart Button.
Icon Indicators—Displays various indicators such
as the digital, in use, in building, no service, SMS
message waiting, and voice message waiting
indicators.
Battery Level Indicator—Show the amount of
charge remaining in your battery.
VibraCall
status of the ringer and VibraCall
Function Keys
A in your display represents the
®
Alert Indicator—Indicates the on/off
®
alert.
r—Recalls phone numbers from memory.
s—Stores phone numbers into memory.
c—Clears characters from the screen.
S—Places or answers calls.
P—Turns the phone on and off.
f—Acts as a “shift” key to access the secondary
functions of other keys.
Overview
m Message Center Button—Allows access to
digital messages and voice mail messages.
e—Ends phone calls.
* and #—Can be used to scroll through
memory entries and menu features.
Microphone—Positioned for convenient
conversation.
Accessory Connector Port—Provides the
connections for an external power supply and
vehicular and optional accessories.
13
Page 14

Phone Diagram
Clock
14
Page 15

Understanding the Guide
Key Presses
Key presses are represented in this guide using
symbols so that you may locate and use the
required sequence quickly. A sequence of key
presses may be shown as follows:
f 0 7 c
This means you should press f followed by 0,
7, and then c, in sequence, not
simultaneously.
Prompts and Messages
Your phone responds to key presses by displaying
either a prompt that guides you to the next action or
a message confirming that your action is complete.
Prompts and messages are represented in this
guide in LCD style, for example Reset Timer.
Short Cuts and Tips
In the margins of your guide are short cuts and
useful hints and ways to improve your phone’s
performance. These are especially helpful for
experienced Motorola users, who can find many of
the same key sequences used with other Motorola
models.
Overview
15
Page 16

Using the Battery
Y our digital phone uses Lithium Ion (LiIon) batteries.
Batteries are available in Slim and Extra Capacity
sizes.
In this chapter, you will learn how to:
• store and dispose of batteries
• remove and attach the cover to the battery
• install and remove batteries
• interpret battery talk-time and standby-time
• check the battery level
• charge batteries using the internal charger
and the desktop charger
Storing and Disposing of Batteries
To prolong the life of your batteries, do not expose
them to temperatures below -10°C (14°F) or above
45°C (113°F). Always take your phone with you
when you leave your car.
16
To dispose of batteries, check with your local
recycling center for a battery recycler near you.
Never dispose of batteries in a fire.
Caution: To prevent injuries or burns, do not allow
metal objects to contact or short-circuit the battery
terminals.
Page 17
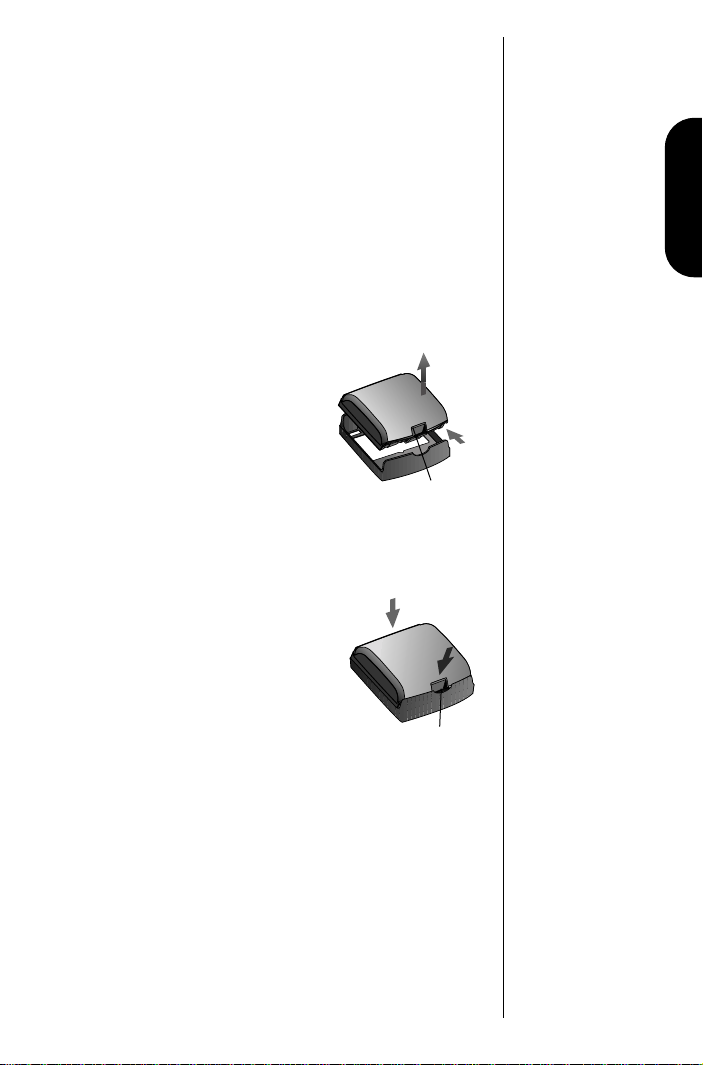
Removing and Attaching Battery Covers
Your phone’s batteries are shipped uncharged and
fitted with protective covers. Before you install the
batteries, remove these covers, and save them for
storing unused batteries. The covers prevent metal
objects from contacting the battery terminals,
reducing the risk of injury or damage from a battery
short circuit.
Removing the Battery Cover
1. Press the release latch.
2. Rotate the battery
upward and lift it out of
the cover.
Attaching the Battery
Cover
1. Lower the edge of the
battery opposite the
release latch into the
cover.
2.
Release Latch
1.
2.
Batteries
1.
2. Drop the side with the
release latch down until
the latch clicks into
place.
Release Latch
17
Page 18
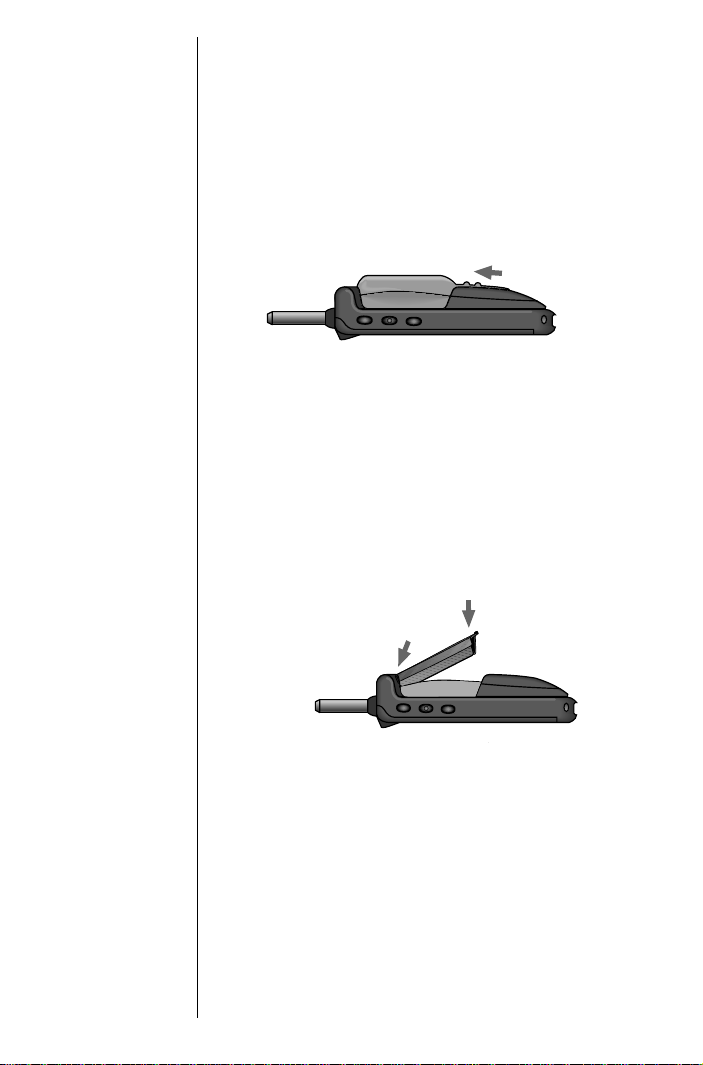
Installing and Removing Batteries
Installing the Battery
1. Remove the interchangeable cover:
a. To loosen the cover, place your fingers on
the ridges at the bottom of the cover and
push forward.
b. Lift the cover away from the phone.
2. Insert the battery:
a. Holding the battery with the flat side
down, insert the top end of the battery
into the top of the compartment.
b. Push the other end of the battery (the end
with the release latch) down until it snaps
into place.
b.
a .
18
Page 19

3. Replace the interchangeable cover:
a. Insert the tabs at
the lower end of
the cover into the
slots near the
lower end of the
phone.
b. Slide the top of
the cover down until it snaps into place.
Removing the Battery
1. Press P to turn your phone off.
2. Remove the interchangeable cover:
a. To loosen the cover, place your fingers on
the ridges at the bottom of the cover and
push the cover forward.
b. Lift the cover away from the phone.
3. Press the battery release latch back, and lift
the battery out.
Batteries
19
Page 20
Y
High
X
Low
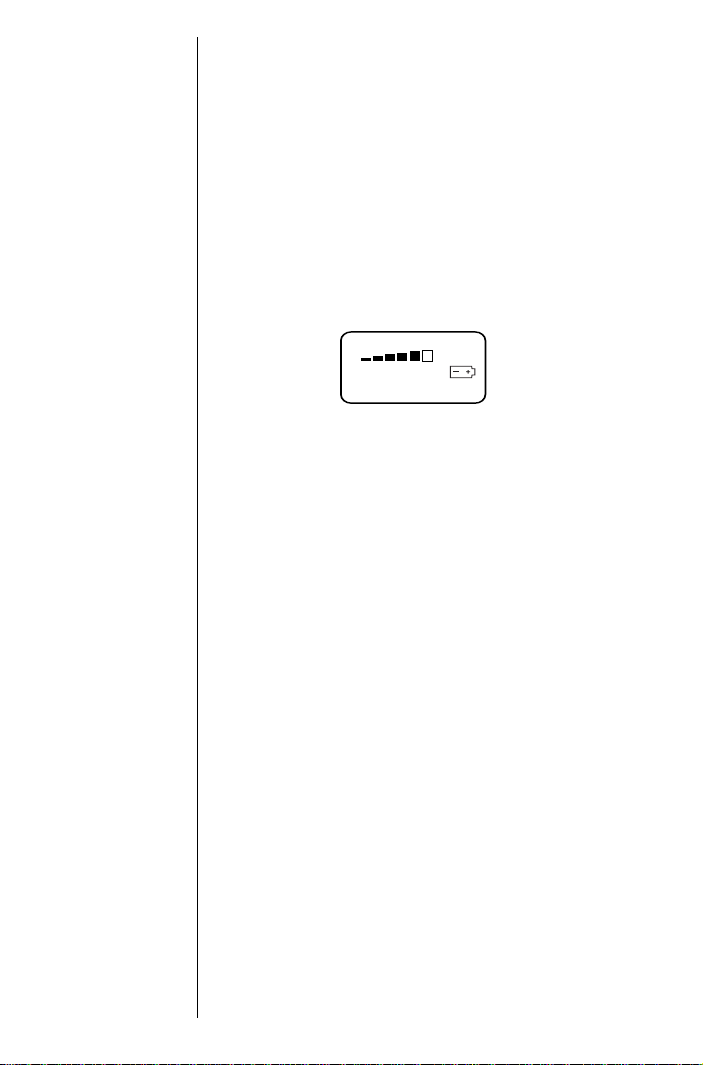
Checking Battery Levels
Battery Level Indicator
The three bar segments on your phone’s Battery
Level Indicator display the amount of charge
remaining in your battery. The more segments
visible, the greater the charge.
For a detailed battery level reading:
Press
f 4.
The following is displayed:
Main
The more segments filled on the battery
gauge, the greater the charge.
Low Battery Warning
When the battery level is low and only a few
minutes of talk-time remain, your phone signals you
in three ways:
• Low Battery appears in the first line of the
display.
• No bar segments are highlighted.
• A short tone plays periodically.
20
To confirm low battery signals:
Press
f 4.
Page 21
Power Status Messages
You may also see one of the following messages:
Main
Charging
Main
Main battery fitted; phone is operating
from main battery.
Main battery fitted; main battery is
being charged.
Charging Batteries
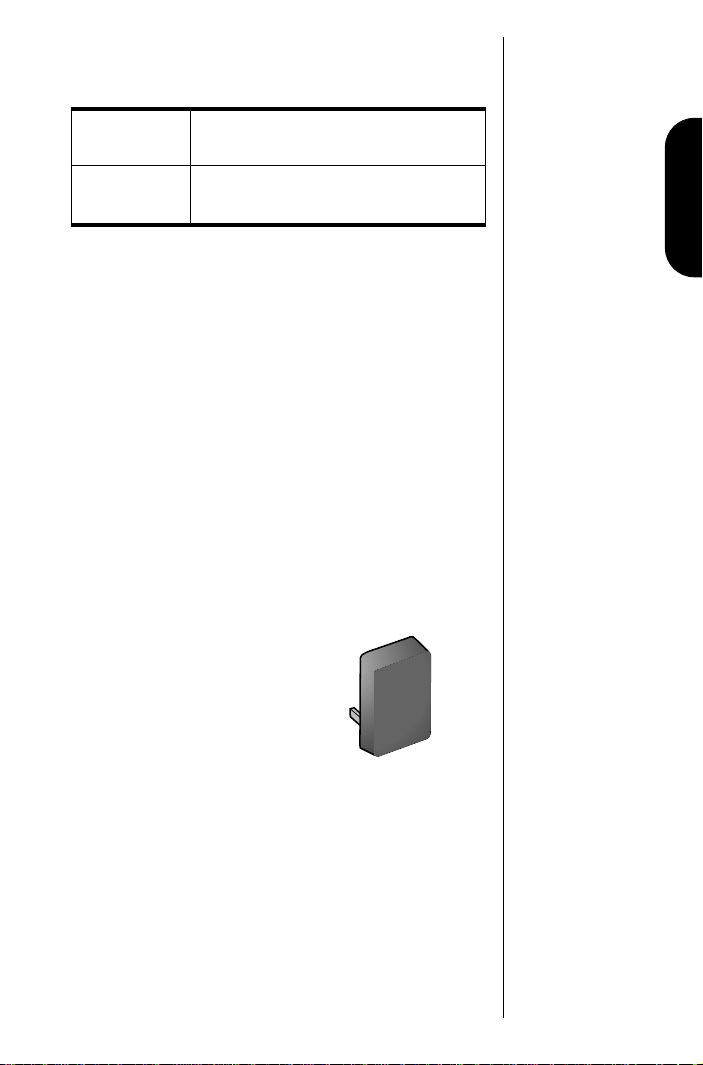
Using the Internal Charger
Your phone has a built-in battery charger. Using
either the AC or vehicle power adapter, you can
plug the handset directly into a power source to
charge any attached battery.
To charge:
1. Plug the AC adapter or vehicle power
adapter into the accessory connector on the
bottom of your phone as shown, with the
release tab facing up.
2. Plug the power adapter into a 110V AC
electrical outlet.
Tip:
You can still
place and
answer calls
while using
either the
internal
charger or the
vehicle power
adapter.
Remember that
talking on the
phone requires
energy, so
charging takes
more time. To
place the
phone in
charger-only
mode, turn off
the phone by
pressing
once.
P
Batteries
or
Plug the vehicle power adapter into the
power adapter plug in the vehicle.
In both cases, a beep-tone sounds, and the
battery icon flashes.
21
Page 22
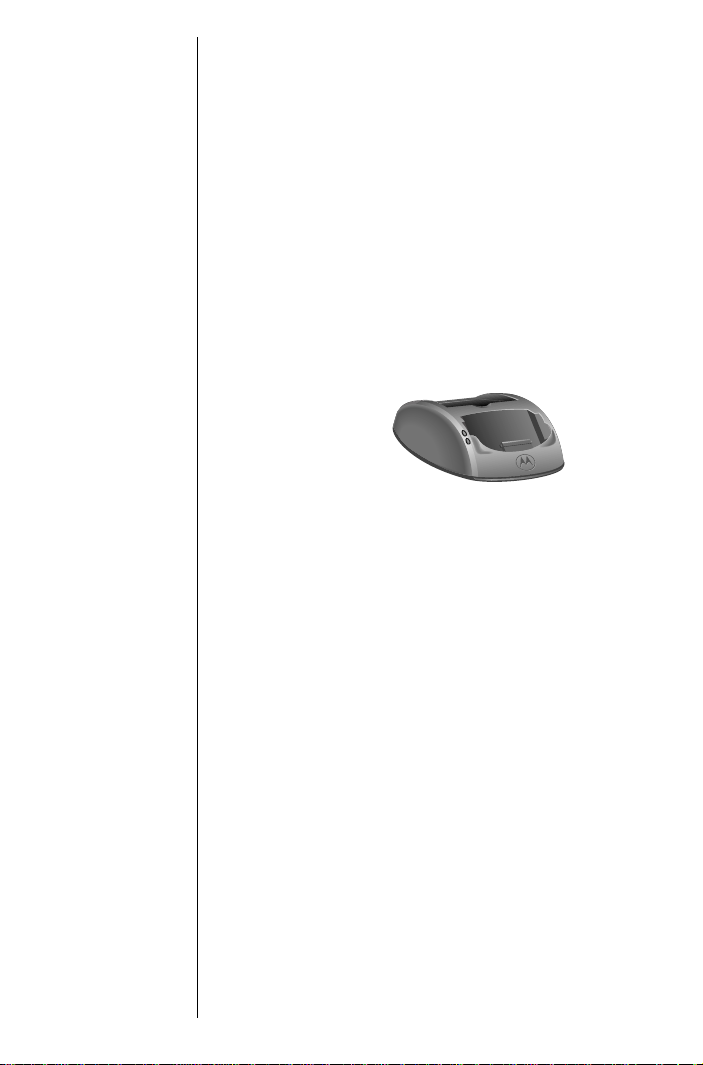
Using the Desktop Charger
You can use the desktop charger to charge
batteries while they are attached to your phone, or
you can charge a main battery separately.
To charge:
1. Plug the AC adapter into the back of the
charger, release tab facing up.
2. Plug the other end of the adapter into an AC
wall socket.
3. With battery attached, place the phone into
the charger’s front pocket. Optionally, place
an additional battery into the charger’s back
pocket.
22
Note: When the phone is charging, the battery level
indicator flashes. When the battery is fully charged,
this icon stops flashing. If your phone cannot
charge the battery, this indicator does not appear.
Page 23

Battery Charging Tips
To ensure that you enjoy maximum battery life and
use your battery to its fullest capacity:
• Always use Motorola approved battery
chargers.
• For the best results, charge Li-Ion batteries
using the E•P™ Desktop Charger or your
phone’s internal charger.
• The battery should be at or near room
temperature when charging.
• New batteries or batteries that have been
stored for long periods of time may not rapid
charge properly. In these instances, the
battery requires an overnight charge.
• When you don’t intend to use a battery for a
while, store it uncharged in a cool, dark, dry
place, such as a refrigerator.
• Over extended periods of time, batteries
gradually wear down and require longer
charging times. This is normal. If you charge
your battery regularly and notice a decrease
in talk-time or an increase in charging time,
then it is probably time to purchase a new
battery.
Batteries
• Battery life depends on the battery used,
network configuration, signal strength, and
the features selected. Talking or using
features on the phone uses more power than
leaving it idle.
• Your phone operates more efficiently in
digital mode than in analog mode.
23
Page 24

Quick Change Power Source
The quick change feature enables you to switch
power sources while a call is in progress without
losing the call. If you hear a low-battery warning
while you are in a call, plug in the vehicle power
adapter or AC adapter.
24
Page 25

Using the Phone
This chapter introduces you to the basic features of
your phone. You will learn how to:
• turn the phone on and off
• read the indicators
• store your phone in its holster
• view your own phone number
• place, end, and receive a call
• use the Smart Button
• redial a number
• control the volume
Using the Phone
25
Page 26

Turning the Phone On and Off
1. Open your phone to expose the keypad.
2. To turn the phone on, press and hold
until the display appears and you hear an
audible alert.
3. Press and hold
off. Powering Off is displayed, and you hear
an audible alert.
P again to turn the phone
P
What Y ou Will See
When you turn on your digital phone, it performs a
self-test to let you know it is operational. When the
test is completed, the display shows:
• one of several possible greetings, such as
one of the following:
- the name of your Service Provider
- an indication of local or non-local cover-
age area
- Motorola
- Motorola Talkabout
• your phone number
• the Digital icon
26
Page 27

Reading the Indicators
B
1
09:55
on
2
3 4567
8
9
10
Signal Strength Indicator (1)
The Signal Strength Indicator (SSI) indicates the
strength of your phone’s connection with the local
cellular system. A strong signal increases your
chances of placing and receiving calls. Weak
signal strength can occur in a fringe area of the
cellular system. Buildings, tunnels, and bad
weather can block or interfere with reception.
Digital Indicator (2)
The digital indicator displays if you are receiving a
digital signal.
In Use Indicator (3)
The In Use (IU) Indicator appears when a call is in
progress.
In-Building Indicator (4)
The In-Building Indicator lights when the phone
accesses an In-Building Cellular System or other
non-public system.
Using the Phone
Strong
C
Weak
D
I
E
No Service Indicator (5)
If you travel beyond the range of a cellular system,
the No Service Indicator appears to let you know
that calls cannot be placed or received from your
location.
N
27
Page 28

M
O
Y
High
X
Low
SMS Message Waiting Indicator (6)
The Short Message Service (SMS) Message
Waiting Indicator is displayed when the phone
receives a message. (This is an optional, network
and subscription-dependent feature that is not
available in all areas.)
Voice Message Waiting Indicator(7)
The Voice Message Waiting Indicator is displayed
when your Voicemail has received a message. (This
is an optional, network and subscription-dependent
feature that is not available in all areas.)
Battery Level Indicator (8)
The three bar segments on the Battery Level
Indicator show the amount of charge remaining in
your battery. The more segments you see, the
greater the charge. The phone alerts you to a low
charge in three ways:
• No bar segments are highlighted.
• Low Battery is displayed.
• A short tone plays periodically.
Alphanumeric Display (9)
The middle area of the display shows input from the
keypad, information recalled from memory, and
other messages.
28
VibraCall® Alert Indicator (10)
One of the VibraCall® alert combinations appears
in the display:
W VibraCall
off, and the VibraCall
V Vibrate then ring—Both your phone’s ringer
and the VibraCall
J Ring only—Your phone’s ringer is turned on
and the VibraCall
K Ring and vibrate off—Both your phone’s
ringer and the VibraCall
®
on—Your phone’s ringer is turned
®
alert is on.
®
alert are on.
®
alert is turned off.
®
alert are turned off.
Page 29

Power/Status Indicator
While wearing your phone in its holster or while
carrying it, you can check the Power/Status
indicator on top of the phone for status information
on your current type of service and message status.
The messages can include voice mails and Short
Message Services (SMS) messages, or the receipt
of recent calls. (This is an optional, network and
subscription-dependent feature that is not available
in all areas.)
During wake-up and while the phone is “ringing,”
the Power/Status Indicator flashes alternating red
and green. Otherwise, if the flip is closed and the
Status Light setting in the Phone Options menu is
set to On, then the Power/Status Indicator flashes
according to the following chart. (See “Selecting
Battery Options—Status Light” on page 104 for
information on the status indicator.)
Using the Phone
First
Flash
Green
Yellow
Red
Second
Flash
Green
Red
Yellow Roaming
Red
Off
Red
Service Condition
Service in
home
system
(service in
non-home
system)
No service
No message
Message
waiting
No message
Message
waiting
No message
Message
waiting
Note: The Power/Status Indicator is off when the
phone is open or in charger-only mode, or when the
status light feature is turned off.
29
Page 30

Standby Mode
To conserve energy, your phone may turn off its
lights when in standby mode. The display backlight
comes back on the next time you press a key or
open the phone.
Storing Your Phone in Its Holster
To slip your phone into its holster, make sure the
battery is facing the outside of the holster. Then clip
the holster onto a belt, purse or briefcase.
Notes:
• For body-worn use, keep the antenna at least
one inch from your body when transmitting.
• The holster has been designed for your
convenience and is not meant to secure your
phone under all circumstances.
Using the Smart Button
Use the Smart Button to place and end calls, enter
menus, toggle features on and off, and select items
in the display. The Smart Button is the middle key
on the left side.
30
Smart Button
The symbol
Button.
A in your display represents the Smart
Page 31

Selecing Items in the Display
The most basic use of the Smart Button is for
making selections. Whenever you are given a
choice such as a ringer setting, press the Smart
Button to select the setting you want.
Toggling Features On and Off
Some of your phone’s features toggle on and off.
Use the upper or lower volume key to scroll to the
desired feature, then press the Smart Button to
select it.
Entering the Menu System
Press f, then press = to access the menu
system. Y ou see Recent Calls—the first entry
in the menu list.
Placing and Ending a Call
You can use the Smart Button to place and end a
call, as described in “Placing a Call” on page 32
and “Ending a Call” on page 33.
Viewing Your Phone Number
Press r# for a quick look at your phone
number.
Using the Phone
Tip: You can
also enter the
menu system
by pressing
f 1.
31
Page 32

Placing a Call
To place a call:
1. Power the phone on by pressing and holding
P until the display appears and you hear
an audible alert.
2. Enter the number you want to call.
• Press c to erase one digit at a time if
you make a mistake.
• Press and hold
entry.
You can also recall a previously dialed or
stored number. (See “Using Phone Memory”
on page 36 for details on storing or recalling.)
3. Press and hold = until you hear two tones.
You see Dialing
number you are calling.
or
Press S to place the call. You hear a singletone alert (if the keypad tones are turned on)
and see Dialing
number you are calling.
You can dial phone numbers with up to 32 digits,
but only the last 20 digits appear in the display.
Press
r to see the entire phone number.
c to clear the entire
XXX
XXX
, where
, where
XXX
XXX
is the
is the
32
Page 33

Ending a Call
Select one of the following three ways to end a call:
• Press
e.
or
• Close the phone.
or
• Use the Smart Button:
1. Press and hold
You see
2. Press
= again to end the call.
= until you hear two tones.
A To End Call.
Receiving a Call
Y our phone must be powered on to r eceive calls. To
answer a call:
Press
S or open the phone when the
phone rings.
Note: Opening the phone does not answer the call
if the Open to Answer feature is off. (See
“Deactivating Open to Answer” on page 102.)
Unanswered Call Indicator
When you cannot take a call, your digital phone
keeps a count of your unanswered calls and alerts
you with the message Missed
the number of missed calls.
XX
Calls, where XX is
Using the Phone
Press
= to view missed calls.
Terminating the Ring or Vibrate Alert
You can terminate either the ring or the vibrate alert
by pressing either of the volume keys during the
ring/vibrate cycle.
33
Page 34

Redialing a Number
Automatic Redial
A fast busy signal indicates that the cellular system
is busy. With Automatic Redial, your phone calls
continuously for the next four minutes.
When it makes a connection, the phone rings or
vibrates. You can distinguish this ring because it is
half as long as the ring or vibrate for a new
incoming call. When the person you are calling
answers, you can begin talking.
If you hear a fast busy signal:
1. You see Redial Call?.
Press
= or S to redial, or press e to exit.
2. If the call does not go through after four
minutes, press
attempt.
You see Redial.
If you hear an ordinary busy signal:
1. Press
2. Press and hold
e to hang up.
busy number.
= or S to continue the call
=, or press S, to redial the
34
Page 35

Controlling V olume
Adjusting V olume
Use the upper and lower volume keys to adjust
earpiece, keypad, and ringer volume. When you
press these keys, the phone’s speaker
demonstrates the current volume level.
To adjust earpiece and keypad volume:
Press
> or < to raise or lower the volume.
To adjust the ringer volume:
1. Press
2. Press
Muting the Microphone
For privacy during a call, mute the microphone. Y ou
can hear the person on the other end, but he or she
cannot hear you.
f.
> or < to raise or lower the ringer
volume.
Using the Phone
1. Press
2. Press
f 6 to mute the microphone. You
see Mute.
f 6 again to resume normal
conversation.
Selecting Silent Vibration Mode
In situations where you don’t want your phone to
ring, or in noisy places where you may not hear
your phone, select the VibraCall
discreet vibration:
Press
f 8 to toggle between ringer and
vibration mode. You see Ring only or
Vibrate only.
®
Alert function for
35
Page 36

Using Phone Memory
Use your TDMA digital phone’s internal Phone Book
to store up to 99 names and numbers for easy
access.
In this chapter you will learn how to:
• store names and numbers into the phone
book
• recall phone numbers from memory
• clear names and numbers
• dial a number with Speed Dial and
Turbo Dial
• make notes on the scratchpad
Follow these symbols as a guide for using the keys
on the side of your phone:
Press
>
to scroll up.
Press
= to select.
Press
< to scroll down.
Y ou can also use your phone’s
to scroll through the menu system.
®
* and # keys
36
Page 37

Using Your Phone’s Built-in Phone Book
Each phone number in your phone book is stored in
a memory location numbered 01-99.
Arrange numbers for easy recall by storing related
numbers in groups. If you store the numbers you
call most in locations 01-09, then you can use
Turbo Dial
(See “Using the Turbo Dial® Function” on page 42
for details.)
You can also store names to identify phone
numbers. Later, you can recall a number by the
name that corresponds to it.
®
to call those numbers with a single key .
Using Memory
37
Page 38

Storing Names and Numbers
How to Store Phone Numbers
1. Enter the phone number you want to store.
Note: You can store up to 32 digits per phone
number entry.
2. Press s to begin storing.
The phone prompts you to enter a memory
location by displaying Location ——.
3. Enter the two-digit memory location where
you want the sequence stored.
or
Press * to store the sequence in the first
available location.
or
Enter the first digit of the memory location,
then
press * to store the sequence in the
first available location beginning with that
digit.
You see Enter Name:.
4. Enter a name to identify the phone number.
(See the following section for details on
entering names.)
38
5. Press
= or s when you finish entering the
name.
Y our phone confirms your entry by displaying
the information you stored.
Page 39

How to Enter Letters and Numbers
You can press the numeric keys one or more times
to produce any letter or number in the alphabet.
Use the letters printed on each key as a guide. For
example, press
shown:
2 to enter “A,” “B,” “C,” or “2” as
press one time to insert an A
press two times to insert a B
press three times to insert a C
press four times to insert a 2
How to Enter a Name
1. Press the appropriate keys to generate the
characters shown.
1 Space . 1 ? ! , @ & : ; " ( ) ' ® ≠ % $ —
2 A B C 2
a b c 2
3 D E F 3
d e f 3
4 G H I 4
g h i 4
5 J K L 5
j k l 5
6 M N O 6
m n o 6
7 P Q R S 7
p q r s 7
8 T U V 8
t u v 8
9 W X Y Z 9
w x y z 9
0 + - 0 x * / = > < # _
The top line for each key shows the upper
case characters, the lower line shows the
lower case characters. Press
between upper and lower case letters.
< or > to toggle
Using Memory
Tip:
Press the
upper or lower
volume key to
toggle between
upper and
lower case
letters.
You can use the
different typing modes. A Shift indicator
shows the currently selected typing mode. A
counter beside the Shift indicator shows the
number of free spaces remaining for input.
f key to toggle among
39
Page 40

09:55
J
Shift Indicator
abc 010
Character
Counter
f Key
Presses
1
2
3
4
Mode
Selected
lowercase
Shift
Caps
Lock
NumLock
Result When
Entering
Characters
all characters are
lower case
first character is
upper case, all
following are
lower case
all characters are
upper case
all characters are
numbers
The cursor advances automatically to the
next space after you enter a letter or after a
short period of inactivity. If you are repeating
a character, then press
# to advance the
cursor to the next space.
2. Press
*to move back or c to erase a
letter if you make an error.
Shift
Indicator
Displays
abc
Abc
ABC
123
40
3. Press
= or s when you finish entering text.
Page 41

Recalling an Entry by Name
After storing names and numbers, you can recall
them alphabetically and immediately place calls.
Use the Smart Button for instant access to the name
directory .
1. Press
2. Enter the first letter of the name you want to
3. Press
4. Press and hold
= once to enter your name directory.
recall. The display shows the first name in the
phone book that begins with that letter.
If no entry is found beginning with a
particular letter, then a message is displayed.
For example, if no name begins with the letter
A, then No A
Zs is displayed.
> or < to scroll to the name you want.
When the name is displayed, the
corresponding number is displayed on a
third line, and the phone memory location is
displayed in the upper right corner.
=, or press S, to call the
number you selected.
Recalling an Entry by Memory Location
Each name and number you store is placed in a
memory location numbered 01-99. Once you have
stored names and numbers, you can recall them by
memory location:
Using Memory
1. Press
2. Enter the two-digit memory location of the
3. Press and hold =, or press S, to call the
r.
phone number you want.
number you selected.
41
Page 42

Clearing a Phone Memory Entry
1. Recall by name the entry that you want to
erase. (See “Recalling an Entry by Name” on
page 41.)
2. Press
3. Press
c to clear the entry.
You see Delete Entry?.
= or s to confirm that you want to
erase the entry.
Your phone displays the numbered location
of the cleared entry.
or
Press
e to exit without clearing the entry.
Shortcuts for Recalling Phone Book Entries
Using Speed Dial
If you know the memory location of the number you
want to call, try the Speed Dial function:
1. Enter the two-digit memory location (01-99).
2. Press and hold =, or press S, to place the
call.
Using the Turbo Dial® Function
The Turbo Dial® function enables you to dial
numbers stored in locations 01-09 with the push of
a single button:
42
Press and hold a number
1 through
9 on the keypad, and your call is placed.
You hear a two-tone alert afterwards.
Your phone’s Priority Call feature gives you fast
access to any number stored in location 01. To
learn more about this feature, see “Activating
Priority Calling” on page 89.
Page 43

Making Notes on the Scratchpad
In addition to your internal phone book, you also
have a built-in scratchpad for making quick notes.
The scratchpad remembers the last phone number
shown on your display.
Entering a Number in the Scratchpad
If you are on the phone and your party gives you
another number to call, enter the number on the
scratchpad so you can place the call later.
1. Enter the number into the keypad. (The
person on the line can hear tones as you
dial.)
Using Memory
2. Press
3. Press
e to end the current call, if
necessary.
S to call the number you saved on
the Scratchpad.
Storing Numbers During a Call
You can also store numbers during a call:
1. Enter the number into the keypad. (The
person on the line can hear tones as you
dial.)
2. Press
s and continue storing with step 3 in
“Storing Names and Numbers” on page 38.
43
Page 44

Using the Menu System
Your digital cellular phone includes many features
to help you be more productive. The phone’s userfriendly menu system helps you find what you need
quickly and easily.
In this chapter you will learn:
• what are the main menu features
• how to navigate through the menus
• how to read a menu road map
Introducing the Menu Features
As you scroll through the menu system, you will see
the following icons, each representing a high-level
menu.
44
F
Recent Calls
Timers
U
Lock Secure
L
Phone Book
T
Tone Control
H
Phone Options
Network Selection
Time and Date
Page 45

Navigating the Menu
You can navigate through the menu system using
the three keys located on the left side of the phone.
Use the upper and lower volume keys to scroll to
sub-menus and to control volume. Use the middle
Smart Button to choose menus and functions.
Follow these symbols as a guide for using the keys
on the side of your phone:
Press
>
to scroll up.
Press
= to select.
Press
< to scroll down.
ˇhe Menu System
Y ou can also use your phone’s
to scroll through the menu system.
* and # keys
Road Maps
To help you navigate through the phone’s menu
system, each chapter begins with an easy-to-follow
visual “road map.” Press the key shown, and
observe the message that appears in the display.
For example, try this:
1. Press
2. Press
3. Press
4. Press
Detailed instructions within each chapter describe
how each feature works.
f, then press = to enter the menu
features
or
Press f 1. “menu” is printed on the
1 key as a reminder.
> and < to scroll through the menu’s
top level, shown here in the margin.
= to select a menu item.
e to exit the menu.
45
Page 46

Managing Recent Calls
The recent calls menu option allows you to access
your Caller Line ID and review previous calls. Caller
Line ID is an optional network and subscriptiondependent feature that is not available in all areas.
In this chapter you will learn how to review all calls
that you have received or dialed.
Follow these symbols as a guide for using the keys
on the side of your phone:
Press
>
to scroll up.
Press
= to select.
Press
< to scroll down.
46
You can also use your phone’s
keys to scroll through the menu system.
* and #
Page 47

Road Map for Recent Calls
To enter the menu system:
f, then press =.
Press
or
f 1.
Press
Start:
Recent
Calls
Received
Calls
Dialed
Calls
To Main
Menu
About Recent Calls
The Recent Calls menu allows you to review
previous calls that you have received or dialed.
Following are some useful tips and information
about reviewing recent calls.
• To view Caller Line ID information prior to
answering a call, you must turn off the Open
to Answer feature. (See “Deactivating Open
to Answer” on page 102.)
• Your digital cellular phone can store the
telephone numbers and names of the last
thirty incoming calls.
• If the caller’s phone number matches a
phone number stored in the phone’ s memory,
the phone automatically displays the name
associated with that phone number.
Recent Calls
47
Page 48

• If you subscribe to call waiting and receive a
call while another call is in progress:
- You hear a call waiting tone.
- The caller’s name and number are dis-
played.
- The name and number are automatically
stored and can be viewed after ending the
call, using the procedure described in
“Reviewing Received Call” on page 49.
• Caller Line ID allows you to view the name
and number of the calling party in the
phone’s display while the phone is ringing.
Caller Line ID is an optional feature that is not
available in all markets. Contact your Service
Provider for availability information.
• If the caller has restricted transmission of the
phone number, your phone displays
Anonymous. If the Calling Number ID
information is not available to the cellular
network, your phone displays Unavailable.
• You can store any number contained in your
Caller Line ID memory to a memory location
in the same way you would save any phone
number. Once the correct number is
displayed, press
or
s * to autoload. See “Recalling an
Entry by Location” on page 55 for more
information on storing phone numbers.
sand a memory location
48
Page 49

Getting to Recent Calls
1. Press f, then press = to enter the menu system.
2. When you see Recent Calls, press =
to select.
3. Press > or < to scroll to the following features.
Reviewing Received Call
1. Follow the steps in “Getting to Recent Calls”
above to scroll to Received Calls. The total
numbers of received calls stored is displayed
in the upper right corner. If there are no
numbers in the Caller Line ID list, you see 00
in the upper right corner.
2. Press
3. Press
= to enter your Caller Line ID list of
received calls.
> or < to scroll through the list.
Your phone displays the order in which the
call was received in the upper right corner,
with the phone number and name of the
calling party (if available).
The received call list can range from 01 (the
most recent previous phone call) to 30 (the
least recent phone call).
Y our phone also displays the time and date of
the incoming call.
The following symbols appear next to the
received calls:
F
G
Answered
Missed
Shortcut:
Press
r r
to view your
received calls.
You must hold
the second
until the
received call
list is
displayed.
r
Recent Calls
4. Press
S to dial the displayed number.
49
Page 50

Getting to Recent Calls
1. Press f, then press = to enter the menu system.
2. When you see Recent Calls, press =
to select.
3. Press > or < to scroll to the following features.
Reviewing Dialed Calls
1. Follow the steps in “Getting to Recent Calls”
above to scroll to Dialed Calls.
Your phone displays the total number of
dialed calls that are stored in the upper right
corner. You can see up to the last twenty
numbers dialed. If there are no numbers in
the Dialed Call list, you see 00.
Shortcut:
Press
r
0 0 to
enter your
dialed calls list.
50
2. Press
3. Press
4. Press
= to enter your dialed calls list.
> or < to scroll through the list. The
dialed call list can range from 01 (the most
recent dialed phone call) to 20 (the least
recent dialed phone call).
Your phone displays the order of the
previously dialed phone call in the upper
right corner, with the phone number and
name (if available) of the party called.
Y our phone also displays the time and date of
the outgoing call.
S to dial the displayed number.
Page 51

Clearing Caller Line ID
To erase all entries saved in your Caller Line ID
memory:
1. Follow the steps in “Getting to Recent Calls”
on page 50 to scroll to Received Calls.
2. Press and hold
name and number is displayed. You see
Delete All?.
3. Press
To erase a single entry saved in your Caller Line ID
memory:
1. Press
2. Press
= or s to clear.
or
e to leave your Caller Line ID
Press
memory intact.
c or any other key when a Caller Line
ID name and number is displayed. You see
Delete Entry?.
= or s to clear.
or
e to leave your Caller Line ID
Press
memory intact.
c when a Caller Line ID
Tip: To erase
all
entries you
must press and
hold
c,
whereas to
erase a
entry you
simply press
single
c.
Recent Calls
51
Page 52

Managing the Phone Book
In “Using Phone Memory” you learned how to store
and recall phone numbers with the internal Phone
Book. You can access the same features, along
with several advanced features, using your phone’ s
convenient menu system.
In this chapter you will learn how to:
• recall and store phone numbers using the
menu system
• store numbers with pause dialing
• store calling card sequences for easy access
• edit your memory information
• select the individual ringer style
• attach email addresses to phone book
entries
Follow these symbols as a guide for using the keys
on the side of your phone:
Press
>
to scroll up.
Press
= to select.
52
Press
< to scroll down.
Y ou can also use your phone’s
to scroll through the menu system.
* and # keys
Page 53

Road Map for Phone Book
To enter the menu system:
f, then press =.
Press
or
f 1.
Press
Start:
Recall By
Name
Recall By
Location
Edit Name
and Number
Phone Book
53
Page 54

Getting to Phone Book
1. Press f, then press = to enter the menu system.
2. Press > or < to scroll to Phone Book, and press =
to select.
3. Press > or < to scroll to the following features, and press =
select.
Recalling an Entry by Name
to
Shortcut: You
can recall
phone
numbers
without using
the Phone
Book. See
“Recalling an
Entry by Name”
on page 41 or
“Recalling an
Entry by
Memory
Location” on
page 41.
Once you have stored entries, you can recall them
alphabetically with the Phone Book menu. Find the
name, choose the number, and instantly place a
call. To recall a stored name:
1. Follow the steps in “Getting to Phone Book”
above to select Recall By Name. You see
Enter 1st Letter.
2. Enter the first letter of the name you want to
recall. Your phone displays the first name in
the phone book that begins with that letter.
If no entry is found beginning with a
particular letter, then a message is displayed.
For example, if no name begins with the letter
“A”, then No A
3. Press
4. Press and hold
> or < to scroll to the name you want.
When the name is displayed, the
corresponding number is displayed on the
third line, and the phone memory location is
displayed in the upper right corner.
number you selected.
Zs is displayed.
=, or press S, to call the
54
Page 55

Recalling an Entry by Location
Each name and number you store is placed in a
memory location numbered 01-99. After storing
names and numbers, you can recall them by
memory location with the Phone Book menu.
1. Follow the steps in “Getting to Phone Book”
on page 54 to select Recall By Location.
You see Location ——.
2. Enter the two-digit memory location of the
number you want.
3. Press and hold
number you selected.
=, or press S, to call the
Storing with the Menu
To store names and numbers into the Phone Book:
1. Follow the steps in “Getting to Phone Book”
on page 54 to select Store Name and Number.
You see Enter Number.
2. Enter the phone number you want to store.
See “How to Enter Letters and Numbers” on
page 39.
3. Press
4. Press
= when you finish entering the number.
You see Location ——.
* to store the sequence in the next
available location.
or
Enter the first digit of the memory location
and press
first available location beginning with that
digit.
* to store the sequence in the
Tip: Select a
Phone Book
entry and press
m to send a
text message.
Refer to
“Sending Text
Messages” on
page 124.
Tip: If the
chosen
location is full,
press
e and
restart the
storing
sequence.
Phone Book
or
Enter the two-digit memory location where
you want the sequence stored.
55
Page 56

5. When you see Enter Name:, enter a name to
identify the phone number. (See “How to
Enter a Name” on page 39 for details on
entering names.)
6. Press
7. Press
= or s, when you finish entering the
name. Your phone confirms your entry by
displaying the location, number, and name
you stored. Proceed with step 7 below, or
return to step 2 above to store more
numbers.
e to exit the menu.
Storing and Placing Numbers with Pause Dialing
Entering a Pause in a Number
When you call automated systems, a recorded
message prompts you for PIN numbers, Voice Mail
numbers, etc.
You can store these numbers in your phone’s
memory, separated by “pauses”—special
characters that tell your phone to wait before
sending additional numbers.
1. Follow the steps in “Getting to Phone Book”
on page 54 to select Store Name and Number.
You see Enter Number.
2. Enter the phone number you use to access
the automated system.
56
3. Press
4. Press
5. Enter the next group of numbers (such as an
6. Enter any other required symbols (such as *
f S.
You see Insert Wait o.
= to insert a pause (o) into the
sequence.
account number or PIN number).
or #).
Page 57

7. Insert another pause, and enter the next
group of numbers by repeating steps 3
through 5 as many times as necessary. Then
store the entire sequence as you would any
phone number.
8. Press
9. Enter the two-digit memory location where
10. Enter a name for your sequence.
11. Press
s to begin storing.
You see Location——.
you want the sequence stored.
You see Enter Name:.
(See “How to Enter a Name” on page 39 for
details on entering names.)
= when you finish entering the name.
Y our phone confirms your entry by displaying
the location, number, and name you stored.
Tip: You can
store up to 32
digits,
including
pauses.
Placing a Call with Pauses
To use your stored sequence:
1. Recall the stored number with the pause
inserted.
2. Press and hold =, or press S, to place the
call.
3. When the recording prompts you for
information, press
set of stored numbers.
4. Press
= or S as many times as necessary,
to transmit all the numbers.
= or S to send the next
Phone Book
57
Page 58

Getting to Phone Book
1. Press f, then press = to enter the menu system.
2. Press > or < to scroll to Phone Book, and press =
to select.
3. Press > or < to scroll to the following features, and press =
select.
Storing and Placing Numbers for Calling Card Information
Storing Calling Card Information
Like Pause Dialing, you can store calling card
access numbers, separated by pauses, for recall
later. You can also store a Number Character in the
memory sequence to save a place for the number
you call when you use your calling card.
See “Using Lock/Security Features” on page 85 for
more information on protecting your calling card
information.
1. Follow the steps in “Getting to Phone Book”
above to select Store Name and Number. You
see Enter Number.
to
58
2. Enter the phone number you use to access
your calling card system. (Skip this step if
you only dial 0.)
3. Press
4. Press
5. Enter the next numbers, if needed. (For
f S. You see Insert Wait o.
= to insert a pause (o) into the
sequence.
example, some long distance carriers require
you to dial a 0 first. If no further numbers are
needed, skip to step 7.)
Page 59

6. Press f S.
7. Press
< to scroll to the Number Character.
You see Insert Number 'N.
8. Press
9. Press
10. Press
11. Enter your calling card PIN number.
12. Press s to store your calling card
13. Enter the two-digit memory location where
14. Enter a name for your sequence. (See “How
15. Press
= to insert the 'N Character.
This special character saves a place for the
phone number you will be calling. The
number is inserted automatically when you
place the call.
f S.
= to insert another pause, as in steps 3
and 4.
sequence.
You see Location ——.
you want the sequence stored.
You see Enter Name:.
to Enter a Name” on page 39 for details on
entering names.)
= when you are finished entering the
name.
Y our phone confirms your entry by displaying
the location, number, and name you stored.
Phone Book
59
Page 60

Placing a Calling Card Call
To recall your stored calling card information:
1. Recall the calling card information you
stored.
(See “Recalling an Entry by Name” on
page 54 and “Recalling an Entry by
Location” on page 55 for more information on
Recalling Numbers.)
2. Press
3. Enter the phone number you want to call,
4. Press and hold
5. Press
6. Repeat step 5 to send the next group of
S before entering the number. You
see Enter Number.
including the area code.
Enter the number manually, by location, or
recall.
=, or press S, to place the
call.
Your phone dials the number to access your
long distance provider.
=, or press S, to send the next group
of numbers when you are prompted.
The phone automatically inserts the selected
number to call at the appropriate time in the
sequence.
numbers as many times as necessary.
60
Page 61

Getting to Phone Book
1. Press f, then press = to enter the menu system.
2. Press > or < to scroll to Phone Book, and press =
to select.
3. Press > or < to scroll to the following features, and press =
select.
Attaching an Email Address
You can attach email addresses to your Phone
Book entries with the Phone Book menu.
1. Follow the steps in “Getting to Phone Book”
above to select Attach Email Addr. You see
Enter 1st Letter
2. Enter the first letter of the name for the entry
you want to modify. Your phone displays the
first name in the phone book that begins with
that letter . If no entry beginning with that letter
is found, No A
3. Press
4. Press
Email Addr.
< or > to scroll to the name you want.
= to select the name. You see Enter
Zs is displayed.
to
Phone Book
5. Enter the email address. (Press
repeatedly to enter symbols. See “How to
Enter a Name” on page 39 for more on
entering names.)
6. Press
=, or s, when you finish entering the
address. Your phone confirms your entry by
displaying Email Addr Attached.
1
61
Page 62

Getting to Phone Book
1. Press f, then press = to enter the menu system.
2. Press > or < to scroll to Phone Book, and press =
to select.
3. Press > or < to scroll to the following features, and press =
select.
Editing a Memory Location
After you store names and numbers in the Phone
Book, you can edit the information or erase entries
at any time.
1. Follow the steps in “Getting to Phone Book”
above to select Edit Name and Number.
2. Recall the entry by location or by name. (See
“Recalling an Entry by Name” or “Recalling
an Entry by Location” on page 55.)
to
62
3. Press
4. Press c to erase one digit at a time.
5. Enter your changes to the phone number.
6. Press = when you finish editing the phone
= to begin editing the phone number.
Your phone displays the name briefly, then
the phone number.
Press and hold
number.
number.
Your phone displays the location where your
number is currently stored.
c to erase the entire
Page 63

7. Press c to erase the memory location, then
enter a new two-digit location.
or
Press = to keep the phone number in its
current location.
Y our phone displays the name stored with the
phone number you are editing.
8. Enter your changes to the name. (See “How
to Enter a Name” on page 39.)
Press
c to erase one letter at a time, or skip
to step 9 to leave the name unchanged.
9. Press
10. Press
11. Press
= when you finish editing the name.
Your phone displays the new information.
= to save your changes.
Y our phone confirms your entry by displaying
the location, number, and name you stored.
or
e to leave the information
Press
unchanged.
e to exit, or scroll to other features.
Phone Book
63
Page 64

Getting to Phone Book
1. Press f, then press = to enter the menu system.
2. Press > or < to scroll to Phone Book, and press =
to select.
3. Press > or < to scroll to the following features, and press =
select.
Editing an Email Address
After you attach an email address to a Phone Book
entry, you can edit the address at any time.
1. Follow the steps in “Getting to Phone Book”
above to select Edit Email Addr. You see
Enter 1st Letter
2. Enter the first letter of the name whose
address you want to edit. The display shows
the first name in the phone book that begins
with that letter. If no entry beginning with that
letter is found, No A
3. Press
4. Press
< or > to scroll to the name you want.
= to select the name. You see the
current email address.
Zs is displayed.
to
64
5. Press
6. Enter your changes to the email address.
7. Press
c to erase one character at a time.
Press and hold
number.
(Press
1 repeatedly to enter symbols. See
“How to Enter a Name” on page 39 for more
on entering names.)
c to erase the entire
=, or s, when you finish entering the
address. Your phone confirms your entry by
displaying Email Addr Changed.
Page 65

Assigning an Individual Ring Style to a Phone Book Entry
You can use the individual ring style feature to
assign one of nine ring styles to alert you of an
incoming call from a phone number listed in your
phone book.
Note: This featur e will only operate if you subscribe
to Caller ID from your service provider. Caller ID is
not available in all areas.
1. Follow the steps in “Getting to Phone Book”
above to select Individual Ring Style.
2. Select the phone book entry to which you
want to assign an individual ring style.
a. Enter the first letter of the name entry
associated with the phone number.
b. Scroll up and down to reach the desired
phone book entry.
3. When you reach the phone number you want,
select it by pressing
Your phone displays Press 0-9, 0=OFF.
4. Press
5. Press
6. Press e to exit, or scroll to other features.
0 to remove the last ring style
selected.
or
Press an entry from 1 to 9 to select
one of the nine ring styles. The ring style will
sound.
= or s to select that ring style.
Your phone confirms the selection by
displaying Ring Style Assigned.
= or s.
Phone Book
65
Page 66

Setting the Time and Date
The Time and Date menu lets you format and edit
your phone’s time and date information.
In this chapter you will learn how to:
• set the time and date
• set the date format
• automatically update your time and date
The time and date settings are used by the Caller
Line ID feature to indicate the time of incoming and
outgoing calls. (See “Reviewing Received Call” on
page 49 and “Reviewing Dialed Calls” on page 50.)
Follow these symbols as a guide for using the keys
on the side of your phone:
Press
>
to scroll up.
Press
= to select.
Press
< to scroll down.
66
Y ou can also use your phone’s
to scroll through the menu system.
* and # keys
Page 67

Road Map for Time and Date
To enter the menu system:
f, then press =.
Press
or
f 1.
Press
Start:
Recent
Calls
Phone
Book
Set Time
Set Date
Time and
Date
Set Date
Set Date
Format
Format
Set Time
Format
Set Date
Autoupdate
Format
Off
To Main
To Main
Menu
Menu
Time and Date
67
Page 68

Activating Pager Mode
Getting to Time and Date
1. Press f, then press = to enter the menu system.
2. Press > or < to scroll to Time and Date, and press =
3. Press > or < to scroll to the following features.
Setting the Time
Use this feature to manually set your phone’s clock:
1. Follow the steps in “Getting to Time and
Date” above to select Set Time. The phone
displays the current Time setting, with an
arrow under the hour field.
to select.
2. Press
3. Press
4. Press
5. Press
> or < to scroll to the correct hour
setting.
or
Enter the hour on the keypad.
= to store the hour setting.
The arrow moves to the minutes field.
> or < to scroll to the correct minute
setting.
or
Enter the minutes on the keypad.
= to store the minutes setting.
If the Time Format is set to 24-hour format,
your phone now exits the time setting
function. Skip to step 7.
or
If the Time Format is set to 12-hour format,
the arrow moves to the am/pm field.
68
Page 69

6. Press > or < to scroll to the correct am/pm
setting, and press
time setting display.
= to select it and exit the
7. Press
e to exit, or scroll to other features.
Setting the Date
Use this feature to manually set your phone’s date:
1. Follow the steps in “Getting to Time and
Date” on page 68 to select Set Date. Your
phone displays the current Date setting, with
an arrow under the first field.
2. Press
3. Press
4. Repeat these steps for the next two date
5. Press
> or < to scroll to the correct month (for
MM/DD/YY
and press
or
Enter the month or day on the keypad.
format) or day (for
= to select it.
DD/MM/YY
= to store the month or day, and move
to the next field.
settings.
e to exit, or scroll to other features.
format),
Changing Your Date Format
Your phone can display dates in a day/month/year
format, or in a month/day/year format. Use this
feature to select the format you want:
Time and Date
1. Follow the steps in “Getting to Time and
Date” on page 68 to select Set Date Format.
2. Press
3. Press
> or < to scroll to the sample date that
matches the format you want, and press
select it.
e to exit, or scroll to other features.
= to
69
Page 70

Changing the Time Format
Y our phone can display time in a 12-hour or 24-hour
format. To select the format you want:
1. Follow the steps in “Getting to Time and
Date” on page 68 to select Set Time Format.
2. Press
3. Press
> or < to scroll to the sample time that
matches the format you want, and press
select it.
e to exit, or scroll to other features.
= to
Turning Autoupdate On and Off
When you activate this feature, your phone updates
its time and date from the network each time you
turn it on.
Notes:
• If you turn Autoupdate off, you must set your
phone’s clock and date manually. (See
“Setting the Time” on page 68 and “Setting
the Date” on page 69.)
• Network updating is not available in all areas.
To turn Autoupdate On and Off:
1. Follow the steps in “Getting to Time and
Date” on page 68 to select Autoupdate.
2. Press
= to toggle the autoupdate setting on
and off.
70
3. Press
e to exit, or scroll to other features.
Page 71

Timing Your Calls
Your phone’s Call Timers give you a variety of
options for managing your time. You can monitor
the length of individual calls, or have the phone
alert you at intervals that you specify.
In this chapter you will learn how to:
• view the timers
• monitor the length of your calls
• set and view the resettable timer
• program audible timers for your individual
needs
Follow these symbols as a guide for using the keys
on the side of your phone:
Press
>
to scroll up.
Press
= to select.
Press
< to scroll down.
Y ou can also use your phone’s
to scroll through the menu system.
* and # keys
Call Timers
71
Page 72

Road Map for Call Timers
To enter the menu system:
f, then press =.
Press
or
f 1.
Press
Start:
Recent
Calls
Phone
Book
Time and
Date
Individual
XX YY
Resettable
XXXXX
Cumulative
XXXXX
72
Timers
Reset
Timer
Individual
Timer Off
One Minute
Timer Off
Repeat
Timer Off
Single
Timer Off
To Main
Menu
Page 73

Getting to Call Timers
1. Press f, then press = to enter the menu system.
2. Press > or < to scroll to Timers, and press =
to select.
3. Press > or < to scroll to the following features, and press =
select.
Viewing Call Timers
Network connection time is the elapsed time, in
one-minute intervals, from the moment you connect
to your service provider’s network to the moment
you end the call by pressing
busy signals and ringing.
The amount of network connection time you track
on your resettable timer may not equal the amount
of time for which you will be billed by your wireless
service provider. For billing information, please
contact your service provider directly.
Viewing the Individual Call Timer
You can view the network connection time of the
most recent call or the call in progress (in minutes
and seconds) at any time. The Individual Call Timer
resets when you place the next call and when you
turn the phone off.
1. Follow the steps in “Getting to Call Timers”
above to select Individual
phone displays the network connection time
of your last call in minutes (
(
YY
).
2. Press
e to exit, or scroll to other features.
e. The time includes
XX YY
. Your
XX
) and seconds
Shortcut:
Press
# for a
quick look at
this timer.
to
r #
Call Timers
Y ou can also choose to have the timer display while
calls are in progress. See “Displaying the Individual
Timer Automatically” on page 75.
73
Page 74

Shortcut:
Press
r #
# # for a
quick look at
this timer.
Viewing the Resettable Call Timer
You can track, in one-minute intervals, the
approximate amount of network connection time
elapsed. Use this feature to view the time elapsed,
and refer to “Resetting the Timer” on page 74 to
reset the timer.
1. Follow the steps in “Getting to Call Timers” on
page 73 to select Resettable
phone displays your network connection time
in minutes (
timer.
XXXXX
) since you last reset the
XXXXX
. Your
Shortcut:
Press
r #
# #
# for a
quick look at
this timer.
2. Press
Follow the instructions in “Resetting the Timer” on
page 74 to reset the timer.
e to exit, or scroll to other features.
Viewing the Cumulative Timer
This is a non-resettable timer that keeps track of
your phone’s total network connection time (in
minutes).
1. Follow the steps in “Getting to Call Timers” on
page 73 to select Cumulative
phone displays network connection time in
minutes since your phone was activated.
2. Press
e to exit, or scroll to other features.
XXXXX
. Your
Resetting the Timer
After you reset this timer, it continues to keep track
of your network connection time (in minutes) until
you reset it again.
1. Follow the steps in “Getting to Call Timers” on
page 73 to select Resettable
2. Press
3. Press
< to scroll to Reset Timer.
= to reset the timer.
XXXXX
.
74
Your phone may display Busy for a few
seconds.
4. Press e to exit, or scroll to other features.
Page 75

Getting to Call Timers
1. Press f, then press = to enter the menu system.
2. Press > or < to scroll to Timers, and press =
to select.
3. Press > or < to scroll to the following features, and press =
select.
Displaying the Individual Timer Automatically
to
When you turn this feature on, your phone
automatically displays your network connection
time in minutes (
after each call.
1. Follow the steps in “Getting to Call Timers”
above to select Individual Timer. You see
Individual Timer Off or Individual Timer
On.
2. Press
Off and Individual Timer On.
3. Press
XX
) and seconds (YY) during and
= to toggle between Individual Timer
e to exit, or scroll to other features.
Setting the One-Minute Audible Timer
Activate this feature to hear an audible beep 10
seconds before the end of every minute during a
call. The party on the other end does not hear the
beeps.
1. Follow the steps in “Getting to Call Timers”
above to select One Minute Timer. You see
One Minute Timer Off or One Minute Timer
On.
Tip:
Activating the
Individual
Timer may
reduce both
standby and
talk times.
Call Timers
2. Press
3. Press
= to toggle between One Minute Timer
Off and One Minute Timer On.
e to exit, or scroll to other features.
75
Page 76

Setting the Repeating Audible Timer
You can set this timer to beep during your calls at
an interval that you select—from 11-999 seconds.
You will hear the beep 10 seconds before the end
of each interval, but the party on the other end does
not hear the beeps.
1. Follow the steps in “Getting to Call Timers” on
page 75 to select Repeat Timer. You see
Repeat Timer Off or Repeat Timer On.
2. Press
3. If you turned the timer off, skip to step 5.
4. Press
5. Press
= to toggle between Repeat Timer Off
and Repeat Timer On.
or
Enter the number of seconds you would like
between audible beeps. Y ou see Beep At
Secs.
= to set the timer. The phone confirms
the setting by displaying Set At
YYY
Secs.
e to exit, or scroll to other features.
YYY
76
Page 77

Setting the Single Timer
Use the Single Timer to sound a beep during calls
at a specified interval—from 11-999 seconds. The
beep sounds 10 seconds before the interval but
can’t be heard by the other party.
1. Follow the steps in “Getting to Call Timers” on
page 75 to select Single Timer. You see
Single Timer Off or Single Timer On.
2. Press
3. If you turned the timer off, skip to step 5.
4. Press
5. Press
= to toggle between Single Timer Off
and Single Timer On.
or
Enter the number of seconds you would like
between audible beeps. Y ou see Beep At
Secs.
= to set the timer. The phone confirms
the setting by displaying Set At
YYY
Secs.
e to exit, or scroll to other features.
YYY
Call Timers
77
Page 78

Adjusting Tone Controls
Use these features to select vibration mode,
personalize your phone’s ringer styles, or turn the
ringer off.
In this chapter you will learn how to:
• select the type of Call Alert or Message Alert
• choose from nine different ringer styles
• silence the keypad
• silence the scratchpad
Follow these symbols as a guide for using the keys
on the side of your phone:
Press
>
to scroll up.
Press
= to select.
Press
< to scroll down.
78
Y ou can also use your phone’s
to scroll through the menu system.
* and # keys
Page 79

Road Map for Tone Controls
To enter the menu system:
f, then press =.
Press
or
f 1.
Press
Start:
Recent
Calls
Phone
Book
Time and
Date
Timers
Tone
Control
Call Alert
Type
Msg Alert
Type
Call Alert
Ring Style
Keypad
Tone On
Scratchpad
Tone On
To Main
Menu
Tone Controls
79
Page 80

Getting to Tone Controls
1. Press f, then press = to enter the menu system.
2. Press > or < to scroll to Tone Control, and press =
to select.
3. Press > or < to scroll to the following features, and press =
select.
Selecting Call Alert Type
to
Shortcut:
Press
f 8
to toggle the
VibraCall
Alert function
on and off.
®
Using this feature, you can choose to be alerted to
incoming calls using the vibrating alert, the ringer,
both, or neither. Ring Only is the default.
In particular, the VibraCall
ideal for situations where ringing may not be
appropriate, or in noisy places where you might not
hear the ringer.
When both the ringer and vibrating alerts are
selected, the phone alerts you by vibrating for three
cycles and then ringing.
Notes:
• Although you set your call alert type below,
the selection is temporarily suppressed if
Pager Mode is enabled. See “Activating
Pager Mode” on page 98 for details.
• When your phone is connected to an external
power supply and you receive an incoming
call, your phone will ring, regardless of the
call alert setting.
To select an alert type, complete the following
steps:
1. Follow the steps in “Getting to Tone Controls”
above to select Call Alert Type. Your phone
displays your current alert type setting.
®
Alert vibrating alert is
80
Page 81

2. Press > or < to scroll through your choices:
K
Option
Ring Only
Vibrate Only
Vib then Ring
Ringer Off Vib Off
3. Press
4. Press
= when you reach the setting you want.
e to exit, or scroll to other features.
Icon (appears in idle
display)
J
W
V
Selecting Message Alert Type
Using this feature, you can choose to receive an
alert to incoming voice mails and short messages
using the VibraCall
The beep tone and vibrating patterns differ if the
incoming message is marked urgent versus
normal. You will receive one beep for a normal
message and three beeps for an urgent message.
1. Follow the steps in “Getting to Tone Controls”
on page 80 to select Msg Alert Type.
®
alert, beeping alert, or no alert.
2. Press
3. Press
4. Press
> or < to scroll through your choices:
Messages Beep, Messages Vibrate, and Beep
Off Vib Off. Messages Beep is the default
setting.
= when you reach the setting you want.
e to exit, or scroll to other features.
Tone Controls
81
Page 82

Getting to Tone Controls
1. Press f, then press = to enter the menu system.
2. Press > or < to scroll to Tone Control, and press =
to select.
3. Press > or < to scroll to the following features, and press =
select
Selecting a Ring Style
Your phone lets you select any of nine different ring
styles. After you choose a style, the phone gives
you a brief sample of the new ring style, or vibrates
if you have selected the VibraCall
1. Follow the steps in “Getting to Tone Controls”
above to select Call Alert Ring Style.
2. Press 1 through 9 to hear the dif ferent
ring styles, or scroll through the ring styles.
Ring Style 1 is the default setting.
®
Alert feature.
to
82
3. Press
4. Press
= when you reach the ring style you
want.
You see Ring Style
number of the style you selected.
X
Set, where X is the
e to exit, or scroll to other features.
Page 83

Turning Keypad Tones On and Off
Keypad tones are the sounds you hear when you
press any key on the phone. By default, keypad
tones are turned on. If you want to be discreet, use
this feature to silence the audio feedback from the
keypad.
Note: The other party still hears tones when you
use the keypad during a call.
1. Follow the steps in “Getting to Tone Controls”
on page 82 to select Keypad Tone. You see
Keypad Tone On or Keypad Tone Off.
2. Press
3. Press
= to toggle between Keypad Tone On
and Keypad Tone Off.
e to exit, or scroll to other features.
Tone Controls
83
Page 84

Turning Scratchpad Tones On and Off
Scratchpad tones are the tones that your phone
sends to access automated calling systems like
Voice Mail. By default, scratchpad tones are turned
on. If you don’t want your party to hear these
sounds when you use the scratchpad, turn the
scratchpad tones off.
1. Follow the steps in “Getting to Tone Controls”
on page 82 to select Scratchpad Tone. You
see Scratchpad Tone On or Scratchpad Tone
Off.
2. Press
3. Press
Note: If you turned the scratchpad tones off but
want to access a tone-activated system like Voice
Mail, place the call, enter the numbers you need to
transmit, then:
= to toggle between Scratchpad Tone
On and Scratchpad Tone Off.
e to exit, or scroll to other features.
Press
r S to send the tones.
84
Page 85

Using Lock/Security Features
While you probably would not want to leave your
phone unattended, your digital phone has a
number of built-in security features to prevent
unauthorized use.
In this chapter you will learn how to:
• activate the Voice Privacy feature
• lock and unlock your phone
• place priority calls
• change your lock code
• restrict call placement and memory access
• reset or clear your phone’s settings
Follow these symbols as a guide for using the keys
on the side of your phone:
Press
>
to scroll up.
Press
= to select.
Press
< to scroll down.
Y ou can also use your phone’s
to scroll through the menu system.
* and # keys
Lock/Security
85
Page 86

Road Map for Lock Security
To enter the menu system:
f, then press =.
Press
or
f 1.
Press
Start:
Code
View
Lock Code
Change
Lock Code
Service
Level X
Master
Reset
Master
Clear
86
Page 87

Getting to Lock Security
1. Press f, then press = to enter the menu system.
2. Press > or < to scroll to Lock Secure, and press =
to select.
3. Press > or < to scroll to the following features, and press =
select.
Activating V oice Privacy
When you activate your phone’s Voice Privacy
feature, you request your cellular system to search
for a Voice Privacy channel with each call. If no
Voice Privacy channel is available (or your call is
“handed off” to a cell where a Voice Privacy
channel is not available), five short beeps alert you
that the call is no longer private.
You must select the Voice Privacy feature before
you make a call in order for that call to search for a
Voice Privacy channel.
Note: This feature is not available in all markets.
Contact your Service Provider for additional
information about your service area.
To turn the Voice Privacy feature on or off:
to
1. Follow the steps in “Getting to Lock Security”
above to select Voice Privacy. You see
Privacy Off or Privacy Preferred.
2. Press
3. Press
= to toggle between Privacy Off and
Privacy Preferred.
e to exit, or scroll to other features.
Lock/Security
87
Page 88

Locking/Unlocking Your Phone
Locking Y our Phone Automatically
When you turn this feature on, your phone
automatically locks itself each time you turn it off.
1. Follow the steps in “Getting to Lock Security”
on page 87 to select Automatic Lock. You
see Automatic Lock Off or Automatic Lock
On.
Tip: “LOCK” is
printed on the
5 key, as a
reminder.
2. Press
3. Press
= to toggle between Automatic Lock
Off and Automatic Lock On.
e to exit, or scroll to other features.
Locking Your Phone Manually
You can lock your phone manually at any time to
prevent unwanted use. Once you lock the phone, it
remains locked whether it is powered on or off.
1. Press
2. Press and hold
3. Press
f.
5 for at least one full
second.You see Lock?.
s or = to lock. You see Locked.
Unlocking Y our Phone
To unlock your phone:
Once your phone is on, enter your three-
digit lock code to unlock your phone. (See
“Viewing and Changing the Lock Code” on
page 90 for more information on your lock
code.)
88
Page 89

Answering Calls While the Phone Is
Locked
Y ou can still receive calls when the phone is locked.
To answer an incoming call:
1. Enter your three-digit lock code.
2. Press and hold =, or press S to receive the
call.
Activating Priority Calling
Priority Call allows the Turbo Dial® function to dial
from memory location 01—even when the phone is
locked. Y ou can stor e an emergency number or the
number of someone you would like to contact in
case of emergency.
Note: Some cellular systems have their own
emergency numbers and deny access to
emergency numbers like 911 (not available in some
areas). Check with your Service Provider for more
information.
By default, Priority Call is activated. To turn it off or
to switch it back on, complete the following steps:
1. Follow the steps in “Getting to Lock Security”
on page 87 to select Priority Call. You see
Priority Call Off or Priority Call On.
Tip: If you
forget your lock
code, try
pressing
1
2 3 or
the last three
digits of your
cellular phone
number.
2. Press
3. Press
= to toggle between Priority Call
Off and Priority Call On.
e to exit, or scroll to other features.
Lock/Security
89
Page 90

Getting to Secure Options
1. Press f, then press = to enter the menu system.
2. Press > or < to scroll to Lock Secure, and press =
to select.
3. Press > or < to scroll to the Secure Options submenu, and
press
=
to select.
4. Enter your six-digit security code, scroll to the following
features, and press
=
to select.
Viewing and Changing the Lock Code
For your protection, you must enter the six-digit
security code to access the features that your
phone contains. The factory-programmed lock
code for unlocking the phone is 123. The six-digit
default security code is 000000. These codes may
have been changed when your phone was
activated. Contact your Service Provider if you are
unsure of your lock and security codes.
Viewing the Lock Code
To display the active three-digit lock code:
90
1. Follow the steps in “Getting to Secure
Options” above to select View Lock Code.
You see View Lock Code.
2. Press
3. Press
= to display your three-digit lock code.
The code appears for a few seconds.
e to exit, or scroll to other features.
Page 91

Changing the Lock Code
To change your three-digit lock code:
1. Follow the steps in “Getting to Secure
Options” on page 90 to select Change Lock
Code. You see Enter Code __.
2. Enter the new three-digit code. You see
Changed To
3. Press
Note: If you try to change your lock code to 911 or
the first three digits of an emergency number, you
will see Code Invalid, and the code you entered
will not be accepted. You will return to step 1
above.
XXX
, where
XXX
is your new code.
e to exit, or scroll to other features.
Restricting Call Placement
You may want to restrict call placement or hide
memory information when loaning your phone to
others.
Selecting a Service Level
1. Follow the steps in “Getting to Secure
Options” on page 90 to select Service Level.
The phone displays your current service
level. Refer to the chart on the next page.
2. Press
3. Press
> or < to scroll through the service
level settings, and press
service level you want.
If you select Level 7, the phone prompts you
for the range of memory locations you want to
remain active. You see Range 1-__.
Enter the range of digits memory locations
from which calls are allowed. The phone
confirms the allowed range, and you
see 1-
XX
Allowed.
= to select the
e to exit, or scroll to other features.
Lock/Security
91
Page 92

Service Level Settings
Each of your phone’s eight service levels offers a
different combination of access privileges and
restriction.
Note: Caller Line ID is an optional network and
subscription feature that is not available in all areas.
Level Description Display
• Calls can be placed from
memory locations 1-10
only.
• No dialing from keypad
1
• No memory edit or storage
• No access to name
directory
• No access to last number
dialed
• Calls can be placed from
all memory locations.
• No dialing from keypad
2
• No memory edit or storage
• No access to Caller Line ID
stack or Last Number
Dialed
1 Memory 1-10
2 Memory Only
92
• Calls can be placed
manually from the keypad
only.
• No access to memory
3
4
5 Seven-digit (local) dialing only
information
• No memory edit or storage
• No access to Caller Line ID
stack or Last Number
Dialed
Standard setting, no
restrictions
3 Keypad Only
4 Standard
Setting
5 Local Only
Page 93

Level Description Display
• Calls can be placed from
the keypad and from
6
7
8
memory.
• No edit or memory storage
to memory locations 1-10
• Calls can be placed from a
selected memory range
only.
• Memory edit and storage
allowed with the selected
range.
• No access to name
directory
No edit, storage, or recall
from memory locations 1-9
6 No Store
1-10
7 Allow Range
8 Hide Turbo
93
Lock/Security
Page 94

Getting to Secure Options
1. Press f, then press = to enter the menu system.
2. Press > or < to scroll to Lock Secure, and press =
to select.
3. Press > or < to scroll to the Secure Options submenu, and
press
=
to select.
4. Enter your six-digit security code, scroll to the following
features, and press
= to select.
Resetting All Options
Use the Master Reset feature to reset all userselectable options back to their original factory
settings.
Note: Once you select this feature, the reset
process cannot be canceled or reversed.
1. Follow the steps in “Getting to Secure
Options” above to select Master Reset.
94
2. Press
3. Press
= if you want to reset all your phone’s
options back to their factory settings. You see
Standard Setting.
or
Press
e to exit the menu if you do not want
to reset your phone’s options.
e to exit, or scroll to other features.
Page 95

Clearing All Stored Information
If you want to start over, use Master Clear to reset
all user-selectable options, clear the resettable
timer, and erase all Phone Book information.
Note: Once you select this feature, the process
cannot be canceled or reversed.
1. Follow the steps in “Getting to Secure
Options” on page 94 to select Master Clear.
2. Press
3. Press
= to clear the memory and reset all
your phone’s options back to their factory
settings. You see Busy. (This takes a few
seconds.)
or
Press
e to exit the menu if you do not want
to reset your phone’s options.
e to exit, or scroll to other features.
A-Key Entry
This menu item is locked and can only be used
when instructed by your Service Provider.
Lock/Security
95
Page 96

Customizing Phone Options
The Phone Options menu lets you customize the
way your phone sends and receives calls.
You can personalize your phone’s settings, view
information about the phone, and choose from a
number of convenient features.
In this chapter you will learn how to:
• activate pager mode
• view your own phone number
• switch cellular phone numbers
• review your phone’s feature settings
• select features for vehicular use
• conserve battery power
• display your system identification
• select a language
Follow these symbols as a guide for using the keys
on the side of your phone:
Press
>
to scroll up.
96
Press
= to select.
Press
< to scroll down.
Y ou can also use your phone’s
to scroll through the menu system.
* and # keys
Page 97

Road Map for Phone Options
To enter the menu system:
f, then press =.
Press
or
f 1.
Press
Start:
Recent
Calls
Phone
Book
Time and
Date
Timers
Tone
Control
Lock
Secure
Phone
Options
Pager
Mode Off
My
Number
Change
Number
Feature
Review
Call
Options
Battery
Options
System
Options
Language
To Main
Menu
Automatic
HF On
Multi Key
Answer Off
Open to
Answer On
Automatic
Answer Off
To Main
Menu
97
Phone Options
Page 98

Activating Pager Mode
Getting to Phone Options
1. Press f, then press = to enter the menu system.
2. Press < or > to scroll to Phone Options, and press =
3. Press < or > to scroll to the following features
to select.
Tip: When
Pager Mode is
active,
f
8 only
toggles the
Message Alert
Type settings.
f 8 has
no effect on the
Call Alert Type
settings.
Activating Pager Mode
When Pager Mode is activated, the phone
simulates a pager. Pager Mode suppresses
incoming call alerts but leaves message alerts
active. The following conditions occur:
• Voice call alerts are suppressed.
• Message alerts are allowed.
• The Open to Answer function is turned off.
• The Automatic Answer function is turned off.
• The Call Alert Type, Open to Answer, and
Automatic Answer menus cannot be
accessed.
By default, Pager Mode is turned off. Complete the
following steps to turn Pager Mode on and off.
1. Follow the steps in “Getting to Phone
Options” above to select Pager Mode
on/off. Your phone displays your current
Pager Mode setting.
2. Press
3. Press
= to toggle between Pager Mode on
and off.
e to exit, or scroll to other features.
Shortcut:
Press
r #
for a quick look
at your phone
number.
98
Viewing Your Own Number
Use this feature to view your phone’s currently
active phone number. If you have more than one
phone number, you can change the active number
with the Change Number feature in the Phone
Options menu.
Page 99

1. Follow the steps in “Getting to Phone
Options” on page 98 to select My Number.
2. Press
3. Press
= to view your own phone number.
Your active phone number appears on the
screen. After six seconds, the phone returns
to step 1.
e to exit, or scroll to other features.
Switching Between Numbers
Note: This option is not available in all areas. If
unavailable, please contact your Service Provider.
Your phone can operate on two different home
systems. If you travel often, you can have your
phone programmed with two cellular numbers to
reduce roaming. This feature allows you to change
your active number to the one appropriate for the
area you are in.
When your phone has two numbers, both are
designated as your home system but only one
number can be active at any given time. Calls are
placed and received by the currently active number
only. Each time you turn your phone ON, you’ll see
a message in the display that indicates which
phone number and home system are currently
active.
To switch your phone number:
1. Follow the steps in “Getting to Phone
Options” on page 98 to select Change Number.
The active phone number appears in the
display (for example, 5155551515).
2. Press
3. Press
4. Press
< to switch to your other phone number
(for example, 7085551212).
= to confirm the new setting.
e to exit, or scroll to other features.
Phone Options
99
Page 100

Reviewing Feature Settings
Use this feature to review the changes you’ve made
to feature settings.
Note: While scrolling through Feature Review, you
can only review settings. You cannot change them.
1. Follow the steps in “Getting to Phone
Options” on page 98 to select Feature
Review.
2. Press
3. Press
< or >, or press * or #, to scroll
through features you changed from their
default settings.
If all of the features are set to the factory
standard settings, the your phone displays
Standard Setting.
e to exit the menu.
100
 Loading...