


®
ASTRO
TM
XTL
Digital Mobile Radio
5000
W3 Control Head
User's Guide


MODE
HOME
2
ABC
1
QZ
3
DEF
4
GHI
5
JKL
6
MNO
7
PRS
8
TUV
9
WXY
0
VOL
Side Button 1 (S1)
Side Button 2 (S2)
Side Button 3 (S3)
On/Off
Button
(T1)
Push-To-Talk
(PTT) Button
LED
Indicator
Alphanumeric
Keypad
Volume
Control
Mode Control
Orange Programmable
Button
(T2)
Programmable
Button
(T3)
Display
Indicates scanning of a priority mode
(flashing for Priority 1 mode; solid for
When solid, radio is transmitting securely.
When flashing, radio is receiving securely.
When off, radio is operating in clear
mode.
Flashes when a Private Call, page, or
Indicates carrier squelch is open to
monitor all active conventional mode
traffic. When not displayed, traffic is not
open to monitoring.
Phone Call is received.
scanning.
Priority 2 mode).
When solid, radio is in view mode.
directly to another radio (talkaround).
When off, you are talking through a
When flashing, radio is in programming
mode.
repeater.
V to adjust the volume.
PTT button to transmit; release the PTT button to
receive.
1 Select the desired zone and mode.
2 Press
Tran s mi tting (Conventional Modes)
3 When a mode becomes available, press and hold the
Transmitting (Trunked Systems)
1 Select the desired zone and mode.
V to adjust the volume.
PTT button to receive.
2 Press
3 Press and hold the PTT button to transmit; release the
STATUS ANNUNCIATORS
These are small symbols that appear on the display
indicating the status of certain radio functions.
C)
Carrier Squelch
(
D)
Programming/
J) When on, indicates you are talking
I)
View Mode
(
Direct (
G) When displayed, indicates the radio is
F)
(Secure radios
only)
Call Received
Secure
Operation (
(
H)
Priority Scan
(
Scan (
;7/
.
=21(
.
.
.
=21(
m below
. You will hear a high-pitched (good power-up) tone.
1 Press > until the display shows
Selecting the Zone and Mo de
2 Press
If your rad io shows an error on power-up, contact your
BASIC OPERATION
Press the top left button (T1) to turn the radio on or off.
Turning the Radio On and Off
system manager for assistance.
When the radio is powered on, the display shows
The display shows the current zone and mode.
O or the PTT button to save the displayed
enter the zone number using the keypad.
zone as the new home zone.
4 Press
3 Press > until the display shows the desired zone, or
Monitoring Conventional Modes
021,72521
021,7252))
V to adjust the volume.
Take the microphone off hook, or press the
preprogrammed Monitor button (S1, S2, or S3).
The display shows
Place the microphone on hook, or press the
preprogrammed Monitor button (S1, S2, or S3).
Cancelling Monitoring
The display shows
1 Select the desired zone and mode.
2 Press
Receiving
®
XTL™ 5000 Digital
Mobile Radio with W3
ASTRO
Control Head
Quick Reference Card
087(
21
and the
6&$1
and the
721(62))
or
and the current trunked
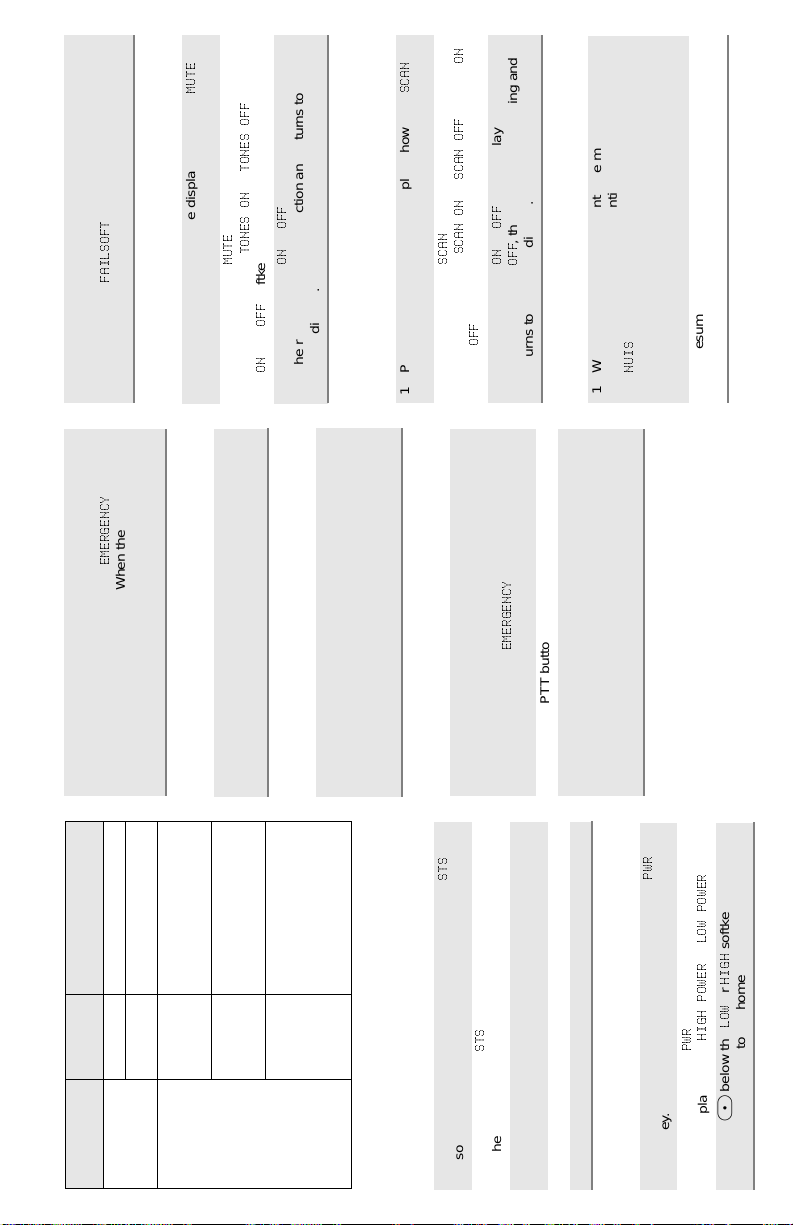
)$,/62)7
softkey.
mode name.
During Failsoft operation, you hear a faint beeping tone
every ten seconds. The radio unsquelches. The display
Failsoft Operation (Trunked Systems Only)
alternately shows
and the
(0(5*(1&<
1 Press < or > until the display shows the
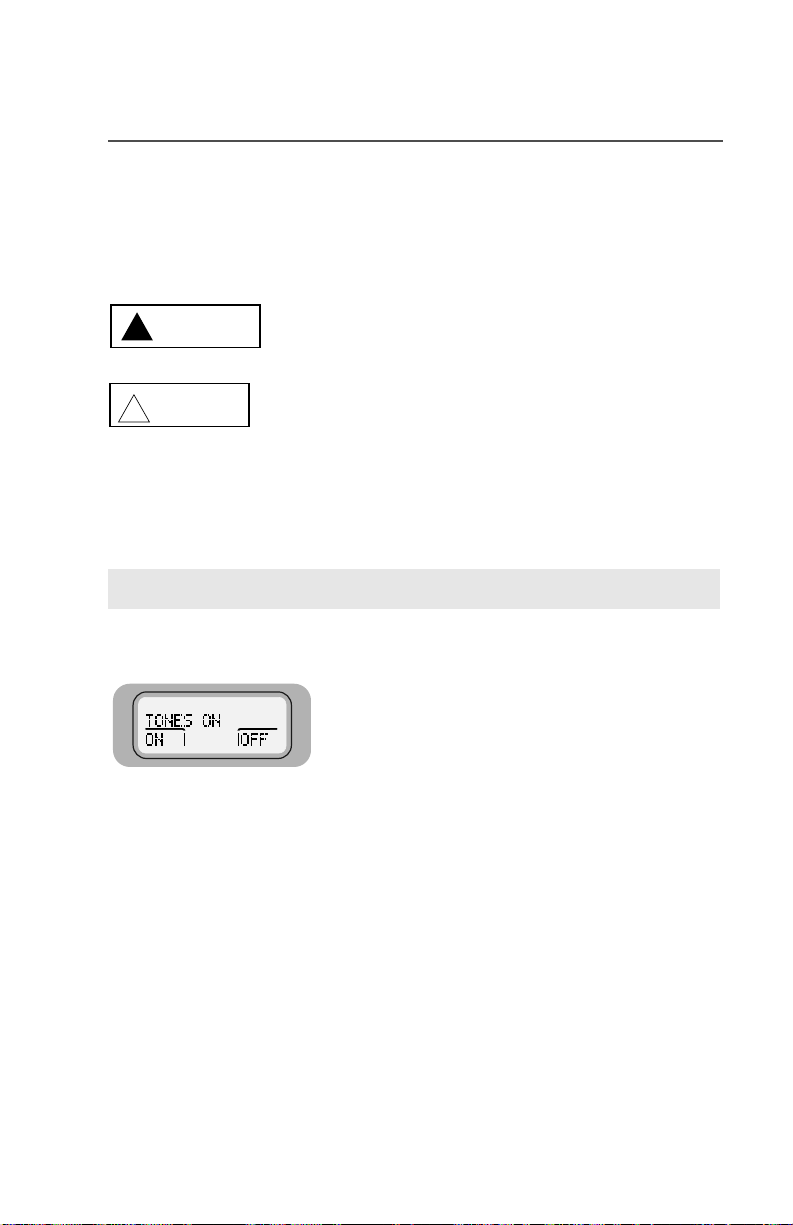
Muting Keypad Tones
.
087(
m below
2 Press
721(621
The display shows
softkeys.
2))
and
21
.
2))
or
21
The radio saves your selection and returns to the
home display.
3 Press m below
Scanning
Turning Scan On or Off
1 Press < or > until the display shows the
6&$12))
or
. The display shows G.
2))
.
6&$1
m below
softkey.
2 Press
6&$121
softkeys.
2))
The display shows
and
or
21
3 Press m below
and the current zone
(0(5*(1&<
, the radio stops scanning and
2))
< or > until the display shows the
softkey, Alternatively, press the preprogrammed
Nuisance Delete button.
The mode is deleted and you hear a valid key-press
chirp.
18,6
When you select
returns to the home display.
delete, press
1 When the radio is locked onto the mode you want to
Deleting Nuisance Modes
and then back on again.
2 To resume scanning the deleted mode, turn scan off
Press and hold the orange top button (T2).
Sending an Emergency Alarm
LED
LED INDICATIONS
The red LED lights steadily. You hear a short,
medium-pitched emergency tone. The display
alternately shows
and mode names.
button for a little over 1-1/2 seconds (or for the
duration specified by your system manager).
You hear a medium-pitched exit tone and the radio
returns to normal operation
The display shows the last acknowledged status.
2 Press the PTT button and announce your emergency.
3 To exit emergency call mode, press the emergency
.
3:5
/2:32:(5
softkey.
or
+,*+
or
/2:
.
+,*+32:(5
3:5
m below
Selecting Transmit Power Level
softkey.
1 Press < or > until the display shows the
status, or enter the list item’s number using the keypad.
4 Press the PTT button to transmit the selected status.
3 Press < or > until the display shows the desired
5 Press O to exit status and return to the home display.
2 Press
The display shows
The radio returns to the home display.
3 Press m below the
The red LED lights steadily. You hear an emergency
tone. The display alternately shows
current zone and mode names. When the alarm is
acknowledged by the dispatcher, you hear four beeps.
The radio returns to normal operation.
Meaning
Condition
Steady red Normal transmission
Unlit Not transmitting
Action
Press the PTT
button to
transmit
Press and hold the orange top button (T2).
The radio transmits the emergency without any external
Sending a Silent Emergency Alarm
Mode busy (clear)
(conventional modes
Single red
flash
Release the
PTT button to
indication than an alarm is in progress.
only)
Mode busy (encrypted)
(conventional modes
only)
Two red
flashes
receive
Press and hold the emergency button before the alarm is
acknowledged,
You hear an exit tone and returns to normal operation. If
the radio does not return to normal operation, press the
Cancelling an Emergency Alarm
Receipt of phone call,
private conversation call,
dispatcher interrupt call,
conventional selective
Flashing
green
PTT button. The radio does NOT sound an exit tone.
call, or Call Alert page
GENERAL FEATURES
1 Press and hold the orange top button (T2).
Sending an Emergency Call
676
.
676
m below
softkey.
2 Press
1 Press < or > until the display shows the
Status (Trunking Systems Only)
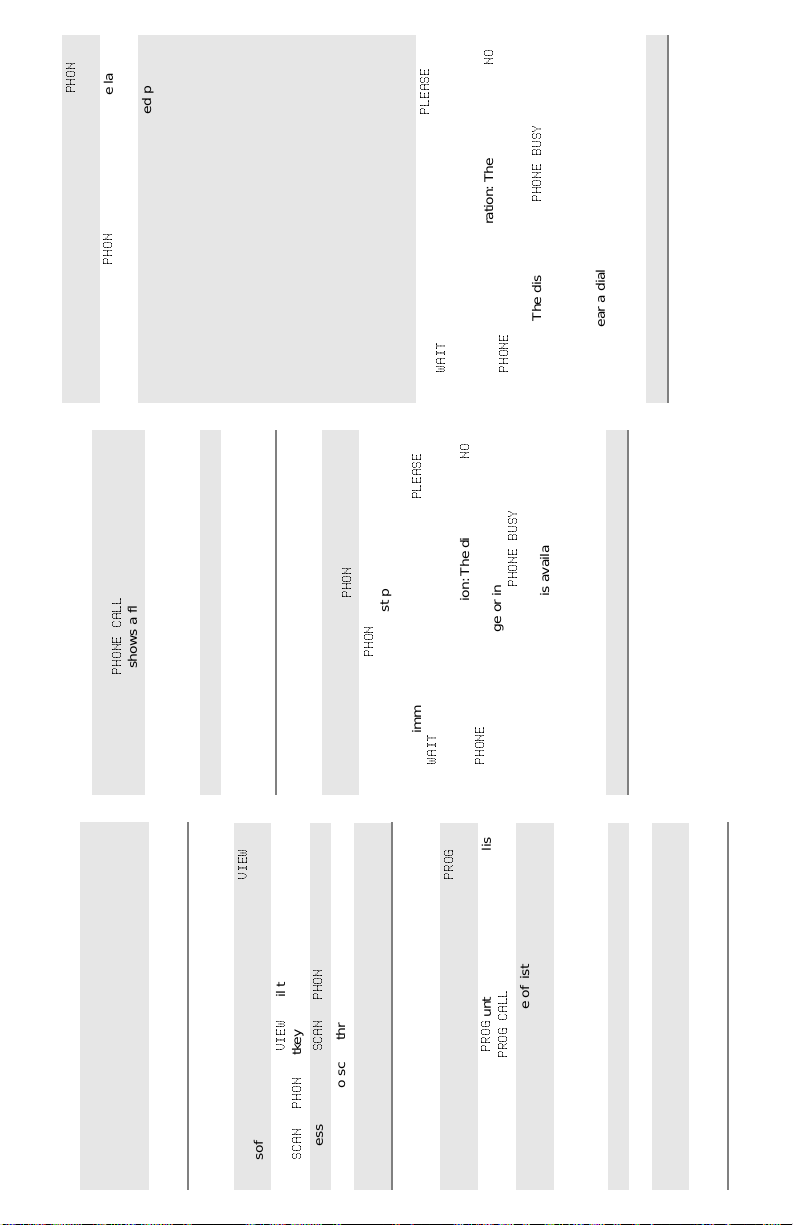
3+21
12
3/($6(
. The display shows the last
3+21
indicating
3+21(%86<
m below
softkey, or press the preprogrammed phone button.
phone number dialed .
number.
2 Press
1 Press < or > until the display shows the
Making Delayed-Acces s Calls
Answering a Telephone Call
Tele phone Operation
3 Use the numeric keypad to enter the desired phone
F.
and the current mode
3+21(&$//
name. The display shows a flashing
You hear a telephone-like ringing sound. The display
alternately shows
1 Press the programmed phone or call-response
button.
< or > to enter the phone list. The display
alternately shows the name and phone number
associated with the entry.
hang up.
9,(:
OR
The radio returns to the home display.
To make a delayed-access call to a number in the
phone list:
Press
O or the preprogrammed phone button to
F annunciator disappears from the display.
The
2 Press the PTT button to talk; release it to listen.
3 Press
< or > to enter the phone list. Then press
To make a delayed-access call to a number at a
location in the phone list:
Press
a location from 1 to 19 corresponding to the number
softkey.
3+21
.
3+21
m below
until the display shows the
2 Press
1 Press < or > (or the preprogrammed button)
Calling the Last Number Dialed
. If you do not hear a dial tone, press O to hang
you wish to call. The display alternately shows the
name and phone number associated with the entry.
:$,7
4 Press the PTT button. The display shows
3/($6(
; otherwise, press the PTT button.
The display shows the last phone number dialed.
With immediate access, the display shows
:$,7
352*
; you hear a low-pitched tone which indicates
up and return to Step 1.
Trunked Telephone Operation: The display shows
the radio is out-of-range or interconnect is not in
service. The display shows
interconnect is in use; the radio will re-dial the number
when interconnect becomes available.
If you hear a dial tone, this indicates access was
successful. The display shows the last phone number
dialed.
5 Proceed to step 1 of “Transmit a Phone Call.”
If you hear a dial tone, this indicates access was
successful.
3 Proceed to step 1 of “Transmit a Phone Call.”
12
Trunked T elephone Operation: The display shows
; you hear a low-pitched tone which indicates
3+21(
the radio is out-of-range or interconnect is not in
3+21(
,
3+21(%86<
service. If the display shows
interconnect is in use; the radio will re-dial the
number when interconnect is available.
.
3+21
until the display shows the
or
9,(:
6&$1
softkey.
3+21
m below
with the radio locked onto the Priority 2 mode. (The
Priority 1 mode cannot be modified.)
You hear a valid key-press chirp.
and then on again.
1 Press the preprogrammed Dynamic Priority button
Dynamic Priority Change (Conventional Operation
Only)
2 To resume sca nn in g t he P r io ri ty 2 mo de , t u rn sc a n of f
softkey.
2 Press
1 Press < or > until the display shows the
Viewing a Scan or Phone List
or
6&$1
> to scroll through the list entries.
The radio returns to the home display.
3 Press m below
5 Press O or the PTT button to exit the list.
4 Press
softkey.
1 Press < or > until the display shows the
Programming a List
until the display shows the list
352*
m below
2 Press
, etc.).
&$//
,
352*
softkey options (
3 Press m below the type of list you wish to access.
I indicator.
< or > until you reach the list entry you
The display shows a flashing
wish to edit, or enter the number of the item in the list
using the keypad.
5 Press the preprogrammed list edit (S2) button.
4 Press
6 Use the numeric keypad to modify the entry.
O to exit programming mode and return to
the home display.
changes.
7 Press the preprogrammed S2 button to save your
8 Press
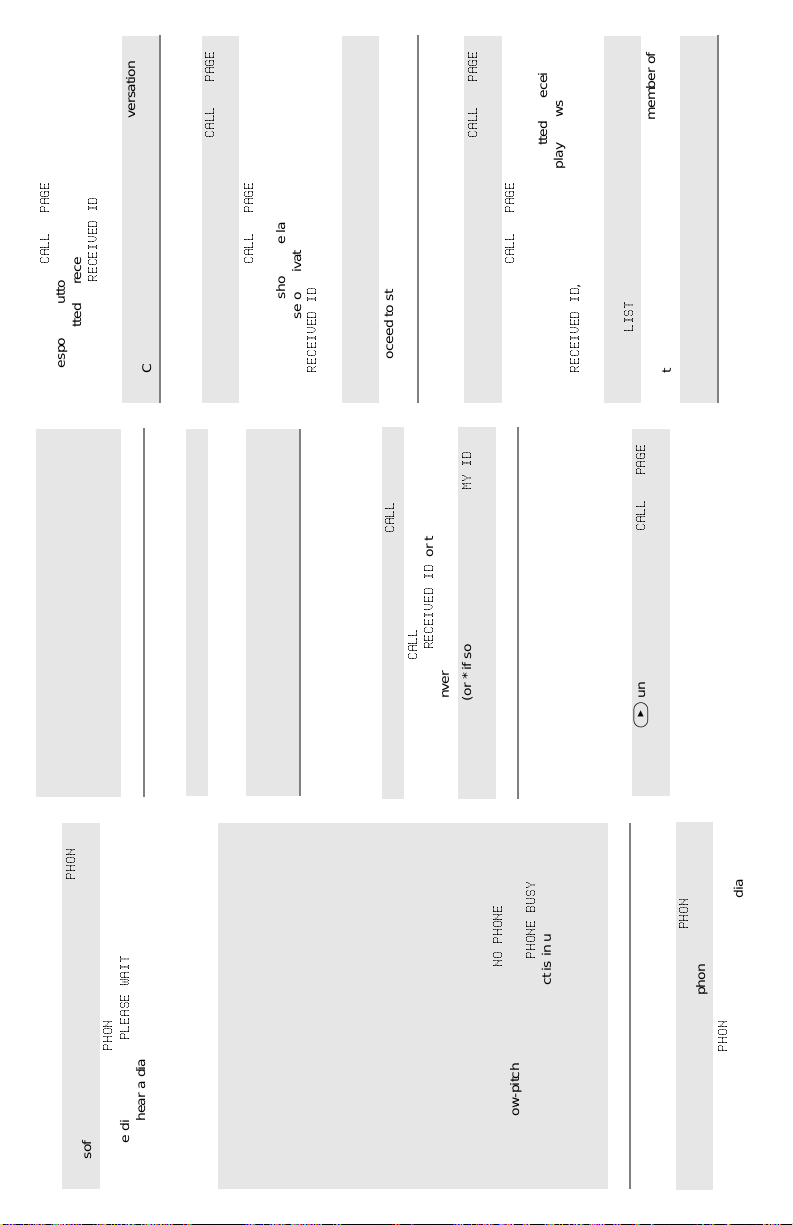
3$*(
(or
&$//
3$*(
(or
&$//
(or use the quick-
3$*(
or
&$//
2 Press m below
response button). The display shows the last ID
, or the ID number
5(&(,9(','
(Private Conversation II).
transmitted or received. In the case of private call, the
display shows
Call” or “Send a Call Alert Page.”
3 Proceed to step 1 of “Send a Private Conversation
Directly Entering the ID Number to be Called or Paged
O to hang up.
(or use the quick-
3$*(
or
&$//
, or the ID number (Private
m below
new ID number.
response button).
for Call Alert) softkey.
1 Press > until the display shows the
2 Press
Conversation II).
The display shows the last ID transmitted or received.
In the case of private call, the display shows
5(&(,9(','
Call” or “Send a Call Alert Page.”
4 Proceed to step 1 of “Send a Private Conversation
3 Use the numeric keypad (0 to 9 keys) to enter the
Scrolling to an ID Number in the Call List
softkey.
&$//
, or the ID number
.
5(&(,9(','
&$//
m below
1 Press > until the display shows the
:
0<,'
(or use the quick-
3$*(
or
&$//
, or the ID number (Private
.
5(&(,9(','
/,67
< or > to scroll to the desired member of
Conversation II).
the list.
4 Press
Call” or “Send a Call Alert Page.”
5 Proceed to step 1 of “Send a Private Conversation
below
3 Press < or > to enter the call list, or press m
3$*(
(or
&$//
m below
response button).
The display shows the last ID transmitted or received.
for Call Alert) softkey.
In the case of private call, the display shows
2 Press
O to return to the home display.
again to talk; release it to listen.
send the hang-up code.
code.
You hear a dial tone.
If you do not hear a dial tone, press
Use the keypad to change the phone number.
1 Press the PTT button to send the phone number.
3 Use the numeric keypad to enter the phone access
3+21
1Press < or > until the display shows the
Making Immediate-Access Calls
4 Proceed to step 1 of “Transmit a Phone Call.”
.
.
3/($6(:$,7
3+21
m below
softkey, or press the preprogrammed phone button.
The display shows
If you hear a dial tone, this indicates access was
successful. The display shows the last phone number
2Press
2 If the other party answers, press the PTT button
Transmitting a Phone Call
O to hang up.
dialed.
If you do not hear a dial tone, press
Return to Step 1.
3 Use the numeric keypad to modify the phone number.
The radio returns to the home display.
3 Press O or the preprogrammed phone button to
To make a delayed-access call to a number at a
TRUNKING FEATURES
Displaying the ID Number
< or > to enter the phone list. Press a
location from 1 to 19 of the number you wish to call.
The display alternately shows the name and phone
location in the phone list:
number associated with the entry.
Press
OR
The display shows
and the ID number.
(Private Conversation II).
2 Press
1 Press > until the display shows the
< or > to enter the phone list. The display
To make a delayed-access call to a number using the
phone list:
Press
4 Press
3 Press > (or * if so programmed) to display
alternately shows the name and phone number
associated with the entry.
displayed
123+21(
Trunked Telephone Operation:
Private Conversation™ II, Enhanced Private
Conversation™, and Call Alert
Calling or Paging the Last ID Number Transmitted or
3+21(%86<
with a low-pitched tone means radio is out-of-range
or interconnect is not in service.
displayed means interconnect is in use; when
interconnect is available, number will be re-dialed.
A dial tone means access is successful.
Received
4 Proceed to step 1 of “Transmit a Phone Call.”
for Call Alert) softkey.
1 Press > until the display shows the
softkey, or
3+21
.
3+21
m below
press the preprogrammed phone button.
The display shows the last phone number dialed.
2 Press
1 Press > until the display shows the
Making Manual-Access Calls
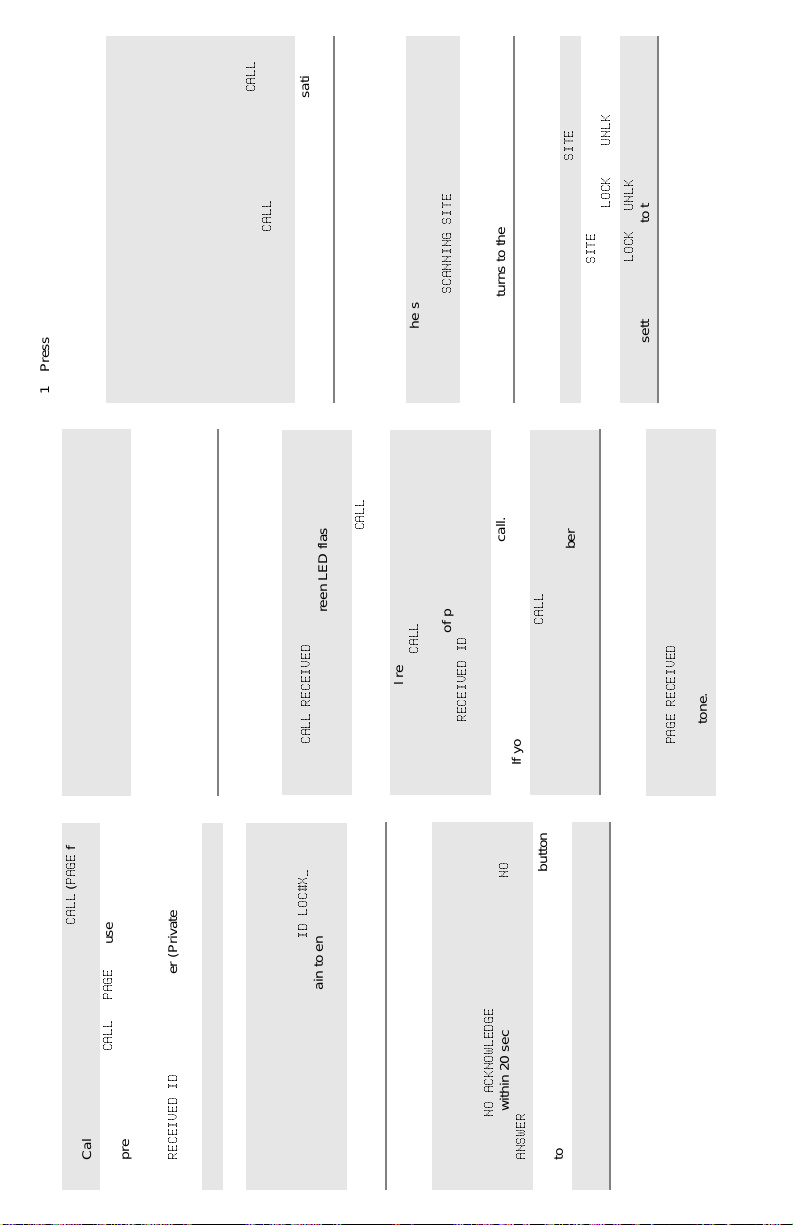
.
&$//
softkeys.
.
81/.
6,7(
and
. The display shows the
6,7(
m below
2 Press
. The radio saves the
/2&.
81/.
or
/2&.
new setting and returns to the home display.
current lock state, and the
3 Press m button
.
&$//
> or the preprogrammed call or call
a. Press
m below
The display shows the ID of the paging radio.
response button until the display shows
b. Press
Call.”
3 Proceed to step 1 of “Send a Private Conversation
Automatic Multiple Site Selection (AMSS)
Viewing the Current Site and Forcing a Site Change
F turn off. The ID is saved as the last ID
number received.
The display shows the current mode. The LED, alert
tone, and
Everyone who belongs to the talkgroup will hear your
transmission.ORIf you want to respond to the page with a Private Call:
1 Press the PTT button to answer the page.
2 Press the PTT button to talk, release to listen.
if the radio is scanning).
6&$11,1*6,7(
radio scans for a new site.
The display shows the number of the site if the radio
1 Press the search button mom entarily.
The radio returns to the home display.
is locked (or
2 Press and hold down the search button while the
1 Press > until the display shows
Locking and Unlocking a Site
O to
number.
If the radio you are paging cannot be reached, you
hear only one beep.
hang up.
If the radio you called has received your page, you
will hear five beeps. The radio returns to the home
display.
1 Press the PTT button to transmit the displayed ID
Sending a Call Alert Page
for
3$*(
(
&$//
2 Press the PTT button to try again, or press
(or use the
3$*(
or
&$//
, or the ID number (Private
Answering a Private (and Enhanced Private)
When a private call is received, the display alternately
Conversation Call
and the current mode name. The
&$//5(&(,9('
shows
.
,'/2&;B
softkey,
&$//
, or the preprogramme d
.
, or the ID number (Private
&$//
m button below
5(&(,9(','
The display shows the last ID number transmitted or
received. In the case of private call, the display
shows
Conversation II).
> until the display shows the
F annunciator and the green LED flash. You hear
or press the preprogrammed call response button.
the
two alert tones.
1Press
2 Press the call response button again, or press the
&$//
If you hear a busy tone, the system is busy.
call response button to hang up.
The radio saves the caller’s ID number and returns to
the home display.
3 Press the PTT button to answer the call.
4Press O, m below
12
. If the other party does not
and the current mode name. The
3$*(5(&(,9('
F annunciator and the green LED flash. You hear a
the
When a call alert page is received, the display alternately
shows
Answering a Call Alert Page
four-beep tone.
.
1 Press the PTT button to transmit the displayed ID
12$&.12:/('*(
O to exit private call, or press the PTT button
number.
If the radio you are calling is not in service, the display
shows
answer within 20 seconds, the display shows
$16:(5
The radio returns to the home display.
to speak.
2 Press
3 Press O to hang up.
m below
Call Alert) softkey.
1 Press > until the display shows the
Going Directly to an ID Number in the Call List
2 Press
5(&(,9(','
preprogrammed quick-response button).
The display shows the last ID transmitted or received.
In the case of private call, the display shows
Conversation II).
3 Press < or > to enter the call list.
< or > to scroll to the desired list entry.
4 Press
The display alternately shows the name and ID
number associated with the entry. If there are 10 or
more list entries, the display shows
Use the numeric keypad again to enter the second
digit of the location number.
Call” or “Send a Call Alert Page.”
5 Press the 0 to 9 keys to enter the location number.
6 Proceed to step 1 of “Send a Private Conversation
Sending a Private Conversation Call

Reload key.
Set radio to
“clear,” or
Indicates clear
transmission on
secure-equipped radio.
Keyfail. Encryption key
lost or erased.
Keyfail. Radio set in
secure position. PTT is
Type of Tone Indication Action
One beep
immediately
after PTT button
press
Six medium-
pitched tones
Six medium-
ALERT TONES (SECURE-EQUIPPED
RADIOS ONLY)
Emergency alarm/call
exit. Exiting.
Failsoft (trunked
pitched tones
Waiting for
next
systems only).
Phone busy. All modes
busy. Radio is in queue.
select a clear
being pressed.
(continuous)
available line.
mode, or
reload key.
Waiting for
Trunked system busy
Reload key.
Encrypted operation
Six medium-
next
available
(trunked systems only).
Radio is in queue.
Set radio to
“clear,” or
select a clear
mode, or
reload key.
Reload key.
problem. Radio is set
to either clear or
secure.
Encrypted operation
problem. PTT button
not being pressed.
Loss of encryption key
during secure
operation.
pitched tones
on radio power-
up
Six medium-
pitched tones
every five to ten
seconds
Consecutive,
medium-pitched
tones
mode.
Your page has been
received by the target
radio.
Private Conversation
Okay to
transmit in that
talkgroup.
call or conventional
selective call received.
Call back (trunked
systems only). A
talkgroup is now
available.
Call Alert (page)
received.
ALERT TONES (Continued)
ALERT TONES
Type of Tone Indication Action
Continuous,
medium-
pitched tone
Faint beeping
tone every 10
seconds
“Bah-bah-
bah-bah”
Contact your
service
representative.
Unsuccessful power-up.
Radio failed self-test.
Radio not ready for use.
Invalid (bad) key press.
A key press was
rejected.
Time-out timer warning.
Transmission time will
expire in four seconds.
Valid (good) key press.
Type of Tone Indication Action
Short, low-
pitched tone
Short,
A key press was
accepted.
medium-
pitched tone
Pressed emergency
Single,
medium-
pitched tones
followed by
group of four
medium-
pitched tones
Group of two
medium-
pitched tones
Group of
three
medium-
pitched (di-di-
dit) tones
Group of four
medium-
pitched tones
every five
seconds
Release PTT
button.
button to enter
emergency. Emergency
entered.
Successful power-up.
Radio passed self-test.
Transmit on receive-
only mode. Pr essed
PTT button on receive-
only mode.
Transmit inhibit on busy
mode. Pressed PTT
button while mode was
busy.
Short, high-
pitched tone
Continuous,
low-pitched
tone
Release PTT
button.
Invalid mode. An invalid
or unprogrammed
operation.
Time-out timer timed
out. Transmission was
terminated.

ASTRO® XTL™ 5000
Digital Mobile Radio
with
W3 Control Head
User’s Guide
68P81096C67-A
Document Creation Date: 2/28/03
Document Modification Date: 6/24/03

Product Safety and RF Exposure Compliance
C
n
Before using this product, read the operating instructions for safe
!
usage contained in the Product Safety and RF Exposure booklet
a u t i o
enclosed with your radio.
This radio is restricted to occupational use only to satisfy FCC RF energy
exposure requirements. Before using this product, read the RF energy
awareness information and operating instructions in the Product Safety and RF
Exposure booklet enclosed with your radio (Motorola Publication part number
68P81095C99) to ensure compliance with RF energy exposure limits.
Computer Software Copyrights
ATTENTION!
The Motorola products described in this manual may include copyrighted Motorola
computer programs stored in semiconductor memories or other media. Laws in the
United States and other countries preserve for Motorola certain exclusive rights for
copyrighted computer programs, including, but not limited to, the exclusive right to copy
or reproduce in any form the copyrighted computer program. Accordingly, any
copyrighted Motorola computer programs contained in the Motorola products described
in this manual may not be copied, reproduced, modified, reverse-engineered, or
distributed in any manner without the express written permission of Motorola.
Furthermore, the purchase of Motorola products shall not be deemed to grant either
directly or by implication, estoppel, or otherwise, any license under the copyrights,
patents or patent applications of Motorola, except for the normal non-exclusive license
to use that arises by operation of law in the sale of a product.
Documentation Copyrights
No duplication or distribution of this document or any portion thereof shall take place
without the express written permission of Motorola. No part of this manual may be
reproduced, distributed, or transmitted in any form or by any means, electronic or
mechanical, for any purpose without the express written permission of Motorola.
Disclaimer
The information in this document is carefully examined, and is believed to be entirely
reliable. However, no responsibility is assumed for inaccuracies. Furthermore, Motorola
reserves the right to make changes to any products herein to improve readability,
function, or design. Motorola does not assume any liability arising out of the
applications or use of any product or circuit described herein; nor does it cover any
license under its patent rights, nor the rights of others.
MOTOROLA, the Stylized M Logo, ASTRO, SmartZone, and FLASHport are registered
in the U.S. Patent & Trademark Office. All other product or service names are the
property of their respective owners. P25 radios contain technology patented by Digital
Voice Systems, Inc.
© Motorola, Inc. 2003. All Rights Reserved. Printed in the U.S.A. 7/03.
ii
Notations Used in This Manual
WARNING
CAUTION
Throughout the text i n this pub licat ion , you wil l notic e the u se of WARNINGS,
CAUTIONS, and Notes. These notations are used to emphasize that safety
hazards exist, and care that must be taken or observed.
WARNING: An operational procedure, practice, or other
!
!
condition, which might result in injury or death if not carefully
observed.
CAUTION: An operational procedure, practice, or other
condition, which might result in damage to the equipment if not
carefully observed.
Note: Note: An operational procedure, practice, or other condition,
which is essential to emphasize.
The following special notations identify certain items:
Example Description
Light button or
3+21(
>
Buttons and keys are shown in bold print or as a key
symbol.
The special display font is used to show information in
the display.
Menu items (softkeys) are similar to the way they
appear on the radio’s display.
ASTRO XTL 5000 Digital Mobile Radio with W3 Control Head iii

Notes
iv

Contents
Computer Software Copyrights ....................................... ...... ....... ..... ii
Documentation Copyrights ................................................................ ii
Disclaimer ......................................................................................... ii
Notations Used in This Manual .........................................................iii
Getting to Know Your Radio . . . . . . . . . . . . . . . . . . . . 1
Major Radio Components .................................................................2
The XTL 5000 Radio ..................................................................2
The W3 Control Head .................................................................2
Using Your Radio: The Basics ..........................................................4
Turning Your Radio On or Off ..................................................... 4
Adjusting the Volume ......... ....................................... ...... ....... ..... 5
Turning the Display/Keypad Light On or Off ...............................5
Browsing through Menus (Softkeys) ........................................... 5
Entering Softkey Menus .............................................................6
Returning to the HOME Display .................. ...... ....... ...... ....... ..... 7
Interpreting Radio Status Indicators ...........................................7
Entering Characters Using the Keypad .................................... 1 3
Basic Radio Operation . . . . . . . . . . . . . . . . . . . . . . . . 15
Monitoring Conventional Modes .....................................................16
Selecting a Zone and Mode (Channel) ...........................................17
Receiving on a Conventional Mode ................................................18
Changing the Squelch Setting ........................................................19
Receive on Trunked Systems .........................................................20
Transmitting on Conventional Modes ..............................................21
Transmitting on Trunked Systems ................................................... 22
Time-out Timer ................................................................................23
Common Radio Features . . . . . . . . . . . . . . . . . . . . . . 25
Sending a Status Call (Trunking Only) ............................................26
Selecting Transmit Power Level ......................................................28
Conventional Squelch Options ........................................................29
Analog Squelch Options ...........................................................29
Digital Squelch Options ............................................................29
Sending an Emergency Alarm .................... ....... ...... ....... ...... ..........30
Sending a Silent Emergency Alarm ................................................31
Sending an Emergency Call .... ...... ....... ...... ....... ...... ....... ................32
Muting and Unmuting the Keypad Tones ........................................34
Types of Scan .................................................................................35
ASTRO XTL 5000 Digital Mobile Radio with W3 Control Head v

Turning Scan On or Off .............................................................37
Viewing a Scan List .........................................................................38
Programming a Scan List ................................................................39
Deleting Nuisance Modes .........................................................41
PTT-ID (Optional) ............................................................................42
Viewing a Page, Call, or Phone List ................................................43
Telephone Operation (Conventional and Trunking) .........................44
Answer a Telephone Call ..........................................................44
Selecting a Phone Number to Call ............................................45
Initiating a Telephone Call ........................................................47
Call Alert (Conventional and Trunking) ............................................49
Call Alert Paging .......................................................................49
Page the Last ID Number Transmitted or Received .................49
Entering Directly the ID Number to be Paged ...........................50
Scrolling to an ID Number in the Page List ...............................51
Going Directly to an ID Number in the Page List ......................52
Sending a Call Alert Page . ....... ...... ....... ...... ....... .......................54
Answering a Call Alert Page .....................................................55
Programming a Page, Call, or Phone List Number .........................57
Programming a Page, Call, or Phone List Name .............................60
Optional External Alarms (Horn and/or Lights) ................................63
Turning External Alarm(s) On ...................................................63
Changing or Turning Off the Selected Alarm(s) ........................64
When a Call Is Received While Alarms Are Turned On ............65
Conventional Features. . . . . . . . . . . . . . . . . . . . . . . . 67
Repeater/Direct Operation ...............................................................67
Smart PTT .......................................................................................68
Talkgroup Calls ................................................................................69
Selecting a Talkgroup ...............................................................69
Selective Call ...................................................................................71
Selective Calling .......................................................................71
Calling the Last ID Number Transmitted or Received ...............71
Entering Directly the ID Number to be Called ...........................72
Scrolling to an ID Number in the Call List .................................73
Going Directly to an ID Number in the Call List .........................74
Starting a Selective Call ............................................................76
Answering a Selective Call .......................................................77
Trunking Features . . . . . . . . . . . . . . . . . . . . . . . . . . . 79
vi

Features Used on Trunking Systems ..............................................79
Viewing Your Radio’s ID Number ....................................................80
Enhanced Private Conversation™ ..................................................81
Private Conversation Calling ....................................................81
Calling the Last ID Number Transmitted or Received ..............81
Entering Directly the ID Number to be Called ........................... 82
Scrolling to an ID Number in the Call List .................................83
Going Directly to an ID Number in the Call List ........................84
Starting a Private Conversation Call .........................................86
Answering an Enhanced Private Conversation Call .................87
Dynamic Regrouping ......................................................................89
Electronic (Menu) Mode Selection .. ...... ....... ...... ....... ...... ..........89
Selecting Enable and Disable ...................................................89
Reprogramming Request .........................................................90
SmartZone
Locking/Unlocking a Site ..........................................................91
Searching for a Site ..................................................................93
Site Trunking ............................................................................94
Failsoft ...................................................................................... 94
Out-of-Range Indication ..................................................................95
®
Operation ...................................................................91
Secure Features . . . . . . . . . . . . . . . . . . . . . . . . . . . . . 97
Features Available on Secure XTL 5000 ........................................97
Transmitting in Secure and Clear Modes ........................................98
Selecting an Index (Conventional Only) ..........................................99
Selecting a Key (Conventional Only) ............................................100
Glossary. . . . . . . . . . . . . . . . . . . . . . . . . . . . . . . . . . . 103
Patent Disclosure ..........................................................................107
Commercial Warranty (Standard) ..................................................107
Index. . . . . . . . . . . . . . . . . . . . . . . . . . . . . . . . . . . . . . 109
W3 Control Head Foldout Page . . . . . . . . . . . . . . . . 115
ASTRO XTL 5000 Digital Mobile Radio with W3 Control Head vii

Notes
viii
Getting to Know Your Radio
Motorola XTL 5000 Digital Mobile Radios are sophisticated, state-ofthe-art, communication units, pioneering the latest technology in radio
electronics. Intelligent and flexible software increases the radio’s
capability, and permits many of the radio’s features to be customized
for your specific needs.
HOME
VOL
M
O
D
E
1
Q
Z
2
ABC
4
G
H
3
I
DEF
5
JKL
7
P
6
R
S
M
NO
8
TUV
9
WXY
0
The XTL 5000 Digital Mobile Radio can operate in the following
frequency ranges:
VHF UHF 700/800 MHz
136-174 MHz 380-470 MHz 764-776 MHz
450-520 MHz 794-806 MHz
806-825 MHz
851-870 MHz
ASTRO XTL 5000 Digital Mobile Radio with W3 Control Head 1

Getting to Know Your Radio
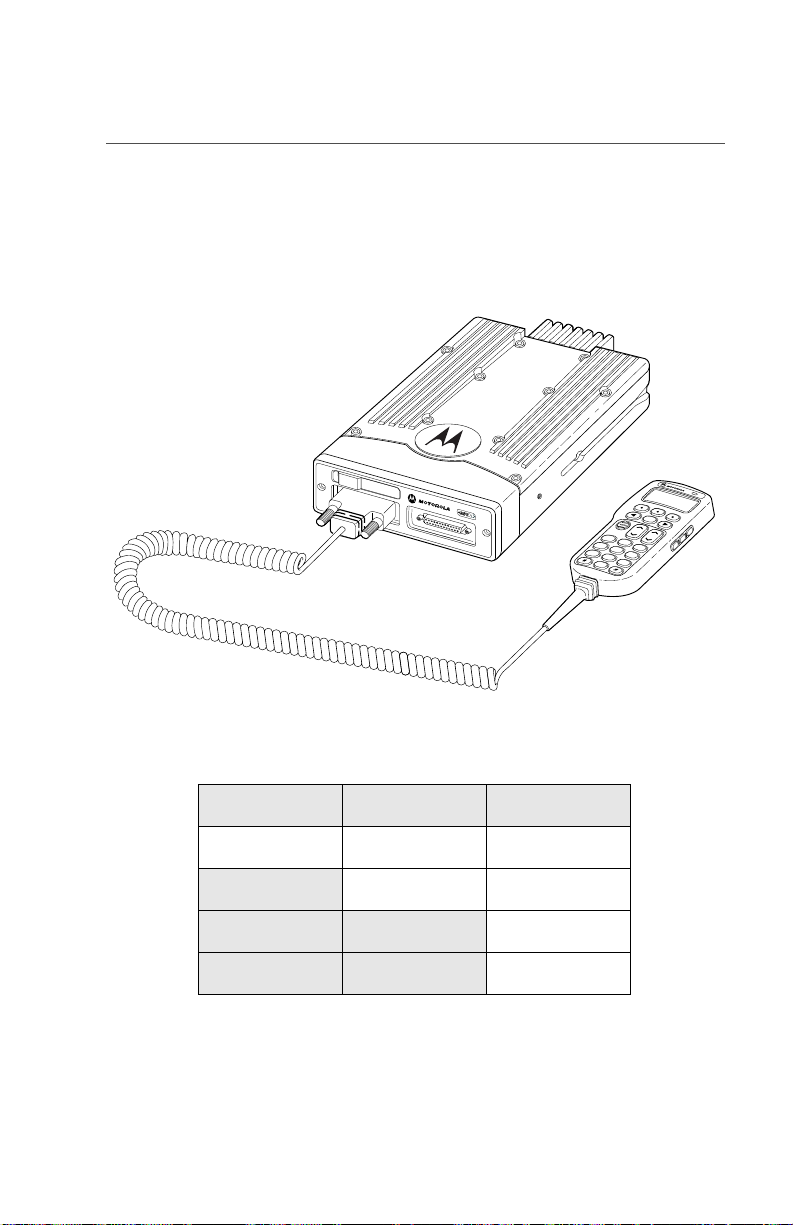
Major Radio Components
Your radio has two major components: the radio unit installed in your
vehicle and the control head that is used to activate various radio
features. You may also have radio accessories installed based on the
specific configuration of your radio .
This user guide describes how to use your radio and its control head.
The foldout page inside the back cover of this guide contains an
illustration of the W3 control head showing all the controls and
programmable buttons situated on the control head. Keep this foldout
open as a reference as you review the procedures in this user guide.
The XTL 5000 Radio
The XTL 5000 radio unit contains a receiver, a transmitter, and
associated internal circuitry. The radio is programmed by your system
manager to meet your specific needs and/or those of your workgroup.
The W3 Control Head
The W3 control head that came with your XTL 5000 radio has the
following features (refer to the foldout at the back of this user guide):
• On/Off Button (T1): Used to turn the radio on or off (see
page 4).
• Two-line, 14-character-per-line, liquid-crystal display
(LCD): Shows alphanumeric messages or feature information
as you use your radio. Also displays status annunciators above
the character lines, indicating the status of certain radio
functions (see page 7).
• Full Keypad : Features 20 keys and used to enter menus, scroll
through a list of displayed options, and enter data.
2

Getting to Know Your Radio
The first row contains three dedicated menu-select buttons
(see page 6).
The second row contains the left scroll key
O, and the right scroll key >.
<, the HOME key
The third row has two rocker switches: the VOL rocker button
V) which is used to adjust the volume level up or down, and the
(
MODE rocker button (
M) which is used to scroll up or down
through the list of available modes.
A set of standard 3 x 4 telephone keys complete the keypad.
• PTT button: Pressed to transmit on the displayed mode and
released to receive.
• LED indicator: Green/red light-emitting diode that indicates
radio status as you operate various features (see page 9).
• Programmable buttons: Five buttons that can be customprogrammed by your system manager. These are:
Orange Programmable Button (T2)
Programmed at the factory to activate the Emergency feature.
Programmable Button (T3)
Programmable Side Button 1 (S1)
Programmable Side Button 2 (S2)
Programmable Side Button 3 (S3)
Check with your system manager for information on how these
buttons have been programmed. Use the foldout at the back of
this manual to record the functions that have been programmed
to each button.
ASTRO XTL 5000 Digital Mobile Radio with W3 Control Head 3
Getting to Know Your Radio
Using Your Radio: The Basics
This subsection gives you the basic knowledge you need in order to
use your radio. The following topics are covered:
• Turning your radio on or off (page 4)
• Adjusting the volume (page5)
• Turning the display/keypad light on or off (page 5)
• Browsing through menu options or softkeys (page 5)
• Entering softkey menus (page 6)
• Returning to the Home display ( page 7)
• Interpreting various radio indicators (page 7)
• Entering characters using the keypad (page 13)
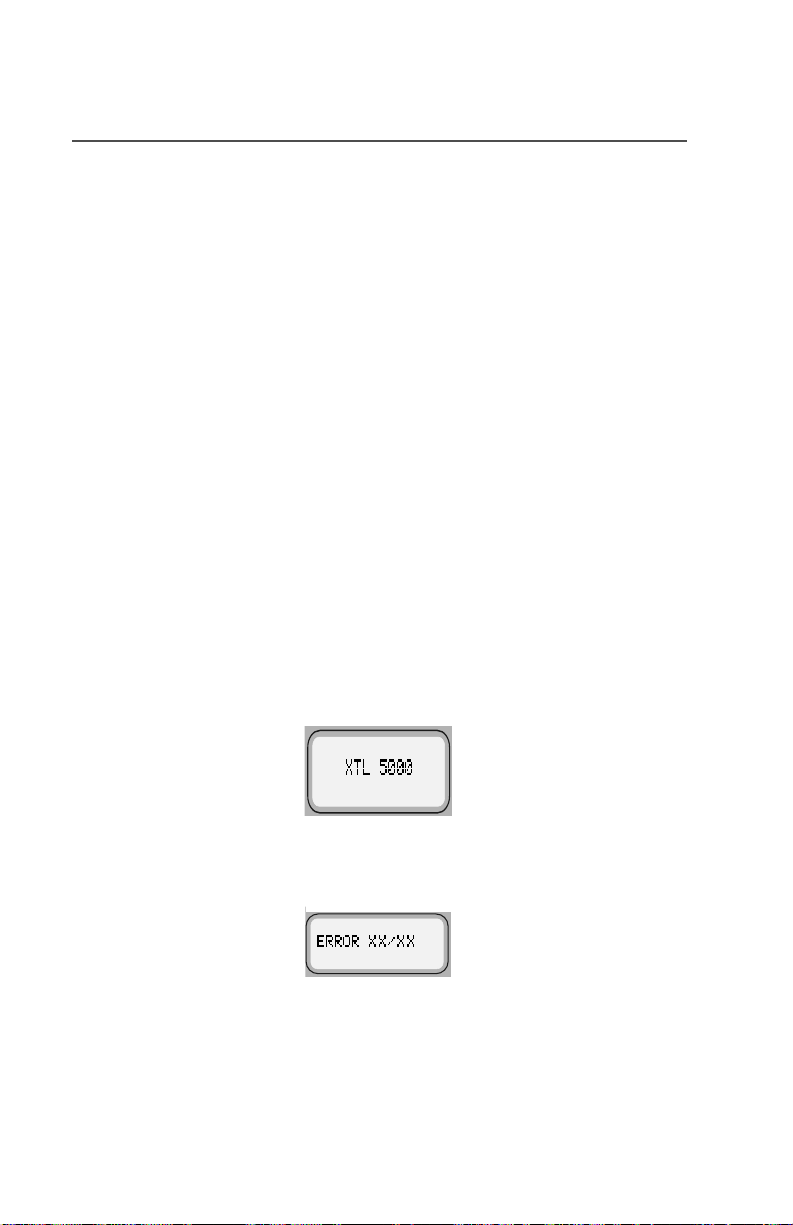
Turning Your Radio On or Off
To turn your radio on or off:
Press the top left button on the control head (T1).
The display shows
indicating the radio has passed a self-check.
If the display shows
alphanumeric code) and you hear a low-pitched tone, the radio
has failed the self-test.
Do the following:
1 Press the top left button (T1) to turn the radio off.
2 Make sure the power source is not malfunctioning.
3 Press T1 to turn the radio on again.
;7/. You hear a high-pitched tone
(5525;;;; (where ;;;; is an
4

Getting to Know Your Radio
If the radio fails the self-test again, contact your system
manager.
Adjusting the Volume
To adjust the volume to a comfortable level:
Press the Volume rocker button (
volume level is reached.
V) up or down until the desired
Turning the Displ ay/Keypad Light On or Off
The display light is useful when you need to read the information on
the display and locate keys on the keypad in less than optimal lighting
conditions (for example, during night time).
To toggle the display and keypad light on or off:
Press the preprogrammed light button. (The default is Side
Button 1.)
The Control Head ships from the factory with the backlighting set to
ON.
Browsing through Menus (Softkeys)
Softkeys are menu items that appear on the bottom row of the control
head’s display. These menu items are software-activated and enable
you to access many of the radio’s features without having to activate
dedicated mechanical controls. Each menu item has a four-digit alpha
label (for example,
To browse through available softkey options and lists:
Press the
087( and 9,(:).
< and > scroll key as appropriate.
If you scroll continuously in one direction, the display will wrap around
to the beginning of the list. To scroll faster, hold down the desired
scroll key.
ASTRO XTL 5000 Digital Mobile Radio with W3 Control Head 5

Getting to Know Your Radio
Entering Softkey Menus
To access a menu item:
Press the menu-select button (
softkey you wish to access.
m) immediately below the
6

Getting to Know Your Radio
Returning to the HOME Display
In most cases, the home d ispla y is you r radio ’ s dispatch state, that is,
the default channel and zone that your radio operates on. T o return to
the Home display at any time:
Press the
O key for at least one second.
Note: The default channel and zone are programmed by your
system manager.
Interpreting Radio Status Indicators
Your radio has three types of status indicators:
• Status annunciators that appear on the display
• LED indicators
• Alert tones
Status Annunciators
These are small symbols that appear on the display above the
channel name indicating status as you operate various radio features.
Annunciator Indicates...
C
D
Carrier Squelch (Conventional mode only)
All active traffic on the selected channel in being
monitored during conventional operation.
When not displayed, traffic is not open to monitoring.
Secure Operation only
When lit solid, radio is transmitting in secure mode.
When flashing, radio is receiving in secure mode.
When off, radio is operating in clear mode.
F
ASTRO XTL 5000 Digital Mobile Radio with W3 Control Head 7
Call Received
Flashes when a Private Call, Phone Call or page is
received.

Getting to Know Your Radio
Annunciator Indicates...
G
H
(Flashing Dot)
H
(Steady Dot)
I
J
Scan
The radio is scanning a preprogrammed list of channels/
modes for activity.
Priority 1 Channel Scan
The channel assigned as the Priority 1 channel is being
scanned for activity.
Priority 2 Channel Scan
The channel assigned as the Priority 2 channel is being
scanned for activity.
View/Programming Mode
When solid, radio is in list view mode.
When flashing, radio is in list progr amming mode.
Direct/Talkaround (Conventional operation only)
When on, indicates you are talking directly to another
radio.
When off, you are talking through a repeater.
8
Getting to Know Your Radio
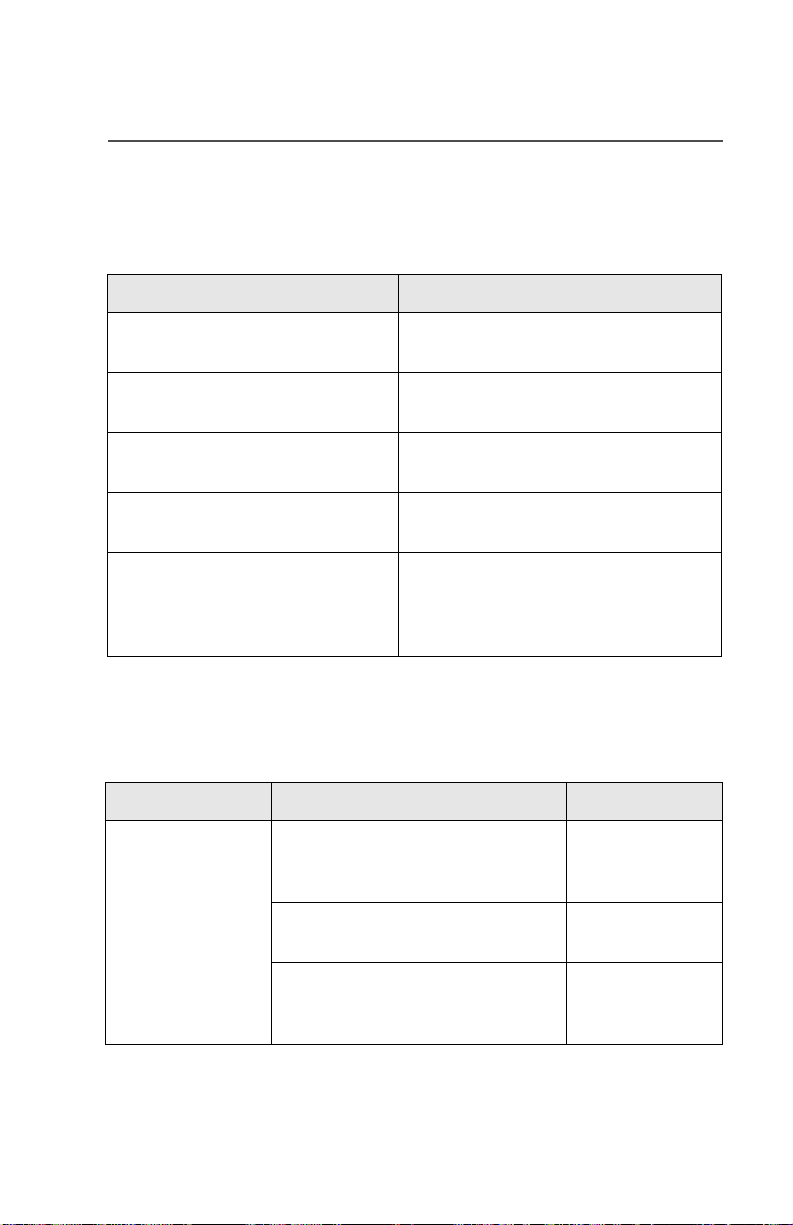
LED Indications
The LED indicator on the front of the W3 control head indicates
operational status as you use various features:
LED State Indicates...
Continuous red when you press
PTT button to transmit
Unlit when you press PTT button
to transmit
Single red blink when you release
PTT button to receive
Two red blinks when you release
PTT button to receive
Blinking green when you release
PTT button to receive
Normal transmission
Not transmitting
Mode busy (conventional clear)
Mode busy (conventional encrypted)
Receipt of phone call, Private
Conversation call, dispatcher
interrupt call, conventional selective
call, or Call Alert page
Alert Tones
Your radio uses alert tones to inform you of radio conditions.
Type of Tone Indicates... Action
Short, lowpitched tone
Unsuccessful power-up. Radio
failed self-test. Radio not ready
for use.
Contact your
service
representative.
Invalid (bad) key press. A key
press was rejected.
Time-out timer warning.
Transmission time will expire in
four seconds.
ASTRO XTL 5000 Digital Mobile Radio with W3 Control Head 9

Getting to Know Your Radio
Type of Tone Indicates... Action
Short, mediumpitched tone
Short, highpitched tone
Continuous, lowpitched tone
Continuous,
medium-pitched
tone
Faint beeping
tone every ten
seconds (trunked
systems only)
Valid (good) key press. A key
press was accepted.
Pressed emergency button to
enter emergency. Emergency
entered.
Successful power-up. Radio
passed self-test.
Transmit on receiv e-only mode.
Pressed PTT button on receiveonly mode.
Transmit inhibit on busy mode.
Pressed PTT button while mode is
busy.
Invalid mode. An invalid or
unprogrammed operation.
Time-out timer timed out.
Transmission terminated.
Emergency alarm/ca ll exi t.
Exiting.
Failsoft.
Release PTT
button.
Release PTT
button.
“Bah-bah-bahbah” (trunked
systems only)
Single, mediumpitched tones
followed by group
of four mediumpitched tones
10
Trunked system busy. Radio is in
queue.
Your page has been received by
the target radio.
Waiting for next
available mode.

Getting to Know Your Radio
Type of Tone Indicates... Action
Group of two
medium-pitched
tones
Group of three
medium-pitched
(di-di-dit) tones
(trunked systems
only)
Group of four
medium-pitched
tones every five
seconds
Short, mediumpitched tone
(trunking only)
Four short,
medium-pitched
tones
Continuous, lowpitched tone
Private Conversation call
received.
Call back. A talkgroup is now
available.
Call Alert (page) received by your
radio.
Echo received in response to
emergency alarms.
Emergency alarm
acknowledged.
No Emergency. Current trunking
personality or
conventional system does not
have emergency enabled. No
emergency tone.
Okay to transmit
in that talkgroup.
Group of two
high-pitched
tones
ASTRO XTL 5000 Digital Mobile Radio with W3 Control Head 11
Fast ring in Private call.
System is searching for target
radio.

Getting to Know Your Radio
Alert Tones (Secure-Equipped Radios Only)
Your secure-equipped radio uses alert tones to let you know the
condition of security features.
Type of T on e Indication Action
One beep
immediately aft er
PTT button press
Six mediumpitched tones
Six mediumpitched tones
(continuous)
Six mediumpitched tones on
radio power-up
Six mediumpitched tones
every five to ten
seconds
Consecutive,
medium-pitched
tones
Indicates clear transmis sion on
secure-equipped radio.
Keyfail. Encryption key lost or
erased.
Keyfail. Radio set in secure
position. PTT is being pressed.
Encrypted operation problem.
Radio is set to either clear or
secure.
Encrypted operation problem.
PTT button not being pressed.
Loss of encryption key during
secure operation.
Reload key.
Set radio to clear,
or select a clear
mode, or reload
key.
Reload key.
Set radio to clear,
or select a clear
mode, or reload
key.
Reload key.
12

Getting to Know Your Radio
Entering Characters Using the Keypad
Your XTL 5000 radio accepts input through the keypad in the form of
numeric or alphanumeric strings. You may use manual keypad entry
to select a status or a mode, to program a list, or to dial a phone
number.
For instance, when you access the Status function using the
softkey, the display shows the last successfully acknowledged status
first. If you would like to send a different status message, you can
scroll to the entry or, in the case of long lists, use the keypad to enter
a number corresponding to its numeric location in the list. If you wish
to access the twelfth status entry in the list, for example, you can
press 1 and then 2, and press the PTT button to transmit that status.
This concludes an introduction on operating your XTL 5000 radio.
You can now begin familiarizing yourself with using your radio to
perform basic procedures such as transmitting and receiving. These
are covered in the following chapter.
676
ASTRO XTL 5000 Digital Mobile Radio with W3 Control Head 13

Getting to Know Your Radio
Notes
14
 Loading...