

ASSEMBLY INSTRUCTIONS
STEP 1
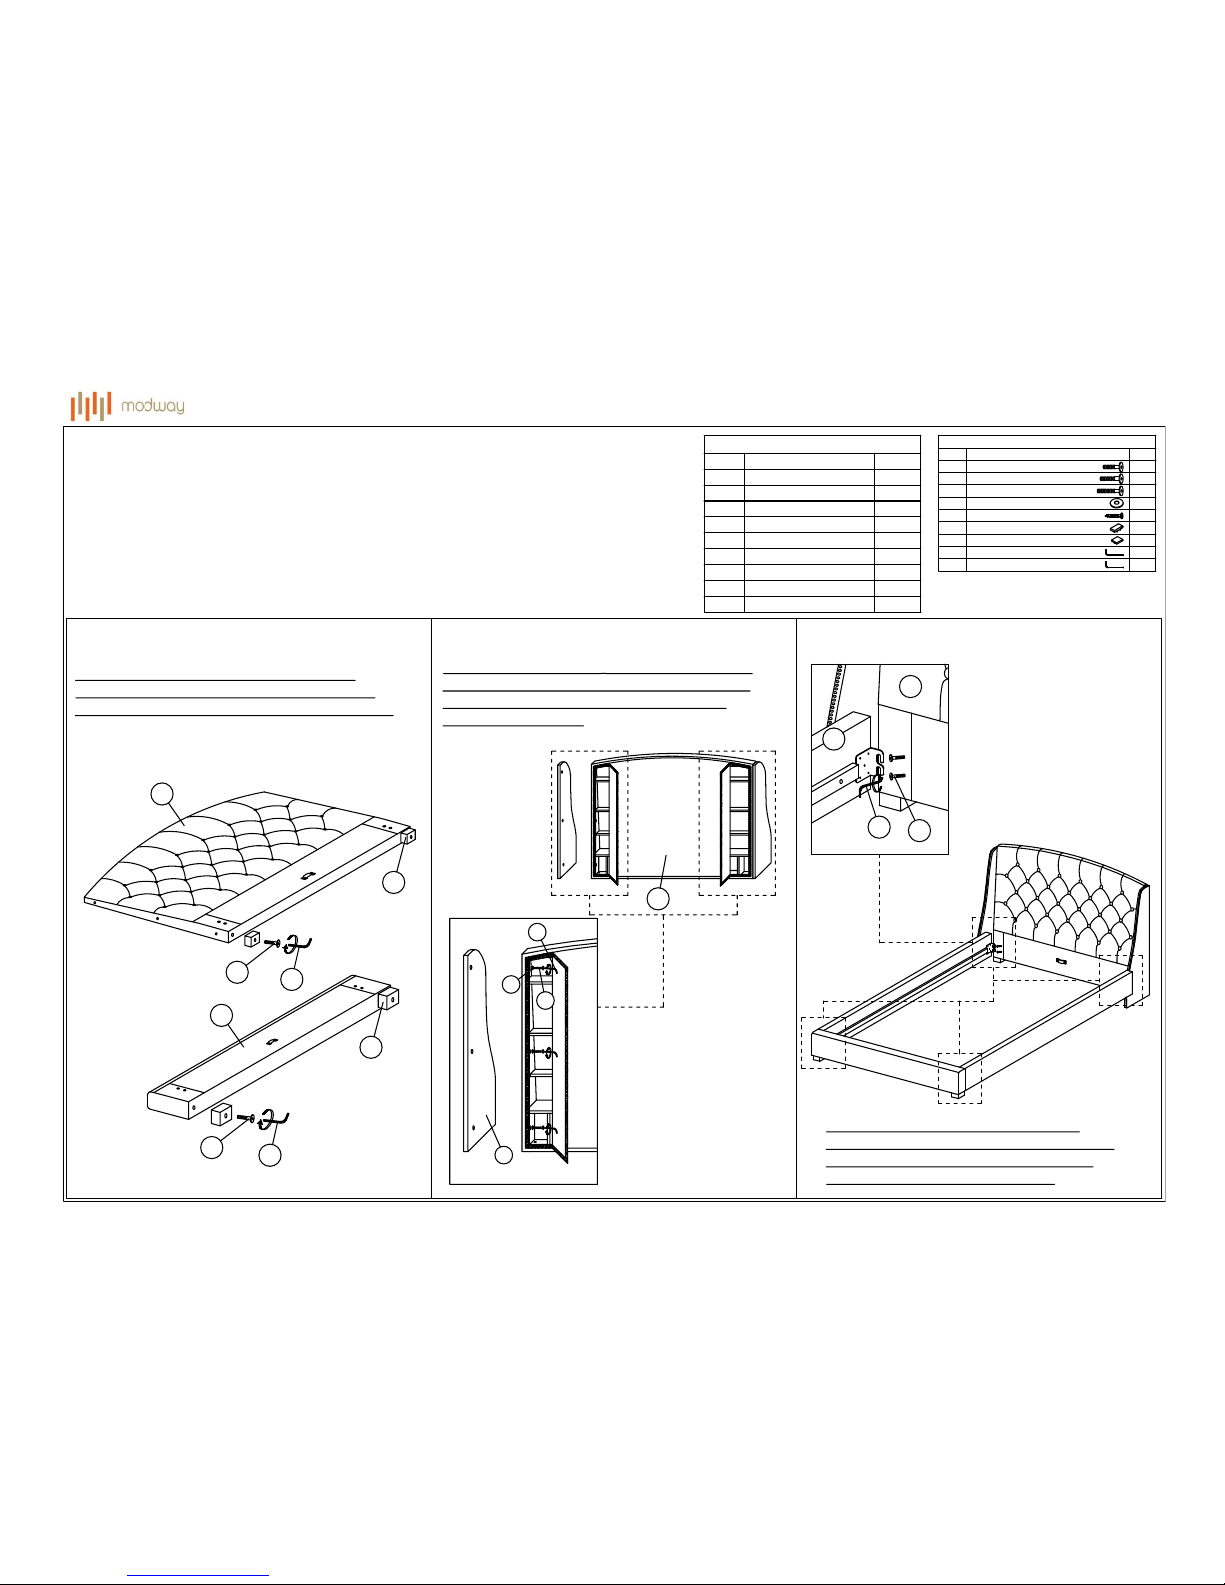
FURNITURE PART LIST
ITEM DESCRIPTION
QTY
A
HEADBOARD 1 PC
B
FOOTBOARD 1 PC
C
SIDE RAIL 2 PCS
D
CENTER RAIL 1 PC
E
CENTER SUPPORT 2 PCS
F
BED LEG 4 PCS
G
CENTER SUPPORT LEG 3 PCS
H
BED SLAT 26 PCS
I
HEADBOARD WING (L&R)
2 PCS
HARDWARE PART LIST
ITEM DESCRIPTION
QTY
1
JCBB BOLT M8 x 40mm
8 PCS
2
JCBC BOLT M6 x 35mm
4 PCS
3
JCBC BOLT M6 x 45mm
6 PCS
4
M6 FLAT WASHER
6 PCS
5
WOOD SCREW M3.5 x 16mm
8 PCS
6
BED SLAT SIDE FITTER
26 PCS
7
BED SLAT CENTER FITTER
13 PCS
8
M4 ALLEN KEY
1 PC
9
M5 ALLEN KEY
1 PC
STEP 2 STEP 3
PAGE 1 OF 2
9
C
A
1
F
2
8
F
2
8
A
B
A
I
3
4
8
Screw 2 bed leg [F] to headboard [A] with 2
JCBC Bolt [2] & tighten with supplied allen key
[8]. Repeat the same procedure for footboard [B].
Attach headboard wing [I] to headboard [A] with
3 JCBC Bolt [3] & 3 flat washer [4]. Tighten with
allen key [8]. Repeat the same procedure to
secure the other side.
Screw 8 JCBB Bolt [1] half way into the
headboard [A] and footboard [B]. Attach side
rails [C] to headboard [A] & footboard [B].
Tighten each bolt with allen key [9].
Read this instruction carefully. See furniture and hardware part lists,
on the right, for guidance.
Have all parts ready before assembly. Place all wooden furniture
parts on a clean and flat soft surface to prevent from being scratched.
Follow the steps below to start assembling.
CAUTION : 1. Do not FULLY - TIGHTEN the nut or bolt until all nuts and bolts are assembled.
2. Do not OVER - TIGHTEN the nut or bolt to avoid causing damages to the thread.
3. Keep all hardware parts out of reach of children.
NOTE : THE LIST AND QUANTITY SHOWN ARE FOR 1 UNIT ASSEMBLY.
MOD - 5044
ASSEMBLY INSTRUCTIONS
PAGE 2 OF 2
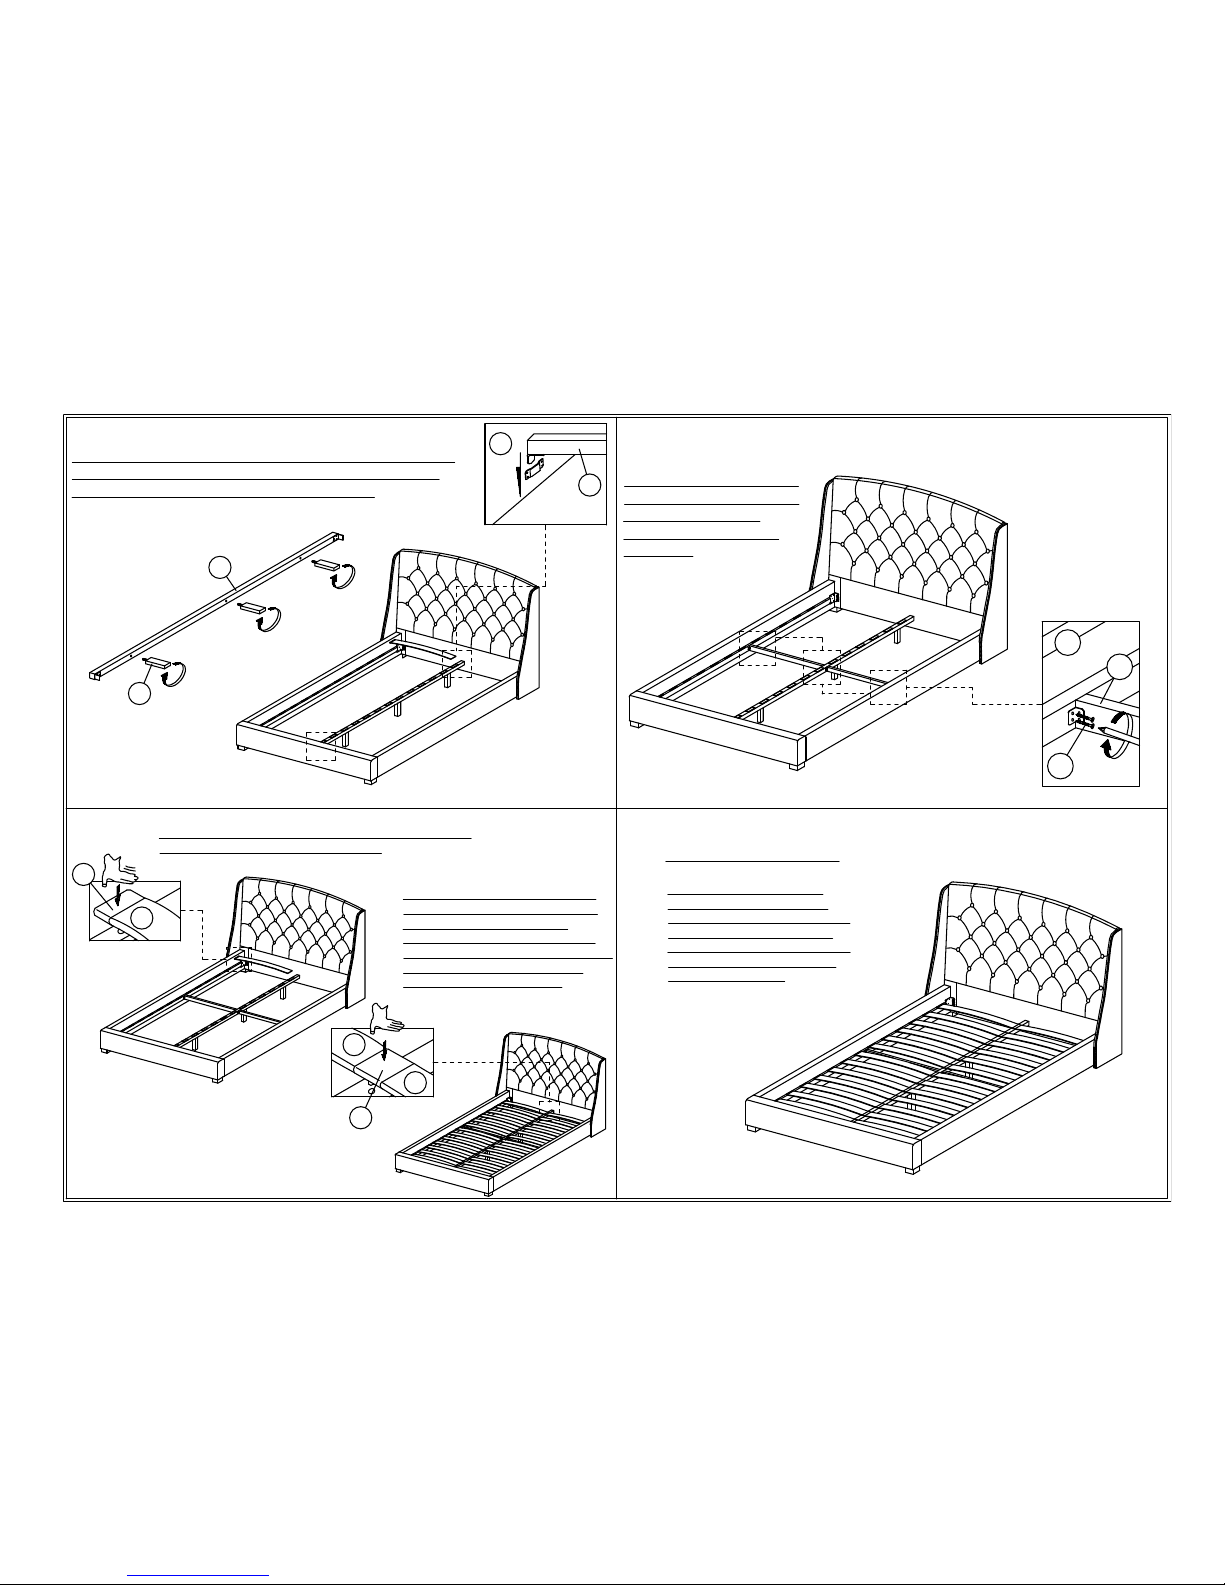
STEP 4 STEP 5
Palm
G
H
6
D
STEP 6 STEP 7
Screw 2 center support leg [G] into corresponding holes on
center rail [D]. Insert center rail [D] into its corresponding
brackets on the headboard [A] & footboard [B].
A
D
Attach 2 center support [E]
to side rail [C] with 4 screw
[5]. Repeat the same
procedure to secure the
other side.
C
5
E
Insert bed slats [H] into bed slat side fitter [6] & fix it to the
corresponding holes on the side rails [C].
H
H
7
Slot first slat [H] into bed slat center
fitter [7] & insert second bed slat [H]
into bed slat center fitter [7] on
opposite side. Attach bed slats side
fitter [6] to bed slat before pressing the
caps into corresponding holes on
center rail [D] & side rails [C].
1. Note : When moving the bed
position please ensure center
support legs are vertically aligned
to avoid any broken problems.
2. Note : Hardware may loosen over
time. Periodically check that all
connections are tight.
Your bed is assembly complete.
 Loading...