

Page 1

T200 Manual
SAFETY INFORMATION FOR WIRELESS HANDHELD PHONES
WARNING! Please do not use your Mitsubishi wireless telephone if you may be
distracted from another activity (such as driving a motor vehicle or walking across
the street) and create a safety hazard to yourself and others. Use your wireless
telephone responsibly. Be alert to your surroundings whenever you operate your
wireless telephone.
For the safe and efficient operation of your phone, observe the following
guidelines:
EXPOSURE TO RADIO FREQUENCY SIGNALS
Your wireless handheld portable telephone is a low power radio transmitter and
receiver. When it is ON, it receives and also sends out radio frequency (RF)
signals.
In August 1996, the Federal Communications Commissions (FCC) adopted RF
exposure guidelines with safety levels for handheld wireless phones. Those
guidelines are consistent with the safety standards previously set by both U.S. and
international standards bodies:
ANSI C95.1 (1992)*
NCRP Report 86 (1986)*
ICNIRP (1996)*
*American National Standards Institute; National Council on Radiation Protection and Measurements;
International Commission on Non-Ionizing Radiation Protection
Those standards were based on comprehensive and periodic evaluations of the
relevant scientific literature. For example, over 120 scientists, engineers, and
physicians from universities, government health agencies, and industry reviewed
the available body of research to develop the ANSI Standard (C95.1).
The design of your phone complies with the FCC guidelines (and those standards).
ANTENNA CARE
Use only the supplied or an approved replacement antenna. Unauthorized
antennas, modifications, or attachments could damage the phone and may violate
FCC regulations.
PHONE OPERATION
NORMAL POSITION: Hold the phone as you would any other telephone with the
antenna pointed up and over your shoulder.
TIPS ON EFFICIENT OPERATION: For your phone to operate most efficiently:
• Extend your antenna fully.
• Do not touch the antenna unnecessarily when the phone is in use. Contact
with the antenna affects call quality and may cause the phone to operate
Page 2

at a higher power level than otherwise needed.
DRIVING
Check the laws and regulations on the use of wireless telephones in the areas
where you drive. Always obey them. Also, if using your phone while driving,
please:
• Give full attention to driving -- driving safely is your first responsibility;
• Use hands-free operation, if available;
• Pull off the road and park before making or answering a call if driving
conditions so require.
ELECTRONIC DEVICES
Most modern electronic equipment is shielded from RF signals. However, certain
electronic equipment may not be shielded against the RF signals from your
wireless phone.
Pacemakers
The Health Industry Manufacturers Association recommends that a minimum
separation of six (6”) inches be maintained between a handheld wireless phone
and a pacemaker to avoid potential interference with the pacemaker. These
recommendations are consistent with the independent research by and
recommendations of Wireless Technology Research.
Persons with pacemakers:
• Should ALWAYS keep the phone more than six inches from their
pacemaker when the phone is turned ON
• Should not carry the phone in a breast pocket
• Should use the ear opposite the pacemaker to minimize the potential for
interference
• If you have any reason to suspect that interference is taking place, turn
your phone OFF immediately.
Hearing Aids
Some digital wireless phones may interfere with some hearing aids. In the event of
such interference, you may want to consult your service provider (or call the
customer service line to discuss alternatives).
Other Medical Devices
If you use any other personal medical device, consult the manufacturer of your
device to determine if they are adequately shielded from external RF energy. Your
physician may be able to assist you in obtaining this information.
Turn your phone OFF in health care facilities when any regulations posted in these
areas instruct you to do so. Hospitals or health care facilities may be using
equipment that could be sensitive to external RF energy.
Page 3

Vehicles
RF signals may affect improperly installed or inadequately shielded electronic
systems in motor vehicles. Check with the manufacturer or its representative
regarding your vehicle. You should also consult the manufacturer of any
equipment that has been added to your vehicle.
Posted Facilities
Turn your phone OFF in any facility where posted notices so require.
AIRCRAFT
FCC regulations prohibit using your phone while in the air.
Switch OFF your phone before boarding an aircraft.
BLASTING AREAS
To avoid interfering with blasting operations, turn your phone OFF when in a
“blasting area” or in areas posted: “Turn off two-way radio.” Obey all signs and
instructions.
POTENTIALLY EXPLOSIVE ATMOSPHERES
Turn your phone OFF when in any area with a potentially explosive atmosphere
and obey all signs and instructions. Sparks in such areas could cause an explosion
or fire resulting in bodily injury or even death.
Areas with a potentially explosive atmosphere are often but not always clearly
marked. They include fueling areas such as gasoline stations; below deck on
boats; fuel or chemical transfer or storage facilities; vehicles using liquefied
petroleum gas (such as propane or butane); areas where the air contains
chemicals or particles, such as grain, dust, or metal powders; and any other area
where you would normally be advised to turn off your vehicle engine.
For Vehicles Equipped with an Air Bag
An air bag inflates with great force. DO NOT place objects, including both installed
or portable wireless equipment, in the area over the air bag or in the air bag
deployment area. If in-vehicle wireless equipment is improperly installed and the
air bag inflates, serious injury could result.
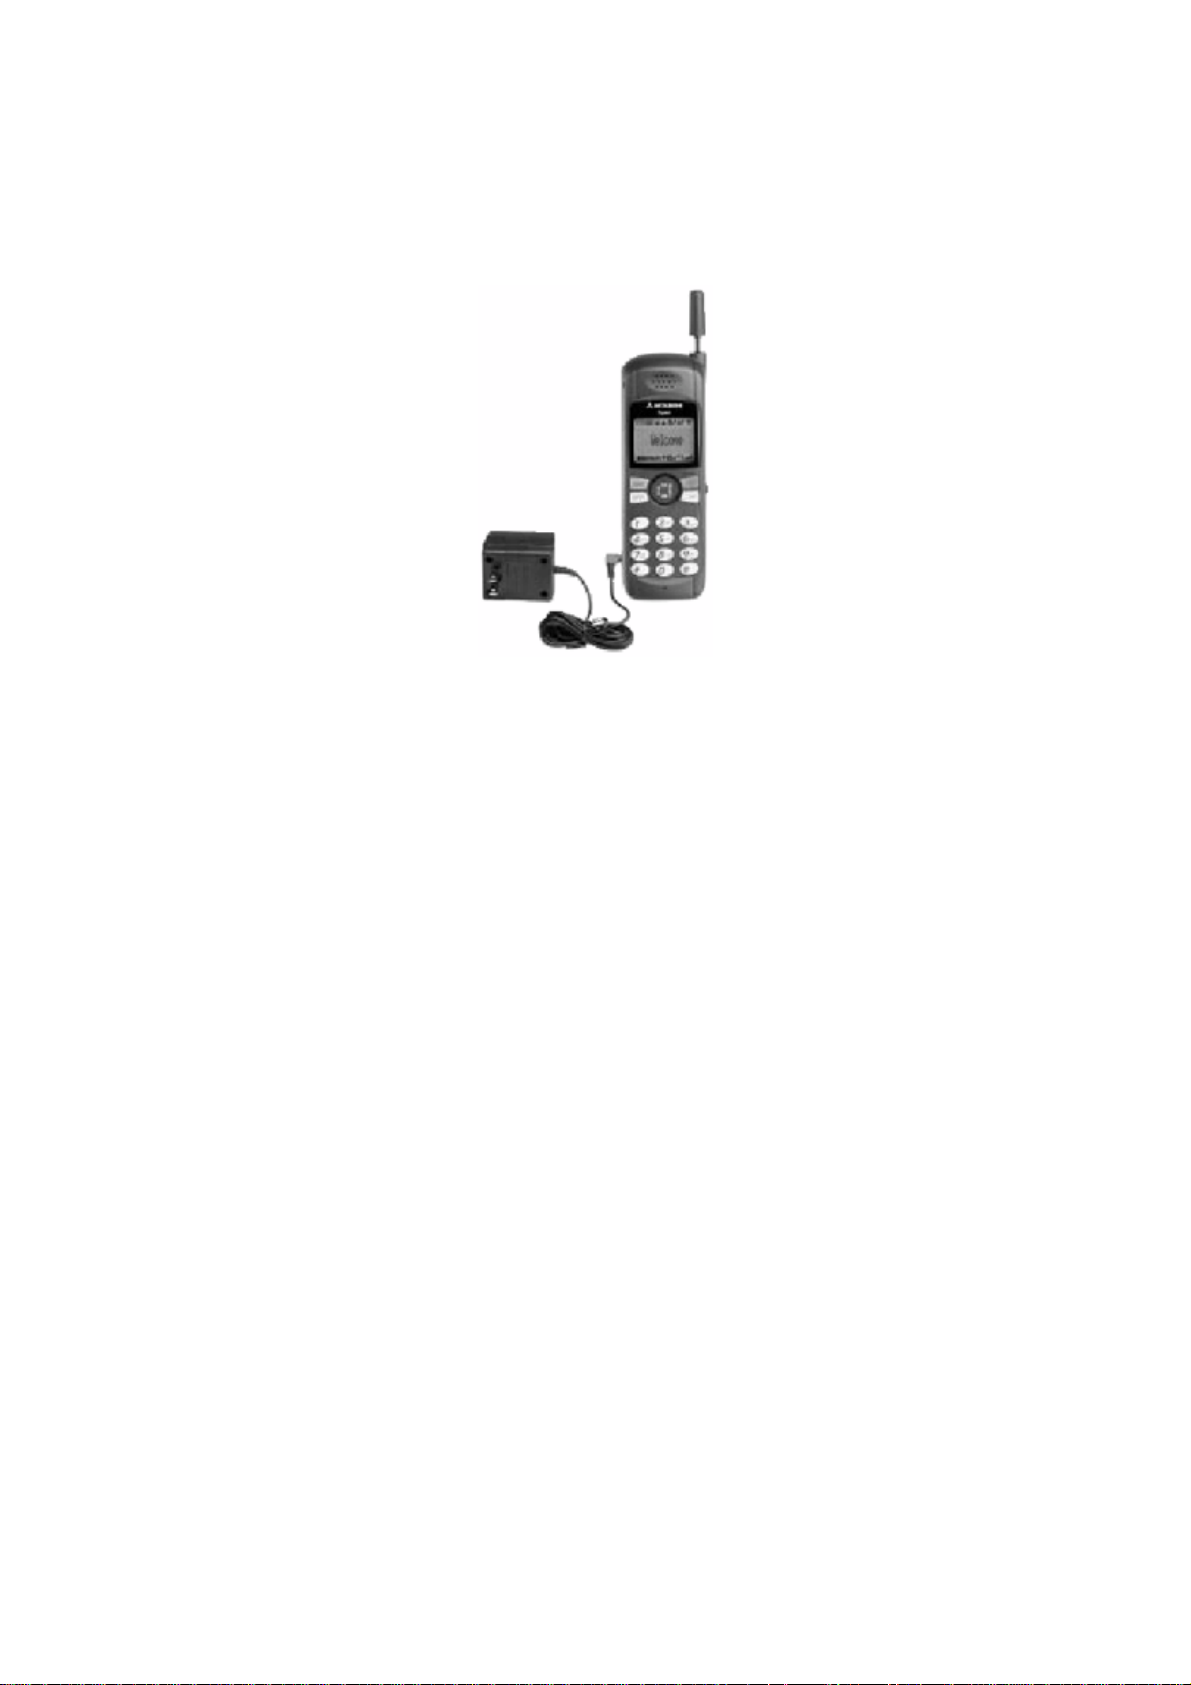
PHONE OVERVIEW
Page 4

GETTING STARTED
Charging the Battery
The battery must be fully charged before using your phone for the first time. If it is
a new battery, 3 complete charge and discharge cycles must be performed to
ensure peak operation.
• Make sure the battery is properly installed on your phone.
Refer to Attaching the Battery on page 14 for more information.
• Connect the charger to a standard 120 volt outlet. The Battery Level
Indicator flashes during charging.
Page 5

• Disconnect the charger when the Battery Full message displays.
Prolonging the life of your battery
• Allow your battery to discharge fully once a week. A charged battery
discharges on its own after one month of no use.
• To discharge the battery, leave the phone on until it shuts itself off.
• If you do not plan to use your phone for more than a month, remove the
battery and store it in a cool, dry place.
Charging Times
The following table shows the approximate battery recharging times using the AC
Rapid Charging Adapter.
Battery
Charge
880 mAh NiMH Standard
120 min.
880 mAh NiMH Vibrating
120 min.
1500 mAh NiMH Extended
200 min.
• Battery charging suspends when a call is in progress.
• The NiMH battery performance varies with the condition and history of the
battery.
Attaching the Battery
1. Insert the bottom of the battery into the recess on the back of the phone.
2. Push inward until the locking catch snaps securely into place.
• To remove the battery, turn your phone off. Pull up the locking catch and
remove the battery.
Connecting the AC Rapid Charger to the Phone
When the battery needs to be recharged, 3 short tones sound. The Low Battery
icon and message flash on the display.
1. Connect the charger to the socket at the base of the phone.
Page 6
2. Connect the charger to a standard 120 volt outlet. The battery begins
charging when the charger is connected to the phone.
• If the phone is left on despite a low battery alarm, the phone automatically
shuts itself off to protect the battery from over-discharging.
Turning the Phone ON
Press for 1 second to turn your phone on. When you turn the phone on, a tone
sounds and the display backlighting comes on.
To turn your phone off, press and hold for 1 second.
• If a Locked message appears when you turn your phone on, enter your
preset 3-digit unlock code.
• If the No Service message appears on the display, then you cannot make
or receive calls.
Refer to Problems You Can Solve on page 60 for more information about
display messages.
Note: Make sure the battery is fully charged before turning your phone on for the
first time.
Antenna Caution
Your phone’s antenna locks when it is extended fully.
To unlock the antenna, hold it near the base and push down until it releases. Then
slide the antenna up or down.
Page 7

DISPLAY AND KEYPAD
Display Indicators
Page 8

Indicator Light
The backlight illuminates the keypad and LCD display for 10 seconds each time
you press a key.
Key Functions
Page 9

MAKING AND RECEIVING CALLS
Making and Ending a Call
Speed Dialing
Speed Dialing is an easy way to dial stored numbers. You can store up to 99
names and numbers for speed dial on your phone. Refer to Storing a Number and
Name in Memory on page
51 for more information about storing numbers.
Last Number Redial
Your phone can store up to 10 of the most recently dialed numbers.
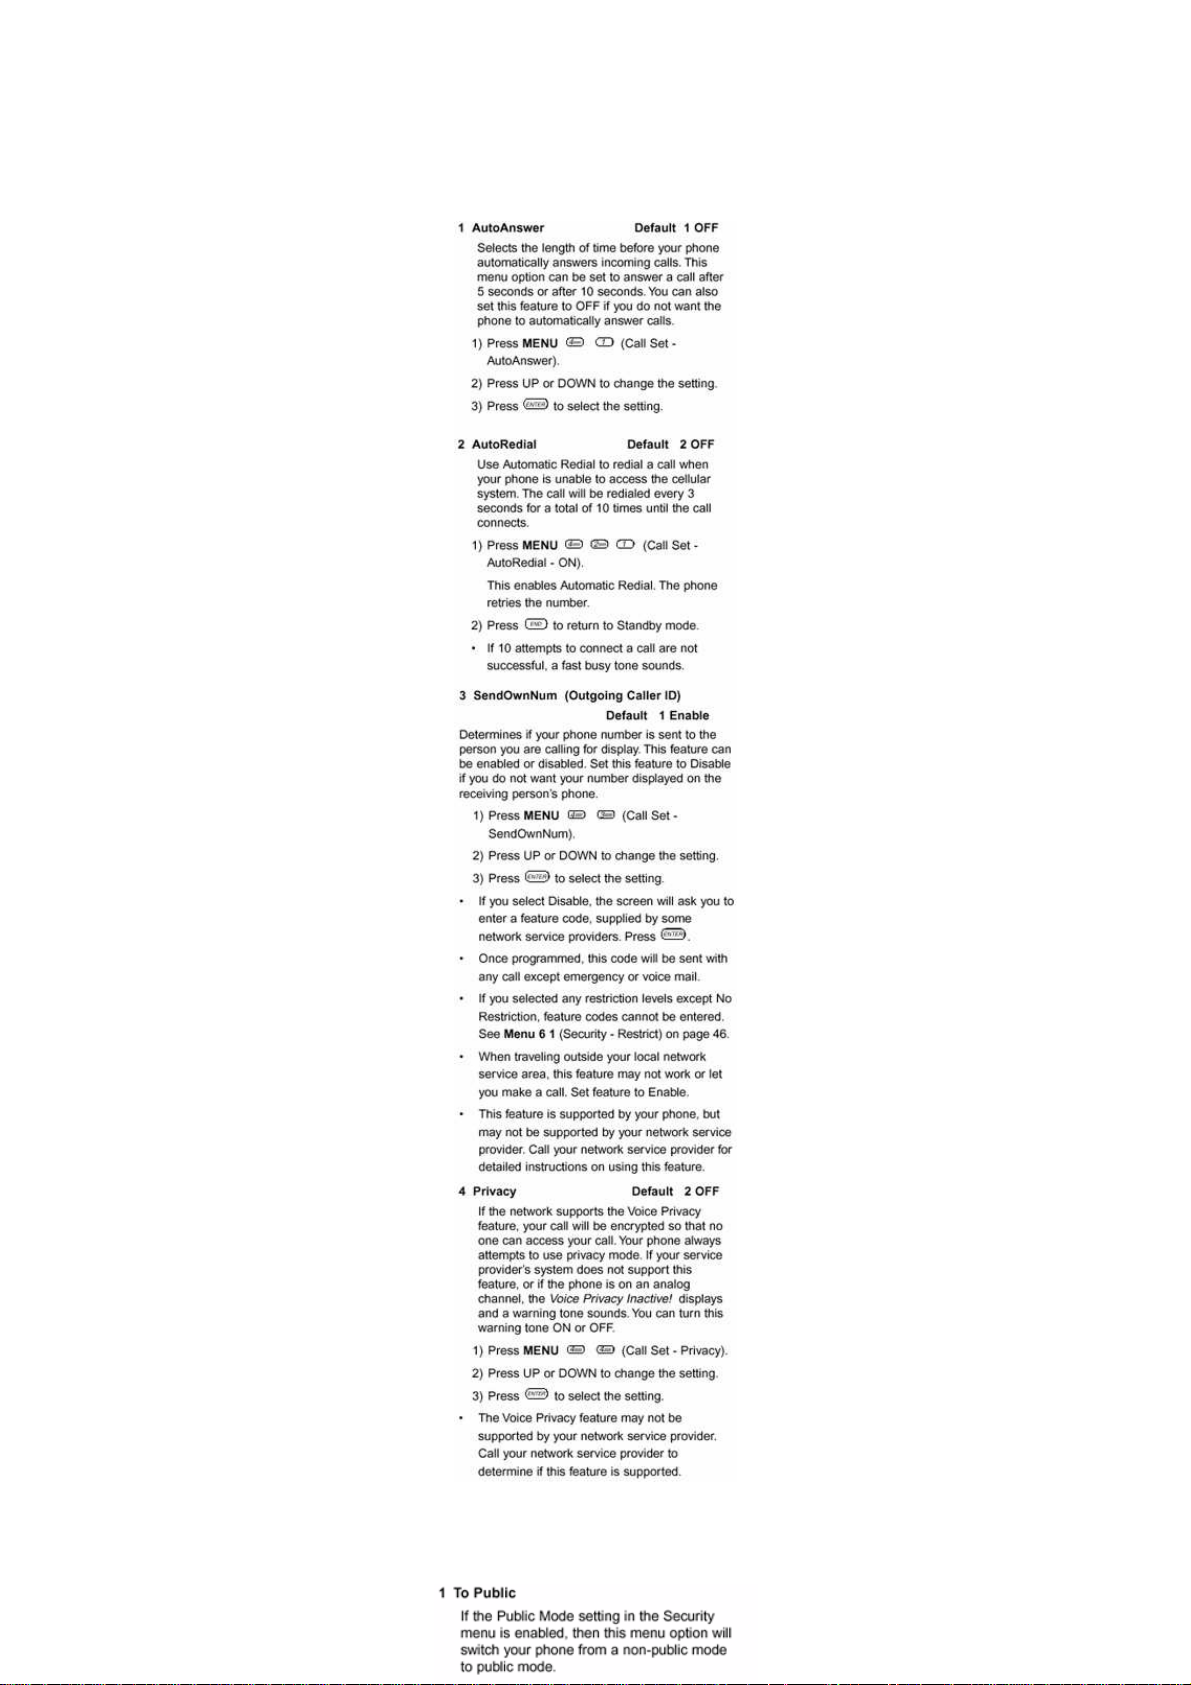
Automatic Redial
Use Automatic Redial to redial a call when your phone is unable to access the
cellular system. The call will be redialed every 3 seconds for a total of 10 times
until the call connects.
Page 10

One Touch Dialing
Use One Touch Dialing to call frequently dialed numbers, such as an answering
machine or voice mail. To use this feature, you must first store the number in the
phone’s memory. Refer to Storing a Number and Name in Memory on page 51 for
more information about storing numbers.
To perform One Touch Dialing:
Answering a Call
Your phone accepts incoming calls when the battery is charged and No Service
does not appear on the display. When there is an incoming
call, a ringing tone sounds and the calling number or caller name if available
flashes on the display.
Making an Emergency Call
Your phone can store 2 emergency numbers. An emergency 911 number is preprogrammed into the phone. Contact your network service provider for information
about programming a second emergency number.
You can dial emergency numbers even when call restrictions are activated or if the
phone is locked. (See Menu 7 on page 49. This is different than Key Lock which
just locks the keypad.)
Page 11

You cannot make emergency calls when Key Lock is turned on.
Key Lock
Key Lock is used to prevent accidental key entry, such as when your phone is in a
handbag or briefcase. You can receive calls when Key Lock is on, but you cannot
make calls.
To turn Key Lock on:
To turn Key Lock off:
Add 1 (for long distance) Before Dialing
This feature is useful if you need to add 1 to the number in a memory location in
order to make a long distance call.
Network Features
The following features are supported by your phone, but may not be supported by
your network service provider:
• Call Waiting
• Caller ID
Call your network service provider for detailed instructions on using these features.
Call Waiting
If this feature is available from the network, then your phone is capable of receiving
a second call while another call is in progress.
Page 12

Calling Line Identification: (Caller ID)
Your phone has Caller ID. When a call with Caller ID is received, the name and
number of the incoming call display (if available from network).
• This function may not work on an analog network.
Sending Tone Signals
You can send Dual Tone Multi-Frequency (DTMF) tones to communicate with
computerized systems, such as answering machines, voice mail or banking by
phone. These tones can also be used for credit card calls and long distance calling
cards.
A DTMF is a digit or a string of digits that produces tone signals—the sounds
created when you press the keys on your phone’s key pad.
You can store DTMF strings the same way you store phone numbers. Refer to
Storing a Number and Name in Memory on page 51 for more information about
storing numbers.
• DTMF tones are enabled only when the Silent Scratch Pad is off.
To send a DTMF manually:
To recall DTMF from memory:
Page 13

To use DTMF as a pause function:
Editing Number by Cursor
USEFUL INFORMATION WHILE TALKING
Different menu items appear on the display during conversation mode so that you
can mute calls, select the Silent Scratch Pad, and send Dual Tone Multi-
Page 14

Frequency tones (see page 26).
Changing the Volume While Talking
Press UP or DOWN to adjust the earpiece volume during a conversation.
To Mute Calls:
To End Muting:
Using the Phone as a Scratch Pad
The Silent Scratch Pad allows you to use the phone as a memo to store numbers
during a conversation. When the Silent Scratch Pad is turned on, the tones made
by pressing the number keys do not sound.
Checking Time of Calls
The Talk Timer keeps track of the elapsed time of a conversation. You can also
view the Operating, Total, and Last Talk Time in Standby mode.
Viewing Last Dialed Number
Page 15

VOICE AND TEXT MESSAGES
Voice Messages
Your phone can receive voice messages when this service is available from your
network service provider. When you receive a voice mail message, the Voice Mail
Indicator appears on the display and a message received tone sounds.
• Voice Mail box and Voice Mail Center phone number both need to be set
up with your network service provider before using quick
voice mail access.
• This function may not work on an analog network.
To retrieve voice messages:
For quick voice message access:
To enter a Voice Mail Center number:
Text Messages
Your phone can receive up to 30 short text messages of up to 80 characters each
when your network service provider supports this feature. Contact your network
service provider for detailed information about short message service.
• This function may not work on an analog network.
To access the text message mailbox:
Page 16

To view your messages:
One Touch Call Back
If a displayed message contains a call back number or an embedded telephone
number, the phone will go into the standby mode and will display the number.
THE MENU SYSTEM
The Menu System is where all of the feature and function settings for your phone
Page 17

are stored. Use the menu information in this section to customize your phone
settings.
Changing Settings
Follow these guidelines to change the settings on your phone:
Menu Overview
You can access all of the feature and function settings for your phone through the
menu system.
• Settings are preserved when the phone is turned off.
• If you do not specify your phone’s settings, then your network service
provider’s default settings will be used.
• Since the display can only show 4 menu items at a time, you will see an
arrow pointing down under the last menu option if there are more than 4
menu options in the menu. Press DOWN at the fourth menu option to see
the additional menu options.
• Press UP at the fifth menu option to go back to the first 4 menu options.
• You can always enter a menu option directly by pressing the number that
appears to the left of the menu option.
The following list of menu options describes each feature’s function and possible
settings.
RINGER SETTINGS - MENU 1
The following menu options allow you to adjust the tone and volume for incoming
calls and messages.
• Tones sound while adjusting volume and tone levels.
• To mute the Ringer or Message tones, select volume level OFF.
• The Vibrator option only displays when the vibrating battery is installed.
Page 18

TALK TIMER MENU - MENU 2
The Talk Timer appears when a call connects. It shows the duration of the call in
hours, minutes and seconds. You can view talk time for the most recent call or for
all calls made or received in public and private network channels.
Page 19

• Refer to the TimerReset menu option on page 49 to reset the Talk Timer.
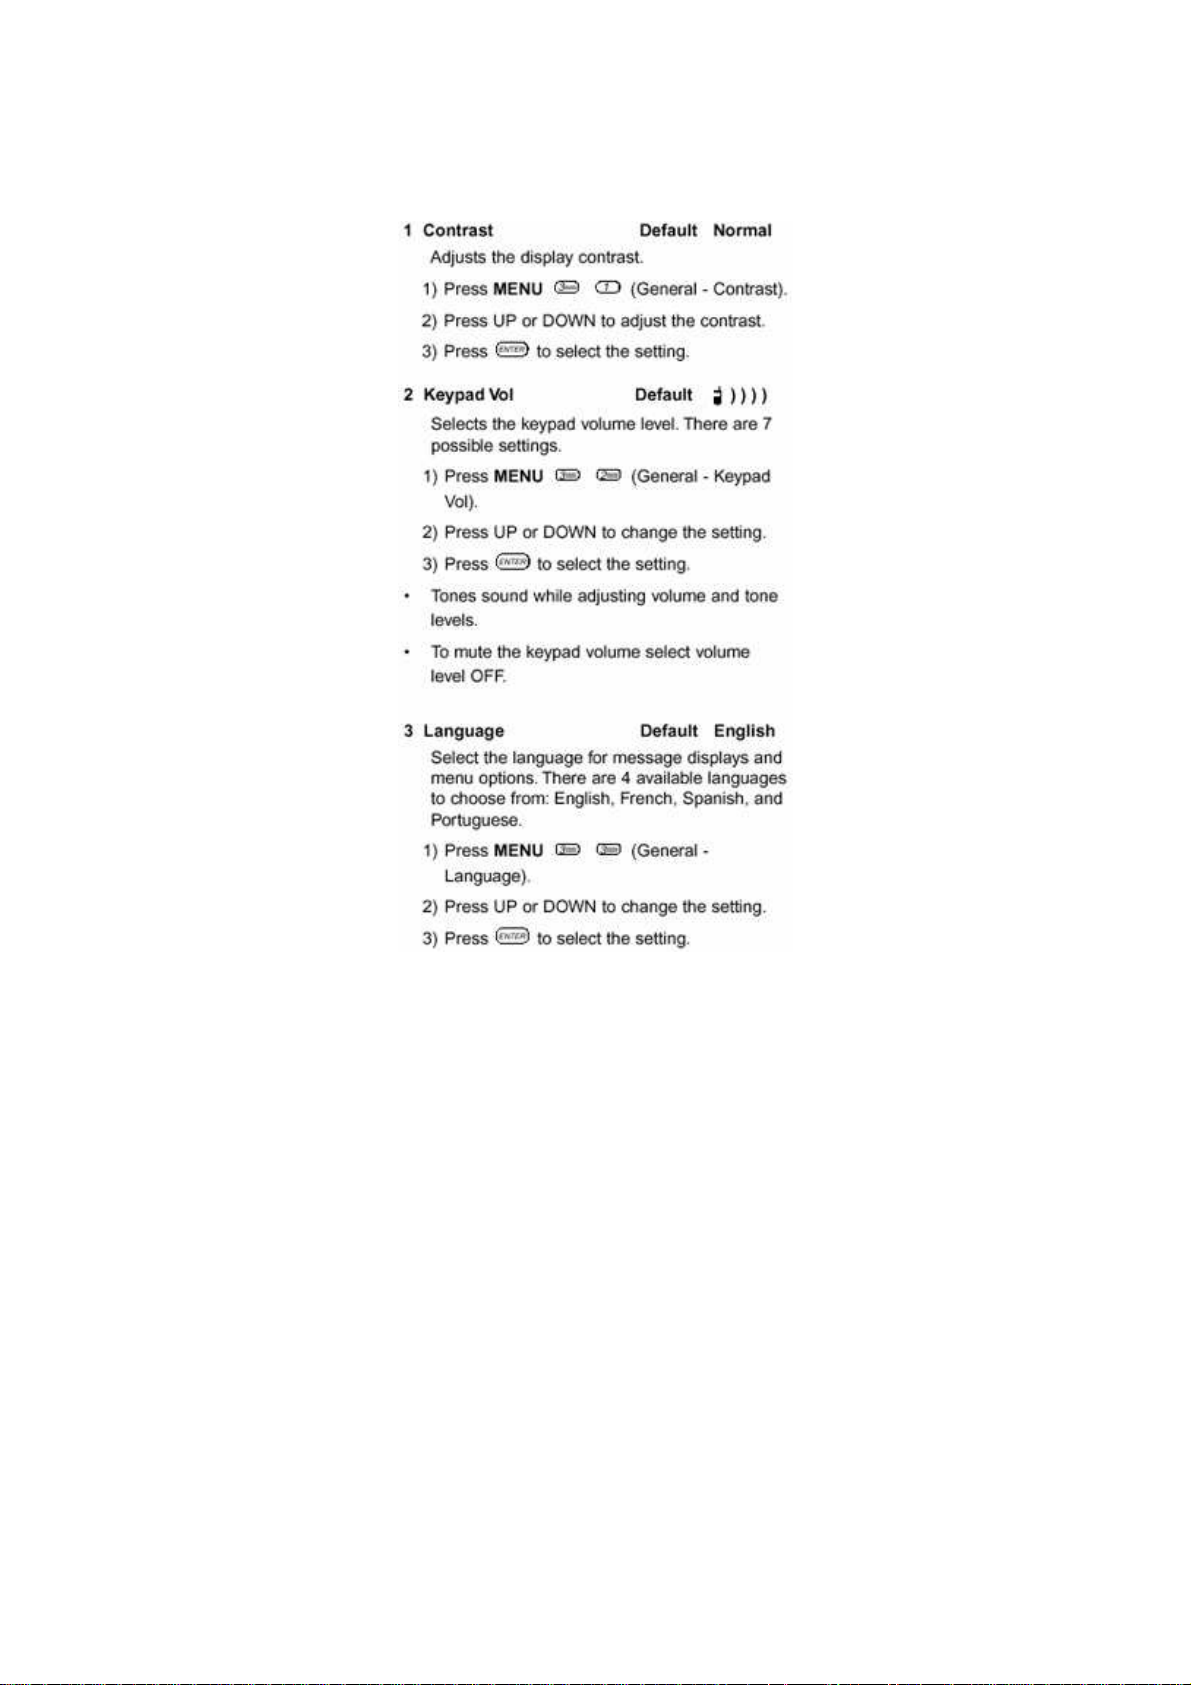
GENERAL SETTINGS - MENU 3
The General Settings menu includes Display Contrast, Language, and the Keypad
Volume.
Page 20
CALL SETTING MENU - MENU 4
The Call Setting menu includes Automatic Answer, Automatic Redial, Sending
Your Phone Number, and Privacy mode.
Page 21
NETWORK MENU - MENU 5
Use this menu to select a network channel when you are out of your cellular area.
Page 22

STORING AND RECALLING NUMBERS
Your phone can store up to 109 names and numbers. You can store and recall
numbers in Standby or Conversation mode. Each entry stores a name, number
and memory location.
To recall names and numbers, press MEM and select a menu item. Four items
appear on the display at 1 time. Scroll DOWN to view the next items.
You can delete or revise an entry by pressing MENU when the name and number
information appear on the display.
To dial a number from memory, enter the memory location and press .
Storing a Number and Name in Memory
There are 2 methods you can use to store a number and name in memory.
Page 23

Entering Names
Editing Names
Deleting a Number from Memory
Numbers and names stored in memory can be deleted or revised. You can edit,
move, or copy an entry to another memory location.
Specifying a Memory Location
Page 24

Storing a Number in Secure Memory
Recalling Stored Numbers
Page 25

Recalling Stored Names
Recalling Unanswered Numbers
Your phone automatically stores up to 10 of the most recently unanswered
incoming calls. When you have missed a call, the Called message displays with
the number of missed calls.
To delete a number, store a number, or delete all numbers from the Unanswered
Call memory, follow these steps:
Page 26
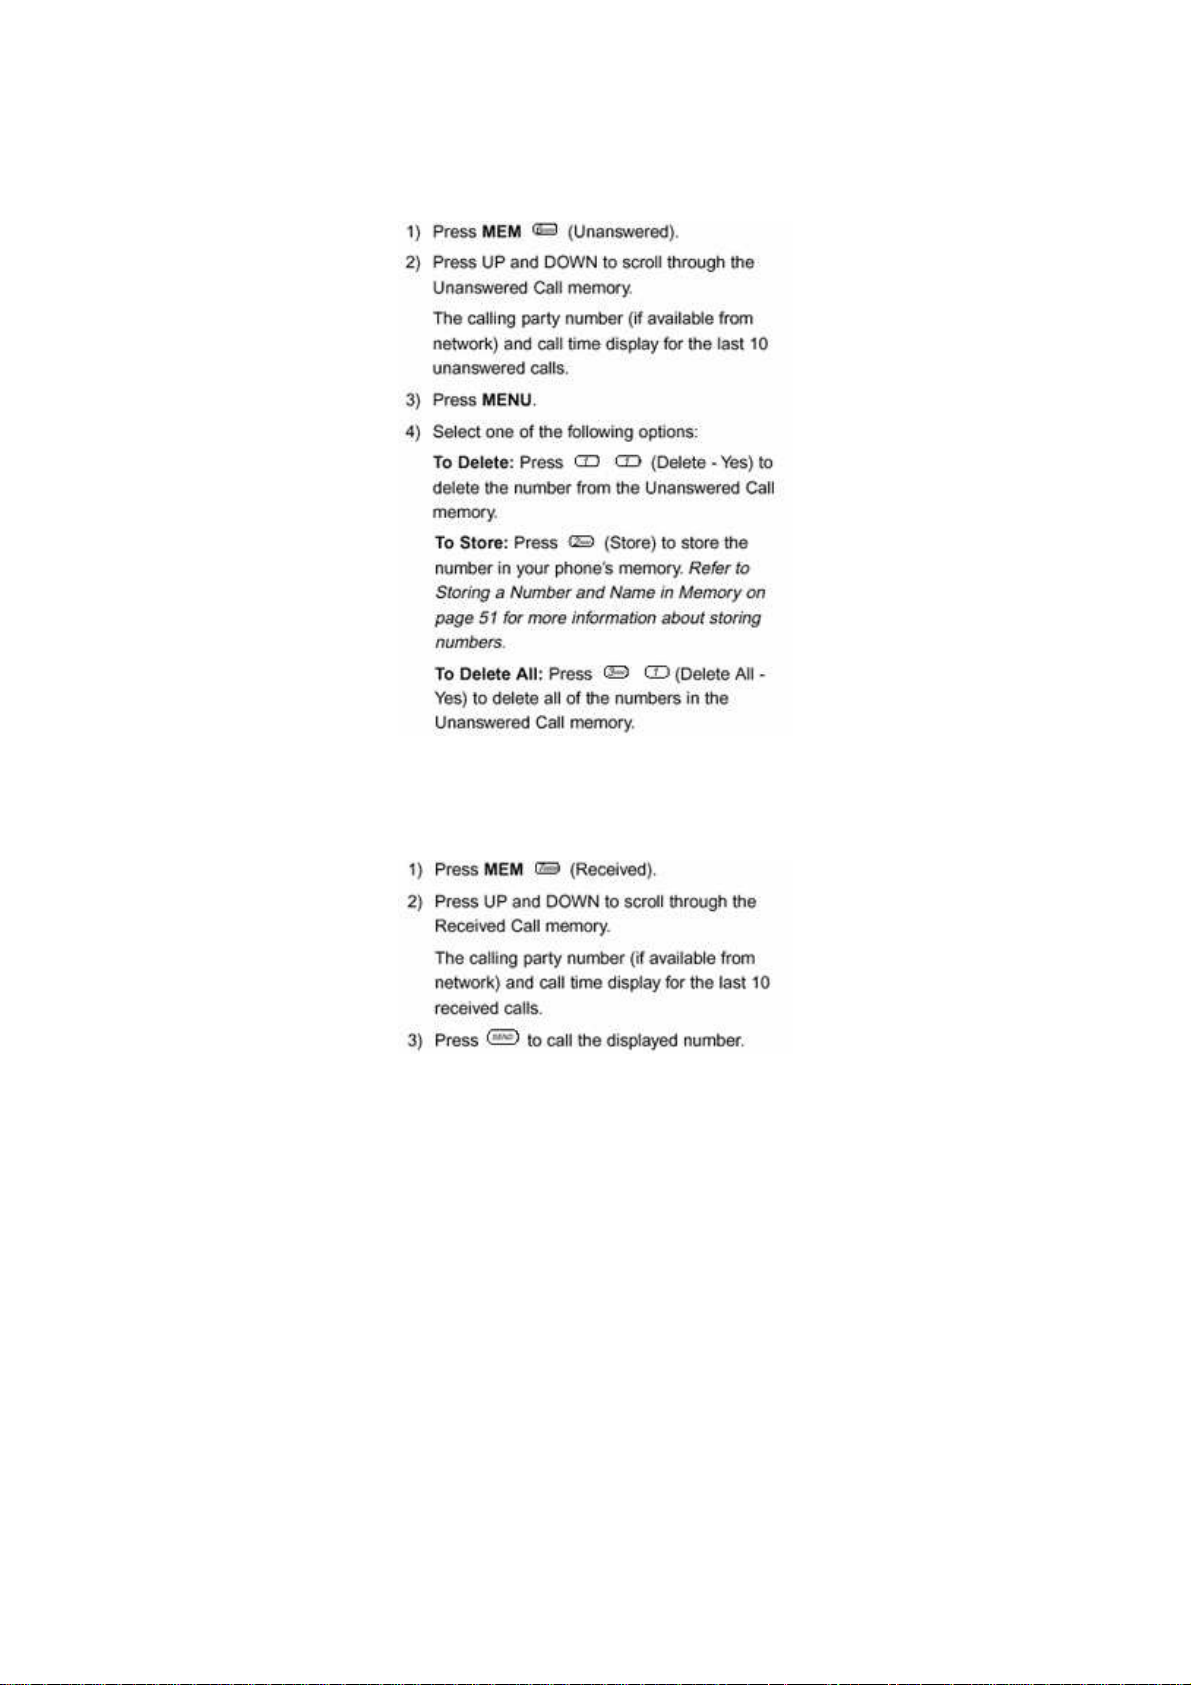
Recalling Received Numbers
Your phone automatically stores up to 10 of the most recently received calls,
whether they were answered or unanswered.
To delete a number, store a number, or delete all numbers from the Received Call
memory, follow these steps:
Page 27

PROBLEMS YOU CAN SOLVE
Hardware Concerns
The phone does not turn on
If the phone is new, see “Charging the Battery” on page 12.
Otherwise, recharge or replace the battery. If this does not solve
the problem, contact Mitsubishi Wireless customer service in the
US at 1-800-866-6600; in Canada, call 1-905-475-7728.'
The phone does not work with the handsfree adapter
A battery is required to use the handsfree adapter; verify a
charged battery is installed on the back of the phone. Verify the
phone is attached to the adapter.
Dropped calls
The signal strength will depend on your location. Check the
received signal strength indicator , make sure your antenna is fully
extended, and try again after the signal strength increases
(another bar appears). In addition to geographic location, the
signal will weaken behind walls, under bridges, in tunnels, or other
obstructions.
Volume varies/mutes briefly
The system’s signal strength will vary depending on your location.
Audio level variations can occur due to:
1. a weak signal (see “Dropped calls”).
2. high speed travel.
Audible Warnings
Page 28

Error tone
An error tone sounds when an unexpected key is pressed (e.g.,
pushing SEND after pushing MENU).
Fast busy tone
A fast busy tone indicates that the system has not accepted your
call.
Siren tone
A siren tone indicates an invalid phone number.
Triple high-pitched tone
A short triple high-pitched tone generated every 20 seconds
indicates the battery needs to be charged.
Display Messages
Battery full
The battery has finished charging.
Charging
The phone is charging normally while powered off. Since the
phone is off, you cannot place or receive calls.
You can press the key to turn on the phone and operate it
normally. The battery will continue to charge (the battery can be
charged with the phone either off or on).
CHECK or Program NAM
Mitsubishi phones are capable of self-diagnostics, and will alert
you when an internal error occurs. For CHECK errors, write down
the number following CHECK and contact your phone’s network
service provider for repairs. If the phone has a Program NAM
error, your network service provider should be able to solve the
problem over the phone.
-Locked-
When the phone is turned on, it may require an access code for
security. Enter the preset 3-digit Unlock code.
Low battery! and phone beeps
The phone will turn off in 1 minute. The phone should be turned off
and the battery recharged or replaced.
Key lock
Key Lock prevents accidental key entry. Press MENU and to turn
off this feature.
-Mute-
Press any key except to turn off mute and take the call off hold.
No service
This message indicates you cannot connect to the system (calls
cannot be placed or received), which may be due to:
1. The system in this area does not support your phone.
Page 29

2. The signal is too weak. Try moving to another location to
Voice Privacy Inactive!
The system does not support the voice privacy feature, or the
phone is on an analog voice channel.
No Voice Mail Center Number
The Voice Mail Center phone number needs to be set up before
using quick voice message access. The screen will prompt to edit
voice mail number. Press (Yes), then enter your Voice Mail Center
phone number.
ACCESSORIES
use your phone.
Page 30

 Loading...