

Page 1

Air-Conditioners Indispensable Optional Parts
BRANCH BOX
PAC-MK51BC
PAC-MK31BC
HFC
utilized
ONLY FOR R410A OUTDOOR UNIT
ONLY FOR INDOOR USE
INSTALLATION MANUAL
For safe and correct use, please read this installation manual thoroughly before installing the air-conditioner
unit.
INSTALLATIONSHANDBUCH
Zum sicheren und ordnungsgemäßen Gebrauch der Klimaanlage das Installationshandbuch gründlich
durchlesen.
MANUEL D’INSTALLATION
Veuillez lire le manuel d’installation en entier avant d’installer ce climatiseur pour éviter tout accident et vous
assurer d’une utilisation correcte.
INSTALLATIEHANDLEIDING
Voor een veilig en juist gebruik moet u deze installatiehandleiding grondig doorlezen voordat u de airconditioner installeert.
MANUAL DE INSTALACIÓN
Para un uso seguro y correcto, lea detalladamente este manual de instalación antes de montar la unidad de
aire acondicionado.
MANUALE DI INSTALLAZIONE
Per un uso sicuro e corretto, leggere attentamente questo manuale di installazione prima di installare il condizionatore d’aria.
ΕΓΧΕΙΡΙΔΙΟ ΟΔΗΓΙΩΝ ΕΓKATAΣTAΣHΣ
Για ασφάλεια και σωστή χρήση, παρακαλείστε διαβάσετε προσεχτικά αυτό το εγχειρίδιο εγκατάστασης πριν
αρχίσετε τηv εγκατάσταση της μονάδας κλιματισμού.
MANUAL DE INSTALAÇÃO
Para segurança e utilização correctas, leia atentamente este manual de instalação antes de instalar a unidade de ar condicionado.
INSTALLATIONSMANUAL
Læs venligst denne installationsmanual grundigt, før De installerer airconditionanlægget, af hensyn til sikker
og korrekt anvendelse.
INSTALLATIONSMANUAL
Läs denna installationsmanual noga för säkert och korrekt bruk innan luftkonditioneringen installeras.
FOR INSTALLER
FÜR INSTALLATEURE
POUR L’INSTALLATEUR
VOOR DE INSTALLATEUR
PARA EL INSTALADOR
PER L’INSTALLATORE
ΓΙA AYΤΟΝ ΠΟΥ ΚΑΝΕΙ ΤΗΝ ΕΓΚΑTAΣΤAΣΗ
PARA O INSTALADOR
TIL INSTALLATØREN
FÖR INSTALLATÖREN
R410A
English
Deutsch
Français
Nederlands
Español
Italiano
Ελληνικά
Português
Dansk
Svenska
MONTAJ ELKİTABI
Emniyetli ve doğru biçimde nasıl kullanılacağını öğrenmek için lütfen klima cihazını monte etmeden önce bu
elkitabını dikkatle okuyunuz.
РУКОВОДСТВО ПО УСТАНОВКЕ
Для осторожного и правильного использования прибора необходимо тщательно ознакомиться с данным руководством по установке до выполнения установки кондиционера.
MONTÖR İÇİN
ДЛЯ УСТАНОВИТЕЛЯ
Türkçe
Русский
Page 2

Contents
1. Safety precautions . . . . . . . . . . . . . . . . . . . . . . . . . . . . . . . . . . . . . . . . . . . . . . 2
2. Selecting a location for installation . . . . . . . . . . . . . . . . . . . . . . . . . . . . . . . . . . 2
3. Confi rming supplied accessories . . . . . . . . . . . . . . . . . . . . . . . . . . . . . . . . . . . 3
4. Dimensions and required servicing space of Branch Box . . . . . . . . . . . . . . . . 3
5. Refrigerant piping . . . . . . . . . . . . . . . . . . . . . . . . . . . . . . . . . . . . . . . . . . . . . . . 6
This installation manual is only for the branch box installation. In installing the indoor units and outdoor units, refer to the installation manual attached to
each unit.
6. Mounting the Branch Box . . . . . . . . . . . . . . . . . . . . . . . . . . . . . . . . . . . . . . . . . 7
7. Installing refrigerant piping . . . . . . . . . . . . . . . . . . . . . . . . . . . . . . . . . . . . . . . . 7
8. Electrical work . . . . . . . . . . . . . . . . . . . . . . . . . . . . . . . . . . . . . . . . . . . . . . . . . 9
9. Test run . . . . . . . . . . . . . . . . . . . . . . . . . . . . . . . . . . . . . . . . . . . . . . . . . . . . . 14
1. Safety precautions
► Before installing the unit, make sure you read all the “Safety precau-
tions”.
► Please report to or take consent by the supply authority before connec-
tion to the system.
► PAC-MK•BC series are designed as professional equipment.
When installing the unit in a regular house, install the optional Reactor
Box (PAC-RB01BC) for harmonic suppression.
► When receiving electricity from the outdoor unit, applicable standards for
the outdoor unit may not be satisfi ed depending on the indoor unit used.
Warning:
Describes precautions that must be observed to prevent danger of injury or
death to the user.
Warning:
• The unit must not be installed by the user.
• Ask a dealer or an authorized technician to install the unit.
• For installation work, follow the instructions in the Installation Manual and
use tools and pipe components specifi cally made for use with refrigerant
specifi ed in the outdoor unit installation manual.
• The unit must be installed according to the instructions in order to mini-
mize the risk of damage from earthquakes, typhoons, or strong winds. An
incorrectly installed unit may fall down and cause damage or injuries.
• The unit must be securely installed on a structure that can sustain its
weight.
• If the air conditioner is installed in a small room, measures must be taken
to prevent the refrigerant concentration in the room from exceeding the
safety limit in the event of refrigerant leakage. Should the refrigerant leak
and cause the concentration limit to be exceeded, hazards due to lack of
oxygen in the room may result.
• Ventilate the room if refrigerant leaks during operation. If refrigerant comes
into contact with a fl ame, poisonous gases will be released.
• All electric work must be performed by a qualifi ed technician according to
local regulations and the instructions given in this manual.
• Use only specifi ed cables for wiring.
• The terminal block cover panel of the unit must be fi rmly attached.
• Use only accessories authorized by Mitsubishi Electric and ask a dealer or
an authorized technician to install them.
• The user should never attempt to repair the unit or transfer it to another lo-
cation.
• After installation has been completed, check for refrigerant leaks. If refriger-
ant leaks into the room and comes into contact with the fl ame of a heater or
portable cooking range, poisonous gases will be released.
• Be sure to connect the power supply cords and the connecting wires for the
indoor units, outdoor units, and branch boxes directly to the units (no intermediate connections).
Intermediate connections can lead to communication errors if water enters
the cords or wires and causes insuffi cient insulation to ground or a poor
electrical contact at the intermediate connection point.
(If an intermediate connection is necessary, be sure to take measures to
prevent water from entering the cords and wires.)
Caution:
Describes precautions that must be observed to prevent damage to the unit.
After installation work has been completed, explain the “Safety Precautions,” use,
and maintenance of the unit to the customer according to the information in the
Operation Manual and perform the test run to ensure normal operation. Both the
Installation Manual and Operation Manual must be given to the user for keeping.
These manuals must be passed on to subsequent users.
: Indicates a part which must be grounded.
Warning:
Carefully read the labels affi xed to the main unit.
Caution:
• Make sure that the refrigerant pipes are well insulated to prevent condensation.
Incomplete insulation may cause condensation on the surface of pipes,
wetting of the ceiling, fl oor and other important properties.
•
Do not use the unit in an unusual environment. If the air conditioner is installed in areas exposed to steam, volatile oil (including machine oil), or sulfuric gas, areas exposed to high salt content such as the seaside, the performance can be signifi cantly reduced and the internal parts can be damaged.
• Do not install the unit where combustible gases may leak, be produced,
fl ow, or accumulate. If combustible gas accumulates around the unit, fi re or
explosion may result.
• When installing the unit in a hospital or communications office, be prepared for noise and electronic interference. Inverters, home appliances,
high-frequency medical equipment, and radio communications equipment
can cause the air conditioner to malfunction or breakdown. The air conditioner may also affect medical equipment, disturbing medical care, and
communications equipment, harming the screen display quality.
•
Thermal insulation of the refrigerant pipe is necessary to prevent condensation.
If the refrigerant pipe is not properly insulated, condensation will be formed.
• Place thermal insulation on the pipes to prevent condensation. If the drainpipe is installed incorrectly, water leakage and damage to the ceiling, fl oor,
furniture, or other possessions may result.
• Do not clean the air conditioner unit with water. Electric shock may result.
• Tighten all fl are nuts to specifi cation using a torque wrench. If tightened
too much, the fl are nut can break after an extended period.
• Be sure to install circuit breakers, if not installed, electric shock may result.
• For the power lines, use standard cables of suffi cient capacity. Otherwise,
a short circuit, overheating, or fi re may result.
• When installing the power lines, do not apply tension to the cables. If the
connections are loosened, the cables can snap or break and overheating or
fi re may result.
• Do not connect the ground wire to gas or water pipes, lighting rods, or
telephone grounding lines. If the unit is not properly grounded, electric
shock may result.
2. Selecting a location for installation
* The branch box is only for indoor use.
Please attach the special optional cover (PAC-AK350CVR-E) to install the
branch box in the outdoors.
• Ensure that the branch box is installed in a location which facilitates servicing
and maintenance. (ensure that the required maintenance hole or service space
is available).
• Do not install near bedrooms. The sound of refrigerant fl owing through
the piping may sometimes be audible.
• Ensure that it is located where noise in operation will not be a problem.
After power is supplied or after an operation stop for a while, a small
clicking noise may be heard from the inside of the branch box. The electronic expansion valve is opening and closing. The unit is not faulty.
2
• Determine the route of refrigerant piping, and electrical wiring beforehand.
• Ensure that the location of the installation is such that the length of refrigerant
piping is within the specifi ed limits.
• Do not install in location that is hot or humid for long periods of time.
• Ensure that the branch box is installed above the ceiling of corridor, bath room,
etc., where persons are not regularly there (Avoid installing at around center of
the room.) for maintenance.
* Ensure that the unit is installed in a location able to support its weight.
Warning:
Ensure that the unit is installed fi rmly in a location able to support its weight.
If the installation is of insuffi cient strength the unit may fall, resulting in in-
jury.
Page 3
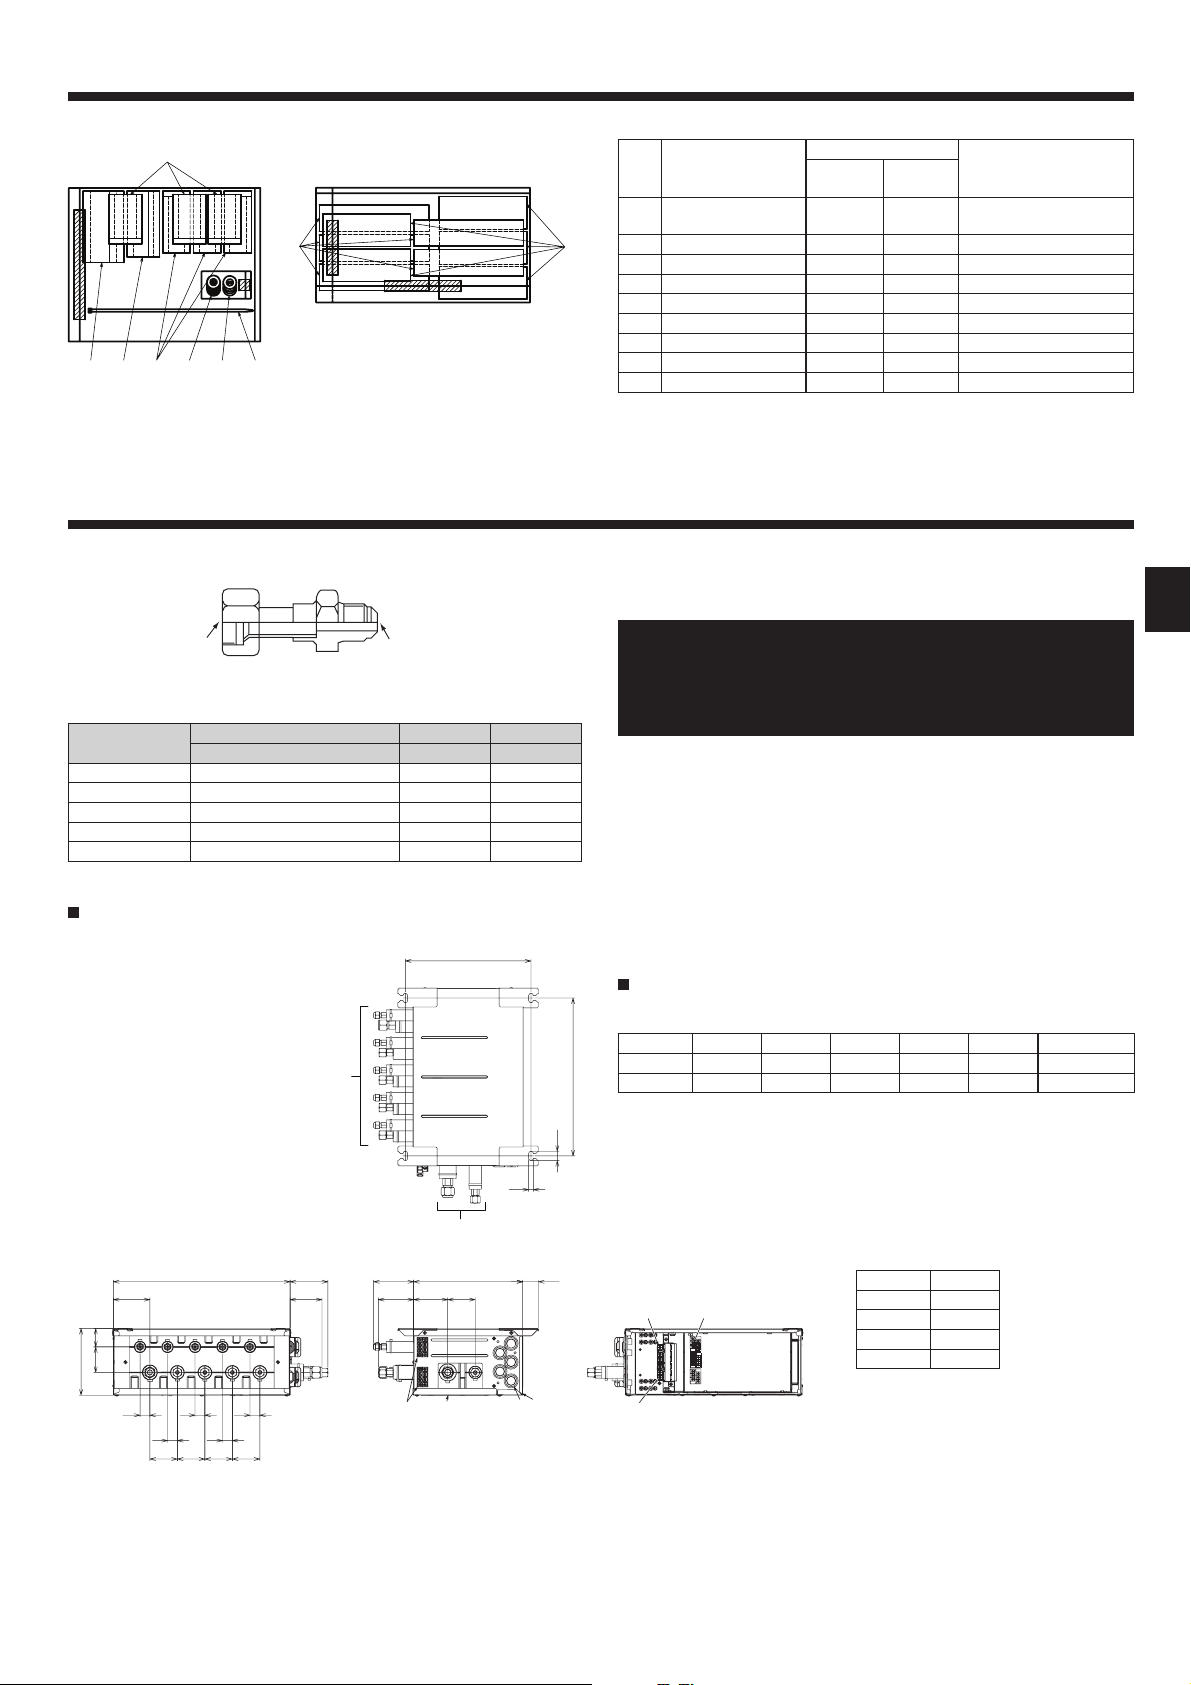
3. Confi rming supplied accessories
3.1. Check the Branch Box accessories and parts
8
4371
56
29
Accessory name
Washer
1
(with insulation)
Washer 4 4
2
Pipe cover (Liquid) 1 1 TO OUTDOOR UNIT
3
Pipe cover (Gas) 1 1 TO OUTDOOR UNIT
4
Pipe cover (Liquid) 3 5 TO INDOOR UNITS
5
Pipe cover (Gas) 3 5 TO INDOOR UNITS
6
Joint cover (Liquid) 1 3
7
Joint cover (Gas) 1 3
8
Band 16 24
9
Fig. 3-1
4. Dimensions and required servicing space of Branch Box
Q’ty
PAC-
MK31BC
PAC-
MK51BC
44
Optional different-diameter (deformed) joints
A
B
Fig. 4-1
Model name
MAC-A454JP ø9.52 → ø12.7 ø9.52 ø12.7
MAC-A455JP ø12.7 → ø9.52 ø12.7 ø9.52
MAC-A456JP ø12.7 → ø15.88 ø12.7 ø15.88
PAC-493PI ø6.35 → ø9.52 ø6.35 ø9.52
PAC-SG76RJ-E ø9.52 → ø15.88 ø9.52 ø15.88
PAC-MK51BC (5-branches type)
Connected pipes diameter Diameter A Diameter B
mm mm mm
A
320
B
(mm)
* Please connect 2 indoor units or more with 1 system.
* Up to 2 branch boxes may be connected to 1 outdoor unit.
* Suspension bolt : W3/8 (M10)
* Refrigerant pipe fl ared connection
* The piping connection size differs according to the type and capacity of
indoor units. Match the piping connection size for indoor unit and branch
box. If the piping connection size of branch box does not match the piping connection size of indoor unit, use optional different-diameter (deformed) joints to the branch box side. (Connect deformed joint directly to
the branch box side.)
A Suspension bolt pitch
B To indoor unit
C To outdoor unit
D Service panel (for LEV, THERMISTOR)
E Electric cover
F Rubber bush
G Terminal block (to indoor unit on control board)
H Terminal block (to outdoor unit)
J Terminal block (for communication cable)
K Cable clamp
* Ensure that the branch box is installed as shown on the below drawing.
PAC-MK51BC (Fig.4-2)
Suspension bolt: W3/8 (M10)
Refrigerant pipe fl ared connection
ABCDE
ø6.35 ø6.35 ø6.35 ø6.35 ø6.35 ø9.52
ø9.52 ø9.52 ø9.52 ø9.52 ø12.7 ø15.88
402
A
Liquid pipe
Gas pipe
mm
To outdoor unit
170
93
4765
EDCBA
EDCBA
25
25
24
12
C
Conversion formula
96450
81
102
90
7087
40278
J
G
1/4 F ø6.35
3/8 F ø9.52
1/2 F ø12.7
5/8 F ø15.88
3/4 F ø19.05
25
25
25
70707070
DK
FE
H
Fig. 4-2
3
Page 4
4. Dimensions and required servicing space of Branch Box
PAC-MK31BC (3-branches type) PAC-MK31BC (Fig.4-3)
A
320
(mm)
Suspension bolt: W3/8 (M10)
Refrigerant pipe fl ared connection
ABC
170
Liquid pipe
Gas pipe
A
B
C
450
233
4765
CBA
CBA
25
25
25
96
81
7070
102
90
278 40
87 70
DK
Fig. 4-3
402
24
12
J
E
F
H
4.1. The direction of the piping can be changed. (Fig.
ø6.35 ø6.35 ø6.35 ø9.52
ø9.52 ø9.52 ø9.52 ø15.88
G
4-4). [Work Procedures] (Fig. 4-5)
1 Remove the screws in each part.
To outdoor unit
mm
Fig. 4-4
2 Remove the electric cover, service panel, and top panel.
Electric cover
A
Service panel
B
Top panel
C
A
B
C
3 Install the top panel on the opposite surface.
Top panel
C
C
4
Page 5
4. Dimensions and required servicing space of Branch Box
4 Fasten the screws in each part.
6 Fasten the screws.
5 Install the service panel on the opposite surface.
Service panel
B
B
7 Install the electric cover on the opposite surface.
Electric cover
A
A
8 Fasten the screws.
Fig. 4-5
5
Page 6

4. Dimensions and required servicing space of Branch Box
(mm)(mm)
(1) (2)
A
B
50 450
250
Fig. 4-6 Fig. 4-7
C
*1
278
250 250
180-200
D E
*3
170 30
*2
NO NO
Min. 250
(3)
G
. 25
Min
Min. 250
Min. 25
0
(mm)
NOYES
E D
450
Fig. 4-8
4.2. Space required for installation and servicing
1. The space when installing with the suspension bolts.
(1) Front View (Fig. 4-6)
(mm)
Branch box
A
On the side of piping
B
(2) Side View (Fig. 4-7, Fig. 4-8, Fig. 4-9)
For indoor installations
C
Ceiling board
450
Fig. 4-9
D
Maintenance hole
E
Reactor Box (Optional parts)
F
*1:
Minimum 350 mm is required for 90° bends in refrigerant piping.
*2: is “Min. 200 mm” <recommendation>.
In the case of less than 200 mm (for example is 100 mm), the exchange work
(mm)
of Branch box from a maintenance hole becomes diffi cult (Only exchange work
of a PCB, linear expansion valve coils and sensors are possible).
To install the optional Reactor Box, set
(Fig. 4-9).
*3: is “
In the case of “
600 mm” <recommendation>.
450 mm”, prepare a maintenance hole at a PCB side (as it is
shown in Fig. 4-8, Fig. 4-9), and “Min. 300 mm” is needed as distance
In the case of less than 300 mm (for example
of Branch box, linear expansion valve coils and sensors from a maintenance
hole becomes diffi cult (Only exchange work of a PCB is possible).
Fig. 4-10
Min
. 50
(mm)
(3) Top View (Fig. 4-10)
Refrigerant piping
G
(mm)
0
Min. 50
Min. 250
Fig. 4-13
to Min. 270 mm <recommendation>
.
is 100 mm), the exchange work
2. The space when installing on the fl oor. (Fig. 4-11)
3. The space when installing on a wall. (Fig. 4-12)
Min. 250
Min. 250
The installation direction is limited when installing on a wall. (Fig. 4-13)
When installing the unit on the wall, install the piping connected to the outdoor
unit facing down. Other ways are not acceptable.
Fig. 4-11
Fig. 4-12
5. Refrigerant piping
* Always follow the specifi cations written in the installation manual of the outdoor unit. Exceeding these requirements may cause reduced performance of the equipment,
and malfunctions.
6
Page 7

6. Mounting the Branch Box
(mm)
B
A
Min. 30
B
C
D(E
)
Min. 50
F
G
H
Fig. 6-1
Bracket
llaW
* Purchase an appropriate
bracket locally if the unit
is to be mounted on a
wall.
Fig. 6-2
7. Installing refrigerant piping
AB
90° ± 0.5°
øA
45°±2°
R0.4 to R0.8
A Flare cutting dimensions
B Flare nut tightening torque
Fig. 7-1
A Flare cutting dimensions
Table 1
Copper pipe O.D.
(mm)
ø6.35 8.7-9.1
ø9.52 12.8-13.2
ø12.7 16.2-16.6
ø15.88 19.3-19.7
B Flare nut tightening torque
Table 2
Copper pipe O.D.
(mm)
ø6.35 17 14-18
ø6.35 22 34-42
ø9.52 22 34-42
ø9.52 26 49-61
ø12.7 26 49-61
ø12.7 29 68-82
ø15.88 29 68-82
ø15.88 36 100-120
Flare dimensions
øA dimensions
(mm)
Flare nut O.D.
(mm)
Tightening torque
(N•m)
*1 N•m ≈ 10 kgf•cm
(mm)
(1) Install the suspension bolts (procure locally) at the specifi ed pitch (Fig. 4-2, 4-3).
(2) Fit the washers and nuts (1, 2, procure locally) to the suspension bolts.
(Fig. 6-1)
(3) Hang the unit on the suspension bolts.
(4) Fully tighten the nuts (check ceiling height).
Min. 50
(5) Use a level to adjust the branch box to the horizontal.
When unit is hung and nuts tightened
A
Suspension bolt
B
Nut
C
Washer (with cushion)
D
Ensure that cushion faces downwards
E
Washer (without cushion)
F
Nut (procure locally)
G
Ceiling board
H
► Connect the liquid and gas pipes of each indoor unit to the same end
connection numbers as indicated on the indoor unit flare connection
section of each Branch Box. If connected to wrong end connection
numbers, it doesn’t work normally.
► When connecting indoor units, make sure to connect refrigerant pipes
and connection wires to the appropriate connection ports marked with
matching alphabets. (Ex. A, B, C, D, E)
Note:
Be sure to mark all the local refrigerant piping (liquid pipes, gas pipes, etc.)
for each indoor unit designating clearly which room it belongs in. (Ex. A, B,
C, D, E)
► List indoor unit model names in the name plate on the control box of
Branch Box (for identification purposes).
• Conduct suffi cient anti-condensation and insulation work to prevent water drip-
ping from the refrigerant piping. (liquid pipe/gas pipe)
• Increase insulation depending on the environment where the refrigerant piping is
installed, or condensation may occur on the surface of the insulation material.
(Insulation material Heat-resistant temperature: 120 °C, Thickness:
15 mm or more)
* When the refrigerant piping is used in locations subject to high temperature
and humidity such as in the attic, further addition of insulation may be re-
quired.
• To insulate the refrigerant piping, apply heat-resistant polyethylene foam be-
tween the indoor unit and insulation material as well as to the net between the
insulation material fi lling all gaps.
(Condensation forming on the piping may result in condensation in the room or
burns when contacting the piping.)
► When using commercially available refrigerant piping, ensure that both
liquid and gas piping are wrapped with commercially available thermal
insulation materials (insulation materials at least 12 mm thick and able
to withstand temperatures in excess of 100 ºC).
► Refer to the installation manual of the outdoor unit when creating a
vacuum and opening or closing valves.
(1) Remove the fl ared nuts and caps from the branch box.
(2) Flare the ends of the liquid and gas piping, and apply refrigeration oil (procure
locally) to the fl ared seat.
Do not apply oil to the threaded portion.
(3) Connect the refrigerant piping immediately. Always tighten the fl ared nuts to
the torque specifi ed in the table 2 using a torque wrench and double spanner.
(4) Press the pipe covers 3 and 5 on the liquid piping against the unit and wrap
to hold in place. (Fig. 7-3)
(5) Press the pipe covers 4 and 6 on the gas piping against the unit and wrap to
hold in place. (Fig. 7-3)
(6) Apply the supplied bands 9 at a position 10 - 20 mm from each end of the
pipe covers (3456).
(7) If the indoor unit is not connected, fi t the supplied pipe covers (with caps, 7
and 8) to the branch box refrigerant piping connections against the unit to
prevent condensation dripping from the pipes. (Fig. 7-4)
(8) Clamp the pipe covers (78) in place with the supplied bands 9.
1
2
7
Page 8

7. Installing refrigerant piping
C
D
4
5
6
Fig. 7-2
Caution:
Tighten the fl are nut with a torque wrench in the specifi ed method.
Overtightening will cause the fl are nut to crack and it will cause refrigerant
leakage over a period of time.
C Apply refrigeration oil to the entire (Fig. 7-2) surface of the fl ared seat.
D Basically use fl ared nuts fi tted to the body (commercially available fl ared nuts
may crack).
3
Note:
A special fl are nut (optional or attached to the indoor unit) is needed to
some indoor units.
Please refer to the installation manual of outdoor unit and indoor unit for
details.
F Band
G Pipe covers
H Tighten
J Refrigerant piping
L Thermal insulation for refrigerant piping
(1) In order to prevent refrigerant leaks, make sure that the fl are nuts are tightened
(2) In order to prevent condensation, install the pipe covers
Table 3
9
3456
► Use the following procedures for indoor connection part which indoor
unit is not connected. (Fig. 7-4)
according to the specifi ed torques* in Table 3.
* Refrigerant may also leak if the fl are nuts are tightened more than the speci-
fi ed torques.
against the unit
and fasten them with the supplied bands
Diameters of branch box openings for
connecting indoor units (mm)
ø6.35 13 ± 2
ø9.52 30 ± 2
ø12.7 50 ± 2
► Refrigerant charge:
Refer to the installation manual of the outdoor unit.
Use only R410A refrigerant (use of other refrigerants may cause troubles).
.
9
7 8
Tightening torque
(N•m)
3456
G
L
Fig. 7-3
7
F
8
H
J
9
1.5 m or less
Fig. 7-5
(mm)
9
Caution:
To avoid excessive strain on the branch box, support the piping with one or
more support(s) 1.5 m or less from the branch box.
Refer to Fig. 7-5 as an example.
J Refrigerant piping
L Thermal insulation for refrigerant piping
10 to 20
30 to 50
Fig. 7-4
Support
Pipe cover
8
Page 9

8. Electrical work
A
B
Fig. 8-1 Fig. 8-2
GEF
D
Fig. 8-3 Fig. 8-4
Electric cover
A
Rubber bush
B
Wiring
C
Controller board
D
Terminal block:
E
Terminal block: TB2B <To outdoor unit>
F
Terminal block: TB3A-TB3E
G
<To indoor unit>
Earth Terminal <To outdoor unit>
H
TB5
Q
R
Earth Terminal <For TB3A>
J
Earth Terminal <For TB3B>
K
Earth Terminal <For TB3D>
L
Earth Terminal <For TB3C>
M
Earth Terminal <For TB3E>
N
Earth Terminal <To other branch box>
O
Cable clamp <For TB2B>
P
Cable clamp <For TB3A-TB3E>
Q
Cable clamp <For TB5>
R
P
H~O
C
B
► Cautions for electrical work.
Warning:
• Always use dedicated circuits with breakers, and at the rated voltage.
Power supply circuits with insuffi cient capacity, and bad workmanship
during installation, may result in electric shock or fi re.
Caution:
• Be sure to establish an earth. Do not earth the unit to a utility pipe,
arrester, or telephone earth.
Incomplete earth may cause electrical shock. A high surge current from
lightning or other sources may cause damage to the air conditioner.
• Use the specifi ed electrical wiring and ensure that it is connected prop-
erly, and that it is not under tension.
Failure to follow these requirements may result in broken wiring, heating,
or fi re.
► Before turning Branch Box on, be sure to set the switches.
► To turn the power on, turn on the Branch Box then the outdoor unit, in
that order.
(In case power supplies for Branch Box and outdoor unit are separated)
► Wiring connecting branch box and outdoor unit, and branch box and
indoor units, functions as both power supply and signal cable. Connect
this wiring in accordance with the terminal block numbers to ensure
correct polarity.
► Ensure that the appropriate refrigerant piping and electrical wiring are
connected to each indoor unit. Incorrect wiring will interfere with the
correct operation of the unit.
► Connect refrigerant pipes and connection wires to the appropriate ports
marked with matching alphabets (Ex. A, B, C, D, E) on this unit.
► Always fix each ground wire separately with a ground screw.
► To prevent that wiring installed in the ceiling is chewed by rats etc., it
should be installed in wiring conduit.
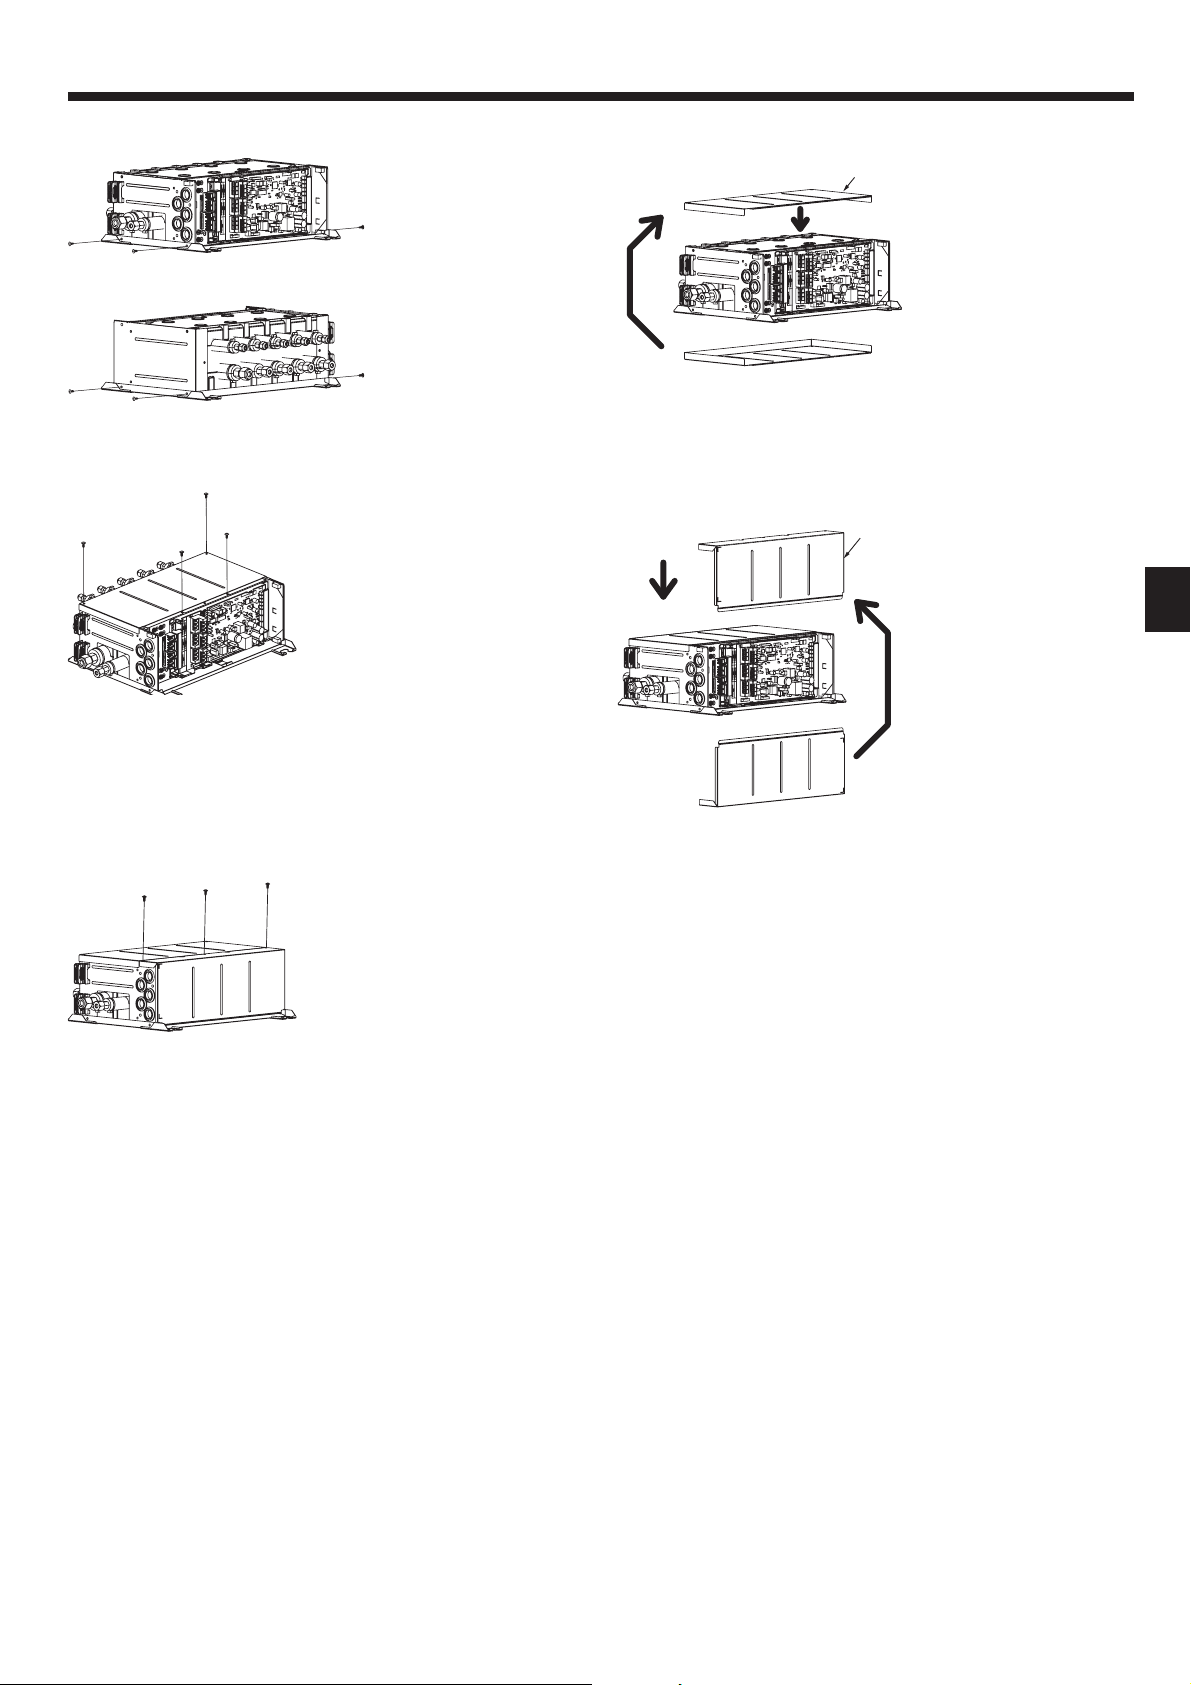
1. Remove the electric cover. (Fig. 8-1)
2. Pass the wiring into the branch box each wire in place with a wiring clamp.
3. Firmly connect each wire to the appropriate terminal block. (Fig. 8-8)
4. Set dip sw. (Refer to 8.3)
5. Replace the electric cover.
A
D
Fig. 8-5 Fig. 8-6
1.5 m or less
Support
B
Fig. 8-7
8.1. When using wiring conduit (Fig. 8-5,6,7)
Replace the horizontal cover when the wiring conduit has been fi xed in place.
C
B
*
Cover
A
Wiring conduit
B
Washer
C
Nut
D
Wiring conduit of up to 1" OD may be used.
(1) When using 1" OD wiring conduit, remove the bush and fi x to the branch box.
Remove the horizontal cover while fi xing to the branch box.
(2) When using wiring conduit of 3/4" OD or smaller, notch the bush and insert the
wiring conduit approximately 100 mm into the branch box.
* Replace the horizontal cover when the wiring conduit has been fi xed in place.
Caution:
To avoid excessive strain on the branch box, support the wiring conduit
with one or more support(s) 1.5 m or less from the branch box.
Refer to Fig. 8-7 as an example.
B
9
Page 10

8. Electrical work
TB3A
TB3B
TB3C
TB3D
TB3E
TB2B
TB5
TB3A
TB3B
TB3C
TB2B
TB5
TB3A
TB3B
TB3C
TB3D
TB3E
TB2B
TB5
TB3A
TB3B
TB3C
TB2B
TB5
Supply power separately to branch box and outdoor unit
E
E
Circuit breaker
Outdoor unit
L
N
M-NET Branch BOX #1
(5-branches type)
TB2B
(A)
B1
B2
M1
M2
Pull box
box
Pull
L
N
TB5
M1
M2
S
(B)
(A)
TB2B
L
N
TB5
M1
M2
S
(B)
M-NET Branch BOX #2
(3-branches type)
TB3A
TB3B
TB3C
TB3
TB3
TB3A
TB3B
TB3C
Indoor unitCircuit breaker
(C)
S1
S2
S3
(C)
S1
S2
S3
(C)
S1
S2
S3
(C)
S1
S2
S3
(C)
S1
S2
S3
(C)
S1
S2
S3
(C)
S1
S2
S3
(C)
S1
S2
S3
Indoor unit
8.2. External wiring procedure (Fig. 8-8, Fig 8-9)
Power supply from Outdoor unit
M-NET Branch BOX #1
Circuit breaker
Outdoor unit
* Refer to installation manual of the outdoor unit
L
S1
A ROOM
S2
S3
S1
B ROOM
S2
S3
S1
C ROOM
S2
S3
S1
D ROOM
S2
S3
S1
E ROOM
S2
S3
S1
A ROOM
S2
S3
S1
B ROOM
S2
S3
S1
C ROOM
S2
S3
E
B1
N
B2
M1
M2
(5-branches type)
(A)
L
N
M1
M2
S
(B)
(A)
L
N
M1
M2
S
(B)
M-NET Branch BOX #2
(3-branches type)
Indoor unit
(C)
S1
S2
S3
S1
S2
S3
S1
S2
S3
S1
S2
S3
S1
S2
S3
S1
A ROOM
S2
S3
(C)
S1
B ROOM
S2
S3
(C)
S1
C ROOM
S2
S3
(C)
S1
D ROOM
S2
S3
(C)
S1
E ROOM
S2
S3
(C)
S1
S2
S3
S1
S2
S3
S1
S2
S3
S1
A ROOM
S2
S3
(C)
S1
B ROOM
S2
S3
(C)
S1
C ROOM
S2
S3
Indoor unit
Supply power separately to branch box and outdoor unit
When installing the unit in a regular house. (Refer to Note 3)
E
E
E
Circuit breaker
Outdoor unit
L
N
M-NET Branch BOX #1
L
NLN
L
NLN
(5-branches type)
TB3A
TB2B
(A)
L
N
TB3B
TB5
M1
M2
S
TB3C
(B)
TB3
TB3
(A)
TB3A
TB2B
L
N
TB3B
TB5
M1
M2
S
TB3C
(B)
M-NET Branch BOX #2
(3-branches type)
Reactor Box
(A)
Pull box
box
Pull
Fig. 8-8
(Optional parts)
Reactor Box
(A)
(Optional parts)
B1
B2
M1
M2
Indoor unitCircuit breaker
(C)
S1
S2
S3
S1
S2
S3
S1
S2
S3
D
S1
S2
S3
E
S1
S2
S3
S1
S2
S3
S1
S2
S3
S1
S2
S3
S1
S2
S3
(C)
S1
S2
S3
(C)
S1
S2
S3
(C)
S1
S2
S3
(C)
S1
S2
S3
(C)
S1
S2
S3
(C)
S1
S2
S3
(C)
S1
S2
S3
Indoor unit
A ROOM
B ROOM
C ROOM
D ROOM
E ROOM
A ROOM
B ROOM
C ROOM
Power supply from Outdoor unit
When installing the unit in a regular house. (Refer to Note 3)
Circuit breaker
Refer to installation manual of the outdoor unit
*
E
Power supply: Single phase 220/230/240 V 50 Hz, 220 V 60 Hz
E
Outdoor unit
L1
L2
L3
N
B1
B2
M1
M2
Reactor Box
(Optional parts)
(A)
NLN
L
M-NET Branch BOX #1
(5-branches type)
(A)
L
N
M1
M2
S
(B)
(A)
L
N
M1
M2
S
(B)
M-NET Branch BOX #2
(3-branches type)
Indoor unit
(C)
S1
S2
S3
S1
S2
S3
S1
S2
S3
S1
S2
S3
S1
S2
S3
S1
A ROOM
S2
S3
(C)
S1
B ROOM
S2
S3
(C)
S1
C ROOM
S2
S3
(C)
S1
D ROOM
S2
S3
(C)
S1
E ROOM
S2
S3
(C)
S1
S2
S3
S1
S2
S3
S1
S2
S3
S1
A ROOM
S2
S3
(C)
S1
B ROOM
S2
S3
(C)
S1
C ROOM
S2
S3
Indoor unit
10
Page 11

8. Electrical work
M-NET Branch BOX
(5-branches type)
TB2B
L
N
TB5
M1
M2
S
TB3A
S1
S2
S3
TB3B
S1
S2
S3
TB3C
S1
S2
S3
TB3D
S1
S2
S3
TB3E
S1
S2
S3
Indoor unit
S1
S2
S3
S1
S2
S3
S1
S2
S3
A ROOM
B ROOM
C ROOM
Note:
1 Connect the lines (B), (C) in accordance with the terminal block names to
ensure correct polarity.
2 As for lines (C), S1 and S2 are for connecting the power source.
And S2 and S3 are for signals. S2 is common cable for the power source
and signal.
Wire diameter
(A) Main power line/
Earth line
3-core 2.5 mm
When using twisted wire for the wiring, the use of round terminal is required.
Notes: 1. Wiring size must comply with the applicable local and national
3 Reactor BOX (Optional parts)
When the product is used for a purpose other than as professional equipment, the Reactor BOX may be necessary.
Never splice the cable, otherwise it may result in a smoke, a fi re or communi-
cation failure.
code.
2. Power supply cords and indoor unit/branch box/outdoor unit connecting cords shall not be lighter than polychloroprene sheathed
flexible cord. (Design 60245 IEC 57)
3. Install an earth line longer than power cables.
4. Do not bundle the M-NET cable with the connection cable and
power supply cable.
It may cause erroneous operation.
Outdoor unit
1-phase power supply Unnecessary Necessary
3-phase power supply Necessary Necessary
Warning:
(B) M-NETcable Shielding
wire CVVS, CPEVS or MVVS
2
2-core 1.25 mm
Less Than 200 m
Branch box power supply method
Power supply from
outdoor unit
2
(C) Signal line/
Earth line
4-core 1.5 mm
Less Than 25 m
Separate power supply
2
220/230/240 V
220/230/240 V
AB
AB
C
Fig. 8-9
or
C
E
D
N
L
TB2B TB5
M1
M2
Fig. 8-10
• Recommended Connection Method
When connecting one indoor unit to the branch box, connect it to TB3A. When connecting
2 indoor units, connect them to TB3A and TB3B. When connecting 3 indoor units, connect
them to TB3A, TB3B, and TB3C. Connect indoor units in the order of A→B→C→D→E.
D
Power supply wiring (Supply power separately to branch box
and outdoor unit)
C
S
or
or
E C
N
L
E
TB2 TB5STB15
E
M2
1 2
M1
• Install an earth line longer than other cables.
• Power supply cords of appliance shall not be lighter than design 245IEC57 or
227IEC57, 245 IEC 53 or 227 IEC 53.
• A switch with at least 3 mm, 1/8 inch contact separation in each pole shall be
provided by the air conditioner installation.
[Fig. 8-10]
Ground-fault interrupter
A
Local switch/Wiring breaker
B
Branch Box
C
Pull box
D
M-NET CONTROL INDOOR UNIT
E
11
Page 12

8. Electrical work
Total operating current of the indoor unit
Minimum wire thickness (mm²)
Main cable Branch Ground
Capacity (A) Fuse (A)
Breaker for wiring
(NFB)
Ground-fault interrupter *1
F0 = 16A or less *2 1.5 1.5 1.5 16 16 20 20A current sensitivity *3
F0 = 25A or less *2 2.5 2.5 2.5 25 25 30 30A current sensitivity *3
F0 = 32A or less *2 4.0 4.0 4.0 32 32 40 40A current sensitivity *3
Apply to IEC61000-3-3 about max. permissive system impedance.
*1 The Ground-fault interrupter should support inverter circuit.
The Ground-fault interrupter should combine using of local switch or wiring breaker.
*2 Please take the larger of F1 or F2 as the value for F0.
F1 = Total operating maximum current of the indoor units × 1.2
F2 = (V1/C)
Connect to Branch box (PAC-MK•BC)
Indoor unit V1 V2
Type 1 SEZ-KD•VA, PCA-RP•KAQ, PLA-ZRP•BA(.UK),
SLZ-KF•VA
Type 2 PEAD-RP•JAQ(L).UK 26.9
Type 3 MLZ-KA•VA, SLZ-KA•VAQ(L)3 9.9
MSZ-FH•VE, MSZ-SF•VE, MSZ-EF•VE, MSZ-SF•VA,
Type 4
MSZ-GF•VE
Type 5 MFZ-KJ•VE, MSXY-FJ 7.4
Type 6 Branch box (PAC-MK•BC) 5.1 3.0
Type 7 ecodan C generation*5 5.1 5.0*
19.8
6.8
Connect to Connection kit (PAC-LV11M)
Indoor unit V1 V2
MSY-EF•VE, MSY-GE•VA, MSY-GH, MSZ-GE•VA,
Type 1
MSZ-SF•VA, MSZ-SF•VE, MSZ-EF•VE, MSZ-FH•VE
Type 2 MFZ-KJ•VE 7.4
Type 3 Connection kit (PAC-LV11M) 3.5
2.4
Indoor unit V1 V2
6.8
2.4
PMFY-VBM, PLFY-VBM, PEFY-VMS1, PCFY-VKM
Type 1
PKFY-VHM, PKFY-VKM, PFFY-VLRMM, PFFY-VKM,
PLFY-VFM
Type 2 PLFY-VCM 9.9
Type 3 PKFY-VBM 3.5
Type 4 PEFY-VMA 38.0 1.6
PLFY-VLMD, PEFY-VMH,PEFY-VMR, PDFY-VM
Type 5
PFFY-VLEM, PFFY-VLRM, PWFY-VM
*This value may increase due to a locally connected actuator.
C : Multiple of tripping current at tripping time 0.01s
Please pick up "C" from the tripping characteristic of the breaker.
Condition: Branch Box × 2 + SEZ-KD•VA × 5, C=8 (refer to right sample chart)
F2 = 5.1 × 2/8 + 19.8 × 5/8
= 13.65
*3 Current sensitivity is calculated using the following formula.
G1 = V2 + V3 × (Wire length[km])
G1 Current sensitivity
30 or less 30 mA 0.1sec or less
100 or less 100 mA 0.1sec or less
Sample chart
6000
600
60
10
SAMPLE
19.8
2.4
00
2
Wire thickness (mm
)V3
1.5 48
2.5 56
4.0 66
When connecting 3 units of the PLA-ZRP series respectively to the Branch Box
2
using 20m of wiring and connecting the Branch Box and PEFY-VMA to
1.5mm
a single breaker using wiring totaling 100m in length;
G1
= 2.4 × 3 + 3 + 1.6 + 48 × 0.02 × 3 + 56 × 0.1
= 20.28
→ 30 mA Current sensitivity
Tripping Time [s]
1
0.1
0.01
12
Rated Tripping current (x)
34 68C10 20
*5 When the ecodan is connected, the master controller (G-50A etc.) cannot be connected.
Warning:
In case of A-control wiring, there is high voltage potential on the S3 terminal caused by electrical circuit design that has no electrical insulation between power
line and communication signal line. Therefore, please turn off the main power supply when servicing. And do not touch the S1, S2, S3 terminals when the power
is energized. If isolator should be used between outdoor unit and branch box/indoor unit and branch box, please use 2-pole or 3-pole type, as shown in the
following fi gures.
2 pole isolator
(Switch)
3 pole isolator
(Switch)
䠆Power supply from Outdoor unit
Power supply
L
Isolator (Switch)
N
L
L
N
Outdoor unit
N
B1
B2
L
Branch box
N
S1
S2
S3
S1
"A-control
S2
Indoor unit"
S3
3 pole isolator
(Switch)
䠆Supply power separately to branch box and outdoor unit
Power supply
L
Isolator (Switch)
N
L
N
L
Branch box
N
S1
S2
S3
S1
S2
S3
"A-control
Indoorunit"
Caution:
After using the isolator, be sure to turn off and on the main power supply to reset the system. Otherwise, the outdoor unit may not be able to detect the
branch box(es) or indoor units.
12
Page 13

8. Electrical work
8.3. Switch setting
SW4 SW5SW11SW12
Model selection
Address setting
TENS DIGIT
Address setting
ONES DIGIT
Dip switch setting (Effective only before turning on the power)
SW1
ON
OFF
123 456
SW4
ON
OFF
123 456
When connecting the Cylinder or the Hydro box unit to the unit in the house, connect
the air to air system indoor unit connected in the bedrooms to A to C ports and make
the following switch settings below.
Also, after referring to the outdoor unit installation manual, add refrigerant.
Port A to C are available for setting for up to a maximum of 3 rooms.
SW5
456
Off Off Off Not specifi ed
On Off Off Port A
Off On Off Port B
On On Off Port A+B
Off Off On Port C
On Off On Port A+C
Off On On Port B+C
On On On Port A+B+C
Address switch (Effective only before turning on the power)
Actual indoor unit address setting varies in different systems. Refer to the installation manual for the outdoor unit for details on how to make the address setting.
Each address is set with a combination of the settings for the tens digit and ones digit.
(Example)
• When setting the address to “3”, set the ones digit to 3, and the tens digit to 0.
• When setting the address to “25”, set the ones digit to 5, and the tens digit to 2.
(Example)
• When setting the address of the branch BOX to “3”, an address is assigned to each indoor unit starting with Unit A as shown below no matter if each indoor unit is connected. (SW1-1~5 ON)
Indoor Unit A Address 3
Indoor Unit B Address 4
Indoor Unit C Address 5
Indoor Unit D Address 6
Indoor Unit E Address 7
• When the address is set to “25” and also 3 indoor units (Unit A, Unit C, and Unit E) are connected. (SW1-1, 1-3, 1-5 ON)
Indoor Unit A Address 25
Indoor Unit C Address 26
Indoor Unit E Address 27
(Example)
When the indoor units are
•
connected to Indoor unit
A and C, turn SW1-1 and
SW1-3 to on.
•
78910
Port setting
(Example)
When the indoor unit is
cooling only system, turn
SW4-5 to on.
Port A
Port A
Port B
Port B
Port C
Port C
Port D
Port D
Port E
Port E
Indoor Unit A SW1-1 Not connected Connected
Indoor Unit B SW1-2 Not connected Connected
Indoor Unit C SW1-3 Not connected Connected
Indoor Unit D SW1-4 Not connected Connected
Indoor Unit E SW1-5 Not connected Connected
Not used SW1-6
Switch OFF ON
SW4-5 Cooling & Heating system Cooling only system
Ports available
Ports available
for setting
for setting
Indoor unit
setting
Switch OFF ON
SW1
Indoor unit
connections
13
Page 14

9. Test run
• Refer to the “Test run” section of the installation manual of the indoor units and outdoor unit.
• When the branch box and outdoor power source are separate, turn on the power of the branch box fi rst, and then turn on the outdoor unit power.
• After power is supplied or after an operation stop for a while, a small clicking noise may be heard from the inside of the branch box. The electronic expansion valve is opening and closing. The unit is not faulty.
• Be sure to perform the test run in cooling mode for each indoor unit. Make sure each indoor unit operates properly following the installation manual attached to the unit.
• If you perform the test run for all indoor units at once, you cannot detect any erroneous connection, if any, of the refrigerant pipes and the indoor/outdoor unit connecting
wires.
• To check for improper wiring, perform the test run for each indoor unit individually.
Caution:
• Use the remote controller to operate the indoor unit.
• The following symptoms are not malfunctions.
Indoor unit does not operate even if set to
cooling (heating) operation
Indoor unit fan stops during heating operation
ddaff
* See the operation manual of indoor units for details.
** This mode is activated for approximately 1 minute to help avoid an insuffi cient supply of refrigerant during heating operation when refrigerant is stored in an indoor unit
that has been turned off or thermo-off.
Symptom Cause Indoor unit LED display *
The cooling (heating) operation cannot be operated when the heating (cooling)
operation of another indoor unit is operating.
The fan stops during defrosting operation. Fan stops when the refrigerant collecting mode ** is activated. Stand by (For Multi System)
Stand by (For Multi System)
14
14
 Loading...