

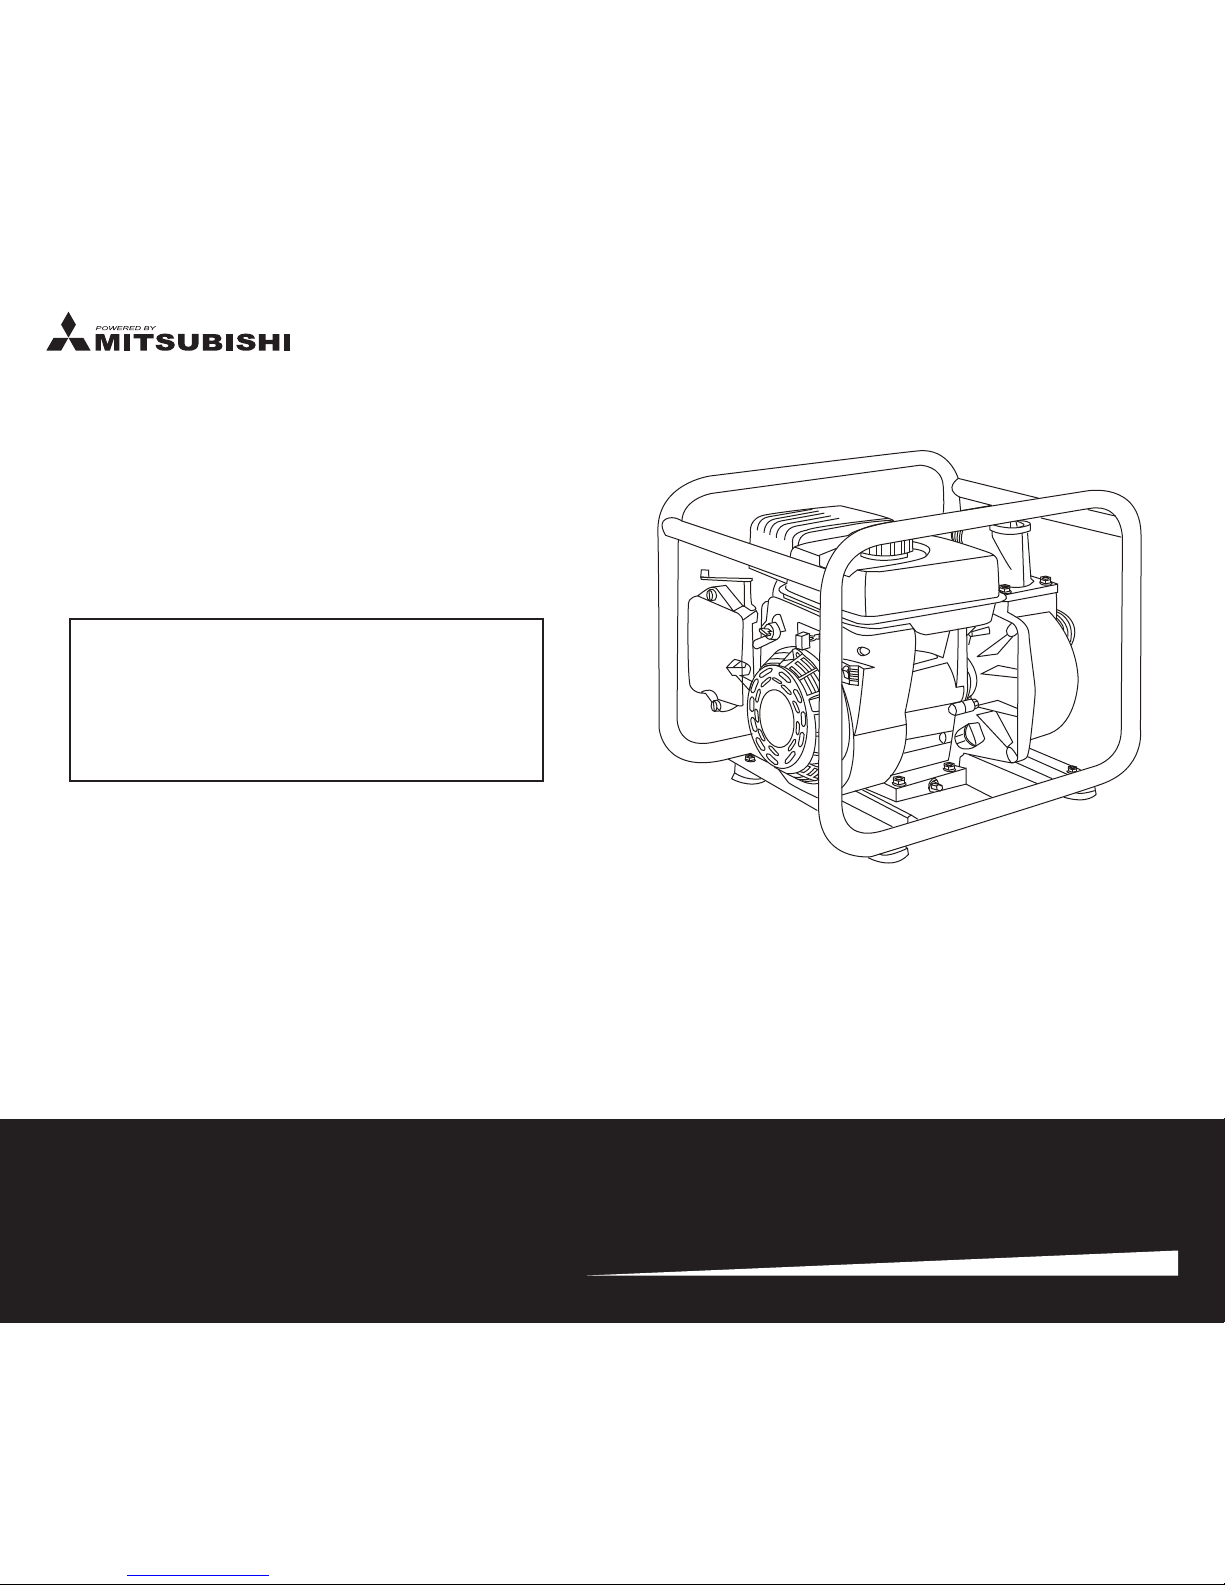
GASOLINE WATER PUMP
IMPORTANT – Please make certain that
persons who are to use this equipment
thoroughly read and understand these
instructions and any additional instructions
provided prior to operation.
NOTE:
No refund or exchange once gasoline is placed
into the fuel tank.Warranty registration must be
complete within 30 days of purchase with proof
of purchase.
MBP15G
MBP20G
MBP30G
MBP40G
MBP20H
MBP30T
Operator’s Manual

TABLE OF CONTENTS
SAFTEY INSTRUCTIONS
● Warning Labels
2-3
3
FEATURES, ASSEMBLY AND ACCESSORIES 4
BEFORE OPERATION 5
OPERATING THE WATER PUMP 6
MAINTENANCE 7-8
STORAGE 8
TROUBLE SHOOTING 9
SPECIFICATIONS 10
PERFORMANCE CURVE 11
LIMITED WARRANTY 13
DANGER WARNING CAUTION
DANGER indicates a potenally
hazardous situaon which, if not
avoided, WILL result in death or
serious injury.
SAFETY INSTRUCTIONS
WARNING indicates a potenally
hazardous situaon which, if not
avoided, could result in death or
serious injury.
CAUTION indicates a potenally
hazardous situaon which, if not
avoided, may result in minor or
moderate personal injury, or
property damage.
WARNING
To reduce the risk of serious injury or even death,
read the following safety precauons and operang
instrucons before operang.
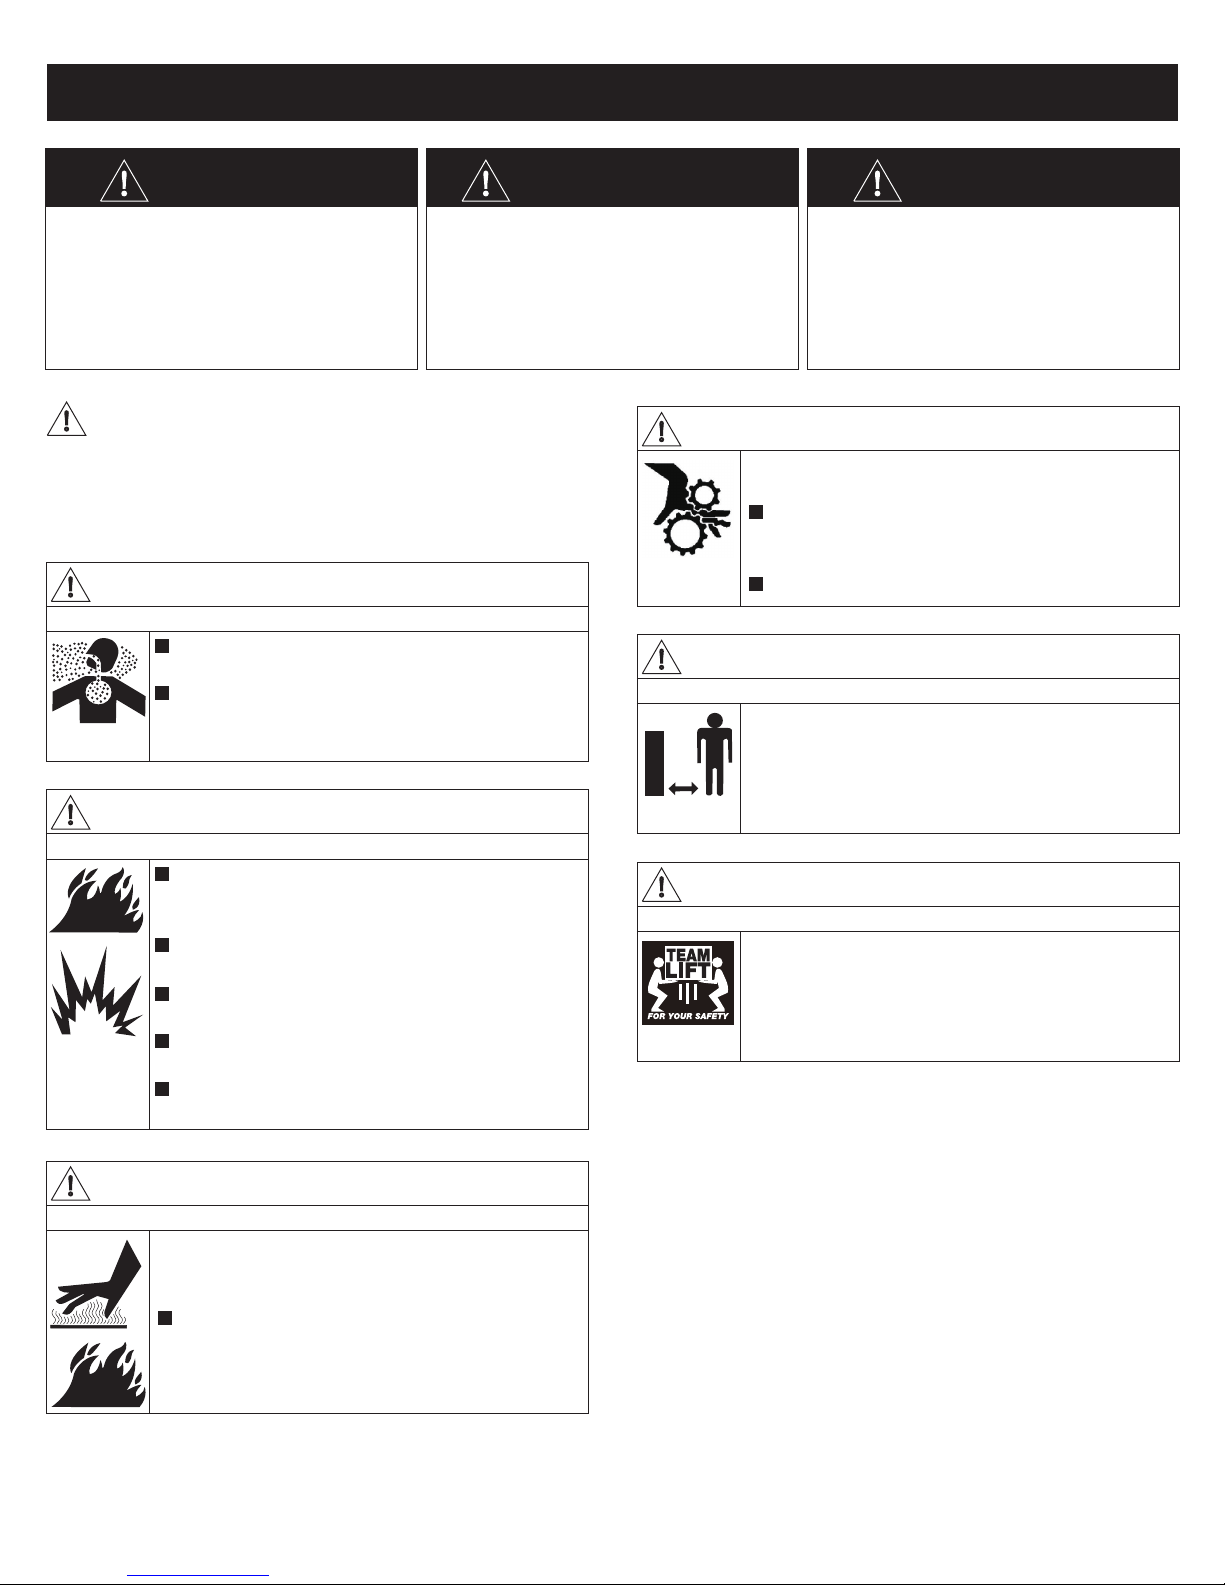
DANGER
Using a water pump indoors WILL KILL YOU IN MINUTES
Engine exhaust contains carbon monoxide.
This is a poison you cannot see or smell.
NEVER use inside a home or garage, even IF doors
and windows are open; only use OUTSIDE and far
away from windows, doors and vents.
DANGER
FUEL IS HIGHLY FLAMMABLE AND EXPLOSIVE
Always turn off the engine before adding fuel. Hot
engine parts, sparks or cigarees can ignite
gasoline. Store fuel away from water pump.
Never refuel while smoking or in the vicinity of an
open flame.
Take care not to spill any fuel on the engine or
muffler when refueling.
Before transporng the water pump in a vehicle,
drain all fuel to prevent leakage that may occur.
Store the water pump in a well venlated area
with the fuel tank empty.
WARNING
Starter and other rotang parts can entangle hands,
hair, clothing, or accessories.
Do not wear loose clothing, jewelry, or anything
that may be caught in the starter or other
rotang parts.
Tie up long hair when operang the water pump.
WARNING
KEEP CHILDREN AND PETS AWAY
Keep bystanders, especially children and pets, at
least 50 feet (15m) from the water pump. Do not let
15m
children touch the water pump. When not in use,
the water pump should be stored in a dry, locked
locaon, out of reach of children.
CAUTION
HEAVY LOAD
Use proper liing techniques when transporng the
water pump from site to site. Improper liing
techniques may result in personal injury.
WARNING
ENGINE AND MUFFLER MAY BE HOT
Contact with muffler area can result in serious burns.
Exhaust heat/gases can ignite combusbles,
structures or damage fuel tank causing a fire.
DO NOT touch hot parts and AVOID hot exhaust
gases. Allow equipment to cool before touching.
- 2 -
CAUTION
Improper treatment can damage the unit and shorten its life
Be sure pump chamber is filled with water before starng the
engine. NEVER run pump without priming.
• Use a non-collapsible hose on the sucon side of the pump.
• Use water pump only for intended uses.
• Not suitable for pumping sea water, beverages, acids, chemical
soluons, or any other liquid, other than clean water.
• DO NOT obstruct the sucon or discharge hose in any way.
• NEVER operate pump without strainer basket connected to end
of sucon hose.
• DO NOT exceed sucon head (see Specificaon). Use shortest
sucon head possible.
• NEVER allow vehicles to drive over hoses. If a hose must be
posioned across a roadway, use planking on each
side of hose to allow vehicles to pass over without obstrucng or
collapsing hose.
• Posion pump to avoid “walking” or equipment movement,
especially if located near a ditch or edge of open ravine. The
equipment could fall in.
• Keep equipment away from edge of river or lake where it could
cause the bank to collapse.
• DO NOT insert any objects through cooling slots.
NOTICE
Engine oil is hazardous to the environment
Be very careful when changing the oil to prevent spilling onto the
ground. Even if it is washed away, it will not mix with water and
will pollute the watershed—having a negave impact on the
plants and animals that it comes in contact with.
When disposing of engine oil:
1. While changing the engine oil, place a drip pan under the oil
plug to collect the waste.
2. Soak up any spills with sawdust, kiy lier, or sand. NEVER
dump down the drain or sewer.
3. Take the oil and filter to an oil recycling center.
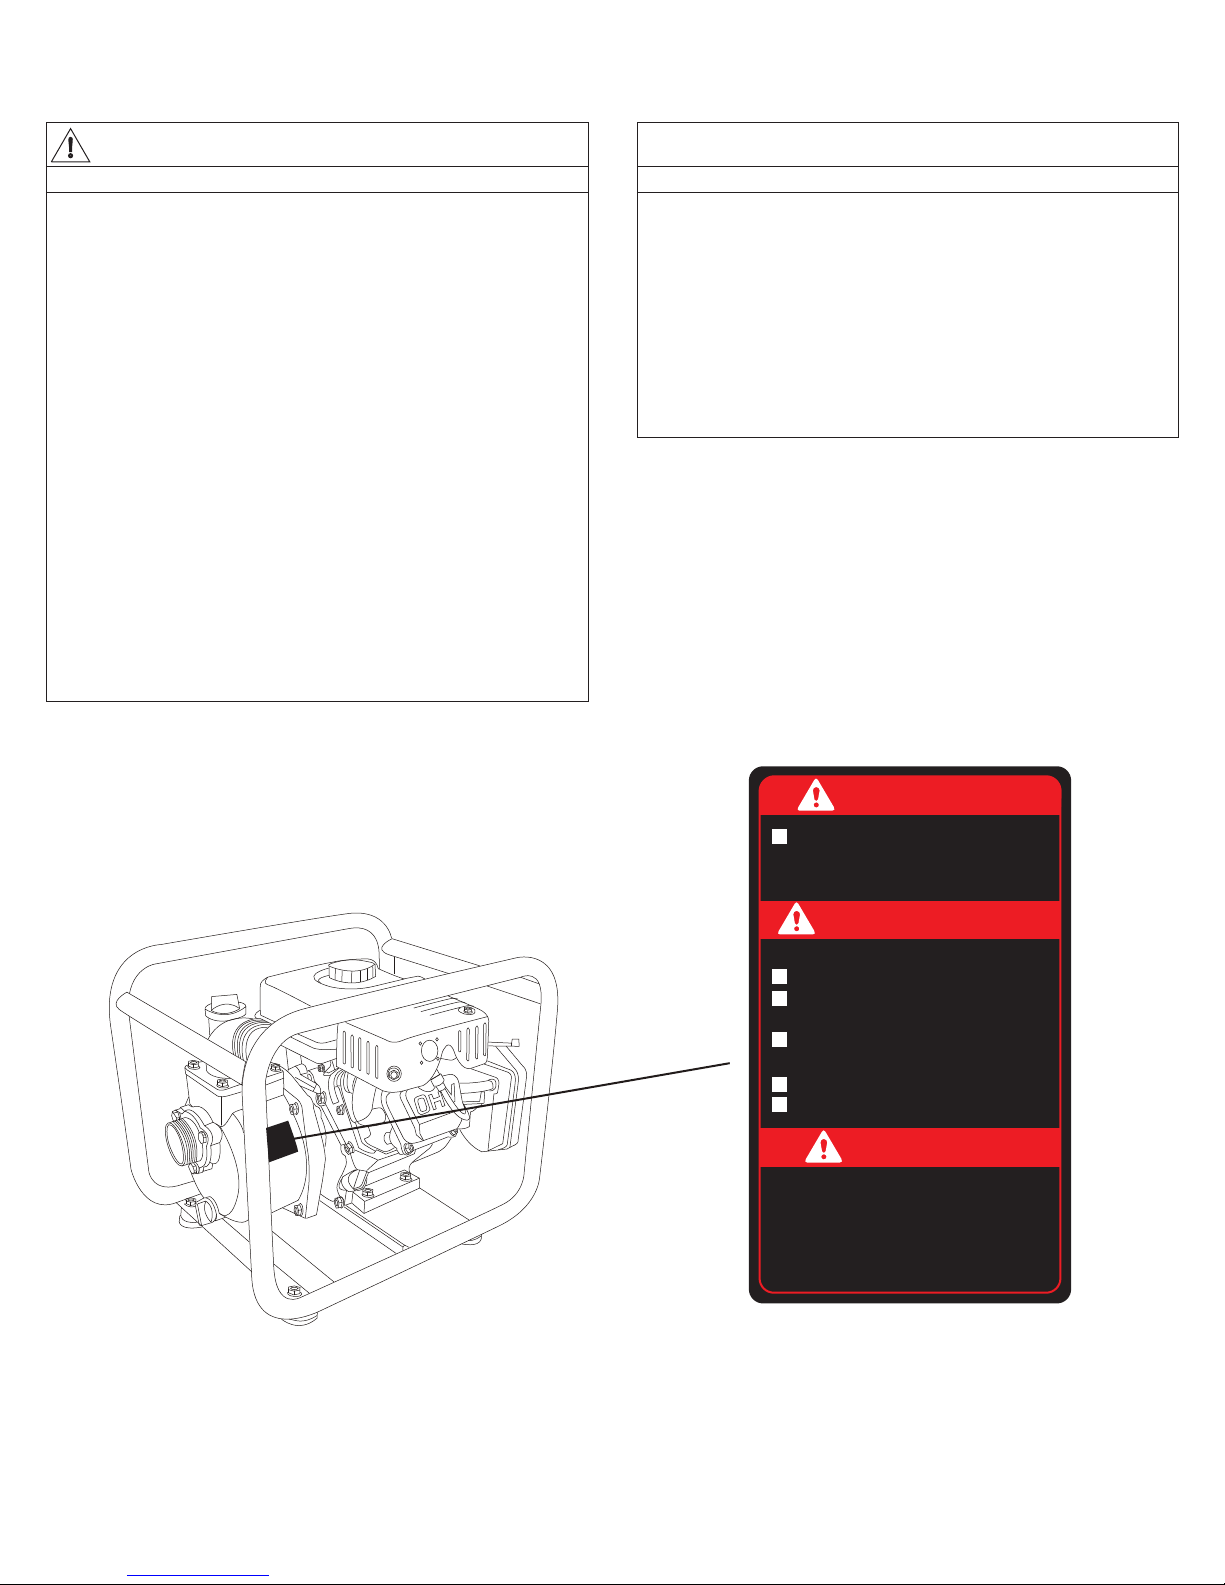
Warning Labels
CAUTION
Fully prime the pump and check all
connections for leakage before starting
this engine.
WARNNING
Fuel is flammable and explosive.
NEVER fuel a running or hot engine.
Ensure there are no fuel leaks before
starting.
Keep sources of sparks and flames
away.
Clean up fuel spills immediately.
Aways keep a fire extinguisher nearby.
DANGER
Do not use the water pump in an
enclosed area, exhaust fumes can
KILL.
- 3 -

FEATURES, ASSEMBLY AND ACCESSORIES
1. FUEL TANK
2. FUEL TANK CAP
3. DISCHARGE OUTLET
4. PRIMING PLUG
5. CHOKE LEVER
6. FUEL COCK
7. SPEED LEVER
8. RECOIL STARTER
9. STOP SWITCH
10. OIL DRAIN PLUG
11. OIL GAUGE
12. SUCTION INLET
13. WATER DRAIN PLUG
14. SPARK PLUG
15. AIR FILTER
16. MUFFLER
Assembly Main Accessories
Inlet/Outlet O-Ring
Nut (X 4)
Hose Clamp
Strainer
CAUTION: Running water pump without rubber feet will
shorten engine life.
Rubber Feet (X 4)
Bolt (X 4)
- 4 -
Spark Plug Wrench
Screwdriver

BEFORE OPERATION
Check Engine Oil
WARNING
DO NOT aempt to start this engine without filling the crank case
with the proper amount and type of oil. Your water pump has
been shipped from the factory without oil in the crankcase.
Operang the unit without oil can damage the engine.
Use class SE oil or a higher grade according to the table below. SAE
10W-30 or 10W-40 is recommended for general, all temperature
use.
Single
Grade
Oil
Multiple
Grade
Oil
Temperature°°C
F
- Inspect the oil level by using the oil gauge
before starng the engine each me;
- Top off the oil level to the maximum level
mark and/or unl oil flows from the
opening;
10W
20W
20#
10W-40
10W-30
–30 –20 –10 0 10 20 30 40
–22 –4 14 32 50 68 86 104
30#
5W-20
40#
OIL GAUGE
(Not Tightened)
Regular Oil
Level
Fill the tank with clean, fresh unleaded
Fuel Level
automove gasoline
- Check fuel level.
- If fuel level is low, refill with unleaded
automove gasoline.
- Be sure to use the fuel filter screen on the
fuel filter neck.
Check Air Cleaner to Make Sure It Is Clean
If not, please refer to “HOW-TO” MAINTENANCE.
Check Loose and Missing Parts
Before starng the water pump, check for loose or missing parts and
for any damage which may have occurred during shipment.
- Ensure both Oil Gauges are secure.
Lowest Oil Level
NOTICE
Low oil sensor
The unit is equipped with a low oil sensor. If the oil level becomes
lower than required, the sensor will acvate a warning device or
stop the engine.
If water pump shuts off and the oil level is within specificaons,
check to see if water pump is sing at an angle that forces oil to
shi. Place on an even surface to correct this.
If engine fails to start, the oil level may not be sufficient to
deacvate low oil level switch. Make sure the sump is completely
full of oil.
Check Engine Fuel
WARNING
DO NOT refuel while smoking or near open flame or other such
potenal fire hazards. Otherwise a fire accident may occur.
- Do not refill tank while engine is running or hot.
- Close fuel cock before refueling with fuel.
- Be careful not to admit dust, dirt, water or other foreign objects
into fuel.
- Wipe off spilt fuel thoroughly before starng engine.
- Keep open flames away.
- 5 -

OPERATING THE WATER PUMP
Aach Sucon Hose
Use a commercially available hose with hose connector and fixtures.
The sucon hose must be reinforced with a non-collapsible wall or
braided material.
a. Insert O-ring into end of hose fixture.
b. Screw hose fixture assembly onto
pump in clockwise rotaon unl hose
fixture assembly is ghtened securely.
CAUTION
The pump will fail to li water if the sucon process has air leak.
c. Aach Sucon Hose to Strainer
Slide hose clamp over hose. Aach open
end of sucon hose to strainer hose
connector. Tighten hose clamp securely.
Connect Discharge Hose
Use a commercially available hose with hose connector and fixture.
Prime the Water Pump
To enable the pump to prime, the pump
chamber must be full of water.
a. Remove drain plug from top of pump.
b. Fill pump with clean, clear water up to
top of discharge outlet. Make sure that
the drain plug is always replaced aer
filling.
• BE SURE pump chamber is filled with
water before starng the engine.
• DO NOT let pump run dry or damage
to mechanical seals may result.
WARNING
Running water pump without priming will severely damage pump
seal system.
Starng the Water Pump
a. Make sure unit is on a flat, level
surface and pump chamber is primed.
b. Turn fuel cock to “On” posion.
pump output, and moving the engine speed lever in the “Slow”
direcon will decrease pump output.
e. Turn the engine stop switch “On” .
f. Pull the starter handle slowly unl
resistance is felt. This is the
“compression” point.
Return the handle to its original posion
and pull swily unl engine starts.
WARNING
To avoid accidently hurng people nearby when pulling the
starter handle, Please keep bystanders, especially children and
pets, away.
CAUTION
Do not allow the starter handle to snap back against the engine.
Return it gently to its starng posion to prevent damage to the
starter or the housing.
g. Aer the engine starts, return the
choke lever gradually to “Open”(Le)
poson and move engine speed lever to
“Fast” (Le) posion.
Note
• Posion the water pump as close as
possible to the water and run the engine
at full speed. Expect to wait for
approximately one minute for the pump
to prime and start pumping. This me
will increase if the pump is further from
the water – parcularly if there is a deep
sucon li.
• If the pump fails to prime, check
TROUBLESHOOTING
Stopping the Water Pump
1. Move engine speed lever to
“Slow” (Right) posion.
2. Push stop switch to “Off”
posion.
3. Turn fuel cock to “Off”
posion.
OPEN
1)
3)
Fast
CHOKE
ON
2)
OFF
c. Set the choke lever to “Choke”
(Right)positon. Not necessary if the
engine is warm.
d. Move engine speed lever to half way
to “Fast” (Le) posion .
Pump output is controlled by adjusng
engine speed. Moving the engine speed
lever in the “Fast” direcon will increase
CHOKE
2)
CHOKE
1)
ON
OFF
CAUTION
Move the engine stop switch to the “OFF” posion to stop engine
directly in an emergency situaon.
Drain the Water Pump
a. Disconnect and sucon and discharge hoses.
b. Remove water drain plug.
c. Replace drain plug aer draining.
- 6 -

1. Maintenance Schedule
MAINTENANCE
(daily)
PRE
INITIAL
EVERY
EVERY
EVERY
ITEM REMARKS
OPERATION
25HR
50HR
100HR
300HR
Check condition adjust gap
Spark Plug
●
and clean. Replace if necessary
Check oil level ●
Engine Oil
replace ● ●
Air Filter Clean, replace if necessary ●
●
Clean and adjust. Replace
Fuel Filter
●
if necessary
Check fuel hose for crack
Fuel Line
●
or damage. Replace if necessary
Check for leakage. Retighten or
●
Exhaust
System
replace gasket if necessary
Check muffler screen.
●
Clean/replace if necessary.
Carburetor check choke operation ●
Cooling
Check fan damage
●
System
Starting
Check recoil starter operation
●
System
Filling/Fast
Check all fittings and
●
eners
fasteners correct if necessary
CAUTION
To prevent accidental starng, always remove the spark plug or
cable from the spark plug before maintaining the water pump or
engine.
- 7 -

2. “How-To” Maintenance
Engine Oil Change
1. Drain oil by removing the drain
plug and the oil gauge while
engine is warm.
2. Reinstall the drain plug and fill
the engine with oil unl it
reaches the upper level on the oil
filler cap.
3. Clean the oil on the panel.
Dispose of used oil in local
authority disposal site.
WARNING
Engine oil may be hot.
Let engine cool at least 2 minutes before removing
fuel cap. Loosen cap slowly to relieve pressure in
tank.
Oil Gauge
Oil Drain Plug
Clean Air Filter
1. Unscrew the air filter cover;
2. Remove filter element and wash
well in solvent;
3. Pour a small amount of oil onto the
filter element and gently squeeze out
any excess oil;
4. Replace the filter element and air
filter cover;
5. Be sure the filter cover seals
properly all around.
Element Holder
Clean Spark Plug
1. If the plug is contaminated
with carbon, remove it using a
plug cleaner and wire brush.
2. Adjust the electrode gap to 0.7
to 0.8 mm.
Engine GT241/400/600 GT1000/GT1300
Manufacturer NGK
Product No. BP6RSH E6RTC BPR5ES W16EPR RN11YC
Bosch
NGK
Denso Champion
Element
Bosch
WR8DC+
Besides draining fuel from fuel tank, the
following procedures should be followed
prior to storage of your water pump for
periods of 3 months or longer.
1. Turn fuel cock to “OPEN” posion.
2. Loosen the drain screw on the side of
the carburetor float chamber, and drain
the fuel completely.
NOTE
1) There are two screws on carburetor.
The vercal one is the screw to hold the
carburetor float chamber; the other one
on the side of the carburetor float
chamber is the drain screw.
2) Tighten the drain screw very carefully
to avoid damaging the fuel cup.
STORAGE
3. Remove the spark plug, pour 2 to 3 cc of
engine oil into the cylinder, and turn the
crank sha several mes.
4. Replace the spark plug and pull starter
Drain screw
handle unl resistance is felt.
5. Store the water pump in a well
venlated, low humidity area.
OIL
- 8 -

TROUBLE SHOOTING
Problem Cause Correcon
1. Pump not primed.
1. Fill pump chamber with water and prime
pump.
No pump output or low
pump output when water
pump is running.
Engine will not start; lacks
power; starts and runs
rough; or "hunts" or falters.
2. Sucon hose restricted, collapsed, damaged,
too long, or diameter too small.
3. Strainer not completely under water.
4. Air leak at sucon hose connector.
5. Strainer clogged.
6. Discharge hose restricted, damaged, too long,
or diameter too small.
7. Excessive or marginal head.
8. Engine speed lever is in “Slow ” posion.
1. Stop switch set to " Off ".
2. Fuel valve is in "Off " posion.
3. Dirty air cleaner.
4. Out of fuel.
5. Stale or contaminated fuel or water in fuel.
6. Spark plug wire not connected to spark plug.
2. Replace sucon hose.
3. Sink the strainer and the end of sucon hose
completely under water.
4. Replace sealing washer if missing or
damaged. Tighten hose connector and clamp.
5. Clean debris from strainer.
6. Replace discharge hose.
7. Relocate pump and/or hoses to reduce head.
8. Move engine speed lever to “ Fast ”
posion.
1. Set switch to "On".
2. Turn fuel valve to "On" posion.
3. Clean or replace air cleaner.
4. Wait two minutes and fill fuel tank.
5. Drain fuel tank and carburetor; fill
with fresh fuel.
6. Connect wire to spark plug.
7. Bad spark plug.
8. Excessive fuel is present in the air/fuel mixture
causing a “flooded” condion.
9. Excessively rich fuel mixture.
10. Intake valve stuck open or closed.
11. Engine has lost compression.
12. Carburetor is running too rich or too lean.
- 9 -
7. Replace spark plug.
8. Wait 5 minutes and re-crank engine.
9. Contact service facility.
10. Contact service facility.
11. Contact service facility.
12. Contact service facility.

SPECIFICATION
MODEL NO. MBP15G MBP20G MBP30G
Brand: MITSUBISHI MITSUBISHI MITSUBISHI
Displacement: 79.6 cc 126 cc 181 cc
Fuel Tank Si ze:
0.423 Gal l on/Unleaded Gas oline 0.66 Gallon/Unleaded Gas oline 1 Gallon/Unleaded Gasoline
0.1 Gallon/Engine oi l SD or Higher 0.16 Gallon/Engi ne oil SD or Hi gher .0.16 Gallon/Engine oil SD or Higher
Max. Flow: 66 GPM 132 GPM 264 GPM
Outlet Diameter: 1.5’’ NPT 2’’ NPT 3" NPT
Self Priming: Yes Yes Yes
Pump Head Material : Aluminum Aluminum Aluminum
Max. Sucon: 23 Feet 23 Feet 23 Feet
Max. Li: 72 Feet 98 Feet 98 Feet
Hose Bands :
Spark Pl ug Driver Ki t
Overview
Engine
Pump
Accessories
Brand: MITSUBISHI MITSUBISHI MITSUBISHI
Engine Model NO.: GT1000 GT600 GT600
Type: OHV, 4 Stroke, Air cooled OHV, 4 Stroke, Air cool ed OHV, 4 Stroke, Air cool ed
Displacement: 296 cc 181 cc 181 cc
0.32 Gallon /Engine oi l SD or Higher 0.16 Gallon/Engine oil SD or Higher 0.16 Gallon/Engine oil SD or Higher
Starng System: Manual Start Ma nua l Start Manual Start
Max. Flow: 352 GPM 122 GPM 198 GPM
Self Priming: Yes Yes Yes
Pump Head Material : Aluminum Al uminum Aluminum
Mechanical Seal Material: Ceramic Carbon Cerami c Carbon Ceramic Carbon
Max. Sucon: 20 Feet 20 Feet 20 Feet
Max. Li: 82 Feet 180.5 Feet 82 Feet
Strainer:
Hose Bands :
Spark Pl ug Driver Ki t
Weight: 110 Lbs. (50 kilogra ms) 72.8 Lbs. (33 kilograms) 105.8 Lbs. (48 kilograms)
Overview
Pump
Accessories
Engine Model NO.: GT241 GT400 GT600
Type: OHV, 4 Stroke, Air cool ed OHV, 4 Stroke, Air cool ed OHV, 4 Stroke, Air cool ed
Lubrica ng oi l :
Starng Sys tem: Manual Start Manual Start Manual Start
Oil Alert: Equipped Equipped Equipped
Inl et Diameter: 1.5’’ NPT 2’’ NPT 3" NPT
Mechanical Seal Material : Ceramic Carbon Ceramic Carbon Ceramic Carbon
Strai ner: Equipped Equipped Equipped
Equipped Equipped Equipped
Equipped Equipped Equipped
Weight: 44 Lbs.(22 kilograms) 62 Lbs. (28 kilograms)s 70.5 Lbs. (32 kilograms)
Dimensions: 17.5"L×14"W×14.6"H 19.7"L×15"W×26.7"H 20.5"L×16.3"W×17.7"H
MODEL NO. MBP40G MBP20H MBP30T
Engine
Fuel Tank Si ze:
1.6 Gallon /Unleaded Gasoline 1 Gallon/Unleaded Gasoline 1 Gallon/Unleaded Gasoline
Lubricang oi l :
Oil Alert:
Equipped Equipped Equipped
Inlet Diameter: 4" NPT 2" NPT 3" NPT
Outlet Diameter: 4" NPTmm 2''/1.5"/1.5'' NPT 3" NPT
Equipped Equipped Equipped
Equipped Equipped Equipped
Equipped Equipped Equipped
Dimensions : 24.2"L×17.5"W×20.5"H 20.5"L×16.3"W×17.7"H 21.7"L×17.3"W×18"H
- 10 -

Li(m)
PERFORMANCE CURVE
30
Li(m)
25
Flow
85
80
75
Li(m)
70
65
60
55
50
45
40
35
30
25
20
15
10
5
0
0 5 10 15 20 25 30 35
MBP20H
Flow
20
15
10
10
5
0
0 5 10 15 20 25 30 35 40 45 50
MBP30T
Flow
- 11 -

LIMITED WARRANTY
This Mitsubishi engine product carries a guarantee of 24 months. If
your product develops a fault within this period, DO NOT return to
store, you should, in the first instance contact our customer
service.
We welcome warranty repairs and apologize to you for being
inconvenienced. Any Authorized Service Dealer may perform
To avoid misunderstanding which might occur between the
customer and the dealer, listed below are some of the causes of
engine failure that the warranty does not cover.
Normal wear: Engines, like all mechanical parts, need periodic
parts service and replacement to perform well. Your warranty will
not cover repairs when wear has occurred because of misuse, lack
of a part or an engine. Warranty would not apply if engine damage
is void if the serial number of the engine has been removed or the
engine has been altered or modified.
Improper maintenance: The life of an engine depends upon the
1. Problems caused by parts that are not original parts.
damage, caused by using contaminated or stale fuel.
3. Parts which are scored or broken because an engine was
and change at recommended intervals). OIL GARD may not shut
down running engine. Engine damage may occur if oil level is not
properly maintained.
4. Damage or wear to parts caused by dirt, which entered the
engine because of improper air cleaner maintenance, re-assembly,
or use of a non-original air cleaner element or cartridge. At
recommended intervals, clean and/or replace the filter as stated in
the Operator’s Manual.
grass, debris, or dirt, which plugs or clogs the cooling fins, or
recommended intervals as stated in the Operator’s Manual.
be premature wear. Such wear, when caused by dirt, dust, spark
plug cleaning grit, or other abrasive material that has entered the
engine because of improper maintenance, is not covered by
warranty.
workmanship only, nor does the warranty extend to repairs
required because of:
to find out closest repair center,
or to order replacement parts or accessories.
HOW TO ORDER REPLACEMENT PARTS
valves, valve seats, valve guides, or burned starter, caused by the
use of gasoline formulated with ethanol greater than 10%.
contact
MBG??????-07203
 Loading...