

Page 1
Wi-Fi INTERFACE
MODEL
MAC-568IF-E
INSTALLATION GUIDE
Intelligent control, no matter where you are.
Page 2
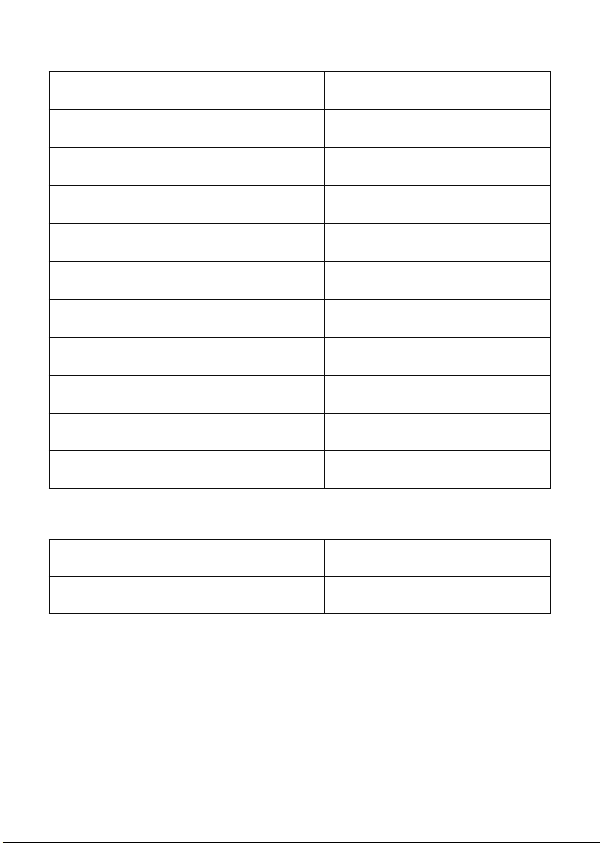
Setting Information
Indoor unit model name
Indoor unit serial number
Outdoor unit model name
Outdoor unit serial number
Wi-Fi interface MAC address (MAC)
Wi-Fi interface serial number (ID)
Wi-Fi interface PIN (PIN)
Wi-Fi interface SSID (SSID)
Wi-Fi interface KEY (KEY)
System commissioning date
Wi-Fi interface installation date
Installer Contact Details
Name
Telephone Number
Wi-Fi interface Minimum Requirements for Operation:
• Router capable of WPA2-PSK(AES) encryption. 2.4GHz needs to be enabled
on dual band Routers. The wireless network coverage must include the heat
pump installation location.
• A PC or Smartphone/Tablet that is iOS/Android compatible.
• A compatible Mitsubishi Electric indoor unit with a Wi-Fi interface.
2
Page 3
Contents
Safety Precautions
Product Introduction
Parts
Connecting the Wi-Fi Interface
Wi-Fi Interface: Setting Up Instructions
LED Pattern
Troubleshooting
Specifications
About Wi-Fi Interface
This Wi-Fi interface communicates the status information and controls the
commands from the server by connecting to an indoor unit.
Safety Precautions
• Read all safety instructions before installation, setting up, or use of the Wi-Fi
interface.
• This installation manual contains important safety information. Be sure to
comply with the instructions.
• After installing the Wi-Fi interface, provide this installation manual for the user.
Instruct users to store it with their indoor unit instruction manual in a safe
location.
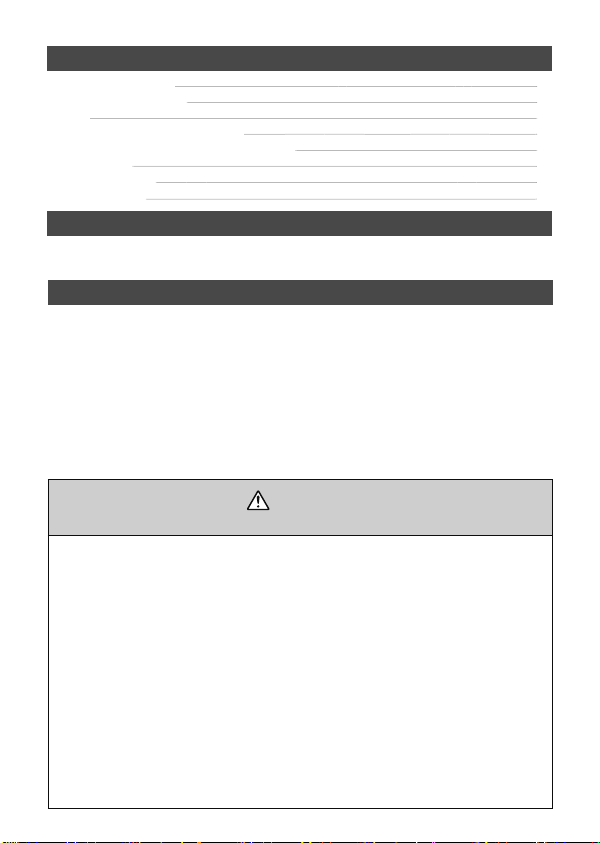
[Precautions for installation]
Warning
(Improper handling may have serious consequences, including serious injury or death.)
• Do not install the Wi-Fi interface by
yourself (user).
Improper installation may result in fire, electric
shock, injury due to fall of the Wi-Fi interface,
or water leaks. Consult the dealer from
whom you purchased the Wi-Fi interface or
professional installer.
• The Wi-Fi interface should be securely
installed in accordance with this
installation manual.
Improper installation may result in fire, electric
shock, or damage, or the Wi-Fi interface
falling.
• The Wi-Fi interface should be mounted in a
location that can support its weight.
If the Wi-Fi interface is installed in a location
that cannot support its weight, the Wi-Fi
interface could fall and cause damage.
• Connect and fasten the electric wires
securely so external force on the wires will
not apply on the terminals.
Improper connection and mounting may
result in breakdown, heat generation, smoke
generation, or fire.
• Mitsubishi Electric’s components or other
designated components must be used for
installation.
Improper component may result in fire,
electric shock, or damage/water leaks.
• Electric work must be performed by
authorized personnel in accordance with
the local regulations and the instructions
detailed in the installation manual.
Inadequate circuit capacity or improper
installation may result in electric shock or fire.
• Do not connect the Wi-Fi interface to earth
inside the indoor unit.
3
7
8
8
10
13
14
15
3
Page 4
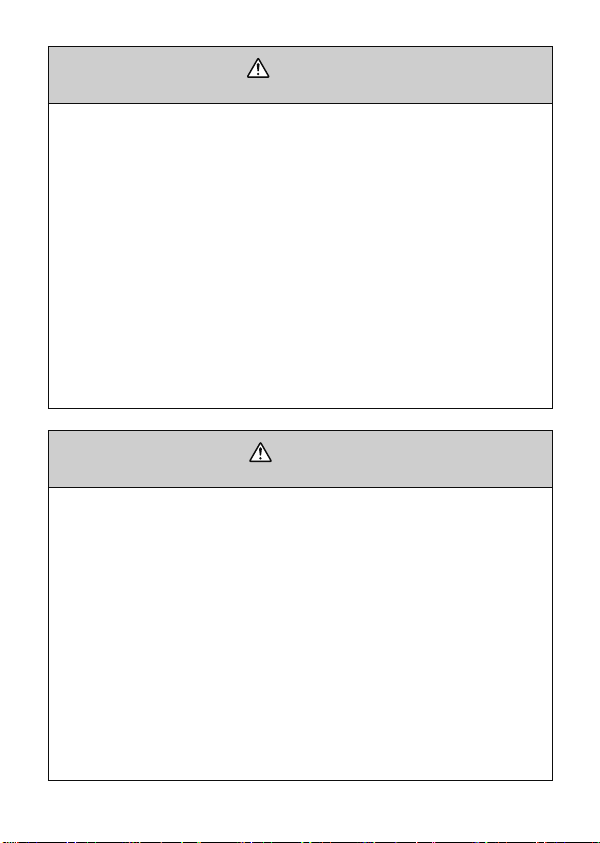
Warning
(Improper handling may have serious consequences, including serious injury or death.)
• Attach the electrical cover to the indoor
unit securely.
If the electrical cover of the indoor units is not
attached securely, it could result in a fire or an
electric shock due to dust, water, etc.
• When installing the Wi-Fi interface, use
appropriate protective equipment and
tools for safety.
Failure to do so could cause injury.
• Turn off the breaker or unplug the power
supply plug of the indoor unit when
connecting the Wi-Fi interface.
Failure to do so could cause electric shock.
• Make sure to connect the connecter of
the Wi-Fi interface to the P.C. board of the
indoor unit properly.
Incomplete connecting or mounting may
result in broken wire, heat generation, smoke
generation, or fire.
(Improper handling may have consequences, including injury or damage to building.)
• To prevent damage from static electricity,
touch a nearby metal body to discharge
static electricity from yourself before
touching the Wi-Fi interface.
Static electricity from the human body may
damage the Wi-Fi interface unit.
• Do not install the Wi-Fi interface in a place
which produces steam, such as bathrooms
and kitchens.
Avoid places where water is splashed or
where condensation forms on walls. Installing
in such places can cause electric shock or
breakdown.
• Do not install the Wi-Fi interface in places
with direct sunlight or where the ambient
temperature is 40°C or more or is 0°C or
less.
Direct sunlight and high or low temperature
environments may cause the Wi-Fi interface
to deform or breakdown.
• Do not install the Wi-Fi interface nearby
the automatic control devices such as
automatic doors or fire alarms.
It can cause accidents due to malfunctions.
• Do not disassemble, modify, or repair by
yourself.
It can cause electric shock, fire, or injury.
• Do not use the Wi-Fi interface near medical
electrical equipment or people who
have a medical device such as a cardiac
pacemaker or an implantable cardioverterdefibrillator.
It can cause an accident due to malfunctions
of the medical equipment or device.
• This equipment should be installed and
operated with a minimum distance of 20
cm between the device and the user or
bystanders.
• This device complies with all Australia and
New zealand regulrements for EMC and
electrical safety.
Caution
• Do not use in special environments.
Use in places with oil (including machine oil),
steam, or sulfuric gas may lead to severe
decrease in functionality and damage to parts.
• Turn off power supply of connected
equipment when performing construction
or wiring work.
Failure to turn off the power supply to
the connected equipment may lead to
malfunction or breakdown of the Wi-Fi
interface or connected equipment.
• The connecting cable must not touch
piping directly.
• Do not use the Wi-Fi interface near other
wireless devices, microwaves, cordless
phones, or facsimiles.
It can cause malfunctions.
• Do not mount the Wi-Fi interface where
children can reach.
It can cause injury.
4
Page 5
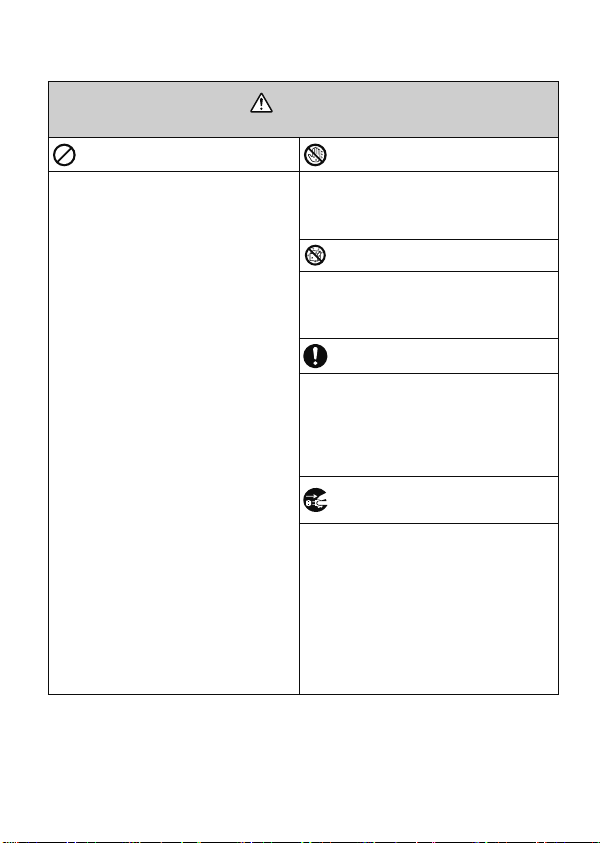
[Precautions for setting up, or use of the Wi-Fi interface]
Warning
(Improper handling may have serious consequences, including serious injury or death.)
Be sure not to do. Never touch with wet hand.
• Do not disassemble, modify, or repair by
yourself (user).
It can cause electric shock, fire, or injury.
• This appliance is not intended for use by
persons (including children) with reduced
physical, sensory or mental capabilities,
or lack of experience and knowledge,
unless they have been given supervision
or instruction concerning use of the
appliance by a person responsible for
their safety.
• Children should be supervised to ensure
that they do not play with the appliances.
• This appliance can be used by children
aged from 8 years and above and persons
with reduced physical, sensory or mental
capabilities or lack of experience and
knowledge if they have been given
supervision or instruction concerning
use of the appliance in a safe way and
understand the hazards involved.
• Children shall not play with the appliance.
Cleaning and user maintenance shall not
be done by children without supervision.
• Do not use the Wi-Fi interface near
electrical medical equipment or people
who have a medical device such as a
cardiac pacemaker or an implantable
cardioverter-defibrillator.
It can cause an accident due to malfunctions
of the medical equipment or device.
• Do not install the Wi-Fi interface near
automatic control devices such as
automatic doors or fire alarms.
It can cause accidents due to malfunctions.
• Do not touch the Wi-Fi interface with wet
hands.
It can cause damage to the device, electric
shock, or fire.
Never splash water on the unit.
• Do not splash water on the Wi-Fi interface or
use it in a bathroom.
It can cause damage to the device, electric
shock, or fire.
Be sure to follow all the instructions.
• Do not install the Wi-Fi interface by yourself
(user).
Improper installation may result in fire, electric
shock, or injury due to the Wi-Fi interface
falling. Consult the dealer from whom you
purchased the Wi-Fi interface or professional
installer.
Be sure to disconnect the power
supply plug from the power outlet.
• When the Wi-Fi interface is dropped, or the
holder or cable is damaged, disconnect the
power supply plug or turn the breaker OFF.
It may cause fire or electric shock. In this case,
consult your dealer.
• In case of an abnormal condition (such as
a burning smell), stop the indoor unit and
disconnect the power supply plug or turn
the breaker OFF.
A continued operation in the abnormal state
may cause a malfunction, fire, or electric shock.
In this case, consult your dealer.
5
Page 6

[Precautions for installation, setting up, or use of the Wi-Fi interface]
Caution
(Improper handling may have consequences, including injury or damage to building.)
Be sure not to do.
• Do not mount the Wi-Fi interface where
children can reach.
It can cause injury.
• Do not step on unstable step stool to set
up or clean the Wi-Fi interface.
It may cause injury if you fall down.
• Do not use the Wi-Fi interface near other
wireless devices, microwaves, cordless
phones, or facsimiles.
It can cause malfunctions.
Note
• Please ensure that the Router supports the
WPA2-PSK(AES) encryption setting before
installation for this Wi-Fi interface begins.
• The end user should read and accept the
terms and conditions of the Wi-Fi service
before installation of this Wi-Fi interface
begins.
• The Router may be required to complete
connection of this Wi-Fi interface to the Wi-Fi
service.
• This Wi-Fi interface should not be installed
and connected to any Mitsubishi Electric
System which is to provide application critical
cooling or heating.
Mitsubishi Electric’s Wi-Fi interface is designed for communication to Mitsubishi Electric’s
Wi-Fi service. Third party Wi-Fi interfaces cannot connect to Mitsubishi Electric’s Wi-Fi
service. Mitsubishi Electric is not responsible for any (i) underperformance of a system or
any product; (ii) system or product fault; or (iii) loss or damage to any system or product;
which is caused by or arises from connection to and/or use of any third party Wi-Fi
interface or any third party Wi-Fi service with Mitsubishi Electric equipment.
• Please write down the model information and
more on the first page "Setting Information",
when you install this Wi-Fi interface.
• Before transferring or disposing of the Wi-Fi
interface, it has to be reset to the factory
default.
• Dismantling the indoor unit
Please refer to the indoor units “service
manual” for detailed instructions for accessing
the control adaptor connector CN105 on the
indoor unit control PCB.
For the latest information regarding Wi-Fi Control:
New Zealand based enquiries please visit: www.mitsubishi-electric.co.nz/wifi
Australian based enquiries please visit: www.mitsubishielectric.com.au/wifi
6
Page 7
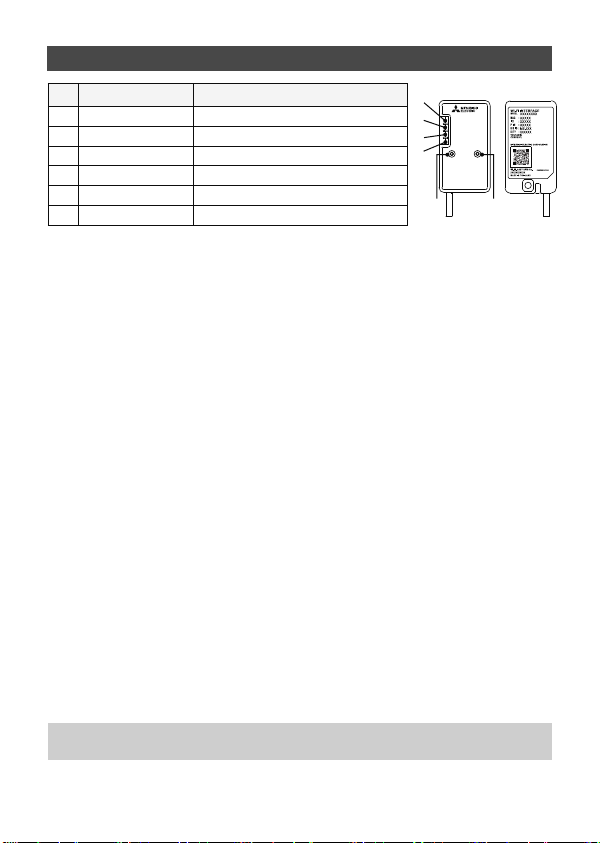
Product Introduction
No Item Description
MODE Button Selects modes.
1
RESET Button Resets the system and ALL settings.
2
ERR LED (Orange) Shows the network error state.
3
NET LED (Green) Shows the network state.
4
MODE LED (Orange) Shows the Access Point Mode state.
5
UNIT LED (Green) Shows the indoor unit state.
6
3
ERR
4
NET
MODE
5
UNIT
6
RESET
MODE
2
1
(1) MODE Button
WPS-Push
• Hold down the MODE Button for 2 seconds to start WPS-Push Pairing.
• When WPS-Push is enabled on the Wi-Fi interface, the MODE LED starts
flashing orange (every second) and the pairing can be completed by enabling
WPS-Push on the Router.
Access Point Mode
• Hold down the MODE Button for 7 seconds to start Access Point Mode.
• When Access Point Mode is enabled on the Wi-Fi interface, the MODE LED
starts flashing orange (every 5 seconds).
• To cancel Access Point Mode, hold down the MODE Button for 7 seconds
again and ensure that the MODE LED is no longer flashing.
WPS-PIN
• Hold down the MODE Button for 15 seconds to start WPS-PIN Pairing.
• When WPS-PIN is enabled on the Wi-Fi interface, MODE LED starts flashing
orange (every 0.5 seconds) and the pairing can be completed by enabling
WPS-PIN on the Router.
• Before using WPS-PIN, the PIN code of the Wi-Fi interface needs to be set on
the Router.
(2) RESET Button
• Hold down the RESET Button for 2 seconds to reboot the system.
• Hold down the RESET Button for 15 seconds to initialise the Wi-Fi interface
to the factory default.
When the Wi-Fi interface is reset to the factory default, ALL the configuration information will
be lost. Take great care in implementing this operation.
7
Page 8

Parts
Interface unit
(with connecting
cable)
Connecting the Wi-Fi Interface
(For details about your heat pump, see the relevant installation manual)
Fixing screw
for
3.5×16 mm
Fixing screw
for
4×16 mm
Mounting cord
clamp
(for bundling
Fastener
the wires)
Holder
Clip
Before dismantling the indoor unit, turn the power off and make sure that the
power has been disconnected from the complete system.
Dismantle the indoor unit in accordance with the service manual to access the
main control PCB.
Locate the CN105 port on the main control PCB and connect the Wi-Fi interface.
When mounting the interface unit
inside an indoor unit, refer to the
installation manual of the indoor unit. Do not mount the interface
inside the indoor unit, unless mentioned in the manual.
unit
When mounting on the wall
1
Taken out
from the
Indoor unit
left side
The Wi-Fi interface should be mounted with the
cable in a downward position.
3 4
Mark for cable
Holder
Interface unit
Taken out
from the
right side
Wall
Screw
2
Mount the holder
the cable faces downward.
Note: Tighten the upper and then the lower
screws; adjust and level the holder
elongated hole for the lower screw.
Holder
Mark for cable
Connecting cable
Screw
Adjustment
on the wall so its mark for
using the
Screw
Mounting cord
clamp
fix
Insert the interface unit
it clicks into place.
8
into the holder until
Page 9

When mounting on the outer side of the indoor unit
1
Holder
2
Holder
Mark for cable
Clip
Insert the clip into the holder until it clicks
into place.
3
Corner box
Slip the clip
the interface unit
Example of mounting on the left side of the indoor unit
1
Indoor unit
Note: Interface unit
the right side of the indoor unit.
To check the LED indication after setup, remove
the interface unit
over the edge of corner box to fix
.
Underside of the
indoor unit
Corner box
Corner box
can also be mounted on
from the holder .
Interface
unit
Clip
Side of the
indoor unit
Indoor unit
Insert the interface unit
it clicks into place.
Note: When inserting the interface unit
the holder, align the cable of the interface unit
with the mark for the cable on the holder
Otherwise, light leakage or degradation in
appearance may result.
4
Note: Mount the interface unit
underside of the indoor unit if it cannot be
mounted on the side of the indoor unit.
2
Run the connecting cable in the space on the
back of the unit as shown in the above image.
Tuck cabling away and secure it.
Note: Make sure that the connecting cable will
not get caught on or between the installation
plate and the wall, or between the indoor unit
and the installation plate. Failure to do so may
cause damage to the connecting cable resulting
in communication problems.
Interface unit
Connecting cable
Align
into the holder until
into
.
on the
9
Page 10

Wi-Fi Interface: Setting Up Instructions
RESET
ERR
NET
MODE
UNIT
MODE
RESET
ERR
NET
MODE
UNIT
MODE
Information for users:
The following steps explain how to connect the Wi-Fi interface to a Router.
KEY (LED LIGHTS):
: ON : Flashing : OFF
1
Ensure the Wi-Fi interface is
connected correctly as per the
previous section, ‘Connecting the
Wi-Fi interface’.
UNIT LED should be flashing green
only.
THERE ARE TWO OPTIONS OF CONNECTING
Option 1 - Access Point Mode Pairing
3
Activate Access Point Mode on your
Wi-Fi interface by using a small object
to press and hold the MODE Button
for 7 seconds.
10
2
Wi-Fi Control
Download and install Wi-Fi Control
App to your compatible Apple or
Android smartphone/tablet (search
term: Mitsubishi Wi-Fi Control).
4
When Access Point Mode is enabled
on the Wi-Fi interface, MODE LED
starts flashing orange (every 5
seconds).
Page 11

5
6
Check the label on the back of the
interface for the SSID. Open the Wi-Fi
networks screen on your smartphone/
tablet and connect to the network
with the same name as the SSID. The
network password, labelled KEY, is
just under the SSID on the interface.
You will now be connected to this
Wi-Fi interface.
Open Wi-Fi Control App and follow
the ‘How to Setup’ instructions in the
‘Setup Wi-Fi interface’ section.
If the app does not go to this section,
you are not connected to the Wi-Fi
interface’s Access Point; please start
process again.
You can either select your available
Wi-Fi Network, or manually configure
a Wi-Fi Network.
7
Once completed, the MAC and ID will
be filled in ‘Add new unit’. Select ‘Add’
and then control your heat pump via
Wi-Fi.
Option 2 - WPS-Push Pairing
3
Check Wi-Fi and WPS are enabled
on your Router. The connection
procedure varies depending on your
Router – refer to your Router’s manual
for more information.
Please Note: The WPS and Router reset buttons may be similar on some Routers. Please
exercise caution as resetting your Router will erase network configuration.
4
Activate WPS Mode on your Router.
This will be enabled for a set period
allowing approximately 2 minutes
to complete the next step. To do so,
please refer to your Router’s manual.
11
Page 12

5
RESET
ERR
NET
MODE
UNIT
MODE
RESET
ERR
NET
MODE
UNIT
MODE
RESET
ERR
NET
MODE
UNIT
MODE
6
Activate WPS on your Wi-Fi interface
by using a small object to press and
hold the MODE Button for 2 seconds.
7
When pairing process is completed on
the Wi-Fi interface, the NET LED lights
up solid green for 5 seconds.
9
Open Wi-Fi Control App. Enter MAC
and ID into ‘Add new unit’ and select
‘Add’.
12
When WPS-Push is enabled on the
Wi-Fi interface, MODE LED starts
flashing orange (every second).
8
If ERR LED lights up orange for 5
seconds at any stage, there may be a
problem; please start process again.
10
Once completed, control your heat
pump via Wi-Fi.
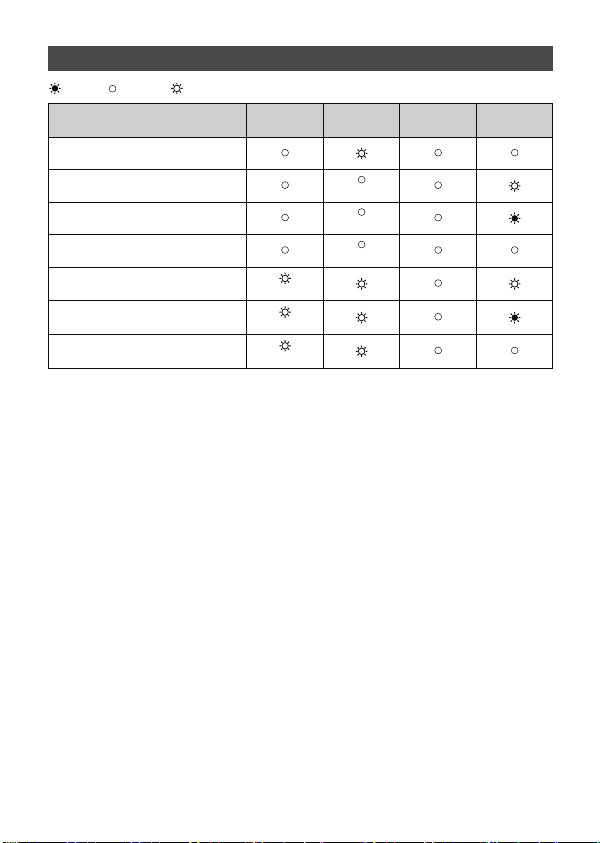
Page 13

LED Pattern
: ON : Flashing : OFF
● Software initialising
Description
Firmware updating
Firmware downloading
Reset to the factory default
● Wireless setting
Description
Access Point Mode activated
WPS-PUSH Mode activated
WPS-PIN Mode activated
Pairing process via WPS completed
Pairing process via WPS failed
● Connection to server in progress
Description
Communicating with server, and
starting up indoor unit
communication
Communicating with server, and
communicating with indoor unit
● Normal operation
Description
Communicating with server, and
communicating with indoor unit
ERR
(Oran ge)
ERR
(Orange)
(5 sec)
ERR
(Oran ge)
ERR
(Oran ge)
NET
(Green)
(every second) (every second)
NET
(Green)
(5 sec)
NET
(Green)
(*1)
(*1) (every 5 sec)
NET
(Green)
(every 5 sec) (every 5 sec)
MODE
(Oran ge)
MODE
(Orange)
(every 5 sec) (every 5 sec)
(every second)
(every 0.5 sec)
MODE
(Oran ge)
MODE
(Oran ge)
UNIT
(Green)
UNIT
(Green)
UNIT
(Green)
UNIT
(Green)
(*1) Details of flash pattern
• Every 0.5 sec: Searching for server.
• Every second: Registering the information of the Wi-Fi interface to server.
13
Page 14
Troubleshooting
: ON : Flashing : OFF
Description
Connection to server established, and
connection to indoor unit failed
Connection to Router failed, and
connection to indoor unit established
Connection to Router failed, and
starting up indoor unit connection
Connection to Router failed, and
connection to indoor unit failed
Connection to server failed, and
connection to indoor unit established
Connection to server failed, and
starting up indoor unit connection
Connection to server failed, and
connection to indoor unit failed
(*2) Details of flash pattern
• Every 0.5 sec: IP address setting is invalid.
Check DHCP Settings of the Router, or check IP address settings of the Wi-Fi interface.
If both settings are correct but still the problem persists, push RESET Button for more than
15 seconds to retry the pairing.
• Every second: DNS setting is invalid.
Check DNS Settings of the Router, or check DNS address settings of the Wi-Fi interface.
If both settings are correct but still the problem persists, push RESET Button for more than
15 seconds to retry the pairing.
• Twice every 5 sec: Not connected to server.
Check if the Router is connected to the internet.
• Once every 5 sec: Not communicating with server properly.
Push RESET Button for 2 seconds.
(*3) Details when NET LED is OFF
The Wi-Fi interface failed to connect to the Router.
Check the following, and pair the Wi-Fi interface.
• Make sure that the communication distance is not too far between the Wi-Fi interface and the Router.
• Make sure 2.4GHz is enabled on dual band Routers.
• Make sure that the Router uses WPA2-PSK(AES) encryption.
• Make sure that the number of connected devices to the Router does not exceed the limit.
• Make sure that WPS is working on the Router.
• Make sure that the Router is compatible with the Wi-Fi interface.
• If Static IP has been set - make sure it is correct as per Router network settings.
If a problem regarding connecting your Router and the Wi-Fi interface persists, please contact your local
Mitsubishi Electric office, as listed on the back of this guide.
A list of compatible Routers is also available.
ERR
(Oran ge)
(*2)
(*2)
(*2)
14
NET
(Green)
(*3)
(*3)
(*3)
MODE
(Oran ge)
UNIT
(Green)
Page 15

Specifications
Input voltage DC12.7 V (from indoor unit)
Power consumption MAX 2W
Size H×W×D (mm) 79×44×18.5
Weight (g) 110g (including cable)
Transmitter power level
(MAX)
RF channel 1ch ~ 13ch (2412~2472 MHz)
Radio protocol IEEE 802.11b/g/n (20)
Encryption AES
Authentication WPA2-PSK
Length of cable (mm) 2,040
17.5 dBm @IEEE 802.11b
Mitsubishi Electric Wi-Fi Heat Pump Control
Register Your Heat Pump(s)
Thank you for choosing a Mitsubishi Electric Heat Pump with Wi-Fi Control. Once your Wi-Fi
interface is installed, either download the app (search term: Mitsubishi Wi-Fi Control) or visit
our website to register your heat pump(s).
Once registered you will be able to control your heat pump with your
smartphone, tablet or online account using an internet connection.
(For a list of compatible devices, please visit the Mitsubishi Electric website).
User Manual
A copy of the user manual, terms & conditions and privacy policy can
be downloaded at any time from the Mitsubishi Electric website.
Mitsubishi Electric New Zealand
www.mitsubishi-electric.co.nz/wifi
Phone: 0800 639 434
Mitsubishi Electric Australia
www.mitsubishielectric.com.au/wifi
Phone: 1300 728 119
*Apple and the Apple logo are trademarks of Apple Inc., registered in the U.S. and other countries. App Store is
a service mark of Apple Inc., registered in the U.S. and other countries.
*Google Play and the Google Play logo are trademarks of Google Inc.
15
Page 16

Contact Details
Mitsubishi Electric New Zealand
www.mitsubishi-electric.co.nz/wifi
WELLINGTON
HEAD OFFICE
1 Parliament Street
PO Box 30772
Lower Hutt 5040
Phone 0800 639 434
Fax (04) 560 9133
Mitsubishi Electric Australia
www.mitsubishi-electric.com.au/wifi
SYDNEY
HEAD OFFICE
348 Victoria Road
Rydalmere
NSW 2116
Phone 1300 728 119
Fax (02) 9898 0484
Helpline opening hours
8.30am - 5.00pm weekdays
HEAD O FFICE: TOK YO BUILDING, 2 -7-3, MA RUNOUCHI, CH IYODA-K U, TOKYO 100-8 310, JAPAN
MITSUBISHI ELECTRIC CONSUMER PRODUCTS (THAILAND) CO., LTD
AMATA NAKORN I NDUSTR IAL ESTATE 700/4 06 MOO 7, TAMBON DON H UA ROH, AMP HUR
MUANG, CHONBURI 20000, THAILAND
JG79Y325H01
 Loading...