

Page 1
Owners Handbook
Mitsubishi FTO
Owners Handbook
Copyright © Tarkus Services (2003)
www.angelfire.com/emo/fto
1
All rights reserved
26-Aug-04
Page 2

Owners Handbook
Contents
Contents........................................................................................................................................ 2
Forward ............................................................................................................................. 5
Acknowledgements ........................................................................................................... 5
Disclaimer ......................................................................................................................... 5
General overview.................................................................................................................................... 6
Dashboard..................................................................................................................................... 6
Interior .......................................................................................................................................... 7
Exterior ......................................................................................................................................... 8
Vehicle Introduction and Safety ........................................................................................................... 9
Warning notes............................................................................................................................... 9
Tips when driving an automatic vehicle.......................................................................... 12
Opening / closing the vehicle ............................................................................................................... 14
The key ....................................................................................................................................... 14
Unlocking the door ..................................................................................................................... 14
Keyless entry .............................................................................................................................. 15
Central door locking ................................................................................................................... 16
Window operation ...................................................................................................................... 17
Engine compartment................................................................................................................... 18
Fuel access.................................................................................................................................. 19
Boot access ................................................................................................................................. 19
Sunroof ....................................................................................................................................... 20
Power sunroof.................................................................................................................. 20
Manual sunroof................................................................................................................ 20
Driving position.................................................................................................................................... 22
Seat adjustment........................................................................................................................... 22
Front seat adjustment....................................................................................................... 22
Rear seat .......................................................................................................................... 24
Seat belts..................................................................................................................................... 25
When you fasten your seat belt........................................................................................ 26
SRS Air bag restraint system.............................................................................................................. 27
Instrument panel.................................................................................................................................. 29
Instrument overview ................................................................................................................... 29
Amp-meter.......................................................................................................................29
Odometer / trip meter ...................................................................................................... 30
Warning lights ............................................................................................................................ 31
Light switch ................................................................................................................................ 33
Wiper switch............................................................................................................................... 34
Front wiper ...................................................................................................................... 34
Wash / wipe control......................................................................................................... 35
Rear screen wiper. ........................................................................................................... 35
Other switches ............................................................................................................................ 36
Copyright © Tarkus Services (2003)
www.angelfire.com/emo/fto
2
All rights reserved
26-Aug-04
Page 3

Owners Handbook
Hazard switch .................................................................................................................. 36
Windscreen de-mist......................................................................................................... 36
Fog / park light ................................................................................................................37
Ignition switch.................................................................................................................37
Park brake........................................................................................................................ 38
Hand brake operation ...................................................................................................... 41
Adjustable items ......................................................................................................................... 42
Steering wheel adjustment............................................................................................... 42
Interior mirror adjustment ............................................................................................... 42
Door mirrors....................................................................................................................42
Door mirror parking ........................................................................................................ 43
ABS ................................................................................................................................. 43
Traction Control operation .............................................................................................. 44
Interior bits ...................................................................................................................... 44
Passenger interior lights................................................................................................... 46
Clock ............................................................................................................................... 46
Storage space .............................................................................................................................. 47
Coin holder ...................................................................................................................... 47
Glove box ........................................................................................................................ 47
Center console ................................................................................................................. 47
Storage in boot.................................................................................................................48
Climate control..................................................................................................................................... 48
Climate controls............................................................................................................... 50
Air flow indicator ............................................................................................................ 51
Automatic air conditioning ......................................................................................................... 52
Operating the system as an automatic air conditioning ................................................... 53
Operating the system as a normal air conditioner............................................................ 54
Audio equipment.................................................................................................................................. 56
Antenna....................................................................................................................................... 56
Safety features ...................................................................................................................................... 58
Fitting of snow chains................................................................................................................. 58
Emergency flare.......................................................................................................................... 58
Tool kit and jack ......................................................................................................................... 59
Supporting the vehicle ................................................................................................................ 60
Changing the wheel and tyre. ..................................................................................................... 60
Starting the vehicle by external battery. .......................................................................... 64
Towing the vehicle. ......................................................................................................... 65
Service guide......................................................................................................................................... 66
Capacities.................................................................................................................................... 66
Fuses ........................................................................................................................................... 66
Removal of fuses ............................................................................................................. 67
Engine oil.................................................................................................................................... 68
Belt adjustment. .......................................................................................................................... 69
Globes......................................................................................................................................... 69
Tyre information......................................................................................................................... 70
Copyright © Tarkus Services (2003)
www.angelfire.com/emo/fto
3
All rights reserved
26-Aug-04
Page 4

Owners Handbook
Engine information ..................................................................................................................... 71
Removing the spark plugs........................................................................................................... 71
Copyright © Tarkus Services (2003)
www.angelfire.com/emo/fto
4
All rights reserved
26-Aug-04
Page 5

Owners Handbook
Forward
This manual has been translated from the Japanese original owner’s manual. It is not an exact
replication, some parts have been omitted and some added.
Acknowledgements
Mitsubishi Motors copyright most of the illustrations. Any additional illustrations or drawings are the
property of Tarkus Services. Thanks to Chihiro Iwamura and Junko Machida for help with the
translation.
Disclaimer
Great care has been taken in the translation / production of this manual, but, vehicle manufacturers
can make alterations and design changes during production of a vehicle. No liability can be accepted
by the authors or production team, for any damage or injuries caused by any errors or omissions in
this manual.
Copyright © Tarkus Services (2003)
www.angelfire.com/emo/fto
5
All rights reserved
26-Aug-04
Page 6
General overview
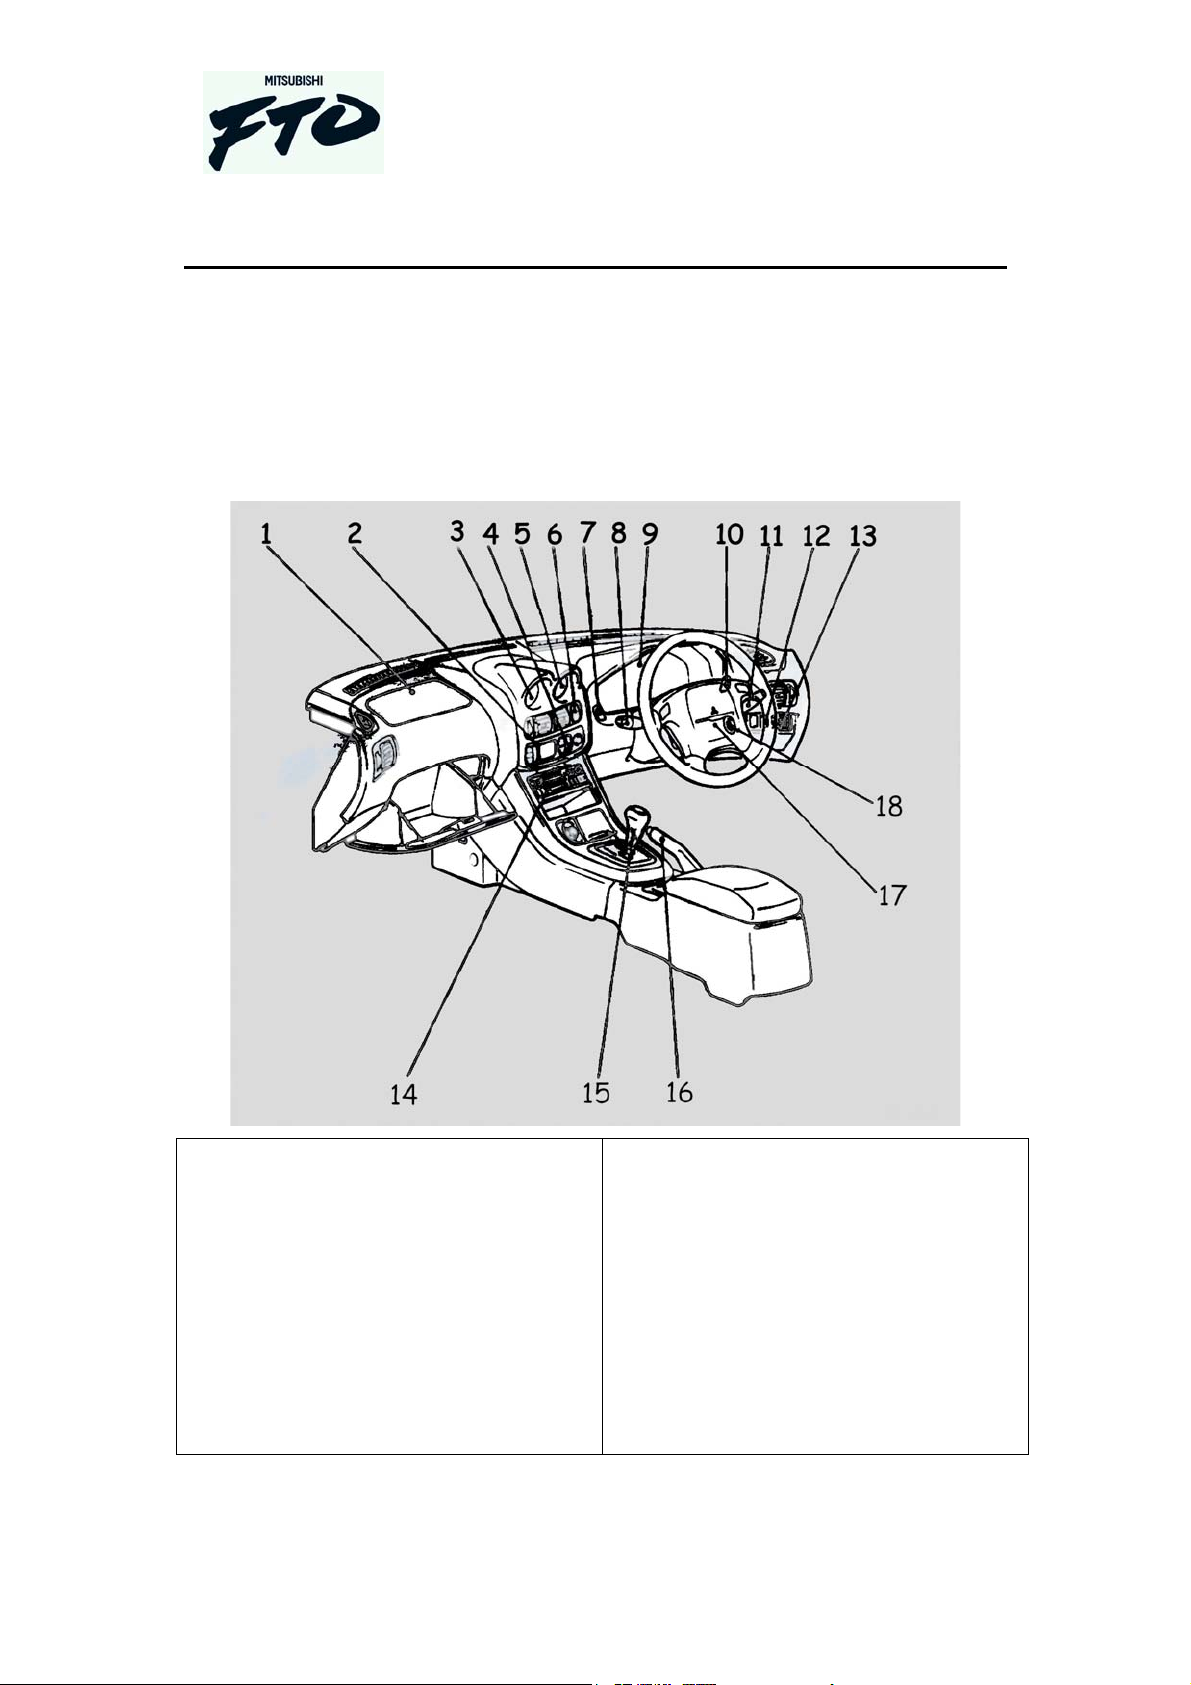
Dashboard
Owners Handbook
1. Passenger air bag cover
2. Climate control screen
3. Analogue clock
4. Heated rear screen switch
5. Ammeter
6. Emergency hazard switch
7. Electric antenna switch
8. Windscreen wiper switch
9. Instrument panel
Copyright © Tarkus Services (2003)
www.angelfire.com/emo/fto
10. Fog light switch
11. Indicator / light switch
12. Traction control switch
13. Exterior mirror control
14. Radio
15. Gear lever
16. Handbrake
17. Drivers air bag cover
18. Ignition switch
6
All rights reserved
26-Aug-04
Page 7
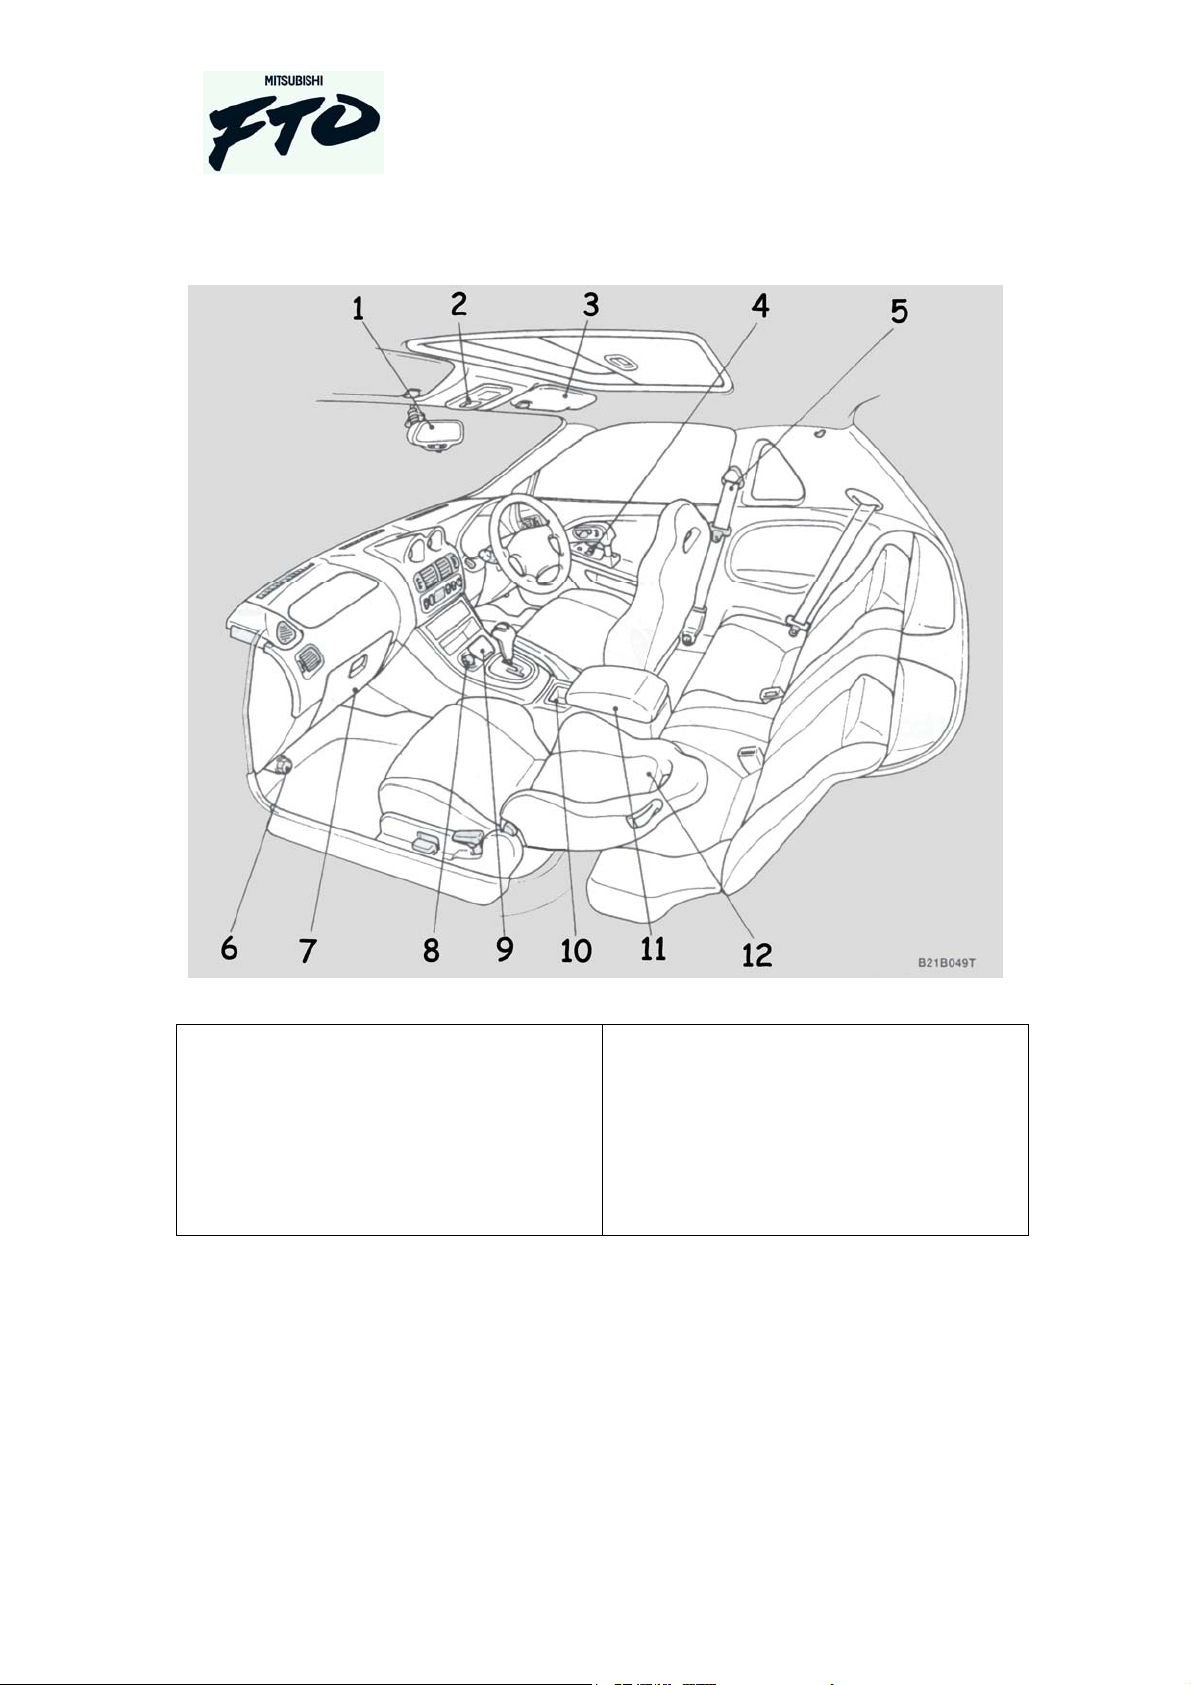
Interior
Owners Handbook
1. Rear view mirror
2. Sunroof switch
3. Sun visor
4. Power window switch panel
5. Seat belt
6. Emergency flare
Copyright © Tarkus Services (2003)
www.angelfire.com/emo/fto
7. Glove box
8. Cigarette lighter
9. Ash tray
10. Cup tray
11. Console box
12. Seat
7
All rights reserved
26-Aug-04
Page 8
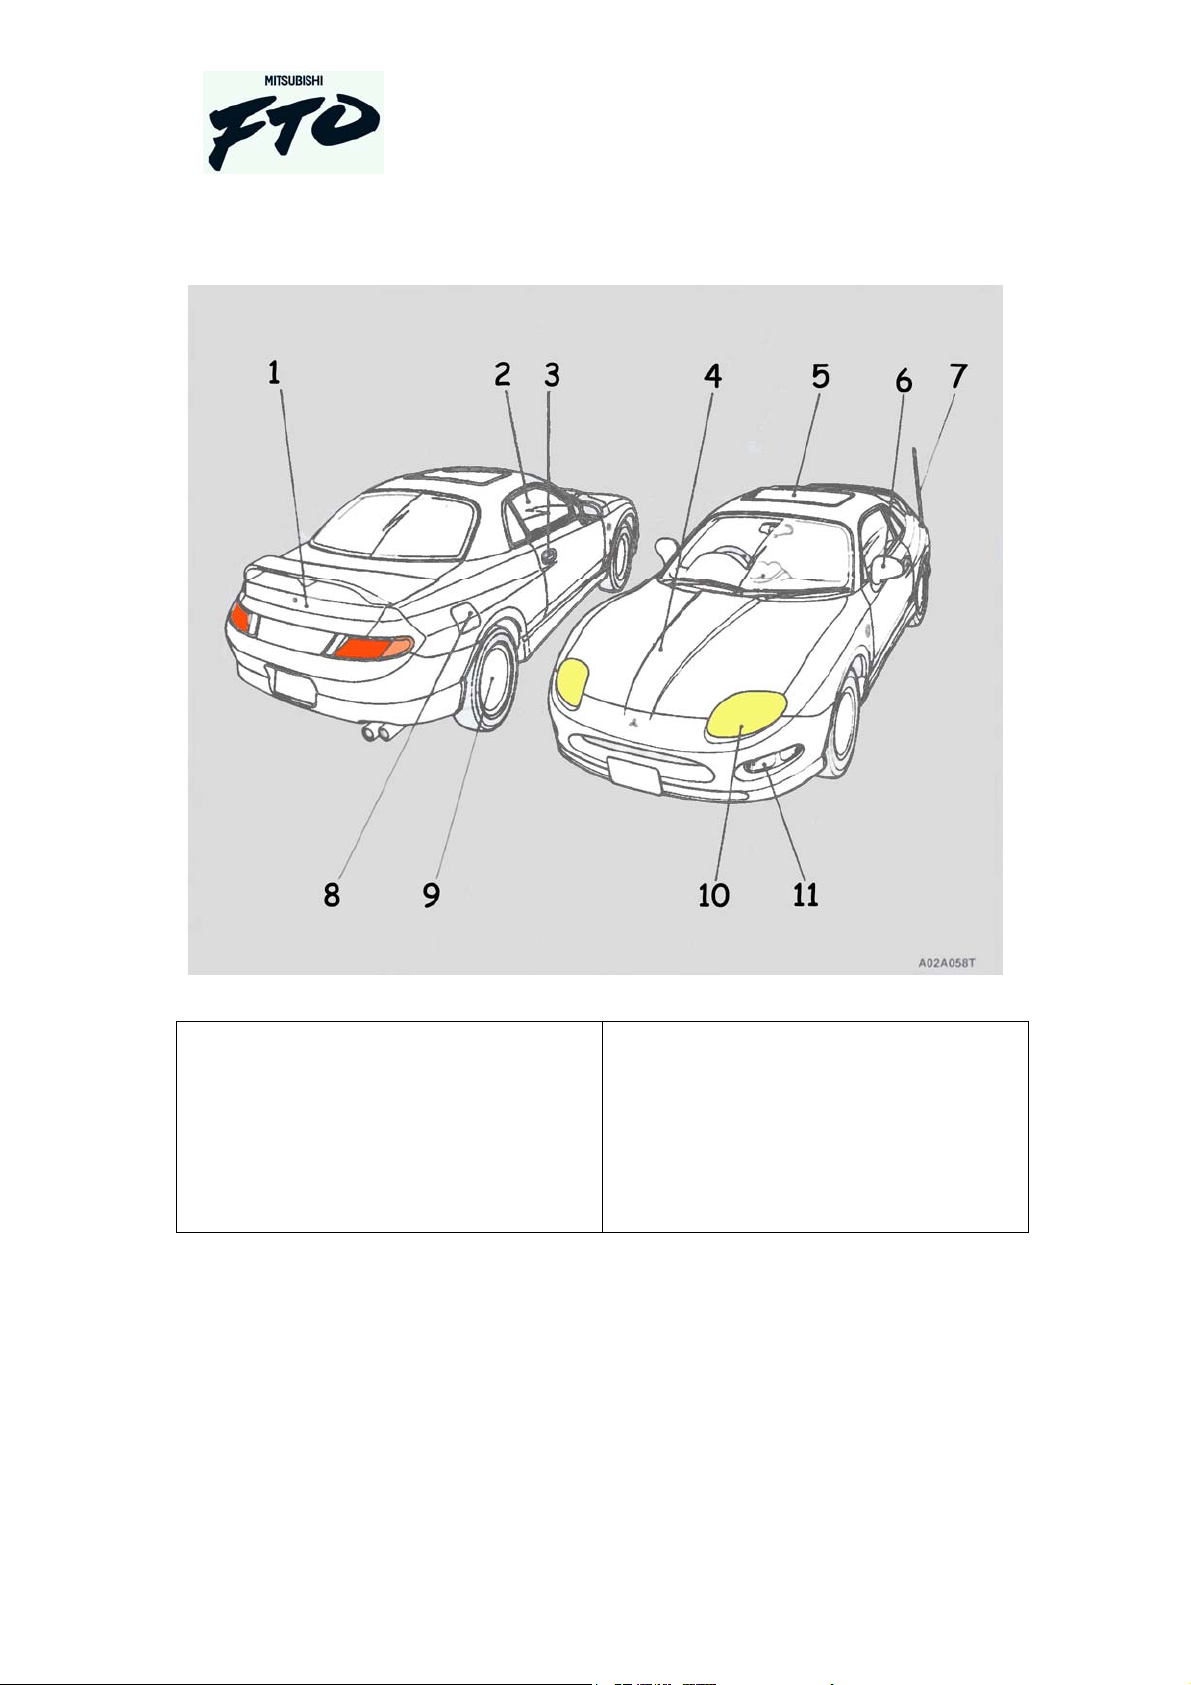
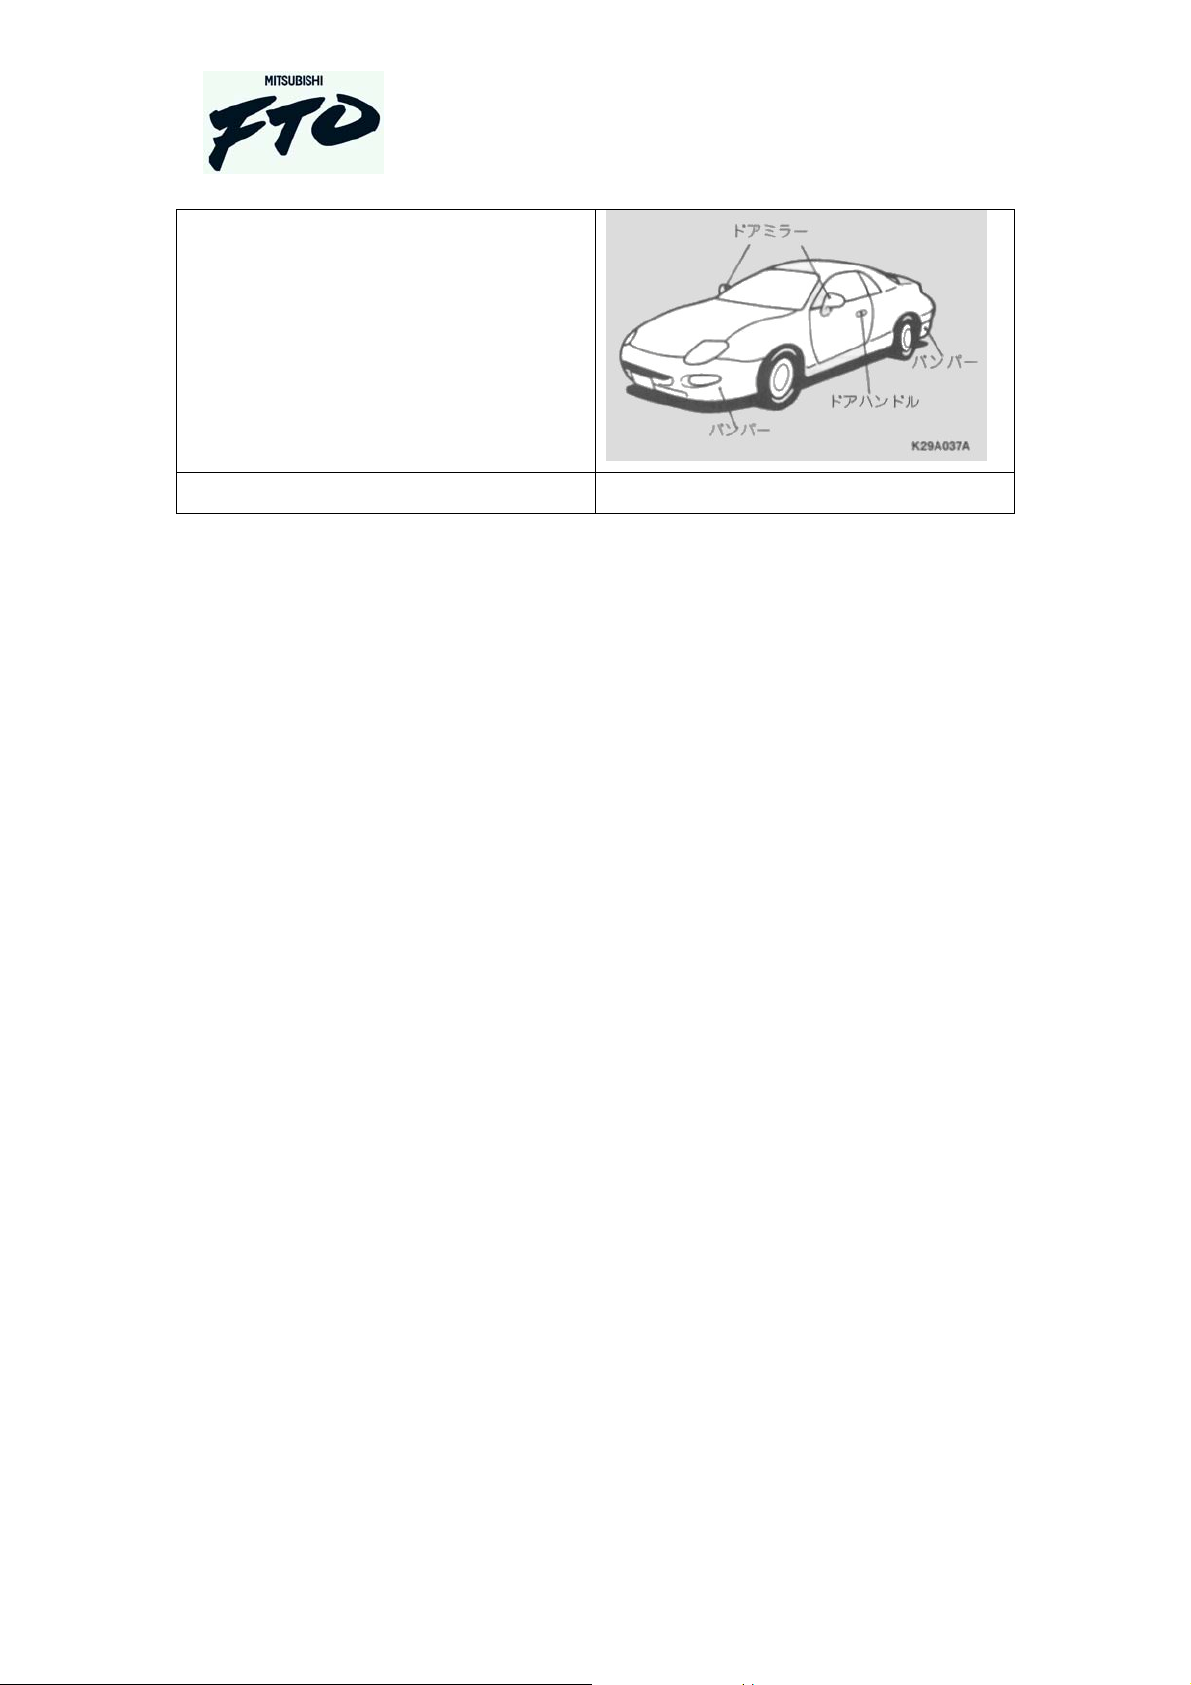
Exterior
Owners Handbook
1. Boot lid
2. Power windows
3. Door handle / lock
4. Bonnet
5. Sun roof
6. Mirrors
Copyright © Tarkus Services (2003)
www.angelfire.com/emo/fto
7. Antenna
8. Fuel cover
9. Wheel
10. Headlight
11. Sidelight
8
All rights reserved
26-Aug-04
Page 9
Owners Handbook
Vehicle Introduction and Safety
Please read this section.
Even if you do not read the entire manual, this section should be studied before
operating the vehicle.
Warning notes
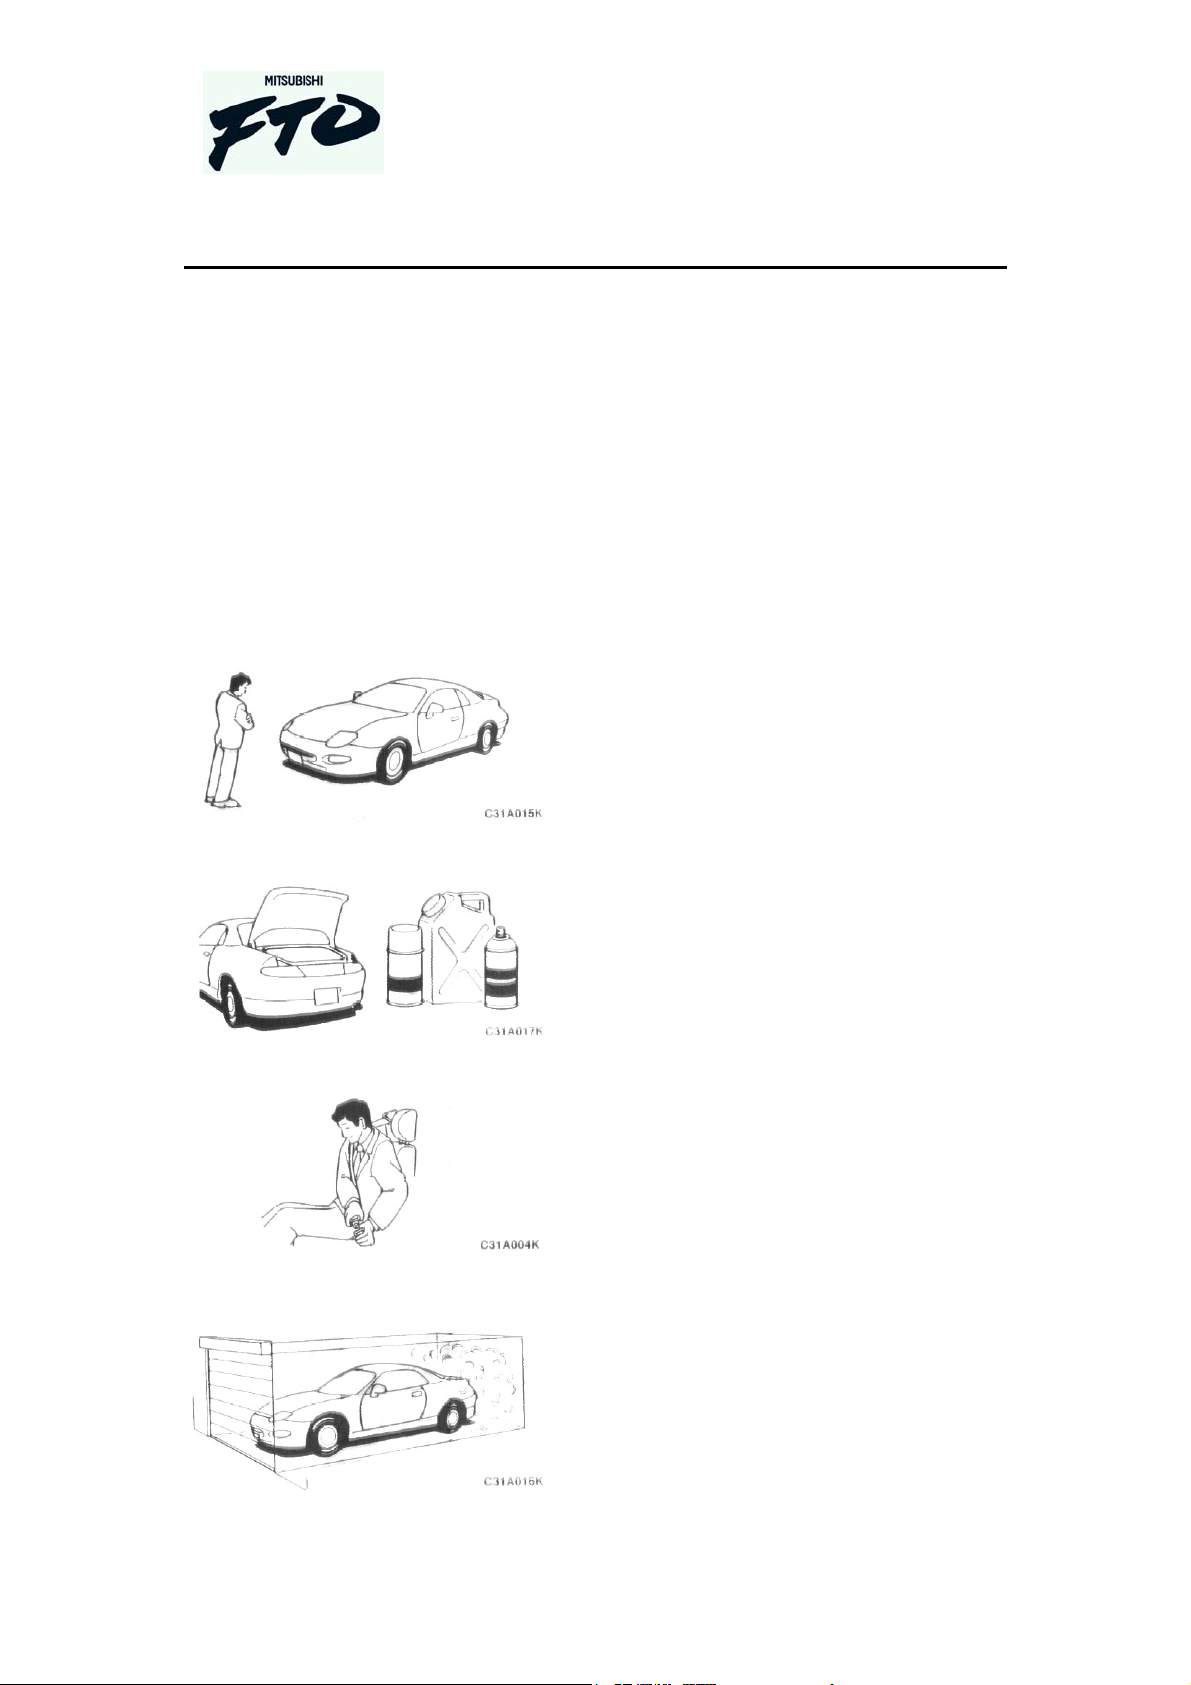
Check exterior of vehicle before driving.
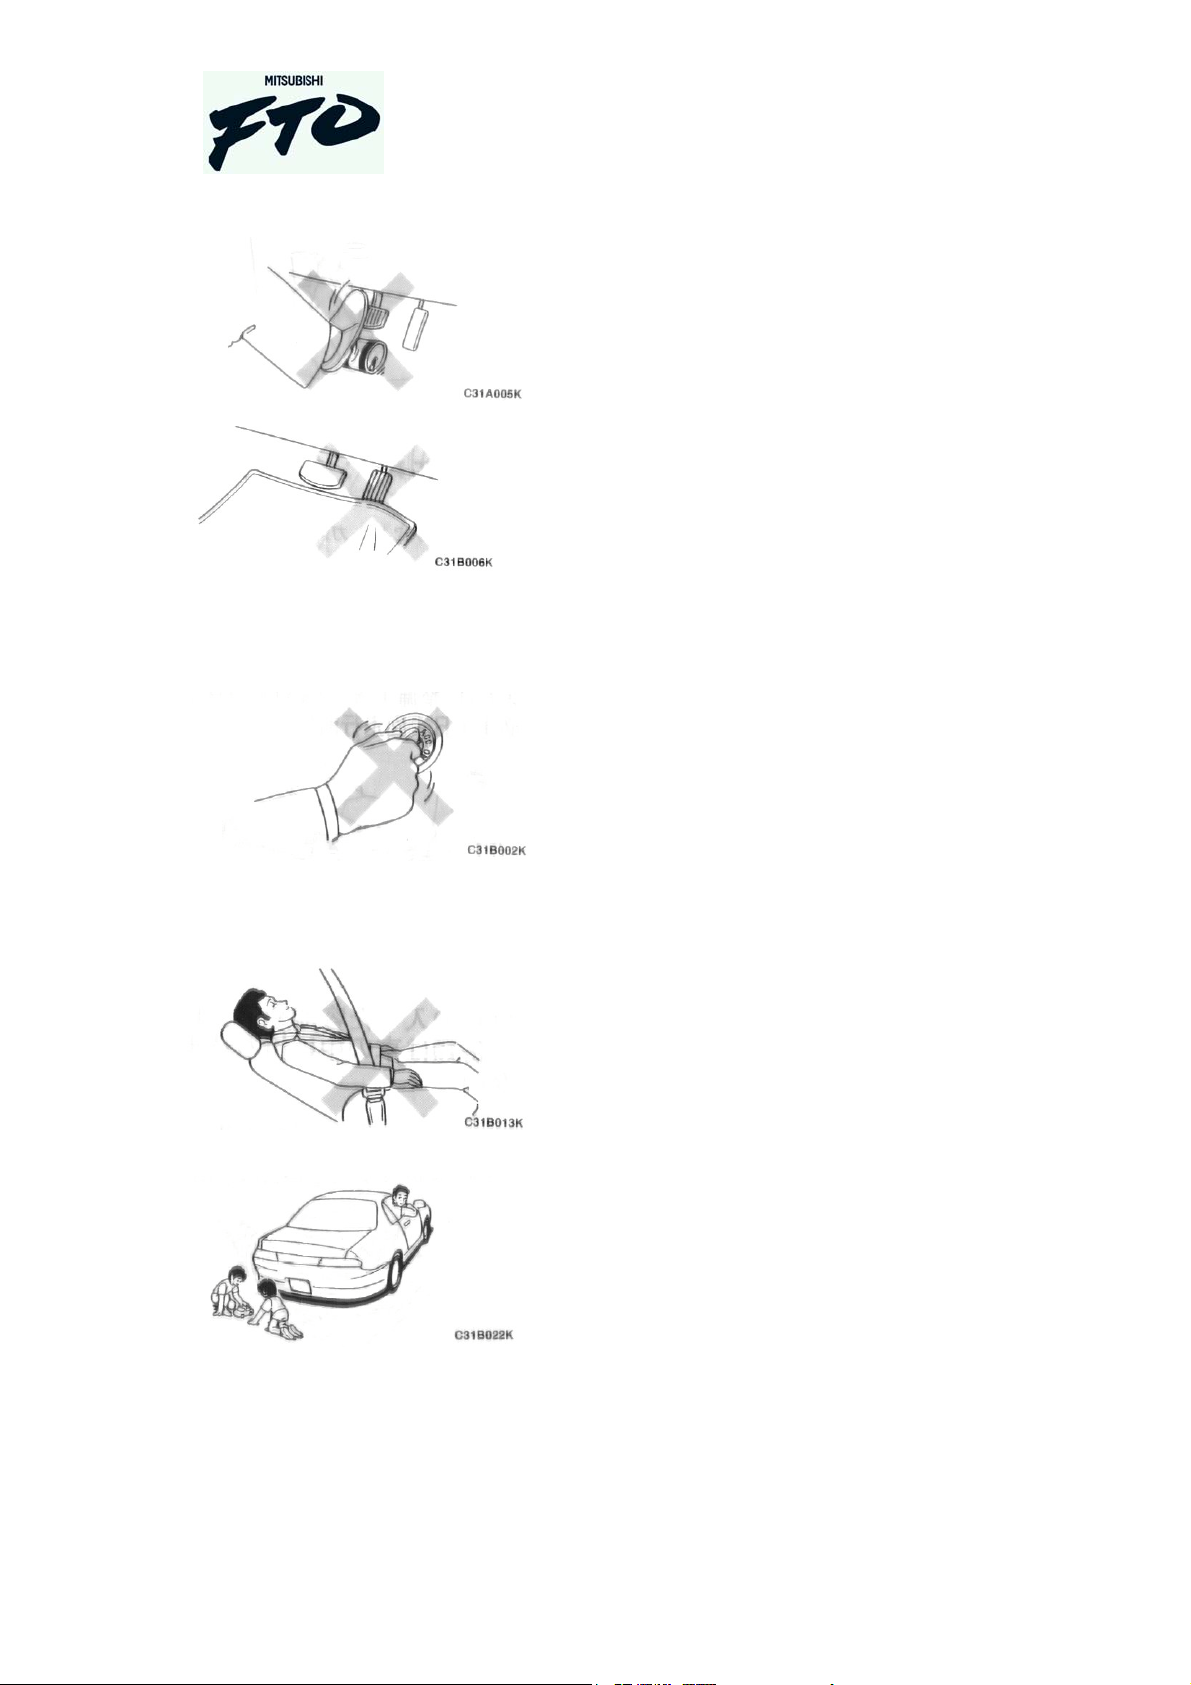
Do not carry flammable liquids or gas
bottles in the vehicle, as this may cause a
fire or explosion in the event of an
accident.
Make sure seat belt is adjusted and
fastened for all passengers as well as the
driver, before driving. For more
information on the seat belts, see later in
this manual.
Copyright © Tarkus Services (2003)
www.angelfire.com/emo/fto
Do not run the engine in a confined area,
as this will cause a build up of carbon
monoxide, which is dangerous. Make
sure that there is adequate ventilation if
you do need to run the engine in a
confined space.
9
All rights reserved
26-Aug-04
Page 10
Owners Handbook
Make that there is nothing loose that can
interfere with the controls of the vehicle,
such as cans or bottles.
Make sure that any mats or covers do not
interfere with the controls of the vehicle.
Page 6 ?
2000cc ? “check translation”.
Do not try to turn the ignition switch off,
while driving. This may cause serious
damage to the engine. If you turn the key
to “ACC” or “LOCK” position while
driving you will lose the use of the power
brakes and power steering, also the
steering lock will engage. Also no
warning lights will be illuminated.
Do not put the seats in the reclined
position, while the vehicle is moving.
When reversing, make sure that the rear
of the vehicle is clear of obstructions and
children.
Copyright © Tarkus Services (2003)
www.angelfire.com/emo/fto
10
All rights reserved
26-Aug-04
Page 11
Page 7?
Owners Handbook
When travelling in wet or slippery
conditions, use care when accelerating
and braking. After driving through deep
water (over 5 cm’s deep) gently apply the
brakes whilst moving to dry them.
When travelling downhill, take extra care
not to use the brakes too much. Excessive
use can cause the fluid to boil and
become ineffective. If possible use the
engine brake to keep the speed at a steady
pace.
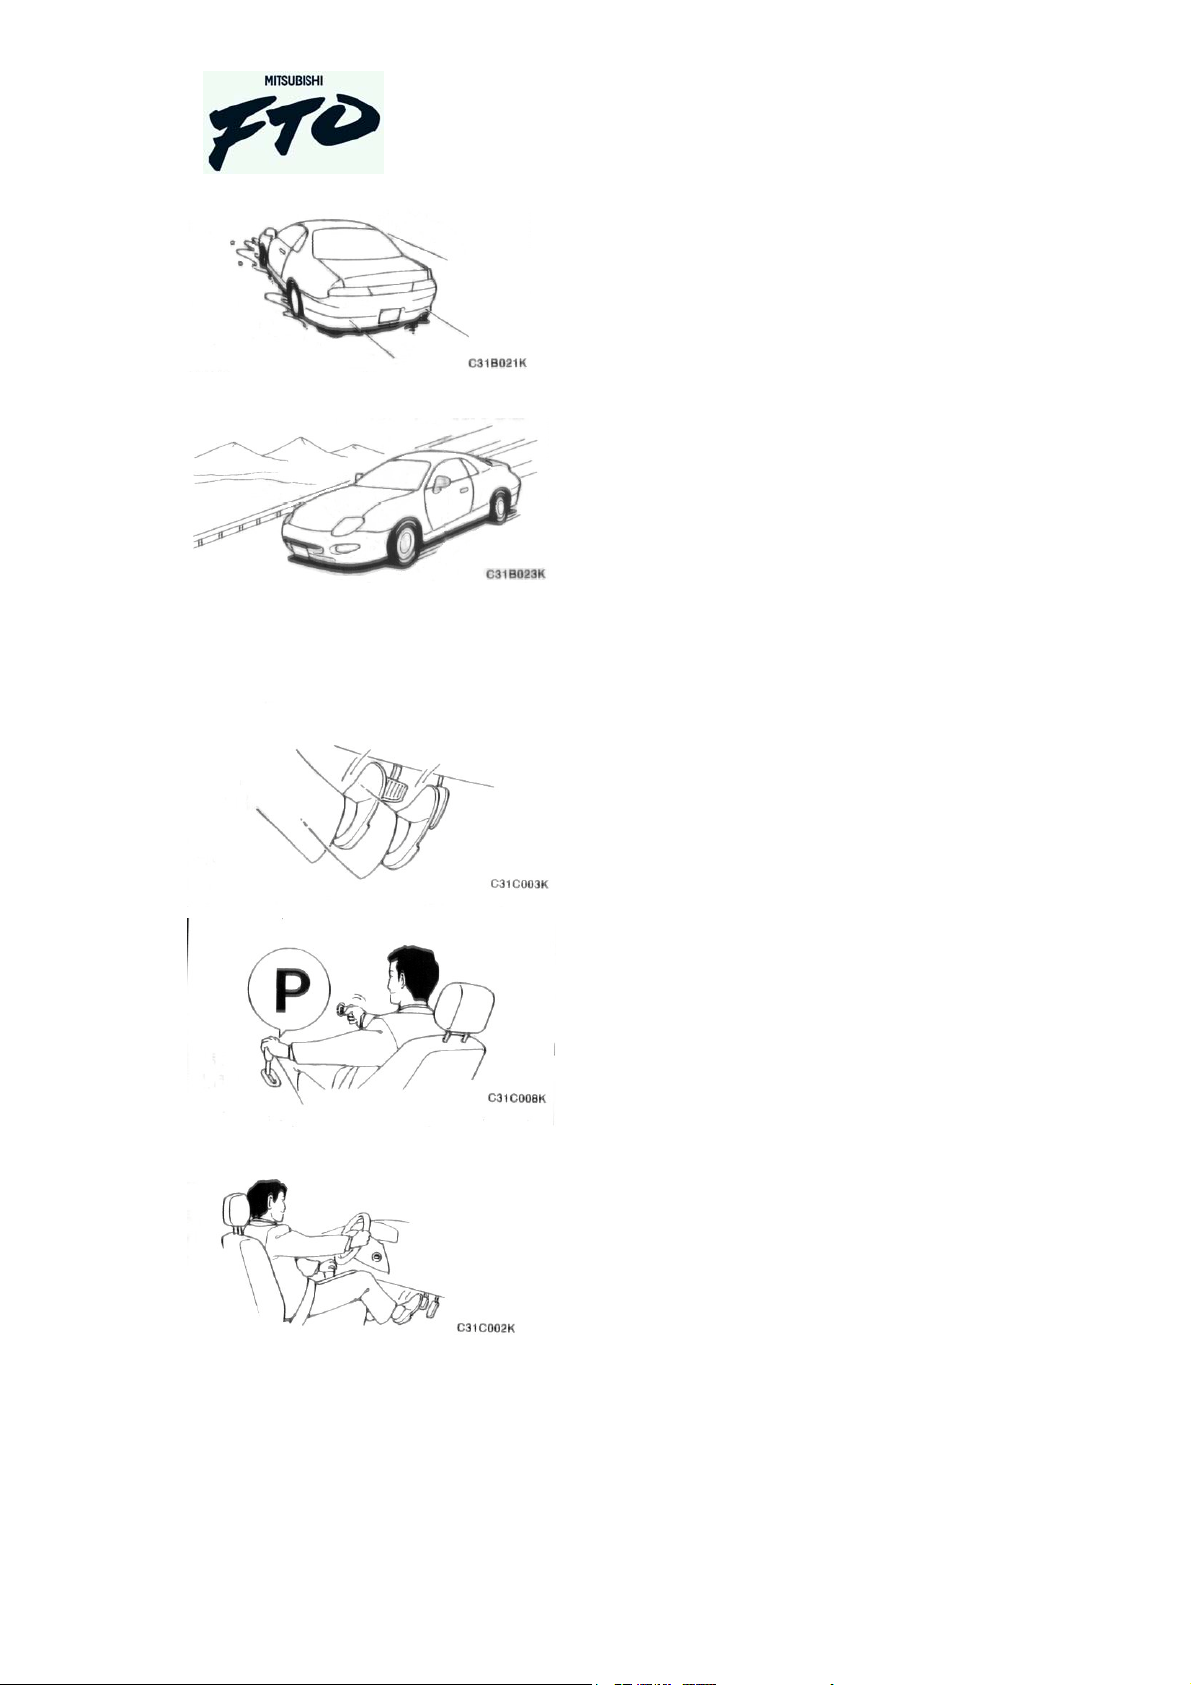
Only use the right foot to operate
automatic vehicle, don’t operate left and
right foot together for this could cause
excessive wear on the brake pads.
The vehicle will only start, when the gear
lever is in park.
The vehicle will only go into reverse,
when the foot brake is operated.
Copyright © Tarkus Services (2003)
www.angelfire.com/emo/fto
11
All rights reserved
26-Aug-04
Page 12
Owners Handbook
When driving an automatic, only use the
right foot to operate the accelerator and
brake.
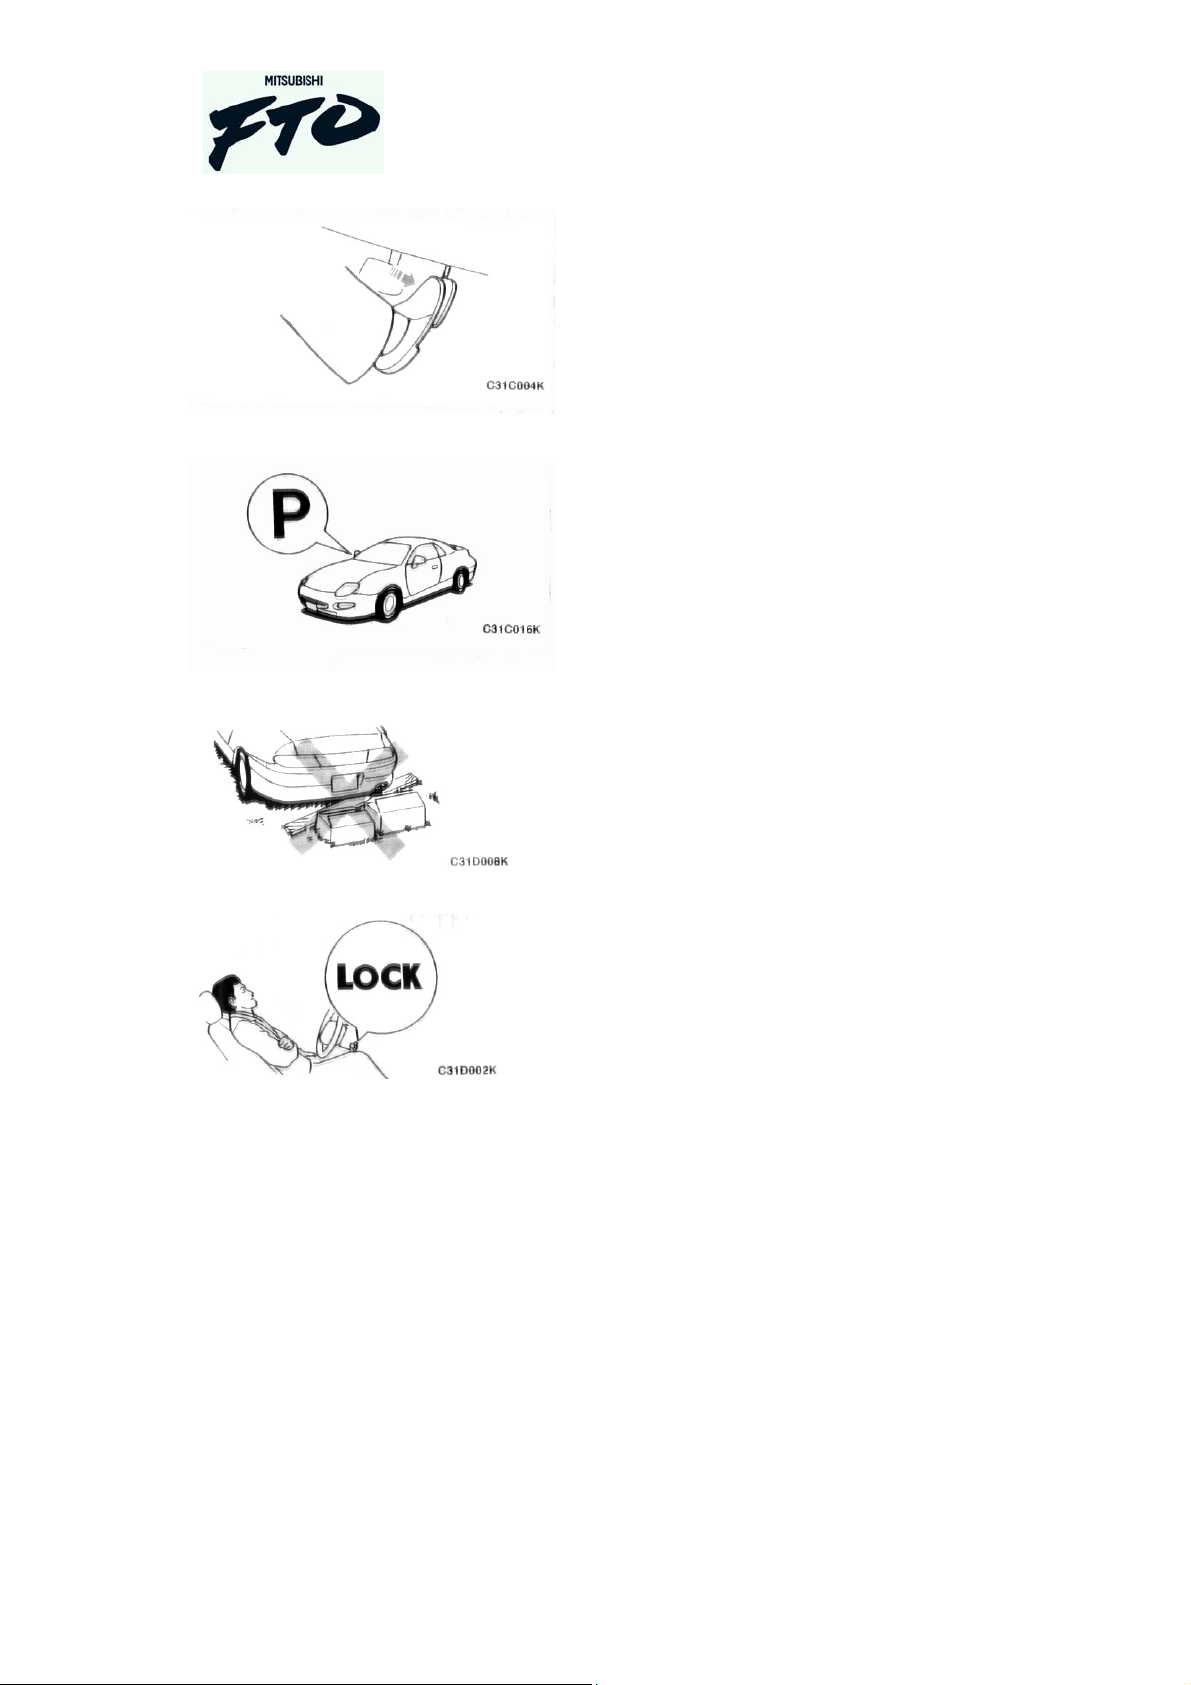
When leaving the vehicle, leave the gear
lever in park.
Do not start the vehicle, if the exhaust is
not clear.
Always leave the ignition in “lock”, when
sleeping?
Tips when driving an automatic vehicle.
Vehicles fitted with automatic transmission are easier to drive for there is no need
for gear changes or clutch operation. But you must learn the techniques related to its
use.
1. When the shift lever is in any position other than “P” or “N”, the vehicle may
creep forward even when the accelerator is not pressed.
2. When stationary, even on level ground, apply the foot brake to prevent the
vehicle moving.
3. If the air conditioner is operating the engine will be idling faster than normal and
may cause the vehicle movement to be greater.
Copyright © Tarkus Services (2003)
www.angelfire.com/emo/fto
12
All rights reserved
26-Aug-04
Page 13
Owners Handbook
Make sure all children are securely
fastened in the seat belts before moving.
Do not allow children to lean out of the
open windows.
Always use genuine Mitsubishi spare parts.
SRS – Supplemental Restraint System
In vehicles fitted with SRS, do not replace the
steering wheel with an “after market” wheel. The
SRS will NOT work.
Make sure children are secure, before
moving the vehicle.
Help children when entering or leaving
the vehicle.
Copyright © Tarkus Services (2003)
www.angelfire.com/emo/fto
13
All rights reserved
26-Aug-04
Page 14
Owners Handbook
Opening / closing the vehicle
The key
The key number is located as shown. It
is advisable to make a note of the key
number.
Unlocking the door
Page 14
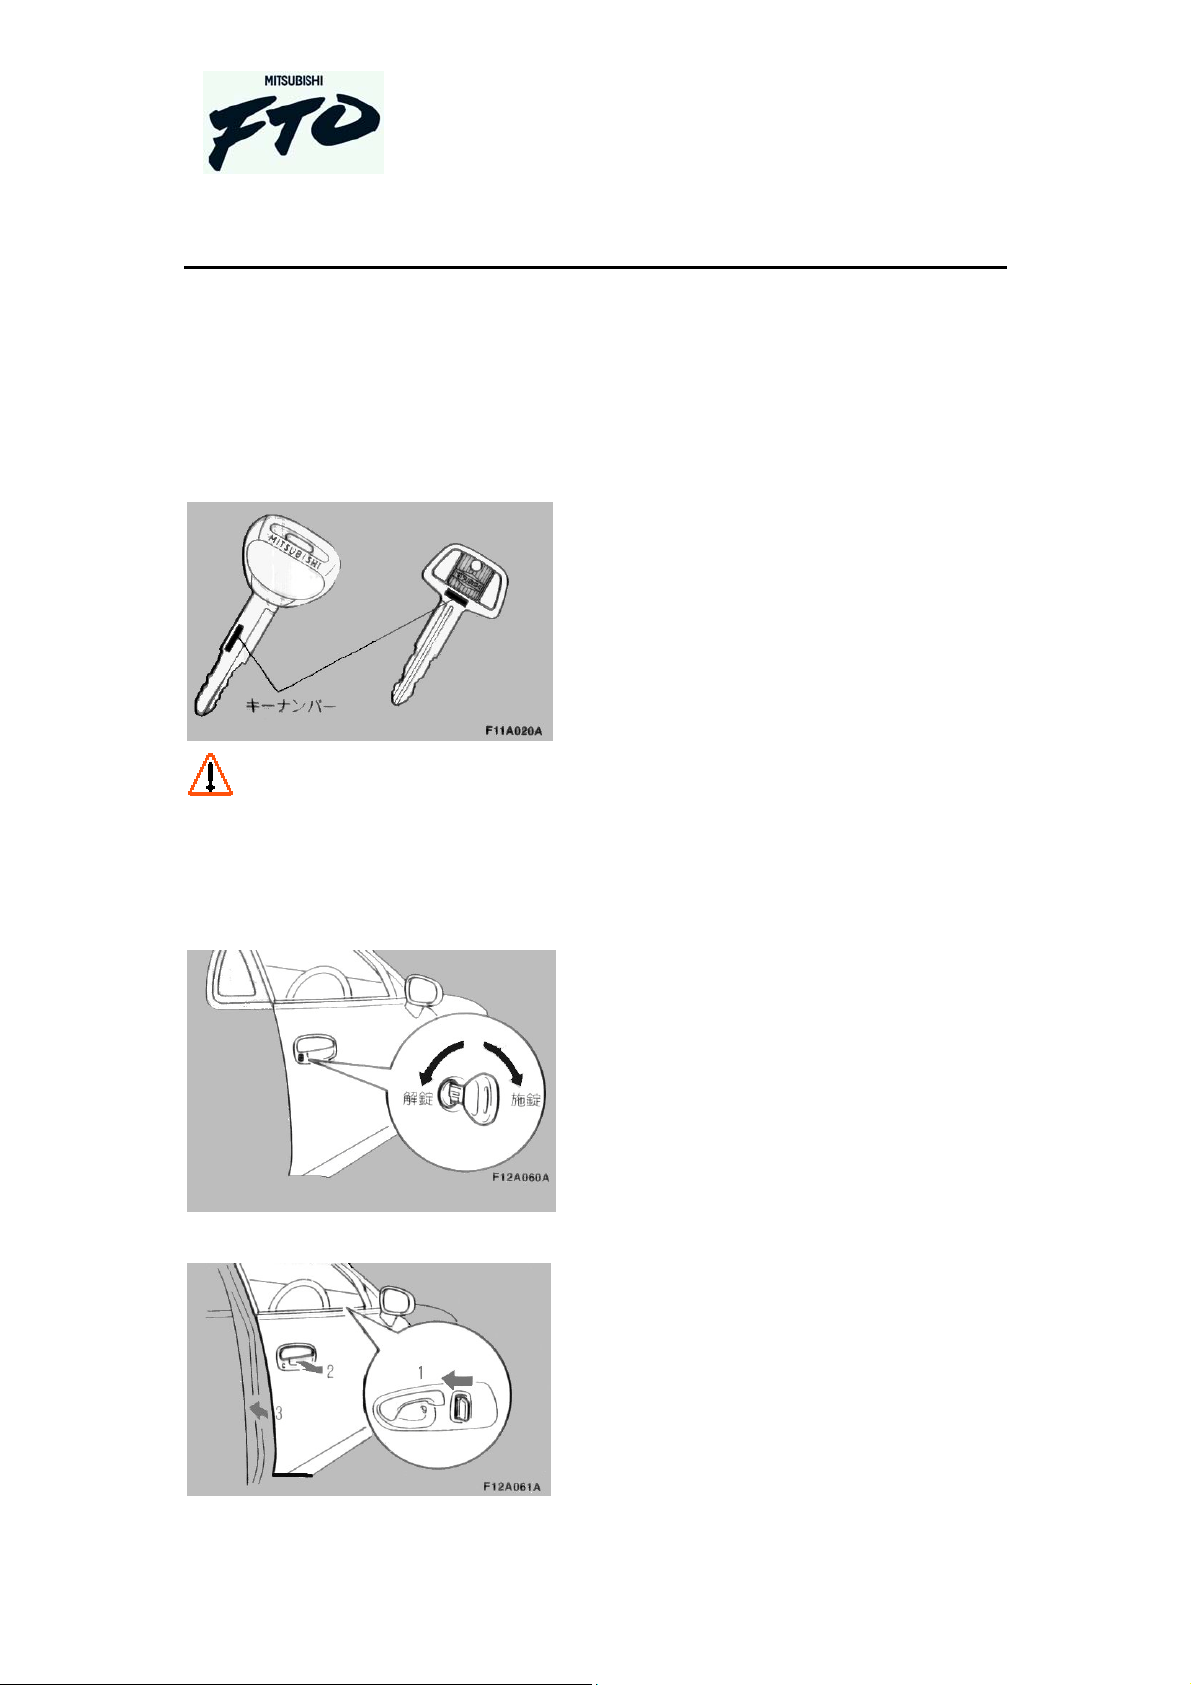
To unlock the vehicle with the key, turn
it anti-clockwise. To lock the vehicle
with the key, turn the key clockwise.
To lock the door without using the key:
1. Push inside door-lock lever forward.
Copyright © Tarkus Services (2003)
www.angelfire.com/emo/fto
2. Hold door handle open.
3. Push door closed.
14
All rights reserved
26-Aug-04
Page 15
Page 15?
Keyless entry
Owners Handbook
To lock the door from inside the vehicle,
push the door-lock lever forward. To
unlock pull the lever backward. If the
drivers handle is used, the door will
automatically open if previously locked.
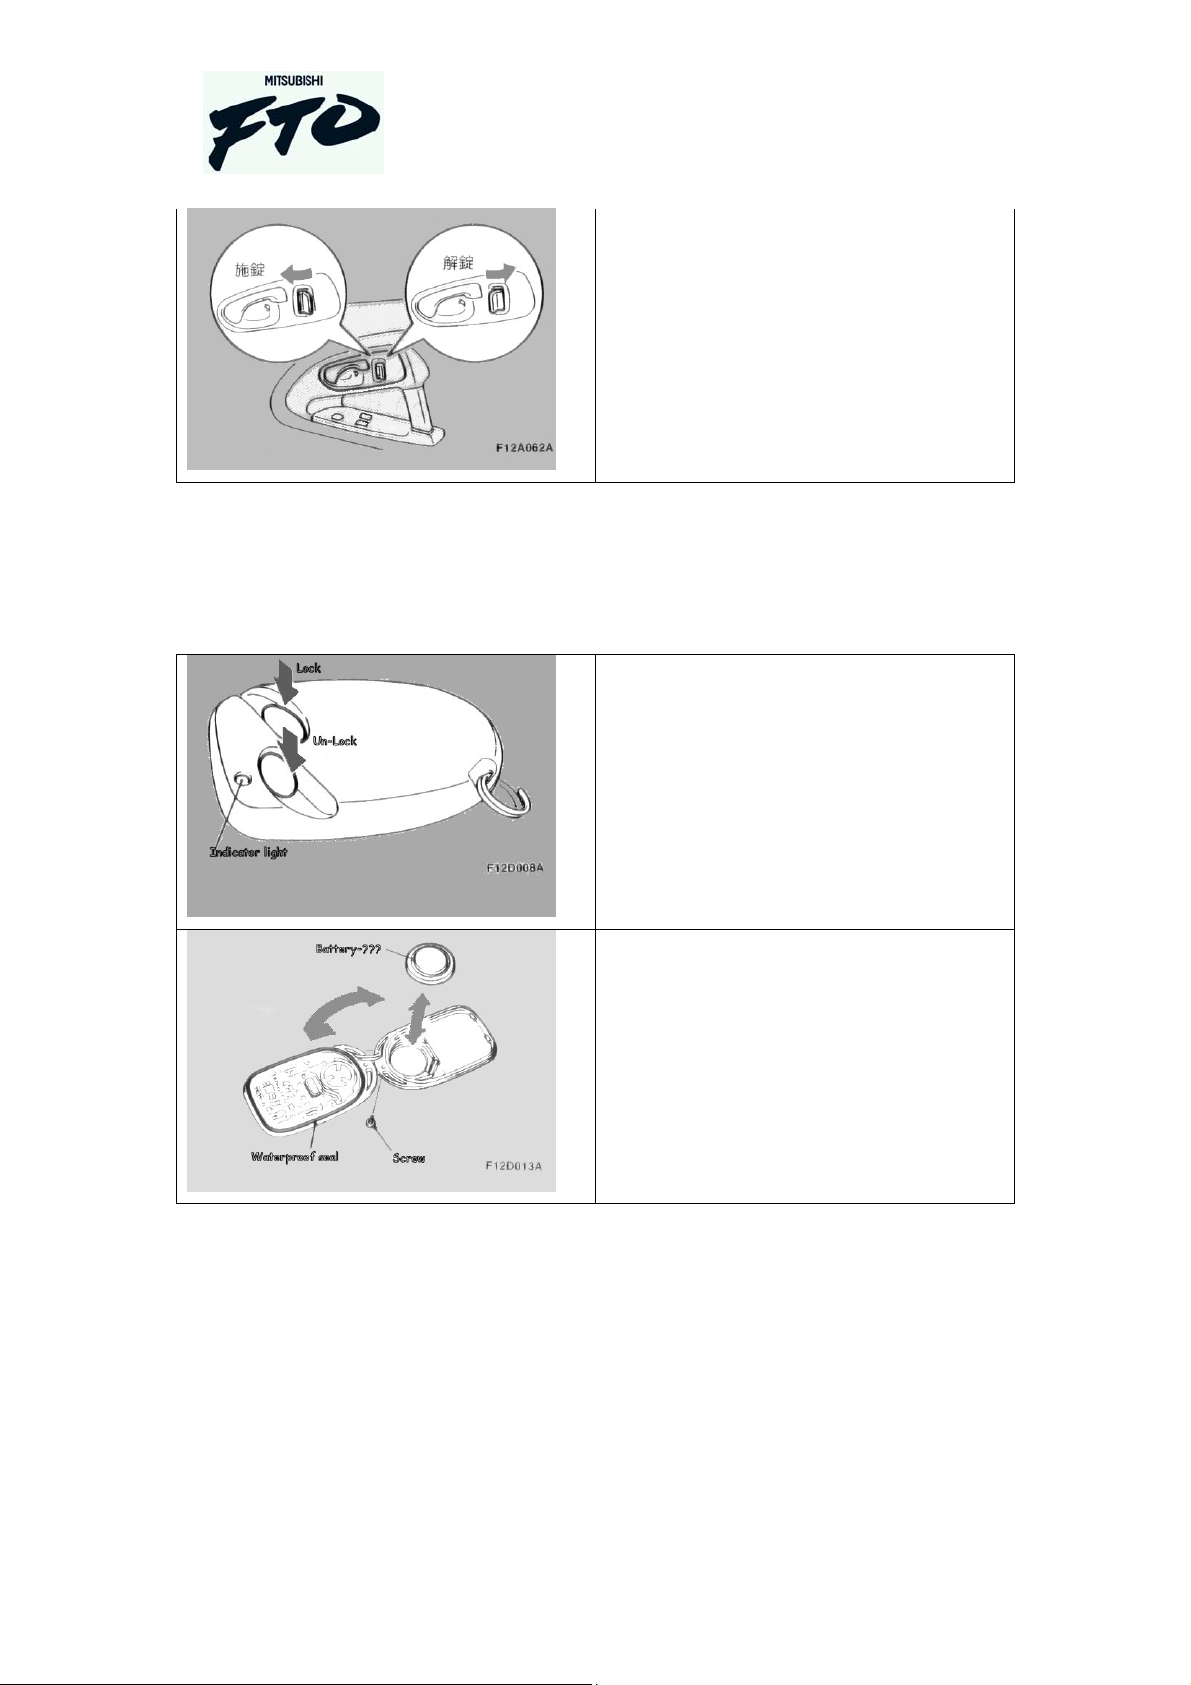
To lock the door with the remote, press
the red button. To unlock the door, press
the white button, the indicator light will
illuminate during both operations.
To change the battery in the remote,
remove the small screw and pries open
the case carefully. Be careful that you do
not damage the seal.
Copyright © Tarkus Services (2003)
www.angelfire.com/emo/fto
15
All rights reserved
26-Aug-04
Page 16
Central door locking
Owners Handbook
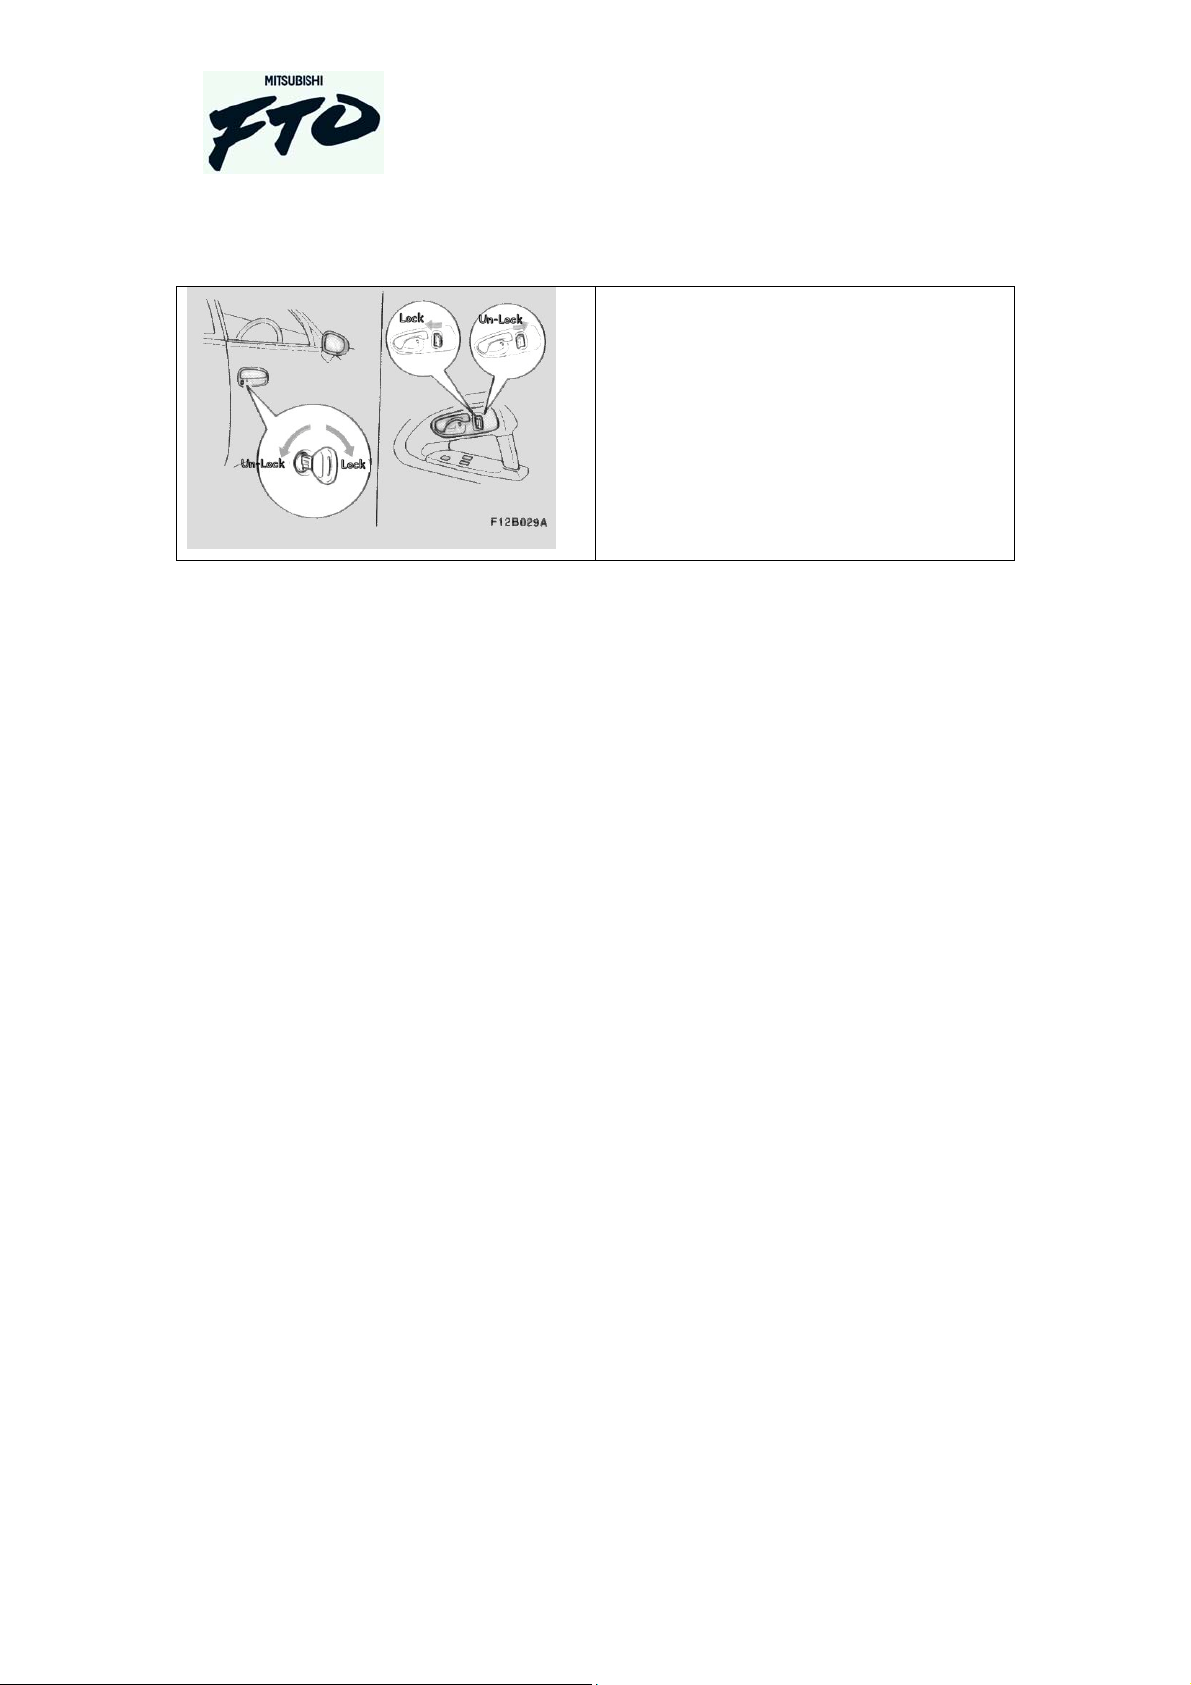
When the key is turned in the door lock,
both doors will either lock or unlock.
This is the same for the remote control.
Copyright © Tarkus Services (2003)
www.angelfire.com/emo/fto
16
All rights reserved
26-Aug-04
Page 17
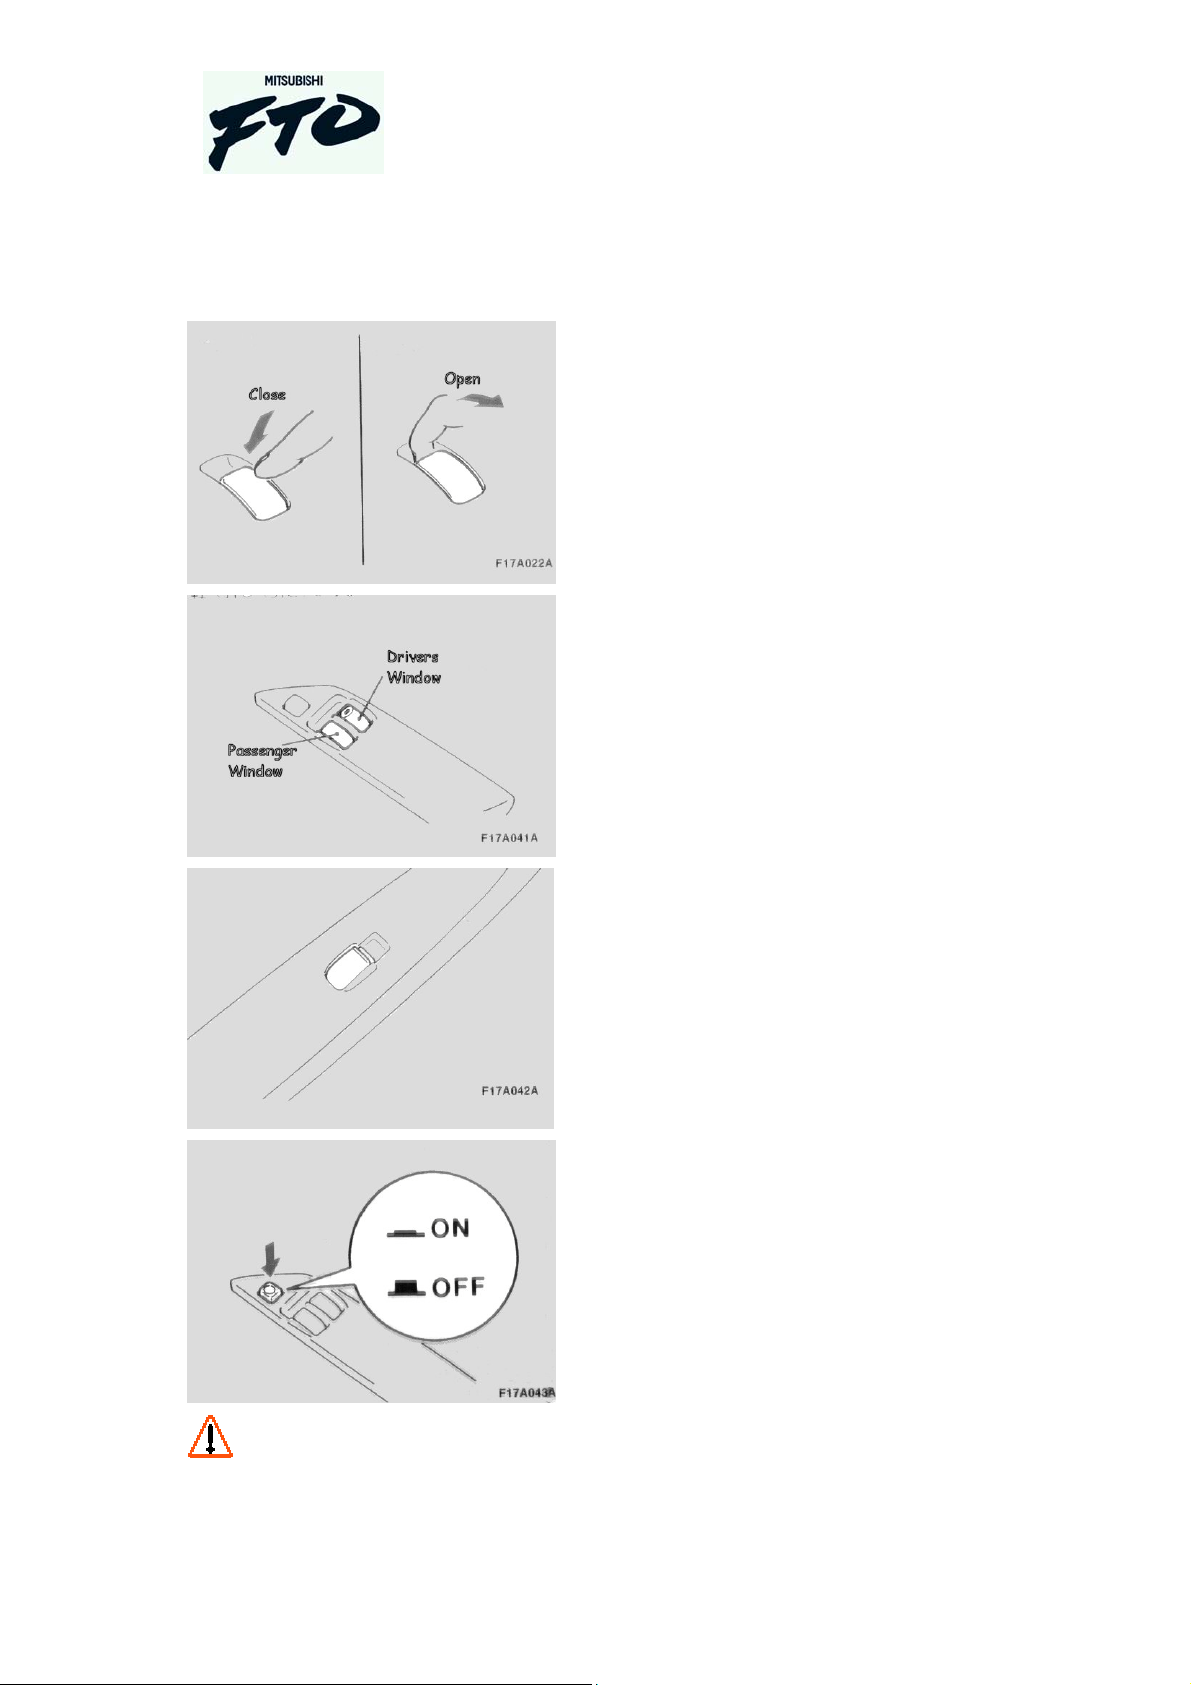
Window operation
Owners Handbook
Push down the button, to close the
window.
Pull the button up to open the window.
The driver’s window can be opened or
closed in one operation. To open pull the
switch up to the top and released
quickly, to close push the switch forward
and release quickly.
On the driver’s door, are 2 window
controls. The left button controls the
passenger side window and the right
button controls the driver’s side window.
On the passenger door is one control.
This is for the passenger window only.
On the drivers door is the button to lock
the window operation.
To protect the battery try to open / close
the windows only when the engine is
running.
Copyright © Tarkus Services (2003)
www.angelfire.com/emo/fto
17
All rights reserved
26-Aug-04
Page 18
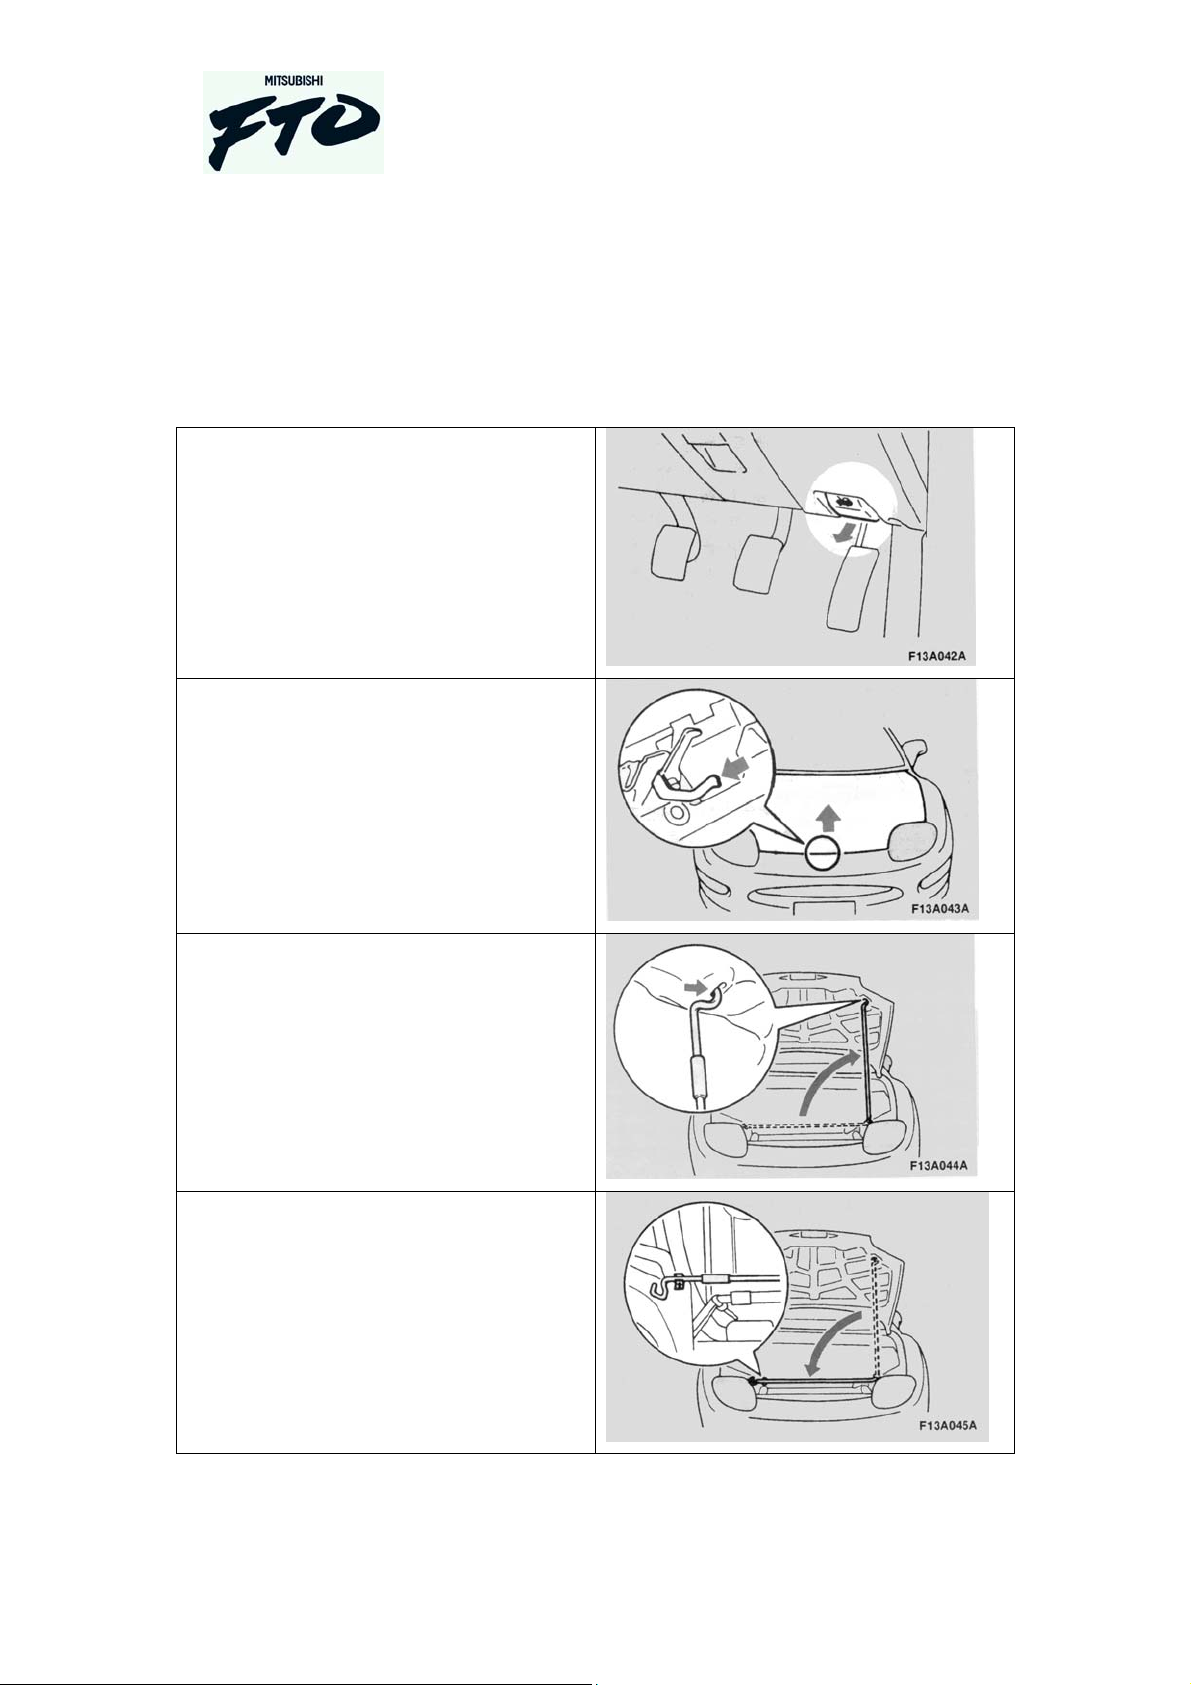
Engine compartment
1. To open the engine compartment, pull
the small lever indicated towards you.
Owners Handbook
2. Under the front of the bonnet, there is
a small lever. Push this to the left. This
will allow the bonnet to lift up.
To secure the bonnet, release the bonnet
stay from the front of the engine bay.
The end of the stay should be secured in
the slot in the bonnet.
The stay should be secured on its clip,
before closing the bonnet.
Copyright © Tarkus Services (2003)
www.angelfire.com/emo/fto
18
All rights reserved
26-Aug-04
Page 19
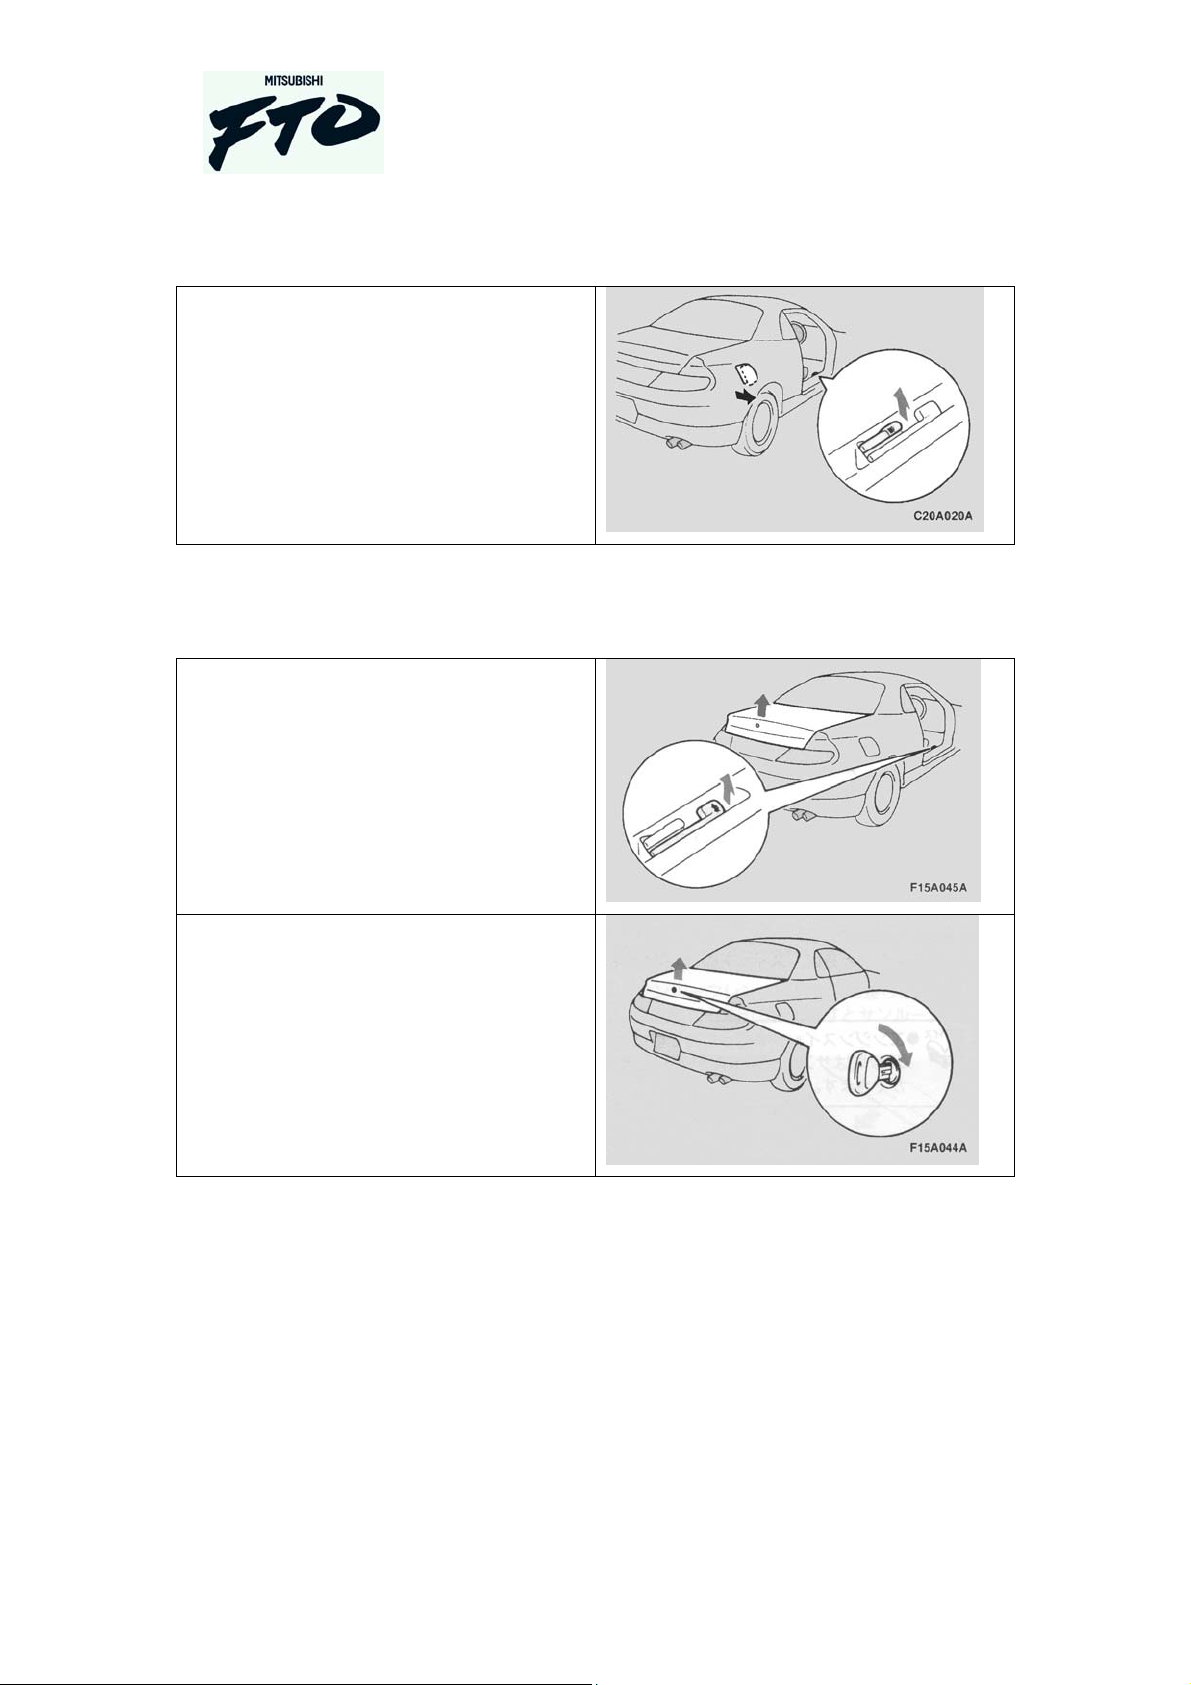
Fuel access
To gain access to the fuel filler, lift the
small lever located at the right side of the
driver’s foot-well.
Boot access
Owners Handbook
Lift lever
Use key
Redo photo
Copyright © Tarkus Services (2003)
www.angelfire.com/emo/fto
19
All rights reserved
26-Aug-04
Page 20
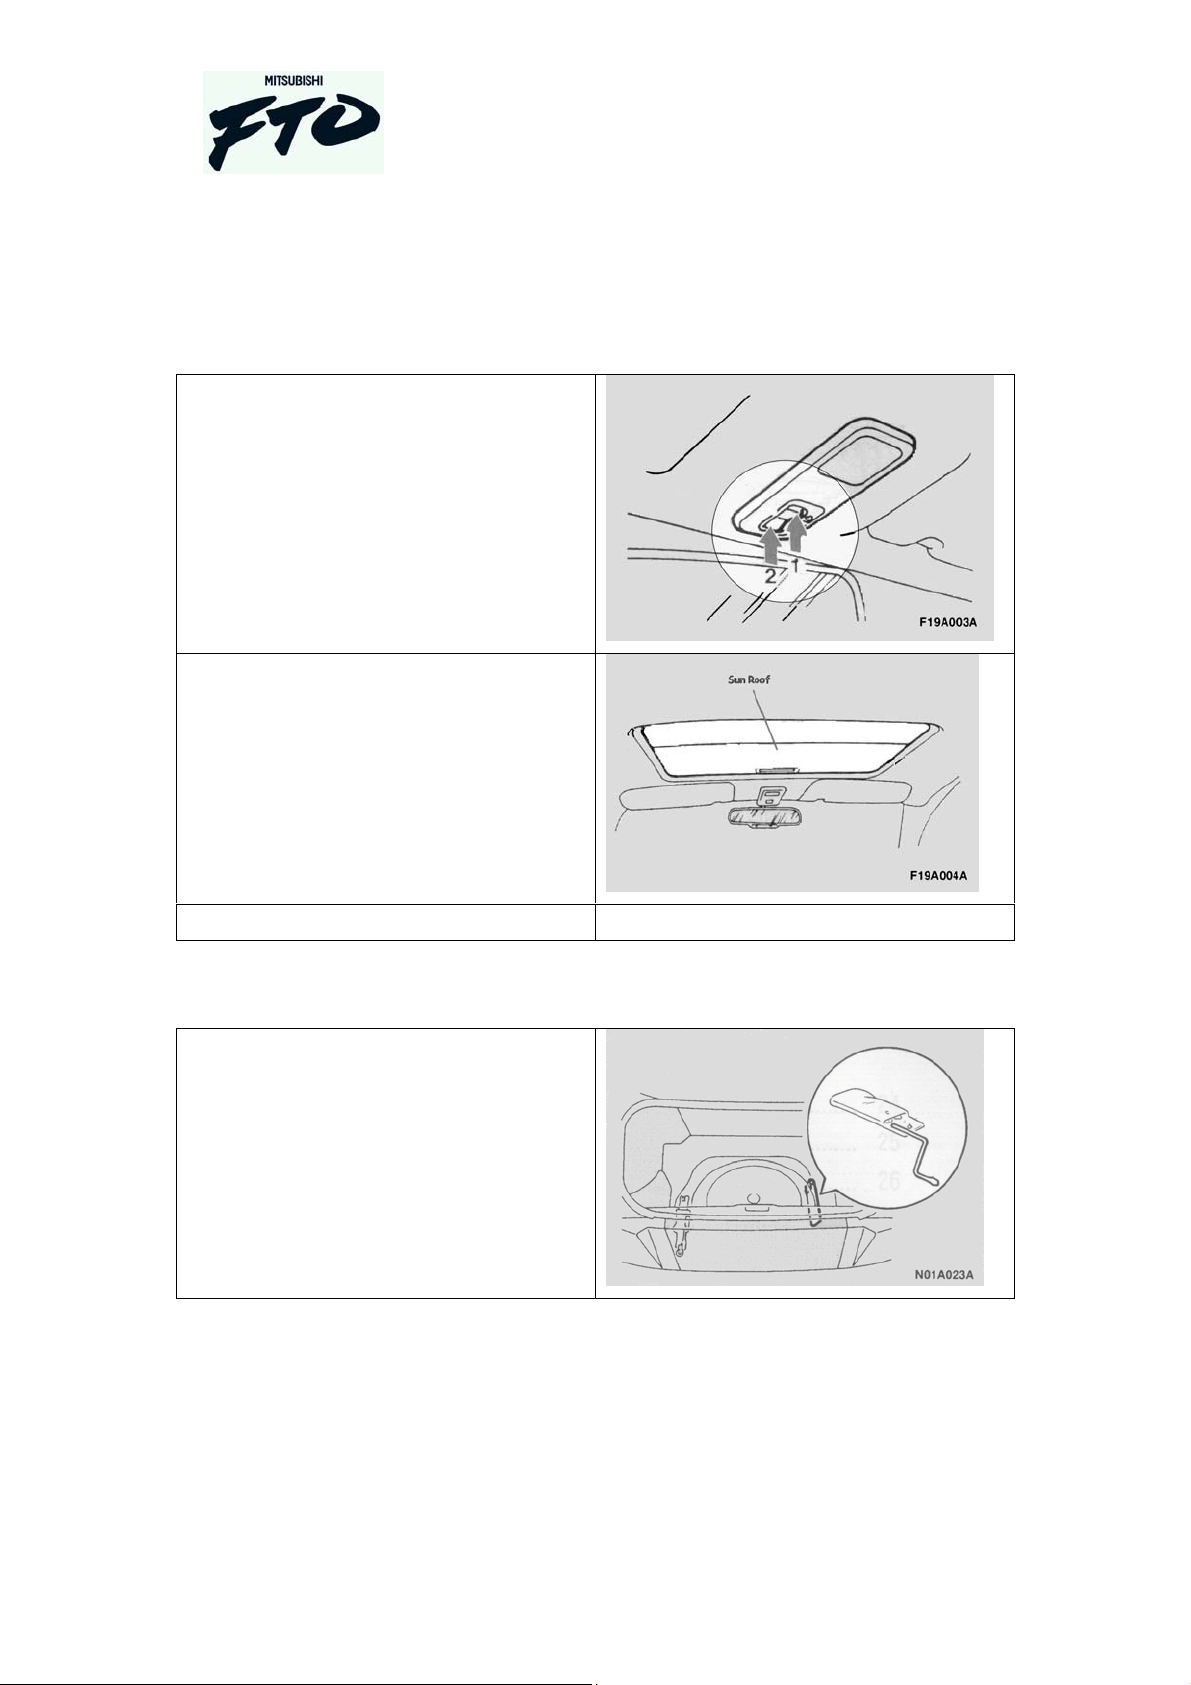
Sunroof
Power sunroof
Fto-om-20-1a
Fto-20-1b
Owners Handbook
Manual sunroof
Fto-21-1a
Copyright © Tarkus Services (2003)
www.angelfire.com/emo/fto
20
All rights reserved
26-Aug-04
Page 21
Fto-21-1b
Fto-21-1c
Owners Handbook
Copyright © Tarkus Services (2003)
www.angelfire.com/emo/fto
21
All rights reserved
26-Aug-04
Page 22
Driving position
Seat adjustment
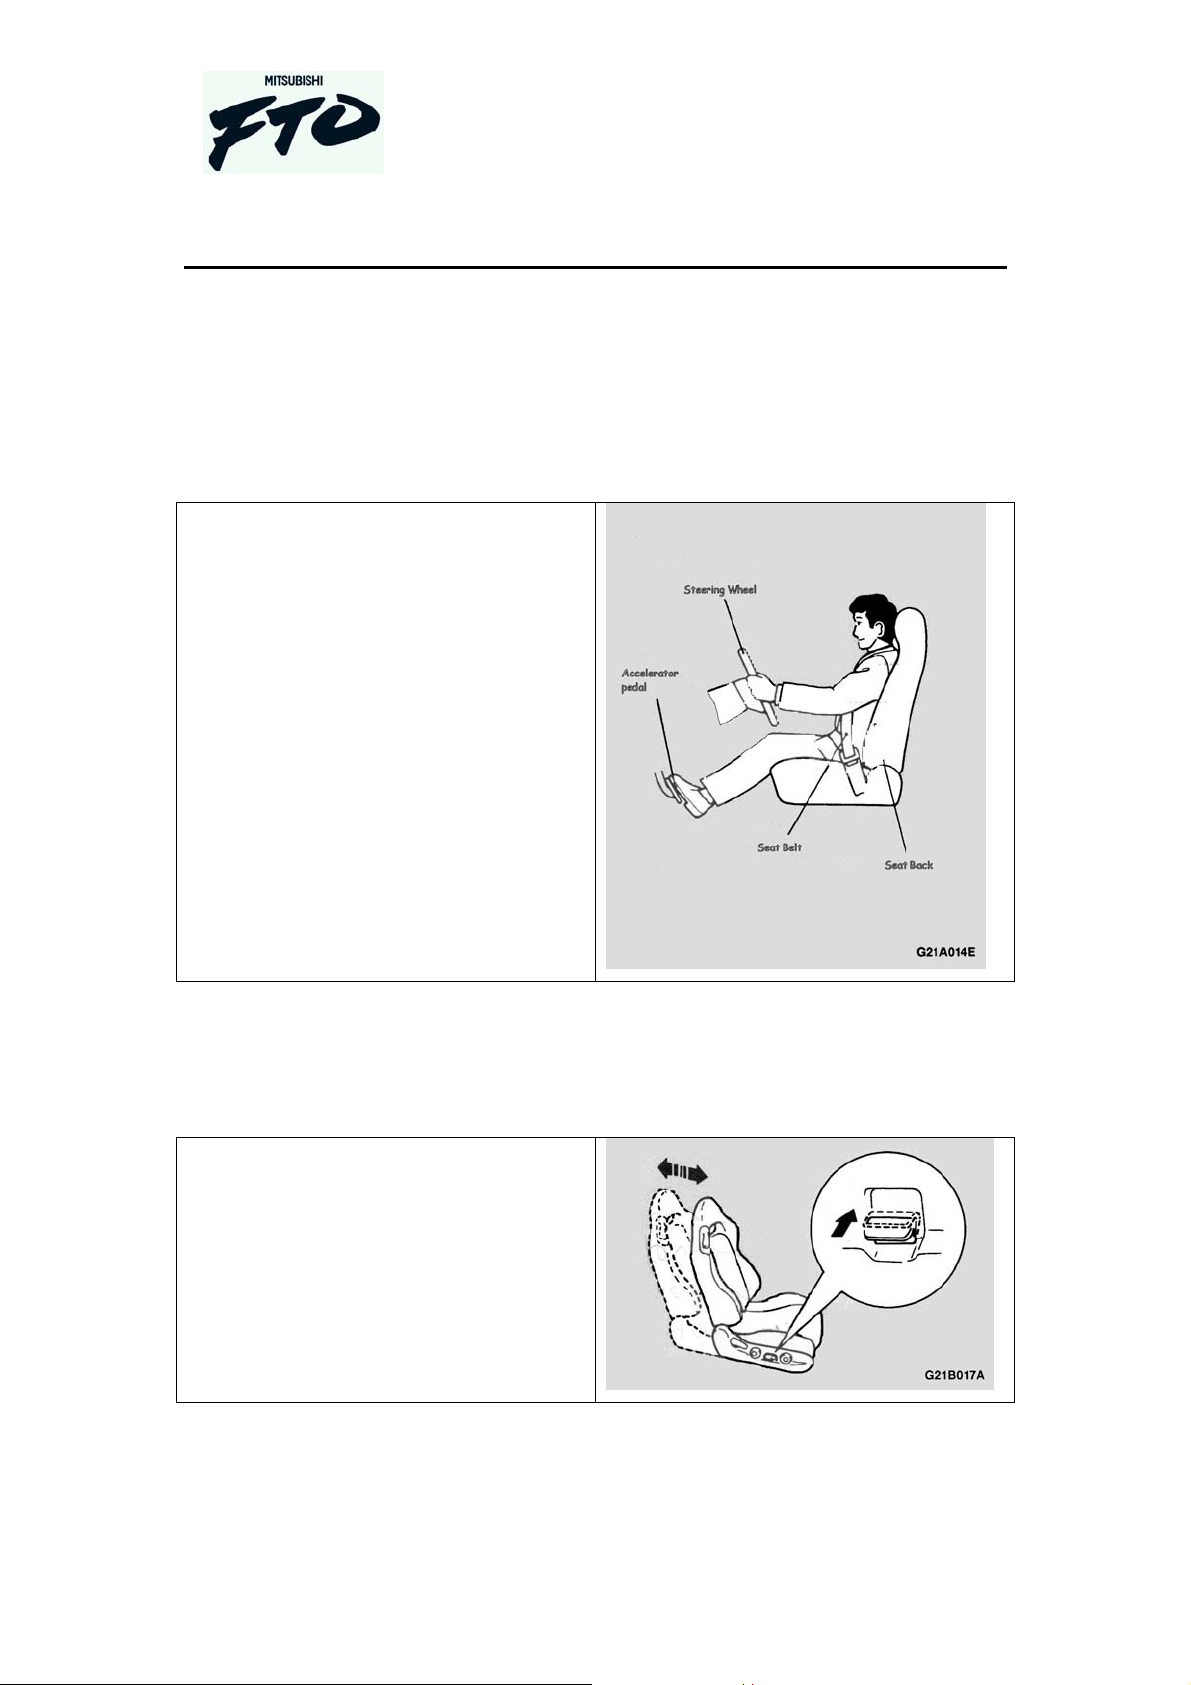
Important
Always adjust the seat to suit you before
driving, making sure:
• You can comfortably reach the
steering wheel.
Owners Handbook
• You can operate the foot controls
with ease.
• The seat belt is comfortable with no
twists.
• You are seated properly.
Front seat adjustment
Do not try to adjust the driver’s seat while the vehicle is moving. The risk of loosing
control while the seat is not fixed could be very dangerous.
Forward and backward
This is achieved by pulling the indicated
lever up, and sliding the seat.
Copyright © Tarkus Services (2003)
www.angelfire.com/emo/fto
22
All rights reserved
26-Aug-04
Page 23

Seat back tilt
Lift the lever indicated, and move the
backrest.
Front seat cushion
By turning the 2 dials at the right-hand
side of the seat, the seat cushion height
can be adjusted.
Owners Handbook
See above.
Rear seat access.
To gain access to the rear seats, push the
small lever (on the passenger seat)
backwards. This allows the seat to move
to its most forward position and the
backrest to tilt forward.
Copyright © Tarkus Services (2003)
www.angelfire.com/emo/fto
23
All rights reserved
26-Aug-04
Page 24

Owners Handbook
Rear seat
The rear seat cushion can be removed, for cleaning or the fitting of seat covers.
Rear seat removal.
Pull the 2 small catches forward lifting the seat
clear of the rear locating lugs. Then pull the
cushion towards yourself.
Seat replacement.
Put the seat belt buckles on the base.
Push the seat backward until the 2 holes
line up with the hooks under the seat
cushion.
Fixing hook.
Fitting holes.
Attention
Please make sure that the seat cushion is put back in its place properly after you
remove it.
Copyright © Tarkus Services (2003)
www.angelfire.com/emo/fto
24
All rights reserved
26-Aug-04
Page 25

Seat belts
Fto-27-1a
Redo photo
Owners Handbook
Fto-28-1a
Redo photo
Copyright © Tarkus Services (2003)
www.angelfire.com/emo/fto
25
All rights reserved
26-Aug-04
Page 26

Fto-28-1c
Redo photo
When you fasten your seat belt.
Fto-29-1a
Make sure that the belt is not twisted. Set
the plate into the buckle until it clicks.
Owners Handbook
Fto-29-1b
Fto-29-1c
When you unfasten the belt, hold the plate and
press on the buckle. The belt will automatically
rewind.
Copyright © Tarkus Services (2003)
www.angelfire.com/emo/fto
26
All rights reserved
26-Aug-04
Page 27

Fto-29-1d
Redo photo
Fto-29-1e
When you see a red label on the anchor
cover, this means that the belt has been
stretched. It must be replaced with a new
belt.
Owners Handbook
SRS Air bag restraint system
Air bags are used to supplement the normal seat belts in case of an accident. Insert
from pages 30, 31 & 32.
If the vehicle is involved in an front end
accident, both the drivers and front
passengers air bags are deployed. Even if
the vehicle has been fitted with SRS, seat
belts must be worn.
Copyright © Tarkus Services (2003)
www.angelfire.com/emo/fto
27
All rights reserved
26-Aug-04
Page 28

Owners Handbook
The SRS cannot be turned off.
Redo photo
Do not place objects or stickers onto the
steering wheel or passenger side air bag
egress panel.
Do not fit rear facing child restraint seats
in the front passenger seat. If the air bag
is deployed in an accident, the child seat
will be pushed backwards.
When the ignition is turned on, the SRS
indicator will be illuminated for approx 7
seconds then go out. If it stays on or fails
to come on at all, contact your dealer.
Copyright © Tarkus Services (2003)
www.angelfire.com/emo/fto
28
All rights reserved
26-Aug-04
Page 29

Instrument panel
Instrument overview
1. Volt-meter.
2. Rev counter.
3. Fuel level.
4. Speedometer.
Owners Handbook
5. Odometer / trip button.
6. Odometer.
7. Trip meter.
8. Engine temperature.
Volt-meter
The voltmeter should have a reading of
about 13 volts in normal running. If the
reading is below 12 volts, have the
system checked by an auto electrician.
Copyright © Tarkus Services (2003)
www.angelfire.com/emo/fto
29
All rights reserved
26-Aug-04
Page 30

Odometer / trip meter
To change from “odometer” to “trip” or
vice versa, push the ODO / trip button on
the instrument panel. To zero the trip
meter, whilst the “trip” is visible, push
and hold the ODO / trip button in for 5
seconds.
Owners Handbook
Copyright © Tarkus Services (2003)
www.angelfire.com/emo/fto
30
All rights reserved
26-Aug-04
Page 31

Warning lights
1. Exhaust warning light.
Owners Handbook
2. Oil pressure warning light.
3. Battery warning light.
4. Engine system warning light
5. Turn signal lights.
6. Washer reservoir tank warning light.
7. Door open warning light.
8. Brake / hand brake warning light.
9. High beam indicator light
10. Seat belt reminder light.
11. Low fuel warning light.
Copyright © Tarkus Services (2003)
www.angelfire.com/emo/fto
31
All rights reserved
26-Aug-04
Page 32

Owners Handbook
Turn signal indicator. – when the indicator lever is operated
for a left or right turn, the appropriate light will be illuminated, it
will flash along with the outside lights. Pushing the hazard-warning
switch will cause both the turn indicators on the instrument panel
and all the outside lights to flash.
High beam indicator light. – This will be illuminated when
the main lights are switched to high beam.
Exhaust warning light. – If this comes on then the exhaust is
overheating. Stop the car as soon as possible, make sure there is
nothing flammable (grass, paper etc) under the vehicle. Wait approx
15 minutes before restarting, if the light has gone out continue on
your journey. If the light comes back on stop the vehicle again and
wait longer, also have the exhaust checked.
Oil pressure warning light. – This will normally come, on
when the ignition is turned on, but should go out after a few seconds.
Battery warning light. – This will normally come, on when the
ignition is turned on, but should go out after a few seconds. If it
stays on or comes on whilst you are driving, stop the car and have it
checked by an auto electrician.
Engine system. – if this comes on, it indicates a problem with the
engine or electrical system, have the engine / electric’s checked.
Washer reservoir tank warning light. – This will come on
when the water level in the washer bottle is low.
Door open warning light. – This will come on when a door is
open or not closed properly.
Brake / hand brake warning light. – This has 3 functions:-
1. Will be illuminated when the handbrake is on.
2. When the brake fluid is low.
3. When the brake pads need replacing.
Seat belt reminder light. – This will be illuminated until the
driver puts their seat belt on.
Low fuel warning light. – This will come on when the fuel
level is down to about 8 litres.
Copyright © Tarkus Services (2003)
www.angelfire.com/emo/fto
32
All rights reserved
26-Aug-04
Page 33

Light switch
Ft0-40-1a
- Off.
- Parking lights.
Owners Handbook
Redo photo
- Driving lights.
Ft0-40-1b
Change from main beam to low beam.
Ft0-41-1a
Position 1 – indicator on.
Position 2 – hold for indicator.
Copyright © Tarkus Services (2003)
www.angelfire.com/emo/fto
33
All rights reserved
26-Aug-04
Page 34

Wiper switch
Front wiper
Fto-41-1b
O = off
- - - = intermittent (fixed time)
I = normal speed
II = fast speed
Fto-41-1c
Owners Handbook
O = off
- - - = intermittent (variable time)
I = normal speed
II = fast speed
Fto-42-1a
O = off
- - - = intermittent (variable time)
I = normal speed
II = fast speed
Fto-42-1b
By turning this switch, you can control
the delay on the intermittent.
Copyright © Tarkus Services (2003)
www.angelfire.com/emo/fto
34
All rights reserved
26-Aug-04
Page 35

Fto-42-1c
By turning this switch, you can control
the delay on the intermittent.
Wash / wipe control.
Owners Handbook
Fto-43-1a
Operates wash / wipe.
Rear screen wiper.
Fto-43-1b
O = off
- - - = Intermittent.
I = normal speed.
Copyright © Tarkus Services (2003)
www.angelfire.com/emo/fto
35
All rights reserved
26-Aug-04
Page 36

Fto-43-1c
Rear screen washer control.
Other switches
Owners Handbook
Hazard switch
Hazard warning light switch. This turns
ON / OFF the hazard warning lights. The
turn signal indicator light will operate on
the instrument panel. The ignition does
not need to be on for this operation.
Windscreen de-mist
The switch indicated is for the
windscreen de-mister. When it is
operating, there is a small indicator on
the display panel.
Copyright © Tarkus Services (2003)
www.angelfire.com/emo/fto
36
All rights reserved
26-Aug-04
Page 37

Fog / park light
Fto-44-1c
Fog light switch? / Park lights?. When
this is depressed the front fog lights and
the rear lights will be illuminated.
Redo photo
Ignition switch
Ft0-46-1a
Owners Handbook
Ignition switch.
Ft0-46-1b
When the key is in this position, the
steering is locked and the key can be
removed.
Ft0-46-1c
When the key is in this position, the
accessories i.e. radio / CD can be used.
Copyright © Tarkus Services (2003)
www.angelfire.com/emo/fto
37
All rights reserved
26-Aug-04
Page 38

Park brake
Fto-47-1a
Lift up to activate park brake. Press
button in, to release the brake.
Fto-47-1b
Always leave the gear selection in
Neutral or Park, when the park brake is
applied.
Owners Handbook
Fto-48-1a
Recommended speeds / gears for
running in.
Redo photo
Copyright © Tarkus Services (2003)
www.angelfire.com/emo/fto
38
All rights reserved
26-Aug-04
Page 39
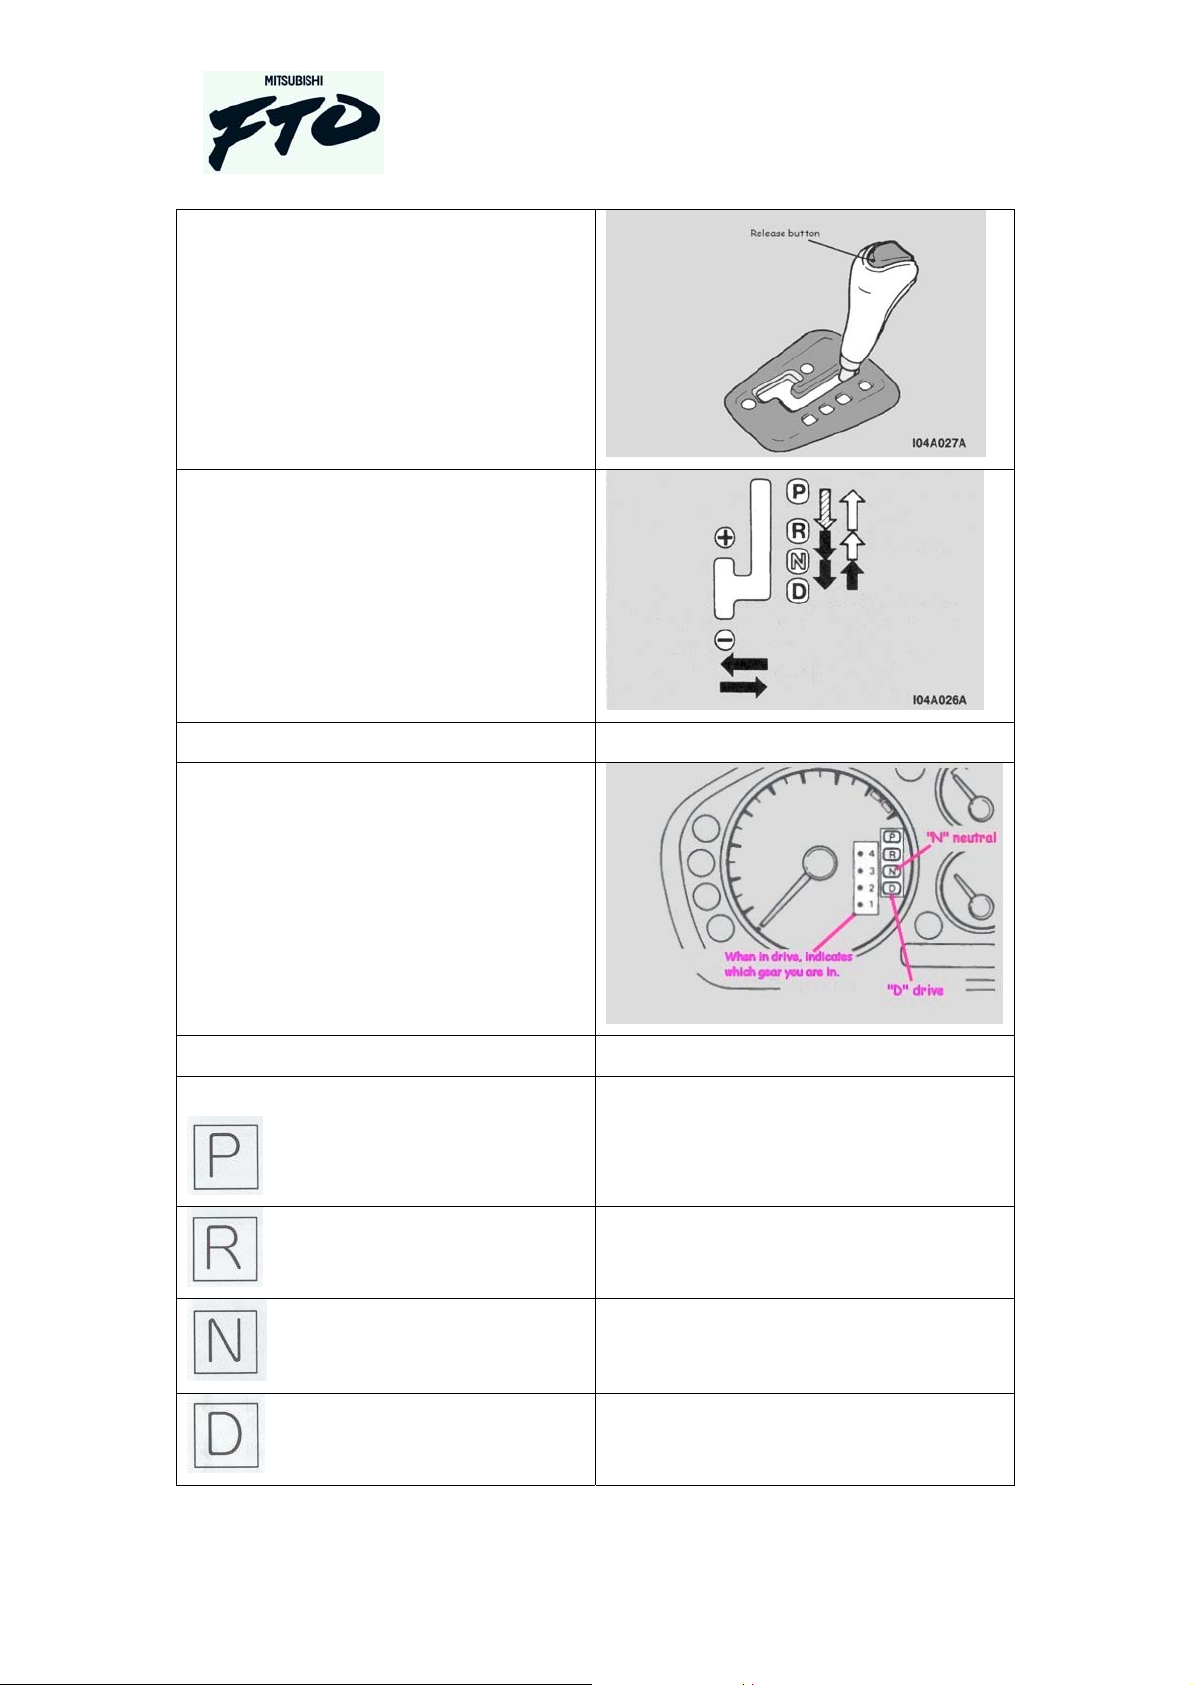
Ft0-50-1a
The button indicated must be depressed
and the foot brake applied, before the
gear lever can be moved.
Fto-50-1b
Owners Handbook
FTO-51-1
Gear selection indicator.
Add pages 52/53/54/55/56
Fto-52-1a
Park.
Reverse.
Neutral.
Copyright © Tarkus Services (2003)
www.angelfire.com/emo/fto
39
Drive.
All rights reserved
26-Aug-04
Page 40

Ft0-53-1a
53-1b
Owners Handbook
53-1c
54-1a
Copyright © Tarkus Services (2003)
www.angelfire.com/emo/fto
40
All rights reserved
26-Aug-04
Page 41

Kick Down
When the accelerator is pressed down
quickly, the transmission will “kick
down” to a lower gear. This will give an
instant power response which is useful
when overtaking or entering a major
road or motorway.
55-1a
Tip-Tronic gear selection.
Owners Handbook
56-1a.
The selected gear is shown as indicated
by the arrow.
Hand brake operation
56-1b
lift the hand brake to apply, push in the
button to release the brake.
Copyright © Tarkus Services (2003)
www.angelfire.com/emo/fto
41
All rights reserved
26-Aug-04
Page 42

Adjustable items
Steering wheel adjustment
Fto-57-1a
Push lever located under the steering
wheel down, move the steering wheel to
the desired position and firmly pull the
lever up to lock.
Owners Handbook
Interior mirror adjustment
Fto-57-1b
The mirror can be dipped (so you are not
dazzled by the lights from a following
vehicle) by moving the small lever
forward or backward.
Door mirrors
Fto-57-1c
On basic model. The small joystick will
adjust the drivers door mirror.
Copyright © Tarkus Services (2003)
www.angelfire.com/emo/fto
42
All rights reserved
26-Aug-04
Page 43

Fto-57-1d
On the next model, the switch can be
moved so you can adjust both door
mirrors.
Door mirror parking
Fto-58-1a
The door mirrors can be folded in to
allow for easier parking.
Owners Handbook
Fto-58-1b
To fold the mirrors in, depress #1 button.
To unfold the mirrors, depress #2 button.
ABS
Anti Lock Brakes
Copyright © Tarkus Services (2003)
www.angelfire.com/emo/fto
43
All rights reserved
26-Aug-04
Page 44

Traction Control operation
Fto-060-1a
To turn the TCL on / off, use the switch
located next to the mirror adjustment
switch.
Fto-060-1b
Owners Handbook
Fto-060-1c
When the Traction Control on, the
indicator light on the instrument panel is
illuminated.
Interior bits
Fto-062-1a
The sun-visor can be unclipped and
moved to the side position.
Redo photo
Copyright © Tarkus Services (2003)
www.angelfire.com/emo/fto
44
All rights reserved
26-Aug-04
Page 45
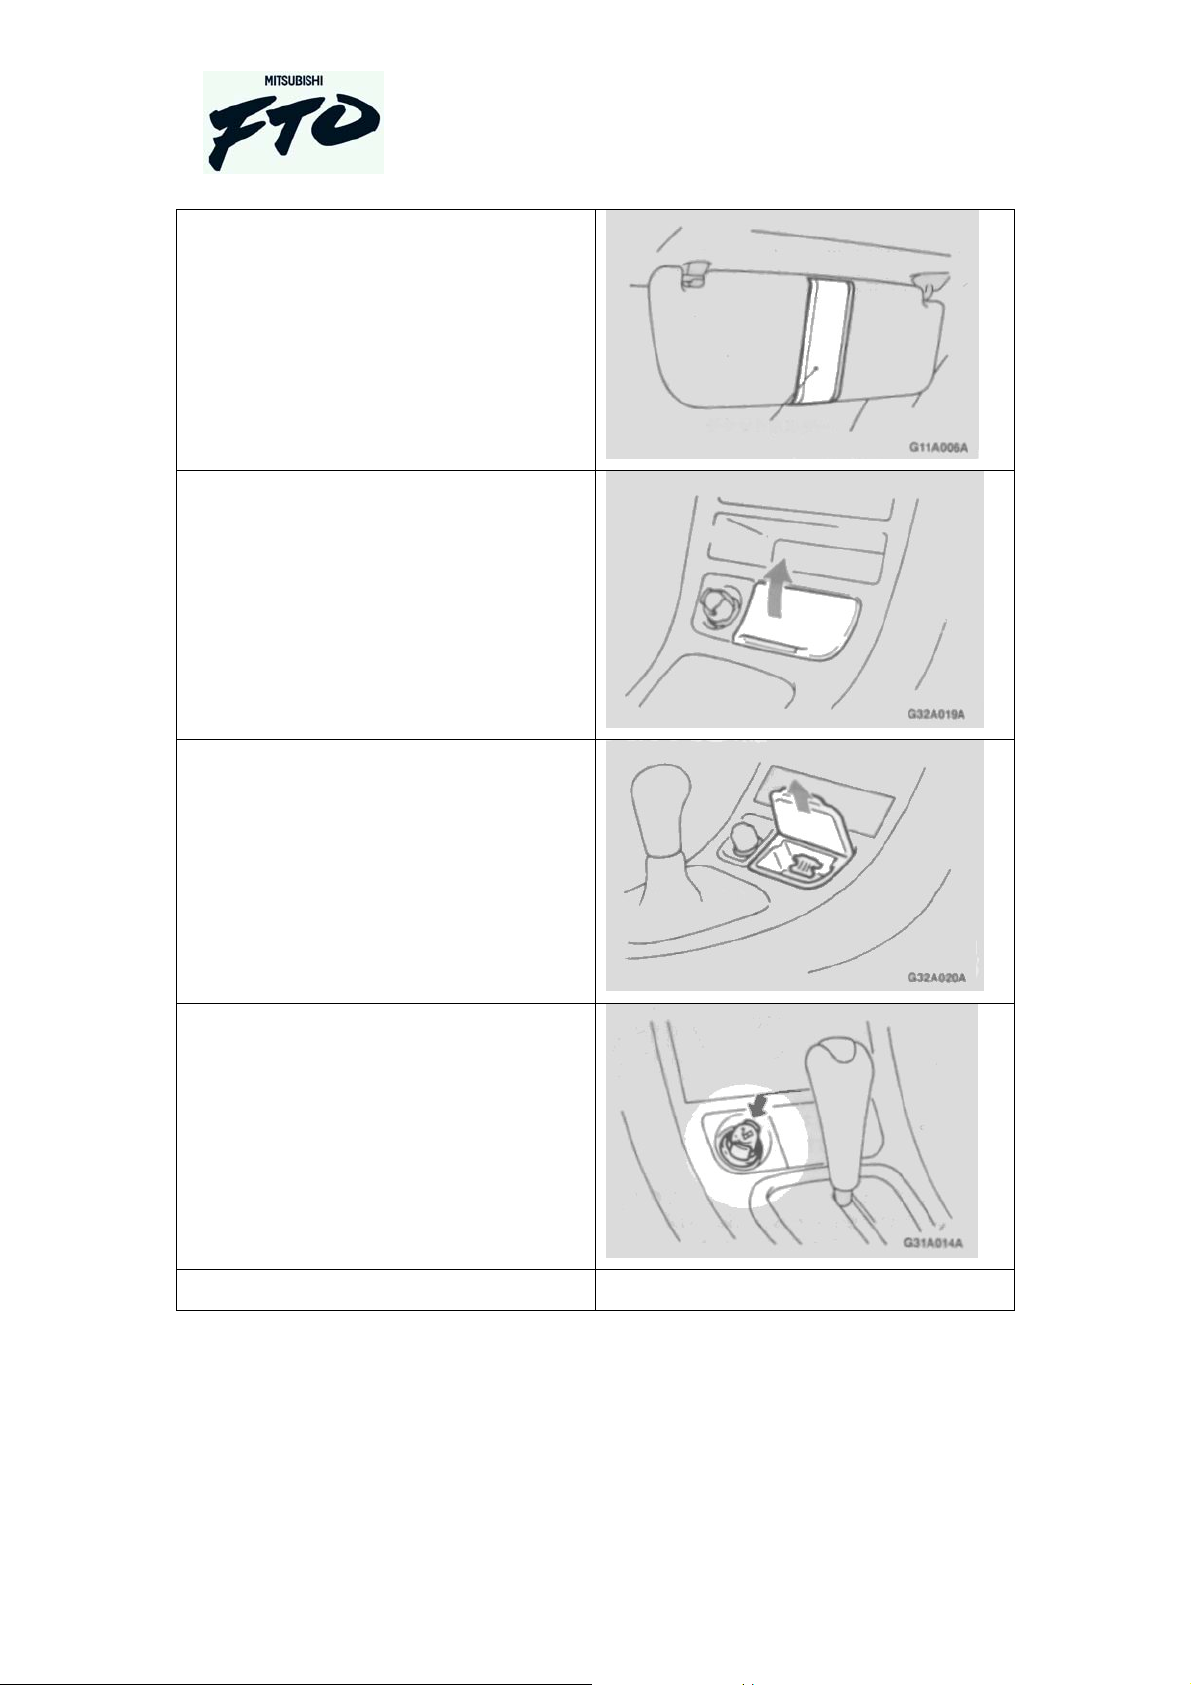
Fto-062-1b
Document / sunglasses holder.
Fto-062-1c
Cigarette ashtray. Lift to open.
Owners Handbook
Fto-062-1d
Pull to remove so you can empty the
ashtray.
Fto-062-1e
Cigarette lighter, push in to use.
Copyright © Tarkus Services (2003)
www.angelfire.com/emo/fto
45
All rights reserved
26-Aug-04
Page 46

Passenger interior lights.
Fto-063-1a
Fto-063-1b
Owners Handbook
Clock
64-1a
Copyright © Tarkus Services (2003)
www.angelfire.com/emo/fto
46
All rights reserved
26-Aug-04
Page 47

Storage space
Coin holder
064 1b
Redo photo
Owners Handbook
Glove box
1c
Center console
1d
Copyright © Tarkus Services (2003)
www.angelfire.com/emo/fto
47
All rights reserved
26-Aug-04
Page 48

Storage in boot
65-1a
Redo photo
Climate control
Owners Handbook
Fto-68-1a
Fto-68-1b
Copyright © Tarkus Services (2003)
www.angelfire.com/emo/fto
48
All rights reserved
26-Aug-04
Page 49

Fto-68-1c
Redo photo
Fto-69-1a
Owners Handbook
Copyright © Tarkus Services (2003)
www.angelfire.com/emo/fto
49
All rights reserved
26-Aug-04
Page 50

Climate controls
Fto-70-1a
1. On switch.
2. Rear screen de-mist switch.
3. Air flow.
4. Fan speed control.
5. Air condition control.
6. Exterior temperature switch.
7. Off switch.
Owners Handbook
8. Indicator screen.
9. Air flow direction.
10. Front screen de-mist switch.
Fto-70-1b
Fan speed indicator.
Redo photo
Fto-071-1a
Copyright © Tarkus Services (2003)
www.angelfire.com/emo/fto
50
`
All rights reserved
26-Aug-04
Page 51

Rear demister switch
Front demister switch
Owners Handbook
Air flow indicator
Copyright © Tarkus Services (2003)
www.angelfire.com/emo/fto
51
All rights reserved
26-Aug-04
Page 52
Owners Handbook
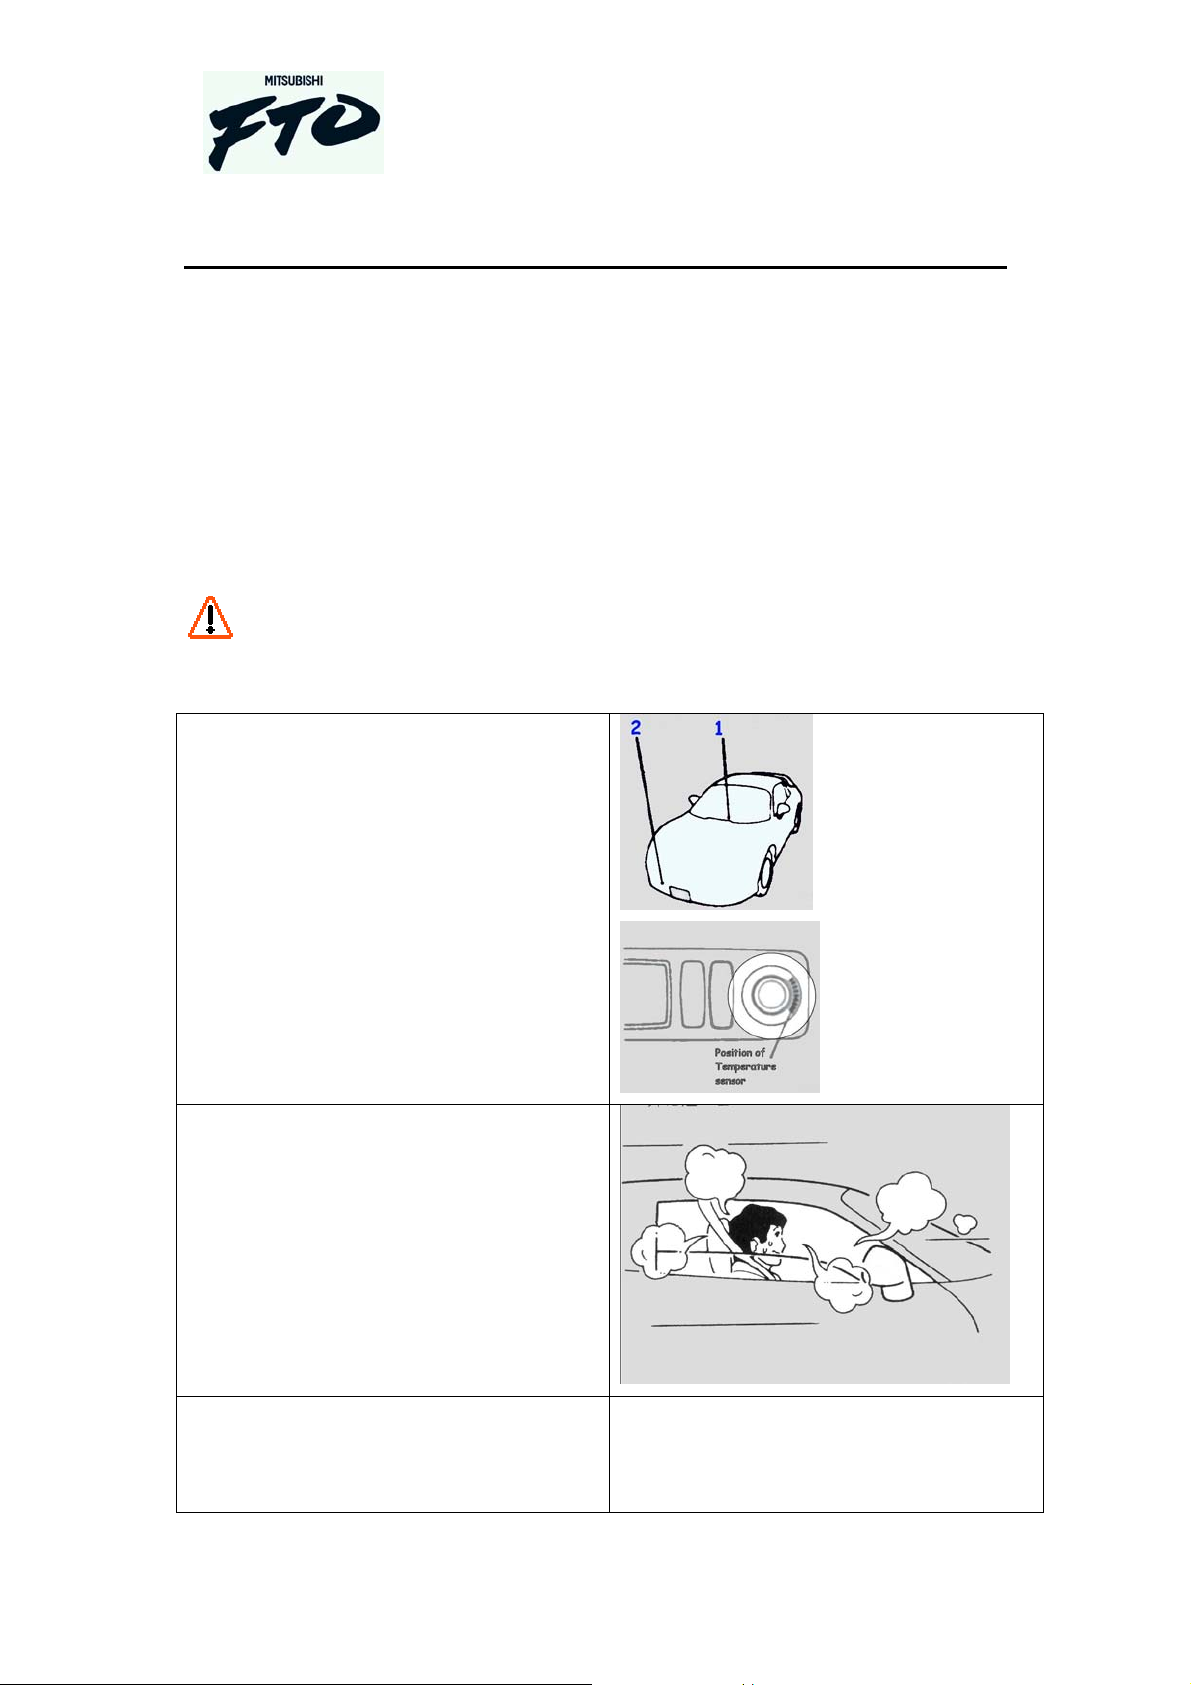
Automatic air conditioning
By simply pressing the “AUTO” button and selecting the desired temperature, the air conditioning
operates to cool or warm automatically in order to maintain the selected temperature.
Insert pictures – showing sensors.
CAUTION – When using the air conditioning, the idling speed is slightly increased. Therefore,
take extra care when starting to move the vehicle.
Note:
1 - There is a photo sensor, atmospheric
temperature sensor and an interior air temperature
sensor inside the vehicle.
1. Photo sensor
2. Atmospheric temperature sensor
3. Interior air temperature sensor
Never place anything on top or cover these
sensors, doing so will prevent them from
functioning properly.
2 – A mist may be seen coming from the air outlets
for a while during cooling. This is simply the result
of humid air being suddenly cooled.
3 – The temperature setting and the button selected
air condition modes remain in memory even after
the engine has been switched off. However,
disconnecting the cable from the battery terminal
will erase all those stored in memory and set the
Copyright © Tarkus Services (2003)
www.angelfire.com/emo/fto
52
All rights reserved
26-Aug-04
Page 53

temperature automatically to 25.0°C (AUTO).
Operating the system as an automatic air conditioning
Owners Handbook
1. Auto button and temperature set dial.
2. Front windscreen demister.
3. Outside air / recirculate.
4. Fan speed control.
5. Air condition control.
6. Set temperature / outside temperature control.
7. Off button.
8. Display screen.
9. Air flow control.
10. Rear windscreen demister control.
In normal conditions, use the system in AUTO mode and follow these procedures:
1. Press the “AUTO” button. The indicator will illuminate and the outlet port (except ? and ?),
interior/exterior air select and blower speed and ON/OFF of air conditioner will be controlled
automatically. The air conditioning compressor operation will change to (insert picture) (constant
air conditioning operation).
2. Turn the “TEMP” dial to set the desired temperature. The temperature can be set within a range
of 17.0°C to 32.0°C. the temperature will increase as the dial is turned in a clockwise direction.
Note: 1 If the outside air temperature drops below 0°C an alarm will sound, and the outside air
temperature is automatically displayed for a while.
Note: 2 When the vehicle is stopping or in some cases when the outside air temperature is likely to
be influenced by the engine compartment, or the sunshine reflected by the road surface, the
displayed temperature may be higher than the actual temperature.
Note: 3 Press the * button according to the need. Ever time the button is pressed, the mode
changes from ECO * to * to stop; and simultaneous with this, the display indicator changes
as well.
Copyright © Tarkus Services (2003)
www.angelfire.com/emo/fto
53
All rights reserved
26-Aug-04
Page 54

Owners Handbook
ECO * - Use this mode when humidity is low. The air compressor is operated as required to make
energy saving operation.
• - Effectively used for dehumidification. The air compressor is operated to perform air cooling
and dehumidifying.
Operating the system as a normal air conditioner.
68-1a
68-1b
68-1c
Copyright © Tarkus Services (2003)
www.angelfire.com/emo/fto
54
All rights reserved
26-Aug-04
Page 55

71-1a
71-1b
Redo photo
Owners Handbook
72-1b
72-1c
72-1d
Copyright © Tarkus Services (2003)
www.angelfire.com/emo/fto
55
All rights reserved
26-Aug-04
Page 56

Audio equipment
Antenna
90-1a
There are 2 antenna options on the
vehicle. 1st option is a built in antenna
using part of the heated rear screen
element. The 2nd option is an electric
telescopic antenna, located on the rear
near side quarter panel.
Owners Handbook
Redo photo
90-1b
Redo photo
90-1c
Copyright © Tarkus Services (2003)
www.angelfire.com/emo/fto
56
All rights reserved
26-Aug-04
Page 57
94-1a
Redo photo
Owners Handbook
Copyright © Tarkus Services (2003)
www.angelfire.com/emo/fto
57
All rights reserved
26-Aug-04
Page 58
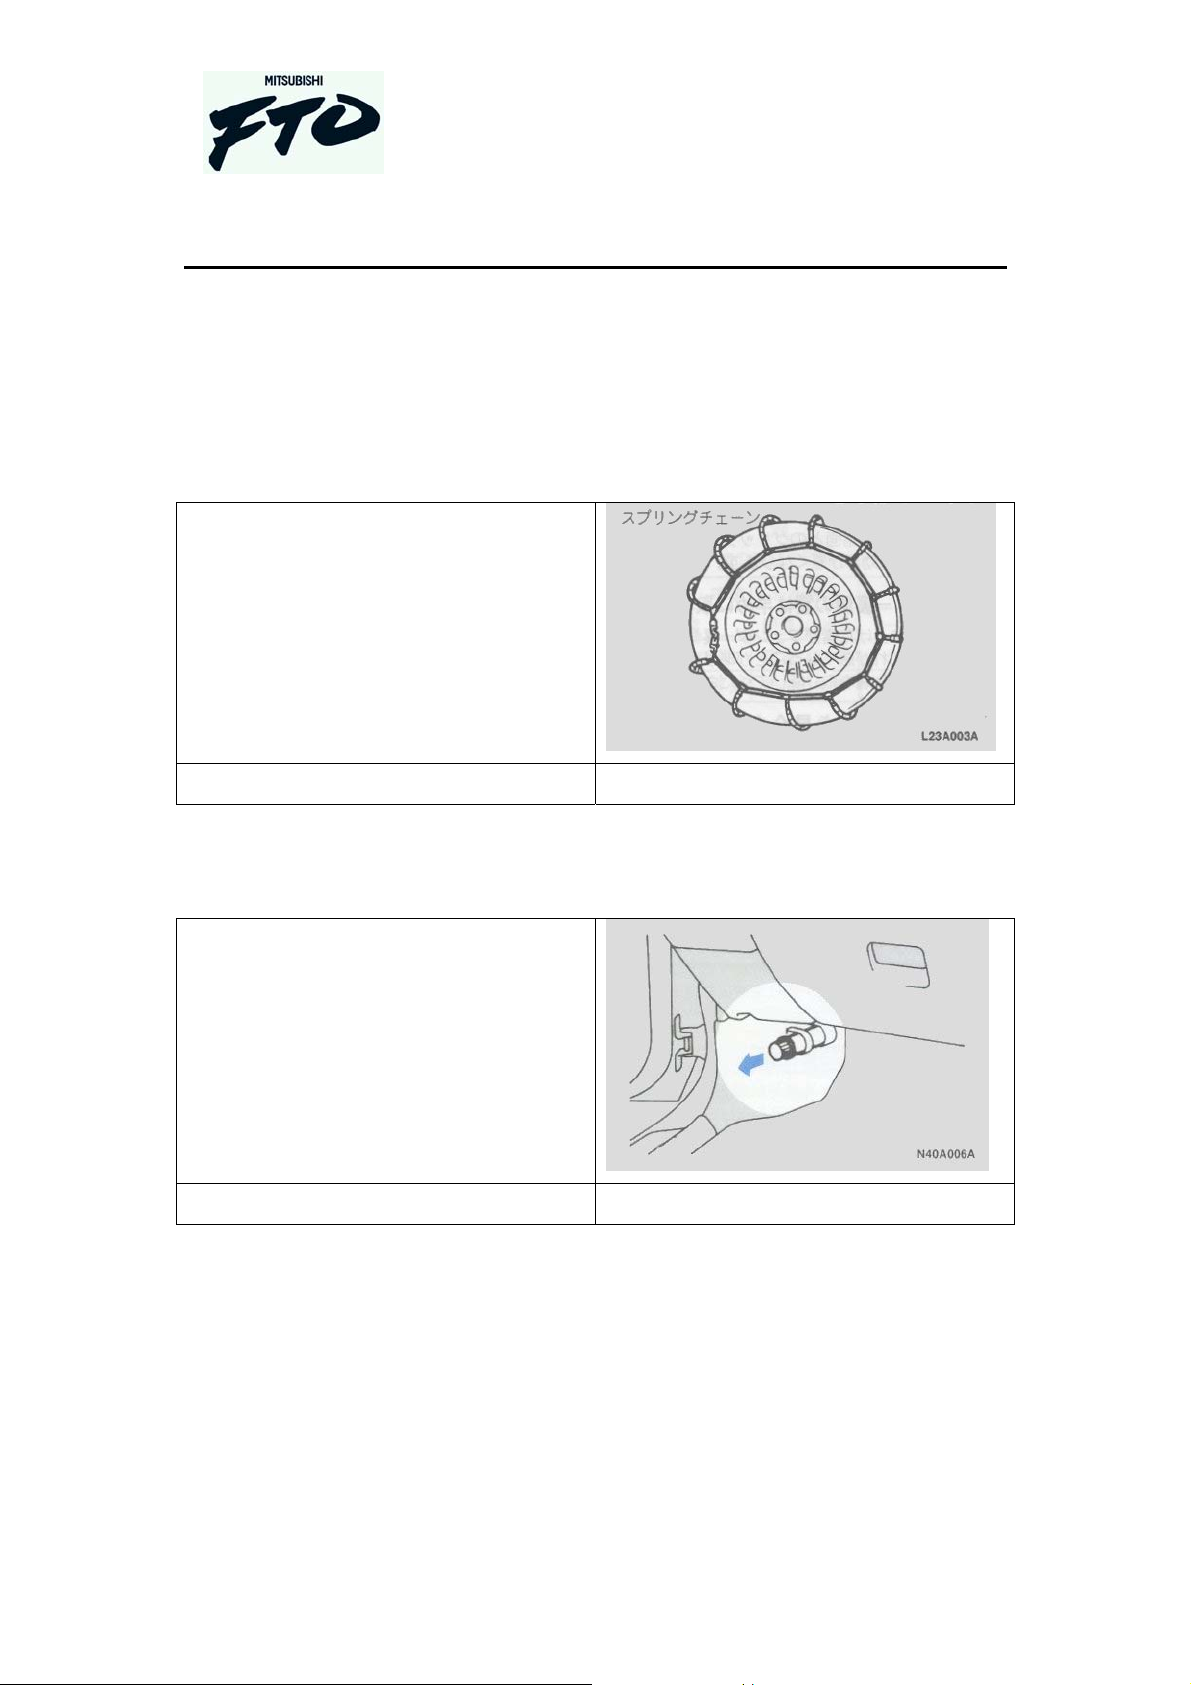
Safety features
Fitting of snow chains
98-1a
Redo photo
Owners Handbook
Emergency flare
100-1a
In Japan it is mandatory to carry an
emergency flare, in case you break
down. This is illegal in Australia.
Redo photo
Copyright © Tarkus Services (2003)
www.angelfire.com/emo/fto
58
All rights reserved
26-Aug-04
Page 59

Tool kit and jack
101-1a
To access the tool kit and jack, open the
boot and lift up the carpeted section in
the middle of the boot floor. The tool kit
is in a black plastic bag and the jack is
secured at the left hand side of the spare
wheel.
101-1b
The tool kit comprises of 1 small
spanner, a wheel nut wrench and jack
handle. A spark plug spanner is also
included.
Owners Handbook
101-1c
Redo photo
Copyright © Tarkus Services (2003)
www.angelfire.com/emo/fto
59
All rights reserved
26-Aug-04
Page 60
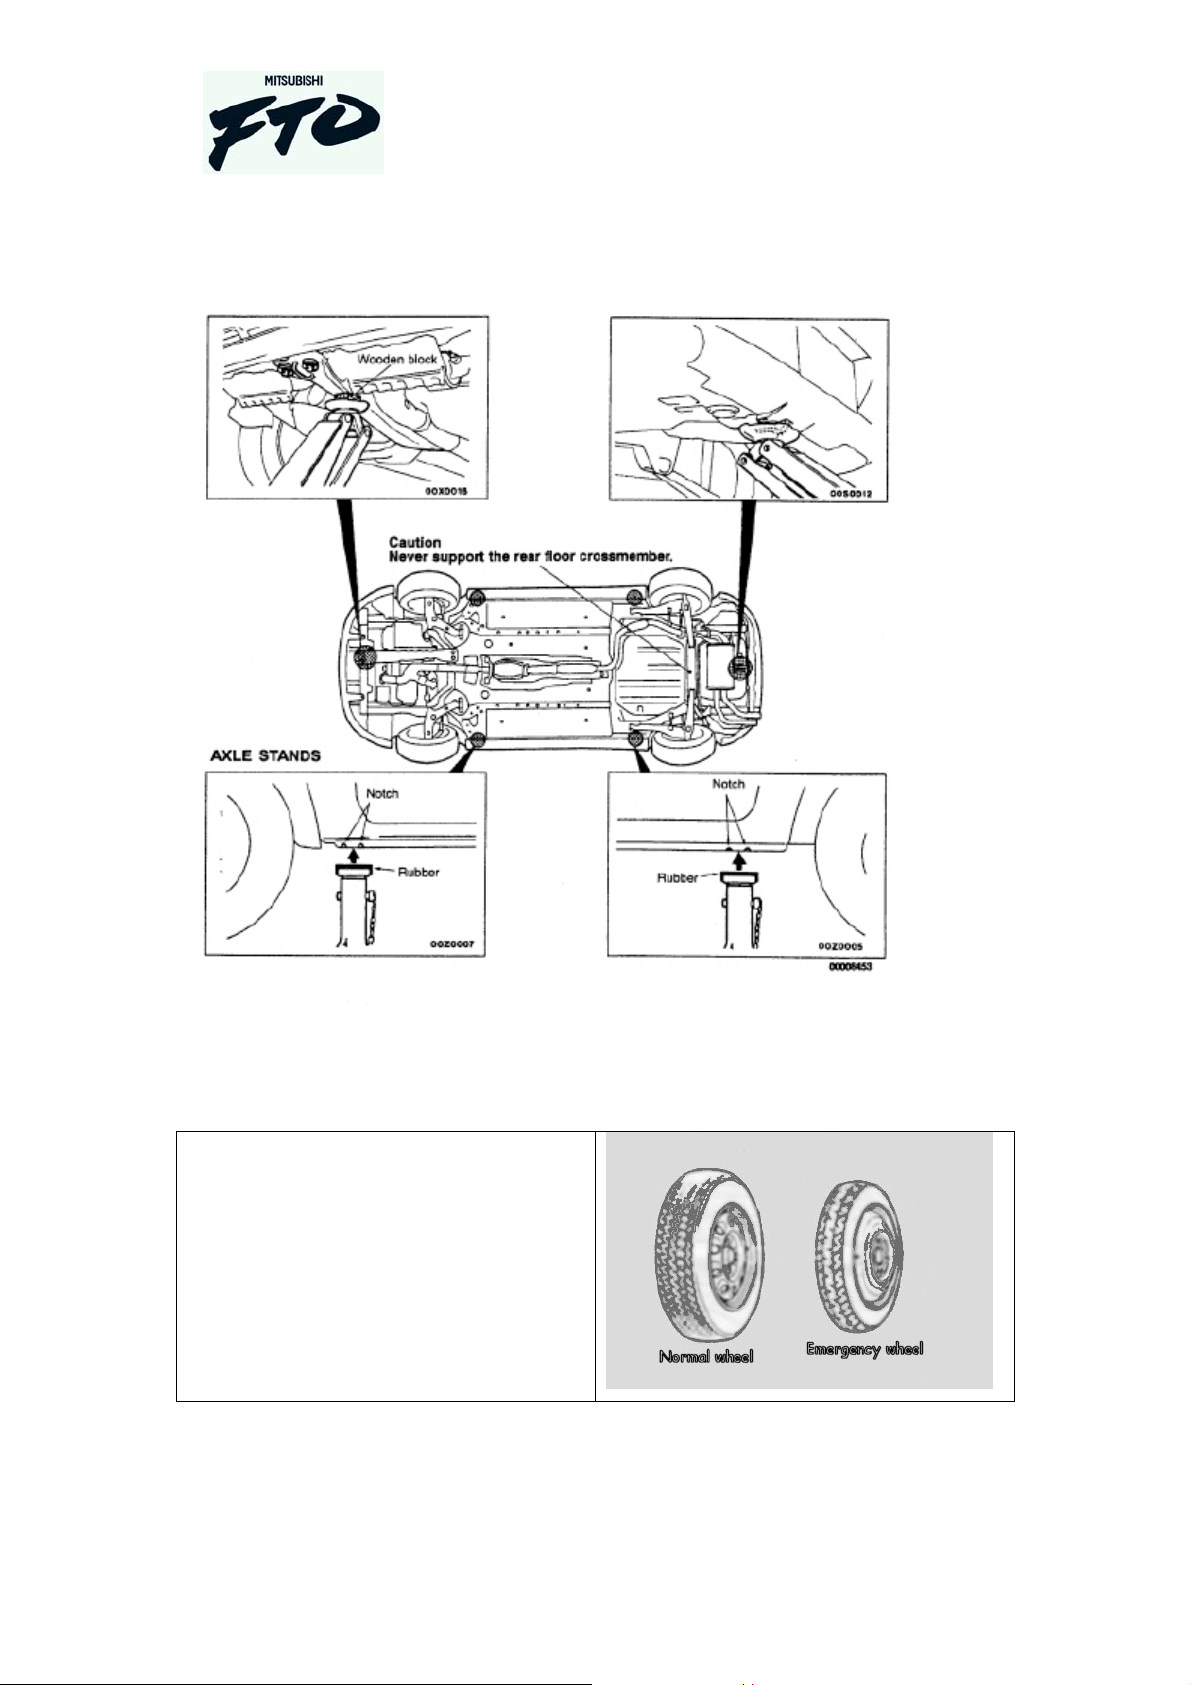
Supporting the vehicle
Owners Handbook
Changing the wheel and tyre.
102-1a
Note that the spare wheel is of the
“emergency” use only type. It should
only be used for a short distance and at
greatly reduced road speed.
Copyright © Tarkus Services (2003)
www.angelfire.com/emo/fto
60
All rights reserved
26-Aug-04
Page 61

102-1b
102-1c
Owners Handbook
103-1a
103-1b
Copyright © Tarkus Services (2003)
www.angelfire.com/emo/fto
61
All rights reserved
26-Aug-04
Page 62

103-1c
103-1d
Owners Handbook
103-1e
104-1a
Copyright © Tarkus Services (2003)
www.angelfire.com/emo/fto
62
All rights reserved
26-Aug-04
Page 63

105-1a
105-1b
Owners Handbook
105-1c
106-1a
106-1b
Redo photo
Copyright © Tarkus Services (2003)
www.angelfire.com/emo/fto
63
All rights reserved
26-Aug-04
Page 64

106-1c
Starting the vehicle by external battery.
107-1a
Owners Handbook
107-1b
108-1a
Redo photo
Copyright © Tarkus Services (2003)
www.angelfire.com/emo/fto
64
All rights reserved
26-Aug-04
Page 65

108-1b
Towing the vehicle.
108-1c
Towing eye.
Owners Handbook
109
Copyright © Tarkus Services (2003)
www.angelfire.com/emo/fto
65
All rights reserved
26-Aug-04
Page 66

Service guide
Capacities
Fuel 60 liters
Engine oil 4 liters
Transmission oil – manual ? liters
Transmission oil – automatic 7.5 liters
Owners Handbook
Cooling system ? liters
Fuses
110-1a
To access fuse in drivers foot-well.
110-1b
Copyright © Tarkus Services (2003)
www.angelfire.com/emo/fto
66
All rights reserved
26-Aug-04
Page 67

Removal of fuses
111-1a
111-1b
#1 fuse is OK, #2 fuse is dead.
Owners Handbook
Redo photo
112-1a
Copyright © Tarkus Services (2003)
www.angelfire.com/emo/fto
67
All rights reserved
26-Aug-04
Page 68

Engine oil
Owners Handbook
113-1a
113-1b
Copyright © Tarkus Services (2003)
www.angelfire.com/emo/fto
68
All rights reserved
26-Aug-04
Page 69

114-1a
Redo photo
Belt adjustment.
1800 cc engine
Owners Handbook
A – 7.00 m/m to 8.00 m/m
B -
Globes.
Headlight
Main beam 60 W
Low beam 51 W
?5 W
? 55 W
? 21 / 5 W
Copyright © Tarkus Services (2003)
www.angelfire.com/emo/fto
69
All rights reserved
26-Aug-04
Page 70

Owners Handbook
? 21 W
?
? 21 W
?5 W
? 21 W
?5 W
Tyre information
Position of sticker showing tyre
pressures and size.
117-1a
Tyres should be only moved front to
back, not diagonally. The tyres are
directional.
Copyright © Tarkus Services (2003)
www.angelfire.com/emo/fto
70
All rights reserved
26-Aug-04
Page 71

Engine information
1800 cc &
2000 cc
engine.
118-1a
Owners Handbook
2000 cc
MIVEC
118-1b
Redo photo
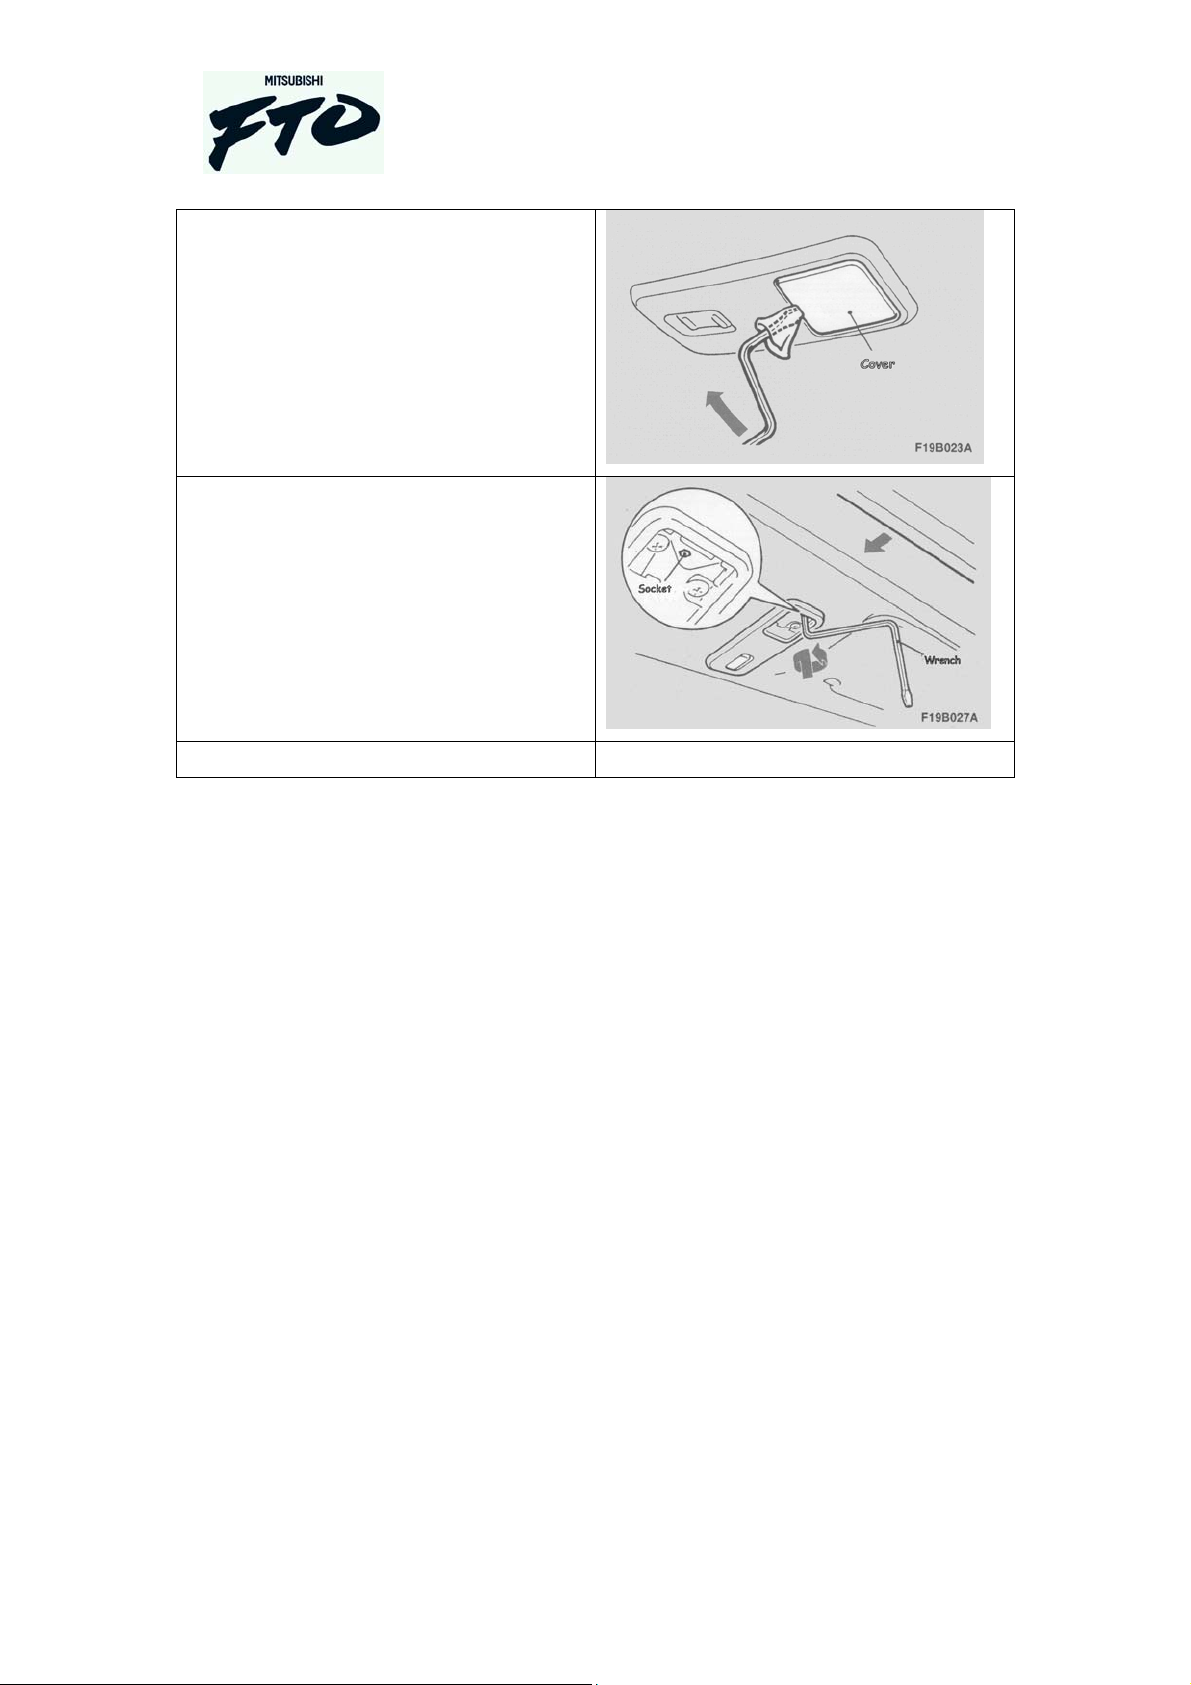
Removing the spark plugs
Remove the 5 screws indicated.
119-1a
Copyright © Tarkus Services (2003)
www.angelfire.com/emo/fto
71
All rights reserved
26-Aug-04
Page 72

Lift off the cover ?.
119-1b
Redo photo
119-1c
Redo photo
Owners Handbook
119-1d
Redo photo
Copyright © Tarkus Services (2003)
www.angelfire.com/emo/fto
72
All rights reserved
26-Aug-04
 Loading...